1
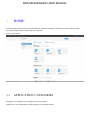
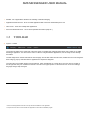
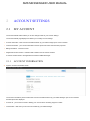
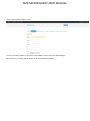
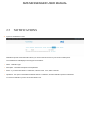
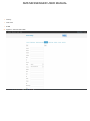
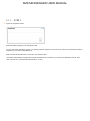
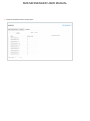
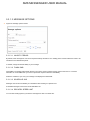
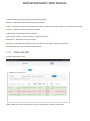
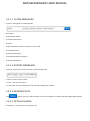
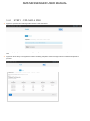
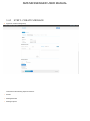
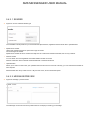
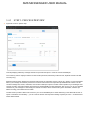
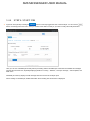
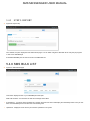
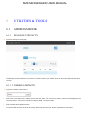
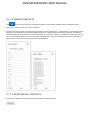
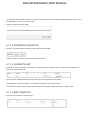
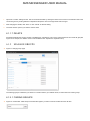
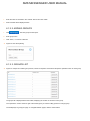
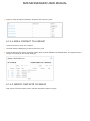
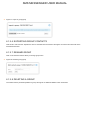
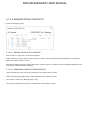
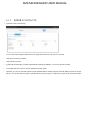
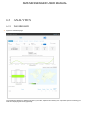
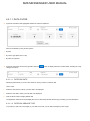
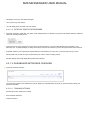
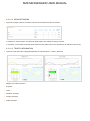
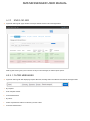
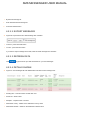
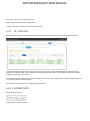
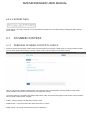
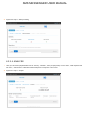
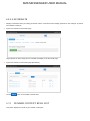
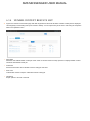
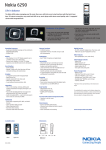
SMS MESSENGER USER MANUAL SMS MESSENGER USER MANUAL CONTENTS 1 Home 4 1.1 Application categories 4 1.2 Toolbar 5 1.3 Menu options 6 1.4 Contact 6 7 7 2 Account settings 7 2.1 My account 7 2.1.1 Account information 8 2.1.2 Contact information 8 2.2 Billing addresses 9 2.3 Password change 10 2.5 Notifications 11 2.6 User Details 12 SMS MESSENGER USER MANUAL 4 Messaging 14 4.1 Quick SMS 14 4.1.1 Step 1 15 4.1.2 Step 2 16 4.1.3 Step 3 4.2 4.3 4.4 5 SMS log 48H 17 4.2.1 Filter messages 17 4.2.2 Export messages 18 4.2.3 Refresh data 18 4.2.4 Details shown 18 Professional SMS 19 4.3.1 Professional SMS 20 4.3.2 Drafts 24 4.3.3 SMS log 48h 25 4.3.4 SMS bulk list 27 File2SMS 28 4.4.1 STEP 1 : Upload a file 29 4.4.2 STEP 2: Create message 30 4.4.3 STEP 3: Process/Preview 35 4.4.4 STEP 4: Start job 36 4.4.5 STEP 5: Report 37 4.4.6 SMS bulk list 37 Utilities & tools 39 5.1 Address book 39 5.1.1 Manage contacts 39 5.1.2 Manage groups 42 5.1.3 Import contacts 44 5.2 5.3 Analytics 48 5.2.1 Dashboard 48 5.2.2 SMS log 48H 52 5.2.3 NC log 48h 54 Number Context 55 5.3.1 Perform Number Context Lookup 55 5.3.2 Perform Number Context wizard 56 5.3.3 Number Context Bulk List 60 SMS MESSENGER USER MANUAL . 5.3.4 6 Glossary Number Context results list 62 63 SMS MESSENGER USER MANUAL 1 HOME The Home page shows the entire list of SMS Messenger applications available on the app store. The left side menu helps you quickly navigate between different app store categories. Figure 1: Home screen 1.1 APPLICATION CATEGORIES Messaging - list of applications for sending and receiving messages Utilities & tools - list of applications that help manage your messaging activities SMS MESSENGER USER MANUAL Reseller - list of applications related to the reselling of mobile messaging Application Download zone - list of non-Web applications that need to be downloaded prior to use Other zone1 - list of other Infobip Web applications Document Download zone2 - List of various uploaded documents (Help etc.) 1.2 TOOLBAR Figure 2: Toolbar The Toolbar is visible on the upper side of the home page. It is divided into categories listed above and is visible in any SMS Messenger application. You don’t need to return to Home to navigate between Applications; this can easily be done through the toolbar. The first image link on the left side leads to the homepage. The left side offers the main menu, divided into four main categories. Each category pops up and offers links to applications in respective categories. The right side of the toolbar displays account balance, which is displayed as a Rand value. The user menu is located on the far right side with your username as the title. The user menu pops up links to vital services such as account settings, language change, help and logout. 1 Other zone Web applications have their own help documents available for each application. 2 A help document for each of the download zone applications comes with the installation program. SMS MESSENGER USER MANUAL . 1.3 MENU OPTIONS Figure 3: Menu options The Menu Option is available on the right side of the toolbar, and allows the following options: Account settings - direct link to account settings Payments - direct link to the payment application Contact - pop up window with contact form and contact details of your account Manager and Infobip Support Language - primary and secondary language selector Help - link to online help document Logout - when finished working on SMS Messenger, use this option to logout out of a SMS Messenger session 1.4 CONTACT Contact data allows you to easily contact your Sales Manager or customer support through the online contact form. In order to provide you with best possible service and fast response time, please try to always contact your Sales Manager first. Already familiar with all the details regarding your account, your Sales Manager can provide you with fast and accurate help. SMS MESSENGER USER MANUAL 2 ACCOUNT SETTINGS 2.1 MY ACCOUNT The Account details toolbar allows you to save changes made to your account settings. The Account details page displays and allows you to modify account settings: Account information - basic account information filled in by your sales manager upon account creation. Contact information - your contact information used for reports and other communication purposes. Billing information - used for invoices Registered numeric senders - verified mobile numbers used as numeric senders. A numeric sender needs to be registered and verified in SMS Messenger. 2.1.1 ACCOUNT INFORMATION Figure 6: Account information screen The Account information panel contains basic account information filled in by your Sales Manager upon account creation. Several options are displayed: Account ID - your account ID used to identify your account when contacting Support or Sales. Created date - date when your account was created by your Sales Manager. SMS MESSENGER USER MANUAL Language - select your language in which SMS Messenger will be displayed. Default sender name - default sender name that is used as alphanumeric or numeric sender in Quick SMS and File2SMS. A numeric sender needs to be registered and verified in SMS Messenger. 2.1.2 CONTACT INFORMATION Figure 7: Contact information section. Mandatory field are labelled with an asterisk (*). Contact information contains your contact and location details. Country and Time zone: please be sure you set up your country and Time Zone properly in order to get the correct corresponding time when receiving reports. SMS MESSENGER USER MANUAL 2.2 BILLING ADDRESSES Figure 8: Billing addresses screen. A BA becomes active once a successful payment occurs. The BA marked “default” will be used for purchasing credits. The billing addresses area contains data used for invoices. Several billing addresses can be entered, but only one is used as the default address for invoicing. To enter a new billing address or change the current address, please contact your Sales Manager. SMS MESSENGER USER MANUAL Figure 9: Add new billing address screen To enter a new billing address or change the current address, please contact your Sales Manager. When entering a new billing address, filling in all the required fields is mandatory. SMS MESSENGER USER MANUAL 2.5 NOTIFICATIONS Figure 15: Notifications screen Notifications provide useful information about your account that can be sent to your email or mobile phone. The “Notifications” table displays several types of information: Name - notification type. Description - notification description and explanation. Status - if you have subscribed to a notification, status is active. If not, status is inactive. Operations - the option to subscribe/unsubscribe to/from a notification, and edit notification options if subscribed. To receive a notification you have to be subscribed to one. SMS MESSENGER USER MANUAL If notifications are sent to your cellphone your account will be charged for the SMS3 sent. 2.6 USER DETAILS Figure 16: User details screen displays a list of created users. User details allow you to manage users. You can have multiple users with different login credentials all used for the same account. You can easily create new user, edit the existing ones or disable them. Mandatory fields are: Username Password 3 SMS (Short Message Service) is a form of text messaging communicating on phones and mobile phones. SMS MESSENGER USER MANUAL Country Time zone E-Mail Figure 17. Add new user screen SMS MESSENGER USER MANUAL 5 MESSAGING 5.1 QUICK SMS Figure 29: Quick SMS screen consisting of the “Recipients”, “Sender” and “Message” sections Quick SMS allows you to send SMS messages to up to 50 recipients by using four simple steps. SMS MESSENGER USER MANUAL 5.1.1 STEP 1 Figure 30: Recipients section Enter the mobile number(s) in the “Recipients” field. You can enter them manually by typing, or by pasting numbers copied from a TXT, Excel or CSV file. The maximum number of recipients you can add on quick SMS is 50. Make sure the numbers are each in a new line, one under the other. The system automatically recognises the numbers and their format, and there is no need to enter delimiters (comma, semicolon, full stop etc.) or special characters (leading + or zero). SMS MESSENGER USER MANUAL 5.1.2 STEP 2 Figure 32: Message section Enter the message text in the Message box. Message and character counts are displayed above the frame. 5.1.3 STEP 3 Figure 33: Send button Click Send to send message(s) to send a preview message to the number of your choice. SMS MESSENGER USER MANUAL 5.2 SMS LOG 48H Figure 34: SMS log 48h screen SMS log 48h section gives you an overview of all your sent messages, as well as export options. 5.2.1 FILTER MESSAGES Figure 35: Filter forms. Click the Refresh button after toggling form properties or entering or removing data for changes to take effect. By recipient: 1. Enter recipient number 2. Press Refresh button By status: 1. Select only the desired checkbox for statuses you want to filter 2. Press Refresh button By External message Id: 1. Enter the desired External message Id 2. Press the Refresh button SMS MESSENGER USER MANUAL 5.2.2 EXPORT MESSAGES Figure 36: Export form To Excel - press the Excel button To CSV - press the CSV button If you also wish to export message text, mark "With message text" checkbox. 5.2.3 Click 5.2.4 REFRESH DATA to get the most up-to-date information on your sent messages. DETAILS SHOWN Figure 37: SMS log 48h list example Sending time - exact time when SMS was sent Sender ID - sender name Recipient - recipient name or number Destination country - details on the destination country name Destination Network - details on the destination network name Sent count - total number of SMS sent in job Status - gives information about current message status Delivery report time - time when the message was delivered SMS MESSENGER USER MANUAL 5.3 PROFESSIONAL SMS Figure 38: Professional SMS home screen SMS MESSENGER USER MANUAL The module for quick messaging to many recipients. This section is closely tied with “Address Book contacts and groups”. 5.3.1 PROFESSIONAL SMS 5.3.1.1 RECIPIENTS The “Recipients panel” displays the full recipient list and all selected recipients. Select recipients - recipients can be added manually or inserted from the address book (contacts and groups). Recipients list - displays the list of recipients that will receive the message. 5.3.1.1.1 ADD RECIPIENTS TO RECIPIENTS LIST You can add recipients to the recipients list using the options provided below: Manual input - by entering the mobile number in the text field and confirming by clicking “Add to Recipient List”. Make sure the numbers are each in a new line, one under the other. Contacts - by selecting contacts under the “Contacts” tab. Groups - add a whole contact group to the recipients list by selecting a group under the Groups tab. Figure 39: Recipients section, paste / manual input option SMS MESSENGER USER MANUAL Figure 40: Recipients section, Groups option SMS MESSENGER USER MANUAL 5.3.1.2 MESSAGE Figure 42: Message section The “Message” section has a text box for entering messages. Several important message-related details are displayed in the message panel. There are 2 text boxes displaying message text. The left box is where you input your message text, the right one displays the preview of the actual text you will be sending. The preview is very useful when you are using the mapping option. Number of SMS messages - displays the current number of SMS messages per recipient and the maximum allowed number of messages per recipient. Characters left – displays the number of characters remaining in the current message. Total allowed number of characters per message is 160 or 459 if multipart message is used. SMS MESSENGER USER MANUAL 5.3.1.3 MESSAGE OPTIONS Figure 43: Message options section 5.3.1.3.1 VALIDITY PERIOD By default, each message has a 48 hours expected delivery timeframe. The “Validity period” function allows this value to be shortened to the desired time period. If needed, change the default validity of your message. 5.3.1.3.2 FLASH SMS Flash SMS is a message that appears directly on the phone screen, instead of being routed to the inbox. It is a useful alternative to normal SMS when you want to capture the recipient’s attention immediately. Select the checkbox if you want your message to be displayed as flash SMS. 5.3.1.3.3 SCHEDULE JOB Messages can be sent immediately or scheduled for later sending at a specific time. Scheduled messages can be found under SMS Bulk List. 5.3.1.3.4 DELIVERY SPEED LIMIT You can limit sending speed if you wish the messages are sent at a slower rate. SMS MESSENGER USER MANUAL 5.3.1.4 ACTIONS Figure 44: Professional SMS page actions 5.3.1.4.1 START JOB Once you set your SMS job click “Start job” in order to start your SMS sending process. 5.3.1.4.2 SEND TEST SMS Allows you to send a preview message to the number of your choice. 5.3.1.4.3 SAVE DRAFT Saves a draft of the message for later editing and sending. Draft messages are messages saved for later editing or sending. These unfinished messages can easily be customised at any later point. 5.3.1.4.4 RESET Use the button to reset the current job (can be undone by clicking Undo). All messages saved as drafts are displayed under Drafts menu. 5.3.2 DRAFTS Figure 45: Drafts screen SMS MESSENGER USER MANUAL The Drafts table shows all draft messages with their relevant data. Draft time - date and time when the draft message was created. Subject - name of draft entered when saving the draft message. Clicking on the subject will allow you to edit the draft message. Sender ID - sender ID that will be displayed to recipients. Total recipients - total recipients count per draft job. SMS count per recipient – number of SMSs per recipient in a draft job. Message text – displays the body of the message. Operations - drafts can be either edited by clicking the “Edit” button or deleted using the “Delete” button. Draft messages can be saved only with Professional SMS. 5.3.3 SMS LOG 48H Figure 46: SMS log 48h screen SMS log 48h section gives you an overview of all your sent messages, as well as export options. SMS MESSENGER USER MANUAL 5.3.3.1 FILTER MESSAGES Figure 47: SMS log 48h sent messages filter By recipient: 1. Enter recipient number 2. Press the Refresh button By status: 1. Select only desired checkbox for status you want to filter 2. Press Refresh button By External message Id: 1. Enter desired External message Id 2. Press the Refresh button 5.3.3.2 EXPORT MESSAGES Figure 48: Export data to excel or CSV with or without message text To Excel - press the “Excel” button To CSV - press the “CSV” button If you also wish to export message text, mark the "With message text" checkbox. 5.3.3.3 REFRESH DATA Click to get the most up-to-date information on your sent messages or to refresh data after toggling filter properties. 5.3.3.4 DETAILS SHOWN Sending time - exact time when an SMS was sent SMS MESSENGER USER MANUAL Sender ID - sender name Recipient - recipient name or number Destination country - details on the destination country name Destination Network - details on the destination network name Sent count - total number of SMS sent Status - gives information about message status Delivery report time - time when the message was delivered 5.3.4 SMS BULK LIST Figure 49: SMS bulk list screen This section displays the list of your Professional SMS performed jobs. SMS bulk result list: Scheduled for - if a job has been scheduled for a specific time then this column will display the scheduled job time. If the job has been sent immediately then it will show the exact sending time Updated at - displays the time when the job has been uploaded to our system Delivery speed limit - max number of messages that will be sent per chosen time unit (Minute, Hour, Day) Description - default or user predefined Professional SMS job name. Click on the “Professional SMS job name” to open the SMS log 48h for the selected SMS job. If the selected job is older than 2 days you need to export it from the Report Centre inside the “Analytics” application. SMS MESSENGER USER MANUAL Send count - displays total SMS count of a job Status - sent job status. Can be one of the following: Scheduled, Paused, In process, Finished, Failed, Cancelled, Delayed Download summary - download Professional SMS job summary in excel or CSV formats. Also, depending on the bulk job status you can “Cancel”, “Pause”, and “Resume” a job, change schedule time and delivery speed. 5.3.4.1 FILTER BY DATE Figure 50. Date filter Filtering by date allows you to set a time frame for which you want to observe data. 1. Choose date criteria first – “Scheduled for” or “Uploaded at” 2. Select the start date from which you wish to review data 3. Select the end date to which your wish to review data 4. Click the Refresh button to display filtered data The application assumes 00:00 (midnight) times: the 'to' date should be after the last day of sending you are interested in. 5.3.4.2 FILTER BY STATUS Uncheck unwanted statuses and click 5.4 button. FILE2SMS File2SMS is a tool designed to handle large customised SMS volumes (e.g. messaging campaigns). SMS MESSENGER USER MANUAL 5.4.1 STEP 1 : UPLOAD A FILE Figure 51: Upload a file containing GSM numbers to start the wizard. In this step import your contact database by uploading a CSV, TXT or MS Excel document. Select recipient column and click next. Figure 52: Worx will try to recognise the column containing recipients. Check if the right column is marked “Recipients” to proceed. SMS MESSENGER USER MANUAL 5.4.2 STEP 2: CREATE MESSAGE Figure 53: Create message step This area has the following important sections: Sender Message/Preview Message options. SMS MESSENGER USER MANUAL 5.4.2.1 SENDER Figure 54: Choose a desired sender type The “File2SMS” sender panel lets you choose between alphanumeric, registered numeric sender IDs or uploaded data. Alphanumeric sender Letters and numbers are both an option for this type of sender. Can be changed as needed. Alphanumeric sender ID can be entered manually and can contain both numbers and letters, but not only numbers. Numeric sender You can select one of the registered and verified mobile numbers on the list. Numeric values are used to simulate actual international or national sender IDs. Uploaded data Allows you to select a column from your uploaded document and use it as a sender. This way, you can customise the sender for each recipient. Default sender ID is set up under Account > My Account menu, Account information panel 5.4.2.2 MESSAGE/PREVIEW Figure 55: Message / preview section The “Message” section has a text box (marked with an envelope) for entering your message. SMS MESSENGER USER MANUAL Several important message-related details are displayed on the message panel. Number of SMS messages Displays the current number of SMS messages per recipient and the maximum allowed number of messages per recipient. Characters left Displays remaining characters in the current message. Total allowed number of characters per message is 160 (459 if multipart message is used). Select mapping6 If any symbol outside the GSM7 standard is used, the message will be sent in Unicode. Since Unicode messages allow fewer characters per message, mapping is used to replace symbols outside the GSM7 standard to the GSM7 standard. Insert placeholder Use this option to personalise each of your messages. Use your database columns as data values. 5.4.2.2.1 HOW TO USE MAPPING: 1. Write your message without restrictions 2. If any symbol outside the GSM7 standard is used, the message will be sent in Unicode format. 3. Select the mapping that suits your language to transform all special symbols from Unicode to the GSM7 standard. 4. A preview of mapped message is shown 5. If any mapping is active, you will not be able to enter any symbol outside the GSM7 standard. If you need to enter other symbols, turn off transliteration. When done, turn it on again. 5.4.2.2.2 HOW TO USE PLACEHOLDERS: 1. Write your message 2. Insert a placeholder when you need to add a different value for each contact 6 In information theory, transliteration is a mapping from one system of writing into another, word by word, or ideally letter by letter. Transliteration attempts to use a one-to-one correspondence and be exact, so that an informed reader should be able to reconstruct the original spelling of unknown transliterated words. To achieve this objective, transliteration may define complex conventions for dealing with letters in a source script which do not correspond with letters in a goal script. SMS MESSENGER USER MANUAL 3. Use the “Send test” button to send a test message to a custom GSM number. 5.4.2.3 MESSAGE OPTIONS Figure 56 Message options sections Several message options are available: Flash SMS Is a message that appears directly on the phone screen, instead of being routed to the inbox. It is a useful alternative to normal SMS when you want to capture the recipient’s attention immediately. Select the checkbox if you want your message to be displayed as flash SMS. Validity period By default, each message by default has a 48 hour expected delivery timeframe. The “Validity period” function allows this value to be shortened to the desired time period. If needed, change the default validity of your message. Scheduled job Messages can be sent immediately or scheduled for later sending. Scheduled messages can be found under SMS Manager -> Scheduled messages A flash SMS appears directly on the phone screen, instead of being routed to the inbox. It is a useful alternative to normal SMS when you want to capture the recipient’s attention immediately. By default, each message has a 48 hour expected delivery timeframe. The “Validity period” function allows this value to be shortened to the desired time period. Delivery speed limit You can limit sending speed if you wish the messages are sent at a slower rate. Custom client Id Select column from uploaded file and data in that column will be saved with each sent message. You can then request report in Analytics Report Centre and report will contain this custom data. SMS MESSENGER USER MANUAL 5.4.2.4 ACTIONS Figure 57: Page actions Back Returns you to the previous step Send test SMS Allows you to send a test message to a number of your choice. This is very useful for testing and verifying the actual message your recipients will receive once the job is started. Next This action is used to proceed to next step (Process/Preview) and continue with the wizard. Cancel job Use the “Cancel job” button to reset the current job. A confirmation dialog will appear. Confirming this action resets all changes made up to this point. SMS MESSENGER USER MANUAL 5.4.3 STEP 3: PROCESS/PREVIEW Figure 58: Process / preview step This step displays preliminary message statuses and provides the option to name the current File2SMS job. The “Summary section” displays numbers of total records processed, followed by invalid records, duplicate records and valid records (if any). Message preview section displays the first three valid records for verification purpose. This is very useful if you use placeholder data in your message since the list previews the actual records inserted from respective uploaded data file columns. The list contains message text, sender, characters, and number of SMS per recipient. The last column specifies if your messages uses Unicode encoding. Unicode messages are longer than standard GSM7 encoded messages; this occurs if you use non-standard characters in your messages. If the message is Unicode encoded, it will be marked with a green checkmark, otherwise (for GSM7 encoding) it is marked with a red dash. The last section provides a field to add a name to your current File2SMS job for easier referencing in the SMS bulk list and / or reports. This field is not mandatory – you can continue with the next step without adding a specific job name – an default name will be added instead. SMS MESSENGER USER MANUAL 5.4.4 STEP 4: START JOB Figure 59: Start job step. Pressing the button in this step triggers the start of the actual job. You can use the button on all steps prior to this one in case you entered some data incorrectly or you wish to modify other bulk parameters. Here you can view a detailed job summary before proceeding with the File2SMS job. Summaries are available for messages with the same character set, separately displaying details for “Country”, “Network”, “Price per message”, “Total recipients, and SMS count”. File2SMS job summary displays overall message volumes to be sent and total job price. When creating a scheduled job, detailed information about sending time and location is displayed. SMS MESSENGER USER MANUAL 5.4.5 STEP 5: REPORT Figure 60: Report step Once started, the job is displayed in the SMS bulk list page. You can either navigate to SMS bulk list to verify the job progress or start a new File2SMS job Scheduled File2SMS jobs can also be found in the SMS Bulk List. 5.4.6 SMS BULK LIST Figure 61: SMS bulk list page This section displays the list of your File2SMS performed jobs. SMS bulk result list – the list below the date and message status filters: Scheduled for - if a job has been scheduled for a specific time then this column will display the scheduled job time. If the job has been sent immediately then it will show the exact sending time. Updated at - displays the time when a job has been uploaded to our system SMS MESSENGER USER MANUAL Delivery speed limit - max number of messages that will be sent per chosen time unit (Minute, Hour, Day) Description - default or user predefined Professional SMS job name. Click on Professional SMS job name open SMS log 48h just for the selected SMS job. If the selected job is older than 2 days you need to export it from the Report Centre inside the “Analytics” application. Send count - displays total SMS count for a specific job Status - sent job status. Can be one of the following: Scheduled, Paused, In process, Finished, Failed, Cancelled, Delayed Download summary - download Professional SMS job summary in excel or CSV formats. Also, depending on bulk job status you can “Cancel”, “Pause” and “Resume” a job, change schedule time and delivery speed. 5.4.6.1 FILTER BY DATE Figure 62: SMS bulk list filter. Filtering by date allows you to set a time frame for which you want to examine data. You can also toggle various message statuses below to filter data only to very specific parameters. Please note that any changes to filter properties, being either date/time or message status-related, require the button to be clicked in order to display the filtered data. 5.4.6.1.1 HOW TO FILTER DATA 1. First select type of date reference – either the period the job is “scheduled for” or is “uploaded at”. 2. Select the start date from which you wish to review data 3. Select the end date until which you wish to review data 4. Click the button to display filtered data The application assumes 00:00 (midnight) time: the 'to' date should be after the last day of sending you are interested in. SMS MESSENGER USER MANUAL 6 UTILITIES & TOOLS 6.1 ADDRESS BOOK 6.1.1 MANAGE CONTACTS Figure 63: Manage contacts page The Manage contacts toolbar lets you search for contacts saved in your address book, as well as add, delete all and export contacts. 6.1.1.1 FINDING CONTACTS Figure 64: Filter the contact data to 1. Enter name or first letter in the “Criteria” text box and click” Filter”. You can use any of the 4 column records displayed in the contact list below – First name, Last name, Email and GSM – as search criteria. 2. Search results will be displayed below. To reset the filter and view the list of all contacts, delete the value from the “Criteria” input field and click “Filter”. SMS MESSENGER USER MANUAL 6.1.1.2 ADDING CONTACTS 1. Click . New Contact window opens, with fields for different contact details. Obligatory fields are highlighted yellow. 2. Click “Save” to add new contact, or “Cancel” to dismiss. Figure 65: New contact popup. The popup window consists of two tabs. The first one - “Contact details” - provides a list of fields that can be associated with a user and used as placeholder text or number later when composing a message. The GSM and First name fields (the first two fields in the tab) are mandatory. The second tab - “Groups” - enables you to associate a user with one or more groups for easier sending to a specific list of recipients later. Click the “Save” button at the bottom of the dialog to keep changes or click “Cancel” button to discard all the changed data. 6.1.1.3 DELETING ALL CONTACTS Figure 66: The “Delete all” button the last button at the left hand side of the toolbar. SMS MESSENGER USER MANUAL The “Delete all” button deletes all contacts in system. After clicking the button a confirmation dialog will appear. Click “Yes” to complete delete or “Cancel” to abort this action. Figure 67: Delete confirmation dialog. 6.1.1.4 EXPORTING CONTACTS Figure 68: The export buttons located at the right hand side of the toolbar. To export contacts, click Excel or CSV to export in those formats. 6.1.1.5 CONTACTS LIST Figure 69: A contact list grid with one example row. Use the Operations dropdown menu to either edit contact details or to remove the contact from the list. The contacts list is displayed below the toolbar, with only the most important contact details. The list displays 10 contacts per page. To navigate between pages, use the arrows below. The “Operations” section at the far right of the toolbar gives you editing and deleting options for a single contact. 6.1.1.6 EDIT CONTACTS Figure 70: Edit contact from contact list grid. SMS MESSENGER USER MANUAL 1. Opens the “Contact” editing window. This can be achieved either by clicking the name of the contact on the left hand side of the contact list grid or by clicking Edit link on Operations dropdown menu at the right hand side of the grid. 2. After changing the details, click “Save” or click “Cancel” to dismiss editing. 3. The same window opens if you click the contact name. 6.1.1.7 DELETE Permanently deletes the contact. The link is available from “Operations” menu on the right hand side of the contact list grid (See Figure 70 for example; the “Delete” action is also available in the “Operations” dropdown menu). 6.1.2 MANAGE GROUPS Figure 71: Mange groups page The “Manage groups” toolbar lets you search for contacts saved in your address book, as well as add new contact groups. 6.1.2.1 FINDING GROUPS Figure 72: Criteria filter. Clear the input and click filter again if you want to remove the filter and view all data. SMS MESSENGER USER MANUAL 1. Enter the name or first letter in the “Criteria” text box and click “Filter”. 2. Search results will be displayed below. 6.1.2.2 ADDING GROUPS 1. Click . The New group window opens. 2. Enter group name. 3. Click “Save”, or “Cancel” to dismiss. Figure 73: New Group dialog. 6.1.2.3 GROUPS LIST Figure 74: Groups list contains group names, number of respective contacts and dropdown operations menu for each group. The groups list is displayed below the toolbar, displaying the number of contacts in each group. The “Operations” section at the far right of the toolbar gives you various editing options for a single group. The list displays 10 groups per page. To navigate between pages, click the arrows below. SMS MESSENGER USER MANUAL Figure 75: Group list with the “Operations” dropdown menu open for a group. 6.1.2.4 ADD A CONTACT TO A GROUP 1. To add a contact to a group, click “Contacts”. 2. The same window is displayed if you click the name of a group. Figure 76: Manage group popup. The left list contains all the contacts available in the “Address Book”. The right list is a list of contacts of the group you are currently modifying. 6.1.2.5 IMPORT CONTACTS TO GROUP Click” Import” to browse for Excel, CSV or TXT files and upload contacts to a group. SMS MESSENGER USER MANUAL Figure 77: Import in group popup 6.1.2.6 EXPORTING GROUP CONTACTS Click Excel or CSV from the “Operations” menu to download in those formats. See Figure 75 for Excel and CSV links in the aforementioned menu. 6.1.2.7 RENAME GROUP Click on the “Rename” button allows you change group name. Figure 78: Rename group popup 6.1.2.8 DELETING A GROUP The “Delete” button permanently deletes a group. See Figure 75 additional “Delete” button information. SMS MESSENGER USER MANUAL 6.1.2.9 MANAGE GROUP CONTACTS Figure 79: Managing a group 6.1.2.9.1 ADDING CONTACTS TO GROUPS 1. Click “Contacts” or group name. A new screen appears. 2. Select contact(s) you wish to enter in a group from the “Contacts” column and click the arrows pointing left. Contact(s) will appear in the “Group contacts” column. Note that the selected contacts no longer appear in the “Contacts column” to prevent you from accidentally adding them twice. This does not delete the selected contact(s). 6.1.2.9.2 REMOVING CONTACTS FROM GROUPS 1. Check contact(s) you wish to remove from the group in the “Group contacts” column. 2. Click the arrows pointing right and the contacts will appear in the “Contacts” column. 3. Click “Close” to return to the “Manage groups” page. *Note that only existing contacts from your address book can be added to a group. SMS MESSENGER USER MANUAL 6.1.3 IMPORT CONTACTS Figure 80: Import contacts page You can also import multiple contacts from a file. Supported formats are TXT, Excel or CSV files. 1. Click Import to browse for the file. 2. Click Upload to proceed. 3. System will automatically try to detect uploaded file encoding and delimiter. You can change this manually. 4. In the table map each column is set with predefined column names. 5. Optionally, you can use “File Split” options to split uploaded data into smaller groups by manually defining number of records per file. You can also ask the system to split data into set number of groups or split into even groups with set record number. SMS MESSENGER USER MANUAL 6.2 ANALYTICS 6.2.1 DASHBOARD Figure 81: Dashboard page The “Dashboard” displays a detailed overview of your traffic, expenses and delivery rate. It provides options for filtering your traffic and displaying the results graphically. SMS MESSENGER USER MANUAL 6.2.1.1 DATA FILTER Figure 82: Data filters with highlighted statistics of traffic and expenses Data can be filtered by using several options: By date By service type (SMS, HLR or All) By traffic or expenses Figure 83: Date range and service type filter. Click the charged” checkbox. button to display data set in the filter fields, including the “Only 6.2.1.1.1 FILTER BY DATE Filtering by date allows you to set a time frame for which you want to examine data. How it works: 1. Select the start date from which you wish data to be displayed 2. Select the end date to which you wish data to be displayed 3. Click the Show button to display filtered data The application assumes 00:00 (midnight) time: the 'to' date should be after the last day of sending you are interested in. 6.2.1.1.2 FILTER BY SERVICE TYPE To provide you with even more insight on your traffic and costs, you can filter messages by service type. SMS MESSENGER USER MANUAL “Messages” shows only sent SMS messages. “HLR” shows only HLR queries. “All” will display both, sent SMS and HLR queries. 6.2.1.1.3 FILTER BY TRAFFIC OR EXPENSES Figure 84: Expenses / traffic filter. This option works independently from the filter in Figure 83 and switches between respective views with the data already shown. Traffic shows how many messages you have sent to a specific location. It can be further filtered to show all traffic or only delivered, sent, or failed messages. It clearly shows which countries and networks you have the largest traffic volume towards. Expenses will show your expenses per top destinations. This will allow you to fine tune your prices and lower your costs. Filtering traffic only by date and type requires clicking the “Show” button to display results. All other filtering options will display filtered data when selected. 6.2.1.2 DASHBOARD NETWORKS OVERVIEW Figure 85: Networks overview The secondary toolbar on the dashboard is used to display your top destinations and give you quick information about your expenses and traffic. 6.2.1.2.1 TOOLBAR OPTIONS Several options are visible on the toolbar: Show networks checkbox Traffic information SMS MESSENGER USER MANUAL 6.2.1.2.2 SHOW NETWORKS Figure 86: Example overview of networks when the Show networks checkbox is checked. If checked, the “Show networks” checkbox will display traffic in the selected country by networks. If unchecked, you will obtain information about selected country traffic that won’t be extended for all networks in that country. 6.2.1.2.3 TRAFFIC INFORMATION Figure 87:Traffic information is displayed depending on selected options – Traffic or Expenses Displays your traffic information. Expenses Traffic Delivered messages Pending messages Failed messages SMS MESSENGER USER MANUAL 6.2.2 SMS LOG 48H Figure 88: SMS log 48h page with filter and export toolbar and list of sent messages below SMS log 48h section gives you an overview of all your sent messages, as well as export options. 6.2.2.1 FILTER MESSAGES Figure 89: SMS log 48h filter displaying recipient filter field, message status checkboxes and external message ID field By recipient: 1. Enter recipient number 2. Press Refresh button By status: 1. Select only desired checkbox for statuses you want to filter 2. Press the Refresh button SMS MESSENGER USER MANUAL By External message ID: 1. Enter desired External message ID 2. Press the Refresh button 6.2.2.2 EXPORT MESSAGES Figure 90: Export buttons and ‘With message text’ checkbox To Excel - press the Excel button To CSV - press the CSV button If you wish to export message text as well, mark the "With message text" checkbox. 6.2.2.3 REFRESH DATA Click to get the most up-to-date information on your sent messages. 6.2.2.4 DETAILS SHOWN Figure 91: Sent messages list with detailed data overview for each message sent. Sending time - exact time when an SMS was sent Sender ID - sender name Recipient - recipient name or number Destination country - details on the destination country name Destination Network - details on the destination network name SMS MESSENGER USER MANUAL Sent count - total number of SMS sent in a job Status - gives information about message status Delivery report time - time when the message was delivered 6.2.3 NC LOG 48H Figure 92: Number Context log 48h page with recipient filter and export actions and the list of performed lookups below This section displays real-time results of all your Number Context Home Location Register lookup is a lookup into central database that contains details of each mobile phone subscriber that is authorised to use the GSM core network. It displays lookups performed in the last 48 hours. In the default view, the toolbar displays only the “Refresh” button, which you can use to get the most up-to-date information on your performed Number Context Lookups. Information shown is dependent on your Number Context packet. 6.2.3.1 EXPORT DATA Figure 93: Export buttons Export options to Excel or CSV file. SMS MESSENGER USER MANUAL 6.2.4.2 EXPORT DATA Export options to an Excel or CSV file. You can also include message text in the exported file by checking the ‘With message text’ checkbox. 6.3 NUMBER CONTEXT 6.3.1 PERFORM NUMBER CONTEXT LOOKUP Figure 97: Number Context page contains a five step wizard that lets you perform in-depth check of a range of mobile numbers. You can either upload a file containing numbers or paste or enter a list of numbers to start with the lookup. Here you can perform a Number Context lookup. It is a lookup into the central database containing details for each mobile phone subscriber number that is authorised to use the GSM core network. The system is directly connected to the global mobile network, which ensures fast and highly accurate access to key information about a specific mobile number, including: Validity - checking whether a mobile phone number is valid. Mobile location - country level information about the location of a phone. Mobile network - the current network that the phone is operating on. SMS MESSENGER USER MANUAL International Mobile Subscriber Identity (IMSI)7 - enhance anti-fraud procedures by performing IMSI verification directly from the GSM network. Porting - checks whether a mobile phone number has been 'ported' to a new network due to MNP (Mobile Number Portability). 6.3.1.1 TOOLBAR To reset current job press the “Cancel” job button (can be undone by clicking “Undo”). 6.3.2 PERFORM NUMBER CONTEXT WIZARD 6.3.2.1 INPUT DATA Use the form to either insert numbers manually (by entering numbers individually or pasting spread sheets of numbers) or upload a CVS, TXT or MS Excel document containing mobile numbers. 7 IMSI An International Mobile Subscriber Identity or IMSI (pronounced /ˈɪmzi/) is a unique identification associated with all GSM and UMTS network mobile phone users. It is stored as a 64 bit field in the SIM inside the phone and is sent by the phone to the network. It is also used for acquiring other details of the mobile in the Home Location Register (HLR) or as locally copied in the Visitor Location Register. To prevent eavesdroppers identifying and tracking the subscriber on the radio interface, the IMSI is sent as rarely as possible and a randomly-generated TMSI is sent instead. SMS MESSENGER USER MANUAL Figure 98: Paste or enter numbers option. 6.3.2.2 REVIEW UPLOAD Here you can customise input from uploaded data by managing parameters such as the encoding delimiter, and preview data. SMS MESSENGER USER MANUAL Figure 99: Step 2 – Review upload 6.3.2.3 DATA PROCESSING This step displays the results status of and provides the option to name the current Number Context job. SMS MESSENGER USER MANUAL Figure 100: Step 3 – Data processing 6.3.2.4 ANALYSE Here you can review job parameters such as “Country”, “Network”, “Price per (NC) lookup” in euro cents, “Total recipients and NC count”, “Total number” of Number Context lookups and “Total price” in euro cents. Figure 101: Step 4 - Analyse SMS MESSENGER USER MANUAL 6.3.2.5 NC RESULTS Displays confirmation that a job is being processed. Use the “View NC list” link to display job status or click “New job” to perform new Number Context job. Figure 102: Number Context results page Large uploads can take a longer time to complete and display on the NC results page. Figure 103: Number Context results page (NC Bulk list) Use the 6.3.3 button on the toolbar to refresh data. NUMBER CONTEXT BULK LIST This section displays the results of your Number Context jobs. SMS MESSENGER USER MANUAL Number Context lookup is a check of a central database with the details of each mobile subscriber authorised to use the GSM core network. The Number Context Lookups store details of every SIM. A subscriber identity module (SIM) on a removable SIM card securely stores the service-subscriber key (IMSI) used to identify a subscriber on mobile telephony devices (such as mobile phones and computers) card issued by the mobile phone operator. Each SIM has a unique identifier called an IMSI. International Mobile Subscriber Identity or IMSI (pronounced /ˈɪmzi/) is a unique identification associated with all GSM and UMTS network mobile phone users. It is stored as a 64 bit field in the SIM inside the phone and is sent by the phone to the network. It is also used for acquiring other details of the mobile in the Home Location Register (HLR) or as locally copied in the Visitor Location Register. To prevent eavesdroppers identifying and tracking the subscriber on the radio interface, the IMSI is sent as rarely as possible and a randomly-generated TMSI is sent instead. This is the primary key to each Number Context Lookup record. Examples of other data stored in the Number Context Lookup against an IMSI record: GSM services that the subscriber requested or has been provided with. GPRS General packet radio service (GPRS) is a packet oriented mobile data service on the 2G and 3G cellular communication systems global system for mobile communications (GSM). The service is available to users in over 200 countries worldwide. GPRS was originally standardized by European Telecommunications Standards Institute (ETSI) in response to the earlier CDPD and i-mode packet switched cellular technologies. It is now maintained by the 3rd Generation Partnership Project (3GPP). Settings allow the subscriber to access packet services. Current location of the subscriber (VLR and serving GPRS support node/SGSN). Call diverts settings applicable for each associated MSISDN MSISDN is a number uniquely identifying a subscription in a GSM or a UMTS mobile network. Simply put, it is the telephone number of the SIM card in a mobile/cellular phone. In the default view, the toolbar displays only the Refresh button, which you can use to get the most up-to-date information on your performed Number Context. SMS MESSENGER USER MANUAL 6.3.4 NUMBER CONTEXT RESULTS LIST Figure 104: Number Context results page with date range filter and the result list below. Number Context jobs are displayed chronologically in a descending order (from newest to oldest). You can export each job as Excel or CSV using the respective links in the operations column. Description Default or user defined Number Context job name. Click on “Number Context Lookup job name” to display Number Context results for that Number Context job. Finish time Shows the exact time when a Number Context Lookup job was done. Sent count Total Number Context Lookups in a Number Context Lookup job. Operations Export options to an Excel or CSV file. SMS MESSENGER USER MANUAL 7 Bulk SMS Bulk Messaging is the dissemination of large numbers of SMS messages for delivery to mobile phone terminals. It is used by media companies, enterprises, banks (for marketing and fraud control) and consumer brands for a variety of purposes including entertainment, enterprise and mobile marketing. CDMA CDMA is a digital technology for transmitting data. It is a general technology utilized through various standards. CDMA has no limit on capacity but the base station will only connect users upon determining that the call quality would fall below a predetermined limit. Concatenated SMS In the cellular phone industry, mobile phones and their networks sometimes support concatenated short message service (or concatenated SMS) to overcome the limitation on the number of characters that can be sent in a single SMS text message transmission (which is usually 160). Using this method, long messages are split into smaller messages by the sending device and recombined at the receiving end. Each message is then billed separately. When the feature works properly, it is nearly transparent to the user, appearing as a single long text message. Delivered messages Messages that reached the destination successfully, and are terminated normally on the targeted handset. Failed messages Failed messages are messages that have been finalised but not delivered to the handset. This can happen when the destination does not exist, when the subscriber is invalid, or when a similar permanent unavailability issue occurs. Flash SMS Message that appears directly on the phone's screen, instead of the 'Inbox'. It’s a useful alternative to normal SMS when you want to catch the recipient’s attention immediately. GPRS General packet radio service (GPRS) is a packet oriented mobile data service on the 2G and 3G cellular communication systems global system for mobile communications (GSM). The service is available to users in over 200 countries worldwide. GPRS was originally standardized by European Telecommunications Standards Institute (ETSI) in response to the earlier CDPD and i-mode packet switched cellular technologies. It is now maintained by the 3rd Generation Partnership Project (3GPP). IMSI An International Mobile Subscriber Identity or IMSI (pronounced /ˈɪmzi/) is a unique identification associated with all GSM and UMTS network mobile phone users. It is stored as a 64 bit field in the SIM inside the phone and is sent by the phone to the network. It is also used for acquiring other details of the mobile in the Home Location Register (HLR) or as locally copied in the Visitor Location Register. To prevent eavesdroppers identifying and tracking the subscriber on the radio interface, the IMSI is sent as rarely as possible and a randomly-generated TMSI is sent instead. SMS MESSENGER USER MANUAL MSISDN MSISDN is a number uniquely identifying a subscription in a GSM or a UMTS mobile network. Simply put, it is the telephone number of the SIM card in a mobile/cellular phone. Number Context Number Context lookup is a check of a central database with the details of each mobile subscriber authorised to use the GSM core network. Pending messages Messages which were submitted to the operator, but are currently pending for delivery. This can happen due to temporary handset unavailability. Sent messages Messages which were submitted to the operator, but are currently pending for delivery. This can happen due to temporary handset unavailability. SIM A subscriber identity module (SIM) on a removable SIM card securely stores the service-subscriber key (IMSI) used to identify a subscriber on mobile telephony devices (such as mobile phones and computers) SMS SMS or the Short Messaging Service allows users to send and receive personal text messages directly between mobile phones or sometimes to email addresses. Each message can be up to 160 characters long (when using the default character set) and can be sent to and from users of different operator networks. All mobile phones support SMS. Transliteration From an information-theoretical point of view, transliteration is a mapping from one system of writing into another, word by word, or ideally letter by letter. Transliteration attempts to use a one-to-one correspondence and be exact, so that an informed reader should be able to reconstruct the original spelling of unknown transliterated words. To achieve this objective, transliteration may define complex conventions for dealing with letters in a source script which do not correspond with letters in a goal script. UMTS Universal Mobile Telecommunications System (UMTS) is one of the third-generation (3G) mobile telecommunications technologies, which is also being developed into a 4G technology. The first deployment of the UMTS is the release99 (R99) architecture. It is specified by 3GPP and is part of the global ITU IMT-2000 standard. The most common form of UMTS uses WCDMA (IMT Direct Spread) as the underlying air interface but the system also covers TD-CDMA and TD-SCDMA (both IMT CDMA TDD). Being a complete network system, UMTS also covers the radio access network (UMTS Terrestrial Radio Access Network, or UTRAN) and the core network (Mobile Application Part, or MAP), as well as authentication of users via USIM cards (Subscriber Identity Module). Validity period Timeframe in which message delivery is expected.