1
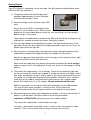
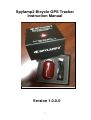
Spylamp2 Bicycle GPS Tracker
Instruction Manual
Version 1.0.0.0
1
Getting Started
Your GPS tracker is controlled via text message. You will need your mobile phone and a
SIM card (2G) with credit on it
1) Charge the tracker with the charging cord
provided. Approximately 3 hours should be
sufficient but overnight is best.
2) Remove the light cover and insert your SIM
card.
Please ensure the SIM is activated and has
credit on it. You should use this SIM to make a
phone call first from mobile phone so you are sure everything is set up correctly
before using it in the tracker.
Take note of the mobile phone number of the SIM card. We will be sending texts to
and from this number to control the tracker (texting the tracker)
3) Press the light button on the back of the tracker. The light should come on. If the
light does not stay on, then attach the charging cord and charge the unit. Press the
button again to turn the light off.
4) When you press the light button, the tracker will always attempt to connect to the
mobile phone network. Wait approximately 30 seconds for it to connect.
Now we are going to send the tracker a text message, just to check that it was able
to connect and can receive and send texts.
Send a text message from your phone to the tracker containing the word settings
(upper or lower case is not important but make sure there are no leading or trailing
spaces)
5) The tracker will respond with a list of settings. These are not important right now,
we are just testing the tracker can respond. If you do not receive a text back, wait a
little while, and go back to step 2 and try again. If you still cannot receive texts then
the tracker may not be able to connect to the network. Check that it has sufficient
credit and you are able to send and receive texts from in it on a regular mobile
phone. Also check that it is a 2G network. 3G-only networks will not work.
SMS text messages are not always delivered immediately by the GSM network.
You may find they come through in a minute or two. Please check the
troubleshooting section on the support section of our website for more details.
6) We need to give the tracker your mobile phone number so it knows who to text if it
detects it is being stolen. Send the tracker a text like the one below
setphone1 +44789123456 (replace with you own mobile number)
The tracker will respond with a confirmation message
Using the + international area code syntax is useful in case your tracker is taken
overseas. This is not essential and you may just enter it as you dial it.
2
7) Send the following texts to set up live tracking
setapn www.mynetworkapn.com
setuser myuser mypassword
- Substitute network APN
- Substitute network user and password
You will need to find your APN, username and password for your mobile network.
These are usually easy to find. Try these pages :
The APN section on the support tab of our website
www.quickim.com/support/gprs-settings.html
www.flexispy.com/Mobile APN Setting to use GPRS.htm
www.taniwha.org.uk/gprs.html
or alternatively contact your network provider. Often a Google search works eg :
"APN TescoMobile"
8) That's it, the tracker is ready to try out
3
Using the tracker
Obtaining the location of the tracker
Go outside and turn the tracker's light on and off. This will cause the tracker to connect to
the mobile network so that it is active. Wait 30 seconds for it to connect and then text
whereareyou to the tracker.
The tracker will send back a text, acknowledging your request and then attempt to obtain
a GPS lock and return its coordinates. This will take between 15 secs and 5 mins
depending on view of sky and number of satellites visible.
If the tracker cannot obtain a GPS lock then it will return a less accurate location based
on GSM triangulation. Many things can affect the ability to obtain a GPS lock but most
important is the view of the sky. The tracker will work inside small buildings but dense
materials like brick or steel will affect performance. In this case you will be sent a link that
gives the position based upon the nearby mobile phone towers. This is only accurate to
within a few hundred meters but will give you an indication of where the tracker is until it
can obtain a GPS lock.
Send the tracker the text settings. It will respond with a text showing some of its common
configuration settings. Among these are its unique IMEI code. Note this number down.
Now send the tracker the text upload. The tracker will respond and then obtain its GPS
location and upload it to www.gpstrackthis.com. Go to the whereisit page and enter the
IMEI number, you should see your tracker on the map.
Activating the motion sensor
The tracker contains a vibration sensor. This is useful when you want to lock your bicycle
up somewhere and want to be notified if anyone touches it.
Hold down the on/off button on the back of the tracker for 5
seconds.
The tracker will flicker for 1 second to indicate that the
vibration sensor is now on.
In 30 seconds time, the sensor will activate and if the
tracker is moved, you will receive a text message.
Whenever the tracker detects movement, it will begin uploading its location to the
GPSTrackThis website at regular intervals. It will do this until 5 minutes after the vibrations
stop
You can also activate the vibration sensor by sending the text arm. This is useful if your
bicycle was stolen but you had forgotten to activate the vibration sensor.
Deactivating the motion sensor
Hold the on/off button down for 5 seconds again. The light will give 5 long steady pulses
to indicate the vibration sensor is now off. Make sure this is the first thing you do when
you return to your bicycle or you will set it off yourself! (You can also send disarm)
4
If the tracker is stolen
If your bicycle is stolen, you will receive an SMS text message to
your phone as soon as vibrations are detected (if you have not
activated the vibration sensor, you should send the text arm).
The tracker will then obtain a GPS lock and begin uploading its
location to the online tracking service. By default, it will upload its
location every 20 seconds.
You can look on the website and you will see a red line leading from where your bicycle
was stolen to where it was taken to.
The tracker will continue to upload its location until 5 minutes after vibrations have
stopped. So, if your thief gets home and puts the bicycle in the garage, 5 minutes later, it
will then go back to sleep.
If the thief then rides your bike again, you will receive another text, notifying you that it is
on the move and then it will start tracking again. This will continue each time the thief
uses your bike.
This is useful in case your bicycle is taken to a block of flats or placed somewhere where
it cannot get a clear GPS signal and you are unable to pinpoint exactly where it is. The
next time they ride your bike, you are notified straight away and you will be able to see
where they go.
If you send the tracker a text while it is asleep, it will respond to the text the next time it
wakes or the next time the thief moves the bike or uses the bike light.
*NB : The tracker is completely disconnected from the mobile network until it wakes up
Flashing the light
You can send the text flash to flash the light. This may be useful to test the tracker and
even to find it in the dark. Also its a good way to check if the tracker is receiving your
SMS even if it is not replying (ie you have no credit on your SIM card)
Battery
The tracker contains a lithium ion battery. This battery, when fully charged, should be
enough to run the tracker for many months. It is best to keep it well charged.
There are a number of factors which affect battery life, including how much you use the
light, the network signal strength and the wakeup interval. See the SpyLamp section on
the website setup page for more details.
You can see how much battery is left with the command checkbattery
The tracker will stop working at 3.35 volts
You will receive a low voltage warning at 3.5 volts
Approx 4 volts represents a full charge
If the battery is below 3.35 v and you attempt to switch the light on, the light will flicker
and switch back off. It is time to charge the battery. Please use the charger provided.
5
Responding to text messages
SMS text messages are sometimes not responded to straight away for a number of
reasons :
The tracker will respond to text messages if it is connected to the network.
Using the default settings, the tracker will stay connected to the network for 5 mins after it
wakes up (either from timer, button press or vibration sensor). It will respond to SMS
messages during this time but afterwards will go back to sleep and disconnect from the
network. It does this to maximise the battery.
If an SMS message is sent to the tracker while it is not connected to the network then it
should receive this message the next time it connects.
How this occurs is dependant on your GSM network provider. Most send through missed
text messages within 30 seconds of connecting but sometimes it can takes several
minutes. This varies between networks and current network load.
Sometimes SMS messages are not delivered immediately by the GSM networks. This
may be due to network congestion. Occasionally it can be hours before they arrive,
although this is unusual. If in doubt, just send the message again.
*NB an easy way to ensure the tracker is connected when you want to change its
configuration is to switch the light on and off. Wait 30 seconds to ensure that the
tracker has connected to the network and then send it a text.
Always check you have credit on your SIM card.
Downloading new software
The tracker can download new software from the online web server. This is useful for
upgrading the tracker, fixing issues and making enhancements.
To download the latest version, send the text download
To download a specific version, send the text download 1.3.0.1 (the version you want)
You can also download new software using the reset button and the light button.
Hold the light button down. Now click the reset button (gold button under the cover) and
release while keeping the light button down. Keep the light button down for a further 5
seconds until the tracker flashes. It will now start downloading.
Downloading takes approximately 5 minutes during which time the light will flicker and
flash to indicate it is working. After it has finished, send the text settings to check the
version that is running.
*NB : You must have the correct APN, IP and port configuration set up to download new
software versions. Only perform this step when necessary
Installation
Spylamp is designed to function as a tail light, attached to your bicycle seatpost. It is
advisable not to use a quick-release seatpost clamp when using spylamp.
6
Some common commands :
Text these numbers to the SIM card in your GPS tracker to control it
Some common settings :
whereareyou
help
settings
gprssettings
setphone1
reset
setwakeup
setwaketime
setstatus
flash
networkinfo
cellinfo
checkbattery
arm/disarm
setdebug
setsensitivity
- Send me the current GPS location
- Send me some common commands
- What are the current settings
- What are the current gprs (internet) settings
- Set my current phone number setphone1 +441234567879
- Reset to factory settings. (You will need to text setphone1 again)
- How often should the device wake. i.e. setwakeup 6 hours
- How long the tracker stays connected after waking setwaketime 5 mins
- How often the tracker should 'check in'. i.e. setstatus 7 days
- Flash the light.
- Send me local cell information for my mobile tower
- Send me local cell information for all surrounding mobile towers
- How much charge does the battery have left
- Turn the vibration sensor on or off
- Causes the tracker to flash when it receives a text. Only for testing
- (3-30). 3 = highest sensitivity, 30 = lowest. Default = 6 ie setsensitivity 6
GPRS tracking commands
setapn
- Set the GPRS APN ie. setapn myapn.com
setuser
- Set the GPRS username and password ie setuser myuser mypassword
setip
- Set the GPRS IP and port. ie setip 78.129.149.11 9201
settracking - Turn tracking on or off ie settracking on
setgprsinterval - Set the time in between tracking positions. ie setgprsinterval 20 seconds
setgprsamount - (1-10) Set the number of positions that are uploaded each time setgprsamount 5
upload
- Upload the GPS location once to the website
download
- Download a new version of firmware to the tracker ie download latest
UPPER or lower case is not important but ensure there are no leading or trailing spaces
The setwakeup, setwaketime and setstatus messages are denominated in seconds, minutes, hours or
days. e.g. setwakeup 6 hours, setwaketime 5 minutes, setstatus 7 days or you can abbreviate
setwakeup 6 h, setwaketime 5 m, setstatus 7 d.
The setvibration, setdebug, settracking and setnotify messages take the form setxxxxx on/off
These instructions are valid for the tracker at the time of writing. You can download new
versions of software to your tracker from time to time when they are released. Because of this,
specific functions may be added or changed.
Refer to the Spylamp website for the latest instructions
7
Warranty
GPS TRACKER
PURCHASE DATE
____________________________________
If your tracker is faulty within 12 months of purchase then it will be replaced or
refunded at your discretion.
We do not accept responsibility for any damage that may occur to equipment during
the use, misuse or installation of your tracker above the price of the unit.
This warranty is in addition to your statutory rights.
[email protected]
8