1
document title/ titre du document
CUS SOFTWARIE
ADIMINISTRATOR AND
OPIERATOR MANUAi.
Reference
IERSE-USER-EOAO-MA-01-000
l
Issue
Revision
I~
Prepared By
1Tullio Crisafulli
Domenico Costrovillori llntecs
Signature
dote
12/09/2001
Paolo Costantini
Reviewed By
Domenico Costrovillori llntecs
Signature
dote
12/09/2001
19/09/2001
Authorised By
Domenico Castrovillari
Signature
dote
Agency Agreement
Stefano Badessi
Signature
dote 21/09/2001
Gesa
CUSSoftware Administrator and Operator Manual
issue I revision 0- 12/09/2001
e 2 of 91
CHANGE
l.OG
reason for change /raison Ju changement
issue/issue
revision/revision
dote/dote
Initial Issue
1
0
20 Sept. 2001
CHANGE
RECORD
ISSUE: 1 REVISION: 0
reason for change/ raison Ju changement
poge(sVpoge(sJ
porogroph(sVparagraph(s}
Gesa
CUSSoftware Administrator and Operator Manual
issue I revision 0- 12/09/2001
e 5 of 91
1
INTRODUCTION
1.1
Purpose
This document describes all procedures to be executed by administrators and operators in order to
support correct activities of CUS facility
1.2
Scope
The CUS facility is a system operated by EEM-ADU section, fitting the following main
requirements:
•
•
•
•
1.3
Order handling, to manage requests for satellite data from users world wide
Mission Planning for ERS-2 payloads, according to user requests
Production management, to handle requests for products generated from satellite data
Reference Inventory, to keep a centralised inventory of all missions available
References
Al CU-MA-MDA-SY-0003
1.4
Abbreviations
ADD
Architectural Design Document
A.O.
Acquisition Order
cus
Central User Services System
D.VJD.O.
Delivery Unit I Detail Order
DESCW
"Display ERS Swath Coverage" for PC/Windows
ECF
ESRIN Central Facilities
EO
Earth Observation
ERS
European Remote Sensing satellite
ESA
European Space Agency
FDP
Fast Delivery Product
CENTRAL USER SERVICE USER'S MANUAL
Gesa
CUSSohware Administrator and Operator Manual
issue 1 revision 0 · 12/09/2001
e 6 ol 91
1.5
GUI
Graphical User Interface
HW
Hardware
ICD
Interface Control Document
ISS
Interface Sub-Set (multi-mission, multi-protocol, multi-machine)
ISSCUS
ERS global products order handling system
MMI
Man-Machine Interface
MUIS
Multi-mission User Information Services
ocs
Eurimage Commercial Order Handling System
OHS/
MMOHS
ESRIN new Multi-mission Order Handling System
P.O.
Product Order
P.O.I.
Product Order Item
P.U.
Package Unit (in MUIS and PROMISE)
PAF
Processing and Archiving Facility
PF
Processing Facility
Pl
pp
Principal Investigator
PROMISE
P.O.H.
PRoduct Ordering system for Multiple Satellite Environment, Product Order Handling
R.S.
Remote Sensing
Pilot Project
s.o.
Sensing Order
SW
Software
T.B.C.
To Be Confirmed
T.B.D.
To Be Defined
TPM
Third-Party Missions (ESA supported non-ESA satellites)
u.o.
User Order
Document Overview
This document is organised as follows:
•
•
This chapter describes the purpose of the document itself, and the scope of the application
being operated
Chapter 2 provides the list of procedures, sorted out by operational aras
Gesa
CUSSohwore Administrator ond Operator Monuol
issue 1 revision 0 · 12/09/2001
,ooe 7 of 91
2
PROCEDURES
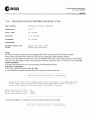
2.1
MISSION PLANNING
2.1.1
PHASE DEFINITION
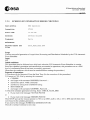
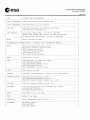
2.1.1.1 Creating a phase
User profile
Connection
Start time
Duration
Frequency
References
Related tables and
files
CUS System Manager,
CUS Operations Planner
VT200
on request
0.5 day (depending on phase duration)
N/A
CUS Software Reference Manual,
CFI User Manual, and Operational Files
CUS tables:
CATDD_unpr_catalogue
GAPDD_xxx
HERDD_phase
ORSDD_xxx
URQDD_user_request
Scope
It generates the tables GAPDD_xxx which provide storage for fields used to plan satellite activity.
The phase parameters are stored in the HERDD_phase table.
The table HERDD_phase defines the periods, when the orbit is stable (fixed mean nodal period). The
manoeuvres to change from one orbit to another are not defined in this table, but can be calculated as the
difference between end of previous and start of next phase.
Input
1- Ensure that the associated ORACLE account has the privilege to update HERDD_phase and
GAPDD_XXX tables.
2- Ensure that the phase is not already defined (Phase change, option "H"). If so, the old phase has to be
deleted first (See procedure "Deleting a phase").
3- Ensure that the CFI software modules have been run using the desired phase parameters.
See the procedures :
Generate the Orbitevent file
Generate the Visibility table
Generate the Daylight table
4- Ensure that the logical "En_PLAN_CYCLE_x", where n is the satellite identifier (1 for ERS-1, and 2 for
ERS-2) and x is the phase identifier, has been defined and points to the directory where the
ORBITEVENT.En file is located.
Gesa
CUSSohware Administrator and Operator Manual
issue 1 revision 0- 12/09/2001
e 8 ol 91
5- Ensure that the logical SQL_CFI_ACCOUNT points to the oracle account where DAYLIGHT and
VISIBILITY tables are, and that the logical SQL_ACCOUNT_PWD points to the required data Oracle
account for the current environment (i.e. ORAPROD for production).
6- Inform ISS of the creation. (they use a copy of HERDD_PHASE).
Initital Conditions
(Describes the conditions which must be matched before running the procedure)
Sequence of Operations
1- Run the phase change tool typing "PHASE_CHANGE at VMS prompt;
2- Select a working copy (1 or 2);
Choose option "C" for create a phase;
4- Enter, one by one, the following phase parameters:
• Phase to create
• Satellite
• Number of orbit in phase
• Number of orbit in cycle
• Days per cycle
• First mission orbit number
These parameters must correspond exactly to the ones found in the ORBITEVENT.En file. (See the CPI
Operational File Document "ER-TN-ESA-GS-0030"). Note the differences in the units used.
5- If all the parameters were entered correctly, the message "Creating phase" is displayed. Wait ...
Output
The phase change tool generates a PCHGnnnn_date_time.RPT
file in the reports directory.
Error Handling
The phase change tool also generates a process errorlog file in the directory PHAP _XPHT_LOG_DIR.
Notes
(Any useful information not covered before.)
Gesa
CUSSohware Administrator and Operator Manual
issue I revision 0 · 12/09/2001
e 9 of 91
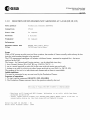
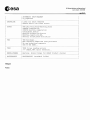
2.1.1.2 Deleting a phase
User profile
CUS System Manager, CUS Operations Planner
Connection
VT200
Start time
on request
Duration
1 day (depending on phase duration)
Frequency
N/A
References
CUS Software Reference, Manual CFI User Manual
Related tables and
files
CUS tables:
CATDD_unpr_catalogue
GAPDD_
HERDD_phase
ORSDD_xxx
URQDD_user_request
Scope
(This procedure is used to delete an existing phase.)
Input
(Describes the input (e.g. file) required by the procedure.)
Initial conditions
1. Ensure that the associated Oracle account has the privilege to update CATDD_unpr_catalogue,
HERDD_phase, ORSDD_XXX, GAPDD_XXX and URQDD_user_request tables.
2. Ensure that the CFI file ORBITEVENT.En corresponds to the phase to be deleted. If not please run
the procedure "Generate the ORBITEVENT file".
3. Ensure that the logical En_PLAN_CYCLE_x has been defined and points to the directory where the
ORBITEVENT.En file is located.
4. Ensure that the logical SQL_ACCOUNT_PWD points to the required data Oracle account for the
current environment (i.e. ORAPROD for production).
Sequence of operations
1-Run the phase change tool typing "PHASE_CHANGE" at VMS prompt;
2-Select a working copy (1 or 2);
3-Choose option "D" to delete a phase;
4-Enter phase to delete and satellite identifier;
5-The message "Deleting phase" is displayed after confirmation by the user. Wait ...
6-Inform ISS of the deletion.
Output
The phase change tool generates a PCHGnnnn_date_time.RPT file in the reports directory.
Effect on User Request and Planning :
All Planned or Partially Planned user request within the deleted phase go to the Rejected state.
Gesa
CUSSoftware Administrator and Operator Manual
issue I revision 0- 12/09/2001
e JO of 91
The corresponding Orbit Selection, Catalogue entries (Future and Past) are deleted.
Orbits of the old phase are deleted from the GAP.
Other user requests are not changed.
Error handling
The phase change tool also generates a process errorlog file in the directory PHAP_XPHT_LOG_DIR.
Notes
(Any useful information not covered before.)
Gesa
CUSSohware Administrator and Operator Manual
issue 1 revision 0- 12/09/2001
e 11 of 91
2.1.1.3 Modifying a phase
User profile
CUS System Manager, CUS Operations Planner
Connection
VT200
Start time
on request
Duration
1 day (depending on phase duration)
Frequency
N/A
References
CUS Software Reference Manual,
Related tables and
files
CUS tables:
HERDD_phase
CATDD_unpr_catalogue
CATDD_last_orbit_no
GAPDD_gap_orbit
ORSDD_xxSCOPE
Scope
This procedure is used to modify an existing phase.Note
that only the following changes can be performed:
• a) Set the new start time before OR after the old start time AND/OR
• b) Modify the number of orbits in phase (Option "L") OR
• 3) Modify the mission orbit number of the orbits (Option "M")
Remarks:
In case (a), the time shift can only correspond to aninteger number of orbits (ie. for a 3 day cycle phase, the
starttime can be set forward 3 days, thus corresponding to 43 orbits.The new first orbit of the phase must
have in this case the samelongitude of ascending node as the old one, and its mission orbitnumber must be
equal to "Old first mission orbit number -43".)
If the time shift does not correspond to a multipleof cycle (ie. a multiple of 43 orbits in the 3 day cycle),
thenthe new first orbit of the phase must have the adequate longitudeof ascending node. For all other cases
(ie. when the coveragehas to be shifted in space or in time), the old phase has to bedeleted first, then the new
phase can be generated (see relatedprocedures).
Input
(Describes the input (e.g. file) required bu the procedure.)
Initial conditions
1. Ensure that the associated Oracle account has the privilege to update HERDD_phase, ORSDD_xxx,
GAPDD_xxx and URQDD_xxx tables.
2. Ensure that the CFI software modules have been run using the desired phase parameters. See the
procedures :
• - Generate the Orbitevent file
• - Generate the Visibility table
Gesa
CUSSohware Administrator and Operator Manual
issue I revision 0-12/09/2001
e 120191
• - Generate the Daylight table
Note : in case (a), the ORBITEVENT.E<l>n<ll> file must contain all orbits of the old phase plus all orbits
of the new phase
1. Ensure that the logicals Eclc-n-c/I> _PLAN_CYCLE_<Ic-x-c/I> has been defined and points to the
directory where the ORBITEVENT.E<l>n<ll> file is located.
2. Ensure that the logical SQL_CFI_ACCOUNT points to the Oracle account where DAYLIGHT and
VISIBILITY tables are, and that the logical SQL_ACCOUNT_WD points to the required data
Oracle account for the current environment (i.e. ORAPROD for production)
Sequence of operations
1. Run the phase change tool typing "PHASE_CHANGE" at VMS prompt;
2. Select a working copy (1 or 2);
3. Choose option "L" to modify the length of the phase (case a and/orb) or option
"M" to modify the mission orbit number (case c);
4. Enter phase to modify and the satellite identifier;
5. Enter, one by one, the modified phase parameters:
• - Start date time(DD-MM-YYYY HH:MM:SS.SSS)
• - Number of orbits in phase
• - Longitude of first ascending node (0-360 deg)
• - First mission orbit number
These parameters must correspond exactly to the ones found
in the ORBITEVENT.E<l>n<ll> file. (See the CPI Operational File
Document "ER-TN-ESA-GS-0030"). Note the differences in the units used.
6. If all the parameters were entered correctly, the message "Modifying phase" is displayed.
Wait
7. In case the ORBITEVENT.E<l>n<ll> file contains orbits of the old phase which are not part of the new
phase, regenerate the
orbit event file, and remove corresponding entries from
DAYLIGHT and VISIBILITY tables (See related procedure);8- Inform ISS team of the change since they
use the HERDD_phase table.
Output
OUTPUTThe phase change tool generates a PCHG<l>nnnn_date_time.</l>RPTfile in the reports directory.
Effect on User Request and Planning (in case a and b):
BEFORE AFTER
UR Submitted within new UR Submitted
phase
UR Submitted outside new UR Submitted
phase
UR Awaiting Planning within UR Awaiting Plan
new phase
UR Awaiting Planning UR Awaiting Plan
outside new phase
UR Planned within new phase UR Planned
UR Planned outside new UR Rejected
phase
UR Partially Planned within UR Partially plan
Gesa
CUSSoftware Administrator and Operator Manual
issue l revision 0- 12/09/2001
e 13 of 91
new phase
UR Partially Planned UR Rejected
outside new phase
In case (c), the user request and the planning are not affected.
Error handling
The phase change tool also generates a process error log file in the directory PHAP_XPHT_LOG_DIR.
Gesa
CUSSoftware Administrator and Operator Manual
issue l revision 0 · 12/09/2001
e 14ol 91
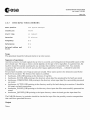
2.1.1.4 Generate Visibility table
User profile
CUS System Manager,CUS Operations Planner
Connection
VT200, Direct connection on ERSCUS
Start time
on request
Duration
2 h (depending on phase duration)
Frequency
Each time phase definition is to be changed
When a station mask is added or modified
References
VISIBILITY GEN User Manual
CFI Operation File
Related tables and
files
CUS tables
GS_LINK_AODVISIBILITY
CFI files
ORBITEVENT.En(where n=l,2)
STATION.DEF
STATION.LST
Output files : Visibility_gen.log
Scope
This procedure is used to add or delete records from the table VISIBILITY. Each record defines a segment
of station visibility on one orbit for a satellite. All orbits from all phases for all satellites containing a
visibility segment must have an entry in this table. These orbits are referenced by the mission orbit number.
The VISIBILITY table is used by the Phase Change tool to generate The GAP tables. It is also accessed
during planning activity (GAP validation).
Input
En_PLAN_CYCLE_x:ORBITEVENT.En (See "Generation of the Orbitevent File")
CUS$DBF_DIR:STATION.DBF, the stations mask
CUS$DBF_DIR:STATION.LST, the list of stations for which visibility segments need to be added or
deleted in the visibility table (Manually updated).
CUS$SCENARIO_DIR:ORB_cyclelength.En
GS_LINK_AOD, a CUS table giving the start and end of link angles for the stations (Manually updated)
Initial conditions
1. Make sure that the ORBITEVENT.En was generated and is in the directory defined by the logical
"En_PLAN_CYCLE_.x"where n is the satellite identifier (1 for ERS-1, and 2 for ERS-2) and xis the
identifier of the phase).
1. The VISIBILITY table must exist and must be in the same Oracle account as the GS_LINK_AOD
table.
1. Make sure you have a write access to En_PLAN_CYCLE_x.
Sequence of operations
1. Type VISIBILITY_GEN at the VMS prompt and enter the desired satellite and phase;
Gesa
CUSSoftware Administrator and Operator Manual
issue 1 revision 0- 12/09/2001
e 15 of 91
2. Enter the name and the password of the Oracle account where the tables GS LINK AOD and
VISIBILITY can be found. (Generally, this account is different from the data account of the current
environment i.e. ORACFI in production);
3. Enter the mode, "Add" or "Delete";
4. Enter satellite, first and last orbit number. These orbits must be present in the ORBITEVENT.En
when in mode "Add";
5. Enter Roll-tilt mode (YIN).
Output
In case of "ADD" mode, a certain number of visibility segments per station is inserted in the VISIBILITY
table.
VERY IMPORTANT NOTE!!:
There is a bug in VISIBILITY_GEN. In some cases, no segments at all are generated for a station, or just a
subset.
It should be verified via SQL that the number of segments is correct (The more the station is close to the
pole, the more segments they should be).
For example, type in SQL the command :
SELECT COUNT(*),GS_ID FROM VISIBILITY GROUP BY GS_ID;
In case of problem on one station, VISIBILITY_GEN should be run again for this station only (Modifying
the STATION.LST file). The bug seems not to occure when only one station is proccessed at a time.
Error handling
A VISIBILITY_GEN.LOG file is generated in current directory giving the list of processed stations, the
number of segments created and rejected, and a list of warnings sent back by module2m.
A MODULE3.0UT file gives a more detailed report of the segment calculations.
~esa
CUSSoftware Administrotor and Operator Manual
issue 1revision0-12/09/2001
e 16 of 91
2.1.1.5 Generate Daylight table
User profile
CUS System Manager, CUS Operations Planner
Connection
VT200, To be run on ERSCUS
Start time
on request
Duration
30 mn (depending on phase duration)
Frequency
N/A
References
CUS
CUS
CFI
CUS
CFI
Related tables and
files
CUS tables : DAYLIGHT
CFI Files :ORBITEVENT.En (where n = L,2)
Software Reference Manual, CFI User Manual
tables : DAYLIGHT
Files :ORBITEVENT.En (where n = L,2)
tables : DAYLIGHT
Files :ORBITEVENT.En (where n = L,2)
Scope
This procedure is used to add or delete records in the CUS table DAYLIGHT. Each record gives the entry
and exit times of eclipse for an orbit. DAYLIGHT must contain one entry for each orbit of the phases
defined in CUS. These orbits are referenced by the mission orbit number.
The DAYLIGHT table is used by the Phase change tool to generate The GAP tables. It is also accessed
during planning activity (GAP validation).
Input
En_PLAN_CYCLE_x:ORBITEVENT.En
Initial conditions
1. Make sure that the ORBITEVENT.En was generated and is in the directory defined by the logical
"En_PLAN_CYCLE_x" where n is the satellite number (i.e. 1 for ERS-1, 2 for ERS-2) and xis the
phase identifier.
1. The DAYLIGHT table must exist in the required Oracle account.
Sequence of operations
1. Type DAYLIGHT_GEN at VMS prompt and enter the satellite and phase;
1. Enter the name and the password of the Oracle account where the table DAYLIGHT can be found
(generally, this account will be different from the data account of the current environment; ie,
ORACFI in the production);
1. Enter the mode, "Add" or "Delete";
1. Enter satellite, first and last orbit number. These orbits must be present in the ORBITEVENT.En
when in mode "Add".
Gesa
CUSSoftware Administrator and Operator Manual
issue 1 revision 0 - 12/09/2001
e 17 of 91
2.1.1.6 Generate the Orbit eventfile
User profile
CUS System Manager, CUS Operations Planner
Connection
VT200
Start time
on request
Duration
0_25 day (depending on phase duration)
Frequency
Before a phase definition modification
References
CFI Operation Files (ER-TN-ESA-GS-0030),
Mission Planning CUS Software Interface Document
(ER-TN-ESA-GS-364)
Related tables and
files
CFI Files : See Input & Output
Scope
This procedure generates a set of files defining the satellite orbital parameters and the instrument swaths for
all orbits of a defined phase. These files, called the CFI files, are used by the phase change tools and for
daylight and visibility generation.
Input
• CUS$SCENARIO_DIR:SCENARIO.En - (where n = 1,2)
• CUS$SYSTEM_DIR:ROLLTILT.En
• CUS$SYSTEM_DIR:VERSION_En
• CUS$SYSTEM_DIR:MOONECLIPSE.En
• CUS$SYSTEM_DIR:SUNZENITH.En
Initial conditions
The directory logical En_PLAN_CYCLE_x must be defined prior to generating the Orbitevent file.
Sequence of operations
1. Type ORBITEVENT_GEN at VMS prompt;
1. Enter the satellite identifier and phase parameters to define the current output directory
(i.e."En_PLAN_CYCLE_x:");
l_Enter the first and last orbit numbers.
Output
1. En_PLAN_CYCLE_x:ORBITEVENTEn
2. CUS$SCENARIO_DIR:ORBJjjj.En wherejjjj is the cycle lenght and n is the satellite identifier
3. CUS$SCENARIO_DIR:SARJjjj.En
4. CUS$SCENARIO_DIR:RADJjjj.En
5. CUS$SCENARIO_DIR:RADREDjjjj.En
6. CUS$SCENARIO_DIR:WNDJjjj.En
7. CUS$SCENARIO_DIR:SARRTMJjjj.En
8. CUS$SCENARIO_DIR:GOMkkkJjjj.E2 (5 files) where kkk is the swath identifier (ie, 120, 240,
360, 480 and 960 km), andjjjj is the cycle length.
~esa
CUSSoftware Administrator and Operator Manual
issue 1 revision 0- 12/09/2001
e 18 of 91
9. CUS$SCENARIO_DIR:GOM_N_jjjj.E2
10. CUS$SCENARIO_DIR:GOM_S_jjjj.E2
Gesa
CUSSoftware Administrator and Operator Manual
issue 1 revision 0- 12/09/2001
e 19 of 91
2.1.1.7 Generate a new Scenario file
User profile
CUS System Manager, CUS Operations Planner
Connection
VT200
Start time
on request
Duration
30 minutes
Frequency
N/A
References
N/A
Related tables and
files
N/A
Scope
When creating a new satellite phase, a new SCENARIO.En (where n= 1,2 is the satellite number) file is
required as first step.
Sequence of operations
Run the scenario generation tool by typing at VMS prompt SCENARIO_GEN;
Enter the data requested i.e.:
• the satellite identifier
• t e phase name
• the first orbit number
• the repeat cycle
• the cycle length
• the ascending node longitude
• the year
• the month
• the day
The program loops requiring again the data:
• the next phase name as above
• the first orbit number as above
• the repeat cycle as above
• the cycle length as above
• the ascending node longitude as above
• the year end of phase year
• the month end of phase month
• the day end of phase day
Then the program requires Back(-1) or Forward(+ 1) search and the operator has to interrupt it by CTRL-y;
The operator must edit the SCENARIO.En, and replace the second line with the following data:
• OlnnnnnjjjjjOOOOOOOOOOOOOOOOOOOO
(32 chars)
~esa
CUSSoftware Administrator and Operator Manual
issue 1 revision 0 · 12/09/2001
1e
20 of 91
where: nnnnn =first orbit of the phase
jjjjj = total number of orbits in the phase
copy the SCENARIO.En file to the directory CUS$SCENARIO_DIR if the current directory is different.
Output
Scenario.En in the current directory
Notes
The creation of a Scenario file is required only during test phase as normally it is provided by ESTEC .
When extending an already existing phase, it is suggested to edit the already existing Scenario file (using
EDIT/EDT VMS editor), appending to it the one more record for each new cycle. Each cycle record group
os c;ear;y marked within the scenario file, and start date/start orbit values shall be updated. Before saving
the file, update the second line just like displayed above, to put the correct number of orbits in the phase.
Gesa
CUSSoftware Administrator and Operator Manual
issue l revision 0- 12/09/2001
e 21 of 91
2.1.2
UPDATEDAYLIGHT_GEN.
User profile
CUS System Manager, CUS Operations Planner
Connection
VT200
Start time
on request
Duration
1 day
Frequency
N/A
References
see Daylight_Gen
Related tables and
files
DAYLIGHT CFI Files
ORBITEVENT.En where n =1,2)
Scope
(Describes the scope of the procedure.)
Input
(Describes the input (e.g. file) required by the procedure.)
Initial conditions
(Describes the conditions which must be matched before running the procedure.)
Sequence of operations
Copy the ECLIPSELIB.OLB to ECLZ (UNITS:[CF5Z.EC3Z]) Relink DAYLIGHT_GEN in all the
executable environments
(i.e. CUSPRODEXE,CUSMAINTEXE,CUSINTEXE i.e. in the directory pointed by ECLIPSE
[XXXXXXXXX.CFI.ECLIPSE]
using @ECLIPSE:ECLIPSE_LINK
Output
(Describes the output (e.g. files, etc) of the procedure.)
Error handling
(Describes possible errors and actions to be undertaken.)
Notes
The other CFI executables can be updated similarly and there is a DCL command file
[XXXXXXXXXXX.CFI]RECONFIG_CFI.COM to relink all the CFI executables.
Gesa
CUSSohware Administrator and Operator Manual
issue 1 revision 0- 12/09/2001
e 22 of 91
2.1.3
PEP GENERATION AND TRANSMISSION
User profile
CUS Mission
Connection
VT200
Start
Friday
time
Planner
or Workstation
Duration
10 min.
Frequency
Weekly
afternoon
or on request
(DPEP)
References
Related
files
tables
and
SCOPE
Generate and transmit to MMCC the PEP file, containing one week of planning data (four weeks ahead of
operations) and/or the
changes to the planning data previously sent to MMCC (nominally the changes can only be related to
activities at least one week in the future).
INPUT
Ranges of orbits for Mission Planner
INITIAL CONDITIONS
No planning operation in progress
SEQUENCE OF OPERA TI ONS
1)-From the CUS Operations Planner Menu choose:
Acquisition Planning and Monitoring
Distribute PEP
2)-Enter in the Operations Planner Form the Start Time for the execution of this procedure
3)-Enter the search criteria including the extreme Date and Time range covering all the orbits to be
transmitted (also if some ranges need not to be transmitted)
4)-Remove from the list all the orbits which need not to be transmitted using the Clear Record key
5)-Enter in the Operations Planner Form the ranges of orbits in the Notes
6)-From the Menu Options choose:
Generate and Transmit PEP
7)-Verify that the file is moved to the ISS directory
OUTPUT
ERROR HANDLING
NOTES
Gesa
CUSSoftware Administrator and Operator Manual
issue 1 revision 0· 12/09/2001
e23ol91
2.1.4
DMOP INGESTION
User profile
CUS Mission Planner
Connection
VT200 or Workstation
Start time
on request
Duration
1 hour (depending on no. of orbits)
Frequency
Daily
References
Related tables and
files
SCOPE
Ensure reception and correct processing of the various DMOP types:
-"unsolicited" DMOP (received before the corresponding PEP is sent and mainly containing data on orbits
blocked for
manoeuvres and/or activities directly scheduled by MMCC) -DMOP (nominally one week of data in
response to PEP) -DMOP/OIP (nominally for the coning 3 days, consolidating the
plan and providing more precise timing)
-Restituted DMOP (orbits where execution deviated from
planning: single orbits, at most one week after operations)
INPUT
INITIAL CONDITIONS
SEQUENCE OF OPERA TI ONS
1)-From the CUS Operations Planner Menu choose:
Monitoring
Monitor External Events
2)-Note down in the Notes of the Operations Planner Form the
name of the input DMOP file(s) together with the reception date and time
3)-For each of the received DMOP file perform the following steps:
a)-From the Monitoring Menu choose: Monitor Unusual Events
b)-Note down in the Notes of the Operations Planner Form the Unusual Event (if any) and take the
appropriate corrective action
c)-From the Monitoring Menu choose: Monitor Blocked States
d)-Note down in the Notes of the Operations Planner Form the Blocked State (if any) and take the
appropriate corrective action
e)-Verify in the CUS Log file the completion of the DMOP processing
f)-Note down in the Notes of the Operations Planner Form the DMOP processing completion together with
the time
4)-Enter in the Operations Planner Form the End Time and the Completion Flag
OUTPUT
~esa
CUSSoftware Administrator and Operator Manual
issue lrevision 0 · 12/09/2001
e 24 of 91
ERROR HANDLING
NOTES
Nominally each day, within 12h, the DMOP related to the coming 3 days of operations (OIP) should be
received. This DMOP must be used for the generation of the station schedules, since the times it contains are
more precise.
Daily the "restituted" DMOP should be received, describing the activities really performed (only for the
orbits deviating from plan).
Nominally once a week a one week DMOP should be received in response to the PEP.
The DMOP is ingested and processed automatically by CUS as soon as received, on Automatic Event
Scheduler trigger.
To be noted that MMCC will operationally keep transmission of unchanged orbits to CUS to a minimum.
Gesa
CUSSoftware Administrator and Operator Manual
issue 1 revision Q. 12/09/2001
e 25 of 91
2.1.5
PROVIDE ACQUIS PLAN TO WWW USERS
User profile
CUS Mission Planner
Connection
Workstation
Start time
9:00
Duration
0.5 hours
Frequency
every Wednesday
References
Related tables and
files
SCOPE
Generate a Plot of the Acquisition Plan for the coming week and fax this Plot to a set of users and a special
Zoom to Cotopaxi.
INPUT
INITIAL CONDITIONS
SEQUENCE OF OPERA TI ONS
1.) Login as Operations Planner
2.) if run from a terminal, the work station has to have the same account that the terminal session; then type:
SET DISPLAY/CREATE/NODE=ERSMPn
then type:
DISPLAY_TOOL
3.) Specify Satellite
4.) Specify that no file will be displayed
Specify acquisition and production frames will be displayed
5.) Select the orbit range starting next Monday for one week.
6.) Plot the graphic display
7) Run the xv tool on the graphic workstation and capture the screen, saving it to a .gif file
OUTPUT
gif images to be exposed on Earthnet WWW site
ERROR HANDLING
NOTES
Gesa
CUSSoftware Administrator and Operator Manual
issue 1 revision 0- 12/09/2001
'e 26 of 91
2.2
Ground Station Management
2.2.1
OVERVIEW
Ground Station operations are based on the timely availability of data from MMCC and schedules from
cus.
MMCC will provide daily:
-MMCC Time Correlation Element (PATM): 10 files, one file
after each pass over Kiruna;
-Predicted MMCC Orbit (ORPM), early in the morning, after the
last of consecutive passes over Kiruna.
ISS will transmit to all stations the result of the conversion of the above files (shortly after their reception).
That is, respectively:
-Time Correlation Element (PATC);
-Predicted Orbit (ORPD).
The temporal relation between the orbit prediction files, as well as their availability and respective coverage
are roughly shown graphically below. It can be seen that two ORPC files will be generated from each
ORPM file, after elimination of the
initial 14 records. Each file will contain 16 state vectors (100 minutes apart).
European Time
12 0 12 0 12 0 12 0 12 0 12 0 12
AAAAAAAAAAAAAAAAAAAAAAAAAAAAAAAAAAAAAAAAAAAAAAAAAAAAAAAAAAAA
Predicted MMCC Orbit
AAAAAAAAAAAAAAAAAAAAAAAAAAAAAAAAAAAAAAAAAAAAAAAAAAAAAA'
AA ORPM at EECF
Predicted EECF Orbit
(14) (16) (16)
AA A A A AAAAAAAAAAAAAAAAAAAA'
AA ORPC to stations
The CUS schedules will be generated on the basis of the planning information exchanged with MMCC. In
order to ensure correct alignment of the times in the schedules, CUS should wait for the most recent update
of the DMOP (the OIP, which is related to the coming 3 days). The temporal relation between DMOP and
cus
schedules, as well as CUS schedules availability and coverage are roughly shown graphically below.
European Time
12 0 12 0 12 0 12 0 12 0 12 0 12
AAAAAAAAAAAAAAAAAAAAAAAAAAAAAAAAAAAAAAAAAAAAAAAAAAAAAAAAAAAA
DMOP (OIP)
AAAAAAAAAAAAAAAAAAAAAAAAAAAAAA'
AA DMOP (OIP) at EECF
Gesa
CUSSohware Administrator and Operator Manual
issue l revision 0-12/09/2001
'aae 27 of 91
CUS Schedules
AAAAAAAAAA'
AA CUS Schedules to stations
ESA STATIONS Kiruna (SAR+ LBR)
AAAAAAA'
Fucino (SAR)
A'
Maspalomas (SAR + LBR)
A'A'
Gatineau (LBR)
A'
Prince Albert (LBR) A'
NAT/FOR STATIONS Tromsoe (SAR)
AAAAAAA'
Gatineau (SAR)
A'
Fairbanks (SAR)
A'
European Time
12 0 12 0 12 0 12 0 12 0 12 0 12
AAAAAAAAAAAAAAAAAAAAAAAAAAAAAAAAAAAAAAAAAAAAAAAAAAAAAAAAAAAA
Gesa
CUSSohware Administrator and Operator Manual
issue 1revision0-12/09/2001
e 28 of 91
2.2.2
PRELIMINARY SCHEDULES' GENERATION.
User profile
ERS Operators
Connection
VTA200
Start time
10:00
Duration
15 mn
Frequency
every Wednesday
References
Related tables and
files
Scope
Weekly generation of SAR Acquisition Preliminary Schedules for the Ground Stations for ERS-1/2.
These schedules are all sent by Fax to the stations.
Input
NA
Initial conditions
NA
Sequence of operations
For manual schedule generation:
1) Note down in the Operator's Form the Start Time (for the execution of this procedure).
2) Connect to CUS, first by entering the command:
• C ERSISS
• and Logon with usemame XXOPOOOl,Password ....
• and then by setting host to ERSCUS using:
• SET H ERSCUS
• and Logon with usemame XXOPOOOl,Password ....
3) Generate the preliminary Schedules by entering the command:
• RUNFORMORAPROD/ORAPROD @NFS
Wait until the VMS prompt ("OP_1")comes back (from 2 to 20 minutes).
4) The schedules are printed automatically on the laser printer in EECF Mission Planning office (browse)
5) Logoff ERSCUS machine by typing:
• LO
6) Logoff ERSISS machine by typing:
• LO
7) Fax a copy of each schedule to the correct station (the station code is on the top left of each page).
Note that a station might have the file NFS.LIS, in the home directory of user XXOPOOOl.
~esa
CUSSohware Administrator and Operator Manual
issue 1 revision 0- 12/09/2001
e 29 of 91
Error handling
NA
Notes
For Cotopaxi a plot of the next week's coverage shall be attached.
Gesa
CUSSoftware Administrator and Operator Manual
issue 1revision0-12/09/2001
1e
2.2.3
30 of 91
SCHEDULES' GENERATION.
User profile
ERS Operators
Connection
VT200
Start time
12:00 UTC
Duration
6 min.
Frequency
Daily
References
Doc. R-1, Chapter 7.2.1
Related tables and
files
Scope
The Schedule Generation is normally handled by the CUS Automatic Event Scheduler. The following
procedure is only used if it is necessary to manually transfer the schedules (ie. AES is not running).
Input
(Describes the input (e.g. file) required by the procedure.)
Initial conditions
NOTE: THIS IS THE FIRST PROCEDURE IN THE DAILY GENERATION, TRANSFER AND FAXING
OF SCHEDULES
Sequence of operations
1) Note down in the Operator's Form the Start Time (for the execution of this procedure).
2) Connect to CUS, first by entering the command:
C ERSISS
and Logon with usemame ISS$0PER, Password ....
and choose option: VMS commands
and then by setting host to ERSCUS using:
SETHERSCUS
and Logon with usemame XXOPOOO
1, Password ....
3) In order to inform other ERSCUS users of the pending schedule generation, enter:
@SYS$LOGIN:WARN_USERS
After entering this command, you will get messages back which tell you how many terminals have received
our message.
Proceed immediately to the next step.
4) Process any existing ORRS files by switching to the CUS maintenance directory, entering:
GO CUSPROD$DISK:[CUSPROD.TCS.RECEIVE]
Look for any files that start with the 4 letters: ORPD,
using:
DIR ORPD*.*/DATE
Gesa
CUSSoftware Administrator and Operator Manual
issue 1 revision 0- 12/09/2001
e 31of91
If no ORPD files were found, proceed to step 12.
5) If more than one ORPD file is found, each of the files must be processed in tum.
Copy the oldest file (the one with the earliest date or the lowest Cyclic Counter value) into CUS input
directory using:
COPY ORPD_xxxxxxxxxxxx.El MMIP_XORD_QUEUED_DIR:/LOG
where xxxxxxxxxxxxx is the file name substring of the chosen input file.
6) Enter the commands:
HOME
START_PROC
21
y
This should start a detached process called MMIP_XORD_xxxx, where xxxx is a number - write it down,
you will need it in the next two steps.
NOTE:If this process does not start up correctly, then enter:
CLEAN_PROC
and answer YES to any questions and repeat this step again.
7) In order to monitor the progress of the process, enter: JPI MMIP_XORD_xxxx
The progress of the process will be displayed on your terminal. When the process is finished, the OP$ cursor
will be displayed on your screen. Go to the next step. If the JPI program crashes, proceed.
If the message: NON-EXISTENT PROCESS appears when you type the above command, then the process
is already finished. Go to the next step.
8) Enter the commands:
GO MMIP_XORD_LOG_DIR
RED MMIP_XORD_xxxx.ERR
where xxxx is the number from step 6.
9) You are now reading the errorlog. Use the "PAGE DOWN" key to look through the whole file for errors.
You can exit from this file using first the PFl key and then "Q". Repeat for all processes started for each of
the processed files.
10) In case of any errors in the errorlog, then do not proceed further, that is: STOP! Call the operations
manager.
11) If any more files were found in step 4, repeat steps 4 to 10 for the next most recent file until all the files
have been processed.
12) Now process any existing ORRS files by switching to the CUS maintenance directory, entering:
GO CUSPROD$DISK:[CUSPROD.TCS.RECEIVE]
Look for any files that start with the 4 letters: ORRS,
usmg:
DIR ORRS*.*
If no ORRS files are found, go to step 14.
If any files are found, copy all of them into the CUS input directory using:
COPY ORRS*.El MMIP_XORD_QUEUED_DIR:/LOG
All ORRS files are processed at the same time.
13) Perform steps 6 to 10 to process the ORRS file(s).
14) To start the process which generates the schedules, enter: HOME
START_PROC
28
Gesa
CUSSoftware Administrator and Operator Manual
issue 1revision0-12/09/2001
1e
32 of 91
y
This will start a detached process called SCGP _XGAS_xxxx where xxxx is a number - write it down, you
will need it in the next step.
NOTE:If this process does not start up correctly, then enter:
CLEAN_PROC
and answer YES to any questions and repeat this step again.
15) In order to monitor the progress of the process, enter:
JPI SCGP _XGAS_xxxx
The progress of the process will be displayed on your terminal. When the process is finished, the OP$ cursor
will be displayed on your screen. Go to the next step. If the JPI crashes, proceed.
If the message: NON-EXISTENT PROCESS appears when you type the above command, then the process
is already finished. Go to the next step.
16) Enter:
GO SCGP _XGAS_LOG_DIR
RED SCGP _XGAS_xxxx.ERR
where xxxx is the number of the previous step.
If you do not have the number xxxx, type the following to obtain the name of the file most recently created:
DIR/SIN SCGP _XGAS_ *.ERR
17) You are now reading the errorlog. Use the "PAGE DOWN" key to look through the whole file for
errors. You can exit from this file using first the PFl key and then "Q".
18) If you saw any errors in the errorlog, then do not proceed further, that is: STOP! Call the operations
manager.
If not, then enter:
HOME
DIR SCHEDULE_DIR:
You should see a list of all the schedules that you have generated. There are three types; they start with
either: SHAQ, SHPN or SHDS as the first 4 letters.
19) Logoff twice; first from ERSCUS, then from ERSISS.
20) Note down in the Operator's Form the End Time, the Completion Flag and eventually notes on the
operation.
Output
(Describes the output (e.g. files, etc) of the procedure.)
Error handling
(Describes possible errors and actions to be undertaken.)
Notes
(Any useful information not covered before.)
~esa
CUSSoltwore Adminislrolor ond Operotor Monuol
issue 1 revision 0 · 12/09/2001
e 33 of 91
2.2.4
SCHEDULES' EDITING.
User profile
CUS Mission Planner
Connection
VT200
Start time
after schedule generation
Duration
dependent on changes
Frequency
Daily (when necessary)
References
Doc. R-1, Chapter 7.3.4
Related tables and
files
SCOPE
Edit the system generated Acquisition, Processing andDistribution Schedules.
INPUT
Authorised request for change
INITIAL CONDITIONS
This procedure must be followed only if really necessary and any change must be carefully verified, since
the system does not perform any check on the manual changes.
SEQUENCE OF OPERA TIO NS
1) From the CUS Operations Planner Menu choose:
• Acquisition Planning and Monitoring
• Monitor Ground Segment
• Edit Schedules
2) Edit the schedules which require changes
3) Note down in the Notes of the Operations Planner Form the identifier(s) of the affected schedules and the
End Time.
OUTPUT
A hard copy of the authorised request for change must be filed in the Operations Log Book.
ERROR HANDLING
NOTES
CUS generates the stations schedules automatically at a pre-defined time of the day (see CUS Parameters).
After their generation the schedules can be manually modified within a pre-defined time window (see CUS
Parameters).
Gesa
CUSSoftware Administrator and Operator Manual
issue 1 revision 0 · 12/09 /2001
e 34 of 91
2.2.5
SCHEDULES' GENERATION ERROR CHECKING
User profile
ERS Operators
Connection
VT200
Start time
13:00 UTC
Duration
several minutes
Frequency
Daily
References
Related tables and
files
SGCP_XGAS_xxxx.ERR
Scope
Confirm successful generation of Acquisition, Processing and Distribution Schedules by the CUS Automatic
Event Scheduler.
Input
NA
Initial conditions
This procedure must be followed on a daily basis when the CUS Automatic Event Scheduler is running.
Since the schedules' generation and transmission are essential to operations, this procedure acts as a final
level of confirmation that all has been successfully processed.
(Describes the conditions which must be matched before running the procedure.)
Sequence of operations
1) Note down in the Operator's Form the Start Time (for the execution of this procedure).
2) Connect to CUS, first by entering the command:
• C ERSISS
• and Logon with usemame ISS$0PER, Password ....
• and choose option: VMS commands
• and then by setting host to ERSCUS using:
• SET H ERSCUS
• and Logon with usemame XXOPOOOl, Password ....
3) Check the schedule generation errorlog. Enter: CHECK_XGAS_ERR
• If you receive the message: NO FILE FOUND
or
• If you receive the message: ERRORS FOUND
Then STOP! and call the mission planner (x 703) or an MDA staff (x 326, x 327, x 409) and tell them errors
were found in the schedule generation.
If you receive the message: SCHEDULE GENERATION OK
Then all is normal. Continue to next step.
Gesa
CUSSohware Administrator and Operator Manual
issue 1 revision 0- 12/09/2001
e35ol91
4) Logoff twice; first from ERSCUS, then from ERSISS.
5) Note down in the Operator's Form the End Time, theCompletion Flag and eventually notes on the
operation.
Output
(Describes the output (e.g. files, etc) of the procedure.)
Error handling
(Describes possible errors and actions to be undertaken.)
Notes
(Any useful information not covered before.)
Gesa
CUSSoftware Administrator and Operator Manual
issue 1 revision 0 · 12/09/2001
e 36 of 91
2.2.6
SCHEDULES' TRANSMISSION ERROR CHECKING
User profile
ERS Operators
Connection
VT200
Start time
15:30
Duration
several minutes
Frequency
Daily
UTC
References
Related tables and
files
SGCP_XTAS_xxxx.ERR
Scope
Confirm successful transmission of Acquisition, Processing and Distribution Schedules by the CUS
Automatic Event Scheduler.
Input
NA
Initial conditions
This procedure must be followed on a daily basis when the CUS Automatic Event Scheduler is running.
Since the schedules' generation and transmission are essential to operations, this procedure acts as a final
level of confirmation that all has been successfully processed.
Sequence of operations
1) Note down in the Operator's Form the Start Time (for the execution of this procedure).
2) Connect to CUS and Logon with usemame XXOPOOOl,Password ....
3) Check the schedule generation errorlog. Enter: CHECK_XTAS_ERR
• If you receive the message: NO FILE FOUND
or
• If you receive the message: ERRORS FOUND
Then STOP! and call the mission planner (x 703) or an MDA staff (x 326, x 327, x 409) and tell them errors
were found in the schedule transmission.If you receive the message: SCHEDULE TRANSMISSION OK
Then all is normal. Continue to next step.
4) Logoff twice; first from ERSCUS, then from ERSISS.
5) Note down in the Operator's Form the End Time, the Completion Flag and eventually notes on the
operation
Output
(Describes the output (e.g. files, etc) of the procedure.)
Error handling
(Describes possible errors and actions to be undertaken.)
Notes
~esa
CUSSoftware Administrator and Operator Manual
issue 1 revision 0 - 12/09/2001
e37of91
(Any useful information not covered before.)
Gesa
CUSSohware Administrator and Operator Manual
issue I revision 0- 12/09/2001
e 38 ol 91
2.2.7
PROCESS ACQUISTION REPORTS
User profile
ERS Mission
Connection
VT200
Start time
Daily
3 PM UTC
Duration
appr.
10 min.
Frequency
Daily
Planner
References
Related
files
tables
and
Scope
This process is normally started by the CUS Automatic Event Scheduler. The following procedure is only
used if it is necessary to manually transfer the schedules (ie. AES not running).CUS processing of incoming
Acquisition Reports (REAQ) files.
Input
Acquisition Report (REAQ) files
Initial conditions
None
Sequence of operations
1) Connect to CUS and logon with usemame XXOPOOOland password.
2) Copy any REAQ requested explicitely to process to the GSIP_XACQ_QUEUED_DIR
3) Check that there are files in the acquisition reports queued directory:
DIR GSIP_XACQ_QUEUED_DIR:
If no files are found, go to STEP 9).
4) To process the queued Acquisition Report files, enter:
• HOME
• START_PROC
• 22
• y
This should start a detached process called GSIP_XACQ_nnnn where nnnn is a 4-digit number -- write it
down. You will need it in the following steps.
If you accidentally type 'N' instead of 'Y', then do the following:
DEFINE ERRORLOG GSIP_XACQ_LOG_DIR:GSIP_XACQ_nnnn.ERR where "nnnn" is the 4-digit
number noted before and then RUN/NODEBUG GSIP_XACQ_IMAGE
and wait for the command to finish. In this case you can't use the JPI command (STEP 8) so skip to STEP 9.
NOTE: If the GSIP_XACQ_nnnn process does not start up correctly, then enter:
• CLEAN_PROC
Gesa
CUSSoftware Administrator and Operator Manual
issue l revision 0 · 12/09/2001
e 39 of 91
• and answer YES to any questions and repeat this step again.
5) The error checking occurs automatically. The XXOPOOOluseris informed by MAIL if errors are found.
Output
Errorlog in directory:file GSIP_XACQ_LOG_DIR:GSIP_XACQ_nnnn.ERR.
Error handling
Consult with MDA staff, who will take appropriate action. NOTES
Notes
(Any useful information not covered before.)
Gesa
CUSSoftware Administrator and Operator Manual
issue 1revision0-12/09/2001
e 40 of 91
2.2.8
ACQUISITION UPDATE PROCESSING .
User profile
CUS Mission Planner
Connection
VT200
Start time
20:00 PM UTC
Duration
10 minutes (process runs about 6 hrs)
Frequency
Daily
References
Related tables and
files
*.En files
REDP_ *.En files
AUPP_XACQ_nnnn
Scope
The Acquisition Update process is normally started by he CUS Automatic Event Scheduler. The following
procedure is only used if it is necessary to start up the process manually (ie. AES is not running).
CVS acquisition updating process, including processing of restituted DMOPs and distribution reports.
NOTE: Since this process runs for many hours, it is started at 21:00 PM UTC, nightly, and then error
checking occurs the following morning by the mission planner.
Input
Distribution Report (REDS) files
Restituted DMOP Report (REDP) files
Initial conditions
1. Ensure that the Acquisition Report Processing has been completed (previous procedure). This should be
run daily at 20:00 UTC. If the AES is running, the Acquisition Reports are processed upon arrival from ISS.
2. The mission planner will inform the operators if there are any conflicts in starting this process at 20:00
UTC
Sequence of operations
1) Connect to CUS and logon with usemame XXOPOOOland password.
2) To start the process, enter:
• HOME
• START_PROC
• 30
• y
This should start a detached process called AUPP_XACQ_nnnn where nnnn is a 4-digit number -- write it
down. You will need it in the following steps.If you accidentally type 'N' instead of 'Y', then do
thefollowing:
Gesa
CUSSohware Administrator and Operator Manual
issue l revision 0- 12/09/2001
e 41of91
•
DEFINE ERRORLOG AUPP _XACQ_LOG_DIR:AUPP _XACQ_nnnn.ERR where "nnnn" is the 4digit number noted before and then RUN/NODEBUG AUPP _XACQ_IMAGE and wait for the
command to finish.Jn this case you can'tuse the JPI command (STEP 7).
• Notify MDA staff or mission planners so that they can ensure that the process has now been started.
Skip to STEP 8).
NOTE: If the AUPP _XACQ_nnnn process does not start up correctly, then enter:
• CLEAN_PROC
and answer YES to any questions and repeat this step again
Output
Errorlog in directory:file AUPP _XACQ_LOG_DIR:AUPP _XACQ_nnnn.ERR. ERROR HANDLING
Consult with CUS TEam staff or mission planners, who will take appropriate action.
Error handling
(Describes possible errors and actions to be undertaken.)
Notes
The mission planner may require the process name AUPP _XACQ_nnnn on the following morning in order
to handle error checking. Ensure this will be available.
~esa
CUSSoftware Administrator and Operator Manual
issue 1 revision 0- 12/09/2001
e 42 of 91
2.2.9
ACQ./POST-ACQ. UPDATE ERROR CHECKING.
User profile
Technical support
Connection
VT200
Start time
8h30-9h00
Duration
N/A
Frequency
Daily, every morning
References
Related tables and
files
Selection ....tables
REDS_*.En files REDP_*.En files, EXTDD_late_orbit_entry table
Catalogue/Product Journal/Sensing Orders/Orbit
Process Name
AUPP_XACQ_nnnn/AUPP_XPAU_nnnn
Scope
The error checking normally occurs automatically after Acquisition Update and Post-Acquisition Update
processing. If errors are found, a mail message is sent to the XXTSOOOlaccount.
The mail is systematically read every morning (at least) by the Technical Support staff which starts the
corrective actions immediately.
Support can be done by the CUS Maintenance team.
Input
Acquisition Updating errorlogs (AUPP_XACQ_nnnn.ERR/AUPP_XPAU_nnnn.ERR) and XXTSOOOlmail
e.g.:
From:
To:
CC:
Subj:
PROCUS::CUSPROD
XXTSOOOl
"AES is watching you"
Acquisition Update Processing Errors
See cuserrlg for details:
AUPP_XACQ_LOG_DIR:AUPP_XACQ_6606.ERR
and
From:
To:
CC:
Subj:
PROCUS::CUSPROD
XXTS0001,XXPP0001
"AES is watching you"
Post-Acquisition Update Processing Errors
See cuserrlg for details:
Gesa
CUSSohware Administrator and Operator Manual
issue 1 revision 0- 12/09/2001
£2S,e 43 of 91
AUPP_XPAU_LOG_DIR:AUPP_XPAU_1844.ERR
Initial conditions
NIA
Sequence of operations
• Connect to XXTSOOOland type the command MAIL. Mails not yet processed are either in the
NEWMAIL or MAIL folder.
• from the mail information, you can edit the file: RED
AUPP_XACQ_LOG_DIR:AUPP_XACQ_nnnn.ERR or
RED AUPP_XPAU_LOG_DIR:AUPP_XACQ_nnnn.ERR (where nnnn is a cyclic counter).
where nnnn is the number of the process you see in the mail.
(if you user TPU editor, to improve readability and/or increase the column size of the screen, use the PFl
key followed by "W".)
Search for processing errors by pressing the FIND key and entering the search string "error" (followed by
RETURN). To hop to the next "error" string, press the PF3 key. If this string is not found, you will see the
message "String not found" at the bottom of the screen.
If the error message appears in a line which begins with %GSD-I-INFO, this message can be ignored.
Other errors must be immediately reported to the CUS Maintenance team.
• move the mail to the CUS_PROC folder once all actions have been completed
Output
NIA
Error handling
NIA
Notes
NIA
Gesa
CUSSoftware Administrator and Operator Manual
issue I revision 0- 12/09/2001
e 44ol 91
2.2.10 MANUAL TRANSFER OF SCHEDULES TO ISS.
User profile
CUS Mission Planner
Connection
VT200
Start time
15:00 UTC
Duration
a few minutes
Frequency
Daily
References
Doc. R-1, Chapter 7.2.1
Related tables and
files
Scope
The Schedule Transfer is normally handled by the CUS Automatic Event Scheduler. This procedure is only
used if it is necessary to manually transfer the schedules (ie. AES is not running).
However, the error checking (STEP 5) of this procedure must be performed by the operators on a daily
basis.
Ensure that CUS (generated and) transferred to ISS the Acquisition and Processing Schedules for all
involved stations and the Distribution Schedules for ISS (LBR FDPs) or for NSC (SAR FDPs).
(
Input
(Describes the input (e.g. file) required by the procedure.)
Initial conditions
NOTE: BEGIN THIS PROCEDURE ONLY AFTER SCHEDULE GENERATION CUS OP-MAN
PROCEDURE #4.2.4
Sequence of operations
NOTE: THIS IS THE SECOND PROCEDURE IN THE DAILY GENERATION, TRANSFER AND
FAXING OF SCHEDULES
1) Connect to CUS and Logan with usemame XXOPOOOl,Password ....
2) Enter the command:
• HOME
• START_PROC
•
29
• y
This will start a detached process called SCGP_XTAS_xxxx where xxxx is a number - write it down.
• NOTE:If this process does not start up correctly, then enter:
• CLEAN_PROC
and answer YES to any questions and repeat this step again.
3) Enter:
Gesa
CUSSohware Administrator and Operator Manual
issue 1 revision 0 - 12/09/2001
e 45 of 91
• GO SCGP_XTAS_LOG_DIR
• RED SCGP_XTAS_xxxx.ERR
• where xxxx is the number from the last step.
If you do not have the number xxxx, enter the following command to get the name of today's file:
• DIR/SIN SCGP_XTAS_*.ERR
6) You are now reading the errorlog. Use the "page down" key to look through the whole file for errors. You
can exit from this file using first the PFl key and then "Q".
7) If you saw any errors in the errorlog, then do not proceed further, that is: STOP! Call the operations
manager.
• If not, then enter:
• HOME
• DIR SCHEDULE_DIR:
The message "no files found" should be received. The files have now been transmitted to ISS.
Output
NA
Error handling
When a problem is detected, file its description in the Operation Log Book and inform the Operations
Manager.
Notes
CUS generates the stations schedules automatically at a pre-defined time of the day (see CUS Parameters).
After their generation the schedules can be manually modified within a pre-defined time window (see CUS
Parameters).
Gesa
CUSSoftware Administrator and Operator Manual
issue 1revision0-12/09/2001
e 46 of 91
2.2.11 UPDATEGROUNDSTATIONDATA
2.2.11.1
Overview
The information used by CUS concerning ground stations, their location and coverage, the data links, the
processing capacities and the unavailability is stored in several CUS tables and files.
The only form in the user interface which updates the GSPDD_ground_station_desc table is the Ground
Station Data Detail form, PSDAF_gsdatadetail. Only some of the columns of this table are updatable from
the form, because it is considered a major change to modify the others, and thus is considered something
that a "system manager" would do via SQLPLUS.
A ground station needs to be defined in the: -XXX HOOPS file for graphical display of the coverage mask
-Station.DBF file
-Station.LST file
-GS_LINK_AOD table
-GSPDD_ground_station_desc table
-GSPDD_gs_dl table
-PRMDJ_facility table
-DOBDD_gs_priority table for ESA stations
The station visibility is calculated off-line using the program VISIBILITY_GEN, which uses the
STATION.DBF file and the table GS_LINK_AOD.
The graphical station display needs to be updated running HZ_MASK which also reads the STATION.DBE
A HOOPS metafile needs to be generated for display.
Gesa
CUSSoftware Adminislralor and Operator Manual
issue l revision 0- 12/09/2001
e 47 of 91
2.2.11.2
Add a ground station in CUS tables
User profile
CUS System Manager,
CUS Operations Planner
Connection
VT 200
Start time
on request
Duration
Frequency
N/A
References
Related tables and
files
CUS tables:
DOBDD_gs_priority table/ESA stations
FDFDD_def_fd_gs table/ESA stations
FUNDD_facility_unavail table
GSPDD_ground_station_desc table
GSPDD_gs_dl table
PRMDJ_facility table
STATION.DEF file
STATION.LST file
Scope
New stations might become available with time. In this case the station might be:
• -either already defined in the CUS database, but flagged as unavailable and still displayed on the
screen (basemap display),
• -or it must be added with all related information.
The defined stations, available or not, and some of the station parameters can be listed via the CUS
application menus and forms.
For table updates a specific procedure shall be used.
Input
(Describes the input (e.g. file) required by the procedure.)
Initial conditions
(Describes the conditions which must be matched before running the procedure.)
Sequence of operations
1)-Edit STATION.DBF and STATION.LST files (add definition for each new ground station).
2)-Add records to CUS tables GSPDD_ground_station_desc, GSPDD_gs_dl, PRMDJ_facility (and to
DOBDD_gs_priority and FDFDD_def_fd_gs tables if ESA ground stations).
3)-Re-run VISIBILITY_GEN for new ground stations, thereby updating VISIBILITY table.
4)-Re-validate GAP orbits.
Output
(Describes the output (e.g. files, etc) of the procedure.)
Error handling
(Describes possible errors and actions to be undertaken.)
Gesa
CUSSoftware Administrator and Operator Manual
issue 1 revision 0- 12/09/2001
e 48 of 91
Notes
(Any useful information not covered before)
Gesa
CUSSoftware Administrator and Operator Manual
issue 1 revision 0- 12/09/2001
e 49 ol 91
2.2.11.3
Update AOS/LOS elevations
User profile
CUS System Manager,
CUS Operations Planner
Connection
VT200
Start time
on request
Duration
15 minutes
Frequency
N/A
References
Related tables and
files
CUS tables and files:
GS LINK_AOD table
STATION.DEF file
VISIBILITY table
Scope
Update the station visibility, used for the calculation of sensing segments.
Input
(Describes the input (e.g, file) required by the procedure.)
Initial conditions
(Describes the conditions which must be matched before running the procedure.)
Sequence of operations
1)-Edit STATION.DBF
2)-Update STATION.DBF
Note, that some stations (Gatineau and Prince Albert) are described twice as high rate (GH and PH) and as
LBR stations (GS and PS).
3)-SQL
4)-Update the table GS_LINK_AOD.
5)-Run VISIBILITY_GEN with the user-name of the account the VISIBILITY table is to be written to.
6)-Run CUS and re-validate the GAP with new VISIBILITY table.
7)-Verify user requests, which could be invalid after GAP validation.
8)-Update GAPDD_GS_info Table (running CFE) (TBC).
Output
(Describes the output (e.g. files, etc) of the procedure.)
Error handling
(Describes possible errors and actions to be undertaken.)
Notes
The visibility start and stop times used by CUS are calculated off-line running the program
VISIBILITY_GEN, which calls MODULE2M.
Gesa
CUSSoftware Administrator and Operator Manual
issue l revision 0 · 12/09/2001
e 50 of 91
The output values of VISIBILITY_GEN are written in the VISIBILITY table in the data environment
specified by the user-name.
The station elevation angles used by VISIBILITY_GEN have to be verified at 2 places:
- in the STATION.DBF file (e.g. 50000 = 5 deg) as circle
- in GS_LINK_AOD table (e.g. Ll start 5 deg stop 2 deg L2 start 2 deg stop 2 deg
The higher value of the two is the shorter visibility segment to be used as the output value written in the
VISIBILITY table. In the above example, for both Ll and L2, the visibility would be calculated from 5 to 5
degrees, since this is specified in the STATION.DBF file.
Ideally the values in STATION.DBF would all be set to the lowest value, then the visibility is controlled
always through the GS_LINK_AOD table. The visibility information to be used per station, has to be
synchronized with MMCC.
~esa
CUSSoftware Administrator and Operator Manual
issue I revision 0 - 12/09 /200 I
e 51 of 91
2.2.11.4
Generate Station Visibility
User profile
CUS System Manager
CUS Operations Planner
Connection
VT200
Start time
on request
Duration
15 minutes
Frequency
N/A
References
Doc.s R-2, RlO
Mission Planning CUS Software
Related tables and
files
CUS tables and files:
CFI table
GS_LINK_AOD CFI table
VISIBILITY
STATION.DEF file
Scope
Update the station visibility, used for the calculation of sensing segments.
Input
(Describes the input (e.g. file) required by the procedure.)
Initial conditions
Access privilege (insert and delete) to the CFI VISIBILITY table.
Access privilege (select) to the table GS_LINK_AOD.
The logical "STATIONS" shall point to the appropriate STATION.LST file.
The logical ERS 1CFE$DIR must point to the directory that holds the files opened by MODULE2M.
Sequence of operations
1)-Run VISIBILITY_GEN, as described in the user guide.
Output
(Describes the output (e.g. files, etc) of the procedure.)
Error handling
see User Guide
Notes
1)-CUS doesn't use the various station parameters such as latitude or longitude coordinates and coverage
elevation values directly for planning. Those station parameters are read in from the
STATION_PROFILE_FILE (matching theSTATION.DBF used by the CFI software, namely
VISIBILITY_GEN) using the PEP_STATION_ID of the Oracle table.
GSPDD_ground_station_desc and are only used in the PEP generation. Although CUS doesn't use the
various station parameters directly, any change of those parameters will affect the station RF and link
visibilities and indirectly some of the GAP activities already planned may be invalidated. The actual
~esa
CUSSoftware Administrator and Operator Manual
issue I revision 0-12/09/2001
e 52 of 91
changes will be used by CUS through the CFI database, namely the VISIBILITY table of the
SQL_CFI_ACCOUNT for all planning or validation in future.
2)-In general, whenever the station visibilities change (caused by changes in the horizon profile, antenna
location or the link elevation angles (ELEVATION_ACQ, ELEVATION_LOSS of table GS_LINK_AOD)),
the associated orbits should be extracted and re-validated after the VISIBILITY table has been updated (by
running VISIBILITY_GEN). This should be done whenever a new station unavailability report has been
received by CUS.
3)-The ground station information is stored in a number of files or database tables. The STATION.DBF is
mainly used by the CFI software to generate the link visibilities and the results are stored in the CFI Oracle
VISIBILITY table. The CFI software also gets the link acquisition elevation angle from the
GS_LINK_AOD table which CUS never reads or checks, and the list of stations from the STATION.LST
file (which should be consistent with the PEP_STATION_ID and FACILITY_ID in the corresponding
GSPDD_ground_station_desc table used by CUS. However, the CFI software never needs to know anything
about the station subsystem (SAR processors, FDPC subsystem etc.) which are used by CUS in planning
and generation of schedules for the station.
4j-There are a maximum of four pairs of start and stop times stored in the CUS GAPDD_gs_info table,
namely the RF mask, one occultation period, link-I mask and link-II mask. They are initialized from the
values obtained from the VISIBILITY table. However, the link-I and link-II mask may be adjusted
according to previous operations initiated by the Operations Planner through the Orbit Display Folder.
5)-A word of warning: all new stations should be added to the CUS Oracle tables first before the CFI
VISIBILITY table. The PEP_STATION_ID, FACILITY_ID, HEMISPHERE of
GSPDD_ground_station_desc should be matching with STATION.DBF and STATION.LST. The CFI
GS_LINK_AOD table should be matching with the CUS GSPDD_GS_DL table.
6)-Changes to station parameters:
Populate or regenerate the VISIBILITY table whenever changes affect the occultation period, RF and link
masks of the station (this includes changes to the GS_LINK_AOD table also). Depending on the actual
change, a new CFI account should be used for populating the updated VISIBILITY table and change logical
SQL_CFI_ACCOUNT after the new table has been created and confirmed corrected. It is best to have
SQL_CFI_ACCOUNT as a group logical and stop all planning during the switch.
7)-Station visibility is per 'PASS' (i.e a possibility of two passes within one physical orbit) and the pass is
identified by satellite, phase, orbit, ground station and pass_id (-1, 0 or+ 1) internally within CUS data
structure (gs_coverage).
@esa
CUSSoftware Administrator and Operator Manual
issue 1 revision 0- 12/09/2001
e 53 of 91
2.2.11.5
Update Basemap Display (Station Location & Coverage)
User profile
CUS System Manager
CUS Operations Planner
Connection
VT200
Start time
on request
Duration
15 minutes
Frequency
N/A
References
Related tables and
files
Scope
Add new stations to the basemap display.
Input
(Describes the input (e.g. file) required by the procedure.)
Initial conditions
(Describes the conditions which must be matched before running the procedure.)
Sequence of operations
a)-If a change to the basemap (eg. the GS coverage circles) must be made, the following steps should be
followed:
!)-Update the corresponding WBD files(eg.BMMG_gs_coverage.bdy) and copy them to directory
CUS_MAP_DATA.
2)-Run BMMG_XBLD and select "Rectangular" after the utility is invoked.
3)-After the basemap completes drawing/generation (this will take upwards of 20 - 30 mins), select exit to
save the basemap metafile.
The metafile:
HOOPS_METAFILES:BMMG_RECTANGULAR_BASEMAP.HMF is created.
4)-Repeat 2 and 3 for the "North Polar" projection. Themetafile:
HOOPS_METAFILES:BMMG_POLAR_NORTH_BASEMAP.HMF is created.
5)-Repeat 2 and 3 for the "South Polar" projection. The metafile:
HOOPS_METAFILES:BMMG_POLAR_SOUTH_BASEMAP.HMF is created.
6)-Run CUS to see changes. The changes are visible in either the Geo Area Edit, Observation Set Selection
or the UR Subset folder graphics applications.
b)-If it is needed a "coarse" copy of the basemap(s) update BMMG_SAMPLE_RATES.DAT, increase the
sampling interval and invoke BMMG_XBLD.
Output
(Describes the output (e.g. files, etc) of the procedure.)
Gesa
CUSSoftware Administrator and Operator Manual
issue 1 revision 0 · 12/09/2001
1e
54 of 91
Error handling
(Describes possible errors and actions to be undertaken.)
Notes
HOOPS Metafiles
CUS uses HOOPS metafiles to display the following basemap elements:
• - map coasts
• - political boundaries
• - ground station locations and coverage "circles"
• - sea-ice boundaries
• - international date line
Metafiles are opened and read the first time graphics is entered or if the projection is changed by the user.
The metafile is the HOOPS way of describing a set of polylines. It is in ASCII but should not be modified
via a text editor. If any of the above basemap characteristics change, the metafiles should be regenerated
using the utilities described below.
There are three CUS metafiles corresponding to the three types of projections supported by CUS and located
in the directory HOOPS_METAFILES:
• BMMG_POLAR_NORTH_BASEMAP.HMF
• BMMG_POLAR_SOUTH_BASEMAP.HMF
• BMMG_RECTANGULAR_BASEMAP.HMF
BASEMAP GENERATIONNIEWING UTILITIES -----------------------------------There are two basemap utilities used for generating and viewing basemap metafiles: BMMG_XVUE.EXE
AND BMMG_XBLD.EXE. They are located under the CUS_TOOLS directory.
The BMMG_XVUE program is an interactive basemap viewing utility. It reads one of the HOOPS basemap
metafiles and allows the user to view it using zoom and pan commands. The basemap metafile viewed
corresponds to the projection type selected when the user first invokes the utility.
The BMMG_XBLD program is an interactive basemap creation and viewing utility. It reads the appropriate
basemap data (WDB II format) from a file on disk (in directory "CUS_MAP_DATA"), converts this data
into a HOOPS segment tree, and then lets the user view it using zoom and pan commands. The user selects
the projection type when he invokes the utility and has the option of creating/saving the relevant basemap
metafile when he exits.
BMMG_XBLD INPUT FILES
The BMMG_XBLD utility reads a set of World Databank II (WDB) files as input to create the HOOPS
metafiles. The data for these files were originally provided by ESA although they were slightly corrected in
some cases.
These are ASCII files and can be quite big. There are three sets of WDB files:
• - *.CIL files which generally correspond to coast boundaries
• - *.BDY files which correspond to political boundaries
• - *.LOC file which corresponds to locations (currently only GS locations)
All files should be placed in the directory CUS_MAP_DATA before executing the utility. They are usually
located in BMMG.
BMMG_ASIA.CIL - Asia Coast
BMMG_EUROPE_AFRICA.CIL - Europe/Africa Coast
Gesa
CUSSoftware Administrator and Operator Manual
issue 1 revision 0- 12/09/2001
e55of91
BMMG_NORTH_AMERICA.CIL - North America Coast
BMMG_SOUTH_AMERICA.CIL - South America Coast
BMMG_APR_JUN_ICE.BDY - April to June Sea/Ice Boundaries
BMMG_ASIA.BDY - Asia Political Boundaries
BMMG_DATE_LINE.BDY - International Date Line
BMMG_EUROPE_AFRICA.BDY - Europe/Africa Political Boundaries BMMG_GS_COVERAGE.BDY Ground Station Coverage Circles
BMMG_JAN_MAR_ICE.BDY - Jan to Mar Sea/Ice Boundaries
BMMG_JUL_SEP_ICE.BDY - July to Sept Sea/Ice Boundaries
BMMG_NORTH_AMERICA.BDY - North America Political Boundaries BMMG_OCT_DEC_ICE.BDY Oct to Dec Sea/Ice Boundaries
BMMG_SOUTH_AMERICA.BDY - South America Political Boundaries
BMMG_GROUND_STATIONS.LOC - Ground Stations locations (marked by'+')
In addition to these files BMMG_XBLD also reads a sampling rate definition file
(BMMG_SAMPLE_RATES.DAT) which controls how the WBD data is subsampled for metafile
generation since the WBD data is often far too detailed for CUS.
The following parameters are defined:
1 ! date line dessimation
5 ! detail coast dessimation
200 ! rough coast dessimation
5 ! political bdy dessimation
1 ! ice bdy dessimation
1 ! ground station coverage dessimation
Note the parameter "detail coast dessimation" does NOT correspond to the coarse basemap but refers to the
"rougher" version visible at low zoom ratios.
Gesa
CUSSoftware Administrator and Operator Manual
issue l revision 0 · 12/09/2001
e 56 of 91
2.3
PAF Management
2.3.1
PAF INTERFACE
a)-When it is necessary to cancel an order already transmitted to the PAF, a mail message must be used.
b)-Cancellation of a Product Order should be handled carefully, because a part of the User Request might
not be satisfied any more.
2.3.2
PROCESS ARCHIVE REPORTS
User profile
Production
Planner
Connection
VT200
Start time
See Operator
Duration
depends on number and size of archiving
Frequency
Daily
Time Schedule
reports
References
Related tables and
files
CATDD_prod_catalogue
CATDD_unpr_catalogue
REARs reports
Process Name
HLIC_XARC_nnnn
,
,
Scope
CUS processing of incoming Archive Report (REAR) files. Processing of Archive Reports is normally
started by the CUS Automatic Event Scheduler.
The following procedure is only used if reports must be processed manually.
Input
Archive Report (REAR) files
Initial conditions
The Acquisition Update (AUPP_XACQ), Post- Acquisition Update (AUPP_XPAU) and Product Order
Preparation (PPIO_XROP) processes must not be running at the same time as Archive Report processing.
If either process is running wait for them to finish before starting Archive Report processing.
Sequence of operations
1) Connect to CUS with an operational usemame/password
2) Check that there are new REARs to be processing typing: DIR WAITING_REAR_DIR
3) Ensure initial conditions.
Enter: PROCESSES
This produces a display on the screen and if either of the above-mentioned processes are running.
@esa
CUSSoftware Administrator and Operator Manual
issue 1 revision 0 · 12/09/2001
e 57 of 91
If either process is running then either wait until it is finished.
4) Inform other users of your intent to start processing Archive Reports.
• Enter the command: START_PROC
• A menu will be displayed, Enter: 14 (i.e. option 14: archive_rpt)
• the following text will be displayed:
Process type:
PRMSE_ARCHIVE_RPT
Type 'Y' if you want to start the detached process
•
Enter: Y. This should start a detached process called HLIC_XARC_nnnn
number -- write it down. You will need it in the following steps.
where nnnn is a 4-digit
NOTE:
-o If the HLIC_XARC_nnnn process does not start up correctly i.e. the following message is not displayed
*** Successful completion ***
then Enter: CLEAN_PROC and answer YES to all questions and repeat this step again.
-c- If you accidentally type 'N' instead of 'Y', then run CLEAN_PROC as above, log out and start again from
Step 1).
5) Inform other users that Archive Report processing has completed:
6) The errorlog is checked automatically. The XXTSOOOl and XXPPOOOl user accounts are informed by
MAIL if errors are found.
7) If errors are found then check with the Technical Support staff that the errors will be handled.
Output
Errorlog in directory:file HLIC_XARC_LOG_DIR:HLIC_XARC_nnnn.ERR.
mail sent to XXTSOOOl and XXPPOOOl if errors occurred.
Error handling
Inform CUS Team about any error reported.
~esa
CUSSohware Administrator and Operator Manual
issue 1 revision 0 · 12/09/2001
'e 58 of 91
2.3.3
PRODUCT ORDER PREPARATION.
User profile
CUS Production
Connection
VT200
Start time
See Operator
Duration
- 5 minutes
Frequency
Daily
Planner
Time Schedule
(After Archive Report processing)
References
Related tables and
files
CATDD_unpr_catalogue
PRJDD_product_journal
Process Name
PPIO_XROP_nnnn
Scope
The Product Order Preparation process does two things:
- Updates WAITING product journals to READY if all the frames in the product journal series have been
archived (the reason for running this process AFTER Archive Report processing). The Production Planner
may now be able to generate more Product Orders.
- Updates certain GS-PAF SAR unprocessed catalogue frames from ACQUIRED to ARCHIVED. The orbit
range for these updates is from the LAST_ARCHIVED_ORBIT (last orbit updated by this procedure) to at
most the LAST_ACQUIRED_ORBIT (last Acquisition-Updated orbit).
This procedure is done when the process needs to be started manually.
Input
NIA
Initial conditions
The Acquisition Update (AUPP_XACQ), Post- Acquisition Update (AUPP_XPAU), Archive Report
processing (HLIX_XARC) and Product Order Preparation (PPIO_XROP) processes must not be running at
the same time as Archive Report processing.
If either process is running wait for them to finish before starting Product Order Preparation.
Sequence of operations
1) Connect to CUS with an operational username/password.
2) Ensure initial conditions.
Enter: PROCESSES
This produces a display on the screen and if either of the above-mentioned processes are running.
If either process is running then either wait until it is finished.
3) Inform other users of your intent to start Product Order Preparation process.
• Enter the command : START_PROC
• A menu will be displayed, Enter: 40 (i.e. option 40: po_preparation)
Gesa
CUSSohware Administrator and Operator Manual
issue 1 revision 0- 12/09/2001
e 59 of 91
•
the following text will be displayed:
Process type:
PRMSE_PO_PREPARATION
Type 'Y' if you want to start the detached process
•
Enter: Y. This should start a detached process called PPIO_XROP _nnnn where nnnn is a 4-digit
number -- write it down. You will need it in the following steps.
NOTE:
-o If the PPIO_XROP _nnnn process does not start up correctly i.e. the following message is not displayed
*** Successful completion ***
then Enter: CLEAN_PROC and answer YES to any questions and repeat this step again.
-c- If you accidentally type 'N' instead of 'Y', then run CLEAN_PROC as above, log out and start again from
Step 1).
4) Inform other users that Archive Report processing has completed:
5) The errorlog is checked automatically. The XXTSOOOl and XXPPOOOl user accounts are informed by
MAIL if errors are found.
6) If errors are found then check with the Technical Support staff that the errors will be handled.
Output
Errorlog in directory:file PPIO_XROP _LOG_DIR:PPIO_XROP _nnnn.ERR.
mail send to XXTSOOO1 and XXPPOOO1 if errors occured.
Error handling
Inform CUS Team about any error reported
~esa
CUSSoftware Administrator and Operator Manual
issue 1 revision 0-12/09/2001
e 60 of 91
2.3.4
GENERATE PRODUCT ORDERS
User profile
CUS Production
Connection
VT200
Start time
- 16:30
Duration
- 15 minutes
Frequency
Daily
Planner
References
Related tables and
files
PRJDD_po_params,
PRJDD_product_journal,
URQDD_user_request
Process Name
Scope
Generate and transmit Product Orders to the PAFs.
Input
User requests, product journals.
Initial conditions
Product journals must be in ARCHIVED state.
Sequence of operations
1) Start up a CUS Order Desk session.
2) From the Main Menu choose option:
• 6. Production Planning and Monitoring
3) From this sub-menu, choose option
• 3. Distribute Product Orders
This brings up the Product Order Query/Summary form.
4) Query for READY product journals using this form. Queries can be based on PAP_ID, UR_ID,
USER_ID, PJ_ID, product type, target-delivery-date, catalogue information or any combination of these
parameters.
NOTE that Product Orders can only be generated for product journals in an READY status.
NOTE that Product Orders will be generated for ALL the product journals listed in the Summary Area of the
form.
For product journals which should not have Product Orders generated, use the CLRREC key to remove the
records from the summary block
e.g. you will remove Product Orders to DP for FDCs having copy flag= N.
5) Choose option 2. Distribute All POs from the Product Order Query/Summary form to generate the
Product Orders.
Gesa
CUSSoftware Administrator and Operator Manual
issue l revision 0- 12/09/2001
e 61 of 91
Messages will appear at the bottom of the screen to indicate the progress of the Product Order generation
process.
6) Exit from the form (press twice PF4 and on ORDER DESK choose option 11 Logoff).
Output
ODPO and ODPD files (in pairs) where the ODPO contains information relevant to all the product orders
detailed in the ODPD.
Error handling
Contact CUS Team in case of error message.
Gesa
CUSSohware Administrator and Operator Manual
issue I revision 0- 12/09/2001
e 62 of 91
2.3.5
PROCESS PRODUCTION STATUS REPORTS
User profile
Production Planner
Connection
VT200
Start time
See Operator Time Schedule
Duration
- 10 minutes
Frequency
Daily
References
Related tables and
files
PRADD_product_accounting,
PRJDD_product_journal,
UNEDD_unusual_event,
URQDD_user_request
REPSs reports
Process Name
PPIO_XPST_nnnn
Scope
CUS processing of incoming Product Status Report (REPS) files. This procedure is normally started by the
CUS Automatic Event Scheduler.
The following procedure is only used if reports must be processed manually.
Input
Product Status Report (REPS) files
Initial conditions
The Post- Acquisition Update (AUPP_XPAU) processe must not be running at the same time.
If this process is running wait for it to finish.
Sequence of operations
1) Connect to CUS with an operational usemame/password
2) Ensure initial conditions.
Enter: PROCESSES
This produces a display on the screen and if either of the above-mentioned process are running.
If a Post-Acquisition Update process is running then wait until it is finished.
3) Inform other users of your intent to start processing Production Status Reports.
• Enter the command: START_PROC
• A menu will be displayed, Enter: 19 (i.e. option 19: prod_status_rpt)
• the following text will be displayed:
Process type:
PRMSE_PROD_STATUS_RPT
Type 'Y' if you want to start the detached process
Gesa
CUSSohware Administrator and Operator Manual
issue 1 revision 0- 12/09/2001
e63ol91
•
Enter: Y. This should start a detached process called PPIO_XPST_nnnn where nnnn is a 4-digit
number -- write it down. You will need it in the following steps.
NOTE:
-o If the PPIO_XPST_nnnn process does not start up correctly i.e. the following message is not displayed
*** Successful completion ***
then Enter: CLEAN_PROC and answer YES to any questions and repeat this step again.
-o If you accidentally type 'N' instead of 'Y', then run CLEAN_PROC as above, log out and start again from
Step 1).
4) Inform other users that Production Status Report processing has completed:
5) The errorlog is checked automatically. The XXTSOOOland XXPPOOOluser accounts are informed by
MAIL if errors are found.
6) If errors are found then check with the Technical Support staff that the errors will be handled.
7) Check to see if any PAF Product Journal Difference Reports were produced:
• DIR USER_REPORT_DIR:PJDP*ddmmmyyyy*.RPT
In place of "ddmmmyyyy" put today's date -- for example," 10junl992".
Output
Errorlog in directory:file PPIO_XPST_LOG_DIR:PPIO_XPST_nnnn.ERR.
mail send to XXTSOOOland XXPPOOOlif errors occured.
Product Journal Difference Reports in USER_REPORT_DIR:PJDPcccc_ddmmmyyyy__hhmmss.RPT (only
if product journals have been rejected).
Error handling
Notify CUS Team about any error
Gesa
CUSSohwore Adminislrolor ond Operator Monuol
issue l revision 0 · 12/09/2001
e 64 of 91
~esa
CUSSoftware Administrator and Operator Manual
issue 1 revision 0 · 12/09/2001
£2ll,e 65 of 91
2.3.6
MONITORING OF PENDING PRODUCT ORDERS AND REPS GENERATION
User profile
Production Planner XXPPOOOx
Connection
VT220
Start time
On request
Duration
5-10 minutes
Frequency
On request
References
Related tables and
files
PRJDD_product_journal
- SYS$LOGIN:PENDING_xx_FOR_PAF.LIS
(xx is a PAF ID),
- SYS$LOGIN:PENDING_xx_FOR_PP.LIS
- PPIO_XPST_QUEUED_DIR:REPS_yymmddxxECOOOO.En
(yymmdd is the generation date, xx is the PAF
ID, n = 1 or 2)
Scope
This procedure is composed of two tools used:
1- to retrieve the list of pending product orders for a given PAF (i.e Submitted, In production and Produced),
2- to generate a REPS, with status D (i.e. Dispatched) for that product orders.
this second tool will be used when the orders are closed at the PAF and the PAF is not able to regenerate
anymore a REPS for those orders.
Initial conditions
You must be connected to any account used by the Production Planner.
Sequence of operations
I- retrieving the list of pending product orders for a given PAF
1-To start, type the command: PAF _PENDING_PROD
2-Choose an option from the main menu:
Handling
PAF
Main
pending production
Menu
1- Find pending Product Orders
2- View PP list
~esa
CUSSoftware Administrator and Operator Manual
issue 1revision0-12/09/2001
1e
66 of 91
3- View PAF list
4- Generate REPS report
5- Exit from this menu
Choose an option (1, 2, 3, 4 or 5):
Option 1 enables to list the pending product orders. You will be asked:
the PAF ID,
a 'before' date i.e. the tool will retrieve the orders having the
Target Delivery Date before that date.
->
Two lists are built and you return then, to the main menu. Use the
following options to display the lists.
->
Option 2 enables to display - with the editor - the list built for
internal use.
->
Option 3 enables to display - with the editor - the list built for
the PAF.
This list is a kind of memo for the PAF. It starts with a general
explanation and then lists the pending orders. Some fields (Quantity,
nb of copies, production date and delivery date) are left blank and
should be filled in by the PAF in case it is not able to generate
anymore a REPS. In that case when you receive the list back from the
PAF,you will run the second tool.
Notes:
- Exit from the editor using PFl Q command.
- Answer to the question: Do you want to print the report,
(default Yes) .
->
yin [y]
Option 4 gives a direct access to the second tool main menu (see
below).
3- Send the list to the PAP. The file name is SYS$LOGIN:PENDING-xx-FOR-PAP.LIS where xx is the
PAF ID.
If the list has to be filled in by the PAP, send it by E-mail and asked the PAF to send it back also, by E-mail.
The list for internal use is in the file SYS$LOGIN:PENDING_xx_POR_PP.LIS
2- to generate a REPS, with status D
1-To start, type the command: PAF _PENDING_PROD and chooses option 4
or, type the command REPS_ GENERATION to access directly the tool
2-Choose an option from the tool main menu:
Automatic generation of REPS report for Completed Product Orders
Gesa
CUSSoftware Administrator and Operator Manual
issue I revision 0- 12/09/2001
e 67 of 91
Main Menu
1- Insert manually
2- Insert from input file
3- Exit and put the REPS into the queue
Choose an option (1, 2 or 3):
->
Option 1 enables to generate a record in a REPS report for a product
orders.
You will be asked to enter the following information:
the PAF ID (only the first time, then it assumes the orders are all
for the same PAF),
the satellite ID (can be El or E2 in the same session. In this case
two distinct REPS will be created) ,
- the Product Journal ID,
- the number of frames produced,
- the number of copies done,
- the production date,
- the delivery date
The tools retrieves the Product Journal - which must be in Submitted,
In production or Produced status - and generates a REPS record with
status D.
->
Option 2 enables to generate records in a REPS report for a list
product orders contained in an input file. The file is the one
generated by the first tool i.e.
SYS$LOGIN:PENDING_xx_FOR_PAF.LIS
it must be:
- in your SYS$LOGIN directory and named: PENDING_xx_FOR_PAF.LIS,
filled in by the PAF,
- edited to remove the explanation lines at the beginning.
You will be asked only to enter the PAF ID (only the first time to
individuate the file in input, then it assumes the orders are all for the
same PAF).
The tool reads the input file and generates a REPS record for each
record in input.
Notes:
- You can execute option 1 and 2 in the same session, since product
Gesa
CUSSoftware Administrator and Operator Manual
issue 1 revision 0- 12/09/2001
e 68 of 91
orders are put in the same REPS,
- If you received a reply from the PAF by E-mail on PROCUS you will:
goto into your mail,
extract the mail giving as file name SYS$LOGIN:PENDING_xx_FOR_PAF.LIS,
edit the file and remove the header.
->
Notes:
Option 3 lets you exit from the tool main menu. If a REPS has been
generated, it will display a message. The REPS are put automatically
in the PPIO_XPST_QUEUE_DIR to be processed at the next Production Status
Reporting process execution.
If you run the command REPS_GENERATION, you will return to the DCL prompt.
If you run the command PAF_PENDING_PROD, you will return to that tool
main menu.
Output
Fisrt tool: SYS$LOGIN:PENDING_xx_FOR_PAF.LIS
(xx is a PAF ID),
SYS$LOGIN:PENDING_xx_FOR_PP.LIS.
second tool: REPS_yymmddxxECOOOO.En (yymmdd is the generation date,
xx is the PAF ID, n 1 or 2)
=
Error handling
When an error message is displayed during the tool execution, contact the Technical Support Team.
Gesa
CUSSohware Administrator and Operator Manual
issue 1 revision 0- 12/09/2001
e 69 ol 91
2.3.7
DELETION FROM CUS PRODUCT CATALOGUE
User profile
Production Planner XXPPOOOx
Connection
VT220
Start time
On request
Duration
2 minutes by product
Frequency
On request
References
Related tables and
files
HLQDD_series_selection,
HLQDD_acq_series,
HLQDD_prod_series,
HLQDD_prod_series_frame,
CATDD_unpr_catalogue,
CATDD_product_catalogue,
SYSDATA:DELETE_PRODUCTS_yymmddhhmmss.LOG
Scope
This tool allows to delete a product from the CUS product catalogue if it is not in the Product Journal and
Production Series tables.
Initial conditions
You must be connected to any account used by the Production Planner.
Sequence of operations
1-To start, type the command: DELETE_PROD
2- Answer then to the questions asked by the tool:
------------------------------Deleting Poducts from Catalogue
------------------------------Arch Locat
[ •• J
Satellite
[ •• J
Sensor
[ •••
J
Orbit Numb
[ .....
Frame Numb
[ ••••
J
Produ Type
[ •••••
Scene Quadrant [. J
Gr Station
[ •• J
)
J
(new
(new
(new
(new
(new
(new
(new
(new
value
value
value
value
value
value
value
value
or
or
or
or
or
or
or
or
type
type
type
type
type
type
type
type
exit):
exit):
exit):
exit) :
exit) :
exit) :
exit):
exit) :
dp
el
sar
12358
3609
slc
3
th
Gesa
CUSSolrware Administrator and Operator Manual
issue l revision 0-12/09/2001
e 70 of 91
Notes: the Scene Quadrant is asked only for a SLC product.
3- The tool displays what has been found in the catalogue:
Result of search on Products Catalogue
ORBIT
FRAME
GS PAF PROD S DATE_PROD
12358
3609
TH DP
SLC
3 21-JUN-1994:23:47:52
Press RETURN to continue
Notes: if more than one product is retrieved, and one only need to be deleted,
note down the processing date of the one that is to be deleted. It will
be asked later.
4- The tools searches then for Production Series and Product Journals for that product.
->
if nothing is found the following message is displayed and the
deletion can be done.
No Production Series and no Product Journals found,you can delete the product
Press RETURN to continue
->
otherwise, the Production Series and/or Product Journals found are
displayed and the deletion cannot be done.
5- If the deletion can be done the following menu is displayed:
Deleting Poducts from Catalogue
1- Delete the product(s)
2- Delete the product for a given processing date
3- Do not delete the product
4- Exit
Gesa
CUSSohware Administrator and Operator Manual
issue 1revision0- 12/09/2001
e 71 of 91
Your Choice (1-4):
->
Option 1 enables to delete the product(s) _ More than one product
may be deleted
since no processing date is asked to differentiate
multiple entries in the catalogue.
->
Option 2 enables to delete the product. The processing date is
asked before the deletion to individuate a single catalogue entry.
->
Option 3 enables not to delete the product and goes on for a next product.
->
Option 4 enables to exit from the tool without deleting the product.
Notes: All the deletions done during a session are written in a Log File:
SYSDATA:DELETE_PRODUCTS_yymmddhhmmss.LOG
6- To delete another product, you can use the data previously entered and type in only the new one. In the
example below, another frame for the same PAF/SAT/Sensor/Orbit/Product type/Station is to be deleted.
Only the frame number need to be entered:
Deleting Poducts from Catalogue
Arch Locat
Satellite
Sensor
Orbit Numb
Frame Numb
Produ Type
Scene Quadrant
Gr Station
[DP]
(new
(new
[SAR]
(new
[12358] (new
[3609] (new
[SLC l (new
(new
[3 J
[TH]
(new
[El]
value
value
value
value
value
value
value
value
or
or
or
or
or
or
or
or
type
type
type
type
type
type
type
type
exit):
exit):
exit):
exit):
exit) : 3627
exit) :
exit) :
exit):
----------------------------------------------------------~--------Output
The Log File: SYSDATA:DELETE_PRODUCTS_yymmddhhmmss.LOG
Error handling
When an error message is displayed during the tool execution, contact the Technical Support Team.
Gesa
CUSSoftware Administrator and Operator Manual
issue 1 revision 0-12/09/2001
e 72 of 91
2.3.8
DELETION OF KS/UP ENTRIES ARCHIVED AT DP
User profile
Production Planner XXPPOOOx
Connection
VT220
Start time
On request
Duration
5-10 minutes
Frequency
On request
References
Related tables and
files
EXTDD_late_orbit_entry,
CATDD_unpr_catalogue.
Scope
To remove from the unprocessed catalogue the KS orbits acquired at UP and archived at DP.
These orbits will never been archived at UP since the tapes have been routed to DP but,
entries for UP have been created since UP is the default PAF for KS. They need to be set to unavailable.
This tool was developed to cope with a particular situation, limited in time, in which UP was overloaded.
Initial conditions
You must be connected to any account used by the Production Planner.
Sequence of operations
1-To start, type the command: KS_UP _DP
2- The Production Planner answers then to the questions asked by the tool:
Setting of KS/UP/DP orbits to Unavailable
- Retrieve KS orbits still Acquired at UP and Archived at the same time at DP
- Insert these orbits/frames into EXTDD_LATE_ORBIT_ENTRY table to be set to
unavailable status by the Post-Acquisition Update Process
Enter the SAT ID (El/E2) : El
Enter start mission orbit: 21500
Enter end mission orbit:
22000
3- The tools displays - if required - the list of orbits found within the range.
Setting of KS/UP/DP orbits to Unavailable
Gesa
CUSSohware Administrator and Operator Manual
issue l revision 0-12/09/2001
e 73 of 91
Do you want to edit the list, y/n [n]: y
(default is Yes)_
The list is a sequence of SQL inserts in the EXTDD_Iate_orbit_entry table:
insert into ORAPROD.EXTDD_LATE_ORBIT_ENTRY VALUES ('El','SAR',21596,9,7191,'KS','UP',O,O);
insert into ORAPROD.EXTDD_LATE_ORBIT_ENTRY VALUES ('El ','SAR',21598,9,7191,'KS','UP',O,O);
insert into ORAPROD.EXTDD_LATE_ORBIT_ENTRY VALUES ('El','SAR',21608,9,7191,'KS','UP',O,O);
insert into ORAPROD.EXTDD_LATE_ORBIT_ENTRY VALUES ('El','SAR',21610,9,7191,'KS','UP',O,O);
insert into ORAPROD.EXTDD_LATE_ORBIT_ENTRY VALUES ('El','SAR',21611,9,7191,'KS','UP',O,O);
insert into ORAPROD.EXTDD_LATE_ORBIT_ENTRY VALUES ('El','SAR',21618,9,7191,'KS','UP',O,O);
insert into ORAPROD.EXTDD_LATE_ORBIT_ENTRY VALUES ('El','SAR',21624,9,7191,'KS','UP',O,O);
insert into ORAPROD.EXTDD_LATE_ORBIT_ENTRY VALUES ('El','SAR',21626,9,7191,'KS','UP',O,O);
insert into ORAPROD.EXTDD_LATE_ORBIT_ENTRY VALUES ('El','SAR',21638,9,7191,'KS','UP',O,O);
insert into ORAPROD.EXTDD_LATE_ORBIT_ENTRY VALUES ('El ','SAR',21639,9,7191,'KS','UP',O,O);
etc .
4- Exit from the editor using PFl Q command.
5- Answer to the question:
Do you want to set these orbits to Unavailable y/n [n]: y
(default is No).
if you answer yes, the file you edited in step 3 will be executed and the orbits will be inserted in the
EXTDD_late_orbit_entry table. The orbits will be set to unavailable by the Post-Acquisition update process
next execution.
6- Answer to the question:
Do you want to run this tool again for another Satellite/Orbit range y/n [n]:
(default is No to exit).
Output
The SQL file: SYS$LOGIN: KS_UP_DP_ORBITSyymmddhhmiss.SQL containing the inserts.
If this file is executed (answering Yes at step 5 above), the file will be save in the SYSDATA PROCUS
directory with extension LOG instead of SQL.This allow to keep trace of manipulations done on the
catalogue.
Error handling
When an error message is displayed during the tool execution, contact the Technical Support Team.
~esa
CUSSohware Administrator and Operator Manual
issue 1revision0-12/09/2001
1e
2.3.9
74of 91
DELETION OF NFS FRAMES NOT ARCHIVED AT A PAF (DP, IP, UP)
User profile
Production Planner XXPPOOOx
Connection
VT220
Start time
On request
Duration
5 minutes
Frequency
On request
References
Related tables and
files
EXTDD_late_orbit_entry,
CATDD_unpr_catalogue.
Scope
When a PAF screens an orbit received from a station, the number of frames actually archived may be less
than the initial number thought to be acquired.
The CUS unprocessed catalogue will remain with these frames - assumed as acquired first - but never
archived at the PAF.
The frames - for National and Foreign stations - can be identified since they:
1- have Ground_Station_ID = PAF _ID (e.g, CO/CO, CU/CU, ...),
2- are in a status acquired or archived (in that case archived means auto-archived),
3- belong to an orbit for which exist other frames archived at a real PAF (i.e. DP, IP, UP).
The purpose of the tool is to individuate such frames and set them to unavailable.
Initial conditions
You must be connected to any account used by the Production Planner.
Sequence of operations
1- To start, type the command: DELETE_NFS_FRAMES
2- The Production Planner answers then to the questions asked by the tool:
Setting of Acquired NFS frames to Unavailable
- Retrieve still Acquired NFS frames, belonging to an orbit which has been
archived at DP,IP,UP
- Insert these orbits/frames into EXTDD_LATE_ORBIT_ENTRY table to be set to
unavailable status by the Post-Acquisition Update Process
Enter the SAT ID (El/E2) : El
Enter start mission orbit: 1000
Gesa
CUSSohware Administrator and Operator Manual
issue I revision 0- 12/09/2001
e7Sol91
Enter end
mission orbit: 2000
Enter Ground Station ID:
CO
3- The tools displays - if required - the list of orbits found within the range.
Setting of Acquired NFS frames to Unavailable
Do you want to edit the list, y/n [n]: y
(default is No).
The list is a sequence of SQL inserts in the EXTDD_late_orbit_entry table:
insert into ORAPROD.EXTDD_LATE_ORBIT_ENTRY VALUES ('El ','SAR', 1671,495,495,'SE','SE',O,O);
insert into ORAPROD.EXTDD_LATE_ORBIT_ENTRY VALUES ('El ','SAR',1671,513,513,'SE','SE',O,O);
etc .
4- Exit from the editor using PFl Q command.
5- Answer to the question:
Do you want to set these orbits to Unavailable yin
[n]: y
(default is Yes).
if you answer yes, the file you edited in step 3 will be executed and the orbits will be inserted in the
EXTDD_late_orbit_entry table. The orbits will be set to unavailable by the Post-Acquisition update process
next execution.
6- Answer to the question:
Do you want to run this tool again for another Satellite/Orbit range yin
(default is No to exit).
[n]:
Output
The SQL file: SYS$LOGIN: DELETE_NFS_FRAMESyymmddhhmiss.SQL containing the inserts.
If this file is executed (answering Yes at step 5 above), the file will be save in the SYSDATA PROCUS
directory with extension LOG instead of SQL.This allow to keep trace of manipulations done on the
catalogue.
Error handling
When an error message is displayed during the tool execution, contact the Technical Support Team.
Gesa
CUSSoftware Administrator and Operator Manual
issue I revision 0- 12/09/2001
e 76 ol 91
2.4
MMCC Interface
2.4.1
ACQUISITION REPORT ERROR CHECKING .
user profile
Technical support
Connection
VT200
Start time
8h30-9h00
Duration
N/A
Frequency
Daily, every morning
References
Related tables and
files
REAQ_*.En files
Process Name
GSIP_XACQ_nnnn
Scope
The error checking normally occurs automatically after Acquisition Report processing. If errors are found, a
mail message is sent to the XXTSOOOl account.
The mail is systematically read every morning (at least) by the Technical Support staff which starts the
corrective actions immediately.
Support can be done by the CUS Maintenance team and the Mission Planner
Input
Acquisition Report errorlog (GSIP _XACQ_nnnn.ERR)
From:
PROCUS: :CUSPROD
and XXTSOOOl mail e.g.:
"AES is watching you"
To: XXTSOOOl,XXOPOOOl
CC:
Subj:
Acquisition Report Processing Errors
See cuserrlg for details:
GSIP_XACQ_LOG_DIR:GSIP_XACQ_6787.ERR
Initial conditions
NIA
Sequence of operations
1- New errors handling:
Gesa
CUSSohware Administrator and Operator Manual
issue 1 revision 0 · 12/09/2001
e 77 of 91
•
Connect to XXTSOOOland type the command MAIL. Mails not yet processed are either in the
NEWMAIL or MAIL folder.
• from the mail you can edit the file: RED GSIP_XACQ_LOG_DIR:GSIP_XACQ_nnnn.ERR
where nnnn is the number of the process you are now reading in the mail.
(if you user TPU editor, to improve readability and/or increase the column size of the screen, use the PFl
key followed by "W".)
Search for processing errors by pressing the FIND key and entering the search string "error" (followed by
RETURN). To hop to the next "error" string, press the PF3 key. If this string is not found, you will see the
message "String not found" at the bottom of the screen.
• Errors are identified, analyzed and reported in pre-formatted template (i.e. CUS Processing Error
report). For each error mention: the Report Name (i.e. REAQ_*), the record number, the anomaly
message from the log file and the corrective action required.
• Prepare a fax to be sent to the corresponding Ground Station. A fax template exists for each Ground
Station. Print it, add the date and a reference number taken from the section chrono.
• Join the fax to the CUS Processing Error report and send it to the Ground Station.
• Keep the faxlCUS Processing Error report in the ad-hoc ring binder in the Open actions part.
• move the mail to the CUS_PROC folder once all actions have been completed.
Notes: support can be obtained from either CUS Maintenance team or Mission Planner. In any case Mission
Planner must be informed of the error.
2- Open errors handling:
In coordination with the Mission Planner, the Technical Support staff will follow-on the correction of open
errors i.e.:
• the Ground Station should send back the fax reporting on the corrective action done on their side.
• the Ground Station should send a new and correct REAQ_*report.
• When the REAQ_* has been successfully processed by CUS, the Technical Support staff will close
the action i.e. put the faxlCUS Processing Error report in the Closed actions part of the ring-binder.
3- Monthly reporting:
Every month at a given date fixed with the ESRIN responsible the Technical Support staff will provide a
brief summary of the actions handled during the month.
Output
fax to the Ground Station including the CUS Processing Error report.
CUS Processing Error report ring binder for the Ground Station.
Monthly report.
Error handling
NIA
Notes
NIA
Gesa
CUSSoftware Administrator and Operator Manual
issue lrevision 0- 12/09/2001
e 78 of 91
2.4.2
ARCHIVING REPORT ERROR CHECKING .
Oser profile
Technical support
Connection
VT200
Start time
8h30-9h00
Duration
N/A
Frequency
Daily, every morning
References
Related tables and
files
REAR_*.En files
Process Name
HLIC_XARC_nnnn
Scope
The error checking normally occurs automatically after Archiving Report processing. If errors are found, a
mail message is sent to the XXTSOOOlaccount.
The mail is systematically read every morning (at least) by the Technical Support staff which starts the
corrective actions immediately.
Support can be done by the CUS Maintenance team and the Mission Planner
Input
Archiving Report errorlogs:
HLIC_XARC_nnnn.ERR and VER_REAR_ddmonyyyy_hhmmss.RPT
and
XXTSOOOlmail e.g.:
From:
PROCUS ::CUSPROD
To:
CC:
Subj:
XXTSOOOl,XXPPOOOl
"AES is watching you"
Archive Report Processing Errors
Please see today's VER_REAR report file for details:
CUSPROD$DISK: [CUSPROD.TCS.OLD_RECEIVE.REAR.CHECKED.LOGS]VER_REAR_250CT1996_03010
0.RPT
The following REAR file(s) contain(s) errors:
REAR_961023CPEC1357.E2
The file(s) have been moved to:
CUSPROD$DISK: [CUSPROD.TCS.OLD_RECEIVE.REAR.BAD_DO_NOT_PROCESS]
or
Gesa
CUSSoftware Administrator and Operator Manual
issue 1 revision 0- 12/09/2001
~e79of91
From:
PROCUS: :CUSPROD
To:
CC:
Subj:
XXTSOOOl,XXOPOOOl
"AES is watching you"
Acquisition Report Processing Errors
See cuserrlg for details:
HLIC_XARC_LOG_DIR:HLIC_XARC 6787-ERR
Initial conditions
NIA
Sequence of operations
1- New errors handling:
• Connect to XXTSOOOland type the command MAIL. Mails not yet processed are either in the
NEWMAIL or MAIL folder.
• from the mail you can edit the files:
VER_REAR_ddmonyyyy_hhmmss.RPT or HLIC_XARC_LOG_DIR:HLIC_XARC_nnnn.ERR
(if you user TPU editor, to improve readability and/or increase the column size of the screen, use the PFl
key followed by "W".)
-o in VER_REAR_ddmonyyyy_hhmmss.RPT you will find the result of the analysis done on the REAR_*
supplied in input of the HLIC_XARC pre-processor.
The log gives a list of REAR_* and for each of them the wrong records/frames together a diagnostic. The
errors will be grouped together in order to send a separate report to each PAF concerned.
-c- in HLIC_XARC_nnnn.ERR you will find the result of the analysis done on the REAR_* supplied in
input of the HLIC_XARC process itself.
Search for processing errors by pressing the FIND key and entering the search string "error " (followed by
RETURN). To hop to the next "error" string, press the PF3 key. If this string is not found, you will see the
message "String not found" at the bottom of the screen.
• All errors from both logs are identified, analyzed and reported in pre-formatted template (i.e. CUS
Processing Error report). For each error mention: the Report Name (i.e. REAR_*), the record
number, the anomaly message from the log file and the corrective action required. This operation is
easier when errors are coming from the HLIC_XARC pre-processor due to the log layout (as
explained above).
• Prepare a fax to be sent to the corresponding PAF. A fax template exists for each PAF. Print it, add
the date and a reference number taken from the section chrono.
• Join the fax to the CUS Processing Error report and send it to the PAF.
• Keep the fax/CUS Processing Error report in the ad-hoc ring binder in the Open actions part.
• move the mail to the CUS_PROC folder once all actions have been completed.
Notes: support can be obtained from either CUS Maintenance team or Mission Planner. In any case
Production Planner must be informed of the error.
2- Open errors handling:
In coordination with the Production Planner, the Technical Staff will follow-on the correction of open errors
r.e.:
• the PAF should send back the fax reporting on the corrective action done on their side.
Gesa
CUSSoftware Administrator and Operator Manual
issue 1 revision 0- 12/09/2001
e 80 ol 91
•
•
the PAF should send a new and correct REAR_* report.
When the REAR_* has been successfully processed by CUS, the Technical Support staff will close
the action i.e. put the fax/CUS Processing Error report in the Closed actions part of the ring-binder.
3- Monthly reporting:
Every month at a given date fixed with the ESRIN responsible the Technical Support staff will provide a
brief summary of the actions handled during the month.
Output
fax to the PAF including the CUS Processing Error report.
CUS Processing Error report ring binder for the PAF.
Monthly report.
Error handling
NIA
Notes
NIA
Gesa
CUSSoftware Administrator and Operator Manuol
issue 1 revision 0 · 12/09/2001
e 81of91
2.4.3
PRODUCTION STATUS REPORT ERROR CHECKING .
User profile
Technical support
Connection
VT200
Start time
8h30-9h00
Duration
N/A
Frequency
Daily, every morning
References
Related tables and
files
REPS_*.En files
Process Name
PPIO_XPST_nnnn
Scope
The error checking normally occurs automatically after Archiving Report processing. If errors are found, a
mail message is sent to the XXTSOOOlaccount.
The mail is systematically read every morning (at least) by the Technical Support staff which starts the
corrective actions immediately.
Support can be done by the CUS Maintenance team and the Mission Planner
Input
Production Status Report errorlogs:
PPIO_XPST_nnnn.ERR
and
XXTSOOOlmail e.g.:
"AES is watching you"
From:
PROCUS: :CUSPROD
To: XXTS0001,XXPP0001
CC:
Subj:
Product Status Report Processing Errors
See cuserrlg for details:
PPIO_XPST LOG_DIR:PPIO_XPST_4903.ERR
Initial conditions
NIA
Sequence of operations
1- New errors handling:
• Connect to XXTSOOOland type the command MAIL Mails not yet processed are either in the
NEWMAIL or MAIL folder.
Gesa
CUSSoftware Administrator and Operator Manual
issue 1revision0-12/09/2001
e 82 of 91
• from the mail you can edit the log file:
in PPIO_XPST_nnnn.ERR (where nnnn is the number of the process you are now reading in the mail) you
will find the result of the analysis done on the REPS_* supplied in input of the PPIO_XPST process itself.
(if you user TPU editor, to improve readability and/or increase the column size of the screen, use the PFl
key followed by "W".)
Search for processing errors by pressing the FIND key and entering the search string "error" (followed by
RETURN). To hop to the next "error " string, press the PF3 key. If this string is not found, you will see the
message "String not found" at the bottom of the screen.
• All errors from both logs are identified, analyzed and reported in pre-formatted template (i.e. CUS
Processing Error report). For each error mention: the Report Name (i.e. REPS_*), the record number,
the anomaly message from the log file and the corrective action required.
• Prepare a fax to be sent to the corresponding PAP. A fax template exists for each PAP. Print it, add
the date and a reference number taken from the section chrono.
• Join the fax to the CUS Processing Error report and send it to the PAP.
• Keep the faxlCUS Processing Error report in the ad-hoc ring binder in the Open actions part.
• move the mail to the CUS_PROC folder once all actions have been completed.
Notes: support can be obtain from either CUS Maintenance team or Mission Planner. In any case
Production Planner will be informed of the error.
2- Open errors handling:
In coordination with the Production Planner, the Technical Support staff will follow-on the correction of
open errors i.e.:
• the PAP should send back the fax reporting on the corrective action done on their side.
• the PAP should send a new and correct REPS_* report.
• When the REPS_* has been successfully processed by CUS, the Technical Support staff will close
the action i.e. put the faxlCUS Processing Error report in the Closed actions part of the ring-binder.
3- Monthly reporting:
Every month at a given date fixed with the ESRIN responsible the Technical Support staff will provide a
brief summary of the actions handled during the month.
Output
fax to the PAP including the CUS Processing Error report.
CUS Processing Error report ring binder for the PAP.
Monthly report.
Error handling
NIA
Notes
NIA
Gesa
CUSSohwore Administrator ond Operator Monuol
issue I revision 0- 12/09/2001
e83ol91
2.5
MUIS Interface
2.5.1
DOWNLOADING CUS CATALOGUE TO MUIS
User profile
Connection
CUS Operators
VT200
Start time
Duration
4 hours
Frequency
As requested by MUIS Responsibles
References
Related tables and
(IN
) CATDD_unpr_catalogue: CUS Catalogue
files
(IN OUT) CATDD_unpr_catalogue_log: log table of all changes done on CUS
Catalogue
(
OUT) SARUF_*.En: Full download files for SAR Catalogue
(
OUT) ATSUF_*.En: Full download files for ATS Catalogue
Scope
To download CUS Catalogue to MUIS, in order to realign MUIS Catalogue in case of operational problems,
and/or at startup of operations of MUIS
Input
Satellite
Sensor
Date Range to be used for filtering frames over Acquisition Start Time
(ENTER ALWAYS 01-JAN-1990:00:00:00 - 01-JAN-2010:00:00:00, i.e. no filter applied, whole catalogue
downloaded)
Initial conditions
Operator logged in on Procus, Oracle Account with write privileges on Oraprod Database account, 2
sessions. The Procus account shall be included in CUS operatioanl group,
in order to access CUS environment facilities (e.g. CUSPROD account)
CUS Maintenance Team alerted about the generation of the full download.
No user working on CUS
Enough free space available on disk hosting the CUSF _SAVED_DIR directory (currently DISK$RAID_l):
by example, for downloading Ell ATSR data, about 500,000 blocks will be needed.
Sequence of operations
1. On the first session, enter the following commands:
SQL
LOCK TABLE CATDD_UNPR_CATALOGUE_LOG
IN EXCLUSIVE MODE NOWAIT;
Gesa
CUSSoftware Administrator and Operator Manual
issue 1 revision 0 - 12/09/2001
e84ol91
wait for the prompt back.
This will prevent other users from changing data in the CUS Catalogue during the generation of the
full download, taking care of the actual synchronization between Full Catalogue and Incremental
downloads.
PLEASE NOTE THAT THE PREVIOUS COMMAND IS ABLE TO FREEZE THE ACTIVITY
OF THE WHOLE CUS FACILITY.
2. On the second session, run the tool
MUIS_CAT_DOWN_UF
Specifying Satellite, Sensor and Date Range of interest.
When the tool has completed, the new download file is displayed, within the directory
CUSF_SAVED_DIR
3. If the download has been requested by MUIS responsibles, enter:
COPY <filejust_created> CUS_TO_TCS_DIR: /lo
checking for success.
4. Going back to the first session, for the <satellite> and <sensor> for which the download file has been
generated, enter
DELETE CATDD_UNPR_CATALOGUE_LOG WHERE satellite= <satellite> AND sensor=
<sensor>;
COMMIT;
EXIT;
Output
SARUF*.* once SAR catalogue has been dumped
ATSUF*.* once ATS catalogue has been dumped
Error handling
In case of errors:
1)-Be sure that the default directory of your session is one where you are authorized to write. A few work
files will be created within the current directory, to be removed when the procedure completes.
2)-Check that your account belongs to the same group as the CUSPROD account
Notes
The full download is a very big file. In order to save disk space, whenever the full download for a mission is
requested, please inform CUS Maintenance Team, in order to let them recover disk space from previous full
downloads.
Gesa
CUSSohware Administrator and Operator Manual
issue l revision 0- 12/09/2001
e 85 ol 91
2.6
Operations monitoring
2.6.1
CHECKING MAIL MESSAGES
User profile
CUS System Manager
Connection
VT200
Start time
on request
Duration
30 minutes
Frequency
daily
References
N/A
Related tables and
files
N/A
Scope
Any process or batch that executes operational actions on the system is programmed to send an email
whenever an error occurs. A few processes send the email even if they terminate successfully. This allows a
strict check on the system behaviour and a fast response on errors.
Sequence of operations
Every morning the emails sent to the XXTSOOOlaccount on PROCUS are checked. If the emails contain
errors the correspondent process actions are investigated in order to discover the cause that generates the
error and remove it if possible or creates a Software Change Request (SCR) in case the errnr is due to the
algorithm developed. The more usual way to investigate the error is checking the various logs that every
process or batch generates. When the email has been checked, it should be moved into its relative folders in
order to allow for a future investigation. The correspondence between the subject of the emails and their
folders are exposed hereunder:
+================+=============================================================+
I
F 0 L D E R
I
N 0 T E
+================+=============================================================+
I NEWMAIL
I NEWMAIL (standard folder)
I ARCHIVE_RPT_ATSI Archive Report Processing Errors (ATS)
I
I
+----------------+-------------------------------------------------------------+
BASELINES
I BSLN_LOAD_BATCH
I Baselines Files Loader errors
I Daily IBIS file not found
+----------------+-------------------------------------------------------------+
I CATALOG
I
I ERROR_IN_CUS_CAT_CHECK_BATCH_EXECUTION
I CUS_CAT_CHECK_BATCH execution report
+----------------+-------------------------------------------------------------+
I
I
I
Gesa
CUSSohware Administrator and Operator Manual
issue l revision 0- 12/09/2001
e 86 of 91
I CHECK_BATCH
I
I
I
I
I
I
I
CHECK_BATCH_QUEUE reporting
CHECK_BATCH_QUEUE reporting: ERROR, batch not found
>>> CHECK_BATCH : Batch *** NOT FOUND ***
>>> VERIFY_CHECK_BATCH : CHECK_BATCH *** NOT FOUND ***
I
I
I
I
+----------------+-------------------------------------------------------------+
I CHECK_ERSISS
I
I
I >>> WARNING: ERSISS is not available.
I >>> WARNING: ERSISS is available.
I Check Iss errors
I
I
I
+----------------+-------------------------------------------------------------+
CLEAN_CATALOGUEI FRAMES DELETED BY CLEAN CAT BATCH
I CLEAN_CAT_BATCH Log file
I Clean Catalogue errors
I
I
I
+----------------+-------------------------------------------------------------+
CUS_PROC
I Archive Report Processing...
I
Post-Acquisition Update Processing ...
Acquisition Update Processing...
Product Status Report Processing ...
(Personal Name=
"AES is watching you")
I
I
I
I
I
+----------------+-------------------------------------------------------------+
CUS_REJECTIONS I Handling_PAUP_rejections
I Handling_ACNF_rejections
I HANDLING_CUS_REJECTIONS_REPORTING
I
I
I
+----------------+-------------------------------------------------------------+
DAILY_PO
DAILY_PO(s)_LIST
Pending Product List
Pending Product List
Pending Product List
Pending Product List
for
for
for
for
Italian PAF
German PAF
Central PAF
UK PAF
I
I
I
I
I
+----------------+-------------------------------------------------------------+
I DESC
I
I Update DESC Log File...
I DESC File Server ...
I
+----------------+-------------------------------------------------------------+
I FIX_REAR
I Fix_rear_ats Report
+----------------+-------------------------------------------------------------+
FTP
I FTP: Failure, Automatic Recovery Planned (...)
FTP: Automatic Recovery Completed (...)
>>>ERROR:
FTP_TRANSFER_PROC Failure (
)
>>>FATAL ERROR: FTP_TRANSFER_PROC (
)
FTP: Error File ... Not Found
+----------------+-------------------------------------------------------------+
I
GAP
I
Automatic_GAP_file_generation
+----------------+-------------------------------------------------------------+
I GETSWAT
I
I BATCH_GETSWAT_GS Log File
I >>> ERROR: GETSWAT_GS Failure
+----------------+-------------------------------------------------------------+
I IMAGE_SERVER
I
I
I
I
I
I
I
I
I
I
I
I
I
I
I
Localization Log ...
ImageServer Files Loading errors
>>> WARNING: Localization Log File Not Found.
IMAGEDB_MON: File CUTLOG.TXT not found
IMAGEDB_MON: File ERSLOG.TXT not found
IMAGEDB_MON: File SEND_LOG.TXT not found
Image Server Log: CUTLOG.TXT
Image Server Log: ERSLOG.TXT
+----------------+-------------------------------------------------------------+
Gesa
CUSSoftware Administrator and Operator Manual
issue 1 revision 0- 12/09/2001
e 87 ol 91
I Iss
I
ISSCUS LOG_FILE_CONTROL
+----------------+-------------------------------------------------------------+
I
JACQ (OBSOLETE)I JERS Acquisition Table Update LOG
+----------------+-------------------------------------------------------------+
I
JCAT (OBSOLETE)I JERS CATALOG log file control
+----------------+-------------------------------------------------------------+
I
LBR_FDP
I
I
I
LBR_Dist_Sched_for_Sth_Africa_reporting
LBR_FDP_Dist_Sched_gen_for ...
I
I
+----------------+----------------------------------------------------·---------+
I
LBR_PRODUCT
I
I
I
I
I
New global LBR product in CUS on <DD MON>
ERROR: New global LBR product is CUS on <DD MON>
No new global LBR product is CUS on <DD MON>
I
I
I
+----------------+-------------------------------------------------------------+
I
MAIL
I
MAIL (standard folder)
+----------------+-------------------------------------------------------------+
I
MISSING_DATA_PERCENTAGE_DP
I
MISSING DATA PERCENTAGE ERRORS. --
I
+----------------+-----------------------------------------------------·--------+
MUIS
Muis_B_upload_f iles_gen errors
Muis Y2K Inventory Files errors
MUIS ingestion errors
IDS Directories cleaner
IDS loading errors
BDS Directories cleaner
+----------------+-------------------------------------------------------------+
I
NOAA
I
I
I
I
I
I
I
NOAA Orbit errors
+----------------+-------------------------------------------------------------+
OHS
I Prepared FAX for Promise orders
OHS INVENTORY UPDATE
OHS_INV_UPDATE_BATCH errors
OHSS_POS_BATCH errors
Ohs alignment to Cus errors
+----------------+-------------------------------------------------------------+
I
OHSF
I
New orders by OHSF
+----------------+-------------------------------------------------------------+
I
OTHERS
I
(General correspondance, usually from individuals)
+----------------+-------------------------------------------------------------+
PENDING_GLOBAL
I
I
I
Pending Global Product Orders
GPC_PENDING_ORDERS_BATCH errors
Pending Global Product Orders for D-PAF
+----------------+--------------------------------------------------------------+
I
PEP_NAK
I
PEPs Not Ackgd by ESOC on Sat. E2
I
+----------------+--------------------------------------------------------------+
PROJECTS
I
I
I
List of projects having exceeded their quota
A03 PROJECT STATUS. -PROJECT_REQUEST_STATUS
+----------------+-------------------------------------------------------------+
I
REDP
I
New REDP Files from ESOC
+----------------+-------------------------------------------------------------+
I
REPR
I
REPRT File Error : ...
+----------------+-------------------------------------------------------------+
I
SEND_MAIL
I
MAIL: SEND_MAIL_PROC Failure (...)
+----------------+-------------------------------------------------------------+
SHIPMENT
I Shipment_Update
TBS LISTING
Shipment_Delay
I
I
I
Gesa
CUSSohware Administrator and Operator Manual
issue 1revision0-12/09/2001
1e 88 of 91
I
I
I
I
+------------------------------------------------------------------------------+
I SHORTLINK
I Links too Short Removed
I
I
I Remove Short LlR Links errors
I
AUTOMATIC SHIP REQUEST
Pj_hopeless
+----------------+-------------------------------------------------------------+
STATS
PAF_Delivery_Delay/Backlog_Stats
STATSH computation
STATOD monthly computation
Catalogues_Status
Monthly_Production_Status
Monthly_report_for_MP_
Monthly Accumulated Statistics
I
I
I
I
I
I
I
+----------------+-------------------------------------------------------------+
TBD
TBD Eurimage ...
New requests submitted from providers
No new submitted requests
OHS TO BE DONE ...
+----------------+-------------------------------------------------------------+
I
I
TPMI
I
I
TPMI files loading errors
>>> CHECK_TPM: Error Detected ...
+----------------+-------------------------------------------------------------+
I
WRONG_FRAMES
I
Warning: Wrong frames for READY Product Journal
+----------------+-------------------------------------------------------------+
I
WASTEBASKET
I
WASTEBASKET (standard folder)
+----------------+-------------------------------------------------------------+
Output
Notes
Gesa
CUSSoftware Administrator and Operator Manual
issue 1 revision 0- 12/09/2001
e 89 of 91
2.6.2
UPDATING BATCH SETUP
User profile
CUS System Manager
Connection
VT200
Start time
on request
Duration
30 minutes
Frequency
N/A
References
N/A
Related tables and
files
N/A
Scope
The configuration of every batch installed is maintained on the database. A tool called BM has been
developed to manage the configurations and the installation of the batch processes.
Sequence of operations
The BM tool when launched shows a menu with six options:
1. Configure a batch application
2. Submit a batch application
3. Cancel a batch application and configuration
4. Delete a batch application
5. List batch applications
6. Exit
The first option allows the configuration set-up through the use of Oracle Forms. The form should be filled
with the following data:
• Bm Batch Com
- The command file to launch
- The queue where the batch is to be submitted to
• Bm Batch Queue
- The name showed in the list
• Bm Batch Name
• Bm Batch User
- The user for the batch submitting
- The full path of the Jog file
• Bm Batch Log
• Bm Batch Dir
- The directory where the batch can be found
• Bm Mail User
- The user(s) to which send the email
• Bm First Execution
- Date and time when the batch should be started for the first time
• Bm Next Execution
- Read only. Shows the date and time of the next execution
• Bm Delta Time - Days
- Number of days to add to the last time of execution to calculate the next date
of execution, Valid when Bm Cyclic flag is checked, otherwise ignored
• Bm Delta Time - Time
- Hour minutes and seconds to add to the last time of execution to calculate the
next time of execution. Valid when Bm Cyclic flag is checked, otherwise ignored
Gesa
CUSSohwore Administrator and Operator Manual
issue 1 revision 0 · 12/09/2001
e 90 of 91
•
•
•
•
•
•
Bm Absolute Time
- Hour, minutes and seconds of execution. Valid when Bm Daily, Weekly,
Monthly, Yearly flags are checked, otherwise ignored
Bm Frequency Flags
- Frequency of execution. More than one can be checked. The algorithm
choose the sooner time of execution calculated
Bm Weekday Flags
- Days of the week to run the process. More than one can be chosen. Valid
when the Bm Weekly flag is checked, otherwise ignored
Bm Month Flags
- Months during which the batch should run. Valid when Bm Yearly Flag is
checked, otherwise ignored
Bm Day Flags
- Days of the month when the batch should run. Valid when Bm Monthly Flag
or Bm Yearly Flag is checked, otherwise ignored
Bm Send Mail Always - If checked the email is sent even on successful termination, otherwise only if
an error occur
The second option submits the batch chosen on the list of configured batches showed on the window.
The third option cancel the configuration of the relative batch and remove it from the queue
The fourth option delete the batch from the queue. Note that the configuration is maintained so the batch
removed can be submitted again.
The fifth option show a list of configured batches.
The sixth exits the program.
When a new batch is developed and should be installed the following operations are to be accomplished:
• Start BM and select option one
• Fill in the batch configuration and exit. At this point the configuration is saved
• Select option 2.
• Select option 6 to exit.
Output
Notes
Gesa
CUSSohware Administrator and Operator Manual
issue 1 revision 0- 12/09/2001
e 91of91
2.6.3
CHECKING TOOLS ERRORS
User profile
CUS System Manager
Connection
VT200
Start time
on request
Duration
30 minutes
Frequency
N/A
References
N/A
Related tables and
files
N/A
Scope
This procedure should be followed whenever an error occurs.
Sequence of operations
Anytime a process or a batch signals that an error is occurred, an investigation on the possible causes of the
error should start. The steps to follow strictly depends on the type of error signalled. As a general rule, the
log files should be scanned searching for any anomaly that could have caused the error. Any anomaly
occurred to the system, the network and any other legacy application (Oracle,... ) should be taken into
consideration.
For any batch installed a set of logical name are created. These names point to the directories used by the
batch for its execution. The format of the names is codified:
• batchname_LOG_DIR pointing to the directory of Jog files
• batchname_SAVED_DIR pointing to the directory where data files produced by the batch are stored
• batchname_COMPLETED_DIR pointing to the directory where input data files successfully processed
are stored
• batchname_ACTIVE_DIR pointing to the directory used by the batch during its execution. It should be
left empty on batch termination.
• batchname_FAILED_DIR pointing to the directory where input data files unsuccessfully processed are
stored
• batchname_QUEUED_DIR pointing to the input directory where the batch gets the input data files
The FAILED directory in particular should be checked for input files that possibly contain corrupted data
that could have generated the error.
Output
Notes