1
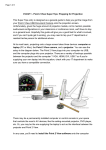
AV Technologies
Laptop User Manual
Rev. 2013
Overview:
All Hi-Tech, and Tech Ready classrooms offer the ability to connect a personal laptop. Both Apple
MacBooks, and PC laptops are able to connect, although the Apple product line requires an adaptor
known as a “dongle” to connect to the system. Connecting a laptop to the system is accomplished by
connecting the supplied VGA cable to the correct display port on your laptop.
Please note AV Technologies does NOT supply Apple dongles. These are available for purchase at
apple.com, the UConn Co-Op, Amazon.com, etc.
Making the Right Connection:
VGA + Headphone Audio:
The majority of classrooms use the VGA style connection which is a square shaped connector with 15
pins inside. The corresponding port on your computer will also be square shaped with 15 sockets for the
connector to fit into. This connection type is very common and has been used for many years. The VGA
connector will get your video out, but to hear sound through the system you will also need to connect
the 1/8” headphone jack into your laptops headphones port. Making this connection will allow sound to
get out of your computer and through the speakers in the classroom.
Once the cables are connected to the proper ports, it is common on most PC laptops to “port out” the
signal. Porting Out you laptop simply means turning on that port to allow the video to go out. To do this
there is usually a key combination that needs to be pressed on your laptops keyboard. The combination
typically uses the “fn” key and one the “F” keys across the top. The”F” key will have a picture of a
monitor on it, or sometimes will say”CRT/LCD.” If you need assistance with how to do this on your
laptop please call our help line at 860-486-1774 and a technician will assist you.
HDMI:
If you laptop is new it is likely to have an HDMI port on it. The HDMI is a High Definition combined audio
and video signal that can support higher resolutions. The HDMI cable is provided in the room and once
connected to your laptop should auto sense and send out the audio and video to the system in the
classroom. As AV Technologies upgrades and installs classrooms that addition of the HDMI supported
laptop is expanding. Please refer to the AV Technologies website to find out if the classroom you will be
teaching in supports HDMI laptop use.
Accessing the Laptop Cables:
The cables for the laptop are located on top of the teaching station either inside the Cable Cubby or the
Laptop Bundle. The Cable Cubby is a square black box that is flush mounted into the top of the teaching
station. In this cubby you will find the two previously described cables for HDMI and VGA laptop
connection. When you are done using the laptop cables please return the cable into the cubby to
prevent any damage.
AV Technologies
Laptop User Manual
Rev. 2013
The Laptop Bundles are located on top of the teaching station and are wrapped in “snake skin” which is
a woven black protective covering to keep the cables from being tangled and damaged. This bundle has
a certain length provided to accommodate your laptop. When you are finished using the laptop bundle
please leave the bundle on the top of the teaching station.
Sending to the Projector:
Tech Ready Classroom:
Once your laptop is powered on and the cables are connected, power the system on and then push the
LAPTOP button from the list of sources.
Hi-Tech Classroom:
First turn the system on by using the touch panel, and then connect the appropriate cable to your
laptop. From the list of sources on the Touch Panel select either LAPTOP VGA or LAPTOP HDMI
depending on your connection. Once the cables are connected and the source is selected press the
SEND TO PROJECTOR button to display your laptop on the projection screen.