1
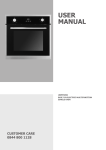
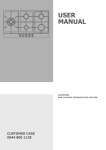
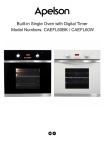
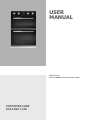
USER
MANUAL
8%0)7&66
BUILT-UNDER ELECTRIC DOUBLE OVEN
CUSTOMER CARE
0344 800 1128
IMPORTANT INFORMATION
8%0)7&66
CONTENTS
Important Information
Before you start
Safety information
Environment information
Technical and legal information
Voltage and frequency of power supply
Your oven
Control panel
Electronic programmer
Your Oven
First use/Setting up your oven
Setting the clock
Cleaning the oven
Product functions
2
3
4
4
4
5
5
5
6
6
7
Daily operation of your oven
3-key timer procedure cooking mode
8
Cooling ventilation
9
Oven modes
9
Care and Maintenance
How to keep your oven in good condition
12
How to remove the oven doors
13
Replacing the oven lamp
14
Installation15
Trouble shooting
18
Guarantee19
Customer service contact details
20
BEFORE YOU START
To avoid the risks that are always present when you use
an electrical appliance it is important that this appliance is
installed correctly and that you read the safety instructions
carefully to avoid misuse and hazards. Please keep this
instruction booklet for future reference and pass it on to
any future owners. After unpacking the appliance please
check that it is not damaged. If in doubt, do not use the
appliance but contact Apelson on 0344 800 1128.
Decide on the appropriate location for your product.
Check the package and make sure you have all of the
parts below.
UBMFTC72SS Oven x1
Your product contains glass please take care when fitting
or handling to prevent personal injury or damage to the
product.
The specifications plate displays all the necessary
identification information for ordering replacement parts.
If you sell the appliance, give it away, or leave it behind
when you move house, make sure you also pass on this
manual so that the new owner can become familiar with
the appliance and its safety warnings.
Grill pan handle x1
Oven shelf x2
Grill pan/drip tray x1
Support rails #2 x2
Ø4mm x 25mm screws x12
2
Ø4mm x 10mm screws x8
Plastic washers x4
IMPORTANT INFORMATION
8%0)7&66
SAFETY INFORMATION
These instructions are for your safety. Please read through
them thoroughly prior to installation and retain them for
future reference.
All installation work must be carried out by a competent
person or qualified electrician.
This appliance must be installed correctly by a suitably
qualified person, strictly following the manufacturer’s
instructions.
This appliance complies with all current European safety
legislation, however, the Manufacturer must emphasise
that this compliance does not prevent the surfaces of the
appliance from heating up during use and remaining hot
during its operation.
inside the oven.
Warning! Accessible parts may become hot during use.
Children should be kept away.
Warning! If the door or door seals are damaged, the
oven must not be operated until it has been repaired by a
competent person.
Do not lean on the door or place any objects on the door
of the appliance. This can damage the door hinges.
The oven should be cleaned regularly and any food
deposits removed.
Warning! Ensure that the appliance is switched off before
replacing the lamp to avoid the possibility of electric shock.
Do not allow the electric cables to touch the hot parts of
the appliance.
The oven must be installed in accordance with installation
instructions and all dimensions must be followed.
Make sure that the power cord is not caught under or in
the appliance and avoid damage to the power cable.
Before connecting the appliance to the power supply,
check that the power supply voltage and current rating
corresponds with the power supply details shown on the
appliance rating label.
Do not remove the plug in the presence of flammable gas.
Do not install the appliance outdoors in a damp place or in
an area which may be prone to water leaks such as under
or near a sink unit. In the event of a water leak allow the
machine to dry naturally.
Please dispose of the packing material carefully.
Do not use flammable sprays in close vicinity to the
appliance.
This appliance can be used by children aged from 8 years
and above and persons with reduced physical, sensory or
mental capabilities or lack of experience and knowledge if
they have been given supervision or instruction concerning
use of the appliance in a safe way and understand the
hazards involved. Children shall not play with the appliance.
Cleaning and user maintenance shall not be made by
children without supervision.
Regularly check the power plug and power cord for
damage. If the supply cord is damaged, it must be replaced
by the manufacturer, its service agent or similarly qualified
persons in order to avoid a danger or injury.
A steam cleaner is not to be used.
The appliance is not intended to be operated by means of
external timer or separated remote-control system.
The appliance is for domestic use only.
The Manufacturer declines all liability for personal or
material damage as a result of misuse or incorrect
installation of this appliance.
Danger of burns! During use the appliance becomes hot.
Care should be taken to avoid touching heating elements
Never use a damaged appliance! Disconnect the appliance
from the electrical outlet and contact your retailer if it is
damaged.
Danger of electric shock! Do not attempt to repair the
appliance yourself. In case of malfunction, repairs are to
be conducted by qualified personnel only.
To avoid damaging the cord, do not squeeze, bend or
chafe it on sharp edges. Keep it away from hot surfaces
and open flames as well.
Lay out the cord in such a way that no unintentional
pulling or tripping over it is possible.
Keep the appliance and its cord out of reach of children.
Do not operate the appliance with wet hands or while
standing on a wet floor. Do not touch the power plug with
wet hands.
Connect the power plug to an easily reachable electrical
outlet so that in case of an emergency the appliance can
be unplugged immediately. Pull the power plug out of the
electrical outlet to completely switch off the appliance. Use
the power plug as the disconnection device.
Disconnect the power plug from the electrical outlet when
not in use and before cleaning.
Always turn the appliance off before disconnecting the
power plug.
This appliance is classified as protection class I and must
be connected to a protective ground (Earth).
Means for full disconnection must be incorporated in
the fixed wiring in accordance with the wiring rules. To
3
IMPORTANT INFORMATION
8%0)7&66
achieve this install an appropriate circuit breaker (CB) and
residual current device (RCD). It should be installed in an
easily reachable place so that in case of emergency the
appliance can be disconnected from power immediately.
The fixed wiring must be protected against heat surfaces.
Do not hang an objects to the handle of the oven door.
Do not cover the bottom of the oven with aluminium foil or
other objects. Caution: Risk of fire!
Do not allow aluminium foil, plastic, paper or fabric contact
with heating elements.
Never leave the appliance unattended during use,
especially when cooking with flammable substances (e.g.
hot oil, fat, etc.).
designed specifically for heating or cooking food. The use
of corrosive chemicals in heating or cleaning will damage
the unit and may cause injury.
Should any food inside the oven catch fire, keep the
door closed. Switch the oven off and disconnect the power
supply.
Always exercise caution when opening the door. Move
to side, open the door slowly to vent the hot air and/or
steam. Make sure your face is away from the opening and
make sure there are no children or pets near the oven.
Only use utensils that are suitable for use in this type
of oven.
Do not store or never use harsh chemicals, sprays,
flammable or non-food in or near the oven. Oven is
ENVIRONMENTAL INFORMATION
TECHNICAL AND LEGAL INFORMATION
Waste electrical products should not be disposed of
with household waste. Please recycle where facilities
exist. Check with your Local Authority or retailer for
recycling advice.
TECHNICAL INFORMATION:
This symbol on the product or its packaging
indicates that this product cannot be treated
as normal household waste. This product must
be handed over to an electric and electronic
equipment collection point for recycling.
On ensuring that this product is disposed of correctly, you
will help to avoid possible negative consequences for the
environment and public health, which could occur if this
product is not handled correctly. To receive more detailed
information about recycling this product, contact your
local government, domestic waste disposal services or the
outlet where the product was bought.
Power supply: Power consumption: Power supply cable: 220-240V~, 50/60Hz
max. 5.1kW
H05RR-F 3 x 2.5mm²
Bulb Type: E14
Wattage & Voltage: 25W/220-240V
Measurements:
Oven capacity (net): External dimensions (WxHxD): Net weight: Top 32.5L/Bottom 45L
594x718x560mm
48kg
LEGAL INFORMATION
The Manufacturer declines all liability for damage caused
to persons and objects due to incorrect or improper
installation of the appliance.
VOLTAGE AND FREQUENCY OF POWER SUPPLY:
Conventional Lower heat
oven
with fan
Top Oven
32.5L
1950-2300W
Bottom
Oven 45L
2100-2550W
4
Top heat
element
Full grill
Fan assisted
grill
True fan
mode
Defrost
mode
20902520W
4601120W
9401110W
20902520W
Lower heat
element
10001200W
21002550W
16602020W
45-55W
YOUR OVEN
8%0)7&66
YOUR CONTROL PANEL
D
D
C
B
A
A
A. Cooking mode selection dial - Top and bottom ovens
B. Cooking temperature selection dial
C. Electronic programmer - allows you to programme the
desired cooking by selecting the cooking time and the
B
end cooking time. It can also be used as a timer (only
available on certain models)
D.Oven indication light. When lit, it indicates the ovens is
heating up to the temperature set
YOUR ELECTRONIC PROGRAMMER
YOUR OVEN
1. Timer
a. Control panel
2. Cooking time
b. Shelf guides
3. End cooking time
c. Oven shelf
4.Clock
d.Grill pan set
5. Display
5
6. – button
7. Mode change
8. + button
a
4
1
b
b
c
d
6
2
3
8
7
5
FIRST USE/SETTING UP YOUR OVEN
8%0)7&66
We recommend that you read the instructions in this owner’s manual carefully before use for the best performance and to
extend the life of your appliance, as it will provide you with all the instructions you require to ensure its safe installation,
use and maintenance. Always keep this owner’s manual close to hand since you may need to refer to it in the future.
Thank you.
SETTING THE CLOCK
CLEANING THE OVEN FOR THE FIRST TIME
Once it is connected to the electrical supply, the display
will show “ 12:00 ” within the square above “
” symbol.
Before using the oven for the first time we recommend
that both ovens be switched on and set to there highest
temperature. Keep the oven doors closed and leave the
appliance on for 30 minutes with nothing in it. Ensure
adequate ventilation during this process by opening any
doors and windows in the room. Any odours created
during this operation will be due to the evaporation of
substances used to protect the appliance during storage
prior to installation.
Press the “ + ” or “ – ” button to increase or decrease the
number until it reaches the right time; after 5 seconds
it will start automatically or you can press the function
button to make it work.
6
FIRST USE/SETTING UP YOUR OVEN
8%0)7&66
PRODUCT FUNCTIONS
The oven is controlled by a thermostat between 50°C
and 250°C, depending on the temperature required.
The thermostat light turns on and off to indicate the
temperature control during use.
The required cooking mode is selected using the cooking
mode selection dial (A). The functions that may be
selected are:
TOP OVEN
Oven Light
Grill
Turning cooking mode
selection dial to this setting,
the oven light will illuminate
in the oven cavity, and will
operate on all selected
functions.
Grill element comes on and is
dispersed by radiant heat
Upper and lower heating
element come on. Heat
is distributed by natural
convection and this means
the top half of the oven is
warmer than the bottom half,
Conventional
food should be placed on a
higher shelf if the food is to
be crisped. It is recommended
that the oven is pre-heated
for 10-15 minutes before
commencing cooking
Lower heat
Lower element comes on,
heat radiates by natural
convection from the base of
the oven.
MAIN OVEN
Oven Light
Turning cooking mode
selection dial to this setting,
the oven light will illuminate
in the oven cavity, and will
operate on all selected
functions.
Upper and lower heating
element come on. Heat
is distributed by natural
convection and this means
the top half of the oven is
warmer than the bottom half,
Conventional
food should be placed on a
higher shelf if the food is to
be crisped. It is recommended
that the oven is pre-heated
for 10-15 minutes before
commencing cooking
Lower heat
with fan
mode
Lower element comes on,
heat radiates by force con‑
vection. The oven does not
require pre‑heating
Top heat
Top element comes on, heat
radiates by natural convection
from the top of the oven.
Grill
Grill element comes on and is
dispersed by radiant heat
Grill element comes on and
Fan Assisted is dispersed by the rear fan.
Even distribution of heat is
Grill
attained in the cavity.
True Fan
Defrost
The circular rear element and
fan come on together and
the heat is dispersed by force
convection. The oven does not
require pre‑heating.
Only the fan comes on
and the food is thawed by
ventilation without heat.
Read the information of the food packaging for the
cooking temperatures and times. Once familiar with the
performance of the appliance, the temperatures and times
may be varied to adapt them to your personal tastes.
Check that frozen food is completely thawed before
cooking, unless indicated otherwise.
7
DAILY OPERATION OF YOUR OVEN
8%0)7&66
This multi-function double oven combines the advantages
of traditional convection ovens with those of the more
modern fan assisted models in a single appliance. It is an
extremely versatile appliance that allows you to choose
easily and safely between different cooking modes.
3-KEY TIMER PROCEDURE COOKING MODE
AUTOMATIC SETTING (set the time with full
automatic starting and ending)
Press the mode button repeatedly until the square symbol
above the “
” flashes, and press + or - button to set
the required cooking time.
Press the mode button repeatedly until the square symbol
” flashes, and press + or - button to set
above the “
the time to switch off.
Adjusting the cooking temperature selection dial and
cooking mode dial to set temperature and baking method.
” and
After these setting, the symbols above the “
“
” will flash. This indicates that oven is now set to
complete the set cooking programme.
EXAMPLE:
If the food is required to bake for 45 minutes, and it is
supposed to stop at 14:00 then …
… press the mode button repeatedly until the square
” flashes, and set the time of baking to
symbol above “
45 minutes.
Press the mode button repeatedly until the square symbol
” flashes, and set the end time of baking at
above “
14:00.
After these setting, the proper clock (hour, minute) and
the square symbol will show on the display, it indicates
the setting of baking procedure has been remembered
automatically.
When the clock shows 13:15 (between 14 - 15min), the
oven will switch on automatically.
During the baking time frame, the square symbol will keep
flashing.
When the clock shows 14:00, baking will switch off
automatically. The alarm will ring, the square symbol will
flash. To stop the ringing press any button.
SEMI-AUTOMATIC SETTING (set the time of
automatic starting and ending)
A. Setting the required time frame for baking (10 hours
maximum)
Press the mode button repeatedly until the square symbol
”, and set the required time using the + and above “
buttons.
Switch on the oven immediately, the square symbol above
” begins to flash.
“
When the baking is done the square symbol above
” will flash, and the alarm will sound. To cancel the
“
alarm press any button.
B. Setting the end time of baking (23 hours 59 minutes
maximum)
Press the mode button repeatedly until the square symbol
” flashes, and set the end time of baking using
above “
the + and - buttons.
Switch on the oven immediately, the square symbol above
” begins to flash.
“
When it reaches the time set, baking procedure will switch
” flashes,
off automatically. The square symbol above “
and the alarm will sound. To cancel the alarm press any
button.
The set baking procedure could be seen by pressing the
mode button repeatedly at any time, only if the time frame
of baking is at “ 0” position. By adjusting the end time of
baking to the current time, the set baking procedure can
be cancelled.
TIMER
The longest time frame can be set is 23 hours and
59 minutes. For setting time, press the mode button
” flashes,
repeatedly until the square symbol above “
and press “+ or - button until the desired time shows on
the display. After setting, the required time (hours and
minutes) the square symbol above the “
” begins to
flash. In addition, the time countdown begins to work.
When it reaches the set time, the square symbol above
the “
” flashes, and the alarm sounds. To cancel the
alarm press any button.
NOTE!
Once a function has been selected, setting the time
needs to be started within 5 seconds. If the power fails
unexpectedly all programmes and the set time will be
cancelled.
Once power has been restored “12:00” and the square
” will show on the display. You will
symbol above “
need to reset the time and any programmes required.
8
DAILY OPERATION OF YOUR OVEN
8%0)7&66
COOLING VENTILATION
In order to cool down the exterior of the appliance, this
model is equipped with a cooling fan, which comes on
automatically when the oven is hot.
When the fan is on, a normal flow of air can be felt exiting
between the oven door and the control panel.
NOTE!
When cooking is done, the fan stays on until the oven
cools down sufficiently.
USING THE LOWER HEAT WITH FAN MODE
This mode uses the lower heating element and
fan to circulate the air and is ideal for pizzas,
pastries and cakes. It is recommended for foods
that require more meat to be from the bottom of
the oven.
USING THE TOP HEAT MODE
This function uses the top .element only. Idea for
browning the top of food.
PRACTICAL COOKING ADVICE
USING THE GRILL
The oven offers a wide range of alternatives which allow
you to cook any type of food in the best possible way.
With time you will learn to make the best use of this
versatile cooking appliance and the following directions are
only a guideline which may be varied according to your
own personal experience.
This multifunction oven offers you 2 different grilling
modes.
OVEN MODES
THE OVEN LIGHT
Set dial “A” to the “
” symbol to turn it on. It
lights the oven and stays on when any of the
electrical heating elements in the oven come on.
USING THE CONVENTIONAL OVEN
This is traditional convection cooking using the
top and bottom elements and the heat is diffused
by natural convection. This mode is recommended
for foods that require the same temperature both
internal and external such as roast.
USING THE LOWER HEATING ELEMENT
Use this setting for browning the base of a variety
of dishes.
USING THE DEFROST MODE
In this mode only the oven fan comes on. This
mode is suitable for the quick thawing of frozen
foods. Thawing times vary depending on the
quantity and type of food to be defrosted.
USING THE TRUE FAN MODE
The rear circular element and the fan come on
and the heat is dispersed by forced convection.
This mode is suitable for roast joints when you
want it well cooked on the outside and tender in
the middle. The oven does not need any preheating when using this mode.
GRILL MODE
Placing the food under the centre of the grill
(situated on the 3rd or 4th shelf position from the
bottom) because only the central part of the top
heating element is turned on.
Use the bottom rack (1st from the bottom),
placing the grill pan provided to collect any
sauce and /or grease and prevent the same from
dripping onto the oven bottom. When using this
mode, we recommend you set the thermostat
to the highest setting. However, this does not
mean you cannot use lower temperatures, simply
by adjusting the thermostat knob to the desired
temperature.
FAN ASSISTED GRILL MODE
Setting “Fan assisted grill” is extremely useful for
grilling foods rapidly, as the distribution of heat
makes it possible not only to brown the surface,
but also to cook the bottom part.
Moreover, it can also be used for browning foods
at the end of the cooking process, such as adding
that gratin finish to pasta bakes, for example.
When using this mode, place the grid on the 2nd
or 3rd oven rack from the bottom (see cooking
table) then, to prevent fat and grease from
dripping onto the bottom of the oven and thus
smoke from forming, place a grill-pan on the 1st
rack from the bottom.
When using this mode, we advise you to set the
thermostat to 200°C, as it is the most efficient
way to use the grill, which is based on the use
of infrared technology. However, this does not
mean you cannot use lower temperatures, simply
by adjusting the thermostat knob to the desired
temperature
9
DAILY OPERATION OF YOUR OVEN
8%0)7&66
THE INFORMATION GIVEN IN THE FOLLOWING CHARTS IS INTENDED ONLY AS A GUIDE.
SELECT THE LOWEST TEMPERATURE QUOTED AND CHECK THE FOOD AT THE END OF THE
SHORTEST DURATION QUOTED.
Conventional
Cakes/Biscuits
Temperature °C
Conventional
Shelf Position
(Recommended)
from the bottom
Cooking
Time
Food
Temperature °C
in min.
Cake Mixture Desserts in Moulds
Shelf Position
(Recommended)
from the bottom
Cooking
Time
in min.
Roast beef,
approx. 1 kg
190 - 210
1
100 – 120
Beef fillet,
approx. 1 kg
200 – 220
1
45 – 55
Venison, approx.
1 kg
190 – 210
1
90 – 120
Pork joint,
approx. 1 kg
200 – 220
1
100 – 120
Pork joint,
approx. 2 kg
180 – 200
1
120 – 150
Sponge cake
150 – 170
1
60 – 70
Marble, nut cake
(tin)
150 – 170
1
60 – 80
Fresh fruit cake
(tray)
170 – 190
2
45 – 50
Flan base
170 – 190
1
20 – 25
Biscuits (tray)
170 – 190
2
20 – 20
Sponge cake
(3 to 6 eggs)
170 – 190
1
20 – 35
Ham joint,
approx. 1 kg
200 – 220
1
60 – 70
Swiss roll
180 – 200
1
12 – 16
Meat loaf,
approx. 1 kg
190 – 210
1
70 – 80
Veal, approx.
1.5 kg
190 – 210
1
100 – 120
Leg of lamb,
approx. 1.5 kg
220 – 220
1
90 – 120
Rack of lamb,
approx. 1.5
190 – 210
1
50 – 60
Poultry,
0.8 – 1 kg
190 – 210
1
60 – 70
Poultry, approx.
2 kg
190 – 210
1
90 – 110
Poultry, approx.
4 kg
180 – 200
1
150 – 180
Fish, whole,
approx. 1.5 kg
190 – 210
1
35 – 55
Short Pastry Dessert in Moulds
Tart / flan base
170 – 190
2
15 – 20
Streusel cake
170 – 190
2
45 – 55
Cheesecake
170 – 190
2
10 – 20
Apple pie
170 – 190
1
90 – 90
Apricot tart with
topping
170 – 190
1
55 – 75
Raised Dough Dessert in Moulds
Streusel cake
170 – 190
1
35 – 45
White bread
180 – 200
1
40 – 50
Pizza (tray)
190 – 210
1
35 – 45
Onion tart
180 – 200
1
25 – 35
Apple turnovers
160 – 180
2
25 – 30
Choux pastry,
Eclairs
180 – 200
2
25 – 35
Puff Pastry
190 – 210
2
15 – 25
Meringues,
Macaroons
120 – 140
2
25 – 50
Pre-heat the oven.
10
Pre-heat the oven.
DAILY OPERATION OF YOUR OVEN
8%0)7&66
True fan mode
Cakes/Biscuits
Temperature °C
True fan mode
Shelf Position
(Recommended)
from the bottom
Cooking
Time
Cakes/Biscuits
Temperature °C
in min.
Cake Mixture Desserts in Moulds
Shelf Position
(Recommended)
from the bottom
Cooking
Time
in min.
Raised Dough Dessert in Moulds
Sponge cake
150 – 170
1
60 – 70
Streusel cake
150 – 170
1
35 – 45
Marble, nut cake
(tin)
150 – 170
1
60 – 80
White bread
160 – 180
1
40 – 50
Fresh fruit cake
(tray)
150 - 170
Pizza (tray)
170 – 190
1
35 – 45
1
45 – 50
Flan base
150 – 170
1
20 – 25
Biscuits (tray)
150 – 170
1, 3
20 – 25
Sponge cake
(3 to 6 eggs)
160 – 180
1
25 – 35
Swiss roll
160 – 180
1
20-25
Short Pastry Dessert in Moulds
Tart / flan base
150 – 170
1
25 - 25
Streusel cake
150 – 170
1
45 – 55
Onion tart
170 – 190
1
35 – 45
Apple turnovers
150 – 170
1, 3
25 – 30
Choux pastry,
Eclairs
160 – 180
1, 3
30 – 40
Puff Pastry
170 – 190
1, 3
20 – 25
Meringues,
Macaroons
120 – 140
2
25 – 50
Poultry, approx.
4 kg
160 - 180
1
150 -180
Fish, whole,
approx. 1.5 kg
160 - 180
1
35 - 55
Cheesecake
150 – 170
1
70 – 90
Apple pie
150 – 170
1
50 – 70
Pre-heat the oven.
Apricot tart with
topping
150 – 170
1
55 – 75
Unless otherwise stated, the times given are for an oven which
has not been pre-heated.
Pre-heat the oven.
Unless otherwise stated, the times given are for an oven which
has not been pre-heated.
Food to be
grilled
Recommended
shelf level
from the
bottom
GRILL
Temperature
setting
FAN GRILL
Total grilling time in
min.
Temperature
setting
Total grilling time in
min.
Thin cuts
Steak
3 or 4
maximum
10-16
maximum
20-25
Chicken kebabs
3
maximum
20-25
maximum
23-27
Liver
3 or 4
maximum
8-12
maximum
12-15
Burgers
3 or 4
maximum
14-20
maximum
18-22
Sausages
3 or 4
maximum
10-15
maximum
9-13
Fish fillet
3 or 4
maximum
12-16
maximum
13-18
Trout
3 or 4
maximum
16-20
maximum
20-25
Cheese toast
3 or 4
maximum
7-9
maximum
5-8
1
maximum
50-60
maximum
60-85
1
maximum
100-120
maximum
95-100
Thicker cuts
Chicken
(approx. 1 kg)
Pork
(approx. 1 kg)
Turn half way through the grilling time.
Select the appropriate shelf level for the thickness of the food.
Use the 2nd shelf level from the bottom for "Fan grill".
11
CARE AND MAINTENANCE
8%0)7&66
WARNING
Always switch off the electricity supply before
performing maintenance work. In the event of a
fault, contact customer services.
DOUBLE POLE SWITCHED
FUSED SPUR OUTLET
FUSE
ON
USE A 30 AMP FUSE
CAUTION
Do not use hot water, dilutents, petrol, alcohol, kerosene,
washing powder, cleanser, alkaline detergent, acid,
chemical cloth, etc. for cleaning so as not to damage the
enamel coating and plastic. The appliance must not be
cleaned directly with water as this could cause rusting or
render the insulation less efficient.
The enamelled and stainless steel parts of the appliance
should be wiped clean using a damp cloth using the
minimum possible amount of soap and lukewarm water.
Do not use abrasive powders or corrosive substances
which could ruin the surfaces. Remember stainless steel
could tarnish and restoring these surfaces can be difficult.
Specialist stainless steel cleaners are available from major
supermarkets. After cleaning these surfaces should be
wiped with a clean cloth and lukewarm water to remove
any traces of detergent.
The inside of the oven should ideally be cleaned when the
oven is still warm using a damp cloth and the minimum
possible amount of soap and hot water. After cleaning the
soap should be removed using a clean damp cloth and hot
water. Dry the interior of the oven with a soft dry cloth
after cleaning.
Do not use abrasive powders, cleaners, sponges or acids
(lime scale remover) to clean the interior as these can
damage the enamel. If the interior is very difficult to
clean use a specialist oven cleaner. Follow closely the
instructions provided on the packaging.
WARNING!
DO NOT USE EXCESSIVE AMOUNTS OF WATER WHEN
CLEANING THE PRODUCT AND NEVER USE A STEAM
CLEANER TO CLEAN THE INSIDE OF THE OVEN.
If the oven is in use for an extended length of time
condensation may form. Once the oven has cooled remove
the condensation using a dry cloth.
12
HOW TO KEEP YOUR OVEN IN GOOD
CONDITION
Before cleaning your oven, or performing maintenance,
disconnect it from the power supply.
To extend the life of your oven, it must be cleaned
frequently, keeping in mind that
The enamelled or stainless steel parts should be washed
with lukewarm water without using any abrasive powders
or corrosive substances which could ruin them. Stainless
steel could get stained. If these stains are difficult to
remove, use special products available on the market.
After cleaning, it is advisable to rinse thoroughly and dry.
The inside of the oven should preferably be cleaned
immediately after use, when it is still warm, with hot water
and soap. The soap should be rinsed away and the interior
dried thoroughly. Avoid using abrasive detergents (for
example cleaning powders, etc.) and abrasive sponges for
dishes or acids (such as lime scale remover, etc.) as these
could damage the enamel. If the grease spots and dirt
are particularly tough to remove, use a special product for
oven cleaning, following the instructions provided on the
packet.
WARNING!
NEVER USE A STEAM CLEANER TO CLEAN THE INSIDE OF
THE OVEN.
If you use your oven for an extended period of time,
condensation may form. Dry it using a soft cloth.
There is a rubber seal surrounding the oven opening which
guarantees its perfect functioning. Check the condition
of this seal on a regular basis .If necessary, clean it and
avoid using abrasive products or objects to do so. Should
it become damaged, please contact the customer service
centre. We recommend you avoid using the oven until it
has been repaired.
Never line the oven bottom with aluminium foil, as the
build up of heat could compromise cooking and even
damage the enamel.
Clean the glass door using non-abrasive products or
sponges and dry it with a soft cloth.
CARE AND MAINTENANCE
8%0)7&66
HOW TO REMOVE THE OVEN DOORS
For a more thorough clean, you can remove the oven door.
To remove the oven door use the following instructions:
1. Open the door to the full extent.
2. Open the lever A completely on
the both hinges
3. Open the door to angle as
shown.
A
B
4. Close the door until the left & right hand
levers A are hooked to part B of the door
5. Withdraw the hinge hoods for
there position following arrow C.
To replace the door, reverse the
above procedure
C
REMOVING THE INNER PANE OF GLASS
1. Remove the top plate by unscrewing the 2 screws (A).
2. Gently pull out the inner panel of glass
G
A
A
Clean the glass with an appropriate cleaner. Dry thoroughly, and place on a soft surface. Now you can also clean the
inside of the outer glass.
To replace the glass reverse the procedure above.
13
CARE AND MAINTENANCE
8%0)7&66
REPLACING THE OVEN LAMP
WARNING!
Disconnect the appliance from the electricity supply, open
the oven door remove the oven shelves. During use the
appliance becomes hot. Care should be taken to avoid
touching heating elements inside the oven.
90’
Remove all internal shelves and shelf support guides from
the oven cavity, by applying downward pressure to Point A
and upward pressure to point B to release and guides.
To remove the glass cover, position thumb at top of glass
panel and exert a small amount of downward pressure and
the glass panel will pop off, ensure you use two hands for
this process to enable you to hold the piece of glass when
it is released.
Unscrew the old light bulb and dispose of it safely and
ecologically, change it for one as specified in the “Technical
data” and replace the cover.
A
B
14
INSTALLATION
8%0)7&66
Only a qualified person in compliance with the instructions
provided must install the appliance. The manufacturer
declines all responsibility for improper installation, which
may harm persons and animals and damage property.
INSTALLATION METHOD 1
CAUTION
Fix the remaining two support rails using 8 screws [Ø4mm
x 25mm] provided to the side of the oven,ensuring they
are level with the base of the oven.
Fix the two support rails using 8x screws [Ø4mm x 10mm]
provided, ensuring that they are level with the base of the
adjoining end panel.
The power supply to the appliance must be switched
off before any adjustments or maintenance work is
undertaken.
Prepare two uprights (A) (not supplied) from MFC/MDF
material, dimensions need to be W:30-50mm, L:650mm,
D:18mm
INSTALLATION OF BUILT-UNDER DOUBLE
OVEN
Connect to mains power supply ensuring the cable is not
bent (see electrical connection)
INSTALLATION METHOD 1
Secure theA oven in place (see page 14)
03
600
A
547
0
56
703
21
718
594
min
720 min
703
718
547
570
650
Fitting under the work top, between two units, a 600mm
gap is required for this installation.
720 min
Place theminoven on the metal support rails by lifting the
570 with the handle inserts located on the side of
appliance
the oven and position in place.
650
This product can only be fitted under the work surface and
to ensure that the built-in appliance functions correctly it
should be installed using one of the two methods shown:
03
600
600
594
0
56
21
INSTALLATION METHOD 2
Fitting under the work top in a new or existing oven
housing unit. Modifications to this unit will be required.
15
20
Support rail
41
15
20
41
Existing or new
600mm cabinet
15
INSTALLATION
8%0)7&66
INSTALLATION METHOD 2
ELECTRICAL CONNECTION
Remove the both upper shelf (A) and cross member
support (B) on the oven housing unit as shown. Cut the
bottom panel (C) of the oven housing as shown.
All installation work must be carried out by a competent
person or qualified electrician.
If required use support rails provided and screw onto side
of cabinet as shown in using 8x screws [Ø4mm x 10mm]
provided
Connect to mains power supply ensuring the cable is not
bent (see electrical connection)
Before connecting the mains supply ensure that the mains
voltage corresponds to the voltage on the rating plate
inside the cooker hood.
WARNING:
THIS APPLIANCE MUST BE EARTHED.
Place the oven on the metal support rails by lifting the
appliance with the handles located on the side of the oven
and slide into place.
Mains Supply could be connected to the Mains Voltage by
Direct Connection
Secure the oven in place (see Page 14)
WARNING
Make sure the fused spur outlet is
located in an accessible position.
DOUBLE POLE SWITCHED
FUSED SPUR OUTLET
DIRECT CONNECTION
FUSE
ON
USE A 30 AMP FUSE
If the appliance is being connected
directly to the mains an omnipolar
circuit-breaker must be installed with a minimum opening
of 3mm between contacts.
B
A
If the cable is damaged or to be replaced, the operation
must be carried out the by a qualified electrician with
dedicated tools to avoid any accidents.
50
C
50
The installer must ensure that the correct electrical
connection has been made and that it complies with wiring
diagram.
The cable must not be bent or compressed.
min
ELECTRICAL REQUIREMENTS
Any permanent electrical installation must comply with
the latest I.E.E. Regulations and local electricity company
regulations. For your own safety a qualified electrician or
contractor who is on the roll of the National Inspection
Council for Electrical Installation Contracting (NICEIC)
should undertake the electrical installation.
720 min
570
The cable must be checked regularly and replaced by
authorized technicians only.
547
703
718
04
600
Electrical Connection
594
0
56
Before connecting the mains supply ensure that the mains
voltage corresponds to the voltage on the rating plate
inside the appliance.
41
21
Support rail
WARNING:
THIS APPLIANCE MUST BE EARTHED
The appliance is supplied with a 3-core mains cable and
must be connected to the electricity supply via a double
pole switch having a 3mm minimum contact gap on each
connector.
16
INSTALLATION
8%0)7&66
A Switched Fused Connection Unit to BS 1363 Part 4 is
recommended
The fuse must be rated at 30 Amps.
The wires in the mains lead are coloured in accordance
with the following code:
Brown = L - Live
Blue = N - Neutral
Green and Yellow =
- Earth
VENTILATION
An air circulation slot that should be cut into the plinth if
fitted. See below for air circulation requirements.
It is essential when installing your oven there is adequate
air circulation around the appliance to ensure the correct
operation of the appliance. Inadequate air circulation will
greatly impair the operation of the appliance and can
affect surround cabinets due to the rise in temperature.
The connection point must be placed in a position adjacent
to the appliance so as to be readily accessible for an
engineer in the event of a breakdown.
Disconnect the appliance from the mains supply before
carrying out any kind of maintenance or cleaning.
10mm
FIXING THE DOUBLE OVEN
mm
2mm
200
Once the oven has been lifted into place insert the 4x
plastic washers into the holes located within the sides of
the metal casing of
the oven as shown
and secure with 4x
screws [Ø4mm x
25mm].
Also ensure that you
adjust the furniture
doors adjacent to the
sides of the oven so
there is a 5 - 7mm
gap between them,
otherwise heat
displaced from the
oven might damage
the furniture door.
10mm
Upper vent
THE APPLIANCE IS NOW READY TO USE.
17
TROUBLESHOOTING
8%0)7&66
WHAT SHOULD I DO IF THE OVEN DOESN’T
HEAT UP?
Check to see if one of the following actions resolves the
issue:
The oven may not be switched on. Switch the oven
on.
The clock may not be set. Set the clock (see section
“Setting the clock”).
Check to see if the required settings have been
applied.
A household fuse may have blown or a circuit breaker
may have tripped. Replace the fuses or reset the
circuit. If this happens repeatedly, call the Service
Centre.
WHAT SHOULD I DO IF, EVEN THOUGH THE
OVEN FUNCTION AND TEMPERATURE HAVE
BEEN SET, THE OVEN DOES NOT HEAT UP?
There may be problems with the internal electrical
connections. Call the Service Centre.
WHAT SHOULD I DO IF THE TIME DISPLAY IS
BLINKING?
There was a power failure. Set the clock (see “Setting the
clock”).
WHAT SHOULD I DO IF THE OVEN LIGHT DOES
NOT ILLUMINATE?
The oven light is faulty. Replace the oven light bulb (see
“Replacing the oven lamp the lamp”).
WHAT SHOULD I DO IF THE OVEN’S FAN IS
RUNNING WITHOUT HAVING BEEN SET?
Following use, the oven’s fan runs until the oven has
cooled down. Call the service centre if the fan continues to
run after the oven has cooled down.
THE GRILL DOES NOT HEAT UP PROPERLY?
The grill power is set to low, turn the temperature control
dial to maximum.
18
GUARANTEE
8%0)7&66
This appliance is covered by a full manufacturer’s 2 year
parts and 2 year labour guarantee and covers all parts and
labour costs associated with the repair of the appliance
in a domestic environment. We will repair any defect that
arises due to faulty materials or workmanship and use
genuine manufacturers parts.
All claims must be supported with the original receipt or
other reasonable proof of purchase.
If, during the guarantee period, the appliance becomes
irreparable as agreed by the engineer approved by
Apelson Appliances UK Ltd then we reserve the right, at
our discretion, to exchange the defective product with
a replacement appliance at Apelson Appliances UK Ltd
sole cost. If the same product is no longer available an
alternative will be offered with the same functions as the
faulty item.
After an appliance has been repaired or replaced any
remaining balance of the Apelson Appliances UK Ltd
guarantee will be valid and any further call outs during this
prescribed period will be covered by Apelson Appliances
UK Ltd on the replacement appliance.
Should any person other than an authorized engineer
modify or attempt to repair the appliance then the
warranty will be invalid.
The guarantee applies to the UK mainland, Scotland and
Ireland but is not transferable between EU countries.
This guarantee is non-transferable to any other person or
product.
The guarantee is covered by UK law and is in addition to
and does not diminish your legal rights.
EXTENDED PARTS ONLY WARRANTY
As testimony to our commitment to you as a valued
customer of Apelson Appliances UK Ltd, we will offer you
an additional 3 years parts warranty absolutely free.
If during the extended parts warranty period the
appliance fails and it is considered uneconomical to repair
our Customer Service Department will offer you the
opportunity to purchase the same or equivalent model at a
discounted price.
All parts supplied free of charge under the extended
warranty must be fitted by our approved engineers and
will be subject to a call out charge to fit the part.
EXCLUSIONS TO THE GUARANTEE
This guarantee does NOT cover:
Appliances that have been damaged or neglected as a
result of failure to store, assemble, install, use or care
of the products in accordance with the manufacturer’s
instructions - Apelson Appliances UK Ltd will not accept
responsibility under this guarantee if a product is damaged
or becomes defective due to, misuse, neglect, wilful or
accidental damage or act of god.
Normal wear and tear.
Consumable items such as carbon filters and bulbs.
Claims arising from non-domestic use or commercial
environment.
Any gas appliance not fitted by a gas safe qualified
installer.
If no fault is found then Apelson Appliances UK Ltd
reserves the right to charge for the call out at the going
rate of £55.00 plus VAT.
In the course of the service work carried out it may be
necessary to remove the built in appliance from its fitted
position. If the appliance is glued, grouted or tiled in such
a manner that it cannot be removed, it is the responsibility
of the customer/installer to remove and reinstall the
appliance to facilitate the repair.
This Guarantee does not affect your statutory rights.
The guarantee is offered by Apelson Appliances UK Ltd,
8QLW1RUPDQG\/DQGLQJV3RSH6WUHHW&DVWOHIRUG:$$*
19
USEFUL CONTACTS
8%0)7&66
USEFUL CONTACTS
TECHNICAL SUPPORT
Apelson Appliances UK LTD
Phone: Email: [email protected]
Web: www.myspareparts.co.uk
SPARES
Apelson Appliances UK LTD
Phone: 0 800 1128
Email: [email protected]
Web: www.myspareparts.co.uk
SERVICE AND GUARANTEE
Apelson Appliances UK LTD
Phone: 044 800 1128
Email: [email protected]
Web: www.myspareparts.co.uk
20
APELSON APPLIANCES UK LTD,
Unit 3 Normandy Landings
Pope Street
Castleford
WF6 2AG