1
MRO Management 6.0 Users Manual
by Scanlon Associates
Version 6.0.70725
I
6.0.70725
Table of Contents
Part I Main Screen
1 Work Area
2
................................................................................................................................... 2
2 Browse Work ...................................................................................................................................
File
2
3 Toolbar
................................................................................................................................... 2
4 Result Data Tab
................................................................................................................................... 3
5 Edit Collector ...................................................................................................................................
Names
4
6 Edit MRO Names
................................................................................................................................... 5
7 Participant Detail
................................................................................................................................... 5
8 Processing Flags
................................................................................................................................... 6
9 MRO Verification
................................................................................................................................... 6
Part II File Menu
8
1 File Menu Overview
................................................................................................................................... 8
2 Import Lab Results
................................................................................................................................... 8
3 Validate Results
................................................................................................................................... 9
4 Automatically...................................................................................................................................
Adding Participants to DrugPak
9
5 Batch Verification
...................................................................................................................................
of Negatives
10
6 Export Verified
...................................................................................................................................
Results
11
Part III Reports Menu
13
1 MRO Worksheet
................................................................................................................................... 13
2 MRO Management
...................................................................................................................................
Result List
13
3 Exceptions Report
................................................................................................................................... 13
4 Results Exported
...................................................................................................................................
Audit Trail
13
5 New Participants
...................................................................................................................................
Audit Trail
14
Part IV Tools Menu
16
1 Pack Data Files
................................................................................................................................... 16
2 Purge Transmission
...................................................................................................................................
Outbox by Date
16
Part V Preferences Menu
18
1 Preferences ...................................................................................................................................
Menu
18
2 Global Settings
................................................................................................................................... 18
General Options
.......................................................................................................................................................... 18
Import Options
.......................................................................................................................................................... 18
Validation Options
.......................................................................................................................................................... 19
Required Fields
.......................................................................................................................................................... 20
Contents
II
"New Participant"
..........................................................................................................................................................
Options
20
Duplicate Specimen
..........................................................................................................................................................
Options
21
Part VI Help Menu
23
1 Help Menu ................................................................................................................................... 23
II
Part
I
Main Screen
1
Main Screen
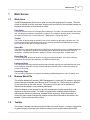
1.1
Work Area
2
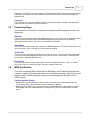
The MRO Management Work Area is what you see after logging into the system. The main
screen is referred to as the "work area" because this is where all of the imported records are
displayed individually, to be reviewed or edited.
Filter Panel
This panel contains controls for managing filtered data sets. It contains a list which displays the current
filter, and buttons for adding or clearing filter conditions. The visibility of the filter panel is controlled by
the setting in Preferences > User Preferences > Main Module > Show Filter Panel.
Toolbar
The Toolbar is aligned along the left side of the screen, bordered on the right by the work area. The
Toolbar contains buttons that provide quick access to items otherwise accessible through the Main
Menu.See the Toolbar topic for usage instructions.
Status Bar
The status bar is aligned along the bottom of the screen, bordered at the top by the MRO Management
client area. The status bar contains several display panels that provide the user with a variety of
information. Including Data Set state, number of records, current user name, and a hint bar.
Result Data Tab
The Result Data tab provides an interface to edit typical result information, such as the individual
substances, the collection site, laboratory, and MRO-Verification data.
Participant Detail
The Participant Detail page displays supplemental information regarding the participant and the result.
Some participant information may be imported with the results and used to create new participant
records, if necessary.
Processing Flags
The Processing Flags data is controlled automatically by MRO Management, and is for display only.
1.2
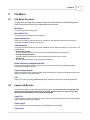
Browse Work File
This window displays all records in MRO Management in a data grid. All records in the work
area are always accessible in the Browse Work File dialog (i.e., the browser is not affected
by the active filter on the main screen). The columns in this grid can be resized and
repositioned according to your personal preferences.
When the browser is first opened, the grid will automatically find the record which was
displayed on the main screen. The data in this grid can be modified without validation
(although the data will be always be validated before exporting). When the browser is
closed, the main screen interface will attempt to locate the record which was active in the
browser; if the record meets filter criteria.
1.3
Toolbar
The toolbar is aligned vertically along the left side of the main screen. It contains a sequence
of graphic buttons to provide quick access to common tools and processes within MRO
3
6.0.70725
Management.
Validate Results
This button provides access to various Validation options, which will appear on a pop-up menu. You
can also access this feature via the File menu. The options include:
· Current Record Only
Run the validation process only on the record currently displayed in the work area.
· Currently Filtered Records
Run the validation process only on the records which meet the current criteria.
· All Records
Run the validation process on all records in the work area.
Print Worksheet
When you would like to work with one or more results on paper, click this button to display the Print
MRO Worksheet dialog. You can also access this feature via the reports menu.
Browse Work File
When you would like to view or edit work area records in a "data grid" format, click this button to
display the MRO Work File Browser. You can also access this feature via the Tools menu.
Import Results
When you are ready to import a new set of results from your laboratory, click this button to display the
Translation Engine Control Panel.
Export Verified Results
When one or more records have been completely MRO-Verified and have no exceptions, select this
menu item to display the Export to DrugPak window. You can also access this feature via the File
menu.
Verify Negative Results
After you have imported records into the work area, select this menu item to display the Batch
Verification of Negatives window. You can also access this feature via the File menu.
Exit
When you are done working in MRO Management, click this button to close the application. You can
also access this feature via the File menu.
1.4
Result Data Tab
The Result Data page on the main screen provides an interface for editing a result before
exporting it to DrugPak. Familiar quick-entry and code-lookup techniques make this page as
easy to use as the results rage in the DrugPak main module. Typically, the information in
this section is already complete and accurate by the time it has been imported from the lab.
Notification Date & Time
Enter the date and time that the participant was notified, if known. Click on the down arrow to bring up
the calendar pop-up. Today's date will automatically be chosen, but you may choose any date
(assuming it is today, or prior). Enter the time that the participant was notified, if known. If you enter it
in 24 hour format, the AM or PM will automatically be entered (for example, 8 for 8 AM, and 15 for 3
PM)
Main Screen
4
Collect. Site
Enter the code for the location where the specimen was collected, or click on the > button to open the
Find Collection Site window. The code entered here must exist in DrugPak for entry to be accepted.
Collected by
Enter, or select the name of the person who collected the participant's specimen, if known. The
drop-down list will show any and all collector names associated with the collection site chosen. If you
wish to add, delete, or edit a collector name, click on the > button to bring up the Edit Collector Names
window.
Laboratory
Enter the code for the laboratory that performed the analysis, or click on the > button to bring up the
Find Laboratory window. The code entered here must exist in DrugPak for entry to be accepted.
MRO Name
Select the name of the Medical Review Officer who assumes supervisory responsibility for this test. To
add, delete, or edit names in the list of MRO names, click the > button to open the Edit MRO Names
list window.
For negative result records, this value will be automatically completed by the Batch Verify Negative
Results process. Double-click in this field to quickly enter the last value entered here.
Date Verified
Enter the date the MRO verified the validity of this result record. This information does not apply to
Alcohol records. Double-click in this field to quickly enter the last value entered here. You may also
enter the date in the mm/dd/yyyy format, or enable the calendar pop-up by clicking on the down arrow.
The calendar will automatically choose today's date. You can, however, change it to any date you like
(dates in the future are not allowed).
Disposition
Enter the Disposition code to describe the the action taken as a result of the test status. Choose
the appropriate disposition by pressing the sown arrow or by pressing the > button to Find
Disposition Code window.
It is not uncommon for the disposition to be an unknown value for positive, dilute, or untestable
specimens, until the employer is notified of the result. This field may be required prior to exporting to
DrugPak, based on the Global Settings.
1.5
Edit Collector Names
This window allows you to add, delete, and edit collector names.
· The collector names are associated with a collection site
· To add, delete, or edit a collector name, you must first select the appropriate collection
site.
· A test result's collection site will determine which collector names (if any) will be available
in the results window collector names menu
5
1.6
6.0.70725
Edit MRO Names
This window allows you to add, delete, and edit MRO names. You can also assign a
signature image to an MRO name.
· To add an MRO name to DrugPak, press the plus (+) button, enter the name, and press
the check box button
· If you wish to add an image of an MRO's signature (to appear on result letters), select the
appropriate MRO name from the list, press the Select Signature Image button, and select
the correct image. Be careful that dimensions of the signature image file is not much larger
than the image itself. Consult your image manipulation documentation or IT staff regarding
image/canvas size.
· If you wish to remove a signature image from an MRO name, select the appropriate MRO
name from the grid, and press the Clear Signature Image button.
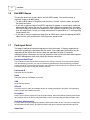
1.7
Participant Detail
This page of additional import data appears on the main screen. It displays supplemental
information regarding the participant and the result. Some participant information may be
imported with the results and used to create new participant records, if necessary.
Additional System information can help you determine when a particular result was imported
into MRO Management, and which import file the data came from.
Participant Detail Panel
The information in this section can be acquired from a variety of sources. It may be imported directly
from the laboratory's text file, or it may be retroactively garnered from the corresponding participant
record in DrugPak. For Pre-Employment tests, the information in this panel may be inserted into a new
participant record created during the validation process.
Participant ID
Participant ID from DrugPak.
Name
Participant name in First Middle Last format.
SSN
Social Security Number
Other ID
This value may be used to automatically identify an existing participant in DrugPak, if the participant
has not already been matched by SSN.
Occupation
Press F2 in this field to display the Find Occupation dialog. When automatically inserting a participant
into DrugPak, this value will be used preferentially over the corresponding participant template value.
Operating Administration
For DOT tests, select the appropriate operating administration from the list. This field is not required if
the participant already exists in DrugPak and that record has an operating administration specified.
Home Base
Main Screen
6
Right-click or press F2 in this field to display the Find Home Base dialog. When automatically inserting
a participant into DrugPak, this value will be used preferentially over the corresponding participant
template value.
License #
This value may be used to automatically identify an existing participant in DrugPak, if the participant
has not already been matched by SSN or Other ID.
1.8
Processing Flags
The information in this section is controlled automatically by MRO Management, and is for
display only.
Record #
This number is automatically assigned by MRO Management. This number is used by the Exceptions
report to uniquely identify a result in the MRO Management system (because other identifying
information may be missing). This value is not transmitted to DrugPak.
Import Date
This value is the date the record was imported into MRO Management. This is an indexed field, so you
can sort records in order. This value is not transmitted to DrugPak.
Archive File
This value is the name of the file that the current result came from. This may not be the original name
of the file, because MRO Management will rename files to ensure a unique name. Archived files are
located in the ...\dp50\OUTBOX directory.
Error Count
This value indicates the number of exceptions found by the validation process. This is an indexed
field, so you can sort records according to how many problems they have.
1.9
MRO Verification
A record is considered MRO-Verified when its MRO Name and Verification Date fields are
complete. Negative/Canceled result records can be verified as a group, while Positive result
records must be verified individually. A record cannot be exported to DrugPak until it is
"MRO-Verified."
Verifying Positive Results
· Double-click on the Verification Date field (if blank) in the Work Area to automatically insert the
current system date or press the down arrow top display the calendar
· Manually enter an MRO name, or double-click on the MRO Name field to automatically insert the
default MRO name (the default MRO name is assigned every time you manually enter an MRO
name)
Part
II
File Menu
2
File Menu
2.1
File Menu Overview
8
The file menu provides quick access to some of the main features of MRO Management.
Each of these menu items is also represented on the toolbar.
Work Area
This options opens the Work Area.
Brows Work File...
This option opens the Brows Work File window.
Import Lab Results
When you are ready to import a new set of results from your laboratory, select this menu item to
display the Translation Engine Control Panel.
Validate Results
This menu item provides access to various Validation options, which will appear on a sub-menu. The
options include:
· Current Record Only
Run the validation process only on the record currently displayed in the work area.
· Currently Filtered Records
Run the validation process only on the records which meet the current criteria.
· All Records
Run the validation process on all records in the work area.
Batch-Verification of Negative Results...
After you have imported records into the work area, select this menu item to display the Batch
Verification of Negatives window.
Export Verified Results...
When records have been completely MRO-Verified and have no exceptions, select this menu item to
display the Export to DrugPak window.
Exit
When you are done working in MRO Management, select this menu item to close the application.
2.2
Import Lab Results
Use this menu option to select and import data from lab(s). It is up to the user to coordinate with
the lab or labs regarding the acquisition of lab data. Once the data is on the user's system,
then Scanlon Associates can offer technical assistance.
Setup Tab
These settings are meant for advanced users. Please consult Scanlon Associates' Technical Support
staff for assistance with these settings.
Select Layout
Choose the lab layout that corresponds to the data that you are importing.
Select Files
9
6.0.70725
Pressing this button will open the folder displayed in the box below.
Select all files
Pressing this button will select all the files in the folder displayed at the right. (Press the folder icon to
navigate to a different folder , if necessary.)
Include Subdirectories
Uncheck this box to exclude all files in directories within the folder displayed above.
Translate immediately after selecting files
Check this box to skip the Translate step (i.e., after selecting a file, the translation process will begin
immediately.)
2.3
Validate Results
An automated data processing system must ensure that the data it handles is valid and
complete. The Validation process performs numerous checks on each result record to make
sure that all required information is complete. If/when MRO management runs into a
problem (missing/invalid data), the validation process reports an "exception." If a result
record has any exceptions, then it cannot be exported to DrugPak.
Validation
The validation process performs numerous checks to ensure the integrity of your data. Some example
include making sure that all of the provided codes (e.g. test status, company ID, test type, laboratory,
collection site, disposition, etc) can be found in the DrugPak database. The Validation process can be
run upon demand via the Toolbar on the main screen, or via the File | Validate menu option. However,
it is also run automatically at two important stages:
· Importing results - before approving records for addition to the work area, records must be validated.
Sometimes the validation process will reveal problems that can be fixed in the Translation Engine. It
is much better to fix such problems in the translation Engine than to import a hundred or more
records all sharing the same problem.
· Exporting results - records are always re-validated immediately before exporting to DrugPak. This is
the most important step for performing Validation. This ensures that only the highest-quality records
are sent to DrugPak.A record will not be exported if it is found to have any exceptions.
Identifying Participants
One of the most important steps in the validation process is participant identification. Every result in
DrugPak must be associated with a specific DrugPak Participant ID. Typically, the results sent by your
laboratory will not include the DrugPak Participant ID. For that reason, the validation process will use
several other pieces of information to try to locate the proper participant in DrugPak. These include:
company ID, participant ID, Social Security/Social Insurance number, "Other ID," and driver's license #
If a participant record cannot be located based on any combination of the above fields, then MRO
Management may automatically add the participant to DrugPak. If the participant cannot be
automatically added to DrugPak, then an exception will be reported with an explanation of the problem.
2.4
Automatically Adding Participants to DrugPak
During the Validate Results process, if a participant cannot be located in DrugPak, a
participant record can be automatically added to the DrugPak database under several
conditions:
File Menu
10
Validation was performed in the Work Area
Participants will not be automatically added to DrugPak when Validating from within the Translation
Engine Control Panel. This is because the Translation Engine is designed to have no impact on your
working data set until you approve the records.
Valid SSN:
Social Security Numbers are reformatted upon every validation. The SSN field must have nine (9)
numeric characters in it. Punctuation is permitted, but unnecessary; the SSN will be re-punctuated
automatically.
Valid Company ID:
If a valid Company ID has not been provided by the Translation process, then you will be prompted to
select one from a list.
Qualifying Test Type:
The result record's test type must be included in the Auto Test-Type Trigger section of Preferences >
Global Settings > MRO Management > "New Participant" Options. By default, only PRE
(pre-employment tests) is included as an auto test-type trigger, but you may more test types.
When the validation process encounters a result record whose participant record is not on file and
whose test type is included as a test-type trigger, a window will appear, asking you to confirm the
addition of the participant. The window will display the imported SSN, as well as the imported name
and company ID (if any). If a company ID has not been provided by the Translation process, you must
select the appropriate Company ID from a lookup list. You are provided four options which you can
select by clicking the buttons on the bottom of the window:
· Yes: Adds a participant record to the displayed company, using the currently displayed participant
data. Each non-existent participants with qualifying test types belonging to the same company will
prompt the user to add that participant.
· Add All: Adds participant records to the displayed company, using the currently displayed participant
data. All other non-existent participants with qualifying test types belonging to the same company will
be automatically added as they are encountered, without user input.
· No: Records an exception indicating that this pre-employment participant is not on file and has not
been automatically added to DrugPak. You will be prompted again when the next non-existent
pre-employment participant is encountered.
· Skip All: Records an exception indicating that this pre-employment participant is not on file and has
not been automatically added to DrugPak. Similar exceptions will be recorded for all other
non-existent pre-employment participants belonging to the same company, without user input.
Depending on the settings in the appropriate company (in DrugPak: Companies window >
Participant/Result Options tab), the participant template may be used to supplement the new
participant record. If/when a participant record is automatically inserted into DrugPak, identifying
information will appear on the New Participants Audit Trail. You should use the New Participants Audit
Trail later to locate the new participant records and complete the pertinent demographic information.
2.5
Batch Verification of Negatives
Use this feature to verify multiple negatives at once. Enter the MRO Name and Verification
Date in the fields provided; these values will be automatically inserted into each record in the
work area which is eligible for automatic verification.
Following are the prerequisites for automatic verification of a result record:
· No other users should be modifying MRO Management data files
· Records with positive results will not be automatically verified
11
6.0.70725
· The result record must not have been previously verified
· Records with validation exceptions will not be automatically verified
2.6
Export Verified Results
The final step in processing imported result records is to export the verified results to
DrugPak. Select main menu option File | Export Verified Results to display the Export
Verified Results window.
Following are the prerequisites for the export of a result record:
· The result record must have an MRO verification date and MRO name
· The result record must no exceptions
To ensure the integrity of the DrugPak RandSel system, it is not possible to export a result record with
a test type of RND unless a corresponding RND record already exists in DrugPak. If you anticipate
receiving results from random selections generated outside of DrugPak, then you may specify a
substitute random selection code (such as RAN). Enter the substitute code in the field provided on the
Export Verified Results dialog; the code must already exist in the DrugPak Test Types file. If the export
procedure cannot locate a suitable result record to populate with results, it will automatically insert a
new record, replacing the RND test type code with the code you have specified. If you do not
anticipate receiving results from random selections generated outside of DrugPak, then you should
leave the Substitute RND Code field blank.
A status screen will tally the records exported, unverified records, records skipped by the user, and
records with exceptions. When the export is complete, an audit trail will print, identifying all the
exported records, displaying the Company ID, Batch #, Participant ID, and other supporting
information.
Part
III
13
6.0.70725
3
Reports Menu
3.1
MRO Worksheet
The MRO Worksheet is a report which has been designed to assist in the MRO-Verification
of positive results. Click the Worksheet button on the Work Area tool bar to print a
worksheet for the currently displayed result. To print multiple worksheets, select menu
option Reports | MRO Worksheet. The MRO Worksheet dialog offers a variety of options to
determine which worksheets will print:
Only print "current record" from the work area
Check this box to print only the current record in MRO management.
Company Scope
Select Single Company Only, Consortium, or All Companies
Print Only Unverified Records
When this box is unchecked, records which have both an MRO Name and a Verification Date will be
excluded from the report.
Print Positive/Refused/Canceled/Not Performed/Unknown Results
Check the boxes of the result statuses which you would like to be included MRO Worksheet.
3.2
MRO Management Result List
This report lists results not yet exported from MRO Management to DrugPak.
Company Scope
Select Single Company Only, Consortium, or All Companies
Start/End Date
Select a range of result collections dates to include in the report (or leave the dates blank to print all
records).
3.3
Exceptions Report
The Exceptions Report is a convenient way to reconcile irregularities found by the validation
process. Each record provides identifying information such as record number, Company ID,
SSN, Name, Specimen ID, Lab code, source file, and import date. Two of the result memos
are listed side by side: the Exceptions memo and the Internal Comments field. Often the
Internal Comments field will store information which can help reconcile the exceptions.
When printing the Exceptions Report during the translation process, it is usually desirable to
print no more than one page of the report at a time. This is because exceptions reported
during the Translation process are usually "code-matching" exceptions which may be
repeated many times, so subsequent pages are often redundant. Instead it is sufficient to
correct the code matching problems reported on the first page, and then retranslate.
3.4
Results Exported Audit Trail
This report is useful for finding out details about results that have been exported to DrugPak.
Reports Menu
14
Company Scope
Select Single Company Only, Consortium, or All Companies
Start/End Date
Select a range of result collections dates to include in the report (or leave the dates blank to print all
records).
3.5
New Participants Audit Trail
This report is useful for finding out details about participants that have been automatically
added to DrugPak by MRO Management.
Company Scope
Select Single Company Only, Consortium, or All Companies
Start/End Date
Select a range of result collections dates to include in the report (or leave the dates blank to print all
records).
Part
IV
Tools Menu
4
Tools Menu
4.1
Pack Data Files
16
If you delete a record from a data file, the record is not actually deleted. Instead, each
record is internally marked as having been deleted. It becomes unusable, but the record
continues to take up physical space in the file. After many such deletions, your data files
take up more space than they should and the performance of the system begins to
degrade.
· To keep your system running at peak efficiency, pack and index your files periodically.
· Since this process rapidly accesses all of a company's records, no other users may be
accessing this application.
· If you are running this software on a network, you should notify your coworkers when you
are about to perform this procedure.
· Uncheck the Reindex only check box in order to pack and index (with the box checked, the
data files will be reindexed, but not packed.)
4.2
Purge Transmission Outbox by Date
Use the Purge function to remove previously imported MRO Management data files
(...scanlon\dp50\outbox directory). After using this utility, you should run the Pack and Index
utility from the Tools menu.
Purging Cutoff Date
Enter a date representing the earliest record you would like to keep. Choose this date carefully.
Records dated prior to this date will be deleted from the system.
Part
V
Preferences Menu
5
Preferences Menu
5.1
Preferences Menu
18
No user preferences are available for MRO Management.
5.2
Global Settings
5.2.1
General Options
These settings control general settings within MRO Management
Only MASTER Users may Delete Records
Enabling this option will disallow any user other than the MASTER user from deleting records from
MRO Management.
Automatically Pack after export
To keep your system running at peak efficiency, pack your files periodically. The main MRO
Management data file sees a lot of through-traffic. Records enter the system and are deleted daily, so
you will need to pack the MRO Management data files more frequently than you may need to pack
your other systems.
If you delete a record from a data file, the record isn’t physically deleted. Instead, each record is
internally marked as being deleted. It becomes unusable, but the record continues to take up physical
space in the file. After many such deletions, your data files take up more space than they should and
the performance of the system begins to degrade.
Since this process rapidly accesses all of MRO Management's records, no other users may be
accessing this application. If you are running this software on a network, you should notify your
coworkers when you are about to perform this procedure.
Construct Batch Numbers from
The batch number for each record in MRO Management (except RND tests) will be created based on
your choice of System Date, Collection Date, MRO Verification Date, or Import Date.
5.2.2
Import Options
These settings control the way MRO Management behaves when adding translated records
into the work area.
"Get Results" Command Line
This field stores the command that will be executed when the user selects the Import Lab Results
option from the File menu or Toolbar. This option is useful for integrating MRO Management with third
party communication software.
Importing "Duplicate" Specimen IDs
This setting controls how the system will behave if a record is imported with the same Specimen ID as
a record that already exists for the same participant in the MRO Management work area. The options
are:
· Overwrite Existing record
The record in the work area will be overwritten with any data provided in the new record, without
19
6.0.70725
notifying the user. Blank fields from the newer record will not replace data in the old record.
Additionally, memo field data ("comments") from the new record will be added to end of any memo
field data in the old record.
· Insert the new "duplicate" record
A new record will be inserted into the MRO Management work area, without notifying the user.
· Prompt user for action (overwrite / insert)
The user will receive a message warning them about the duplicate information. The user can then
decide whether to update the existing record, or to insert an entirely new record.
Automatically revalidate record when adding to the Work Area
This setting will revalidate all records when adding to the work area.
5.2.3
Validation Options
These settings control the way the behavior of the validation process.
If MRO and DP Participant Names disagree
You have the choice of Ignoring the Difference, Updating MRO Management with DP Value (assuming
the name in DP is correct), or Updating DP with MRO Value (assuming the name in MRO
Management is correct).
If MRO and DP home bases disagree
You have the choice of Ignoring the Difference, Updating MRO Management with DP Value (assuming
the home base in DP is correct), or Updating DP with MRO Value (assuming the home base in MRO
Management is correct).
Discard numeric names
This setting will discard any name that is made up of numbers, or a name preceded by any number.
Auto MRO-Verify DOT Negatives if record has no exceptions
This setting will automatically insert today's date in the Date Verified field for negative DOT tests that
have no exceptions.
Auto MRO-Verify Non-DOT Negatives if record has no exceptions
This setting will automatically insert today's date in the Date Verified field for negative non-DOT tests
that have no exceptions.
Auto-enter collection site if blank.
This setting will automatically insert the collection site - based first on the participant's home base
default, then on the company's default, then on the global default collection site. If none of the three
has a default collection site, nothing will be automatically entered.
Special behavior for Random (RND) results
Examine randoms in only (??) days
This number tells MRO how many days prior to the collection date to look for random (RND) tests. It is
set to 90 days by default, since most users pull randoms every quarter, but you may change it to best
suit your needs.
Perform Global RND checking when SSN is available.
Check this box to search for open randoms in all companies. To search just the selected company,
uncheck this box.
Substitute RND code.
This is the code used for tests that were randomly drawn outside of DrugPak - RAN is the most
appropriate code to use, however, you may create your own, and use it.
Preferences Menu
20
Default Sample Type to "Urine" if blank.
If the imported data has not supplied a sample type, this function will automatically change the type to
urine.
Record an exception if a DOT test has a non-DOT panel.
Based on your company's default DOT panel, then your global default DOT panel, if the test in MRO
has a different panel, an exception will occur.
Search Internal Comments for "Dilute" / "Substituted" trigger text.
With this function enabled, MRO Management will search the internal comments for the words "Dilute"
and "Substituted." If either word is found, the corresponding check box will be checked.
Search Result Letter Comments for "Dilute" / "Substituted" trigger text.
With this function enabled, MRO Management will search the result letter comments for the words
"Dilute" and "Substituted." If either word is found, the corresponding check box will be checked.
Prohibit future dates.
With this function enabled, MRO Management will create an exception if either the collection date or
the MRO verification date is AFTER the system date.
Record exception when participant is terminated
Options include:
· Never record exception
· Always record exception
· Record exception only if not pre-employment test. (This last option is useful when you have chosen
to automatically terminate participants when auto-added through MRO Management).
Record an exception if alcohol result is positive without >.02 or >.04 specified
Check this box to permit a "P" positive result for Alcohol. Uncheck this box to require entry of Stage 1
(>.02) or Stage 2 (>.04) for positive results.
Record an exception if matching random test in DrugPak has a different DOT status
Check this box to have MRO Management record an exception when the DOT status of a random test
in MRO Management does not match the DOT status of the corresponding test in DrugPak.
5.2.4
Required Fields
Use these check boxes to determine which fields are required before a test can be exported
to DrugPak.
5.2.5
"New Participant" Options
It is very common for a result to be reported to MRO Management before the Participant has
been entered into the DrugPak system. A perfect example of this is for pre-employment
tests. To make things easier, MRO Management can automatically add participants to
DrugPak for you. MRO Management will only add a participant to DrugPak if it has some
valid form of unique identification, such as a Social Security number, driver's license #, or
"Other ID" value. The result record must also be of the correct test type, such as
pre-employment. Use this page to manage the list of test types that will permit a participant
to be automatically added to DrugPak.
Auto-Add Participants
When adding participants, Prompt User, Automatically Add Participants, Never Add Participants
21
6.0.70725
Auto-Add Test Type Triggers
This box contains a list of all test types (if any) that will create a new participant in DrugPak when one
has not been found for a result in MRO Management.
Add Test Type
Click this button to display the Find Test Type dialog and select a test type to add to the list.
Remove Test Type
Click this button to remove the highlighted test type from the list of test type triggers.
"Include in randoms" Status
Never include in randoms if result is non-negative
Check this box to override the "Obey participant template's Include in Randoms" and "Always mark
Include in Randoms" options in the drop-down menu.
When adding participants
· Obey participant template's "Include in Randoms"
· Never mark "Include in Randoms"
· Always mark Include in Randoms"
Active/Terminated Status
Never include in randoms if result is non-negative
Check this box to override the "Always mark "Active" option in the drop-down menu.
When adding participants:
· Never mark "Active"
· Always mark "Active"
5.2.6
Duplicate Specimen Options
These options allow you to set the conditions that will warn of duplicate specimen IDs.
Part
VI
23
6.0.70725
6
Help Menu
6.1
Help Menu
Contents
Displays the contents view of the MRO Management Help file.
Search
Displays the keyword index of the MRO Management Help file.
Print User's Manual
Print the PDF version of the users manual. (Free) Adobe Acrobat reader is required:
http://www.adobe.com/products/acrobat/readstep2.html)
Register
Displays the registration dialog, to permanently enable the software or renew a software lease.
DrugPak.com
This will launch your default web browser and take you to the main DrugPak page.
Program Updates
This will launch your default web browser and take you to the DrugPak updates page.
About
Display the MRO Management About window for important version and license information. You can
also click on the underlined "Data Dir" or "Application Dir" paths to open the directory in the Windows
Explorer.