1
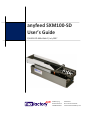
anyfeed SXM100-SD User’s Guide P/N 002-575-000-A Edit 0 / July 2007 flexfactory ag Giessenstrasse 15 CH-8953 Dietikon Switzerland Phone +41 44 774 55 66 Internet www. flexfactory.com Table of Contents Inhalt 1 2 3 Overview ..................................................................................................................................................... 5 1.1 Introduction ........................................................................................................................................ 5 1.2 About Your anyfeed SXM100-SD......................................................................................................... 5 1.3 Material Checklist................................................................................................................................ 5 1.4 Other Items You Need ......................................................................................................................... 6 1.5 Dangers, Warnings, Cautions, and Notes ............................................................................................ 6 1.6 Sound Emissions .................................................................................................................................. 6 1.7 Working Areas ..................................................................................................................................... 7 1.8 Pinch Points ......................................................................................................................................... 8 1.8.1 Pinch Points on the anyfeed SXM100-SD .................................................................................... 8 1.8.2 Pinch Points in combination with surrounding equipment ........................................................ 9 1.9 Qualification of Personell .................................................................................................................... 9 1.10 Protection Against Unauthorized Operation ....................................................................................10 1.11 Safety Aspects while performing Maintenance and Repair ..............................................................10 1.12 Intended Use of the anyfeed SXM100-SD .........................................................................................10 1.13 Risks Due to Incorrect Installation or Operation ...............................................................................11 Installation.................................................................................................................................................12 2.1 Introduction ......................................................................................................................................12 2.2 Installation procedure .......................................................................................................................13 2.3 Verifying the Installation ...................................................................................................................16 2.4 Troubleshooting if feeder does not respond or work properly ........................................................17 Serial Communication ...............................................................................................................................18 3.1 Conventions used to describe serial communication .......................................................................18 3.2 anyfeed SXM100-SD Serial Action Commands..................................................................................18 3.3 Additional anyfeed SXM100-SD Serial Commands ...........................................................................20 3.4 Default Parameter Settings ...............................................................................................................20 3.5 How the anyfeed SX responds to commands (receive side) .............................................................21 3.5.1 3.6 4 Dialog examples ........................................................................................................................21 Error Messages returned by the anyfeed SXM100-SD......................................................................23 Mechanical Settings and Functions ...........................................................................................................24 4.1 Adjusting the dispense gate open/close speed ................................................................................24 flexfactory ag 24.04.2007 2 4.2 Purging the Feeder ............................................................................................................................24 4.3 Removing/Replacing the Backlight....................................................................................................25 4.4 Replacing the Feed Surface ...............................................................................................................25 5 Periodic Maintenance ...............................................................................................................................26 6 Dimensions and Technical Specifications..................................................................................................27 6.1 anyfeed SXM100-SD Dimensions ......................................................................................................27 6.2 AUX Port Pinout (Camera Strobe and Pick Signal) ............................................................................28 6.3 Front Panel Connectors with Pinout .................................................................................................28 List of Figures Figure 1-1: Declaration of CE conformity ............................................................................................................ 4 Figure 1-1: anyfeed SXM100-SD with sample parts on feed surface .................................................................. 5 Figure 1-2: anyfeed SXM100-SD pinch zones...................................................................................................... 8 Figure 1-3: anyfeed SXM work envelope ............................................................................................................ 9 Figure 2-1: anyfeed SXM100-SD with its major functional parts ......................................................................12 Figure 2-2: Mounting hole pattern for anyfeed SXM100-SD ............................................................................13 Figure 2-3: anyfeed SXM100-SD front panel.....................................................................................................14 Figure 2-4: Serial cable RS232 pinout................................................................................................................14 Figure 2-5: Serial cable ......................................................................................................................................14 Figure 2-6: DC Power Cable ...............................................................................................................................15 Figure 2-7: Pick and camera strobe signal.........................................................................................................15 Figure 4-1: dispense gate with rotary actuator and throttle valves .................................................................24 Figure 4-2: Purging the feeder; feeder with purge gate open ..........................................................................24 Figure 4-3: Exploded view with backlight removed ..........................................................................................25 Figure 4-4: Feeder with feed surface pulled out ...............................................................................................25 Figure 6-1: anyfeed SXM100-SD dimensions ....................................................................................................27 Figure 6-2: Pinout AUX port ..............................................................................................................................28 Figure 6-3: Front panel connectors and pinout ................................................................................................28 List of Tables Table 1-1: Use of Warning symbols in this manual ............................................................................................. 6 Table 2-1: Serial communication settings .........................................................................................................16 Table 3-1: Convention to describe serial communication ................................................................................18 Table 3-2: anyfeed SXM100-SD commands ......................................................................................................19 Table 3-3: Additional serial commands .............................................................................................................20 Table 3-4: Default parameter settings ..............................................................................................................20 Table 5-1: Periodic maintenance ......................................................................................................................26 flexfactory ag 24.04.2007 3 Figure 1-1: Declaration of CE conformity flexfactory ag 24.04.2007 4 1 Overview 1.1 Introduction This manual describes the key points for getting your anyfeed SXM operational. Before getting started, make sure you have all the components necessary to set up your feeder. In addition to the feeder (shown in Figure 1-1 below), it is assumed that you have a robot and vision system to work with the feeder. You must have read and fully understood this manual before proceeding with the installation and operation of the anyfeed SXM100-SD. Figure 1-1: anyfeed SXM100-SD with sample parts on feed surface 1.2 About Your anyfeed SXM100-SD The anyfeed SXM100-SD provides flexible parts feeding without the limitations of a hard-tooled feed system (such as a bowl-feeder or tray-feeding system). The anyfeed SXM100-SDD is designed for feeding a wide variety of small parts with rapid change-over times. 1.3 Material Checklist The anyfeed SXM100-SD package includes: • • • • anyfeed SXM100-SD mechanism with integrated controls and LED backlight 4mm POM/white/flat feed surface 24 VDC power cable, 5m RS232 Cable, 4.5 m anyfeed SXM100-SD User’s Guide flexfactory ag 24.04.2007 p/n 002-285-000-B p/n 002-290-000-A p/n002-114-001-E p/n 002-116-000 p/n 002-575-000-A 5 1.4 Other Items You Need • • • • • • • 1.5 24VDC/5A regulated power supply Compressed air 4-6bar Robot Vision System Sturdy mounting table(s) for the robot and anyfeed SXM100-SD Camera-mounting structure Personal computer (for interfacing with and programming the robot and vision system) Dangers, Warnings, Cautions, and Notes There are four levels of special alert notation used in this manual. In descending order of importance, they are: Level Symbol Description 1 This indicates an imminently hazardous situation which, if not avoided, will result in death or serious injury. 2 This indicates a potentially hazardous situation which, if not avoided, could result in serious injury or major damage to the equipment. 3 This indicates a situation which, if not avoided, could result in minor injury or damage to the equipment. 4 This provides supplementary information, emphasizes a point or procedure, or gives a tip for easier operation. Table 1-1: Use of Warning symbols in this manual 1.6 Sound Emissions The sound emission level of the anyfeed SXM100-SD depends on the type of parts being fed, speed, and payload. The maximum value is 85 dB. flexfactory ag 24.04.2007 6 Acoustic emission from the anyfeed SXM100-SD may be up to 85 dB (A) under worst-case conditions. Typical values will be lower, depending on the type of parts being fed, speed, and payload. Appropriate safety measures should be taken against excessive acoustic emission, such as using ear protection and displaying a warning sign. It the noise level is to high, the safeguard around the robot and feeder can be designed to also reduce the noise level down to an accptable level. 1.7 Working Areas The anyfeed SXM100-SD is typically placed within the work envelope of a robot. Follow the safety instructions provided by the robot supplier. Always make sure, that robot is powerd-down or in a safe (slow operation mode) when you enter its work envelope. Never remove parts from the feeders presentation surface with the robot powered-up. If the robot is powered up and servoing, the robot might suddenly move to go and pick a part when it receives the coordinates for a pickable part from the vision system. Electrical Hazard! Impact Hazard! Never remove any safeguarding and never make changes in the system that will decommission a safeguard. Impact Hazard! Never assume a robot which does not move at one moment, it is not going to move the next moment. flexfactory ag 24.04.2007 7 1.8 Pinch Points 1.8.1 Pinch Points on the anyfeed SXM100-SD The feedplatform of the anyfeed SXM performs a circular motion with a radius of 1.5 to 7mm, depending of the model you received. The standard radius – sometimes also refered to as excentricity – is 2mm. When the feeder performs a feed, flip, dispense or purge operation, some gaps between the moving feed platform and the stationary parts of the feeder are therefore narrowed by 2*2=4mm and represent therefore potenial pinch points. Figure 1-2: anyfeed SXM100-SD pinch zones Injury: Do not put your fingers or any other body parts inside the marked zones in figure 1-2. For maintanance and repair, disconnect the feeder from power and compressed air. flexfactory ag 24.04.2007 8 1.8.2 Pinch Points in combination with surrounding equipment Figure 1-3: anyfeed SXM work envelope Avoid creating new pinch points with surrounding pieces of equipment. If it can not be avoided, take appropriate safety measures and place warning labels near pinch points. Obstacles that interfere with the feeder’s work envelope may permanently damage the feeder or cause the feeder not to work properly. 1.9 Qualification of Personell This manual assumes that all personnel have received instructions on how to safely operate the robot and the feeder and have a working knowledge of the system. The user must provide the necessary additional training for all personnel who will be working with the system. As noted in this manual, certain procedures should be performed only by skilled or instructed persons. For a description of the level of qualification, flexfactory uses the standard terms: • Skilled persons have technical knowledge or sufficient experience to enable them to avoid the dangers, electrical and/or mechanical. • Instructed persons are adequately advised or supervised by skilled persons to enable them to avoid the dangers, electrical and/or mechanical. flexfactory ag 24.04.2007 9 All personnel must observe sound safety practices during the installation, operation, and testing of all electrically powered equipment. To avoid injury or damage to equipment, always remove power by disconnecting the AC power from the source before attempting any repair or upgrade activity. Use appropriate lockout procedures to reduce the risk of power being restored by another person while you are working on the system. The user must get confirmation from every entrusted person before the person starts working with the robot that the person: • Has received the manual • Has read the manual • Understands the manual • Will work in the manner specified by the manual 1.10 Protection Against Unauthorized Operation The system must be protected against unauthorized use. Restrict access to the keyboard and the pendant by locking them in a cabinet or use another adequate method to prevent access to them. 1.11 Safety Aspects while performing Maintenance and Repair Only skilled persons with the necessary knowledge about the safety and operating equipment are allowed to maintain the anyfeed SXM100-SD. During maintenance and repair, the power to the anyfeed SXM100-SD and the compressed air . Unauthorized third parties must be prevented from turning on power through the use of lockout measures. 1.12 Intended Use of the anyfeed SXM100-SD The anyfeed SXM100-SD has been designed for the sole purpose of feeding/manipulating small parts which then can be localized by a vision system and susequently picked off the feeder by a robot. DO NOT use the anyfeed SXM100-SD for anything else then its intended purpose of use as stated above. Furthermore, do not use it to feed wet/oily parts or chemically aggressive parts. flexfactory ag 24.04.2007 10 1.13 Risks Due to Incorrect Installation or Operation Certain risks will be present if installation or operation is not performed properly. • • • • Purposely defeating any aspect of the robot cell’s safety E-Stop system Improper installation or programming of the robot system Unauthorized use of cables other than those supplied or use of modified components in the system Defeating an interlock so that an operator can enter a workcell with High Power ON Take precautions to ensure that these situations do not occur. flexfactory ag 24.04.2007 11 2 Installation 2.1 Introduction This chapter describes the installation procedure for the anyfeed SXM. Purge Gate Bulk Container Dispense Gate Excenter Drive Compressed air LED Backlight 24V DC supply RS232 port Aux port Figure 2-1: anyfeed SXM100-SD with its major functional parts The feeder must be bolted or clamped down to the base plate at any time it is in operation. Due to its working principle, the feeder may “walk off” the base plate during operation, if it is not properly secured to the base plate. Do not connect the feeder to electrical power or compressed air before it is securely bolted or clamped down to the base plate. flexfactory ag 24.04.2007 12 2.2 Installation procedure Step 1: Unpack the feeder and check if all material is present according to the list below: • anyfeed SXM100-SD mechanism with integrated controls and LED backlight • 4mm POM/white/flat feed surface • 24 VDC power cable, 5m • RS232 Cable, 4.5 m anyfeed SXM100-SD User’s Guide p/n 002-285-000-B p/n 002-290-000-A p/n002-114-001-E p/n 002-116-000 p/n 002-575-000-A Step 2: Prepare a flat and stable mounting surface with a hole pattern as shown below: Figure 2-2: Mounting hole pattern for anyfeed SXM100-SD flexfactory ag 24.04.2007 13 Step 2: Connect ‘RS232 cable’ between controlling device and SXM front panel Figure 2-3: anyfeed SXM100-SD front panel The controlling device is typically a robot controller, vision system, or PC. When you use the anyfeed SXM the first time, we recommend you interface it to a PC’s COM-Port and use HyperTerminal to make yourself familiar with the feeder’s functions. Use the RS232 Cable p/n 002-116-000 provided with the anyfeed SXM package. Figure 2-4: Serial cable RS232 pinout Figure 2-5: Serial cable flexfactory ag 24.04.2007 14 Step 3: Connect ‘24VDC Power Cable’ between power supply and SXM front panel (see figure 2-3). DO NOT plug in the cable connector of the power cable into the corresponding socket on the anyfeed SXM front panel. Connect the flying leads of the other cable end to your power supply first. Then measure the voltage over the high-current contacts: Contact A1: +24VDC Contact A2: 0V Use cable (p/n002-114-001) provided with the anyfeed SXM packge. Mixing up the polarity of +24VDC and 0V will destroy the servomotor inside the anyfeed SXM. Connect RED marked wire to +24DC on your power supply Connect BLUE marked wire to 0V/GND of your power supply Connect BLACK marked wire to FRAME GND of your power supply Figure 2-6: DC Power Cable Step 4: Provide 6 bar of compressed air to SXM front panel (see figure 2-3). Use 4mm PU or PA air hose to do so. Step 5: Establish connection for camera strobe and pick signal using AUX port (see figure 2-3) This step is optional and only used when a Cognex In-Sight vision sensor with anyfeedWare CX is used to control the anyfeed SXM. Figure 2-7: Pick and camera strobe signal flexfactory ag 24.04.2007 15 2.3 Verifying the Installation Start up HyperTerminal on your PC and setup a session with the following settings: Baudrate Data bits Stop bits Parity Flow control 9600 8 1 no none append line feed to each line sent append line feed to each line received Table 2-1: Serial communication settings Make sure the RS232 cable is pluged into the COM port you are using. Make sure 24VDC power is turned ON and air pressure is ON. Feeder is firmly attached to the base plate Type in the following commands to check if the feeder is working properly: x=16<cr> m11 m10 Feeder drives searches for the home sensor and then returns to up position x=1<cr> m11 m10 Feeder moves parts forward (put parts on surface) x=2<cr> m11 m10 Feeder moves parts backward x=3<cr> m11 m10 Feeder flips parts forward. You may need to increase the speed and number of revolutions to actually flip the part you have on the surface. x=4<cr> m11 m10 Feeder flips parts backward. You may need to increase the speed and number of revolutions to actually flip the part you have on the surface. x=5<cr> m11 m10 Flips part forward and then backward. flexfactory ag 24.04.2007 16 x=6<cr> m11 m10 2.4 Parts are fed forward and the dispense gate opens briefly to let parts escape from bulk storage into the pick zone. Troubleshooting if feeder does not respond or work properly Check serial connection Check serial communication settings Make sure 24VDC is ON and the power supply can deliver at least 5 amps Make sure the feed platform of the feeder is not blocked by surrounding obstacles If none of the actions taken help, please contact flexfactory or your local supplier. flexfactory ag 24.04.2007 17 3 Serial Communication Table 3-1 provides a list of all available anyfeed SXM100-SD serial commands. With each command there is a maximum of two associated parameters which influence that command. Note that some commands do not need any parameters. During startup, the anyfeed SXM100-SD firmware assigns default values to all parameters. For example, if you send the feeder a “feed forward“ command without first changing any of its parameters, the feeder control system will apply the default parameters (see Table 3-7 for details). Once a parameter associated with a command – such as number of filp turns – has been changed to a new value, that value remains at the set value after the command was executed. Best practice to keep communication time at a minimum is, to download the command parameters after startup and then only invoke actions commands to feed/manipulate parts. 3.1 Conventions used to describe serial communication [speed] integer in the range 0..10 [turns] integer in the range 1..10, except for purge the range is 1..127 <cr> Carriage return, ASCII code 13 (decimal) > Symbolizes the prompt of a text terminal window Note that commands shown in the syntax column of table 1 are case sensitive, which means x is not equal X or AB[1] is not equal ab[1] ! Table 3-1: Convention to describe serial communication 3.2 anyfeed SXM100-SD Serial Action Commands Command + [Short form] Description Syntax Initialize [init] Initializes the feeders home position; required before any other action can take place > x=16<cr> Feed forward [ffwd] Feeds parts forward > ab[1]=[turns]<cr> > ab[17]=[speed] x=17<cr> > x=1<cr> Sets number of ffwd turns Changes ffwd speed Execute a ffwd Feed backward [fbwd] Feeds parts backward > ab[2]=[turns]<cr> > ab[18]=[speed] x=18<cr> > ab[0]=1 > x=2<cr> Sets number of fbwd turns Changes fbwd speed Disp gate open(1)/close(0) during dispense Execute a fbwd Feed/flip forward [flipfwd] Feeds part forward and flips them > ab[3]=[turns]<cr> > ab[19]=[speed] x=19<cr> > x=3<cr> Sets number of flipfwd turns Changes flipfwd speed Execute a flipfwd flexfactory ag 24.04.2007 Explanations 18 Command + [Short form] Description Syntax Explanations Feed/flip backward [flipbwd] Feeds part backward and flips them > ab[4]=[turns]<cr> > ab[20]=[speed] x=20<cr> > ab[0]=1 > x=4<cr> Sets number of flipbwd turns Changes flipbwd speed Disp gate open(1)/close(0) during dispense Executes a flipbwd Flip [flip] Combination of feed/flip forward and feed/flip backward > ab[5]=[turns]<cr> > ab[21]=[speed] x=21<cr> > x=5<cr> Sets number of flip turns Changes flip speed/intensity Executes a flip Dispense [dispense] Moves parts from the bulk zone into the pick zone. The dispense gate is opened automatically. > ab[6]=[turns]<cr> > ab[22]=[speed] x=22<cr> > ab[0]=1 > x=6<cr> Executes a dispense Sets number of dispense turns Purge [purge] Feeds all parts backward out; dispense gate opens automatically , purge gate must be opened manually > ab[7]=[turns]<cr> > ab[23]=[speed] x=23<cr> > x=7<cr> Executes a purge Sets number of purge turns Changes purge speed Turn motor power off Disables servo mode > x=14<cr> Turn motor power on Turns motor power on and move to home > x=15<cr> Stop [stop] Stops current action and moves feeder to home position > x=15<cr> Reset error Resets error status and > x=30<cr> moves feeder to home position Changes dispense speed Must be used after feeder reported an error before new actions commands can be executed. Table 3-2: anyfeed SXM100-SD commands flexfactory ag 24.04.2007 19 3.3 Additional anyfeed SXM100-SD Serial Commands Command + Short form Description Syntax Explanations Restart feeder firmware aborts current motions/actions and restarts firmware > S RUN<cr> Feeder will output m10<cr> m20<cr> as a greeting message. Which indicates that the feeder is online. Feeder must be initialized (x=16) before it can execute action commands. Parameters downloaded prior to the ‘S RUN’ command are reset to default values. Set digital outputs Allows you to change the state of feeder internal digital outputs > ab[27]=2 x=27<cr> > ab[27]=3 x=27<cr> > ab[27]=4 x=27<cr> > ab[27]=5 x=27<cr> Turns the backlight off Turns the backlight on Moves the dispense gate up Moves the dispense gate down > tt=1<cr> > tt=0<cr> Activates test mode Deactivates test mode Feeder must be initialized in order to use test mode. Activate/Deactivate test mode Table 3-3: Additional serial commands 3.4 Default Parameter Settings Parameter ab[0] ab[1] Default Value 0 5 Description Dispense gate mode feed forward speed feed backward speed feed/flip forward speed feed/flip backward speed flip speed dispense speed purge speed ab[2] 5 feed backward repetitions ab[3] 5 feed and flip forward repetitions ab[4] 5 feed and flip backward repetitions ab[5] 6 flip repetitions ab[6] 8 dispense repetitions ab[7] 30 purge repetitions ab[17] 1 feed forward speed ab[18] feed backward speed ab[19] feed and flip forward speed ab[20] feed and flip backward speed ab[21] flip speed ab[22] dispense speed ab[23] purge speed Table 3-4: Default parameter settings flexfactory ag 24.04.2007 20 3.5 How the anyfeed SX responds to commands (receive side) For each action command line the feeder receives, the feeder will respond as follows: m1x<cr> The ‘1’ after the m indicates whether the message is comming from motor/drive 1. Motor numbering is included already with the single motor feeder, since future models of the SXM feeder might use more then one motor. If x has a value of 1, command is valid/accepted; if x has a value of 0, the command completed successfully; x values larger then 1 represent an error number 3.5.1 Dialog examples Initializing the feeder Terminal window Explanation For clarity, text received is in bold/inclined x=16<cr> Send 'Init' command m11<cr> Motor/Drive 1 understood command and is now busy, indicated by the second '1' m10<cr> Motor/Drive 1 completed action successfully indicated by '0' Feeding parts forward Terminal window Explanation For clarity, text received is in bold/inclined x=1<cr> Send 'feed forward' command m11<cr> Motor/Drive 1 understood command and is now busy, indicated by the second '1' m10<cr> Motor/Drive 1 completed action successfully flexfactory ag 24.04.2007 21 Changing the flip speed/intensity Terminal window Explanation For clarity, text received is in bold/inclined ab[21]=10 x=21<cr> Sends the flip speed 'ab[21]' and activates it with 'x=21' m11<cr> Drive 1 command understood m10<cr> Drive 1 finished Set feed/flip forward turns and execute feed/flip forward Terminal window Explanation For clarity, text received is in bold/inclined ab[3]=6 x=3<cr> Sends the feed/flip forward turns 'ab[3]' and executes the command 'x=3' m11<cr> Drive 1 command understood m10<cr> Drive 1 finished Feeder not initialized Terminal window Explanation For clarity, text received is in bold/inclined x=1<cr> Sends a feed forward command to the feeder but the feeder has not been initialized before m11<cr> Drive 1 command understood m16<cr> Drive 1 reports that it is not initialized Servo overload Terminal window Explanation For clarity, text received is in bold/inclined x=7<cr> Sends a purge command to the feeder m11<cr> Drive 1 command understood m17<cr> Drive 1 stops motion and reports error state ‘7’ flexfactory ag 24.04.2007 22 Servo timeout Terminal window Explanation For clarity, text received is in bold/inclined x=6<cr> Sends a dispense command to the feeder m11<cr> Drive 1 reports error state m17<cr> Drive 1 stops motion and reports error state ‘7’ Unknown Command Terminal window Explanation For clarity, text received is in bold/inclined x=9<cr> Sends command '9' – an unknown command - to the feeder m12<cr> Drive 1 reports that this is an unknown command 3.6 Error Error Messages returned by the anyfeed SXM100-SD Error Message Details / possible cause 12 Invalid command Motor 1 received a command which is not supported 13 Motor 1 reports a servo error Motor 1 is overloaded, drive blocked … 16 Motor 1 not initialized Motor 1 hasn’t been initialized yet or lost it’s state due to power cycle 17 Error state on Motor 1 Servo error has occurred on Motor 1. No commands will be accepted until error state is reset. flexfactory ag 24.04.2007 23 4 Mechanical Settings and Functions 4.1 Adjusting the dispense gate open/close speed If the dispense gate opens to fast, parts laying in front of the dispense gate might be kicked out of the feeder. Reduce the speed by adjusting the throttle valve accordingly. Also make sure, that the return/close speed is not unnecessarilly high, since rotary unit might otherwise fatigue to soon. Figure 4-1: dispense gate with rotary actuator and throttle valves 4.2 Purging the Feeder In order to purge the feeder from remaining parts, the purge gate must be openend manually as shown and a ‚purge‘ command must be issued via the serial command interface. Figure 4-2: Purging the feeder; feeder with purge gate open flexfactory ag 24.04.2007 24 4.3 Removing/Replacing the Backlight 1. Remove the 2 screws on either side of the feeder 2. Remove the brackets 3. Unscrew the power supply cables 4. Pull out backlight Figure 4-3: Exploded view with backlight removed 4.4 Replacing the Feed Surface Preparation: purge the feeder as explained under 4.2. 1. Make sure the purge gate is open 2. Pull out the feed surface. Note the thump-hole on the underside of the feed plate. Helps to get a better grip on the feed plate. Figure 4-4: Feeder with feed surface pulled out flexfactory ag 24.04.2007 25 5 Periodic Maintenance Item Feed surface Feed surface Feed channel Backlight Task Clean upper side of feed surface and frame with a non-abrasive, no-residue cleaner, such as rubbing alcohol or window cleaner. Failure to do this may degrade vision performance. Clean the rimm of the feed platform and the inner walls of the bulk container as well as the dispense gate. Remove feed surface and clean bottom side with a non-abrasive, no-residue cleaner, such as rubbing alcohol or window cleaner. Clean support surface and glass window (Backlight) with alcohol. Failure to do this may degrade vision performance. Interval weekly Monthly Table 5-1: Periodic maintenance flexfactory ag 24.04.2007 26 6 Dimensions and Technical Specifications 6.1 anyfeed SXM100-SD Dimensions Figure 6-1: anyfeed SXM100-SD dimensions flexfactory ag 24.04.2007 27 6.2 AUX Port Pinout (Camera Strobe and Pick Signal) Figure 6-2: Pinout AUX port 6.3 Front Panel Connectors with Pinout Figure 6-3: Front panel connectors and pinout flexfactory ag 24.04.2007 28