1
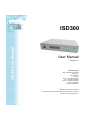
ISD300 User Manual
ISD300
User Manual
Version 1.0
Manufactured by
SEH Computertechnik GmbH
Suedring 11
33647 Bielefeld
Germany
Phone: +49 (0)521 94226-29
Fax: +49 (0)521 94226-99
Support: +49 (0)521 94226-44
Email: [email protected]
Web: http://www.seh.de
© 2005
SEH Computertechnik GmbH
All trademarks, registered trademarks, logos and product names are
property of the respective owners.
General Information ........................................................... 4
Purpose ............................................................................................. 4
Technical Data .................................................................................. 4
Safety Regulations............................................................................. 5
First Steps.......................................................................................... 6
Manual ............................................................................................... 7
Support Information ........................................................................... 7
Using the Panel Interface................................................... 8
How to switch on the ISD300?........................................................... 9
How to switch off the ISD300?........................................................... 9
How to get information from the front display? .................................. 9
ISD300 User Manual
Using the ISD300 Homepage........................................... 10
How to open the ISD300 Homepage? ............................................. 10
How to log on to the ISD300 Homepage? ....................................... 11
Structure of the ISD300 Homepage................................................. 11
Network Settings .............................................................. 13
How to set TCP/IP Parameters? (IP, Netmask, Gateway)............... 13
How to set a Host Name? ................................................................ 15
How to set Date and Time? ............................................................. 16
How to set DNS? ............................................................................. 17
How to configure via Quick Setup?.................................................. 17
Microsoft Authentication (SMB)...................................... 20
How to display MS Windows Network information?......................... 21
How to use the ISD300 as a member of a Domain?
(Windows NT or Active Directory).................................................... 21
How to use the ISD300 as Stand-Alone Server?
(Local Authentication) ...................................................................... 23
How to set Local Users and Groups? .............................................. 23
How to set a Printer Administrator Account? ................................... 25
Managing Print Drivers .................................................... 26
How to prepare the ISD300 for’Point and Print’? ............................. 26
How to store Drivers on the ISD300? (Windows XP/2000) ............. 27
How to store Drivers on the ISD300? (Windows NT 4.0)................. 28
How to assign Windows Print Driver to several Queues?................ 28
How to use ’Point and Print’ with your PC client? ............................ 29
Managing Queues and Jobs ............................................ 30
Types of Queues ............................................................................. 31
How to create a Queue? .................................................................. 33
How to modify a Queue? ................................................................. 36
ISD300 User Manual
2
How to stop or restart a Queue? (Accumulate Print Jobs)...............36
How to reject or accept Print Jobs? .................................................36
How to assign a Filter Application (3party software) to a Queue? ...37
How to delete a Queue? ..................................................................37
How to display all active Jobs? ........................................................37
How to display a Job History?..........................................................38
How to manage a Print Job?............................................................38
How to move a Print Job to another Queue? ...................................38
How to print one Job on several Printers? (Copy Queue)................39
How to keep printed Jobs in a Queue? ............................................39
How to manage Jobs in the Repository ...........................................39
How to print a Test Page?................................................................41
ISD300 User Manual
Printing methods .............................................................. 42
LPD Printing .....................................................................................42
Point & Print .....................................................................................42
IPP Printing ......................................................................................42
Socket Printing .................................................................................43
ThinPrint® ........................................................................................43
Using ISD300 as DHCP / DNS Server .............................. 44
How to set the DHCP Service? ........................................................44
How to display the lease file?...........................................................46
How to set DNS Server? ..................................................................46
How to start/stop the DHCP or DNS Server?...................................48
Security.............................................................................. 49
Panel Lock (PIN) ..............................................................................49
Login Accounts.................................................................................50
Certificates .......................................................................................52
IP Sender Protection (Restricting Printing Access)..........................55
Maintenance ...................................................................... 57
How to get Board Information? ........................................................57
How to configure e-mail or SNMP trap notifications?.......................59
How to update Firmware or Software?.............................................61
How to create a Backup? .................................................................61
How to reboot the ISD300?..............................................................62
How to install Software?...................................................................62
How to delete Software? ..................................................................63
Parameter Description ..................................................... 64
Index .................................................................................. 65
ISD300 User Manual
3
General Information
General Information
Purpose
The ISD300 was developed as an appliance to spool and manage
print jobs and to handle print queues.
ISD300 User Manual
In complex networks with high volumes of data traffic and in
large-scale structures, the ISD300 can substantially relieve server
load and remove strain from the network. This results in better
performance and enhanced system stability.
The ISD300 adds server qualities to the printing in peer-to-peer
networks. Enhanced transparency, higher performance and the
central management of all print processes result in maximum
efficiency and very little time required for maintenance and system
updates.
The ISD300 is able to accept print jobs from various operating
systems and to forward them to the printer via Socket, LPD, or IPP.
Technical Data
Data
Values
Network connector
RJ-45 connector for 10BaseT and 100BaseTX
Interfaces
2 x USB 2.0 HS
Print protocols
(Client -> ISD300)
LPD, SMB, Socket, IPP, ThinPrint
Print protocols
(ISD300 -> printer)
LPD, Socket, IPP
Power supply
100-240 VAC
Current input
max. 0.25 A
Ambient temperature
5 - 30 °Celsius
Relative humidity
20 - 80 %
Width x Depth x Height
215 x 186 x 47 mm
Weight
1500 g
ISD300 User Manual
4
General Information
Safety Regulations
ISD300 User Manual
Before starting the initial operation procedure and during the
operation procedure of the ISD300, please read the following safety
regulations:
-
The ISD300 may only be connected to the mains and to the
network by qualified personnel.
-
Do not open the housing of the device. The ISD300 may only
be connected and operated if the housing is not opened and if
the ISD300 is in perfect condition. Do not put objects on top of
the housing.
-
The ISD300 must be placed on a solid surface with no
vibration. The device must not be operated in dusty places and
direct sunlight. Avoid contact with humidity or liquids. The
ISD300 may only be connected and operated if the installation
location meets the ambient conditions; see: Technical Data on
page 4.
-
If the supplied power cord cannot be used in your country,
acquire an appropriate power cord that suits national
provisions. For more information, please consult your retailer.
-
Make sure that no-one steps on or stumbles over the cables.
-
Position the ISD300 in a way that guarantees that the socket
for the connection of the power cord is in the proximity of the
device and is easily accessible. Make sure that the device can
be separated easily from the network. A damaged power cord
must be replaced immediately. For more information, please
consult your retailer.
-
Do not connect a telephone cable to the RJ-45 connector. The
RJ-45 connector may only be connected to SELV voltages. For
the connection to the RJ-45 connector only S/UTP cabling
(category 5 or better) may be used. The shielding must fit
flushly to the connector.
-
Use a certified USB Hi-Speed cable to connect the printer. A
list of certified cables may be found at www.usb.org !
The ISD300 must be connected to a socket with protective
contact.
ISD300 User Manual
5
General Information
First Steps
Follow the steps to configure the ISD300 quickly and easily. After
that, the ISD300 is ready for operation.
1. Connect the ISD300 to the network and the power supply. For
further information see the Quick Installation.
2. Switch on the ISD300; see: How to switch on the ISD300? on
page 9.
ISD300 User Manual
3. Configure the IP Settings; see: Setting TCP/IP parameter
manually via panel interface on page 13.
4. Start the ISD300 Homepage; see: How to open the ISD300
Homepage? on page 10.
5. Log on the the ISD300 Homepage; see: How to log on to the
ISD300 Homepage? on page 11.
6. Configure TCP/IP Network Settings and identify the printers in
the network; see: Network Settings on page 13.
7. Configure Microsoft® Network Settings and define a printer
administrator account; see: Microsoft Authentication (SMB) on
page 20.
8. Install the drivers; see: Managing Print Drivers on page 26.
9. Configure the printer queues; see: Managing Queues and Jobs
on page 30.
ISD300 User Manual
6
General Information
Manual
This manual is intended to help you to configure the ISD300. You
can download the latest version from:
http://www.seh-technology.com/support
ISD300 User Manual
The manual is available in PDF (User Manual) and HTML (Online
Manual) format.
-
The PDF User Manual requires a PDF reader. We recommend
Adobe Acrobat. You may already have a version of this on your
computer. If not, please find the Acrobat Reader Software on
the InterCon CD or on the Adobe website.
-
The HTML Online Manual can be found on the InterCon CD
and installed directly on the ISD300. The installation of the
Online Manual is similarly to the installation of filters on the
ISD300; see: How to install Software? on page 62.
After the installation the Online Manual can be started via
ISD300 Homepage. Please click the ’Help’ Button on the
’Login’ page.
Support Information
If questions remain which cannot be clarified by the documentation,
please contact our hotline, where we will readily provide you with
the necessary assistance.
Support hotline:
+49 (0)521 94226-44
Monday - Thursday 8:00 a.m. to 5:45 p.m.
Friday 8:00 a.m. to 4:15 p.m. (CET)
Email:
ISD300 User Manual
[email protected]
7
Using the Panel Interface
Using the Panel Interface
ISD300 User Manual
A number of actions can be carried out via the unit’s operating
panel. The figure shows the components of the panel interface.
Figure: ISD300 front and rear view
The ISD300’s operating panel can be protected from unauthorized
access with a 4-digit PIN. The administrator sets the PIN on the
ISD300 Homepage. If the panel is locked, the requested PIN is
entered directly on the device.
The following actions can be carried out via the panel interface:
•
•
•
•
•
•
How to switch on the ISD300?
Entering the PIN
How to get information from the front display?
How to switch off the ISD300?
Setting TCP/IP parameter manually via panel interface
Setting TCP/IP parameter automatically (DHCP) via panel
interface
ISD300 User Manual
8
Using the Panel Interface
How to switch on the ISD300?
Proceed as follows:
1. Switch on the power switch on the backside.
2. Switch on the soft power switch
on the frontside.
The ISD300 boots automatically.
How to switch off the ISD300?
ISD300 User Manual
Print jobs that are halted by the device being switched off will not be
completed. Print jobs in a queue will be completed when the device
reboots. This also applies in the case of power failures. To avoid
loss of data, shutdown the ISD300 before you switch off the power
switch.
Proceed as follows:
1. Keep
pressed for five seconds.
The device shuts down and switches off.
2. Switch off the power switch on the backside.
How to get information from the front display?
It is possible to get the following informations via the display of the
panel interface:
-
IP Address,
Date and Time,
Harddisk usage,
MAC Address
To get information use the navigation key
information is indicated in sequence.
ISD300 User Manual
on the ISD300. The
9
Using the ISD300 Homepage
Using the ISD300 Homepage
Initial installation, configuration and subsequent administration of
the ISD appliances as well as management of the relevant network
printers can be carried via the integrated web server (ISD300
Homepage). Administration is entirely independent of operating
systems and locations, so it can be done from any workstation
within the network.
ISD300 User Manual
Exception: With the ’Point and Print’ method the driver installation
and editing of the user rights is adjusted via a Client PC.
Only versions of Netscape Navigator 4.0 or later and Microsoft
Internet Explorer 4.0 or later are supported. For the display we
recommend a resolution of 1024 x 768 Pixel at least.
After start the ISD300 Homepage the ’Login’ dialog appears.
Access to the ISD300 Homepage is defined for three user groups.
Which information do you need?
•
•
•
How to open the ISD300 Homepage?
How to log on to the ISD300 Homepage?
Structure of the ISD300 Homepage
How to open the ISD300 Homepage?
Before starting the ISD300 Homepage it is neccesary to assign an
IP Address to the ISD300; see How to set TCP/IP Parameters? (IP,
Netmask, Gateway)
1. Start your web browser.
2. Enter the IP address of the ISD300 as URL.
The ISD300 Homepage is displayed. If the Homepage is not
displayed, check the proxy settings of your browser.
After the Homepage was started you have to log on; see: How to
log on to the ISD300 Homepage? on page 11.
ISD300 User Manual
10
Using the ISD300 Homepage
How to log on to the ISD300 Homepage?
Access to the ISD300 is defined for three user groups: ’Any’, ’User’,
and ’Admin’. For further information see: Login Accounts on page
50.
The instructions describe the login as administrator.
ISD300 User Manual
1. Start the ISD300 Homepage
2. Click Admin.
3. Enter the user name and the password:
user name: 'admin' (default setting)
password: 'admin' (default setting)
4. Click OK to confirm.
The user interface for the administrator is displayed.
Structure of the ISD300 Homepage
The main menu is displayed on the left side of the dialog. After a
menu point was selected the submenu will appear at the top of the
dialog.
Figure: Administrator Login
ISD300 User Manual
11
Using the ISD300 Homepage
After login some basic information about the ISD300 are displayed.
In addition to details about the login, the host name and the IP
address, you get the following information:
Table: Parameter Information - Home
Parameter
Software version
Description
Release number of the software
Firmware version Release number of the firmware
Print queues
ISD300 User Manual
Print jobs
Hard disk usage
Number of print queues on the ISD300
Number of print jobs at present on the ISD300
Used hard disk capacity
Memory usage
Used RAM capacity
Connected
windows clients
Number of Windows clients connected to the ISD300
More detailled information about board settings can be found in
Maintenance. More detailled information about queues can be
found in Queues/Jobs.
ISD300 User Manual
12
Network Settings
Network Settings
In order to work with the ISD300, Host, Date and TCP/IP
parameters must be set. In order to set all parameters, use the
Quick Setup for an easy configuration.
ISD300 Network settings can be configured by administrators only.
ISD300 User Manual
What do you want to do?
•
•
•
•
•
How to set TCP/IP Parameters? (IP, Netmask, Gateway)
How to set a Host Name?
How to set Date and Time?
How to set DNS?
How to configure via Quick Setup?
How to set TCP/IP Parameters? (IP, Netmask, Gateway)
The TCP/IP parameter can be set in different ways. You can assign
the TCP/IP parameter manually or have it assigned automatically
via DHCP (Dynamic Host Configuration Protocol). The manually
assignment is default. You can set the TCP/IP parameter via the
panel interface or the ISD300 Homepage.
What do you want to do?
•
•
Setting TCP/IP parameter manually via panel interface
•
Setting TCP/IP parameter via ISD300 Homepage
Setting TCP/IP parameter automatically (DHCP) via panel
interface
Setting TCP/IP parameter manually via panel interface
Use the navigation keys on the panel interface to assign the TCP/IP
parameter manually.
ISD300 User Manual
13
Network Settings
Proceed as follows:
1. Press
.
IP Setup|Cancel appears in the display.
2. Press
to confirm.
IP Configuration appears in the display.
3. Select Manual via
.
4. Press
to confirm.
IP Address:000.000.000.000 appears in the display.
ISD300 User Manual
5. Enter the IP address.
Use
to navigate to individual numerical values within the IP
address. Change individual numerical values via
.
6. Press
to confirm.
Netmask:000.000.000.000 appears in the display.
7. Enter the netmask.
8. Press to confirm.
Gateway:000.000.000.000 appears in the display.
9. Enter the gateway.
10. Press
to confirm.
Apply|Back appears in the display.
11. Press to confirm.
The settings are saved.
Setting TCP/IP parameter automatically (DHCP) via panel
interface
Use the navigation keys on the panel interface to set TCP/IP
parameter via DHCP.
Proceed as follows:
1. Press
.
IP Setup|Cancel appears in the display.
2. Press
to confirm.
IP Configuration appears in the display.
3. Select DHCP via
.
ISD300 User Manual
14
Network Settings
4. Press
to confirm.
Apply|Back appears in the display.
5. Press to confirm.
Upon booting DHCP will be applied automatically. TCP/IP
parameters are assigned by a DHCP server.
Setting TCP/IP parameter via ISD300 Homepage
ISD300 User Manual
Proceed as follows:
1. Click Configuration.
2. Click TCP/IP.
3. Enter the TCP/IP paramter manually or enable the ’DHCP’
option; see Table: Parameter Settings - TCP/IP.
4. Click Set.
Table: Parameter Settings - TCP/IP
Parameter
Description
IP address
IP address of the ISD300 (e.g. 192.168.0.21)
Netmask
Netmask
Gateway
IP address of the gateway used to access other
networks or subnets. This enables the ISD300 to
communicate with devices on other subnets.
DHCP
Enable DHCP to set TCP/IP parameter via DHCP.
The TCP/IP parameters are assigned by a DHCP
server during the next reboot of the ISD300.
How to set a Host Name?
You can set a host name for the ISD300. The host name and the IP
address are displayed at the top left side of the browser window.
Proceed as follows:
1. Click Configuration.
2. Click Board Settings.
ISD300 User Manual
15
Network Settings
3. Enter the Host name (max. 256 characters).
4. Click Set.
How to set Date and Time?
Date and time specifications are necessary if you want to display
the time at which the print job was printed. Date and time
specifications are displayed in the Job History.
Date and time can be entered manually during the Quick Setup
also; see: How to configure via Quick Setup? on page 17.
ISD300 User Manual
Date and time can be adjusted manually or obtained from a time
server.
If you use a time server, the manually entered time will be
overwritten by the time provided by the time server.
Proceed as follows:
1. Click Configuration.
2. Click Board Settings.
3. Enter time and date or use a time server; see Table: Parameter
Settings - Board.
4. Click Set.
Table: Parameter Settings - Board
Parameter
Description
Default name
Default name of the ISD300 set by the manufacturer
Host name
Host name of the ISD300 set by the administrator
(max. 256 characters)
Date
Date in the format: dd.mm.yyyy (e.g. 23.05.2004)
Time
Time in the format: hh:mm (e.g. 16:36)
Time server
IP address or the host name of the time server
(e.g. ’ntp1.ptb.de’) The ’ntp’ protocol is used.
ISD300 User Manual
16
Network Settings
Parameter
Time zone
Description
Select a time zone. The difference between the
local time and the Greenwich Mean Time or UTC
(Universal Time Coordinate) provided by the time
server.
How to set DNS?
ISD300 User Manual
DNS is service that translates domain names into IP addresses.
Using DNS, names can be assigned to IP addresses and vice
versa. In order to use this functionality, specify the primary DNS
server by its IP address.
Proceed as follows:
1.
2.
3.
4.
Click Configuration.
Click DNS.
Enter the data; see Table: Parameter Settings - DNS.
Click Set.
Table: Parameter Settings - DNS
Parameter
Description
Domain name
Domain name of an existing DNS domain
(e.g. company.de)
Primary DNS
server
IP address of the primary DNS server
(e.g. 192.168.0.21)
Secondary DNS
server
IP address of the secondary DNS server. The
secondary DNS server is used if the first one is not
available.
Domain
search list
Suffixes for the domain search list separated by
blanks (e.g. soft.seh.de)
How to configure via Quick Setup?
The Quick Setup is intended for setting up initial parameters and
queues. A prerequisite for the Quick Setup is that you are logged
on as administrator on the ISD300 Homepage.
ISD300 User Manual
17
Network Settings
The Quick Setup involves four steps:
-
general settings
TCP/IP parameters
the search for available printers in the network
the setting up of queues
ISD300 User Manual
Proceed as follows:
1.
2.
3.
4.
5.
6.
Click Quick setup.
Enter the host name, date, and time.
Click Next to confirm.
Enter the TCP/IP parameter.
Click Next to confirm.
Enter a start and end IP address for the printer search. A
maximum of 255 IP addresses can be searched through at a
time.
7. Click Next to confirm.
You will get a message of the number of printers found in the
network.
8. Click OK to confirm.
A list of printers is displayed.
9. Enter a name for the queues in the column Queue name; see:
Queue Name Conventions on page 18.
10. Click Install.
The name of the queue appears dimmed in the column Queue
name.
11. Click Finish setup.
Table: Queue Name Conventions
Queue Name Conventions
- letters and numbers are allowed
- hyphens and underscores are allowed
- no space characters
- no more than 32 characters (Windows 98 max. 15 characters)
ISD300 User Manual
18
Network Settings
ISD300 User Manual
If you want to use ’Point and Print’, we recommended to assign
print drivers to the queues after the Quick Setup; see: Managing
Print Drivers on page 26.
ISD300 User Manual
19
Microsoft Authentication (SMB)
Microsoft Authentication (SMB)
MS Windows client access to installed queues can be restricted by
using the SMB protocol. This method uses users and groups with
associated passwords. The list of users and groups can be
managed locally or taken from a Windows Domain Controller or
Active Directory Server.
ISD300 User Manual
MS domain security is a characteristic that allows administrators to
authorize or restrict print administration and services to define
users and groups by using their existing user name and password
of the domain.
A domain is a collection of network servers and other computers
that share a security and user account for each user. A user logs on
to the domain and not to individual servers in the domain.
Microsoft Authentication settings can be managed by
administrators only.
What do you want to do?
•
•
How to display MS Windows Network information?
•
How to use the ISD300 as Stand-Alone Server? (Local
Authentication)
•
•
How to set Local Users and Groups?
How to use the ISD300 as a member of a Domain? (Windows
NT or Active Directory)
How to set a Printer Administrator Account?
ISD300 User Manual
20
Microsoft Authentication (SMB)
How to display MS Windows Network information?
Click SMB printing in the main menu to open the MS Windows
page. The page displays the following information depending from
the setups.
ISD300 User Manual
Table: Parameter Information - MS Windows
Parameter
Description
Host / Net BIOS name
NetBIOS name of the ISD300
WINS server
IP address or host name of the WINS
server
Workgroup
Name of the workgroup
(Active Directory)
Domain name
Name of the domain
Password server
IP address (e.g. 192.168.0.112) or DNS name
(e.g. security.seh.de) of the password server
Server role
Role of the ISD300 in the network
environment
Status
Member or not a member of a domain
How to use the ISD300 as a member of a Domain?
(Windows NT or Active Directory)
Microsoft domain security is a feature that allows administrators to
easily authorize or restrict print administration and services to
specific groups or users by using their existing user name and
password of the domain.
If the ISD300 is member of a domain (Windows NT or Active
Directory) users are authenticated against user and group accounts
of the selected domain.
Proceed as follows:
1. Click SMB printing.
2. Click Change.
3. Select Domain member.
ISD300 User Manual
21
ISD300 User Manual
Microsoft Authentication (SMB)
4. Click Next.
5. Select the Domain controler.
Use the NTLM method to authenticate users against the Active
Directory or NT 3.5x/4.0 domain controler.
Use Kerberos to authenticate users against the Active Directory
domain controler.
6. Click Next.
7. Enter the data; see Table: Parameter Settings - MS Windows
Domain member.
8. Click Next.
9. Enter administrator account and password.
To create a computer account on the domain controler you
need to use a Windows account with administrative rights on
the domain controler.
10. Click Next.
Table: Parameter Settings - MS Windows Domain member
Parameter
Description
NetBIOS name
NetBIOS name of the ISD300
Active Directory
domain name
------------------Domain
Name of the domain
Use the full Active Directory domain name.
E.g. MYDOMAIN.MYCOMPANY.COM or
thisdomain.local
-----------------------------------------Name of the domain
Password
server
IP address of the password server. Leave blank or
use * for auto selection. (NT Domain only)
WINS server
IP address (e.g. 192.168.0.227) of the WINS server
ISD300 User Manual
22
Microsoft Authentication (SMB)
How to use the ISD300 as Stand-Alone Server? (Local
Authentication)
The ISD300 is used as Stand-Alone-Server in the network
environment. Users are authenticated against the local user- and
group accounts. For further information; see: How to set Local
Users and Groups? on page 23.
ISD300 User Manual
Proceed as follows:
1.
2.
3.
4.
5.
6.
7.
Click SMB printing.
Click Change.
Select Stand-Alone server.
Click Next.
Enter a workgroup.
Enter the IP address of the WINS server.
Click Next.
The Network settings are changed.
How to set Local Users and Groups?
’Local Users and Groups’ is an important security feature because
the administrator can limit the ability of users and groups to perform
certain actions by assigning them rights and permissions. Local
user or group is an account that can grant permissions and rights.
Local users and groups can be managed by the administrators
only.
What do you want to do?
•
•
•
•
•
•
Creating a user
Deleting a user
Changing the password of a user
Assigning a user to groups
Creating a group
Deleting a group
ISD300 User Manual
23
Microsoft Authentication (SMB)
Creating a user
Proceed as follows:
Click SMB printing.
Click Local users&groups.
Click Create new user.
Enter the username and the password. System user- and
groupnames (root, LP, sys, users...) cannot be used.
5. Confirm the new password.
6. Click Create.
ISD300 User Manual
1.
2.
3.
4.
Deleting a user
Proceed as follows:
1.
2.
3.
4.
Click SMB printing.
Click Local users&groups.
Choose a user.
Click Delete user.
Changing the password of a user
Proceed as follows:
1.
2.
3.
4.
5.
6.
7.
Click SMB printing.
Click Local users&groups.
Choose a user.
Click change password.
Enter the password.
Confirm the new password.
Click Set.
Assigning a user to groups
Proceed as follows:
1. Click SMB printing.
2. Click Local users&groups.
3. Choose a user.
ISD300 User Manual
24
Microsoft Authentication (SMB)
4. Click Set group membership.
5. Assign the groups via the Add and the Remove button.
6. Click Set.
Creating a group
ISD300 User Manual
Proceed as follows:
1.
2.
3.
4.
5.
6.
Click SMB printing.
Click Local users&groups.
Click Local groups.
Click Create new grous.
Enter a group name.
Click Create.
Deleting a group
Proceed as follows:
1.
2.
3.
4.
5.
Click SMB printing.
Click Local users&groups.
Click Local groups.
Choose a group.
Click Delete group.
How to set a Printer Administrator Account?
The specified Windows account can upload printer drivers on the
ISD300 and change printing defaults. If no account is specified,
administrative access to the ISD300 from Windows clients is
disabled. The ’printer administrator’ is selected from a list of ’local
users/groups’ or domain members.
Proceed as follows:
1.
2.
3.
4.
Click SMB printing.
Click Printer administrator.
Choose a user or group from the list.
Click Set.
ISD300 User Manual
25
Managing Print Drivers
Managing Print Drivers
In order to print, assign a driver to the queues. If you want to assign
a driver to a queue via ’Point and Print’, store the driver on the
ISD300 first.
If required, the ’Point and Print’ function automatically installs the
relevant drivers on the clients. To make use of this function, the
respective drivers must be centrally stored on the relevant ISD
appliance beforehand.
ISD300 User Manual
Print drivers can be managed by administrators only.
What do you want to do?
•
•
•
•
•
How to prepare the ISD300 for’Point and Print’?
How to store Drivers on the ISD300? (Windows XP/2000)
How to store Drivers on the ISD300? (Windows NT 4.0)
How to assign Windows Print Driver to several Queues?
How to use ’Point and Print’ with your PC client?
How to prepare the ISD300 for’Point and Print’?
Point and Print (automatic printer driver installation) is the easiest
and quickest way to print in heterogeneous Microsoft networks via
the ISD300. All necessary files and configuration information are
automatically downloaded from the print server to the client.
Note the following aspects if you want to use Point and Print:
•
All necessary printer drivers must be stored on the ISD300;
see: How to store Drivers on the ISD300? (Windows XP/2000)
on page 27 or see: How to store Drivers on the ISD300?
(Windows NT 4.0) on page 28.
•
The stored printer drivers need to be assigned to the queues;
see: How to assign Windows Print Driver to several Queues?
on page 28.
ISD300 User Manual
26
Managing Print Drivers
•
The printer drivers that are required for printing will be installed
automatically on the connected clients; see: How to use ’Point
and Print’ with your PC client? on page 29.
How to store Drivers on the ISD300? (Windows XP/2000)
ISD300 User Manual
In heterogeneous networks, a separate printer driver has to be
stored on the ISD300 for each operating system. If there are, for
example, clients with the operating systems Windows XP and
Windows 98, you have to store the printer drivers on the ISD300 for
both operating systems.
Print drivers can be stored by printer administrators only. For further
information see: How to set a Printer Administrator Account? on
page 25.
Proceed as follows:
1. Click Run on the start menu to establish a connection to the
ISD300.
2. Enter the IP address of the ISD300.
Syntax: \\<IP address of the ISD300>
3. Click OK.
The connection will be established.
4. Click Printers (and Faxes).
The window Printers (and Faxes) appears.
5. Click Server Properties on the File menu.
The window Print Server Properties appears.
6. Select the Drivers tab.
7. Click Add.
The Printer Driver Wizard is started.
8. Follow the instructions of the Wizard.
9. If you use further operating systems, install the relevant printer
drivers.
ISD300 User Manual
27
Managing Print Drivers
How to store Drivers on the ISD300? (Windows NT 4.0)
Print drivers can be stored by printer administrators only. For further
information see: How to set a Printer Administrator Account? on
page 25.
ISD300 User Manual
Proceed as follows:
1. Click Run on the start menu.
2. Enter the IP address of the ISD300.
Syntax: \\<IP address of the ISD300>
3. Click OK to confirm.
4. Double-click Printers.
5. Double-click New Printers.
The window Add Printer Wizard appears.
6. Click Next to confirm.
7. Activate Samba Printer.
8. Click Next to confirm.
9. Follow the Wizard.
10. Click Finish to complete the installation.
An error Message appers.
11. Click OK.
The printer drivers have been installed on the ISD300 despite
the error message.
A NT error message (’failed attempt to install a printer on the
ISD300’) can be ignored.
How to assign Windows Print Driver to several Queues?
If you want to assign a Windows driver to a queue, store the driver
on the ISD300 first. For further information see: How to store
Drivers on the ISD300? (Windows XP/2000) on page 27 or How to
store Drivers on the ISD300? (Windows NT 4.0).
ISD300 User Manual
28
Managing Print Drivers
If no Windows driver has been stored on the ISD300, the ’Available
drivers’ box is empty. Print drivers can be assigned by
administrators only.
Proceed as follows:
ISD300 User Manual
1.
2.
3.
4.
5.
Click SMB printing.
Click Windows drivers.
Select the queues.
Choose a driver from the ’Available drivers’ box.
Click Assign.
How to use ’Point and Print’ with your PC client?
The following step finalizes the ’point and print’ procedure. The
assigned printer drivers will be installed on the client.
Proceed as follows:
1. Click Run on the Windows start menu.
2. Enter the IP address of the ISD300.
Syntax: \\<IP address of the ISD300>
3. Click OK.
4. Select the required queue.
5. Click Connect on the File menu.
The printer driver will be installed on the PC client.
ISD300 User Manual
29
Managing Queues and Jobs
Managing Queues and Jobs
There are different queue types. The queue type specifies which
protocol is used to send the print data from the ISD300 to the
network printer. For further information; see: Types of Queues on
page 31.
Click Queues/Jobs in the main menu to open the Print Queues
page. The page displays a list of all queues with details; see Table
Parameter Information - Print Queues.
ISD300 User Manual
Table: Parameter Information - Print Queues
Parameter
Description
Description
String describing the queue or the connected
printer.
(String can be edited by clicking ’modify’.)
Location
String describing the location of the
connected printer.
(String can be edited by clicking ’modify’.)
Host address
IP address or host name of the connected
printer
State
Indicates the status of the queue
Jobs
Number of pending jobs
The Print Queues page offer a list of features for the management
of the print jobs and queues. These include:
-
(Automatic) identification of all network printers
-
Creating, modifying and deleting print queues
Stopping and deleting print jobs
Re-routing print jobs to alternative queues (e.g. when a printer
is not operational)
Blocking print queues (e.g. when a printer is not operational)
Creating balance queues
ISD300 User Manual
30
Managing Queues and Jobs
-
Creating copy queues (simultaneous print out of multiple
copies on more than one printer)
ISD300 User Manual
What do you want to do?
•
•
•
•
•
How to create a Queue?
•
•
•
•
•
•
•
How to delete a Queue?
How to modify a Queue?
How to stop or restart a Queue? (Accumulate Print Jobs)
How to reject or accept Print Jobs?
How to assign a Filter Application (3party software) to a
Queue?
How to display all active Jobs?
How to display a Job History?
How to manage a Print Job?
How to move a Print Job to another Queue?
How to print one Job on several Printers? (Copy Queue)
How to keep printed Jobs in a Queue?
Types of Queues
The queue type specifies which protocol is used to send the print
data from the ISD300 to the network printer.
Table: Information - Queue Types
Queue Type
Description
TCP/IP
socket
printing
The queue Socket/HP JetDirect sends print jobs to a
network printer that prints via TCP/IP socket printing.
When creating the queue, the printer’s IP address or host
name and the TCP/IP port have to be specified.
The same TCP/IP port must also be configured on the
network card of the printer.
ISD300 User Manual
31
ISD300 User Manual
Managing Queues and Jobs
Queue Type
Description
LPD
The LPD queue sends print jobs to a network printer that
prints via the LPD protocol. When creating the queue, the
printer’s IP address or host name and the remote queue
name as remote device have to be specified.
IPP
The IPP queue sends print jobs to a network printer that
prints via IPP (Internet Printing Protocol). When creating
the queue, the device URI of the printer’s network card
has to be specified. (Example for SEH print servers:
ipp://host name/ipp/lp1)
USB printer
The USB printer queue sends print jobs to a printer that is
connected to one of the USB ports of the ISD300. When
creating the queue, you must specify the USB port to
which the printer is connected.
Search
Network
Printer
Search network printer searches via SNMP for network
printers. When creating the queue, you must specify the
IP address range to be searched through.
The ISD300 searches through this address range and
displays all detected network printers. By choosing one of
the detected network printers, the network printer will be
connected to the queue.
Depending on the network card of the printer, the printing
method (TCP/IP sockets, LPD, or IPP) will be selected
automatically. The creation of a queue via Search
Network Printer is identical to the creation of a queue
during the Quick Setup.
ISD300 User Manual
32
ISD300 User Manual
Managing Queues and Jobs
Queue Type
Description
Balance
queue
A balance queue can be used to print the print job on the
next available printer. A balance queue contains
subordinate queues as members which are, on their part,
also assigned to the printers. When creating the queue,
you must specify which queues are to be assigned as
member.
A prerequisite for using balance queues is that the
connected printers are identical in construction or at least
similar.It is possible to use a balance queue with printers
of different manufacturers if these printers can be
addressed via a common printer driver, such as the HP
LaserJet5.
The common printer driver is assigned to the queue and
all printers will then use the settings of the common
printer driver.
Copy queue
A copy queue can be used to print the print job on several
printers. Subordinate queues are assigned to the copy
queue as member. When a print job is sent to the copy
queue, the print job is forwarded to all member queues.
When creating the queue, you must specify which
queues are to be assigned as member. A prerequisite for
using copy queues is that the connected printers are
identical in construction or at least similar.
It is possible to use a copy queue with printers of different
manufacturers if these printers can be addressed via a
common printer driver, such as the HP LaserJet5. The
common printer driver is assigned to the queue and all
printers will then use the settings of the common printer
driver. For further information; see: How to print one Job
on several Printers? (Copy Queue) on page 39.
How to create a Queue?
Queues can be created in two ways.
Automatically
During set-up, all print servers / network printers available in the
network are quickly identified by means of an automated search
ISD300 User Manual
33
Managing Queues and Jobs
routine, and made available as print queues. Using the Quick
Setup; see: How to configure via Quick Setup? on page 17. Once
the automatic search for available print servers fails to find a
device, you can still setup, manually.
Manually
ISD300 User Manual
Proceed as follows:
1. Click Queues/Jobs.
2. Click Create Queue.
3. Enter the data; see: Parameter Settings - Create Queue on
page 34.
4. Click Next.
5. Choose the queue type.
6. Click Next.
7. Enter the settings of the connected printer.
8. Click Next.
Table: Parameter Settings - Create Queue
Parameter
Description
Create Queue - Step 1
Queue name
Queue name
Conventions
- letters and numbers are allowed
- hyphens and underscores are allowed
- no space characters
- no more than 32 characters (Windows 98 max.
15 characters)
Description
Location
description of the connected printer
(optionally)
location of the connected printer (optionally)
Create Queue - Step 2
Device type
ISD300 User Manual
see: Types of Queues on page 31 for further
information
34
Managing Queues and Jobs
Parameter
Description
Create Queue - Step 3
ISD300 User Manual
parameters depending from queue types
Socket
Host name /
IP address
-------------Port
Host name or IP address of the printer
(e.g. 192.168.0.21).
-------------------------------------TCP/IP Port of the printer. The same TCP/IP
port must also be configured on the network
card of the printer.
LPD
Host name /
IP address
----------Remote
device
Host name or IP address of the printer
(e.g. 192.168.0.21)
-----------------------------------The remote queue name as remote device
IPP
Device URI
IPP devices are defined by Device URIs.
(Uniform Device Identificator)
Examples:
SEH Print Server:
ipp://hostname/ipp/lp1
http://hostname:631/ipp/lp1
SEH ISD:
ipp://hostname/printers/queuename
http://hostname:631/printers/queuename
USB
USB
Balance
Queue
Members
Select the members (print queues) of the
balance queue
Copy
Queue
Members
Select the members (print queues) of the
copy queue
Search
Network
Printer
search
from
to
Enter a start and end IP address (e.g.
192.168.0.21) for searching printers.
A maximum of 255 IP addresses can be
searched through.
ISD300 User Manual
Specify the USB port to which the printer is
connected
35
Managing Queues and Jobs
How to modify a Queue?
The description, location, type, and connected printer settings of a
queue can be modified:
ISD300 User Manual
Proceed as follows:
1. Click Queues/Jobs.
2. Click Modify in the list of queues.
3. Change the description string if desired; see: Parameter
Settings - Create Queue on page 34.
4. Change the location string if desired.
5. Click Next.
6. Change the queue type if desired.
7. Click Next.
8. Change the settings of the connected printer if desired.
9. Click OK.
How to stop or restart a Queue? (Accumulate Print Jobs)
It is possible to accumulate print jobs in a queue and to print them
at a later date. In order to do this, you must stop the queue. All
incoming print jobs are stored in the queue.
When the queue is restarted later, all pending jobs are printed one
after another. You can also store all printed jobs in the job
repository or the queue.
Proceed as follows:
1. Click Queues/Jobs.
2. Click Settings in the list of queues.
3. Click Stop to stop the queue or
click Start to restart the queue.
How to reject or accept Print Jobs?
It is possible to configure queues in such a way that this accepts or
rejects print jobs. This is important when a queue is not operational.
Proceed as follows:
1. Click Queues/Jobs.
2. Click Setting in the list of queues.
ISD300 User Manual
36
Managing Queues and Jobs
3. Click Reject jobs or Accept jobs.
How to assign a Filter Application (3party software) to a
Queue?
The ISD300 may be used as a platform for specific, printing related
software solutions provided by third parties (e.g. an SAP Barcode
printing solution) or developed by customers themselves. This
makes the ISD appliances perfectly adaptable to diverse
environments and individual requirements.
ISD300 User Manual
Multple filters can be bound to a selectable queue. To use filter
applications install the third party software to the ISD300 (see: How
to install Software? on page 62) and assign the filter to a queue.
Proceed as follows:
1. Click Queues/Jobs.
2.
3.
4.
5.
6.
Click Settings in the list of queues.
Click Filter.
Select a Filter from the Available-List.
Click Add.
Click Confirm.
How to delete a Queue?
It is possible to delete a queue. All pending jobs in the queue will
also be deleted.
Proceed as follows:
1.
2.
3.
4.
Click Queues/Jobs.
Click Settings in the list of queues.
Click Delete queue.
Click OK to confirm.
How to display all active Jobs?
The jobs that are being printed can be viewed. Information about
e.g. the owner, the name and the size of the print job are available.
Proceed as follows:
1. Click Queues/Jobs.
ISD300 User Manual
37
Managing Queues and Jobs
2. Click Current Jobs.
The active jobs will be displayed.
If you want to change the properties of print jobs of one queue, just
click on the queue name in the list.
How to display a Job History?
The last few printed jobs are displayed in the job history.
Information about e.g. the owner, the name and the size of the print
job are available.
ISD300 User Manual
Proceed as follows:
1. Click Queues/Jobs.
2. Click History.
The job history for all queues will be displayed.
How to manage a Print Job?
In queues print jobs can be managed in different ways. (e.g. restart,
delete, hold, release, move to the top (priority)).
Proceed as follows:
1.
2.
3.
4.
Click Queues/Jobs.
Click Jobs.
Select the print jobs.
Select an action.
How to move a Print Job to another Queue?
When a printer is not operational, it is possible to move a print job
to another queue.
Proceed as follows:
1.
2.
3.
4.
Click Queues/Jobs.
Click Jobs.
Select the print jobs.
Select a queue from the ’Move jobs to Queue’ listbox.
ISD300 User Manual
38
Managing Queues and Jobs
How to print one Job on several Printers? (Copy Queue)
Using a copy queue it is possible to print the same print job on
several printers. The copy queue sends the print job to all member
queues. For further information see: Copy queue on page 33.
ISD300 User Manual
Proceed as follows:
1.
2.
3.
4.
5.
6.
7.
8.
Click Queues/Jobs.
Click Create Queue.
Enter a name for the queue.
Click Next.
Choose Copy queue as device type.
Click Next.
Select the members of the copy queue.
Click Next.
How to keep printed Jobs in a Queue?
It’s possible to keep print jobs in a queue. Printjobs in a queue are
available at any time. The access to the printjobs will be fast and
easily.
Proceed as follows:
1.
2.
3.
4.
5.
Click Queues/Jobs.
Click Jobs.
Click Avanced options.
Enable the Keep printed jobs in the queue option.
Click Set.
How to manage Jobs in the Repository
It’s possible to keep print jobs into a repository. So the print jobs
can be managed anytime.
What do you want to do?
•
•
•
•
Store printed Jobs into the Repository
Load Print Files to the Repository
Print Files from the Repository
Delete Print Files from the Repository
ISD300 User Manual
39
Managing Queues and Jobs
Store printed Jobs into the Repository
Proceed as follows:
1.
2.
3.
4.
5.
Click Queues/Jobs.
Click Jobs.
Click Avanced options.
Enable the Store printed jobs into the repository option.
Click Set.
Load Print Files to the Repository
ISD300 User Manual
Proceed as follows:
1.
2.
3.
4.
5.
Click Queues/Jobs.
Click Jobs Repository.
Click Browse....
Select the print file.
Click Upload.
Print Files from the Repository
Proceed as follows:
1.
2.
3.
4.
5.
Click Queues/Jobs.
Click Jobs Repository.
Select the print file.
Select a queue.
Click Print.
Delete Print Files from the Repository
Proceed as follows:
1.
2.
3.
4.
Click Queues/Jobs.
Click Jobs Repository.
Select the print file.
Click Delete.
ISD300 User Manual
40
Managing Queues and Jobs
How to print a Test Page?
In order to test queues and printers, you can print a test page.
Proceed as follows:
ISD300 User Manual
1. Click Queues/Jobs.
2. Click Setting in the list of queues.
3. Choose the data format for printing the test page (PostScript or
ASCII).
4. Click Print Test page.
ISD300 User Manual
41
Printing methods
Printing methods
You can print to the ISD300 by several methods. They specify
which protocol is used to send the print data from the client to the
ISD300. Usually you define this, while setting up a printer on your
client PC.
ISD300 User Manual
What do you want to do?
•
•
•
•
•
LPD Printing
Point & Print
IPP Printing
Socket Printing
ThinPrint®
LPD Printing
Every queue created during the Quick Setup automatically supports
LPD printing. The port name for the configuration of the client must
be identical with the queue name on the ISD300.
For further information about using LPD to address ISD300 to
printers see: Types of Queues on page 31.
Point & Print
Point and Print is a term that refers to the capability of allowing a
user on a Windows client to create a connection to a remote printer
without providing disks or other installation media. For further
information about using LPD to address ISD300 to printers see:
How to prepare the ISD300 for’Point and Print’? on page 26.
IPP Printing
Every queue created during Quick Setup automatically supports
IPP printing. Please use the following syntax for the configuration of
the client:
syntax: http://<IP address or host name of the
ISD300>:631/printers/<queue name on the ISD300>
example: http://192.168.0.123:631/printers/MY_QUEUE
ISD300 User Manual
42
Printing methods
For further information about using IPP to address ISD300 to
printers see: Types of Queues on page 31.
Socket Printing
It is possible to assign TCP ports in the range from 9100 to 9107 to
print queues. By this way clients may send print jobs to the ISD300
via socket printing and address a queue.
ISD300 User Manual
Proceed as follows:
1.
2.
3.
4.
Click Queues/Jobs.
Click Sockets.
Select a queue for each TCP port.
Click Set.
The queue is assigned to the port number.
ThinPrint®
The ISD300 come with an integrated ThinPrint® server. Used as a
gateway, the ISD appliances receive and decompress print jobs
that have previously been compressed and optimised relating to
the bandwidth required for their transmission via the ThinPrint
technology. ThinPrint is primarily used in Server-based computing.
The ISD300 receives jobs from a ThinPrint® server and sends the
jobs to the network printer either via socket printing, IPP printing or
LPD printing depending on the type of the queue.
For using the ISD300 in a ThinPrint® environment, a ThinPrint® ID
must be assigned to each queue. This ID can be any numeric value
from 0 to 400.
Proceed as follows:
1. Click Queues/Jobs.
2. Click ThinPrint®.
3. Enter the ThinPrint® ID.
4. Click Set.
ISD300 User Manual
43
Using ISD300 as DHCP / DNS Server
Using ISD300 as DHCP / DNS Server
The ISD300 comes with an integrated DHCP/DNS server.
Compared with dedicated DHCP/DNS servers the ISD300 provides
a limited set of features. It is designed for small networks without
complex administrative structures.
What do you want to do?
ISD300 User Manual
•
•
•
•
How to set the DHCP Service?
How to display the lease file?
How to set DNS Server?
How to start/stop the DHCP or DNS Server?
How to set the DHCP Service?
DHCP (Dynamic Host Configuration Protocol) is an Internet
protocol for automating the configuration of computers. DHCP can
be used to automatically assign IP addresses, to deliver TCP/IP
stack configuration parameters such as the subnet mask and
default router, and to provide other configuration information.
DHCP service can be set by administrators only.
Proceed as follows:
1. Click DHCP & DNS.
2. Click Configure DHCP server.
3. Enter the IP address range; see: Parameter Settings - DHCP
Server on page 45.
4. Enter the Fixed IP addresses; see: Parameter Settings DHCP Server on page 45.
5. Enter the DHCP Options; see: Parameter Settings - DHCP
Server on page 45.
6. Click Save.
After DHCP service is set, the server can be started; see: How to
start/stop the DHCP or DNS Server? on page 48.
ISD300 User Manual
44
Using ISD300 as DHCP / DNS Server
Table: Parameter Settings - DHCP Server
Parameter
Description
Address ranges
Start Address
ISD300 User Manual
End Address
‘IP Address Range’ is the range that supplies
DHCP leases to DHCP clients. Up to four
ranges are supported. These can be used to set
exclusion ranges. When a DHCP range is
created, a ‘Start Address’ and an ‘End Address’
need to be entered. Once created, a range
cannot be modified. To modify range settings,
the range must be deleted and a new range
defined.
Fixed IP addresses
MAC Address
IP-Address
Hostname
Hosts receive their explicitly-reserved IP
addresses from the DHCP server. Up to ten IP
addresses may be reserved. For this, the host
requires the following information:
- MAC Address
- IP-Address
- Hostname
To modify host settings, the host must be
deleted and a new host defined.
DHCP Options
These data are equally used for all ranges and hosts. Several server
addresses are separated by a comma.
Lease time
Subnet mask
Broadcast address
Default routers
ISD300 User Manual
The time, in seconds or hours that a DHCP
lease should be provided a host.
A lease is the length of time that a DHCP server
specifies that a client computer can use an
assigned IP address.
The subnet from which to serve the IP
addresses
Broadcast address
Default routers
45
Using ISD300 as DHCP / DNS Server
Parameter
DNS servers
DNS domain name
GMT Time offset
ISD300 User Manual
NTP servers
Description
IP address of the DNS server
DNS domain name
GMT Time offset in seconds Difference between the local time and the
Greenwich Mean Time or UTC (Universal Time
Coordinate) provided by the time server
IP address of the NTP time server
SMTP servers
IP address of the SMTP server
POP3 servers
IP address of the POP3 server
WINS servers
IP address of the WINS server
NetBIOS node type
NetBIOS node type
How to display the lease file?
Information about the DHCP Server configuration is shown in a
lease file.
Proceed as follows:
1. Click DHCP & DNS.
2. Click View leases file to display the file.
In order to save the lease file click Save.
How to set DNS Server?
DNS (Domain Name System) is a service translating names into IP
addresses. DNS is very helpful in particular since names are
retained a lot easier than multiple digits numbers (i.e. Titan instead
of 192.168.0.231). In addition, DNS allows for more flexibility since
names may be assigned independent of IP addresses, therefore,
enabling names to be changed or assigned to a different IP
address at any time.
The task of the DNS server as Slave (Primary) is the sharing of
load. In this way a faster allocation is reached within DNS structure.
ISD300 User Manual
46
Using ISD300 as DHCP / DNS Server
DNS can be set by administrators only.
Proceed as follows:
ISD300 User Manual
1. Click DHCP & DNS.
2. Click Configure DNS server.
3. Enter the data; see: Parameter Settings - DNS Server on page
47.
4. Click Save.
After DNS is configured, the server must be started; see: How to
start/stop the DHCP or DNS Server? on page 48.
Table: Parameter Settings - DNS Server
Parameter
Description
Master DNS
servers
All requests to the ISD300 that cannot be answered
locally or by the servers for local domains are
forwarded to the master servers. Up to 300 answers
from the master servers are cached by the ISD300
to minimize network traffic.
Example: 192.168.000.200
Forward Zones
(servers for local
domains names)
All requests to local domains served by other local
DNS servers can be forwarded to this local DNS
servers. This option can be used to keep network
traffic away from extern master servers (Which might
only serve internet names).
Example: localdomain 192.168.22.11
Master Zones
(Domain names
served by the
ISD300)
DNS request to domains, specified here are not
forwarded to other servers. If the request cannot be
resolved locally, the requesting client receives an
error.
ISD300 User Manual
47
Using ISD300 as DHCP / DNS Server
How to start/stop the DHCP or DNS Server?
After DHCP or DNS is configured, the server can be started.
Proceed as follows:
ISD300 User Manual
1. Click DHCP & DNS.
2. Click Start Server.
In order to start the server during system boot automatically, enable
the Yes option and click Save.
ISD300 User Manual
48
Security
Security
Access to the ISD300 and to the entire configuration is controlled
by means of a multiple level access protection.
ISD300 security can be configured by administrators only.
ISD300 User Manual
What information do you need:
•
•
•
•
Panel Lock (PIN)
Login Accounts
Certificates
IP Sender Protection (Restricting Printing Access)
Addionally the user management may also be integrated into the
Windows Active Directory; for further information see: Microsoft
Authentication (SMB) on page 20.
Panel Lock (PIN)
The ISD300’s operating panel can be protected from unauthorized
access with a 4-digit PIN. If the panel is locked, the requested PIN
is entered directly on the device.
What do you want to do?
•
•
Setting the PIN
Entering the PIN
For further information about the Panel Interface see: Using the
Panel Interface on page 8.
Setting the PIN
The administrator sets the PIN on the ISD300 Homepage. The PIN
defaults to ‘0000’. With this PIN, the panel is not protected. If the
factory default settings are restored, the PIN is erased, i.e. it is
reset to the default value.
Proceed as follows:
1. Click Configuration.
2. Click HTML Passwords.
ISD300 User Manual
49
Security
3. Enter the PIN.
4. Click Set.
Entering the PIN
If a PIN has been set, the message ‘Enter PIN’ appears on the
display after a button is pressed.
To enter the PIN use the navigation keys on the ISD300. Use
to
navigate to individual numerical values within the PIN. Change
individual numerical values via
.
ISD300 User Manual
Carry out your action. When the action is complete, the operating
panel is again protected by the PIN.
Login Accounts
The simply access to the ISD300 Homepage is made by a user in
conjunction with a password. Username and password are
transferred unencrypted. For an encrypted connection (SSL)
certificates are needed; see: Certificates on page 52.
Access to the ISD300 Homepage is defined for three user groups:
’Any’, ’User’, and ’Admin’. See the table below for an overview of
the access rights for each group.
Table: Information - User groups
User group
Access rights
Default password
Any
-
retrieving status information about
queues and print jobs
no password
necessary
User
-
retrieving status information about
queues
user
-
managing own print jobs, e.g.
deleting, halting print jobs,
changing hierarchy (depending on
the configuration by the
administrator)
ISD300 User Manual
50
Security
User group
ISD300 User Manual
Admin
Access rights
-
retrieving status information
-
deleting, halting, and changing
hierarchy of all print jobs
-
installing, configuring, and
maintaing the ISD300
Default password
admin
setting up and administrating
queues
The access rights for the ’user’ login are freely definable by the
administrator.
What do you want to do?
•
•
Changing the password of a login account
Setting access rights for the ’User’ Login Account
Changing the password of a login account
The manufacturer supplies the default passwords user and admin
for the login accounts ’user’ and ’admin’. These default passwords
can be changed.
Proceed as follows:
1.
2.
3.
4.
5.
6.
7.
Click Configuration.
Click HTML Passwords.
Choose the user group (Admin or User).
Enter the old password.
Enter the new password.
Confirm the new password.
Click Set.
Setting access rights for the ’User’ Login Account
The ’user’ login account has predefined access rights to the
ISD300 (e.g. querying the status of queues or the administration of
own print jobs). The access rights can be restricted by
administrators only.
ISD300 User Manual
51
Security
Proceed as follows:
1. Click Configuration.
2. Click User Profile.
3. Enable or disable the desired check boxes; see: Parameter
Settings - User Profile on page 52.
4. Click Set.
Table: Parameter Settings - User Profile
ISD300 User Manual
Parameter
Description
Allow from all hosts
The access rights are granted to print jobs
sent from any host.
Set job to top of queue
The ’user’ is allowed to change the order of
jobs within the queue
Move
The ’user’ is allowed to move print jobs from
one queue to another
Delete jobs
The ’user’ is allowed to delete print jobs
Hold/Release Jobs
The ’user’ is allowed to hold and release
print jobs
Print saved jobs
The ’user’ is allowed to print jobs that are
saved in the job repository of the ISD300.
Certificates
The communication via the Web interface may be encrypted using
HTTPs (SSL). Self-signed certificates (SSLv3) and CA certificates
can be used in TCP/IP-based networks to encrypt data and to
authenticate communication partners.
-
Self-signed certificates have a digital signature that has been
created by the ISD300.
-
CA certificates are certificates that have been signed by a
certification authority (CA). The authenticity of the CA
certificate can be verified by means of a so-called root
ISD300 User Manual
52
Security
certificate issued by the certification authority. The root
certificate is stored on an authentication server in the network.
Upon delivery, a self-signed certificate (the so-called default
certificate) is stored on the ISD300. If you set up encrypted printing
via https the default certificate is used. It is recommended that you
replace the default certificate by a self-signed certificate or CA
certificate.
What do you want to do?
ISD300 User Manual
•
•
•
Creating a self-signed certificate
Creating a CA certificate
Deleting certificates
Creating a self-signed certificate
Certificates can be created by administrators only. If a certificate
has already been saved on the ISD300, the content of this
certificate will be displayed. In this case you have to delete the
existing certificate first; see: Deleting certificates on page 55.
Proceed as follows:
1. Click Maintenance.
2. Click Certificate.
3. Enter the data; see: Parameter Settings - Certificates on page
53.
4. Choose Create self-signed certificate.
5. Click Create.
The certificate is created and installed.
Table: Parameter Settings - Certificates
Parameter
Description
Common name
Is used to clearly identify the certificate. It is
advisable to use the IP address or the host name of
the print server to allow a clear assignment of the
certificate to the print server. You can enter a
maximum of 64 characters.
ISD300 User Manual
53
Security
ISD300 User Manual
Parameter
Description
E-mail address
Indicates an e-mail address. This parameter is
optional. You can enter a maximum of 40
characters. (Entry is optional)
Organization
name
Specifies the company that uses the print server.
You can enter a maximum of 64 characters.
Organizational
unit
Specifies the department or subsection of a
company. This parameter is optional. You can enter
a maximum of 64 characters. (Entry is optional)
Locality name
Specifies the locality where the company is based.
You can enter a maximum of 64 characters.
State name
Specifies the state in which the company is based.
This parameter is optional. You can enter a
maximum of 64 characters. (Entry is optional)
Country name
Specifies the country in which the company is
based. Enter the two-digit country code according to
ISO 3166.
Examples:
DE for Germany, GB for Great Britain, US for the
USA
Issued on
Specifies the date after which the certificate is valid.
Expires on
Specifies the date after which the certificate is
invalid.
Creating a CA certificate
Certificates can be created by administrators only. If a certificate
has already been saved on the print server, the content of this
certificate will be displayed. In this case you have to delete the
existing certificate first; see: Deleting certificates on page 55.
When a certificate request has been created, no self-signed
certificate may be created until the CA (certification authority)
certificate has been saved.
ISD300 User Manual
54
Security
Proceed as follows:
ISD300 User Manual
1.
2.
3.
4.
5.
Click Maintenance.
Click Certificate.
Enter the data.
Choose Create certificate request.
Click Create.
The certificate request is created.
6. Click OK to confirm.
7. Copy the text from 'Begin Certificate Request' to 'End
Certificate Request' and paste it into a text file for saving.
8. Send the certificate request to a certification authority.
When the CA certificate has been received, it must be saved on the
ISD300.
9. Click Browse....
10. Select the file.
11. Click Load.
12. Click OK to confirm.
Deleting certificates
Proceed as follows:
1. Click Maintenance.
2. Click Certificate.
3. Click Delete.
The certificate is deleted.
IP Sender Protection (Restricting Printing Access)
Printing access to a queue can be restricted to IP addresses (e.g.
192.168.0.247) or ranges (e.g. 192.168.0.*). If no entries are made,
protection is disabled. SMB accesses are not controlled via IP
Sender Protection
Proceed as follows:
1.
2.
3.
4.
Click Queues/Jobs.
Click Jobs.
Click Protection.
Enter the IP address of a sender.
ISD300 User Manual
55
Security
ISD300 User Manual
5. Click Add.
6. Click Confirm.
ISD300 User Manual
56
Maintenance
Maintenance
On the page Maintenance you will find detailed information about
the board.
With the assistance of the Software Manage Wizard you can install
and delete software on the ISD300 or create a backup.
Maintenance work can be done by administrators only.
ISD300 User Manual
What do you want to do?
•
•
•
•
•
•
•
How to get Board Information?
How to configure e-mail or SNMP trap notifications?
How to update Firmware or Software?
How to create a Backup?
How to reboot the ISD300?
How to install Software?
How to delete Software?
How to get Board Information?
Detailled information about board settings can be found on the
page Maintenance; see: Table: Parameter Information - Board
Info.
Proceed as follows:
1. Click Maintenance.
2. Click Board Info.
ISD300 User Manual
57
Maintenance
Table: Parameter Information - Board Info
Parameter
Description
ISD300 User Manual
Board
Default name
Default name of the ISD300 (set by the
manufacturer)
Host name
Host name of the ISD300 (set by the
administrator)
Date
Current date
Uptime
Period of time during which the ISD300
is operational
Serial number
Serial number set by the manufacturer
Software version
Release number of the software
Firmware version
Release number of the firmware
Hardware version
Release number of the hardware
Network
Hardware address
Hardware address of the ISD300 (set by
the manufacturer)
IP address
IP address of the ISD300
Netmask
Netmask
Gateway
IP address of the gateway used to
access other networks or subnets. This
enables the ISD300 to communicate
with devices on other subnets.
Primary DNS server
IP address or host name of the primary
(master) DNS server
Secondary DNS
server
IP address or host name of the
secondary (slave) DNS server
DNS Domain
Name of the DNS domain
MS Windows Settings
ISD300 User Manual
58
Maintenance
Parameter
Description
NetBIOS name
NetBIOS name of the ISD300
NetBIOS workgroup
Name of the NetBIOS workgroup
WINS server
IP address or host name of the WINS
server
Windows printer
admin
Local user who can upload printer
drivers on the ISD300 and change
global printer settings
ISD300 User Manual
Hard Disk
Model
Name of the hard disk
Total (spool area)
Total hard disc space for spooling print
jobs
Available
Available hard disc space for spooling
print jobs
How to configure e-mail or SNMP trap notifications?
Automatic error notification ensures possible system errors are
instantly communicated to the administrator via email or SNMP
Traps.
The ISD300 sends warnings and error messages via e-mail or
SNMP traps to a recipient. The system administrator is
automatically notified by the ISD300 if an error occurs on the
ISD300. The notification level specifies which messages will be
sent.
Notifications can be set by administrators only.
Proceed as follows:
1. Click Configuration.
2. Click Notification.
3. Enter the data; see Table: Parameter Settings - Notification.
ISD300 User Manual
59
Maintenance
4. Click Set.
Table: Parameter Settings - Notification
Level
Description
E-Mail
Mail server
ISD300 User Manual
Recipient
Notification
Level
IP address or the host name of the mail server
(e.g. 192.168.0.21)
e-mail address of the recipient
(e.g. [email protected])
The notification level specifies which
messages will be sent.
Disabled
no messages will be sent
Errors only
only fatal system errors will be sent, such as
”Unable to connect to spool server”
Warnings and errors
system errors and warnings will be sent, such
as ”Password for user ’admin’ changed”
All messages
all types of messages will be sent, including
messages such as ”Print queue <queue
name> created”
SNMP Traps
IP address
IP address or the host name of the SNMP
server (e.g. 192.168.0.21)
Trap
community
Trap community
(e.g. public)
Notification
level
see above
ISD300 User Manual
60
Maintenance
It is not necessary to delete the notification setup. The notification
function can be switched of. Choose Disabled in the ’notification
level’ list box.
How to update Firmware or Software?
ISD300 can be updated, simply receiving new firmware or software
via the network.
ISD300 User Manual
During a firmware update, the old firmware is overwritten and
replaced. The configuration parameters retain their original
settings.
The ISD300 comes with the current firmware and software, so that
an update is generally only required as bugfix.
Proceed as follows:
1.
2.
3.
4.
5.
6.
7.
8.
9.
Click Maintenance.
Click Software.
Choose Install software on the ISD300.
Click Next.
Click Browse....
Select a firmware or software file.
Click Next to upload the file to the ISD300.
Click Next to apply the firmware or software to the ISD300.
Click OK.
The ISD300 may be rebooted automatically to activate the
firmware or software.
How to create a Backup?
The system configuration can be stored in a backup file on another
system. If required, the configuration then can be restored within
seconds. This configuration can also be used to configure further
ISD devices, to achieve consistent configuration and minimise
installation times.
With the assistance of the Software Manage Wizard you can create
a backup image of
-
DHCP and DNS settings
ISD300 User Manual
61
Maintenance
-
Network settings, queues, drivers, users and access control
Queues and drivers
Drivers only
ISD300 User Manual
Proceed as follows:
1.
2.
3.
4.
5.
6.
7.
8.
Click Maintenance.
Click Software.
Choose Create backup on the ISD300.
Click Next.
Enable the desired check boxes.
Click Create.
Click Download to save the backup file on your client.
Click Finish to go back to the first page of the Software Manage
Wizard.
How to reboot the ISD300?
The ISD300 must be rebooted after a firmware or software update,
so that the update can take effect.
Proceed as follows:
1. Click Maintenance.
2. Click Reboot.
3. Click Reboot.
How to install Software?
With the assistance of the Software Manage Wizard you can install
filters or manuals on the ISD300.
-
For further information about filters applications see: How to
assign a Filter Application (3party software) to a Queue? on
page 37.
-
For further information about manual see: Manual on page 7.
Proceed as follows:
1. Click Maintenance.
ISD300 User Manual
62
Maintenance
2.
3.
4.
5.
6.
7.
8.
9.
Click Software.
Choose Install software on the ISD300.
Click Next.
Click Browse....
Select a file.
Click Next to upload the file to the ISD300.
Click Next to apply the file to the ISD300.
Click OK.
ISD300 User Manual
How to delete Software?
With the assistance of the Software Manage Wizard you can delete
software (Windows driver, backup files, filters, firmware or software
files) from the ISD300.
Proceed as follows:
1.
2.
3.
4.
5.
6.
7.
8.
Click Maintenance.
Click Software.
Choose Delete software from the ISD300.
Click Next.
Select the resources you want to delete.
Click Delete.
Click OK to confirm.
Click OK to go back to the first page of the Software Manage
Wizard.
ISD300 User Manual
63
Parameter Description
ISD300 User Manual
Parameter Description
Parameter Information - Home....................................................
Parameter Settings - TCP/IP ......................................................
Parameter Settings - Board.........................................................
Parameter Settings - DNS ..........................................................
Queue Name Conventions..........................................................
Parameter Information - MS Windows ........................................
Parameter Settings - MS Windows Domain member..................
Parameter Information - Print Queues ........................................
Information - Queue Types .........................................................
Parameter Settings - Create Queue............................................
Parameter Settings - DHCP Server ............................................
Parameter Settings - DNS Server ...............................................
Information - User groups ...........................................................
Parameter Settings - User Profile ...............................................
Parameter Settings - Certificates ................................................
Parameter Information - Board Info.............................................
Parameter Settings - Notification ................................................
ISD300 User Manual
12
15
16
17
18
21
22
30
31
34
45
47
50
52
53
58
60
64
Index
Index
A
N
Access Rights 51
Authentication 20
Local 23
Netmask 13
Network Settings 13
Notification
e-mail 59
SNMP trap 59
B
Backup 61
ISD300 User Manual
C
P
Host Name 15
Panel Interface 8
Panel Lock 49
Password 51
PIN 49
enter 50
set 49
Point and Print 26
Print Drivers 26
assign 28
store 27
Print Jobs 30
accumulate 36
delete 38
display 37
keep in a Queue 39
move to Queue 38
Printer Administrator Account 25
Printing Methods 42
I
Q
Certificates
CA certificate 54
delete 55
selfsigned certificate 53
Configuring 13
D
Date and Time 16
DHCP 44
DNS 17, 44
F
Filter Application 37
G
Gateway 13
H
IP 13
IPP Printing 42
ISD300 Homepage 10
J
Job History 38
Job Repository 39
L
Local Users and Groups 23
Login Accounts 56
LPD Printing 42
ISD300 User Manual
Queues 30
copy 39
create 33
delete 37
modify 36
stop 36
types 31
Quick Setup 17
65
Index
R
Reboot 62
Repository
load files 40
print files 40
print jobs 40
ISD300 User Manual
S
Security 49
SNMP trap 59
Socket Printing 43
Software
delete 63
install 62
Switch off 9
Switch on 9
T
TCP/IP Parameters 13
Technical Data 4
Test Page 41
ThinPrint® 43
U
Update
firmware 61
software 61
ISD300 User Manual
66