1
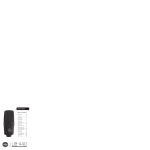
USER’S GUIDE
Table of Contents:
Introduction.................... 2
Overview......................... 3
Precautions..................... 4
Setting Up...................5-9
Specifications......... 10-11
Troubleshooting.....12-13
Warranty........................ 14
ASM-5
Thank you for choosing Senal.
The The Senal ASM-5 Two-Way Active Speaker is designed for
near-field monitoring in professional audio applications. The
ASM-5 features active filter technology and a dual-channel
power amplifier, driven by a 5″ woofer and 0.8″ metal dome
tweeter that deliver a wide and flat frequency response with
pristine audio reproduction and accurate sound imaging. The
cabinet’s curved port tube provides natural low-frequency
output and minimizes distortion, while the ellipsoidal
design and rigid, high-intensity aluminum alloy construction
prevent diffraction and cabinet resonance. This meticulous
engineering allows the ASM-5 to handle high sound pressure
levels in a compact cabinet size.
Fine-tune settings allow the user to adjust the high, mid, and
low frequencies to compensate for the listening environment,
speaker placement, and audio source. There is also a threeposition high-pass filter for low-frequency cutoff that makes
it easy to match the speaker with a subwoofer. The ASM-5
comes with a rubber base that isolates the speaker from its
resting surface to prevent resonant coupling, and makes it
easy to adjust the vertical angle of the speaker to down fire or
up fire. The speaker can also be mounted on a wall or a stand
via the mounting threads on the cabinet.
2
▪
▪
▪
▪
▪
▪
▪
▪
▪
▪
▪
▪
▪
▪
▪
▪
▪
▪
▪
▪
▪
▪
▪
▪
▪
▪
▪
▪
▪
▪
▪
▪
▪
▪
▪
▪
▪
▪
▪
▪
▪
▪
▪
▪
▪
▪
▪
▪
▪
▪
▪
▪
▪
▪
▪
Introduction
Overview
Tweeter
Woofer
SETTING
55
65
HF
LF
MF
HP
75
Volume control
Power LED
Power switch
Also Included:
XLR to XLR cable
XLR to RCA cable
AC power cable
User manual
Rubber base
Mounting threads
Fine-tune settings
HF High frequency
MF Mid frequency
LF Low frequency
HP High-pass filter
Vent
SETTING
55
65
HF
LF
MF
HP
75
XLR input
Power input
Frequency adjust terminal
Mounting thread
Overview
▪
▪
▪
▪
▪
▪
▪
▪
▪
▪
▪
▪
▪
▪
▪
▪
▪
▪
▪
▪
▪
▪
▪
▪
▪
▪
▪
▪
▪
▪
▪
▪
▪
▪
▪
▪
▪
▪
▪
▪
▪
▪
▪
▪
▪
▪
▪
▪
▪
▪
▪
▪
▪
▪
▪
▪
▪
▪
3
Precautions
▪ Please read and follow these instructions, and keep this
manual in a safe place.
▪ Exposure to high sound levels can cause permanent
hearing loss. Avoid listening at high volumes for extended
periods of time.
▪ Keep this product away from water, moisture, and any
flammable gases or liquids.
▪ Make sure this product is powered off when plugging it
into a power source.
▪ Use only the correct, recommended voltage.
▪ Do not attempt to disassemble or repair this product.
There are components inside that can produce a
hazardous electric shock.
▪ Handle this product with care.
▪ Clean this product with only a soft, dry cloth.
▪ Keep this product away from children.
▪ All photos are for illustrative purposes only.
4
▪
▪
▪
▪
▪
▪
▪
▪
▪
▪
▪
▪
▪
▪
▪
▪
▪
▪
▪
▪
▪
▪
▪
▪
▪
▪
▪
▪
▪
▪
▪
▪
▪
▪
▪
▪
▪
▪
▪
▪
▪
▪
▪
▪
▪
▪
▪
▪
▪
▪
▪
▪
▪
▪
▪
Precautions
Setting Up
Mounting the Speaker
For desktop placement,
place the speaker on the
included Crubber base. This
base serves to isolate the
L
R
speaker from its resting
30°
surface and prevent
resonant coupling. The base
110°
is designed to make it easy
for you to adjust the vertical
angle of the speaker to
LSdown fire or up fire,
RSso you
can aim the acoustic axis at
the listener’s ear.
L
C
R
LS
RS
The speaker may also be mounted on a wall via the mounting
threads on the rear of the cabinet, or on a speaker stand via
the threaded mount on the bottom of the cabinet. To mount
the speaker on a wall, you can use the Senal speaker bracket
kit, sold separately.
Setting Up
▪
▪
▪
▪
▪
▪
▪
▪
▪
▪
▪
▪
▪
▪
▪
▪
▪
▪
▪
▪
▪
▪
▪
▪
▪
▪
▪
▪
▪
▪
▪
▪
▪
▪
▪
▪
▪
▪
▪
▪
▪
▪
▪
▪
▪
▪
▪
▪
▪
▪
▪
▪
▪
▪
▪
▪
▪
5
Speaker Placement and Positioning
Position the speakers 2.3′ to 6′ (0.7
to 1.8 m) from where the listener will
be situated, and aim the tweeter
at the approximate height of the
listener’s ears. There should be no
obstructions between the speakers
and the listener. Each speaker should
be 3.5″ (9 cm) or more from the wall
to prevent early reflections, which
can interfere with stereo imaging.
3.5˝
L
L
R
For stereo placement, space the speakers equally to form an
equilateral triangle with the listener at the third point of the
triangle.
LS
C
R
L
L
R
R
L
30°
110°
LS
LS
RS
For five-channel placement, arrange the speakers in a circle,
L
C
R
R As with stereo
with the listener in the center.
placement,
the
left and right
speakers should form an equilateral triangle
L
with the listener. Place the center speaker between the left
and right speakers, so they are spaced evenly at 30° from
each other. Place the rear left and rear right speakers behind
LS from the center.
RS
the listener, at an angle of 100° to 120°
speaker.
6
▪
▪
▪
▪
▪
▪
▪
▪
▪
▪
▪
▪
▪
▪
▪
▪
▪
▪
▪
▪
▪
▪
▪
▪
▪
▪
▪
▪
▪
▪
▪
▪
▪
▪
▪
▪
▪
▪
▪
▪
▪
▪
▪
▪
▪
▪
▪
▪
▪
▪
▪
▪
▪
▪
▪
▪
Setting Up
C
L
R
L
C
R
R
L
30°
110°
LS
LS
R
RS
RS
Note that both setups are perfectly symmetrical, with each
C distance
R
speaker atLan equal
from the listener, and the right
and left sides a mirror image from each other. For optimal.
audio performance, the listener and the center speaker
should be on the centerline of the room.
The Listening Environment
LS
RS
A room with dimensions that are multiples of each other,
such as a room that is twice as wide as it is tall, may result
in standing waves that can blur the bass frequencies. Large
areas of a smooth material like glass will cause acoustic
reflections and may interfere with sound-field reproduction
and imaging. You can avoid reflections by strategically
placing sound-absorbing materials like acoustic foam,
carpeting, and heavy curtains around the room.
Connecting the Speaker
Before connecting your speaker to the audio source and
the power source, make sure that the speaker and the audio
source are turned off and that the volume controls are turned
all the way down.
Setting Up
▪
▪
▪
▪
▪
▪
▪
▪
▪
▪
▪
▪
▪
▪
▪
▪
▪
▪
▪
▪
▪
▪
▪
▪
▪
▪
▪
▪
▪
▪
▪
▪
▪
▪
▪
▪
▪
▪
▪
▪
▪
▪
▪
▪
▪
▪
▪
▪
▪
▪
▪
▪
▪
▪
▪
▪
▪
7
1. Determine whether the line level output of your audio
source requires an XLR or an RCA connector. If your
audio source requires an XLR connector, use the included
XLR to XLR cable. If your audio source requires an RCA
connector, use the included XLR to RCA cable.
Audio Source
Power Source
2. Use the included AC power cable to plug the speaker into
an AC power source.
3. Turn on your audio source and the speaker.
4. Use the volume controls on the speaker and your audio
source to adjust the audio level. When using an audio
source that has its own master level, such as a recording
console, turn the volume on the speaker all the way up,
and control the volume through the master level on the
console.
Fine-Tune Settings
You can fine-tune the frequency response of the speaker via
four fine-tune settings on the rear of the cabinet.
8
▪
▪
▪
▪
▪
▪
▪
▪
▪
▪
▪
▪
▪
▪
▪
▪
▪
▪
▪
▪
▪
▪
▪
▪
▪
▪
▪
▪
▪
▪
▪
▪
▪
▪
▪
▪
▪
▪
▪
▪
▪
▪
▪
▪
▪
▪
▪
▪
▪
▪
▪
▪
▪
▪
▪
▪
Setting Up
You can adjust the high frequency (HF) by ±1 dB and the low
frequency (LF) by ±2 dB. We recommend adjusting these to
suit the listening environment.
55
65
HF
HF
LF
MF
LF
75
MF
HP
You can adjust the mid frequency (MF) by
-2 and -4 dB. We recommend adjusting
these to suit your speaker placement.
When the speaker is placed on a stand or
mounted on a wall, we recommend setting
the MF switch to 0. When the speaker is
placed on a desk or table and its face is
3.1″ to 9.8″ (8 to 25 cm) from the edge of
the desk, we recommend
MF
HFsetting the LF
switch to -2. When the speaker is more than
9.8″ (25 cm) from the edge of the desk,
we recommend setting the MF switch to
-4. These measurements are approximate
and will depend on your specific listening
environment.
MF
You can adjust the high-pass (HP) filter to
cut off low frequencies at 55, 65, and 75
Hz. This feature is ideal when matching the
speaker with a subwoofer. When using the
speaker in
pairs, we recommend
setting
HF
LF
MFthe
HP switch to 55 Hz.
HP
55
65
75
HP
The frequency adjust terminal is for testing and adjusting the
curve. It had been adjusted in an anechoic chamber to its
optimal position, and we strongly recommended that you do
not adjust this setting.
Setting Up
▪
▪
▪
▪
▪
▪
▪
▪
▪
▪
▪
▪
▪
▪
▪
▪
▪
▪
▪
▪
▪
▪
▪
▪
▪
▪
▪
▪
▪
▪
▪
▪
▪
▪
▪
▪
▪
▪
▪
▪
▪
▪
▪
▪
▪
▪
▪
▪
▪
▪
▪
▪
▪
▪
▪
▪
▪
9
Specifications
10
▪
▪
System series:
Professional monitor active filter
speaker system
System type:
Two-way vented
Drivers configuration:
5″ (127 mm) midwoofer, 0.8″ .
(20 mm) metal dome tweeter
Frequency range:
55 Hz to 20 kHz
(±2.5 dB, free space)
Harmonic distortion:
65 Hz to 20 kHz ≤1% (85 dB/1 m)
Filter type:
Professional active filter
Rated power:
70 W RMS/channel
Active crossover
frequency:
3.0 kHz
Bass adjustment range:
+ 2, 0, -2 dB (200 Hz)
Mid-low adjustment
range:
0, - 2, -4 dB (500 Hz)
Treble adjustment range:
+1, 0, -1 dB (10 kHz)
High-pass filter:
55, 65, 75 Hz
Signal-to-noise:
>94 dB (unweighted)
Input sensitivity:
350 mV
Input impedance:
12,000 Ω
Maximum input:
3,000 mV
Finish:
High-intensity aluminum alloy
cabinet
Dimensions:
7.4″ × 10.5″ × 7.2″
(188 × 266.7 × 182.9 mm)
Weight:
12.5 lb. (5.7 kg)
▪
▪
▪
▪
▪
▪
▪
▪
▪
▪
▪
▪
▪
▪
▪
▪
▪
▪
▪
▪
▪
▪
▪
▪
▪
▪
▪
▪
▪
▪
▪
▪
▪
▪
▪
▪
▪
▪
▪
▪
▪
▪
▪
▪
▪
▪
▪
▪
▪
▪
▪
▪
Specifications
Distortion Curve
SPL,2H,3H, Harmonic Distortion:
Distortion Curve
Harmonic Distortion: 60mV/1m (Fund, 2H, 3H)
100
80
60
40
20
dB
0
Hz
200
Total20Harmonic
Distorion:
2k
20k
Total Harmonic Distortion: dB and % (THD)
0
dB
-20
10%
-40
1%
-60
0.1%
-80
20
Specifications
Hz
▪
▪
▪
▪
▪
▪
200
▪
▪
▪
▪
▪
▪
▪
▪
▪
2k
▪
▪
▪
▪
▪
▪
▪
▪
▪
▪
▪
▪
▪
▪
▪
▪
▪
20k
▪
▪
▪
▪
▪
▪
▪
▪
▪
▪
▪
▪
▪
▪
▪
▪
▪
▪
▪
▪
▪
11
Troubleshooting
Problem
Reason
There is no
sound coming
from the
speaker.
There is
no sound
coming from
one of the
channels in a
multichannel
setup.
12
▪
▪
▪
▪
▪
▪
▪
▪
▪
▪
▪
▪
▪
▪
▪
▪
▪
Solution
Comment
The power
cable is not
connected.
Connect the
power cable.
The speaker is
turned off.
Turn the
speaker on.
There is a
short circuit
or the audio
source is not
connected to
the speaker.
Check
whether the
audio cable
has a short
circuit or is
disconnected
from the
speaker. If
necessary,
plug the
cable into the
speaker.
The volume
control is
turned down.
Turn up
the volume
control on the
speaker or the
audio source.
The
balance of
the audio
source is
not set
properly.
Adjust the
balance of
the audio
source.
▪
▪
▪
▪
▪
▪
▪
▪
▪
▪
▪
▪
▪
▪
▪
▪
▪
▪
▪
▪
▪
▪
▪
▪
▪
▪
If the audio
cable
connector
is oxidized,
worn out, or
corroded, we
recommend
replacing the
connector or
the cable.
This usually
occurs
when
configuring
two or
more
channels.
▪
▪
▪
▪
▪
▪
▪
▪
▪
Troubleshooting
Problem
Reason
The sound is
distorted or
noisy.
Troubleshooting
▪
▪
▪
▪
▪
Solution
Comment
The speaker
is not placed
correctly or
the listening
environment
is poor.
Place the
speaker
correctly
or improve
the listening
environment
according
to the
instructions in
this manual.
The fine-tune
settings on
the speaker
are not
adjusted
correctly.
Adjust the
fine-tune
settings
according
to the
instructions in
this manual.
The audio
source has a
malfunction
or the quality
of the audio
source is poor.
Check your
audio source
to determine
the cause
of the
malfunction.
The
connection
between the
audio cable
and the
speaker is
poor.
Make sure
the audio
cable is fully
plugged into
the speaker
and the audio
source. If
necessary,
plug the
cable into the
speaker.
▪
▪
▪
▪
▪
▪
▪
▪
▪
▪
▪
▪
▪
▪
▪
▪
▪
▪
▪
▪
▪
▪
▪
▪
▪
▪
▪
▪
▪
The fine-tune
settings can
be adjusted to
compensate
for the listening
environment,
speaker
placement, and
audio source.
We suggest
using one of
the included
high-quality
audio cables
or a cable of
comparable
quality.
▪
▪
▪
▪
▪
▪
▪
▪
▪
▪
▪
▪
▪
▪
▪
▪
▪
13
One-Year Limited Warranty
Senal provides a limited warranty to the original purchaser
that this product is free from defects in materials and
workmanship under normal consumer use for a period of
one (1) year from the original purchase date or thirty (30)
days after replacement, whichever occurs later. Senal’s
responsibility with respect to this limited warranty shall be
limited solely to repair or replacement, at Senal’s discretion,
of any product that fails during normal consumer use.
Inoperability of the product or part(s) shall be determined
by Senal. If the product has been discontinued, we reserve
the right to replace it with a model of equivalent quality and
function.
To obtain warranty coverage, contact Senal to obtain a return
merchandise authorization (“RMA”) number, and return the
defective product to Senal, along with the RMA number and
proof of purchase. Shipment of the defective product is at
the purchaser’s own risk.
This warranty does not cover damage or defect caused
by misuse, neglect, accident, alteration, abuse, improper
installation or maintenance. EXCEPT AS PROVIDED HEREIN,
SENAL MAKES NEITHER ANY EXPRESS WARRANTIES NOR
ANY IMPLIED WARRANTIES, INCLUDING BUT NOT LIMITED
TO ANY IMPLIED WARRANTY OF MERCHANTABILITY OR
FITNESS FOR A PARTICULAR PURPOSE. This warranty
provides you with specific legal rights, and you may also have
additional rights that vary from state to state.
© Copyright 2013 Gradus Group
All other trademarks are the property of their respective owners.
All photos are for illustrative purposes only.
14
▪
▪
▪
▪
▪
▪
▪
▪
▪
▪
▪
▪
▪
▪
▪
▪
▪
▪
▪
▪
▪
▪
▪
▪
▪
▪
▪
▪
▪
▪
▪
▪
▪
▪
▪
▪
▪
▪
▪
▪
▪
▪
▪
▪
▪
▪
▪
▪
▪
▪
▪
▪
▪
▪
▪
▪
▪
▪
Warranty
www.senalsound.com