1
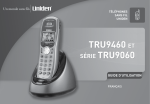
Plantronics CT14
™
User Guide
Welcome
Thank you for selecting the CT14 DECT™ Cordless Headset Telephone from
Plantronics. This guide contains instructions for setting up and using your
system. Please refer to the safety instructions on page 28 of this guide for
important product safety information prior to installation or use of the product.
Getting Assistance
The Plantronics Technical Assistance Center is ready to assist you. You
can find answers to frequently asked questions, ask a question using e-mail,
receive service over the Internet, or speak directly with a representative.
Visit www.plantronics.com/support or call 1-866-363-BLUE (2583).
Registering Your Product
Visit www.plantronics.com/productregistration to register your product online
so we can provide you with the best service and technical support.
ii
www.HeadsetPlus.com
Contents
Getting Started
Package Contents................................................................................................1
Components........................................................................................................2
Installing the Dial Pad Battery...............................................................................4
Wearing the Dial Pad with the Belt Clip.................................................................5
Hooking up the Base............................................................................................6
Charging the Dial Pad...........................................................................................6
Wearing the Headset............................................................................................7
Placing, Receiving and Ending Calls.....................................................................8
Adjusting Volume and Muting Calls.......................................................................8
Traveling Out-of-Range.........................................................................................9
Settings
Language Setup...................................................................................................9
Time and Day Setup.............................................................................................9
Ringer Tone Setting............................................................................................10
To Change the Ring Tone....................................................................................10
Ringer Volume Setup..........................................................................................10
Activating Auto Talk............................................................................................11
Activating Any Key Answer.................................................................................11
Activating the Key Touch Tone............................................................................11
Setting the Dial Mode.........................................................................................12
Tone Dialing Switch Over....................................................................................12
Changing Dial Pad Banner..................................................................................12
Changing the Line Mode for Multiple Extensions.................................................13
Resetting the Dial Pad........................................................................................13
Calling Features
Muting the Ringer...............................................................................................14
Placing a Call on Hold........................................................................................14
Redialing a Number............................................................................................14
www.HeadsetPlus.com
iii
en
Re-registering the Dial Pad.................................................................................14
Deleting a Redial Record....................................................................................15
Adjusting the Audio Tone....................................................................................15
Locating the Dial Pad.........................................................................................15
Low Battery Alert................................................................................................15
Phonebook
Creating Phonebook Entries...............................................................................16
Entering Text from Dial Pad.................................................................................17
Assigning Ring Tones.........................................................................................18
Viewing the Phonebook......................................................................................18
Making Calls from the Phonebook......................................................................19
Editing Phonebook Entries..................................................................................19
Deleting a Phonebook Entry...............................................................................19
Deleting All Phonebook Entries...........................................................................19
Storing Caller ID or Redial Numbers....................................................................20
Chain Dialing from the Phonebook......................................................................20
Subscription Services
Using Call Waiting...............................................................................................21
Using Caller ID....................................................................................................21
Viewing the Caller ID List............................................................................21
Deleting One or All Numbers from the Caller ID List....................................22
Making a Call from a Caller ID Record........................................................22
Adding or Deleting “1” in Caller ID Record..................................................22
Seven-digit Dialing......................................................................................23
Accessing Your Voicemail Service.......................................................................24
One-touch Voice Mail Access.....................................................................24
Setting Voice Mail Signaling Tone................................................................25
Resetting the Voice Message Indicator.......................................................25
Using Multiple CT14 Units Together................................................................26
Troubleshooting................................................................................................26
Safety Instructions...........................................................................................28
Limited Warranty..............................................................................................29
Regulatory Notices...........................................................................................30
iv
www.HeadsetPlus.com
Package Contents
Base
Convertible Headset
Dial Pad
Battery Pack
Battery Door
Belt Clip
User Guide
en
Telephone Cable
AC Power Adapter
www.HeadsetPlus.com
User Guide
1
Base Components
1
2
4
3
Front View
1
2
3
4
5
2
5
Back View
Base antenna / headset holder
CHARGE indicator (LED)
PAGE key
DC power input
Telephone line jack
www.HeadsetPlus.com
Dial Pad Components
Front View
Top View
2
1
3
7
4
5
6
8
9
10
11
12
Headset Jack
MESSAGE WAITING* indicator (LED)
TALK / FLASH key
PHONEBOOK / LEFT (Phonebook / left cursor) key
DOWN key
UP key
END key
CID / RIGHT (Caller ID* / right cursor) key
MENU / SEL (Menu / Select) key
INT’COM / CLEAR (Intercom / Clear) key
en
1
2
3
4
5
6
7
8
9
10
11
12
VOICEMAIL */ MUTE key
PAUSE / REDIAL key
* For more information, see Subscription Services on page 21.
www.HeadsetPlus.com
3
Installing the Dial Pad Battery
Black
Red
White
1
Remove the belt clip
by pulling one side of the belt clip to release the tab from the hole.
2
Squeeze the latch on the battery compartment cover and lift the cover.
3
Connect the Battery Pack connector.
Do not force. Plastic connectors will fit in only one way.
4
Insert battery pack into the battery compartment.
5
Insert tabs of cover into slots and push down to securely close
the cover.
4
www.HeadsetPlus.com
Wearing the Dial Pad with the Belt Clip
Cable route
1
Plug the headset cord into the 2.5mm jack on the top of the dial pad.
2
Route the cord through the dial pad’s cable routing slot on the back of
the dial pad.
Attach the belt clip only after you have routed the cord.
3
Insert the tabs on the sides of the belt clip into the holes on either side
of the dial pad.
Press the belt clip down until it clicks into place.
To remove the belt clip pull one side of the belt clip to release the tab
from the hole.
en
www.HeadsetPlus.com
5
Hooking Up the Base
Back View
1
Connect the AC adapter power cord to the base and an active
AC outlet.
2
Route the power cord as shown in the illustration.
3
Raise the Base Antenna to a vertical position.
Charging the Dial Pad
1
Insert the dial pad into the charging cradle on the base.
Charge for 15 – 20 hours. The CHARGE indicator light will go on.
2
Once the dial pad is fully charged,
plug one end of the telephone cord into the base and plug the other
end into an active telephone outlet.
6
www.HeadsetPlus.com
Wearing the Headset
1
2
1
Place the headset on your head so the speaker covers your ear.
Adjust the tip of the microphone boom toward the corner of your mouth.
2
You can wear the headset on either ear.
3
The headset has two wearing options:
over-the-head or over-the-ear. The headset ships configured in the
over-the-ear wearing style.
See illustration below for directions to convert headset to over-the-head
wearing style.
3
en
www.HeadsetPlus.com
7
Placing, Receiving and Ending Calls
Placing Calls
Press
and listen for the dial tone. Dial the number.
OR
Dial the number and then press
.
Receiving Calls
1
Press
.
(If Any Key Answer is on, press any key on the dial pad.)
2
If dial pad is on base, pick up the dial pad and press .
(If Auto Talk is on, the phone will answer when you pick up the dial pad
from the base.)
For information on setting up Any Key Answer or Auto Talk, see page 11.
Ending Calls
Press
or return the dial pad to the base.
Adjusting Volume and Muting Calls
Adjusting Volume
You can adjust the headset listening volume while you are on a call using
or
. You can choose from six volume levels.
Muting Calls
1
During a call, press
.
Mute On appears briefly on the display
2
The mute icon will also appear in the display
and remain on the screen until muting is canceled.
3
To cancel muting, press
again.
Mute Off appears briefly and the mute icon
8
will disappear.
www.HeadsetPlus.com
Traveling Out-of-Range
Your CT14 has a range of up to 300 ft. from the charging base. If you travel out of
range while the dial pad is in standby, the dial pad will display Out Of Range, and
you will not be able to place/answer calls.
If you travel out of range while on a call, the dial pad will beep, display Out Of
Range, and then go to standby. The base will maintain the connection for
30 seconds after the dial pad goes out of range.
If you move the dial pad back within range of the base within 30 seconds, press
to pick up the call again.
Settings
Language Setup
Your dial pad supports three languages: English, French and Spanish. The default
language is English.
1
To select a different language, press
2
Use
or
to select Handset Setup menu, then press
3
Use
or
to select Handset Language submenu, then press 4
Move the cursor to choose English, Français (French) or Español
(Spanish).
5
Press
.
.
.
to confirm.
Time and Day Setup
1
To change the day or time shown in the display, press
2
Move the cursor to Day & Time and press
3
Use
4
Use the number keypad (0 through 9) to enter the hour and minutes.
5
Use
or
to select AM or PM, and press
You will hear a confirmation tone.
or
.
.
to select the day of the week, and press
.
en
. Note With the phone in standby, the day of the
week does not appear on the dial pad display.
www.HeadsetPlus.com
9
Settings
Ringer Tone Setting
You may choose from three tones or four melodies for your phone’s primary
ring tone.
Tones
Flicker
Clatter
Wake Up
Melodies
Fur Elise (Elise)
We Wish You A Merry Christmas (Merry-Xmas)
Beethoven’s Symphony #9 (Beethoven9)
Home Sweet Home (Hm Swt Hm)
To Change the Ring Tone
1
Press
2
Select the Handset Setup menu, and then the Ringer Tones submenu.
3
Move the cursor
or
to select a ring tone.
As each ring tone is highlighted, you will hear a sample (unless the dial pad
ringer volume is set to Off).
4
When you hear the tone you want to use,
press
.
to confirm.
Ringer Volume Setup
You can choose from three ringer volume settings (Off, Low and High).
With the phone in standby, press
or
.
The display shows the current volume level
and the dial pad sounds the ringer at that level.
If ringer volume is set to Off, the bell icon will
appear on the screen next to the word Off while
in standby mode.
Use
to make the ringer volume louder or use
to make it softer or turn
it completely off. When you hear the ringer volume level you want to use, stop
pressing keys. The dial pad will use the new ringer volume starting with the next
incoming call.
Note For temporary ringer mute, see Muting the Ringer (Temporarily) on page 14.
10
www.HeadsetPlus.com
Settings
Activating Auto Talk
Auto Talk allows you to answer the phone simply
by picking up the dial pad from the base. You do
not have to press a button to answer the call.
1
Press
2
Select the Handset Setup menu, and then the Auto Talk submenu.
3
Move the cursor
.
or
to select On or Off. Press
to confirm.
Activating Any Key Answer
Any Key Answer allows you to answer the phone
by pressing any key on the dial pad.
1
Press
2
Select the Handset Setup menu, and then the Any Key Answer
submenu.
3
Move the cursor to select On or Off. Press
.
to confirm.
Activating the Key Touch Tone
Key Touch Tone is the tone your keypad makes
when keys are pressed. You can turn this tone
on or off.
1
Press
2
Select the Handset Setup menu, and then the Key Touch Tone
submenu.
3
Move the cursor to select On or Off. Press
.
to confirm.
en
www.HeadsetPlus.com
11
Settings
Setting Dial Mode
Your CT14 is set to tone dialing by default, but
you can change the dial mode to pulse dialing.
1
To change the dial mode, press
2
Select the Global Setup menu, and then the Dial Mode submenu.
3
Move the cursor to select Tone or Pulse. Press
.
to confirm.
Tone Dialing Switch Over
If your phone is set to pulse dialing, you can temporarily switch to tone dialing
after the call connects. This feature is useful when you need tone dialing to use
automated menu systems.
Make your call normally. Once your call connects, press
on the dial pad. Any
digits you enter from then on will be sent with tone dialing. When this particular
call ends, the phone automatically returns to pulse dialing.
Changing Dial Pad Banner
The dial pad banner is what you see on the dial
pad screen when it is in standby. The default
banner is Handset #1.
1
To customize the dial pad banner, press
2
Select the Handset Setup menu, and then the Banner submenu.
3
Enter the new banner name.
(See Entering Text from Your Dial Pad on page 17.)
4
Press
.
to confirm.
Note The number will always appear on the banner as that is related to the multi-unit
functions. (See page 26 for details.)
12
www.HeadsetPlus.com
Settings
Changing the Line Mode for Multiple Extensions
Line mode refers to the method that telephones use to signal each other that an
extension is in use. Customer service may recommend changing the line mode if
you have any of the following problems:
Your phone keeps ringing after someone answers on an extension phone.
Your answering system doesn’t stop recording when you answer on an
extension phone.
Caller ID displays briefly and then clears.
1
Press
2
Select the Global Setup menu, and then the Set Line Mode submenu.
3
If Instructed by Customer Service Press [select] appears. Press
4
Move the cursor to select Type - A, Type - B or Off.
5
Press
.
.
. You will hear a confirmation tone.
Resetting the Dial Pad
If you are having trouble with a particular dial pad or if you want to replace a dial
pad, first clear the registration information from the base and the dial pad.
1
Press and hold
2
Select Base Unavailable.
3
Select the base which you want to de-register from, and press
4
The phone will ask you to confirm the de-registration. Select Yes.
5
The dial pad deletes its own base information without contacting
the base.
If the dial pad was registered to only one base, it displays Dial pad not
registered-place dial pad on base to register. See your Owner’s Manual
for help. If the dial pad is still registered to another base, it searches for the
other base and then returns to standby.
and
for at least five seconds.
en
www.HeadsetPlus.com
.
13
Settings
Re-registering the Dial Pad
After the dial pad is de-registered, you must re-register the dial pad before you
can use it.
1
Place the dial pad in the base cradle for several seconds.
2
When the dial pad has registered to the base, the LCD will display
Registration complete, then show the dial pad ID number.
If the display shows Registration failed, try the process again.
Calling Features
Muting the Ringer (Temporarily)
The dial pad must be off the base to mute the ringer.
1
While the phone is ringing, press
for this call.
2
The phone will ring again on the next call.
or
to mute the ringer
Placing a Call on Hold
1
During a call, press
to place the caller on hold.
The display screen will read Line On Hold.
2
To return to the party on hold, press
The phone will return to the holding party.
.
Note Once five minutes has passed, the on hold party’s line will be disconnected.
Redialing a Number
You can quickly redial the last five numbers dialed on each dial pad.
1
With the phone in standby, press the
2
3
Use
and
or
to open the redial list.
to scroll through the redial list.
When you find the number you want to dial, press
.
Note You can also press
before you open the
redial list. Find the phone number you want to dial, and then press
.
14
www.HeadsetPlus.com
Calling Features
Deleting a Redial Record
1
With the phone in standby, press
2
Use
3
When you find the redial number you want to delete, press
select Delete Entry.
4
When the phone asks you to confirm, select Yes.
and
.
to scroll through the redial list.
and
Adjusting the Audio Tone
If you aren’t satisfied with the audio quality of your phone, you can adjust the
Audio Tone of the headset while on a call. Your phone gives you three audio tone
options: Low, Natural and High; the default setting is Natural Tone.
1
To adjust the audio tone while on a call, press
2
Move the cursor to select Audio Tone, and then press
3
Move the cursor to select desired option and then press
to confirm.
.
.
Locating the Dial Pad
1
To locate a misplaced dial pad, press PAGE on the base when the
phone is in standby.
2
The dial pad(s) connected to the paging base will beep for one minute,
and Paging appears on the dial pad display.
3
To cancel paging, press PAGE again or any key on the found dial pad.
Low Battery Alert
en
When Low Battery - Charge Handset appears
in the dial pad display and the phone is in standby,
none of the keys will operate.
If you are on a call, complete your conversation as quickly as possible, and return
the dial pad to the cradle. The battery pack needs to be charged when the empty
battery icon appears.
www.HeadsetPlus.com
15
Phonebook
The phonebook in the dial pad holds up to 70 names and numbers. When the
phonebook is full, the dial pad beeps and shows Memory Full on the display.
You will not be able to add any names and numbers in the dial pad phonebook
until you delete some of the existing ones.
Creating Phonebook Entries
1
With the phone in standby, press
2
To create a new phonebook entry, press
3
Select the Create New menu.
Edit Name appears.
4
Use the keypad to enter a name
for this entry.
The name can contain up to 16 characters.
(See Entering Text from Your Dial Pad on next page.)
5
Press
.
.
when you are finished.
Note If you do not want to enter a name for this entry, your phone will store this entry
as No Name.
6
Enter the number for this entry (Edit Number).
Use the number keypad to enter the phone
number; the phone number can contain up
to 20 digits.
If you need the phone to pause between
digits when it’s dialing (for example, to
enter an extension or an access code), press
to insert a two-second
pause. You will see a P in the display. You can also use more than one pause
together if two seconds is not long enough. Each pause counts as one digit.
7
16
Press
when you are finished.
www.HeadsetPlus.com
Phonebook
Entering Text from Your Dial Pad
You can use the number keypad on your dial pad to enter text by referring to the
letters printed on each number key.
When you press the number key in a text entry field, the phone displays the first
letter printed on the number key.
Press the number key twice to display the second letter and three times to display
the third.
When [Aa] appears on the display, capital letters are displayed first, then
lower case letters, and then the number on the key.
When [aA] appears on the display, lower case letters are displayed first, then
the number on the key, and then capital letters.
When you input the first letter or a letter after a blank space, the default
mode is [Aa]. From the next letter, the mode changes to [aA] automatically.
You can switch back and forth the mode manually between [Aa] and [aA].
Press
; the case (small/capital) of the letter entered changes also.
If two letters in a row use the same number key, enter the first letter, then use
to move the cursor to the next position to enter the second letter.
en
Press
to end your text entry.
If you make a mistake while entering a name, use
to the incorrect character. Press
or
to move the cursor
to erase the wrong character, and then
enter the correct character. To delete all characters, press and hold
www.HeadsetPlus.com
.
17
Phonebook
Assigning Ring Tones
You can attach a special ring tone to each
phonebook entry; the phone will use this ring
tone when this person calls. To assign a ring tone:
1
Find the phonebook entry you would like to assign a ring tone and hit . Choose Edit.
2
3
Press
4
When you hear the ring tone you want to use, press
.
If you do not want to use a personal ring tone for this phonebook entry,
choose No Selection; the phone will use your standard ring tone setting.
5
You will hear a tone confirming that the new entry has been stored,
and Done! appears in the display.
Use
to scroll through until you see Personal Ring.
and
to select one of the seven different ring tones.
To Turn Assigned Ringing On or Off
1
2
3
Press
4
Press
.
Select the Handset Setup menu, and then the Personal Ring submenu.
Move the cursor to select On or Off.
. You will hear a confirmation tone.
Viewing the Phonebook
1
2
Press
to open the phonebook.
Phonebook entries are stored in alphabetical order.
To scroll through the phonebook from A to Z, press
. To scroll through
the phonebook from Z to A press
.
You can also use the letters on the number keys to jump to a name that starts
with that letter. For example, to search for an entry beginning with the letter
M, press 6 once. The phonebook jumps to the first entry that begins with the
letter you entered; you can then use
and
to scroll to other entries.
3
18
To close the phonebook and return to standby, press
.
If you are looking up a phonebook entry during a call and want to close the
phonebook, press
again instead of
.
www.HeadsetPlus.com
Phonebook
Making Calls from the Phonebook
1
With the phone in standby, press
2
Find the phonebook entry you want to call. Press
the number.
You can also press
before you open the phonebook.
to open the phonebook.
to dial
Find the phone number you want to dial, and then press
.
Editing an Existing Phonebook Entry
1
With the phone in standby, press
2
Find the entry you want to edit and press
3
Select Edit. Follow the steps for Creating Phonebook Entries (page 16).
to open the phonebook.
.
If you do not wish to change the information at any step, simply press
to go to the next step.
Deleting Single Phonebook Entry
1
With the phone in standby, press
2
Find the entry that you want to delete and press
3
Select Delete.
Delete Entry? appears in the display.
4
Move the cursor to select Yes and press
You will hear a confirmation tone, and Deleted!
appears in the display.
.
.
.
Deleting All Phonebook Entries
1
With the phone in standby, press
2
Press
, and then select Delete All.
Delete All? appears in the display.
3
Move the cursor to select Yes and press
.
You will hear a confirmation tone.
www.HeadsetPlus.com
en
.
19
Phonebook
Storing Redial or Caller ID Numbers in the Phonebook
You can store redial numbers or Caller ID records in the phonebook so you
can use them later.
Go to the Caller ID or Redial list and select the number you want to store.
If the Caller ID information did not include the number, then you will not be able
to store it.
1
With the phone in standby, press
to open the redial list.
2
Use
and
to scroll through the Caller ID records or redial
numbers. When you come to the number you want to store, press
3
Select Store into PB (phonebook). Edit Name appears.
4
Add the name and press
5
Edit number (if needed) and press
to open the Caller ID list or
.
.
Note If the phone number is already stored in memory, you will hear a beep, and
This data is already saved! appears in the display. The number will not be stored.
Chain Dialing from the Phonebook
If you often have to enter a series of digits or a code number during a call, you
can save that code number to a phonebook entry.
When your call connects, just use the phonebook to transmit the saved code
number. This is referred to as chain dialing.
1
Enter the code number (up to 20 digits) into the phonebook.
See Creating Phonebook Entries on page 16.
Be sure to enter the code number into the phonebook exactly as you
would enter it during a call.
2
During a call, when you hear the prompt that tells you to enter the
code number, press
.
3
Use
or
to select the phonebook entry
that contains the digits you want to send, and press
.
The phone sends the digits of the code number exactly as you saved them
in the phonebook entry.
20
www.HeadsetPlus.com
.
Subscription Services
In order to use voice mail, Caller ID or Call Waiting services, you need to
subscribe to those services from your telephone service provider.
Using Call Waiting
If you have Call Waiting service and a second call
comes in when you are on the phone, a call waiting
tone will sound. Press
to accept the waiting call.
There will be a short pause, and then you will hear
the new caller. To return to the original caller, press
.
Using Caller ID
If you subscribe to Caller ID service from your phone
company, your phone will show you the caller’s phone
number and name (if available) when a call comes in.
If you subscribe to Caller ID on Call Waiting, the phone will also show you the
name and the number of any call that comes in while you’re on the line.
Viewing the Caller ID List
You can store up to 30 Caller ID numbers in the dial pad. Caller ID records are
stored from newest to oldest. Once your Caller ID list is full, the oldest record will
be automatically deleted when a new call is received.
When you have new Caller ID records (that is,
records you have not reviewed yet) and the phone
is in standby, the screen will display the number of
new Caller ID calls received.
To view the Caller ID list, press
.
The phone will show the latest record.
2
Use
and
to scroll through the list.
New records have an asterisk ( ) next to the received time.
en
1
*
Note You can save Caller ID contacts to your phonebook. See Storing Redial or Caller ID
Numbers in the Phonebook on previous page.
www.HeadsetPlus.com
21
Subscription Services
Deleting One Number from the Caller ID List
1
Press
when the phone is in standby, and then find the number
you want to delete.
2
Press
and select Delete Entry. When the phone asks you to
confirm, select Yes.
Deleting All Numbers from the Caller ID List
1
Press
2
Press
and select Delete All. When the phone asks you to
confirm, select Yes.
when the phone is in standby.
Note When you delete a Caller ID number, you delete it permanently.
Making a Call from a Caller ID Record
1
With the phone in standby, press
2
Use
3
If you need to add (or delete) a “1” to the beginning of the displayed
phone number, press
.
If you need to add (or delete) the stored area code, press
.
4
Press
to dial the number.
You can also press
before you open the Caller ID
list. Find the phone number you want to dial, and then press
and
to open the Caller ID list.
to find the Caller ID record you want to dial.
.
Adding or Deleting “1” in the Caller ID Record
Phone numbers in the Caller ID record may (or may not) have a “1” at the front,
depending on how different phone companies send the Caller ID information.
The phone dials the number exactly as it appears in the Caller ID record.
If the phone number is a long distance or toll call, but the Caller ID record
does not have a “1” in front of the number, press
to add it.
If the phone number is a local or non-toll call, but the Caller ID record has
a “1” in front of the number, press
to delete it.
22
www.HeadsetPlus.com
Subscription Services
Seven-digit Dialing
If you can make a local call by dialing only seven digits instead of ten, you can tell
the phone to hide your local area code in the Caller ID list; any calls from outside
your area code will show all ten digits.
1
To program your local area code, press
2
Select the Global Setup menu, and then the Area Code submenu.
3
Use the number keypad (0 through 9) to enter a three-digit area code.
.
If an area code has already been stored, it appears in the display. Press
to delete the stored code, and then enter a new one.
4
Press
.
You will hear a confirmation tone.
The phone uses the stored area code as a filter. When a call comes in, the phone
compares the incoming area code to the code programmed on the phone. If the
two codes match, the dial pad hides the area code in the Caller ID list.
When you are reviewing the Caller ID list, you can show the hidden area code
by pressing
. Press
again to hide the area code.
When you dial from a Caller ID record or store a Caller ID record in the phonebook,
the phone dials or stores the digits exactly as they appear on the display. If
you need to use ten digits, be sure to press
to show the area code before
dialing or storing the number.
Note See page 20 to store a Caller ID record in the phonebook.
en
www.HeadsetPlus.com
23
Subscription Services
Accessing Your Voice Mail Service
If you subscribe to a voice mail service, you can use
your phone to access your voice mailbox.
1
When there are messages waiting in your voice mailbox,
the MESSAGE WAITING Indicator on the dial pad flashes, and
appears in the dial pad display.
2
If you have programmed your access number into your phone (see
instructions below), simply press
to access your voice mail.
Your voice mail service provider should provide you with the access number,
signaling tone, and other specifics when you enroll.
One-touch Voice Mail Access
You can program your voice mail access number to the Voice Mail key
on
the dial pad so you can get your messages at the touch of a button. Your voice
mail service provider will supply you with the access number (this may be simply
a phone number).
1
To edit the voice mail number, press
2
Move the cursor to select the Handset Setup menu and press
3
Move the cursor to select Edit Voice Mail and press
4
Enter your personal access number (up to 20 digits).
If you need to have the phone wait before sending the next digits, press
to insert a two-second pause in the dialing sequence.
For a longer pause, press
.
multiple times.
P appears in the display each time you press
and each pause counts as one digit.
5
24
Press
when you are finished.
You will hear a confirmation tone.
www.HeadsetPlus.com
.
.
Subscription Services
Setting Voice Mail Signaling Tone
If your message waiting indicator on your phone is not illuminating when you
have waiting messages, you need to contact your service provider and ask them
which type of message notification signal — either Frequency Shift Keying (FSK) or
Stutter Dial Tone (SDT) — their service uses.
If your voice mail service uses an FSK message signal to alert you of a new voice
mail message, you must turn off the Voice Mail Tone.
If your voice mail service uses an SDT message signal to alert you of new voice
mail messages, you can leave the Voice Mail Tone on.
1
To set up your cordless phone settings, press
2
Select the Global Setup menu, and then the Voice Mail Tone submenu.
3
Move the cursor to set the SDT Voice Mail Tone to On or Off.
4
Press
.
You will hear a confirmation tone.
.
Resetting the Voice Message Waiting Indicator
When you receive a new voice mail message, the
MESSAGE WAITING indicator on the top
of the dial pad flashes and the voice mail icon
appears in the dial pad display.
If your message waiting light gets out of sync with your phone company’s
voice messaging system, you can manually reset it back to the “No messages
waiting” state.
1
Press and hold PAGE on the base for five seconds.
The dial pad(s) connected to the base will start to beep.
Keep pressing for five seconds.
2
A beep sounds and the message alert tone is reset.
en
www.HeadsetPlus.com
25
Using Multiple CT14 Units Together
The dial pad supplied with your phone can be registered to a total of four different
CT14 bases, and the base supports a total of six cordless dial pads.
Features like intercom, conferencing and transferring are only available if you
have multiple units. If you purchase two or more CT14 units, please refer to the
instructions posted on the resource tab at: www.plantronics.com/ct14
Troubleshooting
When you have this problem
Try this
The CHARGE indicator won’t
illuminate when the dial pad
is placed in the base.
•
Dial pad can’t make or
receive calls.
•
Dial pad can make calls, but it
doesn’t ring or receive a page.
Make sure the ringer is turned on.
Dial pad is not working.
•
•
Check the AC adapter connection.
Re-seat the dial pad in the base.
heck the telephone cord connection. If
C
Check TEL Line appears on the dial pad
display, the telephone cord may not be
connected correctly.
• Disconnect the base AC adapter. Wait
a few minutes, and then reconnect it.
• Change the dial mode.
Check the battery pack connection.
Charge the battery for 15 – 20 hours.
• Reset the dial pad.
•
Dial pad says Unavailable.
•
•
Dial pad does not display any
Caller ID information.
26
Move the dial pad closer to the base.
Make sure the base is plugged in.
heck to see if the call was placed through
C
a switchboard.
• Ask your telephone company to verify your
Caller ID service is current. There may be
a problem with your Caller ID service.
• Let incoming calls ring at least twice before
answering.
•
www.HeadsetPlus.com
Troubleshooting
When you have this problem
Try this
The MESSAGE WAITING
indicator flashes, but there are
no new messages.
Reset the MESSAGE WAITING Indicator.
(See page 25)
The outside caller’s audio
is weak.
If the caller’s voice sounds weak or soft,
the signal might be blocked by large metal
objects or walls; you might also be too far
from the base, or the dial pad’s battery may
be weak.
• Try adjusting the volume of the headset (see
page 8) or the audio tone (see page 15).
• Try moving around while you’re on a call
or moving closer to the base to see if the
sound gets louder.
• Make sure the dial pad’s battery is fully
charged.
There is noise or static on
the line.
• Check nearby for one of the common
interference sources.
• If the base is in close proximity of
microwaves, ovens, TVs, or any electrical
appliances, try moving it away from those
devices.
• Try moving the dial pad away from a
suspected source, or try moving the
suspected source so it’s not between the
dial pad and the base.
If you have DSL on the same phone line,
be sure that you are using a DSL filter
between the base and the telephone jack.
You may obtain a DSL filter from your DSL
service provider.
en
www.HeadsetPlus.com
27
Important Safety and Operational Information
Please read the following safety and operational instructions before using your Plantronics®
headset and accessories. Please keep these instructions for your reference. Additional
warnings may be present on the product or packaging.
This symbol
identifies and alerts the user to the presence of important safety warnings.
General
Operating and storage temperature is +10°C to +40°C (+50°F to +104°F). Do not store or
operate the product outside this temperature range; for example near a room heater or inside
an unoccupied motor vehicle.
Warnings
• Avoid using a telephone during an electrical storm. There may be a remote risk of electric
shock from lightning.
• Do not use the telephone to report a gas leak in the vicinity of the leak.
• Plug the AC adapter into the outlet nearest the equipment that is easily accessible.
• Do not disassemble the AC adapter as this may expose you to dangerous voltages or
other risks.
• Incorrect reassembly can cause electric shock or fire when the product is subsequently used.
• Exposure to high volume sound levels or excessive sound pressure may damage
your hearing.
• Although there is no single volume setting that is appropriate for everyone, you should
always use your headset or headphones with the volume set at moderate levels and avoid
prolonged exposure to high volume sound levels. The louder the volume, the less time is
required before your hearing could be affected. You may experience different sound levels
when using your headset or headphones with different devices. The device you use and its
settings affect the level of sound you hear. If you experience hearing discomfort, you should
stop listening to the device through your headset or headphones. To protect your hearing,
some hearing experts suggest that you:
1. Set the volume control in a low position before putting the headset or headphones on
your ears.
2. Limit the amount of time you use headsets or headphones at high volume.
3. Avoid turning up the volume to block out noisy surroundings.
4. Turn the volume down if the sound from the headset or headphones prevents you from
hearing people speaking near you. See www.plantronics.com/healthandsafety for more
information on headsets and hearing.
• Check local laws regarding use of a mobile phone and headset while driving. If you use the
headset while driving ensure your attention and focus remain on driving safely.
28
www.HeadsetPlus.com
• Observe all signs and instructions that require an electrical device or RF radio product to be
switched off in designated areas, such as gas/refuelling stations, hospitals, blasting areas,
potentially explosive atmospheres, or aircraft.
• Keep all products, cords, and cables away from operating machinery. As with all corded
products, there is a danger of strangulation if a cord should become wrapped around
your neck.
• This product is not a toy. Never allow children to play with the product — small parts may
be a choking hazard.
Battery Warnings
• Do not dispose of the product or battery in a fire.
• Do not open, deform or mutilate the battery.
• Always store batteries where children cannot reach them.
• When replacing the battery, use only the battery type supplied by Plantronics. Observe the
correct polarity when installing the battery. Remove the battery if it will not be used for an
extended period; remove a spent battery promptly.
• Do not allow any battery or its holder to contact metal objects such as keys or coins.
Limited Warranty
For Plantronics Commercial Products Purchased in the US and Canada
• This warranty covers defects in materials and workmanship of Commercial
• Products manufactured, sold or certified by Plantronics which were purchased and used in
the United States and Canada.
• This warranty lasts for one year from the date of purchase of the Products.
• This warranty extends to you only if you are the end user with the original purchase receipt.
• We will, at our option, repair or replace the Products that do not conform to the warranty.
We may use functionally equivalent reconditioned/refurbished/remanufactured/pre-owned
or new Products or parts.
• To obtain service in the U.S. contact Plantronics at (800) 544-4660 and in Canada call
(800) 540-8363. If you need additional information, please contact our service centers at
the numbers provided.
• THIS IS PLANTRONICS’ COMPLETE WARRANTY FOR THE PRODUCTS.
www.HeadsetPlus.com
en
• This warranty gives you specific legal rights, and you may also have other rights which
vary from state to state or province to province. Please contact your dealer or our service
center for the full details of our limited warranty, including items not covered by this
limited warranty.
29
Regulatory Notices
FCC Registration Information
Changes or modifications to this product not expressly approved by our company, or operation of this
product in any way other than as detailed by the owner’s manual, could void your authority to operate
this product.
This equipment complies with Part 68 of the FCC rules and the requirements adopted by the ACTA. On the
bottom of this equipment is a label that contains, among other information, a product identifier in the format
US: AAAEQ##TXXXX. If requested, this number must be provided to the telephone company. An applicable
Universal Service Order Codes (USOC) certification for the jacks used in this equipment is provided (i.e.,
RJ11C) in the packaging with each piece of approved terminal equipment. A plug and jack used to connect
this equipment to the premises wiring and telephone network must comply with the applicable FCC Part 68
rules and requirements adopted by the ACTA.
A compliant telephone cord and modular plug is provided with this product. It is designed to be connected to
a compatible modular jack that is also compliant. See installation instructions for details. The REN is used to
determine the number of devices that may be connected to a telephone line. Excessive RENs on a telephone
line may result in the devices not ringing in response to an incoming call. In most but not all areas, the sum of
RENs should not exceed five (5.0).
To be certain of the number of devices that may be connected to a line, as determined by the total RENs,
contact the telephone provider. For products approved after July 23, 2001, the REN for this product is part
of the product identifier that has the format US:AAAEQ##TXXXX. The digits represented by ## are the REN
without a decimal point (e.g., 03 is a REN of 0.3). For earlier products, the REN is separately shown on
the label.
If this equipment causes harm to the telephone network, the telephone company will notify you in advance
that temporary discontinuance of service may be required. But if advance notice isn’t practical, the
telephone company will notify the customer as soon as possible. Also, you will be advised of your right to
file a complaint with the FCC if you believe it is necessary. The telephone company may make changes
in its facilities, equipment, operations or procedures that could affect the operation of the equipment.
If this happens the telephone company will provide advance notice in order for you to make necessary
modifications to maintain uninterrupted service.
Please follow instructions for repairing if any (e.g. battery replacement section); otherwise do not alternate or
repair any parts of device except specified.
Connection to party line service is subject to state tariffs. Contact the state public utility commission, public
service commission or corporation commission for information.
NOTICE: If your home has specially wired alarm equipment connected to the telephone line, be sure that
installing the system does not disable your alarm equipment. If you have questions about what will disable
alarm equipment, consult your telephone company or a qualified installer.
Should you experience trouble with this equipment, please contact our service center for repair or warranty
information. If the equipment is causing harm to the telephone network, the telephone company may request
that you disconnect the equipment until the problem is resolved.
NOTICE: According to telephone company reports, AC electrical surges, typically resulting from lightning
strikes, are very destructive to telephone equipment connected to AC power sources. To minimize damage
from these types of surges, a surge arrestor is recommended.
To insure the safety of users, the FCC has established criteria for the amount of radio frequency energy
various products may produce depending on their intended usage. This product has been tested and found
to comply with the FCC’s exposure criteria. For body worn operation, the FCC RF exposure guidelines were
also met when used with accessory (belt clip) supplied or this product. Use of other accessories may not
ensure compliance with FCC RF exposure guidelines and should be avoided.
30
www.HeadsetPlus.com
The antenna(s) used for the base-unit must be installed to provide a separation distance of at least 20 cm
from all persons and must not be collocated or operated in conjunction with any other antenna or transmitter.
Radio interference may occasionally cause buzzing and humming in your cordless dial pad, or clicking
noises in the base. This interference is caused by external sources such as TV, refrigerator, vacuum cleaner,
fluorescent lighting, or electrical storm. Your unit is NOT DEFECTIVE. If these noises continue and are too
distracting, please check around your home to see what appliances may be causing the problem. In addition,
we recommend that the base not be plugged into a circuit that also powers a major appliance because of
the potential for interference. Be certain that the antenna on the unit is fully extended when needed. In the
unlikely event that you consistently hear other voices or distracting transmissions on your phone, you may
be receiving radio signals from another cordless telephone or other source of interference. If you cannot
eliminate this type of interference, you need to change to a different channel. Finally, it should be noted that
some cordless telephones operate at frequencies that may cause interference to nearby TVs and VCRs. To
minimize or prevent such interference, the base of the cordless telephone should not be placed near or on
top of a TV or VCR. If interference is experienced, moving the cordless telephone farther away from the TV or
VCR will often reduce or eliminate the interference.
This device complies with part 15 of the FCC rules. Operation is subject to the following two conditions: (1)
This device may not cause harmful interference, and (2) This device must accept any interference received,
including interference that may cause undesired operation. Privacy of communications may not be ensured
when using this phone.
Note: This equipment has been tested and found to comply with the limits for a Class B digital device,
pursuant to part 15 of the FCC Rules. These limits are designed to provide reasonable protection against
harmful interference in a residential installation. This equipment generates, uses and can radiate radio
frequency energy and, if not installed and used in accordance with the instructions, may cause harmful
interference to radio communications. However, there is no guarantee that interference will not occur in
a particular installation. If this equipment does cause harmful interference to radio or television reception,
which can be determined by turning the equipment off and on, the user is encouraged to try to correct the
interference by one or more of the following measures:
--Reorient or relocate the receiving antenna.
--Increase the separation between the equipment and receiver.
--Connect the equipment into an outlet on a circuit different from that to which the receiver is connected.
--Consult the dealer or an experienced radio/TV technician for help.
I.C. Notice
Terminal Equipment
NOTICE: This equipment meets the applicable Industry Canada Terminal Equipment Technical Specifications.
This is confirmed by the registration number. The abbreviation, IC, before the registration number signifies that
registration was performed based on a Declaration of Conformity indicating that Industry Canada technical
specifications were met. It does not imply that Industry Canada approved the equipment.
NOTICE: The Ringer Equivalence Number (REN) for this terminal equipment is marked on the equipment
itself. The REN assigned to each terminal equipment provides an indication of the maximum number of
terminals allowed to be connected to a telephone interface. The termination on an interface may consist of
any combination of devices subject only to the requirement that the sum of the Ringer Equivalence Numbers
of all the devices does not exceed five.
en
Radio Equipment
The term “IC:” before the radio certification number only signifies that Industry Canada technical specifications
were met.
Operation is subject to the following two conditions: (1) this device may not cause interference, and (2) this
device must accept any interference, including interference that may cause undesired operation of the device.
“Privacy of communications may not be ensured when using this telephone.”
www.HeadsetPlus.com
31