1
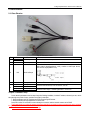
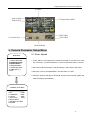
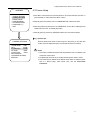
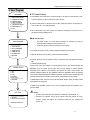
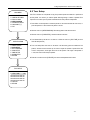
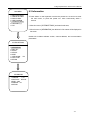
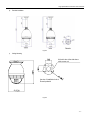
IP High Speed Dome Camera
User’s Manual
V1.1
IP High Speed Dome Camera User’s Manual
Chapter 1 Profile
Network Camera is a kind of embedded digital surveillance product collected traditional simulation camera and network
video server. Adopts embedded Linux operation system and SOC hardware platform of Graim Corp. And has characteristics of
high efficiency on system adjustment, solidified code on Flash, small bulk, high stability and reliability.
1.1 Functions and Characteristics
Basic Function
¾ Video compression tech: adopts H 264 video compression tech, high compression ratio with super agility handling.
¾ Network function: integrate TCP/IP protocols and video, alarm, voice data supported, built-in WEB browser, IE interview
supported.
¾ Heartbeat function: host computer is able to know running state of network camera real time by heartbeat function.
¾ PTZ control function: control for PTZ, kinds of decoder protocols and dome cameras supported.
¾ Alarm function: 1 channel alarm input (signal parameter), 1 channel alarm output (on-off parameter), motion detective,
video lost, mask alarm, alarm link output.
¾ Voice speech: two-way voice speech, one-way voice broadcast.
¾ User management: multi-level user popedom management.
Compression Handling Function
¾ 1 channel video signal supported, separate hardware compression, adopts H.264 compression standard on video
compression, not only support change code ratio, but also support change frame ratio, while setting up video image quality,
it’s able to restrict compression bit rate of video image.
¾ D1(PAL:704*576, NTSC:704*480), CIF(PAL:352*288, NTSC:352*240), QCIF(PAL:176*144, NTSC:240*160) supported
¾ OSD supported, date and time setup available.
Remote interview and transmission function
¾ One self-compliant 10M/100M Ethernet interface as standard accessory..
¾ PPPoE, DHCP, DDNS protocol supported.
¾ Available to set parameter, browse real time video, check network camera state through applications or IE browser.
Available to realize alarm link and save compressed bit rate through network.
¾ Available to realize remote upgrade and maintenance through network.
¾ RS-485 can support one-way network rendezvous point aisle connection, client side can control serial devices through
network rendezvous point aisle of network camera.
1.2 Applications
Suitable for circumstances required for network remote surveillance
¾ ATM, Bank Counter, Supermarket, Factory etc
¾ Nursing House, Kindergarten, School etc.
¾ Intelligentized door management system
¾ Intelligentized Building, intelligentized community management system
¾ Electricity station, telecom base station etc unmanned on duty system
¾ Outdoor bridge, tunnel, crossing traffic etc surveillance system
¾ flowing line and warehouse surveillance
¾ 24h surveillance to road traffic
¾ Remote surveillance to forest, fountain and river etc.
Chapter 2 Installation
2.1 cautions
¾ Please check carefully while unpacking, be sure articles inside accordance to the list
¾ Please read this chapter carefully before installation
¾ Be sure to off all concerned power while installation
¾ Check power and voltage in case to damage facility because of unmatched voltage
¾ Installation circumstance: do not install in circumstances of high humidity or high temperature, please keep good ventilation,
pay attention to defend rain, avoid installing in acute vibrate circumstance.
¾ In times of malfunction, do not attempt to dismantle and service the camera yourself. Please refer to qualified serving
personnel to repair or contact our technical department to solve the problems.
Remark: power supply, lens and SD card optional while ex-factory.
IP High Speed Dome Camera User’s Manual
2.2 Panel Illuminate
2.2.1 Rear Elevation
Fig. 2.1 Connection Cable
ID
2
Cable
Red/White
Black/Purple
N/A
3
N/A
4
N/A
Pink
Green
Orange
Purple
1
5
Function
Connection
AC24V Input
Please refer to the camera parameter
Video Output
Connect to video cable of monitor, standard BNC interface
3.5mm interface, connect to acoustics device, such as speaker etc for
audio speech output(impedance: >16Ω); connect to audio input device,
such as tone arm(impedance: 1kΩ)
Audio In/Output
Network interface
Connect to Ethernet device, such as Ethernet exchanger, HUB etc.
RS485+
Connect to RS-485 device, such as Pan/Tile, PTZ etc.
RS485-
Alarm in(DC12V)
Connect to alarm input, 1 channel signal alarm(0~DC12V)
Alarm in GND
Chapter 3 Parameter setup
Some network parameters must be setup firstly after finishing installation, includes IP address, submask, port etc, can be
setup through many kinds of ways, see below two kinds for examples:
1. Setup parameters such as IP address and PPPoE etc through IE browser
2. Setup parameters through applications on client’s side.
Please be confirm PC and network camera already be connected, and the network camera can be PING!
The Preset No.95 is to invoke the camera menu.Press the left key to cancel or return to the previous menu, and press
the right key to confirm or access to the next menu.
Please refer to the camera manual for the settingd.
IP High Speed Dome Camera User’s Manual
3.1 Setup parameter by IE browser
The default IP:192.168.0.120, default port:30001, superuser: admin, superuser password: admin
Login network camera by IE, input IP address, and will shoot out logging in window, input username and password, click
“login” to enter IE client interface.
Function detailed guide please refer to “NVMS Manual”.
Important Note: to check device by IE, the premise is to set browser security level, open IE browser, enter “tool/Internet
option/security/user-defined level”, set security level ”security level-low”, or directly set “ActiveX, Widget and Insert ”to open.
Appendix
Parameter
Description
Video out
1 BNC(PAL/NTSC, 1.0Vp-p,75Ω)
Video Compression
H.264(ISO/IEC 14496-10) baseline profile to level 3.1
Image Frame Rate
PAL:D1(704x576)@25fps, CIF(352x288)@25fps,
QCIF(176x144)@25fps;
NTSC: D1(704x480)@30fps, CIF(352x240)@30fps,
QCIF(240x160)@30fps.
Bit stream Control
CBR、VBR
Audio Input/Output
1 internal Microphone In, 1 External Microphone In,
1 Audio Line Out
Audio Compression
G723.1/6.3kbps
Audio bit stream
6.3Kbps
Web Server
Microsoft Internet Explorer Version 5.5 or higher
Network Protocol
RTP/RTCP,TCP/UDP,HTTP,DHCP,
DNS,IPv4/IPv6,SMTP,FTP
Network Ethernet
RJ-45,10/100Base-T
Alarm Input/Output
1 Alarm Input
PTZ Control
RS485, Polco-D/Polco-P
SD Card
Support MicroSD/HC, MiniSD/HC
Safely
Watchdog, Password protection
Protection
IP66 Standard, Vandal Proof
CMS Client and SDK
Open API for application integration including SDK
The next content is high speed dome camera manual for the settingd
IP High Speed Dome Camera User’s Manual
Contents
1. Attention ....................................................................................................................................................... 3
2. Speed dome camera performance characteristics.................................................................................... 4
3. Function and Operation............................................................................................................................... 5
4.Basic Operation of Dome Camera ............................................................................................................ 7
5. Display Settings ........................................................................................................................................... 8
6. Camera Parameter Setup Menu .................................................................................................................. 9
7. Privacy Mask ...............................................................................................................................................16
8. User Program ..............................................................................................................................................17
9. System Settings ..........................................................................................................................................23
10. Language setup.........................................................................................................................................28
11. Camera Menu Index ..................................................................................................................................29
12. System Installation....................................................................................................................................30
Appendix A:24VAC Wire Diameter and Transmission Distance Comparison Chart..............................36
Appendix B:Wire Gauge Conversion Chart ...............................................................................................37
Appendix C:Lightning Proof and Surge Signal Proof...............................................................................38
-1-
IP High Speed Dome Camera User’s Manual
SAFE PRECAUTIONS
CAUTION
RISK OF ELECTRIC
SHOCK DO NOT OPEN!
CAUTION: TO REDUCE THE RISK OF ELECTRICAL
SHOCK, DO NOT OPEN COVERS. NO USER
SERVICEABLE PARTS INSIDE. REFER SERVICING
TO QUALIFIED SERVICE PERSONNEL.
The requirement for the people who will install and repair the machine:
●
Owning the certificate to install and repair CCTV system.
●
Owning the certificate to work aloft.
●
Obtaining the basic knowledge and operating skill of wiring and connection at low voltage.
●
Reading carefully and understanding all the contents in this manual.
The requirement for lifting appliance:
●
Using the lifting appliance suitable for the speed dome camera installation place and installation types.
●
Lifting appliance could reach the installation height.
●
Lifting appliance is in good safe condition.
-2-
IP High Speed Dome Camera User’s Manual
1. Attention
→ Electric Safety
The national and local electric safety standard must be obeyed during the installation.
→ Shipping with Care
Prevent the damage caused by stress, strenuous vibration and moist during the shipping, storing and
installation. The products are packed individually, and will not be in warranty due to the damage caused by
whole-packaging in shipping.
→ Careful Installation
Please refer to the instruction manual carefully. Do not install the camera in opposite direction, and handle
the camera block with care; do not press against the structural element, which may cause mechanical
problem. The plastic cover is advanced optical product, please don’t touch it directly to avoid the cover
scratch and bad image quality.
→ Do Not Disassembly The Camera Without Authorization
Do not tear down the screws and protecting cap of the camera block. There are no spare parts in the
camera block for users’ maintenance, and only the professional engineers shall check and maintain the
camera.
→ Environmental Requirement
● Indoor Environmental Requirement:
Temperature: -10º ~ +50º
Humidity :<90%
Atmospheric Pressure: 86 ~ 106Kpa
AC Supply: 24V / 2000mA, 50 / 60HZ
● Outdoor Environmental Requirement
Temperature: -40º ~ +60º
Humidity :<90%
Atmospheric Pressure: 86 ~ 106Kpa
AC Supply: 24V / 2500mA, 50 / 60HZ
→ Do Not Aim Objects in Strong Light
Do not aim the objects in strong light or the sun to avoid the image blur and spectacle , no matter the
camera is in use or not.
→ Waterproof
The outdoor speed dome cameras are featured as waterproof, damp proof and dustproof, and could meet the
international standard IP66. The indoor speed dome camera can not be installed at the place where there is full of
hydrosphere and water. The water drops and splashing may damage the inside components of both the indoor and outdoor cameras.
-3-
IP High Speed Dome Camera User’s Manual
2. Speed dome camera performance characteristics
2.1 Technical Parameter
Electrical:
Set up:
AC24V
Baud
(RS485)
12W indoor, 35W outdoor
Protocol
Rating Voltage
Power
Decoder
Internal
Panning angle
360º Continuous rotation
Tilt angle
0º~90º
Pelco-P / Pelco-D/Phillips / Panasonic and so on, 17
Protocol choice
Protection
level
Alarm
7 input, 2 output
Physical:
Preset
220
Installation
Preset/touring/horizontal scan/ Auto
learning
Magnification times match with
speed
0-255
Environment:
Operation
Environment
Humidity
Level 0.4~270º/S
Vertical 0.4~160º/S
Rotary speed
Speed
2400/4800/9600/19200bps
Add. Set up
Operation:
Surveillance way
rate
Weight(without
bracket)
-40~ +60ºC
0-95%No condensation
IP66, 24-hour, safety cover
TVS1500W lightning proof
surge proof
Ceiling/Corner/ wall type
4.25Kg(outdoor)/3.85Kg(indoor)
Material
Aluminum
2.2 Performance Characteristics
The speed dome cameras adopt bran-new design and are featured as compact and metal structure. It is
equipped with thermostatic apparatus inside, and has rapid heat dissipation function. It is easy and
convenient to install. The surveillance is more privy with the inside black cover. The camera rotates flexibly
with low-noise and wide coverage, providing excellent image quality for users.
→ Internal Decoder
● Digital design, all data are stored in the camera block, and will not be lost even power down
● All-in-one integrated design, high reliability
● 220 presets
● 1-80 preset supports auto touring; 4 tours, 32 presets of each
● 4 Auto learning
● 4 limited scan
● Internal permanent calendar
● Internal temperature sensor
● RS485 (Optional Manchester code or coaxial monitoring control)
● 24 privacy masking zones
● 7 alarm inputs, 2 outputs normal open/close switch available
→ Internal Pan & Tilt
● All-metal structure, high strength, favorable heat dispersion
● Precise stepping motor drive, reposeful operation, sensitive reaction, and exact positioning
● All-in-one integrated design, compact structure, easy to install.
● Ingenious mechanical drive system, support 360 º continuous rotation, tilt angle 0-90º and 180 º
reversal
● 0.4 º/S slow-rotation processing without image quivering
→ Internal Digital Camera
● All-in-one Digital Processing with High Sensitive and High-resolution
● Auto Focus
-4-
IP High Speed Dome Camera User’s Manual
● Auto Brightness Control
● Auto Iris
● Auto AWB
● Color & B/W Transition
● Auto BLC
● Auto Frame Accumulating
→ OSD Menu
● Chinese/English Menu
● OSD menu display; change the information and parameter of the camera by keyboard and OSD,
operation becomes simple and easy.
● Auto activation function can be set, evoking presets or starting up tours, auto leaning and horizontal
scan can be set when the camera is not in use
● Restoring operation before power-down or carry out appointed operation
→ Internal Temperature Detector
● Real-time temperature display
● Fans start up when the temperature exceeds the upper limit
● Speed dome will postpone starting up when the temperature is lower than the lower limit
● The fans start up according to real time temperature detection, which makes the fans longevity longer
→ Real Time Clock Function
● Real time display, clock can be set
● Real time color & B/W transforming time
● Alarm time can be set
3. Function and Operation
This chapter describes the main function and the realize principle of the speed dome and does not
involved in operation. Different system has different method of operation. Usually we use the operation
manual from the system company. If you have any special requirements, please contact the system
company to get the necessary information.
3.1 Set the Camera Coding
There are two code switches on the camera’s pin board, SW1 and SW2, SW1 sets camera address, and
SW2 sets baud rate and protocol (See ‘Camera Settings’ on P38).
Besides the factory protocol, the camera compatible with many main protocol, like: PELCO-D, PELCO-P
etc. ( Optional ALEC, VCL, MOLYNX, VICON, SANTACHI, PANASONIC, SAMSUNG, DIAMOND,
KALATEL, LILIN, PHILIPS and AD and so on.)
Any of the control order must be based on the address. of the target camera, the camera just respond to
the order that has the same add of itself. Three types of the address.
● Code switch address. Set by the Code switch on the bracket in the camera (SW1), add. Range:1-255
● Broadcast address: If the customer prefers to use broadcast address, all of the camera in the system
will carry out the same action; system 255 is the broadcast address.
● Debugging address: (factory protocol and PELCO protocol only): if the address of the camera is 0, the
user can control the camera by any address.
3.2 Auto Carry Out the Operation
→ Focus / Rev Automatic Matching
When we use manual adjustment, in the case of far focus, the camera high speed reaction cause the
rocker shock may cause the image whisk or image lost. Based on humanization design, the camera
-5-
IP High Speed Dome Camera User’s Manual
automatically adjusts the rev of the tripod head according to the focus. And make the manual tracking
object easier.
→ Automatic Reversal
If the operator pulling rocker when the lens appoint the bottom, the lens will horizontal whirl 180 º
automatically and whirl 90º upwards, user can watch the views on the back side, so it can realize the 180 º
entire journey surveillance. To realize the function, you need set the “Automatic reversal” in the OSD to
ON.
→ Timing Automatic Activation
If the camera’s not carrying out any operation by using “spare time activation” function, the user can set
auto transfer preset or start cruise, self-leaning or limited scan.
→ Automatic Activation
By using “restart”, the user can set automatic activation and the camera will recover to the operation before
electrify after electrify or restart, it also can be set auto transfer preset or start cruise, self-leaning or limited
scan.
3.3 Camera Control
→ Magnification Times Control
Through the button named “Three dimension button” or “Wide” and “Tele” button on the keyboard, you can
adjust to full view or close-up view. Dome camera supports digital PTZ and optics PTZ, and digital PTZ can
be settled.
→ Focus Control
System uses auto focus as tacitly approved. When lens change, camera can focus on the view
automatically to keep the view clear. Through “FAR/NEAR”, users can adjust it manually in order to have
the view you want. When use the keyboard, camera can be back to automatic focusing.
On these conditions, camera can not focus automatically:
● Target not in the centre of view
● Observe close view and distant view at the same time, cannot guarantee both of them are clear
● Target is as high light materials. Such as neon lamp, spotlight and any shine objects
● Target moves so fast
● Big size dull target, such as wall
● Target is too dark or not clear
● Target view is too small
→ Iris Control
System uses auto Iris as tacitly approved. It can feel the light around to adjust the iris to keep the output
view’s luminosity steady.
Users can use “Open/Close” button on the keyboard, adjust the iris manually to get the fittest luminosity. It
can be back to automatic iris by using the keyboard.
→ Face Away from Light Compensating
Camera district fulfill facing away from light compensating automatically. Under high light background, it
will automatically compensate to the light, and adjust the light to the fittest view. This method can avoid
whole view with more light, and make the target view more clearly.
→ Auto White Balance
Automatic adjust based on the changing of light around, to appear the true color.
3.4 Monitor Function
→ Set/adjust preset point
Preset point function is that record the data of horizontal angle, tilt angle and focal distance of camera to
-6-
IP High Speed Dome Camera User’s Manual
the memory. When need, you can use these data to the position. Preset point can be set quickly and easily
by using keyboard, you can set two hundred twenty preset points.
→ Auto Cruising
Auto cruising is the function of this dome. It can be settled previously, make the preset points as a
sequence added to the auto cruising. You can inset preset point to the cruising, can fulfill auto cruising
between preset points. Cruising sequence can be set. You also can set the stop time of preset point, one
cruising, can be set 32 preset points.
→ Level, Right & Left Scan
Through keyboard and menu, users can set left position and right position, as a speed scan from left to
right.
→ Self-learning
This dome has the pattern scan function. The dome can record at least 180s moving track. Run the
self-learning pattern, according to the record, dome can repeat moving, one dome can set 4 routes.
→ Privacy masking function set
Users can set privacy masking function to cover some zone.
→ Alarm input & output control
When dome receive a alarm signal, run the preset action, until the alarm is finished. If have some unusual
situation, it will send another alarm signal. Dome can set 7 input alarm signals, 2 output signals.
→ Camera Lens Position Display
After dome self-check, the position will at 0° of level and vertical place, the level place from 0°-360°,the vertical place from
0°-90°.The information can be displayed on the screen.
4.Basic Operation of Dome Camera
4.1 Camera Power On Self-Test
After connecting wires and power-on, dome camera executes self-checking program, it will appear system
information on the screen, as shown below. Camera will move horizontally to horizontal origin which was
default setting when leaving factory, then move vertically to vertical origin, lens is pulled closest and
farthest, self-check finished.
Edition number: 1.0.0
Protocol: PELCOD
Baud rate: 9600
Camera ID: 001
This information will be shown until finishing self-test for system.
● Edition number: Shows information of camera software edition
● Protocol: Shows type of control protocol which has been set up
● Baud rate: Shows communication baud rate which has been set up, including 2400, 4800, 9600, 19200
four types of communication baud rate. Detailed setting method as per addenda.
● Camera ID: Set via camera’s switch SW1, detailed setting method as per addenda.
4.2 Transfer Main Menu
Open the main menu of system by pressing “menu” key on the control keyboard or by matrix via the
operation “Call No. 95 or 64 preset positions”. All menu setup must first transfer main menu.
4.3 Basic Operation of Menu and Keyboard
→ Basic Operation of Keyboard:
[OPEN] When choosing image, shows increasing iris, it will save automatically after finishing setup.
[CLOSE] When choosing image, shows decreasing iris, it will save automatically after finishing setup.
-7-
IP High Speed Dome Camera User’s Manual
[NEAR] focus on vicinity
[FAR] focus on beyond
Joystick tilt up: When choosing menu, shows choosing the previous one, when choosing image, shows
camera circumgyrating upwards.
Joystick tilt down: When choosing menu, shows choosing the next one, when choosing image, shows
camera circumgyrating downwards.
Joystick pan left: When choosing menu, shows entering junior menu, or entering setting up or return to
superior menu, when choosing serial number, shows decreasing, when choosing image, shows camera
circumgyrating leftwards.
Joystick pan right: When choosing menu, shows entering junior menu, or entering setting up or return to
superior menu, when choosing serial number, when choosing serial number, shows increasing, when
choosing image, shows camera circumgyrating rightwards.
Three-Dimensional Joystick Circumgyrating Joystick Cap Function: Circumgyrating deasil shows pull
image closer, setting date/time/visitatorial data increased, circumgyrating widdershins shows pull image
farer, setting date\time\visitatorial data decreased.
→ Basic Menu Operation
“Return”: return to superior menu
“Open”: open certain setting
“Close”: close certain setting
4.4 Camera Language Setting
Switch Chinese/English in language setting menu under main menu.
5. Display Settings
MAIN MENU
1. DISPLAY SETTINGS
2. CAMERA SETTINGS
3. PRIVACY MASK
4. USER PROGRAM
5. SYSTEM SETTINGS
6. LANGUAGE/语言
7. EXIT
1. Press ‘Menu’ on the keyboard or evoke the presets no. 95 and 64 to enter the main menu, or
press the preset no.1 twice continuously within 1 second.
2. Move the joystick horizontally to enter ‘CAMERA SETTINGS’.
3. Each item in the menu can be set to ‘On’ or ‘off’.
The information of the camera will change while the camera block rotates, and user can see the
inner temperature, zoom times, times, etc on the screen. When all information displays, it will
be as below(’288’ indicates the horizontal angle; and ’68 ’indicates the vertical angle.)
Notice:
1. If there is no any operation within 1 minute after entering the main menu, it will be
closed automatically.
2. Default values of the items in the menu are ‘OFF’.
DISPLAY SETUP
1.CAMERA TITLE OPEN
2.ADDRESS
OPEN
3.PRESET TITLE OPEN
4.ZOOM MULTIPLE OPEN
5.COORDINATE OPEN
6.TEMPERATURE OPEN
7.DATE&TIME
OPEN
8.RETURN
-8-
IP High Speed Dome Camera User’s Manual
ID label
Cam era title
Temperature lab el
Preset title
Date label
Time label
Coordinate label
Lens multiple
6. Camera Parameter Setup Menu
MAIN MENU
1. DISPLAY SETTINGS
2. CAMERA SETTINGS
3. PRIVACY MASK
4. USER PROGRAM
5. SYSTEM SETTINGS
6. LANGUAGE/语言
7. EXIT
6.1 Zoom Speed
1. Press ‘Menu’ on the keyboard or evoke the presets no. 95 and 64 to enter
the main menu, or press the preset no.1 twice continuously within 1 second.
2. Move the joystick vertically to ‘Camera settings’, and enter the sub-menu
3. Move the cursor to ‘ZOOM SPEED’; Choose ‘HIGH’ or ‘LOW
4. Move the joystick vertically to ‘RETURN’; Exit the menu and the system will
save the settings automatically
CAMERA SETTINGS
1.ZOOM SPEED
HIGH
2.BLC
CLOSE
3.FLAME HEAP
OPEN
4.D-ZOOM
OPEN
5.VIDEO SYNC
OPEN
6.B/W SETTINGS
7.ADVANCED SETTINGS
8.RETURN
-9-
IP High Speed Dome Camera User’s Manual
MAIN MENU
1. DISPLAY SETTINGS
2. CAMERA SETTINGS
3. PRIVACY MASK
4. USER PROGRAM
5. SYSTEM SETTINGS
6. LANGUAGE/语言
7. EXIT
6.2 BLC
1. Press ‘Menu’ on the keyboard or evoke the presets no. 95 and 64 to enter
the main menu, or press the preset no.1 twice continuously within 1 second.
2. Make the cursor to ‘CAMERA SETTINGS’’, and enter the sub-menu;
3. Move the joystick and make the cursor to ‘BLC’; move the joystick and
choose BLC ‘ON’ or ‘OFF’.
4. Move the joystick vertically to ‘RETURN’; Exit the menu and the system will
save the settings automatically.
Operation Tips
CAMERA SETTINGS
1.ZOOM SPEED
HIGH
2.BLC
CLOSE
3.FLAME HEAP
CLOSE
4.D-ZOOM
OPEN
5.VIDEO SYNC
OPEN
6.B/W SETTINGS
7.ADVANCED SETTINGS
8.RETURN
Strong backlight makes objects cast shadows. BLC function makes the
speed dome camera adjust aperture to fit the lights changing, and
calibrate image brightness to make the image clearer.
Notice:
1. This function relates to the camera block model and parameters.
While enabling BLC, it will adjust automatically (Choosing ‘ON’).
2. BLC can be set only while [exposure mode] is [AUTO]
3. BLC may be different due to different camera blocks. SANYO has 3
options: [OFF], [Control AREAS, and [All AREAS].
Witho u t c ho o si ng b a c k lig h t
b a c klig hti ng sid e is d a rker
u nd e r stro ng sun sh ine 。
With c h o o sin g b a c k li g ht,
the i m a g e is n orm a l.
- 10 -
IP High Speed Dome Camera User’s Manual
MAIN MENU
1. DISPLAY SETTINGS
2. CAMERA SETTINGS
3. PRIVACY MASK
4. USER PROGRAM
5. SYSTEM SETTINGS
6. LANGUAGE/语言
7. EXIT
6.3 Frame Heap
1. Press ‘Menu’ on the keyboard or evoke the presets no. 95 and 64 to enter the main menu, or
press the preset no.1 twice continuously within 1 second.
2. Move the joystick and make the cursor to ‘CAMERA SETTING’, enter the sub-menu.
3. Move the joystick and make the cursor to ‘FRAME HEAP’, choose ‘ON’ for enabling the slow
shutter function and ‘OFF’ for disabling this function.
4. Move the joystick up and down to ‘RETURN’ to exit the menu and save the settings.
Operation Tips
CAMERA SETTINGS
1.ZOOM SPEED
HIGH
2.BLC
CLOSE
3.FLAME HEAP
CLOSE
4.D-ZOOM
OPEN
5.VIDEO SYNC
OPEN
6.B/W SETTINGS
7.ADVANCED SETTINGS
8.RETURN
When the speed dome camera is used at night or in dark place, you can setup slow
shutter, which can lengthen the lighting time and make the picture more clearly!
Notice:
1. This function correlates the camera model and parameter. That is not effective if the
camera has no this function.
2. The flame heap can be set only in condition that the ‘exposure mode’ is ‘AUTO’.
3. This function may be different due to different camera blocks; for SANYO camera,
here it is ‘Gamma setup’, which include ‘OFF’, ‘ON’ and ‘BRIGHTNESS
ENHANCING’.
- 11 -
IP High Speed Dome Camera User’s Manual
MAIN MENU
1. DISPLAY SETTINGS
2. CAMERA SETTINGS
3. PRIVACY MASK
4. USER PROGRAM
5. SYSTEM SETTINGS
6. LANGUAGE/语言
7. EXIT
6.4 D-Zoom Settings
1. Press ‘MENU’ on the keyboard or evoke the presets no. 95 and 64 to enter the main menu,
or press the preset no.1 twice continuously within 1 second.
2. Move the joystick and make the cursor to ‘CAMERA SETTINGS’’, enter the menu.
3. Move the joystick and make the cursor to “D-ZOOM”, choose “ON” to control the zoom, and
choose ‘OFF” to enable this function.
4. Move the joystick up and down to ‘Return’ to exit the menu and save the settings.
Operation Tips
CAMERA SETTINGS
1.ZOOM SPEED
HIGH
2.BLC
CLOSE
3.FLAME HEAP
CLOSE
4.D-ZOOM
OPEN
5.VIDEO SYNC
OPEN
6.B/W SETTINGS
7.ADVANCED SETTINGS
8.RETURN
When the digital zoom function is activated, the camera’s largest zoom times is the
optics zoom multiplying the digital zoom; while the digital zoom function is enabled,
the camera’s largest zoom time is just the optics zoom time.
If the camera block is Sony, LG or CNB branded, the digital zoom option is on/off!
- 12 -
IP High Speed Dome Camera User’s Manual
MAIN MENU
1. DISPLAY SETTINGS
2. CAMERA SETTINGS
3. PRIVACY MASK
4. USER PROGRAM
5. SYSTEM SETTINGS
6. LANGUAGE/语言
7. EXIT
6.5 Video Sync
1. Press ‘Menu’ on the keyboard or evoke the presets no. 95 and 64 to enter the main menu, or
press the preset no.1 twice continuously within 1 second.
2. Move the joystick and make the cursor to ‘camera settings’, enter the menu.
3. Move the joystick and make the cursor to “VIDEO SYNC” and setup this function; choosing
‘OFF for internal sync and ‘OPEN’ for external sync.
Operation Tips
When several speed dome cameras use one terminal video device, the image may
CAMERA SETTINGS
flicker meanwhile switching the pictures. To solve this problem, set each camera to
1.ZOOM SPEED
HIGH
2.BLC
CLOSE
3.FLAME HEAP
CLOSE
4.D-ZOOM
OPEN
5.VIDEO SYNC
OPEN
6.B/W SETTINGS
7.ADVANCED SETTINGS
8.RETURN
external sync, and adjust the sync value.
6.6 B & W /Color Switch
1. Press ‘MENU’ on the keyboard or evoke the presets no. 95 and 64 to enter the main menu,
or press the preset no.1 twice continuously within 1 second.
MAIN MENU
1. DISPLAY SETTINGS
2. CAMERA SETTINGS
3. PRIVACY MASK
4. USER PROGRAM
5. SYSTEM SETTINGS
6. LANGUAGE/语言
7. EXIT
2. Move the joystick and make the cursor to ‘CAMERA SETTINGS’, and enter the menu.
3. Move the joystick and make the cursor to ‘B&W SETTING’, and enter the next menu.
4. Make the cursor to ‘B&W SETTING’; move the joystick to choose switch modes. There are 4
modes available: AUTO, TINING, B&W and COLOR. ‘AUTO’ is the default mode.
●
AUTO:
Color& B/W automatically switches according to illumination.
●
TINGING: Setup the time for Color & B/W switch, and the time setting is effective only in
timing mode.
●
COLOR: Color mode setup
●
B & W:
B & W mode setup
5. Move the joystick vertically to ‘return’ and exit the menu.
Operation Tips
Color/B&W auto switch ensures the image quality and save storage space.
CAMERA SETTINGS
1.ZOOM SPEED
HIGH
2.BLC
CLOSE
3.FLAME HEAP
CLOSE
4.D-ZOOM
OPEN
5.VIDEO SYNC
OPEN
6.B&W SETTINGS
7.ADVANCED SETTINGS
8.RETURN
Notice
1. This function relates to the camera block model and parameter; If the camera block
has no this function, the ‘Color/B&W auto switch’ option is ineffective.
2. Clockwise rotate the tridimensional rocker cap, the time value will be bigger;
otherwise, the time value will be smaller.
3. Only ‘TIMING’ is chosen for ‘B&W SETTING’, the timing setup is effective.
- 13 -
IP High Speed Dome Camera User’s Manual
6.7 Advanced Settings
1. Press ‘Menu’ on the keyboard or evoke the presets no. 95 and 64 to enter the
B&W SETTINGS
main menu, or press the preset no.1 twice continuously within 1 second.
1. B&W/ SWITCH AUTO
2. B&W SWITCH 00:00
3. COLOR SCHEDULE 00:00
4. RETURN
2. Move the joystick and make the cursor to [CAMERA SETTINGS], enter the
menu.
3. Move the joystick and make the cursor to [ADVANCED SETTINGS] and enter
the sub-menu shown in the left:
6.7.1 Exposure Mode
MAIN MENU
1. Move the cursor to [EXPOSURE], and there are the following modes for
selection:
1. DISPLAY SETTINGS
2. CAMERA SETTINGS
3. PRIVACY MASK
4. USER PROGRAM
5. SYSTEM SETTINGS
6. LANGUAGE/语言
7. EXIT
● [AUTO]:
Default setting
● [BRIGHTNESS
● [AI
PREFs]
PREFs]
● [AE
PREFs]
2. While choosing AI PREFs mode, the iris value ‘F1.4’ can be set. Move the
joystick to choose the proper iris, the setup will be saved when exiting the
menu.
CAMERA SETTINGS
1.ZOOM SPEED
HIGH
2.BLC
CLOSE
3.FLAME HEAP
CLOSE
4.D-ZOOM
OPEN
5.VIDEO SYNC
OPEN
6.B/W SETTINGS
7.ADVANCED SETTINGS
8.RETURN
●
[1/50]: Shutter speed; It can be set only when ‘AE PREFs’ is chose;
●
[F1.4]: AI value; It can be set only when ‘AI PREFs’ is chose;
●
[F2.0/10dB]: Brightness; It can be set only when ‘BRIGHTNESS PREFs’ is
chose;
Operation Tips
The picture quality relates to light exposure, i.e. the light throughput that can
ensure the CCD to gain clear image.
The exposure relates to the light through time (decided by AE SPEED)
and light through area (decided by Iris value).
The camera calculates the proper exposure according to the object
brightness and CCD light sensitiveness, etc.
On the condition that the exposure is definite:
ADVANCED SETTINGS
1.EXPOSURE
2.AE
3. AI
4.BRIGHTNESS
5.WB
6. RED GAIN
7. BLUE GAIN
8 RETURN
AUTO
1/50
F1.4
F1.4*10DB
AUTO
[AE]: the camera will automatically decide the AI;
[AL]: the camera will automatically decide the AE speed;
[BRIGHTNESS]: control the image brightness
Notice:
All functions in ‘Advanced Settings’ depend on the camera block and its
parameters.
- 14 -
IP High Speed Dome Camera User’s Manual
MAIN MENU
1. DISPLAY SETTINGS
2. CAMERA SETTINGS
3. PRIVACY MASK
4. USER PROGRAM
5. SYSTEM SETTINGS
6. LANGUAGE/语言
7. EXIT
6.7.2 WB Mode
The system has the following WB modes: [Auto], [Manu], [Self- adjustment], [Single
lock], [Indoor], [Outdoor], etc.
See detailed operation steps as below:
1. Enter the main menu
2. Move the joystick and make the cursor to [Advanced Settings], Enter
the sub-menu and chose ‘WB’ mode. The setup will be saved when
exiting the menu.
[AUTO] is the default mode; the WB sensor of the camera will detect the,
environment, and enable the color reproduction. If you choose
CAMERA SETTINGS
1.ZOOM SPEED
HIGH
2.BLC
CLOSE
3.FLAME HEAP
CLOSE
4.D-ZOOM
OPEN
5.VIDEO SYNC
OPEN
6.B/W SETTINGS
7.ADVANCED SETTINGS
8.RETURN
ADVANCED SETTINGS
[MANU] mode, the [RED GAIN] and [BLUE GAIN] value can be set.
●
[RED GAIN]: value from 0-255, bigger value indicates more red, and the
hue gets warmer.
●
[BLUE GAIN]: Value from 0-255, bigger value indicates more blue, and
the hue gets colder.
●
[INDOOR]: The hue tends to be colder
●
[OUTDOOR]: The hue tends to be warmer
●
[SELF ADJUSTMENT]: The WB sensor of the camera will detect the
working
1.EXPOSURE
2.AE
3. AI
4.BRIGHTNESS
5.WB
6. RED GAIN
7. BLUE GAIN
8. RETURN
AUTO
1/50
F1.4
F1.4*10DB
AUTO
environment
and
relative
parameter
changes
●
[SINGLE LOCK]: the WB sensor won’t detect even the working
environment changes.
- 15 -
IP High Speed Dome Camera User’s Manual
7. Privacy Mask
This function will make concerned area masked, for example, the window of the bedroom or
ATM in the bank. The speed dome camera maximally support 24 privacy mask zones(This
MAIN MENU
function relates to the camera block model, and the mask window numbers may differ due to
different cameras).
1. DISPLAY SETTINGS
2. CAMERA SETTINGS
3. PRIVACY MASK
4. USER PROGRAM
5. SYSTEM SETTINGS
6. LANGUAGE/语言
7. EXIT
Hitachi Camera: maximally supporting 8 privacy zones in 360° inspecting area, and 2 zones
can be set maximally per screen. The screen will show ‘PLEASE MOVE’ once relevant area
can’t be masked, for example when the downward horizontal angle of the lens is <=45°.
SONY Camera: maximally supporting 24 privacy zones in 360° inspecting area, and 2 zones
can be set maximally per screen. Relevant area can’t be masked when the downward
horizontal angle of the lens is <=45°. LG and CNB cameras have no the privacy mask function.
1. Press ‘Menu’ on the keyboard or evoke the presets no. 95 and 64 to enter the main menu, or
press the preset no.1 twice continuously within 1 second.
2. Move cursor to [PRIVACY MASK] and enter the menu.
PRIVACY MASK
1. MASK NO.
2. MASK AREA
3. ACTIVE
4. DELETE
5. RETURN
01
OFF
●
[MASK NO.]: Choose the mask no. as the privacy mask area.
●
[MASK AREA]: Define the current privacy mask window
●
[ACTIVE]: Enable/disable the privacy area. [ON]---Enable current privacy mask area;
●
[DELETE]: Delete current privacy area settings
[OFF] ---disable current privacy mask area;
3. Define current privacy mask window: choose the window no., and then operate as follows:
a. Make the cursor to [PRIVACY AREA], and enter the menu; Move the joystick, and make the
privacy area displayed on the screen;
b. Press[OPEN], privacy area can be set: move the joystick downward/upward/rightward
/leftward, the privacy area will be higher/ shorter/wider/narrower.
c. Press[OPEN], to save current privacy mask settings; and the window status will be open
automatically.
Notice:
This function relates to the camera block and its parameters. This option will be
ineffective if the camera has no this function.
- 16 -
IP High Speed Dome Camera User’s Manual
8. User Program
MAIN MENU
1. DISPLAY SETTINGS
2. CAMERA SETTINGS
3. PRIVACY MASK
4. USER PROGRAM
5. SYSTEM SETTINGS
6. LANGUAGE/语言
7. EXIT
8.1 Preset Setup
1. Press ‘MENU’ on the keyboard or evoke the presets no. 95 and 64 to enter the main menu,
or press the preset no.1 twice continuously within 1 second.
2. Choose current preset no.; Move the cursor to [NO.]. Move the joystick to choose preset no.
from 001-220. No. 1 is current preset point.
3. Set current preset: move cursor to [Set], move joystick to change the zoom times; focus on
the object and press [OPEN] to save.
Operation Tips
﹡ The preset function is to save relative information to memories, like the pan
USER PROGRAM
1. PRESET SETUP
2. TOUR SETUP
3. AUTO LEARNING
4. SCAN SETUP
5. TIMER SETUP
6. ALARM SETUP
7. RETURN
horizontal angle, tilt angle and lens parameters, etc.
﹡ Successful operation notice will be displayed on the screen.
4. Call: Move the cursor to [CALL]; current preset will be appearing on the screen.
5. DELETE: Move the cursor to [CALL]; current preset will be deleted.
6. Edit Title: Move the cursor to the [EDIT TITLE], and enter the menu. Use keyboard to edit the
title.
PRESET SETUP
1. NO.
2. SET
3. CALL
4. DELETE
5. EDIT TITLE
6. RETURN
1. Chinese Character Inputs:
Choose ‘Pinyin’ from ‘Input methods’; move the flashing cursor to the underline beneath the
alphabets; move the joystick left and right, and move the spelling of relevant Chinese
characters to the underline, .press [OPEN] on the keyboard to confirm. At the moment, the
Chinese characters appear at the underlines above the alphabets. Move the flashing
cursor to the underline beneath the Chinese characters; move the joystick left and right, and
move the relevant Chinese character to the underline, press [OPEN] to confirm edition.
2. Delete edited content: move the cursor to the title, the title will flash. Press [CLOSE] to delete
the characters from right to left
3. Delete Pinyin alphabets: move the cursor to the underline beneath the alphabets, press
[Close] to delete.
EDIT TITLE
1. TITLE
PRESET 001
2. RETURN
3. INPUT METHODS PINYIN
-ABCDEFGHIJKLMNOPQ
--
Notice:
1. Choose preset number before the operation, like deleting, and editing title, etc.
2. Maximum 16 characters can be set for the title, with input methods of Pinyin,
numbers, symbol and English, etc. Characters include 0-9, A-Z, Chinese and
symbol, etc.
- 17 -
IP High Speed Dome Camera User’s Manual
MAIN MENU
1. DISPLAY SETTINGS
2. CAMERA SETTINGS
3. PRIVACY MASK
4. USER PROGRAM
5. SYSTEM SETTINGS
6. LANGUAGE/语言
7. EXIT
8.2 Tour Setup
Auto Tour is defined as a sequential moving from preset to preset and dwell for a specific time
at each preset. It is useful if you need to repeat switching among a number of presets. Each
sequence can contain up to 32 presets and dwell time for each preset is independent.
1. Press ‘Menu’ on the keyboard or evoke the presets no. 95 and 64 to enter the main menu, or
press the preset no.1 twice continuously within 1 second.
2. Move the cursor to [USER PROGRAM]. Move the joystick to enter the sub-menu.
3. Move the cursor to [TOUR SETUP], and then enter the sub-menu.
4. Tour Number Setup: set the tour no. within 0~4. Move the cursor to [STAY TIME] to edit it
USER PROGRAM
1. PRESET SETUP
2. TOUR SETUP
3. AUTO LEARNING
4. SCAN SETUP
5. TIMER SETUP
6. ALARM SETUP
7. RETURN
from 000-255(seconds).
5. Tour Line Setup: Move the cursor to “00-00-00…00” Move the joystick to activate the first
position, and then circumvolve the cap of rocker to adjust the number of preset. Move the
cursor to next position, move again the cursor to last position. The range of the presets is
1—80, each route can be setup 32 presets.
6. Execute: move the cursor to [EXECUTE]; the camera will implement this function.
TOUR SETUP
1. NO.
2. STAY TIME:
001
00-00-00-00-00-00-00-00
00-00-00-00-00-00-00-00
00-00-00-00-00-00-00-00
00-00-00-00-00-00-00-00
3. EXECUTE
4. RETURN
- 18 -
IP High Speed Dome Camera User’s Manual
8.3 Auto Learning
MAIN MENU
1. DISPLAY SETTINGS
2. CAMERA SETTINGS
3. PRIVACY MASK
4. USER PROGRAM
5. SYSTEM SETTINGS
6. LANGUAGE/语言
7. EXIT
The camera will at least record the special routing (Pan & Tilt control, or camera control
demand, etc) for 180 seconds continuously. There are 4 auto learnings maximally.
1. Press ‘MENU’ on the keyboard or evoke the presets no. 95 and 64 to enter the main menu,
or press the preset no.1 twice continuously within 1 second.
2. Move the cursor to [USER PROGRAM]. Move the joystick to enter the sub-menu.
3. Move the cursor to [AUTO LEARNING], and then enter the sub-menu.
4. Choose number: Move the cursor to [NO.], the item that is chose will be the current auto
USER PROGRAM
1. PRESET SETUP
2. TOUR SETUP
3. AUTO LEARNING
4. SCAN SETUP
5. TIMER SETUP
6. ALARM SETUP
7. RETURN
learning, and the following operation will be for it only.
5. Define the record track: move the cursor to [RECORD TRACK], and enter the menu. Using
the joystick to move the image or change the zoom times. The camera will at least record the
route for 180 seconds continuously; and the stay tome, zoom times and focus records will be
recorded; Press [OPEN] to save current settings, and [CLOSE] to cancel the settings.
6. Execute current mode: move cursor to [EXECUTE], the camera will run the special route
continuously.
7. Edit Title: Move the cursor to the [EDIT TITLE], and enter the menu. Use keyboard to edit the
title.
AUTO LEARNING SETUP
1. NO.
2. REC TRACK
3. EXECUTE
4. DELETE
5. EDIT TITLE
6. RETURN
001
EDIT TITLE
1. TITLE AUTO LEARNING 001
2. RETURN
3. INPUT METHODS PINYIN
-ABCDEFGHIJKLMNOPQ
--
1. Chinese Character Inputs:
Choose ‘Pinyin’ from ‘Input methods’; move the flashing cursor to the underline beneath the
alphabets; move the joystick left and right, and move the spelling of relevant Chinese
characters to the underline, .press [OPEN] on the keyboard to confirm. At the moment, the
Chinese characters appear at the underlines above the alphabets. Move the flashing
cursor to the underline beneath the Chinese characters; move the joystick left and right, and
move the relevant Chinese character to the underline, press [OPEN] to confirm edition.
2. Delete edited content: move the cursor to the title, the title will flash. Press [CLOSE] to delete
the characters from right to left
3. Delete Pinyin Alphabets: move the cursor to the underline beneath the alphabets, press
[CLOSE] to delete.
Notice:
1. Choose preset number before the operation, like deleting, and editing title, etc.
2. Maximum 16 characters can be set for the title, with input methods of Pinyin,
numbers, symbol and English, etc. Characters include 0-9, A-Z, Chinese and
symbol, etc.
- 19 -
IP High Speed Dome Camera User’s Manual
MAIN MENU
1. DISPLAY SETTINGS
2. CAMERA SETTINGS
3. PRIVACY MASK
4. USER PROGRAM
5. SYSTEM SETTINGS
6. LANGUAGE/语言
7. EXIT
8.4 Scan Setup
1. Preset 2 points first, the camera will scan between 2 presets horizontally with stable speed
and same zoom time. A speed dome camera has 4 groups of scans.
2. Press ‘MENU’ on the keyboard or evoke the presets no. 95 and 64 to enter the main menu;
choose menu to enter the ‘SCAN SETUP’ as shown in the left figures.
3. Choose [NUMBER], There are 4 scans available.
4. Scan Speed Setup: move the cursor to [SPEED] to choose from 001-063;
5. Start Position:Move the cursor to [START POSTITION]; move the joystick to choose object
image, press [OPEN] to save. The end position setup is the same way as start position.
6. Execute the scan: Make the cursor to [EXECUTE], and move the joystick to enter the menu.
USER PROGRAM
1. PRESET SETUP
2. TOUR SETUP
3. AUTO LEARNING
4. SCAN SETUP
5. TIMER SETUP
6. ALARM SETUP
7. RETURN
The camera will execute the scans.
7. [DELETE]: Delete current scan.
Note:
1. If the start position and end position are the same point, the camera will run at
constant speed.
2. During the scan, the speed, zoom time and vertical direction will keep unchanged; if
these parameters are not the same for the 2 points, the scanning will be subject to
the start position.
3. Auto scanning will be titled automatically, which will be displayed on the screen, like
SCAN SETUP
auto scan 001.
1. NO.
001
2. PATH
>=180
3. SPEED
050
4. START POSITION
5. END POSITION
6. EXECUTE
7. DELETE
8. RETURN
- 20 -
IP High Speed Dome Camera User’s Manual
8.5 Timer Setup
MAIN MENU
This function sets the time for executing presets, scan, tour and auto learning.
1. DISPLAY SETTINGS
2. CAMERA SETTINGS
3. PRIVACY MASK
4. USER PROGRAM
5. SYSTEM SETTINGS
6. LANGUAGE/语言
7. EXIT
1. Press ‘MENU’ on the keyboard or evoke the presets no. 95 and 64 to enter the main menu,
or press the preset no.1 twice continuously within 1 second.
2. Move the joystick and make the cursor to [USER PROGRAM], and enter the sub-menu.
3. Move the cursor to [timer Setup] and enter the menu as shown in the left:
●
[NO.]: 8Channels in total
●
[START TIME]: The start time to execute relevant channel
●
[END TIME]: The end time to execute relevant channel
●
[TRIGGER TYPE]: Choose the execution functions of pointed channels; each channel can
●
[TRIGGER ACTION]: Execute relevant channel
●
[TIMING ACTIVE]: Activate the timing device
●
[EVERYDAY]: Executing the timing switch everyday
set Closing preset/Scan/Tour/Auto learning (1-4).
USER PROGRAM
1. PRESET SETUP
2. TOUR SETUP
3. AUTO LEARNING
4. SCAN SETUP
5. TIMER SETUP
6. ALARM SETUP
7. RETURN
4. If the function is closed, the time period of this channel won’t conflict with other channels
Notice:
1. During the scan, touring or auto learning, once the presetting time is over, the
current action will be stopped, and the camera will resume to previous status and
position before presetting time.
2. Idle running function s not allowed during the timing period;
3. The timing functions will not be executed while setting presets, recording auto
learning, setting start/end positions and menu status, etc.
TIMER SETUP
1. NO.
001
2. TRIGGER TYPE PRESET
3. TRIGGER ACTION 001
4. START TIME
00:00
5. END TIME
00:00
6. TIMING ACTIVE
OFF
7. EVERYDAY
8. RETURN
ON
- 21 -
IP High Speed Dome Camera User’s Manual
8.6 Alarm Setup
USER PROGRAM
1. PRESET SETUP
2. TOUR SETUP
3. AUTO LEARNING
4. SCAN SETUP
5. TIMER SETUP
6. ALARM SETUP
7. RETURN
ALARM SETUP
1. REPOSITION
2. DELAY TIME
3. ACTIVE SETTINGS
4. PLACEMENT
5. RETURN
ACTIVE SETTINGS
1. NO.
001
2.ALARM LINKAGE PRESET
3. ALARM ACTION
4. ALARM OUTPUT
5. RETURN
The dome camera supports 7 alarm inputs and 2 outputs; It can realize
alarm-linkage, external alarm info transmitting to camera, alarm position
shooting (evoke presets, or startup auto touring, auto learning and scan), and
decides executing the alarm output or not.
1. Press ‘MENU’ on the keyboard or evoke the presets no. 95 and 64 to enter
the main menu, or press the preset no.1 twice continuously within 1 second.
●【REPOSTION】2 options: ’ON’-Delete alarm output, and the camera will
stop. ’OFF’ –delete alarm output and the camera will keep the current
status.(The delay time must be longer than 3 seconds while setting this
function to be ‘ON’)
●【DELAY TIME】Set the time that system will auto reset the alarm after
current alarm inputs. Values: 1 to 255 seconds
● 【OUTPUT STATUS】Set relay status. There are 2 states. NO or NC
(Normal Open or Normal Close). Choosing NC, the relay will be closed
when there is no alarm output; and the replay will be opened while there is
any alarm output.
8.6.1 Active Settings
Move the cursor to Active Settings, select the item to access its submenu.
● [NO. ] Edit the number of alarm input channel(001-007).When there are
two alarm inputs number 001 and number 002 at the same time, the
dome will respond to number 001 first.
● [ALARM LINKAGE] Set auto respond function. OFF/ Auto Panning/
Pattern / Preset Cruise /Call preset. For example: Alarm channel 001 call
preset 1, alarm channel 002 call preset 2.
● [ALARM ACTION] Select respond output channel for current alarm input.
OFF, 1, 2, 1&2
● [ALARM OUTPUT]: Alarm outputs options while there is alarm input:
Null-no Alarm output/alarm output 1/alarm output 2/both.
8.6.2 Placement Set
Move joystick and make the cursor to [Placement set], and enter the
placement set menu, there are 2 modes:
[ON] Enable this function
[OFF] Disable this function
[START/END TIME] Set the start/end time period for alarm; If the placement
state is On, START/END TIME must be set to make the
alarm action effective.
PLACEMENT SET
1.PLACEMENT STATE ON
2. STATE TIME
00:00
3. END TIME
00:00
4. RETURN
- 22 -
IP High Speed Dome Camera User’s Manual
9. System Settings
9.1 Camera Title
MAIN MENU
Dome title, it is the title of the dome. Assigning a name to a dome helps user
1. DISPLAY SETTINGS
2. CAMERA SETTINGS
3. PRIVACY MASK
4. USER PROGRAM
5. SYSTEM SETTINGS
6. LANGUAGE/语言
7. EXIT
to remember which dome it is.
1. Press ‘Menu’ on the keyboard or evoke the presets no. 95 and 64 to enter
the main menu, or press the preset no.1 twice continuously within 1
second.
2. Move the joystick down to select the ‘System Settings’, then move the
joystick left or right to access the sub-menu.
3. Move the joystick down to ‘Camera title’.
Operation Tips:
SYSTEM SETTINGS
1. CAMERA TITLE
2. INFORMATION
3. PAN & TILT
4. DELETE
5. DEFAULT
6. RESET
7. VIDEO SIGNAL
8. DATE & TIME
9. RETURN
PAL
1. Chinese Character Inputs:
Choose ‘PINYIN’ from ‘INPUT METHODS’; move the flashing cursor to the underline beneath
the alphabets; move the joystick left and right, and move the spelling of relevant Chinese
characters to the underline, .press [OPEN] on the keyboard to confirm. At the moment, the
Chinese characters appear at the underlines above the alphabets. Move the flashing
cursor to the underline beneath the Chinese characters; move the joystick left and right, and
move the relevant Chinese character to the underline, press [OPEN] to confirm edition.
2. Delete Edited Content: Move the cursor to the title, the title will flash. Press [Close] to delete
the characters from right to left
3. Delete Pinyin Alphabets: Move the cursor to the underline beneath the alphabets, press
[CLOSE] to delete.
Notice:
1. Choose preset number before the operation, like deleting, and editing title, etc.
EDIT TITLE
2. Maximum 16 characters can be set for the title, with input methods of Pinyin,
1. TITLE
numbers, symbol and English, etc. Characters include 0-9, A-Z, Chinese and
2. RETURN
symbol, etc.
3. INPUT METHODS
PINYIN
-ABCDEFGHIJKLMNOPQ
--
- 23 -
IP High Speed Dome Camera User’s Manual
9.2 Information
MAIN MENU
1. DISPLAY SETTINGS
2. CAMERA SETTINGS
3. PRIVACY MASK
4. USER PROGRAM
5. SYSTEM SETTINGS
6. LANGUAGE/语言
7. EXIT
1. Press ‘Menu’ on the keyboard or evoke the presets no. 95 and 64 to enter
the main menu, or press the preset no.1 twice continuously within 1
second.
2. Move the cursor to [SYSTEM SETTINGS], and enter the sub-menu;
3. Move the cursor to [INFORMATION], the default info of the camera will be displayed on
the screen.
Default info includes software version, camera address, and communication
parameters.
SYSTEM SETTINGS
1. CAMERA TITLE
2. INFORMATION
3. PAN & TILT
4. DELETE
5. DEFAULT
6. RESET
7. VIDEO SIGNAL
8. DATE & TIME
9. RETURN
PAL
INFORMATION
1. VERSION: 1.0.0
2. PROTOCOL: PELCOD
3. BAUD:9600
4. ADDRESS:001
5. RETURN
- 24 -
IP High Speed Dome Camera User’s Manual
9.3 Pan and Tilt
MAIN MENU
1. DISPLAY SETTINGS
2. CAMERA SETTINGS
3. PRIVACY MASK
4. USER PROGRAM
5. SYSTEM SETTINGS
6. LANGUAGE/语言
7. EXIT
The settings can control series of normal actions. It plays an important role to control the
image display.
1. Press ‘MENU’ on the keyboard or evoke the presets no. 95 and 64 to enter
the main menu, or press the preset no.1 twice continuously within 1
second.
2. Move the cursor to [SYSTEM SETTINGS], and enter the sub-menu;
3. Move the cursor to [PAN & TILT], and enter the sub-menu as shown in the left.
9.3.1Auto Flip
SYSTEM SETTINGS
1. Move the joystick and make the cursor to [AUTO FLIP], and enter the
1. CAMERA TITLE
2. INFORMATION
3. PAN & TILT
4. DELETE
5. DEFAULT
6. RESET
7. VIDEO SIGNAL
8. DATE & TIME
9. RETURN
menu. Choose [ON] to enable this function, and disable this function while
choosing [OFF].
Operation Tips
PAL
When the camera tilts downward and goes just beyond the vertical
position, the camera rotates 180 degrees. After the camera rotates, it
will tilts up 90 degrees if user holds the joystick in the down position.
PAN & TILT
1. AUTO FLIP
OPEN
2. IDLE TIME
000
3. IDLE ACTIVE
ON
4. ACTIVE OPTION
5. RESET ACTIVE LAST START
6. ACTIVE OPTION
7. FAN ACTIVE TEMP
(READ ONLY)
040
8. RETURN
- 25 -
IP High Speed Dome Camera User’s Manual
9.3.2 Idle Time
PAN & TILT
This setting allows the PTZ camera to implement an appointed action after
getting into free time state for some time (1-240minutes). The default setting
1. AUTO FLIP
OPEN
2. IDLE TIME
000
3. IDLE ACTIVE
ON
value is 0, showing not implementing action automatically.
1. make the cursor to “IDLE TIME”, set automatic activation time, ranging from
4. ACTIVE OPTION
0-240 (minutes), “IDLE TIME” means the operation action after activation,
5. RESET ACTIVE LAST START
when idle time is set to be ”0”, the setting for “IDLE ACTIVE” is ineffective.
6. ACTIVE OPTION
2. Control joystick, move cursor to “IDLE ACTIVE”. Choose actions after
7. FAN ACTIVE TEMP
(READ ONLY)
040
activation.
The following options available:
8. RETURN
●
Default-no action
●
Run presets
●
Run scanning
●
Run auto learning function
●
Run touring
3. If [IDLE ACTIVE] evokes presets, move the joystick to [ACTIVE OPTION],
PAN & TILT
1. AUTO FLIP
OPEN
2. IDLE TIME
000
3. IDLE ACTIVE
ON
there are 1-220 presets to chose.
9.3.3 Reset Active
The implementing action after PTZ switches on and self test. If no manual
4. ACTIVE OPTION
intervention, PTZ will run this action repeatedly. The default value is “no
5. RESET ACTIVE LAST START
action”
6. ACTIVE OPTION
1. Move joystick and make the cursor to “RESET ACTIVE” , choose actions
7. FAN ACTIVE TEMP
(READ ONLY)
040
8. RETURN
after the PTZ is powered on:
The following options available
PAN & TILT
1. AUTO FLIP
OPEN
2. IDLE TIME
000
3. IDLE ACTIVE
ON
●
No action
●
Call presets
●
Run scanning
●
Run auto learning
●
Run touring
●
The state before power off
9.3.4 Fan Active TEMP (read-only)
When PTZ camera is applied in high temperature, its own temperature will
increase. In order to keep the whole stability of PTZ, the fan will turn on after
4. ACTIVE OPTION
the temperature rises to some degree.
5. RESET ACTIVE LAST START
1. Move joystick and make the cursor to ‘Fan active Temp’; Users can set
6. ACTIVE OPTION
temperature according to actual situation.
7. FAN ACTIVE TEMP
(READ ONLY)
8. RETURN
040
The default startup temperature of the fan is 40℃, the user can enter “fan
startup set” menu and adjust fan startup temperature. As shown in the chart,
the temperature ranges from 0 to 60℃.
- 26 -
IP High Speed Dome Camera User’s Manual
9.4 Delete
MAIN MENU
1. Press ‘Menu’ on the keyboard or evoke the presets no. 95 and 64 to enter
1. DISPLAY SETTINGS
2. CAMERA SETTINGS
3. PRIVACY MASK
4. USER PROGRAM
5. SYSTEM SETTINGS
6. LANGUAGE/语言
7. EXIT
the main menu, or press the preset no.1 twice continuously within 1 second.
2. Move the cursor to [SYSTEM SETTINGS], and enter the menu
3. Move the cursor to [DELETE], and then enter the sub-menu:
SYSTEM SETTINGS
1. CAMERA TITLE
2. INFORMATION
3. PAN & TILT
4. DELETE
5. DEFAULT
6. RESET
7. VIDEO SIGNAL
8. DATE & TIME
9 RETURN
●
ALL PRESET
●
ALL TOUR
●
ALL AUTO LEARNING
●
ALL SCAN
●
ALL MASK
●
ALL TIMER
●
ALL ALARM
Implementing the function” DELETES OPERATION” will make camera’s
parameters and system’s parameters default value, delete all privacy window
and alarm setting. Please use with caution.
PAL
4. Take deleting “ALL PRESET” as example to explain the operating process.
Move joystick and make the cursor to “ALL PRESET”,and then move the
joystick to enter the deletion interface, press “open” , all presets will be
deleted.
Note: Once the instruction of deleting is implemented, it can’t be
DELETE
1. ALL PRESETS
2. ALL TOUR
3. ALL AUTO LEARNING
4. ALL SCAN
5. ALL MASK
6. ALL TIMER
7. ALL ALARM
8. RETURN
recovered. Please operate this function with caution.
9.5 Default
1. Press ‘MENU’ on the keyboard or evoke the presets no. 95 and 64 to enter
the main menu.
2. Move joystick and make the cursor to [SYSTEM SETTINGS], and enter the
sub-menu.
SYSTEM SETTINGS
1. CAMERA TITLE
2. INFORMATION
3. PAN & TILT
4. DELETE
5. DEFAULT
6. RESET
7. VIDEO SIGNAL
8. DATE & TIME
3. Move the cursor to “DEFAULT”, and enter the reset interface
Press “OPEN” to implement [DEFAULT] function, press “CLOSE” to cancel the
operation.
9.6 Restart
PAL
9. RETURN
1. Choose “RESET” from ‘SYSTEM SETTING’. Move joystick to left or right,
and then PTZ will restart to execute the self-test.
SYSTEM SETTINGS
1. CAMERA TITLE
2. INFORMATION
3. PAN & TILT
4. DELETE
5. DEFAULT
6. RESET
7. VIDEO SIGNAL
8. DATE & TIME
PAL
9. RETURN
- 27 -
IP High Speed Dome Camera User’s Manual
9.7 Date & Time
MAIN MENU
1. DISPLAY SETTINGS
2. CAMERA SETTINGS
3. PRIVACY MASK
4. USER PROGRAM
5. SYSTEM SETTINGS
6. LANGUAGE/语言
7. EXIT
1. Press ‘MENU’ on the keyboard or evoke the presets no. 95 and 64 to enter the main menu.
2. Move joystick and make the cursor to ‘SYSTEM SETTING’, and enter the sub-menu;
3. Move joystick and make the cursor to ‘Date & time’, and enter the menu;
4. Move cursor to “TIME” or “DATE”, clockwise or anticlockwise rotate the joystick cap to
adjust the time and date, exit the interface to save. The date shows as year/month/day, and
time will be minute/second in orders.
SYSTEM SETTINGS
1. CAMERA TITLE
2. INFORMATION
3. PAN & TILT
4. DELETE
5. DEFAULT
6. RESET
7. VIDEO SIGNAL
8. DATE & TIME
9. RETURN
PAL
DAY & TIME
1. DATE 08/ 01/ 01
2. TIME 00: 00: 00
3. RETURN
10. Language setup
1. Press “MENU” on keyboard or call No.95. No.64 preset position, then enter main menu.
MAIN MENU
1. DISPLAY SETTINGS
2. CAMERA SETTINGS
3. PRIVACY MASK
4. USER PROGRAM
5. SYSTEM SETTINGS
6. LANGUAGE/语言
7. EXIT
2. Move cursor to “LANGUAGE”
3. Move joystick to select Chinese or English menu, exit the interface to save the settings.
- 28 -
IP High Speed Dome Camera User’s Manual
11. Camera Menu Index
DISPLAY SETTINGS
1.CAMERA TITLE
2.ADDRESS
3.PRESET TITLE
4.ZOOM MULTIPLE
5.COORDINATE
6.TEMPERATURE
7.DATE & TIME
8.RETURN
OPEN
OPEN
OPEN
OPEN
OPEN
OPEN
OPEN
MAIN MENU
1.DISPLAY SETTINGS
2.CAMERA SETTINGS
3.PRIVACY MASK
4.USER PROGRAM
5.SYSTEM SETTINGS
6. LANGUAGE/语言
7. Exit
CAMERA SETTINGS
1.ZOOM SPEED
2.BLC
3.FLAME HEAP
4.D-ZOOM
5.VIDEO SYNC
6.B&W SETTINGS
7.ADVANCED SETTINGS
8.RETURN
HIGH
CLOSE
OPEN
OPEN
OPEN
PRIVACY MASK
1. MASK NO.
2. MASK AREA
3. ACTIVE
4. DELETE
5. RETURN
USER PROGRAM
SYSTEM SETTINGS
1. CAMERA TITLE
2. INFORMATION
3. PAN&TILT
4. DELETE
5. DEFAULT
6. RESET
7. VIDEO SIGNAL
8. DATE&TIME
9. RETURN
1. PRESET SETUP
2. TOUR SETUP
3. SCAN SETUP
4. AUTO LEARNING
5.TIMING SETUP
6. ALARM SETUP
7. RETURN
001
OFF
PRESET SETUP
B&W/COLOR SETTINGS
1. B&W/COLOR SWITCH
2. B/W SCHEDULE
3. COLOR SCHEDULE
4. RETURN
1. NO.
2. SET
3. CALL
4. DELETE
5. EDIT TITLE
6. RETURN
AUTO
00:00
00:00
PAL
EDIT PRESET TITLE
001
1. TITLE
2. RETURN
PRESET 005
EDIT TITLE
1. TITLE
2. RETURN
TOUR SETUP
1. NO.
2. STAY TIME:
00-00-00-00-00-00-00-00
00-00-00-00-00-00-00-00
00-00-00-00-00-00-00-00
00-00-00-00-00-00-00-00
3. EXECUTE
4. RETURN
ADVANCE SETTINGS
1.EXPOSURE
2.AE
3. AI
4.BRIGHTNESS
5.WB
6. RED GAIN
7. BLUE GAIN
8. RETURN
AUTO
1/50
F1.4
F2.0/0DB
AUTO
100
100
001
005
INFORMATION
1. VERSION:
2. PROTOCOL:
3. BAUD:
4. ADDRESS:
5. RETURN
1.3.0
PELCOD
9600
001
PAN & TILT
AUTO LEARNING SETUP
1. NO.
2. REC TRACK
3. EXECUTE
4. DELETE
5. EDIT TITLE
6. RETURN
001
EDIT AUTO LEARNING TITLE
1. TITLE AUTO LEARNING1
2. RETURN
1. AUTO FLIP
2. IDLE TIME
3. IDLE ACTIVE
4. ACTIVE OPTION
5. RESET ACTIVE
6. ACTIVE OPTION
7. FAN ACTIVE TEMP(READ ONLY)
8. RETURN
SCAN SETUP
1. NO.
2. PATH
3. SPEED
4. START POSITION
5. END POSITION
6. EXECUTE
7. DELETE
8. RETURN
DELETE
001
<180
050
1. ALL PRESET
2. ALL TOUR
3. ALL AUTO LEARNING
4. ALL SCAN
5. ALL MASK
6. ALL TIMER
7. ALL ALARM
8. RETURN
TIMER SETUP
DAY & TIME
1. NO.
001
2. TRIGGER TYPE
3. TRIGGER ACTION
001
4. START TIME
00:00
5. END TIME
00:00
6. TIMING ACTIVE
OFF
7. EVERYDAY
ON
8. RETURN
PLACEMENT SET
1.PLACEMENT STATE
2. STATE TIME
3. END TIME
5. RETURN
ON
00:00
00:00
ALARM SETUP
1. REPOSITION
2. DELAY TIME
3. ACTIVE SETTINGS
4. PLACEMENT
5. RETURN
001
009
1. DATE
2. TIME
3. RETURN
08/ 01/ 01
00: 00: 00
ACTIVE SETTINGS
1. NO.
2. ALARM LINKAGE
3. ALARM ACTION
4. ALARM OUTPUT
5. RETURN
001
PRESET
001
- 29 -
High Speed Dome Camera User’s Manual
12. System Installation
12.1 Installation
1)
Dimension
Figure 1
2)
Installation Style
a)
Wall Installation
Figure 2
- 30 -
High Speed Dome Camera User’s Manual
b)
Pendant Installation
Figure 3
c)
Ceiling Mounting
CLOSE
this hatch aim at the side where
cable comes out
OPEN
the size of installation hole at
Dome's pedestal
φ
Figure 4
- 31 -
High Speed Dome Camera User’s Manual
d)
Ceiling mount
Embed into a cutout with a diameter slightly
larger than 236mm (9.25”).
Figure 5
12.2 Installation Steps
Taking wall-installation style as example:
1.
2.
3.
Unpacking the carton and carefully take out the dome camera and its attachments.
According to the size of Dome, drill the installation hole in the wall and fixed expander bolts.(Also can drill hole according to fixed
hole of bracket )
Rotate the vitreous cover CCW (counterclockwise) and take it out. (see Figure 6)
Figure 6
4.
5.
6.
Set up camera protocol and baud-rate according to Table 2 referring to Figure 4.1. Set the dome address (ID) according to Table
1.
Rotate the vitreous cover CW (clockwise) to install Dome.
Fix the bracket on the main body of dome, rotate the Dome CW (clockwise), and keep the bracket hole and the mounting flange in
line. Tighten the three screws.(refer to Figure7 )
- 32 -
High Speed Dome Camera User’s Manual
Figure 7
7.
8.
9.
Fetch the signal cable, video cable and power wires from bracket. Fix the cover plate, tighten the knurled-screw (refer to Figure 6).
Fix the assembled Dome on the wall and tighten 4 PCS knurled-screws.
Instruction of surface installation:
According to the size of Dome's fixed board, drill the installation hole on the ceiling and fixed expander bolts(Also can drill hole
according to fixed hole of fixed board. Fix the fixed board, fix the main body of dome on fixed board along the guide pole, rotate the
Dome anticlockwise, tighten the screws(figure8)
Figure8
12.3 Installation Steps(taking ceiling mount as an example)
1. Open the package, and take out the camera and accessories.
2. Drill an installation hole in the ceiling with a diameter slightly larger than 236mm (9.25”) (The ceiling
- 33 -
High Speed Dome Camera User’s Manual
material shall be considered; A bracket or plate is necessary sometimes to increase support).
3. Remove the ornament cover by rotating clockwise; then remove the transparent cover by rotating it
counterclockwise(As shown in figure 9).
Coding switch
Counterclockwise rotate the transparent cover
Rotate clockwise and open the ornament cover
Figure 9
4. Referring to table 2, set the camera protocol and baud rate by the coding switch as shown in figure 6.
Check if the camera address is compatible with the address that you want; if not, set the camera to
corresponding address as per table 1.
5. Install the bracket components into the installation hole, fasten the screws to fix the bracket; clockwise
rotate and fasten the transparent cover, and then counterclockwise rotate the ornament cover components
to install them, as per figure 10.
- 34 -
High Speed Dome Camera User’s Manual
Figure 10
12.4 Disassembly and installation of Main Body
1.Quick disassembly design, be easy to maintain and change the main body.
2.Turn vitreous cover on its axis in CCW (counter clockwise) direction and separate it down.
3.Then loosen knurled-screw as shown bellow. Hold the drier shelf, look up the dome, revolve main body CCW (counter clockwise) and
fetch it out (Figure11).
Figure 11
4.The steps of installation are reverse to those of disassembly.
12.5 Dome Configuration.
- 35 -
High Speed Dome Camera User’s Manual
Figure 12
Appendix A:24VAC Wire Diameter and Transmission Distance Comparison Chart
While the wire diameter determinate and 24VAC loss rate under 10%, the longest transmission distance is recommended as
following chart.
Wire diameter (mm)
Power[VA]
Transmission
Distance
feet(m)
0.8000
1.000
1.250
2.000
10
283(86)
451(137)
716(218)
1811(551)
20
141(42)
225(68)
358(109)
905(275)
30
94(28)
150(45)
238(72)
603(183)
40
70(21)
112(34)
179(54)
452(137)
50
56(17)
90(27)
143(43)
362(110)
60
47(14)
75(22)
119(36)
301(91)
70
40(12)
64(19)
102(31)
258(78)
80
35(10)
56(17)
89(27)
226(68)
90
31(9)
50(15)
79(24)
201(61)
100
28(8)
45(13)
71(21)
181(55)
110
25(7)
41(12)
65(19)
164(49)
120
23(7)
37(11)
59(17)
150(45)
130
21(6)
34(10)
55(16)
139(42)
- 36 -
High Speed Dome Camera User’s Manual
140
20(6)
32(9)
51(15)
129(39)
150
18(5)
30(9)
47(14)
120(36)
160
17(5)
28(8)
44(13)
113(34)
170
16(4)
26(7)
42(12)
106(32)
180
15(4)
25(7)
39(11)
100(30)
190
14(4)
23(7)
37(11)
95(28)
200
14(4)
22(6)
35(10)
90(27)
Appendix B:Wire Gauge Conversion Chart
Bare wire diameter
metric size
(mm)
AWG
(Approximate)
SWG
(Approximate)
Bare wire cross
sectional area
(mm2)
0.050
43
47
0.00196
0.060
42
46
0.00283
0.070
41
45
0.00385
0.080
40
44
0.00503
0.090
39
43
0.00636
0.100
38
42
0.00785
0.110
37
41
0.00950
0.130
36
39
0.01327
0.140
35
0.160
34
0.180
33
0.200
32
0.230
31
0.250
30
33
0.04909
0.290
29
31
0.06605
0.330
28
30
0.08553
0.350
27
29
0.09621
0.400
26
28
0.1237
0.450
25
0.560
24
24
0.2463
0.600
23
23
0.2827
0.710
22
22
0.3958
0.750
21
0.01539
37
0.02011
0.02545
35
0.03142
0.04115
0.1602
0.4417
- 37 -
High Speed Dome Camera User’s Manual
0.800
20
21
0.5027
0.900
19
20
0.6362
1.000
18
19
0.7854
1.250
16
18
1.2266
1.500
15
2.000
12
1.7665
14
3.1420
2.500
4.9080
3.000
7.0683
Appendix C:Lightning Proof and Surge Signal Proof
The product adopts TVS lightning proof technology to prevent from damage by lightning strike below 1500 W and impulse signals such
as surge; but it is also necessary to abide by the following precautions to ensure electrical safety based on practical circumstances:
z Keep the communication cables at least 50 meters away from high voltage equipment or cables.
z Make outdoor cable laying-out under eaves as possible as you can.
z In open area shield cables in steel tube and conduct a single point ground to the tube. Trolley wire is forbidden in such
circumstances.
z In strong thunderstorm or high faradic zone (such as high voltage transformer substation), extra strong lightning proof equipment
must be installed.
z Take the building lightning proof requirements into account to design the lightning proof and grounding of outdoor equipment and
cable laying-out in accordance with the national and industrial standards.
z The system must be grounded with equal potentials. The earth ground connection must satisfy the anti-interference and electrical
safety requirements and must not be short connected with high voltage electricity net. When the system is grounded separately,
the resistance of down conductor should be ≤ 4Ω and the sectional area of down conductor should be ≤25mm2
- 38 -