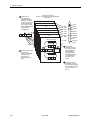
1
BitStorm 2600 and GranDSLAM 4200IP Command Line Interface Reference May 2006 Document Part Number: 2600-A2-GB21-50 Zhone Technologies @Zhone Way 7001 Oakport Street Oakland, CA 94621 USA 510.777.7000 www.zhone.com [email protected] COPYRIGHT 2000–2005 Zhone Technologies, Inc. All rights reserved. This publication is protected by copyright law. No part of this publication may be copied, distributed, displayed, modified, transmitted, stored in a retrieval system, or translated without express written permission from Zhone Technologies, Inc. Acculink, ADSL/R, Bitstorm, Comsphere, DSL the Easy Way, Etherloop, FrameSaver, GigMux, GranDSLAM, GrandVIEW, Hotwire, the Hotwire logo, iMarc, JetFusion, Jetstream, JetVision, MALC, MVL, NextEDGE, Net to Net Technologies, Paradyne, the Paradyne logo, Quick Channel, Raptor, ReachDSL, SLMS, StormPort, TruePut, Z-Edge, Zhone, ZMS, and the Zhone logo are trademarks owned by Zhone Technologies, Inc., which may be registered in some jurisdictions. Zhone Technologies makes no representation or warranties with respect to the contents hereof and specifically disclaims any implied warranties of merchantability, noninfringement, or fitness for a particular purpose. Further, Zhone Technologies reserves the right to revise this publication and to make changes from time to time in the contents hereof without obligation of Zhone Technologies to notify any person of such revision or changes. End User License Agreement (Zhone and Affiliates) Do not install this Software unless you agree to these provisions. Return the Software promptly for a refund if you do not agree. License. Zhone Technologies, Inc. and/or an affiliate ("Zhone") hereby grants you ("User")—either an individual or a single business entity—the non-exclusive right to install, access, run, or interact with ("Use") one copy of the enclosed software (which may have been, or may be, provided on media, as part of a hardware platform, through download, or otherwise) and associated documentation ("Software") on the first computer system on which User installs the Software ("System") solely for internal business purposes (including, without limitation, providing products and services to User's customers) and subject to the restrictions below). Zhone may, in its sole discretion, make available future updates or upgrades to the Software each of which is also Software subject hereto. Title to and all patent rights, copyrights and other intellectual property rights in the Software are retained by Zhone and its direct and indirect suppliers and licensors ("Licensors"). Restrictions. The Software may not be (a) Used on or from any system other than the System; (b) Used with more than any maximum number of subscribers stated in the documentation accompanying the Software; (c) Used so as to circumvent any technological measure included therein or provided by Zhone from time to time to control access to or limit use of the Software; (d) sublicensed, rented, leased or lent to third parties; (e) imported or exported into any jurisdiction except in compliance with all applicable laws of the United States and such jurisdiction; (f) transferred to a third party unless (A) User transfers the original and all surviving copies to a third party who has agreed in writing to be bound hereby and (B) such third party pays to Zhone such reasonable additional fee as Zhone may impose from time to time with respect to 2 BitStorm 2600 and GranDSLAM 4200IP Command Line Interface Reference 2600-A2-GB21-50 such transfer; or (g) made available to third parties as part of any time-sharing or service bureau arrangement. User shall not have the right to use the Software or any portion thereof for a use other than that contemplated by its documentation. User will not copy all or any part of the Software or attempt, or encourage or permit any third party, to modify, adapt, make derivative works from, reverse engineer, reverse compile, disassemble or decompile the Software or any portion thereof except and only to the extent that such activity is expressly permitted by law notwithstanding this limitation. Violation of any of the foregoing shall be deemed a material breach hereof. User may make a reasonable number of copies solely for archival or disaster recovery and subject to the restrictions imposed by copyright law, but may not modify or otherwise copy the Software. User agrees to reproduce product identification, copyright and other proprietary notices of Zhone and Licensors on all copies. User's rights are only as expressly stated herein. Zhone may immediately terminate your rights if you violate the provisions hereof. Limited Warranty. Zhone warrants that the media containing the Software is free from defects in material and workmanship for ninety (90) days following your purchase of the Software. You may provide written notice of such defect (addressed to Zhone Technologies, Inc., Attention: Customer Service, 7001 Oakport Street @ Zhone Way, Oakland, CA 94621) no later than ten (10) days following expiration of such period and, as your sole and exclusive remedy, Zhone will provide replacement media. NEITHER ZHONE NOR ITS LICENSORS MAKE ANY OTHER WARRANTY, EXPRESS, IMPLIED OR STATUTORY. ZHONE AND ITS LICENSORS DISCLAIM ALL WARRANTIES OF FITNESS FOR PARTICULAR PURPOSE, MERCHANTABILITY AND NON-INFRINGEMENT. Some states or other jurisdictions do not allow the exclusion of implied warranties on limitations on how long an implied warranty lasts, so the above limitations may not apply to you. This warranty gives you specific legal rights, and you may also have other rights which vary from one state or jurisdiction to another. Limit of Liability. In case of any claim hereunder or related to the Software, neither Zhone nor its Licensors shall be liable for direct damages exceeding the price paid by User for the Software or for special, incidental, consequential or indirect damages, even if advised in advance of the potential thereof. U.S. Government Users. The Software is a "commercial item" as defined at 48 C.F.R. 2.101, consisting of "commercial computer software" and "commercial computer software documentation" as such terms are used in 48 C.F.R. 12.212. Under 48 C.F.R. 12.212 and 48 C.F.R. 227.7202-1 to 227.7202-4, U.S. Government Users acquire the Software only with the rights set forth therein. Third Party Licensors. This Zhone End User License Agreement may be accompanied by differing or additional provisions applicable to portions of the Software provided by one or more Licensors ("Licensor Provisions"). User acknowledges and agrees that its Use of such portions of the Software is subject to the Licensor Provisions. ! Important Safety Instructions 1 Read and follow all warning notices and instructions marked on the product or included in the manual. 2 This product is intended to be used with a 3-wire grounding type plug — a plug that has a grounding pin. This is a safety feature. Equipment grounding is vital to ensure safe operation. Do not defeat the purpose of the grounding type plug by modifying the plug or using an adapter. Prior to installation, use an outlet tester or a voltmeter to check the AC receptacle for the presence of earth ground. If the receptacle is not properly grounded, the installation must not continue until a qualified electrician has corrected the problem. If a 3-wire grounding type power source is not available, consult a qualified electrician to determine another method of grounding the equipment. 2600-A2-GB21-50 BitStorm 2600 and GranDSLAM 4200IP Command Line Interface Ref- 3 Slots and openings in the cabinet are provided for ventilation. To ensure reliable operation of the product and to protect it from overheating, these slots and openings must not be blocked or covered. 4 Do not allow anything to rest on the power cord and do not locate the product where persons will walk on the power cord. 5 Do not attempt to service this product yourself, as it will void the warranty. Opening or removing covers may expose you to dangerous high voltage points or other risks. Refer all servicing to qualified service personnel. 6 General purpose cables are described for use with this product. Special cables, which may be required by the regulatory inspection authority for the installation site, are the responsibility of the customer. To reduce the risk of fire, use a UL Listed or CSA Certified, minimum No. 26 AWG (0.128 mm2) telecommunication cable, or comparable cables certified for use in the country of installation. 7 When installed in the final configuration, the product must comply with the applicable Safety Standards and regulatory requirements of the country in which it is installed. If necessary, consult with the appropriate regulatory agencies and inspection authorities to ensure compliance. 8 A rare phenomenon can create a voltage potential between the earth grounds of two or more buildings. If products installed in separate buildings are interconnected, the voltage potential may cause a hazardous condition. Consult a qualified electrical consultant to determine whether or not this phenomenon exists and, if necessary, implement corrective action prior to interconnecting the products. 9 In addition, if the equipment is to be used with telecommunications circuits, take the following precautions: — Never install telephone wiring during a lightning storm. — Never install telephone jacks in wet locations unless the jack is specifically designed for wet locations. — Never touch uninsulated telephone wires or terminals unless the telephone line has been disconnected at the network interface. — Use caution when installing or modifying telephone lines. — Avoid using a telephone (other than a cordless type) during an electrical storm. There may be a remote risk of electric shock from lightning. — Do not use the telephone to report a gas leak in the vicinity of the leak. 10 CLASS 1 LASER PRODUCT: This product has provisions for the customer to install a Class 1 laser transciever, which provides optical coupling to the telecommunication network. Once a Class 1 laser product is installed, the equipment is to be considered to be a Class 1 Laser Product (Appareil à Laser de Classe 1). The customer is responsible for selecting and installing the laser transciever and for insuring that the Class 1 AEL (Allowable Emission Limit) per EN/IEC 60825 is not exceeded after the laser transponders have been installed. Do not install laser products whose class rating is greater than 1. Refer to all important safety instructions that accompanied the transciever prior to installation. Only laser Class 1 devices, certified for use in the country of installation by the cognizant agency are to be utilized in this product. 11 The equipment is intended for installation in a max. 50° C ambient temperature, in an environment that is free of dust and dirt. 12 The power supply cord for countries other than North America is to be a minimum H05 V V-F type, min. 0.75 mm2, 2-conductor and earth ground terminated in an IEC 320 connector on one end, and a plug which is certified for use in the country of installation at the other end. 4 BitStorm 2600 and GranDSLAM 4200IP Command Line Interface Reference 2600-A2-GB21-50 13 Do not physically stack more than eight (8) 26x1 units high. Physical stability has not been evaluated for stacking higher than eight units, and any configuration greater than eight may result in an unstable (tip-over) condition. Ensure that the four (4) rubber feet supplied with the product have been installed on the bottom of each unit prior to stacking any 26x1 units on top of one another. EMI Notices ! UNITED STATES – EMI NOTICE: This equipment has been tested and found to comply with the limits for a Class A digital device, pursuant to Part 15 of the FCC rules. These limits are designed to provide reasonable protection against harmful interference when the equipment is operated in a commercial environment. This equipment generates, uses, and can radiate radio frequency energy and, if not installed and used in accordance with the instruction manual, may cause harmful interference to radio communications. Operation of this equipment in a residential area is likely to cause harmful interference in which case the user will be required to correct the interference at his own expense. The authority to operate this equipment is conditioned by the requirements that no modifications will be made to the equipment unless the changes or modifications are expressly approved by Paradyne Corporation. If the equipment includes a ferrite choke or chokes, they must be installed per the installation instructions. ! CANADA – EMI NOTICE: This Class A digital apparatus meets all requirements of the Canadian interference-causing equipment regulations. Cet appareil numérique de la classe A respecte toutes les exigences du réglement sur le matérial brouilleur du Canada. 2600-A2-GB21-50 BitStorm 2600 and GranDSLAM 4200IP Command Line Interface Ref- Notices to Users of the Canadian Telephone Network NOTICE: This equipment meets the applicable Industry Canada Terminal Equipment Technical Specifications. This is confirmed by the registration number. The abbreviation IC before the registration number signifies that registration was performed based on a Declaration of Conformity indicating that Industry Canada technical specifications were met. It does not imply that Industry Canada approved the equipment. NOTICE: The Ringer Equivalence Number (REN) for this terminal equipment is labeled on the equipment. The REN assigned to each terminal equipment provides an indication of the maximum number of terminals allowed to be connected to a telephone interface. The termination on an interface may consist of any combination of devices subject only to the requirement that the sum of the Ringer Equivalence Numbers of all the devices does not exceed five. When the equipment is used in a customer premises environment, a Model 6051 POTS Splitter must be used to ensure CS-03 compliance. Refer to the POTS splitter installation instructions for details. CE Marking When the product is marked with the CE mark on the equipment label, a supporting Declaration of Conformity may be downloaded from the Zhone World Wide Web site at www.zhone.com. Japan Class A ITE This is a Class A product based on the standard of the Voluntary Control Council for interference by Information Technology Equipment (VCCI). If this equipment is used in a domestic environment, radio disturbance may arise. When such trouble occurs, the user may be required to take corrective actions. 6 BitStorm 2600 and GranDSLAM 4200IP Command Line Interface Reference 2600-A2-GB21-50 Contents About This Guide 1 2 Document Purpose and Intended Audience . . . . . . . . . . . . . . . . . . . . i Document Summary . . . . . . . . . . . . . . . . . . . . . . . . . . . . . . . . . . . . . . i Product-Related Documents . . . . . . . . . . . . . . . . . . . . . . . . . . . . . . . . ii System Concepts Active Configurations . . . . . . . . . . . . . . . . . . . . . . . . . . . . . . . . . . . . . . 1-1 System Terminology . . . . . . . . . . . . . . . . . . . . . . . . . . . . . . . . . . . . . . 1-1 Port . . . . . . . . . . . . . . . . . . . . . . . . . . . . . . . . . . . . . . . . . . . . . . . . 1-1 Unit . . . . . . . . . . . . . . . . . . . . . . . . . . . . . . . . . . . . . . . . . . . . . . . . 1-2 Port ID . . . . . . . . . . . . . . . . . . . . . . . . . . . . . . . . . . . . . . . . . . . . . . 1-2 DSL Port ID . . . . . . . . . . . . . . . . . . . . . . . . . . . . . . . . . . . . . . . . . . 1-2 DSL Bonded Group ID. . . . . . . . . . . . . . . . . . . . . . . . . . . . . . . . . . 1-3 Ethernet Port ID . . . . . . . . . . . . . . . . . . . . . . . . . . . . . . . . . . . . . . . 1-3 Reserved Names . . . . . . . . . . . . . . . . . . . . . . . . . . . . . . . . . . . . . . 1-3 T1 and E1 Port ID . . . . . . . . . . . . . . . . . . . . . . . . . . . . . . . . . . . . . 1-4 PPP Port ID . . . . . . . . . . . . . . . . . . . . . . . . . . . . . . . . . . . . . . . . . . 1-4 MLPPP Bundle Port ID . . . . . . . . . . . . . . . . . . . . . . . . . . . . . . . . . 1-4 Priority Groups . . . . . . . . . . . . . . . . . . . . . . . . . . . . . . . . . . . . . . . . . . . 1-5 IGMP Snooping . . . . . . . . . . . . . . . . . . . . . . . . . . . . . . . . . . . . . . . . . . 1-7 CLI Conventions 2600-A2-GB21-50 Overview . . . . . . . . . . . . . . . . . . . . . . . . . . . . . . . . . . . . . . . . . . . . . . . 2-1 Access Levels . . . . . . . . . . . . . . . . . . . . . . . . . . . . . . . . . . . . . . . . . . . 2-1 Logging In . . . . . . . . . . . . . . . . . . . . . . . . . . . . . . . . . . . . . . . . . . . . . . 2-2 Command Line Prompts . . . . . . . . . . . . . . . . . . . . . . . . . . . . . . . . . . . 2-2 Modes of Operation . . . . . . . . . . . . . . . . . . . . . . . . . . . . . . . . . . . . . . . 2-3 Back Command . . . . . . . . . . . . . . . . . . . . . . . . . . . . . . . . . . . . . . . . . . 2-3 Automatic Command Completion . . . . . . . . . . . . . . . . . . . . . . . . . . . . 2-3 Command History Buffer . . . . . . . . . . . . . . . . . . . . . . . . . . . . . . . . . . . 2-4 More Prompt . . . . . . . . . . . . . . . . . . . . . . . . . . . . . . . . . . . . . . . . . . . . 2-4 Command Help . . . . . . . . . . . . . . . . . . . . . . . . . . . . . . . . . . . . . . . . . . 2-4 Keyboard Definitions . . . . . . . . . . . . . . . . . . . . . . . . . . . . . . . . . . . . . . 2-5 May 2006 i Contents 3 Command Syntax Error Handling . . . . . . . . . . . . . . . . . . . . . . . . . . . . 2-5 Automatic Logout . . . . . . . . . . . . . . . . . . . . . . . . . . . . . . . . . . . . . . . . . 2-5 Configuring the System . . . . . . . . . . . . . . . . . . . . . . . . . . . . . . . . . . . . 2-6 Typographic Conventions . . . . . . . . . . . . . . . . . . . . . . . . . . . . . . . . . . 3-1 Back . . . . . . . . . . . . . . . . . . . . . . . . . . . . . . . . . . . . . . . . . . . . . . . . . . 3-1 Clear. . . . . . . . . . . . . . . . . . . . . . . . . . . . . . . . . . . . . . . . . . . . . . . . . . . 3-2 Commands Clear Bridge ii ........................................ 3-2 Clear Management ARP . . . . . . . . . . . . . . . . . . . . . . . . . . . . . . . . 3-2 Clear Syslog . . . . . . . . . . . . . . . . . . . . . . . . . . . . . . . . . . . . . . . . . 3-2 May 2006 2600-A2-GB21-50 Contents 2600-A2-GB21-50 Configure . . . . . . . . . . . . . . . . . . . . . . . . . . . . . . . . . . . . . . . . . . . . . . . 3-3 Configure Bridge . . . . . . . . . . . . . . . . . . . . . . . . . . . . . . . . . . . . . . 3-3 Configure Bridge Clear . . . . . . . . . . . . . . . . . . . . . . . . . . . . . . . . . 3-3 Configure Bridge Mode . . . . . . . . . . . . . . . . . . . . . . . . . . . . . . . . . 3-4 Configure Bridge Timeout . . . . . . . . . . . . . . . . . . . . . . . . . . . . . . . 3-5 Configure Date and Time. . . . . . . . . . . . . . . . . . . . . . . . . . . . . . . . 3-5 Configure Date-Timezone . . . . . . . . . . . . . . . . . . . . . . . . . . . . . . . 3-6 Configure Factory Defaults . . . . . . . . . . . . . . . . . . . . . . . . . . . . . . 3-7 Configure Filter . . . . . . . . . . . . . . . . . . . . . . . . . . . . . . . . . . . . . . . 3-7 Configure Filter Create . . . . . . . . . . . . . . . . . . . . . . . . . . . . . . . . . 3-8 Configure Filter Delete. . . . . . . . . . . . . . . . . . . . . . . . . . . . . . . . . . 3-9 Configure Filter Modify. . . . . . . . . . . . . . . . . . . . . . . . . . . . . . . . . . 3-9 Configure Filter Protocol-Specific . . . . . . . . . . . . . . . . . . . . . . . . . 3-10 Configure Filter-Binding . . . . . . . . . . . . . . . . . . . . . . . . . . . . . . . . . 3-10 Configure Filter-Binding Create . . . . . . . . . . . . . . . . . . . . . . . . . . . 3-10 Configure Filter-Binding Delete . . . . . . . . . . . . . . . . . . . . . . . . . . . 3-11 Configure Filter-Rule Create (L2 filter). . . . . . . . . . . . . . . . . . . . . . 3-11 Configure Filter-Rule Modify (L2 filter). . . . . . . . . . . . . . . . . . . . . . 3-12 Configure Filter-Rule Delete . . . . . . . . . . . . . . . . . . . . . . . . . . . . . 3-12 Configure Filter Operational Notes . . . . . . . . . . . . . . . . . . . . . . . . 3-13 Configure IGMP Snooping. . . . . . . . . . . . . . . . . . . . . . . . . . . . . . . 3-13 Configure IGMP Snooping Querier Auto Detect . . . . . . . . . . . . . . 3-14 Configure IGMP Snooping Querier Interface . . . . . . . . . . . . . . . . 3-14 Configure IGMP Snooping Query Interval . . . . . . . . . . . . . . . . . . 3-15 Configure IGMP Snooping Leave Delay . . . . . . . . . . . . . . . . . . . . 3-15 Configure IGMP Snooping Leave Join Delay . . . . . . . . . . . . . . . . 3-16 Configure IGMP Query Count . . . . . . . . . . . . . . . . . . . . . . . . . . . . 3-16 Configure IGMP Query Wait Timer . . . . . . . . . . . . . . . . . . . . . . . . 3-17 Configure IGMP Proxy Enable. . . . . . . . . . . . . . . . . . . . . . . . . . . . 3-17 Configure IGMP Proxy Report Summary Enable . . . . . . . . . . . . . 3-18 Configure Interface ................................... 3-18 Configure Interface Console Data-Bits . . . . . . . . . . . . . . . . . . . . . 3-18 Configure Interface Console Parity . . . . . . . . . . . . . . . . . . . . . . . . 3-19 Configure Interface Console Rate . . . . . . . . . . . . . . . . . . . . . . . . . 3-19 Configure Interface Console Show . . . . . . . . . . . . . . . . . . . . . . . . 3-19 Configure Interface Console Stop Bits. . . . . . . . . . . . . . . . . . . . . . 3-20 Configure Interface DSL . . . . . . . . . . . . . . . . . . . . . . . . . . . . . . . . 3-21 Configure Interface DSL ATM VC Create . . . . . . . . . . . . . . . . . . 3-22 Configure Interface DSL ATM VC Delete .................. 3-23 Configure Interface DSL ATM Encapsulation . . . . . . . . . . . . . . . 3-23 May 2006 iii Contents Configure Interface DSL Bonding . . . . . . . . . . . . . . . . . . . . . . . . . 3-24 Configure Interface DSL Bonding Create . . . . . . . . . . . . . . . . . . . 3-24 Configure Interface DSL Bonding Delete. . . . . . . . . . . . . . . . . . . . 3-25 Configure Interface DSL Bonding Group Status Trap . . . . . . . . . . 3-25 Configure Interface DSL Bonding Name . . . . . . . . . . . . . . . . . . . . 3-26 Configure Interface DSL Bonding Profile Alarm Activate. . . . . . . . 3-26 Configure Interface DSL Bonding Profile Alarm Create. . . . . . . . . 3-27 Configure Interface DSL Bonding Profile Alarm Delete . . . . . . . . . 3-27 Configure Interface DSL Bonding Profile Alarm Modify ATU-C Threshold Rate Down . . . . . . . . . . . . . . . . . . . . . . . . . . . . . . . . . . . . . . . . . . . 3-28 Configure Interface DSL Bonding Alarm Modify ATU-C Threshold Rate Up 3-28 Configure Interface DSL Bonding Alarm Modify ATU-R Threshold Rate Down . . . . . . . . . . . . . . . . . . . . . . . . . . . . . . . . . . . . . . . . . . . . . . . 3-29 Configure Interface DSL Bonding Alarm Modify ATU-R Threshold Rate Up 3-29 Configure Interface DSL Line Length – Effective Working Length (ReachDSL® Only) . . . . . . . . . . . . . . . . . . . . . . . . . . . . . . . . . . . . . . . . . . . 3-30 Configure Interface DSL Line Length – Loop Length (ReachDSL Only)330 Configure Interface DSL Line Length – Quad (ReachDSL Only) . 3-31 Configure Interface DSL Line-Mode (ADSL Only) . . . . . . . . . . . . 3-32 Configure Interface DSL Linkupdown Trap ................ 3-33 ......................... 3-33 Configure Interface DSL Name Configure Interface DSL Max-TxPower-Downstream (ReachDSL Only) 3-34 Configure Interface DSL Max-TxPower-Upstream (ReachDSL Only)3-34 Configure Interface DSL Pwrmgmt-State (ADSL2 Only) . . . . . . . . 3-35 Configure Interface DSL Pwrmgmt-Enabling (ADSL2 Only) . . . . . 3-35 Configure Interface DSL L0Time (ADSL2 Only) . . . . . . . . . . . . . . 3-36 Configure Interface DSL L2-Atpr (ADSL2 Only) . . . . . . . . . . . . . . 3-36 Configure Interface DSL L2-Atprt (ADSL2 Only) . . . . . . . . . . . . . . 3-37 Configure Interface DSL L2Time (ADSL2 Only) . . . . . . . . . . . . . . 3-37 Configure Interface DSL Profile Alarm Activate. . . . . . . . . . . . . . . 3-38 Configure Interface DSL Profile Alarm Create . . . . . . . . . . . . . . . 3-39 Configure Interface DSL Profile Alarm Delete . . . . . . . . . . . . . . . . 3-39 Configure Interface DSL Profile Alarm Downstream Decreasing Rate 340 Configure Interface DSL Profile Alarm Downstream Error Seconds 3-40 Configure Interface DSL Profile Alarm Downstream Increasing Rate 3-41 Configure Interface DSL Profile Alarm Downstream Loss of Frame Sec- iv May 2006 2600-A2-GB21-50 Contents onds . . . . . . . . . . . . . . . . . . . . . . . . . . . . . . . . . . . . . . . . . . . . . . . . 3-41 Configure Interface DSL Profile Alarm Downstream Loss of Signal Seconds . . . . . . . . . . . . . . . . . . . . . . . . . . . . . . . . . . . . . . . . . . . . . . . . 3-42 Configure Interface DSL Profile Alarm Downstream Severely Error Seconds . . . . . . . . . . . . . . . . . . . . . . . . . . . . . . . . . . . . . . . . . . . . . . . . 3-43 Configure Interface DSL Profile Alarm Downstream Unavailable Seconds 3-43 Configure Interface DSL Profile Alarm Show. . . . . . . . . . . . . . . . . 3-44 Configure Interface DSL Profile Alarm Upstream Decreasing Rate 3-44 Configure Interface DSL Profile Alarm Upstream Increasing Rate 3-45 Configure Interface DSL Profile Alarm Upstream Error Seconds . 3-45 Configure Interface DSL Profile Alarm Upstream Loss of Frame Seconds 3-46 Configure Interface DSL Profile Alarm Upstream Loss of Link Seconds346 Configure Interface DSL Profile Alarm Upstream Loss of Power Seconds 3-47 Configure Interface DSL Profile Alarm Upstream Loss of Signal Seconds 3-47 Configure Interface DSL Profile Alarm Upstream Severely Errored Seconds . . . . . . . . . . . . . . . . . . . . . . . . . . . . . . . . . . . . . . . . . . . . . . . . 3-48 Configure Interface DSL Profile Alarm Upstream Init Failure . . . . 3-48 Configure Interface DSL Profile Alarm Upstream Unavailable Seconds349 Configure Interface DSL Profile Line Activate . . . . . . . . . . . . . . . . 3-49 Configure Interface DSL Profile Line Create . . . . . . . . . . . . . . . . 3-50 Configure Interface DSL Profile Line Delete . . . . . . . . . . . . . . . . . 3-51 Configure Interface DSL Profile Line Latency (ADSL Only) . . . . . 3-51 Configure Interface DSL Profile Line Max Interleave Delay Downstream (ADSL Only). . . . . . . . . . . . . . . . . . . . . . . . . . . . . . . . . . . . . . . . . . 3-52 Configure Interface DSL Profile Line Max Interleave Delay Upstream (ADSL Only). . . . . . . . . . . . . . . . . . . . . . . . . . . . . . . . . . . . . . . . . . . . . 3-52 Configure Interface DSL Profile Line Max-SNR-Margin-Downstream 53 3- Configure Interface DSL Profile Line Max-SNR-Margin-Upstream 3-53 Configure Interface DSL Profile Line Max-Speed-Downstream . 3-54 .. 3-54 Configure Interface DSL Profile Line Max-Speed-Upstream Configure Interface DSL Profile Line Min-SNR-Margin-Downstream 55 Configure Interface DSL Profile Line Min-SNR-Margin-Upstream Configure Interface DSL Profile Line Min-Speed-Downstream Configure Interface DSL Profile Line Min-Speed-Upstream 33-55 . 3-56 ... 3-56 Configure Interface DSL Profile Line Rate Adaptive Downstream (ADSL 2600-A2-GB21-50 May 2006 v Contents Only) . . . . . . . . . . . . . . . . . . . . . . . . . . . . . . . . . . . . . . . . . . . . . . . 3-57 Configure Interface DSL Profile Line Rate Adaptive Upstream (ADSL Only) vi May 2006 2600-A2-GB21-50 Contents 3-57 Configure Interface DSL Profile Line Show . . . . . . . . . . . . . . . . . . 3-58 Configure Interface DSL Profile Line Target-Margin-Downstream 3-58 Configure Interface DSL Profile Line Target-Margin-Upstream. . . 3-59 Configure Interface DSL Profile PSD Create . . . . . . . . . . . . . . . . 3-59 Configure Interface DSL Profile PSD Delete . . . . . . . . . . . . . . . . . 3-60 Configure Interface DSL Profile PSD Show. . . . . . . . . . . . . . . . . . 3-60 Configure Interface DSL Profile PSD Activate. . . . . . . . . . . . . . . . 3-61 Configure Interface DSL Profile PSD Atuc-Max-PSD . . . . . . . . . . 3-61 Configure Interface DSL Profile PSD Atur-Max-PSD . . . . . . . . . . 3-62 Configure Interface DSL Profile PSD Atuc-Max-Tx-Pwr . . . . . . . . 3-62 Configure Interface DSL Profile PSD Atur-Max-Tx-Pwr . . . . . . . . 3-63 Configure Interface DSL Profile PSD Atuc-Max-Rx-Pwr . . . . . . . . 3-63 .................................................... 3-64 Configure Interface DSL- Profile -Traffic Create . . . . . . . . . . . . . 3-64 Configure Interface DSL- Profile -Traffic Delete 3-64 ............. Configure Interface DSL- Profile -Traffic Max Rate .......... Configure Interface DSL- Profile -Traffic Port Activate 3-65 ........ 3-65 Configure Interface DSL- Profile -Traffic Port Deactivate . . . . . . 3-66 Configure Interface DSL- Profile-Traffic Traffic-Class ........ 3-66 Configure Interface DSL- Profile -Traffic Show . . . . . . . . . . . . . 3-67 Configure Interface DSL Pwrmgmt-State (ADSL2 Only) . . . . . . . 3-68 Configure Interface DSL Pwrmgmt-Enabling (ADSL2 Only) . . . . . 3-68 Configure Interface DSL Queue ......................... 3-69 Configure Interface DSL Show . . . . . . . . . . . . . . . . . . . . . . . . . . . 3-69 Configure Interface DSL Spectrum Management Selection . . . . . 3-70 Configure Interface DSL Spectrum Management Show . . . . . . . . 3-70 Configure Interface DSL State 3-71 ......................... Configure Interface DSL VLAN PVID ..................... 3-71 Configure Interface DSL VLAN Priority . . . . . . . . . . . . . . . . . . . . 3-72 Configure Interface DSL VLAN Acceptable-Frame-Type ...... 3-72 Configure Interface DSL VLAN Ingress-Filtering . . . . . . . . . . . . . 3-73 Configure Interface SHDSL ............................ 3-73 Configure Interface SHDSL ATM VC Create . . . . . . . . . . . . . . . . 3-74 Configure Interface SHDSL ATM VC Delete . . . . . . . . . . . . . . . . 3-75 Configure Interface SHDSL ATM Encapsulation ............ 3-75 Configure Interface SHDSL Equipment Mode . . . . . . . . . . . . . . . . 3-76 Configure Interface SHDSL Extended Rate Mode Selection. . . . . 3-76 Configure Interface SDSL Line Length - Effective Working Length (EWL) 2600-A2-GB21-50 May 2006 vii Contents 3-77 Configure Interface SDSL Line Length - Loop Length. . . . . . . . . . 3-77 Configure Interface SHDSL Linkupdown-Trap . . . . . . . . . . . . . . . 3-78 Configure Interface SHDSL Name . . . . . . . . . . . . . . . . . . . . . . . . 3-78 Configure Interface SHDSL Number of Repeaters . . . . . . . . . . . . 3-79 Configure Interface SHDSL Queue . . . . . . . . . . . . . . . . . . . . . . . 3-79 Configure Interface SHDSL Segment Alarm . . . . . . . . . . . . . . . . . 3-80 Configure Interface SHDSL Show . . . . . . . . . . . . . . . . . . . . . . . . . 3-81 Configure Interface SHDSL State . . . . . . . . . . . . . . . . . . . . . . . . . 3-81 Configure Interface SHDSL VLAN PVID . . . . . . . . . . . . . . . . . . . 3-82 Configure Interface SHDSL VLAN Priority . . . . . . . . . . . . . . . . . . 3-82 Configure Interface SHDSL VLAN Acceptable-Frame-Type . . . . 3-83 Configure Interface SHDSL VLAN Ingress-Filtering . . . . . . . . . . 3-83 Configure Interface SHDSL Profile Alarm Activate-Port . . . . . . . . 3-84 Configure Interface SHDSL Profile Alarm-Code-Violation-Threshold 3-84 Configure Interface SHDSL Profile Alarm Create . . . . . . . . . . . . 3-85 Configure Interface SHDSL Profile Alarm Delete . . . . . . . . . . . . . 3-86 Configure Interface SHDSL Profile Alarm Errored-Seconds Threshold 386 Configure Interface SHDSL Profile Alarm Loop Attenuation Threshold 387 Configure Interface SHDSL Profile Alarm Loss-Of-Sync-Word-Seconds Threshold . . . . . . . . . . . . . . . . . . . . . . . . . . . . . . . . . . . . . . . . . . . 3-87 Configure Interface SHDSL Profile Alarm Severely-Errored-Seconds Threshold . . . . . . . . . . . . . . . . . . . . . . . . . . . . . . . . . . . . . . . . . . . 3-88 Configure Interface SHDSL Profile Alarm Show . . . . . . . . . . . . . . 3-88 Configure Interface SHDSL Profile Alarm SNR-Margin Threshold 3-89 Configure Interface SHDSL Profile Alarm Unavailable-Seconds Threshold viii May 2006 2600-A2-GB21-50 Contents 3-89 2600-A2-GB21-50 Configure Interface SHDSL Profile Line Activate . . . . . . . . . . . . . 3-90 Configure Interface SHDSL Profile Line Create ............. 3-91 Configure Interface SHDSL Profile Line Delete. . . . . . . . . . . . . . . 3-91 Configure Interface SHDSL Profile Line Line-Probe . . . . . . . . . . . 3-92 Configure Interface SHDSL Profile Line Max-Rate . . . . . . . . . . . . 3-92 Configure Interface SHDSL Profile Line Min-Rate . . . . . . . . . . . . 3-93 Configure Interface SHDSL Profile Line Mode . . . . . . . . . . . . . . . 3-93 Configure Interface SHDSL Profile Line Power-Feeding . . . . . . . 3-94 Configure Interface SHDSL Profile Line Power-Spectral-Density 3-94 Configure Interface SHDSL Profile Line Reference-Clock . . . . . . 3-95 Configure Interface SHDSL Profile Line Remote-Management . . 3-95 Configure Interface SHDSL Profile Line Show . . . . . . . . . . . . . . . 3-96 Configure Interface SHDSL Profile Line Target-Margin . . . . . . . . 3-96 Configure Interface SHDSL Profile Line Wire-Interface. . . . . . . . . 3-97 Configure Interface SHDSL Spectrum Management Region . . . . 3-97 Configure Interface SHDSL Spectrum Management Selection . . . 3-98 Configure Interface Ethernet Connector . . . . . . . . . . . . . . . . . . . . 3-98 Configure Interface Ethernet Flow Control . . . . . . . . . . . . . . . . . . 3-99 Configure Interface Ethernet Mode . . . . . . . . . . . . . . . . . . . . . . . . 3-99 Configure Interface Ethernet Rate . . . . . . . . . . . . . . . . . . . . . . . . 3-100 Ethernet Rate Restrictions. . . . . . . . . . . . . . . . . . . . . . . . . . . . . . . 3-100 Configure Interface Ethernet Show . . . . . . . . . . . . . . . . . . . . . . . . 3-101 Configure Interface Ethernet Xover . . . . . . . . . . . . . . . . . . . . . . . 3-101 Configure Interface Ethernet VLAN PVID . . . . . . . . . . . . . . . . . . 3-102 Configure Interface Ethernet VLAN Priority . . . . . . . . . . . . . . . . . 3-102 Configure Interface Ethernet VLAN Acceptable-Frame-Type . . . 3-103 Configure Interface Ethernet VLAN Ingress-Filtering ......... 3-103 Configure Interface T1/E1 Circuit Name . . . . . . . . . . . . . . . . . . . 3-104 Configure Interface T1/E1 Frame Format (E1 only) .......... 3-104 Configure Interface T1/E1 Line Build Out (T1 Only) . . . . . . . . . . 3-105 Configure Interface T1/E1 Line Equalization (T1 Only) . . . . . . . . 3-105 Configure Interface T1/E1 Line Type ..................... 3-106 Configure Interface T1/E1 Port Status . . . . . . . . . . . . . . . . . . . . . 3-106 Configure Interface T1/E1 Timing . . . . . . . . . . . . . . . . . . . . . . . . . 3-107 Configure Management . . . . . . . . . . . . . . . . . . . . . . . . . . . . . . . . . 3-107 Configure Management Access List . . . . . . . . . . . . . . . . . . . . . . . 3-107 Configure Management Access List Create . . . . . . . . . . . . . . . . . 3-108 Configure Management Access List Delete All . . . . . . . . . . . . . . . 3-108 Configure Management Access List Delete Entry . . . . . . . . . . . . . 3-108 May 2006 ix Contents Configure Management Access List Show . . . . . . . . . . . . . . . . . . 3-109 Configure Management ARP add . . . . . . . . . . . . . . . . . . . . . . . . . 3-109 Configure Management ARP Clear Dynamic Addresses . . . . . . . 3-110 Configure Management ARP Delete . . . . . . . . . . . . . . . . . . . . . . 3-110 Configure Management Default Gateway Address . . . . . . . . . . . . 3-111 Configure Management InBand Address. . . . . . . . . . . . . . . . . . . . 3-111 Configure Management Out-of-Band Address . . . . . . . . . . . . . . . 3-112 Configure Management Route Add \ . . . . . . . . . . . . . . . . . . . . . . . 3-112 Configure Management Route Delete . . . . . . . . . . . . . . . . . . . . . 3-113 Configure Management Route Show . . . . . . . . . . . . . . . . . . . . . . 3-113 Configure Management Periodic ARP Add . . . . . . . . . . . . . . . . . 3-114 Configure Management Periodic ARP Delete . . . . . . . . . . . . . . . 3-114 Configure Management Periodic ARP Show . . . . . . . . . . . . . . . . 3-115 Configure Management SNMP Access Validation . . . . . . . . . . . . 3-115 Configure Management SNMP NMS Traps Add . . . . . . . . . . . . . 3-116 Configure Management SNMP NMS Traps Delete All . . . . . . . . . 3-116 Configure Management SNMP NMS Traps Delete Entry . . . . . . . 3-117 Configure Management SNMP NMS Traps Show. . . . . . . . . . . . . 3-117 Configure Management SNMP Read/Write Community String . . 3-118 Configure Management SNMP Read Only Community String . . . 3-118 Configure Management SNMP State . . . . . . . . . . . . . . . . . . . . . . 3-119 Configure Management SNMP Trap Rate Limiting Period . . . . . . 3-119 Configure Management Telnet Access Validation. . . . . . . . . . . . . 3-120 Configure Management Telnet Show . . . . . . . . . . . . . . . . . . . . . . 3-120 Configure Management Telnet State . . . . . . . . . . . . . . . . . . . . . . 3-121 Configure Management Web Access Validation . . . . . . . . . . . . . . 3-121 Configure Management Web Show . . . . . . . . . . . . . . . . . . . . . . . 3-122 Configure Management Web State . . . . . . . . . . . . . . . . . . . . . . . 3-122 Configure Multicast . . . . . . . . . . . . . . . . . . . . . . . . . . . . . . . . . . . . 3-123 Configure Multicast Unknown Forwarding Mode . . . . . . . . . . . . . 3-123 Configure Multicast Unknown Filtering Mode . . . . . . . . . . . . . . . . 3-124 Configure MLPPP . . . . . . . . . . . . . . . . . . . . . . . . . . . . . . . . . . . . . 3-124 Configure MLPPP Bundle Add 3-124 .......................... Configure MLPPP Bundle Delete ........................ 3-125 Configure MLPPP Bundle Fragement Size . . . . . . . . . . . . . . . . . 3-125 Configure MLPPP Bundle MRRU . . . . . . . . . . . . . . . . . . . . . . . . 3-126 Configure MLPPP Bundle Restart 3-126 ....................... Configure MLPPP Bundle Short Sequence Number x ......... 3-127 Configure MLPPP Bundle VLAN Acceptable-Frame-Type . . . . . 3-127 Configure MLPPP Bundle VLAN Ingress-Filtering . . . . . . . . . . . . 3-128 May 2006 2600-A2-GB21-50 Contents Configure MLPPP Bundle VLAN Priority . . . . . . . . . . . . . . . . . . . 3-128 Configure MLPPP Bundle VLAN PVID . . . . . . . . . . . . . . . . . . . . 3-129 Configure PPP . . . . . . . . . . . . . . . . . . . . . . . . . . . . . . . . . . . . . . . . 3-129 Configure PPP Address and Control Field Compression . . . . . . . 3-129 Configure PPP Bridge Control Protocol . . . . . . . . . . . . . . . . . . . . 3-130 Configure PPP Frame Control Sequence Size . . . . . . . . . . . . . . . 3-130 Configure PPP Keep Alive Quiet Time . . . . . . . . . . . . . . . . . . . . . 3-131 Configure PPP Keep Alive Timeoug . . . . . . . . . . . . . . . . . . . . . . . 3-131 Configure PPP Magic Number . . . . . . . . . . . . . . . . . . . . . . . . . . . 3-132 Configure PPP Maximum Receive Unit . . . . . . . . . . . . . . . . . . . . 3-132 Configure PPP Protocol Field Compression . . . . . . . . . . . . . . . . . 3-133 Configure PPP VLAN Acceptable-Frame-Type . . . . . . . . . . . . . 3-133 Configure PPP VLAN Ingress Filtering . . . . . . . . . . . . . . . . . . . . 3-134 Configure PPP VLAN Priority . . . . . . . . . . . . . . . . . . . . . . . . . . . 3-134 Configure PPP VLAN PVID ............................ 3-135 Configure Proxy ARP NHR . . . . . . . . . . . . . . . . . . . . . . . . . . . . . . 3-135 Configure RADIUS Add 3-136 ............................... Configure RADIUS Delete ............................. 3-136 Configure RADIUS Show . . . . . . . . . . . . . . . . . . . . . . . . . . . . . . 3-137 Configure RADIUS state 3-137 .............................. Scheduled Configuration Backups 2600-A2-GB21-50 ....................... 3-137 Configure Scheduled Backup Enable . . . . . . . . . . . . . . . . . . . . . . 3-138 Configure Scheduled Backup Dynamic . . . . . . . . . . . . . . . . . . . . . 3-138 Configure Scheduled Backup Fixed . . . . . . . . . . . . . . . . . . . . . . . 3-139 Configure Scheduled Backup FTP . . . . . . . . . . . . . . . . . . . . . . . . 3-139 Configure Scheduled Backup Time Stamp . . . . . . . . . . . . . . . . . . 3-140 Configure Security . . . . . . . . . . . . . . . . . . . . . . . . . . . . . . . . . . . . 3-141 Configure Security IP (Host Address Limiting) Enable . . . . . . . . . 3-141 Configure Security IP Add Static Address . . . . . . . . . . . . . . . . . . 3-142 Configure Security IP Max Addresses . . . . . . . . . . . . . . . . . . . . . 3-143 Configure Security IP Show . . . . . . . . . . . . . . . . . . . . . . . . . . . . . 3-143 Configure Security MAC Add . . . . . . . . . . . . . . . . . . . . . . . . . . . . 3-144 Configure Security MAC Delete. . . . . . . . . . . . . . . . . . . . . . . . . . . 3-145 Configure Security MAC Show . . . . . . . . . . . . . . . . . . . . . . . . . . . 3-145 Configure SNTP. . . . . . . . . . . . . . . . . . . . . . . . . . . . . . . . . . . . . . . 3-146 Configure SNTP Enable . . . . . . . . . . . . . . . . . . . . . . . . . . . . . . . . 3-146 Configure SNTP Server Address . . . . . . . . . . . . . . . . . . . . . . . . . 3-146 Configure SNTP Interval. . . . . . . . . . . . . . . . . . . . . . . . . . . . . . . . 3-147 Configure Syslog .................................... 3-147 Configure Syslog Rate Limiting . . . . . . . . . . . . . . . . . . . . . . . . . . . 3-147 May 2006 xi Contents Configure Syslog Threshold . . . . . . . . . . . . . . . . . . . . . . . . . . . . . 3-148 Configure Syslog Remote Enable . . . . . . . . . . . . . . . . . . . . . . . . . 3-148 Configure Syslog Remote Create . . . . . . . . . . . . . . . . . . . . . . . . . 3-149 Configure System Location . . . . . . . . . . . . . . . . . . . . . . . . . . . . . . 3-149 Configure System Name . . . . . . . . . . . . . . . . . . . . . . . . . . . . . . . . 3-150 Configure System Contact. . . . . . . . . . . . . . . . . . . . . . . . . . . . . . . 3-150 Configure System Options Date Display Format . . . . . . . . . . . . . . 3-151 Configure System Options Inactivity Time Out . . . . . . . . . . . . . . . 3-151 Configure System Options Spectrum Management .......... 3-152 Configure System Options Alarm Threshold Temperature High . 3-152 Configure System Options Alarm Threshold Temperature Intake Low 3152 Configure System Options Test Timeout . . . . . . . . . . . . . . . . . . . 3-153 Configure Uplink ................................. 3-153 Configure Uplink Show ................................ 3-154 Configure Uplink-Tag ................................ 3-154 Configure Uplink Tagging Index . . . . . . . . . . . . . . . . . . . . . . . . . . 3-155 Configure User-Accounts. . . . . . . . . . . . . . . . . . . . . . . . . . . . . . . . 3-156 Configure User-Accounts Create . . . . . . . . . . . . . . . . . . . . . . . . . 3-157 Configure User-Accounts Delete ........................ 3-157 Configure VLAN. . . . . . . . . . . . . . . . . . . . . . . . . . . . . . . . . . . . . . . 3-157 Configure VLAN Create . . . . . . . . . . . . . . . . . . . . . . . . . . . . . . . . . 3-158 Configure VLAN Delete . . . . . . . . . . . . . . . . . . . . . . . . . . . . . . . . . 3-158 Configure VLAN modify DHCP Option 82 . . . . . . . . . . . . . . . . . . . 3-159 Configure VLAN Modify Name. . . . . . . . . . . . . . . . . . . . . . . . . . . . 3-159 Configure VLAN Modify Next Hop Router . . . . . . . . . . . . . . . . . . . 3-160 Configure VLAN Modify Ports . . . . . . . . . . . . . . . . . . . . . . . . . . . . 3-160 Configure VLAN Modify Proxy-ARP . . . . . . . . . . . . . . . . . . . . . . . 3-161 Configure VLAN Modify Secure VLAN . . . . . . . . . . . . . . . . . . . . . 3-161 Configure VLAN Reserved Block Start . . . . . . . . . . . . . . . . . . . . . 3-162 Configure VLAN Show. . . . . . . . . . . . . . . . . . . . . . . . . . . . . . . . . . 3-162 Copy (Configuration) . . . . . . . . . . . . . . . . . . . . . . . . . . . . . . . . . . . . . . 3-163 Copy From FTP Server to Startup Configuration (Download Configuration) 3-163 xii Copy Running Configuration to Startup Configuration (Save) . . . . 3-164 Copy Running Configuration to Startup Configuration (Backup) . . 3-164 Copy Startup Configuration to Running Configuration (Reload) . . 3-165 End. . . . . . . . . . . . . . . . . . . . . . . . . . . . . . . . . . . . . . . . . . . . . . . . . . . . 3-165 Exit . . . . . . . . . . . . . . . . . . . . . . . . . . . . . . . . . . . . . . . . . . . . . . . . . . . . 3-166 May 2006 2600-A2-GB21-50 Contents 2600-A2-GB21-50 Firmware . . . . . . . . . . . . . . . . . . . . . . . . . . . . . . . . . . . . . . . . . . . . . . . 3-166 Firmware Download . . . . . . . . . . . . . . . . . . . . . . . . . . . . . . . . . . . 3-166 Firmware Download Status . . . . . . . . . . . . . . . . . . . . . . . . . . . . . . 3-167 Firmware Revision . . . . . . . . . . . . . . . . . . . . . . . . . . . . . . . . . . . . . 3-167 Firmware Switch . . . . . . . . . . . . . . . . . . . . . . . . . . . . . . . . . . . . . . 3-168 Paging . . . . . . . . . . . . . . . . . . . . . . . . . . . . . . . . . . . . . . . . . . . . . . . . . 3-168 Password . . . . . . . . . . . . . . . . . . . . . . . . . . . . . . . . . . . . . . . . . . . . . . . 3-169 Ping . . . . . . . . . . . . . . . . . . . . . . . . . . . . . . . . . . . . . . . . . . . . . . . . . . 3-170 Privilege . . . . . . . . . . . . . . . . . . . . . . . . . . . . . . . . . . . . . . . . . . . . . . . . 3-170 Restart . . . . . . . . . . . . . . . . . . . . . . . . . . . . . . . . . . . . . . . . . . . . . . . . . 3-171 Save . . . . . . . . . . . . . . . . . . . . . . . . . . . . . . . . . . . . . . . . . . . . . . . . . . . 3-171 May 2006 xiii Contents xiv Show . . . . . . . . . . . . . . . . . . . . . . . . . . . . . . . . . . . . . . . . . . . . . . . . . . 3-171 Show Bridge . . . . . . . . . . . . . . . . . . . . . . . . . . . . . . . . . . . . . . . . . 3-172 Show Bridge Timeout . . . . . . . . . . . . . . . . . . . . . . . . . . . . . . . . . . 3-173 Show Date . . . . . . . . . . . . . . . . . . . . . . . . . . . . . . . . . . . . . . . . . . . 3-173 Show Filter. . . . . . . . . . . . . . . . . . . . . . . . . . . . . . . . . . . . . . . . . . . 3-174 Show Filter-Binding . . . . . . . . . . . . . . . . . . . . . . . . . . . . . . . . . . . 3-175 Show Filter-Proto-Specific ............................. 3-176 Show Filter-Rule . . . . . . . . . . . . . . . . . . . . . . . . . . . . . . . . . . . . . . 3-176 Show IGMP Configuration . . . . . . . . . . . . . . . . . . . . . . . . . . . . . . 3-177 Show IGMP-Proxy . . . . . . . . . . . . . . . . . . . . . . . . . . . . . . . . . . . . 3-178 Show IGMP-Proxy . . . . . . . . . . . . . . . . . . . . . . . . . . . . . . . . . . . . 3-178 Show Interface Console. . . . . . . . . . . . . . . . . . . . . . . . . . . . . . . . . 3-179 Show Interface DSL Bonding Configuration . . . . . . . . . . . . . . . . . 3-179 Show Interface DSL Bonding Performance . . . . . . . . . . . . . . . . . . 3-180 Show Interface DSL Bonding Statistics ATM. . . . . . . . . . . . . . . . . 3-181 Show Interface DSL Bonding Profile Alarm . . . . . . . . . . . . . . . . . . 3-182 Show Interface DSL Far End . . . . . . . . . . . . . . . . . . . . . . . . . . . . . 3-184 Show Interface DSL Profile Alarm . . . . . . . . . . . . . . . . . . . . . . . . . 3-184 Show Interface DSL Profile Line . . . . . . . . . . . . . . . . . . . . . . . . . . 3-185 Show Interface DSL Profile PSD . . . . . . . . . . . . . . . . . . . . . . . . . . 3-185 Show Interface DSL Rates . . . . . . . . . . . . . . . . . . . . . . . . . . . . . . 3-187 Show Interface DSL Statistics ATM. . . . . . . . . . . . . . . . . . . . . . . . 3-188 Show Interface DSL Statistics Line Far End . . . . . . . . . . . . . . . . . 3-189 Show Interface DSL Statistics Line Near End . . . . . . . . . . . . . . . . 3-190 Show Interface SHDSL Configuration . . . . . . . . . . . . . . . . . . . . . 3-193 Show Interface SHDSL Extended Rate Mode . . . . . . . . . . . . . . . . 3-194 Show Interface SHDSL Performance . . . . . . . . . . . . . . . . . . . . . . 3-195 Show Interface SHDSL Rates . . . . . . . . . . . . . . . . . . . . . . . . . . . 3-196 Show Interface SHDSL Segment Alarm . . . . . . . . . . . . . . . . . . . . 3-197 Show Interface SHDSL Statistics-ATM . . . . . . . . . . . . . . . . . . . . . 3-198 Show Interface SHDSL Statistics Line. . . . . . . . . . . . . . . . . . . . . . 3-199 Show Interface SHDSL Status. . . . . . . . . . . . . . . . . . . . . . . . . . . . 3-200 Show Interface SHDSL Unit Inventory. . . . . . . . . . . . . . . . . . . . . . 3-202 Show Interface SHDSL Profile-Alarm . . . . . . . . . . . . . . . . . . . . . . 3-202 Show Interface SHDSL Profile-Line. . . . . . . . . . . . . . . . . . . . . . . . 3-203 .................................................... 3-203 Show Interface T1/E1 Configuration . . . . . . . . . . . . . . . . . . . . . . 3-203 .................................................... 3-203 Show Interface T1/E1 Performance . . . . . . . . . . . . . . . . . . . . . . . 3-204 .................................................... 3-204 May 2006 2600-A2-GB21-50 Contents Show Interface T1/E1 Statistics Far End . . . . . . . . . . . . . . . . . . . 3-205 Show Interface T1/E1 Statistics Near End ................. 3-206 .................................................... 3-208 .................................................... 3-208 Show Interface Ethernet Clear Statistics . . . . . . . . . . . . . . . . . . . . 3-208 Show Interface Ethernet Configuration . . . . . . . . . . . . . . . . . . . . . 3-209 Show Management Access List. . . . . . . . . . . . . . . . . . . . . . . . . . . 3-211 Show Management ARP Table . . . . . . . . . . . . . . . . . . . . . . . . . . . 3-211 Show Management Default Gateway Address . . . . . . . . . . . . . . . 3-212 Show Management Inband . . . . . . . . . . . . . . . . . . . . . . . . . . . . . . 3-212 Show Management Out of Band . . . . . . . . . . . . . . . . . . . . . . . . . . 3-213 Show Management Route 3-213 ............................. Show Management Periodic-ARP 2600-A2-GB21-50 ....................... 3-214 Show Management SNMP Configuration . . . . . . . . . . . . . . . . . . . 3-214 Show Management SNMP Statistics . . . . . . . . . . . . . . . . . . . . . . . 3-215 Show Management Telnet Configuration . . . . . . . . . . . . . . . . . . . 3-215 Show Management Web Configuration . . . . . . . . . . . . . . . . . . . . 3-216 Show Multicast Configuration . . . . . . . . . . . . . . . . . . . . . . . . . . . 3-217 Show Multicast Forwarding Table . . . . . . . . . . . . . . . . . . . . . . . . . 3-218 Show Multicast Lat Reporter . . . . . . . . . . . . . . . . . . . . . . . . . . . . . 3-219 Show Proxy ARP NHR . . . . . . . . . . . . . . . . . . . . . . . . . . . . . . . . 3-219 Show Running Configuration . . . . . . . . . . . . . . . . . . . . . . . . . . . . 3-220 Show Scheduled Backup . . . . . . . . . . . . . . . . . . . . . . . . . . . . . . 3-221 Show Security IP . . . . . . . . . . . . . . . . . . . . . . . . . . . . . . . . . . . . . 3-222 Show Security MAC . . . . . . . . . . . . . . . . . . . . . . . . . . . . . . . . . . . 3-223 Show SNTP . . . . . . . . . . . . . . . . . . . . . . . . . . . . . . . . . . . . . . . . . . 3-224 Show Syslog . . . . . . . . . . . . . . . . . . . . . . . . . . . . . . . . . . . . . . . . . 3-225 Show Syslog-Remote . . . . . . . . . . . . . . . . . . . . . . . . . . . . . . . . . . 3-226 Show System Information . . . . . . . . . . . . . . . . . . . . . . . . . . . . . . 3-227 Show System Options . . . . . . . . . . . . . . . . . . . . . . . . . . . . . . . . . . 3-228 Show System Self-Test . . . . . . . . . . . . . . . . . . . . . . . . . . . . . . . . . 3-229 Show System Status . . . . . . . . . . . . . . . . . . . . . . . . . . . . . . . . . . . 3-230 Show Technical-Support . . . . . . . . . . . . . . . . . . . . . . . . . . . . . . . 3-231 Show Uplink . . . . . . . . . . . . . . . . . . . . . . . . . . . . . . . . . . . . . . . . . 3-231 Show Uplink-Tag .................................... 3-232 Show User Accounts . . . . . . . . . . . . . . . . . . . . . . . . . . . . . . . . . . . 3-233 Show Users . . . . . . . . . . . . . . . . . . . . . . . . . . . . . . . . . . . . . . . . . . 3-234 Show VLAN Configuration . . . . . . . . . . . . . . . . . . . . . . . . . . . . . . 3-235 Show VLAN Reserved Block Start. . . . . . . . . . . . . . . . . . . . . . . . . 3-236 May 2006 xv Contents Test . . . . . . . . . . . . . . . . . . . . . . . . . . . . . . . . . . . . . . . . . . . . . . . . . . . 3-236 Test LEDs Start . . . . . . . . . . . . . . . . . . . . . . . . . . . . . . . . . . . . . . . 3-236 Test LEDs Stop . . . . . . . . . . . . . . . . . . . . . . . . . . . . . . . . . . . . . . . 3-237 Test PPP Discard . . . . . . . . . . . . . . . . . . . . . . . . . . . . . . . . . . . . . 3-237 Test PPP Echo Packet . . . . . . . . . . . . . . . . . . . . . . . . . . . . . . . . . 3-237 Test SHDSL Loopback Start . . . . . . . . . . . . . . . . . . . . . . . . . . . . . 3-238 Test SHDSL Loopback Stop . . . . . . . . . . . . . . . . . . . . . . . . . . . . . 3-239 Test T1E1 Inject Error . . . . . . . . . . . . . . . . . . . . . . . . . . . . . . . . . . 3-239 Test T1E1 Local Line Loopback . . . . . . . . . . . . . . . . . . . . . . . . . . 3-240 Test T1E1 Local Monitor 2^15 Pattern . . . . . . . . . . . . . . . . . . . . . 3-241 Test T1E1 Local Monitor QRSS Pattern . . . . . . . . . . . . . . . . . . . . 3-242 Test T1E1 Local Payload Loopback . . . . . . . . . . . . . . . . . . . . . . . 3-243 Test T1E1 Local Send 2^15 Pattern . . . . . . . . . . . . . . . . . . . . . . . 3-244 Test T1E1 Local Send QRSS Pattern . . . . . . . . . . . . . . . . . . . . . 3-245 Test T1E1 Remote FDL Line Loopback (T1 Only) . . . . . . . . . . . . 3-246 Test T1E1 Remote FDL Payload Loopback (T1 Only) . . . . . . . . . 3-246 Test T1E1 Remote Inband Line Loopback (T1 Only) . . . . . . . . . . 3-247 A Reference Tables Time Zones . . . . . . . . . . . . . . . . . . . . . . . . . . . . . . . . . . . . . . . . . . . . . A-1 Ether Types . . . . . . . . . . . . . . . . . . . . . . . . . . . . . . . . . . . . . . . . . . . . . A-4 B Command Summary Commands . . . . . . . . . . . . . . . . . . . . . . . . . . . . . . . . . . . . . . . . . . . . . . B-1 Index xvi May 2006 2600-A2-GB21-50 About This Guide Document Purpose and Intended Audience This guide describes the Command Line Interface (CLI) used to configure and monitor the BitStorm® 2600 and GranDSLAM® 4200 IP DSLAMs. It is designed for installer and operators of those devices. Document Summary Section Description Chapter 1, System Concepts Describes basic system concepts and terminology. Chapter 2, CLI Conventions Describes how to use the CLI. Chapter 3, Commands Describes the individual CLI commands in detail. Appendix A, Reference Tables Provides information applicable to some commands. Appendix B, Command Summary Lists all the commands and their formats for easy reference. Index Lists key terms, concepts, and sections in alphabetical order. A master glossary of terms and acronyms used in Paradyne documents is available online at www.paradyne.com. Select Support → Technical Manuals → Technical Glossary. 2600-A2-GB21-50 May 2006 i About This Guide Product-Related Documents Complete documentation for this product is available online at www.paradyne.com. Select Support → Technical Manuals. ii Document Number Document Title 2600-A2-GB22 BitStorm 2600 and GranDSLAM 4200 IP DSLAM SNMP Reference 2600-A2-GN20 BitStorm 2600 IP DSLAM Installation Guide 4200-A2-GN21 GranDSLAM 4200 IP DSLAM Installation Guide 6210-A2-GB21 Hotwire 6210, 6211, and 6381 User’s Guide 7890-A2-GB22 GrandVIEW EMS User’s Guide May 2006 2600-A2-GB21-50 System Concepts 1 Active Configurations The system has two configuration memories: Running configuration (RAM) Startup configuration (NVRAM) The system operates based on the settings in the running configuration memory (RAM). This configuration may or may not be the same as the configuration in NVRAM. All configuration changes made through any of the user interfaces (CLI, web interface, NMS) are stored only in the running configuration area. You must explicitly copy the Running configuration to the Startup configuration. Multiple users are permitted to be in the configuration mode at the same time, on all three interfaces. If any of the users perform a save command, then the configuration changes made by all the users will be saved to the startup configuration. System Terminology The following terms are used in this manual and the product’s user interfaces. Port A port is one of the physical interfaces on the device. These include: 2600-A2-GB21-50 ALARM RELAY CONSOLE DSL Ports 1–24 MANAGEMENT (Port 1) UPLINK (Port 2 or Port 3) DOWNLINK (Port 2 or Port 3) May 2006 1-1 1. System Concepts Unit A single 1U chassis is referred to as a unit. Port ID Port ID is the generic term used to refer to a DSL or Ethernet port in this document regardless of what method is used. For DSL ports, the port ID can be a number from 1 to 24, or an interface name as described below. The fast Ethernet ports are named eth1 and eth2. The GigE Ethernet port is named eth3. DSL Port ID There are several ways a DSL port can be identified in the unit. Interface Number. DSL ports 1–24 of the unit can be referred to by the numbers 1–24 respectively. Example: PDYN# configure interface dsl 24 line-code dmt Interface Name. You can use the configure interface dsl name command to assign a name to the port, which you can then use instead of the number. Example: PDYN# configure interface dsl room_401 line-code dmt Port Name or Number with Priority Group. You can additionally specify a specific priority group to modify. The priority group is specified using a colon (:) and a number from 1 (lowest priority) to 8 (highest priority) after the port name or number. If no priority group is specified, then group 1 is assumed. Example: PDYN# configure interface dsl room_401:8 line-code dmt All. The keyword all may be used to specify all DSL ports in a command that refers only to DSL ports. Example: PDYN# configure interface dsl all line-code dmt Range. Any of the port ID types may be used as an operator in a range specification. The only requirement is that the port used as the first operator in a range must have a lower interface number than the second operator. Example: PDYN# configure interface dsl 1-24 line-code dmt 1-2 May 2006 2600-A2-GB21-50 1. System Concepts DSL Bonded Group ID The DSL Bonded Group IDs on the unit are dynamically allocated when a DSL Bonded group is created. The DSL Bonded Group ID is used to Identify the DSL Bonded group for configuration and display. The DSL Bonded Group ID is an integer value with a range of 1 to 65535. When creating a DSL Bonding Group, the group ID is ignored. PDYN# configure interface dsl-bonding 1 delete PDYN# show interface dsl-bonding 1 configuration Ethernet Port ID The Ethernet ports on the unit are identified by the following names which correspond to the labeling on the front of the unit: eth1 (Port 1) eth2 (Port 2) eth3 (Port 3) PDYN# configure interface ethernet eth2 mode auto Reserved Names The following are reserved names and may not be assigned as DSL port names: 2600-A2-GB21-50 / (slash) - (dash) all dhcp downlink management uplink eth1 eth2 eth3 mgmt_i mgmt_o ppp1, ppp2, ppp3, ppp4, ppp5, ppp6, ppp7, ppp8 mlppp1, mlppp2, mlppp3, mlppp4, mlppp5, mlppp6, mlppp7, mlppp8 May 2006 1-3 1. System Concepts T1 and E1 Port ID There are several ways a T1 or E1 port can be identified in the unit. Interface Number T1 or E1 ports 1–8 of the unit can be referred to by the numbers 1–8 respectively. Example: PDYN# configure interface t1e1 8 timing local All The keyword all may be used to specify all T1 or E1 ports in a command that refers only to the T1 or E1 ports. Example: PDYN# configure interface t1e1 all timing loop Range Any of the T1 or E1 port ID types may be used as an operator in a range specification. The only requirement is that the port used as the first operator in a range must have a lower interface number than the second operator. Example: PDYN# configure interface t1e1 1-4 timing local PPP Port ID The PPP ports on the unit are identified by the following names, which correspond to the T1/E1 port labeling on the front of the unit: ppp1 ppp2 ppp3 ppp4 ppp5 ppp6 ppp7 ppp8 PDYN# configure uplink ppp1 MLPPP Bundle Port ID The MLPPP ports on the unit are identified by the following names, which correspond to the T1/E1 port labeling on the front of the unit: mlppp1 mlppp2 mlppp3 mlppp4 mlppp5 mlppp6 mlppp7 mlppp8 PDYN# configure uplink mlppp1 1-4 May 2006 2600-A2-GB21-50 1. System Concepts Priority Groups When entering tagged or untagged members of a VLAN that are DSL ports, specify a priority group on the DSL port using the port-id:pg form. (See DSL Port ID on page 1-2.) If only the DSL port number is specified then the VLAN is mapped to priority group 1 for that DSL port. A VLAN can at most have only one priority group per DSL port as a member of the VLAN. The following illustrations show how priority groups affect upstream and downstream traffic. Priority Group (PG) VC - VLAN Upstream Flow Example DSL Port 1 1:8 (Highest Priority Group) 1:7 1:6 VC 0/40 VC 1/33 VC 1/34 VC 1/35 VC 1/36 VC 0/62 VC 0/32 1 VC 0/35 1:5 1:4 5 1:3 Bridge and Classification 1:2 1:1 (Lowest Priority Group) Discard Frame VLAN 1 4 Ingress Filter optionally checks that ingress frames are tagged with a VLAN ID defined for this PG. 5 Frames are forwarded to the bridging and classification processes. 2600-A2-GB21-50 Filter Filter 4 Ingress Filter? d s p v 3 Default Priority Por VLAN ID (PVID) May 2006 Video 2 Video 3 Video 4 PPPoE Bridged VC Default Data 2 Acceptable Frame Type? Yes d s p v Voice Video 1 Forward VLAN Tagged? No 03-17462 1 Frames are received from a subscriber interface on a VC. Frames are assigned to a PG based on the VC. 2 Frames (VLAN tagged and untagged) are checked against the acceptable frame type rule for the PG. 3 Untagged frames are tagged with the PVID and Default Priority fields for the PG. 1-5 1. System Concepts 1 Frames to be transmitted are assigned to a PG based on VLAN ID. The DSL port PG is made a member of the VLAN by using the port-id:pg form in the VLAN configuration. Priority Group (PG) VLAN - VC Downstream Flow Example DSL Port 1 1:8 (Highest Priority Group) 1:7 4 1:6 1:5 1:4 1:3 1 s p v d 1:2 1:1 (Lowest Priority Group) Queue 4 (High) VC 0/40 VC 1/33 VC 1/34 VC 1/35 VC 1/36 VC 0/62 VC 0/32 VC 0/35 3 2 d s p v Queue 2 Select Packets Queue 1 (Low) 03-17461 1-6 Video 2 Video 3 Video 4 PPPoE Bridged VC Default Data Queue 3 VLAN 1 2 Frames are queued in each PG based on the IEEE 802.1p priority field or FIFO (configurable per PG). Voice Video 1 May 2006 3 Frames are selected from the PG output queues for transmission. Frames will be untagged before forwarding if the PG is an Untagged Member of the VLAN. 4 Output VC (Cell) Scheduling: All VCs are AAL5 Strict Priority PG 8 Queue 4 (High) to PG 1 Queue 1 (Low). 2600-A2-GB21-50 1. System Concepts IGMP Snooping Internet Group Management Protocol (IGMP) snooping is a method of handling multicast data streams by analyzing IGMP packets to learn multicast group address and port associations. The following parameters control IGMP snooping: Leave Delay – The amount of time that the multicast stream will continue on a port after the receipt of a Leave message. Leave-Join Forwarding Delay – The amount of time that the start of a new multicast stream on a port is delayed following the receipt of a leave message. The combination of these timers allows for a crisp channel change. Quick Query Wait Time – The amount of time to wait for a reply before issuing another Quick Query message. Quick Queries are IGMP Queries for a specified multicast group. This is needed when there is more than one set top box is on a port subscribed to the same multicast group. These parameters are set using the CLI or web interface. STB (Set-Top Box) to/from DSLAM Join A Query for A Leave A Query for A Join B Stream A Stream B 03-17460 From DSLAM to Upstream Leave Delay Parameter Send Join B Send Leave A and Stop Old Stream Start New Stream Quick Query Wait Time Parameter 2600-A2-GB21-50 Leave - Join Forwarding Delay Parameter May 2006 1-7 1. System Concepts 1-8 May 2006 2600-A2-GB21-50 CLI Conventions 2 Overview The Command Line Interface (CLI) is accessible via either a directly connected terminal session or a Telnet connection. You can use the CLI to: Change the operational characteristics of the device by setting configuration values Display system status Perform diagnostics The system supports multiple simultaneous CLI sessions. Access Levels CLI users have one of two access levels: User – The user may display certain configuration and status information. Administrator – The user has access to all commands. The Administrator level requires a second password. At least one login ID and one password are internally stored for each user, and can be modified by the administrator. If the user has administrator privileges, one login ID and two passwords are stored (one for User privilege and one for Administrator privilege). The passwords must be different for User level and Administrator level access for the same login ID. 2600-A2-GB21-50 May 2006 2-1 2. CLI Conventions Logging In When the CLI connection is first established, a login prompt is displayed: Login> Enter a user name. The first time you log in on a new unit, type the name admin and press Enter. The password prompt is displayed: Password> Enter the password associated with the user name. The default password for admin is null, so press Enter without typing anything. The following prompt is displayed: PDYN> Type privilege and press Enter. The password prompt is displayed again to show that you must enter the administrator privilege password. The first time you log in, just press Enter. The following prompt is displayed: PDYN# For security purposes, immediately establish new passwords for the user name admin. Command Line Prompts The command line prompt shows the user access level, whether there are any unsaved configuration changes, and at what level you are in the command tree. For the User access level, the following prompt is displayed: PDYN> For the Administrator access level, the following prompt is displayed: PDYN# If changes have been made to the configuration in this or a previous session that have not been changed, an exclamation point is added to the prompt. For example: PDYN#! The next section, Modes of Operation, shows how your position in the command tree further affects the prompt. 2-2 May 2006 2600-A2-GB21-50 2. CLI Conventions Modes of Operation You may enter CLI commands in their entirety on one line. For example: PDYN#!configure interface dsl 1/1 line-code dmt PDYN#!configure interface dsl 1/1 latency fast Alternatively, you may logically position the command interface at any point in the command tree structure by entering partial commands. The prompt shows where you are in the command structure. For example: PDYN#configure PDYN(configure)#interface PDYN(configure-interface)#dsl PDYN(configure-interface-dsl)#1/1 PDYN(configure-interface-dsl-1/1)#line-code dmt PDYN(configure-interface-dsl-1/1)#!latency fast You can move back up the command tree using the back command. Back Command The back command positions the CLI up one level in the command tree. For example, if DSL interface 1/1 is being configured, the following prompt is displayed: PDYN(configure-interface-dsl-1/1)# Each back command positions the interface one level higher: PDYN(configure-interface-dsl-1/1)#back PDYN(configure-interface-dsl)#back PDYN(configure-interface)#back PDYN(configure)#_ Automatic Command Completion Commands and keywords can be abbreviated to as few characters as are required to make them uniquely identifiable. For example, con is a valid abbreviation for configure and cop is a valid abbreviation for copy, but the abbreviation co is ambiguous. You can request automatic completion of a command or keyword you have partially typed by pressing the Tab key. If the command or keyword you have typed is ambiguous, the Tab key displays the options for completion. 2600-A2-GB21-50 May 2006 2-3 2. CLI Conventions Command History Buffer The last 7 commands are maintained in a command history buffer. You can use the Up Arrow and Down Arrow keys to scroll through and redisplay commands, then alter and resubmit a command maintained in the buffer. More Prompt The CLI lets you control the flow of text to the screen with a paging command. If paging is disabled, text is sent to the screen without interruption. If paging is enabled, only 23 lines of text are displayed at a time. A More prompt is displayed on line 24 of your screen, and you can do the following: To view the next screen of output, press the spacebar. To view the next line of output, press the Enter key. To return to the command line, press q or any other key besides the spacebar and Enter key. The paging command affects only the user who enters the command. Command Help You can obtain help when you enter commands by using the following methods: To list all commands for a specific level, enter a question mark (?) at the system prompt: PDYN#? To obtain a list of commands that start with a particular character set, enter an abbreviated command immediately followed by a question mark: PDYN#configure sys? To list a command's keywords or arguments, enter a question mark in place of a keyword or argument on the command line: PDYN#configure management ? 2-4 May 2006 2600-A2-GB21-50 2. CLI Conventions Keyboard Definitions The following table summarizes the special uses of keys in the CLI: Press . . . To . . . Ctrl-c Clear the current command line entry, exit a command line prompt without answering, or abort the command in progress. Ctrl-z Terminate a privileged mode session and continue the session in standard mode. If Ctrl-z is entered by a user not in privileged mode, it places the user at the top of the command tree. Down Arrow Recall commands from the command line history buffer starting with the first command in the buffer. Enter Submit the current command line, or, if a More prompt is displayed, display the next line of text. q Abort a More prompt and return to the command line prompt. (Pressing any key other than Enter or the spacebar has this effect.) ? (Question Mark) Display the Help text for the current command. Spacebar Display the next page of output when a More prompt is displayed on line 24 of your screen. Up Arrow Scroll to the previous valid command line entry leaving the cursor at the end of the entry. Command Syntax Error Handling The CLI checks the syntax of commands you enter. If an error is detected, the following prompt is displayed: Syntax error - use '?' to see valid completions The prompt returns to normal when you press the Enter key. Automatic Logout The unit automatically terminates the CLI session if the Inactivity Timeout duration is exceeded. The Inactivity Timeout is configurable. 2600-A2-GB21-50 May 2006 2-5 2. CLI Conventions Configuring the System In order to configure the unit you must be at the Administrator access level. Configuration changes take effect immediately. However, the changes are made to the running configuration, which is in RAM (Random Access Memory). You must enter the save command to save your changes to the startup configuration in NVRAM (Non-Volatile RAM). If there are unsaved changes, an exclamation point (!) is added to the prompt to remind you, or other administrators, of the outstanding changes. The changes remain in RAM and can be saved until the unit is powered off or reset. For information about what elements of the system you can configure, see Configure in Chapter 3, Commands. 2-6 May 2006 2600-A2-GB21-50 Commands 3 Typographic Conventions Command descriptions in this chapter use the following conventions: Vertical bars ( | ) separate alternative, mutually exclusive, elements. Braces ( { } ) indicate a required choice. Square brackets ( [ ] ) indicate optional elements. Braces within brackets ( [{ }] ) indicate a required choice within an optional element. Boldface indicates fixed commands and keywords. Back back Minimum Access Level: User The back command moves you back one level in the command tree. For example, if DSL 1 is being configured the following prompt is displayed: PDYN(configure-interface-dsl-1)# The back command returns the display to the PDYN (configure-interface-dsl)# prompt. Example: PDYN(configure-interface-dsl-1)#back PDYN(configure-interface-dsl)#_ PDYN(configure-interface-dsl)#back PDYN(configure-interface)#_ 2600-A2-GB21-50 May 2006 3-1 3. Commands Clear Clear Bridge clear bridge Minimum Access Level: Administrator The clear bridge command deletes learned entries from the bridge table. Static entries are not affected. Example: PDYN# clear bridge Clear Management ARP clear managment arp Minimum Access Level: Administrator The clear management arp command clears all the dynamic entries in the management ARP table. Example PDYN# clear management arp Clear Syslog clear syslog Minimum Access Level: Administrator The clear syslog command clears all the entries in the system log. Example PDYN# clear syslog 3-2 May 2006 2600-A2-GB21-50 3. Commands Configure The configure command causes the CLI to enter configuration mode, from which you can specify what element of the system you would like to configure. configure Minimum Access Level: Administrator The configure command causes the CLI to enter configuration mode. Once the PDYN(configure)# prompt is displayed, you can enter one of the configuration subcommands. Example PDYN# configure PDYN(configure)#interface PDYN(configure-interface)#bridge PDYN(configure-interface-bridge)#mode switch PDYN(configure-interface-bridge)#!save PDYN(configure-interface-bridge)# Configure Bridge This command is used to configure the parameters related to the bridge table. Configure Bridge Clear configure bridge clear Minimum Access Level: Administrator The configure bridge clear command deletes learned entries from the bridge table. Static entries are not affected. Example: PDYN# configure bridge clear 2600-A2-GB21-50 May 2006 3-3 3. Commands Configure Bridge Mode configure bridge mode {mux | switch | sms | uplink-tag} Minimum Access Level: Administrator The configure bridge mode command specifies the mode the bridge will operate in. mux – Multiplexing forwarding mode. The system treats each DSL port as if it were a private network connected to the uplink, and never forwards data on another DSL port. sms – Subscriber Management System (SMS) mode. The system treats each DSL port as if it were a private network connected to the uplink, and never forwards data on another DSL port. In addition, a management Virtual Local Area Network (VLAN) is created on the uplink for use by the SMS. switch – Switched mode. The system acts as a transparent learning bridge. This is the default. uplink-tag – Uplink Tagging mode. Traffic from each DSL subscriber port is given a unique VLAN tag. The system therefore treats each DSL port as if it were a private network connected to the uplink, and never forwards data on another DSL port. Example: PDYN# configure bridge mode mux Notes: 3-4 mux In this mode all traffic is routed to the uplink port . Port to port switching is not allowed. Unit performs a Proxy ARP function. sms In this mode all traffic is routed to the Ethernet uplink port. Port to port switching is not allowed. When this mode is selected, an external management VLAN will be established to the Subscriber Management System. In this mode Proxy ARP is disabled. uplink-tag When this mode is selected all traffic is forwarded to the uplink port as in the mux mode. In addition, all user traffic from the DSL subscriber ports will be have a VLAN tag. Proxy ARP is enabled in this mode. May 2006 2600-A2-GB21-50 3. Commands Configure Bridge Timeout configure bridge timeout {time} Minimum Access Level: Administrator The configure bridge timeout command specifies the maximum amount of time a learned entry may exist in the bridge table without appearing as the source address of a received frame. time – The amount of time, in seconds, that an entry may exist. The valid range is 10–1,000,000 seconds, or 0 (zero, which specifies that no timeouts will occur). The default is 300. Example: PDYN# configure bridge timeout 600 Configure Date and Time configure date [mm/dd/yy | dd/mm/yy] [hh:mm] Minimum Access Level: Administrator The configure date command sets the date and time. mm/dd/yy or dd/mm/yy – specifies the month, day, and year, each as two digits. The date format is set by the configure system options command (see Configure System Options Command); the default order is month, day, and year. hh:mm – Specifies the time in hours (0–23) and minutes (0–59). Example: PDYN# configure date 03/21/02 13:05 Note: If the you have specified SNTP as the source for the date and time, then that option will overwrite whatever you enter for the date and time. The unit will maintain the date and time through power cycles of up to 1 hour. If a power outage lasts longer than 1 hour, the unit will attempt to automatically obtain the date and time from NTP server on the network. If it cannot get time from the specified server, the time will be set to 01/01/01 00:00:00. 2600-A2-GB21-50 May 2006 3-5 3. Commands Configure Date-Timezone configure date-timezone {time-zone} Minimum Access Level: Administrator The configure date-timezone command specifies the offset in hours from Greenwich Mean Time (GMT) that the date and time represent. time_zone – Specifies the offset in hours from Greenwich Mean Time (GMT). Hours before GMT are expressed as negative numbers and hours after GMT are expressed as positive numbers (with or without a plus sign). Half hours are supported as decimals. Valid values are –12 through 12. You can also obtain a list of time zone offsets using the command: configure date-timezone ? The unit does not adjust for Daylight Savings Time. Example: PDYN# configure date-timezone +2 PDYN# configure date-timezone 9 3-6 May 2006 2600-A2-GB21-50 3. Commands Configure Factory Defaults The configure factory command loads the factory default parameters into the running configuration. The default parameters take immediate effect, but are not saved. Execute the Save command to save the parameters to Non-Volatile Random-Access Memory (NVRAM). configure factory Minimum Access Level: Administrator The configure factory command loads factory default parameters. Example: PDYN# configure factory Notes: This command will cause the factory default parameters to be loaded into the running configuration and immediately take effect. The parameters will not be saved to NVRAM unless save command is issued after this. The reset to factory defaults is a two-step process. This prevents the Administrator from accidentally destroying the configuration. After the administrator enters the configure factory command, a warning message ("Warning: This will reset all configuration values. Proceed (yes/no) ?") is displayed. The administrator must enter "yes" in order to change the configuration. To save the configuration to the NVRAM, the administrator must also enter the save command. Factory defaults include an out-of-band management address of 10.10.10.10, and an in-band management address of 0.0.0.0. If you are managing the unit using a different IP address, your connection is terminated upon execution of the configure factory command. It is therefore recommended that this command be executed only from the Console port. Configure Filter Filters are used to restrict selected types of user data. A filter is made up of one or more rules. Each rule that is defined for a filter is processed in the order defined in the filter configuration command. As soon as one of the rules is matched, the action for that rule is taken. The remaining rules, if any, are not checked. In this system, the rules must be defined before the rule name can be specified in the filter statement. This process is different from the process found in some routers, where the rules are buried in the definition of the filter. A maximum of 16 rules can be defined for a filter. 2600-A2-GB21-50 May 2006 3-7 3. Commands The activation of a filter is a three-step process that need to be executed in this order: 1. Define filter rules (see Configure Filter-Rule ) 2. Define a named filter comprising one or more rules (see Configure Filter Command) 3. Bind the filter to an interface (see Configure Filter-Binding ) Configure Filter Create configure filter create filter_name {forward | discard} [ rule_name_1]... [ rule_name_16] Minimum Access Level: Administrator The configure filter create command creates a filter based on existing filter rules. filter_name – Specifies the filter to be created. The name may contain up to 32 printable characters. forward – Specifies that a packet is to be forwarded to the user when none of the conditions specified in the rule or rules are matched. discard – Specifies that a packet is to be discarded when none of the conditions specified in the rule or rules are matched. rule_name_1 through rule_name_16 – Specifies up to 16 different rule names. These must be already defined using the configure filter-rule command (see Configure Filter-Rule Command). Example: PDYN# configure filter create no_at_or_ipx forward no_at no_ipx Note: A maximum of 16 rules can be defined for a filter. 3-8 May 2006 2600-A2-GB21-50 3. Commands Configure Filter Delete configure filter delete filter_name Minimum Access Level: Administrator The configure filter delete command deletes a filter. filter_name – Specifies the filter to be deleted. It must not be bound to an interface. To delete a binding, use the configure filter-binding command (see Configure Filter-Binding Command). Example: PDYN# configure filter delete no_decnet Configure Filter Modify configure filter modify filter_name {forward | discard} [ rule_name_1]... [ rule_name_16] Minimum Access Level: Administrator The configure filter modify command modifies a filter based on existing filter rules. filter_name – Specifies the filter name. The name may contain up to 32 printable characters. forward – Specifies that a packet is to be forwarded to the user when none of the conditions specified in the rule or rules are matched. discard – Specifies that a packet is to be discarded when none of the conditions specified in the rule or rules are matched. rule_name_1 through rule_name_16 – Specifies up to 16 different rule names. These must be already defined using the configure filter-rule command (see Configure Filter-Rule Command). Example: PDYN# configure filter modify no_at_or_ipx forward no_at no_ipx Note: A maximum of 16 rules can be defined for a filter. 2600-A2-GB21-50 May 2006 3-9 3. Commands Configure Filter Protocol-Specific configure filter proto-specific {netbios} {deny | permit} Minimum Access Level: Administrator The configure filter proto-specific command denies or permits traffic for a particular protocol. Protocols netbios – Microsoft’s NetBIOS traffic. deny – Specifies that traffic for the particular protocol should be denied (frames/packets are discarded). permit – Specifies that traffic for the particular protocol should be permitted (frames/packets are forwarded). Example: PDYN# configure filter proto-specific netbios deny Configure Filter-Binding This command is used to bind filter to a port. A filter has no effect until it is bound to a port. The same filter may be bound to multiple ports. Configure Filter-Binding Create configure filter-binding create filter_name port_id Minimum Access Level: Administrator The configure filter-binding create command associates a filter to a port. filter_name – Specifies the inbound filter to be associated with a port. It must exist. (See Configure Filter on page 3-7.) port_id – Specifies the DSL port whose inbound traffic is to be filtered. Example: PDYN# configure filter-binding create no_at_or_ipx 1 The same filter may be bound to multiple ports. There is a maximum of 4 filters per port (2 Ethernet filters (1 input and 1 output) and 2 IP filters ). Only one filter can be bound to a port per command. At this time, the filters apply only to the DSL ports. 3-10 May 2006 2600-A2-GB21-50 3. Commands Configure Filter-Binding Delete configure filter-binding delete filter_name port_id Minimum Access Level: Administrator The configure filter-binding delete command removes the association of a filter to a port. filter_name – Specifies the filter to be associated with a port. It must exist. (See Configure Filter on page 3-7.) port_id – Specifies the DSL port whose traffic is to be filtered. Example: PDYN# configure filter-binding delete no_at_or_ipx 1 Configure Filter-Rule Create (L2 filter) configure filter-rule create { rule_name} {forward | discard} {ether | ether-snap} [ ethertypes] Minimum Access Level: Administrator he configure filter-rule create command creates a rule for filtering traffic. rule_name – The name of the rule to be created. The name may contain up to 32 printable characters. forward – If a packet matches the rule it is forwarded. discard – If a packet matches the rule it is discarded. ether – Specifies that the rule applies to Layer 2 Ethernet traffic. ether-snap – Specifies that the rule applies to Layer 2 SubNetwork Access Protocol (SNAP) traffic. ethertypes – Specifies the Ethertype to be filtered in hexadecimal. The hexadecimal values for Ethertypes as listed in RFC 1700 are valid. These Ethertypes are shown in Ether Types in Appendix A, Reference Tables. Example: PDYN# configure filter-rule create DecNetdrop discard ether 6003 PDYN# configure filter-rule create IPXdrop discard ether 8137 2600-A2-GB21-50 May 2006 3-11 3. Commands Configure Filter-Rule Modify (L2 filter) configure filter-rule modify { rule_name} {forward | discard} {ether | ether-snap} [ ethertypes] Minimum Access Level: Administrator The configure filter-rule modify command modifies the parameters of an existing filtering rule. rule_name – The name of the rule to be modified. forward – If a packet matches the rule it is forwarded. discard – If a packet matches the rule it is discarded. ether – Specifies that the rule applies to Layer 2 Ethernet traffic. ether-snap – Specifies that the rule applies to Layer 2 SubNetwork Access Protocol (SNAP) traffic. ethertypes – Specifies the Ethertype to be filtered in hexadecimal. The hexadecimal values for Ethertypes as listed in RFC 1700 are valid. These Ethertypes are shown in Ether Types in Appendix A, Reference Tables. Example: PDYN# configure filter-rule create DecNetdrop discard ether 6003 PDYN# configure filter-rule create IPXdrop discard ether 8137 Configure Filter-Rule Delete configure filter-rule delete { rule_name} Minimum Access Level: Administrator The configure filter-rule delete command deletes a rule for filtering traffic. rule_name – The name of the rule to be deleted. Example: PDYN# configure filter-rule delete IPXdrop Note that if a rule is part of an active filter, the system will not delete the rule. It must first be removed from the filter. 3-12 May 2006 2600-A2-GB21-50 3. Commands Configure Filter Operational Notes The following operational restriction apply to filters and bindings: Filters and Rules can exist independently, without regard to whether they are used in bindings. A Filter-Rule binding can be created only if both the filter and rule exist. A Port-Filter binding can be created only if both the Port and the Filter exist. A rule cannot be deleted while any filter is bound to it. A filter cannot be deleted while any port is bound to it. Filter-Rule bindings and Port-Filter bindings can be deleted at any time. When a filter is deleted, any Filter-Rule bindings for it are automatically deleted Configure IGMP Snooping configure igmp-snooping {enabled | disabled} Minimum Access Level: Administrator The configure igmp snooping command enables the unit to process multicast data streams. This is done by snooping the content of IGMP messages. This command now enables/disables IGMP snooping for all DSL ports. Previously, this was done on a per port basis. enabled – The unit will process multicast packets and snoop IGMP packets to learn multicast group address and port associations. Only ports that have joined a multicast group will receive multicast traffic. disabled – The unit will not recognize multicast packets. Multicast packets will be flooded to all ports. Example: PDYN# configure igmp-snooping enabled 2600-A2-GB21-50 May 2006 3-13 3. Commands Configure IGMP Snooping Querier Auto Detect configure igmp-snooping querier-auto-detect {enabled | disabled} Minimum Access Level: Administrator The configure igmp snooping querier-auto-detect command enables the unit to automatically detect the port on which the IGMP querier is located. When this feature is enabled, the querier-interface configuration has no effect. All IGMP leave and join messages are sent to the port that has the IGMP querier. enabled – The unit will automatically detect the active IGMP querier. disabled – The unit will not automatically detect the port of the IGMP querier. The port must be specified manually. Example: PDYN# configure igmp-snooping querier-auto-detect enabled Configure IGMP Snooping Querier Interface configure igmp-snooping querier-interface {port_id} Minimum Access Level: Administrator The configure igmp snooping querier-interface command assigns an interface to be the IGMP querier. All IGMP leave and join messages will be forwarded to this port. This feature has no effect when the IGMP querier auto detect feature is enabled. port_id – Any valid port ID. 1 through 48 for DSL ports, ppp1 through ppp8, mlppp1 though mlppp8, eth1, eth2 or eth3. Example: PDYN# configure igmp-snooping querier-interface eth2 3-14 May 2006 2600-A2-GB21-50 3. Commands Configure IGMP Snooping Query Interval configure igmp-snooping query-interval {interval} Minimum Access Level: Administrator The configure igmp snooping querier-interval command defines how often the general IGMP query will be sent on the port that has been specified as the querier interface. This feature has no effect when the IGMP querier auto detect feature is enabled. port_id – Any valid port ID. 1 through 48 for DSL ports, ppp1 through ppp8, mlppp1 though mlppp8, eth1, eth2 or eth3. Example: PDYN# configure igmp-snooping querier-interval 125 Configure IGMP Snooping Leave Delay configure igmp {port_id} snooping leave-delay {delay} Minimum Access Level: Administrator The configure igmp snooping leave-delay command specifies the period of time during which a multicast stream will continue to be forwarded on an interface after receipt of an IGMP leave message for that stream. port_id – Identifies the IGMP DSL port to be configured. Enter all for all ports. delay - The amount of time, in tenth of seconds, that the multicast stream will continue after the receipt of a leave message. The default value is 3. The range is 0 to 25.5 seconds in units of tenths of seconds. Example: PDYN# configure igmp 1 leave-delay 3 2600-A2-GB21-50 May 2006 3-15 3. Commands Configure IGMP Snooping Leave Join Delay configure igmp {port_id} snooping leave-join-delay {delay} Minimum Access Level: Administrator The configure igmp snooping leave-join-delay command specifies the period of time during which new multicast streams will not be forwarded on a port following a Leave Message for another stream on that port. port_id – Identifies the IGMP DSL port to be configured. Enter “all” for all ports. delay - The amount of time, in tenths of seconds, that a new multicast stream on a port is delayed following the receipt of a leave message. The default value is 3. The range is 0 to 25.5 seconds in units of tenths of seconds. Example: PDYN# configure igmp 1 leave-join-delay 3 Configure IGMP Query Count configure igmp {port_id} query-count {count} Minimum Access Level: Administrator The configure igmp query-count determines how many quick query messages will be sent to the subscriber ports in response to a leave message. If no responses are received after this number of messages then it can be assumed that no subscribers want to be in the multicast group. In other products this parameter is also referred to as the robustness value or the number of quick query count. port_id – Identifies the IGMP DSL port to be configured. Enter “all” for all ports. count - This parameter specifies the number of Quick Queries that will be generated by the IGMP Proxy function in response to an IGMP Leave Message. The default is 2. The range is 1 to 10. Example: PDYN# configure igmp 1 query-count 2 3-16 May 2006 2600-A2-GB21-50 3. Commands Configure IGMP Query Wait Timer configure igmp {port_id} query-wait-timer {time} Minimum Access Level: Administrator This command is no longer supported. Example: PDYN# configure igmp 1 query-wait-timer 200 Configure IGMP Proxy Enable configure igmp-proxy {enabled | disabled} Minimum Access Level: Administrator The configure igmp proxy command enables the additional function where the unit creates IGMP query messages. enabled – The unit will act as an IGMP querier if needed. The unit will send a general IGMP query message at the interval specified by the user. In addition the proxy function will perform quick query functions that allows a smooth changing of data streams. The IGMP Snooping function must also be enabled for this function to be enabled. disabled – The unit will relay all IGMP messages and not perform any proxy functions. Example: PDYN# configure igmp proxy enabled 2600-A2-GB21-50 May 2006 3-17 3. Commands Configure IGMP Proxy Report Summary Enable configure igmp-proxy report-summary {enabled | disabled} Minimum Access Level: Administrator This command is no longer supported as of release 2.4.10. Example: PDYN# configure igmp-proxy report-summary disabled Configure Interface This command enters ‘configure interface’ mode. From this level, any of the following interfaces may be selected. console dsl ethernet shdsl Configure Interface Console Data-Bits configure interface console data-bits {7 | 8} Minimum Access Level: Administrator The configure interface console data-bits command sets the number of data bits in a byte on the Console port. data-bits – Valid choices are 7 and 8. The default is 8. Example: PDYN# configure interface console data-bits 7 3-18 May 2006 2600-A2-GB21-50 3. Commands Configure Interface Console Parity configure interface console parity {even | none | odd} Minimum Access Level: Administrator The configure interface console parity command sets the parity bit type for the Console port. parity – Valid choices are none, odd, and even. The default is none. Example: PDYN# configure interface console parity even Configure Interface Console Rate configure interface console rate {9600 | 19200 | 38400 | 57600 | 115200} Minimum Access Level: Administrator The configure interface console rate command sets the rate of the Console port in bps. rate – Valid rates are 9600, 19200, 38400, 57600, and 115200. The default is 9600 bps. Example: PDYN# configure interface console rate 57600 Configure Interface Console Show configure interface console show Minimum Access Level: Administrator The configure interface console show command displays parameters for the Console port without leaving configuration mode. Example: PDYN# configure interface console show Output: refer to Show Interface Console. 2600-A2-GB21-50 May 2006 3-19 3. Commands Configure Interface Console Stop Bits configure interface console stop-bits {1 | 2} Minimum Access Level: Administrator The configure interface console stop-bits command sets the number of stop bits delimiting a byte on the Console port. stop-bits – Valid choices are 1 and 2. The default is 1. Example: PDYN# configure interface console stop-bits 1 3-20 May 2006 2600-A2-GB21-50 3. Commands Configure Interface DSL This command enters the configure ADSL interface mode. You can get to this point in the menu tree one command at time (config -> interface -> adsl), or by entering the entire command at once. The user can configure a DSL port name, line code, operational state, VLAN configuration, ATM VC and encapsulation, priority group and queue method, and manipulate ADSL profiles to configure transmission parameters. The ADSL port transmission parameters are configured using profiles. ADSL Profiles can be created, modified, deleted, and activated. A new ADSL profile is created and activated using the following steps: 1. Allocate a new profile with the configure interface dsl-profile-line create command. 2. Configure desired transmission parameters with the following commands: — configure interface dsl-profile-line rate-adaptive-mode-downstream — configure interface dsl-profile-line rate-adaptive-mode-upstream — configure interface dsl-profile-line latency — configure interface dsl-profile-line max-interleave-delay-downstream — configure interface dsl-profile-line max-interleave-delay-upstream — configure interface dsl-profile-line max-speed-downstream — configure interface dsl-profile-line max-speed-upstream — configure interface dsl-profile-line max-snr-margin-downstream — configure interface dsl-profile-line max-snr-margin-upstream — configure interface dsl-profile-line max-txpower-downstream — configure interface dsl-profile-line max-txpower-upstream — configure interface dsl-profile-line min-speed-downstream — configure interface dsl-profile-line min-speed-upstream — configure interface dsl-profile-line min-snr-margin-downstream — configure interface dsl-profile-line min-snr-margin-upstream — configure interface dsl-profile-line min-txpower-downstream — configure interface dsl-profile-line min-txpower-upstream — configure interface dsl-profile-line target-margin-downstream — configure interface dsl-profile-line target-margin-upstream 3. Activate the profile with the configure interface dsl-profile-line activate command 2600-A2-GB21-50 May 2006 3-21 3. Commands Configure Interface DSL ATM VC Create configure interface dsl { port_id:pg} atm vc create { vpi/vci} {atm_profile} Minimum Access Level: Administrator The configure interface dsl atm vc create command defines a Virtual Channel Link (VCL) for the specified port. If the specified Virtual Circuit Identifier (VCI) or Virtual Path identifier (VPI) is unavailable or in use, the command fails. If the resources specified by the Receive Traffic Descriptor or Transmit Traffic Descriptor are not available, the command fails. VCLs created on DSL ports are created on the currently active channel. If no channel is available, VCLs are not created on the interface. port_id – Identifies the DSL port to be configured. pg - Identifies the priority group on this port. If the priority group is not entered, it will be assumed to be group 1. create - This creates one of eight (8) possible connections. vpi/vci – VPI range of 0–255 and a VCI range of 16–65535. The default for the connection is 0/35. Example: PDYN# configure interface dsl 1 atm vc create 1/35 atm_profile_up atm_profile_down 3-22 May 2006 2600-A2-GB21-50 3. Commands Configure Interface DSL ATM VC Delete configure interface dsl {port_id:pg} atm vc delete { vpi/vci} Minimum Access Level: Administrator The configure interface dsl atm vc delete command deletes a virtual connection for the specified port. port_id – Identifies the ADSL port to be configured. pg - Identifies the priority group on this port. If the priority group is not entered, it will be assumed to be group 1. delete - This deletes the specified vpi/vci from this ADSL port. vpi/vci – Valid input is the VPI/VCI for the connection. The valid range for VPI is 0-255. The valid range for VCI is 16-65535. Example: PDYN# configure interface dsl1/1 atm vc delete 1/35 Configure Interface DSL ATM Encapsulation configure interface dsl {port_id:pg} atm encapsulation {llc-bridged | vcm-bridged} Minimum Access Level: Administrator The configure interface dsl atm encapsulation command specifies whether the port uses Logical Link Control (LLC) or Virtual Channel Multiplexing (VCM) bridged encapsulation. These are defined in RFC 1483. port_id – Identifies the port to be configured. pg - Identifies the priority group on this port. If the priority group is not entered, it will be assumed to be group 1. atm encapsulation – Valid choices are: llc-bridged – The interface uses LLC bridged encapsulation. This is the default. vcm-bridged – The interface uses VCM bridged encapsulation. Example: PDYN# configure interface dsl 1/1 atm encapsulation vcm-bridged 2600-A2-GB21-50 May 2006 3-23 3. Commands Configure Interface DSL Bonding This command enters the configure DSL Bonding interface mode. You can get to this point in the menu tree one command at time (config -> interface -> dsl-bonding) or by entering the entire command at once. You can create and delete a DSL Bonding group. Configure Interface DSL Bonding Create configure interface dsl-bonding {group-id} create {port-id} {dsl-bonding-alarm-profile} Minimum Access Level: Administrator The configure interface dsl-bonding create command defines a DSL Bonding group with the specified DSL port range and DSL Bonding Alarm Profile port_id – Is a port range that Identifies the DSL ports to be included in a DSL Bonded Group. Due to the hardware architecture, a maximum of 6 DSL ports can be in one DSL bonding group. To have 6 DSL ports in a one group, the lowest numbered port must be 1, 7, 13, or 19. Also, the port ranges used for a group can not span DSL Ports 6–7, 12–13, and 18-–9. Therefore a DSL Bonded Group can not be created with ports 5–8 since it crosses ports 6–7. group-id – Is ignored for the create command. A group ID is dynamically allocated for the DSL Bonding group being created. create - This creates a DSL Bonding Group. dsl-bonding-alarm-profile – Name of the DSL Bonding Alarm Profile to be assigned to the DSL Bonded Group. Example: PDYN# configure PDYN# configure PDYN# configure PDYN# configure 3-24 interface interface interface interface dsl-bonding dsl-bonding dsl-bonding dsl-bonding 1 1 1 1 create create create create May 2006 1-6 alarm_profile1 7-12 alarm_profile1 13-18 alarm_profile1 19-24 alarm_profile1 2600-A2-GB21-50 3. Commands Configure Interface DSL Bonding Delete configure interface dsl-bonding {group-id} delete Minimum Access Level: Administrator The configure interface dsl-bonding delete command deletes the specified DSL Bonding group. group-id – Is the dynamically allocated Group ID assigned by the unit when the DSL Bonding Group is created. delete - This deletes a DSL Bonding Group. Example: PDYN# configure interface dsl-bonding 1 delete Configure Interface DSL Bonding Group Status Trap configure interface dsl-bonding {group-id} group-status-trap {enable | disable} Minimum Access Level: Administrator The configure interface dsl-bonding linkupdown-trap command enables or disables the link up/down trap for the specified DSL Bonding group. group-id – Is the dynamically allocated Group ID assigned by the unit when the DSL Bonding Group is created. group-status-trap - This specified the link up and down trap is going to be enabled or disabled. enable – Enable the trap disable – Disable the trap Example: PDYN# configure interface dsl-bonding 1 group-status-trap enable 2600-A2-GB21-50 May 2006 3-25 3. Commands Configure Interface DSL Bonding Name configure interface dsl-bonding {group-id} name {group-name} Minimum Access Level: Administrator The configure interface dsl-bonding name command assigns a name to the specified DSL Bonding group. group-id – Is the dynamically allocated Group ID assigned by the unit when the DSL Bonding Group is created. group-name – Unique name assigned to the DSL Bonded Group, as in ifAlias. Example: PDYN# configure interface dsl-bonding 1 name Sheraton_Grp1 Configure Interface DSL Bonding Profile Alarm Activate configure interface dsl-bonding-profile-alarm activate {profile-name} {dsl-bonding-group-id} Minimum Access Level: Administrator The configure interface dsl-bonding-profile-alarm activate command activates the specified DSL Bonding Alarm Profile onto the designated DSL Bonding Group. profile-name - Specifies the name of the DSL Bonding Group Alarm Profile. dsl-bonding-group-id – Is the dynamically allocated Group ID assigned by the unit when the DSL Bonding Group is created. Example: PDYN# configure interface dsl-bonding-profile-alarm activate room102_alarm_profile 2 3-26 May 2006 2600-A2-GB21-50 3. Commands Configure Interface DSL Bonding Profile Alarm Create configure interface dsl-bonding-profile-alarm create {profile-name} Minimum Access Level: Administrator The configure interface dsl-bonding-profile-alarm create command creates the specified DSL Bonding Alarm Profile. profile-name - Specifies the name of the DSL Bonding Group Alarm Profile. Example: PDYN# configure interface dsl-bonding-profile-alarm create room102_alarm_profile Configure Interface DSL Bonding Profile Alarm Delete configure interface dsl-bonding-profile-alarm delete {profile-name} Minimum Access Level: Administrator The configure interface dsl-bonding-profile-alarm delete command deletes the specified DSL Bonding Alarm Profile. The profile is not deleted if it is in use by a DSL Bonding Group. profile-name - Specifies the name of the DSL Bonding Group Alarm Profile. Example: PDYN# configure interface dsl-bonding-profile-alarm delete room102_alarm_profile 2600-A2-GB21-50 May 2006 3-27 3. Commands Configure Interface DSL Bonding Profile Alarm Modify ATU-C Threshold Rate Down configure interface dsl-bonding-profile-alarm modify threshold-atuc-rate-down {threshold} {profile-name} Minimum Access Level: Administrator The configure interface dsl-bonding-profile-alarm modify threshold-atuc-rate-down command modifies the ATU-C Rate Down Alarm Threshold. If the ATU-C DSL Bonding Group cumulative rate down drops below this value an alarm is generated. threshold-atuc-rate-down – Specifies the ATU-C Rate Down Alarm threshold will to be modified. profile-name – Specifies the name of the DSL Bonding Group Alarm Profile. threshold – Specifies the threshold value when an alarm will be generated. Enter 0 to disable, or an integer value of 1–180000. Example: PDYN# configure interface dsl-bonding-profile-alarm modify threshold-atuc-rate-down 10000 room101_alarm_profile Configure Interface DSL Bonding Alarm Modify ATU-C Threshold Rate Up configure interface dsl-bonding-profile-alarm modify threshold-atuc-rate-up {threshold} {profile-name} Minimum Access Level: Administrator The configure interface dsl-bonding-profile-alarm modify threshold-atuc-rate-up command modifies the ATU-C Rate Up Alarm Threshold. If the ATU-C DSL Bonding Group cumulative rate up exceeds this value an alarm is generated. threshold-atuc-rate-down – Specifies the ATU-C Rate Up Alarm threshold will to be modified. profile-name – Specifies the name of the DSL Bonding Group Alarm Profile. threshold – Specifies the threshold value when an alarm will be generated. Enter 0 to disable, or an integer value of 1–180000. Example: PDYN# configure interface dsl-bonding-profile-alarm modify threshold-atuc-rate-up 10000 room101_alarm_profile 3-28 May 2006 2600-A2-GB21-50 3. Commands Configure Interface DSL Bonding Alarm Modify ATU-R Threshold Rate Down configure interface dsl-bonding-profile-alarm modify threshold-atur-rate-down {threshold} {profile-name} Minimum Access Level: Administrator The configure interface dsl-bonding-profile-alarm modify threshold-atur-rate-down command modifies the ATU-R Rate Down Alarm Threshold. If the ATU-R DSL Bonding Group cumulative rate down drops below this value an alarm is generated. threshold-atur-rate-down – Specifies the ATU-R Rate Down Alarm threshold will to be modified. profile-name - Specifies the name of the DSL Bonding Group Alarm Profile. threshold – Specifies the threshold value when an alarm will be generated. Enter 0 to disable, or an integer value of 1–180000. Example: PDYN# configure interface dsl-bonding-profile-alarm modify threshold-atur-rate-down 10000 room101_alarm_profile Configure Interface DSL Bonding Alarm Modify ATU-R Threshold Rate Up configure interface dsl-bonding-profile-alarm modify threshold-atur-rate-up {threshold} {profile-name} Minimum Access Level: Administrator The configure interface dsl-bonding-profile-alarm modify threshold-atur-rate-up command modifies the ATU-R Rate Up Alarm Threshold. If the ATU-R DSL Bonding Group cumulative rate up exceeds this value an alarm is generated. threshold-atur-rate-down – Specifies the ATU-R Rate Up Alarm threshold will to be modified. profile-name - Specifies the name of the DSL Bonding Group Alarm Profile. threshold – Specifies the threshold value when an alarm will be generated. Enter 0 to disable, or an integer value of 1–180000. Example: PDYN# configure interface dsl-bonding-profile-alarm modify threshold-atur-rate-up 10000 rom101_alarm_profile 2600-A2-GB21-50 May 2006 3-29 3. Commands Configure Interface DSL Line Length – Effective Working Length (ReachDSL® Only) configure interface dsl {port_id} line-length (line-length) Minimum Access Level: Administrator The configure interface dsl ewl command specifies the length of the DSL link in units of feet. This parameter is used by the spectrum management function. This command does not apply to ADSL units. port_id – Identifies the port to be configured. line-length - This is the length of the line. This is also referred to as the effective working length. Example: PDYN# configure interface dsl 1/24 line-length 1000 Configure Interface DSL Line Length – Loop Length (ReachDSL Only) configure interface dsl {port_id} line-length {extrashort|short|medium|long} Minimum Access Level: Administrator The configure interface dsl line-length command specifies the length of the DSL link. This command does not apply to ADSL units. port_id – Identifies the port to be configured. line-length – This is the length of the line. There are four values: extrashort, short, medium and long. These values are valid for certain geographic regions. This will be displayed only on the appropriate models. The default is short. Example: PDYN# configure interface dsl 1/24 line-length medium 3-30 May 2006 2600-A2-GB21-50 3. Commands Configure Interface DSL Line Length – Quad (ReachDSL Only) configure interface dsl {port_id} line-length {same|segupto3km|segabove3km} Minimum Access Level: Administrator The configure interface dsl line-length command specifies the length of the DSL link. This specifies the quad cable configuration and the length of the DSL line. This command does not apply to ADSL units. port_id – Identifies the port to be configured. line-length - same – Same quad - segupto3km – Segregated Quad up to 3 km (default) - segabove3km – Segregated Quad above 3 km These values are valid for certain geographic regions. This will be displayed only on the appropriate models. Example: PDYN# configure interface dsl 1/24 line-length segupto3km 2600-A2-GB21-50 May 2006 3-31 3. Commands Configure Interface DSL Line-Mode (ADSL Only) configure interface dsl {port_id} line-mode {ansi | dmt | g.lite | multimode | adsl2 | adsl2plus | multimode-annexm} Minimum Access Level: Administrator The configure interface dsl line-mode command specifies the line code for a ADSL port. port_id – Identifies the port to be configured. . line-mode – Valid choices are: ansi – The port uses ANSI T1.413-1998. dmt – The port uses G.dmt (G.992.3). g.lite – The port uses G.lite (G.992.4). adsl2 – The port uses ADSL2 (G.992.3). adsl2plus – The port uses ADSL2+ (G.992.5). multimode – The port automatically senses the line code in accordance with G.994.1. This is the default. multimode-annexm – The port automatically senses the line protocol in accordance with G.994.1 and allows G.992.3/G.992.5 Annex M protocol. This command is not available on ReachDSL models, which are always set for Multimode. When multimode or multimode-annexm is chosen, G.992.3 Mode 1 and Mode 2 Annex L protocols will also be allowed. Example: PDYN# configure interface dsl 1/24 line-mode ansi 3-32 May 2006 2600-A2-GB21-50 3. Commands Configure Interface DSL Linkupdown Trap configure interface dsl {port_id} linkupdown-trap {disabled | enabled} Minimum Access Level: Administrator The configure interface dsl linkupdown-trap command specifies whether an SNMP trap should be sent upon link up and link down events. port_id – Identifies the port to be configured. linkupdown-trap – Valid choices are: – disabled – No traps are sent upon link up and link down events. – enabled – A trap is sent upon a link up or link down event. This is the default. Example: PDYN# configure interface dsl 1/21 linkupdown-trap disabled Configure Interface DSL Name configure interface dsl {port_id} name {port_name} Minimum Access Level: Administrator The configure interface dsl name command specifies a unique name for this port. port_id – Identifies the port to be configured. name – May be up to 16 printable characters. The name may not include a forward slash (/) or the restricted keywords. See Reserved Names in Chapter 1, System Concepts. Example: PDYN# configure interface dsl 1/22 name Room_100 2600-A2-GB21-50 May 2006 3-33 3. Commands Configure Interface DSL Max-TxPower-Downstream (ReachDSL Only) configure interface dsl {port-id} max-txpower-downstream {power} Minimum Access Level: Administrator The configure interface dsl max-txpower-downstream command specifies the maximum transmit power, in dB, required for the port. This command does not apply to ADSL units. port_id – Identifies the port to be configured. power – Valid choices are –14 to 12 dB in 1 dB increments. The default is dependant on the maximum allowable for the geographic location. Example: PDYN# configure interface dsl 1/22 max-txpower-downstream 1 Configure Interface DSL Max-TxPower-Upstream (ReachDSL Only) configure interface dsl {port-id} max-txpower-upstream {power} Minimum Access Level: Administrator The configure interface dsl max-txpower-upstream command specifies the maximum transmit power of the far end, in dB, required for the port. This command does not apply to ADSL units. port_id – Identifies the port to be configured. power – Valid choices are –14 to 12 dB in 1 dB increments. The default is dependant on the maximum allowable for the geographic location. Example: PDYN# configure interface dsl 1/22 max-txpower-upstream 1 3-34 May 2006 2600-A2-GB21-50 3. Commands Configure Interface DSL Pwrmgmt-State (ADSL2 Only) configure interface dsl {port-id} pwrmgmt-state {enable | disable} Minimum Access Level: Administrator The configure interface dsl pwrmgmt-state command allows the port to enable or disable power management. This command does not apply to the Reach unit. port_id – Identifies the port to be configured. state – enabled or disabled. Example: PDYN# configure interface dsl 1/22 pwrmgmt-state enable Configure Interface DSL Pwrmgmt-Enabling (ADSL2 Only) configure interface dsl {port-id} pwrmgmt-enabling {none | idle | lowpower | both} Minimum Access Level: Administrator The configure interface dsl pwrmgmt-state command sets the power management state enabling. This command does not apply to the Reach unit. port_id – Identifies the port to be configured. state – enabled or disabled. Example: PDYN# configure interface dsl 1/22 pwrmgmt-enabling idle 2600-A2-GB21-50 May 2006 3-35 3. Commands Configure Interface DSL L0Time (ADSL2 Only) configure interface dsl {port-id} l0time {time} Minimum Access Level: Administrator The configure interface dsl l0time command sets the L0 time. Valid values are 0 to 255 seconds. This command does not apply to the ReachDSL unit. port_id – Identifies the port to be configured. state – enabled or disabled. Example: PDYN# configure interface dsl 1/22 l0time 10 Configure Interface DSL L2-Atpr (ADSL2 Only) configure interface dsl {port-id} l2atpr {power reduction} Minimum Access Level: Administrator The configure interface dsl l2atpr command sets the L2-Atpr. Valid values are 0 to 15 dB in 1 dB increments. This command does not apply to Express, ReachDSL, or SHDSL models. port_id – Identifies the port to be configured. power reduction – Specifies the maximum aggregate transmit power reduction per L2 trim. Example: PDYN# configure interface dsl 1/24 l2atpr 1 3-36 May 2006 2600-A2-GB21-50 3. Commands Configure Interface DSL L2-Atprt (ADSL2 Only) configure interface dsl {port-id} l2atprt {total power reductions} Minimum Access Level: Administrator The configure interface dsl l2atprt command sets the L2-Atprt. Valid values are 0 to 15 dB in 1 dB increments. This command does not apply to Express, ReachDSL, or SHDSL models. port_id – Identifies the port to be configured. total power reductions – Specifies the maximum total aggregate transmit power reduction in L2 trim mode. Example: PDYN# configure interface dsl 1/24 l2atprt 6 Configure Interface DSL L2Time (ADSL2 Only) configure interface dsl {port-id} l2time {time} Minimum Access Level: Administrator The configure interface dsl l2time command sets the L2 time. Valid values are 0 to 255 seconds. This command does not apply to the ReachDSL unit. port_id – Identifies the port to be configured. state – enabled or disabled. Example: PDYN# configure interface dsl 1/22 l2time 10 2600-A2-GB21-50 May 2006 3-37 3. Commands Configure Interface DSL Profile Alarm Activate configure interface dsl-profile-alarm activate {profile_name} {port_id} Minimum Access Level: Administrator The configure interface dsl-profile-alarm activate command activates the specified Alarm profile onto the specified port(s). port_id – Identifies the port or range of ports in which the profile is to be activated. profile_name – Identifies the ADSL Alarm profile to be activated. Example: PDYN# configure interface dsl-profile-alarm activate adsl_alarm_profile1 1/22 3-38 May 2006 2600-A2-GB21-50 3. Commands Configure Interface DSL Profile Alarm Create Configure interface dsl-profile-alarm create {profile_name} Minimum Access Level: Administrator The configure interface dsl-profile-alarm create command creates a new ADSL Alarm Profile. profile_name – Identifies the ADSL Alarm profile to be created. Following are the parameters that comprise the ADSL Downstream / Near End Alarm Profile or Upstream / Far End Alarm Profile: Loss of Frame Seconds – SNMP trap is sent if the number of LOFS events in a 15-minute interval meets or exceeds the selected value (0–900 seconds, where 0 disables the messages). Loss of Power Seconds – SNMP trap is sent if the number of LPRS events in a 15-minute interval meets or exceeds the selected value (0–900 seconds, where 0 disables the messages). Errored Seconds – SNMP trap is are sent if the number of ES events in a 15-minute interval meets or exceeds the selected value (0–900 seconds, where 0 disables the messages). Severely-Errored Seconds – SNMP trap is sent if the number of SES events in a 15-minute interval meets or exceeds the selected value (0–900 seconds, where 0 disables the messages). Unavailable Seconds – SNMP trap is sent if the number of UAS Events in a 15-minute interval meets or exceeds the selected value (0–900 seconds, where 0 disables the messages). Increasing Rate – SNMP rate change trap is sent if the current rate is greater than or equal to the previous rate plus this threshold (0–65535 kbps, where 0 disables the messages). Decreasing Rate – SNMP rate change trap is sent if the current rate is less than or equal to the previous rate minus this threshold (0–65535 kbps, where 0 disables the messages). Example: PDYN# configure interface dsl-profile-alarm create adsl_alarm_profile1 Configure Interface DSL Profile Alarm Delete Configure interface dsl-profile-alarm delete {profile_name } Minimum Access Level: Administrator The configure interface dsl-profile-alarm delete command deletes an ADSL Alarm Profile. profile_name – Identifies the ADSL alarm profile to be deleted. Example: PDYN# configure interface dsl-profile-alarm delete adsl_alarm_profile1 2600-A2-GB21-50 May 2006 3-39 3. Commands Configure Interface DSL Profile Alarm Downstream Decreasing Rate Configure interface dsl-profile-alarm downstream-dr {dr} {profile_name} Minimum Access Level: Administrator The configure interface dsl-profile-alarm downstream-dr command modifies the downstream decreasing rate to generate an alarm. profile_name – Identifies the ADSL Alarm profile to be modified. dr - SNMP rate change trap is sent if the current rate is less than or equal to the previous rate minus this threshold (065535 kbps, where 0 disables the messages). Example: PDYN# configure interface dsl-profile-alarm downstream-dr 5000 adsl_alarm_profile1 Configure Interface DSL Profile Alarm Downstream Error Seconds Configure interface dsl-profile-alarm downstream-es {es} {profile_name} Minimum Access Level: Administrator The configure interface dsl-profile-alarm downstream-es command modifies the downstream errored seconds required to generate an alarm. profile_name – Identifies the ADSL Alarm profile to be modified. es - SNMP trap is sent if the number of errored seconds events in a 15-minute interval meets or exceeds the selected value (0–900 seconds, where 0 disables the messages). Example: PDYN# configure interface dsl-profile-alarm downstream-es 500 adsl_alarm_profile1 3-40 May 2006 2600-A2-GB21-50 3. Commands Configure Interface DSL Profile Alarm Downstream Increasing Rate Configure interface dsl-profile-alarm downstream-ir {ir} {profile_name} Minimum Access Level: Administrator The configure interface dsl-profile-alarm downstream-ir command modifies the downstream increasing rate to generate an alarm. profile_name – Identifies the ADSL Alarm profile to be modified. ir - SNMP rate change trap is sent if the current rate is greater than or equal to the previous rate plus this threshold (065535 kbps, where 0 disables the messages). Example: PDYN# configure interface dsl-profile-alarm downstream-ir 50000 adsl_alarm_profile1 Configure Interface DSL Profile Alarm Downstream Loss of Frame Seconds Configure interface dsl-profile-alarm downstream-lofs {lofs} {profile_name } Minimum Access Level: Administrator The configure interface dsl-profile-alarm downstream-lofs command modifies the downstream los-of-frame-seconds required to generate an alarm. profile_name – Identifies the ADSL Alarm profile to be modified. lofs - if the number of LOFS events in a 15-minute interval meets or exceeds the selected value (0–900 seconds, where 0 disables the messages). Example: PDYN# configure interface dsl-profile-alarm downstream-lofs 500 adsl_alarm_prof1 2600-A2-GB21-50 May 2006 3-41 3. Commands Configure Interface DSL Profile Alarm Downstream Loss of Link Seconds Configure interface dsl-profile-alarm downstream-lols {lols} {profile_name } Minimum Access Level: Administrator The configure interface dsl-profile-alarm downstream-lols command modifies the downstream los-of-link-seconds required to generate an alarm. profile_name – Identifies the ADSL Alarm profile to be modified. lols - SNMP trap is sent if the number of LOLS events in a 15-minute interval meets or exceeds the selected value (0–900 seconds, where 0 disables the messages). Example: PDYN# configure interface dsl-profile-alarm downstream-lols 500 adsl_alarm_profile1 Configure Interface DSL Profile Alarm Downstream Loss of Signal Seconds Configure interface dsl-profile-alarm downstream-loss {loss} {profile_name} Minimum Access Level: Administrator The configure interface dsl-profile-alarm downstream-loss command modifies the downstream los-of-signal-seconds required to generate an alarm. profile_name – Identifies the ADSL Alarm profile to be modified. loss - if the number of LOSS events in a 15-minute interval meets or exceeds the selected value (0–900 seconds, where 0 disables the messages). Example: PDYN# configure interface dsl-profile-alarm downstream-loss 500 adsl_alarm_profile1 3-42 May 2006 2600-A2-GB21-50 3. Commands Configure Interface DSL Profile Alarm Downstream Severely Error Seconds Configure interface dsl-profile-alarm downstream-ses {ses} {profile_name } Minimum Access Level: Administrator The configure interface dsl-profile-alarm downstream-ses command modifies the downstream severely errored seconds required to generate an alarm. profile_name – Identifies the ADSL Alarm profile to be modified. ses - SNMP trap is sent if the number of severely errored seconds events in a 15-minute interval meets or exceeds the selected value (0–900 seconds, where 0 disables the messages). Example: PDYN# configure interface dsl-profile-alarm downstream-ses 500 adsl_alarm_profile1 Configure Interface DSL Profile Alarm Downstream Unavailable Seconds Configure interface dsl-profile-alarm downstream-uas {uas} {profile_name } Minimum Access Level: Administrator The configure interface dsl-profile-alarm downstream-us command modifies the downstream unavailable seconds required to generate an alarm. profile_name – Identifies the ADSL Alarm profile to be modified. uas - SNMP trap is sent if the number of UAS events in a 15-minute interval meets or exceeds the selected value (0–900 seconds, where 0 disables the messages). Example: PDYN# configure interface dsl-profile-alarm downstream-uas 500 adsl_alarm_profile1 2600-A2-GB21-50 May 2006 3-43 3. Commands Configure Interface DSL Profile Alarm Show configure interface dsl-profile-alarm show {profile_name } Minimum Access Level: Administrator The configure interface dsl-profile-alarm show command displays the configuration of the specified alarm profile. profile_name – Identifies the ADSL alarm profile to be displayed. Example: PDYN# configure interface dsl-profile-alarm show adsl_alarm_profile1 Configure Interface DSL Profile Alarm Upstream Decreasing Rate configure interface dsl-profile-alarm upstream-dr {dr} {profile_name } Minimum Access Level: Administrator The configure interface dsl-profile-alarm upstream-dr command modifies the upstream decreasing rate to generate an alarm. profile_name – Identifies the ADSL Alarm profile to be modified. dr - SNMP rate change trap is sent if the current rate is greater than or equal to the previous rate plus this threshold (065535 kbps, where 0 disables the messages). Example: PDYN# configure interface dsl-profile-alarm upstream-dr 5000 adsl_alarm_profile1 3-44 May 2006 2600-A2-GB21-50 3. Commands Configure Interface DSL Profile Alarm Upstream Increasing Rate configure interface dsl-profile-alarm upstream-ir {ir} {profile_name } Minimum Access Level: Administrator The configure interface dsl-profile-alarm upstream-ir command modifies the upstream increasing rate to generate an alarm. profile_name – Identifies the ADSL Alarm profile to be modified. ir - SNMP rate change trap is sent if the current rate is greater than or equal to the previous rate plus this threshold (065535 kbps, where 0 disables the messages). Example: PDYN# configure interface dsl-profile-alarm upstream-ir 50000 adsl_alarm_profile1 Configure Interface DSL Profile Alarm Upstream Error Seconds configure interface dsl-profile-alarm upstream-es {es} {profile_name } Minimum Access Level: Administrator The configure interface dsl-profile-alarm upstream-es command modifies the upstream errored seconds required to generate an alarm. profile_name – Identifies the ADSL Alarm profile to be modified. es - SNMP trap is sent if the number of errored seconds events in a 15-minute interval meets or exceeds the selected value (0–900 seconds, where 0 disables the messages). Example: PDYN# configure interface dsl-profile-alarm upstream-es 500 adsl_alarm_profile1 2600-A2-GB21-50 May 2006 3-45 3. Commands Configure Interface DSL Profile Alarm Upstream Loss of Frame Seconds configure interface dsl-profile-alarm upstream-lofs {lofs} {profile_name } Minimum Access Level: Administrator The configure interface dsl-profile-alarm upstream-lofs command modifies the upstream los-of-frame-seconds required to generate an alarm. profile_name – Identifies the ADSL Alarm profile to be modified. lofs - if the number of LOFS events in a 15-minute interval meets or exceeds the selected value (0–900 seconds, where 0 disables the messages). Example: PDYN# configure interface dsl profile-alarm upstream-lofs 500 adsl_alarm_prof1 Configure Interface DSL Profile Alarm Upstream Loss of Link Seconds configure interface dsl-profile-alarm upstream-lols {lols} {profile_name } Minimum Access Level: Administrator The configure interface dsl-profile-alarm upstream-lols command modifies the upstream los-of-link-seconds required to generate an alarm. profile_name – Identifies the ADSL Alarm profile to be modified. lols - SNMP trap is sent if the number of LOLS events in a 15-minute interval meets or exceeds the selected value (0–900 seconds, where 0 disables the messages). Example: PDYN# configure interface dsl-profile-alarm upstream-lols 500 adsl_alarm_profile1 3-46 May 2006 2600-A2-GB21-50 3. Commands Configure Interface DSL Profile Alarm Upstream Loss of Power Seconds configure interface dsl-profile-alarm upstream-lops {lops} {profile_name } Minimum Access Level: Administrator The configure interface dsl-profile-alarm upstream-lops command modifies the downstream los-of-power-seconds required to generate an alarm. profile_name – Identifies the ADSL Alarm profile to be modified. lops - SNMP trap is sent if the number of LOPS if the number of LOPS events in a 15-minute interval meets or exceeds the selected value (0–900 seconds, where 0 disables the messages). Example: PDYN# configure interface dsl-profile-alarm upstream-lops 500 adsl_alarm_prof1 Configure Interface DSL Profile Alarm Upstream Loss of Signal Seconds configure interface dsl-profile-alarm upstream-loss {loss} {profile_name } Minimum Access Level: Administrator The configure interface dsl-profile-alarm upstream-loss command modifies the upstream los-of-signal-seconds required to generate an alarm. profile_name – Identifies the ADSL Alarm profile to be modified. loss - if the number of LOSS events in a 15-minute interval meets or exceeds the selected value (0–900 seconds, where 0 disables the messages). Example: PDYN# configure interface dsl-profile-alarm upstream-loss 500 adsl_alarm_profile1 2600-A2-GB21-50 May 2006 3-47 3. Commands Configure Interface DSL Profile Alarm Upstream Severely Errored Seconds configure interface dsl-profile-alarm upstream-ses {ses} {profile_name } Minimum Access Level: Administrator The configure interface dsl-profile-alarm upstream-ses command modifies the upstream severely errored seconds required to generate an alarm. profile_name – Identifies the ADSL Alarm profile to be modified. ses - SNMP trap is sent if the number of severely errored seconds events in a 15-minute interval meets or exceeds the selected value (0–900 seconds, where 0 disables the messages). Example: PDYN# configure interface dsl-profile-alarm upstream-ses 500 adsl_alarm_profile1 Configure Interface DSL Profile Alarm Upstream Init Failure Configure interface dsl-profile-alarm upstream-init-failure {yes | no} {profile_name } Minimum Access Level: Administrator The configure interface dsl-profile-alarm upstream-decreasing-rate command modifies the upstream init failure to generate an alarm. profile_name – Identifies the ADSL Alarm profile to be modified. Yes - Enable Initialization Failure Trap messages as specified in RFC 2662. No - Disable Initialization Failure Trap messages as specified in RFC 2662. Example: PDYN# configure interface dsl-profile-alarm upstream-init-failure yes adsl_alarm_profile1 3-48 May 2006 2600-A2-GB21-50 3. Commands Configure Interface DSL Profile Alarm Upstream Unavailable Seconds Configure interface dsl-profile-alarm upstream-uas {uas} {profile_name } Minimum Access Level: Administrator The configure interface dsl-profile-alarm upstream-uas command modifies the upstream unavailable seconds required to generate an alarm. profile_name – Identifies the ADSL Alarm profile to be modified. uas - SNMP trap is sent if the number of UAS events in a 15-minute interval meets or exceeds the selected value (0–900 seconds, where 0 disables the messages). Example: PDYN# configure interface dsl-profile-alarm upstream-uas 500 adsl_alarm_profile1 Configure Interface DSL Profile Line Activate configure interface dsl-profile-line activate {profile_name } {port_id} Minimum Access Level: Administrator The configure interface dsl-profile-line activate command activates the specified profile onto the specified port(s). port_id – Identifies the port or range of ports in which the profile is to be activated. profile_name – Identifies the Adsl-profile to be activated. Example: PDYN# configure interface dsl-profile-line activate adsl_profile1 1/22 2600-A2-GB21-50 May 2006 3-49 3. Commands Configure Interface DSL Profile Line Create Configure interface dsl-profile-line create {profile_name } Minimum Access Level: Administrator The configure interface dsl-profile-line create command creates a new ADSL Line Profile. profile_name – Identifies the ADSL profile to be created. This profile contains the following line parameters: Latency - Select the channel the following rates are effective for: Fast or Interleaved. Downstream / Near End Profile ----------------------------------------max-speed-downstream -- maximum rate 0 to 65535. min-speed-downstream --Enter a minimum rate from 0 to 65535. max-interleave-delay-downstream - Max delay allowed for the interleaved channel, in ms. max-snr-margin-downstream - Max Noise Margin Select the maximum noise margin. min-snr-margin-downstream - Min Noise Margin Select the maximum noise margin. target-snr-margin-downstream - Target noise margin. rate-adaptive-mode-downstream - Rate adaptive mode (Manual, Init, Dynamic) Upstream / Far End Profile ----------------------------------max-speed-upstream -- maximum rate 0 to 65535. min-speed-upstream --Enter a minimum rate from 0 to 65535. max-interleave-delay-upstream - Max delay allowed for the interleaved channel, in ms. max-snr-margin-upstream - Max Noise Margin Select the maximum noise margin. min-snr-margin-upstream - Min Noise Margin Select the maximum noise margin. target-snr-margin-upstream - Target noise margin. rate-adaptive-mode-upstream - Rate adaptive mode (Manual, Init, Dynamic) Example: PDYN# configure interface dsl-profile-line create adsl_profile1 3-50 May 2006 2600-A2-GB21-50 3. Commands Configure Interface DSL Profile Line Delete configure interface dsl-profile-line delete {profile_name } Minimum Access Level: Administrator The configure interface dsl-profile create command deletes an ADSL Line Profile. profile_name – Identifies the ADSL profile to be deleted. Example: PDYN# configure interface dsl-profile-line delete adsl_profile1 Configure Interface DSL Profile Line Latency (ADSL Only) configure interface dsl-profile-line latency {fast | interleaved} {profile_name} Minimum Access Level: Administrator The configure interface dsl-profile-line latency command specifies whether an interleave buffer is used. This command does not apply to ReachDSL units. profile_name – Identifies the ADSL profile to be modified. latency – Valid choices are: fast – No interleave buffer is used. interleaved – This port uses an interleave buffer. This is the default. Example: PDYN# configure interface dsl-profile-line latency interleaved adsl_profile1 2600-A2-GB21-50 May 2006 3-51 3. Commands Configure Interface DSL Profile Line Max Interleave Delay Downstream (ADSL Only) configure interface dsl-profile-line max-interleave-delay-downstream {delay} {profile_name} Minimum Access Level: Administrator The configure interface dsl-profile-line max-interleave-delay-downstream command specifies the downstream maximum delay in the interleaver/deinterleaver memory allowed when configured for interleave mode. This command does not apply to ReachDSL units. profile_name – Identifies the ADSL profile to be modified. delay – The delay in milliseconds. The choices are 1, 4, or 16 ms. The default is 16 ms. Example: PDYN# configure interface dsl-profile-line max-interleave-delay-downstream 16 adsl_profile1 Configure Interface DSL Profile Line Max Interleave Delay Upstream (ADSL Only) configure interface dsl-profile-line max-interleave-delay-upstream {delay} {profile_name } Minimum Access Level: Administrator The configure interface dsl-profile-line max-interleave-delay-upstream command specifies the maximum upstream delay in the interleaver/deinterleaver memory allowed when configured for interleave mode. This command does not apply to ReachDSL units. profile_name – Identifies the Adsl profile to be modified. delay – The delay in milliseconds. The choices are 1, 4, or 16 ms. The default is 16 ms. Example: PDYN# configure interface dsl-profile-line max-interleave-delay-upstream 16 adsl_profile1 3-52 May 2006 2600-A2-GB21-50 3. Commands Configure Interface DSL Profile Line Max-SNR-Margin-Downstream configure interface dsl-profile-line max-snr-margin-downstream {margin} {profile_name } Minimum Access Level: Administrator The configure interface dsl-profile-line max-snr-downstream command specifies the far end maximum SNR margin, in dB, required for the port. profile_name – Identifies the ADSL profile to be modified. margin – Valid choices are 0–31 dB in 1-dB increments. The default is 31. Example: PDYN# configure interface dsl-profile-line max-snr-margin-downstream 9 adsl_profile1 Configure Interface DSL Profile Line Max-SNR-Margin-Upstream configure interface dsl-profile-line max-snr-margin-upstream {margin} {profile_name} Minimum Access Level: Administrator The configure interface dsl-profile-line max-snr-margin-upstream command specifies the maximum SNR margin, in dB, required for the port. profile_name – Identifies the ADSL profile to be modified. margin – Valid choices are 0–31 dB in 1-dB increments. The default is 31. Example: PDYN# configure interface dsl-profile-line max-snr-margin-upstream 9 adsl_profile1 2600-A2-GB21-50 May 2006 3-53 3. Commands Configure Interface DSL Profile Line Max-Speed-Downstream configure interface dsl profile-line max-speed-downstream {rate} {profile_name} Minimum Access Level: Administrator The configure interface dsl-profile-line max-speed-downstream command specifies the maximum rate, in kbps, available for traffic from the port toward the CPE. If behavior is set to fixed, this is the only downstream rate. profile_name – Identifies the ADSL profile to be modified. rate – Valid rates are: For G.dmt and ANSI: 64 to 12000 kbps in 32 kbps increments. For G.lite: 64 to 4000 kbps in 32 kbps increments. For ReachDSL: 32 to 2167 kbps in 32 kbps increments. For ADSL2: 64 to 25000 kbps in 32 kbps increments. For ADSL2+: 64 to 25000 kbps in 32 kbps increments. Example: PDYN# configure interface dsl-profile-line max-speed-downstream 2176 adsl_profile1 Configure Interface DSL Profile Line Max-Speed-Upstream configure interface dsl max-speed-upstream {rate} {profile_name} Minimum Access Level: Administrator The configure interface dsl-profile-line max-speed-upstream command specifies the maximum rate, in kbps, available for traffic toward the port from the CPE. If behavior is set to fixed, this is the only upstream rate. profile_name – Identifies the ADSL profile to be modified. rate – Valid rates are: For G.dmt and ANSI: 32 to 1024 kbps in 32 kbps increments. For G.lite: 32 to 1024 Kbps in 32 kbps increments. For ReachDSL: 32 to 2176 kbps in 32 kbps increments. For ADSL2: 64 to 25000 kbps in 32 kbps increments. For ADSL2+: 64 to 25000 kbps in 32 kbps increments. Example: PDYN# configure interface dsl-profile-line max-speed-upstream 128 adsl_profile1 3-54 May 2006 2600-A2-GB21-50 3. Commands Configure Interface DSL Profile Line Min-SNR-Margin-Downstream Configure interface dsl-profile-line min-snr-margin-downstream {margin} {profile_name} Minimum Access Level: Administrator The configure interface dsl-profile-line min-snr-downstream command specifies the far end minimum SNR margin, in dB, required for the port. profile_name – Identifies the ADSL profile to be modified. margin – Valid choices are 0–31 dB in 1-dB increments. The default is 0. Example: PDYN# configure interface dsl-profile-line min-snr-margin-downstream 9 adsl_profile1 Configure Interface DSL Profile Line Min-SNR-Margin-Upstream configure interface dsl-profile-line min-snr-margin-upstream {margin} {profile_name} Minimum Access Level: Administrator The configure interface dsl-profile-line min-snr-margin-upstream command specifies the minimum SNR margin, in dB, required for the port. profile_name – Identifies the ADSL profile to be modified. margin – Valid choices are 0–31 dB in 1-dB increments. The default is 0. Example: PDYN# configure interface dsl min-snr-margin-upstream 9 adsl_profile1 2600-A2-GB21-50 May 2006 3-55 3. Commands Configure Interface DSL Profile Line Min-Speed-Downstream configure interface dsl-profile-line min-speed-downstream {rate} {profile_name} Minimum Access Level: Administrator The configure interface dsl-profile-line min-speed-downstream command specifies the minimum rate, in Kbps, to adapt to for traffic from the port toward the CPE. profile_name – Identifies the ADSL profile to be modified. min-downstream-speed – Valid rates are: For DMT and ANSI: 64 to 12000 kbps in 32 kbps increments. For ADSL2: 64 to 25000 kbps in 32 kbps increments. For G.lite: 64 to 4000 kbps in 32 kbps increments. For ReachDSL: 32 to 2167 kbps in 32 kbps increments. Example: PDYN# configure interface dsl-profile-line min-speed-downstream 96 adsl_profile1 Configure Interface DSL Profile Line Min-Speed-Upstream Configure interface dsl-profile-line min-speed-upstream {rate} {profile_name} Minimum Access Level: Administrator The configure interface dsl-profile-line min-speed-upstream command specifies the minimum rate, in Kbps, to adapt to for traffic toward the port from the CPE. profile_name – Identifies the ADSL profile to be modified. rate For DMT and ANSI: 64 to 12000 Kbps in 32 kbps increments. For ADSL2: 64 to 25000 Kbps in 32 kbps increments. For G.lite: 64 to 4000 kbps in 32 kbps increments. For ReachDSL: 32 to 2167 kbps in 32 kbps increments. Example: PDYN# configure interface dsl-profile-line min-speed-upstream 64 adsl_profile1 3-56 May 2006 2600-A2-GB21-50 3. Commands Configure Interface DSL Profile Line Rate Adaptive Downstream (ADSL Only) configure interface dsl-profile-line rate-adaptive-downstream {manual | init | dynamic} {profile_name | all} Minimum Access Level: Administrator The configure interface dsl-profile-line behavior downstream command specifies whether the port will adapt its rate to downstream line conditions. This command does not apply to ReachDSL units. profile_name – Identifies the ADSL profile to be modified. rate-adaptive-mode – Valid choices are: manual - Manually selected at startup init - Automatically selected at startup dynamic - Automatically selected at run time Example: PDYN# configure interface dsl-profile-line rate-adaptive-downstream init adsl_profile1 Configure Interface DSL Profile Line Rate Adaptive Upstream (ADSL Only) configure interface dsl-profile-line rate-adaptive-upstream {manual | init | dynamic} {profile_name} Minimum Access Level: Administrator The configure interface dsl-profile-line behavior upstream command specifies whether the port will adapt its rate to upstream line conditions. This command does not apply to ReachDSL units. profile_name – Identifies the ADSL profile to be modified. rate-adaptive – Valid choices are: manual - Manually selected at startup init - Automatically selected at startup dynamic - Automatically selected at run time Example: PDYN# configure interface dsl-profile-line rate-adaptive-upstream dynamic adsl_profile1 2600-A2-GB21-50 May 2006 3-57 3. Commands Configure Interface DSL Profile Line Show configure interface dsl-profile-line show {profile_name} Minimum Access Level: Administrator The configure interface dsl-profile-line show command displays the contents of the specified ADSL Line Profile. profile_name – Identifies the ADSL profile to be displayed. Example: PDYN# configure interface dsl-profile-line show adsl_profile1 Configure Interface DSL Profile Line Target-Margin-Downstream configure interface dsl profile-line target-margin-downstream {margin} {profile_name} Minimum Access Level: Administrator The configure interface dsl-profile-line target-margin-downstream command specifies the SNR margin, in dB, required at startup for traffic toward the port from the CO/near-end. profile_name – Identifies the ADSL profile to be modified. margin – Valid choices are 0–31 dB in 1-dB increments. Example: PDYN# configure interface dsl-profile-line target-margin-downstream 3 adsl_profile1 3-58 May 2006 2600-A2-GB21-50 3. Commands Configure Interface DSL Profile Line Target-Margin-Upstream configure interface dsl-profile-line target-margin-upstream {margin} {profile_name} Minimum Access Level: Administrator The configure interface dsl-profile-line target-margin-upstream command specifies the SNR margin, in dB, required at startup for traffic toward the port from the CPE. profile_name – Identifies the ADSL profile to be modified. margin – Valid choices are 0–31 dB in 1-dB increments. Example: PDYN# configure interface dsl-profile-line target-margin-upstream 3 adsl_profile1 Configure Interface DSL Profile PSD Create Configure interface dsl-profile-psd create {profile_name } Minimum Access Level: Administrator The configure interface dsl-profile-psd create command creates a new ADSL PSD Profile. Only applicable on ADSL2 units. profile_name – Identifies the ADSL profile to be created. This profile contains the following line parameters: Atuc-max-psd – Enter the ATU-C max nominal PSD from –60.0 to –38.0 dBm/Hz. Atur-max-psd – Enter the ATU-R max nominal PSD from –60.0 to –38.0 dBm/Hz. Atuc-max-tx-pwr – Enter the ATU-C max aggregate transmit power from 0 to 25.5 dBm. Atur-max-tx-pwr – Enter the ATU-R max aggregate transmit power from 0 to 25.5 dBm. Atuc-max-rx-pwr – Enter the ATU-C max receive power from 0 to 25.5 dBm or 2048. Example: PDYN# configure interface dsl-profile-psd create adsl_profile1 2600-A2-GB21-50 May 2006 3-59 3. Commands Configure Interface DSL Profile PSD Delete configure interface dsl-profile-psd delete {profile_name } Minimum Access Level: Administrator The configure interface dsl-profile-psd delete command deletes an ADSL PSD Profile. Only applicable on ADSL2 units. profile_name – Identifies the ADSL profile to be deleted. Example: PDYN# configure interface dsl-profile-psd delete adsl_profile1 Configure Interface DSL Profile PSD Show configure interface dsl-profile-psd show {profile_name} Minimum Access Level: Administrator The configure interface dsl-profile-psd show command displays the contents of the specified ADSL PSD Profile. Only applicable on ADSL2 units. profile_name – Identifies the ADSL profile to be displayed. Example: PDYN# configure interface dsl-profile-psd show adsl_profile1 3-60 May 2006 2600-A2-GB21-50 3. Commands Configure Interface DSL Profile PSD Activate configure interface dsl-profile-psd activate {profile_name } [adsl2 | adsl2plus] {port_id} Minimum Access Level: Administrator The configure interface dsl-profile-psd activate command activates the specified profile onto the specified port(s). Only applicable to ADSL units. adsl2 or adsl2plus – Identifies the ADSL2 or ADSL2+ PSD profile to activate. profile_name – Identifies the profile to be activated. port_id – Identifies the port or range of ports in which the profile is to be activated. Example: PDYN# configure interface dsl-profile-psd activate adsl_profile1 1/22 Configure Interface DSL Profile PSD Atuc-Max-PSD configure interface dsl-profile-psd atuc-max-psd {psd} {profile_name} Minimum Access Level: Administrator The configure interface dsl-profile-psd atuc-max-psd command specifies the ATUC max nominal PSD, in dBm/Hz. Only applicable to ADSL units. profile_name – Identifies the ADSL profile to be modified. psd – Valid choices are –60.0 to –38.0 dBm/Hz in 0.1-dBm/Hz increments. Example: PDYN# configure interface dsl-profile-psd atuc-max-psd -40.0 adsl_profile1 2600-A2-GB21-50 May 2006 3-61 3. Commands Configure Interface DSL Profile PSD Atur-Max-PSD configure interface dsl-profile-psd atur-max-psd {psd} {profile_name} Minimum Access Level: Administrator The configure interface dsl-profile-psd atur-max-psd command specifies the ATU-R max nominal PSD, in dBm/Hz. Only applicable to ADSL units. profile_name – Identifies the ADSL profile to be modified. psd – Valid choices are –60.0 to –38.0 dBm/Hz, in 0.1-dBm/Hz increments. Example: PDYN# configure interface dsl-profile-psd atur-max-psd –40.0 adsl_profile1 Configure Interface DSL Profile PSD Atuc-Max-Tx-Pwr configure interface dsl-profile-psd atuc-max-tx-pwr {tx_pwr} {profile_name} Minimum Access Level: Administrator The configure interface dsl-profile-psd atuc-max-tx-pwr command specifies the ATUC max nominal Aggregate Transmit Power, in dBm. Only applicable to ADSL units. profile_name – Identifies the ADSL profile to be modified. tx_pwr – Valid choices are 0 to 25.5 dBm, in 0.1-dBm increments. Example: PDYN# configure interface dsl-profile-psd atuc-max-tx-pwr 25.5 adsl_profile1 3-62 May 2006 2600-A2-GB21-50 3. Commands Configure Interface DSL Profile PSD Atur-Max-Tx-Pwr configure interface dsl-profile-psd atur-max-tx-pwr {tx_pwr} {profile_name} Minimum Access Level: Administrator The configure interface dsl-profile-psd atur-max-tx-pwr command specifies the ATU-R max nominal Aggregate Transmit Power, in dBm. Only applicable to ADSL units. profile_name – Identifies the ADSL profile to be modified. tx_pwr – Valid choices are 0 to 25.5 dBm, in 0.1-dBm increments. Example: PDYN# configure interface dsl-profile-psd atur-max-tx-pwr 25.5 adsl_profile1 Configure Interface DSL Profile PSD Atuc-Max-Rx-Pwr configure interface dsl-profile-psd atuc-max-rx-pwr {rx_pwr} {profile_name} Minimum Access Level: Administrator The configure interface dsl-profile-psd atuc-max-rx-pwr command specifies the ATU-C max Receive Power, in dBm. Only applicable to ADSL units. profile_name – Identifies the ADSL profile to be modified. rx_pwr – Valid choices are 0 to 25.5 dBm, in .1 increments. 2048 indicates that no maximum receive power limit is to be applied. Example: PDYN# configure interface dsl-profile-psd atuc-max-rx-pwr 25.5 adsl_profile1 2600-A2-GB21-50 May 2006 3-63 3. Commands Configure Interface DSL- Profile -Traffic Create configure interface dsl-profile-traffic create {profile_name} Minimum Access Level: Administrator The configure interface dsl-profile-traffic create command creates a DSL traffic profile used for rate-limiting ports. profile_name – Identifies the traffic profile. Example: PDYN# configure interface dsl-profile-traffic create TrafficProfileVideo Configure Interface DSL- Profile -Traffic Delete configure interface dsl-profile-traffic delete {profile_name} Minimum Access Level: Administrator The configure interface dsl-profile-traffic create command deletes a DSL traffic profile used for rate-limiting ports. profile_name – Identifies the traffic profile. Example: PDYN# configure interface dsl-profile-traffic delete TrafficProfileVideo 3-64 May 2006 2600-A2-GB21-50 3. Commands Configure Interface DSL- Profile -Traffic Max Rate configure interface dsl-profile-traffic max-rate {max-rate} {profile_name} Minimum Access Level: Administrator The configure interface dsl-profile-traffic max-rate command specifies the maximum rate in kbps a port will transfer data, regardless of the port’s physical speed. profile_name - Identifies the traffic profile. max-rate - The maximum rate in 32 kbps increments that the port will run at. Example: PDYN# configure interface dsl-profile-traffic max-rate 4096 TrafficProfileVideo Configure Interface DSL- Profile -Traffic Port Activate configure interface dsl-profile-traffic port-activate {profile_name} {port-id} Minimum Access Level: Administrator The configure interface dsl-profile-traffic port activate command specifies the DSL port to which the traffic profile is applied. profile_name - Identifies the traffic profile. port-id - Identifies the port or range of ports for which the profile is to be activated Example: PDYN# configure interface dsl-profile-traffic port-activate TrafficProfileVideo 1 PDYN# configure interface dsl-profile-traffic port-activate TrafficProfileVideo 1-24 PDYN# configure interface dsl-profile-traffic port-activate TrafficProfileVideo 1:2 2600-A2-GB21-50 May 2006 3-65 3. Commands Configure Interface DSL- Profile -Traffic Port Deactivate configure interface dsl-profile-traffic port-deactivate {profile_name} {port-id} Minimum Access Level: Administrator The configure interface dsl-profile-traffic port activate command specifies the DSL port to which the traffic profile is to be removed. profile_name - Identifies the traffic profile. port-id - Identifies the port or range of ports for which the profile is to be deactivated. Example: PDYN# configure interface dsl-profile-traffic port-deactivate TrafficProfileVideo 1 PDYN# configure interface dsl-profile-traffic port-deactivate TrafficProfileVideo 1-24 PDYN# configure interface dsl-profile-traffic port-deactivate TrafficProfileVideo 1:2 Configure Interface DSL- Profile-Traffic Traffic-Class configure interface dsl-profile-traffic traffic-class {data | video | voice} {profile_name} Minimum Access Level: Administrator The configure interface dsl-profile-traffic traffic-class command specifies the ATM traffic class for the specified profile. This command has not been implemented at this time. profile_name - Identifies the traffic profile. data - Specifies that the port is running data (UBR). video - Specifies that the port is running video (rt-VBR) voice - Specifies that the port is running data (CBR). Example: PDYN# configure interface dsl-profile-traffic traffic-class data TrafficProfileVideo 3-66 May 2006 2600-A2-GB21-50 3. Commands Configure Interface DSL- Profile -Traffic Show configure interface dsl-profile-traffic show {profile_name} Minimum Access Level: Administrator The configure interface dsl-profile-traffic show command displays the definition of the traffic profile. profile_name - Identifies the traffic profile. Example: PDYN# configure interface dsl-profile-traffic show Video ********************************* * Traffic Profile Configuration * ********************************* Traffic Profile Name Traffic Class Maximum Rate Number of References Ports Bound To Profile 2600-A2-GB21-50 Video data 16000 kbps 2 1:1, 4:1 May 2006 3-67 3. Commands Configure Interface DSL Pwrmgmt-State (ADSL2 Only) configure interface dsl {port-id} pwrmgmt-state {enable | disable} Minimum Access Level: Administrator The configure interface dsl pwrmgmt-state command allows the port to enable or disable power management. This command does not apply to the Express, ReachDSL, or SHDSL models. port_id – Identifies the port to be configured. state – enabled or disabled. Example: PDYN# configure interface dsl 1/22 pwrmgmt-state en Configure Interface DSL Pwrmgmt-Enabling (ADSL2 Only) configure interface dsl {port-id} pwrmgmt-enabling {none | idle | lowpower | both} Minimum Access Level: Administrator The configure interface dsl pwrmgmt-state command sets the power management state enabling. This command does not apply to the Express, ReachDSL, or SHDSL models. none – The port cannot autonomously switch states. idle – The port can autonomously switch to the idle state. lowpower – The port can autonomously switch to the low power state. both – The port can autonomously switch to the idle or low power state. Example: PDYN# configure interface dsl 1/22 pwrmgmt-enabling idle 3-68 May 2006 2600-A2-GB21-50 3. Commands Configure Interface DSL Queue configure interface dsl {port_id:pg} queue {fifo | 802.1p} Minimum Access Level: Administrator The configure interface dsl queue command assigns queuing method to be used on the ADSL port when there is more than one VLAN assigned to the priority group . fifo – The selected priority group will use a first in first out queuing method 801.2p - The selected priority group will use the priority bits in the VLAN tag as the queuing method. Example: PDYN# configure interface dsl 1/1:2 queue fifo Configure Interface DSL Show configure interface dsl [port_id] show Minimum Access Level: Administrator The configure interface dsl show command displays parameters for a ADSL port without leaving the configuration mode. port_id – Identifies the port whose configuration is to be displayed. If no port is specified, the port currently in configuration mode, if any, is displayed. Example: PDYN# configure interface dsl 1/7 show Output: The output from this command is identical to the show interface dsl command. 2600-A2-GB21-50 May 2006 3-69 3. Commands Configure Interface DSL Spectrum Management Selection configure interface dsl-spectrum-mgmt selection {ansi-t1.417 | anfp-nd1602 | disable | enable | jj-100.01} Minimum Access Level: Administrator The configure interface dsl-spectrum-mgmt selection command specifies whether the system enables spectrum management capability. anfp-nd1602 – Spectrum mangement is enabled with anfp-nd1602 regional compliance (ADSL2 only). ansi-t1.417 – Spectrum management is enabled with ansi-t1.417 regional compliance (ADSL2 only). disable – Spectrum management is disabled for the unit. enable – Spectrum management is enabled for the unit without a regional specification (ReachDSL only). jj-100.01 – Spectrum management is enabled with jj-100.01 regional compliance (ADSL2 only). Example: PDYN# configure interface dsl-spectrum-mgmt selection enabled Configure Interface DSL Spectrum Management Show configure interface dsl-spectrum-mgmt show Minimum Access Level: Administrator The configure interface dsl-spectrum-mgmt show command displays the units spectrum management settings without leaving the configuration mode. Example: PDYN# configure interface dsl-spectrum-mgmt show 3-70 May 2006 2600-A2-GB21-50 3. Commands Configure Interface DSL State configure interface dsl {port_id} state {disabled | enabled } Minimum Access Level: Administrator The configure interface dsl state command specifies the availability of a ADSL port. port_id – Identifies the port to be configured. state – Specifies the availability of the port. Valid choices are disabled or enabled. The default is enabled. Example: PDYN# configure interface dsl 1/24 state enabled Configure Interface DSL VLAN PVID configure interface dsl {port_id:pg} vlan pvid {pvid} Minimum Access Level: Administrator The configure interface dsl vlan pvid assigns the VLAN ID to be assigned to untagged frames or Priority-Tagged frames received on the ingress of this port. port_id:pg - This specifies the ADSL port number and the priority group on that port. pvid - The VLAN tag. Valid values are 1 through 4095. The default is 1. Example: PDYN# configure interface dsl 1/1 vlan pvid 1 2600-A2-GB21-50 May 2006 3-71 3. Commands Configure Interface DSL VLAN Priority configure interface dsl {port_id:pg} vlan priority {priority} Minimum Access Level: Administrator The configure interface dsl vlan priority assigns the VLAN priority to be assigned to untagged frames or Priority-Tagged frames received on the ingress of this port. This value is also used if priority remapping is enabled. port_id:pg - This specifies the ADSL port and the priority group on that port. priority - The VLAN priority. Valid values are 1 through 8. The default is 1. Example: PDYN# configure interface dsl 1/1 vlan priority 1 Configure Interface DSL VLAN Acceptable-Frame-Type configure interface dsl {port_id:pg} vlan acceptable-frame-type {all | tagged} Minimum Access Level: Administrator The configure interface dsl vlan acceptable-frame-type command determines if tagged frames will be accepted on a port. port_id:pg - This specifies the DSL port and the priority group on that port. tagged – With this value set, the device will discard untagged or priority-tagged frames received on this port. all – With this value set, the device will accept all frame types including untagged frames. Untagged frames or priority-tagged frames will be assigned the PVID associated with this port. Example: PDYN# configure interface dsl 1 vlan acceptable-frame-type all 3-72 May 2006 2600-A2-GB21-50 3. Commands Configure Interface DSL VLAN Ingress-Filtering configure interface dsl {port_id:pg} vlan ingress-filtering {disabled | enabled} Minimum Access Level: Administrator The configure interface dsl vlan ingress-filtering command will discard incoming tagged frames that are not members of this port. port_id:pg - This specifies the DSL port and the priority group on that port. disabled – The port will accept all incoming frames. enabled – The port will discard incoming frames for VLANS which do not include this port in its Member set. Example: PDYN# configure interface dsl 1 vlan ingress-filtering enabled Configure Interface SHDSL This command enters the configure SHDSL interface mode. The user can get to this point in the menu tree, one command at a time (config -> interface -> shdsl) or by entering the entire command at once. The user can configure a DSL port name, operational state, VLAN configuration, ATM VC and encapsulation, priority group and queue method, and manipulate SHDSL profiles to configure transmission parameters. The SHDSL port transmission parameters are configured using profiles. SHDSL Profiles can be created, modified, deleted, and activated. A new SHDSL line profile is created and activated using the following steps: 1. Allocate a new profile with the configure interface shdsl-profile-line create command. 2. Configure desired transmission parameters with the following commands: — configure interface shdsl-profile-line max-rate — configure interface shdsl-profile-line min-rate — configure interface shdsl-profile-line mode — configure interface shdsl remote-management — configure interface shdsl reference-clock — configure interface shdsl target-margin 3. Activate the profile with the configure interface shdsl-profile-line activate command 2600-A2-GB21-50 May 2006 3-73 3. Commands Configure Interface SHDSL ATM VC Create configure interface shdsl {port_id:pg} atm vc create {vpi/vci} {atm_profile} Minimum Access Level: Administrator The configure interface shdsl atm vc create command defines a Virtual Connection Link (VCL) for the specified port. If the specified Virtual Circuit Identifier or Virtual Path identifier is unavailable or in use, the command fails. If the resources specified by the Receive Traffic Descriptor or Transmit Traffic Descriptor are not available, the command fails. VCLs created on DSL ports will be created on the currently active channel. If no channel is available, VCLs will not be created on the interface. port_id – Identifies the SHDSL port to be configured. pg - Identifies the priority group on this port. If the priority group is not entered, it will be assumed to be group 1. create - This creates one of eight (8) possible connections. vpi/vci – Valid input is the VPI/VCI for the connection. The allowable ranges for VPI and VCI values are determined by the number of VPI and VCI bits allocated on an ATM interface and by the available address space in the NE's ATM switch used for all VCLs. Interfaces on LT cards support a maximum of four VCLs a with maximum VPI range of 0–15 and VCI range of 32–127. Interfaces on NT cards support a maximum VPI range of 0–255 and a VCI range of 32–65535. A total of 8192 VCLs are supported on the DSLAM. The maximum address space supported by the DSLAM is 250,000. A number of VCLs are created as part of the basic factory defaults. The default VCLs may be changed or overwritten by customer-specific factory defaults. VCLs associated with a slot and port are created when a card is installed. The default for the connection is 0/35. atm_profile – Name of ATM profile to be assigned to the VCL. Example: PDYN# configure interface shdsl 1 atm vc create 1/35 PACKET 3-74 May 2006 2600-A2-GB21-50 3. Commands Configure Interface SHDSL ATM VC Delete configure interface shdsl {port_id:pg} atm vc delete {vpi/vci} Minimum Access Level: Administrator The configure interface dsl atm vc delete command deletes a virtual connection for the specified port. port_id – Identifies the SHDSL port to be configured. pg - Identifies the priority group on this port. If the priority group is not entered, it will be assumed to be group 1. delete - This deletes the specified vpi/vci from this SHDSL port. vpi/vci – Valid input is the VPI/VCI for the connection. The valid range for VPI is 0–255. The valid range for VCI is 16–65535. Example: PDYN# configure interface shdsl 1 atm vc delete 1/35 Configure Interface SHDSL ATM Encapsulation configure interface shdsl {port_id:pg} atm encapsulation {llc-bridged | vcm-bridged} Minimum Access Level: Administrator The configure interface shdsl atm encapsulation command specifies whether the port uses Logical Link Control (LLC) or Virtual Channel Multiplexing (VCM) bridged encapsulation. These are defined in RFC 1483. port_id – Identifies the port to be configured. pg - Identifies the priority group on this port. If the priority group is not entered, it will be assumed to be group 1. atm encapsulation – Valid choices are: llc-bridged – The interface uses LLC bridged encapsulation. This is the default. vcm-bridged – The interface uses VCM bridged encapsulation. Example: PDYN# configure interface shdsl 1 atm encapsulation vcm-bridged 2600-A2-GB21-50 May 2006 3-75 3. Commands Configure Interface SHDSL Equipment Mode configure interface shdsl {port_id} equip-mode {co-mode | cpe-mode} Minimum Access Level: Administrator The configure interface shdsl equip-mode command configures the specified port to operate as a CO device or a CPD device for the stu-c unit. port_id – Identifies the port to be configured. co-mode - Port in the central office unit operates in CO mode. cpe-mode - Port in the cental office unit operates in CPE mode. Example: PDYN# configure interface shdsl 24 equip-mode co-mode Configure Interface SHDSL Extended Rate Mode Selection configure interface shdsl-extended-rate-mode selection {payload5696 | disable} Minimum Access Level: Administrator The configure interface shdsl-extended-rate-mode selection command configures the extended rate mode for all SHDSL ports. The hardware implementation requires different DSP code loads for each of the selections. payload5696 – Enables extended rate mode to support a payload rate of 5696 Kbps on each wire pair. disable – Disables extended rate mode. Example: PDYN# configure interface shdsl-extended-rate-mode selection payload5696 3-76 May 2006 2600-A2-GB21-50 3. Commands Configure Interface SDSL Line Length - Effective Working Length (EWL) configure interface shdsl {port_id} line-length {line-length} Minimum Access Level: Administrator The configure interface shdsl line-length for EWL command specifies the length of the SHDSL link in units of ft. This parameter is used by the spectrum management function.. port_id – Identifies the port to be configured. line-length - This is the length of the line. This is also referred to as the effective working length. Example: PDYN# configure interface shdsl 24 line-length 1000 Configure Interface SDSL Line Length - Loop Length configure interface shdsl {port_id} line-length {extrashort | short | medium | long} Minimum Access Level: Administrator The configure interface dsl line-length command specifies the length of the SHDSL link. port_id – Identifies the port to be configured. line-length - This is the length of the line. There are four values extrashort, short, medium and long. These values are valid for certain geographic regions. The default is short. Example: PDYN# configure interface shdsl 24 line-length medium 2600-A2-GB21-50 May 2006 3-77 3. Commands Configure Interface SHDSL Linkupdown-Trap configure interface shdsl {port_id} linkupdown-trap {disabled | enabled} Minimum Access Level: Administrator The configure interface shdsl linkupdown-trap command specifies whether an SNMP trap should be sent upon link up and link down events. port_id – Identifies the port to be configured. linkupdown-trap – Valid choices are: disabled – No traps are sent upon link up and link down events. enabled – A trap is sent upon a link up or link down event. This is the default. Example: PDYN# configure interface shdsl 2/21 linkupdown-trap disabled Configure Interface SHDSL Name configure interface shdsl {port_id} name {port_name} Minimum Access Level: Administrator The configure interface shdsl name command assigns a line circuit name to the specified port. port_id – Identifies the port to assign the line circuit name. name – Enter a name from 1 to 255 characters long to indicate to whom the port is assigned. The following values are reserved and cannot be used: AVAILABLE (port is not assigned), and FAULTY (port is faulty and can not be assigned). Example: PDYN# configure interface shdsl 22 name paradyne_video_server 3-78 May 2006 2600-A2-GB21-50 3. Commands Configure Interface SHDSL Number of Repeaters configure interface shdsl {port_id} nbr-repeaters {number} Minimum Access Level: Administrator The configure interface shdsl nbr-repeaters command allows the number of repeaters on a line to be assigned. port_id – Identifies the port to assign the line circuit name. number – Enter the number of repeaters from 1 to 8. Example: PDYN# configure interface shdsl 22 nbr-repeaters 4 Configure Interface SHDSL Queue configure interface shdsl {port_id:pg} queue {fifo | 802.1p} Minimum Access Level: Administrator The configure interface shdsl queue command assigns queuing method to be used on the SHDSL port when there is more than one VLAN assigned to the priority group . fifo – The selected priority group will use a first-in, first-out queuing method. 801.2p - The selected priority group will use the priority bits in the VLAN tag as the queuing method. Example: PDYN# configure interface shdsl 22 queue fifo 2600-A2-GB21-50 May 2006 3-79 3. Commands Configure Interface SHDSL Segment Alarm configure interface shdsl- {port_id} segment-alarm {stu-c | stu-r | rep-1 | rep-2 | rep-3 | rep-4 | rep-5 | rep-6 | rep-7 | rep-8} {cust | net} {pair-1 | pair-2 | pair-3 | pair-4} {profile_name} Minimum Access Level: Administrator The configure interface shdsl segment alarm command activates the specified SHDSL Alarm profile onto the specified unit, unit side, and wire pair for a particular interface. port_id – Identifies the port or range of ports in which the profile is to be activated. Unit to apply the alarm profile to: stu-c – SHDSL centeral site terminal unit. stu-r – SHDSL remote site terminal unit. rep-1... rep-8 – SHDSL regenerator/repeater unit. The side of the device to apply the alarm profile to: cust – The side of the unit facing the customer terminal equipment net – The side of the unit facing the central office The wire pair to apply the alarm profile to: pair-1 – First wire pair pair-2 – Second wire pair pair-3 – Third wire pair pair-4 – Fourth wire pair profile_name – Identifies the SHDSL Alarm profile to be activated. Example: PDYN# configure interface shdsl 22 segment alarm rep-2 net pair-2 shdsl_alarm profile1 3-80 May 2006 2600-A2-GB21-50 3. Commands Configure Interface SHDSL Show configure interface shdsl {port_id} show Minimum Access Level: Administrator The configure interface shdsl show command displays parameters for a SHDSL port without leaving the configuration mode. port_id – Identifies the port whose configuration is to be displayed. If no port is specified, the port currently in configuration mode, if any, is displayed. Example: PDYN# configure interface shdsl 2/7 show PDYN(configure-interface-adsl-7)#show Output: The output from this command is identical to the show interface shdsl command. Configure Interface SHDSL State configure interface shdsl {port_id} state {enable | disable | reset} Minimum Access Level: Administrator The configure interface shdsl state command modifies the specified port state as requested. port_id – Identifies the port to assign the equivalent working length. enable – state of this port is enabled disable – state of this port is disabled reset – state of this port is out of service Example: PDYN# configure interface shdsl state 22 enable 2600-A2-GB21-50 May 2006 3-81 3. Commands Configure Interface SHDSL VLAN PVID configure interface shdsl {port_id:pg} vlan pvid {pvid} Minimum Access Level: Administrator The configure interface shdsl vlan pvid assigns the VLAN ID to be assigned to untagged frames or Priority-Tagged frames received on the ingress of this port. port_id:pg - This specifies the SHDSL port number and the priority group on that port. pvid - The VLAN tag. Valid values are 1 through 4095. The default is 1. Example: PDYN# configure interface shdsl 1 vlan pvid 1 Configure Interface SHDSL VLAN Priority configure interface shdsl {port_id:pg} vlan priority {priority} Minimum Access Level: Administrator The configure interface shdsl vlan priority assigns the VLAN priority to be assigned to untagged frames or Priority-Tagged frames received on the ingress of this port. This value is also used if priority remapping is enabled. port_id:pg - This specifies the SHDSL port and the priority group on that port. priority - The VLAN priority. Valid values are 0 through 7. The default is 0. Example: PDYN# configure interface shdsl 1 vlan priority 1 3-82 May 2006 2600-A2-GB21-50 3. Commands Configure Interface SHDSL VLAN Acceptable-Frame-Type configure interface shdsl {port_id:pg} vlan acceptable-frame-type {all | tagged} Minimum Access Level: Administrator The configure interface shdsl vlan acceptable-frame-type command determines if tagged frames will be accepted on a port. port_id:pg - This specifies the SHDSL port and the priority group on that port. tagged – With this value set, the device will accept only tagged frames. all – With this value set, the device will accept all tagged and untagged frames. Untagged frames or priority-tagged frames will be assigned the PVID associated with this port. Example: PDYN# configure interface shdsl 1 vlan acceptable-frame-type all Configure Interface SHDSL VLAN Ingress-Filtering configure interface shdsl {port_id:pg} vlan ingress-filtering {disabled | enabled} Minimum Access Level: Administrator The configure interface shdsl vlan ingress-filtering command will discard incoming tagged frames that are not members of this port. port_id:pg - This specifies the SHDSL port and the priority group on that port. disabled – The port will accept all incoming frames. enabled – The port will discard incoming frames for VLANS which do not include this port in its Member set. Example: PDYN# configure interface shdsl 1 vlan ingress-filtering enabled 2600-A2-GB21-50 May 2006 3-83 3. Commands Configure Interface SHDSL Profile Alarm Activate-Port configure interface shdsl-profile-alarm activate-port {profile_name} {port_id} Minimum Access Level: Administrator The configure interface shdsl-profile-alarm activate command activates the specified SHDSL Alarm profile onto the specified port(s). port_id – Identifies the port or range of ports in which the profile is to be activated. profile_name – Identifies the SHDSL Alarm profile to be activated. Example: PDYN# configure interface shdsl-profile-alarm activate-port shdsl_alarm_profile1 22 Configure Interface SHDSL Profile Alarm-Code-Violation-Threshold configure interface shdsl-profile-alarm code-violation-threshold {cvt} {profile_name} Minimum Access Level: Administrator The configure interface shdsl-profile-alarm code-violation-threshold command modifies the code violation threshold required to generate an alarm. profile_name – Identifies the SHDSL Alarm profile to be modified. cv – Specify a Code Violations threshold of 0–900 seconds. An SNMP code violations trap message may be sent if the number of Code Violations in a 15-minute interval equals or exceeds this threshold. At most one SNMP will be sent per interval per device. A value of 0 disables event notifications for the condition. Example: PDYN# configure interface shdsl-profile-alarm code-violation-threshold 700 shdsl_alarm_profile1 3-84 May 2006 2600-A2-GB21-50 3. Commands Configure Interface SHDSL Profile Alarm Create configure interface shdsl-profile-alarm create {profile_name} Minimum Access Level: Administrator The configure interface shdsl-profile-alarm create command creates a new SHDSL Alarm Profile. profile_name – Identifies the SHDSL Alarm profile to be created. Following are the parameters that comprise the SHDSL Alarm Profile. Loop Attenuation – Specify a loop attenuation alarm threshold of 0–127 dB. An SNMP Loop Attenuation crossing trap message may be sent if the current loop attenuation reaches or exceeds this threshold. A Loop Attenuation alarm will also be declared when the current Loop Attenuation exceeds this value. A value of 0 disables event notifications for the condition. SNR Margin – Specify an SNR Margin alarm threshold of 0–15 dB. An SNMP Margin crossing trap message may be sent if the current SNR Margin reaches or drops below this threshold. A SNR Margin alarm will also be declared when the current SNR Margin has dropped below this value. A value of 0 disables event notifications for the condition. Errored Seconds – Specify an ES threshold of 0–900 seconds. An SNMP ES trap message may be sent if the number of ES events in a 15-minute interval equals or exceeds the selected value. At most one SNMP will be sent per interval per device. A value of 0 disables event notifications for the condition. Severely-Errored Seconds – Specify an SES threshold of 0–900 seconds. An SNMP SES trap message may be sent if the number of SES events in a 15-minute interval equals or exceeds the selected value. At most one SNMP notification will be sent per interval per device. A value of 0 disables event notifications for the condition. Code Violations – Specify a Code Violations threshold of 0–900 seconds. An SNMP code violations trap message may be sent if the number of Code Violations in a 15-minute interval equals or exceeds this threshold. At most one SNMP will be sent per interval per device. A value of 0 disables event notifications for the condition. Loss of Sync Word Seconds – Specify a Loss of Sync Word Seconds threshold of 0–900 seconds. An SNMP LOSWS trap message may be sent if the number of LOSWS in a 15-minute interval equals or exceeds this threshold. At most one SNMP will be sent per interval per device. A value of 0 disables event notifications for the condition. Unavailable Seconds – Specify an Unavailable Seconds threshold of 0–900 seconds. An SNMP UAS trap message may be sent if the number of UAS events in a 15-minute interval equals or exceeds the selected value. At most one SNMP and will be sent per interval per device. A value of 0 disables event notifications for the condition. Example: PDYN# configure interface shdsl-profile-alarm create shdsl_alarm_profile1 2600-A2-GB21-50 May 2006 3-85 3. Commands Configure Interface SHDSL Profile Alarm Delete configure interface shdsl-profile-alarm delete {profile_name} Minimum Access Level: Administrator The configure interface shdsl-profile-alarm delete command deletes an SHDSL Alarm Profile. profile_name – Identifies the SHDSL alarm profile to be deleted. Example: PDYN# configure interface shdsl-profile-alarm delete adsl_alarm_profile1 Configure Interface SHDSL Profile Alarm Errored-Seconds Threshold configure interface shdsl-profile-alarm es-threshold {es} {profile_name} Minimum Access Level: Administrator The configure interface shdsl-profile-alarm es-threshold command modifies the error seconds threshold required to generate an alarm. profile_name – Identifies the SHDSL Alarm profile to be modified. es – Specify an Errored Second threshold of 0–900 seconds. An SNMP Errored Second trap message may be sent if the number of Errored Second events in a 15-minute interval equals or exceeds the selected value. At most one SNMP notification will be sent per interval per device. A value of 0 disables event notifications for the condition. Example: PDYN# configure interface shdsl-profile-alarm es-threshold 500 shdsl_alarm_profile1 3-86 May 2006 2600-A2-GB21-50 3. Commands Configure Interface SHDSL Profile Alarm Loop Attenuation Threshold configure interface shdsl-profile-alarm loop-attenuation-threshold {atten} {profile_name} Minimum Access Level: Administrator The configure interface shdsl-profile-alarm loop-attenuation-threshold command modifies the loop attenuation threshold required to generate an alarm. profile_name – Identifies the SHDSL Alarm profile to be modified. atten – Specify loop attenuation threshold of 0 to 27 dB. An SNMP loop attenuation crossing trap message may be sent if the theshold in a 15-minute interval equals or exceeds the selected value. At most one SNMP notification will be sent per interval per device. A value of 0 disables event notifications for the condition. Example: PDYN# configure interface shdsl-profile-alarm loop-attenuation-threshold 5 shdsl_alarm_profile1 Configure Interface SHDSL Profile Alarm Loss-Of-Sync-Word-Seconds Threshold configure interface shdsl-profile-alarm losws-threshold {losws} {profile_name} Minimum Access Level: Administrator The configure interface shdsl-profile-alarm losws-threshold command modifies the Loss Of Sync Word Seconds Threshold required to generate an alarm. profile_name – Identifies the SHDSL Alarm profile to be modified. losws – Specify a Loss of Sync Word Seconds threshold of 0–900 seconds. An SNMP LOSWS trap message may be sent if the number of LOSWS in a 15-minute interval equals or exceeds this threshold. At most one SNMP will be sent per interval per device. A value of 0 disables event notifications for the condition. Example: PDYN# configure interface shdsl-profile-alarm losws-threshold 700 shdsl_alarm_profile1 2600-A2-GB21-50 May 2006 3-87 3. Commands Configure Interface SHDSL Profile Alarm Severely-Errored-Seconds Threshold configure interface shdsl-profile-alarm ses-threshold {ses} {profile_name} Minimum Access Level: Administrator The configure interface shdsl-profile-alarm ses-threshold command modifies the severely errored seconds threshold required to generate an alarm. profile_name – Identifies the SHDSL Alarm profile to be modified. ses – Specify an SES threshold of 0-900 seconds. An SNMP SES trap message may be sent if the number of SES events in a 15-minute interval equals or exceeds the selected value. At most one SNMP notification will be sent per interval per device. A value of 0 disables event notifications for the condition. Example: PDYN# configure interface shdsl-profile-alarm ses-threshold 700 shdsl_alarm_profile1 Configure Interface SHDSL Profile Alarm Show configure interface shdsl-profile-alarm show {profile_name} Minimum Access Level: Administrator The configure interface shdsl-profile-alarm show command displays the configuration of the specified alarm profile. profile_name – Identifies the SHDSL alarm profile to be displayed. Example: PDYN# configure interface shdsl-profile-alarm show shdsl_alarm_profile1 3-88 May 2006 2600-A2-GB21-50 3. Commands Configure Interface SHDSL Profile Alarm SNR-Margin Threshold configure interface shdsl-profile-alarm snr-margin-threshold {snr} {profile_name} Minimum Access Level: Administrator The configure interface shdsl-profile-alarm snr-margin-threshold command modifies the SNR margin threshold required to generate an alarm. profile_name – Identifies the SHDSL Alarm profile to be modified. snr – Specify an SNR Margin alarm threshold of 0–15 dB. An SNMP Margin crossing trap message may be sent if the current SNR Margin reaches or drops below this threshold. A SNR Margin alarm will also be declared when the current SNR Margin has dropped below this value. A value of 0 disables event notifications for the condition. Example: PDYN# configure interface shdsl-profile-alarm snr-margin-threshold 12 shdsl_alarm_profile1 Configure Interface SHDSL Profile Alarm Unavailable-Seconds Threshold configure interface shdsl-profile-alarm uas-threshold {uas} {profile_name} Minimum Access Level: Administrator The configure interface shdsl-profile-alarm ses-threshold command modifies the unavailable seconds threshold required to generate an alarm. profile_name – Identifies the SHDSL Alarm profile to be modified. uas – Specify an Unavailable Seconds threshold of 0–900 seconds. An SNMP UAS trap message may be sent if the number of UAS events in a 15-minute interval equals or exceeds the selected value. At most one SNMP and will be sent per interval per device. A value of 0 disables event notifications for the condition. Example: PDYN# configure interface shdsl-profile-alarm uas-threshold 700 shdsl_alarm_profile1 2600-A2-GB21-50 May 2006 3-89 3. Commands Configure Interface SHDSL Profile Line Activate configure interface shdsl-profile-line activate {profile_name} {port_id} Minimum Access Level: Administrator The configure interface shdsl-profile-line activate command activates the specified SHDSL line profile onto the specified port(s). port_id – Identifies the port or range of ports in which the profile is to be activated. profile_name – Identifies the SHDSL line profile to be activated. Example: PDYN# configure interface shdsl-profile-line activate shdsl_line profile1 22 3-90 May 2006 2600-A2-GB21-50 3. Commands Configure Interface SHDSL Profile Line Create configure interface shdsl-profile-line create {profile_name} Minimum Access Level: Administrator The configure interface shdsl-profile-line create command creates a new SHDSL Line Profile. profile_name – Identifies the SHDSL line profile to be created. Following are the parameters that comprise the SHDSL Line Profile: Line Probe – Enables or disables support for line probing to find the best possible rate. Max Rate – Enter a maximum rate from 0 to 4112 kbps. Min Rate – Enter a minimum rate from 0 to 4112 kbps. Line Mode – Select the regional setting supported, as specified by ITU-T G.991.2: Annex A, Annex B, or Both (the port trains to the Mode setting of the endpoint) Power Feeding – Enables or disables support for power feeding the SDSL line. Power Spectral Density – Select Symmetric or Asymmetric to determine whether the SHDSL transceiver uses a symmetric or an asymmetric power spectral density mask, as specified in G.992.1 Annex A or Annex B. This is one of the options used to determine the allowable line rates on a SHDSL port. Reference Clock – Select the timing source: System – Clocking is provided by the backplane. Local – Clocking is provided by an onboard oscillator. Remote Management – Select Enable or Disable to determine whether remote management is supported for the network element this profile is assigned to. Target Margin – Enter a desired SNR margin for both the upstream and downstream direction from 2–15 dBm, or None. Wire Interface – Selects two-wire or four-wire operation for SHDSL lines. Example: PDYN# configure interface shdsl-profile-line create shdsl_line_profile1 Configure Interface SHDSL Profile Line Delete configure interface shdsl-profile-line delete {profile_name} Minimum Access Level: Administrator The configure interface shdsl-profile-line delete command deletes an SHDSL Line Profile. profile_name – Identifies the SHDSL line profile to be deleted. Example: PDYN# configure interface shdsl-profile-line delete adsl_line_profile1 2600-A2-GB21-50 May 2006 3-91 3. Commands Configure Interface SHDSL Profile Line Line-Probe configure interface shdsl-profile-line line-probe {enable | disable} {profile_name} Minimum Access Level: Administrator The configure interface shdsl-profile-line line-probe command modifies support for Line Probe for the specified profile. profile_name – Identifies the SHDSL line profile to be modified. enable - Unit probes the line to find the best possible rate. disable – Unit does not probe line to find the best possible rate. Example: PDYN# configure interface shdsl-profile-line line-probe enable shdsl_line_profile1 Configure Interface SHDSL Profile Line Max-Rate configure interface shdsl-profile-line max-rate {rate} {profile_name} Minimum Access Level: Administrator The configure interface shdsl-profile-line max-rate command modifies the maximum rate for the specified profile. profile_name – Identifies the SHDSL line profile to be modified. rate – Enter a maximum rate from 0 to 4112 kbps. Example: PDYN# configure interface shdsl-profile-line max-rate 2312 shdsl_line_profile1 3-92 May 2006 2600-A2-GB21-50 3. Commands Configure Interface SHDSL Profile Line Min-Rate configure interface shdsl-profile-line min-rate {rate} {profile_name} Minimum Access Level: Administrator The configure interface shdsl-profile-line min-rate command modifies the minimum rate for the specified profile. profile_name – Identifies the SHDSL line profile to be modified. rate – Enter a minimum rate from 0 to 4112 kbps. Example: PDYN# configure interface shdsl-profile-line min-rate 1000 shdsl_line_profile1 Configure Interface SHDSL Profile Line Mode configure interface shdsl-profile-line mode {annex-a | annex-b | both} {profile_name} Minimum Access Level: Administrator The configure interface shdsl-profile-line mode command modifies the SHDSL mode as specified by ITU-T G.991.2 for the specified profile. profile_name – Identifies the SHDSL line profile to be modified. annex-b – The port trains to Annex A regional setting as specified by ITU-T G.991.2. annex-b – The port trains to Annex B regional setting as specified by ITU-T G.991.2. both – The port trains to the mode setting of the endpoint. Example: PDYN# configure interface shdsl-profile-line mode both shdsl_line_profile1 2600-A2-GB21-50 May 2006 3-93 3. Commands Configure Interface SHDSL Profile Line Power-Feeding configure interface shdsl-profile-line power-feeding {no-power | power-feed | wetting-current} {profile_name} Minimum Access Level: Administrator The configure interface shdsl-profile-line power-feeding command enables or disables support for power feeding the SHDSL line profile_name – Identifies the SHDSL line profile to be modified. no-power-feed – No power is fed in the line. power-feed – Power is fed on the line. wetting-current – Not supported. This selection is ignored by the driver. Example: PDYN# configure interface shdsl-profile-line power-feeding power-feed shdsl_line_profile1 Configure Interface SHDSL Profile Line Power-Spectral-Density configure interface shdsl-profile-line psd {symmetric | asymmetric} {profile_name} Minimum Access Level: Administrator The configure interface shdsl-profile-line psd command modifies the Power Spectral Density setting for SHDSL line profile_name – Identifies the SHDSL line profile to be modified. symmetric – Symmetric PSD is supported. asymmetric – Asymmetric PSD is supported. Example: PDYN# configure interface shdsl-profile-line psd symmetric shdsl_line_profile1 3-94 May 2006 2600-A2-GB21-50 3. Commands Configure Interface SHDSL Profile Line Reference-Clock configure interface shdsl-profile-line reference-clock {local | system} {profile_name} Minimum Access Level: Administrator The configure interface shdsl-profile-line remote-management command specifies the clock source to be used. profile_name – Identifies the SHDSL line profile to be modified. system – Clocking is provided by the backplane. local – Clocking is provided by an onboard oscillator. Example: PDYN# configure interface shdsl-profile-line reference-clock local shdsl_line_profile1 Configure Interface SHDSL Profile Line Remote-Management configure interface shdsl-profile-line remote-management {enable | disable} {profile_name} Minimum Access Level: Administrator The configure interface shdsl-profile-line remote-management command enables or disables remote management as requested. profile_name – Identifies the SHDSL line profile to be modified. enable – enable remote management disable – disable remote management Example: PDYN# configure interface shdsl-profile-line remote-management enable shdsl_line_profile1 2600-A2-GB21-50 May 2006 3-95 3. Commands Configure Interface SHDSL Profile Line Show configure interface shdsl-profile-line show {profile_name} Minimum Access Level: Administrator The configure interface shdsl-profile-line show command displays the configuration of the specified line profile. profile_name – Identifies the SHDSL line profile to be displayed. Example: PDYN# configure interface shdsl-profile-line show shdsl_alarm_profile1 Configure Interface SHDSL Profile Line Target-Margin configure interface shdsl-profile-line target-margin {margin} {profile_name} Minimum Access Level: Administrator The configure interface shdsl-profile-line target-margin command specifies the target margin to be used. profile_name – Identifies the SHDSL line profile to be modified. margin – Enter a target noise margin from 2–15 dBm. Example: PDYN# configure interface shdsl-profile-line target-margin 8 shdsl_line_profile1 3-96 May 2006 2600-A2-GB21-50 3. Commands Configure Interface SHDSL Profile Line Wire-Interface configure interface shdsl-profile-line wire-interface {two-wire | four-wire | six-wire | eight-wire} {profile_name} Minimum Access Level: Administrator The configure interface shdsl-profile-line wire-interface command specifies the number of wires that will be in operation. profile_name – Identifies the SHDSL line profile to be modified. two-wire – Two-wire operation. four-wire – Four-wire operation. six-wire – Six-wire operation. eight-wire – Eight-wire operation. Example: PDYN# configure interface shdsl-profile-line wire-interface two-wire shdsl_line_profile1 Configure Interface SHDSL Spectrum Management Region configure interface shdsl-spectrum-management region {anfp-nd1602 | ansi-t1.417 | none} Minimum Access Level: Administrator The configure interface shdsl-spectrum-management region command specifies the region or standard of spectrum management compliance for all SHDSL cards. anfp-nd1602 – ND 1602 compliance. ansi-t1.417 – T1.417 compliance. none – No compliance scheme is specified. Example: PDYN# configure interface shdsl-spectrum-management region ansi-t1.417 2600-A2-GB21-50 May 2006 3-97 3. Commands Configure Interface SHDSL Spectrum Management Selection configure interface shdsl-spectrum-management selection {enable | disable} Minimum Access Level: Administrator The configure interface shdsl-spectrum-management selection command enables or disables spectrum management for all SHDSL cards. enable – Enables spectrum management. disable – Disables spectrum management.. Example: PDYN# configure interface shdsl-spectrum-management selection enabled Configure Interface Ethernet Connector configure interface ethernet {port_id} connector {rj45 | fiber} Minimum Access Level: Administrator The configure interface ethernet connector command specifies the physical interface to be used when both interfaces are active at the same time. Ordinarily the product uses the fiber optic port if an SFP transceiver is detected. This command provides a way to force the use of the 8-position modular jack even if a transceiver is installed. port_id – Identifies the Ethernet port to be configured. The possible forms of the identifier are described in Ethernet Port ID in Chapter 1, System Concepts. connector – Valid choices are: rj45 – The unit uses the 8-position modular jack for the port_id interface. fiber – The unit uses the fiber optic port for the port_id interface. Example: PDYN# configure interface ethernet eth3 connector rj45 3-98 May 2006 2600-A2-GB21-50 3. Commands Configure Interface Ethernet Flow Control configure interface ethernet {port_id} flow-control {enabled | disabled} Minimum Access Level: Administrator The configure interface ethernet flow-control command specifies whether flow control should be used on the port. port_id – Identifies the Ethernet port to be configured. The possible forms of the identifier are described in Ethernet Port ID in Chapter 1, System Concepts. flow-control – Valid choices are disabled and enabled. Example: PDYN# configure interface ethernet eth2 flow-control enabled Configure Interface Ethernet Mode configure interface ethernet {port_id} mode {auto | manual} Minimum Access Level: Administrator The configure interface ethernet mode command specifies whether the duplex mode and rate are automatically set, and the crossover type automatically sensed. port_id – Identifies the Ethernet port to be configured. The possible forms of the identifier are described in Ethernet Port ID in Chapter 1, System Concepts. mode – Valid choices are: auto – The unit automatically senses the rate and duplex mode. This is the default. manual – The administrator must set the rate and duplex mode. Example: PDYN# configure interface ethernet eth1 mode manual 2600-A2-GB21-50 May 2006 3-99 3. Commands Configure Interface Ethernet Rate configure interface ethernet {port_id} rate {10full | 10half | 100full | 100half | 1000full | 1000half} Minimum Access Level: Administrator The configure interface ethernet rate command specifies the duplex mode and rate if mode is set to manual. port_id – Identifies the Ethernet port to be configured. The possible forms of the identifier are described in Ethernet Port ID in Chapter 1, System Concepts. rate – Valid choices are: 10full – 10 Mbps and full duplex 10half – 10 Mbps and half duplex 100full – 100 Mbps and full duplex 100half – 100 Mbps and half duplex 1000full – 1000 Mbps and full duplex 1000half – 1000 Mbps and half duplex Example: PDYN# configure interface ethernet eth2 rate 100full Notes: There are some restrictions on the various combinations of settings. See Ethernet Rate Restrictions on page 3-100. Although all the rates will be presented to the user, only the valid entries will be allowed. For example, the GigE port will not accept any of the 10/100 settings. Ethernet Rate Restrictions There are some restrictions on the various combinations of settings. The tables below summarize the selections for each mode setting. For the GigE copper (RJ45) port the following settings apply. Note that for the RJ45 interface there is no way to manually set the rate to 1000. Mode Rate Duplex Mode Crossover Auto Auto Auto Auto Manual 10 Full or Half mdi or mdix Manual 100 Full or Half mdi or mdix For the GigE fiber interface the following settings apply: Mode Rate Duplex Mode Crossover Auto Auto Auto N/A Manual 1000 Full or Half N/A The fiber interface is always GigE (1000). The only reason for the manual mode is for older equipment that does not support the auto protocol. 3-100 May 2006 2600-A2-GB21-50 3. Commands Configure Interface Ethernet Show configure interface ethernet [port_id] show Minimum Access Level: Administrator The configure interface ethernet show command displays parameters for an Ethernet port without leaving configuration mode. port_id – Identifies the port whose configuration is to be displayed. If no port is specified, the port currently in configuration mode, if any, is displayed. Example: PDYN(configure-interface-ethernet-eth1)#show PDYN# configure interface ethernet eth1 show The output from this command is identical to the show interface ethernet command. Configure Interface Ethernet Xover configure interface ethernet {port_id} xover {mdi | mdix} Minimum Access Level: Administrator The configure interface ethernet xover command specifies the crossover type when mode is set to manual. port_id – Identifies the Ethernet port to be configured. xover – Valid choices are: mdi – The port is connected to a Network Interface Card (NIC). mdix – The port is connected to a hub. Example: PDYN# configure interface ethernet eth1 xover mdi 2600-A2-GB21-50 May 2006 3-101 3. Commands Configure Interface Ethernet VLAN PVID configure interface ethernet {port_id} vlan pvid {pvid} Minimum Access Level: Administrator The configure interface ethernet vlan pvid assigns the VLAN ID to be assigned to untagged frames or Priority-Tagged frames received on the ingress of this port. port_id – Identifies the Ethernet port to be configured. pvid - The VLAN tag. Valid values are 1 through 4095. The default is 1. Example: PDYN# configure interface ethernet eth1 vlan pvid 1 Configure Interface Ethernet VLAN Priority configure interface ethernet {port_id} vlan priority {priority} Minimum Access Level: Administrator The configure interface ethernet vlan priority assigns the VLAN priority to be assigned to untagged frames or Priority-Tagged frames received on the ingress of this port. This value is also used if priority remapping is enabled. port_id – Identifies the Ethernet port to be configured. priority - The VLAN priority. Valid values are 0 through 7. The default is 0. Example: PDYN# configure interface ethernet eth2 vlan priority 1 3-102 May 2006 2600-A2-GB21-50 3. Commands Configure Interface Ethernet VLAN Acceptable-Frame-Type configure interface ethernet {port_id} vlan acceptable-frame-type {all | tagged} Minimum Access Level: Administrator The configure interface ethernet vlan acceptable-frame-type command determines if tagged frames will be accepted on a port. port_id – Identifies the Ethernet port to be configured. tagged – With this value set, the device will discard untagged or priority-tagged frames received on this port. all – With this value set, the device will accept all frame types including untagged frames. Untagged frames or priority-tagged frames will be assigned the PVID associated with this port. Example: PDYN# configure interface ethernet eth3 vlan priority-remapping enabled Configure Interface Ethernet VLAN Ingress-Filtering configure interface ethernet {port_id} vlan ingress-filtering {disabled | enabled} Minimum Access Level: Administrator The configure interface ethernet vlan ingress filtering command will discard incoming tagged frames that are not members of this port. port_id – Identifies the Ethernet port to be configured. disabled – The port will accept all incoming frames. enabled – The port will discard incoming frames for VLANS which do not include this port in its Member set. Example: PDYN# configure interface ethernet eth1 vlan ingress-filtering enabled 2600-A2-GB21-50 May 2006 3-103 3. Commands Configure Interface T1/E1 Circuit Name configure interface t1e1 {port} circuit-name {name} Minimum Access Level: Administrator The configure interface t1e1 circuit name command defines a unique identifier for the T1/E1 circuit. port_id – Identifies the T1/E1 port to be configured. name – Unique identifier up to 255 characters long for the T1/E1 circuit. Example: PDYN# configure interface t1e1 6 circuit-name citylink1 Configure Interface T1/E1 Frame Format (E1 only) configure interface t1e1 {port_id} frame-format {crc | no-crc} Minimum Access Level: Administrator The configure interface t1e1 frame format command specfies whether the E1 line G.703 network interface CRC-4 multiframe as in G.704 or uses standard framing without CRC-4. port_id – Identifies the T1/E1 port to be configured. crc - Specifies that the E1 line uses CRC-4 multiframe no-crc - Specifies that the E1 line does not use CRC-4 multiframe Example: PDYN# configure interface t1e1 6 frame-format no-crc 3-104 May 2006 2600-A2-GB21-50 3. Commands Configure Interface T1/E1 Line Build Out (T1 Only) configure interface t1e1 {port_id} fline-build-our {0 | 7.5| 15 | 22.5} Minimum Access Level: Administrator The configure interface t1e1 line build out command specfies a line Build Out in dB for the T1 line. The command does not apply for E1, and is only valid for T1 long haul. port_id – Identifies the T1/E1 port to be configured. 0 - 0 dB 7.5 - 7.5 dB 15 - 15 dB 22.5 - 22.5 dB Example: PDYN# configure interface t1e1 6 line-build-out 7.5 Configure Interface T1/E1 Line Equalization (T1 Only) configure interface t1e1 {port_id} line-equalization (0 | 134 | 267 | 400 | 534} Minimum Access Level: Administrator The configure interface t1e1 line equalization command specfies a line equalization value for the T1 short haul line. This does not apply to E1 lines. port_id – Identifies the T1/E1 port to be configured. 0 134 267 400 534 - Specifies 0 to 133 ft line length ( 0 .0 - 40.4 m) - Specifies 134 to 266 ft line length ( 40.8 - 81.1 m) - Specifies 267 to 399 ft line length ( 81.4 - 121.6 m) - Specifies 400 to 533 ft line length (121.9 - 162.5m) - Specifies 534 to 655 ft line length (162.8 - 199.9 m) Example: PDYN# configure interface t1e1 6 line-equalization 134 2600-A2-GB21-50 May 2006 3-105 3. Commands Configure Interface T1/E1 Line Type configure interface t1e1 {port_id} line-type (long-haul | short-haul} Minimum Access Level: Administrator The configure interface t1e1 line type command specfies whether the T1/E1 line is a short haul or a long haul. port_id – Identifies the T1/E1 port to be configured. long-haul - Specifies that the line is longer than 535 feet (200 m). short-haul - Specifies that the line is less than535 feet (200 m). Example: PDYN# configure interface t1e1 6 line-type long-haul Configure Interface T1/E1 Port Status configure interface t1e1 {port_id} port-status [enable | disable} Minimum Access Level: Administrator The configure interface t1e1 port-status command specfies whether the T1/E1 port is enabled or disabled. port_id – Identifies the T1/E1 port to be configured. enable - Enable the T1/E1 port. disable - Disable the T1/E1 port. Example: PDYN# configure interface t1e1 6 port-status enable 3-106 May 2006 2600-A2-GB21-50 3. Commands Configure Interface T1/E1 Timing configure interface t1e1 {port_id} timing {local | loop} Minimum Access Level: Administrator The configure interface t1e1 port-status command specfies the timing source for the selected T1E1 port. port_id – Identifies the T1/E1 port to be configured. local - Specifies that the timing is provided by the system. loop - Specfies that the timing is derived from the network. Example: PDYN# configure interface t1e1 6 timing local Configure Management The following set of commands are used to configure all of the management functions in the unit. Configure Management Access List The Management Domain Access List controls access to entities in the Management Domain. These entities include the SNMP, web interface, and Telnet. An entry in the list, identified by an IP address and a subnet mask pair, defines an IP address or a range of IP addresses allowed to access an entity or a set of entities in the domain. The list is considered to control accesses to an entity provided its respective Access Validation configuration parameter is enabled. If the parameter is disabled, the list is ignored for the entity. 2600-A2-GB21-50 May 2006 3-107 3. Commands Configure Management Access List Create configure management access-list create-entry {ip-address}...{subnet-mask} {snmp | telnet | web}...{snmp | telnet | web}...{snmp | telnet | web} Minimum Access Level: Administrator The configure management access-list create-entry command adds an entry in the Management Domain Access List for at least one entity. The subnet-mask field allows an entry to be applied to a range of IP addresses. Example: PDYN# configure management access-list create-entry 192.168.100.0 255.255.255.0 snmp web Configure Management Access List Delete All configure management access-list delete all Minimum Access Level: Administrator The configure management access-list delete all command removes all the entries in the Management Domain Access List. Example: PDYN# configure management access-list delete all Configure Management Access List Delete Entry configure management access-list delete entry {ip-address}...{subnet-mask} Minimum Access Level: Administrator The configure management access-list delete entry command removes a specific entry in the Management Domain Access List. Example: PDYN# configure management access-list delete entry 192.168.100.0 255.255.255.0 3-108 May 2006 2600-A2-GB21-50 3. Commands Configure Management Access List Show configure management access-list show Minimum Access Level: Administrator The configure management access-list show command displays all entries in the Management Domain Access List. Example: PDYN# configure management access-list show Output: The output from this command is identical to the show management access-list command. Configure Management ARP add configure management arp add {ip_address} {mac_address} Minimum Access Level: Administrator The configure management add command adds static trusted entity. Example: PDYN# configure management add 135.90.147.9 2600-A2-GB21-50 01-02-03-04-05-06 May 2006 3-109 3. Commands Configure Management ARP Clear Dynamic Addresses configure management arp clear-dynamic Minimum Access Level: Administrator The configure management add command deletes all the dynamically learned entries in the managerment ARP table. Example: PDYN# configure management clear-dynamic Configure Management ARP Delete configure management arp delete Minimum Access Level: Administrator The configure management delete command deletes the specified entry from the management ARP table. Example: PDYN# configure management delete 135.90.147.8 3-110 May 2006 2600-A2-GB21-50 3. Commands Configure Management Default Gateway Address This command is used to configure the management IP address, subnet mask and gateway address. These IP addresses are in the management domain, not the user domain. configure management default-gateway {ip_address} Minimum Access Level: Administrator The configure management default gateway command specifies the IP address of the next hop router for the management traffic. ip_address – Specifies the IP address of the default gateway for the management ports.. Example: PDYN# configure management default-gateway 137.90.127.1 Configure Management InBand Address This command is used to configure the inband management IP address, subnet mask and gateway address. These IP addresses are in the management domain, not the user domain. The inband management traffic is received on the same uplink port as user traffic. configure management inband address {ip_address} { subnet_mask} Minimum Access Level: Administrator The configure management inband address command specifies the IP address of the unit. ip_address – Specifies the management IP address. Default is 0.0.0.0 (disabled) subnet_mask – Specifies the subnet mask to be applied to the IP address. The default mask is 255.255.255.0. Example: PDYN# configure management inband address 137.90.127.3 255.255.255.0 2600-A2-GB21-50 May 2006 3-111 3. Commands Configure Management Out-of-Band Address This command is used to configure the management IP address, subnet mask and gateway address. These IP addresses are in the management domain, not the user domain. configure management out-of-band address {bootp | {{ip_address} { subnet_mask} } Minimum Access Level: Administrator The configure management out-of-band address command specifies the IP address of the unit that will accept management traffic on the out-of-band management port. bootp – Specifies that a BOOTP server will determine the management IP address. ip_address – Specifies the management IP address. The default address is 10.10.10.10. subnet_mask – Specifies the subnet mask to be applied to the IP address. The default mask is 255.255.255.0. Example: PDYN# configure management out-of-band address bootp PDYN# configure management out-of-band address 137.90.127.3 255.255.255.0 Configure Management Route Add \ configure management route add {ip_address} {subnet_mask} {gateway} Minimum Access Level: Administrator The configure management route add command defines an explicit route for management destinations, that cannot be reached through the management default gateway. ip_address – Specifies the destination IP address. subnet_mask – Specifies the subnet mask to be applied to the IP address. gateway – Specifies the gateway IP address to be used to reach the specified IP destination. Example: PDYN# configure management route add 137.90.127.3 255.255.255.0 137.90.0.1 3-112 May 2006 2600-A2-GB21-50 3. Commands Configure Management Route Delete configure management route delete {ip_address} Minimum Access Level: Administrator The configure management route delete command deletes an explicit route based on the specified destinations. To modify an existing route, the administrator will first need to delete the route and then add a new route. ip_address – Specifies the destination IP address. Example: PDYN# configure management route delete 137.90.127.3 Configure Management Route Show configure management route show Minimum Access Level: Administrator The configure management route show command displays all of the management routes that have been configured. Example: PDYN# configure management route show Destination Mask Gateway 137.90.127.3 255.255.255.0 137.90.0.1 137.90.128.1 255.255.255.0 137.90.0.1 PDYN# _ 2600-A2-GB21-50 May 2006 3-113 3. Commands Configure Management Periodic ARP Add configure management periodic-arp add {ip_address} {time} Minimum Access Level: Administrator The configure management periodic arp add command specifies the IP address that the unit will periodically send an ARP request to. ip_address - The address to send ARP requests to. time - Time in minutes between peridic ARP requests Example: PDYN# configure management periodic-add 135.90.147.8 5 Configure Management Periodic ARP Delete configure management periodic-arp delete {ip_address} Minimum Access Level: Administrator The configure management periodic arp delete command will remove an IP address from the list of addresses for periodic ARPs ip_address - The address to send ARP requests to. Example: PDYN# configure management periodic-delete 135.90.147.8 3-114 May 2006 2600-A2-GB21-50 3. Commands Configure Management Periodic ARP Show configure management periodic-arp show Minimum Access Level: Administrator The configure management periodic arp show command display the table of addresses that will be sent ARP requests. Example: PDYN# configure management periodic-arp show IP Address 135.90.147.7 135.90.147.8 Request Period 5 10 Minutes To Next Request 4 9 Configure Management SNMP Access Validation configure management snmp access-validation {disabled | enabled} Minimum Access Level: Administrator The configure management snmp access-validation command specifies whether the unit validates the IP address of incoming SNMP (Simple Network Management Protocol) messages. disabled – No access validation occurs. This is the default. enabled – If the IP address of an SNMP packet is not one of those specified using the configure management snmp nms-address command, the packet is discarded. Example: PDYN# configure management snmp access-validation enabled 2600-A2-GB21-50 May 2006 3-115 3. Commands Configure Management SNMP NMS Traps Add configure management snmp nms-traps add { traps_address1}... [ traps_address8] Minimum Access Level: Administrator The configure management snmp nms-traps add command specifies the IP addresses of up to eight trap managers to the Trap Manager List. SNMP Trap PDUs will be sent to each IP address in the Trap Manager List. traps_address1 – traps_address8 – Specifies one to eight IP addresses of NMS trap managers. Example: PDYN# configure management snmp nms-traps add 135.76.90.90 135.76.91.1 The product sends all traps in SNMPV1 format. It is assumed that all SNMPv2 and V3 Managers will accept V1 traps. Configure Management SNMP NMS Traps Delete All configure management snmp nms-traps delete all Minimum Access Level: Administrator The configure management snmp nms-traps delete all command command removes all IP addresses that were defined as NMS trap managers from the Trap Manager List. Example: PDYN# configure management snmp nms-traps delete all 3-116 May 2006 2600-A2-GB21-50 3. Commands Configure Management SNMP NMS Traps Delete Entry configure management snmp nms-traps delete entry { traps_address1}... [ traps_address8] Minimum Access Level: Administrator The configure management snmp nms-traps delete entry command removes from one to eight IP addresses from the Trap Manager List. traps_address1 – traps_address8 – Specifies one to eight IP addresses of traps managers. Example: PDYN# configure management snmp nms-traps delete entry 135.76.90.90 135.76.91.1 Configure Management SNMP NMS Traps Show configure management snmp nms-traps show Minimum Access Level: Administrator The configure management snmp nms-traps show command displays all IP addresses in the Trap Manager List. Example: PDYN# configure management snmp nms-traps show 10.10.2.2 135.90.1.1 2600-A2-GB21-50 10.10.10.1 May 2006 3-117 3. Commands Configure Management SNMP Read/Write Community String configure management snmp private-string { private_community_string} Minimum Access Level: Administrator The configure management snmp private-string command specifies the community string for read-write access. private_community_string – Specifies the string used for read-write access. It may be up to 32 printable characters. The default is private. Example: PDYN# configure management snmp private-string topsecret Configure Management SNMP Read Only Community String configure management snmp public-string { public_community_string} Minimum Access Level: Administrator The configure management snmp public-string command specifies the community string for read-only access. public_community_string – Specifies the string used for read-only access. It may be up to 32 printable characters. The default is public. Example: PDYN# configure management snmp private-string topsecret 3-118 May 2006 2600-A2-GB21-50 3. Commands Configure Management SNMP State configure management snmp state {disabled | enabled} Minimum Access Level: Administrator The configure management snmp state command specifies the availability of the SNMP agent. state – Valid choices are disabled and enabled. The default is disabled. Example: PDYN# configure management snmp state disabled Configure Management SNMP Trap Rate Limiting Period configure management snmp trap-rate-limiting-period {period} Minimum Access Level: Administrator The configure management snmp trap-rate-limiting-period command specifies the gap, in seconds, that the SNMP agent enforces, between consecutive traps for the same instance of a particular event. Traps will not be sent to the SNMP Trap manager or managers for instances of events that occur prior to the expiration of this period. period – Gap enforced for traps for same instance of an event, in seconds. A zero disables any trap rate limiting. The range for the period is 0 to 232–1. Example: PDYN# configure management snmp trap-rate-limiting-period 500 2600-A2-GB21-50 May 2006 3-119 3. Commands Configure Management Telnet Access Validation configure management telnet access-validation {disabled | enabled} Minimum Access Level: Administrator The configure management telnet access-validation command specifies whether the unit validates the IP address of incoming Telnet messages. disabled – No access validation occurs. This is the default. enabled – If the IP address of a Telnet packet is not one of those specified using the configure management access-list command, the packet is discarded. Example: PDYN# configure management telnet access-validation enabled Configure Management Telnet Show configure management telnet show Minimum Access Level: Administrator The configure management telnet show command displays the settings for Telnet access. Example: PDYN# configure management telnet show 3-120 May 2006 2600-A2-GB21-50 3. Commands Configure Management Telnet State configure management telnet state {disabled | enabled} Minimum Access Level: Administrator The configure management telnet state command specifies the state of the Telnet server. disabled – Telnet management is disabled. This is the default enabled – If the IP address of a Telnet packet is not one of those specified using the configure management access-list command, the packet is discarded. Example: PDYN# configure management telnet state enabled Configure Management Web Access Validation configure management web access-validation {disabled | enabled} Minimum Access Level: Administrator The configure management web access-validation command specifies whether the unit validates the IP address of incoming Telnet messages. disabled – No access validation occurs. This is the default. enabled – If the IP address of a web packet is not one of those specified using the configure management access-list command, the packet is discarded. Example: PDYN# configure management web access-validation enabled 2600-A2-GB21-50 May 2006 3-121 3. Commands Configure Management Web Show configure management web show Minimum Access Level: Administrator The configure management web show command displays the settings for Telnet access. Example: PDYN# configure management web show Configure Management Web State configure management web state {disabled | enabled} Minimum Access Level: Administrator The configure management web state command specifies the state of the Telnet server. disabled – Telnet management is disabled. This is the default enabled – If the IP address of a web packet is not one of those specified using the configure management access-list command, the packet is discarded. Example: PDYN# configure management web state enabled 3-122 May 2006 2600-A2-GB21-50 3. Commands Configure Multicast Configure Multicast Unknown Forwarding Mode configure multicast <port_id> unknown-forwarding-mode {drop | flood} Minimum Access Level: Administrator The configure multicast unknown forwarding mode command specifies the state of the Telnet server. port_id – This can be a DSL port (1-48), a ppp port (ppp1 - ppp8), a MLPPP port (mlppp1 - mlppp8) or and Ethernet port (eth2, or eht3). All can be used to specify all DSL ports. drop – Drop unknown multicast packets received on a specified port. flood - Flood unknown multicast packetsreceived on a specified port. Example: PDYN# configure multicast 1 unknown-forwarding-mode drop PDYN# configure multicast all unknown-forwarding-mode flood PDYN# configure multicast mlppp1 unknown-forwarding-mode drop 2600-A2-GB21-50 May 2006 3-123 3. Commands Configure Multicast Unknown Filtering Mode configure multicast filtering-mode {disable | enable} Minimum Access Level: Administrator The configure multicast filtering-mode command specifies whether the unit accepts multicast traffic from sources that are configured in the multicast whitelist table. disabled – Forward all multicast traffic. This is the default. enabled – Accept multilcast traffic from sources that are configured in the multicast whitelist table. Example: PDYN# configure multicast filtering-mode enable Configure MLPPP Configure MLPPP Bundle Add configure mlppp-bundle {mlppp-bundle-number} add {port_id} Minimum Access Level: Administrator The configure mlppp bundle add command adds the specified T1/E1 port to the specified MLPPP bundle. mlppp-bundle-number – Valid bundle numbers are 1 through 8. port_id – T1/E1 port ID. Example: PDYN# configure mlppp-bundle 1 add 1 3-124 May 2006 2600-A2-GB21-50 3. Commands Configure MLPPP Bundle Delete configure mlppp-bundle {mlppp-bundle-number} delete {port_id} Minimum Access Level: Administrator The configure mlppp bundle delete command deletes the specified T1/E1 port to the specified MLPPP bundle. mlppp-bundle-number – Valid bundle numbers are 1 through 8. port_id – Accept multilcast traffic from sources that are configured in the multicast whitelist table. Example: PDYN# configure mlppp-bundle 1 delete 1 Configure MLPPP Bundle Fragement Size configure mlppp-bundle {mlppp-bundle-number} fragment-size {value} Minimum Access Level: Administrator The configure mlppp bundle fragment size command specifies the mazimum fragment size allowed for the specified MLPPP bundle. mlppp-bundle-number – Valid bundle numbers are 1 through 8. value – Maximum Fragment size for the specified MLPPP bundle. Select 0 to disable fragmentation. Example: PDYN# configure mlppp-bundle 1 fragment-size 1000 2600-A2-GB21-50 May 2006 3-125 3. Commands Configure MLPPP Bundle MRRU configure mlppp-bundle {mlppp-bundle-number} mrru {value} Minimum Access Level: Administrator The configure mlppp bundle mrru command specifies the size of the Maximum Reconstructed Receive Unit in bytes for the specified MLPPP bundle. mlppp-bundle-number – Valid bundle numbers are 1 through 8. value – MRRU size in bytes. The range is 1 through 1524. Example: PDYN# configure mlppp-bundle 1 mrru 1542 Configure MLPPP Bundle Restart configure mlppp-bundle {mlppp-bundle-number} restart Minimum Access Level: Administrator The configure mlppp bundle restart command forces re-initialization of the mlppp-bundle so all the negotiated MLPPP parameters are re-negotiated. mlppp-bundle-number – Valid bundle numbers are 1 through 8. Example: PDYN# configure mlppp-bundle 1 restart 3-126 May 2006 2600-A2-GB21-50 3. Commands Configure MLPPP Bundle Short Sequence Number configure mlppp-bundle {mlppp-bundle-number} short-sequence-number {12bit | 24bit} Minimum Access Level: Administrator The configure mlppp bundle short-sequence-number command specifies whethe the local node wishes to use 12 bit or 24 bit sequence numbers for the specified MLPPP bundle. mlppp-bundle-number – Valid bundle numbers are 1 through 8. 12bit - Specifies local node wishes to use 12 bit sequence numbers. 24bit - Specifies local node wishes to use 24 bit sequence numbers. Example: PDYN# configure mlppp-bundle 1 short-sequence-number 12bit Configure MLPPP Bundle VLAN Acceptable-Frame-Type configure mlppp-bundle {mlppp-bundle-number} vlan acceptable-frame-type {all | tagged} Minimum Access Level: Administrator The configure mlppp bundle vlan acceptable-frame-type command determines if tagged and untagged frames, or if tagged frames only will be accepted on a port. mlppp-bundle-number – Valid bundle numbers are 1 through 8. all - The unit will accept all frame types including untagged frames. Untagged frames or priority-tagged frames will be assigned the PVID associated with this port. tagged - Only tagged frames will be allowed on this bundle. The unit will discard untagged or priority-tagged frames received on this bundle. Example: PDYN# configure mlppp-bundle 1 vlan acceptable-frame-type all 2600-A2-GB21-50 May 2006 3-127 3. Commands Configure MLPPP Bundle VLAN Ingress-Filtering configure mlppp-bundle {mlppp-bundle-number} vlan ingress-filtering {disabled | enabled} Minimum Access Level: Administrator The configure mlppp bundle vlan ingress-filtering command causes the unit ot discard incoming tagged frames that are not members of the VLAN for this port. mlppp-bundle-number – Valid bundle numbers are 1 through 8. disabled - The unit will accept all incoming tagged frames. enabled - The unit will accept only tagged frames that are members of the VLAN associated with this bundle. Example: PDYN# configure mlppp-bundle 1 vlan ingress-filtering enabled Configure MLPPP Bundle VLAN Priority configure mlppp-bundle {mlppp-bundle-number} vlan priority {priority} Minimum Access Level: Administrator The configure mlppp bundle vlan pririty command assigns the VLAN priority to be assigned to untagged frames received on this bundle. mlppp-bundle-number – Valid bundle numbers are 1 through 8. priority - The VLAN priority. Valid values are 1 through 8. The default is 1. Example: PDYN# configure mlppp-bundle 1 vlan priority 1 3-128 May 2006 2600-A2-GB21-50 3. Commands Configure MLPPP Bundle VLAN PVID configure mlppp-bundle {mlppp-bundle-number} vlan PVID {pvid} Minimum Access Level: Administrator The configure mlppp bundle vlan pvid command assigns the VLAN ID to the untagged frames received on the bundle. mlppp-bundle-number – Valid bundle numbers are 1 through 8. PVID - The VLAN ID . Valid values are 1 through 4095. The default is 1. Example: PDYN# configure mlppp-bundle 1 vlan PVID 99 Configure PPP Configure PPP Address and Control Field Compression configure ppp {port_id} address-control-field-compression {enabled | disabled} Minimum Access Level: Administrator The configure ppp address control field compression command specifies whether addresss and contorl field compression is to be used. port_id – T1/E1 port number. Valid numbers are 1 through 8. enable - Specifies that address and control field compression is to be used. disable - Specifies that address and control field compression is NOT to be used. Example: PDYN# configure ppp 1 address-control-field-compression enable 2600-A2-GB21-50 May 2006 3-129 3. Commands Configure PPP Bridge Control Protocol configure ppp {port_id} bridge-control-protocol {enable | disable } Minimum Access Level: Administrator The configure ppp bridge control protocol command specifies whether the Bridge Control Protocol will be negotiated for the specified PPP link. port_id – T1/E1 port number. Valid numbers are 1 through 8. enable - Negotiate the bridge control protocol. disable - Do not negotiate the bridge control protocol. Example: PDYN# configure ppp 1 bridge-control-protocol enable Configure PPP Frame Control Sequence Size configure ppp {port_id} fcs-size {16bit | 32bit } Minimum Access Level: Administrator The configure ppp frame control sequence size command specifies the size of the FCS, in bits, that the local node will attempt to negotiate for use with the remote node. Regardless of the value of the object, the local now will comply with any FCS size negotiations initiated by the remote node. This operation is per the PPP specification. Changing this value will have effect the next time that the link is restarted. port_id – T1/E1 port number. Valid numbers are 1 through 8. 16bit - The FCS size will be 16 bits. 32bit - The FCS size will be 32 bits. Example: PDYN# configure ppp 1 fcs-size 32bit 3-130 May 2006 2600-A2-GB21-50 3. Commands Configure PPP Keep Alive Quiet Time configure ppp {port_id} keep-alive-quiet-time {value } Minimum Access Level: Administrator The configure ppp keep alive quiet time command specifies the keep alive quiet time, in seconds, used for the specified PPP link. If no PPP packets are receied within this amount of time, the local PPP entity will send an Echo-Request as a “keep alive” mechanism to ensure that the link is still active. A value of 0 disables this feature. The maximum value is 3600 (1 hour). port_id – T1/E1 port number. Valid numbers are 1 through 8. value - The keep alive quiet time in seconds. 0 will disable the feature. Example: PDYN# configure ppp 1 keep-alive-quiet-time 30 Configure PPP Keep Alive Timeoug configure ppp {port_id} keep-alive-timeout {value } Minimum Access Level: Administrator The configure ppp keep alive quiet time command specifies the keep alive timeout used for the specified port. This is the time that the unit will wait for an Echo-Reply response to an Echo-Request message that was sent as a Keep-Alive mechanism. When this timer has expired, the link will terminate and will attempt to reestablish a connection with the remote peer. The maximum value is 300 (5 minutes). port_id – T1/E1 port number. Valid numbers are 1 through 8. value - The keep alive quiet timeout in seconds. Example: PDYN# configure ppp 1 keep-alive-timeout 30 2600-A2-GB21-50 May 2006 3-131 3. Commands Configure PPP Magic Number configure ppp {port_id} magic-number {enable | disable } Minimum Access Level: Administrator The configure ppp keep alive quiet time command specifies whether to negotiate a magic number for the specified PPP link. port_id – T1/E1 port number. Valid numbers are 1 through 8. enable - Negotiate a magic number. disable - DO not negotiate a magic number. Example: PDYN# configure ppp 1 magic-number disable Configure PPP Maximum Receive Unit configure ppp {port_id} maximum-receive-unit {value} Minimum Access Level: Administrator The configure ppp keep alive quiet time command specifies the maximum receive unit size for the specified PPP link. The local PPP unit will advertise this value to the remote unit. If the value of this variable is 0 then the local PPP entity will not advertise any MRU to the remote unit, and the default MRU will be assumed. Changing this object will not take effect until the link is resarted. The Default MRU is ? The range for the maximum receive unit is port_id – T1/E1 port number. Valid numbers are 1 through 8. value - The value of the maximum receive unit. Example: PDYN# configure ppp 1 maximum-receive-unit 1500 3-132 May 2006 2600-A2-GB21-50 3. Commands Configure PPP Protocol Field Compression configure ppp {port_id} protocol-field-compression {enable | disable} Minimum Access Level: Administrator The configure ppp protocol field compression command specifies whether protocol field compression is to be used. port_id – T1/E1 port number. Valid numbers are 1 through 8. enable - Protocol field compression is to be used. disable - Protocol field compression is NOT to be used. Example: PDYN# configure ppp 1 protocol-field-compression disable Configure PPP VLAN Acceptable-Frame-Type configure ppp {port_id} vlan acceptable-frame-type {all | tagged} Minimum Access Level: Administrator The configure ppp vlan acceptable-frame-type command determines if tagged and untagged frames, or if tagged frames only will be accepted on a port. port_id – T1/E1 port number. Valid numbers are 1 through 8. all - The unit will accept all frame types including untagged frames. Untagged frames or priority-tagged frames will be assigned the PVID associated with this port. tagged - Only tagged frames will be allowed on this port. The unit will discard untagged or priority-tagged frames received on this port. Example: PDYN# configure ppp 1 vlan acceptable-frame-type all 2600-A2-GB21-50 May 2006 3-133 3. Commands Configure PPP VLAN Ingress Filtering configure ppp {port_id} vlan ingress-filtering {disabled | enabled} Minimum Access Level: Administrator The configure ppp vlan ingress-filtering command will cause the unit to discard incoming taggedd frames that are not members of this port. port_id – T1/E1 port number. Valid numbers are 1 through 8. disabled - The unit will accept all incoming frames. enabled - The unit will discard tagged frames for VLANS which do not include this port as a member. Example: PDYN# configure ppp 1 vlan ingress-filtering enabled Configure PPP VLAN Priority configure ppp {port_id} vlan priority {priority} Minimum Access Level: Administrator The configure ppp vlan priority command defines the VLAN priority to be assigned to untagged frames received on this port. port_id – T1/E1 port number. Valid numbers are 1 through 8. priority - The VLAN priority. Valid values are 1 through 8. The default is 1. Example: PDYN# configure ppp 1 vlan priority 6 3-134 May 2006 2600-A2-GB21-50 3. Commands Configure PPP VLAN PVID configure ppp {port_id} vlan pvid {pvid} Minimum Access Level: Administrator The configure ppp vlan pvid command defines the VLAN ID to be assigned to untagged frames received on this port. port_id – T1/E1 port number. Valid numbers are 1 through 8. pvid - The VLAN pvid. Valid values are 1 through 4095. The default is 1. Example: PDYN# configure ppp 1 vlan pvid 99 Configure Proxy ARP NHR configure proxy-arp nhr {ip_address} Minimum Access Level: Administrator The configure proxy-arp nhr command determines the default Next-Hop Router (NHR) address for all subscriber ports in the system. This value is used by the proxy-arp function. ip_address – Specifies the IP address of the next-hop router for subscriber ports. . Example: PDYN# configure proxy-arp nhr 135.75.90.112 2600-A2-GB21-50 May 2006 3-135 3. Commands Configure RADIUS Add configure radius add {ip_address} {secret} Minimum Access Level: Administrator The configure radius add command specifies the IP address of the RADIUS server. ip_address – Specifies the IP address of the RADIUS server. secret - Secret value used for secutity purposes. 1 to 32 characters. Example: PDYN# configure radius add 135.90.147.8 mysecret Configure RADIUS Delete configure radius delete {ip_address} Minimum Access Level: Administrator The configure radius delete command specifies the IP address of the RADIUS server. ip_address – Specifies the IP address of the RADIUS server. Example: PDYN# configure radius delete 135.90.147.8 3-136 May 2006 2600-A2-GB21-50 3. Commands Configure RADIUS Show configure radius show Minimum Access Level: Administrator The configure radius show command specifies all of the RADIUS servers that have been defined for the system. Example: PDYN# configure radius show Radius Server State: enable Entry=1, serverIp=135.90.147.8, Secret=asdf, Port=1812, Timeout=3, Retries=3 Entry=2, serverIp=135.90.147.98, Secret=asdftoo, Port=1812, Timeout=3, Retries=3 Configure RADIUS state configure radius state {enable | disable} Minimum Access Level: Administrator The configure radius state command specifies whether the RADIUS server feature will be used. enable disable - Specifies that the system will use the RADIUS server to authenticate users - Specifies that the system will not use the RADIUS server. Example: PDYN# configure radius state enable Scheduled Configuration Backups This command sets parameters for automatic configuration backup. This feature allows the administrator to automatically back up the configuration of the unit on a 2600-A2-GB21-50 May 2006 3-137 3. Commands scheduled basis. When enabled, auto backup uploads the configuration of each device according to a schedule selected. Configure Scheduled Backup Enable configure scheduled-backup {disabled | enabled} Minimum Access Level: Administrator The configure scheduled-backup command determines whether automatic configuration backup occurs. disabled – Specifies automatic configuration backup will not occur. This is the default. enabled – Specifies that automatic configuration backup will occur. Example: PDYN# configure scheduled-backup enabled Configure Scheduled Backup Dynamic configure scheduled-backup dynamic [hh:mm] Minimum Access Level: Administrator The configure scheduled-backup dynamic command specifies that automatic configuration backup will occur after each configuration change. hh:mm – Specifies the amount of time after a configuration change that a configuration backup will automatically occur. Time is specified in hours (1–24) and minutes (0–59) separated by a colon. The default and minimum is 00:30 (30 minutes). Example: PDYN# configure scheduled-backup dynamic 24:00 3-138 May 2006 2600-A2-GB21-50 3. Commands Configure Scheduled Backup Fixed configure scheduled-backup fixed {daily | monday | tuesday | wednesday | thursday | friday | saturday | sunday} { hh:mm} Minimum Access Level: Administrator The configure scheduled-backup fixed command specifies the fixed times at which configuration backups will occur. day_of_week – Specifies the day of the week backups will occur. If daily is selected, a backup occurs every day. hh:mm – Specifies the time of day the backup will occur. Time is specified in hours (00–23) and minutes (00–59) separated by a colon. Example: PDYN# configure scheduled-backup sunday 00:00 Configure Scheduled Backup FTP configure scheduled-backup ftp {ip_address} {user_name} {password} {filename} Minimum Access Level: Administrator The configure scheduled-backup ftp command defines the FTP (File Transfer Protocol) server used for automatic configuration backup. ip_address – Specifies the network address of the FTP server. user_name – Specifies a user name accepted by the FTP server. password – Specifies the password associated with the user name. filename – Specifies the file containing the configuration backup. Example: PDYN# configure scheduled-backup ftp 135.27.90.98 admin admnpass iac2_bkup 2600-A2-GB21-50 May 2006 3-139 3. Commands Configure Scheduled Backup Time Stamp configure scheduled-backup ftp timestamp {append | none} Minimum Access Level: Administrator The configure scheduled-backup ftp timestamp command determines whether a timestamp is added to filenames to distinguish them from each other and prevent overwriting existing files. append – Date and time are added to the filename. none – The filename is used as entered. This is the default. Example: PDYN# configure scheduled-backup ftp timestamp append 3-140 May 2006 2600-A2-GB21-50 3. Commands Configure Security This command is used to limits the number of active IP addresses on a port. The Administrator can set the limit of the number of IP addresses that are allowed on the port. The limit can range from 1 to 32. The Administrator may configure a static IP address so that it is always part of the table of authorized IP addresses. The number of learned addresses is reduced by each static entry. The IP addresses are the most recently learned addresses. For example, assume that the administrator sets the limit to one, and the system has learned an IP address. When a second DHCP acknowledge message is received, the first IP address is deleted, and the new IP address is allowed. Configure Security IP (Host Address Limiting) Enable configure security ip {port_id} {disabled | enabled} Minimum Access Level: Administrator The configure security ip command determines whether there is a limit on the number of IP addresses associated with a DSL port. port_id – Identifies the DSL port to be affected. The possible forms of the identifier are described in Chapter 2, Terminology and Conventions. disabled – Specifies that there are no restrictions on the number of IP addresses on the specified port. This is the default. enabled – Specifies that there are restrictions on the number of IP addresses allowed on the specified port. Example: PDYN# configure security ip 3 enabled 2600-A2-GB21-50 May 2006 3-141 3. Commands Configure Security IP Add Static Address configure security ip {port_id} add {ip_address} {nhr_address} Minimum Access Level: Administrator The configure security ip add command specifies an IP address allowed to be active on a particular DSL port. port_id – Identifies the DSL port to be affected. The possible forms of the identifier are described in Chapter 2, Terminology and Conventions. ip_address – Specifies an IP address allowed to be active on the port. If the table of allowed IP addresses already has the number of addresses specified by the configure security IP max-ip command, the following error message is displayed: Command not allowed: Too many static entries nhr_address – Specifies the address of the Next Hop Router for this port. It overrides the default address. message is displayed: Example: PDYN# configure security ip 23 add 135.27.90.2 135.27.90.21 Configure Security IP Delete Static Address configure security ip {port_id} delete {ip_address} Minimum Access Level: Administrator The configure security ip delete command deletes an IP address in the table of addresses allowed to be active on a particular DSL port. port_id – Identifies the port to be affected. The possible forms of the identifier are described in Chapter 2, Terminology and Conventions. ip_address – Specifies an IP address to be deleted. The address must exist in the table of addresses for this port. You can display the table using the configure security ip show command. Example: PDYN# configure security ip 21 delete 135.27.90.2 3-142 May 2006 2600-A2-GB21-50 3. Commands Configure Security IP Max Addresses configure security ip {port_id} max-ip {max_ip} Minimum Access Level: Administrator The configure security ip max-ip command specifies the number of IP addresses allowed to be active on a particular DSL port. port_id – Identifies the port to be affected. The possible forms of the identifier are described in Chapter 2, Terminology and Conventions. max_ip – Specifies the maximum number of IP addresses allowed on the port. The valid range is 1–32. The default is 32. Example: PDYN# configure security ip 12 max-ip 2 Configure Security IP Show configure security ip {port_id} show Minimum Access Level: Administrator The configure security ip show command displays the table of addresses allowed for a particular DSL port. port_id – Identifies the port whose table is to be displayed. The possible forms of the identifier are described in Chapter 2, Terminology and Conventions. Example: PDYN# configure security ip 12 show The output of this command is identical to the output from the show security ip command. 2600-A2-GB21-50 May 2006 3-143 3. Commands Configure Security MAC Add configure security mac { port_id} add {mac_address} vlan Minimum Access Level: Administrator The configure security mac add command is used to limit access to the system based on the MAC address and VLAN of the inbound traffic on the DSL ports. The system monitors the MAC addresses and VLAN on a port. If this feature is enabled, then only the MAC addresses and VLANs that have been entered by the administrator are allowed on the selected port. Traffic with any other MAC address will be dropped. Up to 32 addresses are allowed. port_id – Identifies the port to be affected. The possible forms of the identifier are described in Chapter 2, Terminology and Conventions. mac_address – Specifies a MAC address allowed to send data to the port. Traffic from any other MAC address is dropped. Adding an address automatically enables the MAC address filtering feature for the port. The address must be in the form xx-xx-xx-xx-xx-xx, where each x is a hexadecimal digit 0–f. vlan – Specifies a VLAN allowed to send data to the port. Traffic from any other VLAN is dropped. Example: PDYN# configure security mac 12 add 00-01-d2-e4-d3-c1 3-144 May 2006 2600-A2-GB21-50 3. Commands Configure Security MAC Delete configure security mac {port_id} delete {mac_address | all} vlan Minimum Access Level: Administrator The configure security mac delete command deletes a MAC address in the table of addresses allowed to send data to a particular DSL port. port_id – Identifies the port to be affected. The possible forms of the identifier are described in Chapter 2, Terminology and Conventions. mac_address – Specifies a MAC address to be deleted. The address must exist in the table of addresses for this port. You can display the table using the configure security mac show command. The address must be in the form xx-xx-xx-xx-xx-xx, where each x is a hexadecimal digit 0–f. vlan – Specifies a vlan allowed to send data to the port. Traffic from any other vlan is dropped. all – Specifies that all MAC addresses defined for the port are to be deleted. The MAC address filtering feature is disabled for the port. Example: PDYN# configure security mac 12 delete 00-01-d2-e4-d3-c1 10 Configure Security MAC Show configure security mac { port_id} show Minimum Access Level: Administrator The configure security mac show command displays the table of MAC addresses allowed for a particular DSL port. port_id – Identifies the port whose table is to be displayed. mac_address – MAC address allowed to send data to the port. vlan –Vlan allowed to send data to the port. Traffic from any other vlan is dropped. Example: PDYN# configure security mac show 2600-A2-GB21-50 May 2006 3-145 3. Commands Configure SNTP This command is used to configure the Simple Network Time Protocol client. Configure SNTP Enable configure sntp {disabled | enabled} Minimum Access Level: Administrator The configure sntp command determines whether the unit makes SNTP requests. disabled – The unit does not make SNTP requests. Date and time must be set manually. enabled – The unit updates the date and time periodically by sending requests to an SNTP server. Example: PDYN# configure sntp disable Configure SNTP Server Address configure sntp address {ip_address} Minimum Access Level: Administrator The configure sntp address command specifies the IP address of an SNTP server. ip_address – The address of an SNTP server. The default is 192.5.41.40. Example: PDYN# configure sntp address 137.90.127.40 3-146 May 2006 2600-A2-GB21-50 3. Commands Configure SNTP Interval configure sntp interval {interval} Minimum Access Level: Administrator The configure sntp interval command specifies the frequency that the unit should make SNTP requests to update the date and time. The units makes a time request whenever it powers on, then it makes periodic requests based in the interval specified. interval – The period, in hours, between SNTP requests. Valid values are 1–24. The default is 24 hours. Example: PDYN# configure sntp interval 12 Configure Syslog This command configures the Syslog threshold and rate limiting. Configure Syslog Rate Limiting configure syslog rate-limiting {disabled | enabled} Minimum Access Level: Administrator The configure syslog rate-limiting command determines whether duplicate messages are written to the system log. disabled – All messages (satisfying the syslog threshold setting) are written to the system log. This is the default. enabled – Consecutive duplicate messages are written to the system log only if they are received more than five minutes apart. Example: PDYN# configure syslog rate-limiting disabled 2600-A2-GB21-50 May 2006 3-147 3. Commands Configure Syslog Threshold configure syslog threshold {emergency | alert | information | debug} Minimum Access Level: Administrator The configure syslog threshold command specifies the levels severity for messages that are written to the system log. There are eight levels of severity that can be assigned to syslog messages, numbered 0 (highest level of severity) to 7 (lowest level severity). A message containing a level of severity that is lower than the threshold specified here will be discarded and not be written to the system log. emergency – Level 0 (Emergancy - Highest level of severity). System is unusable. alert – Level 1 (Alert). Action must be taken immediately. This is the default. critical – Level 2 (Critical). Critical condition. error – Level 3 (Error). Error condition. warning – Level 4 (Warning). Warning condition. notice – Level 5 (Notice). Normal but significant condition. information – Level 6 (Informational). Informational message. debug – Level 7 (Debug – Lowest level of severity). Debug-level message. Example: PDYN# configure syslog threshold information Configure Syslog Remote Enable When remote syslog is enabled, the system will send the syslog message to the local syslog file as well as to the remote syslog server that has been configured. configure syslog remote {enabled | disabled} Minimum Access Level: Administrator The configure syslog remote enable command enables or disables the remote syslog feature. disabled – No messages get sent to a remote syslog server. This is the default. enabled – Syslog messages will be sent to a remote server if one has been defined. Example: PDYN# configure syslog remote enabled 3-148 May 2006 2600-A2-GB21-50 3. Commands Configure Syslog Remote Create configure syslog remote create {ip_address} [udp_port] Minimum Access Level: Administrator The configure syslog remote create command specifies the IP address to send syslog messages. ip_address – The address of a remote Syslog server. The default is 0.0.0.0 The system only supports one remote Syslog server. To change the IP address of the server, the user enters a new IP address using the configure syslog remote create command. The new IP address will overwrite the previous address. udp_port This value specifies the UDP port to be used for sending remote syslog messages. If no value is specified then the default value will be used. The default port is 514 as specified in RFC 3164. Example: PDYN# configure syslog remote create 135.90.2.1 Configure System Location configure system information system-location { location} Minimum Access Level: Administrator The configure system information system-location command stores the location of the system. location – Up to 36 printable characters. No spaces are allowed. Example: PDYN# configure system information system-location Building_C_First_Floor 2600-A2-GB21-50 May 2006 3-149 3. Commands Configure System Name configure system information system-name { name} Minimum Access Level: Administrator The configure system information system-name command stores a name identifying the system. name – Up to 36 printable characters. No spaces are allowed. Example: PDYN# configure system information system-name Zhone_IAC_8 Configure System Contact configure system information system-contact {contact} Minimum Access Level: Administrator The configure system information system-contact command usually stores the name of a person to contact if the system has a problem. name – Up to 36 printable characters. No spaces are allowed. Example: PDYN# configure system information system-contact Toby 3-150 May 2006 2600-A2-GB21-50 3. Commands Configure System Options Date Display Format configure system options date-display-format {dd/mm/yy | mm/dd/yy} Minimum Access Level: Administrator The configure system options date-display-format command determines the date format displayed and accepted by the system. dd/mm/yy – The date display format is in the order day, month, year. mm/dd/yy – The date display format is in the order month, day, year. This is the default. Example: PDYN# configure system options date-display-format dd/mm/yy Configure System Options Inactivity Time Out configure system options inactivity-timeout {time} Minimum Access Level: Administrator The configure system options inactivity-timeout command specifies how long a Telnet session can exist with no activity before it is terminated by the system. time – Specifies the amount of time in minutes an inactive Telnet session can exist before it is terminated. The valid range is 1–20. The default is 5 minutes. A value of 0 (zero) disables the inactivity timeout. Example: PDYN# configure system options inactivity-timeout 10 Note: This inactivity timer applies to the CLI whether it is from a Telnet session or a local connection on the console port. 2600-A2-GB21-50 May 2006 3-151 3. Commands Configure System Options Spectrum Management configure system options spectrum-management {enabled | disabled} Minimum Access Level: Administrator The configure system options spectrum management command specifies whether the system enables the spectrum management capability. Example: PDYN# configure system options spectrum-management enabled Configure System Options Alarm Threshold Temperature High configure system options alarm-threshold temp-high {threshold} Minimum Access Level: Administrator The configure system options alarm-threshold temp-high command specifies the high alarm threshold for the intake temperature sensor. Example: PDYN# configure system options alarm-threshold temp-high 120 Configure System Options Alarm Threshold Temperature Intake Low configure system options alarm-threshold temp-low {threshold} Minimum Access Level: Administrator The configure system options alarm-threshold temp-low command specifies the low alarm threshold for the intake temperature sensor. Example: PDYN# configure system options alarm-threshold temp-low 10 3-152 May 2006 2600-A2-GB21-50 3. Commands Configure System Options Test Timeout configure system options test-timeout {time} Minimum Access Level: Administrator The configure system options test-timeout command specifies the maximum amount of time a disruptive test is allowed to run. time – Specifies the amount of time in minutes a disruptive test can run before it is terminated. The valid range is 1–30. The default is 5 minutes. Example: PDYN# configure system options test-timeout 2 Note that currently there are no disruptive tests defined for this product. Configure Uplink configure uplink {eth2 |eth3} Minimum Access Level: Administrator The configure uplink command specifies which Ethernet port is the designated uplink. When the unit is configured for mux forwarding or secure VLANs, all traffic is forwarded to the designated uplink. eth2 – This selects Ethernet port 2 as the uplink. eth3 – This selects Ethernet port 3 as the uplink. This is the factory default. Note that Ethernet port 1 is always used as the out of band management port. Example: PDYN# configure uplink eth2 2600-A2-GB21-50 May 2006 3-153 3. Commands Configure Uplink Show configure uplink show Minimum Access Level: Administrator The configure uplink show command displays which port has been designated as the uplink port. Example: PDYN# configure uplink show uplink eth3 PDYN# _ Configure Uplink-Tag This command is used to configure the unit for Uplink Tagging. In the Uplink tagging mode, the data from each DSL port is assigned a unique VLAN tag. These commands set the base VLAN tag, and an index. With just these two commands, the VLAN tag for every DSL port in the unit is defined. The factory default is 16 for the base and an index of 1. Configure Uplink Tagging Base configure uplink-tag base {base} Minimum Access Level: Administrator The configure uplink-tag base command determines the base value to be used for setting VLAN tags for the DSL ports. base – Specifies the base value used in setting the range of VLAN tags. The valid values are: 16, 256, 512, 768, 1024, 1280, 1536, 1792, 2048, 2304, 2560, 2816, 3072, 3328, 3584, 3840. The default is 16. Example: PDYN# configure uplink-tag base 1024 3-154 May 2006 2600-A2-GB21-50 3. Commands Configure Uplink Tagging Index configure uplink-tag index {index} Minimum Access Level: Administrator The configure uplink-tag index command determines the index value to be used for setting VLAN tags for the DSL ports. index – Specifies the index value used in setting the range of VLAN tags. Valid values are 1–10. The default is 1. Example: PDYN# configure uplink-tag index 2 The following tables summarizes the range of VLAN tags for a unit based on the base and index. 2600-A2-GB21-50 Base VLAN Tag Index 1 ULT Tags Index 2 ULT Tags Index 3 ULT Tags Index 4 ULT Tags Index 5 ULT Tags 16 (x'0010') 16 – 39 40 - 63 64 - 87 88 - 111 112 - 135 256 (x'0100') 256 – 279 280 – 303 304 – 327 328 – 351 352 – 375 512 (x'0200') 512 – 535 536 – 559 560 – 583 584 – 607 608 – 631 768 (x'0300') 768 – 791 792 – 815 816 – 839 840 – 863 864 – 887 1024 (x'0400') 1024 –1047 1048 – 1071 1072 – 1095 1096 – 1119 1120 – 1143 1280 (x'0500') 1280 – 1303 1304 – 1327 1328 – 1351 1352 – 1375 1376 – 1399 1536 (x'0600') 1536 –1559 1560 – 1583 1584 – 1607 1608 – 1631 1632 – 1655 1792 (x'0700') 1792 – 1815 1816 – 1839 1840 – 1863 1864 – 1887 1888 – 1911 2048 (x'0800') 2048 – 2071 2072 – 2095 2096 – 2119 2120 – 2143 2144 – 2167 2304 (x'0900') 2304 – 2327 2328 – 2351 2352 – 2375 2376 – 2399 2400 – 2423 2560 (x'0A00') 2560 – 2583 2584 – 2607 2608 – 2631 2632 – 2655 2656 – 2679 2816 (x'0B00') 2816 – 2839 2840 – 2863 2864 – 2887 2888 – 2911 2912 – 2935 3072 (x'0C00') 3072 – 3095 3096 – 3119 3120 – 3143 3144 – 3167 3168 – 3191 3328 (x'0D00') 3328 – 3351 3352 – 3375 3376 – 3399 3400 –3423 3424 – 3447 3584 (x'0E00') 3584 – 3607 3608 – 3631 3632 – 3655 3656 – 3679 3680 – 3703 3840 (x'0F00') 3840 - 3863 3864 – 3887 3888 – 3911 3912 – 3935 3936 – 3959 May 2006 3-155 3. Commands Base VLAN Tag Index 6 ULT Tags Index 7 ULT Tags Index 8 ULT Tags Index 9 ULT Tags Index 10 ULT Tags 16 (x'0010') 136 - 159 160 – 183 184 -207 208 - 231 232 – 255 256 (x'0100') 376 – 399 400 – 423 424 - 447 448 – 471 472 – 495 512 (x'0200') 632 – 655 656 – 679 680 - 703 704 - 727 728 – 751 768 (x'0300') 888 – 911 912 – 935 936 - 959 960 – 983 984 - 1007 1024 (x'0400') 1144 – 1167 1168 –1191 1192 - 1215 1216 - 1239 1240 – 1263 1280 (x'0500') 1400 – 1423 1424 – 1447 1448 - 1471 1472 - 1495 1496 - 1519 1536 (x'0600') 1656 – 1679 1680 – 1703 1704 - 1727 1728 - 1751 1752 – 1775 1792 (x'0700') 1912 – 1935 1936 – 1959 1960 - 1983 1984 - 2007 2008 – 2031 2048 (x'0800') 2168 – 2191 2192 – 2215 2216 - 2239 2240 - 2263 2264 – 2287 2304 (x'0900') 2424 – 2447 2448 – 2471 2472 - 2495 2496 - 2519 2520 – 2543 2560 (x'0A00') 2680 – 2703 2704 – 2727 2728 - 2751 2752 - 2775 2776 – 2799 2816 (x'0B00') 2936 – 2959 2960 – 2983 2984 - 3007 3008 - 3033 3034 – 3057 3072 (x'0C00') 3192 – 3215 3216 – 3239 3240 -3263 3264 -3287 3288 –3311 3328 (x'0D00') 3448 – 3471 3472 – 3495 3496 - 3519 3520 - 3543 3544 – 3567 3584 (x'0E00') 3704 – 3727 3728 – 3751 3752 - 3775 3776 - 3799 3800 – 3823 3840 (x'0F00') 3960 – 3983 3984 – 4007 4008 - 4031 4032 - 4055 4056 - 4079 Configure User-Accounts This command is used to configure users of the system. Maximum number of users is 20. Only a user with Administrator privilege can create or delete users. When an Administrator creates a user account they also determine the privilege level by the number of passwords they give the user – the privilege_password that gives a user admin privilege is optional. Any administrator can delete any other administrator or user. The system will not allow all use accounts to be deleted. There must always be at least one administrator defined. The system will not allow Admins to delete themselves. To ‘modify’ user’s or administrator’s options (user_name, login_password, or privilege_passrword) the Administrator has to create existing user or administrator with new login_password or privilege_password. The create command is used to "over-write" or "modify" an existing account. 3-156 May 2006 2600-A2-GB21-50 3. Commands Configure User-Accounts Create configure user-accounts create { user} { login_password} [ privilege_password] Minimum Access Level: Administrator The configure user-accounts create command creates a user account and defines passwords for it. It also can be used to change passwords. user – Specifies a user name of 1–15 printable characters. Spaces are not allowed. If the user already exists, the command modifies the password or passwords for the user. login_password – Specifies a password of 1–15 printable characters. Spaces are not allowed. A login password is required of all users. privilege_password – Specifies a password of 1–15 printable characters. Spaces are not allowed. The optional second password allows users to enter privileged mode to configure the system. The privilege password must be different than the login password. Example: PDYN# configure user-accounts create clerk sesame PDYN# configure user-accounts create admin2 sesame newpass Configure User-Accounts Delete configure user-accounts delete {user} Minimum Access Level: Administrator The configure user-accounts delete command deletes a user account. user – Specifies the user account to be deleted. Example: PDYN# configure user-accounts delete tempacct Configure VLAN This command is used to configure the parameters related to the VLAN table. 2600-A2-GB21-50 May 2006 3-157 3. Commands Configure VLAN Create configure vlan create {vlan_id} Minimum Access Level: Administrator The configure vlan create command is used to define a unique VLAN for the system. vlan_id - This value specifies the VLAN tag value for this VLAN. The range is 1 to 4095. The value must be unique and not a vlan_id that is already in use. Example: PDYN# configure vlan create 3 Configure VLAN Delete configure vlan delete {vlan_id | vlan_name} Minimum Access Level: Administrator The configure vlan delete command is used to delete a unique VLAN for the system. vlan_id - This value specifies the VLAN to be deleted. vlan_name - This value uses the assigned VLAN name to identify the VLAN to be deleted. Example: PDYN# configure vlan delete 12 3-158 May 2006 2600-A2-GB21-50 3. Commands Configure VLAN modify DHCP Option 82 configure vlan modify {vlan_id | vlan_name} dhcp-option-82 {enabled | disabled} Minimum Access Level: Administrator The configure vlan modify dhcp-option-82 command specifies if the HDCP Option 82 feature will be enabled on the selected VLAN. vlan_id - This value specifies the VLAN to be modified. vlan_name - This value uses the assigned VLAN name to identify the VLAN to be modified. enabled - The DHCP Option 82 function will be enabled for the selected VLAN. disabled - The DHCP Option 82 function will not be enabled for the selected VLAN. Example: PDYN# configure vlan modify 1 dhcp-option-82 disabled Configure VLAN Modify Name configure vlan modify {vlan_id | vlan_name} name {vlan_name} Minimum Access Level: Administrator The configure vlan modify name command is used to define a unique VLAN for the system. vlan_id - This value specifies the VLAN to be modified. vlan_name - This value uses the assigned VLAN name to identify the VLAN to be modified. In this case the VLAN would be renamed to the new value entered. Example: PDYN# configure vlan modify room12 room11 2600-A2-GB21-50 May 2006 3-159 3. Commands Configure VLAN Modify Next Hop Router configure vlan modify {vlan_id | vlan_name} nhr {ip_address} Minimum Access Level: Administrator The configure vlan modify nhr command is used to define the next hop router address for the subscribers on this vlan. vlan_id - This value specifies the VLAN to be modified. ip_address - This value is the IP address of the next hop router for the subscribers on this VLAN. Example: PDYN# configure vlan 77 modify nhr 135.90.1.1 Configure VLAN Modify Ports configure vlan modify {vlan_id | vlan_name} ports {tagged | untagged } {delete | port-id:pg | port-list} Minimum Access Level: Administrator The configure vlan modify ports command is used to define the ports that are members of this vlan. vlan_id - This value specifies the VLAN to be modified. vlan_name - This value uses the assigned VLAN name to identify the VLAN to be modified. port-id - This value specifies the port to be included in this vlan. pg - Identifies the priority group on this port. If the priority group is not entered, it will be assumed to be group 1. port-list - This value is a range of ports to be included in this vlan. Valid values are 1-24,eth1,eth2, and eth3. Enter delete to delete all ports. tagged - This parameter specifies that the ports listed in this command are tagged members of the vlan. untagged - This parameter specifies that the ports listed in this command are untagged members of the vlan. Example: PDYN# configure vlan modify 1 ports untagged eth1,eth2,eth3,1-24 3-160 May 2006 2600-A2-GB21-50 3. Commands Configure VLAN Modify Proxy-ARP configure vlan modify {vlan_id | vlan_name} proxy-arp (enabled | disabled} Minimum Access Level: Administrator The configure vlan modify proxy-arp command specifies if the proxy-arp function will be used on the selected VLAN. vlan_id - This value specifies the VLAN to be modified. vlan_name - This value uses the assigned VLAN name to identify the VLAN to be modified. enabled – The proxy ARP function will be enabled for the selected VLAN. This is the factory default. disabled - The proxy ARP function will be disabled for the selected VLAN. Example: PDYN# configure vlan modify 1 proxy-arp disabled Configure VLAN Modify Secure VLAN configure vlan modify {vlan_id | vlan_name} secure (enabled | disabled} Minimum Access Level: Administrator The configure vlan modify secure command specifies if the vlan will be in secure mode. When a VLAN is in secure mode, all the traffic from the DSL port is routed to the designated uplink port. vlan_id - This value specifies the VLAN to be modified. vlan_name - This value uses the assigned VLAN name to identify the VLAN to be modified. enabled – The secure VLAN function will be enabled for the selected VLAN. This is the factory default. disabled - The secure VLAN function will be disabled for the selected VLAN. Example: PDYN# configure vlan modify 1 secure disabled 2600-A2-GB21-50 May 2006 3-161 3. Commands Configure VLAN Reserved Block Start configure vlan reserved-block-start {vlan_id} Minimum Access Level: Administrator The configure vlan reserved-block-start command is used to configure the reserved block of vlans. The vlan id is the first reserved vlan in the contiguous reserved block of 16. vlan_id - This value specifies the first reserved vlan in the reserved block of 16. The default is 4080. Example: PDYN# configure vlan reserved-block-start 4080 Configure VLAN Show configure vlan show {vlan_id | vlan_name} Minimum Access Level: Administrator The configure vlan show command displays all the configuration parameters for the selected VLAN. This command is identical to the show vlan configuration command. Example: PDYN# configure vlan show 3-162 May 2006 2600-A2-GB21-50 3. Commands Copy (Configuration) The copy function is used for saving and restoring configurations. The command is designed so that a file is copied from the first specified configuration to the second specified configuration or FTP (meaning FTP server file system). The prototype for the command is: copy {source}[options]{destination}[options] There is a restriction when FTP is used as either the source or the destination. In this case the other parameter must be "startup-config". All FTP transfers are to/from the configuration file in nonvolatile memory. In order to download a configuration and make it active, the Administrator must execute two copy commands. The first command does an FTP transfer to the startup configuration file. The second command copies the startup configuration to the running configuration. Copy From FTP Server to Startup Configuration (Download Configuration) copy ftp {ip_address} { user_name} { password} { filename} startup-config Minimum Access Level: Administrator The copy ftp command downloads a configuration file to the start up configuration which is in non-volatile memory. ftp – Specifies that destination file is on an FTP server. The ftp keyword must be followed in order by: ip_address – The IP address of the FTP server user_name – A user name allowed on the FTP server password – The password associated with the user name filename – The name of the source or destination file startup-config – Specifies that the destination file is the configuration in non-volatile memory. Example: PDYN# copy ftp 135.90.28.28 ftpuser ftppw save.config startup-config 2600-A2-GB21-50 May 2006 3-163 3. Commands Copy Running Configuration to Startup Configuration (Save) copy running-config startup-config Minimum Access Level: Administrator The copy running-config startup-config command copies the configuration of the volatile running configuration to the non-volatile start-up configuration. This is the same function as the save command. running-config - Specifies the running configuration (volatile memory) is the source file. startup-config – Specifies that the destination file is the configuration in non-volatile memory. Example: PDYN# copy running-config startup-config Copy Running Configuration to Startup Configuration (Backup) copy startup-config ftp {ip_address} {user_name} {password} {filename} Minimum Access Level: Administrator The copy startup-config ftp command saves the startup configuration file to the file specified on the ftp server. ftp – Specifies that destination file is on an FTP server. The ftp keyword must be followed in order by: ip_address – The IP address of the FTP server user_name – A user name allowed on the FTP server password – The password associated with the user name filename – The name of the source or destination file startup-config – Specifies that the destination file is the configuration in non-volatile memory. Example: PDYN# copy startup-config ftp 135.90.28.28 ftpuser ftppw save.config 3-164 May 2006 2600-A2-GB21-50 3. Commands Copy Startup Configuration to Running Configuration (Reload) copy startup-config running-config Minimum Access Level: Administrator The copy startup-config running-config command loads the startup configuration file to running configuration. startup-config – Specifies that the source file is the configuration in non-volatile memory. running-config - Specifies the running configuration (volatile memory) is the source file. Example: PDYN# copy startup-config running-config End end Minimum Access Level: User The end command terminates a privileged mode session and continues the session in standard mode. If the end command is executed by a user not in privileged mode, it places the user at the top of the command tree like one or more back commands. Example: PDYN# end You are ending your privilege mode session PDYN>_ 2600-A2-GB21-50 May 2006 3-165 3. Commands Exit exit Minimum Access Level: User The exit command terminates the CLI session. If the CLI session is by telnet, the connection is dropped. Example: PDYN# exit Firmware To download or apply new firmware to the product. Firmware Download firmware download {ip_address} {user_name} {password} {filename} [no | yes] Minimum Access Level: Administrator The firmware download command downloads new firmware to the BitStorm 4800, and optionally applies it immediately. ip_address – Specifies the network address of the FTP server containing the FW file. user_name – Specifies a user name accepted by the FTP server. password – Specifies the password associated with the user name. filename – Specifies the file containing the operational firmware. no – The file is downloaded to the alternate firmware area, but not applied or executed. yes – The file is downloaded and applied immediately. The unit is also reset. Example: PDYN# firmware download 135.27.90.98 admin admnpass firm0302.bin no 3-166 May 2006 2600-A2-GB21-50 3. Commands Firmware Download Status firmware download-status Minimum Access Level: Administrator The firmware download-status command displays the status of the active or last firmware download. Example: PDYN# firmware download-status File name: sample_filename FTP Server Address xxx.xxx.xxx.xxx Bytes Transferred xxxxxxxxxx Transfer Status: Download in Progress PDYN# _ The following status is reported: Completed successfully Download in progress Transfer failed Firmware Revision firmware revision Minimum Access Level: Administrator The firmware revision command displays the revision numbers of the firmware currently running and alternate firmware maintained in memory. Example: PDYN# firmware revision Running version Alternate version 01.01.20 01.01.16 PDYN# 2600-A2-GB21-50 May 2006 3-167 3. Commands Firmware Switch firmware switch Minimum Access Level: Administrator The firmware switch command loads and executes the alternative firmware file. This also resets the unit. Example: PDYN# firmware switch Switch from firmware revision 01.02.03 to firmware revision 01.02.04? (yes/no) yes Firmware switched, system rebooting PDYN# Paging paging {disabled | enabled} Minimum Access Level: User The paging command determines how a full screen of output is displayed. The selection affects only the user who enters the command. disabled – Specifies that output is sent to the screen without interruption. enabled – Specifies that when 23 lines of output have been sent to the screen, a More prompt is displayed on line 24. When More is displayed, you can: Press the space bar to view the next screen of output Press the Enter key to view the next line of output Press the “q” key to return to the command line. Example: PDYN>paging enabled 3-168 May 2006 2600-A2-GB21-50 3. Commands Password This command allows a user to change the login password. If this command is executed while in the privilege mode, it will change the privilege password. If the command is executed while in the user mode, it will change only the user password. password Minimum Access Level: User The password command changes the user or administrator (privilege) password, depending on which level is active. Example: PDYN# password enter old admin level password: **** enter new admin level password: ****** enter new admin level password again: ****** password changed PDYN# Operational Notes: This command is interactive. The user is prompted for the information to be entered. The user first is asked for the password that was used to login. Then the user is asked for the new password. The new password must be entered twice. The second password is used to verify that the new password was entered correctly. If the old password is incorrect, the command is ignored, and an error message is displayed. The password can have a maximum of 15 alphanumeric characters, and a minimum of 0 (zero) characters. 2600-A2-GB21-50 May 2006 3-169 3. Commands Ping ping {ip_address} Minimum Access Level: User The ping command sends a ICMP echo message to the selected IP address. Example: PDYN>ping 135.90.1.2 135.90.1.2 is alive PDYN> PDYN>ping 135.90.1.2 no response from 135.90.1.2 PDYN> Privilege privilege Minimum Access Level: User The privilege command causes the user to be prompted for an administrator password. When the password is entered correctly, the user is placed in Administrator (privileged) mode. The Administrator can then change configuration parameters. Example: PDYN>privilege Password: ****** PDYN# _ PDYN>privilege Password: ****** Incorrect password try again. Password: ****** Incorrect password try again. Password: ****** Incorrect password try again. PDYN>_ Operational Note: If the password is typed in incorrectly the CLI responds with the following: "Incorrect password: Try again." After three attempts to gain access to privilege mode with the wrong password, the administrator is returned to the user mode prompt. 3-170 May 2006 2600-A2-GB21-50 3. Commands Restart restart Minimum Access Level: Administrator The restart command restarts the unit, causing it to reload the startup configuration and retrain the DSL ports. Example: PDYN# restart Save save Minimum Access Level: Administrator The save command copies the running configuration, which is in volatile memory, to the startup configuration file, which is in nonvolatile memory. The PDYN# prompt changes to PDYN# ! when the configuration has been changed and has not yet been saved. It returns to PDYN# after the save command is executed. Example: PDYN# !save PDYN# _ Show The show commands display configuration and statistical information about the system. 2600-A2-GB21-50 May 2006 3-171 3. Commands Show Bridge show bridge [port_id] Minimum Access Level: Administrator The show bridge command displays the MAC table. port_id – Specifies that the display should be limited to entries for a single port. Example: PDYN# show bridge Mode: Mux Total Entries:7 Port-id 4 4 24 24 1 2 eth1 mac address 00-90-f2-ce-44-00 00-90-f2-ce-44-00 00-00-0c-42-27-f7 00-00-0c-42-27-f7 00-90-f2-ce-44-00 00-90-f2-ce-44-00 00-90-f2-ce-44-00 status learned learned learned learned learned learned learned vlan 001 002 003 004 005 006 006 name default alcatel paradyne management abdo inband outofband Display results: Mode – Displays the last mode command that was used to configure the bridge: switched – Switched mode. The system acts as a transparent learning bridge. mux – The system treats each DSL port as if it were a private network connected to the uplink, and never forwards data on another DSL port. sms – The system treats each DSL port as if it were a private network connected to the uplink, and never forwards data on another DSL port. uplink-tagging – The system treats each DSL port as if it were a private network connected to the uplink, and never forwards data on another DSL port. This is accomplished by assigning a VLAN tag to each DSL port. The values of the tags are predefined by the system. Total Entries – The number of entries currently in the table. hardware address – The MAC address of the table entry. port-id – The port ID of the entry. status – The status of the entry: invalid – This learned entry has timed out but has not yet been deleted. learned – This entry was learned. management – This entry has a matching static address. other – None of the other statuses apply to this entry. self – This entry is the unit. 3-172 May 2006 2600-A2-GB21-50 3. Commands Show Bridge Timeout This command will display bridge table entry timeout value in seconds. The timeout is a value in seconds that specifies the time interval after which entry in bridge table will be removed. show bridge timeout Minimum Access Level: User The show bridge timeout command displays the bridge table entry timeout value in seconds. Example: PDYN# show bridge timeout 300 sec PDYN# Display results: timeout – The bridge table entry timeout value. Show Date To display the current date and time configured on the Speedway product. The date will be displayed in dd/mm/yy or mm/dd/yy format depending on users preference as configured with the configure system date-display-format command. show date Minimum Access Level: User The show date command displays the system date, time, and time zone. Example: PDYN# show date dd/mm/yy hh/mm/ss timezone 01/06/05 21:22:38 -5 OR mm/dd/yy hh/mm/ss timezone 06/01/05 21:22:38 -5 2600-A2-GB21-50 May 2006 3-173 3. Commands Show Filter show filter [filter_name] Minimum Access Level: User The show filter command displays configured data filters. filter_name – Specifies that the display should be limited to a single filter. Example: PDYN>show filter rule1 rule-name rule1 discard type ether rule2 rule-name rule2 forward type action ether discard action discard frame dix frame dix rule AAE rule 660 PDYN>show filter rule1 rule1 rule-name rule1 discard type action ether forward frame dix rule aae Display results: filter-name – The name of the filter. action – The action to be performed: forward – Specifies that a packet is to be forwarded to the user when none of the conditions specified in the rule or rules are matched. discard – Specifies that a packet is to be discarded when none of the conditions specified in the rule or rules are matched. rule-name – The name assigned to the rule or rules associated with this filter. type – The rule type: ether – The rule is based on Ethertypes. action – The action to perform if the rule is satisfied: forward – The packet is forwarded. discard – The packet is discarded. frame – DIX or SNAP ether frame type. rule – The rule criteria: The Ethertypes the rule affects. 3-174 May 2006 2600-A2-GB21-50 3. Commands Show Filter-Binding show filter-binding [filter [ filter_name]] | [port [ port_id]] Minimum Access Level: User The show filter-binding command displays the bindings of filters to interfaces. filter – Specifies that output is sorted by filter name. filter_name – Specifies that the display should be limited to a single filter. port – Specifies that output is sorted by port number. port_id – Specifies that the display should be limited to a single port. Example: PDYN>show filter-binding port filter name 2 ethernetFilter 3 anotherFilter 18 ethernetFilter 19 ethernetFilter direction Inbound Inbound Inbound Inbound PDYN>show filter-binding filter ethernetFilter ethernetFilter Inbound Inbound Inbound 18 19 2 PDYN>show filter-binding port 3 3 anotherFilter Inbound Display results: port-id – The port the rule is bound to. filter-name – The name of the filter. direction – The direction of the data stream affected by this binding: inbound – Traffic toward the port is affected. outbound – Traffic from the port is affected. 2600-A2-GB21-50 May 2006 3-175 3. Commands Show Filter-Proto-Specific show filter-proto-specific Minimum Access Level: User The show filter-proto-specific command displays the settings for all protocol-specific filters Example: PDYN>show filter-proto-specific NetBIOS denied (dropped). PDYN>show filter-proto-specific NetBIOS permitted (forwarded). Show Filter-Rule show filter-rule [rule_name] Minimum Access Level: User The show filter-rule command displays configured filter rules. filter_name – Specifies that the display should be limited to a single filter. Example: PDYN>show filter-rule rule1 rule-name rule1 type ether action forward frame dix rule 000AAD Display results: rule-name – The name assigned to the rule. type – The rule type: – ether – The rule is based on Ethertypes. – ether-snap – The rule applies to Layer 2 SubNetwork Access Protocol (SNAP) traffic. action – The action to perform if the rule is satisfied: – forward – The packet is forwarded. – discard – The packet is discarded. rule – The rule criteria: The Ethertypes the rule affects. frame – DIX or SNAP ether frame type. 3-176 May 2006 2600-A2-GB21-50 3. Commands Show IGMP Configuration show igmp {port_id} configuration Minimum Access Level: User The show igmp configuration command displays the configuration of the parameters related to the IGMP snooping and proxy functions. port_id – Specifies that the display should be limited to this specified port. If all is specified, all ports configurations are displayed. Example: PDYN>show igmp 1 configuration Port 1 IGMP Configuration: snooping leave-delay leave-join-delay query-count query-wait-timer proxy report-summary enabled 300 msec 300 msec 3 1000 msec disabled disabled PDYN> 2600-A2-GB21-50 May 2006 3-177 3. Commands Show IGMP-Proxy show igmp-proxy Minimum Access Level: User The show igmp-proxy command displays the configuration of the parameters related to the IGMP proxy function. Example: PDYN>show igmp-proxy IGMP proxy is disabled Show IGMP-Proxy show igmp-snooping Minimum Access Level: User The show igmp-snooping command displays the configuration of the parameters related to the IGMP snooping function. Example: PDYN>show igmp-snooping IGMP Snooping Configuration: Snooping Selection enabled Query Interval 125 Querier Auto Detect disabled Querier Interface eth3 3-178 May 2006 2600-A2-GB21-50 3. Commands Show Interface Console show interface console Minimum Access Level: User The show interface console command displays the configuration of the Console port on the unit. Example: PDYN# show interface console rate 9600 data-bits8 stop-bits1 paritynone PDYN# _ Show Interface DSL Bonding Configuration show interface dsl-bonding {group_id} configuration Minimum Access Level: User The show interface dsl-bonding configuration command displays information about all DSL Bonding Groups or a specified DSL Bonding Group. group_id – Specifies that the display should be limited to this specified group. If all is specified, information is displayed for all DSL Bonding Groups. configuration – Specifies that the bonding group’s configuration should be displayed. Example: PDYN# show interface dsl-bonding 1 configuration **************************************************** * DSL Bonding Group ID : 1 **************************************************** Group Index Group Name State Number of References Alarm Profile Name DSL Port Members 2600-A2-GB21-50 55 room101 enabled 3 Alarm_Profile1 1, 2, 3, 4, 5 May 2006 3-179 3. Commands Show Interface DSL Bonding Performance show interface dsl-bonding {group_id} performance Minimum Access Level: User The show interface dsl-bonding performance command displays performance information about all DSL Bonding Groups or a specified DSL Bonding Group. group_id – Specifies that the display should be limited to this specified group. If all is specified, information is displayed for all DSL Bonding Groups. performance – Specifies that the bonding group performance should be displayed. Example: PDYN# show interface dsl-bonding 1 performance **************************************************** * DSL Bonding Group ID : 1 **************************************************** Group Index Group Name Admin Status Link Status Current ATU-C Net Data Rate Current ATU-R Net Data Rate Previous ATU-C Net Data Rate Previous ATU-R Net Data Rate 3-180 55 room101 enabled up 10000 999 18000 12000 May 2006 2600-A2-GB21-50 3. Commands Show Interface DSL Bonding Statistics ATM show interface dsl-bonding {group_id} statistics-atm [bucket_number] Minimum Access Level: User The show interface dsl statistics-atm command displays ATM statistics for the specified DSL Bonding Group. group_id – Specifies that the display should be limited to this specified group. If all is specified, information is displayed for all DSL Bonding Groups. bucket_number – Optional parameter to specify which statistics interval (1–96) to display. If no bucket number is specified then all intervals are displayed. Example: show interface dsl 1/2 statistics-atm ATM Statistics Interval Current 1 2 3 . . . 96 Rx Cells xxxxxxxx xxxxxxxx xxxxxxxx xxxxxxxx xxxxxxxx Tx Cells xxxxxxxx xxxxxxxx xxxxxxxx xxxxxxxx xxxxxxxx HEC xxxxxxxx xxxxxxxx xxxxxxxx xxxxxxxx xxxxxxxx OCD xxxxxxxx xxxxxxxx xxxxxxxx xxxxxxxx xxxxxxxx xxxxxxxx xxxxxxxx xxxxxxxx xxxxxxxx ATM PVC Performance VCC total cells sent total cells received 0/35 xxxxxx xxxxxx VCC total cells sent total cells received 0/40 xxxxxx xxxxxx 2600-A2-GB21-50 May 2006 3-181 3. Commands Show Interface DSL Bonding Profile Alarm show interface dsl-bonding-profile-alarm {profile-name} Minimum Access Level: User The show interface dsl-bonding-profile-alarm command displays information about all DSL Bonding Alarm Profiles or a specified DSL Bonding Alarm Profile. profile-name – Specifies that the display should be limited to this specified profile name. If not profile name is specified, information is displayed for all DSL Bonding Alarm Profiles. Example: PDYN# show interface dsl-bonding-profile-alarm BondingProfile1 DSL Bonding Alarm Profile Configuration: Alarm Profile Name Number of References ATU-C Threshold Rate ATU-C Threshold Rate ATU-R Threshold Rate ATU-R Threshold Rate 3-182 Up Down Up Down BondingProfile1 2 10000 10000 20000 20000 May 2006 2600-A2-GB21-50 3. Commands Show Interface DSL Configuration show interface dsl {port_id} configuration Minimum Access Level: User The show interface dsl configuration command displays information about all ADSL ports or a specified ADSL port. port_id – Specifies that the display should be limited to this specified port. If all is specified, information is displayed for all ports. configuration – Specifies that the port’s configuration should be displayed. Example: PDYN# show interface dsl 1/1 configuration name room_101 state enabled line length (kft) 10 transmission mode multimode latency interleaved linkupdown-trap enabled pwrmgmt-state enabled pwrmgmt-enabling idle l0-time 10 l2-time 10 Line Profile Name ADSL_LINE_PROFILE Alarm Profile Name ALARM_PROFILE ADSL2 PSD Profile Name Profile1 ADSL2 Plus PSD Profile Name Profile2 Upstream adaptive 1000 64 3 0 6 1 16 behavior adaptive max-speed (kb/s) min-speed (kb/s) target-margin (dB) min-snr-margin (dB) max-snr-margin (dB) max transmit power (dBm) max interleave delay (ms) P-G 1 3 4 VCC 0/35 1/92 0/40 12000 256 15 0 6 1 16 Encap VLAN llc-bridged 0001,0002, 0003,0004, 0005, 0006, 0007, 0008 llc-bridged 0092 llc-bridged 0140 Priority Group queuing method pvid priority acceptable-frame-type ingress-filtering 2600-A2-GB21-50 Downstream 1 fifo 001 0 all disabled 2 3 4 fifo fifo fifo 001 001 001 0 0 0 all all all disabled disabled disabled May 2006 3-183 3. Commands Show Interface DSL Far End show interface dsl {port_id} far-end Minimum Access Level: User The show interface dsl far-end command displays endpoint information for the designated port. port_id – ADSL port id Example: PDYN# show interface dsl 1/2 far-end PDYN> Vendor ID 0255 Firmware Revision 01.00.12 Serial Number 1234567 Show Interface DSL Profile Alarm Show interface dsl-profile-alarm {profile_name } Minimum Access Level: User The show interface dsl-profile-alarm command displays the configuration of the specified alarm profile. profile_name – Identifies the ADSL alarm profile to be displayed. Example: PDYN# show interface dsl-profile-alarm adsl_alarm_profile1 3-184 May 2006 2600-A2-GB21-50 3. Commands Show Interface DSL Profile Line show interface dsl-profile-line {profile_name } Minimum Access Level: User The show interface dsl-profile-line command displays the configuration of the specified ADSL line profile. profile_name – Identifies the ADSL line profile to be displayed. Example: PDYN# show interface dsl-profile-line adsl_line_profile1 Show Interface DSL Profile PSD show interface dsl-profile-psd {profile_name } Minimum Access Level: User The show interface dsl-profile-psd command displays the configuration of the specified ADSL PSD profile. profile_name – Identifies the ADSL PSD profile to be displayed. Example: PDYN# show interface dsl-profile-psd adsl_psd_profile1 2600-A2-GB21-50 May 2006 3-185 3. Commands Show Interface DSL Performance show interface dsl all performance Minimum Access Level: User The show interface dsl performance command displays performance information for all ADSL ports. all – This is the port id. All ports for a slot are displayed. The only valid choice is “all”. performance – Specifies that performance statistics for the specified port should be displayed. Example: PDYN# show interface dsl all performance ADSL ports 1 2 3 4 5 6 7 8 Status UP DN UP UP UP UP UP Line Rate Up8000 8000 8000 8000 8000 8000 8000 8000 Line Rate Down8000 8000 8000 8000 8000 8000 8000 8000 Margin UP 15 15 15 15 15 15 15 15 Margin Down 15 15 15 15 15 15 15 15 AttainableRate Up8000 8000 8000 8000 8000 8000 8000 8000 AttainableRate Down8000 8000 8000 8000 8000 8000 8000 8000 Attenuation Up 10 10 10 10 10 10 10 10 Attenuation Down 10 10 10 10 10 10 10 10 TX Power RX Level 8 8 -4 8 -4 8 -4 8 -3 8 -3 8 -2 8 -1 -5 ADSL ports 9 10 11 12 13 14 15 16 Status UP DN UP UP UP UP UP Line Rate Up8000 8000 8000 8000 8000 8000 8000 8000 Line Rate Down8000 8000 8000 8000 8000 8000 8000 8000 Margin UP 15 15 15 15 15 15 15 15 Margin Down 15 15 15 15 15 15 15 15 AttainableRate Up8000 8000 8000 8000 8000 8000 8000 8000 AttainableRate Down8000 8000 8000 8000 8000 8000 8000 8000 Attenuation Up 10 10 10 10 10 10 10 10 Attenuation Down 10 10 10 10 10 10 10 10 TX Power 8 8 8 8 8 8 8 8 ADSL ports 17 18 19 20 21 22 23 24 Status UP DN UP UP UP UP UP Line Rate Up8000 8000 8000 8000 8000 8000 8000 8000 Line Rate Down8000 8000 8000 8000 8000 8000 8000 8000 Margin UP 15 15 15 15 15 15 15 15 Margin Down 15 15 15 15 15 15 15 15 AttainableRate Up8000 8000 8000 8000 8000 8000 8000 8000 AttainableRate Down8000 8000 8000 8000 8000 8000 8000 8000 Attenuation Up 10 10 10 10 10 10 10 10 Attenuation Down 10 10 10 10 10 10 10 10 TX Power 8 8 8 8 8 8 8 8 3-186 May 2006 UP UP UP 2600-A2-GB21-50 3. Commands Show Interface DSL Rates show interface dsl {port_id} rates Minimum Access Level: User The show interface dsl rates command displays the data rate for all ADSL ports. port_id – Must be all all. rate – Specifies that the current rate of the specified port should be displayed. Example: PDYN# show interface dsl all rates PORT UP DOWN 1 1000 12000 2 1000 12000 3 1000 12000 4 1000 12000 5 1000 12000 6 1000 12000 7 1000 12000 8 1000 12000 9 1000 12000 10 1000 12000 11 1000 12000 12 1000 12000 PDYN>_ PORT 13 14 15 16 17 18 19 20 21 22 23 24 UP 1000 1000 1000 1000 1000 1000 1000 1000 1000 1000 down down DOWN 12000 12000 12000 12000 12000 12000 12000 12000 12000 12000 down down Display results: Line Rate Up – The upstream data rate of the link is up. If the link is down, one of the following will be displayed: – Dsbl – The port is administratively disabled. – Down – The link is down. Line Rate Down – The downstream data rate. If the link is down, one of the following will be displayed: – Dsbl – The port is administratively disabled. – Down – The link is down. 2600-A2-GB21-50 May 2006 3-187 3. Commands Show Interface DSL Statistics ATM Show interface dsl {port_id} statistics-atm [bucket_number] Minimum Access Level: User The show interface dsl statistics-atm command displays ATM statistics for the specified ADSL port. port_id – Specifies that the display should be limited to this specified port. If all is specified, information is displayed for all ports. bucket_number – Optional parameter to specify which statistic interval (1..96) to display. If no bucket number is specified then all intervals are displayed. Example: PDYN# show interface dsl 1/2 statistics-atm ATM STATISTICS Interval current 1 2 3 . . . 96 Rx-Cells xxxxxxxx xxxxxxxx xxxxxxxx xxxxxxxx xxxxxxxx xxxxxxxx xxxxxxxx xxxxxxxx Tx Cells xxxxxxxx xxxxxxxx xxxxxxxx xxxxxxxx xxxxxxxx xxxxxxxx xxxxxxxx xxxxxxxx HEC xxxxxxxx xxxxxxxx xxxxxxxx xxxxxxxx xxxxxxxx xxxxxxxx xxxxxxxx xxxxxxxx OCD xxxxxxxx xxxxxxxx xxxxxxxx xxxxxxxx xxxxxxxx xxxxxxxx xxxxxxxx xxxxxxxx ATM PVC Performance VCC total cells sent total cells received 0/35 xxxxxx xxxxxx VCC total cells sent total cells received 0/40 xxxxxx xxxxxx Display results: ATM Statistics (Up and Down denote values for the upstream and downstream directions): total cells rx – Total number of ATM cells received. total cells tx – Total number of ATM cells sent. total HEC – Number of cells from the CPE whose headers were corrected. total OCD – Number of Out of Cell Delineation events on the link from the CPE. ATM PVC Performance total cells sent – Number of ATM PVC Cells sent by the port. total cells received – Number of ATM PVC cells received on the port. 3-188 May 2006 2600-A2-GB21-50 3. Commands Show Interface DSL Statistics Line Far End Show interface dsl {port_id} statistics-line-far-end [bucket_number] Minimum Access Level: User The show interface dsl statistics-line command displays statistics for the specified ADSL port. port_id – Specifies that the display should be limited to this specified port. bucket_number – Optional parameter to specify the maximum interval (1..96) to display. If no bucket number is specified then all intervals are displayed. If bucket_number is entered, then all buckets up to the specified bucket are displayed. The current interval is always displayed. Example: PDYN# show interface dsl 1/2 statistics-line-far-end FAR END ADSL STATISTICS Interval current 1 2 3 . . . 95 96 LOFS xxxxxxxx xxxxxxxx xxxxxxxx xxxxxxxx xxxxxxxx xxxxxxxx xxxxxxxx xxxxxxxx xxxxxxxx LOSS xxxxxxxx xxxxxxxx xxxxxxxx xxxxxxxx xxxxxxxx xxxxxxxx xxxxxxxx xxxxxxxx xxxxxxxx LPRS xxxxxxxx xxxxxxxx xxxxxxxx xxxxxxxx xxxxxxxx xxxxxxxx xxxxxxxx xxxxxxxx xxxxxxxx ES xxxxxxxx xxxxxxxx xxxxxxxx xxxxxxxx xxxxxxxx xxxxxxxx xxxxxxxx xxxxxxxx xxxxxxxx SES xxxxxxxx xxxxxxxx xxxxxxxx xxxxxxxx xxxxxxxx xxxxxxxx xxxxxxxx xxxxxxxx xxxxxxxx UAS xxxxxxxx xxxxxxxx xxxxxxxx xxxxxxxx xxxxxxxx xxxxxxxx xxxxxxxx xxxxxxxx xxxxxxxx Display results: ES (errored seconds) – Seconds during which an error occurred. SES (severely errored seconds) – Seconds during which there was a major error such as an out of frame condition, or a bit error density greater than 10–2. LOFS (loss of frame seconds) - Counts accrued after loss of frame detected LOSS (loss of signal seconds) – Counts accrued after loss of signal detected LPRS (loss of power) - Counts accrued after loss of power detected US (unavailable seconds) - Counts of unavailable seconds. 2600-A2-GB21-50 May 2006 3-189 3. Commands Show Interface DSL Statistics Line Near End Show interface dsl {port_id} statistics-line-near-end [bucket_number] Minimum Access Level: User The show interface dsl statistics-line command displays statistics for the specified ADSL port. port_id – Specifies that the display should be limited to this specified port. bucket_number – Optional parameter to specify the maximum interval (1–96) to display. If no bucket number is specified then all intervals are displayed. If bucket_number is entered, then all buckets up to the specified bucket are displayed. The current interval is always displayed. Example: PDYN# show interface dsl 1/2 statistics-line-near-end NEAR END ADSL STATISTICS Interval current 1 2 3 . . . 95 96 LOFS xxxxxxxx xxxxxxxx xxxxxxxx xxxxxxxx xxxxxxxx xxxxxxxx xxxxxxxx xxxxxxxx xxxxxxxx LOSS xxxxxxxx xxxxxxxx xxxxxxxx xxxxxxxx xxxxxxxx xxxxxxxx xxxxxxxx xxxxxxxx xxxxxxxx LOLS xxxxxxxx xxxxxxxx xxxxxxxx xxxxxxxx xxxxxxxx xxxxxxxx xxxxxxxx xxxxxxxx xxxxxxxx ES xxxxxxxx xxxxxxxx xxxxxxxx xxxxxxxx xxxxxxxx xxxxxxxx xxxxxxxx xxxxxxxx xxxxxxxx SES xxxxxxxx xxxxxxxx xxxxxxxx xxxxxxxx xxxxxxxx xxxxxxxx xxxxxxxx xxxxxxxx xxxxxxxx UAS xxxxxxxx xxxxxxxx xxxxxxxx xxxxxxxx xxxxxxxx xxxxxxxx xxxxxxxx xxxxxxxx xxxxxxxx Display results: ES (errored seconds) – Seconds during which an error occurred. SES (severely errored seconds) – Seconds during which there was a major error such as an out of frame condition, or a bit error density greater than 10–2. LOFS (loss of frame seconds) - Counts accrued after loss of frame detected LOSS (loss of signal seconds) – Counts accrued after loss of signal detected LOLS (loss of link) - Counts accrued after loss of link detected UAS (unavailable seconds) – Counts of unavailable seconds. 3-190 May 2006 2600-A2-GB21-50 3. Commands Show Interface DSL Status show interface dsl {port_id} status Minimum Access Level: User The show interface dsl status command displays the status for the specified ADSL port. port_id – Specifies that the display should be limited to this specified port. Example: PDYN# show interface dsl 1/2 status link status link up time transmission mode latency near end alarm state far end alarm state Up ddd hh:mm:ss dmt interleaved OK OK ADSL status: rate (Kbps) attainable rate (Kbps) previous rate margin (dB) attenuation (dB) current transmit power (dB) ADSL line init attempts 2600-A2-GB21-50 Near End xxxxx xxxxx xxxxxx xx xx xx xxx May 2006 Far End xxxxx xxxxx xxxxxx xx xx xx 3-191 3. Commands show interface dsl status, continued Display results: link status – The status of the link: – dormant – The link has not yet trained up. – down – The link is down. – notConnected – The link is training. – unknown – The link’s status cannot be determined. – up – The link is enabled and ready to send packets. link up time – The number of days, hours, minutes, and seconds the interface has been active. transmission mode – The line code used on the port: DMT, ANSI, or G.lite. latency – The buffer setting for the port: fast or interleaved. near end alarm state – shows any alarms detected on the DSL Line. Multiple alarms may be displayed. OK – No Alarm LOF – Loss of Frame LOS – Loss of Signal LOL – Loss of Link LOSQ – Loss of Signal quality far end alarm state – shows any alarms detected on the far end (CPE) . Multiple alarms may be displayed. OK – No Alarm LOF – Loss of Frame LOL – Loss of Link LOP – Loss of Power LOSQ – Loss of Signal quality ADSL Status (Up and Down denote values for the upstream and downstream directions): margin – The amount of noise margin that can be tolerated, in dB. rate – The data rate. attainable rate – An estimate of the maximum attainable rate. attenuation – The decrease of intensity of the signal across the link, in dB. previous rate – Previous Rate. margin (dB) – Margin. current transmit power (dB) – Transmit Power. ADSL line init attempts – ADSL Line init attempts. 3-192 May 2006 2600-A2-GB21-50 3. Commands Show Interface SHDSL Configuration show interface shdsl {port_id} configuration Minimum Access Level: User The show interface shdsl configuration command displays information about all SHDSL ports or a specified SHDSL port. port_id – Specifies that the display should be limited to this specified port. If all is specified, information is displayed for all ports. configuration – Specifies that the port’s configuration should be displayed. Example: PDYN# show interface shdsl 1 configuration SHDSL Port 1 Configuration: Name State room_101 up Line mode co line length (kft) 10 linkupdown-trap enabled line profile name shdsl_line_profile_1 alarm profile name shdsl_alarm_profile_1 repeaters configured 3 repeaters discovered 1 P-G 1 3 4 VCC 0/35 1/92 0/40 Encap llc-bridged llc-bridged llc-bridged Priority Group VLAN 0001,0002, 0003,0004, 0005, 0006 0092 0140 1 2 3 4 queuing method fifo fifo fifo fifo pvid 001 001 001 001 priority 0 0 0 0 acceptable-frame-type all all all all ingress-filtering disabled disabled disabled disabled 5 6 7 8 queuing method fifo fifo fifo fifo pvid 001 001 001 001 priority 0 0 0 0 acceptable-frame-type all all all all disabled disabled disabled disabled Priority Group ingress-filtering 2600-A2-GB21-50 May 2006 3-193 3. Commands Show Interface SHDSL Extended Rate Mode show interface shdsl-extended-rate-mode Minimum Access Level: User The show interface shdsl-extended-rate-mode command displays the configuration of extended rate mode. Example: PDYN# show interface shdsl-extended-rate-mode 3-194 May 2006 2600-A2-GB21-50 3. Commands Show Interface SHDSL Performance show interface shdsl {all} performance Minimum Access Level: User The show interface shdsl performance command displays performance information for all SHDSL ports. all – This is the port id. All ports are displayed. The only valid choice is “all”. performance – Specifies that performance statistics for the specified port should be displayed. Example: PDYN# show interface shdsl all performance SHDSL Performance SHDSL Ports Status Line Rate Attainable Rate Relative Capacity SNR Margin 1 SNR Margin 2 Loop Attenuation 1 Loop Attenuation 2 SHDSL Ports Status Line Rate Attainable Rate Relative Capacity SNR Margin 1 SNR Margin 2 Loop Attenuation 1 Loop Attenuation 2 SHDSL Ports Status Line Rate Attainable Rate Relative Capacity SNR Margin 1 SNR Margin 2 Loop Attenuation 1 Loop Attenuation 2 (kbps) (kbps) (%) (dB) (dB) (dB) (dB) 1 UP 2312 4112 56 15 15 10 10 2 3 4 5 6 7 8 UP UP UP UP UP UP - 2312 2312 2312 2312 2312 2312 - 4112 4112 4112 4112 4112 4112 56 56 56 56 56 56 15 15 15 15 15 15 15 15 15 15 15 15 10 10 10 10 10 10 10 10 10 10 10 10 (kbps) (kbps) (%) (dB) (dB) (dB) (dB) 9 10 11 12 13 14 15 16 UP UP UP UP UP UP UP UP 2312 2312 2312 2312 2312 2312 2312 2312 4112 4112 4112 4112 4112 4112 4112 4112 56 56 56 56 56 56 56 56 15 15 15 15 15 15 15 15 15 15 15 15 15 15 15 15 10 10 10 10 10 10 10 10 10 10 10 10 10 10 10 10 (kbps) (kbps) (%) (dB) (dB) (dB) (dB) 17 18 19 20 21 22 23 24 UP DN UP UP UP UP UP UP 2312 2312 2312 2312 2312 2312 2312 2312 4112 4112 4112 4112 4112 4112 4112 4112 56 56 56 56 56 56 56 56 15 15 15 15 15 15 15 15 15 15 15 15 15 15 15 15 10 10 10 10 10 10 10 10 10 10 10 10 10 10 10 10 Note: “-“ indicates that the port doesn’t exist as it one of the wire pairs and not the first wire pair. 2600-A2-GB21-50 May 2006 3-195 3. Commands Show Interface SHDSL Rates show interface shdsl {port_id} rates Minimum Access Level: User The show interface shdsl rates command displays the data rate for all SHDSL ports. port_id – Must be all all. rate – Specifies that the current rate of the specified port should be displayed. Example: PDYN# show interface shdsl all rates SHDSL Rates (kbps) PORT 1 2 3 4 5 6 7 8 9 10 11 12 RATE 2312 ---2313 2312 2312 2312 2312 2312 2312 2312 2312 2312 PORT 13 14 15 16 17 18 19 20 21 22 23 24 RATE 2312 2312 2312 2312 2312 2312 2312 2312 2312 2312 Down Dsbl Note: “-“ indicates that the port doesn’t exist as it one of the wire pairs and not the first wire pair. Display results: Rate – The data rate of the link. If the link is down, one of the following will be displayed: – Dsbl – The port is administratively disabled. – Down – The link is down. 3-196 May 2006 2600-A2-GB21-50 3. Commands Show Interface SHDSL Segment Alarm show interface shdsl {port_id} segment-alarm {stu-c | stu-r | rep-1 | rep-2 | rep-3 | rep-4 | rep-5 | rep-6 | rep-7 | rep-8} {cust | net} {pair-1 | pair-2 | pair-3 | pair-4} Minimum Access Level: User The show interface shdsl segment-alarm command displays the name of the alarm profile associated with the unit, unit side, and wire pair for a specified SHDSL port. port_id – Specifies that the display should be limited to this specified port. If all is specified, information is displayed for all ports. Unit: — stu-c – SHDSL centeral site terminal unit. — stu-r – SHDSL remote site terminal unit. — rep-1 ... rep-8 – SHDSL regenerator/repeater unit. The side of the unit: — cust – The side of the unit facing the customer terminal equipment — net – The side of the unit facing the central office The wire pair: — pair-1 – First wire pair — pair-2 – Second wire pair — pair-3 – Third wire pair — pair-4 – Fourth wire pair Example: PDYN# show interface shdsl 1 segment-alarm rep-1 cust pair-1 SHDSL Port 1 Segment Alarm Rep-1, cust, pair-1: red_alarm_profile 2600-A2-GB21-50 May 2006 3-197 3. Commands Show Interface SHDSL Statistics-ATM Show interface shdsl {port_id} statistics-atm [bucket_number] Minimum Access Level: User The show interface shdsl statistics-atm command displays ATM statistics for the specified SHDSL port. port_id – Specifies that the display should be limited to this specified port. If all is specified, information is displayed for all ports. bucket_number – Optional parameter to specify the maximum interval (1–96) to display. If no bucket number is specified then all intervals are displayed. If bucket_number is entered, then all buckets up to the specified bucket are displayed. The current interval is always displayed. Example: PDYN# show interface shdsl 2 statistics-atm ATM STATISTICS – Port 2 Interval current 1 2 3 . . . 96 Rx-Cells xxxxxxxx xxxxxxxx xxxxxxxx xxxxxxxx xxxxxxxx xxxxxxxx xxxxxxxx xxxxxxxx Tx Cells xxxxxxxx xxxxxxxx xxxxxxxx xxxxxxxx xxxxxxxx xxxxxxxx xxxxxxxx xxxxxxxx HEC xxxxxxxx xxxxxxxx xxxxxxxx xxxxxxxx xxxxxxxx xxxxxxxx xxxxxxxx xxxxxxxx OCD xxxxxxxx xxxxxxxx xxxxxxxx xxxxxxxx xxxxxxxx xxxxxxxx xxxxxxxx xxxxxxxx ATM PVC STATISTICS – Port 2 VCC total cells sent total cells received 0 / 35 xxxxxx xxxxxx VCC total cells sent total cells received 0 / 40 xxxxxx xxxxxx Display results: ATM Statistics (Up and Down denote values for the upstream and downstream directions): total cells rx – Total number of ATM cells received. total cells tx – Total number of ATM cells sent. total HEC – Number of cells from the CPE whose headers were corrected. total OCD – Number of Out of Cell Delineation events on the link from the CPE. ATM PVC Performance total cells sent – Number of ATM PVC Cells sent by the port. total cells received – Number of ATM PVC cells received on the port. 3-198 May 2006 2600-A2-GB21-50 3. Commands Show Interface SHDSL Statistics Line Show interface shdsl {port_id} statistics-line {stu-c | stu-r | rep-1 | rep-2 | rep-3 | rep-4 | rep-5 | rep-6 | rep-7 | rep-8} {cust | net} {pair-1 | pair-2 | pair-3 | pair-4} [bucket_number] Minimum Access Level: User The show interface shdsl statistics-line command displays statistics for the specified SHDSL port. port_id – Specifies that the display should be limited to this specified port. Unit: — stu-c – SHDSL centeral site terminal unit. — stu-r – SHDSL remote site terminal unit. — rep-1 ... rep-8 – SHDSL regenerator/repeater unit. The side of the unit: — cust – The side of the unit facing the customer terminal equipment — net – The side of the unit facing the central office The wire pair: — pair-1 – First wire pair — pair-2 – Second wire pair — pair-3 – Third wire pair — pair-4 – Fourth wire pair bucket_number – Optional parameter to specify the maximum interval (1–96) to display. If no bucket number is specified then all intervals are displayed. If bucket_number is entered, then all buckets up to the specified bucket are displayed. The current interval is always displayed. Example: PDYN# show interface shdsl 2 statistics-line-rep-1 net pair-1 SHDSL Port 2 rep-1 net pair-1 STATISTICS Interval current 1 2 3 . . . 95 96 ES xxxxxxxxxx xxxxxxxxxx xxxxxxxxxx xxxxxxxxxx xxxxxxxxxx xxxxxxxxxx xxxxxxxxxx xxxxxxxxxx xxxxxxxxxx SES xxxxxxxxxx xxxxxxxxxx xxxxxxxxxx xxxxxxxxxx xxxxxxxxxx xxxxxxxxxx xxxxxxxxxx xxxxxxxxxx xxxxxxxxxx CV xxxxxxxxxx xxxxxxxxxx xxxxxxxxxx xxxxxxxxxx xxxxxxxxxx xxxxxxxxxx xxxxxxxxxx xxxxxxxxxx xxxxxxxxxx LOSWS xxxxxxxxxx xxxxxxxxxx xxxxxxxxxx xxxxxxxxxx xxxxxxxxxx xxxxxxxxxx xxxxxxxxxx xxxxxxxxxx xxxxxxxxxx UAS xxxxxxxxxx xxxxxxxxxx xxxxxxxxxx xxxxxxxxxx xxxxxxxxxx xxxxxxxxxx xxxxxxxxxx xxxxxxxxxx xxxxxxxxxx Display results: ES (errored seconds) – Count of Errored Seconds. SES (severely errored seconds) – Count of Severely Errored Seconds during which there was a major error such as an out of frame condition, or a bit error density greater than 10–2. CV (code violation seconds) – Count of seconds during which there was a CRC anomaly. LOSWS (loss of sync word seconds) – Count of Loss of Sync Word seconds. UAS (unavailable seconds) – Count of Unavailable Seconds 2600-A2-GB21-50 May 2006 3-199 3. Commands Show Interface SHDSL Status Show interface shdsl {port_id} status {stu-c | stu-r | rep-1 | rep-2 | rep-3 | rep-4 | rep-5 | rep-6 | rep-7 | rep-8} {cust | net} Minimum Access Level: User The show interface shdsl status command displays the status for the specified unit, unit side, and SHDSL port. port_id – Specifies that the display should be limited to this specified port. Unit: — stu-c – SHDSL centeral site terminal unit. — stu-r – SHDSL remote site terminal unit. — rep-1 ... rep-8 – SHDSL regenerator/repeater unit. The side of the unit: — cust – The side of the unit facing the customer terminal equipment — net – The side of the unit facing the central office 3-200 May 2006 2600-A2-GB21-50 3. Commands show interface dsl status, continued Example: PDYN# show interface SHDSL 2 status stu-c cust SHDSL Port 2 stu-c cust Status: link status link up time alarm state 1 alarm state 2 rate (Kbps) attainable rate (Kbps) snr margin 1 (dB) snr margin 2 (dB) loop attenuation 1 (dB) loop attenuation 2 (dB) up ddd hh:mm:ss OK OK xxxxx xxxxx xx xx xx xx Note that the port at the central site for port 2 is configured for a four-wire interface. As a result, there is an SNR margin and a loop attenuation associated with each wire pair. Display results: link status – The status of the link: – up – The link is enabled and ready to send packets. – down – The link is down. – testing – The link is under a test such as loopback. – unknown – The link’s status cannot be determined. – dormant – The link has not yet trained up. – not present – The link doesn’t exist. It might be part of an adjacent wire pair. link up time – The number of days, hours, minutes, and seconds the interface has been active. near end alarm state – shows any alarms detected on the DSL Line. Multiple alarms may be displayed. OK – No Alarm DC – DC Continuity Fault SNR – SNR Margin threshold exceeded ATTEN – Loop Attenuation threshold exceeded LOSW – Indicates a forward LOSW alarm PROTO – Indicates an endpoint failure during initialization due t imcompatible protocol used by the paired endpoint. NO NEIGH – Indicates an endpoint failure during initialization due to no activation sequence detected from the paired endpoint LB – Loopback active far end alarm state – shows any alarms detected on the far end (CPE) . Multiple alarms may be displayed. Alarms are the same as those for near end alarm state SHDSL Status (Up and Down denote values for the upstream and downstream directions): rate – The data rate. attainable rate – An estimate of the maximum attainable rate. Snr margin – The amount of noise margin that can be tolerated, in dB. Loop attenuation – The decrease of intensity of the signal across the link, in dB. 2600-A2-GB21-50 May 2006 3-201 3. Commands Show Interface SHDSL Unit Inventory show interface shdsl {port_id} unit-inventory {stu-c | stu-r | rep-1 | rep-2 | rep-3 | rep-4 | rep-5 | rep-6 | rep-7 | rep-8} Minimum Access Level: User The show interface shdsl unit-inventory command displays inventory information for the designated unit. port_id – SHDSL port id Unit’s information to display inventory information: — stu-c – SHDSL centeral site terminal unit. — stu-r – SHDSL remote site terminal unit. — rep-1 ... rep-8 – SHDSL regenerator/repeater unit. Example: PDYN# show interface shdsl 2 unit-inventory rep-1 SHDSL Port 2 rep-1 Unit Inventory: Vendor ID Firmware Revision Serial Number PRDN 01.00.12 1234567 Show Interface SHDSL Profile-Alarm Show interface shdsl-profile-alarm {profile_name} Minimum Access Level: User The show interface shdsl-profile-alarm command displays the configuration of the specified alarm profile. profile_name – Identifies the SHDSL alarm profile to be displayed. Example: PDYN# show interface shdsl-profile-alarm shdsl_alarm_profile1 3-202 May 2006 2600-A2-GB21-50 3. Commands Show Interface SHDSL Profile-Line show interface shdsl-profile-line {profile_name} Minimum Access Level: User The show interface shdsl-profile-line command displays the configuration of the specified SHDSL line profile. profile_name – Identifies the SHDSL line profile to be displayed. Example: PDYN# show interface shdsl-profile-line shdsl_line_profile1 Show Interface T1/E1 Configuration show interface t1e1 {port_id} confguration Minimum Access Level: User The show interface t1e1 configuration command displays the configuration of the specified T1/E1 port. port_id – Specifies the T1/E1 port configuration to be displayed. If all is specified, then information for all ports is displayed. Example: PDYN# show interface t1e1 6 configuration T1E1 Port 6 Configuration: Circuit Name room_6 Port Status enabled Line Type Long Haul Line Build Out 7.5 dB Line Equalization 0 - 133 Timing local Frame format no-crc 2600-A2-GB21-50 (T1 only) (T1 only) (E1 only) May 2006 3-203 3. Commands Show Interface T1/E1 Performance show interface t1e1 {port_id} performance Minimum Access Level: User The show interface t1e1 configuration command displays the performance information of the specified T1/E1 port. port_id – Specifies the T1/E1 port configuration to be displayed. If all is specified, then information for all ports is displayed. Currently, all is the only valid choice. Example: PDYN# show interface t1e1 all performance T1E1 Port 6 Configuration: T1E1 Ports 1 2 3 4 5 6 7 8 Alarm Indicator OK OK OK OK OK OK OK OK Loss of Frame Alarm Alarm Alarm Alarm Alarm Alarm Alarm Alarm Loss of Signal OK OK OK OK OK OK OK OK Remote Alarm Indication OK OK OK OK OK OK OK OK 3-204 May 2006 2600-A2-GB21-50 3. Commands Show Interface T1/E1 Statistics Far End show interface t1e1 {port_id} statistics-far-end [bucket-number] Minimum Access Level: User The show interface t1e1 statistics far end command displays the far end statistics information about all ports, or the selected port. port_id – Specifies the T1/E1 port configuration to be displayed. If all is specified, then information for all ports is displayed. bucket-number - Optional parameter to specify the maximum interval (1 to 96) to display. If no bucket number is specified, then all intervals are displayed. If bucket-number is entered, then all buckets up to the specified bucket are displayed. The current interval is always displayed. Example: PDYN# show interface t1e1 6 statistics-far-end T1E1 Far End Statistics port 6: Current Interval 1 ... Interval 2 ES SES SEFS UAS BES PCV LES 1 12 1 24 26 17 80 0 0 0 0 888 1 1 0 0 0 0 0 0 0 Displayed Results ES SES SEFS UAS BES PVC LES The number of Errored Seconds in the 15 minute interval (900 seconds). An Errored Second has one or more Path Code Violations, one or more Out of Frame defects, one or more Controlled Slip events or a detected Alarm Indication Signal (AIS) defect. The number of Severely Errored Seconds. The number of Severely Errored Frame Seconds. SEFS are seconds with one or more Out of Frame defects of a detected AIS defect. The number of Unavailable Seconds. The number of Bursty Errored Seconds, which have 2 to 319 Path Code Violation error events, no Severely Errored Frame defects, and no detected incoming AIS defects. The number of Path Coding Violations. A PCV is a frame synchronization bit error in the D4 aond E1 no CRC formats, or a CRC or frame synchronization bit error in the ESF and E1 CRC formats. The number of Line Errored Seconds. A Line Errored Second is a second in which one or more Line Code Violation error events are detected. 2600-A2-GB21-50 May 2006 3-205 3. Commands Show Interface T1/E1 Statistics Near End 3-206 May 2006 2600-A2-GB21-50 3. Commands show interface t1e1 {port_id} statistics-near-end [bucket-number] Minimum Access Level: User The show interface t1e1 statistics near end command displays the near end statistics information about all ports, or the selected port. port_id – Specifies the T1/E1 port configuration to be displayed. If all is specified, then information for all ports is displayed. bucket-number - Optional parameter to specify the maximum interval (1 to 96) to display. If no bucket number is specified, then all intervals are displayed. If bucket-number is entered, then all buckets up to the specified bucket are displayed. The current interval is always displayed. Example: PDYN# show interface t1e1 6 statistics-near-end T1E1 Far End Statistics port 6: Current Interval 1 ... Interval 2 ES SES SEFS UAS BES PCV LES LCV 1 12 1 24 26 17 80 0 0 0 0 0 888 1 1 0 0 0 0 0 0 0 0 0 Displayed Results ES The number of Errored Seconds in the 15 minute interval (900 seconds). An Errored Second has one or more Path Code Violations, one or more Out of Frame defects, one or more Controlled Slip events or a detected Alarm Indication Signal (AIS) defect. SES The number of Severely Errored Seconds. SEFS The number of Severely Errored Frame Seconds. SEFS are seconds with one or more Out of Frame defects of a detected AIS defect. UAS The number of Unavailable Seconds. BES The number of Bursty Errored Seconds, which have 2 to 319 Path Code Violation error events, no Severely Errored Frame defects, and no detected incoming AIS defects. PVC The number of Path Coding Violations. A PCV is a frame synchronization bit error in the D4 aond E1 no CRC formats, or a CRC or frame synchronization bit error in the ESF and E1 CRC formats. LES The number of Line Errored Seconds. A Line Errored Second is a second in which one or more Line Code Violation error events are detected. LCV The number of Line Coding Violations. An LCV is the occurrence of either a Bipolar Violation (BPV) Excessive Zeroes (eXZ) Error Event. 2600-A2-GB21-50 May 2006 3-207 3. Commands Show Interface Ethernet Clear Statistics show interface ethernet {port_id} clear-statistics Minimum Access Level: User The show interface ethernet clear-statistics command resets statistics for all Ethernet ports or a specified port. port_id – Specifies that the display should be limited to this specified port. If all is specified, information is displayed for all Ethernet ports. clear-statistics – Resets to zero the statistics for this session. This affects only the statistics displayed using the show command during this session. All statistics continue to be maintained. Example: PDYN# show interface ethernet eth1 clear-statistics 3-208 May 2006 2600-A2-GB21-50 3. Commands Show Interface Ethernet Configuration show interface ethernet {port_id} configuration Minimum Access Level: User The show interface ethernet configuration command displays configuration information for all Ethernet ports or a specified port. port_id – Specifies that the display should be limited to this specified port. If all is specified, information is displayed for all Ethernet ports. configuration – Specifies that the port’s configuration should be displayed. Example: PDYN# show interface ethernet eth3 configuration flow-controlenabled mode manual rate 10fulldup xover mdi pvid 125 priority 1 acceptable-frame-type all ingress-filtering enabled 2600-A2-GB21-50 May 2006 3-209 3. Commands Show Interface Ethernet Statistics show interface ethernet {port_id} statistics Minimum Access Level: User The show interface ethernet statistics command displays statistics for all Ethernet ports or a specified port. port_id – Specifies that the display should be limited to this specified port. If all is specified, information is displayed for all Ethernet ports. statistics – Specifies that the error statistics for the specified port should be displayed. Example: PDYN# show interface ethernet eth1 statistics ethernet link up current link up time ddd hh:mm:ss rate 100 Mb/s mode auto connector type rj45 Ethernet statistics: total bytes Rx total bytes Tx total frames Rx total frames Tx total broadcast Rx total multicast Rx total frames discarded: PDYN# xxxxxx xxxxxx xxxxxx xxxxxx xxxxxx xxxxxx xxxxxx ethernet link – The status of the link: – dormant – The link has no device attached. – down – The link is down. – unknown – The link’s status cannot be determined. – up – The link is enabled and ready to send packets. current link up time – The number of days, hours, minutes, and seconds the interface has been active. rate – The data rate of the port. mode – The duplex mode: full duplex or half duplex. connector type – The connector used for the link: rj45 or fiber. total bytes rx – Number of bytes received on the port. total bytes tx – Number of bytes transmitted by the port. total frames rx – Number of bytes received on the port. total frames tx – Number of bytes transmitted by the port. total frames discarded – Number of frames discarded by the port. 3-210 May 2006 2600-A2-GB21-50 3. Commands Show Management Access List show management access-list Minimum Access Level: User The show management access-list command displays all entries in the Management Domain Access List. Example: PDYN# show management access-list ip-address subnet-mask 192.168.0.100 192.168.1.2 192.168.1.200 192.168.111.222 255.255.255.255 255.255.1.1 255.255.1.1 255.255.255.252 entities… telnet web snmp web snmp telnet web PDYN#_ Show Management ARP Table show management arp Minimum Access Level: User The show management arp command displays the arp table for the management processor. Example: PDYN# show management arp ip address mac address 135.90.1.1 11-22-33-44-55-66 PDYN#_ 2600-A2-GB21-50 May 2006 type dynamic 3-211 3. Commands Show Management Default Gateway Address show management default-gateway Minimum Access Level: User The show management default-gateway command displays the IP address of the next hop router for the management traffic. ip_address – Specifies the IP address of the default gateway for the management ports.. Example: PDYN# show management default-gateway Management default-gateway is 137.90.127.1 PDYN#_ Show Management Inband show management inband Minimum Access Level: User The show management inband address command displays the settings for the inband management. Example: PDYN# show management inband ip address 10.10.11.2 subnet mask 255.255.255.0 PDYN#_ Display results: ip address – The IP address of the inband management channel subnet mask – The subnet mask for the IP address of the inband management channel. 3-212 May 2006 2600-A2-GB21-50 3. Commands Show Management Out of Band show management out-of-band Minimum Access Level: User The show management out-of-band address command displays the settings for the out of band management port. Example: PDYN# show management out-of-band ip address subnet mask 10.10.11.2 255.255.255.0 PDYN#_ Display results: ip address – The IP address of the out-of-band management channel subnet mask address – The subnet mask for the IP address of the out of band management channel Show Management Route show management route Minimum Access Level: User The show management route command displays all of the management routes that have been configured. Example: PDYN# show management route Destination 137.90.127.3 137.90.128.1 Mask 255.255.255.0 255.255.255.0 Gateway 137.90.0.1 137.90.0.1 PDYN#_ 2600-A2-GB21-50 May 2006 3-213 3. Commands Show Management Periodic-ARP show management periodic-arp Minimum Access Level: User The show management periodic-arp command displays all of the management routes that have been configured. Example: PDYN# show management periodic-arp IP Addresss 137.90.127.3 137.90.128.1 Request Period 5 5 Minutes to Next Request 3 3 PDYN#_ Show Management SNMP Configuration show management snmp configuration Minimum Access Level: User The show management snmp configuration command displays the settings for SNMP access. Example: PDYN# show management snmp configuration state access-validation public-string private-string trap-rate-limiting-period nms-traps enabled enabled someaccess mostaccess 500 10.10.2.2 10.10.10.1 135.90.1.1 PDYN#_ Display results: state – The availability of SNMP access (disabled or enabled). access-validation – Whether access validation is in force (disabled or enabled). public-string – The community string for read-only access. private-string – The community string for read-write access. trap-rate-limiting-period – Gap, in seconds, the SNMP agent enforces, between the sending of consecutive traps for the same instance of a particular event. nms-traps – The addresses to which traps are sent. 3-214 May 2006 2600-A2-GB21-50 3. Commands Show Management SNMP Statistics show management snmp statistics Minimum Access Level: User The show management snmp statistics command displays the settings for SNMP access. Example: PDYN# show management snmp statistics snmpInPkts snmpInBadVersions snmpInBadCommunityNames snmpInBadCommunityUses snmpInASNParseErrs snmpInGetRequests snmpInGetNexts snmpInSetRequests snmpOutGetResponses snmpOutTraps snmpEnableAuthenTraps snmpSilentDrops snmpProxyDrops PDYN#_ 0000000000 0000000000 0000000000 0000000000 0000000000 0000000000 0000000000 0000000000 0000000000 0000000016 0000000001 0000000000 0000000000 Show Management Telnet Configuration show management telnet configuration Minimum Access Level: User The show management telnet configuration command displays configuration parameters for the telnet feature. Example: PDYN# show management telnet configuration state access-validation 2600-A2-GB21-50 enable disabled May 2006 3-215 3. Commands Show Management Web Configuration show management web configuration Minimum Access Level: User The show management telnet configuration command displays configuration parameters for the web feature. Example: PDYN# show management web configuration state access-validation 3-216 enable disabled May 2006 2600-A2-GB21-50 3. Commands Show Multicast Configuration show multicast configuration Minimum Access Level: User The show multicast configuration command displays configuration parameters for the multicast feature. Example: PDYN# show multicast web configuration Port ID ============ DSL Port 1 DSL Port 2 DSL Port 3 DSL Port 4 DSL Port 5 DSL Port 6 DSL Port 7 DSL Port 8 DSL Port 9 DSL Port 10 DSL Port 11 DSL Port 12 DSL Port 13 DSL Port 14 DSL Port 15 DSL Port 16 DSL Port 17 DSL Port 18 DSL Port 19 DSL Port 20 DSL Port 21 DSL Port 22 DSL Port 23 DSL Port 24 eth2 eth3 2600-A2-GB21-50 Unknown Forwarding Mode ======================= flood flood flood flood flood flood flood flood flood flood flood flood flood flood flood flood flood flood flood flood flood flood flood flood flood flood May 2006 3-217 3. Commands Show Multicast Forwarding Table show multicast forwarding-table Minimum Access Level: User The show multicast forwarding table command displays various IGMP statistics for each port. Example: show multicast forwarding-table Querier Interface: Auto Detect Multicast IP Address 224.0.0.1 225.1.1.11 225.1.1.11 225.1.1.11 225.1.1.11 225.1.1.11 225.1.1.11 225.1.1.11 DSL Port eth3 1 2 3 4 5 7 8 Multicast Packets Sent 0 4903682 4903724 4899545 4903729 4903793 4903903 4903648 IGMP Leaves 0 0 0 0 0 0 0 0 IGMP Reports 0 107 107 107 107 107 107 107 IGMP Queries 8490 1 1 1 1 1 1 1 Display results: Multicast IP Address DSL Port Multicast Packets Leaves Reports Queries 3-218 - IP address of the multicast group - DSL port that is a member of the multicast group. - Total number of Multicast packet sent on the port. - Total number of leave messages sent or received on the port. - Total number of report messages sent or received on the port. - Total number of query messages sent or received on the port. May 2006 2600-A2-GB21-50 3. Commands Show Multicast Lat Reporter show multicast last-reporter Minimum Access Level: User The show multicast last-reporter command displays various IGMP statistics for each port. . Example: show multicast last-reporter Querier Interface: eth2 Multicast IP Address 224.0.0.1 225.1.1.11 DSL Port eth3 1 *** Last Reporter IP 192.168.210.1 192.168.210.233 Last Reporter MAC 00-01-30-fb-42-40 00-02-02-02-70-5d Display results: Multicast IP Address - IP address of the multicast group DSL Port - DSL port that is a member of the multicast group. Last Reporter IP - The IP address of the device that sent the last IGMP report on the port. Last Reporter MAC - The MAC address of the device that sent the last IGMP report on the port. Show Proxy ARP NHR show proxy-arp nhr Minimum Access Level: User The show proxy-arp nhr command displays the address of the default Next Hop Router in the user data domain. Example: PDYN# show proxy-arp nhr nhr address 10.10.11.1 PDYN#_ Display results: nhr address – The IP address of the default Next Hop Router in the user data domain. 2600-A2-GB21-50 May 2006 3-219 3. Commands Show Running Configuration show running configuration Minimum Access Level: User The show running-configuration command displays the running configuration for the DSLAM. Example: PDYN# show running-configuration show system information System Name ... show date mm/dd/yy 05/17/06 Video_Lab_2600 hh:mm:ss timezone 22:17:56 -05:00 show bridge Mode: Total Entries: switched 30 port-id mac-address 1 1 2 status 00-02-02-02-70-5d learned 00-30-54-95-6c-28 learned 00-02-02-02-72-8e learned vlan vlan name 37 37 37 video video video ... Display results: This command is equivalent to executing all of the show commands. 3-220 May 2006 2600-A2-GB21-50 3. Commands Show Scheduled Backup show scheduled backup Minimum Access Level: User The show scheduled backup command displays the settings for the automatic (scheduled) backup. Example: PDYN# show scheduled backup state server filename mode time enabled xxx.xxx.xxx.xxx file name fixed Monday 3 am PDYN# Display results: state – The availability of the scheduler (disabled or enabled). server – The address of the FTP server used for automatic configuration backup. filename – The file containing the backup. mode – The type of backup: – dynamic – Backup occurs upon any configuration change. – fixed – Backup occurs at a specified day and time. time – For fixed mode, the day and time backups occur. 2600-A2-GB21-50 May 2006 3-221 3. Commands Show Security IP show security ip [port_id] Minimum Access Level: User The show security ip command displays the settings for IP address security. port_id – Specifies the port to be displayed. The possible forms of the identifier are described in System Terminology in Chapter 2, Terminology and Conventions. If all is specified or the parameter is omitted, information for all ports is displayed. Example: PDYN# show security ip 17 Port 1 State: Disabled Max IP: 32 IP Address NHR Type Mac Address VLAN ID Timeout Time Remaining 192.168.210.233 192.168.210.1 dynamic 00-02-02-02-70-5d 37 2592000 2565737 Display results: State – Whether IP security is in effect (disabled or enabled). Maximum IP addresses – Maximum number of IP addresses allowed on the port. Port – DSL port ID. IP Address – IP address allowed on the port. NHR – Next Hop Router for the port. Type – The source of the address: – dynamic – The address was learned. – static – The address was added to the table of allowed addresses by the administrator. MAC Address - MAC address allowed on the port. Time Out - Number of seconds that the entry will be allowed. Time Remaining - Number of seconds remaining before this entry is aged out. 3-222 May 2006 2600-A2-GB21-50 3. Commands Show Security MAC show security mac [port_id] Minimum Access Level: User The show security mac command shows the settings for MAC address security feature. port_id – Specifies the port to be displayed. The possible forms of the identifier are described in System Terminology in Chapter 2, Terminology and Conventions. If all is specified or the parameter is omitted, information for all ports is displayed. Example: PDYN# show security mac 22-24 State: Port 22 23 24 Enabled MAC Address 11-22-33-44-55-66 77-88-99-00-11-22 vlan 10 20 30 PDYN# Display results: State – Whether the MAC security feature is in effect (disabled or enabled). Port – DSL port ID. MAC Address – MAC address allowed to send data to the port. 2600-A2-GB21-50 May 2006 3-223 3. Commands Show SNTP show sntp Minimum Access Level: User The show sntp command displays the configuration parameters for SNTP. Example: PDYN>show sntp state ip address interval enabled xxx.xxx.xxx.xxx 24 hours PDYN> Display results: state – Whether the unit makes SNTP requests: – disable – The unit does not make SNTP requests. – enable – The unit updates the date and time periodically by sending requests to an SNTP server. ip address – The address defined for the SNTP server. interval – The number of hours between SNTP requests. 3-224 May 2006 2600-A2-GB21-50 3. Commands Show Syslog show syslog Minimum Access Level: User The show syslog command displays the configuration and contents of the system log. Example: PDYN> show syslog threshold: information rate-limiting: disabled Priority information alert alert Date and Time Aug 7, 19:45:11 Aug 7, 19:50:30 Aug 9, 10:30:45 Message FTP download completed Link reset on port 49 Link reset on port 49 PDYN> Display results: Threshold – The level of messages written to the log: – emergency – Only emergency messages are written to the system log. – alert – Emergency and alert messages are written to the system log. This is the default. – information – Emergency, alert, and informational messages are written to the system log. – debug – Emergency, alert, informational, and debugging messages are written to the system log. Rate-limiting – Whether rate limiting (suppression of duplicate messages) is in effect (disabled or enabled). Priority – The level of the message. Date and Time – The date and time the message was written. Message – The message text. 2600-A2-GB21-50 May 2006 3-225 3. Commands Show Syslog-Remote show syslog-remote Minimum Access Level: User The show syslog-remote command displays the configuration of the remote system log. Example: PDYN> show syslog-remote state enabled ip address 135.90.1.1 udp port 153 PDYN>_ Display results: state - Shows if the syslog-remote feature is enabled. IP Address – The IP address of the syslog-remote syslog server. UDP port – The UDP port of the syslog-remote syslog server. 3-226 May 2006 2600-A2-GB21-50 3. Commands Show System Information show system information Minimum Access Level: User The show system information command shows the system administrative information. Example: PDYN> show system information System Name Paradyne_demo_system System Location main_building_basement System Contact MiguelA FW Revision 1.0.0 Model 2611-A1-420 Serial Number 1234567 MAC Address 11-22-33-44-55-66 Main card HW rev: PLD Rev: 5275-81E 1.0.0 MAUI card HW rev: PLD Rev: 5276-81A 1.0.0 POTS Card HW rev: 5278-81A PDYN> 2600-A2-GB21-50 May 2006 3-227 3. Commands Show System Options show system options Minimum Access Level: User The show system options command shows the system configuration. Example: PDYN> show system options test-time-out date-display-format inactivity-time-out alarm threshold temperature high alarm threshold temperature low spectrum management 5 minutes dd/mm/yy 5 minutes 120 C 10 C enabled PDYN> Display results: test-time-out – The amount of time a disruptive test is allowed to run. date-display-format – The format of dates displayed and accepted by the system: – dd/mm/yy – Day, month, year. – mm/dd/yy – Month, day, year. inactivity-time-out – The amount of time before an inactive CLI session is terminated. spectrum management – Tells if the DSL line is using spectrum management. alarm threshold temperature high - High alarm threshold for temperature sensor alarm threshold temperature low – Low alarm threshold for temperature sensor 3-228 May 2006 2600-A2-GB21-50 3. Commands Show System Self-Test show system self-test Minimum Access Level: User The show system self-test command shows the self-test results for the unit. Example: PDYN> show system self-test Unit Pass CPU Real Time Clock Fan and Temp Control I2C Bus Serial Eeprom Heater Pass Pass Pass Pass Pass Pass ethernet 1 ethernet 2 ethernet 2 Pass Pass Pass DSL ports 1 Status P 2 P 3 P 4 P 5 P 6 P 7 P 8 P 9 10 11 12 P P P P DSL ports 13 14 15 16 17 18 19 20 21 22 23 24 Status P P P P P P P P P P P P PDYN> 2600-A2-GB21-50 May 2006 3-229 3. Commands Show System Status show system status Minimum Access Level: User The show system status command shows the state of alarms throughout the system. Example: PDYN>show system status Status Name Location Contact Up Time Up xxxxxxxxxxx xxxxxxxxxxxxxxxx xxxxxxxxxxxxxxxxxx ddd:hh:mm selftest fan 1 fan 2 pass alarm alarm intake temperature internal temperature input relay alarm (70 C) alarm (99 C) open Ethernet Ports eth2 up DSL Links Status 1 D eth1 up 2 . 3 U 4 . 5 U 6 U eth3 up 7 U 8 U 9 . 10 11 12 D D D 13 14 15 16 17 18 19 20 21 22 23 24 U U U U U U U U U U U U Display results: selftest – The result of the power-on self-test (fail or pass). uplink – The state of the uplink (blank or alarm). fan n – The state of the fans 1-2 (blank or alarm). temperature – The system intake and internal temperature, in Centigrade. If there are multiple sensors, this will be the temperature sensor that is most out of range. Under DSL port numbers 1–24 is one of the following: – D: Port is down. – U: Port is up. – . (period): Port is disabled. 3-230 May 2006 2600-A2-GB21-50 3. Commands Show Technical-Support show technical-support Minimum Access Level: User The show technical-support command shows contact information similar to that in Warranty, Sales, Service, and Training Information at the beginning of the user’s manual. Example: PDYN> show technical-support Warranty, Sales, Service, and Training Information Contact your local sales representative, service representative, or distributor directly for any help needed. For additional information concerning warranty, sales, service, repair, installation, documentation, training, distributor locations, or Paradyne worldwide office locations, use one of the following methods: Internet: Visit the Paradyne World Wide Web site at www.paradyne.com. (Be sure to register your warranty at www.paradyne.com/warranty.) — Telephone: Call our automated system to receive current information by fax or to speak with a company representative. — Within the U.S.A., call 1-877-946-6320 (1-877-Zhone20), prompt 3 Outside the U.S.A., call 1-510-7133, prompt 3 ---Via Email: [email protected] Show Uplink show uplink Minimum Access Level: user The show uplink command displays which port has been designated as the uplink port. Example: PDYN# show uplink uplink eth3 PDYN#_ 2600-A2-GB21-50 May 2006 3-231 3. Commands Show Uplink-Tag show uplink-tag Minimum Access Level: User The show uplink-tag command shows the VLAN tag associated with each DSL port if uplink tagging is used. Example: PDYN> show uplink-tag Base vlan tag number 16 Index 1 PORT 1 2 3 4 5 6 7 8 9 10 11 12 VLAN 16 17 18 19 20 21 22 23 24 25 26 27 13 14 15 16 17 18 19 20 21 22 23 24 PORT 28 29 30 31 32 33 34 35 36 37 38 39 VLAN PDYN> Display results: Base vlan tag number – The base value used to set VLANs. Index – The index value used to set VLANs. PORT and VLAN – Port numbers 1–24 are listed followed by their unique VLAN tag numbers. 3-232 May 2006 2600-A2-GB21-50 3. Commands Show User Accounts show user-account Minimum Access Level: Administrator The show user-accounts command shows user names configured in the system. Example: PDYN# show user-accounts User Name admin user1 user2 Privilege Level admin user user PDYN#_ Display results: User Name – The name used for logging in. Passwords are not displayed. Privilege Level – The access level assigned to this user name: – admin – The user name has administrator privileges. – user – The user name has user privileges. 2600-A2-GB21-50 May 2006 3-233 3. Commands Show Users show users Minimum Access Level: User The show users command shows users currently logged on the system. Example: PDYN# show users User admin user1 user2 Port console telnet web Location 135.90.1.1. 135.90.1.1 PDYN#_ Display results: User – User name. Port – Mode of access: – console – Console port. – telnet – Telnet session. – web – Web interface. Location – For Telnet and Web interface sessions, the IP address of the user. For the Console port, n/a (Not Applicable). 3-234 May 2006 2600-A2-GB21-50 3. Commands Show VLAN Configuration show vlan configuration [vlan_id | all ] Minimum Access Level: User The show vlans command shows all the configuration parameters for all the VLANs in the system. vlan_id – this field specifies the vlan id or the vlan name all - this selection will display all the vlans in the system. Video_Lab_2600(show)#!vlan configuration all VLAN 1 Name Tagged Members UnTagged Members ProxyARP ProxyARP Mode Secure Mode DHCP Option 82 Proxy ARP NHR Proxy ARP NHR MAC VLAN 37 Name Tagged Members UnTagged Members ProxyARP ProxyARP Mode Secure Mode DHCP Option 82 Proxy ARP NHR Proxy ARP NHR MAC VLAN 4080 Name Tagged Members UnTagged Members ProxyARP ProxyARP Mode Secure Mode DHCP Option 82 Proxy ARP NHR Proxy ARP NHR MAC default 1, 2, 3, 4, 5, 6, 7, 8, 9, 10, 11, 12, 13, 14, 15, 16, 17, 18, 19, 20, 21, 22, 23, 24, mgmt_i, eth2, eth3 disabled normal disabled disabled 0.0.0.0 00-00-00-00-00-00 video eth3 1:7, 2:7, 3:7, 4:7, 5:7, 6:7, 7:7, 8:7, 9:7, 10:7, 11:7, 12:7, 13:7, 14:7, 15:7, 16:7, 17:7, 18:7, 19:7, 20:7, 21:7, 22:7, 23:7, 24:7 disabled normal enabled disabled 0.0.0.0 00-00-00-00-00-00 OutOfBand VLAN mgmt_o, eth1 disabled normal disabled disabled 0.0.0.0 00-00-00-00-00-00 Video_Lab_2600(show)#! 2600-A2-GB21-50 May 2006 3-235 3. Commands Show VLAN Reserved Block Start Show vlan reserved-block-start vlan_id Minimum Access Level: User The show vlan reserved-block-start command is used to display the reserved block of vlans. The displayed vlan id is the first reserved vlan in the contiguous reserved block of 16. vlan_id - This value specifies the first reserved vlan in the reserved block of 16. The default is 4080. Example: PDYN# show vlan reserved-block-start Test Test LEDs Start test leds start Minimum Access Level: User The test leds start command causes all Light-Emitting Diodes (LEDs) on the front panel of the unit to turn on. See the Installation Guide for the locations of all LEDs. Verify that all LEDs are lit. If an LED does not light up during the LED test, notify your service representative. Example: PDYN# test leds start 3-236 May 2006 2600-A2-GB21-50 3. Commands Test LEDs Stop test leds stop Minimum Access Level: User The test leds stop command causes stops the led test. Example: PDYN# test leds stop Test PPP Discard test ppp-discard {port_id} Minimum Access Level: Administrator The test ppp discard command causes a PPP LCP DIscard packet to be sent to the peer. The peer discards the packet. There is no tstatus for this test. . Example: PDYN# test ppp discard 1 Test PPP Echo Packet test ppp echo-reply {start | status} {port_id} Minimum Access Level: Administrator The test ppp discard command starts, and displays status for the PPP echo-reply test for te specified port. When the echo-reply ste is started, 1 echo-request packet is sent to the peer. if the peer responsds with a echo-reply the test is successful. . Example: PDYN# test ppp echo-reply 1 2600-A2-GB21-50 May 2006 3-237 3. Commands Test SHDSL Loopback Start test shdsl loopback start {stu-c | stu-r | repeater-1 | repeater-2 | repeater-3 | repeater-4 | repeater-5 | repeater-6 | repeater-7 | repeater-8} {customer-side | network-side} {timeout} {port_id} Minimum Access Level: user The test shdsl loopback start command causes dsl loopback test to start. The test will run until it time outs or the user can manually terminate the test. Unit to apply the loopback to: ² stu-c – SHDSL centeral site terminal unit. ² stu-r – SHDSL remote site terminal unit. ² repeater-1 ... repeater-8 – SHDSL regenerator/repeater unit. The side of the device to loopback on: ² customer-side – The side of the unit facing the customer terminal equipment ² network-side – The side of the unit facing the central office port_id – Specifies the SHDSL port to be tested. time-out – Enter a timeout value in minutes. Example: PDYN# test shdsl loopback start stu-r network-side 22 3-238 May 2006 2600-A2-GB21-50 3. Commands Test SHDSL Loopback Stop test shdsl loopback stop {stu-c | stu-r | repeater-1 | repeater-2 | repeater-3 | repeater-4 | repeater-5 | repeater-6 | repeater-7 | repeater-8} {customer-side | network-side} {port_id} Minimum Access Level: user The test shdsl loopback stop command causes dsl loopback test to stop on the specified port. Unit to stop the loopback on: ² stu-c – SHDSL centeral site terminal unit. ² stu-r – SHDSL remote site terminal unit. ² repeater-1 ... repeater-8 – SHDSL regenerator/repeater unit. The side of the device to stop the loopback on: ² customer-side – The side of the unit facing the customer terminal equipment ² network-side – The side of the unit facing the central office port_id - Specifies the SHDSL port to stop loopback test. Example: PDYN# test shdsl loopback stop stu-r network-side 22 Test T1E1 Inject Error test t1e1 inject-error {start | stop } {port_id} Minimum Access Level: Administrator The test t1e1 inject error command is used to inject an error during a T1/E1 loopback test. start - Start injecting errors stop - Stop injecting errors port_id - Specifies the T1/E1 port. Example: PDYN# test t1e1 inject-error start 2 PDYN# test t1e1 inject-error stop 2 2600-A2-GB21-50 May 2006 3-239 3. Commands Test T1E1 Local Line Loopback test t1e1 local-line-loopback {start | stop | status } {port_id} Minimum Access Level: Administrator The test t1e1 local-line-loopback command is used to start or stop a T1/E1 loopback test. This command will also display the test status for a specific port. start - Start the loopback test. stop - Stop the loopback test status - Display the status of the loopback test. port_id - Specifies the T1/E1 port. Example: PDYN# test t1e1 local-line-loopback start 2 PDYN# test t1e1 local-line-loopback status 2 3-240 May 2006 2600-A2-GB21-50 3. Commands Test T1E1 Local Monitor 2^15 Pattern test t1e1 local-monitor-2e15-pattern {start | stop | status } {port_id} Minimum Access Level: Administrator The test t1e1 local monitor 2e15 pattern command is used to start or stop a T1/E1 local monitor pattern to start or stop. This command will also display the test status for a specific port. start - Start the monitor test. stop - Stop the monitor test status - Display the status of the test. port_id - Specifies the T1/E1 port. Example: PDYN# test t1e1 local-monitor-2e15-pattern start 2 PDYN# test t1e1 local-monitor-2e15-pattern status 2 Test active on T1E1 port 2 Test Details: Monitoring 2E15-1 BERT Result:Not In Sync Count:0 2600-A2-GB21-50 May 2006 3-241 3. Commands Test T1E1 Local Monitor QRSS Pattern test t1e1 local-monitor-qrss-pattern {start | stop | status } {port_id} Minimum Access Level: Administrator The test t1e1 local monitor qrss pattern command is used to start or stop a T1/E1 local monitor pattern to start or stop. This command will also display the test status for a specific port. start - Start the monitor test. stop - Stop the monitor test status - Display the status of the test. port_id - Specifies the T1/E1 port. Example: PDYN# test t1e1 local-monitor-qrss-pattern start 2 PDYN# test t1e1 local-monitor-qrss-pattern status 2 Test active on T1E1 port 2 Test Details: Monitoring QRSS BERT Result:Not In Sync Count:0 3-242 May 2006 2600-A2-GB21-50 3. Commands Test T1E1 Local Payload Loopback test t1e1 local-payload-loopback {start | stop | status } {port_id} Minimum Access Level: Administrator The test t1e1 local payload loopback command is used to start or stop a T1/E1 local payload loopback to start or stop. This command will also display the test status for a specific port. start - Start the monitor test. stop - Stop the monitor test status - Display the status of the test. port_id - Specifies the T1/E1 port. Example: PDYN# test t1e1 local-payload-loopback start 2 PDYN# test t1e1 local-payload-loopback status 2 Test active on T1E1 port 2 Test Details: Monitoring 2E15-1 BERT Result:Not In Sync Count:0 2600-A2-GB21-50 May 2006 3-243 3. Commands Test T1E1 Local Send 2^15 Pattern test t1e1 local-send-2e15-pattern {start | stop | status } {port_id} Minimum Access Level: Administrator The test t1e1 local-send-2e15-pattern command is used to start or stop sending a 2^15 pattern to the selected port. This command will also display the test status for a specific port. start - Start the monitor test. stop - Stop the monitor test status - Display the status of the test. port_id - Specifies the T1/E1 port. Example: PDYN# test t1e1 local-send-2e15-pattern start 2 PDYN# test t1e1 local-send-2e15-pattern status 2 Test active on T1E1 port 1 Test Details: Sending 2E15-1 BERT Injected Error Count:0 3-244 May 2006 2600-A2-GB21-50 3. Commands Test T1E1 Local Send QRSS Pattern test t1e1 local-send-qrss-pattern {start | stop | status } {port_id} Minimum Access Level: Administrator The test t1e1 local-send-qrss-pattern command is used to start or stop sending a qrss pattern to the selected port. This command will also display the test status for a specific port. start - Start the monitor test. stop - Stop the monitor test status - Display the status of the test. port_id - Specifies the T1/E1 port. Example: PDYN# test t1e1 local-send-qrss-pattern start 2 PDYN# test t1e1 local-send-qrss-pattern status 2 Test active on T1E1 port 1 Test Details: Sending QRSS BERT Injected Error Count:0 2600-A2-GB21-50 May 2006 3-245 3. Commands Test T1E1 Remote FDL Line Loopback (T1 Only) test t1e1 remote-fdl-line-loopback {start | stop | status } {port_id} Minimum Access Level: Administrator The test t1e1 remote-fdl-line-loopback command is used to start or stop a remote FDL loopback test selected port. This command will also display the test status for a specific port. start - Start the test. stop - Stop the test status - Display the status of the test. port_id - Specifies the T1/E1 port. Example: PDYN# test t1e1 remote-fdl-line-loopback start 2 PDYN# test t1e1 remote-fdl-line-loopback status 2 Test T1E1 Remote FDL Payload Loopback (T1 Only) test t1e1 remote-fdl-payload-loopback {start | stop | status } {port_id} Minimum Access Level: Administrator The test t1e1 remote-fdl-payload-loopback command is used to start or stop a remote FDL payload loopback test selected port. This command will also display the test status for a specific port. start - Start the test. stop - Stop the test status - Display the status of the test. port_id - Specifies the T1/E1 port. Example: PDYN# test t1e1 remote-fdl-payload-loopback start 2 PDYN# test t1e1 remote-fdl-payload-loopback status 2 3-246 May 2006 2600-A2-GB21-50 3. Commands Test T1E1 Remote Inband Line Loopback (T1 Only) test t1e1 remote- inband-line-loopback {start | stop | status } {port_id} Minimum Access Level: Administrator The test t1e1 remote-inband-line-loopback command is used to start or stop a remote inband line loopback test selected port. This command will also display the test status for a specific port. start - Start the test. stop - Stop the test status - Display the status of the test. port_id - Specifies the T1/E1 port. Example: PDYN# test t1e1 remote-inband-line-loopback start 2 PDYN# test t1e1 remote-inband-line-loopback status 2 2600-A2-GB21-50 May 2006 3-247 3. Commands 3-248 May 2006 2600-A2-GB21-50 Reference Tables A Time Zones The following values are used by the configure date-timezone command. Table A-1. Time Zone Offsets from UTC (1 of 3) 2600-A2-GB21-50 Time Zone Name Offset and Description gmt Greenwich Mean Time (UTC), No Daylight Savings Time us-eastern UTC – 5, Subject to U.S. Daylight Savings Time Rules us-indiana UTC – 6, No Daylight Savings Time us-central UTC – 6, Subject to U.S. Daylight Savings Time Rules us-mountain UTC – 7, Subject to U.S. Daylight Savings Time Rules us-arizona UTC – 7, No Daylight Savings Time us-pacific UTC – 8, Subject to U.S. Daylight Savings Time Rules us-alaska UTC – 9, Subject to U.S. Daylight Savings Time Rules us-aleutian UTC – 10, Subject to U.S. Daylight Savings Time Rules us-hawaii UTC – 10, No Daylight Savings Time us-samoa UTC – 11, No Daylight Savings Time canada-newfoundland UTC – 3.5, Subject to Canadian Daylight Savings Time Rules canada-atlantic UTC – 4, Subject to Canadian Daylight Savings Time Rules canada-eastern UTC – 5, Subject to Canadian Daylight Savings Time Rules canada-central UTC – 6, Subject to Canadian Daylight Savings Time Rules canada-east-saskatchewan UTC – 6, No Daylight Savings Time canada-mountain UTC – 7, Subject to Canadian Daylight Savings Time Rules May 2006 A-1 A. Reference Tables Table A-1. Time Zone Offsets from UTC (2 of 3) A-2 Time Zone Name Offset and Description canada-pacific UTC – 8, Subject to Canadian Daylight Savings Time Rules canada-yukon UTC – 9, Subject to Canadian Daylight Savings Time Rules mexico-bajanorte UTC – 8, Subject to U.S. Daylight Savings Time Rules mexico-bajasur UTC – 7, No Daylight Savings Time mexico-general UTC – 6, No Daylight Savings Time brazil-denoronha UTC – 2, Subject to Brazilian Daylight Savings Time Rules brazil-east UTC – 3, Subject to Brazilian Daylight Savings Time Rules brazil-west UTC – 4, Subject to Brazilian Daylight Savings Time Rules brazil-acre UTC – 5, Subject to Brazilian Daylight Savings Time Rules chile-continental UTC – 4, Subject to Chilean Daylight Savings Time Rules chile-easterisland UTC – 6, Subject to Chilean Daylight Savings Time Rules cuba UTC – 5, Subject to Cuban Daylight Savings Time Rules gb-erie UTC, Subject to British Daylight Savings Time Rules europe-western UTC, Subject to Western European Daylight Savings Time Rules europe-central UTC + 1, Subject to Central European Daylight Savings Time Rules europe-eastern UTC + 2, Subject to Eastern European Daylight Savings Time Rules australia-nsw UTC + 10, Subject to Australian New South Wales Daylight Savings Time Rules australia-yancowinna UTC + 9.5, Subject to Australian New South Wales Daylight Savings Time Rules australia-tasmania UTC + 10, Subject to Tasmanian Daylight Savings Time Rules australia-victoria UTC + 10, Subject to Australian New South Wales Daylight Savings Time Rules australia-queensland UTC + 10, No Daylight Savings Time australia-north UTC + 9.5, No Daylight Savings Time australia-west UTC + 8, No Daylight Savings Time australia-south UTC + 9.5, Subject to Southern Australian Daylight Savings Time Rules new-zealand UTC + 12, Subject to New Zealand Daylight Savings Time Rules israel UTC + 3, Subject to Israeli Daylight Savings Time Rules May 2006 2600-A2-GB21-50 A. Reference Tables Table A-1. Time Zone Offsets from UTC (3 of 3) 2600-A2-GB21-50 Time Zone Name Offset and Description turkey UTC + 3, Subject to Turkish Daylight Savings Time Rules egypt UTC + 2, Subject to Egyptian Daylight Savings Time Rules iran UTC + 3.5, Subject to Iranian Daylight Savings Time Rules libya UTC + 2, Subject to Libyan Daylight Savings Time Rules japan UTC + 9, No Daylight Savings Time korea UTC + 9, Subject to Korean Daylight Savings Time Rules singapore UTC + 8, No Daylight Savings Time china-prc UTC + 8, Subject to Chinese Daylight Savings Time Rules china-roc UTC + 8, No Daylight Savings Time china-hongkong UTC + 8, No Daylight Savings Time May 2006 A-3 A. Reference Tables Ether Types The following values are used by the configure filter-rule command. Table A-2. Ether Types (1 of 6) A-4 Ether Type Description 0000-05DC IEEE 802.3 Length Field 0101-01FF Experimental 0200 XEROX PUP (see 0A00) 0201 PUP Addr Trans (see 0A01) 0400 Nixdorf 0600 XEROX NS IDP 0660 DLOG 0661 DLOG 0800 Internet IP (IPv4) 0801 X.75 Internet 0802 NBS Internet 0803 ECMA Internet 0804 Chaosnet 0805 X.25 Level 3 0806 ARP 0807 XNS Compatibility 081C Symbolics Private 0888-088A Xyplex 0900 Ungermann-Bass net debugr 0A00 Xerox IEEE802.3 PUP 0A01 PUP Addr Trans 0BAD Banyan Systems 1000 Berkeley Trailer nego 1001-100F Berkeley Trailer encap/IP 1600 Valid Systems 4242 PCS Basic Block Protocol 5208 BBN Simnet 6000 DEC Unassigned (Exp.) 6001 DEC MOP Dump/Load May 2006 2600-A2-GB21-50 A. Reference Tables Table A-2. Ether Types (2 of 6) 2600-A2-GB21-50 Ether Type Description 6002 DEC MOP Remote Console 6003 DEC DECNET Phase IV Route 6004 DEC LAT 6005 DEC Diagnostic Protocol 6006 DEC Customer Protocol 6007 DEC LAVC, SCA 6008-6009 DEC Unassigned 6010-6014 3Com Corporation 7000 Ungermann-Bass download 7002 Ungermann-Bass dia/loop 7020-7029 LRT 7030 Proteon 7034 Cabletron 8003 Cronus VLN 8004 Cronus Direct 8005 HP Probe 8006 Nestar 8008 AT&T 8010 Excelan 8013 SGI diagnostics 8014 SGI network games 8015 SGI reserved 8016 SGI bounce server 8019 Apollo Computers 802E Tymshare 802F Tigan, Inc. 8035 Reverse ARP 8036 Aeonic Systems 8038 DEC LANBridge 8039-803C DEC Unassigned 803D DEC Ethernet Encryption 803E DEC Unassigned May 2006 A-5 A. Reference Tables Table A-2. Ether Types (3 of 6) A-6 Ether Type Description 803F DEC LAN Traffic Monitor 8040-8042 DEC Unassigned 8044 Planning Research Corp. 8046 AT&T 8047 AT&T 8049 ExperData 805B Stanford V Kernel exp. 805C Stanford V Kernel prod. 805D Evans & Sutherland 8060 Little Machines 8062 Counterpoint Computers 8065 Univ. of Mass. @ Amherst 8066 Univ. of Mass. @ Amherst 8067 Veeco Integrated Auto. 8068 General Dynamics 8069 AT&T 806A Autophon 806C ComDesign 806D Computgraphic Corp. 806E-8077 Landmark Graphics Corp. 807A Matra 807B Dansk Data Elektronik 807C Merit Internodal 807D-807F Vitalink Communications 8080 Vitalink TransLAN III 8081-8083 Counterpoint Computers 809B Appletalk 809C-809E Datability 809F Spider Systems Ltd. 80A3 Nixdorf Computers 80A4-80B3 Siemens Gammasonics Inc. 80C0-80C3 DCA Data Exchange Cluster May 2006 2600-A2-GB21-50 A. Reference Tables Table A-2. Ether Types (4 of 6) 2600-A2-GB21-50 Ether Type Description 80C4 Banyan Systems 80C5 Banyan Systems 80C6 Pacer Software 80C7 Applitek Corporation 80C8-80CC Intergraph Corporation 80CD-80CE Harris Corporation 80CF-80D2 Taylor Instrument 80D3-80D4 Rosemount Corporation 80D5 IBM SNA Service on Ether 80DD Varian Associates 80DE-80DF Integrated Solutions TRFS 80E0-80E3 Allen-Bradley 80E4-80F0 Datability 80F2 Retix 80F3 AppleTalk AARP (Kinetics) 80F4-80F5 Kinetics 80F7 Apollo Computer 80FF-8103 Wellfleet Communications 8107-8109 Symbolics Private 8130 Hayes Microcomputers 8131 VG Laboratory Systems 8132-8136 Bridge Communications 8137-8138 Novell, Inc. 8139-813D KTI 8148 Logicraft 8149 Network Computing Devices 814A Alpha Micro 814C SNMP 814D BIIN 814E BIIN 814F Technically Elite Concept 8150 Rational Corp May 2006 A-7 A. Reference Tables Table A-2. Ether Types (5 of 6) A-8 Ether Type Description 8151-8153 Qualcomm 815C-815E Computer Protocol Pty Ltd 8164-8166 Charles River Data System 817D-818C Protocol Engines 818D Motorola Computer 819A-81A3 Qualcomm 81A4 ARAI Bunkichi 81A5-81AE RAD Network Devices 81B7-81B9 Xyplex 81CC-81D5 Apricot Computers 81D6-81DD Artisoft 81E6-81EF Polygon 81F0-81F2 Comsat Labs 81F3-81F5 SAIC 81F6-81F8 VG Analytical 8203-8205 Quantum Software 8221-8222 Ascom Banking Systems 823E-8240 Advanced Encryption Syste 827F-8282 Athena Programming 8263-826A Charles River Data System 829A-829B Inst Ind Info Tech 829C-82AB Taurus Controls 82AC-8693 Walker Richer & Quinn 8694-869D Idea Courier 869E-86A1 Computer Network Tech 86A3-86AC Gateway Communications 86DB SECTRA 86DE Delta Controls 86DF ATOMIC 86E0-86EF Landis & Gyr Powers 8700-8710 Motorola 8863 PPPoE Discovery May 2006 2600-A2-GB21-50 A. Reference Tables Table A-2. Ether Types (6 of 6) 2600-A2-GB21-50 Ether Type Description 8864 PPPoE Session 8A96-8A97 Invisible Software 9000 Loopback 9001 3Com(Bridge) XNS Sys Mgmt 9002 3Com(Bridge) TCP-IP Sys 9003 3Com(Bridge) loop detect FF00 BBN VITAL-LanBridge cache FF00-FF0F ISC Bunker Ramo May 2006 A-9 A. Reference Tables A-10 May 2006 2600-A2-GB21-50 Command Summary B Commands clear bridge clear management arp clear syslog configure bridge clear configure bridge mode {mux | switch | sms | uplink-tag} configure bridge timeout {time} configure date [ mm/dd/yy | dd/mm/yy] [ hh:mm] configure date-timezone {time-zone} configure factory configure filter create filter_name {forward | discard} [ rule_name_1]... [ rule_name_16] configure filter delete filter_name configure filter modify filter_name {forward | discard} [ rule_name_1]... [ rule_name_16] configure filter proto-specific {netbios} {deny | permit} configure filter-binding create filter_name {outbound | inbound | both} port_id configure filter-binding delete filter_name {outbound | inbound | both} port_id configure filter-rule create { rule_name} {forward | discard} {ether | ether-snap} [ ethertypes] configure filter-rule delete { rule_name} configure filter-rule modify { rule_name} {forward | discard} {ether | ether-snap} [ ethertypes] configure igmp {port_id} query-count {count} configure igmp {port_id} show 2600-A2-GB21-50 May 2006 B-1 B. Command Summary configure igmp {port_id} snooping leave-delay {delay} configure igmp {port_id} snooping leave-join-delay {delay} configure igmp-proxy {enabled | disabled} configure igmp-snooping {enabled | disabled} configure igmp-snooping querier-auto-detect {enabled | disabled} configure igmp-snooping querier-interface {port_id} configure igmp-snooping query-interval {interval} configure igmp-snooping show configure interface console data-bits {7 | 8} configure interface console parity {even | none | odd} configure interface console rate {9600 | 19200 | 38400 | 57600 | 115200} configure interface console show configure interface console stop-bits {1 | 2} configure interface dsl {port_id} atm encapsulation {llc-bridged | vcm-bridged} configure interface dsl {port_id} atm vc create { vpi/vci} configure interface dsl {port_id} atm vc delete { vpi/vci} configure interface dsl {port_id} ewl {line length} configure interface dsl {port_id} line-length {short | medium | long | same | segupto3km | segabove3km | <length> configure interface dsl {port_id} line-mode {ansi | dmt | g-lite | adsl2 | adsl2plus | multimode | multimode-annexm} configure interface dsl {port_id} linkupdown-trap {disabled | enabled} configure interface dsl {port_id} name { port_name} configure interface dsl {port_id} show configure interface dsl {port_id} state {disabled | enabled} configure interface dsl {port_id} vlan acceptable-frame-type {all | tagged} configure interface dsl {port_id} vlan ingress-filtering {disabled | enabled} configure interface dsl {port_id} vlan priority {priority} configure interface dsl {port_id} vlan pvid {pvid} B-2 May 2006 2600-A2-GB21-50 B. Command Summary configure interface dsl {port_id:pg} queue {fifo | 802.1p } configure interface dsl {port_id} pwrmgmt-state {enable | disable} configure interface dsl {port_id} pwrmgmt-enabling {none | idle | lowpower | both} configure interface dsl {port-id} l0time {time} configure interface dsl {port-id} l2atpr {power reduction} configure interface dsl {port-id} l2atprt {total power reductions} configure interface dsl {port-id} l2time {time} configure interface dsl-bonding {group_id} create { port_id} {dsl-bonding-alarm-profile} configure interface dsl-bonding {group_id} delete configure interface dsl-bonding {group_id} group-status-trap {enable | disable} configure interface dsl-bonding {group_id} name {group-name} configure interface dsl-bonding {group_id} show configure interface dsl-bonding-profile-alarm activate {profile-name} {dsl-bonding-group-id} configure interface dsl-bonding-profile-alarm create {profile-name} configure interface dsl-bonding-profile-alarm delete {profile-name} configure interface dsl-bonding-profile-alarm modify threshold-atuc-rate-down {threshold} {profile-name} configure interface dsl-bonding-profile-alarm modify threshold-atuc-rate-up {threshold} {profile-name} configure interface dsl-bonding-profile-alarm modify threshold-atur-rate-down {threshold} {profile-name} configure interface dsl-bonding-profile-alarm modify threshold-atur-rate-up {threshold} {profile-name} configure interface dsl-profile-alarm activate {profile_name} {port_id} configure interface dsl-profile-alarm create {profile_name} configure interface dsl-profile-alarm delete {profile_name} configure interface dsl-profile-alarm downstream-dr {dr} {profile_name} configure interface dsl-profile-alarm downstream-es {es} {profile_name} configure interface dsl-profile-alarm downstream-ir {ir} {profile_name} configure interface dsl-profile-alarm downstream-lofs {lofs} {profile_name} configure interface dsl-profile-alarm downstream-lols {lols} {profile_name} 2600-A2-GB21-50 May 2006 B-3 B. Command Summary configure interface dsl-profile-alarm downstream-loss {loss} {profile_name} configure interface dsl-profile-alarm downstream-ses {ses} {profile_name} configure interface dsl-profile-alarm downstream-uas {uas} {profile_name} configure interface dsl-profile-alarm show {profile_name} configure interface dsl-profile-alarm upstream-dr {dr} {profile_name} configure interface dsl-profile-alarm upstream-es {es} {profile_name} configure interface dsl-profile-alarm upstream-ir {ir} {profile_name} configure interface dsl-profile-alarm upstream-lofs {lofs} {profile_name} configure interface dsl-profile-alarm upstream-lols {lols} {profile_name} configure interface dsl-profile-alarm upstream-lops {lops} {profile_name} configure interface dsl-profile-alarm upstream-loss {loss} {profile_name} configure interface dsl-profile-alarm upstream-ses {ses} {profile_name} configure interface dsl-profile-alarm upstream-init-failure {yes | no} {profile_name} configure interface dsl-profile-alarm upstream-uas {uas} {profile_name} configure interface dsl-profile-line activate {profile-name} {port_id} configure interface dsl-profile-line create {profile-name} configure interface dsl-profile-line delete {profile-name} configure interface dsl-profile-line latency {fast | interleaved} {profile-name} configure interface dsl-profile-line max-interleave-delay-downstream {delay} {profile-name} configure interface dsl-profile-line max-interleave-delay-upstream {delay} {profile-name} configure interface dsl-profile-line max-snr-margin-downstream {margin} {profile-name} configure interface dsl-profile-line max-snr-margin-upstream {margin} {profile-name} configure interface dsl-profile-line max-speed-downstream {rate} {profile-name} configure interface dsl-profile-line max-speed-upstream {rate} {profile-name} configure interface dsl-profile-line min-snr-margin-downstream {margin} {profile-name} configure interface dsl-profile-line min-snr-margin-upstream {margin} {profile-name} configure interface dsl-profile-line min-speed-downstream {rate} {profile-name} configure interface dsl-profile-line min-speed-upstream {rate} {profile-name} configure interface dsl-profile-line rate-adaptive-downstream {manual | init | dynamic} {profile-name} configure interface dsl-profile-line rate-adaptive-upstream {manual | init | dynamic} {profile-name} B-4 May 2006 2600-A2-GB21-50 B. Command Summary configure interface dsl-profile-line show {profile-name} configure interface dsl-profile-line target-margin-downstream {margin} {profile-name} configure interface dsl-profile-line target-margin-upstream {margin} {profile-name} configure interface dsl-profile-psd activate {profile-name} {adsl2 | adsl2plus] {port_id} configure interface dsl-profile-psd atuc-max-psd {psd} {profile-name} configure interface dsl-profile-psd atur-max-psd {psd} {profile-name} configure interface dsl-profile-psd atuc-max-tx-pwr {tx_pwr} {profile-name} configure interface dsl-profile-psd atur-max-tx-pwr {tx_pwr} {profile-name} configure interface dsl-profile-psd atur-max-rx-pwr {rx_pwr} {profile-name configure interface dsl-profile-psd atuc-max-rx-pwr {rx_pwr} {profile-name} configure interface dsl-profile-psd create {profile-name} configure interface dsl-profile-psd delete {profile-name} configure interface dsl-profile-psd show {profile-name} configure interface dsl-profile-traffic create {profile-name} configure interface dsl-profile-traffic delete {profile-name} configure interface dsl-profile-traffic max-rate {rate} {profile-name} configure interface dsl-profile-traffic port-activate {profile-name} configure interface dsl-profile-traffic port-deactivate {profile-name} configure interface dsl-profile-traffic show {profile-name} configure interface dsl-profile-traffic traffic-class {traffic-class} {profile-name} configure interface dsl-spectrum-mgmt selection {ansi-t1.417 | anfp-nd1602 | disable | enable | jj-100.01} configure interface dsl-spectrum-mgmt show configure interface ethernet {port_id} connector {rj45 | fiber} configure interface ethernet {port_id} flow-control {enabled | disabled} configure interface ethernet { port_id} mode {auto | manual} configure interface ethernet { port_id} rate {10full | 10half | 100full | 100half | 1000full | 1000half} configure interface ethernet [ port_id] show 2600-A2-GB21-50 May 2006 B-5 B. Command Summary configure interface ethernet { port_id} vlan acceptable-frame-type {all | tagged} configure interface ethernet { port_id} vlan ingress-filtering {disabled | enabled} configure interface ethernet { port_id} vlan priority {priority} configure interface ethernet { port_id} vlan pvid {pvid} configure interface ethernet { port_id} xover {mdi | mdix} configure interface shdsl {port_id:pg} atm encapsulation {llc-bridged | vcm-bridged} configure interface shdsl {port_id:pg} atm vc create {vpi/vci} {atm_profile} configure interface shdsl {port_id:pg} atm vc delete {vpi/vci} configure interface shdsl {port_id} equip-mode {co-mode | cpe-mode} configure interface shdsl {port_id} line-length {extrashort | short | medium | long} configure interface shdsl {port_id} line-length {line-length} configure interface shdsl {port_id} linkupdown-trap {disabled | enabled} configure interface shdsl {port_id} name {port_name} configure interface shdsl {port_id} nbr-repeaters {number} configure interface shdsl {port_id:pg} queue {fifo | 802.1p} configure interface shdsl {port_id} segment-alarm {stu-c | stu-r | rep-1 | rep-2 | rep-3 | rep-4 | rep-5 | rep-6 | rep-7 | rep-8} {cust | net} {pair-1 | pair-2 | pair-3 | pair-4} {profile_name} configure interface shdsl {port_id} show configure interface shdsl {port_id} state {enable | disable | reset} configure interface shdsl {port_id:pg} vlan acceptable-frame-type {all | tagged} configure interface shdsl {port_id:pg} vlan ingress-filtering {disabled | enabled} configure interface shdsl {port_id:pg} vlan priority {priority} configure interface shdsl {port_id:pg} vlan pvid {pvid} configure interface shdsl-extended-rate-mode selection {payload5696 | disable} configure interface shdsl-profile-alarm activate-port {profile_name} {port_id} configure interface shdsl-profile-alarm code-violation-threshold {cvt} {profile_name} configure interface shdsl-profile-alarm create {profile_name} configure interface shdsl-profile-alarm delete {profile_name} configure interface shdsl-profile-alarm es-threshold {es} {profile_name} B-6 May 2006 2600-A2-GB21-50 B. Command Summary configure interface shdsl-profile-alarm loop-attenuation-threshold {atten} {profile_name} configure interface shdsl-profile-alarm losws-threshold {losws} {profile_name} configure interface shdsl-profile-alarm ses-threshold {ses} {profile_name} configure interface shdsl-profile-alarm show {profile_name} configure interface shdsl-profile-alarm snr-margin-threshold {snr} {profile_name} configure interface shdsl-profile-alarm uas-threshold {uas} {profile_name} configure interface shdsl-profile-line activate {profile_name} {port_id} configure interface shdsl-profile-line create {profile_name} configure interface shdsl-profile-line delete {profile_name} configure interface shdsl-profile-line line-probe {enable | disable} {profile_name} configure interface shdsl-profile-line max-rate {rate} {profile_name} configure interface shdsl-profile-line min-rate {rate} {profile_name} configure interface shdsl-profile-line mode {annex-a | annex-b | both} {profile_name} configure interface shdsl-profile-line power-feeding {no-power | power-feed | wetting-current} {profile_name} configure interface shdsl-profile-line psd {symmetric | asymmetric} {profile_name} configure interface shdsl-profile-line reference-clock {local | system} {profile_name} configure interface shdsl-profile-line remote-management {enable | disable} {profile_name} configure interface shdsl-profile-line show {profile_name} configure interface shdsl-profile-line target-margin {margin} {profile_name} configure interface shdsl-profile-line wire-interface {two-wire | four-wire | six-wire | eight-wire} {profile_name} configure interface shdsl-spectrum-management region {anfp-nd1602 | ansi-t1.417 | none} configure interface shdsl-spectrum-management selection {enable | disable} configure interface t1e1 {port_id} circuit-name { name } configure interface t1e1 {port_id} frame-format {crc | no-crc } (note: E1 Only) configure interface t1e1 {port_id} line-build-out {0 | 7.5 | 15 | 22.5} (note: short haul only) configure interface t1e1 {port_id} line-equalization {0 | 134 | 267 | 400 | 534 } (note: long haul only) configure interface t1e1 {port_id} line-type {long-haul | short-haul} configure interface t1e1 {port_id} port-status {enable | disable } configure interface t1e1 {port_id} timing { local | loop } 2600-A2-GB21-50 May 2006 B-7 B. Command Summary configure management access-list create-entry {ip-address}...{subnet-mask} {snmp | telnet | web}...{snmp | telnet | web}...{snmp | telnet | web} configure management access-list delete all configure management access-list delete entry {ip-address}...{subnet-mask} configure management access-list show configure management arp add configure management arp clear-dynamic configure management arp delete configure management default-gateway {ip_address} configure management inband address {ip_address} { subnet_mask} configure management out-of-band address {bootp | { ip_address} { subnet_mask} } configure management periodic-arp add configure management periodic-arp delete configure management periodic-arp show configure management route add {ip_address} {subnet_mask} {gateway} configure management route delete {ip_address} configure management route show configure management snmp access-validation {disabled | enabled} configure management snmp nms-traps add { traps_address1}... [ traps_address8] configure management snmp nms-traps delete all configure management snmp nms-traps delete entry { traps_address1}... [ traps_address8] configure management snmp nms-traps show configure management snmp private-string { private_community_string} configure management snmp public-string { public_community_string} configure management snmp state {disabled | enabled} configure management snmp trap-rate-limiting-period {period} configure management telnet access-validation {disabled | enabled} configure management telnet show configure management telnet state {disabled | enabled} configure management web access-validation {disabled | enabled} configure management web show B-8 May 2006 2600-A2-GB21-50 B. Command Summary configure management web state {disabled | enabled} configure mlppp-bundle {mlppp-bundle-number} add {port id} configure mlppp-bundle {mlppp-bundle-number} delete {port id} configure mlppp-bundle {mlppp-bundle-number} fragment-size { value } configure mlppp-bundle {mlppp-bundle-number} mrru { value } configure mlppp-bundle {mlppp-bundle-number} restart configure mlppp-bundle {mlppp-bundle-number} short-sequence-number {12bit | 24bit } configure mlppp-bundle {mlppp-bundle-number} vlan acceptable-frame-type {all | tagged} configure mlppp-bundle {mlppp-bundle-number} vlan ingress-filtering {disabled | enabled} configure mlppp-bundle {mlppp-bundle-number} vlan priority {priority} configure mlppp-bundle {mlppp-bundle-number} vlan pvid {pvid} configure multicast <port_id> unknown-forwarding-mode {drop | flood} configure multicast filtering-mode {disable | enable} configure ppp {port_id} address-control-field-compression {enable | disable } configure ppp {port_id} bridge-control-protocol { enable | disable } configure ppp {port_id} fcs-size { 16bit | 32bit } configure ppp {port_id} keep-alive-quiet-time { value } configure ppp {port_id} keep-alive-timeout { value } configure ppp {port_id} magic-number { enable | disable } configure ppp {port_id} maximum-receive-unit { value } configure ppp {port_id} protocol-field-compression {enable | disable } configure ppp {port_id} vlan acceptable-frame-type {all | tagged} configure ppp {port_id} vlan ingress-filtering {disabled | enabled} configure ppp {port_id} vlan priority {priority} configure ppp {port_id} vlan pvid {pvid} configure proxy arp nhr {ip_address} configure radius add {server_address} 2600-A2-GB21-50 May 2006 B-9 B. Command Summary configure radius delete configure radius show configure radius state {enable | disable} configure scheduled-backup disabled configure scheduled-backup enabled configure scheduled-backup dynamic configure scheduled-backup fixed configure scheduled-backup ftp configure scheduled-backup timestamp configure security ip { port_id} add { ip_address} { nhr_address} configure security ip { port_id} delete { ip_address} configure security ip { port_id} max-ip { max_ip} configure security ip { port_id} show configure security ip {port_id} {disabled | enabled} configure security mac { port_id} add {mac_address} vlan {vlan} configure security mac { port_id} delete {mac_address | all} {vlan} configure security mac { port_id} show configure sntp {disabled | enabled} configure sntp address { ip_address} configure sntp interval { interval} configure syslog rate-limiting {disabled | enabled} configure syslog remote {enabled | disabled} configure syslog remote create {ip_address} [udp_port] configure syslog threshold {emergency | alert | critical | error | warning| notice | information | debug} configure system information system-contact {contact} configure system information system-location { location} configure system information system-name { name} B-10 May 2006 2600-A2-GB21-50 B. Command Summary configure system options alarm-threshold temp-high {threshold} configure system options alarm-threshold temp-intake-high {threshold} ??? configure system options date-display-format {dd/mm/yy | mm/dd/yy} configure system options inactivity-timeout {time} configure system options spectrum-management {enabled | disabled} configure system options test-timeout {time} configure uplink {eth2 |eth3 | ppp1..ppp8 | mlppp1..mlppp8} configure uplink show configure uplink-tag base { base} configure uplink-tag index { index} configure user-accounts create { user} { login_password} [ privilege_password] configure user-accounts delete {user} configure vlan create {vlan_id} configure vlan delete {vlan_id | vlan_name} configure vlan modify {vlan_id | vlan_name} dhcp-option-82 {enabled | disabled} configure vlan modify {vlan_id | vlan_name} name {vlan_name} configure vlan modify {vlan_id | vlan_name} nhr {ip_address} configure vlan modify {vlan_id | vlan_name} ports {tagged | untagged } {delete | port-id:pg | port-list} configure vlan modify {vlan_id | vlan_name} proxy-arp (enabled | disabled} configure vlan modify {vlan_id | vlan_name} secure (enabled | disabled} configure vlan reserved-block-start {vlan_id} configure vlan show {vlan_id | vlan_name} copy ftp { ip_address} { user_name} { password} { filename} startup-config copy running-config startup-config 2600-A2-GB21-50 May 2006 B-11 B. Command Summary copy startup-config ftp {ip_address} {user_name} {password} {filename} copy startup-config running-config end exit firmware download {ip_address} {user_name} {password} {filename} [no | yes] firmware download-status firmware revision firmware switch paging {disabled | enabled} password ping {ip_address} privilege restart save show bridge [ port_id] show bridge timeout show date show filter [filter_name] show filter-binding [filter [ filter_name]] | [port [ port_id]] show filter-proto-specific show filter-rule [ rule_name] show igmp {port_id} configuration show igmp-proxy show igmp-snooping show interface console show interface dsl {port_id} clear-statistics-atm show interface dsl {port_id} clear-statistics-line-far-end B-12 May 2006 2600-A2-GB21-50 B. Command Summary show interface dsl {port_id} clear-statistics-line-near-end show interface dsl {port_id} configuration show interface dsl {port_id} far-end show interface dsl all performance show interface dsl {port_id} rates show interface dsl {port_id} statistics-atm show interface dsl {port_id} statistics-line-far-end [bucket_number] show interface dsl {port_id} statistics-line-near-end [bucket_number] show interface dsl {port_id} status show interface dsl-bonding {group_id} configuration show interface dsl-bonding {group_id} performance show interface dsl-bonding {group_id} statistics-atm [bucket_number] show interface dsl-bonding-profile-alarm {profile-name} show interface dsl-profile-alarm {profile-name} show interface dsl-profile-line {profile-name} show interface dsl-profile-psd {profile_name } show interface dsl-profile-traffic {profile-name} show interface ethernet {port_id} clear-statistics show interface ethernet {port_id} configuration show interface ethernet {port_id} statistics show interface shdsl {port_id} clear-statistics-atm show interface shdsl {port_id} clear-statistics-line {stu-c | stu-r | rep-1 | ... rep-8} {cust | net} {pair-1 | pair-2} show interface shdsl {port_id} configuration show interface shdsl {all} performance show interface shdsl {port_id} rates 2600-A2-GB21-50 May 2006 B-13 B. Command Summary show interface shdsl {port_id} segment-alarm {stu-c | stu-r | rep-1 | ... rep-8} {cust | net} {pair-1 | pair-2} [bucket_number show interface shdsl {port_id} statistics-atm show interface shdsl {port_id} statistics-line {stu-c | stu-r | rep-1 | ... rep-8} {cust | net} {pair-1 | pair-2} [bucket_number] show interface shdsl {port_id} status {stu-c | stu-r | rep-1 | ... rep-8} {cust | net} show interface shdsl {port_id} unit-inventory {stu-c | stu-r | rep-1 | ... rep-8} {cust | net} show interface shdsl-extended-rate-mode show interface shdsl-profile-alarm {profile_name} show interface shdsl-profile-line {profile_name} show interface shdsl-profile-traffic {profile_name} show interface t1e1 {port_id} configuration show interface t1e1 {port_id} performance show interface t1e1 {port_id} statistics show management access-list show management arp show management default-gateway show management inband address show management out-of-band address show management periodic-arp show management route show management snmp configuration show management snmp statistics show management telnet configuration show management web configuration show mlppp-bundle {bundle-number} clear-statistics show mlppp-bundle {bundle-number} configuration B-14 May 2006 2600-A2-GB21-50 B. Command Summary show mlppp-bundle {bundle-number} statistics show mlppp-bundle {bundle-number} status show mutlicast configuration show muticast forwarding-table show muticast last-reporter show multicast statistics show ppp {port id} configuration show ppp {port id} statistics show proxy-arp nhr show running-config show scheduled backup show security ip [port_id] show security mac [port_id] show sntp show syslog show syslog-remote show system information show system options show system self-test show system status show technical-support 2600-A2-GB21-50 May 2006 B-15 B. Command Summary show uplink show uplink-tag show user-accounts show users show vlan configuration show vlan reserved-block-start {vlan_id} test leds {start | stop} test ppp {echo-reply } {start | status} {port_id} test shdsl loopback start {stu-c | stu-r | repeater-1 | repeater-2 | repeater-3 | repeater-4 | repeater-5 | repeater-6 | repeater-7 | repeater-8} {customer-side | network-side} {timeout} {port_id} test shdsl loopback stop {stu-c | stu-r | repeater-1 | repeater-2 | repeater-3 | repeater-4 | repeater-5 | repeater-6 | repeater-7 | repeater-8} {customer-side | network-side} {port_id} test t1e1 inject-error start test t1e1 local-line-loopback {start | stop| status} {port_id} test t1e1 local-monitor-2e15-pattern {start | stop| status} {port_id} test t1e1 local-monitor-qrss-pattern {start | stop| status} {port_id} test t1e1 local-payload-loopback {start | stop| status} {port_id} test t1e1 local-send-2e15-pattern {start | stop| status } {port_id} test t1e1 local-send-qrss-pattern {start | stop| status} {port_id} test t1e1 remote-fdl-line-loopback {start | stop| status } {port_id} (note: t1 only) test t1e1 remote-fdl-payload-loopback {start | stop| status} {port_id} (note: t1 only) test t1e1 remote-inband-line {start | stop| status} {port_id} (note: t1 only) B-16 May 2006 2600-A2-GB21-50 Index A About This Guide, i Access Levels, 2-1 Active Configurations, 1-1 Automatic Command Completion, 2-3 Automatic Logout, 2-5 B Back Command, 2-3 Back , 3-1 Bonded Group ID, 1-3 C Clear, 3-2 Clear Bridge, 3-2 CLI Conventions, 2-1 Command Help, 2-4 Command History Buffer, 2-4 Command Line Prompts, 2-2 Command Summary, B-1 Command Syntax Error Handling, 2-5 Commands, 3-1, B-1 Configure Bridge, 3-3 Configure Bridge Clear, 3-3 Configure Bridge Mode, 3-4 Configure Bridge Timeout , 3-5 Configure Date and Time , 3-5 Configure Date-Timezone , 3-6 Configure Factory Defaults, 3-7 Configure Filter Create, 3-8 Configure Filter Delete, 3-9 Configure Filter Modify, 3-9 Configure Filter Operational Notes, 3-13 Configure Filter Protocol-Specific, 3-10 Configure Filter-Binding, 3-10 Configure Filter-Binding Create, 3-10 Configure Filter-Binding Delete, 3-11 Configure Filter-Rule Create (L2 filter), 3-11 Configure Filter-Rule Delete, 3-12 Configure Filter-Rule Modify (L2 filter), 3-12 Configure Filter, 3-7 Configure IGMP Proxy Enable, 3-17 Configure IGMP Proxy Report Summary Enable, 3-18 Configure IGMP Query Count, 3-16 Configure IGMP Query Wait Timer, 3-17 Configure IGMP Snooping, 3-13–3-14 2600-A2-GB21-50 Configure IGMP Snooping Leave Delay, 3-15 Configure IGMP Snooping Leave Join Delay, 3-16 Configure Interface Console Data-Bits, 3-18 Configure Interface Console Parity, 3-19 Configure Interface Console Rate, 3-19 Configure Interface Console Show, 3-19 Configure Interface Console Stop Bits, 3-20 Configure Interface DSL ATM Encapsulation , 3-23 Configure Interface DSL ATM VC Create, 3-22 Configure Interface DSL ATM VC Delete , 3-23 Configure Interface DSL Bonding, 3-24 Configure Interface DSL Bonding Alarm Modify ATU-C Threshold Rate Up, 3-28 Configure Interface DSL Bonding Alarm Modify ATU-R Threshold Rate Down, 3-29 Configure Interface DSL Bonding Alarm Modify ATU-R Threshold Rate Up, 3-29 Configure Interface DSL Bonding Create, 3-24 Configure Interface DSL Bonding Delete, 3-25 Configure Interface DSL Bonding Link Up Down Trap, 3-25 Configure Interface DSL Bonding Name, 3-26 Configure Interface DSL Bonding Profile Alarm, 3-26 Configure Interface DSL Bonding Profile Alarm Create, 3-27 Configure Interface DSL Bonding Profile Alarm Delete, 3-27 Configure Interface DSL Bonding Profile Alarm Modify ATU-C Threshold Rate Down, 3-28 Configure Interface DSL L0Time (ADSL2 Only), 3-36 Configure Interface DSL L2-Atpr, 3-36 Configure Interface DSL L2-Atprt, 3-37 Configure Interface DSL L2Time (ADSL2 Only), 3-37 Configure Interface DSL Line Length – Effective Working Length (ReachDSL Only), 3-30 Configure Interface DSL Line Length – Loop Length (ReachDSL Only), 3-30 Configure Interface DSL Line Length – Quad (ReachDSL Only), 3-31 Configure Interface DSL Line-Mode (ADSL Only) , 3-32 Configure Interface DSL Linkupdown Trap , 3-33 Configure Interface DSL Max-TxPower-Downstream (ReachDSL Only) , 3-34 Configure Interface DSL Max-TxPower-Upstream (ReachDSL Only), 3-34 Configure Interface DSL Name , 3-33 Configure Interface DSL Profile Alarm Activate, 3-38 Configure Interface DSL Profile Alarm Create , 3-39 Configure Interface DSL Profile Alarm Delete, 3-39 May 2006 IN-1 Index Configure Interface DSL Profile Alarm Downstream Decreasing Rate , 3-40 Configure Interface DSL Profile Alarm Downstream Error Seconds, 3-40 Configure Interface DSL Profile Alarm Downstream Increasing Rate , 3-41 Configure Interface DSL Profile Alarm Downstream Loss of Frame Seconds, 3-41 Configure Interface DSL Profile Alarm Downstream Loss of Signal Seconds, 3-42 Configure Interface DSL Profile Alarm Downstream Severely Error Seconds, 3-43 Configure Interface DSL Profile Alarm Downstream Unavailable Seconds, 3-43 Configure Interface DSL Profile Alarm Show, 3-44 Configure Interface DSL Profile Alarm Upstream Decreasing Rate, 3-44 Configure Interface DSL Profile Alarm Upstream Error Seconds, 3-45 Configure Interface DSL Profile Alarm Upstream Increasing Rate , 3-45 Configure Interface DSL Profile Alarm Upstream Init Failure , 3-48 Configure Interface DSL Profile Alarm Upstream Loss of Frame Seconds, 3-46 Configure Interface DSL Profile Alarm Upstream Loss of Link Seconds, 3-46 Configure Interface DSL Profile Alarm Upstream Loss of Power Seconds, 3-47 Configure Interface DSL Profile Alarm Upstream Loss of Signal Seconds, 3-47 Configure Interface DSL Profile Alarm Upstream Severely Errored Seconds, 3-48 Configure Interface DSL Profile Alarm Upstream Unavailable Seconds, 3-49 Configure Interface DSL Profile Line Activate, 3-49 Configure Interface DSL Profile Line Create , 3-50 Configure Interface DSL Profile Line Delete , 3-51 Configure Interface DSL Profile Line Latency (ADSL Only), 3-51 Configure Interface DSL Profile Line Max Interleave Delay Downstream (ADSL Only), 3-52 Configure Interface DSL Profile Line Max Interleave Delay Upstream (ADSL Only), 3-52 Configure Interface DSL Profile Line Max-SNR-Margin-Downstream, 3-53 Configure Interface DSL Profile Line Max-SNR-Margin-Upstream , 3-53 Configure Interface DSL Profile Line Max-Speed-Downstream , 3-54 Configure Interface DSL Profile Line Max-Speed-Upstream, 3-54 Configure Interface DSL Profile Line Min-SNR-Margin-Downstream, 3-55 Configure Interface DSL Profile Line Min-SNR-Margin-Upstream, 3-55 Configure Interface DSL Profile Line Min-Speed-Downstream , 3-56 IN-2 Configure Interface DSL Profile Line Min-Speed-Upstream , 3-56 Configure Interface DSL Profile Line Rate Adaptive Downstream (ADSL Only), 3-57 Configure Interface DSL Profile Line Rate Adaptive Upstream (ADSL Only), 3-57 Configure Interface DSL Profile Line Show, 3-58 Configure Interface DSL Profile Line Target-Margin-Downstream, 3-58 Configure Interface DSL Profile Line Target-Margin-Upstream, 3-59 Configure Interface DSL Profile PSD Activate, 3-61 Configure Interface DSL Profile PSD Atuc-Max-PSD, 3-61 Configure Interface DSL Profile PSD Atuc-Max-Rx-Pwr, 3-63 Configure Interface DSL Profile PSD Atuc-Max-Tx-Pwr, 3-62 Configure Interface DSL Profile PSD Atur-Max-PSD, 3-62 Configure Interface DSL Profile PSD Atur-Max-Tx-Pwr, 3-63 Configure Interface DSL Profile PSD Create, 3-59 Configure Interface DSL Profile PSD Delete, 3-60 Configure Interface DSL Profile PSD Show, 3-60 Configure Interface DSL Pwrmgmt-Enabling (ADSL2 Only), 3-35 Configure Interface DSL Pwrmgmt-State, 3-68 Configure Interface DSL Pwrmgmt-State (ADSL2 Only), 3-35 Configure Interface DSL Queue , 3-69 Configure Interface DSL Show, 3-69 Configure Interface DSL Spectrum Management Selection, 3-70 Configure Interface DSL Spectrum Management Show, 3-70 Configure Interface DSL State , 3-71 Configure Interface DSL VLAN Acceptable-Frame-Type , 3-72 Configure Interface DSL VLAN Ingress-Filtering , 3-73 Configure Interface DSL VLAN Priority, 3-72 Configure Interface DSL VLAN PVID, 3-71 Configure Interface DSL, 3-21 Configure Interface Ethernet Connector , 3-98 Configure Interface Ethernet Flow Control , 3-99 Configure Interface Ethernet Mode , 3-99 Configure Interface Ethernet Rate , 3-100 Configure Interface Ethernet Show, 3-101 Configure Interface Ethernet VLAN Acceptable-Frame-Type , 3-103 Configure Interface Ethernet VLAN Ingress-Filtering , 3-103 Configure Interface Ethernet VLAN PVID , 3-102 Configure Interface Ethernet Xover , 3-101 Configure Interface SDSL Line Length - Effective Working Length (EWL), 3-77 Configure Interface SDSL Line Length - Loop Length, May 2006 2600-A2-GB21-50 Index 3-77 Configure Interface SHDSL, 3-73 Configure Interface SHDSL ATM Encapsulation , 3-75 Configure Interface SHDSL ATM VC Create, 3-74 Configure Interface SHDSL ATM VC Delete , 3-75 Configure Interface SHDSL Equipment Mode, 3-76 Configure Interface SHDSL Extended Rate Mode Selection, 3-76 Configure Interface SHDSL Linkupdown-Trap , 3-78 Configure Interface SHDSL Name , 3-78 Configure Interface SHDSL Number of Repeaters , 3-79 Configure Interface SHDSL Profile Alarm Activate-Port, 3-84 Configure Interface SHDSL Profile Alarm Create , 3-85 Configure Interface SHDSL Profile Alarm Delete, 3-86 Configure Interface SHDSL Profile Alarm Errored-Seconds Threshold, 3-86 Configure Interface SHDSL Profile Alarm Loop Attenuation Threshold, 3-87 Configure Interface SHDSL Profile Alarm Loss-Of-Sync-Word-Seconds Threshold, 3-87 Configure Interface SHDSL Profile Alarm Severely-Errored-Seconds Threshold, 3-88 Configure Interface SHDSL Profile Alarm Show, 3-88 Configure Interface SHDSL Profile Alarm SNR-Margin Threshold , 3-89 Configure Interface SHDSL Profile Alarm Unavailable-Seconds Threshold, 3-89 Configure Interface SHDSL Profile Alarm-Code-Violation-Threshold , 3-84 Configure Interface SHDSL Profile Line Activate, 3-90 Configure Interface SHDSL Profile Line Create , 3-91 Configure Interface SHDSL Profile Line Delete, 3-91 Configure Interface SHDSL Profile Line Line-Probe , 3-92 Configure Interface SHDSL Profile Line Max-Rate , 3-92 Configure Interface SHDSL Profile Line Min-Rate , 3-93 Configure Interface SHDSL Profile Line Mode , 3-93 Configure Interface SHDSL Profile Line Power-Feeding , 3-94 Configure Interface SHDSL Profile Line Power-Spectral-Density , 3-94 Configure Interface SHDSL Profile Line Reference-Clock , 3-95 Configure Interface SHDSL Profile Line Remote-Management , 3-95 Configure Interface SHDSL Profile Line Show, 3-96 Configure Interface SHDSL Profile Line Target-Margin, 3-96 Configure Interface SHDSL Profile Line Wire-Interface, 3-97 Configure Interface SHDSL Queue , 3-79 Configure Interface SHDSL Segment Alarm, 3-80 Configure Interface SHDSL Show, 3-81 Configure Interface SHDSL Spectrum Management Region, 3-97 Configure Interface SHDSL Spectrum Management 2600-A2-GB21-50 Selection, 3-98 Configure Interface SHDSL State, 3-81 Configure Interface SHDSL VLAN Acceptable-Frame-Type , 3-83 Configure Interface SHDSL VLAN Ingress-Filtering , 3-83 Configure Interface SHDSL VLAN Priority , 3-82 Configure Interface SHDSL VLAN PVID , 3-82 Configure Interface , 3-18 Configure Management Access List Create, 3-108 Configure Management Access List Delete All, 3-108 Configure Management Access List Delete Entry, 3-108 Configure Management Access List Show, 3-109 Configure Management Default Gateway Address, 3-111 Configure Management InBand Address, 3-111 Configure Management Out-of-Band Address, 3-112 Configure Management Route Add , 3-112 Configure Management Route Delete , 3-113 Configure Management Route Show, 3-113 Configure Management SNMP Access Validation, 3-115 Configure Management SNMP NMS Traps Add, 3-116 Configure Management SNMP NMS Traps Delete All, 3-116 Configure Management SNMP NMS Traps Delete Entry, 3-117 Configure Management SNMP Read Only Community String , 3-118 Configure Management SNMP Read/Write Community String , 3-118 Configure Management SNMP State, 3-119 Configure Management SNMP Trap Rate Limiting Period, 3-119 Configure Management, 3-107 Configure Proxy ARP NHR , 3-135–3-136 Configure Scheduled Backup Dynamic, 3-138 Configure Scheduled Backup Enable, 3-138 Configure Scheduled Backup Fixed, 3-139 Configure Scheduled Backup FTP, 3-139 Configure Scheduled Backup Time Stamp, 3-140 Configure Security, 3-141 Configure Security IP (Host Address Limiting) Enable, 3-141 Configure Security IP Add Static Address, 3-142 Configure Security IP Max Addresses, 3-143 Configure Security IP Show, 3-143 Configure Security MAC Add, 3-144 Configure Security MAC Delete, 3-145 Configure Security MAC Show, 3-145 Configure SNTP, 3-146 Configure SNTP Enable, 3-146 Configure SNTP Interval, 3-147 Configure SNTP Server Address, 3-146 Configure Syslog Rate Limiting, 3-147 Configure Syslog Remote Create, 3-149 Configure Syslog Remote Enable, 3-148 May 2006 IN-3 Index Configure Syslog Threshold, 3-148 Configure Syslog , 3-147 Configure System Contact, 3-150 Configure System Location, 3-149 Configure System Name, 3-150 Configure System Options Alarm Threshold Temperature High , 3-152 Configure System Options Alarm Threshold Temperature Intake Low , 3-152 Configure System Options Date Display Format, 3-151 Configure System Options Inactivity Time Out, 3-151 Configure System Options Spectrum Management , 3-152 Configure System Options Test Timeout, 3-153 Configure Uplink Show , 3-154 Configure Uplink Tagging Index, 3-155 Configure Uplink , 3-153 Configure Uplink-Tag , 3-154 Configure User-Accounts, 3-156 Configure User-Accounts Delete, 3-157 Configure User-Accounts, 3-157 Configure VLAN, 3-157 Configure VLAN Create, 3-158 Configure VLAN Delete, 3-158 Configure VLAN Modify Name, 3-159 Configure VLAN Modify Next Hop Router, 3-160 Configure VLAN Modify Ports, 3-160 Configure VLAN Modify Proxy-ARP , 3-161 Configure VLAN Modify Secure VLAN, 3-161 Configure VLAN Reserved Block Start, 3-162 Configure VLAN Show, 3-162 Configure , 3-3 Configuring the System, 2-6 Copy (Configuration), 3-163 Copy From FTP Server to Startup Configuration (Download Configuration), 3-163 Copy Running Configuration to Startup Configuration (Backup), 3-164 Copy Running Configuration to Startup Configuration (Save), 3-164 Copy Startup Configuration to Running Configuration (Reload), 3-165 D Document Purpose and Intended Audience, i Document Summary, i DSL Bonded Group ID, 1-3 DSL Bonding, 3-24 DSL Port ID, 1-2 E E1 Port ID, 1-4 End, 3-165 Ether Types, A-4 IN-4 Ethernet Port ID, 1-3 Ethernet Rate Restrictions, 3-100 Exit, 3-166 F Firmware, 3-166 Firmware Download, 3-166 Firmware Download Status, 3-167 Firmware Revision, 3-167 Firmware Switch, 3-168 I IGMP Snooping, 1-7 K Keyboard Definitions, 2-5 L Logging In, 2-2 M MLPPP Bundle Port ID, 1-4 Modes of Operation, 2-3 More Prompt, 2-4 O Overview of CLI, 2-1 P Paging, 3-168 Password, 3-169 Ping , 3-170 Port, 1-1 Port ID, 1-2 E1 or T1, 1-4 MLPPP Bundle, 1-4 PPP, 1-4 PPP Port ID, 1-4 Priority Groups, 1-5 Privilege, 3-170 Product-Related Documents, ii R Reference Tables, A-1 Reserved Names, 1-3 Restart , 3-171 S Save, 3-171 May 2006 2600-A2-GB21-50 Index Scheduled Configuration Backups , 3-137 Show Bridge Timeout, 3-173 Show Bridge, 3-172 Show Date, 3-173 Show Filter-Binding , 3-175 Show Filter-Proto-Specific , 3-176 Show Filter-Rule, 3-176 Show Filter, 3-174 Show IGMP Configuration, 3-177 Show Interface Console, 3-179 Show Interface DSL Bonding Configuration, 3-179 Show Interface DSL Bonding Performance, 3-180 Show Interface DSL Bonding Profile Alarm, 3-182 Show Interface DSL Bonding Statistics ATM, 3-181 Show Interface DSL Far End, 3-184 Show Interface DSL Profile Alarm, 3-184 Show Interface DSL Profile Line, 3-185 Show Interface DSL Profile PSD, 3-185 Show Interface DSL Rates , 3-187 Show Interface DSL Statistics Line Far End, 3-189 Show Interface DSL Statistics Line Near End, 3-190 Show Interface Ethernet Clear Statistics, 3-208 Show Interface Ethernet Configuration, 3-209 Show Interface SHDSL Configuration, 3-193 Show Interface SHDSL Performance, 3-195 Show Interface SHDSL Profile-Alarm, 3-202 Show Interface SHDSL Profile-Line, 3-194, 3-203 Show Interface SHDSL Rates , 3-196 Show Interface SHDSL Segment Alarm, 3-197 Show Interface SHDSL Statistics Line, 3-199 Show Interface SHDSL Statistics-ATM, 3-198 Show Interface SHDSL Status, 3-200 Show Interface SHDSL Unit Inventory, 3-202 Show Management Access List, 3-211 Show Management ARP Table, 3-211 Show Management Default Gateway Address, 3-212 Show Management Inband, 3-212 Show Management Out of Band, 3-213 Show Management Route, 3-213–3-214 2600-A2-GB21-50 Show Management SNMP Configuration, 3-214 Show Management SNMP Statistics, 3-215 Show Multicast , 3-219 Show Proxy ARP NHR, 3-219 Show Scheduled Backup , 3-221 Show Security IP , 3-222 Show Security MAC, 3-223 Show SNTP, 3-224 Show Syslog-Remote, 3-226 Show Syslog, 3-225 Show System Information , 3-227 Show System Options, 3-228 Show System Self-Test, 3-229 Show System Status, 3-230 Show Technical-Support , 3-231 Show Uplink, 3-231 Show Uplink-Tag , 3-232 Show User Accounts, 3-233 Show Users, 3-234 Show VLAN Configuration, 3-235 Show VLAN Reserved Block Start, 3-236 System Concepts, 1-1 System Terminology, 1-1 T T1 Port ID, 1-4 Terminology, 1-1 Test LEDs Start, 3-236 Test LEDs Stop, 3-237 Test SHDSL Loopback Start , 3-238 Test SHDSL Loopback Stop, 3-239 Test, 3-236 Time Zones, A-1 Typographic Conventions, 3-1 U Unit, 1-2 May 2006 IN-5 Index IN-6 May 2006 2600-A2-GB21-50