1
RCS Handbook
by
Brian O’Donovan
Copyright 1992.
--
--
Table of Contents
Chapter 1 RCS Basics ________________________________2
Getting Started
_________________________________________________________3
Version Numbering ______________________________________________________6
Retrieving Old Versions
Locking
__________________________________________________8
_______________________________________________________________10
Traceability Information
Specifying File Names
Generic Options
__________________________________________________14
___________________________________________________16
________________________________________________________18
Chapter 2 Identification Markers ______________________20
The Complete List _______________________________________________________23
The Change Log
The rcsit command
________________________________________________________24
______________________________________________________27
Re-formatting Identification Markers
________________________________________29
Chapter 3 Branches __________________________________30
Variants and Revisions
___________________________________________________31
Numbering of Branch Versions
Creating Branch Versions
Retrieving Branch Versions
____________________________________________33
_________________________________________________35
_______________________________________________36
Setting a Default Branch __________________________________________________37
When to use Branches ____________________________________________________37
Chapter 4 Symbolic Names and States __________________38
States
_________________________________________________________________39
Symbolic Names
________________________________________________________41
--
--
Chapter 5 Additional Utilities _________________________45
Displaying Differences
Merging
___________________________________________________45
_______________________________________________________________46
Deleting Old Versions ____________________________________________________49
The rcsclean command
___________________________________________________50
The rcsfreeze command
__________________________________________________51
The rlog command
______________________________________________________53
Telling White Lies
______________________________________________________57
Chapter 6 Interaction with Make ______________________59
Problems
______________________________________________________________62
Homegrown Solutions ____________________________________________________63
Chapter 7 RCS for Team Development Efforts ___________66
Getting Everyone to Use the Same RCS Files _________________________________68
Getting Everyone to Use the Same Working Files
What is Missing ?
_____________________________70
_______________________________________________________73
Chapter 8 Securing Your RCS Files ____________________73
Access Control Lists
_____________________________________________________75
Using UNIX file protection
Using the Set-uid Bit
_______________________________________________76
____________________________________________________77
Using Groups to Restrict Access
___________________________________________79
Chapter 9 RCS Based Systems _________________________79
Software Project Management System (SPMS) ________________________________81
CCSLAND
____________________________________________________________84
Concurrent Versions System (CVS) _________________________________________87
Distributed RCS: an even broader solution
___________________________________89
--
--
Appendix A History of RCS Releases ___________________92
Appendix B Converting SCCS files into RCS files ________94
Appendix C Storing Differences ________________________96
Appendix D Date Formats ____________________________97
Preface
"Why do you need a version control system?" ---- It’s very easy to ask this question before you have
learned about version control and what it can do for you. After all, RCS is just another software tool that
you have to understand. These tools have a reputation for being difficult and arcane. Why give yourself
more trouble than you need?
Whether or not you know it, you have probably wished you had a version control system several times in
the past month. If you’re at all typical, you probably have improvised a rudimentary version control system of your own. Therefore, you can understand why a version control system is necessary just be thinking about how you work. Are you nervous about what will happen when you modify a large or important
file? Do you worry about what will happen if you can’t reconstruct the original version of the file? Have
you ever made a "safe" copy (or wished you had such a copy) before starting to edit a file?
If the answer to any of these questions is "yes," you should look seriously at what RCS has to offer. RCS
really doesn’t do anything more than automate what you’ve been doing by hand all along: it lets you
reconstruct the prior versions of a file, and prevent other users from modifying your files until you are
done. When you are only editing a single file, it is easy to save the old version the file before modifying
it. However, this method is impractical when many files are involved or when many developers are
working on the same project.
What do we mean by "automating" the version control of your project? As we’ve said, it quickly
becomes impractical to keep "fallback" copies of old versions, track changes made, and so on. If you are
involved in a large development project, you need a database to track the changes made to a file, let you
reconstruct old versions easily, and record the intent and author of each modification. RCS provides such
a database. It solves these management problems by efficiently storing and managing multiple versions
of source files. It also gives you a way to archive the program at crucial stages, allowing you to reconstruct old versions as necessary for debugging and maintenance. In addition it provides many utilities
which assist in the version management process.
Unfortunately, version control systems have an unjustified reputation for being difficult to use. This reputation has prevented them from being used more widely. If you are new to version control, this book will
help to de-mystify the topic for you so that you can feel free to use RCS to solve your version
1
RCS Handbook
management problems. If you are already a competent user of RCS, this book will acquaint you with
more advanced features that will enhance your productivity. Here are some of the book’s more important
features:
•
We explain the underlying concepts of version control.
•
We provide many examples of how to use the advanced features of RCS.
•
We describe common mistakes and how to overcome them.
•
We provide a detailed reference on user-supplied enhancements to RCS that are available in the public domain.
This book will therefore be particularly helpful to:
•
Potential users who would like to find out what a version control system can do.
•
Existing users of RCS who wish to learn how they can get more from their system.
This book can be broken down into three sections. The first section contains a chapter which introduces
the basic commands and concepts of RCS. This chapter will teach you how to start controlling your files
with the RCS system. It covers the fundamental features only.
The second section introduces you to some of the more advanced features of RCS itself. This section
contains descriptions of identification markers, branches, symbolic names, states and general utility commands.
The third and final section describes how you can extend the functionality of RCS to make it more useful
for team development efforts. Despite the fact that RCS is frequently used to control the source files for
a team based project, RCS has several weaknesses when used by teams. In this section there is a chapter
describing some shell scripts which you can use with RCS to make it much more suitable for use with a
team based projects. We have also included a chapter describing the security problems that arise in team
based projects and how them can be overcome. Last but not least there is a chapter which describes a
number of RCS based systems which provide a team based version control service. All of these systems
provide more functionality than RCS, but they use RCS itself for the basic version management tasks.
I would like to acknowledge the assistance of Mike Loukides who was the editor of this book. His
suggestions greatly improved this book. I would also like to acknowledge the assistance of Donal Daly
who originally came up with the idea for the book. Last but by no means least I would like to thank my
wife Frances and my daughter Fiona for their great patience with me while I wrote the book.
2
RCS Basics
1
RCS Basics
"Nothing changes more constantly than the past; for the past that influences our lives does
not consist of what actually happened, but of what we believe happened".
Gerald White Johnson
American Heroes and Hero Worship, 1943
If you have never used RCS before, you will probably be a little puzzled by the whole concept of a version control system. This chapter we will help you by introducing the concept of version control and
describing how to get started with RCS. First we introduce the files that RCS uses to maintain its databases and explain the relationship between them. We then describe how you would place a file under
source management, how to retrieve a working copy of a file that is under source management, and how
to retrieve an older version of your file.
Getting Started
Version control systems like RCS store and manage different versions of text files. For each file that you
manage, RCS creates two files: a working file and a library file. The working file is the file that you edit,
compile, or even distribute. It is no different from any other text file, except that it is managed by your
version control system. The library file is the RCS system’s database about the working file. It contains
the most recent version of the working file, a description of how to construct any older version, and other
archival information: author, creation date, comments, and so on. You rarely need to work with the
library file directly; the version control system provides tools to manage it. If you look at the library file,
3
RCS Handbook
you should be able to find a copy of the working file within it with little trouble. But there will be a lot
of other junk. You obviously can’t compile a library file, and would never send it to a customer.
The two most basic operations that any version control system performs are called check-in and checkout. The check-in operation stores the current contents of the working file within the library file. It also
records the time of the check-in, the person performing the check-in, the file’s version number, and other
information. Once you have checked-in a version of a file, you cannot modify that version any more.
You can only create new versions; you cannot change old versions. This ensures that you can accurately
trace the development a program’s development. You can use the check-out operation to retrieve and
modify an old version of the file--but this creates a new version, rather than changing the older version
that you’ve already checked-in.
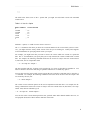
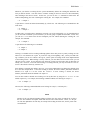
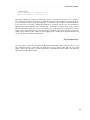
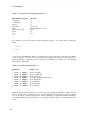
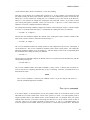
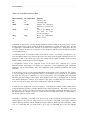
In order to clarify the relationship between each library file and the corresponding working file, the system assigns it a similar name. The name of the RCS library file is generated by appending ,v to the end
of the working file name. The following examples show how this works :
Table 1-1: Library File Names
Working file
2
Library file
2222222
1
test.c
sample.h
2
2222222
1
test.c,v
sample.h,v
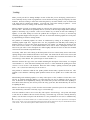
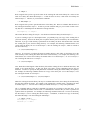
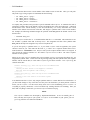
If many files from one directory are under RCS control, the directory can become cluttered with all of the
library files. In order to avoid this problem most users put the library files into a sub-directory of their
own. This is often called an ‘‘archive’’ directory. By convention, the sub-directory used for storing RCS
library files is called RCS. The following table show the mapping between working file names and their
associated library file names when using a sub-directory.
Table 1-2: Library Files in Sub-directory
Working file
2
RCS library file
222222222
1
test.c
sample.h
2
222222222
1
RCS/test.c,v
RCS/sample.h,v
While you don’t need to store files library files in a special subdirectory, we strongly recommend that you
do. It will be much easier for you to work if your workspace is uncluttered. Furthermore, if you are
using RCS properly, you should never have to peek at the library files.
Before you can start using RCS, you must create library files for each working file that you want to
manage. Assume that you want to place a single file named sample.c under RCS control, and that you
have already created the a sub-directory RCS to hold the library files.
The command for initializing a library file is rcs -i. Therefore you can generate a RCS library file to be
associated with sample.c by entering the command:
4
RCS Basics
% rcs -i sample.c
This automatically generates a library file named RCS/sample.c,v. RCS does not care whether you use
the name of the working file or the name of the library file because the system can automatically convert
from one form to another. Therefore you could equally well have typed the command:
% rcs -i RCS/sample.c,v
The rcs -i command only creates a skeleton library file. Even if the working file sample.c exists, its contents aren’t reflected in the library file yet. In other words, you have initialized a database, but you
haven’t put any data in it.
Before you can go any further, you must insert an initial version of the working file into the library file.
This is called checking-in the current contents of the working file. The RCS check-in command is ci.
Therefore, you use:
% ci sample.c
When you check-in the first version of a file, the system issues a diagnostic message indicating that it has
numbered the first version 1.1.
You frequently want to create an initial version at the same time as you create the library file, so RCS
provides a convenient way to perform the two operations together. RCS will automatically create the
library file if one does not already exist when you issue the ci command. This means that the rcs -i command is redundant in most situations.
When the contents of the working file are checked-in to the library file, the system deletes the working
file. You don’t need the working file any more; you can re-create its contents at any time by checking it
out from the library file. Furthermore, if the working file still existed, it would only tempt you to make
mistakes by editing it directly and circumventing source control.
To retrieve a working file, you must ‘‘check it out,’’ as you would check a book out of a library. The
check-out operation extracts an editable working copy from the library file. The RCS check-out command is co. This command re-creates the working file sample.c as it was immediately prior to check-in:
% co sample.c
At this point, there is no need to specify which version you want because there is currently only one version stored in the library file. Later, when you have stored several versions of the file in your library,
these commands will get the most recently created version. There are several different ways to retrieve
other versions, but before this can become a problem you must first create a new version and store it in
the library file.
To create a new version of a file, you have to edit it. But if you try, you’ll find that you can’t edit the file
that you’ve just checked out. By default, when you re-create a version using the check-out operation, the
resultant working file is created in read-only mode. This reminds you that a file should not be updated
without first locking the associated library file. RCS employs an exclusive locking scheme (only one user
is allowed to lock a file at a time) to ensure that two developers can’t work on the same file simultaneously.†
333333333333333333
† The "locking" that RCS performs is completely independent of the file locking facilities that your operating system may (or may
not) support. We only describe the locking provided by RCS.
5
RCS Handbook
You can lock an RCS file (and create a writable working file) by using i the -l (lock) option with the
check-out command. e.g.:
% co -l sample.c
After you have created a writable working file you can then use a text editor or other tool to create the
new version of the working file (e.g., vi sample.c). Once you have finished editing the file, the next step
is to check-in the changed working file into the library file as a new version. The RCS check-in command is ci. e.g.:
% ci sample.c
RCS stores the current contents of the working file as a new version in the library file with an associated
version number (1.2). The system then prompts you to enter a commentary: you should type in a short
comment describing the changes you have made since the last check-out. The commentary can be used
later by someone who is trying to understand your changes or to debug your code.
Before moving on, let’s ask one more question. Why would you ever want to "check out" a file without
locking it? Why would you want a read-only copy of the file? Assume that you are working with five
other programmers on a large project. Each programmer is primarily responsible for one file, though he
or she may need to edit other files from time to time. You obviously need to check out, locked, any file
that you intend to edit. However, you just can’t ignore the rest of the files: you’ll need all six files for
testing. And you don’t want to lock these--the other developers may want need to modify them, and you
don’t want to prevent them from doing their work. Therefore, you want to check out all six files for the
development project: your own plus the other five. But you should only "lock" the files that you plan to
edit--leave the others unlocked.
Version Numbering
Once a file is under RCS control, each version of the file has a unique version ID number. These
numbers are not assigned arbitrarily; version ID numbers have a special structure and significance. You
have already seen some ID numbers: the ID number 1.1 was assigned to the initial version of sample.c
when it was checked in. After sample.c was checked-out, modified, and checked-in again, it was
assigned the number 1.2.
Version numbers consist of positive two integers separated by a dot (e.g., 3.7). The integer before the dot
is called the release number while the integer after the dot is called the revision number. Therefore a version numbered 3.7 is revision 7 of release 3. The first version created is normally assigned a version id
number of 1.1 (revision 1 of release 1). By default, every newly created version is assigned a version id
number with the same release number as the current version but a revision number that is one higher.
Thus the revision number differentiates between subsequent versions. The need for a release number is
not as obvious to a novice user. We therefore introduce an example which will show you the benefit of
release numbers.
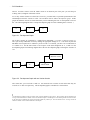
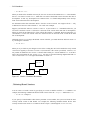
The benefit of having separate release and revision numbers can not be seen by looking at a single file.
Most software systems contain a number of inter-related source files which must be developed together.
Release numbers only become meaningful when we look at these larger systems. In order to illustrate the
benefits of the release numbering system, we will consider a sample system containing two files.
6
RCS Basics
system.c
system.h
The file containing all routines etc.
The file containing variable definitions etc.
When they were created, both files were assigned the initial version number 1.1. After a few months of
development work, the company is happy with the current status of the system and ready to start selling
the system to customers. At this time system.c has been changed 9 times and hence its current version is
numbered 1.10. However, system.h was only changed twice in the same period and hence its current version is numbered 1.3. Development work will continue on this system after the release, creating further
versions of both files. Since version 1.10 of system.c and version 1.3 of system.h are going to be compiled together and released to a large number of customers, it is important that the company should be
able to remember easily that version 1.10 of system.c and version 1.3 of system.h combine to form release
1 of the system as a whole.
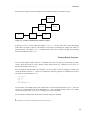
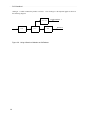
However, if the release level of the system were left unchanged, subsequent versions of system.h would
be numbered 1.4, 1.5, etc., and the subsequent versions of system.c would be numbered 1.11, 1.12, and so
on. It would be easy for the developers to forget or get confused about which versions were used to form
release 1 of the system. To eliminate confusion, subsequent versions of both files should be assigned a
release number of 2 to show that they belong to the development of release 2 of the system. This means
that the sequence of version numbers in system.c will be ... 1.10, 2.1, 2.2 .... and the sequence of version
numbers in system.h will be ... 1.3, 2.1, 2.2 ... This makes it clear that version 1.10 of system.c was used
to build release 1 of the system because it is the highest revision number of the file with a release number
1. It is also clear that version 1.3 of system.h was used to build release 1 of the system as a whole
because it is the highest revision number of this file with a release number 1.
While even this simple example shows the benefit of using a release based numbering convention, most
software development projects contain more than two source files. As the number of files increases there
is a corresponding increase in the benefit of following the release numbering convention. You should be
aware that it is important to put some thought into the release/revision numbering scheme before creating
a new version of any file: it is not possible to change the ID number of a version after it is created. You
should also be aware that "external" release numbers (like "Version 4.25 of the Software Bugzapper") are
conveniences for the public and for your marketing department, but they don’t necessarily correspond to
RCS version numbers. When you are developing a program, use conventions that make sense to you.
Normally RCS automatically assigns a version ID number to a newly checked-in version by incrementing
the revision number of the predecessor. For example, if the previous version was numbered 1.3, the next
version will be numbered 1.4. Likewise, if the current version is numbered 3.2, the next version will be
numbered 3.3. You can override the default version number by specifying an alternate number for the
new version with the ci -r command. For example the following command checks-in a new version and
assigns it a version id number of 4.1.
% ci -r4.1 sample.c
If you specify a release number with the ci -r command (instead of a complete version id), RCS will
assign the new version the lowest possible version id number from that release. For example, if the
highest version id number currently stored in the library file sample.c,v was 4.3 the following command
would cause the newly created version to be assigned the version id number 5.1.
% ci -r5 sample.c
7
RCS Handbook
However, if there already was a version with an id number of 5.3, the newly created version would be
assigned a version id number 5.4.
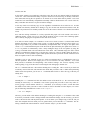
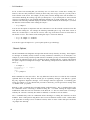
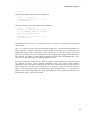
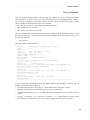
You can specify any arbitrary version number when checking in a file with the ci -r command. The ci -r
command is usually used to increment the release number: e.g., to go from release 2 to release 3.1.
However, the only restriction that RCS enforces is that the new version number must be higher than the
highest existing version number (to avoid duplicates). The following table shows how you might use the
ci -r command:
Table 1-3: New Version Numbers Assigned
Command
Used
2
%
%
%
%
%
%
%
%
2
Current Default
Version Number
222222222222222222
ci
ci
ci
ci
ci
ci
ci
ci
sample.c
-1.9 sample.c
-r1.3 sample.c
-r2 sample.c
-r2 sample.c
-r1 sample.c
-r3 sample.c
-r3.3 sample.c
222222222222222222
1
1
1
1
1
1.7
1.7
1.7
1.7
2.3
2.3
1.7
1.7
New Version
Number
1
1
1
1
1
1.8
1.9
error
2.1
2.4
error
3.1
3.3
Retrieving Old Versions
If you perform a check-out operation on a library file with more than one version you will, by default, be
given a copy of the most recently created version. The main advantage of using a version control system,
however, is that you have a choice of retrieving any arbitrary version. RCS provides you with a number
of ways of specifying that you want a version other than the default version.
The most straight forward way to specify that you want a different version is by giving the version id
number of the version you want with the -r option to the check-out command. For example, the following command will retrieve version 1.1 of sample.c :
% co -r1.1 sample.c
When you retrieve a version using the co command, the system will automatically retrieve the default
(most recently created) version from the relevant library file. You can retrieve another version by specifying the version id of the version required with the -r option flag. If you specify a release number
rather than a complete version id number, the system will select the most recent version of that release
number.
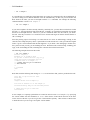
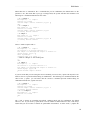
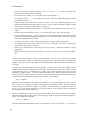
For example, consider a file containing six versions with the following version id numbers:
1.1
1.2
2.1
2.2
8
RCS Basics
2.3
3.1
The table below shows some of the -r options that you might use and which version each command
would retrieve:
Table 1-4: Use of -r Option
RCS Command
2
Version Selected
2222222222
1
co -r2.3
co -r2.2
co -r1
co -r2
co -r3
2
2222222222
1
1
2.3
2.2
1.2
2.3
3.1
Without a -r option, co would of course retrieve version 3.1.
The co -r command is fine when you know the version ID number of the version which you need. However, you might not know exactly which version of the file you are looking for. Luckily RCS supports
several mechanisms for specifying which version you require.
For example, you might know that you want to retrieve the version which was current on a particular
date. The co -d command lets you specify that you are only interested in versions created before a certain
date. For example, the following command checks-out the version of sample.c that was created closest
to, but before, the 1st of September 1990:
% co "-d1-sept-90" sample.c
The date specified with the -d option can be specified in free format as described in appendix D. You
must be careful to enclose the date string in quotation characters if it contains any spaces.
You can also select the most recently created version that was created by a particular user by using the co
-w command. For example, the following command retrieves the latest version of the file sample.c that
was created by the user fred:
% co -wfred sample.c
The various version selection options can be used in conjunction with each other. For example, the following command will retrieve the version of sample.c that was created closest to (but before) 1st of September 1990, that was authored by fred:
% co "-d1-sept-90" -wfred sample.c
You can also select versions based upon their state, symbolic name and/or branch number. However, we
will postpone discussion of these features until later in the book.
9
RCS Handbook
Locking
While you may use RCS to manage multiple versions of files that you are developing yourself, RCS is
more commonly used by teams of programmers to store files that are being jointly developed by the team
members. RCS uses locking to ensure that work being done by one team member is not in conflict with
work being done by another team member. You must lock a file before starting to update it. A lock
ensures that no one else is working on the same file at the same time.
When a number of people are working together on a project they often need to jointly develop some of
the source files. This leads to the possibility that two (or more) of the developers might make conflicting
updates to the library copy of the file. There are two distinct ways in which to deal with conflicting or
updates; we can either attempt to resolve the problem after it happens or we can try to avoid having
conflicting updates happen in the first place. RCS tries to ensure that conflicting updates never take place
by implementing an exclusive locking scheme.
The problem of conflicting updates can easiest be understood by looking at an example of how a
conflicting update might arise. Suppose there were two programmers Jim and Mary both working on
different sections of a project but jointly developing the user manual. On monday Jim checks-out the
most recent version (version 1.1) of the manual source file in order to insert a description of some routines he has just coded. These descriptions are rather lengthly and hence he does not have the modified
version of the user manual ready until thursday.
On tuesday, while Jim is still working on the descriptions of his new routines, Mary notices some minor
spelling changes in the manual and decides to correct them. She checks-out the most recent version (still
version 1.1) of the user manual to make the corrections. She makes these corrections and checks-in her
corrected copy of the manual. The system assigns it version number 1.2.
When Jim checks-in his copy of the user manual containing the description of his routines, it is assigned
version number 1.3. Since Jim started working with version 1.1 of the document the spelling errors from
version 1.1 are in version 1.3 the document. Hence the effect of Mary’s spelling corrections (the update
from 1.1 to 1.2) have been effectively lost in version 1.3.
This problem is sometimes called the lost update problem because Mary’s update has been lost. This
problem is also called the conflicting update problem because the two updates are in conflict with each
other.
When dealing with conflicting updates, as in many other aspects of life, avoidance is better than a cure.
The key to avoiding conflicting updates is to ensure that only one user is updating a file at any given
time. In RCS this is accomplished by locking. RCS insists that you must lock a file before updating it.
Since RCS ensures that only one user may lock a file at any given time, this means that only one user can
be updating the file.†
When a user checks-out a copy of a file from the version control system the syntax of the command indicates whether they want either a read only copy or a write/read copy.
If the user intends to create a new revision, they will request a write/read copy. The system will attempt
to lock the file on behalf of the user before retrieving a write/read copy. If the file is already locked by
another, user the check-out request will fail because it is not permissible for two users to simultaneously
333333333333333333
† In a later chapter we will describe branches; this is a feature which allows you to have two or more separate lines of development
within one file. When you are using development branches, RCS allows that two different users may have locked different branches
of the same file. This is safe because updates to different branches will not be conflicting.
10
RCS Basics
lock the same file.
In the earlier example, Jim would have locked the source file for the user manual when he checked-out
version one. This would mean that Mary’s request to check-out a write/read copy on tuesday would have
been denied thus forcing the two updates to be carried out in series rather than in parallel. Jim’s lock
would have been automatically relinquished on thursday when he checked-in the new version of the file,
Mary would then have been free to proceed with her changes.
A user may check-out a read only copy of a file regardless of whether the file is locked or not. In order
to remind users that they should not be editing a copy of a file that was checked-out without a lock, the
UNIX write permissions are normally turned off even for the owner of the file if it is checked out without
a lock.
Even with the locking mechanism it is always possible that people will work around it and create a
conflicting update. In this case we are left with the problem of how to resolve the conflicting update.
This is done by merging the lost update into the most recent version.
If we take our earlier example, we would like to create a new version (version 1.4) which would contain
both the description of new routines (from version 1.3) and the spelling corrections (from version 1.2).
Special merge utilities are provided to automatically accomplish this task. So long as the update from
version 1.1 to 1.2 affected different parts of the file from the parts affected by the update from version 1.1
to 1.3 it is possible to automatically make a fairly intelligent merge of the two updates by using the
rcsmerge command which will be described later in this book. This command merges the effect of both
changes by including the changed copy of each section. However, if the two updates affect the same section of the file, it is not possible to guess which update should have preference and the conflict between
these two updates must be resolved manually.
Normally a lock is only acquired as part of a check-out operation and it is relinquished as part of a
check-in operation. However, this might prove to be too restrictive for many situations. As a result
RCS provides a mechanism for relinquishing a lock without creating a new revision, acquiring a lock
without getting a copy of the file and even releasing the lock belonging to another user.
The rcs -l command will lock a file without checking-out a working file. This is useful if you check-out
a read-only version of the file, and sometime later decide that you need to edit it. Rather than performing
another check-out operation, you can use rcs -l command shown below to "lock" the copy of the file you
already have.
% rcs -l sample.c
Normally the rcs -l command will lock the default version of the RCS file (i.e. the version that would
normally be retrieved by a co command). You can also specify that you want to reserve any other version by giving a version number with the rcs -l command. (It is necessary to lock a version other than
the default version when you want to create a branch as will be described in a later chapter.) For example, the following command locks version 1.3 of sample.c.
% rcs -l1.3 sample.c
Likewise, you can unlock a file without checking-in a working file using the rcs -u command. This could
be useful if you started to make a change and then realized that the change was not necessary; you do not
want to check-in the file with the partial update. You can delete your changed copy of the file, but you
must also relinquish the lock which you were granted when you executed the co -l command. The following command will unlock whichever version of the file sample.c you have locked.
11
RCS Handbook
% rcs -u sample.c
It is possible that you could have locked more than one version of a single RCS file; this would happen if
you were working on two different branches of the file simultaneously. In this case you will need to tell
RCS which of the locks you want to relinquish with the rcs -u command. For example, the following
command unlocks version 1.3 of sample.c.
% rcs -u1.3 sample.c
If you wish to update a file that is already locked by somebody else, you must find out which user "holds
the lock": i.e., find out which user has locked the file. Normally you would then contact that user and ask
him or her to relinquish the lock. However, if you can’t contact the other user, RCS will let you "break"
the lock. This may be useful if a co-worker leaves for vacation and forgets to check-in the files that he or
she is working on.
Since the primary purpose for locking is to ensure that no two users are unknowingly working on the
same file, RCS adopts the policy that it is permissible to break someone else’s lock, provided the original
locker is given a clear indication that this has happened. If you break a lock belonging to another user,
the system will ask you why you are breaking the lock. RCS then sends a mail message, including your
reply, to the user holding the lock, informing him or her that the lock has been broken.
The following example shows how this works:
% rcs -u1.3 sample.c
RCS file: sample.c,v
Revision 1.3 is locked by fred
Do you want to break the lock? [ny](n): y
State the reason for breaking the lock:
(terminate with ^D or single ’.’)
>> I cannot wait for you to come back
>> from vacation
>> .
1.3 unlocked
done
%
RCS then sends the following mail message to fred to let him know that you have just broken his lock:
Date: Thu, 13 Sep 90 14:57:35 +0100
From: mary
To: fred
Subject: Broken lock on sample.c,v
Your lock on revision 1.3 of file sample.c,v
has been broken by mary for the following reason:
I cannot wait for you to come back
from vacation
In our example, we explicitly specified that we wanted to unlock version 1.3 of sample.c,v by specifying
the version number with the command (rcs -u1.3). Some releases of RCS break the lock on the most
recent version of the file if you do not give the version number explicitly. Other releases of RCS refuse
to break the lock if you do not give an explicit version number.
12
RCS Basics
Whenever you check-in a working file, the system automatically deletes the working file and deletes the
lock you held on the file. You often want to continue working on the next version of a file immediately
after checking-in the current version. In this case, you can use the ci -l command to check-in the file
without relinquishing your lock or deleting the working file. For example, the command:
% ci -l sample.c
is equivalent to a check-in followed immediately by a check-out. The following two commands have the
same effect:
% ci sample.c
% co -l sample.c
At other times, you might want to maintain a read-only copy of the working file (e.g. for compilation) but
you do not want to maintain your lock because you are not going to update the file further. In this case,
you can use ci -u to check-in the file and relinquish your lock without deleting the working file. For
example, the command:
% ci -u sample.c
is equivalent to the following two commands.
% ci sample.c
% co sample.c
Locking is a valuable tool for avoiding conflicting updates when many users are jointly working on a file.
However, it can sometimes be a pain. If you are the only person updating a file, you may feel that locking is nuisance you can live without. RCS gives you the option of turning off the strict implementation
of the locking feature. When locking is strictly enforced, you must hold a lock on a file before you can
check-in an new version. If strict locking is not enforced, you don’t need to hold a lock on files that you
already own. However, even when strict locking is not being enforced, you may not check-in a new version of a file which is locked by someone else.
Strict locking is normally the default. However, your system administrator can change this default when
he or she first compiles RCS. If non-strict locking is desired, the macro STRICT_LOCKING should be
defined to be equal to 0 in the source file rcsbase.h. If strict locking is desired, the macro
STRICT_LOCKING should be defined to be equal to 1.
You can also enable or disable strict locking on a file-by-file basis by using the rcs -L or rcs -U commands respectively. For example, the following command enables strict locking for sample.c,v.
% rcs -L sample.c,v
Likewise, the following command disables strict locking for sample.c,v and sample.h,v.
% rcs -U sample.c,v
NOTE
Because of the way that RCS handles updates to library files, the owner of an RCS file is always
the user who made the last update, rather than the user who created the file. Hence, it is the person who last updated the file who may be exempt from needing to hold a lock, not the person who
created the file.
13
RCS Handbook
Traceability Information
You will often find bugs in one version that did not exist in a previous version. The obvious question to
ask is: "what has changed between these two versions?" The rcsdiff command (which is described later
in the book) can be used to find these changes. However, before you can fix the bug, you should be able
to answer the second question: "what did the author intend when making these changes?" You can’t just
assume that the changes were mistakes. The author was no doubt trying to do something intelligent, and
if you don’t understand the intent, you will only introduce new bugs. There is no way to answer the
second question automatically. Instead, the system stores some traceability information to assist you.
RCS stores a log message with each version. It also stores a general description of the file when you first
put it under control.
Whenever you check-in a new version of a RCS file, the system prompts you to enter a log message
describing the change you have just made. This log message is stored in the RCS file along with the new
version itself. You should enter a clear message describing what changes you made and why you made
these changes: the log messages can serve as a valuable reminder to someone who is later trying to
understand what you have done. Don’t just enter a message like "fixed a bug"--give a description that
will be useful to someone who needs to work with the program after you’ve moved to another project.
The log message may span several lines. You indicate the end of the log message by typing a line that
contains a single period (as the first character) or a a line containing a single CTRL-D. The following
example shows a typical ci operation:
% ci sample.c
RCS/sample.c,v <-- sample.c
new revision: 1.3; previous revision: 1.2
enter log message:
(terminate with ^D or single ’.’)
>> added an input checking routine to eliminate the
>> input consistency bug reported by sally
>> .
done
%
If you check-in a number of files with one ci command, you may want to give the same log message to
each of the newly created versions. To save you from typing the same log message repeatedly, the ci
command gives you the option of reusing the first file’s log message for all subsequent files. The following example shows how this might be used:
% ci sample.c routines.c
RCS/sample.c,v <-- sample.c
new revision: 1.4; previous revision: 1.3
enter log message:
(terminate with ^D or single ’.’)
>> changed these files so that they now use double
>> precision math functions
>> ctrl-D
done
RCS/routines.c,v <-- routines.c
new revision: 1.3; previous revision: 1.2
reuse log message of previous file? [yn](y): y
done
You may prefer to give the log message on the command line rather than using the dialogue format
shown above. You can do this by using the ci -m command. For example, the following command will
check in a new version of the file sample.c with the log message "fixed fp convergence problem".
14
RCS Basics
% ci "-mfixed fp convergence problem" sample.c
RCS/sample.c.c,v <-- sample.c.c
new revision: 1.5; previous revision: 1.4
done
%
If the log message contains spaces, you should be careful to put quotation marks around the -m option, as
in the example. If we had omitted the quotation marks, the shell would have interpreted the words "fp"
and "convergence" as file names, rather than as a continuation of the log message.
The ci -m command is normally used within shell scripts. Because of its syntax, it is really only
appropriate for a short (one-line) comment. However, you can give a multi-line log message with the ci
-m command by putting the ’\’ character at the end of each line. This tells the shell that the command
has not ended yet. For example:
% ci "-mthis log message\
spans two lines" sample.c
will check-in a new version of the file sample.c with the log message:
this log message
spans two lines
Whenever you create a new RCS file, either with the rcs -i command or with the ci command, the system
prompts you to enter a descriptive text. This descriptive text describes the entire RCS file and should not
be confused with the log message. The log message is given whenever you check-in a new version, and
only describes a particular version of the file; the first version of a RCS file is always given the log message "Initial revision." The description is only given once, and describes the purpose of the file as a
whole.
To enter the descriptive message, follow the same rules that you use for the log message. Type as many
lines as you like, terminated by a line containing a single period or CTRL-D, as shown in the following
example:
% ci f_handle.c
RCS/f_handle.c,v <-- f_handle.c
initial revision: 1.1
enter description, terminated with ^D or ’.’:
NOTE: This is NOT the log message!
>> This file contains the code to implement
>> the file handling routines
>> .
done
%
Normally, RCS only asks you to enter a descriptive message when it first creates the library file. However, you don’t always know exactly what a file will contain when you first create it. Over time, your
initial description may become outdated or incorrect. You can force the system to prompt you for a new
descriptive text (and discard the old one) by using either the rcs -t or ci -t commands. For example, both
of the following two commands discard the original description and create a new one.
% rcs -t f_handle.c
RCS file: RCS/f_handle.c,v
enter description, terminated with ^D or ’.’:
NOTE: This is NOT the log message!
15
RCS Handbook
>> This file contains the enhanced file handling routines.
>> .
done
or
% ci -t f_handle.c
RCS/f_handle.c,v <-- f_handle.c
new revision: 1.2; previous revision: 1.1
enter description, terminated with ^D or ’.’:
NOTE: This is NOT the log message!
>> This file contains the enhanced
>> file handling routines.
>> .
enter log message:
(terminate with ^D or single ’.’)
>> Added enhanced routines and updated description
>> .
done
%
If you want to include a lengthy description of the file, you might prefer to prepare the description with
your favorite text editor. Use the editor of your choice to create a text file containing your description,
and then use the -t option to rcs or ci to specify your description file. If you name a description file with
the -t option, RCS uses the description from the file. For example, the following command copies the
descriptive text contained in the file txtfile into the RCS file RCS/f_handle.c,v.
% rcs -ttxtfile f_handle.c
Similarly, the next command copies the descriptive text contained in the file txtfile into the RCS file
RCS/f_handle.c,v; but it also checks-in a new version at the same time.
% ci -ttxtfile f_handle.c
Specifying File Names
All the RCS commands allow you to specify either the name of the working file or the name of the
corresponding library file. However, most RCS commands need to know the name of both files. It is
simple for the system to recognize which of the files you have specified because RCS file names end in ,v
while working file names do not.† And given that it has one file name, it is easy for RCS to compute the
other. RCS has a few simple rules for generating library file names from working file names and viceversa. We’ll start by explaining these rules. For simplicity, all of our examples use the co command to
illustrate the relationship between working files and library files; the other RCS commands all use the
same rules.
If the working file is to be created in the current directory and the RCS file is stored in the RCS subdirectory, the conversion is simple. If you issue the command:
333333333333333333
† Because of the file naming convention used, RCS cannot be used to manage files whose names end in ,v. However, this is not a
very common file ending.
16
RCS Basics
% co sample.c
RCS recognizes that you have given the name of the working file and not the library file. Hence it first
looks for a library file named RCS/sample.c,v. If this file does not exist, it then looks for a library file
named sample.c,v. Likewise, if you issued the command:
% co RCS/sample.c,v
RCS recognizes that you have specified the name of the library file. Hence it calculates that the name of
the working file should be sample.c. In order to prevent confusion and give you a record of what it actually did, the co command prints an informative message like this:
RCS/sample.c,v --> sample.c
This means that the working file sample.c was checked-out from the library file RCS/sample.c,v.
If you are working as part of a development team, you probably keep your copy of the working file in
your local directory, but store the library file in a public directory that is accessible by all team members.
Therefore, if you give a full directory specification for the library file, RCS still assumes that it can find
the working file in your current working directory. For example, the following command checks-out a
version from the library file /usr/src/RCS/sample.c,v into the working file sample.c, which is located in
the current directory:
% co /usr/src/RCS/sample.c,v
However: If you specify a working file name in another directory, RCS looks for the library file in the
same directory as the working file, rather than in the current directory. For example, the following command checks out a version from a library file named either /usr/src/RCS/sample.c,v or /usr/src/sample.c,v
into a working file named /usr/src/sample.c:
% co /usr/src/sample.c
Now, think about what happens when the library file and the working file are in different directories, and
neither is the current directory. In this case, RCS can’t figure out the relationship between the two
filenames. You have to specify the full path names of both the working file and the library file explicitly.
For example, the following command checks-out a copy of the library file /usr/src/RCS/sample.c,v into
the working file named /usr/alt/sample.c:
% co /usr/src/RCS/sample.c,v /usr/alt/sample.c
While the working file and the library file may be in unrelated directories, the working file and the library
file must have similar file names. For example, if the working file is named sample.c the library file must
be named sample.c,v. You can’t have a library file named lib-sample.c,v, or any other permutation.
The co command (and any other RCS command) can operate on several files at the same time. If you
give two different file names with the same co command, RCS assumes that you want to perform two
separate check-out operations. For example, the following command checks-out a version of the library
file RCS/sample.c,v into a working file named sample.c. In addition, it checks-out a copy of the library
file named RCS/diff.c,v into the working file named diff.c:
% co sample.c diff.c
RCS/sample.c,v --> sample.c
RCS/diff.c,v --> diff.c
17
RCS Handbook
So far, we have been assuming that you will always use co to check out a version into a working file.
However, there are many situations in which you don’t really want a copy of the file--you only want to
look at the file on the screen. For example, you may want to browse through some code in another version without disturbing the working copy that you already have. If you would prefer to read a selected
version of your RCS file on your terminal rather than checking out an actual working file, use the co -p
command. The following command displays the default version of the RCS file RCS/sample.c,v, but does
not affect the current contents of the working file sample.c:
% co -p sample.c
You can use this option in conjunction with I/O re-direction to store the selected version into some file
other than the working file. For example, the following commands puts a copy of the latest version of
release two of RCS/sample.c,v into the file release2, and a copy of the latest version of release three of
into the file release3. The contents of the working file sample.c will not be affected:
% co -p -r2 sample.c > release2
% co -p -r3 sample.c > release3
You can also "pipe" the output of co -p into a print spooler to get a hard-copy.
Generic Options
All RCS commands issue diagnostic messages that describe exactly what they are doing. These diagnostic messages are normally useful, but there are many situations in which they are an annoyance. For
example, if you are writing a shell script that uses RCS commands, you may not want the RCS diagnostic
messages to be cluttering up the screen. Invoking any RCS command with the -q option (which stands
for "quiet") suppresses its diagnostic messages. The following example shows the difference between co
and co -q:
% co sample.c
RCS/sample.c,v -->
revision 1.5
done
% co -q sample.c
%
sample.c
Both commands have the same effect. The only difference between the two is that the first command
explained what it was doing, while the second gave no explanatory messages. Note that the -q option
flag only suppresses diagnostic messages. Error messages cannot be suppressed. If something goes
wrong (for example: if co can’t find the file you want to check out), you will get an error message from
co, whether or not -q is present.
Both the co and ci commands have safeguards against accidental misuse. The co command always asks
for confirmation before overwriting a writable working file. A writable working file might contain
modifications which have not been checked-in to the RCS file. Co does not check before overwriting a
read-only file. Because a read-only file cannot be modified, co considers it safe for deletion.
The ci command always asks for confirmation before checking-in a working file which has not been
modified. There is little point in using RCS to store a series of identical versions to a file. Granted, there
is no great harm in storing a series of identical versions, either--it wastes a little disk space and makes
rlog output more unwieldy.
18
RCS Basics
When either the co command or the ci command asks you for confirmation, the default answer to the
question is "no"; this means that if you type a carriage return, the system will abort the command. The
following two commands illustrate how this works:
% co -l sample.c
RCS/sample.c,v --> sample.c
revision 1.5 (locked)
writable sample.c exists; overwrite? [ny](n): y
done
% co -l sample.c
RCS1/sample.c,v --> sample.c
revision 1.5 (locked)
writable sample.c exists; overwrite? [ny](n):
co warning: checkout aborted.
% co sample.c
RCS1/sample.c,v --> sample.c
revision 1.5 (locked)
writable sample.c exists; overwrite? [ny](n): n
co warning: checkout aborted.
%
Here’s a similar sequence with ci:
% ci -l sample.c
RCS/sample.c,v <-- sample.c
new revision: 1.6; previous revision: 1.5
File sample.c is unchanged with respect to revision 1.5
checkin anyway? [ny](n): y
enter log message:
(terminate with ^D or single ’.’)
>> Made no changes to the working file
>> .
done
% ci sample.c
RCS/sample.c,v <-- sample.c
new revision: 1.7; previous revision: 1.6
File sample.c is unchanged with respect to revision 1.6
checkin anyway? [ny](n): n
checkin aborted; sample.c deleted.
%
If you are certain that you are issuing the correct command, you can use the -f option with any RCS command to force it to proceed without asking for confirmation. The following two commands illustrate the
effect of the -f option: you will notice that the second co command proceeds without asking for
confirmation because the -f option was used.
% co -l sample.c
RCS/sample.c,v --> sample.c
revision 1.6 (locked)
writable sample.c exists; overwrite? [ny](n): n
co warning: checkout aborted.
% co -l -f sample.c
RCS/sample.c,v --> sample.c
revision 1.6 (locked)
done
%
The -f and -q options are somewhat inter-related. Whenever RCS asks for confirmation, the default
answer is "no". If you use the -q option, RCS won’t ask whether it should continue or not; it will always
assume that you do not want to continue in questionable circumstances. In other words, -q implies the
19
RCS Handbook
opposite of -f.
The following sequence of commands show how the -f and -q options are inter-related. You will notice
that the second co command aborts without asking you, because the -q option implies that a "no" answer
is assumed to all questions. However, the third co command overwrites the working file without asking
you, because the -f option implies that a "yes" answer is assumed to all questions.
% co -l sample.c
RCS/sample.c,v --> sample.c
revision 1.6 (locked)
done
% co -l -q sample.c
co error: writable sample.c exists; checkout aborted.
% co -l -f -q sample.c
% ci -q sample.c
ci warning: checkin aborted since sample.c was not changed; sample.c deleted.
%
20
Identification Markers
2
Identification Markers
"The sense of identity provides the ability to experience one’s self as something that has continuity and sameness, and to act accordingly."
Erik Hombuger Erikson
Childhood and Society, 1950
RCS helps you to track different versions of source files. However, the ability to track source files would
be of little use if you, the programmer, didn’t also have access to the information stored in the RCS database. You often need to know the version number of the file you’re looking at; the author; when it was
last checked-in; and so on. Therefore, RCS provides "identification markers" which can semiautomatically place identification information into the working copy of your files.
For example, if you want the version id number to appear in the source file, you put the special
identification marker "$Revision$," into the initial version of the file which is to be controlled by RCS
(the working file). Identification markers are usually placed within comment strings. For example:
/* this is version $Revision$ */
Now, let’s assume that you check-in the initial version (1.1) of the file with this identification marker.
Later, when you check-out the working file, the system automatically replaces the above line with
/* this is version $Revision:1.1$ */
21
RCS Handbook
If you later create version 1.2 of the file but leave this line unchanged, the system will automatically
update the identification marker to:
/* this is version $Revision:1.2$ */
It is often a good idea to include identification markers in executable files as well as in the source file.
The exact way in which you do this depends upon the programming language you use. In the C programming language you can ensure that an identification text is inserted into the executable file by including the identification marker in a statically declared string. Here’s how:
static char RCS_ID[] = "version $Revision$ of file.c";
When you compile this file, the identification string will be placed in an initialized but otherwise unreferenced character array within the object module. Note that this string must be static. When you link the
program, identification strings from all of its components will be contained in the executable.
But how do you look for identification markers within an object file or an executable? You can’t just
scan an executable as you can scan a source code file. One alternative would be to use the strings command, but this will usually give you a lot of garbage instead of the markers that you’re interested in.
RCS provides something better. It provides a special utility to locate and print for RCS identification
markers in files. This utility is called ident.
Some executable are compiled from many different source files; by placing the appropriate identification
markers in each source you can identify which version of each source file was used to generate the executable file. The following example shows how this can be done for the system containing the two files
system.h and system.c. The identification lines placed in the original source files would be
Table 2-1: Original Identification Lines
File
2
Identification line
22222222222222222
1
system.c
system.h
2
22222222222222222
char c_id[]="$RCSfile$ $Revision$";
char h_id[]="$RCSfile$ $Revision$";
1
After these files are checked-in, the identification lines would be changed to:
Table 2-2: Expanded Identification Markers
File
2
Identification line
22222222222222222222222222
1
system.c
system.h
2
22222222222222222222222222
char c_id[]="$RCSfile: RCS/system.c,v $ $Revision: 1.10 $";
char h_id[]="$RCSfile: RCS/system.h,v $ $Revision: 1.3 $";
1
When you perform a compilation on these files, the relevant strings will be included in the resultant
binary file system. You can identify which versions of the source file have been used by giving the command:
22
Identification Markers
% ident system
$RCSfile: RCS/sample.c,v $ $Revision: 1.10 $
$RCSfile: RCS/sample.h,v $ $Revision: 1.3 $
This clearly indicates to you that you have used version 1.3 of sample.h and version 1.10 of sample.c.
For a small system made up of two files, you might be able to keep this information in your head. But if
you are working on a large system with many files, you probably won’t be able to remember which version of each file you are using. Identification markers are even more crucial if you are developing an
application that will be shipped to some external users. Assume that a customer reports a bug. You can
find out immediately which files were used to build his copy of the program by asking him to run ident
on his system. If the customer doesn’t have these utilities available, you can still ask him to put his executable on tape and ship it back. When you are debugging, there is nothing more important than knowing
exactly what files you should be working with.
The Complete List
Up to this point we have only described the $Revision$ identification marker. However, there is a lot
more information about a version that you might like to store in the file other than just its revision
number. Hence, RCS provides you with a large number of identification marker strings. The following
table lists all available RCS markers:
23
RCS Handbook
Table 2-3: RCS identification Markers
Marker
Expands to
2222222222222222222222222
$Author$
$Date$
1
1
$Header$
1
1
$Id$
1
$Locker$
1
$Log$
1
1
1
$RCSfile$
$Revision$
$Source$
1
1
$State$
2222222222222222222222222
1
The username of the person who created (checkedin) this version.
The date and time that this version was created
(checked-in).
A complete identifier containing the full path name
of the RCS file, the version id number, the creation
date of this version, the author, the state and the
person who has locked this file (if it is locked).
Same as the $Header$ marker, except that the
RCS file name is given without the full path name.
Not supported by all RCS versions.
If this version is locked, it expands to the username
of the person who holds the lock. If this version is
not locked, this marker is "empty."
This is a special marker which expands to the RCS
file name followed by a list containing the Revision
number, the author, the creation date and the log
message for each version that was checked-in. This
marker behaves differently than all of the others.
We will describe it in more detail below.
The name of the RCS file (e.g., sample.c,v).
The version id number of this version.
The full path name of the RCS file e.g.
/users/fred/RCS/sample.c,v.
The state of this version.
The first letter of each marker is uppercase; the other letters are almost always lowercase. The $RCSfile$
marker is the only exception to this rule. It may be obvious that you need to spell the markers correctly,
but it’s not so obvious that they must be capitalized correctly. Like most other UNIX tools, RCS is
case-sensitive, and will ignore any markers without correct capitalization.
The Change Log
The $Log$ marker behaves differently from other markers in a number of ways. RCS replaces the $Log
marker with all of the log messages that have been given for this file. Over time, the $Log$ marker
grows into a complete history of the file’s development. In this way, it is fundamentally unlike the other
markers, which only reflect information about the most current revision. For example, the initial version
of the working file sample.sh would contain:
24
Identification Markers
# $Log$
After being checked-in to RCS, this might be updated to:
# $Log:
sample.sh,v $
# Revision 1.1 90/09/18 11:25:50
# Initial revision
#
fred
After a new version is created this might in turn be updated to :
#
#
#
#
#
#
#
#
$Log:
sample.sh,v $
Revision 1.2 90/09/18 11:26:11 fred
A long commentary describing the changes
which spans multiple lines
Revision 1.1 90/09/18
Initial revision
11:25:50
fred
Log information about version 1.1 is included in version 1.2 of the file, in addition to the information
about 1.2 itself.
The $Log$ marker is also the only marker that spans multiple lines. All other identification markers fit
onto a single line. Because working files normally contains source code, you will usually put your
identification markers inside of comments to ensure that they do not affect the meaning of the code.
However, this strategy won’t work for $Log$ because many programming languages do not allow multiline comments. For example, C allows multi-line comment, but shell scripts and FORTRAN don’t. How
can you use $Log$ within a shell script without making it incorrect?
RCS tries to handle this problem for you. When it expands the $Log$ marker, it precedes each line of
the expanded text with a special "comment identification string." RCS guesses which comment
identification string is appropriate by looking at the suffix of the working file’s name (the part of the file
name after the dot). The name of the working file in our example is sample.sh, the suffix of this file
name is .sh; hence RCS guessed that it contained a shell script and used the string " # " as the comment
identifier. The following table shows the various suffixes that RCS will recognize and the default comment identifier string it will use for each suffix.
25
RCS Handbook
Table 2-4: Comment Characters used in the Change Log
Suffix
2
.c
.csh
.e
.f
.h
.l
.mac
.me
.ml
.ms
.p
.r
.red
.s
.sh
.sl
.y
.ye
.yr
no suffix
unknown suffix
2
Language Assumed
22222222222222222
22222222222222222
1
1
1
1
1
1
1
1
1
1
C
c-shell
efl
FORTRAN
C-header
lex
DEC-macro
n/troff -me macros
mocklisp
n/troff -ms macros
pascal
ratfor
psl/rlisp
assembler
Bourne-shell
psl
yacc
yacc-efl
yacc-ratfor
unknown
unknown
1
1
1
1
1
1
1
1
1
1
Comment Identifier
*
#
#
c
*
*
;
\"
;
\"
*
#
%
#
#
%
*
*
*
#
none
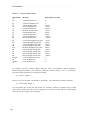
If you do not like the default comment leader selected by the system, you can override it by using the rcs
-c command. For example, the command
% rcs -c"comm" sample.sh
causes the string "comm" to be inserted at the beginning of all future change logs in the file
sample.sh. If we now create a new version the change log will be updated to
# $Log:
sample.sh,v $
comm Revision 1.3 90/09/18 11:45:26 fred
comm commentary supplied with new version
comm
# Revision 1.2 90/09/18 11:26:11 fred
# A long commentary describing the changes
# which spans multiple lines
#
# Revision 1.1 90/09/18 11:25:50 fred
# Initial revision
#
The changed comment leader is only used for the versions that are created after you give the rcs -c command, not for versions that have already been checked-in. When the working file is being checked-out
the system merely updates the part of the change log relating to the current version; it leaves the rest of
the change log untouched. (As a consequence, if you want to delete certain versions from the change log,
you can simply remove the appropriate lines from the working file. Once removed, they won’t reappear.)
26
Identification Markers
The rcsit command
Many software companies put a standard format header at the top of all their source files. This header
typically contains such information as the file name, version number, creation date, change history etc. .
All of this information can be automatically generated by using RCS identification markers. However,
you might consider it a laborious and mechanical task to insert the correct identification markers at the
start of all the source files. Luckily, Michael Cooper from the University of Southern California has gone
to the trouble of developing a special utility named rcsit which you can use to automatically insert the
correct header information at the beginning of your files.
The following example shows how you would use rcsit. Initially you have a file sample.c with the following contents.
main()
{
printf("hello world0);
}
You issue the command:
% rcsit sample.c
the file is updated to the contents shown below.
#ifndef lint
static char *RCSid = "$Header$";
#endif
/*
* $Log$
*/
main()
{
printf("hello world0);
}
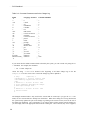
What happened was that the rcsit command recognized that sample.c was a file containing a C program
(because the file name ended in .c) : hence it decided to put in the header shown above which it considers to be the most appropriate header for a C program.
The rcsit program has stored various standard headers which are appropriate for different programming
languages. The following table list the various programming languages that rcsit knows about and the
file names that it will expect for each file type. If rcsit encounters a file whose name does not match any
of the file types shown in the table it will assume that it is a C program.
27
RCS Handbook
Table 2-5: Programming Language assumed by rcsit
Programming Language
2
File Name
222222222222222
1
C Program
C Include File
Fortran
Shell Script
make
Manual entry (troff)
Pascal
TeX
2
1
1
1
222222222222222
1
*.c
*.h
*.f
*.sh or *.csh
makefile, Makefile or *.mk
*.[1-9]
*.p
*.tex
For example if your file was named sample.sh rather than sample.c, rcsit would insert the following
header.
#
# $Header$
#
# $Log$
#
If you use non-conventional file names it is possible that rcsit will not be able to guess the correct header
to put into your file. However, rcsit has a number of option flags which allow you to specify which programming language is contained in your file (and hence which header rcsit should use). The following
table lists these option flags.
Table 2-6: Specifying Headers with rcsit
Command
2
Header Used
222222222222222222
1
%
%
%
%
%
%
%
%
2
222222222222222222
rcsit
rcsit
rcsit
rcsit
rcsit
rcsit
rcsit
rcsit
-c
-h
-f
-M
-s
-m
-p
-x
sample
sample
sample
sample
sample
sample
sample
sample
1
1
1
1
As for C-programs
As for C include files
As for Fortran files
As for files containing manual entries
As for shell scripts
As for makefiles
As for pascal files
As for TeX files
While the default header provided by rcsit will always insert appropriate identification markers into the
file, it is possible that you might want to use a customized header message that you generate yourself.
You can do this by creating a special header file file containing your personalized header information.
For example, Michael Cooper (the author of rcsit) used the following template for creating headers in his
.c files.
28
Identification Markers
/*
* $Header$
*----------------------------------------------*
* $Source$
* $Revision$
* $Date$
* $State$
* $Author$
* $Locker$
*
*----------------------------------------------*
* Michael Cooper ([email protected])
* University Computing Services,
* University of Southern California,
* Los Angeles, California,
90089-0251
* (213) 743-3469
*
*----------------------------------------------* $Log$
*----------------------------------------------*/
The rcsit command is not part of the normal RCS distribution; you can get it through the
comp.source.unix newsgroup.
Re-formatting Identification Markers
You will probably have noticed that RCS retains the identification marker within the working file. For
example, the $Revision$ marker is expanded to $Revision: 2.1 $ and not just to 2.1. Because it
keeps the marker in the working file, RCS can recognize the identification string when you check-in the
next version. If RCS eliminated the identification marker, on the next check-in it would be impossible to
tell a revision number (or, for that matter, any other identification string) from "normal" text in the file. †
However, retaining the original marker can cause RCS identification markers can look a little bit cluttered. This is normally no problem if the file contains source code. However, you might also use RCS to
track the various versions of a published document. The appearance of the published document is crucial.
Jerry Peek (one of the authors at O’Reilly & Associates), has invented a simple macro call which can be
used to parse the $Header$ identification marker in troff based documentation preparation systems. This
macro can be used to provide a somewhat neater appearance for the information contained in the RCS
identification markers.
The following troff statements define his rC macro:
.de rC
.ds fI \\$2
.ds rV \\$3
333333333333333333
† Anyone familiar with SCCS will realize that SCCS handles the expansion of identification markers in a subtly different way from
RCS; SCCS replaces the original marker with the expanded text. In order to ensure that Identification markers can be recognized in
newly checked-in source files, SCCS will not expand identification markers in writable copies of the file.
29
RCS Handbook
.ds
.ds
.ds
.ds
..
dT
tI
aU
sT
\\$4
\\$5
\\$6
\\$7
This macro definition can easily be added into your standard package of macros so that you wont have to
type it in each time. This macro is designed to be used with the $Header$ identification marker. The
line which should be included in the original file is shown below.
.rC $Header$
This line is automatically expanded by RCS to:
.rC $Header: /usr/users/jerry/doc.ms,v 3.2 91/04/20 jerry Exp $
What the rC macro does is that is it splits up the supplied parameter (the $Header$ macro) into words
and assigns each word to a different string register (a troff variable). The second word (the file name) is
assigned to the string register fI. The third word (the version number) is assigned to the string register
rV. The fourth word (the check-in date) is assigned to the string register dT, while the fifth word (the
check-in time) is assigned to the string register tI. The sixth word (the author) is assigned to the string
register aU. and the seventh word (the version state) is assigned to the string register sT.
The values of these string registers can be used at any point in the document. The following example
shows how this might be done. The original document would contain the text.
.rC $Header$
.LP
Welcome to the SuperAppl user manual.
.LP
This is version \(rV of the document which was
checked in by \(aU at \(tI on \(dT.
The current state of this document is \(sT.
Version 1.2 of the document would produce the following output from the formatter:
Welcome to the SuperAppl user manual.
This is version 1.2 of the document which was checked in by jerry at 15:35:03 on 91/01/14.
The current state of this document is Exp.
However, in version 1.5 of the document, this section might read as follows.
Welcome to the SuperAppl user manual.
This is version 1.5 of the document which was checked in by brian at 12:03:25 on 91/02/22.
The current state of this document is Tested.
30
Branches
3
Branches
"Cut is the branch that might have grown full strong; and burned is Apollo’s laurel bough,
that sometime grew within this learned man."
Christopher Marlowe
The Tragical History of Doctor Faustus, 1604
RCS supports a concept known as branches, which allows you to develop more than one variant of a file.
To understand the usefulness of branches, you must first understand the difference between a variant version of a file and the more common revision version.
Variants and Revisions
Normally a new version of a file is a revision of an existing version: for example, you might revise a
program to include new functions. When a new revision of a file is created, it logically supersedes the
version which it revises. This makes intuitive sense because you expect that most users who previously
used the old version will want the new revised version. Once the new version is available, the old version is only useful for archival purposes, bug-fixes, and so on.
A variant version implements something slightly different from the existing version. Assume that you
have an existing version of a file which is suitable for use on UNIX systems. Next, you develop a new
variant version which is suitable for use on MS-DOS systems. In this situation, you can’t say that the
MS-DOS version supersedes the UNIX version or vice-versa. Both are equally important, and equally of
31
RCS Handbook
interest. You don’t want to treat the UNIX version as an obsolete part of the past--you will keep on
working with it, alongside of the DOS version.
To see why variant versions are referred to as branches, you must look at a pictorial representation of the
relationship between the versions in a file. We will draw what is called a development graph. In this
graph, the different versions are interconnected by arrows indicating the flow of development work on a
file. The following diagram shows a simple development graph for a file containing three revisions: †
v1
v2
v3
Figure 3-1. Development Graph
All of these versions are connected by a simple linear relationship. (v3 revises v2 and v2 revises v1).
Later you develop a MS-DOS version by making the appropriate changes to v3. You cannot say that the
MS-DOS version supersedes v3 and hence you do not call it v4. Instead, you call it v3a to indicate that it
is a variant of v3. For the same reason we do not put it on the same straight line as v1, v2 and v3 in the
development graph. The following diagram shows the new development graph, reflecting the existence of
v3a:
v3a
MS-DOS variant
v1
v2
v3
UNIX variant
Figure 3-2. Development Graph with one Variant Version
After some time, you revise both v3 and v3a. You name the new versions v4 and v4a because they are
revisions of v3 and v3a respectively. The development graph is extended as is shown below:
333333333333333333
† In the following example we will not use RCS style version ID numbers for the versions. This is because, the rules that RCS uses
to assign version ID numbers to branch versions are somewhat complex. Introducing the version naming scheme for branch versions
at the same time as introducing the concept of branches would only confuse you. The rules that RCS uses to assign version ID
numbers to branch versions are described later in this chapter.
32
Branches
v3a
v1
v2
v3
v4a
MS-DOS variant
v4
UNIX variant
Figure 3-3. Development Graph with Branches
You can see that the flow of development (as illustrated by the development graph) has been split into
two separate lines or branches. The development graph has begun to look like a tree. (Perhaps we are
stretching the analogy a bit, but you can see that if you introduced many new variants the development
graph would begin to look like a tree.) The versions which are simple revisions of the original (i.e., v1,
v2, v3 and v4) are called trunk versions because they are on the main line of development (the trunk of
the tree). The set of revisions of a single variant is called a branch (i.e., v3a and v4a) because they look
like a branch of the tree in the development graph.
Numbering of Branch Versions
Earlier, we described the format of a version ID number. We told you that version ID number consists
of a release number and a version number, separated by a dot, as in: release.revision. In fact this is not
always true, it is only true for versions on the main line of development; branch version id numbers are
more complex. A simple two part version identification number is not sufficient for branch versions.
In order to identify a branch version it is necessary to identify what branch it belongs to and which version of the branch it is. Therefore RCS assigns version ID numbers of the form branch.branch_revision.
The branch part identifies which branch this version belongs to. The branch_revision is a single number
which identifies which revision of the branch this is. The first version on any branch is branch_revision
1, the second is branch_revision 2, and so on.
RCS assigns ID numbers to each branch which identify where the branch fits into the development graph.
RCS branch numbers have the form branchpoint.branch_number, where branchpoint is the version ID
number of the version from which development of the branch was started. It is possible for many
different branches to start from the same branchpoint, hence branch_number is used as a simple sequence
number to identify branches when there is more than one branch descending from a single branchpoint.
The first branch descended from a branchpoint is branch_number 1, the second is branch_number 2, and
so on.
Putting all of this together we get a branch version ID number with four numbers separated by dots, as
in:
33
RCS Handbook
branchpoint_release.branchpoint_version.branch_number.version
Since this numbering scheme isn’t very easy to understand, let’s look at a few examples. First look at the
simple development graph illustrated below.
1.2.1.1
1.2
1.1
1.2.1.2
2.1
Figure 3-4. A File with One Branch
This file has one branch which is started from version 1.2. The branch has an ID number of 1.2.1, to
indicate that it is the first branch descended from the branchpoint version 1.2. The branch contains two
versions. These are numbered, 1.2.1.1 and 1.2.1.2 to represent the fact that they are the first and second
revisions of the 1.2.1 branch.
Now lets look at a slightly more complex example as illustrated by the development graph shown below.
1.1.1.1
1.1
1.2.1.1
1.2
1.2.1.2
2.1
1.2.2.1
Figure 3-5. A File with Three Branches
This file has three branches, 1.1.1 (the first branch that starts from the branchpoint 1.1), 1.2.1 (the first
branch that starts from the branchpoint 1.2) and 1.2.2 (the second branch that starts from the branchpoint
1.2). It also has a total of four branch versions, 1.1.1.1 (the first revision of the 1.1.1 branch), 1.2.1.1 (the
first revision of the 1.2.1 branch), 1.2.1.2 (the second revision of the 1.2.1 branch) and 1.2.2.1 (the first
revision of the 1.2.2 branch).
In the previous two examples the branchpoint versions were always on the main line of development. It
is also possible to have branches which start from a branch version. † The following development graph
333333333333333333
† Branches that start from a branch versions are a recepie for disaster. This is because, it can be quite difficult to visualize how the
various versions relate to each other. I am only describing these type of branches for the sake of completeness, not because I
34
Branches
shows how the structure of the file might look after starting a branch from a branch version:
1.2.1.1.1.1
1.2.1.1
1.1
1.2
1.2.1.2
2.1
Figure 3-6. A Branch Starting from a Branch Version
In this file we have a version whose ID number is 1.2.1.1.1.1. At first glance this six part ID number
seems hard to de-cipher. However, this number was assigned by following the simple rules which we
described earlier. The number 1.2.1.1.1.1 indicates that it is the first revision of the first branch starting
from the branchpoint version 1.2.1.1.
Creating Branch Versions
You can create branch versions with the ci command in the same way that you would create any other
version. RCS will decide to create a branch version, either because you explicitly tell it to do so, or
because circumstances force it to so.
You can explicitly tell RCS that you would like to create a branch version by assigning a branch style
version ID number with the ci -r option. For example the following sequence of commands will create a
new branch version numbered 2.3.1.1.
% co -l file
% vi file
etc.......
etc.......
% ci -r2.3.1.1 file
You will know from reading the previous section that a version with an ID number of 2.3.1.1 is the first
revision of a branch which starts at the branchpoint 2.3. This command will fail if there is no existing
version with an ID number 2.3 to use as a starting point for the new branch.
You can check-out and lock this new branch version by using the command
333333333333333333
recommend that you should create branches that start from branch versions.
35
RCS Handbook
% co -l2.3.1.1 file
When you check-in the modified version of file, the new version will be numbered 2.3.1.2. This identifies
that it is a revision of version 2.3.1.1, rather than a revision of the default version from the main line of
development. In this way, development can continue on the 2.3.1 branch independently of the development work on the main line of development.
We mentioned earlier that sometimes RCS is forced to create a branch. You might well ask -- "why
would RCS be forced to create a branch ?". Let’s look at an example.
Suppose you had a file with two versions 1.1 and 1.2. If you execute a co -l command on this file, you
will retrieve and lock version 1.2 (because it is the most recent version on the main line of development).
When you check-in the changed copy of the working file with the ci command, RCS will assign the version number 1.3 to the new version. This new version will now be the most recent version on the main
line of development.
Although version 1.2 is no longer the default version of the file, you could check-out and lock version 1.2
by executing the command
% co -l1.2 file
When you try to check-in your changed version of the working file, RCS will consider the newly created
version to be logically a successor to version 1.2 (because this is the version you locked). However, it is
not possible to number this new version 1.3 because there already is a version numbered 1.3. As an alternative, RCS will number the new version 1.2.1.1. You can see from the following diagram that both version 1.3 and version 1.2.1.1 are logical descendants of version 1.2.
1.2.1.1
1.1
1.2
1.3
Figure 3-7. Version 1.2 with two Successors
Retrieving Branch Versions
You can retrieve a branch version by specifying its version id number with the co -r command. For
example, the following command fetches the branch version of the file sample.c numbered 2.1.2.4.
% co -r2.1.2.4 sample.c
If you specify a branch number rather than a particular version number, the system will fetch the most
recently created version on that branch. For example, the following command fetches the the most
recently created version on the 2.1.2 branch of the file sample.c (which might be 2.1.2.4 or 2.1.2.6)
36
Branches
% co -r2.1.2 sample.c
Setting a Default Branch
Normally, the default version fetched by each co command is the most recently created version on the
main line of development: i.e., the line of development which has 2-digit ID number. However, if you
are doing most of your work on a branch other than the main line of development, you might want to
make that branch the default branch. You can set a default branch with the rcs -b command. Once a
default branch has been set for a file, all subsequent co commands fetch the most recently created version
from that branch, unless you explicitly ask for something else. For example, the command:
% rcs -b2.1.2 sample.c
makes the 2.1.2 branch the default branch of the file sample.c, and the command:
% co sample.c
fetches the most recently created version from the 2.1.1 branch. If you give the rcs -b command without
specifying a branch number, the default branch will be reset to the main "trunk" of development. For
example, the command:
% rcs -b sample.c
causes all subsequent co sample.c commands to fetch the most recently created version from the "trunk."
When to use Branches
Branches allow you to maintain two parallel lines of development within one file. If you need to develop
two variants of a file, you might well ask: "when should I use two branches within one file and when
should I use two separate files?" It is very much up to your own personal preference. Many people like
using branches because they indicate that the two branches are only slight variations of the one file. Others avoid using branches because they feel that the mechanisms are too complex and hence prone to
errors. You should thoroughly familiarize yourself with the mechanisms for managing branches before
deciding to use them.
Although branches were originally conceived as a mechanism for developing software for different
operating systems, I personally try to avoid using branches for this purpose. This is because it can cause
problems when a patch is applied to one operating system branch and not to another. If you are a C programmer, the #ifdef directive can normally be used to allow one source file to appear to have slightly
different contents depending upon the system used to compile it. Unfortunately, not all programming
languages have an equivalent feature.
However, I do find that branches are very convenient for tracking patches to an old release. For example,
if version 1.5 of sample.c was shipped as part of release 1 of a product, work would probably start
straight away to develop release 2 of the product. This would result in versions 2.1, 2.2, etc. being
created as successors of version 1.5. After some time a bug report might come in which necessitates
creating a patched version of sample.c. This patched version of version 1.5 could not be assigned a version number 1.6 since version 1.5 already has a successor. The solution would be to crate a branch
37
RCS Handbook
starting at 1.5 which contains the patches to release 1. This would give a development graph as shown in
the following diagram.
Patched Release 1
v1.5.1.1
v1.4
v1.5
v2.1
Figure 3-8. Using a Branch to Maintain an Old Release
38
Release 2
Symbolic Names and States
4
Symbolic Names and States
"The V sign is the symbol of the unconquerable will of the occupied territories,...."
Winston Churchill
1941
If you are working on a large project you are likely to have many source files. Each of these source files
will be continually be updated by many different developers. Unless you are careful you will get very
confused. In this chapter we will describe how you can use the symbolic names feature and the states
feature to avoid this confusion.
States
If you are working on a large group project, it is important to know what versions of each file exist. It is
also important to know how extensively each version has been tested, or what stage this version is at in
the development cycle. RCS allows you to store this information by assigning a state to each version. A
state is really nothing more than a short, arbitrary label that can be assigned to a version of each file. By
default, RCS assigns each version of a file the state "Exp," which stands for "experimental." However,
there is no intrinsic meaning to this label, or to any other. A project group can define as many states as
you want, and invest them with as much (or as little) significance as it deems appropriate.
39
RCS Handbook
If you decide to use the state facility, your working group will need to establish some conventions about
what states to use, and how they are defined. Here is one possible set of definitions:
Table 4-1: A Typical Set of States
State
2
Meaning
22222222222222222222
1
Definition
1
Exp
Test
Experimental
Tested
1
1
Rel
Released
1
Fail
2
22222222222222222222
1
1
Failed
1
A newly created version which has not been tested
A version which has been subjected to the first
level of testing
A version which has passed QA testing and may
be shipped to customers
A version which has failed some test
By default, RCS assigns the state "Exp" to every version when it is checked-in. By convention, this state
indicates that the version is experimental and has not undergone any testing. You can override the
default state for a new version by using the ci -s command. For example, if you subjected the new version to the first level of testing prior to checking it in, you can assign the state "Test" to this version by
giving the command:
% ci -sTest sample.c
This checks-in a new version of sample.c, assigning the newly created version a state of "Test."
A more common (and probably more advisable) procedure is for developers to make their changes; check
them in to RCS with the state "experimental" (or your equivalent); test; and, if the new version passes the
testing, to change the state retroactively. You can change the a file’s state after you have checked it in by
using the rcs -s command. For example the following command changes the state of the default version
of sample.c to "Test."
% rcs -sTest sample.c
You can also use the rcs -s command to change the state of a version other than the default version. To
do this you must supply the version id number of the version whose state you want to change as well as
the state you want to change it to. This is illustrated by the following command which changes the state
of version 1.3 of sample.c to "Test."
% rcs -sTest:1.3 sample.c
NOTE
If a version fails QA testing, you should not delete this version and replace it with a version that
includes the bug fix. For example if versions 1.7 of sample.c fails testing, the state of version 1.7
should be left at Exp and the fixed version should be checked-in as version 1.8.
You might be tempted to delete the failed version with the command rcs -o1.7 sample.c, and then
check-in the fixed version as 1.7. However, this is dangerous because it introduces the possibility
of confusion about "which version 1.7" is currently in use.
40
Symbolic Names and States
Given that you have defined a meaningful set of development states, and that you have diligently put
"state" information into the RCS database about a file, what can you do with it? Most simply, other
developers can look at your "state" information to find out what shape the project is in. Let’s assume that
you are using the four states that we defined earlier. It would be unwise and probably pointless to start
final QA testing if one or more of the files is marked "Failed," or if one or more files are still at the
"Experimental" level. But how do you read this information? If you have placed the $State$ marker into
the file (or the more elaborate $Header$ or $Id$ markers), the expanded version of these markers will
contain the file’s state. More simply, you can use the rlog command to dump all of the file’s RCS information, including the state (plus the descriptive message, all the log messages, and so forth). We’ll discuss rlog later.
You can also use a file’s state to select which version of the file you want to check-out. The co -s command checks-out the most recent version of the file with a given state. For example, if you are creating a
distribution tape that will be shipped to customers, you must ensure that you only check-out versions
which have the state "Rel" (released; final QA passed). To do so, use the following command to checkout the most recent version of sample.c that has a state of "Rel":
% co -sRel sample.c
As we’ve said, the states that we listed above and used in our examples are only examples of how you
might use RCS’s "state" facility. You are free to use a version’s "state" to store any information you
wish, provided that everyone who uses the file is clear about the meaning of the stored information.
Symbolic Names
If you have a large system containing many source files, it will often be difficult for you to remember
which version of each source file should be used for a particular configuration. You can use symbolic
names to solve this problem. Supposing you shipped a test version of our example system to selected
customers and this test version was built using version 1.5 of system.c and version 1.2 of system.h. You
could track this fact by assigning the symbolic name test_release to these versions.
Symbolic names are assigned with the rcs -n command, as shown below:
% rcs -ntest_release:1.5 system.c
% rcs -ntest_release:1.2 system.h
The system now considers the ascii string "test_release" to be equivalent to version number 1.5 in
system.c and version number 1.2 in system.h. This relieves you from needing to remember which version
of each source file was used for the test release. You only need to remember the name that you assigned
to the release. Then the following co command automatically retrieves the versions you want (version
1.5 of system.c and version 1.2 of system.h):
% co -rtest_release system.c system.h
If you issued a new test release consisting of version 1.7 of system.c and version 1.3 of system.h, you
might want to re-assign the symbolic name test_release to refer to these new version numbers. However,
if you use the commands
41
RCS Handbook
% rcs -ntest_release:1.7
% rcs -ntest_release:1.3
system.c
system.h
the system returns an error message indicating that the symbolic name test_release has already been
assigned. To override the assignment of an existing symbolic name you must use the rcs -N command
i.e. :
% rcs -Ntest_release:1.7
% rcs -Ntest_release:1.3
system.c
system.h
You can also delete a symbolic name without reassigning it by using the rcs -n command:
% rcs -ntest_release
% rcs -ntest_release
system.c
system.h
As a convenience, you can assign a symbolic name to a new version at the same time as creating it by
using the ci -n or ci -N options. For example, the following command will assign the symbolic name
"test_release" to the newly created version of system.c:
% ci -ntest_release system.c
However, the above command would fail if the symbolic name "test_release" had already been assigned.
By using the ci -N command, we can ensure the command will succeed even if the symbolic name
"test_release" has already been assigned. For example:
% ci -Ntest_release system.c
Symbolic names are extremely useful. However, to gain maximum advantage out of symbolic names,
you must be careful to adopt clear conventions about what each symbolic names means.
I find it convenient to introduce the distinction between permanent and changeable symbolic names.
Strictly speaking all symbolic names are changeable because it is possible to redefine them. However, I
will use the term permanent symbolic names to refer to those names that are not likely to be changed to
distinguish them from changeable symbolic names whose definitions are frequently changed.
For example your local convention might be to use the following changeable symbolic names.
Table 4-2: Changeable Symbolic Names
Symbolic Name
2
Meaning
222222222222222
1
internal
2
This
version
is
currently
undergoing internal testing.
222222222222222
1
field_test
2
This
version
is
Undergoing Field Test.
222222222222222
currently
1
released
1
42
This version is the most recent
version which has been released.
Symbolic Names and States
As part of the procedure to build a tape for use in field testing, the release engineer should assign the
symbolic name field_test to the appropriate version of each RCS file. Hence, if you issue the command:
% co -rfield_test sample.c
you will get a copy of the version of the file sample.c that is currently in field test (e.g., version 1.7).
However, if you issue the same command in a years time, you will probably get a different version (e.g.,
version 2.11). This is because a different version of the file will be undergoing field test at that time.
If you adopt this policy for assigning symbolic names, it should help you to select the appropriate version
of each source file. If you receive a bug report from a user who is using the field test version of your
software, the first thing which you must do is build an equivalent version of the system on your computer. Assuming that you have assigned the symbolic name field_test to the appropriate version of each
RCS file, it should be simple for you to perform this build. The commands that you use would be:
% co -rfield_test RCS/*
% make binaries
If the bug report related to the released version of your software, the commands that you use would be:
% co -rreleased RCS/*
% make binaries
The symbolic names internal, field_test and released are changeable, because the association between the
symbolic name and the actual version number is likely to change over time (e.g., every time a new field
test is started). It is also useful to have some permanent symbolic named whose association is likely to
remain fixed throughout the life of the file.
For example, a customer might phone you to say that he/she has a problem with release 2.3 of your
software. However, the bug is not in version 2.3 of the source file, because release 2.3 was built using
the following version 2.1 of prog.c, version 2.2 of prog.h and version 4.10 of utils.c.
It would be very difficult for you to remember which version of each source file was used for each
release. Symbolic names help you, by providing a simple mechanism for the release engineer to record
which versions are used in the release. For example the following commands define the symbolic name
two_three to point to the versions which were used in release 2.3 of the system.
% rcs -ntwo_three:2.12 prog.c
% rcs -ntwo_three:2.2 prog.h
% rcs -ntwo_three:4.10 utils.c
Once the symbolic name two_three has been defined, you can use the following command to check-out
the versions of the source files which were used with release 2.3 of the system.
% co -rtwo_three prog.c prog.h utils.c
The symbolic name two_three should never be redefined, because redefining the symbolic name would
erase the record of what version was used with release 2.3. Hence, two_three is called a permanent symbolic name. The use of such a permanent symbolic name is subtly different from the use of a changeable
symbolic name, such as field_test, which is redefined every time a new field test is started.
43
RCS Handbook
In the preceding discussion, I assumed that the symbolic names contained complete version numbers.
However, symbolic names can also be used to store either branch or release numbers.†
For example, if the branch number 1.2.1 of the file sample.c contains code which works on the VMS
operating system, the symbolic name VMS can be defined to be equivalent to the 1.2.1 branch with the
following command.
% rcs -nVMS:1.2.1 sample.c
Once this name has been defined, users can retrieve the most recent version from the 1.2.1 branch using
the following command:
% co -rVMS sample.c
Users can also specify that they want the third revision of this branch (i.e., version 1.2.1.3), with the following command:
% co -rVMS.3 sample.c
Version states and symbolic names are both used to help in selecting the correct version to retrieve with
the co command. Hence, it is easy for you to confuse the two mechanisms. The following table clarifies
the differences between them.
Table 4-3: Version States v Symbolic Names
Version States
2
Symbolic Names
22222222222222222222
1
Each version has one and only one
state.
There can be one, none or many
symbolic names which point to
any particular version.
1
Several versions may have the
same state.
2
22222222222222222222
1
1
Each symbolic name can only
point to one version number
A key point to remember is that, since many versions can have the same state, it is possible to specify a
version number as well as a state to the co command. However, since a symbolic name can only point to
one version number, it makes no sense to specify a version number as well as a symbolic name to the co
command.
For example, the following command specify that you want to check-out the most recent version from
release 2 of sample.c which has a state of Test.
% co -r2 -sTest sample.c
333333333333333333
RCS does not test to see that a symbolic name translates to a valid version number. Therefore, the fact that the symbolic name
sym_name translates to 1.3 does not guarantee that version 1.3 exists.
44
Symbolic Names and States
However, the following command is invalid because the -rfield_test and -r2 options clash.
% co -r2 -rfield_test sample.c
5
Additional Utilities
"Nothing can have value without being an object of utility, ..."
Karl Marx
Capital, 1867-1883
The primary purpose of RCS is to store multiple versions of a source file. Creating library files and
checking working files in and out are the most version control operations. However, there’s much more;
RCS includes many additional features and utilities which help you to manage the multiple versions that
you have stored. In this chapter, we will describe the most commonly used utilities that are available
with RCS.
Displaying Differences
Whenever you get a new version of a program that does not work, you inevitably ask yourself is "what is
different about the new version?" If you still have a copy of the old code, you can print out both versions
of the file and manually compare them. However, this process can be very tedious if the program is large
and the differences are small. UNIX provides a way to automate the process: you can use the diff command to compare two files. For example, the following command compares the contents of oldfile and
45
RCS Handbook
newfile:
% diff oldfile newfile
The diff command prints the differences between the files as a list of the changes which must be made to
oldfile to transform it into the newfile. If both files are identical, there will be no output. The diff command has several option flags for selecting a the format of its output. You can learn more about the various options available by looking at the diff command in the user’s manual that came with your system.
RCS provides a special version of the diff command that can display the differences between different
versions of files that are under RCS control. This command, called rcsdiff, is a convenient "front end" to
the standard diff command. For example, the following command displays the differences between version 1.3 and 1.6 of the library file for sample.c
% rcsdiff -r1.3 -r1.6 sample.c
It is useful to remember that rcsdiff does not actually perform the comparison itself. It checks-out the
relevant versions into temporary files, and then calls diff to do the real work. If you want to learn more
about the comparison methodology, read the documentation for diff.
You can use rcsdiff to compare the current working file with a version in the library file. For example,
the following command compares version 1.3 of the library file with the current working file:
% rcsdiff -r1.3 sample.c
In other words, rcsdiff always compares two versions of the file. If you only specify one version on the
command line (only one -r option), rcsdiff assumes that you want to compare the given version with the
current working file for sample.c. If you omit the -r option entirely, the system assumes that you want to
compare the current working file with the default version of the library file.
The rcsdiff command usually issues diagnostic messages indicating which versions it is comparing:
These diagnostic messages can be suppressed with the -q option. Any option flags aside from -q and -r
are passed on to the diff command. For example, the following command will compare the contents of
the current working file sample with version 1.6 of the associated library file RCS/sample,v using the diff
-e command without issuing any diagnostic messages.
% rcsdiff -r1.6 -q -e sample
Merging
Sometimes you want to make the same changes to two different files--that is, you have made a series of
changes to one file, and want to apply the same changes to another, similar file. The merge command,
which is part of the RCS system, does this automatically. Assume that you have two files sample and
variant, whose contents are:
46
Additional Utilities
sample
2
variant
222222
1
line1
line2
line3
line4
2
1
line1
variant-line2
line3
line4
222222
1
These two files only differ in line 2. Now, assume that you make some changes to line 4 of sample,
creating the file sample.new whose contents are:
line1
line2
line3
new-line4
You would like to make the same change to variant. Rather than manually making the change with an
editor, you can use merge to incorporate the changes between sample and sample.new into variant. The command to do this is:
% merge variant sample sample.new
This command computes the changes which were made to sample to transform it into sample.new, and
then incorporates these changes into variant. After merge has finished, variant will look like this:
line1
variant-line2
line3
new-line4
Take careful note of the order in which the files are specified. The file you want to change is listed first;
the file that you have already changed by hand appears last; and the original file that you edited to create
the new file is in the middle. If you specify the files in wrong order, the effect of the command will be
completely different.
In our simple example, the changes between the files were so straight forward that you could have easily
made the changes yourself manually. In most realistic applications, the changes to be merged will be
much more complex. Sometimes, however, the changes that you wish to combine are so complex that
the merge command can’t do the job by itself. For example, let’s assume that you changed line 2 of
sample.new, in addition to line 4, so that you initially have the following three files:
sample
2
variant
2222222222
sample.new
1
line1
line2
line3
line4
2
2222222222
1
1
line1
line1
variant-line2
new-line2
line3
line3
line4
new-line4
1
1
1
47
RCS Handbook
Now all three files have a different version of line 2. In this case, merge can’t tell which version of line 2
to put into the output: do you want the variant version, or the new version? This is called an overlap: the
merge command issues an error message and flags the overlap in the output file as shown below:
line1
<<<<<<< variant
variant-line2
=======
new-line2
>>>>>>> sample.new
line3
new-line4
This tells you that you that the system cannot decide whether to use line 2 from variant or from
sample.new. Because it cannot make an intelligent choice, it shows you both options and lets you chose
which you prefer. You should manually edit the output file to select one of the alternatives.
If you use the -p option, merge displays its result on your terminal so you can "preview" them, rather
than incorporating the changes directly into the variant file. You can also re-direct standard output so
that the result goes into a different file. It is often useful, and always safer, to look at the changes that
merge will make before incorporating them permanently into another file.
The rcsmerge command provides a convenient front-end for using the merge command with RCS library
files. For example, the following command merges the changes that lead from version 1.3 to version 1.6
of sample into the current working file:
% rcsmerge -r1.3 -r1.6 sample
It is equivalent to the following sequence of commands
%
%
%
%
%
co -r1.6 -p sample > sample_v1.6
co -r1.3 -p sample > sample_v1.3
merge sample sample_v1.3 sample_v1.6
rm sample_v1.6
rm sample_v1.3
When you need to merge different versions from a library file, rcsmerge is much simpler than merge.
Note that rcsmerge also support the -p option, which lets you preview its output on your terminal.
You will often want to check-out various versions of a file and then perform a merge on the various versions. RCS provides a short-cut that allows you to save yourself some hassle by performing the merge
and the check-out at the same time. To do so, use the -j (join) option to the co command. The -j option
indicates that you would like to join (i.e. merge) a set of changes into the version being checked out.
For example, the flag -jrev1:rev2 indicates that you would like to merge (join) the changes between rev1
and rev2 into the version that you are checking-out. For example, the co -j command below has the same
effect as the preceding co and rcsmerge commands:
% co -r1.4.2 sample.c
% rcsmerge -r1.4.1.3 -r1.4.1.4 sample.c
48
Additional Utilities
% co -r1.4.2 -j1.4.1.3:1.4.1.4 sample.c
If you only specify one version number with the -j option, the system looks for the version which is the
common ancestor of the version you are checking-out and the version you specified. It then merges the
changes that have taken place between the constant ancestor and the -j file into the version indicated by
the -r option (or the default version, if -r isn’t given). For example, the following command merges the
changes between version 1.2 and version 1.2.1.3 into the copy of version 1.4 which is being checked-out:
% co -r1.4 -j1.2.1.3 sample.c
In this case, version 1.2 is the common ancestor of version 1.4 and version 1.2.1.3. That is, 1.2 is the
"branchpoint" at which branch 1.2.1 diverges from the main tree, to which 1.4 belongs. Note that the
"common ancestor" will always be a branchpoint.
You normally use the -j option to merge additional changes into the working file. However, you can also
use -j to exclude certain changes from the working file. For example, consider the command:
% co -r1.2 -j1.3:1.5 sample.c
This command checks-out a working file that contains version 1.2 of sample.c merged with the changes
between 1.3 and 1.5. This is effectively the same as checking-out a copy of version 1.5, except that the
changes between 1.2 and 1.3 are not included. If you decide that version 1.3 was a complete mistake, but
you are still optimistic about some code that has been added in versions 1.4 and 1.5, you might find this
command useful. Why might this command be useful? Let’s assume that version 1.3 added one feature
which just never worked the way you had planned, but 1.4 and 1.5 added substantial new features that
haven’t been a problem. Rather than starting from 1.2 and copying the features from 1.4 and 1.5 into the
the new file, you can use this command to automatically delete the features you added for version 1.3.
Deleting Old Versions
RCS library files are designed to minimize the space needed for storing many different versions of a file.
However, they do grow as you check-in additional versions. From time to time, you will want to delete
some of the old, less-useful versions from a library file in order to save room. You can do this by using
the rcs -o command. For example, the following command deletes version 1.3 of sample.c:
% rcs -o1.3 sample.c
You can delete more than one version with the same command. There are three ways of specifying the
range of versions which you wish to delete. First, you can use the notation -orev1-rev2: this tells RCS to
delete all versions between rev1 and rev2, including rev1 and rev2. For example the following command
will delete versions 1.2, 1.3 and 1.4 of sample.c.
% rcs -o1.2-1.4 sample.c
The version range can include branch versions, so long as both rev1 and rev2 belong to the same branch
(or the trunk) of the development tree. For example, the following command will delete branch versions
2.2.1.2, 2.2.1.3 and 2.2.1.4 of RCS/sample.c,v.
49
RCS Handbook
% rcs -o2.2.1.2-2.2.1.4 sample.c
The second way to specify a range of versions is to use the notation -orev-. This means to delete all
versions from rev onwards. If rev is on the main line of development, rev and any more recent version
on the main line of development will be deleted. If rev is a branch version, rev and any more recent
version on that branch will be deleted. For example, the following command will delete all versions of
sample.c from version 2.4 onwards.
% rcs -o2.4- sample.c
The following command will delete all versions on the 1.2.1 branch from version 1.2.1.3 onwards (e.g.
versions 1.2.1.3, 1.2.1.4, 1.2.1.5, etc.).
% rcs -o1.2.1.3- sample.c
The third way, you can express a range of revisions is by using the notation -o-rev. If rev is on the main
line of development, this means "delete all versions on the main line of development up to and including
rev." If rev is a branch version, this means "delete all versions on the branch, up to and including rev."
For example, the following command will delete all versions of RCS/sample.c,v up to and including version 1.4 (e.g versions 1.1, 1.2, 1.3 and 1.4).
% rcs -o-1.4 sample.c
Likewise, the following command will delete all versions of the 1.2.2 branch up to and including version
1.2.1.4 (e.g versions 1.2.1.1, 1.2.1.2, 1.2.1.3 and 1.2.1.4).
% rcs -o-1.2.1.4 sample.c
You cannot delete any version which is locked, nor can you delete a version that is a branchpoint (i.e.,
the starting point for a branch). If you want to delete a locked version, you must first remove the lock
with the rcs -u command. If you want to delete a branchpoint version, you must first delete all of the
versions on the branch with a separate rcs -o command.
The rcsclean command
If you are a typical computer user, you frequently come under pressure to reduce your disk space. At
these times, you scan all of your directories to see what information (if any) you have stored redundantly.
You can safely delete any working files that have not been modified since they were checked-out--you
can always re-create them by checking-out another working file from the RCS file. The rcsclean command does this automatically. It eliminates the need for examining your working files by hand to see if
they can be safely deleted. For example, both of the following commands:
% rcsclean sample.c
--and-% rcsclean RCS/sample.c,v
compare the contents of the working file sample.c with the contents of the default version of the RCS file
RCS/sample.c,v. If they are identical, rcsclean deletes the working file sample.c. If you have locked the
default version of RCS/sample.c,v, rcsclean also deletes the lock. If the working file and the default
50
Additional Utilities
version from the library file are not identical, rcsclean does nothing.
Note that rcsclean doesn’t do everything that you’d like it to. It only compares your working file with
the default (usually, the most recent) revision. Because you can reconstruct any earlier revision from the
library file, it is safe to delete the working file if it is identical to any of the versions of the RCS file.
However, it isn’t practical to compare the working file with each older version. If you want to check
your working file against a particular version, you can use the -r option to rcsclean, which selects an
alternative version for comparison with the working file.
For example the following command compares the contents of the working file sample.c with the contents
of version 1.3 of the RCS file RCS/sample.c,v (and deletes the working file if they are identical).
% rcsclean -r1.3 sample.c
Likewise the next command compares the contents of the working file sample.c with the contents of the
most recent version of release 2 of the RCS file RCS/sample.c,v.
% rcsclean -r2 sample.c
The rcsclean command would not be terribly useful if it only compared one file at a time. Fortunately, it
can do much more. The rcsclean command is commonly used to check a group of files. For example the
following command compares every file ending in .c with the default version of the corresponding RCS
file (and deletes the working file if they are identical).
% rcsclean *.c
Likewise the next command compares the default version of every RCS file in the RCS directory with the
corresponding working file.
% rcsclean RCS/*,v
The rcsclean command, unlike most UNIX commands, is fairly verbose. It always tells you which versions of each file it is comparing and what files (if any) it is deleting. Therefore, you should never be in
doubt about its effects.
NOTE
The rcsclean command is a relatively new addition to RCS. If you are using an old release of
RCS the command might not be available.
The rcsfreeze command
In an earlier chapter, we described how you can use symbolic names to record which version of each
individual file was used to build some version of the system as a whole. You will frequently need to
assign a symbolic name to "the default version" of all of the RCS files. For example, when your system
officially enters beta test, you’ll want to and assign the name beta_test to the current version of each of
your files. However, it isn’t really convenient to do this with rcs -n. The rcs -n command requires you
to state an explicit version number whenever you associate a version with a symbolic name. This means
51
RCS Handbook
that you must first find out the version number of the default version of each file. Then, you will probably need to type a long sequence of commands like the following:
%
%
%
%
rcs
rcs
rcs
rcs
-nbeta_test:2.7
-nbeta_test:2.2
-nbeta_test:2.5
-nbeta_test:2.1
prog.c
prog.h
routines.c
routines.h
To simplify this procedure, RCS provides a special command called rcsfreeze. It automates the task of
assigning a symbolic name to the default version of all the RCS files in the current directory. It finds all
the RCS files in the current directory (or the RCS sub-directory if it exists), determines the version
number of the default version stored in that file, and assigns a symbolic name to that version number.
For example, the following command assigns the symbolic name beta_test to the default version of all
the RCS files:
% rcsfreeze beta_test
Note that rcsfreeze invokes the rcs -n command rather than the rcs -N command. This means that it cannot re-define a symbolic name that is already in use. The assignment will fail if the symbolic name
beta_test has already been assigned to any version of any RCS file.
If you do not specify a symbolic name (i.e., if you invoke rcsfreeze with no arguments), the system
chooses a name for you. This name has the form "C_x," where x is a sequence number that is incremented whenever rcsfreeze is run. Rcsfreeze tells you the sequence number when it is assigned. It
also records the sequence number in a file named .rcsfreeze.version so that it can ensure sequence
numbers are not repeated.
When you give the rcsfreeze command, the system prompts you for a log message describing why you
assigned the symbolic name. It then stores the log message (along with the symbolic name, the sequence
number, and the current date) in a file called .rcsfreeze.log for future reference. The .rcsfreeze.log file
contains entries like:
Version: release_1(C_2), Date: Tue Sep 18 15:31:12 WET DST 1990
----------creating the first release to be shipped to customers
this will have the symbolic name release_1
----------Version: beta_test(C_1), Date: Tue Sep 18 15:27:32 WET DST 1990
----------Creating a beta test version of the entire system
-----------
You should beware that rcsfreeze only assigns symbolic names to versions that have been checked-in. If
you have made changes to any of the files since they were last checked-in, you must perform a check-in
before you run rcsfreeze. For this reason, many users run rcsclean immediately prior to rcsfreeze. If
everything is properly checked-in, rcsclean will delete any working files that are remaining. Once you
know that everything is checked-in, you can run rcsfreeze without worrying.
NOTE
The rcsfreeze command was developed by Stephan Bechtolsheim. It was not initially part of
RCS, and may not be part of your system. If rcsfreeze is not available on your system, you can
get a copy from the Free Software Foundation.
52
Additional Utilities
The rlog command
Now, let’s consider another problem. After returning from vacation, you go to your desk and compile
your file sample.c. It doesn’t work--or it works, but its behavior seems to be slightly different. Strange-you’re sure that everything was fine when you left. In order to figure out what went wrong, you must
answer a number of questions about sample.c file, including:
•
Have any new versions of sample.c been created in your absence?
•
Who created these new versions?
•
Why did they create these new versions?
The rlog command answers these questions and more by displaying all the information that the system
has stored about the file. To ask the system to print out everything it knows about the file sample.c, use
the following command:
% rlog sample.c
The output of this command might be:
RCS file:
RCS/sample.c,v;
Working file:
sample.c
head:
1.3
branch:
locks:
mary: 1.3; fred: 1.2; strict
access list:
fred mary harry
symbolic names: middle_rev: 1.2;
comment leader: " * "
total revisions: 3; selected revisions: 3
description:
sample file used to illustrate the use of the rlog command
---------------------------revision 1.3
locked by: mary;
date: 89/08/07 17:07:18; author: mary; state: Exp; lines added/del: 31/14
Altered the contents of the file significantly
---------------------------revision 1.2
date: 89/08/07 17:06:34; author: fred; state: Exp; lines added/del: 3/0
Inserted some additional lines
---------------------------revision 1.1
date: 89/08/07 17:04:27; author: mary; state: Exp;
Initial revision
=============================================================================
If you’ve followed our discussion all along, this output should be self-explanatory. However, here’s a
summary of what the system is telling us:
•
The name of the RCS file is RCS/sample.c,v and the name of the working file is sample.c.
•
The most recently created version (called the head version) is numbered 1.3.
•
No default branch has been set--i.e., by default, check-outs and check-ins are to the "main" branch, or
"trunk."
•
Version 1.3 is locked by mary. Version 1.2 is locked by fred. Strict locking is enforced. When
strict locking is not enforced, the word "strict" does not appear at the end of the list of locks.
53
RCS Handbook
•
The access control list contains the names fred, mary and harry. These are the only users
allowed to make modifications to the RCSfile.
•
The symbolic name "middle_rev" is equivalent to the version number 1.2.
•
The comment leader is " * ". This means that every line of the the expanded $Log$ marker will be
preceded by the string " * ".
•
This RCS library file contains three versions of sample.c. This rlog command is going to give us
detailed information about all three versions. Later, we will see how to reduce the volume of output
from rlog by restricting the versions that it will report on.
•
The descriptive text stored in the RCS file is: "sample file used to illustrate the use of the rlog command."
•
The first version reported upon is version 1.3: It is locked by "mary," who is also its author.
•
It was checked-in on August 7, 1989 at 7 minutes and 18 seconds past 5pm. Note that the date is
printed as year/month/day rather than month/day/year. RCS uses this notation because it is equivalent
to the "most significant bit first" format.
•
The state of the version is "Exp," which usually (but not necessarily) means "experimental."
•
The changes made to the previous version (version 1.2) to create this version involved deleting 14
existing lines and inserting 31 new lines.
•
When "mary" checked-in this version, she gave the log message: "altered the contents of the file
significantly"
•
Similar information is provided about the other two versions 1.2 and 1.1; we won’t bother to summarize it.
If you’re "fred", and you left for vacation just after checking-in version 1.2, you can now start investigating why the program is different. Rather than puzzling over the code and trying to remember what
changed, you can go directly to the author of those changes, Mary, and ask her what she did while you
were gone.
The name rlog is an abbreviation for "read log messages." However, as we saw in the example, the rlog
command prints much more than just the log messages. The output from rlog can be very long, even for
a simple file like the one we illustrated. If you don’t want to read the entire report, there are many
alternatives--perhaps too many. rlog has an almost interminable list of options designed to customize the
report in one way or another. First, the -t option gives general information about the file under RCS control, but omits all of the information about specific versions. The command
% rlog -t sample.c
prints the same information as the default rlog command, up to and including the descriptive text (the
first 11 lines in our example), but omits everything about the individual versions. You can reduce the
amount of output even further by using the rlog -h option. The command rlog -h produces the same output as rlog -t, except that the descriptive text will not be printed. In other words, it prints everything up
to, and including, the "total revisions" line.
While you probably don’t want to see a long list of details about all the versions in the file, you might be
interested to find out about some of them. You can specify which versions you care about by using the -r
option. For example, the command:
% rlog -r1.2 sample.c
prints the usual header information but only gives details about version 1.2 of sample.c. If you specify a
54
Additional Utilities
branch number in the place of a version number, the system prints details for all versions on that branch.
For example, the command:
% rlog -r1.2.1.1 sample.c
reports upon all the versions on branch 1.2.1 of the file sample.c.
You can request details about several version by specifying a list of versions. For example the following
command prints version-specific data for versions 1.2 and 1.4 of sample.c.
% rlog -r1.2 -r1.4 sample.c
As well a specifically naming the versions you want details about, you can also specify a range of versions. For example the next command prints version-specific data for versions sample.c in the range 1.2
to 1.5 (i.e., 1.2, 1.3, 1.4 and 1.5).
% rlog -r1.2-1.5 sample.c
Likewise, the next two commands will print information about versions of sample.c up to and including
1.3 (i.e., 1.1, 1.2 and 1.3) and from version 1.3 onwards (e.g. 1.3, 1.4 and 1.5).
% rlog -r-1.3 sample.c
% rlog -r1.3- sample.c
You can also specify which versions you want by giving a check-in date. To do so, use the command
rlog -d. RCS allows you to specify dates in free format as described in appendix D. You can specify a
range of check-in dates by using the notation start_date<end_date. For example, the command:
% rlog -d’1-AUG<10-SEPT’ sample.c
reports details about all versions of the file sample.c that were checked-in between the dates August 1 and
September 10.
You can also print details about all versions checked-in before or after a certain date. For example the
following two commands will report on all versions checked-in before the first of september and after
August 15 respectively.
% rlog -d’<1-SEPT’ sample.c
% rlog -d’>15-AUG’ sample.c
Sometimes you might wish to report on versions that were checked-in during any one of a number of
different date ranges. You can do this by listing all of the date ranges with the -d option, using a semicolon to separate them. For example, the command:
% rlog -d’10:30<17:00;3-SEPT>1-SEPT;<1-AUG’ sample.c
prints information about all versions of sample.c that were checked in between half past ten this morning
and five o’clock this evening, as well as versions that were checked in between the first and third of September or before the first of August.
55
RCS Handbook
NOTE
It is extremely important to put single quotation marks around the date range. Otherwise the shell
will interpret the ’<’ and ’>’ characters as indirection requests for standard I/O, and the result
would be significantly different from what was intended. Likewise, if you don’t use quotations
marks the shell will interpret ’;’ as a command delimiter.
The -w option restricts reporting to versions which were created by a particular author. For example, the
following command only reports on versions that were checked-in by "fred."
% rlog -wfred sample.c
Likewise the following command reports on versions that were checked-in by "fred," "mary" or "harry."
% rlog -wfred,mary,harry sample.c
You might like to restrict your report to versions which are currently being worked upon (i.e. versions
which are locked). The -l option restricts reporting to versions which are locked. For example, the following command reports on versions of sample.c which are locked (by anyone).
% rlog -l sample.c
Sometimes, you might like to restrict your report to versions which are currently being worked upon by
particular people. If usernames are supplied with the -l option, rlog will only report on versions which
are locked by the named users. For example, the following command reports on versions of sample.c
which are locked by either "fred" or "mary."
% rlog -lfred,mary sample.c
Another way of restricting the number of versions reported upon, is to specify that only versions with a
particular state should be reported uopn. The rlog -s option is provided to do this. For example, the following command reports on versions of sample.c whose state is equal to "Test."
% rlog -sTest sample.c
Likewise, this next command reports on versions of sample.c whose state is either "Test" or "Rel."
% rlog -sTest,Rel sample.c
The rlog -b command can be used to restrict the report to versions on a particular branch. If sample.c has
a default branch set, the next command prints details about versions which are on the default branch; otherwise it print details about versions on the branch with the highest branch number.
% rlog -b sample.c
You can combine two or more selection criterion within one rlog command. For example, the command:
% rlog -wfred,mary -sTest,Rel sample.c
prints information about sample.c, giving details about versions that were checked-in by either "fred" or
56
Additional Utilities
"mary" and that have a state of "Test" or "Rel."
The rlog command is frequently in shell scripts to convert the name of the working file to the name of
the corresponding RCS file. So that you don’t need to write a special shell script just to extract the RCS
library file name from the rest of rlog’s output, the -R option to rlog prints the RCS file name only. For
example, the following command prints the name of the RCS file associated with sample.c:
% rlog -R sample.c
RCS/sample.c,v
This could be used as part of a shell command. For example, assume that the shell variable file contains the name of a working file. Then the following series of C-shell commands set the shell variable
RCS_file equal to the name of the corresponding library file:
% echo $file
sample.c
% set RCS_file = ‘rlog -R $file‘
% echo $RCS_file
RCS/sample.c,v
Finally, assume that you are involved in a team project with many source files, all of which are under
RCS control. You might want to find out which of the files are currently under development--i.e., which
files have been checked-out and locked. (Files which are checked out but not locked aren’t "under
development," because they can’t be modified). To find out which files are locked, give the command
rlog -L for the files that are in your working directory. The rlog command then prints its standard report
for every file that is locked, ignoring those that aren’t.
For example the following command prints a full report on all RCS files that have been locked.
% rlog -L RCS/*,v
This next command works the same as the previous, but makes its inquiries on the basis of the working
files in the current directory.
% rlog -L *
The -L option can be combined with any other command line option. For example, the following command combined the -L and -R options to print just the names of the RCS files which have been locked.
% rlog -L -R RCS/*,v
Telling White Lies
As well as storing the contents of each new version the ci command records certain housekeeping information about each new version that is created. For example, it will store who created the new version
and when the version was created. RCS can find out this information itself, however, there are occasions
when you might want to tell a few white lies about this housekeeping information.
57
RCS Handbook
Normally, the ci command records the date on which you execute the command as the creation date of
the new version. There are times when you this isn’t what you want. Suppose you created a new version
of sample.c on the 21st of January 1990, but forgot to check it in until the February 1st. You would still
like the RCS system to record the 21st of January 1990 as the creation date; someone who wants to
reconstruct the system as it was on January 22 presumably wants to see your version of sample.c, even
though it wasn’t officially part of the system until much later.
The ci -d command lets you assign a creation date to the new version. For example, the command below
checks-in sample.c, forcibly setting the creation date to the 21st of January, rather than the current date:
% ci "-d21 JAN 1990" sample.c
You will notice that we enclosed the -d option inside of quotation marks: this tells the shell that the date
string is a single parameter, rather than a series of arguments separated by spaces. The date specified
with the ci -d command can be specified in "free format" as described in appendix D.
The ci command normally assumes that the user performing the check-in is the version’s "author."
Again, there are times when you might want to do otherwise: for example, you may be checking-in a file
because someone left for vacation and forgot to do his own check-in. The ci -w command lets you assign
authorship of the new version to another user. For example, if you wanted to check-in a new version of
the file sample.c on behalf of your friend sally, use the command:
% ci -wsally sample.c
If you are using RCS to store versions of software that is being developed elsewhere, it is desirable that
you always should use the same version numbers as the developers. For example, assume that Jim Bean
& Co. has purchased a source license for an accounting package called Cook_the_Books. This package is
supplied by Dodgy Software Ltd (DSL for short). DSL use the RCS package to maintain multiple version of the source code. Every time they make a significant change to the source code, they ship a copy
of the new source code to Jim Bean.
Jim Bean, whose login-id is jim, acts as a system manager for Jim Bean & Co. and installs each new version as he receives it. Experience has taught Jim that he sometimes needs to restore old versions. Therefore, whenever he receives a new version, he doesn’t delete the old code. Instead, he maintains on-line
copies of all the versions using RCS. In order for Jim to communicate with DSL effectively in relation to
bugs in the software, it is desirable that Jim Bean & Co. should use the same version numbers as DSL
and agree about the release date of each version.
Now, assume that a user named fred, who works for DSL, developed version 1.5 of the file accounting.c
and checked it into the RCS file on January 1st. This was subjected to rigorous testing and hence its state
was set to "tested." The $Id$ marker was included in the original file for identification purposes. In version 1.5 of the source code, the $Id$ marker is expanded as shown below:
$Id: accounting.c,v 1.5 90/01/20 11:26:48 fred tested $
Jim Bean & Co signed a license agreement on the 20th of February. Since version 1.5 had not been
superseded in the meantime, it was sent to Jim on the distribution tape. Now consider what happens
when Jim checks in his new source code. If he uses the simple command
% ci accounting.c
the version number would be set to 1.1, the author would be identified to be jim, the creation date would
58
Additional Utilities
be 20th of February and the state would be "Exp". It is clear that confusion arise when Jim calls to complain about a bug in version 1.1 of his software. DSL would have their own idea about what constituted
version 1.1, which would be completely different from Jim’s.
Jim could ensure that he uses the same version number, creation date, author and state as DSL by using
the following command to check-in the source files.
% ci -r1.2 "-d20-JAN-1990 11:26:48" -wfred -stested sample.c
Before Jim could know the correct command line options to use with the ci command, he would have to
know the correct version number, creation date, state and author. Since DSL have been considerate
enough to place id markers in their source files, he can find out this information by looking for the id
marker and then using its contents. Luckily, Jim does not have to go to the trouble of doing this himself,
because RCS has a command which will automatically search for and use the information from the id
markers.
The ci -k command tells the system derive check-in parameters from the expanded markers in the working file itself. The ci command searches the file for expanded identification markers. It then uses the version number, author and creation date from these expanded ID markers (if any) to provide the version
number, author and creation date of the new version.
For example, if Jim used the command
% ci -k accounting.c
to check-in his files, RCS would search through the working copy of accounting.c and find the expanded
$Id$ marker. From the expanded marker, the system would know that this version was authored by fred,
was created on 1st of January, has a state of "tested" and a version number of 1.5. RCS will then enter
the file into its library with this version number, author, and date. Now, when Jim calls DSL to complain, his "version 1.5" will match theirs. Using ci -k can therefore eliminate much of the potential confusion.
If you use the ci -k command and no identifying keywords are found in the working file, the normal
default values will be used for the author, creation date, version number and state. Any of the values read
from the keywords in the file may also be overridden using the -w, -d, -r and -s options.
It might be important for you to be able to distinguish which versions were created with the ci -k command and which versions were created with the normal ci command. In order to assist you, RCS stored a
special log message with every version that is checked in using the -k option. Whenever you check-in a
file using ci -k, the system will automatically generate a log message of the form "checked in with
-k by user at date"; where the date is given in the internal format used by RCS, which is
explained in appendix D. For example:
checked in with -k by jim at 90.02.20.09.11.36.
59
RCS Handbook
6
Interaction with Make
"And God said, let us make man in our image, after our likeness"
The Holy Bible: Genesis
Make is one of the UNIX system’s most exciting and interesting utilities. It is commonly used to build
executable systems from the component source files, and can be put to many other uses. If you have used
UNIX to any extent, you are probably familiar with make already. Why describe make in a book about
RCS ?
Despite the fact that make is used frequently in conjunction with RCS, the interface between them is far
from optimal. There are a number of features of make which make it difficult to use with any version
control system. In this section, we describe a primitive method of interfacing make to a version control
system. We also describe the problems inherent in this interface. We won’t describe make itself in any
detail. The make system is too complex to be adequately described in this small section, so we assume
that you are already familiar with its basic features. If you want to learn more about make, read your
system’s documentation or Managing Projects with Make written by Steve Talbot (O’Reilly & Associates).
Normally, make is used with the most recent version of the source files to build an up-to-date copy of the
executable system. Therefore, by combining make with a version control system, you should be able to
check out and build an arbitrary version of the program automatically. To see how this might happen,
let’s start with a simple case.
60
Interaction with Make
The dependencies between the various compiled files and source files are stored in a makefile, along with
the commands required to rebuild the system. The makefile contains a rule for each target file that it
knows how to build. The rule for each target file must state the dependencies (a list of files that are
required to build this target) and a build command (the shell command or commands required to generate
the target file from its dependencies). Here’s the format of a typical rule:
target: dependencies
build command
For example, let’s look at a simple system consisting of two source files sample.c and sample.h, which
produce an executable file sample. The file sample.c contains the C code for the system; it uses the
header definitions contained in the header file sample.h. The executable file sample can be generated by
compiling the source file sample.c. The Makefile for this system would be as follows
sample: sample.c sample.h
cc -o sample sample.c
These lines tell MAKE that the executable file sample depends upon both sample.c and sample.h: this
implies that sample must be recompiled if either sample.c or sample.h changes. The command to compile sample is cc -o sample sample.c.
In order to interface make to a source control system, you must include extra lines indicating that the
source files are dependent upon the corresponding library files. You must also tell the system how to
create the source file from the library file by giving the appropriate check-out command. For example:
sample.c: RCS/sample.c,v
co sample.c
These lines tell the system that the source files can be generated by checking-out a working file from the
relevant library file. They also tell the system that if the modification time of the library file is more
recent than the modification date on the working file, it should check-out a new working file. With this
additional dependency, make will check-out a new working file if it needs to get an up to date copy--for
example, if a co-worker has checked-in a new version of sample.c since the last time you checked it out.
This interface to the source control system is adequate but not really very powerful. The main problem
with this interface is that the system will always retrieve the current default version of the library file.
Hence, it will not exploit the true benefit of using a version control system, which is the ability to recreate old versions. Fortunately, this problem is easy to fix. The options you provide with the check-out
command determine the version of the source file that will be checked-out, and consequently the version
of the executable that will be built. If we can teach make to provide the checkout options that specify the
particular version that interests us, our job will be done. The simplest way to do this is by using MAKE
variables:
sample.c: RCS/sample.c,v
co $(COFLAGS) sample.c
These lines do tell make to use the contents of the COFLAGS variable as an option flag to the checkout
command. You can define the COFLAGS variable on the make command line. For example, consider
the command:
% make sample COFLAGS=-r2
When you give this command, make does whatever is necessary to generate the file named sample, using
the option flag -r2 whenever checking-out a file from the version control system. This means that the
61
RCS Handbook
most recent version from release 2 of each file will be checked-out and used for the compilation. By
altering the value of the COFLAGS variable, we can vary the options used with the check-out command
and hence the version of sample which will be generated.
More profitably, you can use the COFLAGS variable to supply any check-out option you wish. For
example, assume that you are using RCS and that you have assigned the symbolic name
final_release_1.0 to the version of your product that was actually shipped sometime last year. When a
bug report comes in, you can reproduce the executable that you shipped with the command:
% make sample VERS=-rfinal_release_1.0
Make issues the co commands to check-out the appropriate version of every file, regardless of the current
version. You could use similar variations of the make command to create your product as it stood on any
particular date, and so on.
Problems
These example shown accomplishes a simple but effective interface between RCS and make. With this
interface, make can use RCS to access old versions of the source files and hence build old versions of the
executable files. However, there are still several problems with this interface. We will list here some of
the ways in which make will not interact with RCS in the way that you might intuitively expect. † If you
intend to use make a version control system, you should read and understand these oddities so that you do
not get any unwelcome surprises.
•
You must explicitly enter details into your makefile about every source file which is under version
control. This can become tedious if you are using a large number of source files. Some (but by no
means all) variants of MAKE have default rules which specify how source files should be checked-out
from RCS. You should familiarize yourself with what default rules (if any) your system has for
interacting with RCS.
•
Many variants of make assume that all the required files are in the same directory. If you are using
such a variant of make, it is almost impossible to specify good default rules because the library files
are normally in a different directory from the source files.
•
Make assumes that the compilation rules do not vary. However, the commands needed to compile
release 2 of the system might differ from the commands used to compile release 1 of the system-particularly if you are working with a complex optimizing compiler. There is no simple way to store
two alternate sets of compilation rules within one Makefile.
•
We used the simple rule that a new working file should be checked-out if the current working file is
older than the library file. This is not adequate for every situation. If the working directory currently
contains the current version (release 4) of the source files, and we wish to create a new version of the
executable using release 2 of the source files, MAKE cannot tell by looking at the modification times
of the file that a new working file (release 2 of the source code) needs to be checked-out. The only
solution to this problem is to force make to check-out a new working file. This can result in
333333333333333333
When I refer to the MAKE utility, I mean the original MAKE utility as developed by Stu Feldman. There are several enhanced
MAKE utilities currently in existence. Some of these enhanced MAKE utilities have solved some of the problems discussed in this
section.
The MAKE utility supplied by GNU has advanced features which help you interface between MAKE and RCS. I will describe how
these advanced features can be utilized (if you have them). It is possible that the MAKE utility, which was supplied with your
variant of the UNIX operating system, has some of these advanced features.
62
Interaction with Make
unnecessary compilations and is not satisfactory for large systems.
We have not described some of the more subtle problems that arise when using make in conjunction with
a source control system. Recently, some users have written enhanced versions of MAKE which provide a
cleaner interfaces to RCS. There are also a number of utilities available which assist in some of the more
mechanical aspects of using make in this context. These utilities will be discussed later in the book. All
users should at least be aware that there are serious pitfalls in the interface between RCS and MAKE.
Homegrown Solutions
Since the standard MAKE utility does not contain a good interface telling it how to check-out files from
RCS, the obvious solution is to define your own interface. In this section we show you how you can
improve the interface between RCS and MAKE.
Your first task should be to define a good default rule telling MAKE how to check-out files from RCS.
As an example you can look at the default rule used by the enhanced GNU MAKE. i.e.
CO = /usr/new/co
COFLAGS =
%:: %,v
$(CO) $(COFLAGS) $< $@
%:: RCS/%,v
$(CO) $(COFLAGS) $< $@
These two rules use the pattern matching feature of GNU MAKE which is not available with the standard
MAKE utility. The first rule says that a source file can be built from a file with the same name except
with a ,v appended to the end of it. The second rule says that a source file can be built from a file with
the same name except with a ,v appended to the end of it and in a sub-directory named RCS. For either
rule the default action is to check-out the file using the /usr/new/co program and with no options
specified. However, an alternate check-out program can be specified in the CO macro and option flags
can be specified in the COFLAGS macro. For example the following command will build the install target but will use the /usr/local/co command with the -r2 option flags whenever it needs to check-out a
source file from RCS.
% make install CO=/usr/local/co COFLAGS=-r2
If your version of the MAKE utility does not support pattern matching rules, you will not be able to
define such simple and elegant generic rules for checking-out source files from RCS. The standard
MAKE utility does have any way of defining generic rules for fetching files from another directory.
Therefore, if you store your RCS files in a sub-directory named RCS (as most people do), you must
define explicit rules for how to check-out each of the source files from RCS. For example, your makefile
might contain the following rules:
CO = /usr/new/co
COFLAGS =
prog.c: RCS/prog.c,v
$(CO) $(COFLAGS) RCS/prog.c,v prog.c
63
RCS Handbook
prog.h: RCS/prog.h,v
$(CO) $(COFLAGS) RCS/prog.h,v prog.h
utils.c: RCS/utils.c,v
$(CO) $(COFLAGS) RCS/utils.c,v utils.c
If you have a large number of source files, the list of rules can become quite long. While the standard
MAKE utility does not provide pattern matching rules, it does provide an almost equivalent feature called
suffix rules. The suffix rules feature allows you to define how files with one suffix can be generated from
files with another suffix‡. For example the following rule tells MAKE how files with a suffix of ".c" can
be generated from files with the same name except for a suffix of ".c,v" (the corresponding RCS file).
.SUFFIXES : .c .c,v
.c,v.c :
$(CO) $(COFLAGS) $< $@
The suffix rules feature is not as flexible as the pattern matching feature. An obvious problem with the
above rule is that it only relates to checking out source files whose name ends in ".c". You would have
to define a separate suffix rule to tell MAKE how to check-out files whose names end in ".h" and with
any other file name ending that you use. Another more serious problem with this rule is that it will not
look for the RCS files in any directory other than the current working directory. The suffix rules feature
does not allow you to specify that the dependency files are in another directory (e.g., the RCS subdirectory).
A simplistic solution to this problem would be to define a default rule which would check-out files from
RCS. This rule would be defined as follows:
CO = /usr/new/co
COFLAGS =
$(CO) $(COFLAGS) $<
This rule tell MAKE that, whenever it has no explicit or suffix rules telling it how it can build a particular
file, it should try checking-out the file from RCS. The co command itself will automatically look in the
RCS sub-directory to find the RCS file. However, the problem with using a .DEFAULT rule is that it is
only activated if a source file does not exist; the MAKE utility will not recognize that a source file needs
to be checked-out again when the RCS file is updated, because the .DEFAULT rule does not tell it how to
find the relevant RCS file to test its modification date.
The default rule provided with GNU MAKE is substantially more elegant than any default rule that you
can define with standard MAKE. However, even the GNU MAKE default rule is far from perfect. The
GNU MAKE rule will specify that a source file needs to be checked-out if the modification date of the
RCS file is later than the modification date of the source file. Sometimes this can result in the source file
being unnecessarily checked-out. For example, if a new user was added to the access control list of the
RCS file, the modification time of the RCS file would be updated and MAKE would decide to perform a
333333333333333333
In this context the file suffix is the part of the file name that follows the "."; you should consult your systems’ documentation for
more information about the suffix rules feature.
64
Interaction with Make
check-out (and recompile the source file) even though the contents of the version stored in the RCS file
have not changed. However, most users would be happy to wait for an occasional unnecessary recompilation so long as they are happy that the correct version will be compiled.
A potentially more serious problem with the GNU MAKE rule is that it cannot tell which version is
currently checked-out. For example, if the COFLAGS macro used with the previous make was -r2 the
source file in the working directory will be the most recent version from release 2. However, if you now
perform a new make with the COFLAGS macro set equal to -r1 you would expect to use the most recent
version of the source files from release 1. Unfortunately the MAKE utility has no way of knowing that
the source file in the working directory is not correct. If the RCS file was not modified since the last
compilation was performed, the MAKE utility will incorrectly decide that the source file is up-to-date,
because it was modified more recently than the RCS file.
Since the MAKE utility is not very well integrated with the MAKE utility, it is necessary to use a two
step process when attempting to build an old version of your executables:
•
Ensure that the correct versions of the source files are checked-out of RCS.
•
Build the executables from these sources by using the MAKE utility. (This is the job for which
MAKE was originally intended.)
A major advantage of using the MAKE utility is, that it will only perform the minimum number of recompilation steps required to build the executables. However, if you blindly check-out all of the source
files from RCS immediately prior to each re-compilation, the MAKE utility will be forced to redo all of
the compilation steps. In order to avoid this problem, you must ensure that you only check-out source
files when the currently checked-out version is incorrect.
You might ask: how can I ensure that ? You must follow the following steps:
•
Check-out a copy of the desired version into a temporary file.
•
Compare the contents of the temporary file with the current contents of the source file. If the files are
different, replace the source file with the temporary file. Otherwise delete the temporary file.
The following shell script will automatically carry out the procedure for you.
#! /bin/sh
#
#
A shell script that only checks-out files
#
if the resultant version would be different from
#
the currently checked-out version
#
#
Brian O’Donovan 13-Apr-91
#
# define ${CO} to point to where the "co" command is on your system
# default is "/usr/new/co"
CO=/usr/new/co
#
#
First check the option flags specified
for i
do
case $i in
-*) OPT="${OPT} $1"
shift;;
*)
break;
shift;;
esac
65
RCS Handbook
done
echo "Performing a test check-out with options: ${OPT}"
#
#
The remaining parameters are files to be processed
while test $1
do
echo "Processing $1"
# check-out the correct version into a temporary file
${CO} ${OPT} -p $1 > /tmp/co$$
if [ $? -ne 0 ]
then
echo "Error encountered while checking-out $1"
exit 1
fi
# compare its contents with the source file
diff $1 /tmp/co$$ > /dev/null 2> /dev/null
# if they differ replace the source file
if [ $? -ne 1 ]
then
echo "The source file $1 is being updated"
mv /tmp/co$$ $1
else
echo "The correct version of $1 is currently checked-out"
rm /tmp/co$$
fi
shift
done
echo "Processing Complete"
If you copy this script into a file named test_co. You can then use the following commands to build
release two of the executable file prog.
% test_co -r2 *.c *.h
% make prog
The main advantage of using this shell script is that the modification time of the file is not changed if the
current contents are OK. I have designed an enhancement to the co command which would have the
same effect; it is possible that this enhancement will be included in future release of RCS.
66
RCS for Team Development Efforts
7
RCS for Team Development Efforts
"Our military forces act as a team--in the game regardless of who carries the ball."
Omar Bradley
1949
If you only use RCS to work on small, personal projects, the information from the last chapter should
satisfy you. You know how to use RCS to preserve old versions, track the difference between successive
versions, and so on. For a small project, this may be all you need to do.
However, RCS really comes into its own when you are managing a large project with several teams of
developers. This common scenario places a premium on communications: keeping all sources in a common, central location, providing "interlocks" to prevent simultaneous updates, allowing check-ins to be
coordinated. Unfortunately, this is one aspect of RCS usage that its standard documentation doesn’t
describe. And, to be completely honest, RCS does not solve the problem completely. Many users have
developed scripts to provide the additional help that RCS needs, and several complete systems have been
developed to enhance RCS’s basic services.
In this chapter, we’ll discuss what you need to do to manage large projects. We’ll give you some help
writing the kinds of scripts that are necessary for larger projects by showing you some sample scripts we
have written. We will also discuss how to use some features of RCS itself (like states and version
names) to make management of large projects more convenient.
You should be aware, however, some of the features which you might need to manage a large project are
too complex for a simple shell script. Hence many systems have been written that have been layered "on
top" of RCS. We will give an outline of a few such systems in the next chapter.
67
RCS Handbook
Getting Everyone to Use the Same RCS Files
If you want to ensure that all of the project members use RCS library files from the same project’s shared
directory, you should get the system to automatically look in this directory for RCS library files. However this can cause problems in a large project, because each developer will have their own working files
at different directory locations and RCS assumes that the library file is in a sub-directory named ./RCS
relative to the directory containing the working file.
If you operating system supports symbolic links, this problem is simple to solve. You simply create a
symbolic link from each working directory to the project’s RCS directory. For example the following
sequence of commands will create symbolic links between the projects RCS directory (/proj/lib/RCS) and
the directory locations /usr/users/tom/RCS, /usr/users/dick/RCS and /usr/users/harry/RCS.
% ln -s /proj/lib/RCS /usr/users/tom/RCS
% ln -s /proj/lib/RCS /usr/users/dick/RCS
% ln -s /proj/lib/RCS /usr/users/harry/RCS
After these symbolic links have been created, the users tom, dick and harry can access the project’s RCS
files as if they are in the ./RCS sub-directory of their normal login directories (because the operating system considers these directory paths to be identical).
If your system does not support symbolic links, the problem of getting everyone to use the same RCS
files is not quite as easy to solve. The only practical solution is for you to write a shell script which will
intercept all of the RCS commands issued by the users and translate then into RCS commands that access
the project’s RCS directory. The following program shows you an example of a shell script which I
wrote to accomplish this task. †
1
2
3
4
5
6
7
8
9
10
11
12
13
14
15
16
17
18
19
20
21
22
23
24
25
#! /bin/sh
comdir=/usr/new
RCSDIR=‘cat .rcsdir 2> /dev/null‘
if test -z "$RCSDIR"
then
echo "The RCS directory has not been defined"
if test -d ./RCS
then
echo "It defaults to ./RCS"
RCSDIR="./RCS"
else
echo "Enter the name of the directory containing the RCS files"
read RCSDIR
echo $RCSDIR > .rcsdir
fi
fi
command=‘ echo $0 | sed ’s/.*///g’ ‘
for param in $*
do
case $param in
333333333333333333
† The line numbers have been added for clarity and are not part of the script.
68
RCS for Team Development Efforts
26
27
28
29
30
31
32
33
34
35
36
37
38
39
-*)
options="$options $param"
;;
*)
libfile=$RCSDIR/‘ echo $param | sed ’s/.*///g’ ‘,v
files="$files $param $libfile"
;;
esac
done
$comdir/$command $options $files
exit $?
The important part of this script is contained in lines 5-18. The script reads a file named .rcsdir to find
out the name of the directory where the RCS files are contained. If no file named .rcsdir exists, the script
looks to see if there is a sub-directory named ./RCS available to store the RCS files (so that some users
can continue to use RCS for their own personal projects). If no ./RCS directory can be found, the user is
prompted to type in the name of the RCS directory; this name is recorded in the file .rcsdir for future use.
The RCS directory name, which was deduced in lines 15-18, is used in lines 22-36. All command line
parameters which do not start with ’-’ are assumed to be the name of a working file. For each working
file, the name of the associated RCS library file is generated by pre-pending the name of the RCS directory and by appending ",v". The name of both the working file and the associated library file are given as
parameters to the actual RCS command.
NOTE
This shell script assumes that you will only give the name of the working file when you call RCS
commands and not the name of the library file. Strange things will probably happen if you
specify the name of the library file.
The smart part of this shell script is on line 20 where it figures out the name of the RCS command to use
from the command used to invoke the shell script. This means that the same shell script can be used as a
pre-processor for all of the RCS commands. This script should be installed as /usr/bin so that it will be
seen earlier in users’ search paths than the real RCS commands which will be in /usr/new. There should
be links to this script from each of the RCS command names. The following commands show how you
should install this script. (You will probably need to be logged in as root before you are allowed to execute these commands.)
%
%
%
%
%
%
%
%
%
%
cp SCRIPT /usr/bin/rcs
cd /usr/bin
ln rcs co
ln rcs ci
ln rcs rlog
ln rcs rcsclean
ln rcs rcsmerge
ln rcs rcsdiff
chown root.system rcs co ci rlog rcsclean rcsmerge rcsdiff
chmod 0755 rcs co ci rlog rcsclean rcsmerge rcsdiff
69
RCS Handbook
Getting Everyone to Use the Same Working Files
We said earlier that whenever someone wants to change one of the projects’ source files, they should:
•
Check-out their own working copy of the file.
•
Modify the source file.
•
Test the modified source file.
•
Re-modify and re-test the source file until they are happy with the results of the tests.
•
When they are happy with the test results, they can check-in the modified source file to the shared
directory.
However, in most software systems it is not possible to test a single source file on its own. Hence, a user
must check-out a read-only copy of all of the source files in addition to a writable copy of the one he/she
is actually going to change. This situation is unsatisfactory because it is wasteful on disk space and
because it means that some users could easily be using old versions of the source files if the files are
updated while after they check-out a read-only copy.
It would be preferable if all of the project’s members could share copies of the files that they are not
changing as well as having their personal copies of the files that they intend to modify. This set-up is
possible by using symbolic links and two simple shell scripts to maintain them. The first shell script
(which is shown below) is called make_links. It will establish symbolic links between your current working directory and each of the source files the project’s shared directory.
1
2
3
4
5
6
7
8
9
10
11
12
13
14
15
16
17
18
19
20
21
22
23
24
25
26
27
28
29
30
31
32
70
#! /bin/sh
RCSDIR=‘cat .rcsdir 2> /dev/null‘
if test -z "$RCSDIR"
then
echo "RCSDIR has not been defined"
if test -d ./RCS
then
echo "It defaults to ./RCS"
RCSDIR="./RCS"
else
echo "Enter the name of the directory containing the RCS files"
read RCSDIR
echo $RCSDIR > .rcsdir
fi
fi
case $RCSDIR in
*/RCS)
rcsdir=$RCSDIR
pubdir=‘ echo $RCSDIR | sed ’s//RCS$//’ ‘
;;
*)
rcsdir=${RCSDIR}/RCS
pubdir=$RCSDIR
;;
esac
count=‘ls -la $pubdir 2> /dev/null | wc -l‘
RCS for Team Development Efforts
33
34
35
36
37
38
39
40
41
42
43
44
if test $count -le 3
then
echo "There are no files in
exit 1
fi
for file in $pubdir/*
do
ln -s $file .
done
exit 0
The make_links script uses the same logic as the script shown in the last section to locate the project’s
shared directories. It also assumes that the project’s working files are stored in a directory which is one
level above the directory containing the project’s RCS library files.
The make_links script should be run once by each user in the directory in which he/she intends to do
development work. For example, if the project had three source files prog.c, prog.h and ultils.c. The
project’s shared directory would contain three RCS library files /proj/lib/RCS/prog.c,v,
/proj/lib/RCS/prog.h,v and /proj/lib/RCS/utils.c,v. The project would also have three publicly accessible
working files /proj/lib/prog.c, /proj/lib/prog.h and /proj/lib/utils.c. After fred runs the make_links script
in his home directory /usr/users/fred, he can then access the three publicly accessible working files
/proj/lib/prog.c, /proj/lib/prog.h and /proj/lib/utils.c as if they were named /usr/users/fred/prog.c,
/usr/users/fred/prog.h and /usr/users/fred/utils.c.
These symbolic links are fine for files that fred does not intend to modify, but he will need real copies of
any files that he intends to update. What he needs is a script which will automatically delete the symbolic link to the shared copy of the working file immediately before he checks-out his own copy. This
script should also automatically re-create the symbolic link and check-out a shared copy of the file
immediately after he checks-in a new version.
The /usr/bin/rcs pre-processor script which we described in the last section can easily be modified to do
this extra work. The following is an example of how this can be done:
1
2
3
4
5
6
7
8
9
10
11
12
13
14
15
16
17
18
19
20
21
22
#! /bin/sh
comdir=/usr/new
RCSDIR=‘cat .rcsdir 2> /dev/null‘
if test -z "$RCSDIR"
then
echo "RCSDIR has not been defined"
if test -d ./RCS
then
echo "It defaults to ./RCS"
RCSDIR="./RCS"
else
echo "Enter the name of the directory containing the RCS files"
read RCSDIR
echo $RCSDIR > .rcsdir
fi
fi
case $RCSDIR in
*/RCS)
71
RCS Handbook
23
24
25
26
27
28
29
30
31
32
33
34
35
36
37
38
39
40
41
42
43
44
45
46
47
48
49
50
51
52
53
54
55
56
57
58
59
60
61
62
63
64
65
66
67
68
69
70
71
72
73
74
75
76
77
78
79
72
rcsdir=$RCSDIR
pubdir=‘ echo $RCSDIR | sed ’s//RCS$//’ ‘
;;
*)
rcsdir=${RCSDIR}/RCS
pubdir=$RCSDIR
;;
esac
command=‘ echo $0 | sed ’s/.*///g’ ‘
for param in $*
do
case $param in
-*)
options="$options $param"
;;
*)
libfile=$rcsdir/‘ echo $param | sed ’s/.*///g’ ‘,v
files="$files $param $libfile"
local_files="$local_files $param"
;;
esac
done
case $command in
co)
rm -f $local_files ’ 1> /dev/null 2> /dev/null’
$comdir/co $options $files
exit_status=$?
;;
ci)
$comdir/$command $options $files
exit_status=$?
for file in $local_files
do
pubfile=$pubdir/‘ echo $file | sed ’s/.*///g’‘
rcsfile=$rcsdir/‘ echo $file | sed ’s/.*///g’‘,v
$comdir/co $pubfile $rcsfile
ln -s $pubfile $file
done
;;
*)
$comdir/$command $options $files
exit_status=$?
;;
esac
exit $exit_status
RCS for Team Development Efforts
The main changes to this script are concentrated around lines 53-70 where the co and ci commands are
singled out for special treatment. Line 56 deletes the symbolic link immediately before the actual co
command is executed. Lines 66-68 check-out a new working file for the project’s shared directory and
line 69 re-creates the link from the current directory to it.
There is one major problem with sharing working files by means of symbolic links as we describe in this
section; the make_links procedure assumes that you always want to use the default version of each working file. It is not possible to use this working arrangement if you want to work on a branch other than the
default.
Another problem is that it may be difficult for you to track down bugs in one module of the software
while other project members are simultaneously making changes to related code modules. Therefore, if
you are concerned to ensure that nobody else modifies any of the modules while you are testing, you
should check-out your own personal copy of all files.
What is Missing ?
The shell scripts described in this chapter, can greatly enhance the usefulness of RCS for team based projects. In many ways these scripts achieve much of the functionality of a system such as CCSLAND
(which is described in the next chapter). However, these shell scripts are still missing many features that
you might want. The two most significant shortcomings of these shell scripts are:
•
These scripts do not allow you to manipulate entire directory hierarchies with one command.
•
These scripts do not facilitate development teams where some of the developers are working on
different variants of the code from the others.
However, it is not really practical to implement anything more complex in a simple shell script. If you
need this enhanced level of functionality, you should consider getting a system such as CCSLAND.
73
RCS Handbook
8
Securing Your RCS Files
"The prince who relies upon their words, without having otherwise provided for his security
is ruined; ..."
Niccolo Machiavelli
1532
If you use RCS for your own personal project, you can solve all potential security problems by setting the
security on the RCS library file such that only you can use it. However, this simple solution will not
work for large projects because all of the project members must be able to access the project’s files. On a
large project you will probably be concerned to ensure that:
•
Only project members can access the source files.
•
Only certain named project team members are allowed to update some of the source files.
•
All interaction with the project’s RCS files uses the approved processes.
RCS provides you with a mechanism called access control lists which allow you to restrict who may
update your RCS files. However, the RCS access control lists are not a totally effective way of securing
your RCS files. In order to be really effective, RCS access control lists must be used in conjunction with
normal UNIX files protection. In this chapter we will show you how to use RCS access control lists; we
will then describe how to use normal UNIX file protection to further enhance the security of your RCS
files.
74
Securing Your RCS Files
Access Control Lists
An RCS file may contain an access control list. This list names the users who are permitted to update
the file. When a RCS file is first created, it contains no access control list. By definition, a null access
control list means that anyone can update the RCS file, subject to normal UNIX file protection.
Users can be added to the access control list of a file using the rcs -a command. For example the following command creates an access control list for the RCS file RCS/sample.c,v containing the users mary and
jane.
% rcs -amary,jane sample.c
You can also use the rcs -a command to add users to an existing access control list. For example the
next command, adds the users fred and harry to the existing access control list for the RCS file
RCS/sample.c,v. It now contains the users mary, jane, fred and harry.
% rcs -afred,harry sample.c
Once users have been added to the access control list, they may be deleted with the rcs -e command. For
example the next command deletes the users fred and mary from the access control list for the RCS file
RCS/sample.c,v. It now contains the users jane and fred.
% rcs -efred,mary sample.c
If you use the rcs -e command without giving any user names you will delete the entire access control list
for the file. For example, the following command deletes the entire access control list for the RCS file
RCS/sample.c,v. Now any user can access it, subject to normal UNIX file protection.
% rcs -e sample.c
You are likely to want to have the same access control list on more than one file. Assume that your project has 200 source code files. You might want to give some of the members of your development team
access to any file, but you want to prevent others from accessing the files. In this case, the access control
list for each file would be the same. To save you from giving a lengthy rcs -a command 200 times, RCS
lets you set up the access control list for one file, and then copy that list to the others.
The rcs -A command performs the copying. For example, either of the following tow commands will
copy the access control list of the file RCS/other.c,v into the file RCS/sample.c,v
% rcs -ARCS/other.c,v RCS/sample.c,v
% rcs -Aother.c sample.c
If you give a list of file names to the rcs -A command, it will copy the access control list to all of the
named files in one go. The following two commands show how you might use this feature.
% rcs -Aother.c sample.c test.c sample.h
% rcs -ARCS/other.c,v /pub/RCS/*,v
75
RCS Handbook
Access control lists are a very powerful and flexible mechanism for restricting update access to your RCS
files, because you can explicitly name each user who is allowed to update each of the RCS files. However, there are a few key points that you should remember about the use of access control lists.
•
RCS access control lists only restrict update operations, they do not place any limit on who may read
the file. Anyone with UNIX read permissions for the RCS file can read the file.
•
RCS access control lists act in conjunction with the UNIX file access permissions. In order to update
a RCS file, it is necessary to have write access to the directory containing the RCS file and be on the
access control list (if one exists). If a user does not have write permission to the directory containing
the RCS file, they will not be able to update the file, even if he/she is on the access control list.
•
Regardless of the access control lists, the super-user ("root") and the file’s owner are always allowed
to update a file. These two users are exempt from any restrictions imposed by an access control list.
In other words: you cannot protect a file against a malicious user with the superuser password, and
you cannot protect a file against its owner. You should also remember that, the access control list
only restricts who can update the file: it has no effect on who can read the file.
•
RCS access control lists are really only suitable for restricting access in a friendly environment. It is
relatively simple to circumvent the RCS access control mechanisms. However, it should not be possible to circumvent the UNIX file access protections unless there is a bug in the operating system.
Therefore you should use UNIX file access mechanisms whenever your are really concerned about
security.
Using UNIX file protection
Another mechanism for securing access to your RCS files, is the file protection mechanism of the operating system itself. In fact, the only way of restricting read access to your RCS files is by setting the UNIX
file permissions on the RCS files. For example, if you would like to ensure that only you can read your
RCS files, you should use the following command to restrict UNIX read access to the files.
% chmod 0400 RCS/*
Likewise, you can restrict read access to your RCS files to users that are in your group with the following
command.
% chmod 0440 RCS/*
The default access permission for a newly created RCS file, is taken from the access permissions of the
working file. The RCS file will have the same access permissions as the working file except that all write
and execute permission is turned off. Therefore, the default rule is that anyone who could read the working file will be able to also read the corresponding RCS file. Nobody is allowed to directly write or execute a RCS file, because it would make no sense for them to do so.
RCS has a special way for dealing with updates to library files. Whenever you use a RCS command to
update a library file (e.g., co -l, ci etc.) RCS does not directly update the existing file. Instead, RCS initially creates a temporary file containing your update; when the command is ready to complete, the temporary file is used to replace the original file. This strategy is adopted so that, if the system crashes, you
will never be left with a RCS library file where an update has been only partly carried out. However,
there are a number of significant side effects of this strategy which you must keep in mind:
76
Securing Your RCS Files
•
Since a new RCS file is created every time, the owner of the RCS file is the person who last updated
the file. This means, for example, that the last person to update a file can change its UNIX access
permissions.
•
UNIX write permissions on a RCS file are redundant, because the system never directly writes into
RCS files. This is the reason why RCS automatically turns off the write permission on all RCS files.
(Turning off write permission has no effect upon the operation of the RCS commands, but it
discourages users from directly editing the RCS library file.)
•
If you have a hard link to a RCS file, your link will always point to the same copy of the RCS file.
This is because hard links are associated with the actual i-node number of the file and every time a
RCS file is updated it gets a new i-node number (because it is actually a new file).
If you want to update a RCS file, you must have write access to the directory containing the RCS file (in
order to be able to create the replacement file). You can restrict update access to your RCS files by setting the appropriate UNIX protection on the directory containing your RCS files (not the by setting the
protection on the RCS library files themselves). For example, the following command will only allow
users in the same group as yourself to update the RCS files.
% chmod 0660 RCS
Users can be denied permission to update an RCS file, either because they don’t have write access to the
directory, or because they are not on the access control list. Therefore the previous command has the
effect of restricting update access to users who are in the same group as yourself and are on the access
control list.
Using the Set-uid Bit
All of the RCS commands obey the restrictions of the access control list. However, malicious users can
easily circumvent the access control mechanism by using some non-RCS commands to manipulate the
RCS library files. It would be a good idea if you could ensure that users only used the legitimate RCS
commands to manipulate the RCS files. At first glance this seems like an impossible dream; but by using
the set-uid bit you can sometimes make this dream a reality.
In most variants of the UNIX operating system, files have a set-uid protection bit. When this bit is turned
on, anyone executing the program contained in this file, will have the rights an privileges of the owner of
the file. This mechanism is useful when you want to allow users to perform some specific update operations that they would not normally be allowed to carry out.
If you wish to use the set-uid bit with the RCS commands, you must carry out the following steps:
•
Create a special account for use with RCS (e.g, a user named rcs_user). It is normally a good idea to
disable logins on this account.
•
Set the ownership and protection on all RCS directories so that only the new account has write permission for the directory. e.g.:
% chown rcs_user ./RCS /proj/RCS /alt/RCS ...
% chmod 0644 ./RCS /proj/RCS /alt/RCS ...
77
RCS Handbook
•
This account should be given ownership of the files containing the RCS commands. e.g.:
% cd /usr/new
% chown rcs_user co ci rcs ....
•
The set-uid bit should be set on the RCS program files. (You may need to be the super-user before
you are allowed to do this.) e.g.:
% chmod
u+s,-w co ci rcs ....
CAUTION
It is important that users should not be given write permission to a file which has its set-uid bit
set. This is because, if write permissions enabled on such a file, user can overwrite the program
with any program they wish. They will then be able to execute this new program with the
enhanced permissions.
When the RCS programs have been configured to run with the set-uid bit, all RCS files will be owned by
the rcs_user account. You can ensure that users can only update the RCS files through the standard RCS
commands, by changing the ownership and access permissions on the directories containing the RCS
files. For example:
% chown rcs_user RCS
% chmod 0700 RCS
When file protection has been configured this way, users cannot hack at the RCS files because they have
no access permission for the RCS files themselves. However, users can update the RCS files by using the
regular RCS commands because the set-uid bit gives them the necessary extra permissions. (This
configuration also ensures that the RCS access control lists are respected).
Unfortunately, RCS does not always work correctly with the set-uid bit set. Problems can be encountered
due to bugs in either the RCS code or the underlying operating system. The following simple tests will
let you know whether or not the set-uid feature is working correctly on your system.
•
Create a new RCS file and then check that the file belongs to the rcs_user account. For example:
% rcs -i RCS/test,v
% ls -l RCS/test,v
•
Set-up the protection on the RCS directory so that you do not have write access to the directory.
Attempt to update a RCS file: you should succeed due to the fact that set-uid bit gives you extra permission.
•
Check-out a RCS file with a lock. Look to see that the lock has been granted in your name (and not
the name of the rcs_user account). Also look to see that the resultant working file belongs to you
(and does not belong to the rcs_user account).
If any of these simple tests fail, you should not run RCS with the set-uid bit set. The latest version of
RCS (5.6) allegedly can be used on any variant of UNIX with the set-uid bit turned-on, you should try to
get this version if your current version will not work.
78
Securing Your RCS Files
Using Groups to Restrict Access
One of the main dis-advantages to using the set-uid bit is that everyone is treated equally from the point
of view of UNIX file permissions. This is not a problem for update access because the access control list
can be used to limit who has update access to the RCS files. However, this can cause you to unwittingly
give read access to everyone.
If you are using the set-uid bit on the RCS commands, the owner of the RCS file will be rcs_user. If
owner read is enabled on your RCS files, anyone will be able to read your files with the co command
(because the set-uid bit ensures that anyone who executes the co command is treated as if they were
rcs_user).
It is normal for most UNIX file to allow reads by the owner of the file. However, if a RCS library file is
created from such a file, the default will be for the RCS library file to have owner read enabled. If you
do not want to let everyone have read access to your RCS files, you must ensure that owner read permission is turned off on all of your RCS files.
If you are using the /usr/bin/rcs pre-processor script described in the previous chapter, it is quite simple
to add a command to automatically turn off owner read permission to RCS files. The following command should be added immediately after the ci command (line 62).
% chmod o-r,u-r $rcsfile
If owner read is disabled on your RCS files, it is the group access permissions which decide whether or
not you are allowed to access the RCS files. Read access will be limited to members of the same UNIX
group as the person who created the file. Hence, if you want to limit read access to project team
members, you should put all of the project team members into their own group.
79
RCS Handbook
9
RCS Based Systems
"Obviously, a man’s judgment cannot be better than the information upon which he has based
it."
Arthur Hays Salzberger
1948
RCS was developed to store and manage multiple versions of a single file. Some recent additions to the
RCS system, (such as the rcsclean command), allow the RCS system to efficiently manage multiple files,
but only if all of the files are in the one directory. Many Large software software projects involve a complex directory hierarchy of source files: unfortunately RCS is not very good at managing these directory
hierarchies.
In addition, the exclusive locking system employed by RCS works on the assumption that only one
developer should be modifying a source file at the same time. However, in large projects it is often not
practical to abide by this restriction. RCS is not good at co-ordinating the situation where multiple
developers are simultaneously modifying the same source files.
Because of these deficiencies in RCS, many large projects feel that they need tools with greater functionality. Rather than develop these new tools from scratch, many developers have adopted the strategy
of providing this additional functionality in a software package that runs on top of RCS itself. Such tools
provide for effective management of multiple simultaneous updates to a complex directory hierarchy of
source files. However, they call upon RCS itself for the basic version management functions.
80
RCS Based Systems
In this chapter we will review three such tools which are implemented as an additional layer of software
on top of RCS itself. The Software Project Management System (SPMS), the Configuration Management
System (CCSLAND) and the Concurrent Versions System (CVS). We will also introduce you to a system called Distributed RCS (DRCS) which is an enhanced form of RCS for use by distributed development teams.
Software Project Management System (SPMS)
We mentioned earlier that, RCS is capable of managing multiple files in one directory, but it has problems dealing with multiple directories. RCS is not alone in this regard; many UNIX utilities (such as
MAKE) also have difficulty in dealing with files in more than one directory. SPMS can be used with any
existing tool to allow the tool to work with multiple directories as easily as one directory.†
SPMS works by grouping several directories into one single project. For each project, SPMS maintains a
special "project database" in the project’s root directory. The project database contains a list of all the
directories that are part of the project. SPMS has a number of commands which act on the project directories. The simplest of these is the pexec command.
The pexec command will execute any arbitrary command in each of the directories in turn. For example,
the following command will execute the command rcsclean *.c in each of the project directories
(effectively doing a clean up of all the project sources).‡
% pexec ’rcsclean *.c’
Likewise you could check-out release 2 of all the project’s source file by using the command:
% pexec ’co -r2 *’
If you were not using SPMS you would have to cd into each of the project’s directories and issue the co
command from each individual directory. e.g.
% cd
% co
% cd
% cd
% co
% cd
% cd
% co
% cd
etc.
etc.
src
-r2 *
..
docs
-r2 *
..
man
-r2 *
..
333333333333333333
† It is easy to get confused by the name Software Project Management System. In the SPMS terminology, a project is just a
directory hierarchy. SPMS is not capable of performing the tasks that you would normally associate with a project management
system such as, creating schedules or tracking the progress of the development work.
‡ You will notice that the command rcsclean *.c is placed within quotation marks when used with the pexec command. This is to
stop the shell from expanding the *.c term into all of the files in your current working directory whose names end in .c.
81
RCS Handbook
As well as storing a simple list of all the project directories, SPMS also stores a type and priority for each
directory. The directory type can be used to select which directories the command is to use. For example,
it is only necessary to execute the make command in project directories which contain source code.
Hence you could use the following the following command will perform a make command in all of the
project’s directories whose type is src.
% pexec -Tsrc make
The priority is used to specify in which order the directories should be processed. Directories with a
lower priority are guaranteed to be processed first. This can be important if the make process in one
directory requires to use the output of the make process in another directory.
You can create a project database by using the mkproject command. SPMS maintains a project hierarchy,
which is analogous to the UNIX directory hierarchy. The chproject command is provided to activate a
project (i.e., make that project the current working project; chproject performs the SPMS equivalent to
the UNIX cd). The project database created by the mkproject command initially contains no directories.
Directories can be added to the project database with the pmkdir command. For example the following
series of commands creates a new project named util, activates that project and then adds a new directory
to the project with a name man, a type doc and a priority 2.
% mkproject -d util
% chproject util
% pmkdir -Tdoc.2 man
SPMS has its own semantics for representing project hierarchies which mirrors the UNIX semantics for
representing the directory hierarchy. The symbol ^ is used to represent the root of your project hierarchy;
it is analogous to / character which represents the root of the directory hierarchy. For example the project
name newproj represents a project which is a child of the currently active project. However, a project
name ^newproj represents a project which is a child of your root project.
Similarly, the ^ character can be used as a separator in project names. Thus a project name main^part1
refers to a project named part1 which is a sub-project of the project named main which is a sub-project of
your current working project.
By convention, the UNIX file named . refers to your current working directory and the file named .. refers
to the directory one above it in the directory hierarchy. Not to be outdone, SPMS has introduced the convention that the name ... can be used to refer to the currently active project and the name .... refers to the
project immediately above it in the SPMS project hierarchy. (If you are not confused now you never will
be.)
As well as the general purpose pexec command. SPMS also has some special purpose commands for performing commonly used operations. These commands are summarized in the following table.
82
RCS Based Systems
Table 9-1: SPMS specialized commands
Command
2
Function
2222222222222
1
pdiff
1
1
1
pgrep
1
1
1
pfind
1
1
1
2
2222222222222
1
Similar to the UNIX diff
command.
It compares the
contents of the files in two projects
(e.g. the command pdiff ^proj1
^proj2 compares each of the files
in the project named ^proj1 with
the corresponding file in the
project named ^proj2)
Similar to the UNIX grep
command. It searches for a pattern
in files in any of the project’s
directories. (e.g. the command
pgrep install makefile searches
for occurrences of the pattern
install in files named makefile in
any of the current project’s
directories).
Similar to the UNIX find
command. It finds files in a
project. (e.g. the command pfind
prog.c will print out the location
of any file named prog.c in any of
the current project’s directories).
It is clear that the benefit of using the SPMS tool increases directly in line with the number of directories
in the project. If your file are contained in a small number of directories, you will not derive any benefit
from using SPMS. However, if you are working with a project which has a complex directory hierarchy
(such as the sources for UNIX itself), you will probably find SPMS very useful.
I will not discuss SPMS in any greater detail here because there is ample documentation provided with
the system itself. The source code of SPMS is available free of the normal licensing restrictions. SPMS
was included with release 4.2 of BSD UNIX. However, at the time of writing no decision had been made
about how SPMS would be distributed separately from BSD UNIX. If you contact the author Peter Nicklin at the address below, he will tell you how you can get a copy of SPMS.
83
RCS Handbook
Peter Nicklin,
Hewlett-Packard Company,
Circuit Technology Research and Development,
Circuit Technology Group,
5301 Stevens Creek Boulevard,
PO Box 58059,
Santa Clara,
California 95052-8059,
USA.
Phone: (408) 246 4300
Fax: (408) 249 6255
Email: nicklin%[email protected]
CCSLAND
CCSLAND is a system which allows you to perform version management tasks on an entire directory
hierarchy rather than just on a single source file. CCSLAND uses the services of RCS for version control
of the individual files. CCSLAND extends the functionality of RCS by grouping a complex directory
hierarchy into a single source repository which can be managed as a single entity. The letters CCS at the
start of CCSLAND stand for Configuation Control System.
You already learned that SPMS can be used to manage a complex directory hierarchy as a single entity.
However, CCSLAND has many additional functions to aid in the management of a complex set of source
files. The most significant functionality is, to allow each user to establish their own workspace containing a virtual copy of the source repository. This functionality is very useful because it allows you to
experiment by making changes in your own workspace before making these changes publicly available in
the source repository.
I say that CCSLAND creates a virtual copy, because CCSLAND actually establishes symbolic links
from your workspace to the files in the project’s public directories, rather than actually copying the files.
This saves a substantial amount of disk space relative to what would be required to actually copy the
entire directory hierarchy of the project. In addition, symbolic links have the advantage that you will
automatically see the effects of any updates to the project’s public files. Naturally, CCSLAND enforces
the rule that you must create a copy of any file that you intend to modify.
If you wish to work on files in a project which uses CCSLAND, the first step is to create your own
private workspace containing a cloned copy of the relevant portion of the project hierarchy. The
CCSLAND command to do this is ckclone. For example, the following command will create for you a
private workspace containing a cloned copy of all the project files in the project’s utils/uucp directory
(and all sub-directories of it).
% ckclone utils/uucp
84
RCS Based Systems
The cloned directories are placed at a directory path named utils/uucp relative to your current working
directory. For example, if your current working directory is ~/proj/workdir the cloned directories will be
placed at ~/proj/workdir/utils/uucp.
You might well have asked: how did CCSLAND know where the project’s public directories are located
? The answer is simple: it reads this information from a special CCSLAND configuration file named
.CCS. The .CSS file contains information about the location of the public directory as well as selecting
certain options which will control how the CCSLAND commands operate.
The most common type of line in a .CCS file contains something like:
cklockflags=-f
This line tells CCSland that by default you would always like to use the -f option with the cklock command.
You can have several .CSS configuration files. The CCSLAND system will first look for a .CSS file in
the root (/) directory. It will then look for .CSS files in each of the components of your current pathname.
If options specified in later .CSS files conflict with options specified in earlier .CSS files, the .CSS file
which was read last is the one which has effect. The way that .CCS files are processed in sequence
means that the /.CSS file specifies system wide defaults and a .CCS file in a users home directory
specifies the defaults for that user. A user can activate a different set of defaults by changing their working directory to a sub-directory containing new defaults.
Once you have created your private workspace it is necessary to check-out real copies of the files you
intend editing. It is also necessary that you should place a RCS lock on them. You could use the RCS
co -l command to do this, however, this would require you to know the full pathname of the RCS files in
the project library. In order to make this easier for you, CCSLAND provides the cko command which is
a special interface to the RCS co command. The main difference between the co and cko commands is
that, while co command will look for the RCS file in the ./RCS directory, cko will look for the RCS file
in the project directory determined by reading the .CCS file(s). In addition, the cko command will delete
the symbolic link between your directory and the associated file in the project directory which was established by the ckclone command.
When you are finished editing the files, you must check-in the updated versions into the project’s RCS
files. Once again you could use the standard RCS ci command to do this. However, it is more convenient to use the CCSLAND cki command. Like the cko command, the cki command will look for the
RCS file in the relevant project directory. In addition the cki command will re-establish the symbolic link
between your workspace and the public copy once your local copy has been deleted by the ci command.
CCSLAND has a number of other commands which act as a front end to the RCS system. The following
table summarizes the functionality of each of these and shows which RCS command contains approximately the same functionality.
85
RCS Handbook
Table 9-2: CCSLAND interface to RCS
CVS Command
2
RCS Equivalent
222222222222222222
Function
1
cko
cki
ckdiff
1
1
co
ci
rcsdiff
1
cklock
1
1
rcs -l
1
cklog
2
222222222222222222
1
1
rlog
1
Check-in a file
Check-out a file
Displays the differences
between two versions of a
file
Locks a file (cklock can
also lock an entire
directory hierarchy).
Shows the modification
history of a file
CCSLAND recognizes that, as well as having multiple developers working on the same project, it is also
possible that developers can be working on different incarnations of a project at the same time. In order
to support this, CCSLAND has the concepts of checkpoints and configurations. Each source file will
only have one RCS file, however, it may have several checkpoints and each of the checkpoints may have
several configurations.
A checkpoint consists of a particular variant of the software sources. For example you might have a terminal checkpoint (which is the variant of the source files which work on regular terminals) and a X_win
checkpoint (which is the variant of the source files which work on regular terminals). There will be a
branch created in the RCS files for each checkpoint.
A configuration consists of the compiled version of the source files, compiled for a specific
hardware/software environment. For example you might have a VAX configuration (your executables
compiled to run on VAX hardware) and a Sun configuration (your executables compiled to run on Sun
hardware).
You can specify in your .CCS file which configuration and checkpoint you are working on. For example,
if you are working on the VAX configuration of the X_win checkpoint, you are using the X_win branch of
the source files and you are compiling it to work on VAX systems. The CCSLAND system will ensure
that when you make changes to the sources, these changes are not seen by developers who are working
on a different checkpoint. Likewise, if you compile a copy of the executable files, this will only be seen
by the users who are working on the same configuration of the same checkpoint.
In addition to the management of private workspaces, CCSLAND also contains a utility called makenv
which automatically generates a complete Makefile from a simple template file. This utility is very useful
because it frees you from the tedious and error prone task of manually updating the Makefile every time
the dependencies are changed. However I will not describe this utility here because it is functionality is
not directly related to version control.
In summary, CCSLAND is a tool that can be layered on top of RCS to simplify the management of large
complex projects. You will only really need to use a tool such as CCSLAND if your project contains a
complex directory hierarchy and has multiple developers (otherwise RCS itself will be adequate). However, it is conceivable that you might want to get a copy of CCSLAND just to have the makefile
86
RCS Based Systems
generator makenv.
Unlike both SPMS and CVS, CCSLAND is not available for free. The author describes it as
CHEAPWARE because he only charges $2K for a copy of the source code and a single site license. I will
leave it to you to decide whether or not this really constitutes CHEAPWARE. You should contact
Nathaniel Bronson at the address below if you are interested in either placing an order for CCSLAND or
just getting more information about it.
Nathaniel Bronson,
Microvation Consultants,
20 Sperry Road,
Madison,
CT 06443,
USA.
e-mail: [email protected]
fax: (203) 421 5292
Concurrent Versions System (CVS)
The Concurrent Versions System (CVS) † is a software package that is layered on top of RCS. ‡ However, RCS and CVS have totally different philosophies with regard to how to prevent conflicting updates.
While RCS enforces a strict rule that no two users may simultaneously update a source file, CVS takes a
more pragmatic view that it is sometimes necessary to allow two users to simultaneously work on the
same file. CVS attempts to repair conflicts after they happen, by using the rcsmerge command, rather
than prevent them happening in the first place.
The basic principle of CVS is that all of the project’s developers share a single source repository containing the RCS library files; however each developer has their own copy (version) of the working files. The
name Concurrent Versions System arises from the fact that multiple developers can be concurrently modifying their own version (copy) of a source file. I prefer to say that each user has their own copy rather
than use the CVS terminology that each user has their own versions. This is to avoid a potential confusion between RCS versions and CVS versions.
If you wish to modify certain files from the project’s source repository, you must first establish your personal copy of the files with the cvs checkout command. It is normal to checkout a copy of an entire section of the project’s directory hierarchy rather than just the files you wish to modify. This is so that you
will be able to compile and test the modified files.
333333333333333333
‡ In this section I am actually describing CVS II. The original CVS system (CVS I) was developed by Dick Grune as a set of shell
scripts in 1986. All of the concepts implemented by Dick Grune in his original system were incorporated along with a number of
enhancements by Brian Berliner and Jeff Polk when they developed CVS II in 1989. While the original CVS concepts are retained
by CVS II, the actual commands and operations were changed substantially.
‡ CVS normally calls the RCS routines to manipulate the RCS library files on its behalf. However, CVS does sometimes directly
manipulate the RCS library file. For this reason you must be careful that the version of CVS you are using is compatible with the
version of RCS that you are using.
87
RCS Handbook
You must tell CVS where the project’s source repository is located. You can do this either by defining
an environment variable CVSROOT or by using the -d option with the cvs command. The following
examples show the two ways of telling CVS that you would like to establish your personal copy of the
bin/cat section of the project’s source repository located at /src/proj. The copies will be created in a
directory named bin/cat relative to your current working directory, by performing a RCS co command on
the library files located in the directory /src/proj/bin/cat.
% cvs -d /src/proj checkout bin/cat
or
% setenv CVSROOT /src/proj
% cvs checkout bin/cat
In addition to creating the copies of the source files themselves, the checkout command will also create a
special sub-directory bin/cat/CVS.adm to contain CVS relates status information about your copies of the
source files. The information contained in the files in this sub-directory is vital to the correct operation of
subsequent CVS commands.
Once you have established your copies of the source files with the check-out command, you are free to
edit them as you wish. However, the corresponding RCS library files are not locked and anyone else can
be simultaneously modifying their copy of the same file. As a result, it is necessary for you merge your
changes with the changes (if any) that the other developers have been simultaneously making, before you
return the files to the source repository.
The cvs update command is provided to automatically update your copy of the source files in line with
the changes that anyone else has made to the files in the source repository . There are three possibilities
about what the update command will do:
•
If no new versions were checked-in to the RCS library file since you performed the cvs checkout
command: no action is taken.
•
If a new version was checked-in to the RCS library file since you performed the cvs checkout command, but you made no modification of your own: the cvs update command will replace your copy
of the file with the new version from the source repository.
•
If a new version was checked-in to the RCS library file since you performed the cvs checkout command, and you made modifications of your own: the cvs update command will merge your changes
with the changes which were applied to create the new version in the source repository. This is done
with the rcsmerge command.
The success of the CVS policy of allowing simultaneous updates, depends upon the reliability of the
rcsmerge command. In most real life situations, you will rarely need to call the rcsmerge command.
Even when you do call the rcsmerge command, it will produce a sensible result in as many as 90% of all
merges. However, it is inevitable that rcsmerge will sometimes produce unexpected results. When
deciding to use CVS, you must balance the inconvenience caused by RCS locking against the inconvenience of the occasional failure of the rcsmerge based strategy. If you do decide to use CVS, you should
be constantly vigilant for strange output from the rcsmerge command.
Once you have made your changes to the source files and used the cvs update command to incorporate
other people’s changes, the next step is to do a RCS ci to place the newly created versions into the RCS
library files in the source repository. The CVS command to do this for you is commit. For example, the
following command will check-in the modified files from your copy of the bin/cat sub-section of the
project’s hierarchy into the RCS files in the project’s source repository.
88
RCS Based Systems
% cvs commit bin/cat
The cvs commit command, will first check to see that your source files have incorporated everyone else’s
changes by means of the cvs update command, it will then check-in the modified files by calling the
RCS ci command. The cvs commit command, will only check-in the files that you have actually
modified. The RCS library files will only be locked immediately before the new version is checked-in.
The checkout, update and commit commands form the essential core of the CVS system. However, there
are several other utility commands provided with CVS. I do not have room to describe all of the CVS
utility commands here, but I will briefly describe the tag and patch commands because they are particularly useful.
The tag command can be used to assign a symbolic name to the appropriate version of all of the files
used in a release. For example the following command causes the symbolic name alpha_release to be
assigned to the current default version of all files in the src project directory (and all sub-directories of
the src project directory).
% cvs tag alpha_release src
If you later want to track down some bugs that were reported to occur in the alpha_release of your
software, you can use the following command to retrieve the correct version of all of the source files.
% cvs checkout -r alpha_release src
The tag command can also be used with the patch command to build patches for your software. For
example, if you had two releases names alpha_release and beta_release. The following command would
create a file named alpha_to_beta which can be used with Larry Wall’s patch program to update a copy
of the alpha_release version of your software to a copy of the beta_release version.
% cvs patch -r alpha_release -r beta_release src > alpha_to_beta
CVS is a very convenient tool for coordinating the work of a large number of developers on a complex
project. It provides much of the same functionality as CCSLAND. However, its major strength and its
major weakness is that it does not use exclusive locks. It is really a personal choice whether you would
prefer to use CCSLAND with its exclusive locks or use CVS with its copy/modify/merge strategy. I
would choose CCSLAND, but the experts are not unanimous about which is better.
CVS II was written by Brian Berliner and Jeff Polk. It is available through the Free Software Foundation. The distribution tape contains a number of documents which describe CVS functionality in much
more detail than what was given here. It should not be confused with its predecessor CVS I which was
written by Dick Grune and was released through the comp.sources.unix newsgroup.
Distributed RCS: an even broader solution
Have you ever worked on a project where not all of the project’s developers were based at the same site ?
Such a working arrangement is becoming increasingly common because of the fact that modern communication and networking technology makes such an arrangement possible. I refer to such a group as a distributed development team.
89
RCS Handbook
Plain RCS is not capable of managing the sources for a distributed development team because you may
have developers at different sites simultaneously working on the same source files. In order to manage
the sources for a distributed development team you need a distributed RCS.
Distributed RCS (DRCS), is a system which I developed as part of my Ph.D. project. DRCS allows users
at different geographic locations to have the illusion of sharing access to a single set of RCS files. What
in fact happenes is that there is a replica of each RCS/DRCS file at each of the sites. Whenever a user
updates their local replica, the DRCS software transparently propagates this update to all other replicas.
Hence, all of the replicas are kept in synchronization with each other, and the users get the illusion of
accessing one global RCS file.
The DRCS software consists of, the original RCS code plus some additional routines which I wrote to
handle the distributed features of DRCS. The changes which were made to existing RCS routines were
minimal; all that was required was that they recognize when to call the new routines. Because DRCS
uses the original RCS routines, DRCS is guaranteed to be compatible with RCS. All of the standard RCS
commands and options also work with DRCS. Therefore anyone who is currently using RCS can change
over to use DRCS without any training. In addition any program that interfaces with RCS, (e.g. CVS or
CCSLAND), should not require any modification to interface with DRCS.
The DRCS replica files are almost identical in format to RCS files. The only difference is that, DRCS
files contain additional fields to store information about the location and status of the various replicas of
the file. Hence, it is possible for DRCS software to read and understand existing RCS files (they are
regarded as DRCS files with only one replica). Unfortunately it is not always possible for the standard
RCS software to read and understand DRCS files.
By using a distributed file system, (such as NFS), you can easily provide share access to your RCS files
from a number of nodes in a local area network. Therefore, it is likely that DRCS will really only be
useful for wide area networks where it might not be economically feasible to install communication links
capable of supporting a distribute files system. In fact a major strength of DRCS is the fact that it does
not require on-line links between each of the sites sharing files. Updates are propagated in the background using any queue oriented communications utility (such as UUCP or mail).
In any distributed system, there is a potential for problems to arise when two users simultaneously make
conflicting updates at two different sites. In order to avoid this type of problem, some policy must be
adopted for synchronizing updates at different sites. DRCS adopts a simple master/slave type of synchronization policy. The first replica created is called the master replica, all subsequently created replicas
are called slave replicas. All updates are first carried out on the master replica and then propagated to the
slave replicas. If a user issues an update command on a slave replica, the DRCS software transparently
communicates this command to the master site.
While DRCS implements all of the standards RCS commands options, it must also implement a small
number of new command options relating to the distributed nature of the system. The most significant
new command options are for creating and deleting replicas. New replicas can be created with the rcs -p
options. Existing replicas can be deleted with the rcs -P option.
For example, the following command creates a new replica of the local file sample.c at the remote site
london, the replica file will be located at /usr/src/RCS/sample.c,v at the london site.
% rcs -plondon:/usr/src/RCS/sample.c,v
Likewise, the following command will delete the existing replica at the tokyo site.
90
RCS Based Systems
% rcs -Ptokyo
A distributed system such as DRCS can make substantial performance improvements based upon its decision about when/if to propagate updates from the master to the slave sites. The policy that a system uses
when deciding when/if to propagate updates is called its replication policy.
Some versions are never read at some of the slave sites, hence it is wasteful to copy over these versions
to those slave sites. A replication policy, which decides that versions should only be copied over in
response to specific user demand, is called a demand replication policy. A demand replication is very
efficient in saving communication costs because versions are never copied over unnecessarily. However,
if a demand replication policy is being used, user response is frequently delayed by the need to copy over
data from the master site.
The other extreme from demand replication is pre-replication. If a pre-replication policy is being used,
all versions are copied to all sites immediately after being created. This replication policy avoids all
delays in user response because, whichever version is requested by a user is bound to be stored locally.
However, pre-replication is wasteful of communications bandwidth because many versions are copied
over to sites that never need them.
RCS/DRCS file contain two different types of data: version attributes and version contents. Version
attributes (e.g., the author, creation date etc.) do not comprise much data, hence DRCS uses prereplication for the version attributes. However, the version contents can comprise a large volume of data,
hence DRCS only replicates version contents on demand.
The current DRCS replication policy is very efficient in preserving communications bandwidth (which is
expensive in wide area networks). However, the savings in communications bandwidth are often
achieved in return for poor performance. Some users might prefer to use a pre-replication policy, because
they are willing to pay the increased communications cost in return for improved performance. As a
result, a future version of DRCS (which has been developed but not yet released), will allow users to
select whichever replication policy they prefer.
DRCS v1.0 was built upon release 4 of RCS, which was acquired under license from Purdue. If you are
interested in getting a copy of DRCS v1.0, you can get it by contacting me at the address below. You
will be required to sign a form agreeing to comply with the original RCS license terms from Purdue.
Brian O’Donovan,
c/o Digital Equipment Intl. B.V.,
Mervue Industrial Estate,
Galway,
Republic of Ireland.
Phone : intl - 353 - 91 - 51271
Fax : intl - 353 - 91 - 53946
Email : [email protected]
However, a more recent version of the RCS code is now available through the Free Software Foundation
(GNU). The current release of RCS (v5.6), is available from GNU without the need to sign the Purdue
License agreement. As well as being more freely available, this version also has many new features that
were not in the version of RCS which was used to build DRCS v1.0 . It is very likely that, in the near
future a new version of DRCS will be implemented on top of the latest version of RCS. This new version will combine all of the features of DRCS v1.0, RCS v5.6 and some new features which are currently
being designed. This version will be distributed through the normal GNU channels.
91
RCS Handbook
If you are interested in using DRCS, I would strongly recommend that you should wait until the GNU
version becomes available. If you send me a mail message, I will put you on a mail distribution list to
receive up to date information about DRCS availability.
92
A
History of RCS Releases
Walter Tichy started developing RCS when he was based at the Computer Science Department of Purdue
University in the early 1980s. Since then, many different versions of RCS have been released by Purdue
University. Several developers have been involved in the RCS project, and they have all added
significant new functionality to RCS.
RCS versions are identified by a two part Release.Revision type version id number. This is similar in
style to the RCS version id number, which RCS uses to identify the versions of a source file. The Revision number is incremented every time a new version of the RCS software is made available to the general public. However, the Release number is only incremented when significant new functionality is
added. For this reason, two versions of RCS with the same Release number should have broadly similar
functionality, (e.g., version 4.3 has similar functionality to version 4.4, but version 5.5 has significantly
different functionality).
If you received your RCS software on a tape, the RCS version number should be clearly identified on the
tape. If you received your RCS software via electronic file transfer, the file name should identify which
version of RCS you have got (e.g., if the RCS source code is contained in a file named rcs-5.5.tar.Z, you
have got version 5.5 of the RCS software). However, if you are unsure about the origin of the RCS
software that you are currently using, you can always use the ident command, (which was described earlier,) to find out which release you are using. This command will retrieve the identification marker(s)
which will identify the version number(s) of the original source file(s) used. For example the following
command will find out which version of the source file rcs.c was used to compile the /usr/new/rcs file
(which is probably the rcs command you are currently using).
% ident /usr/new/rcs
92
History of RCS Releases
It is important to remember that, the version number of the rcs.c source file will not necessarily
correspond with the version number of RCS. This is because, when a new version of RCS is being
created, some source files are not updated at all while other source files are updated several times.
Hence, the version number of some source files can stay the same, while others may be incremented
several times. Luckily, the RCS developers have adopted the convention that the release number of all
RCS source files should correspond to the release number of the RCS software. This means that you
know, if your RCS software was compiled using version 4.12 of the source file rcs.c, you must have
release 4 of the RCS software. However, you cannot tell whether you have version 4.2 or version 4.3 of
the RCS software.
It is important for you to know about the differences between each of the RCS releases because, even if
you are currently using the most recent release of RCS, you might have to deal with compatibility problems caused by RCS files which were created by an earlier release of the RCS software. The following
table summarizes the significant differences between the various releases of RCS.
Table A-1: Changes in RCS
Release
2
2222222222222222222222
Release 2
1
Year
1982
1
1
1
1
1
1
1
1
1
1
RCS file names are generated by substituting ".v" in the place
of the file suffix. This is significantly different from all other
releases of RCS which append ",v" to the end of the file
name. For example, a file named sample.c would have a
corresponding RCS file named sample.v with release 2, but a
RCS file named sample.c,v with any other release. The original suffix of the file is stored in the RCS file itself, because it
would not be possible to guess it from the RCS file name.
1
Release 3
1983
Later releases of RCS have the necessary code to read and
understand release 2 RCS files. However, a special compile
time option must be selected if this feature is to be enabled.
1
1
1
1
1
This release changed over to the ",v" type ending for RCS
file names. Purdue University also released an enhanced
make command which has built in rules for dealing with RCS
files. (Previous releases of the make command had problems
dealing with the ",v" file name ending.)
1
Release 4
This release of RCS was distributed with release 4.3 of BSD
UNIX.
1989
1
A new feature was added to allow users to set a default
branch.
1
1
1
1
This release was distributed through the Free Software Foundation (GNU).
1
Release 5
Major improvements were made to the RCS code to support
portability.
1990
1
1
Major Changes
The co and ci commands were enhanced to be able to deal
with non-text files.
1
1
93
RCS Handbook
A-1
Release
2
2
Year
2222222222222222222222
2222222222222222222222
1
1
Major Changes
1
1
1
1
1
1
1
1
1
1
1
1
1
1
Date handling was improved so that RCS will be able to handle dates beyond the end of the century. In addition, all
check-in times are stored in GMT (Greenwich Mean Time)
so that problems will not arise when sharing files across time
zones.
1
Options were added to allow users to select how keywords
should be expanded.
This release has features for enhanced compatibility with
other releases of RCS. It will, whenever possible, write a file
which is compatible with release 3/4 of RCS. The co command can be instructed to emulate an older version of RCS
with the -v option flag. In addition, it has anticipated the
need to read RCS files written by a future release of RCS; it
ignores any fields it does not understand.
1
The recent versions of RCS are much more portable than the earlier versions. The original versions of
RCS were only tested on BSD UNIX running on PDPs and Vaxen. However, RCS has now been ported
to many different hardware and software platforms. As a result, RCS should now work satisfactorily on
practically any UNIX type system. If you encounter any compatibility or other problems with the RCS
software running on your system, you should send a mail message to the mailing list [email protected] and someone will help you out.
94
Converting SCCS files into RCS files
B
Converting SCCS files into RCS files
If you are an existing user of SCCS, you may be reluctant to change over to using RCS, because of all of
the existing SCCS files which you must still maintain. Luckily for you, there exists a utility for automatically converting existing SCCS files into RCS files. This utility is called sccstorcs.
For example you could use the following command to convert the SCCS file s.sample.c into a
corresponding RCS file sample.c,v.
% sccstorcs s.sample.c
The sccstorcs command can also be used for converting a large number of SCCS files at once. For
example the following command converts all of the SCCS files in the current directory into RCS files.
% sccstorcs s.*
The really valuable thing about sccstorcs is that, it preserves all of the versions stored in the SCCS file.
Thus the newly created RCS file sample.c,v would have exactly the same versions as s.sample.c. The
versions of sample.c,v would also have the same attributes as the versions of s.sample.c including their
creation date, commentary and author. The sccstorcs command also maintains the descriptive text and
the access control list of the original SCCS file if it had any.
Unfortunately it is not possible to preserve all of the information from the SCCS file when transforming it
to a RCS file. RCS has no concept of removed deltas, MR numbers or cutoff points. As a result if your
SCCS files contained any of these features they will be lost in the RCS file.
95
RCS Handbook
The sccstorcs command works by retrieving each version of the SCCS file into the working directory and
then checking it into the corresponding RCS file with the ci command. sccstorcs uses the -w, r, -m and
-d options to ensure that the versions in the newly created RCS file have the correct author, version
number, commentary and creation date. If you use the -v (verbose), option flag with the sccstorcs command it will issue messages informing you exactly which ci commands it is issuing.
If you are of a nervous disposition, you can use the sccstorcs -t option to trace the ci commands that
would be used by sccstorcs before you run it for real. For example the following command will inform
you which ci commands would be used by sccstorcs to convert the SCCS file s.sample.c into a RCS file.
% sccstorcs -t s.sample.c
However, there is no need for such nervousness, sccstorcs is very conservative and will abort rather than
overwrite an existing RCS file or working file.
The sccstorcs utility was written by Kenneth Greer. It is sometimes (but not always) distributed with
RCS itself.
96
Storing Differences
C
Storing Differences
This appendix will contain a comparison of reverse deltas and interleaved deltas (a point of fascination
for many people).
97
RCS Handbook
D
Date Formats
RCS allows you to specify dates in free format which means that the system is very flexible about
the format in which you specify dates. If a RCS command requires you to specify a date, RCS will parse
the date/time string you provide into an internal form that it will use. The date/time parsing routines used
by RCS are general purpose routines written by Ken Harrenstein, these general purpose routines are probably more powerful than you normally require because they allow you to specify dates exactly to the
second. In general RCS will parse date strings in the way that you would intuitively expect. However we
have included this appendix describing how dates are parsed by RCS so that you can learn exactly what
is acceptable and what is not.
The following list is a sample of the type of date formats that RCS is able to parse.
10-July-1989 13:02:25-GMT
07/10/89 13:02:25-GMT
gmt, 1989 1:02:25pm jul 10
Monday,July 10 13:02:25 GMT 1989
All of the above date strings would be interpreted by RCS to mean 2 minutes and 25 seconds after 1pm
Greenwich Mean Time on Monday the 10th of July 1989. Internally RCS stores dates in a format
YY.MM.DD.hh.mm.ss; where YY is the number of years past 1900, MM is the month number, DD is the
day number within the month, hh is the hour number in 24 hour format and ss is the number of seconds
past the minute. For the example date given above, that would be "89.07.10.13.02.25" . You will notice
that this format follows the most significant bit first convention. This format is used because dates can be
easily compared by comparing the ASCII values of the RCS strings used to represent them.
RCS allows you to specify (in order of significance) the year, month, day, hour, minute and second.
However, very few people specify values for all of these parameters, hence RCS has two simple rules
which it uses for defaulting parameters which are not specified.
98
Date Formats
•
Any parameter which is more significant than those you provide is defaulted to the current value. For
example if you specify "10pm", RCS will interpret this to mean 10pm today; if you specify "10September", RCS will interpret this to mean the 10th of September this year.
•
Any parameter which is less significant than those you provide is defaulted to the minimum value.
For example if you specify "10am", RCS will interpret this to mean 10:00:00; if you specify "1990",
RCS will interpret this to mean 0:00:00 on the 1st of January 1990.
If a date is specified as a series of numbers separated by either the ’/’ or ’-’ characters, the american date
notation is assumed. (i.e. a date in the form of xx/xx/xx is interpreted as month/day/year. and a date in
the form of xx/xx is interpreted as month/day.) For example 10/12/90 is interpreted as the 12th of
October 1990 rather than the 10th of December 1990 as it would be interpreted in Europe.
RCS will recognize the ascii strings representing the english names of the months of the year.† It is also
possible to use any unambiguous abbreviation of the months of two letters or more. For example "ja" is
an acceptable abbreviation for January, but "ju" is not an acceptable abbreviation for July because it can
be confused with June. If you are using ascii month names you can give the day of the month and the
month name in any order because they will not be confused. For example "10-dec-90" and "dec-10-90"
will both be interpreted as the 10th of December 1990.
RCS will recognize the ascii strings for the days of the week (in english) or any abbreviation of these of
two letters or more. Specifying a day of the week on its own is not considered a valid date specification,
however if you include a day of the week along with a date, the day of the week must be correct for the
date given. Hence, specifying a day of the week is only useful as a check on the correctness of the date
specified. For example, the string "Sat 1-Sept-1990" will be understood to mean the first of September
1990 (which happens to be a saturday). However the string "Sat" or the string "Sat 2-Sept-1990" will be
rejected.
If you specify a date/time string consisting of a single number, RCS will assume that this number is a day
of the month. For example the date/time string "10" will be parsed to 0:00:00 on the 10th of this month.
However, if the single number is followed by either "am" or "pm", RCS will treat it as an hour number.
For example the date/time string "10pm" will be parsed as 22:00:00 today.
If you specify a time to RCS, you must use the HH:MM:SS notation. For example the string "7:06:05" is
interpreted as six minutes and 5 seconds past seven o’clock. RCS understands the ascii strings "am",
"pm", "noon" and "midnight" or any two or more letter abbreviation of them. Unless you specify either
am or pm the system assumes you are using a 24 hour clock. You can omit either the minutes or the
seconds and they will be defaulted to zero. If you specify either the number of minutes or the number of
seconds you must give exactly two digits for each (e.g. "7:6:5" is not a valid time string while "7:06:05"
is).
RCS normally interprets times as referring to the time zone that is currently active in your computer (i.e.
local time). However, if you want the time you specify to be interpreted as a time in a different time
zone you can explicitly state the time zone that you are using. RCS will recognize the time zone abbreviations given in the following table.
333333333333333333
† The RCS date parsing routines are not case sensitive (i.e. uppercase and lowercase characters can be interchanged in ascii strings).
99
RCS Handbook
Table D-1: Timezone Abbreviations
Abbreviation
2
Meaning
222222222222222222222
1
Delay Relative to GMT
1
gmt
gst
ast
est
cst
mst
pst
yst
hst
bst
Greenwich Mean Time
1
Greenwich Standard Time
Atlantic Standard Time
Eastern Standard Time
Central Standard Time
Mountain Standard Time
Pacific Standard Time
Yukon Standard Time
Hawaii Standard Time
Bering Standard Time
0
1
1
1
gdt
adt
edt
cdt
mdt
pdt
ydt
hdt
bdt
0
4 hours
5 hours
6 hours
7 hours
8 hours
9 hours
10 hours
11 hours
1
1
1
Greenwich Daylight Saving Time
Atlantic Daylight Saving Time
Eastern Daylight Saving Time
Central Daylight Saving Time
Mountain Daylight Saving Time
Pacific Daylight Saving Time
Yukon Daylight Saving Time
Hawaii Daylight Saving Time
Bering Daylight Saving Time
1
1
1
1
-1 hour
3 hours
4 hours
5 hours
6 hours
7 hours
8 hours
9 hours
10 hours
1
1
1
1
1
daylight
std
standard
2
222222222222222222222
1
Local Daylight Saving Time
Local Standard Time
Local Standard Time
1
1
??
??
??
1
For example if you were working in Boston during the winter, your computer would be working on
Eastern Daylight Time (EDT). You could retrieve the latest version of the file sample.c created since
10am this morning (local time) by issuing the command :
% co "-d10:00" sample.c
However, since "14:00 GMT" is equivalent to "10:00 EDT", you could also have used the command :
% co "-d14:00 GMT" sample.c
You will probably not use the time zone feature very frequently, because it is unlikely that you would
want to specify a time zone unless you were logged in over a wide are network and were confused about
what time zone the computer was operating in.
100