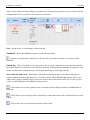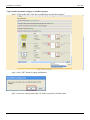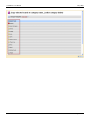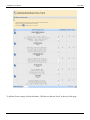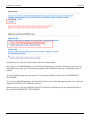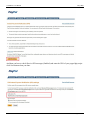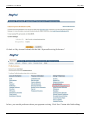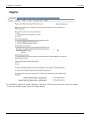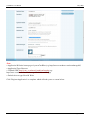
1
eCardMax 10.0 - User Manual July 5, 2010 eCardMax 10.0 User Manual July 5th, 2010 eCardMax.com Software for Website, Inc Email: [email protected] eCardMax 10 - User Manual July 5, 2010 Table of Contents Table of Contents NEW FEATURES ................................................................................................................................ 4 ECARDMAX INSTALLATION ............................................................................................................. 6 SYSTEM REQUIREMENT...................................................................................................................................................... 6 STEP BY STEP INSTALLATION INSTRUCTIONS FOR ECARDMAX ............................................................................................ 6 Copy/Convert MySQL table from eCardMAX 2008 to eCardMAX 10 .................................................................. 10 Post Installation Tasks .............................................................................................................................................. 11 SETUP CRON JOB FOR EMAIL REMINDER SERVICE .............................................................................................................12 SETUP .HTACCESS & .HTPASSWD TO PROTECT YOUR ADMIN DIRECTORY (FOR CPANEL USER ONLY) .......................................14 INVITATION INSTALLATION ........................................................................................................... 16 1. REQUIREMENTS ............................................................................................................................................................16 2. QUICK INSTALL .............................................................................................................................................................16 3. IMPORTANT ..................................................................................................................................................................16 INVITATION CARD SETTINGS .............................................................................................................................................16 ADMIN MENU ITEMS ....................................................................................................................... 17 SITE STATISTICS .............................................................................................................................................................. 18 CHANGE LANGUAGES FOR THE SYSTEM ..............................................................................................................................19 SYSTEM CONFIGURATION ................................................................................................................................................. 20 The System Configuration - General Page .............................................................................................................. 20 Value ......................................................................................................................................................................... 22 Description................................................................................................................................................................ 22 Tell Friend & Birthday Alert .................................................................................................................................... 25 eCard Settings .......................................................................................................................................................... 25 Value ......................................................................................................................................................................... 25 Description................................................................................................................................................................ 25 Styles ......................................................................................................................................................................... 28 Value ......................................................................................................................................................................... 28 Description................................................................................................................................................................ 28 Watermark Settings ................................................................................................................................................. 30 Member Album ......................................................................................................................................................... 32 Value ......................................................................................................................................................................... 32 Description................................................................................................................................................................ 32 Gold Version Settings ............................................................................................................................................... 33 SHOW SEARCH KEYWORD ................................................................................................................................................ 33 VIEW BLACK LIST EMAIL.................................................................................................................................................. 35 BAN USER IP/EMAIL ....................................................................................................................................................... 37 CELL PHONE CARRIER INFO ............................................................................................................................................. 38 SIGN OUT ........................................................................................................................................................................ 40 MEMBERS........................................................................................................................................................................ 42 Set Member Groups .................................................................................................................................................. 42 Show Member Accounts ........................................................................................................................................... 44 Searching for user(s) ................................................................................................................................................ 45 List Inactive Accounts .............................................................................................................................................. 46 View Member Album ................................................................................................................................................ 48 Deleting albums, audio files, poems ......................................................................................................................... 51 ©eCardMax.com Page 2 of 123 eCardMax 10 - User Manual July 5, 2010 EGREETING CARDS ......................................................................................................................... 52 SET PRICE PAY PER CARD ................................................................................................................................................ 52 MANAGE ECARD – ADD/REMOVE CATEGORIES AND ECARDS ............................................................................................ 54 Create New Category ............................................................................................................................................... 55 Add/Remove eCards ................................................................................................................................................ 56 VIEW ECARD LOG ............................................................................................................................................................ 63 VIEW ECARD STATISTICS .................................................................................................................................................. 64 MANAGE INVITATION CARD ............................................................................................................................................. 66 VIEW INVITATION CARD LOG ........................................................................................................................................... 67 ADVANCE OPTIONS ......................................................................................................................... 68 MANAGE JAVA APPLET..................................................................................................................................................... 68 MANAGE ECARD SKIN ...................................................................................................................................................... 70 MANAGE STAMP .............................................................................................................................................................. 73 MANAGE MUSIC .............................................................................................................................................................. 76 MANAGE POEM ................................................................................................................................................................ 79 MANAGE QUOTE .............................................................................................................................................................. 82 MANAGE BANNER AD ...................................................................................................................................................... 85 MANAGE GAME ............................................................................................................................................................... 88 EMAIL TOOL ..................................................................................................................................... 91 RECIPIENT GROUP ............................................................................................................................................................91 CREATE MESSAGE ............................................................................................................................................................ 93 SENDING ......................................................................................................................................................................... 94 CUSTOMIZATION ............................................................................................................................ 97 CHANGE WEBSITE’S CSS, INTERFACE, LOGO ......................................................................................................... 97 CHANGE ADMINISTRATOR SYSTEM’S LOGO ....................................................................................................................... 97 CHANGE WEBSITE’S LOGO................................................................................................................................................ 97 WEBSITE’S BUTTONS ........................................................................................................................................................ 97 INTEGRATION WITH 2CHECKOUT AND PAYPAL ......................................................................... 100 HOW TO INTEGRATE ECARDMAX TO 2CHECKOUT PAYMENT PROCESSOR ........................................................................ 100 HOW TO INTEGRATE ECARDMAX TO PAYPAL PAYMENT PROCESSOR ................................................................................ 104 INTEGRATION WITH FACEBOOK .................................................................................................. 113 INTEGRATION WITH TWITTER ..................................................................................................... 121 ©eCardMax.com Page 3 of 123 eCardMax 10.0 - User Manual July 5, 2010 New features Banner Ads o You can add/edit/delete your banner ads which show on the top of your website at random. Search Engine Friendly URL o A site's URL structure should be as simple as possible. Consider organizing your content so that URLs are constructed logically and in a manner that is most intelligible to humans (when possible, readable words rather than long ID numbers). For example, if you're searching for information about a category, a URL like http://www.ecardmax.com/ecardmax2020/category/2/Birthday will help you decide whether to click that link. o You should also be concerned with user friendliness. URLs with long query strings are not only unfriendly to search engines, but also to users. A user will have a far easier time remembering a URL with real words in it rather than a URL with cryptic numeric data & variable names. Search engine friendly URLs also easily allow you to hide the type of server side programming you're using by removing the extension (such as .php) from your URLs. This means you will be able to change your backend software at a later date without changing your URLs, and it may even provide a security bonus. Send video card o eCardMax enables you place a video of yourself inside a fun card design that you can send to all your friends and family... and now in the case of Twitter, all your followers too. o There's nothing to install or download, simply select one of YouTube/Google Videos and then get video embed code of them. You can make your ecard video to send your friends, family… o Whether it's a special occasion, holiday greeting, or you just want to personally say "Hello"... Everyone loves receiving an eCardMax video card! Upload your address book o The Address Book is a collection of address books or address lists. You can use the Address Book to look up and select names, e-mail addresses, and distribution lists when you address messages. View card sent statistics o This means that Administrator can track statistics associated with website e-cards using the same web analytics technologies used for websites. Monitoring these statistics, the Administrator can see the effectiveness of their e-cards – especially if they are using the ecard for more than just sending warm seasonal wishes to their Clients. o The statistics available with e-cards provide Clients with invaluable feedback regarding the effectiveness of their message and e-card. Print e-cards o You can use this feature to print your lovely cards to your friends, family on paper with a printer. eCardMax 10 - User Manual July 5, 2010 Multiple categories for each e-card o You can set multiple categories for an ecard; this is useful when you want to use an ecard for the categories. Multiple languages o Administrating system can use multiple languages. You can add your file language to translate website default language (English) to your language. Invitation resend o You can reuse your invitation to other clients that you want. ©eCardMax.com Page 5 of 123 eCardMax 10.0 - User Manual July 5, 2010 eCardMax Installation System Requirement eCardMax will require the following for a successful installation: PHP version 5.x or higher MySQL 4.x or higher (5.x is recommended) It can be run on any platform: UNIX, Linux, FreeBSD, and Windows. PHP SAFE_MODE = OFF, this option is required to allow admin and or user to upload files via admin. GD Library Extension for PHP Step by Step Installation Instructions for eCardMAX If you have basic knowledge of using FTP and are sure your hosting service or server will run eCardMAX 10.0 you can use these steps to quickly get started. Otherwise click here to learn the basic of WS-FTP program 1. Decompress the eCardMAX 10.0 archive to a local directory on your system. 2. Upload all the files contained in this archive (retaining the directory structure) to a web accessible directory on your server or hosting account. 3. Change the permissions on config.php + config2.php to be writeable by all (777 within your FTP Client). For more information about how to chmod 777 files and folders please come here 4. Using your web browser visit the location you placed eCardMAX 10.0 with the addition of install.php, e.g. http://www.mydomain.com/greetings/install.php 5. Follow the instruction on the welcome screen to chmod 777 other folders + files. 6. Click the link Go to next step to fill out all the requested information and hit Submit. 7. If you enter correct your MySQL account, eCardMAX 10.0 should now be available. When you run script http://www.mydomain.com/install.php you will see this: eCardMax 10 - User Manual July 5, 2010 Follow the instruction on the screen to chmod 777 the list of files and folders, then click the link Click here to go next step - you will see the form below ©eCardMax.com Page 7 of 123 eCardMax 10 - User Manual July 5, 2010 If eCardMAX does not auto detect your eCard Root Path, then visit the link "click here to find out eCard Root Path" - a long page of configuration info will appear. To find out eCard Root Path, scroll down to find this: ©eCardMax.com Page 8 of 123 eCardMax 10 - User Manual July 5, 2010 Fill out your MySQL account then click Submit button. If your hosting company supports site Admin CPanel, click here to see instruction how to create new MySQL account ©eCardMax.com Page 9 of 123 eCardMax 10 - User Manual July 5, 2010 Copy/Convert MySQL table from eCardMAX 2008 to eCardMAX 10 If you want to upgrade from eCardMAX 2008 to eCardMAX 10, after you install eCardMAX 10 you will need to run script upgrade.php, this program will copy/convert eCardMAX 2008's tables to version 10. This script comes with eCardMAX 10 zip file. ©eCardMax.com Page 10 of 123 eCardMax 10 - User Manual July 5, 2010 Post Installation Tasks Once you have successfully installed eCardMAX 2008 you MUST ensure you remove the entire sql/ directories and /install.php + install_welcome.html + install_step1.html + convert.php + convert_form.html. Leaving these in place is a very serious potential security issue which may lead to deletion or alteration of files, etc. Please note that until these directories are remove eCardMAX 2008 will not operate and a warning message will be displayed. For maximum security we recommend you should use .htaccess to protect directory greetings/admin ©eCardMax.com Page 11 of 123 eCardMax 10 - User Manual July 5, 2010 Setup Cron Job for Email Reminder Service What is cron job (cron tab)? Cron job is a UNIX command for scheduling jobs to be executed sometime in the future. A cron is normally used to schedule a job that is executed periodically - for example, to send out an email notice every month, year. It is also a daemon process, meaning that it runs continuously, waiting for specific events to occur. If you are running Windows server, you will need to set a "Scheduled Task" to run file greetings/cronjob.php every day at 12:01am (or 2:00am - whenever you like) Please note: You should rename file cronjob.php to xxzzyyuu.php (the filename likes a password) so that user can't run this file on their browser. If your server supports cPanel, then the instruction how to set up cron job command below is for you • Login to your cPanel by using this URL: http://mydomain.com/cpanel • Click on icon Cron jobs, see image below • Next screen - click Advanced (Unix Style) button • Next screen - Input data below then click button Commit Changes Minute : 2 Hour: 0 Day: * Month: * Weekday: * ©eCardMax.com Page 12 of 123 eCardMax 10 - User Manual July 5, 2010 Command: cd '/home/path/to/greeting_folder/greetings/' ; php -q cronjob.php -p processqueue > /dev/null ; You can copy the command code below Top of Form cd '/home/path/to/greeting_folder/greetings/' ; php -q cronjob.php -p processqueue > /dev/null ; Bottom of Form Replace /home/path/to/greeting_folder/greetings/ to your eCard Root path. If you don't know what it is, you can look inside the script config.php, code $ecard_root ="/xxx/xxx/xx/greetings"; Minute: 2 - Hour: 0 - Day: * - Month: * - Weekday: * means: your server will auto run the script http://YOU.COM/greetings/cronjob.php every day at 12:02 am (after midnight 2 minutes) If you want to run the script cronjob.php every day at 3:30am then input like this: Minute: 30 - Hour: 3 - Day: * - Month: * - Weekday: * ©eCardMax.com Page 13 of 123 eCardMax 10 - User Manual July 5, 2010 Setup .htaccess & .htpasswd to protect your admin directory (for cPanel user only) If your hosting company supports site Admin cPanel, then follow step by step below to setup password to protect your admin directory • Login to your cPanel by using this URL: http://mydomain.com/cpanel • Click on icon Password Protect Directory, see image below • Next screen you will see the list directory, browse to folder greetings/admin (Open a folder by clicking on its icon. Select the folder you wish to protect by clicking on its name.) Check the check box then click Save button - next screen click Go back link to go back to previous page to set up user name and password - see image below ©eCardMax.com Page 14 of 123 eCardMax 10 - User Manual July 5, 2010 Enter your user name and password then click Add/modify authorized user button • Done ©eCardMax.com Page 15 of 123 eCardMax 10 - User Manual July 5, 2010 Invitation Installation This document will walk you through the basics on installing the add-on Invitation for eCardMAX 10 software. Version: 10.0 1. Requirements 1) You are running eCardMAX 10 2. Quick Install 1. Decompress the Invitation 10.0 archive to a local directory on your system. 2. Upload all the files contained in this archive (retaining the directory structure) to eCardMAX 10 directory on your server or hosting account. 3. Using your web browser visit the location you placed eCardMAX 10 with the addition of install.php, e.g. http://www.mydomain.com/greetings/install.php 3. Important Once you have successfully installed eCardMAX 10.0 you MUST ensure you remove /install.php. Leaving it in place is a very serious potential security issue which may lead to deletion or alteration of files, etc. Invitation Card Settings Administration => System Configuration =>Invitation Card Settings 1. Maximum Font file member can upload 2. Invitation Card expired after ©eCardMax.com Page 16 of 123 eCardMax 10.0 - User Manual July 5, 2010 Admin Menu Items When you are logged in as an administrator, the system provides five modes of operation: Administration, Members, eGreeting Cards, Advance Options, Email Tool. eCardMax 10 - User Manual July 5, 2010 Site Statistics This is where you view the most important parts of the site. Admin Index ©eCardMax.com Page 18 of 123 eCardMax 10 - User Manual July 5, 2010 Change languages for the system This is where you will configure the language that you want to use. Default language is English. You can add your new language file onto “greetings /admin/languages/”. ©eCardMax.com Page 19 of 123 eCardMax 10 - User Manual July 5, 2010 System Configuration The System Configuration - General Page This is where you will configure the most important parts of your general public. For this reason, it is important that you spend time with your setup at the early stages of gallery development to get those settings exactly the way you want them, before actually change settings to the general public. Administration => System Configuration ©eCardMax.com Page 20 of 123 eCardMax 10 - User Manual ©eCardMax.com July 5, 2010 Page 21 of 123 eCardMax 10.0 - User Manual July 5, 2010 Administration => System Configuration => General Value Description Webmaster email All emails sent by the gallery will be sent using this email address. This must be a valid email address. Your site title Enter the name of your gallery in this text field. The name you enter will appear as the title that is displayed in the web browser's title bar and is also displayed in many of the different theme templates. Currency symbol Please use UTF-8 encoding Search Engine Friendly URL .htaccess is supported. You can use SEO URL now used as a shorthand for a currency's name Twitter consumer key Twitter consumer secret Facebook API key Facebook secret Facebook card category Set meta tag Keyword for home page You should also be concerned with user friendliness. URLs with long query strings are not only unfriendly to search engines, but also to users. A user will have a far easier time remembering a URL with real words in it rather than a URL with cryptic numeric data & variable names. Search engine friendly URLs also easily allow you to hide the type of server side programming you're using by removing the tell extension (such as .php) from your URLs. This means you will be able to change your backend software at a later date without changing your URLs, and it may even provide a security bonus. Head over to Twitter and set up an application. The last two fields are important. The callback URL will need to redirect to your web server at a location where you will be uploading some files. Assuming you’re going to upload into your web root, the callback URL would be something like http://yourdomain.com/confirm.php. You’ll also need to make sure you select “Read & Write” access. The API key is the unique code that was assigned to your application when you created it The meta keywords tag allows you to provide additional text for crawler-based search engines to index along with your body copy. Set meta tag Description for home page The meta description tag allows you to influence the description of your page in the crawlers that support the tag. Turn Horizontal banner Yes: horizontal banner will be shown at front end. No: horizontal banner will be hidden at front end. Turn Vertical banner Yes: vertical banner will be shown at front end. No: vertical banner will be hidden at front end. eCardMax 10 - User Manual July 5, 2010 Disable right click (use JavaScript) to prevent user copy your images? Yes: Disable right click on front end to prevent users from stealing website’s images. No: accessing the right click menu, users can be used to copy and save the images. Enable Black list feature. User can subscribe their email to this list and never receive any email from your site again. To secure your site against spammers enable the feature. Yes: enable the feature. No: disable the feature. Today, most people on the internet have dynamic IP addresses that are assigned to them when connecting to the internet by their Internet Service Provider. These IP addresses change each time the user connects to the internet, but during an internet session these IP addresses are "visible" at the web-sites that thee user is surfing. Within the range of all IP addresses (0.0.0.0 to 255.255.255.255), certain ranges are reserved for special purposes (mostly for the use on private networks). The banning feature will not accept IP addresses banning of addresses that belong to these private ranges (e.g. 192.168.0.1). This is necessary to prevent unexperienced, as well as experienced, eCardMax admin from banning IP addresses within their own LAN. If you're actually running eCardMax on your LAN/WAN that uses private IP addresses (e.g. on a company's intranet) and you want the authority to be able to ban users, switch this option to "Yes". If you're running eCardMax on a web server located in the internet (e.g. you're web hosted), you should keep this option set to "No". If you don't use banning at all, you can safely ignore this setting completely. Use easy edit template feature. Yes: Select yes, program will print on the screen this image . Click on this image will tell you which html file name you need to edit (helpful while you design your site), select No to turn this feature off or when you go live your site No: Select no, program won’t print that image. Date format This is the format of the outputted date string. See the formatting options below: DD MM YYYY MM DD YYYY YYYY DD MM YYYY MM DD Set server Time Zone Specify the time zone difference between your local time and ©eCardMax.com Page 23 of 123 eCardMax 10 - User Manual July 5, 2010 the time zone your web server is in. This value will be used to adjust time stamps in eCards and other places. Number of thumbnail images per row This sets the maximum images of the thumbnails that are to be displayed for each row. Default value is 3 this means that each row will show 3 thumbnails. Number of row per page This sets the maximum row of the thumbnails that are to be displayed for each page. Default value is 3. HotEditor Key code Enter keycode to remove link back to HotEditor site eCardMAX Key code Enter keycode to remove link back to eCardMAX site. ePhotoHunt Game Key code Enter keycode to remove link back to ePhotoHunt site. eCardMAX Java Applet Key code Enter keycode to remove link back to eCardMAX site. DSEffect Key code (visit their website to buy Key code) Anfy Key code (visit their website to buy Key code) Ö Change currency symbol: you can change currency symbol of ecards. ©eCardMax.com Page 24 of 123 eCardMax 10 - User Manual July 5, 2010 Tell Friend & Birthday Alert Allows you to get emails alerting you of upcoming birthdays Administration => System Configuration => Tell Friend & Birthday Alert 3. Total Number of Recipents To restrict total number of recipients per message. 4. Set default number of Recipent Name and Recipent Email fields will display 5. eCard Settings Administration => System Configuration =>eCard Settings Value Description Set eCard (photo) max width Sets the maximum allowable size in pixels for the specified dimension of your thumbnails. When changing this setting, only files that are added after the change will be affected. Therefore, it is advisable that this setting not be changed after photos have already been added to the gallery. Thumbnail image width Sets the width on which the maximum pixel size limitation should apply to. When changing this setting, only files that are added after the change will be affected. Therefore, it is advisable that this setting not be changed after photos have already been added to the gallery. Thumbnail image height Sets the height on which the maximum pixel size limitation should apply to. When changing this setting, only files that are added after the change will be affected. Therefore, it is advisable that this setting not be changed after photos have already been added to the gallery. Show Random Quote at homepage Toggles the display of the random quote at homepage. Set to 'NO', the random quote is hidden. Set to 'YES', the random quote is shown. ©eCardMax.com Page 25 of 123 eCardMax 10 - User Manual July 5, 2010 Show Feature cards at homepage Toggles the display of the Feature cards at homepage. Set to 'NO', the Feature cards is hidden. Set to 'YES', the Feature cards is shown. Show Most Popular cards table at homepage Toggles the display of the Most Popular cards table at homepage. Set to 'NO', the Most Popular cards table is hidden. Set to 'YES', the Most Popular cards table is shown. Show Top Rated cards table at homepage Toggles the display of the Top Rated cards table at homepage. Set to 'NO', the Top Rated cards table is hidden. Set to 'YES', the Top Rated cards table is shown. Show Newest cards table at homepage Toggles the display of the Newest cards table at homepage. Set to 'NO', the Newest cards table is hidden. Set to 'YES', the Newest cards table is shown. Show Random cards table at homepage Toggles the display of the Random cards table at homepage. Set to 'NO', the Random cards table is hidden. Set to 'YES', the Random cards table is shown. Card expired after We keep e-cards for 60 days. After this time, the card is deleted and is no longer available on-line. You can change this time. Set all cards for members only when you upload new cards Yes: set this feature. No: not set this feature. ©eCardMax.com Page 26 of 123 eCardMax 10 - User Manual ©eCardMax.com July 5, 2010 Page 27 of 123 eCardMax 10 - User Manual July 5, 2010 Styles Administration => System Configuration =>Styles Value Description Set default Template Use this dropdown list to select the default theme for your gallery (Themes are stored in sub-directories of the themes directory ). Set default Language This sets the default language for your gallery. All language files are stored in the languages directory on your server. Yes: show No: not show Show Holiday/Events box at homepage Show toolbar button Yes: show No: not show Show button Select Java Yes: show No: not show Show button Select Skin Background Yes: show No: not show Show button Select Stamp Yes: show No: not show Show button Select Poem Yes: show No: not show Show button Select Music Yes: show No: not show Show button Card info Yes: show No: not show Show button Card printer Yes: show No: not show Show rate star icon Toggles the display of the rating results below each thumbnail. Yes: show No: not show Show thumbnail toolbar Show preview card icon ©eCardMax.com Yes: show No: not show Page 28 of 123 eCardMax 10 - User Manual July 5, 2010 Show goto category icon Yes: show No: not show Show free card icon Yes: show No: not show Show new icon Yes: show No: not show Show card type Yes: show No: not show Show thumbnail card caption (title)? Toggles the display of the name of card below each thumbnail ©eCardMax.com Page 29 of 123 eCardMax 10 - User Manual July 5, 2010 Watermark Settings Administration => System Configuration =>Watermark Settings Webmaster position Determines where the watermark is supposed to be displayed on each picture. Possible options are: • Bottom right • Bottom left • Up right • Up left ©eCardMax.com Page 30 of 123 eCardMax 10 - User Manual July 5, 2010 • Center Webmaster Opacity Determines the transparency level for the watermark. By setting transparency you can make your image blend nicely into the pictures you upload that get watermarked. ©eCardMax.com Page 31 of 123 eCardMax 10 - User Manual July 5, 2010 Member Album Administration => System Configuration =>Member Album Value Description Allow members to upload their own images Yes: allow No: disabled Allow members to upload their own music files Yes: allow No: disabled Allow members to upload their own stamp files Yes: allow No: disabled Allow members to upload their own poems Yes: allow No: disabled ©eCardMax.com Page 32 of 123 eCardMax 10.0 - User Manual July 5, 2010 Gold Version Settings To turn Payment feature ON you need to login to eCardMAX admin area, click the link System Configuration - scroll down to bottom page - go to section Gold Version Settings, then answer Yes for question "Enable 2CheckOut test mode?" Administration => System Configuration =>Gold Version Settings Show Search Keyword As your gallery grows, there will be an increasing number of files in it and subsequently a lot of keywords to manage. To help you manage your keywords, there is a keyword manager available - just click on the corresponding link in the admin menu. Administration => Show Search Keyword Note: that the keyword manager will only show up in the admin menu, you cannot edit or delete any keyword. eCardMax 10 - User Manual ©eCardMax.com July 5, 2010 Page 34 of 123 eCardMax 10 - User Manual July 5, 2010 View Black List Email To help you manage your list email that you don’t want to send mail when someone use it on your website, there is a black list email manager available - just click on the corresponding link in the admin menu. Administration => View Black List Email All collectors in this black list are added by administrator of the site. In here, administrator can delete or set status for any users. • All emails found in this list which were marked Active will be blocked. System will not send any email message or ecard to them. • Emails which were marked Pending will not be blocked. • If users don't want to receive any email from your site, they can add their email to this list (via user interface). Admin can add/remove their email here. ©eCardMax.com Page 35 of 123 eCardMax 10 - User Manual July 5, 2010 Administrator can add new email to black list by clicking “Click here to add new email to black list” link at the top of the page and filling in the form that will come up. ©eCardMax.com Page 36 of 123 eCardMax 10 - User Manual July 5, 2010 Ban User IP/Email Ban users based on hostname or IP address. Make sure not to ban yourself! Use this feature with extreme caution, as most users today do not have static IP addresses, this feature should only be employed if you really know what you're doing. Click on the corresponding link in the admin menu. Administration => View Black List Email You can add new IP/Email to ban list by clicking “Click here to add new IP/Email to ban list” and fill in the form that will come up. ©eCardMax.com Page 37 of 123 eCardMax 10 - User Manual July 5, 2010 Cell Phone Carrier Info Information about cell phones for the US Detailed info on new phones Administration => Cell Phone Carrier Info ©eCardMax.com Page 38 of 123 eCardMax 10 - User Manual July 5, 2010 You can add new carrier to list by clicking “Click here to add new carrier” and fill in the form that will come up. ©eCardMax.com Page 39 of 123 eCardMax 10 - User Manual July 5, 2010 Sign Out To ensure system security, make sure to close all Web browser windows when you sign out. Administration => Sign Out ©eCardMax.com Page 40 of 123 eCardMax 10 - User Manual ©eCardMax.com July 5, 2010 Page 41 of 123 eCardMax 10 - User Manual July 5, 2010 Members Set Member Groups This is where you define what members of a group can and can't do. When creating a new user or editing an existing user, you will notice a row named "Member group" - it determines what group(s) the user belongs to. Members => Set member Groups • • • The first field determines the name user group. The other fields determine properties of a new group. You can set permissions for it by clicking checkboxes. ©eCardMax.com Page 42 of 123 eCardMax 10 - User Manual ©eCardMax.com July 5, 2010 Page 43 of 123 eCardMax 10 - User Manual July 5, 2010 Show Member Accounts The user control panel can be found when clicking “Show Member Accounts” from the members menu. It is the place where you create and manage your users. Members => Show Member Accounts ©eCardMax.com Page 44 of 123 eCardMax 10 - User Manual July 5, 2010 Searching for user(s) In here, you can search users by many conditions. It is flexible. Page controls • • • You can change number of users show per page by enter a number in display row per page box. If you have more than 15 users, a page tab will appear at the bottom right of the screen, allowing you to go to subsequent pages of your member list Clicking on a user's name will display the profile page of the individual user (read only) ©eCardMax.com Page 45 of 123 eCardMax 10 - User Manual • • • July 5, 2010 The "Member Group" column displays the primary member group the user is in, you can change member group for any user. The “Account Status” column displays status of user. You can change a number of settings for several users at once by clicking the checkbox in back of the user row (use the checkbox at the very top or bottom of the page to select/unselect all users on the page) and then choosing an action to perform from the dropdown box “Suspend/Delete Selected” at the bottom left of the page. The actions you can choose from are “Suspend” or “Delete”. List Inactive Accounts An account with an "Inactive" status simply means that the person registered, but did not login in 6 month Members => List Inactive Accounts ©eCardMax.com Page 46 of 123 eCardMax 10 - User Manual July 5, 2010 You can search member account by clicking “Search member account” and fill in the form that will come up. ©eCardMax.com Page 47 of 123 eCardMax 10 - User Manual July 5, 2010 View Member Album eCardMax stores files inside of albums, so you'll need at least one album for your pictures/files to be placed in. Albums can be stored in categories (but they don't HAVE to be in a category, they can just as well go into the eCardMax "root"). When you click on "albums" in the members menu, you will see the Album Manager. Members => View Member Album There is a menu displayed next to album: • Show member photos: allows you to view or delete photos. • Show member audio files: allows you to view or delete audio files. • Show member poems: allows you to view or delete poems. ©eCardMax.com Page 48 of 123 eCardMax 10 - User Manual ©eCardMax.com July 5, 2010 Page 49 of 123 eCardMax 10 - User Manual ©eCardMax.com July 5, 2010 Page 50 of 123 eCardMax 10 - User Manual July 5, 2010 Deleting albums, audio files, poems • • • Click on the album you want to delete Click the "Delete" button Confirm the alert box with "OK" (Are you sure you want to delete your selected?) ©eCardMax.com Page 51 of 123 eCardMax 10 - User Manual July 5, 2010 eGreeting Cards Set Price Pay Per Card When you set up a Pay Per Card service, you can set price for feature cards. eGreeting Cards => Set Price Pay Per Card ©eCardMax.com Page 52 of 123 eCardMax 10 - User Manual July 5, 2010 You can add new price to list by clicking “Click here to add new price” and fill in the form that will come up. ©eCardMax.com Page 53 of 123 eCardMax 10 - User Manual July 5, 2010 Manage eCard – Add/Remove Categories and eCards In here, you can manage all categories and ecards. It configures all categories, ecards shown on the frontend. Select eGreeting Cards menu then Manage eCard like image shown below. eGreeting Cards => Manage eCard • Check/Uncheck checkbox to activate/deactivate category. • to set birthday category (eCardMAX will randomly pick an ecard in this Click birthday cake category and auto send it to registered users on their birthday. Icon means this category has subcategories. Icon means this category has no subcategories. or to open that category. Click icon • • • ©eCardMax.com Page 54 of 123 eCardMax 10 - User Manual • July 5, 2010 Click category name (underline words) to rename category. Create New Category To add new category, simply click on the button "Create new Main category" at the top of the page and fill in the form that will come up. ©eCardMax.com Page 55 of 123 eCardMax 10 - User Manual July 5, 2010 Add/Remove eCards To add or remove ecards, click on eGreeting Cards menu, Manage eCard, you will see screen like below. Click on icon to see all subcategories then click icon ito manage ecards for that particular subcategory. In case you do not have subcategories then you may add ecards at the main category. The screen below will appear and list all subcategories. ©eCardMax.com Page 56 of 123 eCardMax 10 - User Manual For example if you want to add ecard to the “General” subcategory then click on the folder which will show this screen below. July 5, 2010 icon Click “Click here to add/remove ecard in this category[]” to display the screen below. ©eCardMax.com Page 57 of 123 eCardMax 10 - User Manual July 5, 2010 The screen above displays detail of each ecard. In here, you may add your own ecard or remove existing ecard. To add new ecard, click and you will see the screen below: You may add ecard(s) via admin by click the Browse button and choose thumbnail image and full-size image or you may leave the thumbnail image blank and eCardMax will auto generate the thumbnail image for you base on the thumbnail image size setting under System Configuration. If you have many ecards to upload at once, you may do so via FTP by following the instruction step 1-3 at the top of the above screen. ©eCardMax.com Page 58 of 123 eCardMax 10 - User Manual July 5, 2010 After ecard is added you may configure all options for it. By moving your mouse over to each icon in the column header below, you will see description for each item. Sort – Set the order of ecard display on the front-end Thumbnail – Shows the thumbnail image of ecard and date added - Feature ecard, when this is checked, it will show this ecard in the featured ecard section on the front-end Embed Msg – This is for Flash ecard, if you want to allow user to embed the message when personalize the card to display in your flash ecard, check this checkbox. Additional programming will require for each flash ecard that allows embed message, will require knowledge of flash programming. Select who can send ecard – This displays different membership groups, if you allow each group to send ecard then check the appropriate box. For Guest and Free Basic Membership groups, if you want either of this group to send this card you will also need to turn on the feature Allow users in this group to send ecard in the Members, Set Member Groups section. - Click on this icon to enter caption for the ecard which will be displayed under ecard thumbnail on front-end. - Click on this icon to enter keywords separated by comma, these keywords will be utilized by search engines. - Click on this icon to enter detail description for this ecard. ©eCardMax.com Page 59 of 123 eCardMax 10 - User Manual July 5, 2010 - Click this icon to set the default poem for this ecard. - Click this icon to set default java effect for this ecard. This option will only work for image type ecard only; it will not work for flash ecard. For animated gif ecard, if you use this option then you will lose the gif animation. - Click this icon to set default skin for this ecard. - Click this icon to set default stamp for this ecard. - Click this icon to set default music for this ecard. - Click this icon to preview this ecard. - Click this icon to delete this ecard. - Click this icon to apply action to multiple ecards. The action list is available at the bottom of add/remove ecard screen as shown below. ©eCardMax.com Page 60 of 123 eCardMax 10 - User Manual July 5, 2010 Copy ecard(s) from one category to another category - Step 1: Click on this link “Click here to add/remove ecard in this category” - Step 2: click “OK” button of popup confirmation. - Step 3: select one category name that you want to copy these selected ecards ©eCardMax.com Page 61 of 123 eCardMax 10 - User Manual ©eCardMax.com July 5, 2010 Page 62 of 123 eCardMax 10 - User Manual July 5, 2010 View eCard Log All ecards that are being sent are as well written into the database, where the eCardMax admin can view them. eGreeting Cards => View eCard Log Card Sent Log displays all ecards sent by users. You may use Search ecard sent option to search for all ecard sent by users. ©eCardMax.com Page 63 of 123 eCardMax 10 - User Manual July 5, 2010 View eCard Statistics This page shows information about usage of the ecard including thumbnail, category and number of time sent. eGreeting Cards => View eCard Log ©eCardMax.com Page 64 of 123 eCardMax 10 - User Manual ©eCardMax.com July 5, 2010 Page 65 of 123 eCardMax 10 - User Manual July 5, 2010 Manage Invitation Card This section manage all aspect of the invitation, including add/edit/delete a category and add/edit/delete an invitation card for each category. eGreeting Cards => Manage Invitation Card ©eCardMax.com Page 66 of 123 eCardMax 10 - User Manual July 5, 2010 View Invitation Card Log This page provides information about the usage of the invitation, including: thumbnail, number of guests, time created of each invitation card. eGreeting Cards => View Invitation Card Log ©eCardMax.com sender info, Page 67 of 123 eCardMax 10 - User Manual July 5, 2010 Advance Options Manage Java Applet It is a collection of many cool Java applets (fire, snow, rain, lake, fog, water, lightning, bumpmap, lens, rotate, swirl, ripple, light, clouds, roll, tunnel, scroll, spheremap, cubemap, fireworks, cylinder, pageflip, stars, voxel, crossfade, dissolve, wormhole, explode, wobble, scale, pixelate, dust, blur, shear, filter, plasma, wave, fade, 3D, explosion, blobs, warp and more). Each applet is interactive and includes a HTML code generator that allows to change parameters without any knowledge of Java and HTML programming. Advance Options => Manage Java Applet Check the checkbox to enable Java applet. Uncheck the checkbox will disable that applet. Click Java applet name to rename it If you want to change java applet icon, edit image /resource/applet/[Applet_Folder_Name]/thumb_icon.gif ©eCardMax.com Page 68 of 123 eCardMax 10 - User Manual July 5, 2010 To add new Java applet, simply click on the button “Click here to add new Java applet” at the top of the page. ©eCardMax.com Page 69 of 123 eCardMax 10 - User Manual July 5, 2010 Manage eCard Skin Allows administrator to control and manage website’s eCard skin collection. Advance Options => Manage eCard Skin • • • • Check the checkbox to enable Skin. Uncheck the checkbox will disable that Skin. Click Skin name to rename it If you want to change Skin thumbnail icon, edit image /resource/skin/[Skin_Folder_Name]/skin.gif Delete Skin is not recommended, use Enable/Disable instead. • Click icon ©eCardMax.com to preview skin Page 70 of 123 eCardMax 10 - User Manual July 5, 2010 To add new Skin, simply click on the button “Click here to add new Skin” at the top of this page. ©eCardMax.com Page 71 of 123 eCardMax 10 - User Manual ©eCardMax.com July 5, 2010 Page 72 of 123 eCardMax 10 - User Manual July 5, 2010 Manage Stamp Allows administrator to control and manage website’s stamp collection. Advance Options => Manage Stamp • • • • Check the checkbox to enable Stamp. Uncheck the checkbox will disable that Stamp. Click Stamp name to rename it If you want to change Stamp thumbnail icon, edit image /resource/stamp/[File_Name].gif Delete Stamp is not recommended, use Enable/Disable instead. ©eCardMax.com Page 73 of 123 eCardMax 10 - User Manual July 5, 2010 To add new Stamp, simply click on the button “Click here to add new Stamp” at the top of this page. ©eCardMax.com Page 74 of 123 eCardMax 10 - User Manual ©eCardMax.com July 5, 2010 Page 75 of 123 eCardMax 10 - User Manual July 5, 2010 Manage Music Manage the entire music library for adding eCards. Advance Options => Manage Music Check the checkbox to enable Music. Uncheck the checkbox will disable that Music. Click Music name to rename it Please use Enable/Disable instead of delete that Music file. Click Music icon ©eCardMax.com to play audio file Page 76 of 123 eCardMax 10 - User Manual July 5, 2010 To add new Music, simply click on the button “Click here to add new Music” at the top of this page. ©eCardMax.com Page 77 of 123 eCardMax 10 - User Manual ©eCardMax.com July 5, 2010 Page 78 of 123 eCardMax 10 - User Manual July 5, 2010 Manage Poem Allows administrator to control and manage website’s stamp collection. Advance Options => Manage Poem ©eCardMax.com Page 79 of 123 eCardMax 10 - User Manual July 5, 2010 To add new Poem, simply click on the button “Click here to add new Poem” at the top of this page. ©eCardMax.com Page 80 of 123 eCardMax 10 - User Manual ©eCardMax.com July 5, 2010 Page 81 of 123 eCardMax 10 - User Manual July 5, 2010 Manage Quote This is Collection of inspirational quotes. Advance Options => Manage Quote • • Check the checkbox to enable Quote. Uncheck the checkbox will disable that Quote. Click Quote Body or Quote Author to edit them ©eCardMax.com Page 82 of 123 eCardMax 10 - User Manual ©eCardMax.com July 5, 2010 Page 83 of 123 eCardMax 10 - User Manual July 5, 2010 To add new Quote, simply click on the button “Click here to add new Quote” at the top of the page and fill in the form that will come up. ©eCardMax.com Page 84 of 123 eCardMax 10 - User Manual July 5, 2010 Manage Banner Ad Administrator will be able to manage banner ads effectively, saving them time. Advance Options => Manage Banner Ad • Check the checkbox to turn ON/OFF Banner • Click Icon ©eCardMax.com to preview banner Page 85 of 123 eCardMax 10 - User Manual July 5, 2010 To add new Banner, simply click on the button “Click here to add new Banner” at the top of the page and fill in the form that will come up. ©eCardMax.com Page 86 of 123 eCardMax 10 - User Manual ©eCardMax.com July 5, 2010 Page 87 of 123 eCardMax 10 - User Manual July 5, 2010 Manage Game The management module allows you to supervise and check the games. Advance Options => Manage Game ©eCardMax.com Page 88 of 123 eCardMax 10 - User Manual July 5, 2010 To create a new game, simply click on the button "Click here to add new Game" at the top of the page and fill in the form that will come up. ©eCardMax.com Page 89 of 123 eCardMax 10 - User Manual ©eCardMax.com July 5, 2010 Page 90 of 123 eCardMax 10 - User Manual July 5, 2010 Email Tool Recipient Group Email Tool => Recipient Group Click on group title, from name, from email to edit them. But you can't edit or delete group Newsletters & Special Offers List To add new Group, simply click on the button “Click here to add new Group” at the top of the page. ©eCardMax.com Page 91 of 123 eCardMax 10 - User Manual ©eCardMax.com July 5, 2010 Page 92 of 123 eCardMax 10 - User Manual July 5, 2010 Create Message Email Tool => Create Message eCardMAX will send email newsletter with both HTML & Text format. If user's mail reader can't read HTML email, then they will see Text version. When you create new newsletter message, please include both HTML & Text format. When you add new message, you can use Frontpage, Dreamweaver to create HTML email, then copy HTML source code and paste to textarea box. To add new newsletter, simply click on the button "Click here to create new newsletter" at the top of the page and fill in the form that will come up. ©eCardMax.com Page 93 of 123 eCardMax 10 - User Manual July 5, 2010 Sending Email Tool => Sending ©eCardMax.com Page 94 of 123 eCardMax 10 - User Manual ©eCardMax.com July 5, 2010 Page 95 of 123 eCardMax 10 - User Manual ©eCardMax.com July 5, 2010 Page 96 of 123 eCardMax 10.0 - User Manual July 5, 2010 Customization CHANGE WEBSITE’S CSS, INTERFACE, LOGO Change Administrator System’s Logo You have to go to /home/public_html/ecardmax2020/admin/html/07_login_top.gif then change the company logo and it will update to show on the website. Change Website’s Logo You have to go to /home/public_html/ecardmax2020/ templates/Default2008/company_logo.gif then change the company logo and it will update to show on the website. Website’s Buttons You can change properties of styles of buttons to your own styles from /home/public_html/ecardmax2020/templates/Default2008/style.css • button_link_style1 eCardMax 10 - User Manual • button_link_style2 • button • button2 • button_link ©eCardMax.com July 5, 2010 Page 98 of 123 eCardMax 10 - User Manual • page_active • page_other • Other buttons ©eCardMax.com July 5, 2010 Page 99 of 123 eCardMax 10.0 - User Manual July 5, 2010 Integration with 2Checkout and Paypal How to integrate eCardMAX to 2CheckOut payment processor If you don't have 2CheckOut.com account, then click here to get one (No Waiting Weeks, Start Selling in just a Few Minutes - that's true). First, you need to enable payment feature: Log in to eCardMAX Admin area, click the link System Configuration - go to section Gold version only, then answer Yes for question "Would you like to enable 2CheckOut and PayPal payment?" You have to rename the script 2checkout.php. For example: rename it to Abnd2543Ps.php (it likes the password - hard to guess and you don't have to remember it). Please do not modify the php code inside unless you know what you are doing. Next, click the link below to login to your 2Checkout.com member area https://www.2checkout.com/2co/login At the main page select the link Set Up Product Next page - click the link on your right hand side New Recurring Product. eCardMax 10 - User Manual July 5, 2010 Then fill out the form - See image below Enter the URL of script Abnd2543Ps.php in field Approved URL. Click Create Recurring Product button when you done, then go back to Set Up Products page you will see this ©eCardMax.com Page 101 of 123 eCardMax 10 - User Manual July 5, 2010 Now, please remember your Product ID is 1 Next, go back to Account Homepage, inside Helpful Link table - click the link Look & Feel Settings Next page, select Yes for Direct Return, then enter the URL of script Abnd2543Ps.php ©eCardMax.com Page 102 of 123 eCardMax 10 - User Manual July 5, 2010 Scroll down to set your Secret Word, then click Save Changes button Now, login to eCardMAX admin area, scroll down to bottom page, at section Gold version only enter your 2CheckOut secret word, your 2CheckOut sid number (seller ID number) and your 2CheckOut product_id number. To test 2CheckOut payment script, answer Yes for question Would you like to turn ON 2CHECKOUT TEST MODE? Go to your eCardMAX homepage, click button Join Now to test 2CheckOut payment script. Use credit card number 123456789112345 to make the payment. When you go live your site you MUST turn OFF 2CheckOut Test Mode (say No for question Would you like to turn ON 2CHECKOUT TEST MODE?) ©eCardMax.com Page 103 of 123 eCardMax 10 - User Manual July 5, 2010 How to integrate eCardMAX to PayPal payment processor If you don't have PayPal.com account then click here to get one. Please note: You have to become a PayPal verified member in order to sell product on your site. First, you need to enable payment feature: Log in to eCardMAX Admin area, click the link System Configuration - go to section Gold version only, then answer Yes for question "Would you like to enable 2CheckOut and PayPal payment?" Then, enter Your primary PayPal email address Please note: If you have 2 or more Paypal email accounts then you have to use your Primary PayPal email account. To know which email account is your primary account then do this: • • Login to your PayPal member area Click “My Account” tab then click the link Instant Payment Notification (Selling Preferences) Next page you have to click “Edit IPN Settings” button ©eCardMax.com Page 104 of 123 eCardMax 10 - User Manual July 5, 2010 And then you have to check Receive IPN messages (Enabled) and enter the URL of your paypal.php script click Save button when you done. ©eCardMax.com Page 105 of 123 eCardMax 10 - User Manual July 5, 2010 Go back to “My Account” tab and click the link “Payment Receiving Preferences” In here, you can edit preferences about your payment receiving. Click “Save” button after finish editing. ©eCardMax.com Page 106 of 123 eCardMax 10 - User Manual July 5, 2010 In eCardMAX Admin area, inside “Members” tab, click “Click here to create new Group” to expand “Create new member group” form. (See image below) ©eCardMax.com Page 107 of 123 eCardMax 10 - User Manual ©eCardMax.com July 5, 2010 Page 108 of 123 eCardMax 10 - User Manual ©eCardMax.com July 5, 2010 Page 109 of 123 eCardMax 10 - User Manual July 5, 2010 Click “Click here” to pop-up a Create PayPal Recurring Payments Link, choose how many years you want then click “Create PayPal Link” The Admin area will create PayPal link for you (See image below). Click Submit button to save. Inside “eGreeting Cards” tab, click “Set Price Pay Per Card”, then click “Click here to add new price” to expand the form (See image below) ©eCardMax.com Page 110 of 123 eCardMax 10 - User Manual July 5, 2010 Click “Click here” to create PayPal link for you (See image below). Click Submit button to save. ©eCardMax.com Page 111 of 123 eCardMax 10 - User Manual July 5, 2010 Remember to click Submit button to save these settings to eCardMAX database. Now, go to your eCardMAX homepage, click Join now button to test PayPal payment script ©eCardMax.com Page 112 of 123 eCardMax 10.0 - User Manual Integration with Facebook This guide shows you a quick way to create Facebook application for you ecard website. 1) Open a web browser and go to: http://developers.facebook.com, you will see a screen below. Click Add Facebook to my site. 2) Read and search for "register your website" which will take you to this page: http://developers.facebook.com/setup/ July 5, 2010 eCardMax 10 - User Manual July 5, 2010 Enter Site name (Name of your Facebook application) Enter Site URL (your eCardMax URL) Click "Create app" to continue and you will see the screen below: 3) Type in the text for security check then click Submit which will take you to the screen below: ©eCardMax.com Page 114 of 123 eCardMax 10 - User Manual July 5, 2010 4) Review your settings at screen below: ©eCardMax.com Page 115 of 123 eCardMax 10 - User Manual July 5, 2010 5) Copy "API key" & "App Secret" to eCardMax Admin, System Configuration page. 6) Click "Edit Setting" to check and configure again in which you will be able to make changes to the following screens: ©eCardMax.com Page 116 of 123 eCardMax 10 - User Manual ©eCardMax.com July 5, 2010 Page 117 of 123 eCardMax 10 - User Manual ©eCardMax.com July 5, 2010 Page 118 of 123 eCardMax 10 - User Manual ©eCardMax.com July 5, 2010 Page 119 of 123 eCardMax 10 - User Manual ©eCardMax.com July 5, 2010 Page 120 of 123 eCardMax 10 - User Manual July 5, 2010 Integration with Twitter This guide shows you a quick way to create Facebook application for you ecard website. 1) Open a web browser and go to: https://dev.twitter.com, you will see a screen below. 2) Click "Register an app" and the screen below will show: ©eCardMax.com Page 121 of 123 eCardMax 10 - User Manual July 5, 2010 Note: + Application Website: home page of your eCardMax (e.g: http://www.ecardmax.com/ecardmaxgold/) + Application Type: Browser + Callback URL: http://your_ecardmax/oAuth/confirm.php (e.g: http://www.ecardmax.com/ecardmaxgold/oAuth/confirm.php) + Default Access type: Read & Write Click "Register Application" to complete which will take you to a screen below: ©eCardMax.com Page 122 of 123 eCardMax 10 - User Manual July 5, 2010 3. Review all your information and copy Consumer key and Consumer secret into your eCardMax Admin, System Configuration. Please note that the recipients must follow your twitter to be able to receive card. Please check this URL format to see if recipients have followed you: http://twitter.com/recipients_twitter/following ©eCardMax.com Page 123 of 123