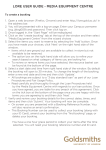
1
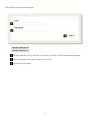
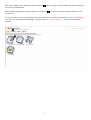
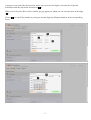
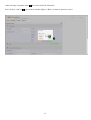
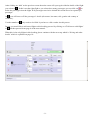
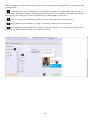
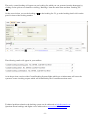
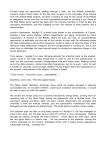
How to create a booking on the Coastal
Booking System.
Click on ‘Agent/Staff Login’ to go to the login page for agents. Notice that now all agents’ functionality
is found after login. This is different from the Coastal Booking System version 1.
-1-
The following login screen will appear:
Fill your username. This is the same one as used in version 1 of the Coastal Booking System.
Fill your password. Also same is you are used to fill.
Click on the login button.
-2-
The screen which opens, shows the menu at the top(
based on your permission.
). By hovering over the buttons sub menus will open
Below the top menu there are some quick access buttons ( ) to the most common subjects based on your
permission.
So if you want to create a new booking you can click on the first quick access button ‘create a new booking’
or hover over the top menu ‘Bookings’ and then click on ‘>> new booking <<’ in the sub menu which
appears.
-3-
After choosing ‘create a new booking’ the screen below appears.
At
fill either ‘LPO number’ or ‘Customer reference’ (= something for you to remember the booking
easily).
Then click at ‘Click here to add flights’ (
).
-4-
A pop up screen opens like the one below where you can select the flight by selecting the origin and
destination from the drop down selection list ( ).
When you click on the ‘Date’ field a calendar pop up appears on which you can select the date of the flight
( ).
Next at
boxes.
you can fill the number of passengers for that flight by filling the numbers in the corresponding
-5-
After selecting the flight and filling the date and number of passengers the screen looks like below. When
finished filling the details click on ‘Find schedule’ ( ).
-6-
After clicking on ‘Find schedule’ a pop up will appear with a drop down selection list box ( ) where you
can select the departure time by clicking on the box behind the text ‘Schedule’.
Shown below: The available departure time(s) will appear (
departure time.
-7-
) from which you can select the desired
After selecting a departure time ( ) the screen will look like below.
Now click on ‘Add’ at
if you want to add the flight or ‘Back’ to return to previous screen.
-8-
After clicking on ‘Add’ on the previous screen the main screen will open again with the details of the flight
you selected ( ). If this is not the right flight or you selected too many passengers you can click on
to
delete the passenger from the flight. If all passengers need to be deleted this action has to be repeated per
passenger.
At . you will have to fill the passengers’ details (first name, last name, title, gender and country of
residence).
Voucher number at
only needs to be filled if you have a valid voucher for this person.
In case you would like to add more flights to this booking proceed by clicking on ‘Click here to add flights’
at
and then proceed from page 4 of the user manual.
When this is the only flight for this booking please continue with the next step which is ‘Pricing and other
details’ which is explained on page 10.
-9-
When all flights have been selected the next step will be to fill the other booking details at ‘Pricing and other
booking details’.
At
‘Connecting from’ and ‘Connecting to’ can be filled for instance so we know if passengers come or
connect to an international flight or can be filled with the hotel name or camp they come form to the airstrip.
Notes and contact details you can fill any information you think might be useful to us.
At
you have to select your payment type and you can see the break down of the total price.
At
you can donate to SOS Children’s Villages Tanzania by clicking on the selection box.
At
you complete the created booking by clicking on ‘Create booking’ or you can go back to the previous
page with the ‘Back’ button or ‘Start over’ creating a booking.
- 10 -
The newly created booking will appear on you booking list which you can generate from the homepage by
clicking on the quick access button or selecting ‘Bookings’ from the main menu and then ‘Booking list’
( ).
On the screen below you see the booking at
pencil in front of the booking number.
on the booking list. To go to the booking details click on the
The following emails will appear in your mailbox.
As in the previous version of the Coastal Booking System flights which are on inducement will cause the
system to create a booking request which will be handled by the Coastal Reservations staff.
Technical problems related to the booking system can be addressed to [email protected].
Questions about bookings and flights can be addressed to [email protected].
- 11 -