1
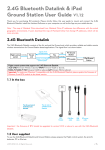
SKYBOX
USER MANUAL
Quick Start Guide
1. Simple Installa on
SkyBox is exactly wired parallel to the indoor monitors no ma er
what system it is connected to.
a.For 4 wires system:
Indoor Monitor
Indoor Monitor
PSU 15V 1.5A
PSU 15V 1.5A
PSU
PSU 15V 1.5A
E- lock
E-lock
Outdoor
Station 1
SkyBox
Outdoor
Station 2
PSU
b. For 2 wires system:
Indoor Monitor
Indoor Monitor
PSU 18V 1.5A
SkyBox
PSU 18V 1.5A
PSU 18V 1.5A
PSU
PSU
E-Magnetic
lock
Outdoor
Station 1
E-lock
E-Magnetic
lock
Outdoor
Station 1
E-lock
-1-
c.For 4+2/cat5 building system:
SkyBox
Indoor Monitor
Indoor Monitor
To Indoor Monitor & SkyBox
SkyBox
To Indoor Monitor & SkyBox
Short Circuit
Protector
Unlocking
Connector
Outdoor Station
Electronic
Control Lock
DC 15V
SP26 18V,3A
2. CONTROLCAM SETUP
To control SkyBox, Android users can download ControlCam App
from Google Play; while iOS users can download it from iOS App
Store; Complete the installa on in your smart phone(or tablet).
Tip: Both download and usage for users are free!
*Please keep your app be the latest version. App herein subject to
change without prior no ce.
Se ngs Instruc on
There are two ways to connect the SkyBox to router,
1. Wi-Fi connec on
*NOTE: SkyBox only works with router of 2.4Ghz Wi-Fi network.
2. RJ45 Ethernet cable connec on
1. How to set factory default
Press and hold the “RESET” bu on on the back side of SkyBox
for 3 seconds , SkyBox will restore to factory default status.
NOTE: before configura on, you have to set the SkyBoxto
factory default status first.
-2-
2.1 WI-FI SETUP
a. For iPhone or iPad:
Step 1: Connect the WiFi from the SkyBox in the WiFi list
on iPhone or iPad; choose the WiFi name like “LIDxxxxxxxx”;
Step 2: Open the ControlCam App;
Step 3: Click “Add a Device”;
Step 4: Click “Add a New Device”;
Step 5: Click “Start configuring”
Step 6: Click the SkyBox to be configured,and click “Start
configuring”;
Step 7: Choose the WiFi from your own router, input its WiFi
password, click se ng;
Step 8: Input the default User Name (admin) and Password(1234),
click “OK” to confirm; then wait the SkyBox to restart for
around 1 minute.
Step 9: Back to the device list and click “
” on the right top
corner of the device; Click “ON” in Outdoor call-in op on
and return to the main interface;
b. For Android
Step 1: Open the ControlCam App on the smart phone(or tablet);
Step 2: Click “Enter Now”;
Step 3: Click “Add a Device”;
Step 4: Click “Add a New Device”;
Step 5: It will show “Searching ” and then find the device(if
it ’s not found please try it again);
Note: Verify that your smart phone(or tablet) can receive the
strong W i F i signal.
Step 6: Click the device to be configured, and click “Start configuring”;
-3-
Step 7: Set WiFi informa on;
Input the WiFi password and click OK.
Step 8: It will show “Configura on is successful. Equipment is
restar ng, it takes about 1 minutes”, then click “OK” to
confirm;
Step 9: Input the device name, default User Name (admin) and
Password(1234), click “OK” to confirm; Then wait SkyBox
to restart for around 1 minute.
Step 10: Click “OK” , SkyBox is added successfully;
2.3. How to add setup device on smart phones(or tablets)
Step 1: Open the ControlCam App on the smart phone (or tablet);
Step 2: Click “Enter Now”;
Step 3: Click “Add a Network Device”;
There are 3 methods to add the network device:
a . LAN Search
Click “LAN Search”, then click the found device, input the
default User Name and Password. Click “OK”, SkyBox is
added successfully.
b . QR Code Scan
Click “QR Code Scan”, input the default User Name and
Password. Click “OK”, the SkyBox is added successfully.
c . Manually Input
Click “Manually Input”, input the SkyBox’ GID, the
default User Name and Password. Click “OK”, the device is
added successfully.
Step 4: Click “
” on the right top corner;
Step 5: Click “ON” on Outdoor call-in op on. (OFF mean no
disturb status, no ring alert will be received).
NOTE:
1). Each SkyBox has a unique GID ;
2). The default user name is “admin”;
3). The default password is “1234”.
-4-
3. RJ45 ETHERNET CABLE SETUP
Step 1: Plug in cable with RJ45 connector (in the gi box) to the
back side of the SkyBox. Connect your ethernet cable to
RJ45 connector. Make sure your ethernet cable works
well with your network router or hub.
Step 2: Then follow the above steps 2.3 “How to add more users on
smart phones(or tablets)” to add the SkyBox to
the device list in ControlCam app.
NOTE: No need to configure if with Ethernet connec on.
4. TIME, DATE AND MOTION DETECTION SETTINGS
NOTE: Most se ngs requires professional network knowledge.
Please do not make any change of the default se ngs if
you are not very sure about.
Step 1: Find the IP address of SkyBox in LAN network from your
router (TIP: IP address of the device can be found in
DHCP client list in your router se ngs).
Step 2: Enter IP address of the device on Internet Explorer, you
will enter the se ng page of the IP camera. The default
user name is admin, password is same password in the
applica on(default one is 1234). (Refer to below picture)
Step 3: Date and me se ng: click Config→System→System Time
→Synchronize with Local Computer to set the local me.
(Refer to below picture)
-5-
Step 4: Mo on detec on se ng: click Config→Alarm Se ngs
→Mo on Detec on to set mo on detec on. Choose
Enable and then set the me period to ac vate. Also
enable IO Output→Save. (Refer to below picture)
User Guide
1. Talking
When the visitor calls, the device will receive the ring alert. The
user can click “Accept” or “decline” on the pop-up call alert.
Press and hold“ ” to start talking and release to listen.
2. Unlocking
Input unlock password while talking or monitoring. (Same
as the user name password ).
-6-
3. Monitoring
Click the image on the main interface to monitor the outside
environment. If you want to talk with the visitor and hear the sound,
click the icon
and
on the screen to start talking.
4. Image Capture
Click the icon
to capture an image.
5. Video Recording
Click the icon
to end it.
to start video recording and then click the icon
6. How to detele the device
Step 1:Click “
”on the right top corner of the device;
Step 2:Click “OFF” in Outdoor call-in op on;
Step 3:Click “Edit”;
Step 4:Click “Delete”;
Step 5:Click “OK” to delete the device.
7. Change unlock passwords
Step 1: Click “
” on the right top corner;
click “OFF” for outdoor Call-in op on;
Step2:click “unlock password se ng ”;
Step3:Input old password and new
password;
Step4: click “Se ng” to finish se ng. (Shown
as the photo at the right side).
-7-