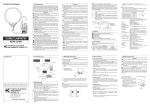
Download MALLOCA
Transcript
MALLOCA
HJ-168
BUILT-IN HOOD
For original parts & reliable service
USER MANUAL
BACHHOP KITCHENWARE COMPANY LIMTED
279 Nguyen Van Troi Street, Phu Nhuan Dist
Ho Chi Minh City, Viet Nam
Tel: +84 8 8625726
Fax: +84 8 8625727
INSTALLATION INSTRUCTIONS
To avoid the risk of accidents or damage to the
appliance, it is essential to read these
instruction before it is installed or used for the
first time.
Troubleshooting
Table of Contents
•
From the Manufacturer
3
•
Specifications
4
•
SAFETY : Read this first !
5, 6
•
Description of Parts
7
•
Overview
8
•
Pre-installation
9
•
Installation
10,11
•
Operation
12
•
Cleaning & Maintenance
13,14
•
Troubleshooting
15
•
Schematic Diagram
15
2
Problem
Possible Cause
Schematic
Diagram
Symptoms
Possible
Hood
does not
No electrical
supplyCause
Solution
Action
Check that plug
is
function
connected
and
main
Ensure the power
plug
switch
is
turned on properly.
Motor does not
No electrical supply
is connected
Poor working
airflow
Grease filters clogged with CleanReset
the grease
filters
and
circuit
breaker.
grease build-up
refit when
drythe filters and
Aluminum
Clean
Poor airflow
filters clogged
replace when dry
Charcoal filters clogged
Replace charcoal filters
Charcoal filters
Replace charcoal
with grease build-up
with new sets
clogged
filters with new sets
Poor extraction
Inadequate ventilation
Ensure Contact
that the kitchen
is
Motor running but
Butterfly valve
technician
rate
sufficiently ventilated to
no airflow
jammed
allow entry of fresh air
High temperature
The kitchen is not
Motor cuts after a Charcoal
safety
device
activated.
sufficiently
ventilated.
filters are not
Install charcoal filters for
installed
few minutes
The hood is installed toosettingThe
in recirculation
hood must mode
be at
near
the
cooking
stove.
least
65cm
from
stove.
Please contact technician
Motor is running Poor exhaust
Oil no
dripping
Aluminum filter
Wash the aluminum
but
airflowonto
stove
saturated.
filters.
Whirring
object
may be
in
Please Contact
contact technician
Whirringsound
sound Foreign
Foreign
object
in contact
technician.
contact with fan blade
with fan blade.
Lights
are do
notnot LampsLamps
are burnt
the damaged
lamps
Lamps
areout
burnt out. ReplaceChange
the lamps.
working
light up
Lamps are loose.
Tighten the lamps.
Lamps are loose
Tighten the lamps
15
CHARCOAL FILTER (Recirculation version) : The charcoal filter should be
From the Manufacturer
replaced when it is noticeably dirty or discolored (usually after 6 to 12 months,
depending on hood usage). It is not washable and cannot be regenerated,
•
processes that minimize waste and respect the environment.
must be replaced with appropriate types. To ensure this appliance functions
effectively, regular maintenance is a must. Charcoal filter restrict airflow and
This appliance and it’s packaging are produced by
•
may cause the motor to overheat.
Please help us to continue the protection of the environment
by disposing the packaging in a correct manner.
Safety !
•
Cling film and plastic wrappings must be kept out of reach of
babies and young children to avoid hazard.
•
Electrical and electronic appliances often contain materials
which if disposed incorrectly could be potentially hazardous
to human health and environment. Please do not dispose
your old appliance with your household waste.
•
Please dispose old/damaged appliance at your local
community waste collection / recycling centre and ensure
that it presents no danger to children while being stored for
disposal.
•
It should be unplugged or disconnected from the mains
electricity supply by a qualified person. If connected by a
plug, the plug must be rendered useless and the cable cut
off directly behind the appliance to prevent misuse.
14
3
Cleaning & Maintenance
Specifications
SURFACES : Wash with warm soapy water and a soft sponge. Never use
Input
:
220-240V 50Hz
Absorption (Motor)
:
260W
appliance as this will cause irreparable damage. Dry the kitchen hood using
LED Light
:
2x3W
a lint-free cloth that does not produce fluff.
Total power
:
266W
ALUMINUM FILTERS : Before
abrasive detergent, scouring pads, steel wool or solvents on any part of this
External Dimensions
clean the aluminum filter, please open the glass
panel, then you can see the aluminum filter. Wash the filter in the
dishwasher, it is advisable to stack them vertically to avoid food residue
sticking to them. Or soak it in a degreasing agent until grease dissolve and
rinsing them under the tap, then rinse off.
LIGHT REPLACEMENT : Before attempting to replace the light, make sure
that the light switch is turned off. Remove the damaged light and replace with
a LED light maximum 3W. Please follow below drawing to change the LED
light.
Dimension
L
H1
H2
H3
770mm
287mm
80mm
284mm
Model
HJ-168
13
4
Operation
SAFETY : Read this First !
The hood with 4 speed remote control and 2 lamp.
•
This appliance must installed by a qualified technician or installer.
•
Do not connect the appliance if there are obvious signs of transportation
damage.
•
Light
Read this user manual thoroughly before attempting to use this
appliance for the first time.
Speed
Periodic
ventilation
Delay
Timer
Slider button
On/Off
•
Installation and repair should be attempted only by qualified technical
personnel.
Note: Before select any operation, please touch On/Off button to switch on
•
It is dangerous to modify any part of this appliance.
the hood, all the button will be display white color. After finish any function,
•
The manufacturer declines all responsibility in case of failure to adopt
proper safety measures.
hold the On/Off button 3 second to switch off the hoods.
LIGHT: Touch to select on, the indicator change to red color and blink, slide
•
Ensure that the appliance is installed in a good permanent ventilation.
•
The distance between the bench top to the lower part of the hood must
the slider button to select the brightness. Touch again to off the light.
SPEED: Touch to select on, the indicator change to red color and blink, slide
be 750mm (see fig.1)
•
The exhaust from the canopy range hood
the slider button to select the low, medium, high and turbo speed. Touch
must not be discharged into any heating flue
again to stop the function.
which may carry
PERIODIC VENTILATION: Touch to select periodic ventilation function, the
combustion products from other sources.
750
indicator change to red color and start to blink, slide the slider button to
select this function at 5,10,15,20 minutes. Touch again to stop the function.
DELAY TIMER: Touch to select on, the button change to red color and blink,
slide the slider button to select this function at 5,10,15,20 minutes
Note: The remote control is available for an area in 5m.
Fig. 1
12
5
•
Multiple plugs and extension cables must not be used. Overload is
dangerous and may cause a fire.
•
Ensure that the power cord is free from any heat source or sharp
Installation - continued
4. Tighten the screw on the 2 side of installation bracket.
objects.
•
The appliance should be switched off and the electrical supply
disconnected before any cleaning or maintenance work.
Specific Warning:
1) If the supply cord is damaged, it must be replaced by the manufacturer or
its service agent.
2) There is a fire risk if cleaning is not carried out in according with the
instructions.
3) This item should be fitted by a competent person only.
5. Use Ф150mm pipe ( fixable if possible) and fix it with a pipe– tighten
ring ( not provided) at the reduction fitting.
6. Connect the pipe to the outdoor duct.
Note: If for recirculation mode, you have to install the charcoal filter
behind the aluminum filter.
6
11
Installation
Description of Parts
Before drilling any holes check that the area behind the surface to be drilled
HJ-168
is clear of any electrical cables or pipes etc. Fixing to a solid joist or truss is
recommended.
Note:
· Whenever possible protect the hob top with cardboard or similar material
to prevent breakage during installation.
A.
B.
C.
D.
E.
F.
Motor Housing
Hood Body
Installation bracket
Aluminum filter
LED light
Glass panel
1. For ducting mode version, please cut a minimum Ф 165mm duct hole on
the top of cabinet.
2. Cut a installation hole on the bottom of the cabinet as per below cut off
size.
3. Lift the hoods into the wall cabinet, do ensure that the appliance is
mounted on a solid surface which could withstand the appliance’s weight. the
two pieces of installation bracket enclosed will clip with the board.
For 80cm of hood
10
Fig. 2
7
Overview
Pre-Installation
Important:
•
Please read these instruction carefully prior to installation or operation for
the first time.
•
Always switch power off prior to installing, servicing or cleaning the
appliance.
•
Never use the appliance without aluminum filter.
•
Please read the notes on general cleaning, especially the filters.
•
Areas where the range hood is installed that also have gas, oil or coal
fired heaters, must be well ventilated.
•
The appliance is supplied with an approved power cable which must not
be changed. If the supply cord of this equipment is damaged, it must only
be replaced by the manufacturer or its service agent or similarly
competent person in order to avoid hazard.
8
9


