Transcript
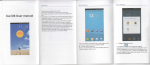
Ualng Card Roador
Digital Photo Album
1. Insert tho momolY card Into tho .101 of tho Album, mako suro that tho mollli
contac16 01 SOIMMClMSlxD momolY card Is lacing Ihollont of IhoAJbum.
2. To removo, simply pullout tho ca~rd.
_
~
User's Manual
»Please read this manual before operatlng«
Read First - - - - - - - - ,
Pie. . rNd .all the 8IlfeI)' and operalinu inetructione before opereting the Album.
And pl. . . follow ell warnlngl pieced on the Album or In the uaer'l ITIIlnuIll'or
!\Itl,lre ...,...."r;e.
Sy.tem Requirement.
Syotem Roqulromon18: Window. 2000IXPNlBIa
Peckege Include.
.E~~
1. Dililal PhatoAJbum J11
a.ACad.,rtor 1t1
2. USB Xl
Importent Sefety Inetructlone
AWARNINB:
L
~
No high humidity
Deacrlptlon
No duat
~
Na hiQh temperature
0
MlnluaB-lll-UaI(m.I.,
M~ru.. _.,....G.~I.
'_lce Hnln
2.!XIT lutton: let ott otcurrwrtrl'lOllk.nd rYll:ln
tDmMlu.
I ....mEeHOWfENTER Button:
ENTER: pMry phlXo orCl:lnlml_-*n
ILIDElHOW: ItIrt orlklp lhe .Idellhow
unlutoHltdhl.ld.lhowdlnllon
... PREYIOUlltI: tl4::lIIutbIn:
.-
1)ShaI1. ...... hbul-.. • ..wwlM ..rnlalUl
.2llfHIljHHIth.butlcnlolNlllcfl HtwMn6:1
1I1l'ld 4:Sd'-P'-rfCIMIlII.
......
l)SMrtproN IhII ~ to~llWtIIt na:t
~ preutM btltkln tel IWtlch between
OrIaNI and Auto ZOOm dlplr,t1lll'1ML
......... OIII'OfI'lnd....I'l.LI!D
..:e,.. ..
~ &9~Ttllham.~OUll.1
r----....J
• Alweys turn otrthe Album before connecting or dilconnecting the
ACcord.
• Only us. theAC adaptor supplied with this Album. Using a different
type of adaptor mey cause melfunction or damage to the product.
·When the/4,C adaptor 18u8edforprolonged period of time, the adaptor
mey h&atup. thi. il normal and ilnota causa forconcem.
• When not ullng the adaJ)tor, unplug It from tile outlet.
1. UtilB theAC edepter to ChergB the batlery. Meke the connection e.
IIllJstrllted below.
2. Slido POWEKtoOFF. (TheAlbum mu.t botumed offlo chOIliO tho
botteryl·
3. The charging Itarts, and when It II tUlly chargect, the charging lIrtoPllr
automatically.
11."'l1li
Tile Photo Album cen be placed on the desktop using the Included stand.
1. Separate the main unit from the ~ver.
2. Talc:Cloutthe rod sland located In the back 01 the main unit.
3, Screw In the rod Into the 8crew hole.
4. Place the Photo Album horizontally.
l-..-lMdlo
Brow. . Photo.
Mothod 1:
In Slido show modo, ropoatodly pre.. SUDE SHOW to soloct"slido show
off" to stop the sltde .show and enter brows. made. use NEXT to browse
the next photo and PREVIOUS to browse the previous photo.
Molhod2:
In Thumbnail modo, selocttho photo and pro.s ENTER, use PREVIOUS
end NEXT to browtre phOto••
View Thumbnail
Viow Slide show
LED Indicator
Placingtha Photo Album
lDJ
'T1lUllI'flllnlll'"
ThieAlbum can be pow.rvd brAe through the supplied ewitching power AC
adoptor. ConnecltheAC .doptor 10 IheAlbum os Illustrated below.
I, Ou~ng charging, tho red and groen LED. blink allllmatlvely.
2. Whon tho bellOIY lolllily chergod,tho greon LED olsyo lit.
3. When thaAlbum u••1 b.ttery for power, ateady green LEO tight:ll.
If the battery power is low, the gr.en LEO blinks.
12. H.I. fcKtt.atllnd
13. Reel atMd
rCTdI'~'.
Ifth. Album i. playing photo. eitherin Brow•• or Slide ahow mod., limply
preIs EXIT to enter Thumbnail mode.
7. POwER OfIIOFF
I. uaa HuUlot
.. IDIIIMClllIId) Ilot
1'. DC poww Input
Ph.VI. .lnglllod••
Bro. .a: Manual viewing of phctoll oneo-by.olKl.
Ihumbnall: Allal of photoa In amallar ala.
Ualng the AC Adaptor
Charging the ballery
.. NEXT/AUTO ZOOM Button:
Throo VIewing Mode.
You can view photos In three ways: BrowN, Thumbnail and Slide show.
a_llOOl.
You need a Mini USB-to-USB (mQle) Qd*ptorcable to connect the Mini
USB port of the Album to the elandeR! USB port of yOur PC.
Note: When eonneeted, you can tranl1erfllel Bml:mg PC, memory eard8
and Internel memory.
uue-.)
L
Or the Dlgltel Photo Album
..........
_-
-.-
Connection to PC
Not.
Do natdi.....mbl.
...
Note:
II you uso MomolY Stick Pro. a MemolY Stick Pro-to- MomolY Stick
adaptor must be uaed otherwise the card may be stuck Inside the alot_
~~rn
~
.~-.
Note :
1. The Album re.ds 4-ln-1 card tlrat before re.dlng thelnlernal memory.
2. If no ftle I. stored In the device, the Album displays «No ftle found· •
VIewing Photoa
1. Slide POWEK ON /OFFto the 'ON"
position, the power Indicator
illuminatel, and thaAlbum .tatt. the
slldo .how automotl""lIy.
2. Inlertyour memory card into SOl
MMClMS/xO. pre.. EXIT 10 dl.play
the memory deyice•.
3. Uee the PREVIOUS or NEXT to eele
the 4 in 1card or internal memory.
Pres. SLID SHOW 10 BIori the .lIdo show, repoatedly pre•• SLID SHOW to
aelect the duration of eech photo (3Sec, 55ec,1 OSec, 15Sec, 30Sec, 1Min.
15Mln.l Hour. 100y) .To .Iop tho .Udo .how. ropesladly p..... SLIDE SHOW
to eeleet • slide .how off" .
Change Dlaploy Format
Long pre.. PREVIOU8I1.:tl4:3to .wltch bolweon 16:9 and 4:3dl.play
form.t.
Long pre" NEXTIAUTO ZOOM to switch between ortglnaland auto-zoom
format.
Trouble.hootlng
Choak
Symptom
No"pl.,
"',..,_0'_
,-
..... RIIIIICIfY Clrd ...
ueletlCk .......
1. Run ololt of b.tte".
2. Check PGwer Iwltch Is ,ION poailion.
1. Remcr.'l1r'lCI i.-ettnmaryC8'd at' USB and mlka ...~
by . . property 1..-bId In . . . .
2.,.... .... 1he 1~1I .. ere h~ farmt:lJPG .
Not.: You may UN Microsott Peint program II) diaplly the
wron;ofonnel Im.gll end "'111 Ihe Imegll .a alena.rd
JPEG beta... diapillying on thia Album.
Specifications
DI.play
Inmrllal
Fla.II.8morr
R••d,bl,
800(HIX4S0(V)
1GB(B".,
memDry
so, MMe, M8• .dl c*rd
R••d,bl. til'
JPG
OpatdteTWI...........n..
0"<:-045"<:
ACAdeptor
OC12V,'.2~
Weight
Dlmenelone
45O,
.208rml(W) x153mm(D) x311T1Tl(H)
• Speclncatlon8 ere subject to change without notice. All efforts have
been made to Bn.ure accuracy, the manufacturer will not be held liable
for eny inaccuraciu orefrors.
07Lh09oWl