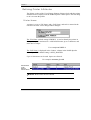
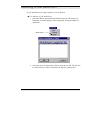
1
The Document System
Spooler32
Technical Manual
© 1997 XLPrint/Laser Image TechnologiesPty. Limited. All rights reserved.
This work is copyright. This manual and its accompanying software may not be reproduced by any means,
mechanical, electronic or otherwise, without the prior agreement and written consent of XLPrint
Pty. Limited or
an appointed representative.
The PARIS Spooler Technical Manual
First published, December 1996
Reprinted 1997
Second edition, 1998
PARIS Spooler is an XLPrint Software product.
PARIS is a trademark of XLPrintPty. Limited, Sydney, Australia
This document may contain or refer to information and products protected by copyright or patents and does not
convey any license under the patent rights of XLPrint
Pty. Limited nor the rights of others. All product names
used in this manual are trademarks of their respective owners.
The information in this document is provided for reference only. Names and data used in examples are fictitious
and are provided for explanatory purposes only.
Written and produced by XLPrintPty. Limited,
Suite 401, 220 Pacific Highway,
Crows Nest,
Sydney, NSW, 2065, Australia.
Printed in Australia
C ONTENTS
AB O U T T H I S M A N U A L
XI
S y m b o l s u s e d i n t h i s m a n u a l _ _ _ _ _ _ _ _ _ _ _ _ _ _ _ _ _ _ _ _ _ _ _ _ _ _x i
P
I
A R T O N E
N T R O D U C T I O N
I N T R O D U C T I O N T O T H E PARIS S P O O L E R
3
3
PARIS Spooler Systems _______________________________ 3
THEORY OF OPERATION
4
PARIS S P O O L E R S T A R T - U P D I A L O G U E S
5
The PARIS Spooler Control Panel ______________________ 6
T H E PARIS E N G I N E D I A L O G U E
R T
TWO
S ETTING UP THE PARIS SPOOLER
7
PA
11
C H A P T E R 1: P R I N T E R D E F I N I T I O N S
12
AD D I N G A P R I N T E R D E F I N I T I O N
13
Defining Printer Attributes ___________________________ 14
Printer Name ___________________________________________ 14
Contents
Printer Type ___________________________________________ 15
Printer Type List ________________________________ ______________ 15
Rebuilding the Printer Type List __________________________ 17
Defining the Output destination __________________________ 18
Using NEXTFILE as the output destination _________________ 19
Retaining the input file name and number for the output file ________21
Setting the Printer Priority_______________________________ 21
P r i n t e r R e s o u r c e s _ _ _ _ _ _ _ _ _ _ _ _ _ _ _ _ _ _ _ _ _ _ _ _ _ _ _ _ _ _ _ __ _ _ 2 3
How PARIS manages printer resources ____________________ 23
XPD Resource Management Commands for PCL and PostScript
printers ________________________________ _____________________ 25
Updating Resources ____________________________________ 27
Resetting Resources ____________________________________ 29
Choosing a Reset option ________________________________ _______29
Media Mapping _________________________________________ 31
P h y s i c a l P a g e S h i f t _ _ _ _ _ _ _ _ _ _ _ _ _ _ _ _ _ _ _ _ _ _ _ _ _ _ _ _ _ _ _ __ 3 2
Saving the Printer Definition _________________________ 33
SPD Files ______________________________________________ 33
MO D I F Y I N G A P R I N T E R D E F I N I T I O N
34
DELETING A PRINTER DEFINITION
35
SETTING THE PRINTER STATUS
36
FLUSHING THE PRINT JOBS FROM A PRINTER
37
C H A P T E R 2: J O B D E F I N I T I O N S
39
SJD Files (Spooler Job Definition files)____________________ 39
iv
The PARIS Spooler32 Technical Manual
Contents
AD D I N G A J O B D E F I N I T I O N
40
J o b D e f i n i t i o n N a m e _ _ _ _ _ _ _ _ _ _ _ _ _ _ _ _ _ _ _ _ _ _ _ _ _ _ _ _ _ _ _ __ 4 1
Defining the Input Source for a Job Definition __________ 41
OVERVIEW OF DIRECTORY AS THE INPUT SOURCE
42
How the Spooler polls Directories for Input Data ___________ 42
Spooler Job Requests (SJR) ________________________________ ___ 42
Changing File Attributes ________________________________ 44
An example of the Spooler polling directories for input data _______ 44
D e f i n i n g D i r e c t o r y a s t h e I n p u t S o u r c e_ _ _ _ _ _ _ _ _ _ _ _ _ _ _ _ _ 4 5
Defining the directory search path ________________________ 45
Defining the directory search settings_____________________ 46
O V E R V I E W O F NO V E L L Q U E U E A S T H E I N P U T S O U R C E
47
Creating Novell Queues to use with PARIS _________________ 47
Creating a PARIS Input Queue ________________________________ _ 48
Preparing PARIS Queues for Input ______________________________ 50
Creating a PARIS Output Queue ________________________________ 56
Using Novell Print Queues with PARIS ____________________ 57
File Server Access ________________________________ ___________ 57
Single Server Access ________________________________ _________ 57
Defining Novell Queue as the Input Source _____________ 58
OVERVIEW OF USING SERIAL AS THE INPUT SOURCE
59
Understanding Serial Communications ____________________ 59
Hardware Overrun Error Messages ______________________________ 59
Identifying the UART chip in your PC ___________________________ 61
D e f i n i n g S e r i a l a s t h e I n p u t S o u r c e_ _ _ _ _ _ _ _ _ _ _ _ _ _ _ _ _ _ _ _ 6 4
Byte Settings ________________________________ ________________ 65
The PARIS Spooler32 Technical Manual
v
Contents
Handshaking ________________________________ _________________ 65
Page Eject ________________________________ ___________________ 65
O V E R V I E W O F U S I N G T H E PARIS P O R T M O N I T O R A S T H E I N P U T
SOURCE
66
The role of Print Providers_______________________________ 66
Configuring your PARIS Port Monitor __________________ 68
I.
Install the PARIS Port Monitor_________________________ 68
II. Create a Job Definition with the Port Monitor as the
Input Source________________________________________ 70
Editing the port name ________________________________ ______71
Deleting a port name ________________________________ _______71
III. Set up a Windows printer _____________________________ 72
Deleting the PARIS Port Monitor: _________________________ 75
O V E R V I E W O F U S I N G LPD Q U E U E A S T H E I N P U T S O U R C E
76
What is an LPD? ________________________________________ 76
Defining LPD Queue as the Input Source _______________ 77
Creating a Job Definition with LPD as the Input Source______ 78
Defining the polling interval for searching an Input
S o u r c e_ _ _ _ _ _ _ _ _ _ _ _ _ _ _ _ _ _ _ _ _ _ _ _ _ _ _ _ _ _ _ __ _ _ _ _ _ _ _ _ _ _ _ _ 7 9
H o l d i n g N e w J o b s _ _ _ _ _ _ _ _ _ _ _ _ _ _ _ _ _ _ _ _ _ _ _ _ _ _ _ _ _ _ _ __ _ _ 7 9
Environment File Selection___________________________ 80
Method 1 ________________________________ ____________________ 80
Method 2 ________________________________ ____________________ 80
Method 3 ________________________________ ____________________ 81
Selecting the Environment _______________________________ 82
If Input Source is Directory… ________________________________ ___82
If Input Source is Novell Queue… _______________________________ 83
vi
The PARIS Spooler32 Technical Manual
Contents
Selecting a Printer for a Job Definition ________________ 84
Selecting a printer when Novell Queue is the input source ___ 85
Appending small print jobs into a single large job __________ 86
Splitting the files in a print job___________________________ 87
Selecting the Number of Copies to be printed ____________________ 87
MO D I F Y I N G A J O B D E F I N I T I O N
88
DELETING A JOB DEFINITION
90
C H A P T E R 3: E N G I N E D E F I N I T I O N S
91
H o w t h e S p o o l e r m a n a g e s m u l t i p l e e n g i n e s_ _ _ _ _ _ _ _ _ _ _ _ _ 9 1
How many engines can be added and launched? ________ 91
A d d i n g a n E n g i n e _ _ _ _ _ _ _ _ _ _ _ _ _ _ _ _ _ _ _ _ _ _ _ _ _ _ _ _ _ _ _ __ _ _ 9 2
Launching an Engine ________________________________ 94
E d i t i n g a n E n g i n e _ _ _ _ _ _ _ _ _ _ _ _ _ _ _ _ _ _ _ _ _ _ _ _ _ _ _ _ _ _ _ __ _ _ 9 5
D e l e t i n g a n E n g i n e _ _ _ _ _ _ _ _ _ _ _ _ _ _ _ _ _ _ _ _ _ _ _ _ _ _ _ _ _ _ _ __ _ 9 6
P
A R T T H R E E
J OB C ONTROL AND P ROCESSING
99
C H A P T E R 4: J O B C O N T R O L
100
PAUSING , RESTARTING , HOLDING AND RELEASING A JOB
101
P a u s i n g a J o b _ _ _ _ _ _ _ _ _ _ _ _ _ _ _ _ _ _ _ _ _ _ _ _ _ _ _ _ _ _ _ __ _ _ _ _ 1 0 1
The PARIS Spooler32 Technical Manual
vii
Contents
R e s t a r t i n g a J o b _ _ _ _ _ _ _ _ _ _ _ _ _ _ _ _ _ _ _ _ _ _ _ _ _ _ _ _ _ _ _ __ _ _ 1 0 2
H o l d i n g a J o b _ _ _ _ _ _ _ _ _ _ _ _ _ _ _ _ _ _ _ _ _ _ _ _ _ _ _ _ _ _ _ __ _ _ _ _ 1 0 2
R e l e a s i n g a J o b_ _ _ _ _ _ _ _ _ _ _ _ _ _ _ _ _ _ _ _ _ _ _ _ _ _ _ _ _ _ _ __ _ _ _ 1 0 3
PAPER AND PAGE CONTROL
104
Moving Forward in a Job ____________________________ 104
S a m p l i n g a P a g e _ _ _ _ _ _ _ _ _ _ _ _ _ _ _ _ _ _ _ _ _ _ _ _ _ _ _ _ _ _ _ __ _ _ 1 0 4
Moving a print job to the front of the queue ___________ 105
C H A P T E R 5: S I N G L E J O B
OR
B A T C H M O D E P R O C E S S I N G 106
Single Spooler Job Request _________________________ 106
AD D I N G A S I N G L E J O B
107
Input Information ______________________________________ 107
Output Options________________________________________ 108
Editing a single job ________________________________ 109
Deleting a single job _______________________________ 110
Flushing the print jobs from a printer ________________ 111
P
A R T F O U R
S POOLER S YSTEM S ETTINGS AND
S POOLER C ONTROL
C H A P T E R 6: S Y S T E M S E T T I N G S
115
116
Verify Engine every [xx] seconds ____________________ 116
viii
The PARIS Spooler32 Technical Manual
Contents
Date and Time Format ______________________________ 116
Date Format __________________________________________ 117
Time Format __________________________________________ 117
C H A P T E R 7: S P O O L E R C O N T R O L
118
Starting the Spooler without downloaded print jobs
b e i n g p r o c e s s e d _ _ _ _ _ _ _ _ _ _ _ _ _ _ _ _ _ _ _ _ _ _ _ _ _ _ _ _ _ _ _ __ _ _ 1 1 8
Pausing the Spooler ________________________________ 119
E x i t i n g t h e S p o o l e r _ _ _ _ _ _ _ _ _ _ _ _ _ _ _ _ _ _ _ _ _ _ _ _ _ _ _ _ _ _ _ __ 1 2 1
A
P P E N D I X A
M ODIFYING THE C HARACTER S ELECTION
T ABLE
125
Why control the number of characters? _______________ 125
Modifying the character set _________________________ 126
U SING
THE
APPENDIX B
M EDIA M APPING F UNCTION
129
Media Mapping Overview ____________________________ 129
Setting up Media Mapping ___________________________ 130
Adding ‘*XLPInputMedia’ statements _____________________ 130
Setting up Media Mapping for an Environment_____________ 131
Adding the ‘mapping’ for a tray in an environment _______________ 132
Selecting the environment to be mapped _______________________ 133
Mapping the tray(s) ________________________________ __________ 134
Editing the mapping for a tray in an environment ________________ 135
The PARIS Spooler32 Technical Manual
ix
Contents
Deleting the mapping for a tray in an environment ________________ 136
Editing the ‘mapping’ for an environment _______________________ 137
Matching the mappings to the printer ___________________________ 138
An example of setting up the Media Mapping for a Docuprint ______139
A
P P E N D I X
M ODIFYING PARIS JOB
C
T ICKETS
143
Job Ticket Structure _______________________________ 143
Record Structure ______________________________________ 143
The PARIS Job Ticket structure ______________________ 144
How are Job Tickets enabled in PARIS?_______________ 145
PARIS XPD Files_______________________________________ 145
XPD statements in XPD files ____________________________ 146
These statements create the Job Ticketing records: ______________ 146
Modifying a Job Ticket _____________________________ 147
Modifying a Job Ticket via the XPD file ___________________ 147
Modifying a Job Ticket via the Environment Editor_________ 149
I NDEX
x
151
The PARIS Spooler32 Technical Manual
About this Manual
This manual describes the use of the PARIS 16-bit and 32-bit Spooler systems
and is to be used in conjunction with thePARIS Designer User’s Manualand
the PARIS Designer Reference Manual.
Symbols used in this manual
Symbols will appear regularly in the text or in the column adjacent to the text
to mark special information that supplements the textual theme or topic.
The symbols may flag additional information such as suggestions, advice or
warnings or may be an illustration of the topic of the text (for example, a tool
button in the ToolBox, a mouse or keyboard).
The symbols used in this manual are as follows:
NOTE
This symbol indicates information supplementary to the current text.
TIP
This symbol indicates a practical hint.
WARNING!
This symbol is to draw your attention to a significant item or topic.
xi
The PARIS Spooler Technical Manual
Contents
xii
The PARIS Spooler32 Technical Manual
P ART O NE
INTRODUCTION TO THE
PARIS S POOLER
Introduction
Theory of Operation
The PARIS Spooler Control Panel
The PARIS Engine
Introduction to the PARIS Spooler
2
The PARIS Spooler32 Technical Manual
Part One
I NTRODUCTION TO THE PARIS S POOLER
The PARIS Spooler is at the heart of the PARIS document management
system. It has the dual responsibilities of directing the flow of data through the
system and ensuring that the correct set of formatting rules are used for each
job by passing instructions to the PARIS formatting engines.
The role of a PARIS Engine is to accept instruction from the Spooler as to
where to find its input, what rules to use for processing, what printer to format
for and ultimately, where to send the output.
The Spooler is fundamentally a messaging system. It does not actually perform
print formatting tasks, the engine has this responsibility. The Spooler passes
processing instructions to the engines and responds to messages sent back from
the engines.
PARIS Spooler Systems
The PARIS Spooler is available as a 16 bit and 32 bit system. Differences in
the 32 bit system include the availability of multiple local engines and
additional input sources (LPD and Port Monitor).
This manual applies to the 32 bit system.
The PARIS Spooler32 Technical Manual
3
Theory of operation
The Spooler is essentially a ‘printer-centric’ system, that is, the main view and
operation of the system is by printer (or destination). Up to 512 different
printers can be defined and serviced by a single execution of the Spooler. Jobs
are in turn defined and allocated to a printer.
For example:
•
The invoice, statement and remittance jobs might be directed to
a printer called ‘Printer2’ which is located in the Accounts
Department.
•
Delivery dockets and stock reports might be directed to a printer
called ‘Printer3’ which is located in the Warehouse.
•
If the Printer2 printer is highlighted the Spooler will display all
the jobs queued or processing for that printer.
Being at the ‘production end’ of the PARIS Document Management System,
the Spooler is intended to be setup then left to perform its duties. It acts as a
print server controlling the flow of information between the host and the target
printers.
4
The PARIS Spooler32 Technical Manual
PARIS Spooler Start-up Dialogues
When the Spooler is started, it automatically locates and starts a formatting
Engine and is ready for processing. This means that in normal operation you
will have two dialogues open on-screen at the same time, the PARIS Spooler
Control Panel and the PARIS Engine.
As the 32 bit PARIS Spooler is capable of launching and managing multiple
formatting engines, any additional engines set to automatically launch at startup will also be displayed. Refer to Chapter 3,Engine Definitions.
Both the Spooler and the Engine dialogues can be re-sized and re-positioned.
Their size and position is remembered when the program is shut down.
The PARIS Spooler32 Technical Manual
5
Introduction to the PARIS Spooler
The PARIS Spooler Control Panel
The PARIS Spooler control panel is deliberately designed to be similar to some
operating system print spoolers. The intent is to provide a simple, clean and
familiar interface containing all the necessary information on the status of the
company printing task.
• For each printer that has been defined in the Spooler, the upper portion of
the control panel displays information on the printer setup.
• Selecting a printer in the upper portion of the control panel will display each
print job defined for the printer in the lower portion of the panel.
• The width of each column of the control panel can be resized by clicking on
the vertical bar and moving the bar to the left or right as required.
Selected printer in
upper portion of
control panel
Print jobs defined for the
selected printer in lower
portion of control panel
The PARIS Spooler Control Panel
6
The PARIS Spooler32 Technical Manual
Introduction to the PARIS Spooler
The PARIS Engine dialogue
When the Spooler is started, it automatically locates and starts a formatting
Engine (and any additional engines) and is ready for processing.
Whereas the PARIS Spooler control panel provides a summary of the printer
setup and print jobs, the PARIS Engine dialogue displays in detail what is
actually happening during the printing process. It lists each job as it starts, the
downloading of fonts and images and reports any error conditions that occur on
the printer.
The PARIS Engine dialogue
The PARIS Spooler32 Technical Manual
7
Introduction to the PARIS Spooler
8
The PARIS Spooler32 Technical Manual
P ART TWO
SETTING
UP THE
PARIS S POOLER
Chapter 1: Printer Definitions
Adding a Printer Definition
Modifying a Printer Definition
Deleting a Printer Definition
Printer Status
Chapter 2: Job Definitions
Adding a Job Definition
Modifying a Job Definition
Deleting a Job Definition
Setting Up the PARIS Spooler
10
The PARIS Spooler32 Technical Manual
Part Two
S ETTING UP THE PARIS S POOLER
To allow the Spooler to perform its dual tasks of flow control and delivering
instructions to the engine, it must first be setup correctly. The setup is at two
basic levels.
First, the printers must be defined and second, the instructions for the individual
jobs must be defined.
Printer functions are defined via the View/Change Printer dialogue and job
functions are defined via the Job Definition Settings dialogue.
Once the printer and the jobs definitions have been setup and the Spooler is
started, it searches for an available engine, fires up the engine then sends full
processing instructions to the engine.
The PARIS Spooler32 Technical Manual
11
Chapter 1
P RINTER D EFINITIONS
Printers are defined by the same methods as those used in the PARIS Designer
system.
Options in the
Printers menu.
If the currently selected
printer is offline, ‘GoOnline’
will be displayed.
If the currently selected
printer is online, ‘Go Offline’
will be displayed.
New printers can be added or existing printers modified via the Printers
menu in the Menu bar.
An added printer can be set online or offline by selecting the relevant option
from the Printers menu and all the jobs defined for a printer can be ‘flushed’
from the printer by using the ‘Flush’ option.
12
The PARIS Spooler32 Technical Manual
Adding a Printer Definition
When the Spooler is first installed a default printer is supplied.
To add a new printer, click on the Add option in the Printers menu. The
View/Change Printer dialogue will be displayed.
Add
option
The dialogue is divided into three sections:
Printer,
Resources,
Physical Page Shift.
The PARIS Spooler32 Technical Manual
13
Chapter 1
Defining Printer Attributes
The Printer section of the View/Change Printers dialogue deals with the printer
attributes that are displayed in the PARIS Spooler control panel. The first thing
to do is to name the printer.
Printer Name
A printer is given a ‘File Name’ and a ‘Full Name’ and each is entered in the
relevant box in the View/Change Printer dialogue.
The ‘File Name’ (default setting NEWPRT) is used to identify the printer in
the Spooler system and must be a valid DOS filename, up to 8 characters and
must also be unique.
For example ACCNTL3
The ‘Full Name’ is displayed in the ‘Printer’ column in the PARIS Spooler
control panel. The default setting is NEW_PRINTER
Up to 16 characters can be used. Spaces are allowed.
For example: Accounts_Level3
Printer Name
in the
Spooler
Control Panel
NOTE: Both names must be entered.
14
The PARIS Spooler32 Technical Manual
Printer Definitions
Printer Type
The printer ‘Type’ refers to the physical printer to which the Spooler will direct
the formatted output file.
Printer Type
Printer Type in the PARIS Spooler control panel
The printer type is displayed in the Type column in the PARIS Spooler
control panel and is selected from the ‘Type’ drop-down list in the
View/Change Printers dialogue.
The printers available in the list vary according to the configuration of the PC
on which the Spooler is running. Usually the list is broken into three general
types differentiated by small graphic symbols as follows:
•
HP-PCL type printers
, indicated by the BLUE HP symbol.
•
Adobe Postscript printers
, indicated by the RED stylized Adobe ‘A’
.
•
Available Windows devices
, indicated by the Windows symbol.
HP Symbol
Adobe ‘A’
Windows Symbol
Printer Type List
The printers displayed in the list are a result oftwo searches the software
performs:
1. The software checks the /PARIS/PRT directory to see what XPD (XLPrint
Printer Description) files are present.
2. The software queries Windows as to what printer (or device) drivers have
been loaded. This allows the Spooler to format for any Windows GDI
supported device, for example Fax drivers or PDF drivers.
The PARIS Spooler32 Technical Manual
15
Chapter 1
About XPD Files
XPD files are the way PARIS describes the features of the printer. They work
either as standalone files, in the case of HP-PCL printers, or in combination
with PPD (Postscript Printer Description) files, in the case of Adobe Postscript
printers.
In general terms XPD files are created and supplied by your distributor. PPD
files are those files supplied by the Printer manufacturer. An XPD for a
PostScript printer simply contains a reference to include a corresponding PPD
file in the XPD.
NOTE
XPD files contain command options to manage printer resources. These options
enable you to tailor Paris resource management for the particular requirements
of your printer. Refer to the section X
‘ PD Resource Management Commands
for PCL and PostScript printers’ on page 25.
WARNING!
Both XPD and PPD files are text files and can be edited using a standardtext
editor, however, it is recommended that these should NOT be changed except by
experienced users or under instructions from the distributor.
A full description of the working of XPD and PPD files can be found inHow
‘
do XPD and PPD files work?
’ in Chapter One of the PARIS Designer
Reference Manual.
Windows GDI supported devices
When using GDI to print there are important points to be considered. Firstly,
GDI was not really designed as a production printing method. As a result, it is
not optimized for speed and can struggle to keep up with high speed printers.
Secondly, when using GDI, PARIS is passing responsibility for the final output
over to Windows and in turn the manufacturer supplied GDI driver. As a result,
the outcome cannot be guaranteed to print exactly as intended. There could be
font substitutions or incomplete support for some of the PARIS features,
because the printer is incapable of imaging the page as originally designed.
16
The PARIS Spooler32 Technical Manual
Printer Definitions
Rebuilding the Printer Type List
PARIS maintains a list of available printers. It is this list that contains the
PCL and Adobe printer entries that are shown in the Printer Type drop-down
menu.
As described on the previous page, this list is a result of two searches the
software performs. This list must be kept up-to-date as the number of printer
types supported by PARIS will constantly grow as new printers are released on
the market. That is the purpose of the Rebuild Printer List button that is within
the View/Change Printer dialogue.
To support the features of a new printer:
1. Place the distributor supplied XPD and\or PPD file in the PARIS/PRT
directory.
2. Once the new files have been added, click on the Rebuild Printer List
button to make the printer available to the software.
Selecting the button causes the software to scan the directory and update
the list with any new entries. If no new XPD\PPD files have been added the
existing list will not be changed.
2.
Click on the Rebuild Printer
List button to make added
XPD or PPD files available to
the software.
The PARIS Spooler32 Technical Manual
17
Chapter 1
Defining the Output destination
Part of the printer definition is to instruct the software where to send the output
once it has been formatted.
Output can be directed to a physical port, Novell Queue, Windows defined
printer or disk file.
If printing to a Windows defined printer,this can in turn be mapped to a
TCP/IP address, a physical port (e.g. LPT2), a Novell Queue or a disk file.
NOTE
If you are printing to a Windows defined printer, you must ensure that:
1. The driver selected for the printer isGeneric Text Only.
2. The Print Processorfor the printer is winprintand RAW (Windows NT)
OR the Spooler Settingfor the printer is RAW (Windows 95).
The output destination is entered in the ‘Output To’ text box. For example, the
name of the Novell Queue or the destination drive, directory and file name if to
a disk file.
‘Output To’ box
The output destination for a printer is displayed in the ‘Output’ column in the
PARIS Spooler control panel.
Printer Output destination in the PARIS Spooler control panel
18
The PARIS Spooler32 Technical Manual
Printer Definitions
Using NEXTFILE as the output destination
NEXTFILE is a special PARIS keyword specified when PARIS is required to
direct its output to a series of files on disk. NEXTFILE allows a file name or
extension to be incremented to avoid overwriting previous files.
NEXTFILE settings are printer bound, not global.
NOTE
File splitting is specified at job level and is described underSplitting Files in a
print job in Chapter 2, Job Definitions.
To define the NEXTFILE settings:
1.
Enter the keyword NEXTFILE in the printer Output To box. The
Settings button to the immediate right will become available.
2.
Click on the Settings button to display the View/Change Next File
Settings dialogue.
The PARIS Spooler32 Technical Manual
19
Chapter 1
Path
In the Path text field, specify the directory path to which you want the files to
be written.
Name and Extension
In the Name and Extension text fields, specify both the initial file name and
extension. Once the filename and extension are specified you can choose to
increment either of them.
Maximum File Number
In the Maximum File Number text field, enter the maximum file number
required. (The highest number available is 999, after that numbering will restart
at 1)
Append the Number to the file name or extension
Append the Number to ‘Name’
To increment the file name, select the Append Number to ‘Name’ checkbox.
For example, as per the dialogue above, the resultant files would be
PRINT001.OUT, PRINT002.OUT and so on.
20
The PARIS Spooler32 Technical Manual
Printer Definitions
Append Number to ‘Extension’
To increment the file extension, select the Append Number to ‘Extension’
checkbox.
For example, as per the dialogue above the resultant files with be PRINT.001,
PRINT.002, PRINT.003 and so on.
Retaining the input file name and number for the output
file
To retain the input file name and number, the character string <input> can be
entered in the Name and Extension text fields.
NOTE
<input> can also be entered as the Path name, however this would result in the
overwriting of the input files by the output files and should only be used with
caution.
Setting the Printer Priority
The PARIS Spooler32 Technical Manual
21
Chapter 1
A priority can be assigned to the printer which is displayed in the Priority
column in the Spooler control panel.
The printer priority number is entered in the ‘Priority’ box and can range
between 1 and 99. The lower the number, the higher the priority. This allows
the system to be configured in such a way that urgent printing (for example,
dispatch notes for the warehouse) can always take priority over printing for
other users.
‘Priority’ box
22
The PARIS Spooler32 Technical Manual
Printer Definitions
Printer Resources
The Resources section of the View/Change Printers dialogue deals with printer
resource management. (The Id number is the internal identifier used by PARIS
for that set of printer resources and cannot be edited.)
How PARIS manages printer resources
Resource management, the downloading of fonts, forms and graphics to the
printer, is automatically controlled by PARIS, but varies according to the
capabilities of the device and Page Description Language (PDL) being used.
There are four general levels of resource management:
I. Printers with permanent storage available.
PARIS is capable of permanently storing the font resources of some printers.
For these printers, when a resource is first sent to the printer, PARIS sets a flag
to indicate the resource is permanently stored and it is not sent again unless
specifically instructed.
Refer to the sectionUpdating Resourceson page 27 (For full details of which
printers are currently supported, contact your distributor.)
II. PCL printers (no permanent storage).
When printing to PCL printers (those with no permanent storage), PARIS uses
its resource flag system to indicate that resources are stored in the printers
memory. Because this is memory-based storage, these resources are lost if the
printer is turned off, or overwritten if another application sends output to the
printer.
If the printer is turned off or reset, you must use the ‘Reset at start of next job’
option in the PARIS Spooler to reset the flags to their initial state.
The PARIS Spooler32 Technical Manual
23
Chapter 1
Also, if the printer is being shared with other applications, (e.g. for wordprocessing), PARIS must be instructed to reset the resources at the beginning of
each job. This naturally means the resources will be sent every time the job is
printed and has the effect of increasing the transmission time to the printer.
Refer to the section ‘XPD Resource Management Commands for PCL and
PostScript printers’ on page 25.
NOTE
PARIS provides you with the option to control the number of characters
downloaded in a character set. This may be necessary if you are using a printer
that requires the resources to be sent every time a job is printed. Refer to
Appendix A, ‘Modifying the Character Selection Table
’.
PCL4 printers
PCL4 printers are not supported by PARIS.
III. Postscript printers (no permanent storage)
As part of its job end processing, Postscript printers go through a clean-up. As
a result, when printing to Postscript printers (those with no permanent storage),
PARIS must send all resources required for a job at the beginning of each job.
Refer to the section ‘XPD Resource Management Commands for PCL and
PostScript printers’ on page 25.
IV. Windows GDI
When printing using a manufacturer supplied GDI driver, PARIS passes total
responsibility for the downloading and management of resources to Windows.
WARNING!
Windows GDI does not understand bitmap fonts. If the application contains
bitmap fonts, Windows passes the information to the driver. It is up to the
printer driver to provide a solution to managing the fonts.
Note also that bitmap fonts will not appear in the Font List if a GDI printer
driver is selected. Refer to Chapter 20, ‘Using the Font List function’of the
PARIS Designer Reference Manualand ‘Adding a font to the fontlist’ in
Chapter 11 of the PARIS Designer User’s Manual
.
24
The PARIS Spooler32 Technical Manual
Printer Definitions
XPD Resource Management Commands for PCL and
PostScript printers
XPD files contain command options to manage printer resources. These options
enable you to tailor Paris resource management according to the particular
requirements of your printer.
Some XLPrint supplied XPDs have these entries already added.
WARNING!
XPD files can be edited using a standardtext editor, however changing XPDs
without proper instruction can be detrimental. It is recommended that XPD files
should NOT be changed except by experienced users or under instructions from the
distributor.
A full description of the working of XPD and PPD files can be found inHow
‘
do XPD and PPD files work?
’ in Chapter One of the PARIS Designer
Reference Manual.
XPD ManageFonts Command
The options for the XPDManageFonts command and the applicable printers are
as follows:
XPD ManageFonts Command
Use
*XPDManageFonts: None
For Docuprint only, no font handling.
*XPDManageFonts: Harddisk
For 4517, 4220, 4230 printers. Downloads to
the hard disk once.
*XPDManageFonts: Download
for PCL and PostScript printers which have
no hard disk. Downloads the fonts as needed.
*XPDManageFonts: Always
Default for Post Script.
*XPDManageFonts: True
Same as Download.
*XPDManageFonts: False
Same as None.
NOTE: PostScript defaults to ‘Always’. PCL defaults to ‘Download’.
The PARIS Spooler32 Technical Manual
25
Chapter 1
XPD ManageForms Command
The options for the XPDManageForms command and their use are as follows:
XPD ManageForms Command
Use
*XPDManageForms: None
For Docuprint only, no font handling.
*XPDManageForms: Harddisk
For 4517, 4220, 4230 printers. Downloads to
the hard disk once.
*XPDManageForms: Download
for PCL and PostScript printers which have
no hard disk. Downloads the fonts as needed.
*XPDManageForms: Always
Default for Post Script.
*XPDManageForms: True
Same as Download.
*XPDManageForms: False
Same as None.
NOTE: PostScript defaults to ‘Always’. PCL defaults to ‘Download’.
XPD ManageGrafs Command
The options for the XPDManageGrafs command and their use are as follows:
XPD ManageGrafs Command
Use
*XPDManageGrafs: None
For Docuprint only, no font handling.
*XPDManageGrafs: Harddisk
For 4517, 4220, 4230 printers. Downloads to
the hard disk once.
*XPDManageGrafs: Download
for PCL and PostScript printers which have
no hard disk. Downloads the fonts as needed.
*XPDManageGrafs: Always
Default for Post Script.
*XPDManageGrafs: True
Same as Download.
*XPDManageGrafs: False
Same as None.
NOTE: PostScript defaults to ‘Always’. PCL defaults to ‘Download’.
26
The PARIS Spooler32 Technical Manual
Printer Definitions
Updating Resources
The Update function in the Resources section of the dialogue only applies to
those printers with permanent storage facilities (see item ‘I’ in the earlier
section ‘How Paris manages printer resources’
).
In rare circumstances, such as the hard disk failing on the printer, or a resource
(e.g. font) being accidentally deleted, it may be necessary to instruct PARIS to
download these resources again.
Click on the Update button to display the View/Change Resource Flags
dialogue which gives you access to the individual PARIS resources.
The dialogue permits the user to select the necessary resource(s) to be updated
and turn off the permanent download flag. This means the next time a job is set
for printing, the selected resource(s) will be sent to the printer.
The PARIS Spooler32 Technical Manual
27
Chapter 1
To update a resource:
1. Click on the Update button to open the View/Change Resource Flags
dialogue.
2. Select the type of resource required from the drop-down menu (Forms,
Fonts or Graphics).
A list will be displayed of all the resources of this type that PARIS has
flagged as being permanently stored on the printer.
3.
Highlight the
required
resources to
reset the flag.
3. Highlight the resource or resources on which you require to have the flag
set to ‘OFF’.
4. Click on Exit. The internal flags for the selected resources will be
automatically set to ‘OFF’.
The next time an application that requires these resources is run they will
be sent to the printer and the download flag will be set to ‘ON’ again.
28
The PARIS Spooler32 Technical Manual
Printer Definitions
Resetting Resources
The Reset options allow the user to instruct the Spooler when to reset the
resources. The options in the drop-down menu are ‘Never’, ‘At Job’ Start’ and
‘At System Start’. In addition there is a ‘Reset at start of next job’ checkbox
option.
The option chosen depends on the storage capabilities of the printer being
defined and whether or not the printer is being shared with other applications.
These are described as four general levels of resource management in the
section ‘How PARIS manages printer resources’ on page 23.
Choosing a Reset option
(A) Printers with permanent storage facilities
If you are defining a printer with permanent storage facilities, you would
choose ‘Never’.
If it is necessary to instruct PARIS to download the resources again for this
printer, you would use the Update Resource button. Refer toUpdating
Resources on page 27.
The PARIS Spooler32 Technical Manual
29
Chapter 1
(B) PCL printers (no permanent storage)
• If you are using a PCL printer with no permanent storage facilitiesthat is
NOT being shared with other applications
you would choose ‘Never’.
However, if the printer is turned off or reset, you would have to modify the
printer definition and select the R
‘ eset at start of next job’checkbox. This
causes the Spooler to reset the resources at the beginning of the next job.
Once the resources are sent, the ‘Reset at start of next job’option is
canceled.
• If you are using a PCL printer with no permanent storage facilitiesthat IS
being shared with other applications
you would choose ‘At Job Start’.
This will cause the Spooler to reset the resources at the start of each job (as
the resources are overwritten if another application sends output to the
printer).
• If you are using a PCL printer with no permanent storage facilitiesas a
dedicated printeryou would choose ‘At System Start’ to reset the
resources each time the system is started.
(C) Postscript printers (no permanent storage)
If you are using a Postscript printer with no permanent storage facilities the
option chosen will be irrelevant as PARIS must send all the resources required
for a job at the beginning of each job.
30
The PARIS Spooler32 Technical Manual
Printer Definitions
Media Mapping
Media Mapping is specific to Xerox Docuprint 350, 350HC, 390 and 390HC
printers only. If you are defining a Docuprint printer, you must define the
media mapping for the printer. This is explained in Appendix B,Using the
Media Mapping Function’.
The PARIS Spooler32 Technical Manual
31
Chapter 1
Physical Page Shift
Physical Page Shift allows the print image to be shifted either or both
horizontally and vertically on the page. This allows the image position of
different printers to be adjusted to match, or pre-printed material can be aligned
exactly.
The specified unit of measure is 300 dots per inch (dpi) so a measure of 1
equals 1/300th inch, or 300 equals 1 inch.
Movement is controlled using positive and negative measure around the X
(Horizontal) and Y (Vertical) axis. Up and left directions are plus (+) and down
and right directions are minus (-).
X
+=
Up
Left
-=
Down
Right
Y
For example, if H = -75 (-¼”) and Y = -150 (-½”), the print image will be
shifted ¼” to the right and ½” down.
¼”
½”
Shift the page to the right
for a quarter of an inch
and down for half an inch
For example:
X (Horizontal) = -75
Y (Vertical) = -150
To shift the image, enter the required number of units (dots) in the Horizontal
and/or Vertical boxes as required.
32
The PARIS Spooler32 Technical Manual
Printer Definitions
Saving the Printer Definition
To save the printer definition, choose the OK button in the View/Change
Printer dialogue. Once a printer has been defined and saved, PARIS creates an
.SPD file in the PARIS\SPL\0 directory.
SPD Files
SPD stands for Spooler Printer Definition. This is a text file that simply
contains the name of the printer definition, the current status and the current
priority.
NOTE
SPD files should not be changed or edited unless under instruction from a
distributor.
Following is an example of an .SPD file
Name=Printer3
Held=true
Priority=5
Z=EndOfParameters
The PARIS Spooler32 Technical Manual
33
Modifying a Printer Definition
In addition to new printer definitions, the settings for existing printer definitions
can be modified. Changes to printer settings only take effect when the Spooler
is shut down and restarted (this does not apply when adding a new printer).
To change the settings for an existing printer definition:
Either:
Double-click on the printer in the PARIS Spooler control panel,
Or:
Select the printer from the PARIS Spooler control panel, then select the
Settings option from the Printersmenu.
Either method will display the View/Change Printer dialogue for the selected
printer. Modify the existing settings as required.
34
The PARIS Spool
er32 Technical Manual
Deleting a Printer Definition
An existing printer definition can be deleted from the list in the PARIS Spooler
control panel. A printer can only be deleted if it has been placed off-line (refer
to the section Printer Status on page 36).
To delete a printer definition:
1.
Select the printer from the PARIS Spooler control panel,
2.
If the printer is on-line, select the ‘Go Offline’ option from the Printers
menu to activate the Delete option (‘offline’ will be shown in the
Status column for the selected printer.)
2. Select
‘Go Offline’.
3. Select
‘Delete’.
3.
Select the Delete option from the Printers menu. A message dialogue
will be displayed, requesting confirmation of the deletion.
4.
Select ‘Yes’ or ‘No’ as required.
NOTE: You cannot delete the DEFAULT printer.
The PARIS Spooler32 Technical Manual
35
Setting the Printer Status
The Printersmenu also provides options whereby printers can be set Offline
(not processing) or Online. The ‘Go Online’ and ‘Go Offline’ options are
context sensitive, depending on the status of the currently selected printer.
A printers status is displayed in the Status column in the Spooler control panel
(see below).
Printer Status in the Spooler control panel
To set the printer status:
1.
Select the printer in the PARIS Spooler dialogue, then open the
Printers menu. Depending on thecurrentstatus of the selected printer,
‘Go Online’ or ‘Go Offline’ will be displayed.
2.
Select the option required to change the status.
If the currently selected
printer is offline, ‘GoOnline’
will be displayed.
If the currently selected
printer is online, ‘Go Offline’
will be displayed.
36
The PARIS Spooler32 Technical Manual
Flushing the print jobs from a printer
The ‘Flush’ option in the Printers menu is used to remove the print jobs that
have been added to a printer.
To flush the print jobs from a printer:
1.
Select the required printer from the control panel.
2.
Select ‘Flush’ from the Printers menu. All the print jobs defined for
the selected printer will be flushed (removed).
NOTE
Defining a print job is described in Chapter Two, ‘Job Definitions’.
The PARIS Spooler32 Technical Manual
37
Chapter 1
38
Chapter 2
J OB D EFINITIONS
When the Spooler is initially installed there will be a default job definition file
created. Once the printers have been setup, the actual print jobs then need to be
defined.
A separate job definition is normally created for each different application. The
exceptions to this are as follows:
1. When serial input is defined.
2. If the incoming data contains DJDE or Runtime event records which
hold job control information.
3. When the netware input files are configured to select the environment
using the Form Name.
SJD Files (Spooler Job Definition files)
As each new print job is defined, a Spooler Job Definition file (.SJD) is created
and stored in the \PARIS\SPL\0 directory.
• The .SJD file name is a generated number.
• An .SJD file is a simple text file which contains all the information required
by the Spooler and remains until the job definition is deleted.
• The files should not be directly edited as the syntax rules are very strict and
unexpected results could result. Any modification should always be done via
the Job Definition dialogue in the Spooler
The PARIS Spooler32 Technical Manual
39
Adding a Job Definition
Job Definitions are created in the Job Definition Settings dialogue. To display
the dialogue, open the Definitions menu in the PARIS Spooler dialogue and
click on the Add option.
A Job Definition is given a Name then the Input Source, Environment, Printer
and Printer Options are selected as required for the print job.
40
The PARIS Spooler32 Technical Manual
Job Definitions
Job Definition Name
The Job Definition name is entered in the ‘Name’ box. This name is a
descriptive name and as such is not limited by DOS eight character naming
conventions, however the maximum number of characters allowed is 16.
Defining the Input Source for a Job Definition
The Input Source section of the Job Definition Settings dialogue is where you
tell the Spooler where the print files for the job are to be found.
The options available in the ‘Search In’ box are:
Directory,
Novell Queue,
Serial,
Port Monitor,
LPD Queue.
The following sections provide detailed information on each type of input
source and its use.
The PARI
S Spooler32 Technical Manual
41
Chapter 2
Overview of ‘Directory’ as the Input Source
If this is the first time you are defining a directory as an input source, it is
important that you understand the way the Spooler generates its processing
requests and what it does when polling directories for input data.
How the Spooler polls Directories for Input Data
Each time a file is found that matches the directory search path criteria, the
Spooler performs two actions. One, it creates an SJR or Spooler Job Request
and two, the input is tagged as eitherhidden, or the file name is changedor the
file extension is changedaccording to what has been selected in the
View/Change Directory Search Settings dialogue (refer toDefining the
directory search settingson page 46).
Spooler Job Requests (SJR)
The SJR is the mechanism by which the Spooler passes instructions to the
formatting engine. It contains all the information the engine needs to
successfully process the job and deliver the output to its final destination.
A Spooler Job Request is exactly as the name implies, that is, a request from
the Spooler to the engine to process a job. The Spooler Job Request remains
until the engine has completed the request and sends notification back to the
Spooler that the job has been completed.
Once the engine notifies the Spooler it has completed processing, the input file
is then deleted. This means that if the system is shut down while job requests
are still in the queue, when the Spooler is next opened those job requests would
still be queued awaiting processing. It also means that if the data file for the
request is deleted before it is processed, the request will remain forever or until
manually deleted.
Spooler Job Requests (.SJR) are stored in the \PARIS\SPL\0 sub directory.
When created they are given a generated number as a file name and only exist
until the engine has processed the file. An .SJR file is a text file that contains all
the information the engine needs to be able to find, process and deliver the file
for printing.
42
The PARIS Spooler32 Technical Manual
Job Definitions
Following is an example of an .SJR file:
ExternalName=34466
InternalName=DailyReports
InputSource=E:\INV\DTA\TUTE3.DTA
InputType=Disk
Description=Disk File
Status=queued
Environment=dfltp
Printer=Printer3
Priority=5
NovellId=0
Size=411
Time=16:21:22
Date=06/111/96
Held=0
CopiesRequested=1
CopiesCompleted=0
Z=EndOfParameters
WARNING!
The .SJR files in the \PARIS\PRT\0 directory should not be edited. The syntax
rules are strict and unpredictable results may result if changed manually.
The PARI
S Spooler32 Technical Manual
43
Chapter 2
Changing File Attributes
The file attributes are changed tohidden, or the file name is changedor the
file extension is changedto prevent the Spooler constantly going back in a
loop and re-processing the same input file.
The side effect of changing the attributes to hidden is that the files appear to
have been immediately deleted from the system. In fact they are still there, they
are simply waiting to be processed by PARIS. Only after processing are the
files deleted.
An example of the Spooler polling directories for
input data
Once a job definition has been created with a directory search path, (for
example, E:\INV\DTA\T*.DTA), the Spooler immediately checks the
contents of this directory to find any files that match the search criteria.
Each time a file is found that matches the criteria, the Spooler creates an SJR,
then it changes the attributes of the file to ‘hidden’.
In this example, the Spooler would search the E:\INV\DTA directory and
immediately generate Spooler Job Requests for all files matching the search
mask, in this case T*.DTA (that is, all filenames starting with ‘T’ and with
the extension .DTA). The attributes for all these matching files would also
immediately be changed to ‘Hidden’, which means the files have in theory
disappeared from the directory.
If there were 20 files in the directory matching the T* and .DTA mask, the
Spooler display would immediately show 20 jobs queued ready for
processing.
44
The PARIS Spooler32 Technical Manual
Job Definitions
Defining Directory as the Input Source
If the Directory option is selected, you are instructing the Spooler to search a
local or remote directory for its input.
You must provide the Spooler with the specific search path, including the
source directory, sub-directories and file names, according to the source of the
input files.
Search path
Defining the directory search path
The search path is entered in the box the right of the Directory option and can
be setup to search for a named file (e.g., C:\PARIS\DTA\SAMPLE.DTA) or
any valid DOS wildcard search, (e.g., C:\PARIS\DTA\T*.DTA).
The PARI
S Spooler32 Technical Manual
45
Chapter 2
Defining the directory search settings
When you click on the Settings button the View/Change Directory Search
Settings dialogue is displayed.
The dialogue drop-down menu provides access to the three options that PARIS
has available for file tagging.
Hidden Attributes
Change Name
Change Extension
The default and preferred method of operation is ‘Hidden Attributes’, but if
necessary, you can choose the required option from the menu. (Refer toHow
‘
the Spooler polls Directories for Input Data
’ on page 42).
Once the Spooler Job Request is generated the input is tagged according to the
selected option (as eitherhiddenor the file name is changed
or the file
extension is changed
). File or extension name changing is all under program
control so there is no need to specify what the new name or extension should
be.
Normal job processing applies in that as soon as the engine notifies the Spooler
that the job has been processed, the input file (whether hidden or renamed) is
deleted.
46
The PARIS Spooler32 Technical Manual
Job Definitions
Overview of ‘Novell Queue’ as the Input Source
PARIS can intercept input from, or direct output to, a Novell print queue.
Existing print queues can be used, or new queues can be created specifically for
PARIS to use.
Before selecting a Novell Queue as the input source, refer to the following
information on creating and using Novell Queues in association with PARIS.
Creating Novell Queues to use with PARIS
A Novell Queue that PARIS will attach to as a queueServer is a PARIS Input
Queue. Although a Novell print queue can be created using Novell's
PCONSOLE, the Server attribute can only be correctly set using PARIS
Designer’s View/Change Novell Queues dialogue. Refer toCreating
‘
a PARIS
Input Queue’.
A Novell Queue that PARIS will attach to as a queueUser is a PARIS Output
Queue and is created using Novell’s PCONSOLE which allows the queue
users to be viewed, added to and deleted from any print queue.
In a ‘standard’ Novell network, creating a queue with PCONSOLE
automatically adds a User Group of ‘Everyone’, meaning all users have
access to the queue. The queue is automatically useable as a PARIS output
destination and the PARIS login user name does not have to be explicitly added
to the user list. Refer to: ‘Creating a PARIS Output Queue
’.
NOTE: You must be logged into the network withSupervisoraccess to
create or modify a Novell queue.
The PARI
S Spooler32 Technical Manual
47
Chapter 2
Creating a PARIS Input Queue
For PARIS to input from a Novell queue, theUser logged on to the workstation
must be defined as the queue'sServer and must also be logged into the network
with Supervisor access.
To create a PARIS Input Queue:
48
1.
Ensure that you are logged in withSupervisoraccess and that the
User is defined as the queueServer.
2.
Select Novell Queue as the Input Source in the Job Definitions
Settings dialogue, then click on the Settings button to display the
View/Change Novell Queues dialogue.
3.
Click on the Add button in the Available Queues section of the
dialogue.
The PARIS Spooler32 Technical Manual
Job Definitions
4. Enter the name
of the new input
queue then
choose OK.
4.
Enter the new queue name (the queue name must be Alphanumeric,
and can be up to 49 characters).
5.
Choose OK. The new queue name will appear in the Available Queues
list.
Once created, the queue must be prepared for input. Refer toPreparing
‘
PARIS
Queues for Input’.
The PARI
S Spooler32 Technical Manual
49
Chapter 2
Preparing PARIS Queues for Input
When preparing a queue for input, theQueue Usersfield must contain the user
name (or a User Group) of each user who will send data to the queue.
(Normally Novell's PCONSOLE will add the user group'Everyone' to the
Queue Users list.)
When you prepare a PARIS queue for input, you need to set theUser, Server
and Operator attributes of the selected Novell print queue.
Setting the queue Users list
The Users list is the list of users who are permitted to add print files to this
queue. It is possible to specify User Groups.
To set the queue Users list:
1.
Select the required queue from the Available Queues list.
2.
Click on the ‘Users’ radio button in the Current Members section of
the dialogue, then click on the Add button in the same section. The
Select Queue Member dialogue will be displayed.
1. Select the
queue.
2. Click on the ‘Users’
radio button, then click
on the Add button.
50
The PARIS Spooler32 Technical Manual
Job Definitions
3.
Select the required user name from the list of Available Members, then
choose OK.
3. Select the required
user name then
choose OK.
The added user name will be displayed in the Current Members list in
the View/Change Novell Queues dialogue.
The PARI
S Spooler32 Technical Manual
51
Chapter 2
Setting the queue Servers list
A single User must be allocated as the Server in order for PARIS to input from
a Novell queue.
The User allocated as the Server must also be the same as that logged onto the
workstation. For example, if the User is logged on to the workstation as PARIS
[USER], the Server must also be PARIS [USER].
To set the queue Servers list:
1.
Select the required queue from the Available Queues list.
2.
Click on the ‘Servers’ radio button in the Current Members section of
the dialogue, then click on the Add button in the same section. The
Select Queue Member dialogue will be displayed.
1. Select the
queue.
2. Click on the ‘Servers’
radio button, then click
on the Add button.
52
The PARIS Spooler32 Technical Manual
Job Definitions
3. Select the required user name from the list of Available Members, then
choose OK.
3. Select the required
user name then
choose OK.
The added user name will be displayed in the Current Members list in the
View/Change Novell Queues dialogue.
The PARI
S Spooler32 Technical Manual
53
Chapter 2
Setting the queue Operators list
The Operators list is the list of users who will have ‘Operator’ access to the
queue. It is possible to specify user groups.
To set the queue Operators list:
1.
Select the required queue from the Available Queues list.
2.
Click on the ‘Ops.’ radio button in the Current Members section of the
dialogue, then click on the Add button in the same section. The Select
Queue Member dialogue will be displayed.
1. Select the
queue.
2. Click on the ‘Ops.’ radio
button, then click on the
Add button.
54
The PARIS Spooler32 Technical Manual
Job Definitions
3. Select the required user name from the list of Available Members, then
choose OK.
3. Select the required
user name then
choose OK.
The added user name will be displayed in the Current Members list in the
View/Change Novell Queues dialogue.
The PARI
S Spooler32 Technical Manual
55
Chapter 2
Creating a PARIS Output Queue
A PARIS Output Queue is a queue that PARIS will attach to as a Queue User.
The queue should be created and configured using the Novell PCONSOLE
utility according to the normal Novell guidelines.
• PCONSOLE allows the Queue Users to be viewed, added to and deleted
from any print queue.
• In a ‘standard’ Novell network, creating a queue with PCONSOLE
automatically adds a ‘user group’ of ‘Everyone’, meaning all users have
access to the queue. The queue is automatically useable as a PARIS output
destination and the PARIS login user name does not have to be explicitly
added to the user list.
NOTE
Output queues can also be created via the PARIS dialogues, however the queue
will have no default servers, operators or users and must therefore be
configured entirely. PCONSOLE is quicker for creating PARIS output queues.
To prepare a queue for PARIS output:
56
1.
Create a new queue using PCONSOLE or select an existing queue.
2.
To make the queue useable under PARIS, ensure that the user name
with which the PARIS workstation is logged in is listed in the ‘Queue
Users’ attributes of the queue.
The PARIS Spooler32 Technical Manual
Job Definitions
Using Novell Print Queues with PARIS
Once the queues have been created and user access has been setup, the queues
are now available for PARIS use.
To send PARIS output to a queue, when defining the settings for a printer
setup, enter the queue name in the ‘Output To’ box for a print destination.
Enter the queue name in the
‘Output To’ box to send PARIS
output to a queue.
File Server Access
If PARIS resources have been loaded onto the file server, the login user name
used at a workstation running PARIS must have:
1.
Access to the file server disk containing the resources, and
2.
A valid drive mapping to the file server disk containing the resources.
For example, if PARIS has been installed to a file server but the user login
‘XLPRINT’ does not have access to that drive, then PARIS will fail to run.
Single Server Access
The current PARIS Novell support does not support multiple server networks.
This does not mean PARIS will not run in a multiple server network, but that
PARIS input or output queues must reside on the server that the workstation is
currently logged in to.
Queues can exist on more than one server but PARIS can only see the queues
on the current server.
NOTE
When Novell is chosen as the input source there are additional options available
by which an environment can be selected. Refer to the section
‘Environment File Selection’ on page 80.
The PARI
S Spooler32 Technical Manual
57
Chapter 2
Defining Novell Queue as the Input Source
When the Novell Queue option is first selected as the input source, the box to
the right will show the text PRINTQ1 (this is the default name). The name of
the Novell Queue to be polled for input is entered in this box.
If the name of the Novell Queue is known it can be directly entered in the box.
Enter the name of the
Novell Queue in this box
If the name is not known it can be selected from the available print queues.
To view the available print queues:
58
1.
Click on the Settings button to display the View/Change Novell
Queues dialogue.
2.
Select the required queue from the list then exit the dialogue and enter
the queue name in the Novell Queue box.
The PARIS Spooler32 Technical Manual
Job Definitions
Overview of using Serial as the Input Source
When you select ‘Serial’ as the Input Source, you will be required to set up
your serial port settings.
Before setting up your serial communications, it is important to understand
serial communications and the configuration of your PC.
Understanding Serial Communications
It is not within the scope of this manual to enter into a full explanation of serial
communications, however, in order to avoid problems there are some issues
that need to be understood.
Hardware Overrun Error Messages
A common problem with serial communication is ‘hardware overrun’ error
messages. The simple answer to their cause is that the baud rate is too high, but
there are other factors and there are simple solutions.
High Baud Rate
Hardware overrun errors and the frequency of this error depend on the PC
configuration, however the baud rate is normally the most critical factor.
Generally the higher the baud rate, the greater the probability of a hardware
overrun.
UART Signals an Error
The hardware overrun error indicates an overrun error of the receive buffer in
the Universal Asynchronous Receiver Transmitter (UART). The Comm driver
obtains this error by reading the Line Status Register (LSR) of the UART, of
which bit 1 is set when an overrun occurs.
When the Comm driver cannot service a Received Data Available interrupt,
before it receives the next transmitted character, the UART signals an error
because at least one character has been lost.
The PARI
S Spooler32 Technical Manual
59
Chapter 2
The UART chip
Every serial port uses a UART chip to send and receive data. Many machines
still use either the 8250 or the 16450 UART chip. The 8250 was the original
UART to ship with the IBM Personal Computer. This UART and the improved
16450 version are limited to one input register that holds one byte at a time.
These UART’s are not normally suited for speeds greater than 9600 bits per
second because of the possible input data overruns that occur, if a character is
left in the input register when the next byte is received.
The newer 16550A UART allows reliable data transfer at high speeds with its
16 byte FIFO (first in, first out) input register. The FIFO feature can buffer up
to 16 bytes at a time, which greatly improves serial communications speeds.
Other causes of hardware overrun error messages
Although the baud rate is the most likely cause of problems, other factors also
need to be considered. These include:CPU speed
Faster CPU’s allow faster throughput with fewer errors. This is because they
allow the communications driver to service character interrupts faster
(preventing interrupt overflow) and allow applications to handle transfer
protocols better.
System overhead
The more applications, TSR’s and device drivers that are running the busier the
operating system is. This reduces overall execution time for everything in the
system.
Windows 3.0 support of UART
Windows 3.0 does not support the advanced first-in first-out (FIFO) buffer
feature of the 16550A UART. It supports the 16550 and 16550A as a standard
8250 UART.
60
The PARIS Spooler32 Technical Manual
Job Definitions
Identifying the UART chip in your PC
The Microsoft Diagnostic utility (MSD) supplied with MS-DOS will easily
allow you to identify the various components of your PC, including the UART
chip.
MSD is run from the DOS prompt simply by typing MSD. The option for
COM ports will display all details including which UART chip is being used.
If you find that you have an older 8250 or 16450 UART, you should check
with your PC dealer about upgrading your I/O board to one with a 16550A
UART.
The information on the following pages is for the Cybercom.drv high speed
(16550AF) Windows serial port driver from Cybersoft Corp. This driver
allows Windows to take full advantage of the 16550 UART chip.
The PARI
S Spooler32 Technical Manual
61
Chapter 2
CyberCom V1.1.0.0P
CYBERCOM.DRV 9264 11-26-93 1:06p
The High Speed Serial Communications Driver for Windows 3.1 Designed for 386
(and above) systems using the 16550 serial port chip. (C) CyberSoft Corp 1993.
Requires Windows 3.1, Enhanced Mode, a 16550 UART
Introduction
CyberCom is a direct replacement for the standard Windows Communications Driver
(COMM.DRV).
Transfer at up to 115,200 KB with a 16550 serial port chip.
Great for V.FAST and Voice modems that require 57,600 Kb.
More reliable Transfer with less overhead on your system - better background
operation, fewer (if any) over/under runs.
How Does it Work?
Don't worry if the following sounds too complicated - just skip over it and move on to
the Installation.
CyberCom enables the FIFO buffer on the 16550 to be enabled for both receive AND
transmit (COMM.DRV only enables the FIFO for receive.)
The ‘interrupt trigger level’ has been set to 8 for both transmit and receive, this gives
your applications a lot more time to process incoming information. (COMM.DRV
sets the trigger level to 14 which means that your application only has 2 characters in
which read from the FIFO buffer.)
What this means is that your communications applications will get far fewer (if any)
‘under runs’ or ‘over runs’ when sending or receiving.
62
The PARIS Spooler32 Technical Manual
Job Definitions
Installation
1. Copy CYBERCOM.DRV into your Windows\System directory.
2. Edit the Windows\SYSTEM.INI file and change the following line:
from:
comm.drv=comm.drv
to:
comm.drv=cybercom.drv
3. If you previously have not taken advantage of the 16550 installed in your
computer, then ensure that the Windows\SYSTEM.INI file has the
following information:
[386Enh]
COMnFIFO=1(where n is the number of the COM port)
For example, if your 16550 is installed on, say, COM 1 then
[386Enh]
COM1FIFO=1
4. Start or Restart windows.
License
CyberCom is provided free for non-commercial use.
The PARI
S Spooler32 Technical Manual
63
Chapter 2
Defining Serial as the Input Source
When ‘Serial’ is selected as the input source to search, the box to the right will
display the serial source (the name of the defined COM port, COM1 is the
default) and the Settings button will be activated.
To set up your Serial Port Settings:
Click on the Settings button to display the View/Change Serial Port Settings
dialogue.
The dialogue contains three sections,Byte Settings, Handshaking
and Page
Eject.
When configured for Serial youmust ensure there is only one job definition
and the job definition contains only
one printer reference.
In other words, when using Serial as an Input Source, PARIS assumes one
input, one output and that environment changing will be done via either
Runtime events or conditional processing.
64
The PARIS Spooler32 Technical Manual
Job Definitions
Byte Settings
Byte Settings must be set to match those of the host computer. Ask your
maintenance engineering staff what settings are required.
Handshaking
The options available in the Hardware Handshaking drop-down menu are
None; DTR Only, RTS Only and DTR and RTS.
Software Handshaking
The Software Handshaking checkbox is selected by default.
WARNING!
This option shouldNOT be de-selected unless the host sends so slowly that
overruns cannot occur.
Page Eject
The page eject options control whether or not a page is ejected from the printer
after a specified number of seconds.
While this option is useful when the last page is not automatically ejected from
the laser printer, it can cause problems if the serial link is broken in the middle
of a print job, in this case the half completed page will be ejected before the
remaining data is received.
The PARI
S Spooler32 Technical Manual
65
Chapter 2
Overview of using the PARIS Port Monitor as the
Input Source
With the PARIS system you are able to create a Port Monitor that sends its
output to a temporary disk file allowing you to direct the output from the
normal Windows 95/NT4 spool system into the PARIS Spooler. The disk file is
then treated as normal input for the PARIS Spooler.
The advantage of this approach is that the actual source of the input data is
totally removed from PARIS. As long as the data can be delivered into the
Windows 95/NT spool system then PARIS can ‘intercept’ it.
To fully appreciate the benefits of the Port Monitor, it is critical to understand
the role of the ‘Print Providers’ in the PARIS system as they determine what
type of data is delivered to the Spool system.
The role of Print Providers
Most Windows applications such as Word or Excel use GDI to send data into
the spool system. GDI always sends data to a printer driver, which in turn
delivers formatted data into the spool system (as internal spool files). These
spool files always go to a port monitor for final delivery to the print device.
Other print providers, such as LPD or the DOS copy command, do not use a
printer driver and the data is delivered directly to the spool system which then
sends it to the port monitor.
The PARIS Port Monitor is able to receiveany data files sent into the
Windows 95/NT spool system. However, it makes no sense to send GDI files as
they are already formatted and therefore cannot be processed by PARIS. As a
result, the Port Monitor is only useful if the print provider used avoids the
Windows print driver (that is, it is not GDI based). This can be achieved by
directing the flow of data through the system as follows:
66
1.
Data enters the system via a third party provider.
2.
The data is stored in a temporary spool file.
3.
This file is then redirected to a temporary disk file via the port monitor.
4.
The engine processes the file and delivers output to the configured
destination.
The PARIS Spooler32 Technical Manual
Job Definitions
Win95/NT4 Spool System
Final Output
(printers, Novell
Queues, Disk Files)
Print Providers
GDI
Printer
Driver
Spooled
Files
Port
Monitor
PARIS
Output
LPD
Temp
Files
Other
Print
Providers
PARIS
Output
PARIS Spooler/Engine
The PARI
S Spooler32 Technical Manual
67
Chapter 2
Configuring your PARIS Port Monitor
To set up and use your PARIS Port Monitor you need to:
I.
Install the PARIS Port Monitor.
II. Create a Job Definition with the Port Monitor as the Input Source.
III. Set up a Windows printer with the above Job Definition (name and
path) as the input source.
NOTE: This printer is used specifically for input to PARIS.
I. Install the PARIS Port Monitor
When you install your PARIS system, the file PMCONFIG.EXE is installed in
the PARIS root directory and the file PARISPM.DLL is installed in the
WINDOWS/SYSTEM directory.
To install the PARIS Port Monitor:
1.
68
Run the PMCONFIG.EXE file
(either via the WindowsRun
dialogue or via Windows
Explorer, double-clicking on
the file name).
The Port Monitor
Configuration dialogue will be
displayed.
The PARIS Spooler32 Technical Manual
Job Definitions
2.
3.
Select the Add
Monitor button.
The PMCONFIG
dialogue will be
displayed confirming
that the Monitor is
added.
2.
Choose OK.
The Port Monitor will
be displayed in the list
in the Port Monitor
Configuration
dialogue (4).
3.
4.
The PARI
S Spooler32 Technical Manual
69
Chapter 2
II. Create a Job Definition with the Port Monitor as the
Input Source
When ‘Port Monitor’ is specified as theinput sourcein a Spooler Job
Definition, the port name given is used by the monitor. The Port Monitor then
makes this job definition available as aport name.
To add a job definition as a port name:
2.
3.
70
1.
Start the PARIS Spooler and select
‘Add’ from the Definitions menu.
The Job Definitions dialogue will
be displayed.
2.
Enter a name for the job definition.
(We have used the name ‘Invoice’
as this is to be the input source for
invoice files.)
3.
Select ‘Port Monitor’ as the Input
Source.
4.
Define the other settings as
required (Environment, Printer,
Printer Options etc. as described in
the later sections of this chapter)
then choose OK.
The PARIS Spooler32 Technical Manual
Job Definitions
NOTE
To view the added job definition, select ‘Settings’ from the Definitions menu in
the PARIS Spooler.
The added job definition with the Port Monitor as the Input Type will be
displayed.
Editing a port name (a job definition with port monitor as
the input source)
The settings for an added port name (environment name, copies, output
destination and so on) can be changed.
To change the settings for a port name:
1.
Go to the Spooler and open the Definitions menu,
2.
Select the Job Definition to be changed,
3.
Make the required changes.
Deleting a port name (a job definition with port monitor
as the input source)
To delete the port name that the Port Monitor uses:
Delete the matching Job Definition in the Spooler.
The PARI
S Spooler32 Technical Manual
71
Chapter 2
III. Set up a Windows printer
2.
1.
In Windows, go to the Add Printer Wizard.
2.
Select a common printer from the list (such as HPLaserjet 4 or
Generic) and go through the process of adding a printer.
When you are asked to select a port to use with the printer, the
port name (job definition) that you have added with the Port
Monitor as the input source will be displayed in the list of
available ports.
3.
3.
72
Select the added port name (job definition). In this case we
have selected the port name ‘INVOICE’ that we added.
The PARIS Spooler32 Technical Manual
Job Definitions
4.
4.
Give the printer a name. (As this printer is actually
for input to PARIS, you can choose a name relevant
to the type of files you are directing to the PARIS
Spooler.
5.
Once the printer is added, it will be displayed in the
Windows Printers dialogue.
5.
The PARI
S Spooler32 Technical Manual
73
Chapter 2
6.
Select the added printer, then select
‘Properties’ from the Printer menu.
6.
7.
7.
74
Select the ‘Details’ tab. The port name that
you have selected for the added printer will be
displayed in the ‘Print to the following port’
box.
The PARIS Spooler32 Technical Manual
Job Definitions
Deleting the PARIS Port Monitor:
1.
Run the
PMCONFIG.EXE file to
display the Port Monitor
Configuration dialogue.
2.
Select PARIS Port
Monitor from the list.
3.
2.
Select the Delete Monitor
button.
The PMCONFIG message
dialogue will be displayed,
confirming the Port Monitor
has been deleted.
The monitor name will be
removed from the list in the
Port Monitor Configuration
dialogue.
3.
The PARI
S Spooler32 Technical Manual
75
Chapter 2
Overview of using LPD Queue as the Input Source
The PARIS Spooler provides an LPD function that allows you to search for
input from LPD queues. A job definition is created with LPD Queue as the
input source and when created, an LPD Log is activated to display the status of
the LPD server.
What is an LPD?
LPD (Line Printer Daemon
) is a printer server function that allows you to
configure your locally attached printer as a network printer. This enables you to
make print services on your locally attached printer available to other people on
the network.
A computer on a network (host) that can create a TCP/IP data stream and use
the LPD protocol can print remotely or act as a print server.
NOTE
It is not within the scope of this manual to enter into a full explanation of the
LPD function and how to set up yourLPD print queues.
76
The PARIS Spooler32 Technical Manual
Job Definitions
Defining LPD Queue as the Input Source
To define LPD Queues as an input source, ajob definitionis set up with LPD
Queue selected as the input source and an LPD Queue name is entered. The
LPD Queue that is named is the link between input files and the job definition.
A job definition must be created for each LPD based data file. The same data
file cannot be printed using different job definitions.
The PARIS Spooler incorporates an LPD dialogue which logs the status of the
LPD function. If you have a job definition with LPD Queue specified as the
input source, when the Spooler is started, the LPD server will open and the
LPD Log dialogue will be displayed.
The LPD Log dialogue can be opened or closed from the Spooler System menu.
NOTE
You can set up your LPD queues, then create the relevant job definitions, or
create the job definitions, then set up your LPD queue.
The PARI
S Spooler32 Technical Manual
77
Chapter 2
Creating a Job Definition with LPD as the Input Source
2.
4.
3.
1.
In the Spooler, open the Definitions menu
and choose Add.
2.
In the Job Definitions Settings dialogue,
enter a name for the job definition.
3.
Choose LPD Queue from the list of Input
Sources. The adjacent edit box will display
the default setting ‘PARIS’.
4.
In the edit box, enter an LPD queue name,
then choose OK. A dialogue will be
displayed requesting if you want to start the
LPD Server.
5.
Choose ‘Yes’ or ‘No’ as required. If you
choose ‘Yes’ the LPD Log dialogue will be
displayed indicating the status of the LPD
server.
5.
78
The PARIS Spooler32 Technical Manual
Job Definitions
Defining the polling interval for searching an
Input Source
The polling interval is specified in the ‘Search Input Source every [x] seconds’
text field in the Input Source section of the Job Definition dialogue.
The polling interval instructs PARIS to search the specified input source
(Directory, Serial, Novell Queue) for the presence of input data at the interval
specified.
NOTE
A polling interval is not specified for a Port Monitor or LPD Queue.
Holding New Jobs
By default, the ‘Hold New Jobs’ checkbox is not activated.
If the ‘Hold New Jobs’ checkbox is activated, any jobs satisfying this job
definition will arrive in the system in a held state. These jobs will not be
processed until the status is changed from ‘Held’ to ‘Release’ in the Spooler
(refer to ‘Releasing a held job’ in Chapter 4).
This option is useful for large jobs that you do not want to start printing
automatically.
The PARI
S Spooler32 Technical Manual
79
Chapter 2
Environment File Selection
The next section in the Job Definition Settings dialogue controls the selection of
the environment file to be used for this input source.
Before describing how to use this method of selecting an environment file, it is
useful to review the general methods by which PARIS selects environments.
Method 1
The first method is where the environment is selected by direct call in the
incoming data file. That is, the data file has been preconditioned with either
Xerox DJDE [Dynamic Job Descriptor Events] or PARIS Runtime events.)
This method has two significant advantages.
•
First, it allows PARIS to provide support for Xerox legacy DJDE
conditioned data streams or LCDS and
•
Second, it allows the host application to have total control over
PARIS.
Its disadvantage is that it does require the host application to be changed to
insert these special records.
Method 2
The second method is where he
t environment is selected by conditional
processing abilities in PARIS. An extensive range of testing abilities in PARIS
enable it to look at the data as it flows into the system and make processing
decisions according to what conditions it finds.
This method, although powerful, needs to be fully understood before it is used
as by its nature it must scan all data coming into the system.
Unless the structure of the data has been fully understood, incorrect
environments could be loaded if it finds a match in a different data file.
80
The PARIS Spooler32 Technical Manual
Job Definitions
Method 3
This is the method that is used and displayed in the Job Definition Settings
dialogue and is where the environment call is linked to the input data file.
In simple terms this means that when PARIS searches and finds the data file
specified in the Input Source, it is to use the environment specified in the
Environment section of the dialogue.
This method provides a new and very powerful level of control for PARIS
users.
• It provides the dynamic functionality of a runtime event method without
having to change the host applications.
• It avoids the possible limitations associated with the environment test option.
When this data file is found,
use this environment
The PARI
S Spooler32 Technical Manual
81
Chapter 2
Selecting the Environment
The options available in the Environment section of the Job Definition dialogue
vary according to the Search type selected for the Input Source.
If Input Source is Directory…
If the Input Source is set to a Directory search, the ‘Select By’ option in the
Environment section of the Job Definition dialogue will displayDefault’
‘
. This
means that the environment to be attached to the input file found in this input
search, will be the environment specified as the default.
The default environment name is entered in the Default box.
Either: Type the environment name in the Default box,
Or:
Select the Browse button to display the Select/Enter File To Load
dialogue. The dialogue lists all the environments in your PARIS
Environment (ENV) directory.
Select the required file from the list, then choose the OK button. The file name
will be displayed in the ‘Default’ box.
82
The PARIS Spooler32 Technical Manual
Job Definitions
If Input Source is Novell Queue…
If the Input Source search is set to Novell Queue, two options are available for
selection of the environment.
The two options for Novell input areDefaultand Form Name.
Default
Default acts the same as Directory polling in that a default environment is
associated with a Novell input queue. Whenever a file is found in the specified
queue, the default environment will be associated with the queue and sent to the
engine for processing.
The default environment name is entered in the ‘Default’ box,
Either : Type the environment name in the ‘Default’ box,
Or:
Select the Browse button to display the Select/Enter File To Load
(.ENV) dialogue and choose the required environme
nt from the
list.
Form Name
The Form Name field is one of the attributes available in a Novell Queue. This
option allows PARIS to look at the Form Name attribute, extract the form
name and use it to select the environment to use.
If there is no Form Name attribute found, or if there is no matching
environment, the default environment is used.
Enter the default environment name in the ‘Default’ box as described above.
The PARI
S Spooler32 Technical Manual
83
Chapter 2
Selecting a Printer for a Job Definition
The Printers section of the Job Definition dialogue concerns printer selection.
This is where you specify where you want this job to be printed.
NOTE
A printer is not selected when Serial is the input source as only one printer can
be specified for Serial input.
To select a Printer:
1.
Click on the Add button in the Job Definitions Settings dialogue to
display the Select Printer dialogue. The dialogue will display a list of
the printers that have been configured for your PARIS system.
2
1
2.
Select the required printer from the list then click on OK. The selected
printer will be displayed in the Printers list in the Job Definition
Settings dialogue.
To remove a printer from the list:
84
1.
Select the printer to be removed from the Printers list.
2.
Click on the Delete button. The printer name will be removed.
The PARIS Spooler32 Technical Manual
Job Definitions
Selecting a printer when Novell Queue is the input
source
If Novell is the selected as the Input Source, an extra option ‘Form Name’ is
available. The printer name can be automatically selected by the Novell Form
Name attribute in the same way that it is used when selecting an environment
(refer to Form Name on page 83).
For example, if the Novell Form Name is called INVOICE and <Form Name>
is selected in the Select Printer dialogue, the output will be sent to a printer
called INVOICE after processing.
<Form Name> is
displayed when the
input source is
Novell Queue
To select the printer name automatically:
1.
Click on <Form Name>.
2.
Click on OK. <Form Name> will be displayed in the Printers list in
the Job Definition Settings dialogue.
The PARI
S Spooler32 Technical Manual
85
Chapter 2
Appending small print jobs into a single large job
Under Printer Options is the ‘Concatenate Logical Reports’ option.
The Concatenate Logical Reports option is used to solve the problem caused by
DJDEs calling different JDEs in an incoming data stream.
A change of JDE causes PARIS to go into its ‘end of job’ processing loop. In
the case of a PostScript printer, this means that the resources are flushed and
have to be re-sent.
Each time the JDE changes, it also creates a new job entry on the printer. In
extreme cases where the JDE is changing on almost every page the result can
be hundreds or potentially thousands of small jobs being submitted to the
printer. This also means that with each new job the resources are re-sent to the
printer.
Why is the option necessary?
The combination of the above factors has a severe impact on printer
performance. To prevent both the continual reloading of resources and flooding
the printer with numerous tiny jobs, the Concatenate Logical Reports option is
used. This instructs PARIS to append small print jobs into a single large job.
To append small print jobs into a single large job:
Select the ‘Concatenate Logical Reports’ checkbox.
NOTE
Incrementing output file names or extensions is explained under
Using
NEXTFILE as the output destinationin Chapter 1, Printer Definitions.
86
The PARIS Spooler32 Technical Manual
Job Definitions
Splitting the files in a print job
Under Printer Options is the ‘Split output after page’ option. This option is
used to split large files into several smaller files.
For example, if a 10,000 page file is split at every 1000 pages, the result would
be 10 files of 1000 pages.
To split the files in a print job:
1.
Select the ‘Split output after page’ checkbox.
2.
Enter the page position for the file splitting in the adjacent text field.
Selecting the Number of Copies to be printed
The number of copies of the file to be printed is entered in the Copies box. If
more than one printer is specified in the list, the output will automatically be
sent to each of the nominated printers.
A different number of copies can be specified for each printer in the list.
NOTE
The Total Copies box reflects the total number of copies sent to all the printers
in the list.
The PARI
S Spooler32 Technical Manual
87
Modifying a Job Definition
Once a job has been defined, the job definition settings can be viewed and, if
required, changed.
To view/change the settings for a job definition:
1.
Select the Settings option from the Definitions menu. The Select Job
Definition to View/Change dialogue will be displayed, listing the
added job definitions.
(The first .SJD listed is the default job definition created when the
Spooler is initially installed).
Settings option
2.
88
Select the required job definition from the dialogue, then choose OK.
The Job Definition Settings dialogue displayed will show the settings
for the selected job.
The PARIS Spooler32 Technical Manual
Job Definitions
3.
Once you have viewed the settings, change them if required, then
choose OK to exit the dialogue.
(If necessary, refer to the sectionAdding a Job Definitionthat begins
on page 40 for instructions on the use of the dialogue.)
The PARI
S Spooler32 Technical Manual
89
Deleting a Job Definition
If a job definition is no longer required, it can be deleted.
To delete a job definition:
1.
Select the Delete option from the Definitions menu. The Select Job
Definition to Delete dialogue will be displayed, listing the added job
definitions.
Delete option
2.
90
Select the job to be deleted from the list, then choose OK. The job will
be deleted and you will be returned to the Spooler control panel.
The PARIS Spooler32 Technical Manual
Chapter 3
E NGINE D EFINITIONS
Unlike the 16 bit PARIS Spooler which has a one-to-one relationship with the
formatting engine, the 32 bit PARIS Spooler is capable of launching and
managing multiple formatting engines.
How the Spooler manages multiple engines
When a job arrives for processing, the 32 bit Spooler automatically searches
for an available formatting engine and assigns the job accordingly.
For example, if you had the Spooler running with 2 engines launched and a
1000 page job arrived followed by a 2 page job, the first job (1000 page) would
be assigned to one engine and the following job would be assigned to the other
available engine. This means that the second job does not have to wait until the
first job is completed.
How many engines can be added and
launched?
There is no upper limit to the number of engines launched by the Spooler, but
rather it is governed by the practical processing limits of the hardware
platform.
The PARIS Spooler32 Technical Manual
91
Chapter 3
Adding an Engine
Print engines are added via the View/Change Print Engines dialogue which is
displayed by selecting ‘View List’ from the Engines menu.
To add an engine to the list:
1.
92
Click on the Add button to display the View/Change Engine dialogue.
The PARIS Spooler32 Technical Manual
Engine Definitions
2.
Either:
Accept the default setting,
Or:
Type in a name for the engine. The name can be Alphanumeric, up to
16 characters.
3.
For the engine to automatically start when the Spooler is started, leave
the Automatic Startup checkbox selected (default setting).
If you do not want the engine to start automatically, click on the
Automatic Startup checkbox to remove the check.
4.
Choose OK. The added engine will be launched when the Spooler is
restarted (if Automatic Startup has been selected).
The PARIS Spooler32 Technical Manual
93
Chapter 3
Launching an Engine
You can launch an engine that is not attached at any time, or if you add an
engine and wish to launch it immediately without restarting the Spooler, you
can do so.
NOTE
The availability status of an engine is displayed in the View/Change Print
Engines dialogue as ‘Not Attached’ or ‘Available’.
To launch an engine:
1.
Select the engine to be launched from the list in the View/Change Print
Engines dialogue.
2.
Select the Launch button. Once launched, the status of the selected
engine will be displayed as Available and the ‘Launch’ button will
toggle to ‘Shutdown’.
2
3
94
The PARIS Spooler32 Technical Manual
Engine Definitions
Editing an Engine
To edit an added engine:
1.
Choose View List from the Engines menu to open the View/Change
Print Engines dialogue.
2.
Select the required engine from the list then choose the Edit button to
display the View/Change Engine dialogue.
v
3.
Make the required changes then choose OK.
The PARIS Spooler32 Technical Manual
95
Chapter 3
Deleting an Engine
An added engine can be deleted, but the engine must be shutdown before the
Delete button becomes available.
To delete an added engine:
96
1.
Select the engine from the list in the View/Change Print Engines
dialogue and, if required, select the Shutdown button. The status of the
engine will change to Not Attached and the Delete button will become
available.
2.
Select the Delete button to delete the engine then select OK from the
Request dialogue to confirm the deletion.
The PARIS Spooler32 Technical Manual
P ART THREE
J OB C ONTROL AND P ROCESSING
Chapter 4:
Job Control
Chapter 5:
Single Job or Batch Mode Processing
Part Three
98
The PARIS Spooler32 Technica
l Manual
Part Three
J OB C ONTROL AND P ROCESSING
As well as providing processing control via the Online and Offline options in
the Printer drop down menu, the Spooler provides specific job control and
single job processing via the Jobs menu.
The PARIS Spooler32 Technical Manual
99
Chapter 4
J OB C ONTROL
The PARIS Spooler Jobs menu provides options specific to job control. A job
can be paused, restarted, held or released. Page controls are also available for a
selected print job.
1
2
3
The first section is context sensitive and will display the options Pause, Restart,
Hold or Release, depending on the status of the currently selected print job.
The options ‘Move Forward’ and ‘Sample Page’ are used for page control for
the selected print job.
The ‘Print Next’ option allows you to move a print job up the queue.
100
The PARIS Spooler32 Technical Manual
Pausing, Restarting, Holding and
Releasing a Job
The status of a job is displayed in the Status column in the PARIS Spooler
Control panel.
If a job is selected from the list of print jobs in the PARIS Spooler control
panel, the first option in the Jobs menu will display Pause, Restart. Hold or
Release according to the current status of the job.
Pausing a Job
To pause a job that is currently processing:
1.
EITHER:
Select the job from the list of print jobs in the PARIS Spooler control
panel, then open the Jobs menu,
OR:
Click the Right mouse button on the job in the control panel. The Jobs
menu will be displayed.
2.
Select Pause from the menu.
The job will be paused and the status of the job will displayed in the
Status column in the control panel. The option in the menu will change
to Restart.
The ‘Restart’ option is
displayed once a job is
aborted or paused and
can be selected to
requeue or restart the
job.
The ‘Pause’ option can
be selected to pause a
job that is currently
processing.
The PARIS Spooler32 Technical Manual
101
Chapter 4
Restarting a Job
To restart an aborted or paused job:
1.
EITHER:
Select the job from the list of print jobs in the PARIS Spooler control
panel, then open the Jobs menu,
OR:
Click the Right mouse button on the job in the control panel. The Jobs
menu will be displayed.
2.
Select Restart from the menu.
Holding a Job
If the selected job is not currently processing (the job is still in the queue
waiting its turn), it can be held by selecting the Hold option from the Jobs
menu.
To hold a job:
1.
EITHER:
Select the job from the list of print jobs in the PARIS Spooler control
panel, then open the Jobs menu,
OR:
Click the Right mouse button on the job in the control panel. The Jobs
menu will be displayed.
2.
Select Hold from the menu. The selected job will be held and the held
status will be displayed in the Status column of the Control panel.
The option in the menu will change to Release awaiting release of the
held job.
102
The PARIS Spooler32 Technica
l Manual
Job Control
Selecting a queued
job then selecting
‘Hold’ from the Jobs
menu will hold the
job.
Once a job is held the
option ‘Release’ will
be displayed for the
job.
Selecting a held job
then selecting
‘Release’ will release
the job.
Releasing a Job
To release a held job:
1.
EITHER:
Select the job from the list of print jobs in the PARIS Spooler control
panel, then open the Jobs menu,
OR:
Click the Right mouse button on the job in the control panel. The Jobs
menu will be displayed.
2.
Select Release from the menu.
The PARIS Spooler32 Technical Manual
103
Paper and page control
Page control options
for a selected print job
Moving Forward in a Job
Selecting the Move Forward option allows a number of pages to be skipped at
the beginning of a file.
NOTE
This option only applies to a job that has been previously paused.
Sampling a Page
This option is used to sample a page on apausedjob.
104
The PARIS Spooler32 Technical Manual
Job Control
Moving a print job to the front of the queue
To requeue a job:
1.
Select the job from the list of jobs in the control panel,
2.
Select Print Next from the Jobs menu to move the print job to the top
of the list (and front of the queue). The requeued job will be printed
next.
Print Next control option
for a selected print job
The PARIS Spooler32 Technical Manual
105
Chapter 5
S INGLE J OB OR B ATCH M ODE P ROCESSING
With job processing, the Spooler has been designed to be setup for the
automatic control of the constant flow of repetitive jobs through the system in a
real time on line environment. This is achieved by the use of Spooler Job
Definitions (SJDs).As you read earlier in the manual, the SJD is the
mechanism by which a repetitive processing instruction can be defined to the
Spooler. Once this definition is setup, it is stored and then re-used whenever the
matching conditions are encountered.
This automatic processing philosophy may not necessarily suit all situations.
For example, in some environments such as service bureaus, much of the work
is not repetitive, and virtually every job can be different. Also, during the
development cycle there is often a requirement to produce a test run of an entire
file. The PARIS Designer system only has an ability to print a single page at a
time from the editor, so the Spooler must be used to do a full ‘live’ test run.
Single Spooler Job Request
In order to accommodate these needs for single job processing, the PARIS
Spooler has an option in the Jobs menu that easily allows single jobs to be
added. This is achieved by bypassing the requirement to create a Spooler Job
Definition, instead a dialogue has been created that creates a single Spooler Job
Request according to the information entered into the dialogue.
This Job Request is then automatically added into the printer queue and
submitted to the engine in the normal fashion. Once the job has been processed
the Job Request disappears.
106
The PARIS Spooler32 Technical Manual
Adding a single job
To set up a single job request:
1.
Select Add from the Jobs menu. The New Job Request dialogue will
be displayed.
Input Information
Enter the Input Information in the Data Source and Description boxes.
2.
In the Data Sourcebox:
Either:
Type the source directories and filename for the input file in the Data
Source box,
Or:
Click on the Browse button to display a standard Windows file
browser and use the browser to select the input file.
3.
In the Descriptionbox enter a description of the file. (The Description
box will display the description ‘Disk File’ by default, however a
description of your own choice can be entered which will be displayed
in the Spooler control panel.)
The PARIS Spooler32 Technical Manual
107
Chapter 5
Output Options
Once the input source is specified you now need to tell the system which printer
you wish to print to and what environment to use. Both options have a Browse
button available to make the selection easy. In both cases these are PARIS
browsers rather than standard Windows file browsers.
4.
In the Printer box:
Either:
Type in the name of the required printer,
Or:
Click on the Browse button to display the PARIS Select Printer
dialogue and select the required printer from the list.
5.
In the Environmentbox:
Either:
Type in the name of the required environment,
Or:
Click on the Browse button to display the PARIS Select/Enter File To
Load (.ENV) dialogue and select the required environment from the
list.
6.
In the Copies box:
Specify the number of copies you require.
7.
Once you have filled in all the details, click on OK.
PARIS immediately generates a Spooler Job Request (SJR) and places it in the
queue for that printer. If the printer is online, and no other jobs are in the queue,
the job instructions will be immediately dispatched to the engine.
If other jobs are already queued it will simply be added to the end of the queue.
NOTE
A single New Job Request uses the attribute changing method, that is as soon
as the request is generated, the file attribute of the file is changed to ‘Hidden’.
As soon as the engine has completed processing the job and notifies the
Spooler, the file is deleted.
108
The PARIS Spooler32 Technica
l Manual
Single Job or Batch Mode Processing
Editing a single job
To edit a job listed in the control panel:
1. Either:
Double-click on the print job to display the Job Request dialogue for the
selected job,
Or:
Select the print job from the list, then select Settings from the Jobs menu to
display the View/Change Job Request dialogue.
2. Edit the Job Request as required.
The PARIS Spooler32 Technical Manual
109
Chapter 5
Deleting a single job
To delete a single print job from the list, select the print job, then select Delete
from the Jobs menu. A message box will appear, requesting confirmation or
cancellation of the deletion.
Select ‘Yes’ or No’ as required.
110
The PARIS Spooler32 Technica
l Manual
Single Job or Batch Mode Processing
Flushing the print jobs from a printer
The print jobs that have been added to a printer can be flushed from the printer.
To do this, select the printer from the control panel, then select ‘Flush’ from the
Printers menu. All the print jobs defined for the selected printer will be flushed
(removed).
The PARIS Spooler32 Technical Manual
111
Chapter 5
112
The PARIS Spooler32 Technica
l Manual
P ART FOUR
SPOOLER SYSTEM SETTINGS AND
SPOOLER C ONTROL
Chapter 6:
System Settings
Chapter 7:
Spooler Control
Part Four
114
The PARIS Spooler32 Technica
l Manual
Part Four
S POOLER S YSTEM S ETTINGS AND S POOLER C ONTROL
The System menu in the PARIS Spooler control panel provides you with three
options, ‘Settings’, ‘Pause’ and ‘Exit’.
The Settings option allows you to define system-wide settings, the Pause option
is used to pause the Spooler and the Exit option is used to exit the Spooler
system.
115
The PARIS Spooler32 Technical Manual
Chapter 6
S YSTEM S ETTINGS
The Settings option allows you to set system-wide default settings for the
Spooler engine and the date and time format.
Verify Engine every [xx] seconds
The first option, ‘Verify engine every [xx] seconds’ is the interval after which
the Spooler will check to verify that the engine is still connected. The range is 1
to 99 with a default of 5.
Date and Time Format
The current date and time are displayed in the Spooler control panel Status Bar
and can be altered.
The PARIS Spooler32 Technical Manual
116
System Settings
Date Format
The Date Format options available for selection are:
MMM DD, YYYY
DD Month, YYYY
Month DD, YYYY
e.g. Jan 23, 1999
e.g. 23 January, 1999
e.g. January 23, 1999
Time Format
The Time Format options available for selection are:
HH:MM:SS - 24 hour clock
HH:MM:SS - 12 hour clock, no am/pm
06:43:22
HH:MM:SS xx - 12 hour clock am/pm
The PARIS Spooler32 Technical Manual
e.g. 18:43:22
e.g.
e.g. 06:3:22 pm
117
Chapter 7
S POOLER C ONTROL
Starting the Spooler without downloaded print
jobs being processed
Apart from control of jobs via the Jobs menu,there may be instances when you
wish to start the Spooler yet prevent any jobs that have been downloaded from
being processed. For example, you may wish to make changes to a job
definition or perform a test run.
To do this, start the Spooler with the command line parameter/T=FALSE.
The Spooler and Engine will both start, but the timing loop is not activated.
This prevents processing messages being sent between the Engine and Spooler
and as a result no processing takes place.
118
The PARIS Spooler32 Technical Manual
Spooler Control
Pausing the Spooler
The Pause option allows you to temporarily stop the Spooler from performing
its normal functions. It effectively turns off the Spooler timing loop, and as a
result no new jobs requests will be automatically created, and no processing
messages will be forwarded to the engine.
1.
To pause the
Spooler, select
‘Pause’.
This option is useful for pausing the system to create new printer or job
definitions, or for setting up test runs of new or changed applications.
When the ‘Pause’ option is selected, the Spooler Status Bar will show
‘Processing Paused’. The option in the System menu will change from ‘Pause’
to ‘Resume’.
The PARIS Spooler32 Technical Manual
119
Chapter 7
When the Spooler is
paused, the option
changes to
Resume.
2.
Select ‘Resume’ to
restart the Spooler.
When the Spooler is
paused, the Status Bar
displays ‘Processing
Paused’.
To restart the Spooler after pausing, select Resume from the System menu. The
Status Bar will display the message ‘Processing Started’.
When the Spooler is
restarted, the Status Bar
displays ‘Processing
Started’.
120
The PARIS Spooler32 Technical Manual
Spooler Control
Exiting the Spooler
The final option in the System menu is ‘Exit’. Selecting this option shuts down
both the Engine and the Spooler.
NOTE
It is not advisable to shut down the Spooler or Engine mid-job. Ensure the
Spooler is either paused or not processing before exiting.
The PARIS Spooler32 Technical Manual
121
Chapter 7
122
The PARIS Spooler32 Technical Manual
APPENDIX A
M ODIFYING THE
C HARACTER SELECTION TABLE
Appendix A
124
The PARIS Spooler32 Technical Manual
Appendix A
M ODIFYING THE C HARACTER S ELECTION T ABLE
The ANSI character set which is supported by Windows includes 256
characters, numbered 0 to 255. The standard definition of characters 0 to 127
correspond to the letters, numbers and symbols seen on a standard U.S.
keyboard and it is these characters that are predominantly used in the English
language.
The remaining characters (128 to 255) are generally unused and correspond to
characters not usually found on your computer’s keyboard, such as accented
letters, currency symbols and mathematical symbols.
PARIS provides you with the option to control the number of characters
downloaded in a character set by allowing you to modify the character selection
table.
Why control the number of characters?
PARIS manages printer resources, the downloading of fonts, forms and
graphics to the printer, according to the capabilities of the device and PDL
(Page Description Language) being used. By controlling the number of
characters in a character set, the transmission time to the printer to download
fonts can be reduced.
For example, if you are using a printer that requires the resources to be sent
every time a job is printed, the transmission time to the printer is increased. If
you are printing multiple jobs, you can reduce the transmission time by
speeding up the downloading of fonts. This is achieved by modifying the
number of characters being downloaded.
The PARIS Spooler32 Technical Manual
125
Appendix A
Modifying the character set
The number of characters within a character selection table are controlled from
the ENGINES.INI file in the PARIS directory (PARIS/ENGINES.INI).
To modify the character set:
1. Open the ENGINES.INI file. The default settings for the ENGINES.INI file
are as follows:
[XLEng0]
Connect=LOCAL
Spooler=XLSp10
NLink=DLL
CSTLimit=255
The command line ‘CSTLimit=XXX ’ describes the current number of
characters in the Character Selection Table (CST). The default setting is 255.
2. Edit the number of characters required within the range 0 to 255 (for example,
CSTLimit=128 will provide the characters 0 to 127 which correspond to
the letters, numbers and symbols seen on a standard U.S. keyboard).
•
All bitmap fonts that are downloaded are affected.
An example of an edited ENGINES.INI FILE:
[XLEng0]
Connect=LOCAL
Spooler=XLSp10
NLink=DLL
CSTLimit=128
WARNING!
The syntax rules for editing a file are strict. Command lines are case-sensitive
and must be edited exactly in the format displayed.
126
The PARIS Spooler32 Technical Manual
APPENDIX B
M EDIA
U SING THE
M APPING F UNCTION
Appendix B
128
The PARIS Spooler32 Technical Manual
Appendix B
U SING THE M EDIA M APPING F UNCTION
Media Mapping Overview
The Media Mapping function in PARIS applies only to Xerox Docuprint 350,
350HC, 390 and 390 HC printers. For these printers, PARIS supports the
selection of different paper stock for printing jobs through the Media Mapping
function which is accessed within the View/Change Printer dialogue.
As PARIS ‘thinks’ in terms of trays and Docuprint printers ‘think’ in terms of
media, the Media Mapping function allows the user to either describe PARIS
trays to the Docuprint, or the Docuprint media to PARIS, whichever fits the
user’s needs.
The Media Mapping function is a supplement to existing tray handling features
for Xerox Docuprint printers, not a replacement.
The PARIS Spooler32 Technical Manual
129
Appendix B
Setting up Media Mapping
Media Mapping is invoked whenever an XPD/PPD file contains at least one
‘*XLPInputMedia’ statement.
WARNING!
Both XPD and PPD files are text files and can be edited using a standard text
editor, however, it is recommended that these shouldNOT be changed except
by experienced users or under instruction by the distributor.
A full description of the working of XPD and PPD files can be found inHow
‘
do PPD (PostScript Printer Description) files work?
’ in the PARIS Designer
Reference Manual.
Adding ‘*XLPInputMedia’ statements
The first step to setting up Media Mapping for your Xerox Docuprint is the
addition of ‘*XLPInputMedia’ statements to any XPD/PPD that will be used to
drive the Docuprint (XPD/PPD files are supplied as part of the PARIS install).
• ‘*XLPInputMedia’ statements replace the Adobe*InputSlot’
‘
statements,
and have an identical syntax.
• If an XPD/PPD file contains both ‘*InputSlot’ and ‘*XLPInputMedia’
statements, the ‘*InputSlot’ statements are ignored.
• ‘*XLPInputMedia’ statements tell the PARIS system which printer uses
Media Mapping and how many media options the printer supports.
• One ‘*XLPInputMedia’ statement is required for each option that is to be
made available in the Environment Editor.
For example, the XPD/PPD file for a Docuprint with 2 input trays would
contain 2 ‘*XLPInputMedia’ statements. A 4 tray printer XLP/PPD would
have 4 entries.
Each entry makes another option available in the PARIS Environment Editor.
For example, the statement*XLPInputMedia Upper: “”means that ‘Upper’
will appear in the editor as a valid option for tray selection.
130
The PARIS Spooler32 Technical Manual
Using the Media Mapping Function
Setting up Media Mapping for an Environment
Media and tray options are used identically to any other printer tray support
options. For example, on an HP5 printer, the user selects ‘Upper’ in a pagedef,
event or DJDE to select paper from the upper tray. On a Xerox Docuprint
printer, the user selects ‘Upper’ to select paper from any tray that meets the
mapping for ‘Upper’.
Selecting the Media Mapping button in the View/Change Printer dialogue will
display the View/Change Media Mappings dialogue and the table of mappings
for the environments in your PARIS system.
Selecting the Media Mapping
button will display the
View/Change Media
Mappings dialogue.
Each user-defined Docuprint printer has its own table of mappings. Within this
table there is a default environment mapping <other>)
(
which applies to any
environment that does not have a specific mapping.
Click on the ‘Add’ button
to display the
View/Change
Environment Mapping
dialogue to add the
mapping for a tray
The mapping is added for a tray in an environment by selecting the Add button
to display the View/Change Environment Mapping dialogue.
The PARIS Spooler32 Technical Manual
131
Appendix B
Adding the ‘mapping’ for a tray in an environment
The View/Change Environment Mapping dialogue will display a table of the
default mapping and user-defined mappings for selected environments.
Click on the Browse
button to select the
environment to be
mapped
Default Mapping
The default mapping simply assigns the default tray to be any
‘ color, any
weight, any type, any size’
, in other words, the default mapping is to useany
tray on the Docuprint. For users who do not need tray selections, this allows
any job to print without any user intervention.
User-defined Mapping
When a job requires tray selection, each tray that will be used within the job
must be ‘mapped’ so that the Docuprint can select that media. Each tray can
be mapped to a particular color, weight, type and size.Any or all of these can
be blank.
NOTE
The Size field should not be used unless you need to mix paper sizes within a
job. If the job only uses a single page size, theSize field should be left blank
.
132
The PARIS Spooler32 Technical Manual
Using the Media Mapping Function
Selecting the environment to be mapped
The environment to be mapped is selected by clicking on the Browse button to
display the Select/Enter File To Load (.ENV) dialogue.
The selected environment will be displayed in the ‘Environment’ box.
Selected
environment
Click on the Add
button to display the
View/Change Media
Mapping dialogue to
‘map’ a tray.
To add the mapping for a tray, click on the ‘Add’ button to display the
View/Change Media Mapping dialogue.
The PARIS Spooler32 Technical Manual
133
Appendix B
Mapping the tray(s)
The Media drop-down menu displays all the available tray assignments in
PARIS.
Media
It is recommended to only use the ‘Upper’, ‘Lower’, ‘Middle’ and Tray4’
selections.
Size
The Size values are entered in points (NOT dots). These values can be found in
the page size section of the PPD for the printer to which you are printing. The
values are entered as they appear in the PPD, that is,width then height.
For example: For letter size on a 4890NPS, you would enter 612 792 (no
brackets with a single space between the two values).
To map a tray:
1. Select the required Media and enter theColor, Weight, Type and Size
values into the appropriate edit box.
2. Choose OK. The added tray mapping will be displayed in the View/Change
Environment Mapping dialogue.
134
The PARIS Spooler32 Technical Manual
Using the Media Mapping Function
Editing the mapping for a tray in an environment
The mapping for a tray is edited by displaying the required environment in the
View/Change Environment Mapping dialogue, then selecting the tray mapping
to be edited.
Selected
environment
The View/Change Media Mapping dialogue will be displayed for editing.
Edited ‘type’
setting
The PARIS Spooler32 Technical Manual
135
Appendix B
Deleting the mapping for a tray in an environment
The mapping for a tray is deleted by displaying the required environment in the
View/Change Environment Mapping dialogue, then selecting the tray mapping
to be deleted.
A warning box will request confirmation or cancellation of the deletion.
136
The PARIS Spooler32 Technical Manual
Using the Media Mapping Function
Editing the ‘mapping’ for an environment
The View/Change Media Mappings dialogue will display the table of mappings
for the environments in your PARIS system.
To edit the mappings for an environment, select the environment, then the Edit
button to display the View/Change Media Mappings dialogue.
Select the
environment
Select the Edit
button
Tray mapping can be added to the environment or the current mapping can be
edited or deleted (refer to the previous sections).
The PARIS Spooler32 Technical Manual
137
Appendix B
Matching the mappings to the printer
The final step is to ensure the mappings match the printer . The physical
Docuprint printer must be configured to match these media using the
SETTRAY console command.
It is not within the scope of this manual to describe the working of the
SETTRAY function on the Docuprint. Refer to your Docuprint documentation
for this information.
138
The PARIS Spooler32 Technical Manual
Using the Media Mapping Function
An example of setting up the Media Mapping for a
Docuprint
A PARIS print destination called D
‘ ocuPS’ is created that uses a Docuprint
printer with 4 trays. The XPD/PPD file would contain 4 entries:
*XLPInputMedia Upper: “”
*XLPInputMedia Lower: “”
*XLPInputMedia Middle: “”
*XLPInputMedia Tray4: “”
This XPD/PPD means the Environment Editor will allow the creation of
environments using any or all of these 4 trays.
•
An environment called ‘Invoice’ is created.
•
Tray select events are created that, at various times during a job, call for all 4
trays to be used.
•
The Media Mapping option is selected in the DocuPS’
‘
printer View/Change
Printer dialogue to create a mapping for the environment ‘Invoice’.
This mapping MUST contain 4 entries (no more, no less). Each entry maps
one of the trays used (Upper, Lower, Middle and Tray4) to a unique
combination of color, weight and type.
For example: Upper=white,75,plain
Lower=white,75,Cheque
Middle=Blue,140,Cover
Tray4=white,140,plain
Finally, the Docuprint must be configured so that each of the four physical
trays has one of the above mappings.
Typically, the largest capacity trays would be configured to the most
commonly used media, in this example ‘Upper=white,75,plain’.
The flexibility of this system is that the user can either configure the printer to
match an environment’s needs, or create media mappings that match the
printer configuration.
The PARIS Spooler32 Technical Manual
139
Appendix B
140
The PARIS Spooler32 Technical Manual
APPENDIX C
M ODIFYING PARIS J OB T ICKETS
Appendix C
142
The PARIS Spooler32 Technical Manual
Appendix C
M ODIFYING PARIS J OB T ICKETS
The PARIS Job Ticketing function provides printers with the information
necessary to create banner sheets for print jobs that contain:
the name of the user sending the job,
a description of the job and
account details for allocation of costs for the job.
NOTE
Currently, Paris Job Ticketing applies to Xerox Docuprint andDocutech
printers only.
Job Ticket Structure
A Job Ticket is structured to contain three sections:
• the header, which contains one mandatory record,
• the control section, which in PARIS contains three mandatory and one
optional record,
• the trailer, which contains one mandatory record.
Record Structure
A Job Ticket record consists of the record name and a value as illustrated
below .
Record name
Value
%XRXsenderName: Paris
Single space
143
The PARIS Spooler32 Technical Manual
Appendix C
The PARIS Job Ticket structure
The PARIS Job Ticket file contains 5 mandatory records and an additional
record for accounting purposes as follows:
%XRXbegin:
the mandatory header record that identifies the beginning of
the job ticket
%XRXdisposition:
mandatory record containing the print instructions. PRINT
is the only option supported by PARIS.
%XRXsenderName: mandatory record containing the user’s name
%XRXtitle:
mandatory record containing a description of the job
%XRXaccount:
optional record containing account details
%XRXend
the mandatory trailer record that identifies the end of the job
ticket
144
The PARIS Spooler32 Technical Manual
Modifying PARIS Job Tickets
How are Job Tickets enabled in PARIS?
The XLPrint supplied XPD files in the PARIS\PRT directory contain XPD
statements to enable job ticketing.
PARIS XPD Files
XPD files are the way PARIS describes the features of the printer. They work
either as standalone files, in the case of HP-PCL printers, or in combination
with PPD (Postscript Printer Description) files, in the case of Adobe Postscript
printers and are used to:
(a) describe the features of an output destination, and
(b) to put the appropriate instructions into the output file to call the features.
In general terms XPD files are created and supplied by your distributor. PPD
files are those files supplied by the Printer manufacturer. An XPD for a
PostScript printer simply contains a reference to include a corresponding PPD
file in the XPD.
NOTE
A full description of the working of XPD and PPD files can be found inHow
‘
do XPD and PPD files work?
’ in Chapter One of the PARIS Designer
Reference Manual.
The PARIS Spooler32 Technical Manual
145
Appendix C
XPD statements in XPD files
The XPD files in the PARIS\PRT directory contain XPD statements for job
ticketing as follows:
*XPD_XJTVersion: 0200
This statement is compulsory to enable job
ticketing and should not be edited.
*XPD_XJTEncoding: 100.
The default encoding for this statement is
ISO 10646 level 2 character set. This
normally would not be changed.
*XPD_XJTSender: Paris
The Sender field contains the user’s name
and can be up to 40 characters.
For example, Accounts Department.
The default setting is Paris.
*XPD_XJTTitle: print file
The Title field contains a description of
the job and can be up to 40 characters.
For example, Monthly Statements.
The default setting is print file.
*XPD_XJTAccount: <account
name>
Account is a field of 3 to 12 characters
which is used to specify the allocation of
costs. For example, Admin.
The structure of an XPD statements is statement name, colon, space, value.
Colon
Statement name
Single space
*XPD_XJTTitle: print file
Value
These statements create the Job Ticketing records:
%XRXbegin: 100.0200
%XRXdisposition: PRINT
%XRXsenderName: Paris
%XRXtitle: print file
%XRXaccount: <account name>
%XRXend
146
The PARIS Spooler32 Technical Manual
Modifying PARIS Job Tickets
Modifying a Job Ticket
A Job Ticket is created by default via the*XPD_XJTVersion: 0200statement
in the XPD file for your printer and can be modified via the XPD file or via the
Environment editor.
• A Job Ticket modified via the XPD file will apply to all print jobs sent to
that printer
• A Job Ticket modified via the Environment Editor for a current environment
will apply only to print jobs containing that environment.
Modifying a Job Ticket via the XPD file
XPD files are contained in the PARIS\PRT directory. Each XPD file contains
the default XPD statements for job ticketing that will print a banner page with
the default values (refer to the previous page).
You can either accept the default values for the banner page or edit the XPD
file to enter your own values.
WARNING!
XPD files can be edited using a standard text editor, however care must be
taken when making any changes. Follow the instructions on the following page
carefully and make changes only to those statements and values where
indicated.
The PARIS Spooler32 Technical Manual
147
Appendix C
To edit the XPD file:
1.
Open the PARIS\PRT directory.
2.
From the list of XPD files, open the file relevant to your printer.
1
2
In the XPD file, the only XPD statements that can be edited are:
*XPD_XJTSender: Paris
*XPD_XJTTitle: print file
*XPD_XJTAccount: <account name>
The only changes that can be made are to the default values for the
sender of the print job (default:Paris), the title of the job (default:
print file) and the account details.
148
3.
Make the required changes (refer to page146 for field sizes for each
value).
4.
Save the edited XPD file and close the file.
The PARIS Spooler32 Technical Manual
Modifying PARIS Job Tickets
Modifying a Job Ticket via the Environment Editor
To create a Job Ticket via the Environment Editor:
1.
Open the PARIS Designer Environment Editor and the required
environment.
2.
Open the File menu and choose Env Info to display the Environment
Information dialogue.
In the appropriate fields for Printing Information enter the:
User Name (a name associated with the job, usually the sender),
Job Title
(a name associated with this job, usually the name of
the type of document),
Accounting (the name of the account that will be charged for the
printing costs associated with the job).
3.
Choose OK. The job ticketing information will be saved with the
environment.
The PARIS Spooler32 Technical Manual
149
Appendix C
150
The PARIS Spooler32 Technical Manual
INDEX
Index
152
The Spooler 32 Technical Manual
Index
printer attributes · 14
A
adding
engine · 92
input information for a single job · 107
job definition · 39–89
job definition as a port name · 70
mapping for a tray in an environment · 132
output options for a single job · 108
printer definition · 13–33
single job (SJR) · 107
XLPInputMedia statements · 130
appending small print jobs into a single job · 86
C
changing · See also modifying
character selection table
modifying · 125, 126
concatenate logical reports in a job definition · 86
configuring
port monitor · 68
Control Panel · 6
controlling
jobs · 100
Spooler · 115, 118
creating
job definition with LPD as the input source ·
78
job definition with port monitor as the input
source · 70
Novell queue · 47
PARIS input queue · 48
PARIS output queue · 56
CyberCom drive · 62
installation · 63
D
date setting · 117
defining
Directory as the input source in a job
definition · 42
LPD queue as the input source · 77
NEXTFILE output settings · 19
Novell Queue as the input source in a job
definition · 47
the input source in a job definition · 41
the polling interval for searching an input
source · 79
the search path for a directory · 45
the search settings for a directory · 46
deleting
engine · 96
job definition · 90
job definition added as a port name · 71
mapping for a tray · 136
port monitor · 75
printer · 35
single job · 110
dialogue
Engine · 7
Spooler Control Panel · 6
directory
as the input source · 42–46
defining as the input source in a job definition
· 42
defining the search path · 45
defining the search settings · 46
polling for input data · 42
searching for input · 45
selecting the environment file when directory
is the input source · 82
using as the input source · 45
E
editing
engine · 95
job definition added as a port name · 71
mapping for a tray · 135
mapping for an environment · 137
single job · 109
engine
adding · 92
deleting · 96
editing · 95
Spooler management of multiple engines · 91
verifying connection · 116
Engine dialogue · 7
environment
adding the mapping for a tray · 132
deleting the mapping for a tray · 136
editing the mapping · 137
The Spooler 32 Technical Manual
153
Index
editing the mapping for a tray · 135
selecting for media mapping · 133
environment file
selecting for a job definition · 80, 82
selecting, when the input source is directory ·
82
selecting, when the input source is Novell
queue · 83
example of a Spooler Job Request · 43
exiting
Spooler · 121
F
flushing
print jobs from a printer · 37, 111
H
hardware overrun messages · 59
baud rate · 59
causes · 60
holding
job · 102
holding new jobs · 79
I
input source
defining the polling interval for searching · 79
directory, polling for input data · 42
directory, searching for input · 45
installing · See also setting up
port monitor · 68
J
job
appending small print jobs into a single job ·
86
control · 100
holding · 102
moving to the front of the queue · 105
pausing · 101
printing a sample page · 104
releasing · 103
restarting · 102
selecting the number of copies to be printed ·
87
single job processing · 106
single, adding · 107
single, adding input information · 107
154
single, adding output options · 108
single, deleting · 110
single, editing · 109
skipping pages · 104
splitting files in a print job · 87
job definition
adding · 39–89
adding as a port name · 70
concatenate logical reports option · 86
creating, with LPD as the input source · 78
creating, with port monitor as the input source
· 70
defining Directory as the input source · 42
defining LPR/LPD queue as the input source ·
77
defining Novell Queue as the input source · 47
defining Port Monitor as the input source · 68,
70
defining Serial as the input source · 64
defining the input source · 41
deleting · 90
holding new jobs · 79
modifying · 88
name · 41
removing a printer · 84
selecting a printer · 84
selecting a printer when Novell queue is the
input source · 85
selecting the environment file · 80, 82
using Port Monitor as the input source · 66
using Serial as the input source · 59
job ticket
creating · 143
modifying · 147
modifying via the Environment Editor · 149
modifying via the XPD file · 147
job ticket structure · 143
job ticket structure in PARIS · 144
job ticketing
enabling · 145
job ticketing file · 146
jobs
holding · 79
preventing downloaded jobs from being
processed · 118
L
LPD (Line Printer Daemon) · 76
LPD Queue
as the input source · 75–78
M
The Spooler 32 Technical Manual
Index
Media Mapping · 31
adding the mapping for a tray · 132
adding XLPInputMedia statements · 130
deleting the mapping for a tray · 136
editing the mapping for a tray · 135
editing the mapping for an environment · 137
matching the mappings to the printer · 138
overview · 129
selecting the environment to be mapped · 133
setting up · 130
setting up for an environment · 131
modifying
job ticket via the Environment Editor · 149
job ticket via the XPD file · 147
modifying
character selection table · 125, 126
job definition · 88
job ticket · 147
printer · 34
moving
forward in a job · 104
job to the front of the queue · 105
N
naming
job definition · 41
printer · 14
NEXTFILE
defining output settings · 19
selecting as the printer output destination · 19
Novell queue · See queue, Novell
using with PARIS · 57
O
output destination
disk file · 18
Novell Queue · 18
physical port · 18
selecting for a printer · 18
Windows defined printer · 18
P
PARIS queue · See queue, PARIS
pausing
job · 101
Spooler · 119
PCL4 · 24
physical page shift
shifting the print image on the page · 32
port monitor
adding a job definition as a port name · 70
as the input source · 66–75
benefits · 66
configuring · 68
creating a job definition · 70
deleting · 75
deleting a job definition added as a port name ·
71
editing a job definition added as a port name ·
71
how it works with print providers · 66
installing · 68
setting up a printer · 72
using as the input source · 68
port settings · See serial port settings
preparing
PARIS queue for input · 50
print jobs
removing from a printer · 37, 111
printer
adding · 13–33
attributes, defining · 14
defining · See adding
defining NEXTFILE output settings · 19
deleting · 35
flushing the print jobs · 37, 111
matching the media mappings · 138
modifying · 34
name · 14
output destination · 18
PCL4 · 24
priority · 22
rebuilding printer type list · 17
removing from a job definition · 84
resetting resources · 29
resource storage · 23
resources, management of · 23
saving the added printer definition · 33
selecting for a job definition · 84
selecting for a job definition when Novell
queue is the input source · 85
selecting NEXTFILE as the output destination
· 19
setting offline or online · 36
setting up · 12
shifting the print image on the page · 32
SPD files · 33
status · 36
type list · 15
updating resources · 27, 28
Windows defined · 18
printer options
The Spooler32 Technical Manual
155
Index
selecting the concatenate logical reports option
in a job definition · 86
printer reset options
At Job Start · 30
At System Start · 30
Never · 29, 30
Reset at start of next job · 30
printing
sample page of a job · 104
processing
single job · 106
Q
queue, LPD
defining as the input source · 77
queue, Novell
as the input source · 47–58
creating · 47
searching for input · 58
selecting a printer when the input source · 85
using as the input source · 57
using with PARIS · 57
queue, Novell as the input source
selecting the environment file · 83
queue, PARIS
preparing for input · 50
setting the queue Operators list · 54
setting the queue Servers list · 52
setting the queue Users list · 50
queue, PARIS input
creating · 48
queue, PARIS output
creating · 56
R
rebuilding
printer type list · 17
releasing
job · 103
removing
print jobs from a printer · 37, 111
printer from a job definition · 84
resetting
printer resources · 29
resources
printer, management of · 23
printer, resetting · 29
printer, storage of · 23
printer, updating · 27, 28
restarting
job · 102
156
S
saving
printer definition · 33
searching
a directory for input · 45
a Novell queue for input · 58
a serial source for input · 64
selecting
environment file for a job definition · 80, 82
environment file when the input source is
directory · 82
environment file when the input source is
Novell queue · 83
environment to be mapped · 133
NEXTFILE as the printer output destination ·
19
output destination for a printer · 18
printer for a job definition · 84
printer for a job definition when Novell queue
is the input source · 85
printer type · 15
the number of copies to be printed in a job · 87
serial
as the input source · 59–65
using as the input source · 64
serial communications
hardware overrun messages · 59
high baud rate · 59
UART error message · 59
understanding · 59
serial port settings
byte settings · 65
handshaking · 65
page eject · 65
setting up · 64
serial source
searching for input · 64
setting up port settings · 64
setting
date · 117
printer online or offline · 36
printer priority · 22
the Operators list for a PARIS input queue · 54
the Servers list for a PARIS input queue · 52
the Users list for a PARIS input queue · 50
time · 117
setting up
Media Mapping · 130
Media Mapping for an environment · 131
printer · 12
printer for a port monitor · 72
serial port settings · 64
The Spooler 32 Technical Manual
Index
Spooler · 11
settings
system · 115
SJD (Spooler Job Definition) files · 39
SJR (Spooler Job Request) · 42, 106
adding · 106, 107
adding input information · 107
adding output options · 108
deleting · 110
editing · 109
example · 43
how the Spooler creates it · 42
SPD (Spooler Printer Definition) files · 33
splitting files in a print job · 87
Spooler
Control Panel · 6
controlling · 118
Engine dialogue · 7
exiting · 121
how it works · 4
introduction · 3
management of multiple engines · 91
pausing · 119
polling directories for input data · 42
setup · 11
starting without downloaded jobs being
processed · 118
start-up dialogues · 5
system, 16 and 32 bit · 3
starting
Spooler without downloaded jobs being
processed · 118
system settings · 115
date and time · 116
verifying engine connection · 116
port monitor as the input source · 68
Port Monitor as the input source in a job
definition · 66
serial as the input source · 64
Serial as the input source in a job definition ·
59
W
Windows defined printer · 18
X
XLPInputMedia statements
adding · 130
XPD files · 15, 16, 145
XPD commands · 16, 25
XPD ManageFonts command · 25
XPD ManageForms command · 26
XPD ManageGrafs command · 26
XPD statements · 146
XPD statements · 146
T
time
setting · 117
type list for printers
about · 15
U
UART chip
identifying in your PC · 61
updating
printer resources · 27, 28
using
directory as the input source · 45
Media Mapping · 130
Novell queue as the input source · 57
The Spooler32 Technical Manual
157
Index
158
The Spooler 32 Technical Manual