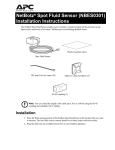
1
500
About
Your
Appliance
Preface
Copyright
© Copyright NetBotz Inc. 2000 - 2005
Trademarks
BotzWare, NetBotz, and the NetBotz symbol are registered trademarks of
NetBotz, Inc.
Other brand and product names are registered trademarks or trademarks of
their respective holders.
Federal Communications Commission (FCC)
Declaration of Conformity Statement
Note: This equipment has been tested and found to comply with the limits for
a Class A digital device, pursuant to Part 15 of the FCC rules. These limits are
designed to provide reasonable protection against harmful interference when
the equipment is operated in a commercial environment. This equipment
generates, uses, and can radiate radio frequency energy. If it is not installed
and used in accordance with the instruction manual, it may cause harmful
interference to radio communications. Operation of this equipment in a
residential area is likely to cause harmful interference, in which case users
will be required to take whatever measures may be necessary to correct the
interference at their own expense.
U.S. Government Restricted Rights
Restricted rights legend. Use, duplication, or disclosure by the Government is
subject to restrictions as set forth in subparagraph (c) (1) (ii) of the Rights in
Technical Data and Computer Software clause at DFARS 252.227-7013 or
subparagraphs (c) (1) and (2) of the Commercial Computer SoftwareRestricted Rights clause at CFR 52.227-19, as applicable.
Certifications
CE
The NetBotz 500 wall and rack models, described in
this publication, are CE certified.
i
Preface
FCC
• Power - 5V @ 3Amps max; 3.3V @ 3Amps
max
• Jack - 4 Pin Power Din
• Leakage Current - Less than 3.5 mA
VCCI
Cleaning
Use only a dry cloth to clean the NetBotz appliance. To clean your NetBotz
appliance, gently wipe the surface of the NetBotz appliance with a dry cloth.
Misuse
Use your NetBotz appliance ONLY in the manner specified. If the equipment
is used in a manner not specified by NetBotz, the protection provided by the
equipment may be impaired. NetBotz is not responsible for misuse.
ii
About Your Appliance: NetBotz 500
Preface
Improper Use of Audio/Video Recording
Capabilities
Attention: THE EQUIPMENT CONTAINS, AND THE
SOFTWARE ENABLES, AUDIO/VISUAL AND RECORDING
CAPABILITIES, THE IMPROPER USE OF WHICH MAY
SUBJECT YOU TO CIVIL AND CRIMINAL PENALTIES.
APPLICABLE LAWS REGARDING THE USE OF SUCH
CAPABILITIES VARY BETWEEN JURISDICTIONS AND MAY
REQUIRE AMONG OTHER THINGS EXPRESS WRITTEN
CONSENT FROM RECORDED SUBJECTS. YOU ARE
SOLELY RESPONSIBLE FOR INSURING STRICT
COMPLIANCE WITH SUCH LAWS AND FOR STRICT
ADHERENCE TO ANY/ALL RIGHTS OF PRIVACY AND
PERSONALTY. USE OF THIS SOFTWARE FOR ILLEGAL
SURVEILLANCE OR MONITORING SHALL BE DEEMED
UNAUTHORIZED USE IN VIOLATION OF THE END USER
SOFTWARE AGREEMENT AND RESULT IN THE
IMMEDIATE TERMINATION OF YOUR LICENSE RIGHTS
THEREUNDER.
Availability of Open Source Technologies
The NetBotz 500 product includes technologies that are governed by the GNU
Public License. The GPL source code contained in our products is available
for free download from:
http://support.netbotz.com/gpl
About Your Appliance: NetBotz 500
iii
Preface
iv
About Your Appliance: NetBotz 500
Contents
Preface......................................................................... ... i
About Your NetBotz 500 ............................................ .. 1
Upgrading Your WallBotz 500 ........................................ ...2
Hardware Upgrades........................................................ ...2
Software Upgrades ................................................... ...3
Before You Begin ....................................................... .. 5
Package Contents .......................................................... ...5
Choosing an Installation Location ................................... ...5
Gathering Network Settings Information ......................... ...6
Administrator Account User ID & Password ................... ...6
Root Account User ID & Password ................................. ...6
The NetBotz 500: A Closer Look ............................... .. 7
About the NetBotz 500 Base Station .............................. ...7
NetBotz 500 Base Station LEDs ............................... ...9
About the Camera Pod 120 ............................................ .10
About the Camera Pod 120’s Imaging Modes .......... .12
Camera Pod 120 Ports and Connections ................. .14
Camera Pod 120 LEDs ............................................. .15
Image Size and Imager Field of View Specifications .16
About the Sensor Pod 120.............................................. .16
About the Integrated Audio Sensor ........................... .17
Sensor Pod 120 Ports and Connections ................... .18
Sensor Pod 120 LEDs .............................................. .19
Sensors Included With Your Appliance .......................... .20
Sensor Pod 120 Sensor Types ................................. .20
Camera Pod 120 Sensor Types................................ .21
Device Crawlers Sensor Types................................. .22
Docking and Undocking Pods................................... 23
Undocking Pods.............................................................. .23
Docking Pods.................................................................. .24
About the NetBotz Installer CD ................................. 27
Installing on a Windows System ..................................... .27
Installing on a Linux System ........................................... .28
Installing on a Solaris System ......................................... .29
Configuring Network Settings ................................... 31
About Your Appliance: NetBotz 500
Obtaining Network Settings Using DHCP ....................... .31
DHCP Vendor Class Support.................................... .31
Using the Serial Configuration Utility .............................. .32
Installing Your Appliance .......................................... 37
Installing with Both Pods Docked ................................... .37
Installing with One or Both Pods Tethered ..................... .39
Installing an Undocked Camera Pod 120 ................. .40
Installing an Undocked Sensor Pod 120 ................... .41
Installing Hardware Options ...................................... 43
Adding Pods to Your NetBotz 500 .................................. .43
Installing and Configuring a CCTV Adapter Pod 120 ..... .45
Connecting an Output Relay Pod 120 ............................ .47
Connecting a Power Control Pod ................................... .47
Installing a Power Control Pod 115 or 235 ............... .47
Installing a Power Control Pod 110 or 230 ............... .48
Installing a Wireless Network Adapter ............................ .50
Installing a PC Card Modem ........................................... .51
Connecting a USB Modem ............................................. .53
Connecting a Wireless Receiver 120 .............................. .53
Connecting RS232-Based Sensors ................................ .55
Supported RS232-Based Sensors ............................ .55
Installing RS232-Based Sensors .............................. .56
Reassigning Serial Ports........................................... .56
Connecting External Sensors ......................................... .57
Changing Camera Pod Lenses ....................................... .58
Installing an Extended Storage System .......................... .58
Installing the Extended Storage System ................... .59
Operational Specifications ........................................ 63
NetBotz 500 Base Station............................................... .63
Camera Pod 120............................................................. .64
Sensor Pod 120 .............................................................. .64
Warranty and Service ................................................. 65
Life-Support Policy..................................................... 67
vi
About Your Appliance: NetBotz 500
About Your NetBotz 500
Your NetBotz 500 has been designed to provide extraordinary asset protection
against physical and environmental threats. Its modular design provides
unparalleled flexibility, enabling you to place the included camera and sensors
in locations that best suit your needs.
The NetBotz 500’s design enables you to attach additional pods, providing the
monitoring power and scalability to meet most any need. Additional Camera
Pod 120s and Sensor Pod 120s expand your monitoring capabilities. CCTV
Adapter Pods enable you to integrate your analog video cameras into your
digital threat-prevention network. And when used in conjunction with Output
Relay Pod 120s and Power Control Pods your NetBotz 500 can automatically
or interactively turn lights on or off, open door locks, cycle power, and so
forth.
Your NetBotz 500 comes complete with 1 Camera Pod 120 and 1 Sensor Pod
120, connected (or “docked”) to your appliance and ready to use. In addition,
the appliance features 4 USB ports and 1 PC Card slot for use in expanding
your appliances monitoring capabilities. The NetBotz 500 base station
contains no environmental sensors: all sensors are included in the detachable
pods.
• The NetBotz 500 base station can have 1 Camera Pod 120 (or CCTV
Adapter Pod 120, available separately. For more information, see
1
About Your NetBotz 500
•
•
•
•
“Installing and Configuring a CCTV Adapter Pod 120” on page 45) and
1 Sensor Pod 120 docked at the same time.
Up to three additional Camera Pod 120s (or CCTV Adapter Pod 120s)
can be connected to the base station simultaneously, for a total of 4
cameras. Camera pods can be connected directly to the USB port using
a standard USB extender cable, or connected to a powered USB hub that
is connected to the USB port. This last option is useful in situations
where you want to connect multiple Sensor Pod 120s to a base station
with multiple tethered camera pods.
Up to 16 additional Sensor Pod 120s can be connected to a base station,
for a total of 17 Sensor Pod 120s. Sensor Pod 120s are low-power USB
devices, and can be connected directly to any USB port, to USB
extender cables, and to powered or unpowered USB hubs.
Up to 4 Output Relay Pod 120s can be connected to the base station,
enabling you to control up to 64 relay-based devices. Output Relay Pod
120s can be connected directly to one of your appliance’s USB ports
using a standard USB extender cable, or connected to a powered USB
hub that is connected to the USB port.
Up to 16 Power Control Pod can be connected to the base station,
enabling you to control the power supplied to up to 80 individual
devices. Using a USB-to-serial port adapter (included with each Power
Control Pod), Power Control Pods can be connected directly to one of
your appliance’s USB ports or connected to a powered or unpowered
USB hub that is connected to the USB port.
Upgrading Your WallBotz 500
Your NetBotz 500 supports a variety of hardware and software upgrades.
These upgrades, including add-on software applications, external sensors, and
the ability to connect multiple Camera and Sensor Pod 120s to a single
NetBotz 500 are designed to enable you to customize your NetBotz 500
appliance to meet your particular environmental monitoring needs.
Hardware Upgrades
You can upgrade your appliance hardware by adding pods (Camera Pod 120s,
CCTV Adapter Pod 120s, Sensor Pod 120s, or Output Relay Pod 120s), a
broad variety of supported external sensors (external sensors must be
connected to a Sensor Pod 120), and Power Control Pods and supported
RS232-based sensors (Power Control Pod and RS232-based sensors and
devices must be connected to the NetBotz 500 using a USB-to-serial port
adapter).
• Available external sensors include TS100 External Temperature
Sensors, HS100 External Humidity Sensors, FD100 Fluid Detectors,
2
About Your Appliance: NetBotz 500
About Your NetBotz 500
PS100 Particle Sensors, and Amp Detectors, as well as many third-party
dry contact sensors (connected to a Sensor Pod 120 using a Dry Contact
Cable).
• Supported RS232-based sensors and devices include NMEA-compliant
GPS devices; RAE Systems MultiRAE Plus, ppbRAE, miniRAE, and
AreaRAE toxic vapor and gas sensors; and the Wireless Receiver 120
(for use with THS-100 Wireless Temperature/Humidity Sensors).
RAE Systems device support is available only with the
additional purchase of a RAE Systems Sensors Option license.
Note
You can also enhance the network communication capabilities of your
appliance by installing a supported wireless network or modem PC Card or by
connecting a supported USB modem.
For more information on upgrading your NetBotz 500
hardware, see “Installing Hardware Options” on page 43.
See also
Software Upgrades
The BotzWare on your NetBotz 500 can be upgraded as newer versions
become available using the Upgrade task. Your appliance also supports addon software applications, such as Advanced Device Crawlers, which provide
powerful advanced environmental threat monitoring functionality. Add-on
software is available for purchase separately from NetBotz and NetBotz
certified resellers.
About Your Appliance: NetBotz 500
3
About Your NetBotz 500
4
About Your Appliance: NetBotz 500
Before You Begin
Before you begin configuring and installing your appliance, you should first
confirm that your appliance package contents are complete. You should also
choose an appropriate installation location and gather some information about
the network settings that will be used for the appliance.
Package Contents
Your NetBotz 500 appliance package contains the following:
• NetBotz 500 Base Station
• Camera Pod 120
• Sensor Pod 120
• Power supply with locking plug
• Wall mounting bracket (high-quality, heavy-duty, 360° positionable
wall-mounting bracket for use with either the NetBotz 500 base station
or a tethered Camera Pod 120)
• Null modem cable
Choosing an Installation Location
Before configuring and installing your appliance, you should identify the
location where you will mount the appliance. You should also determine
whether you will mount your appliance with both of the included pods docked
(connected to the base station), or if one or both of the pods will be tethered
(detached and placed at another location, communicating with the base station
using a USB cable). This will help you to determine the length of any cables
that are needed to connect your appliance to your network. When selecting a
location, be sure to take the following into account:
• Location of the nearest Ethernet port in relation to placement of base
station.
• Location where you will place the door sensor in relation to location of
Camera Pod 120.
• Location where you will place external sensors, if any, in relation to
Sensor Pod 120.
• Objects that might obstruct the Camera Pod 120.
5
Before You Begin
Gathering Network Settings Information
You should also collect the following information. You will need this
information to configure the network settings on your appliance.
• DHCP and IP Address Information:
– Does your network use a DHCP server?
– If you do not use DHCP, what IP address is assigned for use by your
appliance?
• Subnet Mask Information:
– Will you use a subnet mask for the appliance LAN interface?
– If you are using a subnet mask, what is the mask?
• Gateway Information:
– Will you use a default gateway for packet routing?
– If you use a default gateway, what is the IP address of the gateway?
Administrator Account User ID & Password
Your NetBotz 500 comes with a pre-configured Administrator account. The
User ID and Password for this pre-configured account are:
• User ID: netbotz
• Password: netbotz
To ensure security, be sure to use the Advanced View Users
task to change the default Administrator account User ID and
Password.
Note
Root Account User ID & Password
Your NetBotz 500 comes with a pre-configured root account. The root
account is used only for appliance communications that are performed using
the serial port, such as when you use the Serial Configuration Utility to
specify network settings (see “Using the Serial Configuration Utility” on
page 32). The User ID and Password for this pre-configured account are:
• User ID: root
• Password: netbotz
Note
6
You cannot change the root account User ID. However, to
ensure security, be sure to use the Advanced View Change Root
Password Tool menu selection to change the default root
account password.
About Your Appliance: NetBotz 500
The NetBotz 500: A Closer Look
Your NetBotz 500 consists of 3 separate components: the NetBotz 500 base
station, the Camera Pod 120, and the Sensor Pod 120. Detailed information
about each of these components follows.
About the NetBotz 500 Base Station
The base station (shown below with both pods undocked) provides the power
and network connections, as well as ports for serial communications and
connecting additional pods. It also features a PC Card slot for adding PC
Card-based hardware expansions, such as a modem or a wireless network
adapter.
Each port or connection is identified with a symbol on the label. The symbols,
and the ports which they identify, are:
Power. The power supply connects to this port. The port and
power supply plug lock together to discourage accidental
unplugging of the appliance.
Serial. Connect the included null modem cable to this port
for network setting configuration.
7
The NetBotz 500: A Closer Look
10/100 Ethernet Connection. Use a standard RJ-45 cable to
connect the appliance to your Ethernet network.
USB Ports A & B. Use these ports to connect additional
Sensor Pod 120s (up to 16 total Sensor Pod 120s can be
connected to the base station) or 1 additional Camera Pod
120.
Note: USB Ports A & B share bandwidth, and therefore only
one Camera Pod 120 should be connected to either Port A or
Port B. NetBotz suggests that you do not connect Camera
Pod 120s to your base station in a way that causes them to
share bandwidth, as this can severely degrade Camera Pod
120 performance.
USB Ports C & D. Use these ports to connect additional
Sensor Pod 120s (up to 16 total Sensor Pod 120s can be
connected to the base station) and Camera Pod 120s (1 per
port).
PC Card Slot. For adding PC Card-based hardware
upgrades, such as a supported wireless LAN adapter or PC
Card modem, to your NetBotz 500 appliance. The PC Card
slot supports 3.3V and 5V cards, and both 16 Bit PC Cards
and 32 Bit Cardbus cards.
Attention! Use only PC Cards that are specifically supported
by NetBotz. For information about supported PC Cards, see
the NetBotz web site.
The base station also features two docking plugs on the right side of the
appliance. These plugs are inserted into the Sensor Pod 120 and Camera Pod
120 when they are docked, providing the pods with both power and USB
signaling. These plugs can be used only by docked pods.
8
About Your Appliance: NetBotz 500
The NetBotz 500: A Closer Look
NetBotz 500 Base Station LEDs
Your NetBotz 500 base station features a series of 5 LED indicators, shown
below. These LEDs are used to indicate the current power, alert, and network
communication status of the appliance.
LED
Description
Status
Indicates the current operational status of the appliance. On
initial power-up, blinks to indicate that the appliance is in the
process of starting up. Once the startup process is complete,
illuminates steadily. If startup process fails, the LED is not
illuminated and the Alert LED blinks.
Alert
Indicates the current alert status of the appliance and any
connected pods or sensors. If no alerts are currently occurring,
the LED is not illuminated. If any alerts conditions currently
exist the LED blinks. The LED will blink slowly for less severe
alerts, quickly for more severe alerts. If multiple alert conditions
currently exist the LED blink rate is determined by the most
severe alert condition.
10MB
Illuminates if the appliance is currently using a 10MB Ethernet
connection.
100MB
Illuminates if the appliance is currently using a 100MB Ethernet
connection.
Activity
Blinks to indicate network activity.
About Your Appliance: NetBotz 500
9
The NetBotz 500: A Closer Look
About the Camera Pod 120
One Camera Pod 120 comes docked to the NetBotz 500. This pod includes a
USB header that enables the pod to be docked with the NetBotz 500 base
station and a USB port that enables the pod to be tethered to the base station
using a standard USB cable.
Attention: THE EQUIPMENT CONTAINS, AND THE
SOFTWARE ENABLES, AUDIO/VISUAL AND RECORDING
CAPABILITIES, THE IMPROPER USE OF WHICH MAY
SUBJECT YOU TO CIVIL AND CRIMINAL PENALTIES.
APPLICABLE LAWS REGARDING THE USE OF SUCH
CAPABILITIES VARY BETWEEN JURISDICTIONS AND MAY
REQUIRE AMONG OTHER THINGS EXPRESS WRITTEN
CONSENT FROM RECORDED SUBJECTS. YOU ARE
SOLELY RESPONSIBLE FOR INSURING STRICT
COMPLIANCE WITH SUCH LAWS AND FOR STRICT
ADHERENCE TO ANY/ALL RIGHTS OF PRIVACY AND
PERSONALTY. USE OF THIS SOFTWARE FOR ILLEGAL
SURVEILLANCE OR MONITORING SHALL BE DEEMED
UNAUTHORIZED USE IN VIOLATION OF THE END USER
SOFTWARE AGREEMENT AND RESULT IN THE
IMMEDIATE TERMINATION OF YOUR LICENSE RIGHTS
THEREUNDER.
10
About Your Appliance: NetBotz 500
The NetBotz 500: A Closer Look
The Camera Pod 120 includes the following features:
• Image processor that generates images up to 1280x1024 resolution, 24bit color, and up to 30 frames per second.
Note
Actual frame rate available from image processor depends on
the resolution and image quality of generated images.
Maximum framerate of 30 frames per second is available only
at Normal Quality or lower and only at resolutions up to
640x480. Maximum frame rate for 800x600, 1024x768, and
1280x1024 at Normal Quality or lower is 10 frames per second.
If you configure the Camera Pod 120 to capture images in High
Quality, the Maximum Frame Rate for some resolutions
changes: At 640x480 and lower resolution the maximum frame
rate drops from 30 frames per second to 20 frames per second.
In 800x600 the maximum frame rate is unchanged (stays at 10
frames per second). In 1024x768 and 1280x1024 the maximum
frame rate drops from 10 frames per second to 8 frames per
second. Also, the maximum frame rate describes the maximum
number of images that the camera imager is capable of
producing each second. The actual frame rate that will be
visible in the Basic View or Advanced View is largely
dependent on the amount of available bandwidth.
• User adjustable and switchable industry-standard CS-mount lens. CSmount permits access to hundreds of different general purpose and
special purpose lenses.
• Integrated microphone, as well as a microphone jack (standard 3.5mm
miniplug), which provide the ability to monitor and capture
About Your Appliance: NetBotz 500
11
The NetBotz 500: A Closer Look
•
•
•
•
•
•
monophonic audio from the location in which the Camera Pod 120 is
installed.
Speaker/headphone jack (standard 3.5mm stereo miniplug) that can be
used with unpowered headphones or powered speakers to provide
monophonic audio output.
Integrated Door Switch Sensor: State sensor that reports whether a door
is “open” or “closed.”
Integrated Camera Motion Sensor: State sensor that reports the presence
of motion in the camera field of view.
Integrated External Microphone Sensor: State sensor that reports
whether an external microphone or microphone override plug is inserted
into the External Microphone jack on the pod.
Integrated Speaker Sensor: State sensor that reports whether a speaker
plug is inserted into the Speaker jack on the pod.
Activity LED, which indicates the power-on and recording status of the
pod.
The Camera Pod 120 also features a standard 1/4” camera mount (located on
the bottom of the pod) that enables you to mount the pod in a wide variety of
locations.
About the Camera Pod 120’s Imaging Modes
The Camera Pod 120’s imager is capable of capturing images at resolutions up
to 1280x1024, and supports two imaging modes: Wide Screen mode and Pan
and Scan mode.
• In Wide Screen mode, all images that are captured are based on the
entire 1280x1024 frame. The Camera Pod 120 then reduces the total
1280x1024 frame to the appropriate resolution or mode, resulting in a
smaller image that includes the entire field of view supported by the
camera. However, in reducing the image to smaller sizes some image
detail will be lost.
• In Pan and Scan mode, a portion of the total 1280x1024 field of view
supported by the camera is selected as the window of interest within the
frame. This selected window is then used to determine what portion of
the total field of view to include in image captures and in the Camera
view when resolutions lower than 1280x1024 are needed. 1280x1024
images still contain the entire field of view, but lower image resolution
modes use only a portion of the frame, determined by a user-specified
640x480 window of interest.
12
About Your Appliance: NetBotz 500
The NetBotz 500: A Closer Look
Wide Screen Mode and Pan and Scan Mode compared
Pan and Scan mode is especially ideal for users who are interested only in a
specific portion of the entire available field of view, such as an entryway
within a monitored room. In addition, because users can select and adjust the
area of interest from the entire field of view digitally (using the Advanced
View Camera Pods task), Pan and Scan makes it simple for users to adjust the
content of the image “on the fly,” eliminating the need to physically adjust the
camera.
When Pan and Scan mode is in use, resolutions higher than 640x480 (but
lower than 1280x1024) use a portion of the total field of view equal to their
resolution, with the position of this region being determined by the location of
the window of interest (for example, a 1024x768 image captured in Pan and
Scan mode shows a 1024x768 region of the total field of view, with the
region’s center being determined by the center of the selected 640x480
window of interest). Resolutions lower than 640x480 contain the entire
window of interest, but reduced to the requested image size.
Imaging mode and the window of interest are configured using the Advanced
View Camera Pods task.
About Your Appliance: NetBotz 500
13
The NetBotz 500: A Closer Look
Camera Pod 120 Ports and Connections
The Camera Pod 120 features several connectors for use with the Door Switch
Sensor, an external microphone, and headphones or powered speakers.
Each connection is identified with a symbol on the label. The symbols, and the
ports which they identify, are:
Door Switch Sensor. Used to connect the Door Switch
Sensor to the Camera Pod 120.
Microphone. Connect an external microphone to this jack.
Connecting an external microphone will override and
deactivate the built-in microphone.
Headphones. Headphones or powered speakers can be
connected to this port.
14
About Your Appliance: NetBotz 500
The NetBotz 500: A Closer Look
The Camera Pod 120 also features one docking port on the left side of the pod
which can be used only when docking the pod to the base station. It also
features a standard 1/4” camera mount on the bottom of the pod, which can be
used with standard camera mounting hardware when mounting the pod. The
Camera Pod 120 has a USB B connector next to the Docking Port Connector.
Use the USB B connector when connecting the Camera Pod 120 to the base
unit via a standard USB cable.
When using the USB B connector, do not connect anything to
the Docking Connector.
Note
Camera Pod 120 LEDs
Your Camera Pod 120 features a single LED, shown below.
When the Camera Pod 120 is powered on this LED blinks slowly and steadily
(one second on, one second off), indicating that the Camera Pod 120 is
currently active, and capturing video images, but is not recording audio.
When the Camera Pod 120 is capturing and recording audio, using either its
integrated microphone or an external microphone connected to the External
Microphone jack, this LED blinks 5 times per second to indicate that audio
recording is in progress.
About Your Appliance: NetBotz 500
15
The NetBotz 500: A Closer Look
Image Size and Imager Field of View Specifications
• Image Size: 7.7mm x 6.1mm (9.82mm Diagonal = 0.387”).
• Field of View:
– Wide Screen Mode: 64º (H) x 53º (V) for all resolutions.
– Pan and Scan Mode:
• 1280x1024 – 64º (H) x 53º (V)
• 1024x768 – 53º (H) x 43º (V)
• 800x600 – 43º (H) x 35º (V)
• 640x480/320x240/160x120 – 35º (H) x 28º (V).
About the Sensor Pod 120
One Sensor Pod 120 comes docked to the NetBotz 500. It includes a USB port
that enables the pod to be docked with the NetBotz 500 base station and a
USB port that enables the pod to be tethered to the base station using a
standard USB cable. This pod includes the following features:
• Integrated Temperature Sensor: Analog sensor that reports temperature
readings as degrees Fahrenheit or Celsius. Readings include values
down to tenths of a degree.
• Integrated Humidity Sensor: Analog sensor that reports relative
humidity readings as whole number percentage values.
• Integrated Airflow Sensor: Analog sensor that reports airflow readings
as whole number feet or meters per minute values.
• Integrated Dew Point Sensor: Analog sensor that reports dew point
readings as degrees Fahrenheit or Celsius. Readings include values
down to tenths of a degree.
• Integrated Audio Sensor: Analog sensor that reports audio level as a
whole number between 0 (silent) to 100 (very loud).
16
About Your Appliance: NetBotz 500
The NetBotz 500: A Closer Look
Each Sensor Pod 120 also features 4 external sensor ports to which the
following additional sensors can be connected.
• TS100 External Temperature Sensor: Analog sensor that reports
temperature readings as degrees Fahrenheit or Celsius. Readings
include values down to tenths of a degree.
• HS100 External Humidity Sensor: Analog sensor that reports relative
humidity readings as whole number percentage values.
• FD100 Fluid Detector: State sensor that reports the presence or absence
of fluid.
• Amp Detector: Analog sensors that report the amperage values of the
monitored power source.
• Dry contact sensors using a Dry Contact Cable: State sensors that
reports a general “open” or “closed” state. Condition monitored or
detected is dependent on the type of dry contact sensor in use.
About the Integrated Audio Sensor
The Sensor Pod 120’s integrated audio sensor has been enhanced relative to
the audio sensor included in previous NetBotz appliances. The integrated
audio sensor reports noise levels as a value between 1 and 100, instead of as a
state-style sound present/no sound present state sensor. This permits much
more accurate graphing of audio readings in an environment, and can be
highly useful in determining appropriate ranges for the Audio levels for a
particular room.
Also, the Audio sensor has “voice discrimination” technology built in, which
assists the audio sensor in disregarding human voice-level sound, enabling it
to more accurately determine the presence of alarm noise.
The Sensor Pod 120’s audio sensor is designed only to detect
the presence of audio. It cannot be used to record audio.
Note
About Your Appliance: NetBotz 500
17
The NetBotz 500: A Closer Look
Sensor Pod 120 Ports and Connections
The Sensor Pod 120 features 4 ports for adding external sensors (such as
external temperature and humidity sensors, Amp Detectors, or dry contact
sensors) to the pod. The external sensor ports are numbered 1 through 4.
The Sensor Pod 120 also features one docking port on the left side of the pod
which can be used only when docking the pod to the base station. The Sensor
Pod 120 has a USB B connector next to the Docking Port Connector. Use the
USB B connector when connecting the Sensor Pod 120 to the base unit via a
standard USB cable.
Caution: When using the USB B connector, do not connect
anything to the Docking Connector.
Note
18
About Your Appliance: NetBotz 500
The NetBotz 500: A Closer Look
Sensor Pod 120 LEDs
The Sensor Pod 120 features 5 LED indicators, shown below. These LEDs are
used to indicate alert conditions that are being reported by internal sensors or
by external sensors that are connected to the Sensor Pod 120.
LED
Description
Temp
Blinks if the internal temperature sensor is currently reporting an
alert condition. If a connected External Temperature Sensor is
reporting an alert, both the Temp LED and the External LED will
blink together.
Humidity
Blinks if the internal humidity or dew point sensors are currently
reporting an alert condition. If a connected External Humidity
Sensor is reporting an alert, both the Humidity LED and the
External LED will blink together.
Airflow
Blinks if the internal airflow sensor is currently reporting an alert
condition.
Audio
Blinks if the internal audio sensor is currently reporting an alert
condition.
External
Blinks to indicate that an external sensor is currently reporting an
alert condition. If an attached External Temperature Sensor or
External Humidity Sensor is reporting an alert condition the
External LED and the Temp LED or Humidity LED, respectively,
will blink.
About Your Appliance: NetBotz 500
19
The NetBotz 500: A Closer Look
In the event two or more sensors ar reporting alert conditions simultaneously,
the LEDs will cycle through the alert condition indications for all current alert
conditions. For example, if the internal temperature sensor, internal humidity
sensor, and an External Humidity Sensor are all reporting alert conditions the
Temp LED would blink once, then the Humidity LED would blink once, then
both the External and Humidity LED would blink once together, after which
this cycle would repeat.
Sensors Included With Your Appliance
Your appliance does not have any internal sensors. However, the pods that are
included with your appliance each include a number of internal sensors. The
Sensor Pod 120 can also support up to 4 additional external sensors. Finally,
Device Crawlers the monitoring of up to 48 additional SNMP target devices.
Details on the sensors that are included with each pod, sensors available from
devices monitored by Device Crawlers, and whether the sensor is analog or
state follow.
Sensor Pod 120 Sensor Types
A Sensor Pod 120 includes the following sensors:
• Temperature: Analog sensor that reports temperature readings as
degrees Fahrenheit or Celsius. Readings include values down to tenths
of a degree.
• Humidity: Analog sensor that reports relative humidity readings as
whole number percentage values.
• Airflow: Analog sensor that reports airflow readings as whole number
feet or meters per minute values.
• Dew Point: Analog sensor that reports dew point readings as degrees
Fahrenheit or Celsius. Readings include values down to tenths of a
degree.
• Audio: Analog sensor that reports audio level as a whole number
between 0 (silent) to 100 (very loud).
20
About Your Appliance: NetBotz 500
The NetBotz 500: A Closer Look
Each Sensor Pod 120 also features 4 external sensor ports to which the
following additional sensors can be connected.
• TS100 External Temperature Sensor: Analog sensor that reports
temperature readings as degrees Fahrenheit or Celsius. Readings
include values down to tenths of a degree.
• HS100 External Humidity Sensor: Analog sensor that reports relative
humidity readings as whole number percentage values.
• FD100 Fluid Detector: State sensor that reports the presence or
absence of fluid.
• PS100 Particle Sensor: Analog sensor that reports the presence or dust
and other particulates larger than 1 micro meter.
• Amp Detector: Analog sensors that report the amperage values of the
monitored power source.
• External Door Switch: State sensor that reports whether a door is
“open” or “closed.”
• Dry contact sensors using a Dry Contact Cable: State sensors that
reports a general “open” or “closed” state. Condition monitored or
detected is dependent on the type of dry contact sensor in use.
Camera Pod 120 Sensor Types
A Camera Pod 120 includes the following sensors:
• Door Switch: State sensor that reports whether a door is “open” or
“closed.”
• Camera Motion Sensor: State sensor that reports the presence of
motion in the camera field of view.
• External Microphone: State sensor that reports whether an external
microphone or microphone override plug is inserted into the External
Microphone jack on the pod.
• Speaker: State sensor that reports whether a speaker plug is inserted
into the Speaker jack on the pod.
About Your Appliance: NetBotz 500
21
The NetBotz 500: A Closer Look
Device Crawlers Sensor Types
The following sensors are available on all SNMP targets that are monitored
using Device Crawlers:
• Online: State sensor that reports whether the target is Online or Offline.
• Ping RTT: Analog sensor that reports amount of time it takes SNMP
queries or ICMP Ping requests to complete a send and reply from the
appliance.
• SNMP System Uptime: Analog sensor that reports that reports the
uptime value of the target.
• In addition, Device Crawlers also provides the following sensors for
each of the SNMP target’s network interfaces:
• Admin Status: State sensor that reports the admin status of the
interface.
• IF Type: State sensor that reports the interface type value.
• Incoming Discards: Analog sensor that reports the number of incoming
packets discarded by the interface.
• Incoming Errors: Analog sensor that reports the number of incoming
packets containing errors received by the interface.
• Incoming Non-Unicast Packets: Analog sensor that reports the
number of incoming non-unicast packets received by the interface.
• Last Change: Analog sensor that reports the last change value for the
interface.
• OP Status: Analog sensor that reports the OP status of the interface.
• Outgoing Errors: Analog sensor that reports the number of outgoing
packets containing errors sent by the interface.
• Outgoing Non-Unicast Packets: Analog sensor that reports the number
of non-unicast packets sent by the interface.
• Outgoing Octets: Analog sensor that reports the number of outgoing
octets sent by the interface.
• Outgoing Unicast Packets: Analog sensor that reports the number of
outgoing unicast packets sent by the interface.
22
About Your Appliance: NetBotz 500
Docking and Undocking Pods
Your NetBotz 500 base station is designed to have one Camera Pod 120 and
one Sensor Pod 120 docked if desired. Docked pods are securely connected to
the base station and do not use any of the external USB ports, permitting
additional pods to be connected. With the Camera Pod 120 docked, your
NetBotz 500 base station can host up to 4 Camera Pod 120s total. With the
Sensor Pod 120 docked, the NetBotz 500 base station can host up to 17 Sensor
Pod 120s total.
Undocking Pods
To undock a docked pod:
1. Use a 1/4” nut driver to loosen the docking nut (located on the bottom of
the base station, shown below).
23
Docking and Undocking Pods
Loosen the nut until the docking indicator can be seen in the upper
windo was shown below.
Note
Do not over-loosen or over-tighten the docking nut. Loosening
or tightening the docking nut too much can damage your
NetBotz 500. Loosen or tighten the nut only until the docking
indicator can be seen in the center of the upper window (when
undocking) or lower window (when docking).
2. Disconnect one or both pods. To disconnect, gently pull the pod away
from the side of the base station. Pods should disconnect from the base
station with only gentle force or slight rocking or wiggling. If the pods
don’t disconnect, loosen the docking screw a little more and try again.
3. Use the nut driver to tighten the docking nut when you are finished
undocking the pod or pods. Tighten the nut until it is snug and the
docking indicator can be seen in the lower window as shown below.
Docking Pods
To dock a pod:
1. Use a 1/4” nut driver loosen the docking nut (located on the bottom of
the base station, shown above). Loosen the nut until the docking
24
About Your Appliance: NetBotz 500
Docking and Undocking Pods
indicator can be seen in the upper window as shown above.
Note
Do not over-loosen or over-tighten the docking nut. Loosening
or tightening the docking nut too much can damage your
NetBotz 500. Loosen or tighten the nut only until the docking
indicator can be seen in the center of the upper window (when
undocking) or lower window (when docking).
2. Insert the pod’s metal docking posts and into the corresponding holes on
the side of the base station. This will also line up the docking port on the
pod with the docking post on the base station.
3. Push the pod firmly into place. Then, while holding the pods in place,
use the nut driver to tighten the docking nut until the docking nut is snug
and the docking indicator can be seen in the lower window as shown
above.
If the docking nut will not tighten easily one or both pods may
be seated improperly: ensure that the pods are seated properly
and try again.
Note
About Your Appliance: NetBotz 500
25
Docking and Undocking Pods
26
About Your Appliance: NetBotz 500
About the NetBotz Installer CD
You can use the NetBotz Installer CD to install the following applications on
any supported system:
• Advanced View: A Java-based user interface for monitoring and
managing your NetBotz 500.
• Serial Configuration Utility: A Java-based application that you can use
to configure the network settings on your NetBotz 500 or any other
NetBotz appliance.
• Java Runtime Environment (JRE)
By default, the NetBotz Installer will copy the NetBotz 500 documentation to
your system. You can also access these PDF files from the DOCS subdirectory
of the CD.
Installing on a Windows System
To install the applications and the JRE on a supported Windows system
1. Place the NetBotz Installer CD-ROM in the CD-ROM drive of the
system that you will use to configure and manage your appliance. The
NetBotz Installer will start automatically. If you have disabled Autostart
on your system, click Start > Run, type x:\install.exe in the
Open field (where x is the drive letter assigned to your CD-ROM drive)
and then click OK.
2. The Welcome screen appears. Read the window contents and then click
Next to continue.
3. The License Agreement window appears. Read the window contents,
click I Accept the terms of the License Agreement to agree to the
terms and conditions of the license agreement and then click Next. If
you do not agree to the terms and conditions of the license agreement,
click Cancel to close the installation program.
4. The Choose Install Set window appears. You can choose to install the
Typical product features, Minimal product features, or Custom product
features.
– If you choose Typical the Serial Configuration Utility, product
documentation, and Advanced View application will be installed on
your system.
– If you choose Minimal only the Advanced View application will be
installed on your system.
– If you choose Custom you can select which components you want
installed on your system.
27
About the NetBotz Installer CD
Select a product feature option and then click Next to continue.
5. The Pre-Installation Summary window appears and displays
information about the installation options you have chosen. Click
Install to continue.
6. The Register window appears, featuring information on how to register
your product. click Next to continue.
7. The Install Complete window appears. Click Done to finish your
installation and close the NetBotz Installer.
Installing on a Linux System
To install the applications and the JRE on a supported Linux system:
1. Place the NetBotz Installer CD-ROM in the CD-ROM drive of the
system that you will use to configure and manage your appliance. Be
sure to mount the drive if necessary.
2. Run install.bin from the Linux subdirectory on the CD. For example, if
you mounted the CD-ROM drive as /mnt/cdrom, execute the following
command:
sh /mnt/cdrom/linux/install.bin
3. The NetBotz Installer starts and the Welcome screen appears. Read the
window contents and then click Next to continue.
4. The License Agreement window appears. Read the window contents,
click I Accept the terms of the License Agreement to agree to the
terms and conditions of the license agreement and then click Next. If
you do not agree to the terms and conditions of the license agreement,
click Exit to close the installation program.
5. The Choose Install Set window appears. You can choose to install the
Typical product features, Minimal product features, or Custom product
features.
– If you choose Typical the Serial Configuration Utility, product
documentation, and Advanced View application will be installed on
your system.
– If you choose Minimal only the Advanced View application will be
installed on your system.
– If you choose Custom you can select which components you want
installed on your system.
Select a product feature option and then click Next to continue.
6. The Pre-Installation Summary window appears and displays
information about the installation options you have chosen. Click
28
About Your Appliance: NetBotz 500
About the NetBotz Installer CD
Install to continue.
7. The Register window appears, featuring information on how to register
your product. click Next to continue.
8. The Install Complete window appears. Click Done to finish your
installation and close the NetBotz Installer.
Installing on a Solaris System
To install the applications and the JRE on a supported Sparc system running
Solaris 9 (with all patch bundles recommended by Sun installed):
1. Place the NetBotz Installer CD-ROM in the CD-ROM drive of the
system that you will use to configure and manage your appliance. Be
sure to mount the drive if necessary.
2. Run install.bin from the Solaris subdirectory on the CD. For example, if
you mounted the CD-ROM drive as /mnt/cdrom, execute the following
command:
sh /mnt/cdrom/solaris/install.bin
3. The NetBotz Installer starts and the Welcome screen appears. Read the
window contents and then click Next to continue.
4. The License Agreement window appears. Read the window contents,
click I Accept the terms of the License Agreement to agree to the
terms and conditions of the license agreement and then click Next. If
you do not agree to the terms and conditions of the license agreement,
click Exit to close the installation program.
5. The Choose Install Set window appears. You can choose to install the
Typical product features, Minimal product features, or Custom product
features.
– If you choose Typical the Serial Configuration Utility, product
documentation, and Advanced View application will be installed on
your system.
– If you choose Minimal only the Advanced View application will be
installed on your system.
– If you choose Custom you can select which components you want
installed on your system.
Select a product feature option and then click Next to continue.
6. The Pre-Installation Summary window appears and displays
information about the installation options you have chosen. Click
Install to continue.
7. The Register window appears, featuring information on how to register
About Your Appliance: NetBotz 500
29
About the NetBotz Installer CD
your product. click Next to continue.
8. The Install Complete window appears. Click Done to finish your
installation and close the NetBotz Installer.
30
About Your Appliance: NetBotz 500
Configuring Network Settings
Before installing your NetBotz 500 appliance, you must configure your
appliance’s network settings. By default, your appliance is configured to
obtain its network settings using DHCP. Alternately, you can use the Serial
Configuration Utility to specify network settings (including IP address,
gateway address, subnet mask, hostname, NAT proxy, and speed and duplex
settings) to be used by the appliance. You can also use the Serial
Configuration utility to configure a wireless network adapter if you have
installed one in the PC Card slot.
Obtaining Network Settings Using DHCP
By default, your appliance is configured to attempt to obtain its network
settings using DHCP. When you connect the appliance to your network and
power it on, it automatically attempts to contact a DHCP server. The appliance
will wait 30 seconds for a response. If the DHCP server is configured to
provide a hostname the appliance will request either its configured hostname
or ‘netbotzxxxxxx’ (where xxxxxx is the last 6 digits of the appliance serial
number) as a hostname to be associated with the IP address granted by the
DHCP server, enabling you to use a web browser to connect to the appliance
at the http://netbotzxxxxxx without any additional configuration necessary.
The appliance will also request DNS server addresses, DNS domain, SMTP
server addresses, and NTP server addresses from the DHCP server.
Note
After your DHCP server has assigned network settings for the
appliance, you can use your system, a null modem cable, and
the Serial Configuration Utility to view the network settings.
For more information see “Using the Serial Configuration
Utility” on page 32.
DHCP Vendor Class Support
The DHCP client on your NetBotz 500 features vendor class support. When
requesting network configuration from your DHCP server, your NetBotz 500
provides the following vendor class string:
NetBotz500
Vendor classes enable you to define a set of DHCP settings for a specific
equipment vendor and apply those settings to any node falling into that class.
Vendor classes offer enhanced flexibility in assigning custom settings to
individual network clients without affecting others on the same network.
31
Configuring Network Settings
Using this vendor class, your NetBotz 500 can request a custom set of DHCP
settings that is appropriate for its configuration. For example, you might
assign longer lease durations for NetBotz 500 appliances, as they typically
remain on the network in use without interruption. To do this, you would
configure a vendor class on your DHCP server named NetBotz500 (no spaces)
and assign to it a longer lease period. Then, when any NetBotz 500 requests
network settings from the DHCP server, the appliance will automatically
receive a longer lease based on that vendor class.
Using the Serial Configuration Utility
You can use the Serial Configuration Utility (installed using the NetBotz
Installer CD-ROM. For more information, see “About the NetBotz Installer
CD” on page 27) to assign your appliance network settings.
To configure your appliance using the Serial Configuration Utility:
1. Click Start > Programs > NetBotz > Serial Configuration > Serial
Configuration Utility to start the Serial Configuration Utility. If the
Serial Configuration Utility has not yet been installed on your system,
see “About the NetBotz Installer CD” on page 27 for instructions on
how to do so.
2. Connect one end of the null modem cable to a serial connector on your
system and the other end of the cable to the serial port on the appliance.
3. If you will be obtaining network settings using DHCP, plug an Ethernet
cable into the Ethernet socket, and then connect the Ethernet cable to an
Ethernet wall jack or hub.
4. Plug the appliance power supply into a wall outlet, and then connect it
to the power cord connection. The Status LED will illuminate for 2-3
seconds immediately after you connect power to the appliance, and then
go dark. When the appliance is finished starting up (the process can take
as long as 2 minutes, depending on appliance configuration), the Status
LED will illuminate again. Once the Status LED is illuminated again
click Next to continue.
5. The Serial Configuration Utility automatically scans your systems COM
ports to determine if an appliance is connected to the system. If an
appliance is discovered the utility will note the presence of the appliance
in the Device column of the window. Select the radio button that
corresponds to the appliance you wish to configure and then click Next
32
About Your Appliance: NetBotz 500
Configuring Network Settings
to continue configuring your appliance.
Note
If the COM port associated with the port to which your serial
cable is connected is currently in use by another application, the
message beside the COM port in the Owner column will
indicate that the port is not currently available. To correct this,
close the application that is using the COM port and then click
Scan Serial Ports.
6. The Root Password window appears. Type in the Password field the
administrator account password for this appliance (by default this
password is set to “netbotz.” For more information see “Administrator
Account User ID & Password” on page 6) and then click OK.
7. The utility scans the appliance and displays the network settings (IP
Address, Netmask, and Gateway) that are currently stored on the
appliance.
– If you have not installed an additional network interface (for
example, a wireless network adapter), specify the Ethernet Card
settings and then skip to “Specify the DNS Settings.” on page 35. Be
sure to check the Enable Interface check box when you’ve finished.
• To configure your appliance to use network settings assigned by a
DHCP server select the Configure automatically via DHCP
radio button. If desired, specify a NAT proxy name or IP address
that will be used by a NAT Proxy server in your network to enable
users to connect to the appliance from outside the firewall. You can
also specify speed and duplex settings for use by this interface, or
leave them set to Auto Negotiate (the default value).
• To specify network settings for use by this appliance, select the
Configure using these settings radio button and then provide an
IP address, subnet mask, and gatew3ay address for the appliance.
If desired, specify a NAT proxy name or IP address that will be
used by a NAT Proxy server in your network to enable users to
connect to the appliance from outside the firewall. You can also
specify speed and duplex settings for use by this interface, or
leave them set to Auto Negotiate (the default value).
– If you have installed an additional network interface, (for example, a
wireless network adapter), an Interface selection list containing
entries for the Ethernet Card and the Wireless Card appears at the top
of the window. The currently assigned Hostname and IP address (if
any) for each network interface is listed beside its selection list entry.
To configure the Ethernet Card:
About Your Appliance: NetBotz 500
33
Configuring Network Settings
a. Select Ethernet Card from the Interfaces selection list and then click
Edit.
b. Specify the Network settings.
• To configure this interface to use network settings assigned by a
DHCP server select the Configure automatically via DHCP
radio button. If desired, specify a NAT proxy name or IP address
that will be used by a NAT Proxy server in your network to enable
users to connect to the appliance from outside the firewall. You can
also specify speed and duplex settings for use by this interface, or
leave them set to Auto Negotiate (the default value).
• To specify network settings for use by this appliance, select the
Configure using these settings radio button and then provide an
IP address, subnet mask, and gatew3ay address for the appliance.
If desired, specify a NAT proxy name or IP address that will be
used by a NAT Proxy server in your network to enable users to
connect to the appliance from outside the firewall. You can also
specify speed and duplex settings for use by this interface, or leave
them set to Auto Negotiate (the default value).
c. Check the Enable Interface check box, and then click OK to save
these settings and continue.
To configure the Wireless Card:
a. Select Wireless Card from the Interfaces selection list and then click
Edit.
b. Select the Network tab to specify the Network settings.
• To configure this interface to use network settings assigned by a
DHCP server select the Configure automatically via DHCP
radio button. If desired, specify a Hostname for the appliance as
well.
• To specify network settings for use by this interface, select the
Configure using these settings radio button and then provide an
IP address, subnet mask, and gateway address for the appliance. If
desired, specify a Hostname and a NAT proxy name or IP address
that will be used by a NAT Proxy server in your network to enable
users to connect to the appliance from outside the firewall.
c. Select the Wireless tab to specify the Wireless settings. You’ll need
to specify the following values:
• ESS ID: The Extended Service Set value shared by this appliance
and other members of the wireless network.
• Mode: Determines the wireless communication method to use
within your wireless network. If your wireless network uses
Wireless Access Points (WAPs), select Managed. If your wireless
network does not use WAPs, select Ad-Hoc. If you are unsure of
34
About Your Appliance: NetBotz 500
Configuring Network Settings
whether wireless access points are in use in your network, select
Automatic and the adapter will attempt to determine if WAPs are
present and self-determine its mode.
• Channel: The wireless channel on which the adapter will
communicate. Wireless networking clients and WAPs within an
ESS must be configured with the same ESS ID and the same
channel.
• Band: For wireless adapters that support multiple WiFi
communication bands, specifies the wireless band that the card
will attempt to use for communications. You can select:
•Automatic: Searches first for 11a, then 11b, then 11g, and finally
for 11a Turbo. The appliance will use the first band connection/
ESSID match it discovers.
•11a: Looks for only 802.11a band connections
•11b: Looks for only 802.11b band connections
•11g: Looks for only 802.11g band connections
•11a Turbo: Looks for only proprietary 802.11a band connection
• Encryption: Specify the type of encryption that will be used on
the wireless transmissions. You can select WEP, LEAP, or None.
•If you select WEP, you must also specify whether an ASCII or
Hex WEP Key will be used, as well as the WEP Key value.
•If you select LEAP, you must also specify the LEAP Username
and Password that will be used.
LEAP communications are supported only when used with
Cisco 1200 Series AP 12.01T1 wireless access points.
Note
d. Check the Enable Interface check box, and then click OK to save
these settings and continue.
8. Specify the DNS Settings.
– To use DNS Settings that are provided by your DHCP server, check
the Use DHCP DNS Settings check box.
– To specify DNS Settings for this appliance manually uncheck the
Use DHCP DNS Settings check box and then provide the desired
domain and DNS server information.
9. Click Next to save your configuration settings. When the save process is
complete you can click Finish to close the Serial Configuration Utility.
About Your Appliance: NetBotz 500
35
Configuring Network Settings
To test the appliance IP connection, start your web browser and type the IP
address that was assigned to the appliance into the address field. Then, press
Enter. If the appliance is online and properly configured the Basic View will
be displayed in the browser window.
36
About Your Appliance: NetBotz 500
Installing Your Appliance
Once you have configured your appliance’s network settings, you are ready to
install the appliance. The NetBotz 500 appliance comes with the Camera Pod
120 and Sensor Pod 120 docked. However, you can undock one or both of
these pods if desired. Before installing your appliance, please be sure to
review the information regarding the various appliance ports and connections
in “The NetBotz 500: A Closer Look” on page 7.
• If you will be installing the appliance with both pods docked, see
“Installing with Both Pods Docked” on page 37.
• If you will be installing the appliance with one or both pods tethered,
see “Installing with One or Both Pods Tethered” on page 39.
Installing with Both Pods Docked
You need the following parts (included with the appliance) to complete the
following procedures:
• The NetBotz 500 with pods docked
• The power supply
• The Door Switch Sensor and its cable
• Black universal swivel wall mount (if needed)
To mount the NetBotz 500 with both pods docked:
1. Mount the Door Switch Sensor that is included with the appliance.
Complete these steps to mount the switch:
a. Measure the distance between the location where you intend to
mount the switch and the location where you will install the NetBotz
500. Ensure that the Door Switch Sensor cable is long enough before
continuing.
b. Using one of the included adhesive strips, attach the wired portion of
the door switch to the door frame. When mounting this portion of the
switch, ensure that the flat side of the switch is flush with the door
frame.
c. Using another adhesive strip, mount the non-wired portion of the
switch to the door. Be sure to mount the second piece of the switch so
37
Installing Your Appliance
that when the door is closed the two portions of the switch are as
close to each other as possible.
Once both pieces of the door switch are mounted, there must be
no more than 1/4” of space between the two pieces when the
door is closed.
Note
2. Mount the NetBotz 500 to your wall.
– If you will be mounting the NetBotz using the included black
universal swivel wall mount:
a. Select a location for the wall mount, and then use the included
NetBotz swivel wall mount template to mark the locations in which
the anchors need to be installed.
b. Install the screw anchors. Then, use the screws included with the
wall mount to secure the wall mount to your wall. Be sure to use the
included wall anchors and to tighten the screws enough to ensure that
the appliance will be securely fastened to the wall. Do not
overtighten the screws.
c. Using the bracket mount on the rear of the NetBotz, connect the
NetBotz to the wall mount by screwing the NetBotz onto the wall
mount until it is snug.
d. Use the swivel points on the wall mount to orient the NetBotz so that
it is pointed in the desired direction. When facing the bracket, you
can rotate the appliance clockwise and counter-clockwise by turning
the entire appliance; the post will rotate with the appliance. To swivel
the appliance vertically, turn the knob on the bracket just below the
point at which the appliance connects to the bracket, adjust the
position of the appliance as desired, and then tighten the knob again.
– If you will be mounting the NetBotz flush against your wall:
e. Select a location and then use the included NetBotz flush wall mount
template to mark the locations in which the anchors need to be
installed.
f. Install the screw anchors.
g. Screw one screw into each anchor until approximately 1/4” of each
screw is exposed. Then, hang the NetBotz on the screws.
3. Plug the power cord into the power socket. Note that the power cord is a
locking power cord, and you will need to pull the plug sleeve back to
38
About Your Appliance: NetBotz 500
Installing Your Appliance
unplug the cord.
4. Plug the Ethernet cable into the Ethernet socket.
5. Connect the Door Switch Sensor to the Door Switch Sensor connection.
6. Connect the Ethernet cable to an Ethernet wall jack or hub. Plug the
power cord into a wall socket. When you plug in the power cord, the
NetBotz will perform a power-on test and will then begin to collect data.
The LEDs on the NetBotz light up, the Status LED illuminates, and if
the Ethernet connection is live either the 10MB or 100MB link light will
illuminate and the Activity LED should flicker with network traffic.
Note
Be sure to connect the Ethernet socket on your appliance to an
Ethernet network, using a standard RJ-45 Ethernet cable.
Connecting the Ethernet socket to a powered telephone jack or
using an incorrect cable type can cause permanent damage to
your appliance.
When you have completed the installation procedure, use a supported web
browser to verify that the NetBotz is online.
1. Start a supported web browser on any system in your network.
2. Enter the NetBotz IP address in the Address or Website field and then
press Enter.
If the NetBotz is online, the Basic View appears.
Installing with One or Both Pods Tethered
Before proceeding, be sure to refer to the instructions on how to dock and
undock pods, as well as the various appliance ports and connections in “The
NetBotz 500: A Closer Look” on page 7. After undocking one or both pods
install the NetBotz 500 base station using the instructions in “Installing with
Both Pods Docked” on page 37 (if you have undocked the Camera Pod 120,
skip Step 1, Mounting the Door Switch Sensor). Then, refer to the appropriate
sections for instructions on installing tethered pods.
You do not have to undock both pods: You can leave one pod
docked, but install the other separately and tethered.
Note
About Your Appliance: NetBotz 500
39
Installing Your Appliance
Installing an Undocked Camera Pod 120
To install and tether an undocked NetBotz Camera Pod 120:
1. Mount the Door Switch Sensor that is included with the NetBotz.
Complete these steps to mount the switch:
a. Measure the distance between the location where you intend to
mount the switch and the location where you will install the Camera
Pod 120. Ensure that the Door Switch Sensor cable is long enough
before continuing.
b. Using one of the included adhesive strips, attach the wired portion of
the door switch to the door frame. When mounting this portion of the
switch, ensure that the flat side of the switch is flush with the door
frame.
c. Using another adhesive strip, mount the non-wired portion of the
switch to the door. Be sure to mount the second piece of the switch so
that when the door is closed the two portions of the switch are as
close to each other as possible.
Once both pieces of the door switch are mounted, there must be
no more than 1/4” of space between the two pieces when the
door is closed.
Note
2. Measure the distance between the NetBotz 500 base station and the
location at which you will install the pod. You will need to connect the
pod to the base station using a USB cable, and depending on the
distance between the pod and the base station you might require USB
extender cables or (because the Camera Pod 120 is a high-power USB
device) a powered USB hub.
3. Place the Camera Pod 120 at the installation location. The pod can be
mounted to a wall using the included wall mount bracket, if desired, or
you can mount it using standard camera mounting hardware.
4. Connect the Door Switch Sensor to the Camera Pod 120.
5. Connect the Camera Pod 120 to a USB Port on your NetBotz 500
appliance.
– Due to bandwidth requirements, you should avoid connecting more
than one Camera Pod 120 to a single USB Port. Connecting multiple
Camera Pod 120s to a single USB port will dramatically lower the
maximum frame rate available from all cameras sharing the port. For
40
About Your Appliance: NetBotz 500
Installing Your Appliance
best performance, connect only a single Camera Pod 120 to each
USB port.
– USB Ports A and B share bandwidth. Connecting Camera Pod 120s
to both USB Ports A and B will dramatically lower the maximum
frame rate available from both cameras. For maximum performance,
connect only one Camera Pod 120s to USB Port A or USB Port B.
Note that USB Ports C and D do not share bandwidth: You can
connect one Camera Pod 120 to each of these ports without
impacting their performance.
Shortly after the Camera Pod 120 is connected to a USB Port on the base
station the LED on the Camera Pod 120 will illuminate to indicate that it has
been recognized by the base station and is now functional.
Installing an Undocked Sensor Pod 120
To install and tether an undocked Sensor Pod 120:
1. Measure the distance between the NetBotz 500 base station and the
location at which you will install the pod. You will need to connect the
pod to the base station using a USB cable, and depending on the
distance between the pod and the base station you might require USB
extender cables or a powered or unpowered (because Sensor Pod 120s
are low-power USB devices) USB hub.
2. Place the Sensor Pod 120 at the installation location. The pod can be
mounted to a wall using the included Sensor Pod 120 wall mounting
bracket, if desired. Simply use the included screw to secure the wall
mounting bracket to the back of the Sensor Pod 120 and then hang the
Sensor Pod 120 on the wall.
Note
If you are mounting multiple Sensor Pod 120s in multiple racks,
cabinets, or other similar enclosed spaces, be sure to position
the Sensor Pod 120 in the same location and orientation within
each rack or cabinet. Air flow readings can be affected greatly
by the position and orientation of the Sensor Pod 120,
especially within an enclosed space. To ensure consistent air
flow readings between multiple racks and cabinets, install the
Sensor Pod 120s in identical locations in each rack or cabinet.
3. Connect the Sensor Pod 120 to a USB Port on your NetBotz 500
appliance. Up to 17 Sensor Pod 120s can be connected to a single
NetBotz 500 base station, so if you are installing multiple Sensor Pod
120s you will probably need to connect a powered or unpowered hub to
the base station and then connect the Sensor Pod 120 to the hub.
About Your Appliance: NetBotz 500
41
Installing Your Appliance
Shortly after the Sensor Pod 120 is connected to a USB Port on the base
station the LEDs on the Sensor Pod 120 will illuminate briefly, and it will emit
a series of beeps to indicate that it has been recognized by the base station and
is now functional.
42
About Your Appliance: NetBotz 500
Installing Hardware Options
You can upgrade your NetBotz 500 hardware in the following ways:
• Adding Camera Pod 120s, Sensor Pod 120s, CCTV Adapter Pod 120s,
Output Relay Pod 120s, or Power Control Pods to your NetBotz 500
• Installing a supported wireless network adapter in the NetBotz 500 PC
Card slot
• Installing a supported modem in the NetBotz 500 PC Card slot
• Connecting a supported USB modem to a USB port on your NetBotz
500
• Connecting a Wireless Receiver 120 for use with THS-100 Wireless
Temperature/Humidity Sensors
• Connecting supported RS232-sensors (including NMEA-compliant
GPS receivers, and RAE Systems MultiRAE Plus, ppbRAE, miniRAE,
and AreaRAE toxic vapor and gas sensors) to your NetBotz 500 using a
USB-to-serial port adapter or hub
• Connecting supported external sensors to a Sensor Pod 120
• Changing the lens on a Camera Pod 120
• Installing an Extended Storage System
Adding Pods to Your NetBotz 500
Your NetBotz 500 supports the simultaneous use of up to 4 Camera Pod 120s
and CCTV Adapter Pod 120s (combined total of 4), up to 17 Sensor Pod 120s,
and up to 4 Output Relay Pod 120s. Pods can be connected directly to any of
the NetBotz 500 USB ports (except the Power Control Pods, which are
RS232-based and which are connected to the USB ports using a USB-to-serial
port adapter), or you can connect USB hubs to your NetBotz 500 and then
connect pods to the hub. Hubs can also be “daisy chained” (i.e. connecting a
hub to another hub), and pods can then be connected to the daisy-chained
hubs, so long as the pod is no more than the fifth device in the chain.
Note
Due to power requirements, Camera Pod 120s, CCTV Adapter
Pod 120s, and Output Relay Pod 120s must be connected either
directly to one of the NetBotz 500 USB ports or to a powered
USB hub. Sensor Pod 120s, Power Control Pods, and RS232based sensors or devices can be connected to unpowered USB
hubs.
43
Installing Hardware Options
As pods are connected to your NetBotz 500 base station, they will
automatically appear in the Navigation pane in both the Basic and Advanced
View interfaces. Newly added pods will be labeled by their pod type (for
example, Sensor Pod 120, CCTV Adapter Pod 120, Camera Pod 120, or
Output Relay Pod 120) and their serial number.
Once a pod has been added, you can change its label using either the Basic
View or the Advanced View.
Note
44
• Power Control Pods will not appear in the Navigation pane
until you have used the Serial Devices task to specify what
type of device has been added to the serial port.
• Once connected, CCTV Adapter Pod 120s will require
additional configuration before they can be used. For more
information, see “Installing and Configuring a CCTV
Adapter Pod 120” on page 45
• In addition to 1 docked Camera Pod 120 and 1 docked
Sensor Pod 120, the Navigation pane can contain only up
to 4 tethered Camera Pod 120 and CCTV Adapter Pod 120
entries (combined) and up to 16 tethered Sensor Pod 120
entries. If you connect a pod and then disconnect it, its
entry will remain in the Navigation pane, but will be
“grayed out.” If your reconnect a previously disconnected
pod, its Navigation pane entry will become active again.
However, if you have reached the maximum number of
pod-specific entries in the Navigation pane (5 Camera Pod
120s and CCTV Adapter Pod 120s, 17 Sensor Pod 120s)
including “grayed out” entries, additional pods will not
appear in the Navigation pane until you delete a pod entry
of the same type from the list.
About Your Appliance: NetBotz 500
Installing Hardware Options
Note
• Due to bandwidth requirements, you should avoid
connecting more than one Camera Pod 120 or CCTV
Adapter Pod 120 to a single USB Port. Connecting
multiple Camera Pod 120s or CCTV Adapter Pod 120s to a
single USB port will dramatically lower the maximum
frame rate available from all cameras sharing the port. For
best performance, NetBotz recommends that you connect
only a single Camera Pod 120 or CCTV Adapter Pod 120
to each USB port.
• USB Ports A and B share bandwidth. Connecting Camera
Pod 120s or CCTV Adapter Pod 120s to both USB Ports A
and B will dramatically lower the maximum frame rate
available from both cameras. For maximum performance,
connect only one Camera Pod 120 or CCTV Adapter Pod
120 to USB Port A or USB Port B. Note that USB Ports C
and D do not share bandwidth: You can connect one
Camera Pod 120 or CCTV Adapter Pod 120 to each of
these ports without impacting their performance.
Installing and Configuring a CCTV Adapter Pod
120
To install a CCTV Adapter Pod 120, simply connect your video source to the
appropriate DIN, BNC, or RCA video input jack on the pod. Then, use the
USB cable to connect your pod to your NetBotz 500 base station, or to a USB
hub that is connected to the NetBotz 500 base station. To reduce radio
frequency noise and emissions from the USB cable, clamp one clamp-on
ferrite onto the USB cable within 2-3 inches of the end that connects to the
pod, and the second clamp-on ferrite onto the USB cable within 2-3 inches of
the end that connects to your NetBotz 500 or to the USB hub.
About Your Appliance: NetBotz 500
45
Installing Hardware Options
Once you have connected your CCTV Adapter Pod 120 and video source to
your NetBotz 500 base station, you will need to use the Advanced View to
configure the pod.
Note
The NetBotz 500 to which the CCTV Adapter Pod 120 will be
connected must be running BotzWare 2.1 or later, and the
Advanced View interface that will be used to configure the pod
must also be 2.1 or later. Before continuing, please use the
Advanced View Upgrade task to download and install the latest
available applications.
To configure your pod:
1. Start the Advanced View and then select from the Appliance drop-box
the IP address of the NetBotz 500 to which you have connected the
CCTV Adapter Pod 120. Be sure to log into the appliance using a user
account that has administrator privileges. Once you have logged in,
confirm that the newly connected CCTV Adapter Pod 120 appears in
the Navigation Pane. The default label for CCTV Adapter Pod 120s is
CCTV Video Pod serial, where serial is the serial number of the pod.
2. Select the Configuration button and then double-click on the Camera
Pods icon (located in the Pod/Sensor Settings portion of the
Configuration pane).
3. Select from the Camera Pod Configuration pane the entry that
corresponds to the CCTV Adapter Pod 120 and then click Capture.
4. The Camera Capture Settings window opens. In addition to the fields
that are typically available when using this window to configure Camera
Pod 120s, one additional control is available when configuring a CCTV
Adapter Pod 120:
– Video Format: Used to specify the format in which video is
transmitted by the video source. Available selections include: NTSCM, NTSC-Japan, PAL-B, PAL-D, PAL-G, PAL-H, PAL-I, PAL-M,
PAL-N Combination, and SECAM.
5. Use the controls in the Camera Capture Settings window to configure
the camera and image capture settings for use with the pod. To see an
example of an image capture using the currently selected Video
Format, Brightness, Contrast, and Image Quality settings click
Apply and the sample image in the Capture window will be updated
using the new values. When you are finished, click OK and any changes
you have made will be saved to the appliance.
46
About Your Appliance: NetBotz 500
Installing Hardware Options
Your video source should now appear in your Advanced View Cameras pane.
Once configured, you can use the video source in the same ways in which you
use Camera Pod 120s.
Connecting an Output Relay Pod 120
Output Control, when used in conjunction with an Output Relay Pod 120 (or a
supported RS232-based output control device. For more information, see
“Connecting RS232-Based Sensors” on page 55) enables you to use your
NetBotz 500 to turn a variety of devices on or off. Relay output actions can be
executed manually through the Advanced View and Basic View interfaces, or
can be configured as automatic alert actions in response to a threshold event.
To use an Output Relay Pod 120 with your NetBotz 500, connect the pod to
your NetBotz 500 base station, or to a powered USB hub that is connected to
the NetBotz 500 base station. Once the pod is recognized by the NetBotz 500,
use the Basic View Setup view or the Advanced View Output Control task to
complete your installation.
Connecting a Power Control Pod
Output Control enables you to use your NetBotz 500 with a Power Control
Pod to control power supplied to devices. Power control actions can be
executed manually through the Advanced View and Basic View interfaces, or
can be configured as automatic alert actions in response to a threshold event.
The following Power Control Pods are available:
• Power Control Pod 115 (controls 5 outlets @ 115VAC)
• Power Control Pod 235 (controls 5 outlets @ 230VAC)
• Power Control Pod 110 (controls 1 outlet @ 115VAC, 15A)
• Power Control Pod 230 (controls 1 outlet @ 230VAC, 5A)
To use a Power Control Pod with your NetBotz 500, you will first need to use
a USB-to-serial port adapter (included with your Power Control Pod) to add
serial ports to your appliance.
Installing a Power Control Pod 115 or 235
To configure and install your Power Control Pod 115 or 235:
1. Connect your USB-to-serial port adapter to your NetBotz 500 base
station, or to a USB hub that is connected to the NetBotz 500 base
About Your Appliance: NetBotz 500
47
Installing Hardware Options
station.
Note
• The serial port connector on the USB-to-serial port
converter cable is a male connector. You will need to use a
female-to-female connector null modem cable (included
with your Power Control Pod) to connect the device to the
USB-to-serial port adapter.
• You cannot connect a Power Control Pod to the NetBotz
500 integrated serial port. This port is designated for
appliance configuration and diagnostic use only.
2. Connect the devices for which power will be controlled to the outlets
located on the back of the pod.
3. Check the positions of the RATE jumper switches on the back of the
pod. All of these switches should be set to the “Down” position.
4. Connect the Power Control Pod to an outlet and then switch the power
switch, located on the back of the pod, to the “On” position.
5. Once you have connected the USB-to-serial port adapter to your
appliance (or to a USB hub that is connected to the NetBotz 500 base
station), use a female-to-female null modem cable (included with your
Power Control Pod) to connect the RS232 port located on the back of
the pod to a serial port on the USB-to-serial port adapter. Then, use the
Basic View Setup view or the Advanced View Serial Devices task to
specify which serial port-based device you have connected to the
appliance.
After you have installed the Power Control Pod, use the Basic View or the
Advanced View Output Control task to complete your installation.
Note
If, after you have installed and configured a Power Control Pod,
you later choose to uninstall the pod, replace it with a different
serial device, or move the pod to a different serial port, you
must perform a simple uninstall procedure using the Advanced
View Serial devices task before connecting a new serial device
to the previously used serial port. Failure to follow this
procedure will result in your appliance becoming unstable. For
more information, see “Reassigning Serial Ports” on page 56.
Installing a Power Control Pod 110 or 230
To configure and install your Power Control Pod 110 or 230:
1. Connect your USB-to-serial port adapter to your NetBotz 500 base
48
About Your Appliance: NetBotz 500
Installing Hardware Options
station, or to a USB hub that is connected to the NetBotz 500 base
station.
• The serial port connector on the USB-to-serial port
converter cable is a male connector. You will need to use a
female-to-female connector null modem cable (included
with your Power Control Pod) to connect the device to the
USB-to-serial port adapter.
• You cannot connect a Power Control Pod to the NetBotz
500 integrated serial port. This port is designated for
appliance configuration and diagnostic use only.
Note
2. Ensure that the Power Control Pod is set to address 0. To set the pod
address, turn the rotary switch labeled ADRS, located on the back of the
pod, until the small arrow is pointing at the number 0.
3. Set the setup switches to the desired values. There are 4 jumper
switches, labeled SETUP, located on the back of the pod. The settings
that correspond to each jumper switch are:
Switch
Note
Function
Up
Down
1
Data Rate: Sets the
communication speed
(baud rate) between the
pod and the NetBotz 500.
2400 bps (see
important note,
below)
9600 bps
2
Spare
-
-
3
Power Up Default: In the
event that power supply to
the pod is interrupted,
determines the power
supply state that will be
used when power is
restored.
On (power is
“On” when the
power is
restored,
regardless of
state when
power was
interrupted)
Last (power is
set to the state
that it was in
prior to the
power
interruption)
4
Spare
-
-
When installing Power Control Pod 110s or 230s, you must
configure the pod to run in 2400 bps mode. To do this, change
the setting of SETUP switch #1 on each pod to the “up”
position and then power cycle the module.
About Your Appliance: NetBotz 500
49
Installing Hardware Options
1. Connect the device for which power will be controlled to the outlet
located on the back of the Power Control Pod.
2. Connect the Power Control Pod to an outlet and then switch the power
switch, located on the back of the pod, to the “On” position.
3. Once you have connected the USB-to-serial port adapter to your
appliance (or to a USB hub that is connected to the NetBotz 500 base
station), use a female-to-female null modem cable (included with your
Power Control Pod) to connect the RS232 port located on the back of
the pod to a serial port on the USB-to-serial port adapter. Then, use the
Basic View Setup view or the Advanced View Serial Devices task to
specify which serial port-based device you have connected to the
appliance.
After you have installed the Power Control Pod, use the Basic View Setup
view or the Advanced View Output Control task to complete your installation.
Note
If, after you have installed and configured a Power Control Pod,
you later choose to uninstall the pod, replace it with a different
serial device, or move the pod to a different serial port, you
must perform a simple uninstall procedure using the Advanced
View Serial devices task before connecting a new serial device
to the previously used serial port. Failure to follow this
procedure will result in your appliance becoming unstable. For
more information, see “Reassigning Serial Ports” on page 56.
Installing a Wireless Network Adapter
You can enhance the network communication capabilities of your NetBotz
500 by installing a supported wireless network PC Card adapter in the PC
Card slot. At present only the following wireless network adapters are
supported for use with the NetBotz 500:
• Orinoco Classic Gold 802.11b PC Card
• Cisco Aironet 350 PC Card (Cisco AIR-PCM352)
• D-Link Air Xpert DWL-AG650 Tri-Mode Dualband Wireless CardBus
Adapter
• Netgear WAG511 Dual Band Wireless PC Card (32-bit CardBus)
• Cisco Aironet 802.11a/b/g Wireless CardBus Adapter
To install a wireless network adapter in the PC Card slot:
1. Power off the NetBotz 500 appliance. Disconnect the power connection
50
About Your Appliance: NetBotz 500
Installing Hardware Options
from the appliance.
Be sure to disconnect power from your appliance before
installing a hardware upgrade in the PC Card slot.
Note
2. Slide the adapter into the PC Card slot on your appliance. To ensure that
the adapter is properly inserted, gently but firmly press the adapter into
place.
Note
The PC Card must be inserted into the slot with the front of the
PC Card (typically featuring the name of the card as well as the
manufacturer’s logo) facing “down” or toward the back of the
NetBotz 500. The back of the PC Card (typically featuring
technical data about the PC Card, serial number, etc.) must face
“up” or toward the front of the NetBotz 500.
3. Reconnect the power cord to your appliance.
Once you have finished installing your hardware upgrade, you will need to
either a DHCP server to assign network settings to your appliance, or use
either the Serial Configuration Utility 2.0 (see “Using the Serial Configuration
Utility” on page 32) or the Advanced View Network Interfaces task to
configure the adapter’s network interface.
Installing a PC Card Modem
You can enhance the network communication capabilities of your NetBotz
500 by installing a supported PC Card modem in the PC Card slot. At present
only the following PC Card modems are supported for use with the NetBotz
500:
• Option International GlobeTrotter
• Sierra Wireless AirCard 750
• Xircom CreditCard Modem 56-GlobalACCESS
To install a modem in the PC Card slot:
1. Power off the NetBotz 500 appliance. Disconnect the power connection
About Your Appliance: NetBotz 500
51
Installing Hardware Options
from the appliance.
Be sure to disconnect power from your appliance before
installing a hardware upgrade in the PC Card slot.
Note
2. Slide the modem into the PC Card slot on your appliance. To ensure that
the adapter is properly inserted, gently but firmly press the adapter into
place.
Note
The PC Card must be inserted into the slot with the front of the
PC Card (typically featuring the name of the card as well as the
manufacturer’s logo) facing “down” or toward the back of the
NetBotz 500. The back of the PC Card (typically featuring
technical data about the PC Card, serial number, etc.) must face
“up” or toward the front of the NetBotz 500.
3. Reconnect the power cord to your appliance.
Once you have finished installing your modem it will be recognized as a serial
port by the NetBotz 500. You will need to use the Basic View Setup view or
the Advanced View Serial Devices task to specify the modem that is
associated with the serial port. Once you have specified the modem model,
you will also need to use the Advanced View PPP/Modem task to configure
your NetBotz 500 for PPP communications. If the installed modem supports
SMS communications, you will also need to use the Advanced View SMS task
to configure your NetBotz 500 to communicate with your SMS network.
Note
52
If, after you have installed and configured your PC Card
modem, you later choose to uninstall the modem or replace it
with a different modem, you must perform a simple uninstall
procedure using the Advanced View Serial devices task before
connecting any new serial device to the serial port previously
used by the modem. Failure to follow this procedure will result
in your appliance becoming unstable. For more information,
see “Reassigning Serial Ports” on page 56.
About Your Appliance: NetBotz 500
Installing Hardware Options
Connecting a USB Modem
You can enhance the network communication capabilities of your NetBotz
500 by connecting a supported USB modem to your appliance. At present
only the following USB modem is supported for use with the NetBotz 500:
• MultiTech MultiModemUSB
• NERA Satellite Modem
To connect a USB modem to your NetBotz 500, first power off the appliance.
Then, connect the USB modem to your NetBotz 500, or to a USB hub that is
connected to the NetBotz 500, then power the appliance back on. Once the
appliance has finshed booting up power on the modem. Once the modem is
recognized as a serial port by the NetBotz 500, you will need to use the Basic
View Setup view or the Advanced View Serial Devices task to specify the
modem that is associated with the serial port. Once you have specified the
modem model, you will also need to use the Advanced View PPP/Modem task
to configure your NetBotz 500 for PPP communications.
Note
If, after you have installed and configured your USB modem,
you later choose to uninstall the modem, you must perform a
simple uninstall procedure using the Advanced View Serial
devices task before connecting a new serial device to the
previously used serial port. Failure to follow this procedure will
result in your appliance becoming unstable. For more
information, see “Reassigning Serial Ports” on page 56
Connecting a Wireless Receiver 120
To enable your NetBotz 500 to make use of THS-100 Wireless Temperature/
Humidity Sensors, you will need to connect a Wireless Receiver 120 to your
NetBotz 500. Once configured, the Wireless Receiver 120 provides readings
from and enables threshold setting for all detected wireless sensors.
About Your Appliance: NetBotz 500
53
Installing Hardware Options
The Wireless Receiver 120 is an RS232-based device with an integrated USBto-serial converter. To install the receiver, connect the Wireless Receiver 120
to your NetBotz 500 base station, or to a USB hub that is connected to the
NetBotz 500 base. Once connected, a new serial port will be available for
configuration. Use the Basic View Setup view or the Advanced View Serial
Devices task to specify that a Wireless Receiver 120 is associated with the
new serial port. Once configured, the sensor readings associated with any
detected wireless sensors will appear in the Basic and Advanced Views.
Note
54
• When adding a Wireless Receiver 120, you might notice a
delay before the wireless sensors begin appearing in the
Basic or Advanced Views. THS-100 Wireless
Temperature/Humidity Sensors transmit data every once
every 5 seconds for the first 5 minutes they are powered
on, after which they typically transmit data once every 3
minutes. Wireless sensors will not be discovered or appear
in the interface until they have successfully transmitted
data to the Wireless Receiver 120. Once the wireless
sensors have been discovered, you can configure settings
and thresholds for the wireless sensors using the Advanced
View Sensor Pods task.
• If, after you have installed and configured your Wireless
Receiver 120, you later choose to uninstall the device, you
will need to use the Advanced View Serial Devices task to
remove the serial port configuration from your appliance.
About Your Appliance: NetBotz 500
Installing Hardware Options
Connecting RS232-Based Sensors
To connect a supported RS232-based sensor to your NetBotz 500 you will
first need to use a USB-to-serial port adapter (available from NetBotz and
NetBotz resellers) to add serial ports to your appliance. Connect your USB-toserial port adapter to your NetBotz 500 base station, or to a USB hub that is
connected to the NetBotz 500 base station.
Note
• The serial port connector on the USB-to-serial port
converter cable is a male connector. If the RS232-based
sensor you are connecting to the adapter also has a male
connector you will need a female-to-female connector null
modem cable or converter block to connect the device to
the USB-to-serial port adapter.
• You cannot connect RS232-based sensors to the NetBotz
500 integrated serial port. This port is designated for
appliance configuration and diagnostic use only.
Once you have connected the USB-to-serial port adapter to your appliance,
you can connect supported RS232-based sensors to the adapter for use with
your NetBotz 500.
Supported RS232-Based Sensors
The following RS232-based sensors are supported at this time:
• NMEA-compliant GPS receivers: Provide GPS position-oriented
sensors. GPS receivers associate location information (such as latitude,
longitude, altitude, and so forth) with alert data, which can be useful for
mobile NetBotz applications.
• RAE Systems MultiRAE Plus, ppbRAE, miniRAE, and AreaRAE
toxic vapor and gas sensors: Toxic vapor and gas detection systems.
MultiRAE Plus, miniRAE, and ppbRAE systems can be made wireless
with the use of the RAELink wireless communication upgrade package.
For more information on RAE Systems complete line of innovative gas
detection products see http://www.raesystems.com.
Note
RAE Systems device support are available only with the
additional purchase of a RAE Systems Sensors Option license.
If you are connecting a supported RAE systems device to your
appliance, be sure to use the Advanced View License Keys task
to activate RAE Systems Sensors Option support on your
appliance before continuing.
About Your Appliance: NetBotz 500
55
Installing Hardware Options
Installing RS232-Based Sensors
To install, simply connect the RS232-based sensor to a serial port on your
USB-to-serial port adapter. Then, use the Basic View Setup view or the
Advanced View Serial Devices task to specify which serial port-based sensor
you have connected to the appliance.
The sensor readings associated with the device will appear in the Basic and
Advanced Views once you have completed installation.
Note
If, after you have installed and configured your RS232-based
sensor, you later choose to uninstall the sensor, replace it with a
different serial device, or move the sensor to a different serial
port, you must perform a simple uninstall procedure using the
Advanced View Serial devices task before connecting a new
serial device to the previously used serial port. Failure to follow
this procedure will result in your appliance becoming unstable.
For more information, see “Reassigning Serial Ports” on
page 56.
Reassigning Serial Ports
Once you have connected a serial device (such as a modem or an RS232based sensor) to a serial port, and have configured your NetBotz 500 to use
that device, your appliance will expect that only the specified device type will
be connected to that serial port. If you decide to remove a serial device from a
serial port, move a serial device from one serial port to a different serial port,
or disconnect a device and replace it with a different serial device (for
example, if you decide to disconnect your ChemSentry and replace it with a
NMEA-compliant GPS receiver), you must perform a simple uninstall
procedure using the Advanced View Serial devices task before connecting the
new serial device to the serial port. Failure to follow this procedure will result
in your appliance becoming unstable.
To switch serial devices on a serial port:
1. Power off your appliance.
2. Disconnect the serial device from the serial port, and then restore power
to your appliance.
3. Open the Advanced View Serial Devices task, set the Device Type for
the serial port from which you disconnected the serial device to “None,”
and click OK.
4. Connect the new serial device to the serial port. If you’re connecting a
PC Card, be sure to power off the appliance again before inserting the
56
About Your Appliance: NetBotz 500
Installing Hardware Options
PC Card, and then power the appliance on again.
5. Open the Advanced View Serial Devices task and specify the new
Device Type for the serial port. when you are finished, click OK to save
your settings.
Once you have specified the new serial device type, additional interface
features that are associated with the device type (such as additional sensor
types or Configuration tasks) will appear in the Advanced View within 30
seconds.
Connecting External Sensors
To install an external sensor, plug the sensor into an available External Port on
any Sensor Pod 120.
Note
• Be sure to note both the Sensor Pod 120 serial number
(located on the back of the pod) and the number of the
External Port on the pod when you connect the cable; you
will need this information when you use the Sensor Pod
120 task to configure your NetBotz 500. The External Port
number is printed above the port on the pod.
• If the external sensor cable is not long enough, use a
Extension Cable for External Sensors (available in 50’ and
100’ lengths from your NetBotz reseller) to lengthen the
cable.
When you have finished installing, use the Sensor Pods task to configure the
NetBotz 500 to use the external sensor. Once you have configured your
appliance, an additional temperature sensor will appear in the Sensor Data
pane when the pod to which it is connected is selected from the Navigation
pane. You will be able to use the Advanced View Sensor Pods task to specify
thresholds for this external sensor.
About Your Appliance: NetBotz 500
57
Installing Hardware Options
Changing Camera Pod Lenses
Your Camera Pod 120 features a CS-standard lens mount, enabling you to
replace your lens with any standard CS- or C-mount lens (C-mount lenses
require a C-to-CS adapter ring) that supports a .5” or larger imager. Changing
lenses is a simple procedure.
Note
Once the lens is removed, the digital imager assembly is
exposed. Do not touch the imager. Take care to ensure that dust
and dirt do not fall on the imager. If dust or dirt fall on the
imager, use a can of compressed air to clean the imager by
blowing the dust or dirt clear.
To change the lens, simply rotate the lens counter-clockwise until it is fully
extended. Then, using a small amount of force, continue rotating the lens
counter-clockwise until the lens unscrews from the housing. Then, install your
new CS-mount lens (or C-mount lens with CS-mount adapter) by screwing it
into the housing in a clockwise direction. When the lens is fully screwed in,
apply a small amount of additional force in a clockwise direction to ensure
that it is securely installed.
Installing an Extended Storage System
The Extended Storage System enables you to vastly increase the alert and
sensor data storage capabilities of your NetBotz 500. The Extended Storage
System, connected to your appliance, provides the following functionality:
• Maximum camera clip size increased to 32MB maximum (maximum is
8MB without Extended Storage System)
• Total number of resolved alerts, and length of time resolved alerts are
stored, increased to a maximum of 5000 resolved alerts stored for up to
180 days (maximum of 200 resolved alerts stored for up to 24 hours
without Extended Storage System)
• Up to 10,000 individual “captures” (including picture sequences, audio
clips, and graphs) can be stored on the Extended Storage System
• Sensor history for all sensors connected to your appliance with
Extended Storage System increased from 24 hours to a maximum of 180
days (default sensor history for all sensors increased from 8 hours to 90
days), greatly enhancing your ability to track sensor readings over time
using the Graph view
• Sensor history, alerts, and all sensor-associated data (including image
captures, audio clips, and sensor data graphs) are stored persistently on
the Extended Storage System and will not be lost if power to the
appliance is interrupted
58
About Your Appliance: NetBotz 500
Installing Hardware Options
Installing the Extended Storage System
1. Install the Extended Storage System wall mount, shown here. Place the
bracket against the wall so that the opening is facing upward and then
use a pencil to make a mark on the wall in the center of each of the two
bracket screw holes.
2. Install the wall anchors and screws in the marked locations. Then, hang
the bracket on the screw heads. Once you have hung the bracket, use
your screwdriver to tighten the screws, securing the bracket in place.
Make sure you install the wall mount close enough to the
appliance so that the USB cable included with the Extended
Storage System can reach the USB ports on the appliance.
Note
3. Place the Extended Storage System into the wall mount. Be sure to place
the drive into the bracket so that the interface connection is facing down
into the bracket and the power supply switch is visible on the top of the
drive.
Ensure that your appliance is powered off before continuing.
Note
4. Connect the MC-36 male connector end of the interface cable to the
interface connector on the Extended Storage System. The interface
connector should be easily accessible through the opening in the bottom
of the wall mount bracket.
5. Ensure that the Extended Storage System power supply switch is set to
“EXT.”
6. Connect the Extended Storage System to your appliance. Plug the USB
connector on the end of the interface cable into a USB port on your
appliance.
7. Connect the AC power supply to the AC power port on the Extended
Storage System, and then plug the power supply into an AC power
outlet.
8. Using the included strain relief zip tie, connect the USB and power
cables to the wall mount bracket. This will help to ensure that the cables
About Your Appliance: NetBotz 500
59
Installing Hardware Options
do not accidentally become unplugged.
9. Power on your appliance.
10. Use the Advanced View License Keys task to activate the Extended
Storage task. You should have received an Extended Storage System
License Key via e-mail when you placed your order for this Extended
Storage System.
a. From the Configuration view, double-click on License Keys to start
the License Keys task.
b. Select Extended Storage System from the list of available
applications and then click Edit.
c. Type in the Add License Key field the Extended Storage System
license key that you received and then click OK.
d. Click Close to close the License Keys task. The appliance will restart
automatically at this time.
11. Format and use your Extended Storage System. Before the Extended
Storage System can be used by your appliance, you must use the
Advanced View Extended Storage task to format the file system and
configure your appliance to use the additional storage.
a. From the Configuration view, double-click on Extended Storage to
start the Extended Storage task.
b. The Extended Storage window opens. The status and size (in GB) of
the Extended Storage System is shown. Click Add to continue.
c. Select USB Drive from the Select Storage Type pane and then click
Next.
d. The Select Operation pane appears. Two selections are available:
• Use Extended Storage: Configure the appliance to use the
Extended Storage System without formatting the file system first.
Can be used if the Extended Storage System you have connected to
your appliance has previously been formatted and contains camera
and sensor data already.
• Format and Use Extended Storage: Formats the Extended
Storage System’s file system and then configures the appliance to
use the Extended Storage System.
e. Select the operation you wish to perform and then click OK.
• If you selected Use Extended Storage, a confirmation message
appears advising you that the appliance will need to restart to
complete the task. Click Finish to restart the appliance. When the
60
About Your Appliance: NetBotz 500
Installing Hardware Options
restart is complete all Extended Storage System functionality will
be available for use.
• If you selected Format and use Extended Storage, a confirmation
message appears, advising you that formatting the extended
storage device will destroy any data stored on the device and that
formatting can take 10 or more minutes to complete, after which
the appliance must restart to begin using extended storage. Click
Finish to complete this task. Once the Extended Storage System is
formatted, your appliance will restart automatically. When the
restart is complete all Extended Storage System functionality will
be available for use.
12. Once the Extended Storage System is formatted, your appliance will
restart automatically. When your appliance has restarted your
installation is complete.
About Your Appliance: NetBotz 500
61
Installing Hardware Options
62
About Your Appliance: NetBotz 500
Operational Specifications
NetBotz 500 Base Station
• Housing: 20.5cmW (27cmW with pods docked) x 16.5cmH x 2.7cmD,
20 gauge metal.
• Indicators: Base station status, alert, network speed, and network
activity LEDs.
• Pods: Supports up to 4 Camera Pod 120s (1 docked, 3 connected to
USB A or B, C, or D or to powered USB 1.1 hubs; Ports A & B share
bandwidth, and therefore only one Camera Pod 120 should be
connected to either Port A or Port B), up to 17 Sensor Pod 120s (1
docked, up to 16 connected to USB ports either directly or via USB 1.1
powered or unpowered hubs).
• Connectors: Ethernet: RJ-45 to Cat 5 network wiring; Serial: DB-9
receptacle; Power: 5 vdc power brick.
• External Device Connectors: 4 USB-A ports. 1 PC Card slot.
• Data Speed: Ethernet 10/100 Mbps (10/100 BaseT).
• Protocols: TCP/IP, HTTP, SMTP, SNMP, DHCP, DNS, Socks V4 or V5
Proxy server.
• Management Interface: Supports Netscape Navigator 4.79, 6.0 or
later; Internet Explorer 5.5 or later, and Mozilla 1.3 or later on these
operating systems: Microsoft Windows (2000 or XP SP1), Red Hat EL
3, Fedora Core 3, or Debian GNU 3 or a Sparc workstation running
Solaris 9 with all patch bundles recommended by Sun. Use of the
Advanced View interface requires a one-time download of the Java
Runtime Environment Plug-in from Sun Microsystems. Display
Resolution 1024 x 768 minimum.
• Operational Environment: Temperature: 2º to 50º C (35º F to 120º F).
Relative Humidity: 10% to 90% (non-condensing). For indoor use only.
Not designed for use in corrosive or caustic environments.
63
Operational Specifications
Camera Pod 120
• Housing: 6.6cmW x 6.9cmH x 2.7cmD, 20 gauge metal.
• Imager: Image processor that generates images up to 1280x1024
resolution, 24-bit color, and up to 30 frames per second.
• Lens: 35ºW by 28ºH C-mount lens with included CS-mount adapter.
Can be replaced by any standard CS- or C-mount lens.
• External Connectors: Door switch sensor, external microphone jack,
and stereo headphone/powered speaker jack. (Magnetic door sensor
supplied).
• Camera Motion Sensing: Built in, region maskable.
• Indicators: Power on, audio recording activity.
• Operational Environment: Temperature: 2º to 50º C (35º F to 120º F).
Relative Humidity: 10% to 90% (non-condensing). For indoor use only.
Not designed for use in corrosive or caustic environments.
Sensor Pod 120
• Housing: 6.6cmW x 9.7cmH x 3.15cmD (3.76cmD with optional
mounting bracket), 20 gauge metal.
• Temperature: Range: 2º to 50º C (35º to 120º F), Accuracy: +/- 1º C (+/
-1.8º F) typical.
• Relative Humidity: Range: 10% to 90% (non-condensing), Accuracy:
+/-5% RH.
• Air Flow Rate: 0-1,000 Meters Per Minute (0-3,248 Feet Per Minute).
• Audio: Built-in acoustic sensor detects audio above specified level.
• Indicators: Temperature out-of-limit, humidity out-of-limit, airflow
out-of-limit, sound detected, external sensor violation detected.
• External Sensor Ports: 4 on each Sensor Pod 120.
• Operational Environment: Temperature: 2º to 50º C (35º F to 120º F).
Relative Humidity: 10% to 90% (non-condensing). For indoor use only.
Not designed for use in corrosive or caustic environments.
64
About Your Appliance: NetBotz 500
Warranty and Service
Limited warranty
APC warrants the NetBotz 500 to be free from defects in materials and
workmanship for a period of 1 year (hardware) or 90 days (software) from the
date of purchase. Its obligation under this warranty is limited to repairing or
replacing, at its own sole option, any such defective products. This warranty
does not apply to equipment that has been damaged by accident, negligence,
or misapplication or has been altered or modified in any way. This warranty
applies only to the original purchaser.
Warranty limitations
Except as provided herein, APC makes no warranties, expressed or
implied, including warranties of merchantability and fitness for a
particular purpose. Some jurisdictions do not permit limitation or exclusion
of implied warranties; therefore, the aforesaid limitation(s) or exclusion(s)
may not apply to the purchaser.
Except as provided above, in no event will APC be liable for direct,
indirect, special, incidental, or consequential damages arising out of the
use of this product, even if advised of the possibility of such damage.
Specifically, APC is not liable for any costs, such as lost profits or revenue,
loss of equipment, loss of use of equipment, loss of software, loss of data,
costs of substitutes, claims by third parties, or otherwise. This warranty gives
you specific legal rights and you may also have other rights, which vary
according to jurisdiction.
Obtaining service
To obtain support for problems with your NetBotz 500:
0
1. Note the serial number. The serial number is located on the rear of the
unit.
2. Contact NetBotz Customer Support in the following ways:
– Phone: 1-512-439-5916, or toll-free at 1-877-908-2688
– Web: http://register.netbotz.com/how_to_contact.html
3. If you must return the product, the technician will give you a return
material authorization (RMA) number. If the warranty expired, you will
65
Warranty and Service
be charged for repair or replacement.
4. Pack the unit carefully. The warranty does not cover damage sustained
in transit. Enclose a letter with your name, address, RMA number and
daytime phone number; a copy of the sales receipt; and a check as
payment, if applicable.
5. Mark the RMA number clearly on the outside of the shipping carton.
6. Ship by insured, prepaid carrier to the address provided by the Customer
Support technician.
66
About Your Appliance: NetBotz 420
Life-Support Policy
General policy
American Power Conversion (APC) does not recommend the use of any of its
products in the following situations:
• In life-support applications where failure or malfunction of the APC
product can be reasonably expected to cause failure of the life-support
device or to affect significantly its safety or effectiveness.
• In direct patient care.
APC will not knowingly sell its products for use in such applications unless it
receives in writing assurances satisfactory to APC that (a) the risks of injury or
damage have been minimized, (b) the customer assumes all such risks, and (c)
the liability of American Power Conversion is adequately protected under the
circumstances.
Examples of life-support devices
The term life-support device includes but is not limited to neonatal oxygen
analyzers, nerve stimulators (whether used for anesthesia, pain relief, or other
purposes), autotransfusion devices, blood pumps, defibrillators, arrhythmia
detectors and alarms, pacemakers, hemodialysis systems, peritoneal dialysis
systems, neonatal ventilator incubators, ventilators (for adults and infants),
anesthesia ventilators, infusion pumps, and any other devices designated as
“critical” by the U.S. FDA.
Hospital-grade wiring devices and leakage current protection may be ordered
as options on many APC UPS systems. APC does not claim that units with
these modifications are certified or listed as hospital-grade by APC or any
other organization. Therefore these units do not meet the requirements for use
in direct patient care.
67
Life-Support Policy
68
About Your Appliance: NetBotz 420
www.netbotz.com
PN: 02031D05