1
OS-9 Operating System
User Manual
Copyright and Revision
History
Copyright 1991 Microware Systems Corporation. All Rights Reserved.
Reproduction of this document, in part or whole, by any means, electrical,
mechanical, magnetic, optical, chemical, manual, or otherwise is prohibited, without written permission from Microware Systems Corporation.
This manual reflects Version 2.4 of the OS-9 operating system.
Publication Editor:
Revision:
Publication date:
Product Number:
Walden Miller, Kathie Flood, Ellen Grant
D
March 1991
UPR-68-NA-68-MO
Disclaimer
The information contained herein is believed to be accurate as of the date
of publication. However, Microware will not be liable for any damages,
including indirect or consequential, from use of the OS9 operating system,
Microware-provided software or reliance on the accuracy of this
documentation. The information contained herein is subject to change
without notice.
Reproduction Notice
The software described in this document is intended to be used on a single
computer system. Microware expressly prohibits any reproduction of the
software on tape, disk or any other medium except for backup purposes.
Distribution of this software, in part or whole, to any other party or on any
other system may constitute copyright infringements and misappropriation
of trade secrets and confidential processes which are the property of
Microware and/or other parties. Unauthorized distribution of software may
cause damages far in excess of the value of the copies involved.
For additional copies of this software and/or documentation, or if you have
questions concerning the above notice, the documentation and/or software,
please contact your OS-9 supplier.
Trademarks
OS-9 and Microware are registered trademarks of Microware Systems
Corp.
UNIX is a trademark of Bell Laboratories.
Microware Systems Corporation w 1900 N.W. 114th Street
Des Moines, Iowa 50325-7077 w Phone: 515/224–1929
Table of Contents
OS-9 Operating System User Manual
An Overview of OS-9
Chapter 1
What Is an Operating System? . . . . . . . . . . . . . . . . . . . . . . . . . . . . . . . . . .
Using OS-9 as Your Operating System . . . . . . . . . . . . . . . . . . . . . . . . . . . .
Storing Information . . . . . . . . . . . . . . . . . . . . . . . . . . . . . . . . . . . . . . . . . . .
Multi-tasking and Multi-user Features . . . . . . . . . . . . . . . . . . . . . . . . . . . .
The Memory Module and Modular Software . . . . . . . . . . . . . . . . . . . . . . .
Starting OS-9
Chapter 2
Booting OS-9 . . . . . . . . . . . . . . . . . . . . . . . . . . . . . . . . . . . . . . . . . . . . . . .
Backing Up the System Disk . . . . . . . . . . . . . . . . . . . . . . . . . . . . . . . . . . .
Directories Contained on the System Disk . . . . . . . . . . . . . . . . . . . . . . . . .
Basic Commands and
Functions
The OS-9 File System
2-1
2-3
2-8
Chapter 3
Learning the Basics . . . . . . . . . . . . . . . . . . . . . . . . . . . . . . . . . . . . . . . . . . .
Logging on to a Timesharing System . . . . . . . . . . . . . . . . . . . . . . . . . . . . .
An Introduction to the Shell . . . . . . . . . . . . . . . . . . . . . . . . . . . . . . . . . . . .
Using the Keyboard . . . . . . . . . . . . . . . . . . . . . . . . . . . . . . . . . . . . . . . . . .
Basic Utilities . . . . . . . . . . . . . . . . . . . . . . . . . . . . . . . . . . . . . . . . . . . . . . .
The Help Utility and the -? Option . . . . . . . . . . . . . . . . . . . . . . . . . . . . . . .
Free and Mfree . . . . . . . . . . . . . . . . . . . . . . . . . . . . . . . . . . . . . . . . . . . . . .
3-1
3-1
3-2
3-4
3-6
3-7
3-7
Chapter 4
OS-9 File Storage . . . . . . . . . . . . . . . . . . . . . . . . . . . . . . . . . . . . . . . . . . . .
The OS-9 File System . . . . . . . . . . . . . . . . . . . . . . . . . . . . . . . . . . . . . . . . .
Current Directories . . . . . . . . . . . . . . . . . . . . . . . . . . . . . . . . . . . . . . . . . . .
Accessing Files and Directories: The Pathlist . . . . . . . . . . . . . . . . . . . . . . .
Basic File System Oriented Utilities . . . . . . . . . . . . . . . . . . . . . . . . . . . . . .
The Shell
1-1
1-1
1-2
1-2
1-4
4-1
4-5
4-6
4-8
4-10
Chapter 5
The Function of the Shell . . . . . . . . . . . . . . . . . . . . . . . . . . . . . . . . . . . . . .
The Shell Environment . . . . . . . . . . . . . . . . . . . . . . . . . . . . . . . . . . . . . . . .
Built-In Shell Commands . . . . . . . . . . . . . . . . . . . . . . . . . . . . . . . . . . . . . .
Shell Command Line Processing . . . . . . . . . . . . . . . . . . . . . . . . . . . . . . . .
Command Grouping . . . . . . . . . . . . . . . . . . . . . . . . . . . . . . . . . . . . . . . . . .
Shell Procedure Files . . . . . . . . . . . . . . . . . . . . . . . . . . . . . . . . . . . . . . . . .
Setting Up a Time-Sharing System Startup Procedure File . . . . . . . . . . . .
Creating a Temporary Procedure File . . . . . . . . . . . . . . . . . . . . . . . . . . . . .
Multiple Shells . . . . . . . . . . . . . . . . . . . . . . . . . . . . . . . . . . . . . . . . . . . . . .
Error Reporting . . . . . . . . . . . . . . . . . . . . . . . . . . . . . . . . . . . . . . . . . . . . . .
Running Compiled Intermediate Code Programs . . . . . . . . . . . . . . . . . . . .
5-1
5-2
5-4
5-5
5-17
5-18
5-22
5-23
5-25
5-31
5-32
I
Table of Contents
OS-9 Operating System User Manual
Making Files
Chapter 6
The Make Utility . . . . . . . . . . . . . . . . . . . . . . . . . . . . . . . . . . . . . . . . . . . . .
Example One: Updating a Document . . . . . . . . . . . . . . . . . . . . . . . . . . . . .
Example Two: Compiling C Programs . . . . . . . . . . . . . . . . . . . . . . . . . . . .
Example Three: A Makefile that Uses Macros . . . . . . . . . . . . . . . . . . . . . .
Example Four: Putting It All Together . . . . . . . . . . . . . . . . . . . . . . . . . . . .
Making Backups
Chapter 7
Incremental Backups . . . . . . . . . . . . . . . . . . . . . . . . . . . . . . . . . . . . . . . . . .
Making an Incremental Backup: The fsave Utility . . . . . . . . . . . . . . . . . . .
Restoring Incremental Backups: The frestore Utility . . . . . . . . . . . . . . . . .
Incremental Backup Strategies . . . . . . . . . . . . . . . . . . . . . . . . . . . . . . . . . .
The tape Utility . . . . . . . . . . . . . . . . . . . . . . . . . . . . . . . . . . . . . . . . . . . . . .
OS-9 System Management
7-1
7-1
7-4
7-10
7-13
Chapter 8
Setting Up the System Defaults: the Init Module . . . . . . . . . . . . . . . . . . . .
Customization Modules . . . . . . . . . . . . . . . . . . . . . . . . . . . . . . . . . . . . . . .
Changing System Modules . . . . . . . . . . . . . . . . . . . . . . . . . . . . . . . . . . . . .
Making Bootfiles . . . . . . . . . . . . . . . . . . . . . . . . . . . . . . . . . . . . . . . . . . . . .
Using the RAM Disk . . . . . . . . . . . . . . . . . . . . . . . . . . . . . . . . . . . . . . . . . .
Making a Startup File . . . . . . . . . . . . . . . . . . . . . . . . . . . . . . . . . . . . . . . . .
Initializing Devices iniz r0 h0 d0 t1 p1 . . . . . . . . . . . . . . . . . . . . . . . . . . . .
Loading Utilities Into Memory load –z=sys/loadfile . . . . . . . . . . . . . . . . .
Loading the Default Device Descriptor load bootobjs/dd.r0 . . . . . . . . . . .
Initializing the RAM Disk init.ramdisk>/nil >>/nil & . . . . . . . . . . . . . . . .
Multi-User Systems tsmon /t1 & . . . . . . . . . . . . . . . . . . . . . . . . . . . . . . . .
System Shutdown Procedure . . . . . . . . . . . . . . . . . . . . . . . . . . . . . . . . . . .
Installing OS-9 On Hard Disk . . . . . . . . . . . . . . . . . . . . . . . . . . . . . . . . . . .
Managing Processes in a Real-Time Environment . . . . . . . . . . . . . . . . . . .
Using the Tmode and Xmode Utilities . . . . . . . . . . . . . . . . . . . . . . . . . . . .
The Termcap File Format . . . . . . . . . . . . . . . . . . . . . . . . . . . . . . . . . . . . . .
Termcap Capabilities . . . . . . . . . . . . . . . . . . . . . . . . . . . . . . . . . . . . . . . . . .
II
6-1
6-7
6-8
6-9
6-10
8-1
8-5
8-6
8-9
8-11
8-12
8-13
8-15
8-15
8-16
8-16
8-16
8-18
8-21
8-23
8-25
8-27
Table of Contents
OS-9 Operating System User Manual
The OS-9 Utilities
Chapter 9
System Command Descriptions . . . . . . . . . . . . . . . . . . . . . . . . . . . . . . . . .
attr . . . . . . . . . . . . . . . . . . . . . . . . . . . . . . . . . . . . . . . . . . . . . . . . . . . . . . . .
binex/exbin . . . . . . . . . . . . . . . . . . . . . . . . . . . . . . . . . . . . . . . . . . . . . . . . .
break . . . . . . . . . . . . . . . . . . . . . . . . . . . . . . . . . . . . . . . . . . . . . . . . . . . . . .
build . . . . . . . . . . . . . . . . . . . . . . . . . . . . . . . . . . . . . . . . . . . . . . . . . . . . . .
cfp . . . . . . . . . . . . . . . . . . . . . . . . . . . . . . . . . . . . . . . . . . . . . . . . . . . . . . . .
chd/chx . . . . . . . . . . . . . . . . . . . . . . . . . . . . . . . . . . . . . . . . . . . . . . . . . . . .
cmp . . . . . . . . . . . . . . . . . . . . . . . . . . . . . . . . . . . . . . . . . . . . . . . . . . . . . . .
code . . . . . . . . . . . . . . . . . . . . . . . . . . . . . . . . . . . . . . . . . . . . . . . . . . . . . . .
compress . . . . . . . . . . . . . . . . . . . . . . . . . . . . . . . . . . . . . . . . . . . . . . . . . . .
copy . . . . . . . . . . . . . . . . . . . . . . . . . . . . . . . . . . . . . . . . . . . . . . . . . . . . . . .
count . . . . . . . . . . . . . . . . . . . . . . . . . . . . . . . . . . . . . . . . . . . . . . . . . . . . . .
date . . . . . . . . . . . . . . . . . . . . . . . . . . . . . . . . . . . . . . . . . . . . . . . . . . . . . . .
dcheck . . . . . . . . . . . . . . . . . . . . . . . . . . . . . . . . . . . . . . . . . . . . . . . . . . . . .
deiniz . . . . . . . . . . . . . . . . . . . . . . . . . . . . . . . . . . . . . . . . . . . . . . . . . . . . . .
del . . . . . . . . . . . . . . . . . . . . . . . . . . . . . . . . . . . . . . . . . . . . . . . . . . . . . . . .
deldir . . . . . . . . . . . . . . . . . . . . . . . . . . . . . . . . . . . . . . . . . . . . . . . . . . . . . .
devs . . . . . . . . . . . . . . . . . . . . . . . . . . . . . . . . . . . . . . . . . . . . . . . . . . . . . . .
dir . . . . . . . . . . . . . . . . . . . . . . . . . . . . . . . . . . . . . . . . . . . . . . . . . . . . . . . .
dump . . . . . . . . . . . . . . . . . . . . . . . . . . . . . . . . . . . . . . . . . . . . . . . . . . . . . .
echo . . . . . . . . . . . . . . . . . . . . . . . . . . . . . . . . . . . . . . . . . . . . . . . . . . . . . . .
edt . . . . . . . . . . . . . . . . . . . . . . . . . . . . . . . . . . . . . . . . . . . . . . . . . . . . . . . .
events . . . . . . . . . . . . . . . . . . . . . . . . . . . . . . . . . . . . . . . . . . . . . . . . . . . . . .
ex . . . . . . . . . . . . . . . . . . . . . . . . . . . . . . . . . . . . . . . . . . . . . . . . . . . . . . . . .
expand . . . . . . . . . . . . . . . . . . . . . . . . . . . . . . . . . . . . . . . . . . . . . . . . . . . . .
fixmod . . . . . . . . . . . . . . . . . . . . . . . . . . . . . . . . . . . . . . . . . . . . . . . . . . . . .
free . . . . . . . . . . . . . . . . . . . . . . . . . . . . . . . . . . . . . . . . . . . . . . . . . . . . . . .
grep . . . . . . . . . . . . . . . . . . . . . . . . . . . . . . . . . . . . . . . . . . . . . . . . . . . . . . .
help . . . . . . . . . . . . . . . . . . . . . . . . . . . . . . . . . . . . . . . . . . . . . . . . . . . . . . .
ident . . . . . . . . . . . . . . . . . . . . . . . . . . . . . . . . . . . . . . . . . . . . . . . . . . . . . . .
iniz . . . . . . . . . . . . . . . . . . . . . . . . . . . . . . . . . . . . . . . . . . . . . . . . . . . . . . . .
irqs . . . . . . . . . . . . . . . . . . . . . . . . . . . . . . . . . . . . . . . . . . . . . . . . . . . . . . . .
kill . . . . . . . . . . . . . . . . . . . . . . . . . . . . . . . . . . . . . . . . . . . . . . . . . . . . . . . .
link . . . . . . . . . . . . . . . . . . . . . . . . . . . . . . . . . . . . . . . . . . . . . . . . . . . . . . .
list . . . . . . . . . . . . . . . . . . . . . . . . . . . . . . . . . . . . . . . . . . . . . . . . . . . . . . . .
load . . . . . . . . . . . . . . . . . . . . . . . . . . . . . . . . . . . . . . . . . . . . . . . . . . . . . . .
login . . . . . . . . . . . . . . . . . . . . . . . . . . . . . . . . . . . . . . . . . . . . . . . . . . . . . .
logout . . . . . . . . . . . . . . . . . . . . . . . . . . . . . . . . . . . . . . . . . . . . . . . . . . . . .
makdir . . . . . . . . . . . . . . . . . . . . . . . . . . . . . . . . . . . . . . . . . . . . . . . . . . . . .
mdir . . . . . . . . . . . . . . . . . . . . . . . . . . . . . . . . . . . . . . . . . . . . . . . . . . . . . . .
merge . . . . . . . . . . . . . . . . . . . . . . . . . . . . . . . . . . . . . . . . . . . . . . . . . . . . . .
mfree . . . . . . . . . . . . . . . . . . . . . . . . . . . . . . . . . . . . . . . . . . . . . . . . . . . . . .
moded . . . . . . . . . . . . . . . . . . . . . . . . . . . . . . . . . . . . . . . . . . . . . . . . . . . . .
pd . . . . . . . . . . . . . . . . . . . . . . . . . . . . . . . . . . . . . . . . . . . . . . . . . . . . . . . . .
9-1
9-4
9-6
9-8
9-9
9-10
9-13
9-14
9-15
9-16
9-18
9-21
9-22
9-23
9-26
9-27
9-29
9-30
9-32
9-35
9-37
9-38
9-40
9-42
9-43
9-44
9-46
9-47
9-50
9-51
9-53
9-54
9-56
9-57
9-58
9-59
9-61
9-64
9-65
9-66
9-68
9-69
9-70
9-75
III
Table of Contents
OS-9 Operating System User Manual
The OS-9 Utilities
Chapter 9 Continued
pr . . . . . . . . . . . . . . . . . . . . . . . . . . . . . . . . . . . . . . . . . . . . . . . . . . . . . . . . .
printenv . . . . . . . . . . . . . . . . . . . . . . . . . . . . . . . . . . . . . . . . . . . . . . . . . . . .
procs . . . . . . . . . . . . . . . . . . . . . . . . . . . . . . . . . . . . . . . . . . . . . . . . . . . . . .
profile . . . . . . . . . . . . . . . . . . . . . . . . . . . . . . . . . . . . . . . . . . . . . . . . . . . . .
qsort . . . . . . . . . . . . . . . . . . . . . . . . . . . . . . . . . . . . . . . . . . . . . . . . . . . . . . .
rename . . . . . . . . . . . . . . . . . . . . . . . . . . . . . . . . . . . . . . . . . . . . . . . . . . . . .
save . . . . . . . . . . . . . . . . . . . . . . . . . . . . . . . . . . . . . . . . . . . . . . . . . . . . . . .
set . . . . . . . . . . . . . . . . . . . . . . . . . . . . . . . . . . . . . . . . . . . . . . . . . . . . . . . .
setenv . . . . . . . . . . . . . . . . . . . . . . . . . . . . . . . . . . . . . . . . . . . . . . . . . . . . . .
setime . . . . . . . . . . . . . . . . . . . . . . . . . . . . . . . . . . . . . . . . . . . . . . . . . . . . .
setpr . . . . . . . . . . . . . . . . . . . . . . . . . . . . . . . . . . . . . . . . . . . . . . . . . . . . . . .
shell . . . . . . . . . . . . . . . . . . . . . . . . . . . . . . . . . . . . . . . . . . . . . . . . . . . . . . .
sleep . . . . . . . . . . . . . . . . . . . . . . . . . . . . . . . . . . . . . . . . . . . . . . . . . . . . . . .
tape . . . . . . . . . . . . . . . . . . . . . . . . . . . . . . . . . . . . . . . . . . . . . . . . . . . . . . .
tapegen . . . . . . . . . . . . . . . . . . . . . . . . . . . . . . . . . . . . . . . . . . . . . . . . . . . .
tee . . . . . . . . . . . . . . . . . . . . . . . . . . . . . . . . . . . . . . . . . . . . . . . . . . . . . . . .
tmode . . . . . . . . . . . . . . . . . . . . . . . . . . . . . . . . . . . . . . . . . . . . . . . . . . . . . .
touch . . . . . . . . . . . . . . . . . . . . . . . . . . . . . . . . . . . . . . . . . . . . . . . . . . . . . .
tr . . . . . . . . . . . . . . . . . . . . . . . . . . . . . . . . . . . . . . . . . . . . . . . . . . . . . . . . .
tsmon . . . . . . . . . . . . . . . . . . . . . . . . . . . . . . . . . . . . . . . . . . . . . . . . . . . . . .
unlink . . . . . . . . . . . . . . . . . . . . . . . . . . . . . . . . . . . . . . . . . . . . . . . . . . . . .
unsetenv . . . . . . . . . . . . . . . . . . . . . . . . . . . . . . . . . . . . . . . . . . . . . . . . . . .
w/wait . . . . . . . . . . . . . . . . . . . . . . . . . . . . . . . . . . . . . . . . . . . . . . . . . . . . .
xmode . . . . . . . . . . . . . . . . . . . . . . . . . . . . . . . . . . . . . . . . . . . . . . . . . . . . .
Notes . . . . . . . . . . . . . . . . . . . . . . . . . . . . . . . . . . . . . . . . . . . . . . . . . . . . . .
IV
ASCII Conversion Chart
Appendix A
The ROM Debugger
Appendix B
Error Codes
Appendix C
Glossary
Appendix D
9-76
9-78
9-79
9-81
9-82
9-84
9-85
9-86
9-88
9-89
9-91
9-92
9-102
9-103
9-105
9-106
9-107
9-111
9-112
9-115
9-117
9-119
9-120
9-121
9-124
Preface
Introduction
OS-9 is a powerful and versatile operating system that can help you fully
use your 68000 system’s capabilities. OS-9 offers a wide selection of
functions because it was designed to serve the needs of a broad audience.
Whether you are a casual user or a professional programmer, you will find
many useful features in OS-9.
Professional OS-9 is designed to provide a friendly software interface for
personal computers, educational systems, and the professional
programmer. The Professional OS-9 package includes over 70 utility
programs.
Using Professional OS-9 has been designed for use as a reference and
learning guide. It is divided into three distinct parts. Chapters 1-4 discuss
the file structure and utilities available for using OS-9. Chapter 5, 6, and 7
discuss some of the advanced utilities in detail. Chapter 8 discusses topics
of interest to system managers.
This manual is the basic user reference manual for OS-9. The OS-9
Technical Manual is a companion manual for advanced programmers who
wish to learn about the internal operation and function of the system.
At first glance, the OS-9 manual set, especially the OS-9 Technical
Manual, may seem overwhelming. Fortunately, you only need to know a
fairly small percentage of the material presented in this manual to use
OS-9 effectively. You will find that it is easy to learn about OS-9 as you
continue to work and experiment with it.
The secret to getting up to speed quickly with OS-9 is to first identify and
learn only the basic, everyday functions necessary to run applications
programs and programming languages.
This manual contains eight chapters and four appendices:
Chapter 1 is a general introduction to OS-9. It introduces the concept of
an operating system and explains some of OS-9’s basic features.
Chapter 2 describes how to get OS-9 up and running. This includes
formatting and backup procedures.
Chapter 3 helps you get started using the operating system. The more
frequently used system commands are discussed. These are utilities that
every user should be familiar with.
i
Preface
Chapter 4 is a detailed explanation of the tree-structured file and directory
system of OS-9. This includes:
directories
types of files
file security
movement around the file/directory system
Chapter 5 contains a detailed description of the shell, the OS-9 user
interface.
Chapter 6 explains the make utility in detail. This utility is used to
maintain and regenerate software from a group of files.
Chapter 7 explains the concept of incremental backups. The OS-9 utilities
to create the backups are detailed here. This chapter also offers two
different strategies for making backups.
Chapter 8 contains information of interest to system managers. Some of
the topics covered include setting up your system defaults, making a
startup file, and installing OS-9 on a hard disk.
Chapter 9 contains detailed descriptions of all OS-9 commands.
Appendix A contains ASCII symbol definitions and an ASCII
conversion chart.
Appendix B contains information on the ROM Debugger.
Appendix C contains a list of error codes.
Appendix D contains a glossary of common terms.
ii
Chapter
1
An Overview of OS-9
What Is an Operating
System?
An operating system is the master supervisor of the resources and
functions of a computer system. Computer resources consist of memory,
CPU time, and input/output devices such as terminals, disk drives,
and printers.
OS-9 is a sophisticated operating system for microcomputers. OS-9’s basic
functions are to:
provide an interface between the computer and the user
manage the input/output (I/O) operations of the system
provide for the loading and execution of programs
create and manage a system of directories and files
manage timesharing and multi-tasking
allocate memory for various purposes
Using OS-9 as Your
Operating System
The most visible function of the operating system is its role as an interface
between you and the complex internal hardware and software functions of
the system. OS-9 was designed to make its powerful features easy to use,
even by persons with limited technical knowledge.
Because an operating system provides only part of the overall software
necessary to make the computer useful, application programs such as
word processors and accounting packages tend to be the most frequently
used programs. They are not part of the operating system, but they rely
heavily on services such as input and output provided by the operating
system. Most application programs are written by users or obtained from
commercial software suppliers.
Similarly, programming languages are tools used to create application
programs. These rely heavily on and are closely related to the
operating system.
To help make OS-9 easy to use, a set of over 70 programs called utilities
are included. Utilities are not part of the basic operating system. Instead,
they are actually small application programs that provide essential
housekeeping, management, customization, and maintenance functions.
Some utilities, such as the µMACS text editor, are useful, general-purpose
application programs.
1-1
Chapter 1
An Overview of OS-9
Using OS-9’s Functions
OS-9’s many capabilities and functions can be used in two basic ways.
The first method uses the utility command set and the shell command
interpreter program. This allows you to type OS-9 commands directly on
your keyboard. These commands are translated into the more complex
internal system calls actually required to carry out the desired operations.
The OS-9 utilities are described in detail in the OS-9 Utilities section.
The second method uses system calls. System calls are requests made to
OS-9 within programs written in assembler or a high-level language. These
system calls are available to load programs into memory; create new tasks;
create or delete files; read, write, open, or close files; and so on. All OS-9
programming languages have statements that cause the program to use
OS-9 system calls, often in a hidden manner. System calls are largely of
interest to advanced programmers and are discussed in detail in the OS-9
Technical Manual.
Storing Information
Another basic function of any operating system is storing information.
Without some way to store and organize your programs, data, and text,
working on a computer would be extremely complicated.
OS-9 stores information in files and directories located on mass-storage
devices such as floppy disks. OS-9 provides easy access methods for
updating, storing, and retrieving files and directories through
standard utilities.
OS-9 organizes all files into organizational structures called directories. A
directory is actually a special file containing the names and locations of
each file it contains. Directories can contain files and subdirectories. In
turn, these subdirectories may contain other files and subdirectories. This is
called a tree structure, or hierarchical, organization for file storage.
For more information, refer to the chapter on the OS-9 file system.
Multi-tasking and Multi-user
Features
1-2
OS-9 is a multi-tasking and multi-user operating system.
Multi-tasking, or multi-processing, allows the computer to run many
different programs at the same time. By rapidly switching from one
program to the next, many times per second, programs appear to be
running at the same time.
Chapter 1
An Overview of OS-9
Each program running on the system is called a task, or process. OS-9
allows you to have one or more tasks running in the background, while a
task is running in the foreground.
A foreground process is a task that requires your interaction. For example,
if you are editing a file, it is a foreground process because you are actively
using it. A program that prompts you for information is also a foreground
process because you need to respond to it.
A background process is a task that does not require your attention. For
example, if you are printing a text file, you do not have to supervise the
printing process. Therefore you can have the file printing in the
background while you edit another file. This frees the computer from the
limitation of doing only one thing at a time.
Important: A foreground process requires your interaction. A background
process does not require your attention.
Typical Multi–tasking Usage:
Editing a file (foreground process)
Listing a file to a printer (background process)
Sorting and merging datafiles (background process)
OS-9’s multi-tasking capabilities make it possible for efficient memory
use, CPU time, and I/O operations to be shared by all programs
without conflict.
Multi-user, or timesharing, operation is a natural extension of the system’s
basic multi-tasking functions. It allows several people to use the computer
simultaneously. OS-9 provides additional security-related timesharing
functions to control access to the system and privacy within the system.
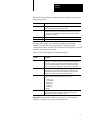
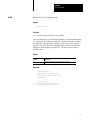
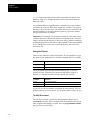
Typical Multi–user System Configuration:
Four terminals on one OS–9 Computer
1-3
Chapter 1
An Overview of OS-9
The multi-tasking and multi-user capabilities tremendously increase
OS-9’s versatility. OS9 is often used as a single-user/multi-tasking system
on small computers. It is also used as a multi-user/multi-tasking system on
larger computer systems. In either case, there is no difference in OS-9
itself, the application software, or how either works.
The Memory Module and
Modular Software
A unique feature of OS-9 is its support of modular software techniques
based on memory modules. The use of memory modules can:
provide more efficient use of available disk and memory storage
make the system run faster
simplify programming jobs
make it easy to customize and adapt OS-9 itself
All OS-9 programs are kept in the form of one or more program modules
containing pure program code. They do not contain variable storage; OS-9
assigns variable storage in a separate block of memory at run-time. Each
module has a unique name and can be loaded into memory or stored on
disk or tape. OS-9 automatically keeps track of the names and locations of
all modules present in memory.
An important characteristic of memory modules is the sharing of one
module by several tasks or users at the same time. For example, if four
users want to run BASIC at the same time, only one copy of the BASIC
program module will be loaded into memory. Other operating systems
would typically load four exact copies of BASIC into memory, thus
requiring 300% more memory. The shared module system is completely
automatic and usually transparent to the user.
Another advantage of memory modules is that frequently used functions
can share common library modules. For example, a standard OS-9 module
called Math provides basic floating point arithmetic operations for virtually
all programming languages and programs. Again, this eliminates the need
for each program to include its own math package. It also means that if you
add a hardware floating point processor to your system, you only need to
replace this one module and all your other software will automatically be
converted without modification. In addition, large and complex programs
can be split up into smaller, testable modules.
1-4
Chapter
2
Starting OS-9
Booting OS-9
Before using OS-9 on your computer, you must boot the system. Booting
is also called a cold start or bootstrapping. It involves the computer
reading a portion of the system disk (or tape) into memory.
If your system is a standard disk-based computer, the system disk contains
all the modules that make up OS-9. The system disk usually contains other
files and directories frequently used during normal operations. This
includes a directory for each user, a shared commands directory, and files
used by the system. A description of the directories commonly supplied
with Professional OS-9 is provided at the end of this chapter.
Two files, which are called startup and OS9Boot by convention, need to be
discussed here. startup is a shell procedure file that is processed
immediately after the system starts running. startup may contain any legal
OS-9 command or program. OS9Boot contains the OS-9 system modules
that are read into memory. The chapter on OS-9 system management
contains information on changing the startup and OS9Boot files.
Important: The boot procedure varies depending on the requirements of
the specific hardware. The manufacturer supplies detailed instructions
outlining the boot procedure for the specific system involved. You should
follow the instructions as specified.
If the system fails to boot, recheck the hardware setup instructions,
especially if you made any modifications to your computer. Make sure the
disk (or tape) was inserted correctly, and try the boot sequence again. If the
boot sequence fails several times, contact your supplier.
When the system boots correctly, a welcoming message is displayed
followed by the setime prompt. The setime utility starts the system clock
and allows OS-9 to keep track of the date and time of the creation of new
files. The clock must be running for multi-tasking to take place.
The clock may be started by the Init module (refer to the chapter on OS-9
system management for more information). If it is not started and you have
a system with a battery-backed clock, type the following command to start
the system clock:
$ setime –s
2-1
Chapter 2
Starting OS-9
Otherwise, execute setime by typing:
$ setime
setime prompts with the following:
yy/mm/dd hh:mm:ss [am/pm]
Time ?
At the prompt, enter the year, month, day, hour, minutes, seconds, and
optionally am or pm. Unless am or pm is specified, setime uses the 24 hour
clock. For example, 15:20 is the same as 3:20 pm. The input is one or two
digit numbers with a space, colon, semicolon, comma, or slash used as a
field delimiter. If a semicolon is used, the entire date string must be within
quotes. For example, to set the time on May 14, 1991 at 1:24 pm, type:
91/5/14/1/24/pm
or 91 05 14 1 24 pm or 91,5,14,13,24
or
91:5:14:13:24
or 91/5/14/13/24 or “91;5;14;13;24”
To find out if the system clock is running or if the date and time was set
correctly, use the date command. For example:
$ date
July 2, 1990 Monday 1:25:26pm
Once the time and date have been properly set, the system displays the
following prompt:
$
The $ prompt means the operating system is active and waiting for you to
enter a command line. This prompt is the default system prompt. This
manual uses the $ prompt for all examples. For information on changing
the shell prompt, refer to the chapter on the shell.
Important: The following sections are specifically intended for systems
distributed with floppy disk system disks. These sections are also of
general interest in terms of formatting and backing up floppy disks. If you
have a hard disk or are booting from a media other than a disk, refer to the
OS-9 system management chapter.
2-2
Chapter 2
Starting OS-9
Backing Up the System Disk
Before experimenting with OS-9, you should make a backup of your
master system disk. The backup procedure involves making an exact copy
of a disk. If for any reason your system disk becomes damaged, it may
become unreadable. For this reason, it is important to have another copy
stored safely away.
Before you can backup your system disk, you need a properly formatted
disk. New disks cannot be read from or written to until they have been
formatted. The format utility initializes new disks for reading and writing.
backup, the OS-9 utility that makes copies of disks, requires the backup
disk to be the same size and format as the original disk.
The following section describes the steps to be taken to backup a disk on a
typical OS-9 system that boots from a floppy drive (usually called /d0).
Important: Before formatting your first disk, it is strongly recommended
that you read the entire section on formatting disks.
Important: A list of the naming conventions OS-9 uses is located in the
chapter on the shell.
Formatting a Disk
The format of OS-9 system disks vary by the type of disk drive and by
manufacturer. Usually, the format is set to be the maximum capacity of the
disk drive.
You can place several parameters on the command line with the
format command:
Parameter:
Description:
–sd
for single density disks
–dd
for double density disks
–ss
for single sided disks
–ds
for double sided disks
Refer to your hardware documentation for the maximum capacity of your
drives. Refer also to the label of your system disk for the proper format of
your backup copy. Consult the format utility description in the OS-9
Utilities section for other available parameters.
2-3
Chapter 2
Starting OS-9
Multiple Drive Format
If your system has two disk drives, place the system disk in the first drive
and the new disk in the second drive. The second drive is usually called
/d1. At the $ prompt, type format, the drive name of the new disk, any
desired options and press the [Return] key to enter the command line:
$ format /d1
This command line specifies that the disk in the second drive will be
formatted as a double-sided, double-density disk. If your disk is different,
your options will be different.
Single Drive Format
If your system has only one disk drive, you will need to load the format
utility into memory. The load utility puts a copy of a program into the
memory of the computer. Once format has been loaded into memory, you
can remove your system disk from the drive. OS-9 can execute the copy of
format that resides in memory. Any OS-9 utility can be loaded and
executed in this fashion.
To load the format utility into memory, type the following command at the
$ prompt:
load format
When format has been loaded, remove the system disk from the drive.
Place the disk to format into the drive. At the $ prompt, type:
format /d0
This command line formats the disk.
Continuing the Formatting Process with Either a Single Drive or a
Multiple Drive
In the case of both single and multiple drive systems, format displays the
specific disk format settings, followed by a prompt:
Formatting device: <drive name>
proceed?
Important: <drive name> is replaced by the name of the device on which
you are trying to format. For example, /d0.
If the drive name in the prompt is not the name of the drive with the blank
disk, type q to quit, or your only system disk may be erased.
2-4
Chapter 2
Starting OS-9
If the drive name and parameters in the prompt are correct, type y for yes.
If you type y at the prompt, there will be a pause while the disk is being
formatted. format then prompts for the name of the disk:
volume name:
After you have entered the volume name, format prints:
verifying media, building bitmap...
During the final phase of the process, the hexadecimal number of each
track is displayed as each track is verified to see if any sectors are bad. If
any bad sectors are found, an error message is displayed along with the
number of the bad sector. The number of good sectors, the number of
unusable sectors, and the total number of verified sectors is also displayed.
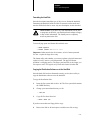
ATTENTION: Never backup a system disk to a disk that has
any bad sectors reported by format.
The Backup Procedure
After a disk is formatted, you can run backup. The backup utility makes an
exact copy of the OS-9 system disk. There are other ways to make a copy
of a disk, but this method is the least complicated. The backup process
involves copying everything from your system disk to a formatted disk.
During the backup procedure, the system disk is referred to as the source
disk. The backup disk is called the destination disk.
Important: This procedure makes copies of any disk, not just the
system disk.
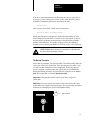
Important: You may wish to write protect your source disk with a write
protect tab when using the backup procedure. This prevents any accidental
confusion in exchanging the source and destination disks.
Write Protect Tab
2-5
Chapter 2
Starting OS-9
backup makes
two passes. The first pass reads a portion of the source disk
into a buffer in memory and writes it to the destination disk. The second
pass verifies that everything was copied to the new disk correctly.
If an error occurs on the first pass, something is wrong with the source disk
or the drive it is in.
If an error occurs during the second pass, the problem is with the
destination disk. If backup repeatedly fails on the second pass, reformat the
disk to make sure it has no bad sectors. If the disk reformats correctly, try
the backup procedure again.
Multiple Drive Backup
If your system has two disk drives, place the source disk in the first drive
(/d0) and the destination disk in the second drive (/d1). At the $ prompt,
type backup and press the [Return] key.
The system assumes you want to backup the disk in /d0. It responds to
backup with the following prompt:
ready to BACKUP /D0 to /D1?
If you have placed the correct disks in the correct drives, type y for yes.
Otherwise, type q for quit. If you type y, the system copies all information
on the disk in /d0 on to the disk in /d1 and returns the $ prompt.
2-6
Chapter 2
Starting OS-9
Single Drive Backup
If your system has only one drive, the backup utility needs to be loaded
into memory. Make sure your system disk is in /d0 and type the
following command:
load backup
After you have loaded backup, you may proceed with the backup
procedure. Type the following command:
backup /d0 –b=100k
This tells the system that you are performing a single drive backup and that
you want to use a 100K buffer for the backup. If your system will allow
you to use a larger buffer, increase this number. The larger the buffer, the
fewer swaps you will have to make. The system responds with the
following prompt:
ready to BACKUP /D0 to /D0?
Type y if you are ready to perform the backup. Otherwise, type q for quit.
If you type y, the system begins a series of prompts to complete the backup
procedure. This consists of swapping the source and destination disks in
the disk drive as prompted by the system.
The first prompt is:
ready destination, hit a key
At this prompt, remove the source disk from the drive and insert the
destination disk. Once this is done, press any key to continue the backup
procedure. The next system prompt is:
ready source, hit a key
At this prompt, remove the destination disk from the drive and insert the
source disk. Once this is done, press any key to continue the backup
procedure. The exchanging of disks continues until the backup procedure
is completed.
Important: When you have backed up the system disk, store the original
disk in a safe place and use the duplicate as your working system disk.
2-7
Chapter 2
Starting OS-9
Directories Contained on the
System Disk
The following is a list of directories commonly distributed with
Professional OS-9. They are all contained in the primary directory (the root
directory) of your system:
Directory:
Description:
BOOTOBJS
Contains the system modules for bootstrap files, system-specific files, etc.
C
Contains Cstart source code and an example of trap handlers for
user education.
CMDS
Contains all the system utilities such as backup, load, setime, etc. Many of
the utilities are discussed in the following chapters. The OS-9 Utilities
section contains descriptions of each utility distributed with
Professional OS-9.
DEFS
Contains several files of symbolic definitions that are useful when using
programming languages.
IO
Contains the device descriptor source for system customization. For more
information on changing device descriptors, refer to the chapter on OS-9
system management.
LIB
Contains system library files.
MACROS
Contains general macros used in driver development, etc.
SYS
Contains system files including:
Errmsg – Contains text for descriptions of error messages. An appendix
listing the error messages is included with this manual set.
password – Contains a sample password file for timesharing systems. The
password file contains information such as the user name, password,
initial process, etc. for each user. For more information on the password
file, refer to the chapter on the shell in this manual and the login utility in
the OS-9 Utilities section.
termcap – Contains descriptions of your terminal characteristics. For more
information on the termcap file, refer to the chapter on OS-9
system management.
SYSMODS
2-8
Contains the source for SysGo and init for system customization. For
more information on SysGo and init, see the OS-9 Technical Manual.
Chapter
3
Basic Commands and Functions
Learning the Basics
Now that your system is up and running, it is time to learn about OS-9’s
basic features and utility commands. This chapter and the chapter on the
OS-9 file system provide a “fast-track” introduction to OS-9 designed to
get you started quickly.
The secret of getting up to speed quickly with OS-9 is to first identify and
learn only the basic, everyday functions necessary to run application
programs and programming languages. It is fairly easy to learn more as
you continue to work with the system.
The general topics covered in this chapter are:
logging on timesharing systems
an introduction to the shell
use of the keyboard and display
the page pause feature
help, free, and mfree utilities
HELP!
Logging on to a
Timesharing System
If you are using a single user system such as a personal computer, you can
skip this section. Otherwise, you need to know how to log on to a
multi-user system. This applies to both hardwire and dial-up terminals.
Until you press the [Return] key, idle terminals on multi-user systems do
nothing but beep at you. Pressing the [Return] key starts the log-on
program called login. login’s function is to maintain system security and
start each user with a personalized environment.
The system asks you for your user name and the password the system
manager assigned to you. The system echoes your user name but for
security purposes, your password is not echoed. You have three chances to
enter a valid user name and password.
3-1
Chapter 3
Basic Commands and Functions
An example of the login procedure is given below:
OS–9/68000 V2.4 Microware Systems P32 90/11/24 14:51:12
User Name: smith
Password: [not echoed]
Process #10 logged on 90/11/24 14:51:20
Welcome!
$
Depending on how the system is set up, a system-wide message of the day
may be displayed on your screen. You can also automatically run one or
more initial programs. In addition, you are normally set up in your own
main working directory.
To log off, simply press the [Esc] (end-of-file) key or type logout any
time your main shell is active.
For more information, see the login and tsmon utility descriptions in the
OS-9 Utilities section.
An Introduction to the Shell
Every operating system has a command interpreter. A command interpreter
is a translator between the commands you type in and the commands the
operating system understands and executes.
OS-9’s command interpreter is called the shell.
The shell is normally started as part of the system startup sequence on a
single user system or after logging on to a timesharing system. It is the
primary interface with the system. When you enter a command, it is the
shell’s job to translate the command into something OS-9 can understand.
The shell provides many functions and options. A chapter is exclusively
devoted to an in-depth discussion of the features available. This section is
intended to provide just enough familiarity with the shell for you to run
basic OS-9 commands.
3-2
Chapter 3
Basic Commands and Functions
The shell functions in two ways:
accepting interactive commands from your keyboard
reading a sequence of command lines from a special type of file called a
procedure file. The shell executes each command line in the procedure
file just as if the command lines had been typed in manually from the
keyboard. Procedure files are a convenient way to eliminate typing
frequently used, identical sequences of commands.
When the shell is ready for command input, it displays a $ prompt. You
can now enter a command line followed by a carriage return.
The first word of the command line is the name of a command. It may be
in upper or lower case. The command may be the name of:
an OS-9 utility command
an application program or programming language
a procedure file
Most commands require or accept additional parameters or options. These
parameters and options provide the program and/or the shell with
additional information such as file names and directory names to search.
Almost all options are preceded by a hyphen (–) character. All parameters
are separated by space characters.
The shell follows a special searching sequence to locate the command in
memory or on disk. If it cannot find the command you specified, the error
#000:216, file not found is generally reported.
Here is an example of a simple shell command line:
$ list myfile
The name of the program is list. The file name myfile is passed to
the program.
3-3
Chapter 3
Basic Commands and Functions
Using the Keyboard
Most input to OS-9, programming languages, and application programs is
line oriented. This means that as you type, the characters are collected but
not sent to the program until you press the [Return] key. This gives you a
chance to correct typing errors before they are sent to the program.
OS-9 has several features to make data entry and error correction simple.
These are called line editing features. Each of these features use control
keys generated by simultaneously pressing the [Ctrl] key and some other
character key.
The line editing control keys are:
Key:
Function:
[Ctrl-A]
Repeats the previous input line. The last line entered is redisplayed
but not executed. The cursor is positioned at the end of the line. You
may enter the line as it is or you can add more characters to it. You
can edit the line by backspacing and typing over old characters.
[Ctrl-D]
Redisplays the current input line. This is mainly used for hardcopy
terminals that cannot erase deleted characters.
[Ctrl-H]
Backspaces to erase previous characters. Most keyboards have a
special [Backspace] key that can be used directly without using the
[Ctrl] key.
[Ctrl-Q]
Resumes the input and output previously stopped by [Ctrl-S]. The
[Ctrl-Q] function is known as X-on.
[Ctrl-S]
Halts input and output until <control>Q is entered. The [Ctrl-S]
function is known as X-off. This is a function used by many serial I/O
devices such as printers to control output speed.
[Ctrl-W]
Temporarily halts output so you can read the screen before data
scrolls off. Output resumes when any other key is pressed. See the
section on the page pause feature.
[Ctrl-X]
Deletes line; erases the entire current line.
[Esc] or [Ctrl-[]
Indicates the end-of-file: all OS-9 I/O devices, including terminals,
are accessed as files. This simulates the effect of reaching the end
of a disk file.
There are also two important control keys called interrupt keys. They
work differently than the line editing keys because they can be used at any
time, not just when a program has requested input. They are normally used
to halt or alter a running program.
3-4
Key:
Function:
[Ctrl-C]
Sends an interrupt signal to the most recent program. This functions
differently from program to program. If a program does not make
specific interrupt provisions, it aborts the program. If a program has
provisions for interrupts, [Ctrl-C] usually provides a way to stop the
current function and return to a master menu or command mode. In
the shell, [Ctrl-C] can be used to convert the foreground program to
a background program, if the program has not begun I/O to
the terminal.
[Ctrl-E]
Sends a program abort signal to the program presently running. In
most cases, this key prematurely aborts the current program and
returns you to the shell.
Chapter 3
Basic Commands and Functions
The control keys described above are the key assignments commonly used
in most OS-9 systems. The correspondence between control keys and their
functions is changeable, so your keys may be different. You can use the
tmode utility to redefine the function of control keys. This command
allows you to customize OS-9 to the specific computer’s keyboard layout.
Important: For more information about tmode, see the chapter on OS-9
system management and the OS-9 Utilities section.
The Page Pause Feature
The page pause feature eliminates the annoyance of having output scroll
off the screen before you can read it. OS-9 counts output lines until a full
screen has been displayed. It then halts output until you press any key. This
is repeated for each screen of output.
Page pause can be fooled by lines longer than the physical width of the
screen. These long lines wrap around to the next line. The system does not
distinguish this, and consequently does not count them properly.
tmode may be used to turn this feature on and off, or to change the number
of lines per screen:
Key:
Function:
tmode pause
Turns the page pause mode on.
tmode nopause
Turns the page pause mode off.
tmode pag=10
Sets the page length to ten lines.
3-5
Chapter 3
Basic Commands and Functions
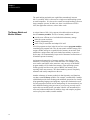
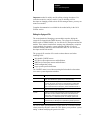
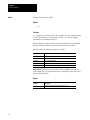
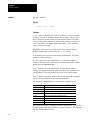
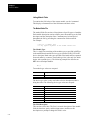
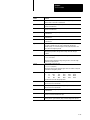
Basic Utilities
OS-9 provides over seventy standard utilities and built-in shell commands.
The majority of them are used rarely, if ever, by casual users. You will
frequently use less than a dozen of them and less frequently use about a
dozen more.
The utilities have been broken down into three groups to give you an idea
of what you should and should not bother learning immediately. You
should get acquainted with the first group now, and the second group as
time permits. If you plan to do advanced programming or systems-level
work, you can study the third group at your convenience.
Important: The utilities indicated with an asterisk (*) are not available
with the control coprocessor.
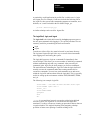
Group 1: Basic Utilities
attr
backup*
build
chd
chx
copy
date
del
deldir
dir
dsave*
echo
edt
format*
free
kill
list
makdir
merge
mfree
pd
pr
procs
rename
set
setime
shell
w
wait
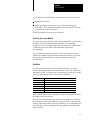
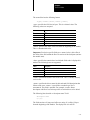
Group 2: Programmer Utilities
binex
cfp
cmp
code
compress
count
dump
ex
exbin
expand
frestore*
fsave*
grep
load
logout
make*
printenv
profile
qsort
save
setenv
tape
tee
tmode
touch
tr
unsetenv
Group 3: System Management Utilities
3-6
break
dcheck
deiniz
devs
diskcache*
events
fixmod
ident
iniz
irqs
link
login
mdir
moded
os9gen*
romsplit*
setpr
sleep
tapegen
tsmon
unlink
xmode
Chapter 3
Basic Commands and Functions
The Help Utility and the
-? Option
The most important command to learn when beginning to use the OS-9
utilities is help. The help utility is an on-line quick reference manual. To
use this utility, type help, a utility name, and a carriage return. The utility
function, syntax, and available options are listed. For example, if you
cannot remember the function or syntax of the backup utility, you could
type help backup after the $ prompt:
$ help backup
Syntax: backup [<opts>] [<srcpath> <dstpath>] [<opts>]
Function: backup disks
Options:
use larger buffer (default is 4k)
–b=<size>
–r
don’t exit if read error occurs
–v
do not verify
$
The descriptions are short and precise. Try it. This is a quick way to find
information without looking up the utility in the documentation.
Important: Typing help by itself displays the syntax and use of the
help utility.
The same information is also available by typing the utility name followed
by a question mark (–?). Each utility has the –? option.
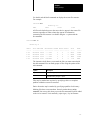
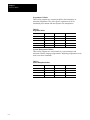
Free and Mfree
During the format procedure, a disk is divided into data sectors of a
pre-defined number of bytes. These sectors, in turn, are allocated into
groups called clusters. The number of sectors per cluster is dependent on
the storage capacity and physical characteristics of the given device. This
means that small amounts of free space, given in sectors, may not be
divisible into the same number of files.
displays the amount of unused disk space in the number of sectors
and in the number of bytes. It also displays the disk name, its creation date
and the cluster size of the device. For example:
free
$ free
“Tazz: /H0 Wren V” created on: Oct 6, 1989
Capacity: 2347860 sectors (256–byte sectors, 8–sector
clusters)
1477296 free sectors, largest block 1356000 sectors
378187776 of 601052160 bytes (360.66 of 573.20 Mb) free
on media (62%)
347136000 bytes (331.05 Mb) in largest free block
3-7
Chapter 3
Basic Commands and Functions
uses a 4K buffer by default. To increase the buffer size, use the –b
option. For example, to use a 10K buffer you could type:
free
$ free –b=10
or
$ free –b10
mfree displays the address and size of unused memory available for
allocation. For example:
$ mfree
Current total free RAM:
164.00 K–bytes
For even more information concerning the unused memory, the –e option
may be used with mfree. For example:
mfree –e
Minimum allocation size:
Number of memory segments:
Total RAM at startup:
Current total free RAM:
4.00 K–bytes
6
8192.00 K–bytes
2084.00 K–bytes
Free memory map:
Segment Address
––––––––––––––
$5B000
$5F000
$99000
$29C000
$2A1000
$2C5000
3-8
Size of Segment
––––––––––––––––––––––––––
$1000
4.00 K–bytes
$2000
8.00 K–bytes
$1E3000
1932.00 K–bytes
$3000
12.00 K–bytes
$1F000
124.00 K–bytes
$1000
4.00 K–bytes
Chapter
4
The OS-9 File System
OS-9 File Storage
All information stored on an OS-9 computer system is organized into files
and directories. Files and directories provide a way for you to organize
your information. A file may contain a program, data, or text. A directory
is a file containing the names and locations of the files and directories it
contains. This allows you to organize your files by topic, work group, etc.
When a file is created, the information is stored as an ordered sequence of
bytes. These bytes are organized into sectors. A sector is a pre-defined
group of bytes. For example, a sector may be composed of 256 bytes. This
means that every 256 bytes are grouped together as a sector.
During the format procedure, each sector is marked as being unused. The
allocation map keeps track of each sector. If a sector is in use, it is marked
in the allocation map located at the beginning of each disk as being in use.
When a file is created, the information is stored in sectors. When a file is
expanded, the new information is stored in sectors. When a file is
shortened or deleted, the previously used sectors are unmarked in the
allocation map and are available for use by other files.
Within a text file, each byte contains one character. Data is written to a file
in the order it is provided. Data is read from a file exactly as it is stored in
the file.
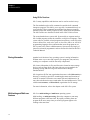
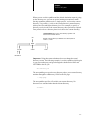
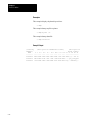
When a file is created or opened, a file pointer is also created and
maintained for it. The file pointer holds the address of the next byte to be
written or read (see Figure 4.1). As data in the file is read or written, the
file pointer is automatically moved. Therefore, successive read or write
operations transfer data sequentially (see Figure 4.2).
You can directly access any part of a file by positioning the file pointer to
any location in the file using an OS-9 system call: seek. You can access the
seek system call through the various languages available for OS-9 or
directly with the macro assembler command: I$SEEK. I$SEEK is
described in the OS-9 Technical Manual.
4-1
Chapter 4
The OS-9 File System
Figure 4.1
1
2
3
4
5
r
o
b
e
r
When creating or opening a file, the file pointer is positioned to read
from or write to the first component.
Figure 4.2
1
2
3
4
5
r
o
b
e
r
After reading or writing the first component of a file, the file pointer
points to the second component.
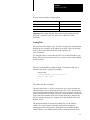
Figure 4.3
1
2
3
4
5
r
o
b
e
r
The file pointer is pointing to the current end-of-file. Attempting
another read operation causes an error. Another write operation
increases the size of the file.
Figure 4.4
1
2
3
4
5
6
r
o
b
e
r
t
The next write operation adds a new component to the file and moves
the file pointer to the new end-of-file.
4-2
Chapter 4
The OS-9 File System
Reading up to the last byte of the file causes the next read operation to
return an end-of-file status (see Figure 4.3). Trying to read past the
end-of-file mark causes an error. To expand a file, simply write past the
previous end of the file (see Figure 4.4).
Because all OS-9 files have the same physical organization, you can
generally use file manipulation utilities on any file regardless of its logical
usage. The main logical types of files used by OS-9 are:
text files
executable program module files
data files
directories
Directory files are an exception and are discussed separately.
Text Files
Text files contain variable length lines of ASCII characters. Each line is
terminated by a carriage return (hex $OD). Text files typically contain
documentation, procedure files, program source code, etc. You can create
text files with any text editor or the build utility.
Executable Program Module Files
Executable program modules store programs generated by assemblers and
compilers. Each file may contain one or more modules with standard OS-9
module format. See the OS-9 Technical Manual for more information
on modules.
Random Access Data Files
A random access data file is created and used primarily by high level
languages such as C, Pascal, and BASIC. The file is organized as an
ordered sequence of records of varying sizes. If each record has exactly the
same length, its beginning address within the file can be computed to allow
records to be accessed in any order. OS-9 does not directly deal with
records other than providing the basic file manipulation functions high
level languages that support random access records require.
4-3
Chapter 4
The OS-9 File System
File Ownership
When you create a file or directory, a group.user ID is automatically
stored with it. The group.user ID is formed from your group number and
your user number. The group number allows people that work on the same
project or work in the same department to share a common group
identification. The user number identifies a specific user. Therefore, a
group.user ID identifies a specific user in a specific group or department.
The group.user ID determines file ownership. OS-9 users are divided into
two classes:
the owner
the public
The owner is any user with the same group or user number as the person
who created the file. This means that any user with the same group number
as the person who created the file can access the file in the same way as the
creator of the file. Likewise, any user with the same user number is
considered the owner.
The public is any person with a group.user ID that differs from the person
who created the file.
A user with a group.user ID of 0.0 is referred to as a super user. A super
user can access and manipulate any file or directory on the system
regardless of the file’s ownership.
On multi-user systems, the system manager generally assigns the
group.user ID for each user. This number is stored in a special file called a
password file. A super user on a multi-user system is generally the system
manager, although other people such as group managers or project leaders
may also be super users.
Important: Password files are discussed in the chapter on the shell.
On single-user systems, users have super user status by default.
Attributes and the File Security System
File use and security are based on file attributes. Each file has eight
attributes. These attributes are displayed in an eight character listing.
The term permission is used when one of the eight possible attribute
characters is set. Permission determines who can access a file or directory
and how it can be used. If a permission is not valid for the file or directory
being examined, a hyphen (–) is in its position.
4-4
Chapter 4
The OS-9 File System
Here is an attribute listing for a directory in which all permissions
are valid:
dsewrewr
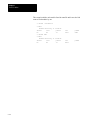
By convention, attributes are read from right to left. They are:
The OS-9 File System
Attribute:
Abbreviation:
Description:
Owner Read
r
The owner can read the file. When off, this denies any access
to the file.
Owner Write
w
The owner can write to the file. When off, this attribute can be
used to protect files from accidentally being deleted
or modified.
Owner Execute
e
The owner can execute the file.
Public Read
pr
The public can read the file.
Public Write
pw
The public can write the file.
Public Execute
pe
The public can execute the file.
Single user
s
When set, only one user at a time can open the file.
Directory
d
When set, indicates a directory.
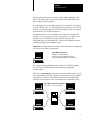
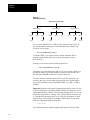
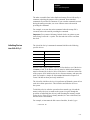
OS-9 uses a tree-structured, or hierarchical, organization for its file
system on mass storage devices such as disk systems (see Figure 4.5). Each
mass storage device has a master directory called the root directory.
The root directory is created automatically when a new disk is formatted. It
contains the names of the files and the sub-directories on the disk. Every
file is listed in a directory by name, and each file has a unique name within
a directory.
An OS-9 directory can contain both files and sub-directories. Each
sub-directory can contain more files and sub-directories. This allows
subdirectories to be imbedded within other subdirectories. The only limit
to this division is the amount of available disk space.
4-5
Chapter 4
The OS-9 File System
Figure 4.5
The File System
ROOT DIRECTORY
file1
file2
SUB–DIRECTORY1
SUB–DIRECTORY3
ETC
SUB–DIRECTORY2
file3
file4
SUB–DIRECTORY4
ETC
file5
ETC
With the exception of the root directory, each file and directory in the
system has a parent directory. A parent directory is the directory directly
above the file or directory being discussed. For example in Figure 4.5, the
parent directory of file2 is SUB–DIRECTORY1. Likewise, the parent
directory of SUB–DIRECTORY1 is the root directory.
Current Directories
Two working directories are always associated with each user or process.
These directories are called the current data directory and the current
execution directory.
A data directory is where you create and store your text files. An execution
directory is where executable files such as utilities and programs you have
created are located.
The current directory concept allows you to organize your files while
keeping them separate from other users on the system. The word current
is used because you can use the chd command to move through the tree
structure of the OS-9 file system to a different directory. This new
directory then becomes your current data or execution directory.
Important: The chd utility is discussed later in this chapter.
On a single user system, OS-9 chooses the root directory of your system
disk as your initial current data directory. Your initial current execution
directory is the CMDS directory. The CMDS directory is located in the
root directory of the system disk.
4-6
Chapter 4
The OS-9 File System
On a multi-user system, your current data and execution directories are
established for you as part of the initial login sequence. When you login,
your initial directories are set up according to your password file entry. A
password entry is established for each user on a multi-user system. This
entry lists the user’s password, current directories, etc. For more
information on password files, see the chapter in this manual on the shell
and the login utility in the OS-9 Utilities section.
Your execution directory on a multi-user system is usually the CMDS
directory. The CMDS directory is shared with other users. CMDS contains
OS-9 utilities and other executable files. If all users had their own copy of
all OS-9 commands, a great deal of disk space would be wasted. Private
execution directories are also possible and are discussed later in
this chapter.
The Home Directory
On typical multi-user systems, all users have their own data directory, but
share an execution directory. The private data directory allows you to
organize your own files by project, function, or any other method without
affecting other user’s files. The data directory specified in the password
file entry is known as your home directory. When you first login to the
system, you are placed in this directory. Using the chd utility with no
parameters also places you in this directory. The chd utility is discussed
later in this chapter.
On single user systems, you may establish a home directory by setting the
HOME environment variable. Refer to the chapter on the shell for more
information on setting the HOME environment variable.
Directory Characteristics
Some important characteristics relating to directory files are:
Directories have the same ownership and attributes as regular files.
However, directories always have the d attribute set.
Each file name within a directory must be unique. For example, you
cannot store two files with the name of trial in the same directory. Files
can have identical names, as long as they are stored in
different directories.
All files are stored on the same device as the directory in which they
are listed.
The only limit to the number of files that can be stored in a directory is
the amount of free disk space.
4-7
Chapter 4
The OS-9 File System
Accessing Files and
Directories: The Pathlist
You can access all files or directories in your current data directory by
specifying the name of the file or directory after the proper command.
When only a file or directory name is given, OS-9 will not look outside
your current data directory to find it.
If you want to access a file that is not in your current data directory or run
a program that is not in your current execution directory, you must either
change your current directory or specify a pathlist through the file system
for OS-9 to follow. The two pathlists are full and relative.
There are two types of pathlists:
full pathlists
relative pathlists
A full pathlist starts at the root directory and follows the directory names
in the list down the file structure to a specific file or directory. A full
pathlist must begin with a slash character (/). Slashes separate names with
the pathlist.
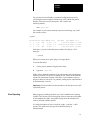
The following example is a full pathlist from the root directory, /d1,
through two subdirectories, PASCAL and TESTS, to the file futureval.
/d1/Pascal/tests/futureval
The next example specifies a path from the root directory, /h0, through
USR subdirectory to the NICHOLLE subdirectory.
/h0/usr/nicholle
A full pathlist begins at the root directory regardless of where your
current data directory is located. It lists each directory located between the root directory and a specific file or subdirectory.
/H0
Example: Your data directory is RESEARCH. A full pathlist to current
is /h0/work/current.
WORK
FUTURE
oldstuff
current
RESEARCH
A relative pathlist starts at the current directory and proceeds up or down
through the file structure to the specified file or directory. A relative
pathlist does not begin with a slash (/). Slashes separate names within a
relative pathlist.
4-8
Chapter 4
The OS-9 File System
When you use a relative pathlist and the desired destination requreis going
up the directory tree, you can use special naming conventions to make
moving around the pathlist easier. A single period (.) refers to the current
directory. Two periods (..) refer to the current director’s parent directory.
Add a period for each higher directory level. For example, to specify a
directory two levels above the current directory, three periods are required.
Four periods refer to a directory three levels above the current directory.
A relative pathlist begins at your current directory regardless of its
location in the overall file structure.
/H0
Example: Your data directory is RESEARCH. A relative pathlist to
current is .../current .
WORK
FUTURE
oldstuff
current
RESEARCH
Important: Using these name substitutes does not change the actual
directory’s name. The following example is a relative pathlist which begins
in your current directory and goes through the subdirectories DOC and
LETTERS to the file jim.
doc/letters/jim
The next pathlist goes up to the next directory above your current directory
and then through the subdirectory CHAP to the file page.
../chap/page
The next pathlist specifies a file within your current directory. No
directories are searched other than the current directory.
accounts
4-9
Chapter 4
The OS-9 File System
Basic File System Oriented
Utilities
This section explains some of the OS-9 utility commands that manipulate
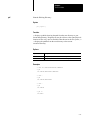
the file system. The utilities include dir, chd, chx, pd, build, makdir, list,
copy, dsave, del, deldir, and attr. The examples given refer to the file
system diagram in Figure 4.6.
Figure 4.6
Diagram of a Typical File System
Root Directory:
DEFS
CMDS SYSMODS
list
copy
C
etc.
CHRIS
TEXT
letter
manual
funct
startup
/h0
USR
SYS
IO
PAUL
PROG
map
gee
MACROS
LIB
ELLEN
ick.c
fall
ice
green
main
Dir: Displaying the Contents of Directories
The dir utility displays the contents of directories. Typing dir by itself
displays the contents of your current data directory. For the following
example, the current data directory is /h0 in Figure 4.6:
$ dir
directory of . 13:56:58
C
CMDS
DEFS
MACROS
SYS
SYSMODS
IO
USR
LIB
startup
To look at directories other than your current data directory, you must
either provide a pathlist to the desired directory or change your current
data directory. Changing directories is discussed later in this chapter.
To display the contents of another directory without changing your current
data directory, type dir and the pathlist to the directory.
For example, if you are in the root directory and you want to see what is in
the DEFS directory, type:
dir defs
4-10
Chapter 4
The OS-9 File System
dir now displays the names of the files in the DEFS directory. The name
defs is a relative pathlist. You can type dir defs because DEFS is in your
current data directory. You can also use the full pathlist, dir /h0/defs,
and get the same result.
To display the contents of your current execution directory, type dir –x.
You may also use wildcards with the dir utility and with most other utilities
as well. OS-9 recognizes two wildcards: the asterisk (*) and the question
mark (?). An asterisk is replaced by any number of letter(s), number(s), or
special characters. Consequently, an asterisk by itself expands to include
all of the files in a given directory. A question mark is replaced by a single
letter, number, or special character.
For example, the command dir * lists the contents of all directories
located in the current data directory. The command dir /h0/cmds/d* lists
all files and directories in the CMDS directory that begin with the letter d.
The command dir prog_? lists all files in your current directory that have
a file name with prog_ followed by a single character.
For more information, see the section on wildcards in the chapter on
the shell.
Dir Options
dir has several options which are fully documented in the OS-9 Utilities
section. Some of these options are discussed here. Try each of the options
and see what information is displayed.
The –e option gives an extended directory listing. An extended directory
listing displays all files within the specified directory with their attributes,
the size of the file, and the sector where the file is stored. The following
example uses the file structure shown in Figure 4.6.
$ dir usr/chris –e
Directory
Owner
–––––––
12.4
12.4
12.4
of USER/CHRIS 12:30:00
Last Modified Attributes Sector Bytecount Name
––––––––––––– –––––––––– –––––– ––––––––– ––––
89/06/17 1601
––––––wr
3458
5744 letter
89/07/03 1148
d–––––wr
104A0
15944 PROG
89/05/13 1417
d–––––wr
DODO
11113 TEXT
4-11
Chapter 4
The OS-9 File System
The –r option displays the contents of the specified directory and any files
contained within its subdirectories. Using Figure 4.6 as an example, typing
dir usr/chris –r lists the following:
PROG
funct
Directory of . 12:30:15
TEXT
letter
Directory of PROG 12:30:15
main
Directory of TEXT 12:30:15
manual
You can use the dir options with each other. Typing dir –er displays all
files within the current data directory, all files within its sub-directories,
and provides an extended listing of their attributes, sizes, etc.
Chd and Chx: Moving Around in the File System
The chd and chx utilities allow you to travel around the file system.
The chd utility allows you to change your current data directory.
The chx utility allows you to change your current execution directory.
To change your current data directory, type chd followed by a full or
relative pathlist. For example, if your current data directory is /h0 and you
want your current data directory to be USR, you would type chd and the
pathlist of USR.
For example, with a relative pathlist, type:
chd usr
With a full pathlist, type:
chd /h0/usr
Your current data directory is now USR. If you type dir, you will see the
contents of USR:
directory of . 14:04:32
CHRIS
ELLEN
PAUL
If you want to see which files are in the CHRIS directory, type dir chris.
Or change directories by typing chd chris and after the new prompt,
type dir.
If you want to return to your home directory, which in this case is /h0, type
chd without a pathlist. After changing directories, dir displays the contents
of /h0.
4-12
Chapter 4
The OS-9 File System
The chx command allows you to redefine an existing directory as a
personal execution directory. This may be important if you have programs
you do not want other people to execute. To use this command, type chx,
followed by a full or relative pathlist to the directory. When using a
relative pathlist with chx, the pathlist is relative to your current
execution directory.
If your current data directory is USR and you want to change your current
execution directory from CMDS to PAUL, you could type the relative
pathlist chx ../usr/paul or the full pathlist chx /h0/usr/paul. When
you type a command after you have changed your current execution
directory, PAUL is searched instead of CMDS.
Typing dir –x displays the contents of your current execution
directory, PAUL:
directory of . 14:05:06
gee
ick.c
map
Climbing Directory Trees
You can use OS-9’s special naming conventions to move around the file
system. As a reminder, the naming conventions are periods specifying the
current directories and directories higher in the file structure. For example:
Naming convention:
Description:
.
refers to the current directory
..
refers to the parent directory
...
refers to two directory levels higher
When used as the first name in a path, you can use these naming
conventions in conjunction with relative pathlists.
Important: If you are planning to port your code to other operating
systems, you must remember that most operating systems only use this
convention as it refers to the current and parent directories. For example, if
you use ... to refer to the directory above a parent directory, most operating
systems require you to use ../.. instead.
The examples below relate to the file structure in Figure 4.7. The examples
assume your initial current data directory is PROG.
4-13
Chapter 4
The OS-9 File System
The following example displays the contents of PROG. It is functionally
the same command as dir:
dir .
directory of . 14:04:32
funct
main
The next command displays the contents of PROG’s parent
directory, CHRIS.
dir ..
directory of .. 14:05:58
PROG
TEXT
letter
This example displays the contents of TEXT by specifying a path starting
with the parent directory (..):
dir ../text
directory of ../text 14:06:47
manual
The following command changes the current data directory from PROG
to ELLEN:
chd .../ellen
Figure 4.7
Accessing Directories Using a Relative Path
ELLEN is accessed from PROG using the relative path .../ellen.
/h0
DEFS
CMDS
list
copy
SYSMODS
etc.
CHRIS
TEXT
letter
manual
4-14
C
startup
SYS
main
map
gee
MACROS
IO
PAUL
PROG
funct
USR
ELLEN
ick.c
fall
ice
green
LIB
Chapter 4
The OS-9 File System
You can use any number of periods (.) to access higher directories. One
period is added for each additional level. An error is not returned if you
specify a greater number of directory levels above your current data
directory than actually exist. Instead, this indicates the root directory on
your system. For example, this command displays the contents of the
root directory:
dir .........
This may be helpful if you are not sure how far down you are in the
directory structure. The next example changes your current data directory
from PROG to MACROS:
chd ........./macros
Using the Pd Utility
When the file system becomes complex, you may become confused as to
where the directory you are currently working in is located in relation to
the overall file system.
The pd utility displays the complete pathlist from the root directory to your
current data directory.
For example, if your current data directory is PAUL:
pd
/h0/USR/PAUL
Likewise, if you forget which directory is your current execution directory,
type pd –x to display the pathlist to the current execution directory.
Using Makdir to Create New Directories
You can create new directories using the makdir utility. For example, to
create a directory called BUS.DEPT, type:
makdir BUS.DEPT
BUS.DEPT now is a new entry is your current directory.
If you want the new directory created somewhere other than your current
directory, you must specify a pathlist. For example,
makdir /h0/usr/BUS.DEPT creates a new directory in USR.
4-15
Chapter 4
The OS-9 File System
The makdir /h0/usr/MARKET command creates a new directory
called MARKET in the USR directory.
/h0
CMDS
CHRIS
USR
MARKET
SYS
PAUL
Rules for Constructing File Names
When creating files and directories, you must follow certain rules. Any file
name can contain from 1 to 28 upper or lower case letters, numbers, or
special characters as listed below. While the file name may begin with any
of the following characters or digits, each file name must contain at least
one letter or number. Within these limitations, a name can contain any
combination of the following:
Description:
Character:
upper case letter:
A-Z
lower case letter:
a-z
period
.
decimal digits
0-9
dollar sign
$
underscore
_
File names may not contain spaces. Instead, use the underscore (_) or the
period (.) to improve the readability of file and directory names. OS-9 does
not distinguish upper case letters from lower case letters. The names FRED
and fred are considered the same name.
Important: By OS-9 convention, directory names are in upper case and
file names are in lower case. This allows you to easily distinguish
directories from files. This is only a recommendation for easy use; you
may develop your own style.
Here are some examples of legal names:
4-16
Name:
Description:
raw.data.2
project_review_backup
X6809
$SHIP.DIR
...c
12345
Chapter 4
The OS-9 File System
Here are some examples of illegal names:
Name:
Description:
Max*min
* is not a legal character
open orders
name cannot contain a space
this.name.obviously.has.more.than.28.characters
too long
Important: File names that start with a period are not displayed by dir
unless the –a option is used. This allows you to hide files within
a directory.
Creating Files
You can create files in many ways. Text files are generally created with the
build utility, the edt utility, or the µMACS text editor. These file building
tools are provided with the Professional OS-9 package for
your convenience.
Use the build utility to create short text files. To use the build utility, type
build, followed by the name of the file you want to create. build responds
with the prompt:
?
This tells you that build is waiting for input. To terminate build, type a
carriage return at the ? prompt. For example:
$ build test
? Some programmers have been known to
? howl at full moons.
?
$
You cannot edit files with build.
You may also use the edt utility to create files. edt is a line-oriented text
editor that allows you to create and edit source files. To use the edt utility,
type edt and the desired pathlist. If the file is new or cannot be found, edt
creates and opens the file. edt then displays a question mark (?) prompt and
waits for an edit command. If the file is found, edt opens it, displays the
last line, and then displays the ? prompt. edt is fully detailed in the OS-9
Utilities section.
The preferred method of creating and editing files is with µMACS.
µMACS is a screen-oriented text editor designed for creating and
modifying test files and programs. Through the use of multiple buffers,
µMACS allows you to display different files or different portions of the
4-17
Chapter 4
The OS-9 File System
same file on the same screen. In addition, extensive formatting commands
allow you to reformat paragraphs with new user-defined margins,
transpose characters, capitalize words, and change words or sections into
upper or lower case. For a more detailed description, see the Using
mMACS manual.
Examining File Attributes with Attr
When you create a file using build or µMACS, only the owner read and
owner write permissions are set. When you create a directory, it initially
has all the permissions set except the single user permission.
To examine file attributes, use the attr utility. To use this utility, type attr,
followed by the name of a file. For example:
$ attr newtest
––––––wr
The file newtest has the permissions set for owner reading and owner
writing. Access to this file by anyone other than the owner is denied.
Important: Users with the same group.user ID as the person who created
the file are considered owners. However, if the file is created by a group 0
user, only users in the super group can read, write, or execute the file.
If you use attr with a list of one or more attribute abbreviations, the file’s
attributes are changed accordingly, provided you have the proper write
permission to access the file. The attribute abbreviations do not have to be
listed in any particular order. The letter n preceding an attribute removes
that permission.
The following command enables public read and write permission and
removes execution permission for both the owner and the public:
$ attr newtest –pw –pr –ne –npe
If you are the owner of a file, you can change the access permissions
regardless of what the permissions indicate. Thus, the owner always has
the right to delete a file, change the user privileges, etc. Users in the same
group have the same permissions as the owner.
The directory attribute is somewhat different than the other attributes. It
could be dangerous to be able to change directory files to normal files or a
normal file to a directory. For this reason, you cannot use attr to turn the
directory (d) attribute on; use makdir to turn this attribute on. Furthermore,
you can only use attr to turn the directory attribute off if the directory
is empty.
4-18
Chapter 4
The OS-9 File System
Listing Files
Use the list utility to display the contents of files. By default, list displays
the lines of text on your terminal screen. To examine a file, type list,
followed by the name of the file. For example:
$ list test
Some programmers have been known to
howl at full moons.
$
It is important to remember that you cannot list a directory. If you type the
command list USR, the following error message and error number
are returned:
list: can’t open “USR”.
Error# 000:214.
This means that you cannot access USR because it is a directory.
list displays text files. All distributed files in CMDS are executable
program module files. If you try to list the contents of a random access
data file or an executable program module file, you see what appears to be
random data displayed on your screen. This may also include unprintable
characters, such as escape or delete, that could change your terminal’s
operating parameters. If the operating characteristics of your terminal are
affected, first try turning the terminal off and on. If this does not
re-initialize the terminal, consult your terminal operating manual.
Copying Files
Use the copy utility to make a duplicate of a file. To copy a file, type copy,
followed by the name of the file to be copied, followed by the name of the
duplicate file. For example:
$ copy test newtest
If you list the file newtest, it is an exact copy of test.
The file you are copying and the duplicate file may be located in any
directory; they do not have to be in your current data directory. For files
located outside of your current data directory, you may use full or relative
pathlists. The following example uses Figure 4.8. The first command
copies the file gee in the PAUL directory to a file named new.info in the
TEXT directory:
copy /h0/usr/paul/gee /h0/usr/chris/text/new.info
4-19
Chapter 4
The OS-9 File System
Assuming your data directory is USR, the following commands would
have the same effect:
copy /h0/usr/paul/gee chris/text/new.info
copy paul/gee chris/text/new.info
Figure 4.8
gee is copied from PAUL/gee to
CHRIS/TEXT/new.info using the command
copy paul/gee chris/text/new.info.
/h0
DEFS
CMDS
list
copy
SYSMODS
C
etc.
CHRIS
TEXT
letter
new.info
manual
startup
SYS
IO
PAUL
PROG
funct
USR
map
gee
MACROS
LIB
ELLEN
ick.c
fall
ice
green
main
If you try to copy the contents of one file into an existing file, you will
receive Error #000:218 Tried to create a file that already exists. If you
know the file exists but you want to overwrite it anyway, use the –r option.
For example, the following command replaces the contents of green with
the contents of fall.
$ copy fall green –r
If you list the contents of both files, you will see that they are identical.
At some point, you may want to copy more than one file at a time into
another directory. By using the –w=<dir> option of copy, you can copy
more than one file with a single command. For example, if your current
directory is PROG and you want to copy all of the files in PROG into the
TEXT directory, you could type the following command line:
$ copy * –w=../text
This option will print the name of the file after each successful copy. If an
error occurs, the prompt continue (y/n) is displayed.
Remember that an asterisk is a wildcard. For more information about
wildcards, refer to the section on wildcards in the chapter on the shell.
4-20
Chapter 4
The OS-9 File System
Important: copy uses a 4K memory buffer by default. This means that
only 4K of information is read from the original file and written to the new
file at one time.
If you have a large file, the copy procedure may be slow because the
system has to perform multiple read and write statements. The –b option
may be used to increase the buffer size. This would make the copy
procedure faster for large files. To use the –b option, type copy, the original
file name, the new file name, and –b=<num>k.
For example, typing copy gee mine –b=20k allocates a 20K buffer for
copying the file gee into the file mine.
Important: You must have permission to copy the file. That is, you must
be the owner of the file to be copied or the public read permission must be
set in order to copy the file. You must also have permission to write in the
directory you specify. In either case, if the copy procedure is successful,
the new file has your group.user number unless you are the super user. If
you are the super user, the new file will have the same group.user number
as the original file.
For more information concerning copy, refer to the OS-9 Utilities section.
Dsave: Copying Files Using Procedure Files
Use the dsave utility to copy all files and directories within a specified
directory by generating a procedure file. The procedure file is either
executed later to actually perform the copy or, by specifying the –e option,
executed immediately.
Important: A procedure file is a special OS-9 file. It contains OS-9
commands. Each command is specified on a line, one command per line.
When the procedure file is executed, the OS-9 commands it contains are
executed in the order they are listed in the procedure file. Procedure files
are discussed in more detail in the chapter on the shell.
To use the dsave utility, type dsave followed by the pathlist of the
directory into which the files are copied, followed by any options you wish
to use.
If no pathlist is specified for the destination, the files are copied to the
current data directory at the time the procedure file is executed. If you do
not specify the –e option or redirect the output to a file, dsave sends the
output to the terminal.
4-21
Chapter 4
The OS-9 File System
The example below uses the following directory structure:
/h0
NOTES
prog.names
PROGMS
CONVERSION
temp.c
tally.c
MY.PROJ
prog1
test.c
If PROGMS is your current data directory and you type dsave ../notes,
the following appears on your screen:
$ dsave ../notes
–t
chd ../notes
tmode –w=1 nopause
load copy
Makdir MY.PROJ
Chd MY.PROJ
Copy –b=10 /h0/PROGMS/MY.PROJ/prog1
Copy –b=10 /h0/PROGMS/MY.PROJ/test.c
Chd ..
Makdir CONVERSION
Chd CONVERSION
Copy –b=10 /h0/PROGMS/CONVERSION/temp.c
Copy –b=10 /h0/PROGMS/CONVERSION/tally.c
Chd ..
unlink copy
tmode –w=1 pause
$
Because the output was not redirected to a procedure file and the –e option
was not used, the above commands were not executed. They were just
echoed to your screen.
If you now type dsave ../notes –e, the commands are again echoed to
the screen. However, the contents of the PROGMS directory are copied
into the NOTES directory.
You can also redirect the output of dsave to a file. When you redirect the
output, the commands that are output from dsave are essentially captured
in a file. You can later execute this file to actually perform the
dsave operation.
4-22
Chapter 4
The OS-9 File System
To redirect the output from dsave to a file, use the redirection modifier for
standard output. The standard output modifier is the > symbol.
For example, from the PROGMS directory, you can redirect the output
from dsave into a file called make.bckp by typing:
dsave >make.bckp
This command creates make.bckp in the current data directory. To perform
the dsave, type make.bckp at the command line.
Redirecting the output to a file is helpful when you want to save most, but
not all, of the files in the directory or directories being saved. You can edit
make.bckp before performing the dsave. This allows you to save only
selected files.
Regardless of how you decide to perform the dsave, if dsave encounters a
directory file, it automatically creates a new directory and changes to that
directory before generating copy commands for files in the subdirectory.
In the dsave example, the directory structure looks like the following after
dsave has finished:
/h0
NOTES
CONVERSION
temp.c
tally.c
listing
MY.PROJ
prog1 test.c
PROGMS
CONVERSION
temp.c
tally.c
MY.PROJ
prog1 test.c
If the current working directory is the root directory of the disk, dsave
creates a file that backups the entire disk, file by file. This is useful when
you need to copy many files from different format disks or from a floppy
disk or a hard disk.
If an error occurs during the dsave process, the following prompt
is displayed:
continue (y,n,a,q)?
A y indicates that you wish to continue with dsave. An n indicates that you
do not wish to continue with dsave. An a indicates that all possible files
should be copied and the prompt should not be displayed on error. A q
indicates that you want to exit the dsave procedure.
4-23
Chapter 4
The OS-9 File System
If for any reason you do not wish to be bothered by the prompt, the –s
option is available. This skips any file which cannot be copied and
continues the dsave routine without the error prompt.
When you copy several subdirectories, you can use the –i option to indent
for directory levels. This helps to keep track of which files are located in
which directories.
You can use dsave to keep current directory backups. Use the –d or
–d=<date> options to compare the date of the file to be copied with a file
of the same name in the directory where it is to be copied. The –d option
copies any file with a more recent date. The –d=<date> option copies any
file with a date more recent than that specified. The following example
shows the use of dsave with the –d option:
$ chd /d0/BACKUP
$ dir
Directory
Owner
–––––––
12.4
12.4
of . 14:14:32
Last Modified
–––––––––––––
90/11/12 1417
90/10/05 1601
Attributes Sector Bytecount Name
–––––––––– –––––– ––––––––– ––––
––––––wr
20CO
11113 program.c
––––––wr
313D
5744 prog.2
$ chd /d0/WORKFILES
$ dir
Directory
Owner
–––––––
12.4
12.4
of . 14:14:32
Last Modified
–––––––––––––
90/11/12 1417
90/11/12 1601
Attributes Sector Bytecount Name
–––––––––– –––––– ––––––––– ––––
––––––wr
DODO
11113 program.c
––––––wr
3458
5780 prog.2
$ dsave –deb32 /d0/BACKUP
$ chd /d0/BACKUP
$ dir
Directory
Owner
–––––––
12.4
12.4
of . 14:14:32
Last Modified
–––––––––––––
90/11/12 1417
90/11/12 1601
Attributes Sector Bytecount Name
–––––––––– –––––– ––––––––– ––––
––––––wr
5990
11113 program.c
––––––wr
A12B
5780 prog.2
Only prog.2 was copied to the BACKUP directory because the date was
more recent in the WORKFILES directory.
For more information about dsave, refer to the OS-9 Utilities section.
4-24
Chapter 4
The OS-9 File System
Del and Deldir: Deleting Files and Directories
Use the del and deldir utilities to eliminate unwanted files and directories.
If you no longer need a file, deleting the file frees disk space. You must
have permission to write to the file or directory in order to delete it.
del deletes a file
deldir deletes a directory
To delete a file, type del, followed by the name of the file that you want
deleted. For example, to delete the file test that you created with build, you
would type:
del test
If you execute dir you see that test is no longer displayed.
When deleting files, you may use wildcards. For example, if you have
three files, trial, trial1, and trial.c, in a directory and you want to use
wildcards to delete trial and trial1, you may be tempted to type del
trial*, but this would also delete trial.c, a file you want to keep. Use
caution when you use wildcards with utilities like del and deldir. It is
easy to unintentionally delete files you want to save.
Important: Wildcards are discussed in the chapter on the shell.
The del –p option displays the following prompt before deleting a file:
delete <filename> ? (y,n,a,q)
Type y to delete the file; n if you do not want to delete the file; a if you
want to delete all specified files without further prompts; and q if you want
to quit the deleting process. This helps prevent deleting files you want
to keep.
Deleting a directory is a little different. Use the deldir utility to delete
directories. deldir first deletes all the files and directories in the given
directory, and then, if no errors occur, finally deletes the directory name.
For example:
$ deldir USER2
Deleting directory: USER2
Delete, List, or Quit (d, l, or q) ?
At the prompt, type l to list the contents of the directory, d to delete the
directory, or q to quit and not delete anything.
Important: Just a reminder: Never delete a file or directory unless you are
sure you do not need it.
4-25
Chapter
5
The Shell
The Function of the Shell
The shell is the OS-9 command interpreter program. The shell translates
the commands you enter into commands the operating system understands
and executes. This allows you to use commands such as dir, copy, and
procs without knowing the complex machine language OS-9 understands.
The shell also provides a user-configurable environment to personalize the
way OS-9 works on your system. You can use the shell to change the shell
prompt, send error messages to a file, or backup your disk before you
log out.
The shell command starts the shell program. This command is
automatically executed following system startup or after logging on to a
timesharing terminal. When the shell is ready for commands, it displays
the prompt:
$
This prompt indicates that the shell is active and waiting for a command
from your keyboard. You can now type a command line followed by a
carriage return.
A number of options are available to the shell. By default, some are
automatically turned on following startup or log on. The available shell
options are:
Option:
–e=<file>
–ne
–l
Description:
Prints error messages from <file>. If no file is specified, /dd/sys/errmsg is used. Without this
option, the shell prints only error numbers with a brief message description. Each error is
described in the appendix on error codes.
–p=<string>
Prints no error messages. This is the default option.
The logout built-in command is required to terminate the login shell. <eof> does not cause the
shell to terminate.
<eof> terminates the login shell. <eof> is normally caused by pressing the [Esc] key. This is
the default option.
Displays prompt. The default prompt is a dollar sign ($).
Sets the current shell prompt equal to <string>.
–np
–t
–nt
–v
–nv
–x
–nx
Does not display the prompt.
Echoes input lines.
Does not echo input lines. This is the default option.
Verbose mode: displays a message for each directory searched when executing a command.
Turns off verbose mode. This is the default option.
Aborts process upon error. This is the default option.
Does not abort process upon error.
–nl
–p
5-1
Chapter 5
The Shell
You can change shell options with either of two methods. The first method
involves typing the option on the command line or after the shell
command. For example:
Option:
Description:
$ –np
Turns off the shell prompt.
$ shell –np
Creates a new shell that does not prompt. When the new shell is exited,
the original shell will prompt.
The second method uses set, a special shell command. To set shell options,
type set, followed by the options desired. When using the set command, a
hyphen (–) is unnecessary before the letter option. For example:
Option:
Description:
$ set np
Turns off the shell prompt.
$ shell set np
Creates a new shell that does not prompt. When the new shell is exited,
the original shell will prompt.
As you can see, the two methods accomplish the same function. They are
both provided for your convenience. You should use the method that is
clearer to you.
The Shell Environment
The shell maintains a unique list of environment variables for each user
on an OS-9 system. These variables affect the operation of the shell or
other programs subsequently executed and can be set according to
your preference.
You can access all environment variables by any process called by the
environment’s shell or by descendant shells. This essentially allows you to
use the environment variables as global variables.
If a subsequent shell redefines an environment variable, the variable is only
redefined for that shell and its descendents. The environment variable is
not redefined for the parent shell.
5-2
Chapter 5
The Shell
Four environment variables are automatically set up when you log on to a
time-sharing system:
Variable:
Description:
PORT
This specifies the name of the terminal. An example of a valid name is /t1.
PORT is automatically set up by the tsmon utility.
HOME
This specifies your home directory. The home directory is specified in your
password file entry and is your current data directory when you first log on
the system. This is also the directory used when the command chd with
no parameters is executed.
SHELL
This is the first process executed when you log on to the system.
USER
This is the user name you typed when prompted by the login command.
On single user systems, you can set these variables with the setenv
command. You can also set up a procedure file with your normal
configuration of these variables. This procedure file could then be executed
each time you startup your terminal.
There are four other important environment variables:
Variable:
Description:
PATH
This specifies any number of directories. A colon (:) must separate
directory paths. The shell uses PATH as a list of commands directories to
search when executing a command. If the default commands directory
does not include the file/module to execute, each directory specified by
PATH is searched until the file/module is found or the list is exhausted.
PROMPT
This specifies the current prompt. By specifying an “at” sign (@) as part of
your prompt, you may easily keep track of how many shells you have
running under each other. @ is a replaceable macro for the shell level
number. The base level is set by the environment variable _sh.
_sh
This specifies the base level for counting the number of shell levels. For
example, set the shell prompt to “@howdy: ” and _sh to 0:
$ setenv _sh 0
$ –p=“@howdy: ”
howdy: shell
1.howdy: shell
2.howdy: eof
1.howdy: eof
howdy:
TERM
This specifies the type of terminal being used. TERM allows word
processors, screen editors, and other screen dependent programs to
know what type of terminal configuration to use.
Important: Environment variables are case sensitive. OS-9 does not
recognize a variable if you do not use the proper case.
5-3
Chapter 5
The Shell
Changing the Shell Environment
Three utility programs are available to use with environment variables:
setenv, unsetenv, and printenv.
Variable:
Description:
setenv
Declares the variable and sets the value of the variable.
unsetenv:
Clears the value and removes the variable from storage.
printenv
Prints the variables and their values to standard output.
setenv declares the variable and sets its value. The variable is put in an
environment storage area accessed by the shell. For example:
$ setenv PATH ..:/h0/cmds:/d0/cmds:/dd/cmds
$ setenv _sh 0
These variables are only known to the shell in which they are defined and
any descendant processes from that shell. This command does not change
the environment of the parent process of the shell which issued setenv.
unsetenv clears the value of the variable and removes it from storage.
For example:
$ unsetenv PATH
$ unsetenv _sh
printenv prints
the variables and their values to standard output. For
example:
$ printenv
PATH=..:/h0/cmds:/d0/cmds:/dd/cmds
PROMPT=howdy
_sh=0
These three commands are described in the OS-9 Utilities section.
Built-In Shell Commands
5-4
The shell has a special set of commands, or option switches, built-in to the
shell. You can execute these commands without loading a program and
creating a new process. You can execute them regardless of your current
execution directory.
Chapter 5
The Shell
The built-in commands and their functions are:
Shell Command Line
Processing
Command:
Description:
* <text>
Indicates a comment: <text> is not processed. This is especially
useful in procedure files.
chd <path>
Changes the current data directory to the directory specified by
the path.
chx <path>
Changes the current execution directory to the directory specified by
the path.
ex <name>
Directly executes the named program. This replaces the shell
process with a new execution module.
kill <proc ID>
Aborts the process specified by <proc ID>.
logout
Terminates the current shell. If the login shell is to be terminated, the
.logout file in the home directory is executed and then the login shell
is terminated.
profile <path>
Reads input from a named file and then returns to the shell’s original
input source.
set <options>
Sets options for the shell.
setenv <env var>
<value>
Sets environment variable to the specified value.
setpr <proc ID>
<priority>
Changes the process’s priority.
unsetenv <env var>
Deletes an environment variable from the environment.
w
Waits for a child process to terminate.
wait
Waits for all child processes to terminate.
The shell reads and processes command lines one at a time from its input
path, which is usually your keyboard. Each line is first scanned, or parsed,
to identify and process any of the following parts which may be present:
Part of command line:
Description:
keyword
A name of a program, procedure file, built-in command,
or pathlist.
parameters
The names of files, programs, values, variables, constants, etc.
to pass to the program being executed.
execution modifiers
These modify a program’s execution by redirecting I/O or
changing the priority or memory allocation of a process.
separators
When multiple commands are placed on the same command
line, separators specify whether they should execute
sequentially or concurrently.
The shell can process a command line with only the keyword present.
Parameters, execution modifiers, and separators are optional. After it
identifies the keyword, the shell processes any execution modifiers and
separators. The shell assumes that any text not yet processed are
parameters; they are passed to the program called.
5-5
Chapter 5
The Shell
The keyword must be the first word in the command line. If the keyword is
a built-in command, it is immediately executed.
If the keyword is not a built-in command, the shell assumes it is a program
name and attempts to locate it. The shell searches for the command in the
following sequence:
1.
The shell checks the memory to see if the program is already loaded
into the module directory. If it is already in memory, there is no need
to load another copy. The shell then calls the program to be executed.
2.
If the program was not in memory, your current execution directory is
searched. If it is found, the shell attempts to load the program. If this
fails, the shell tries to execute it as a procedure file. If this fails, the
shell attempts the same procedure using the next directory specified
in the PATH environment variable. This continues until the command
is successfully executed or the list of directories is exhausted.
3.
The shell searches your current data directory. If it finds the specified
file, it is processed as a procedure file. Procedure files are assumed to
contain one or more shell command lines. These command lines are
processed by a newly created, or child, shell as if they had been typed
in manually. After all commands from the procedure file execute,
control returns to the old, or parent, shell. Because the child shell
processes the commands, all built-in commands in the procedure file
such as chd and chx only affect the child shell.
The shell returns an error if the program is not found. If the program is
found and executed, the shell waits until the program terminates. When the
program terminates, it reports any errors returned. If there are more input
lines, the shell gets the next line and the process is repeated.
This sample command line calls a program:
$ prog #12K sourcefile –l –j >/p
In this example:
5-6
Command:
Description:
prog
Is the keyword.
#12K
Is a modifier which requests that an alternate memory size be
assigned to this process. In this case, 12K is used as memory.
sourcefile –l –j
Are parameters passed to prog.
>
Is a modifier, which redirects output to a file or device. In this
case, > redirects the output to the printer (/p).
/p
Is the system’s printer.
Chapter 5
The Shell
Special Command Line Features
In addition to basic command line processing, the shell facilitates:
memory allocation
I/O redirection, including filters
process priority
wildcard pattern matching
multi-tasking: concurrent execution
These functions are accessed through the use of execution modifiers,
separators, and wildcards. There are virtually unlimited combinations of
ways to use these capabilities.
Characters which comprise execution modifiers, separators, and wildcards
are stripped from the part(s) of the command line passed to a program as
parameters. These characters cannot be passed as parameters to programs
unless contained in quotes:
Modifiers:
Character:
Description:
#
Additional memory size
^
Process priority
>
Redirect output
<
Redirect input
>>
Redirect error output
Separators:
Character:
Description:
;
Sequential execution
&
Concurrent execution
!
Pipe construction
Wildcards
Character:
Description:
*
Matches any character
?
Matches a single character
Execution Modifiers
The shell processes execution modifiers before the program is run. If an
error is detected in any of the modifiers, the run is aborted and the
error reported.
5-7
Chapter 5
The Shell
Additional Memory Size Modifier
Every executable program is converted to machine language for storage.
During the conversion process, a module header is created for the
program. A module header is part of all executable programs and holds the
program’s name, size, memory requirements, etc. You can find a complete
explanation of module headers in the OS-9 Technical Manual.
When the shell processes an executable program, it allocates the minimum
amount of working memory specified in the program’s module header. To
increase the default memory size, you can assign memory in 1K
increments using the pound sign modifier (#), followed by a number of
allocated kilobytes: #10k or #10. If the specified memory allocation is
smaller than would otherwise be used, the modifier is ignored.
The increase in memory allocation only affects one command. If you want
to increase the allocation for the next command, you must add the modifier
(#) again.
Important: Programs written in C use the additional memory for stack
space only.
I/O Redirection Modifiers
Redirection modifiers redirect the program’s standard I/O paths to alternate
files or devices. Usually, programs do not use specific file or device names.
This makes the redirection of standard I/O to any file or device fairly
simple, without altering the program.
Programs which normally receive input from a terminal or send output to a
terminal use one or more of these standard I/O paths:
Path:
Description:
Standard Input Path
Normally passes data from a terminal’s keyboard to a program.
Standard Output Path
Normally passes output data from a program to a
terminal’s display.
Standard Error Path
Can be used for either input or output, depending on the nature
of the program using it. This path is commonly used to output
routine status messages such as prompts and errors to the
terminal’s display. By default, the standard error path uses the
same device as the standard output path.
A new process can only be created by an existing process. The new process
is known as the child process. The process that created the child process is
known as the parent process. Each child process inherits the parent
process’s standard I/O paths.
5-8
Chapter 5
The Shell
When the shell creates a new process, it inherits the shell’s standard I/O
paths. Upon startup or logging in, the shell’s standard input is the terminal
keyboard. The standard output and standard error are directed to the
terminal’s display. Consequently, the child’s standard input is the terminal
keyboard. The child’s standard output and standard error are directed to the
terminal’s display.
When a redirection modifier is used on a shell command line, the shell
opens the corresponding paths and passes them to the new process as its
standard I/O paths.
The three redirection modifiers are:
Modifier:
Description:
<
Redirects the standard input path.
>
Redirects the standard output path.
>>
Redirects the standard error path.
When you use redirection modifiers on a command line, they must be
immediately followed by a path describing the file or device to or from
which the I/O is to be redirected.
Each physical input/output device supported by the system must have a
unique name. Although the device names used on a system are somewhat
arbitrary, it is customary to use the names Microware assigns to standard
devices in OS-9 packages. They are:
Device:
Description:
TERM
Primary System Terminal
t1, t2, etc.
Other Serial Terminals
p
Parallel Printer
p1
Serial Printer
dd
Default Disk Drive
d0
Floppy Disk Drive Unit 0
d1, d2, etc.
Other Floppy Disk Drives
h0, h1, etc.
Hard Disk Drives (Format-inhibited)
h0fmt, h1fmt, etc.
Hard Disk Drives (Format-enabled)
n0, n1, etc.
Network Devices
mt0, mt1
Tape Devices
r0
Ram Disk
pipe
Pipe Device
nil
Null Device
5-9
Chapter 5
The Shell
Important: The h0fmt, h1fmt, etc. device descriptors have a bit set that
allows you to use the format and os9gen utilities on them. To prevent
accidentally formatting a hard disk, you should normally use the device
names h0, h1, etc.
You may only use device names as the first name of a pathlist. The device
name must be preceded by a slash (/) to indicate that the name is an I/O
device. If the device is not a mass storage multi-file device like a disk
drive, the device name must be the only name in the path. This restriction
is true for devices such as terminals and printers.
For example, you can redirect the standard output of list to write to the
system printer instead of the terminal:
$ list correspondence >/p
The shell automatically opens or creates, and closes (as appropriate) files
referenced by I/O redirection modifiers. In the next example, the output of
dir is redirected to the path /d1/savelisting:
$ dir >/d1/savelisting
If list is used on the path /d1/savelisting, output from dir is displayed
as follows:
$ List /d1/savelisting
directory of .
10:15:00
file1
myfile
savelisting
You can use redirection modifiers before and/or after the program’s
parameters, but you can use each modifier only once in a given command
line. You can use redirection modifiers together to cause more than one
redirection of the standard paths. For example, shell <>>>/t1 causes
redirection of all three standard paths to /t1.
The addition and hyphen characters (+ and –) can be used with redirection
modifiers. The “>–” modifier redirects output to a file. If the file already
exists, the output overwrites it. The “>+” modifier adds the output to the
end of the file. The following example overwrites dirfile with output from
the execution directory listing:
dir –x >–dirfile
The next example adds the listing of newfile to the end of oldfile.
list newfile >+oldfile
5-10
Chapter 5
The Shell
Important: Spaces may not occur between redirection operators and the
device or file path.
Process Priority Modifier
On multi-user systems or when multi-tasking, many processes seem to
execute simultaneously. Actually, OS-9 uses a scheduling algorithm to
allocate execution time to active processes.
All active processes are sorted into a queue based on the age of the
process. The age is a number between 0 and 65535 based on how long a
process has waited for execution and its initial priority.
On a timesharing system, the system manager assigns the initial priority for
processes started by each user. This priority for the initial process is listed
in the password file. The initial process is usually the shell. On a single
user system, processes have their priority set in the Init mode. All child
processes inherit their parent process’s priority.
Important: Password files are discussed later in this chapter.
When a process enters the active queue, it has an age set to its initial
priority. Every time a new active process is submitted for execution, all
earlier processes’s ages are incremented. The process with the highest age
executes first.
If you want a program to run at a higher priority, use the caret modifier (^).
By specifying a higher priority, a process is placed higher in the execution
queue. For example:
$ format /d1 ^255
In this example, the process format is given the assigned priority of 255.
By assigning a lower number, you can specify a lower priority.
ATTENTION: Specifying too high of a priority for a process
can cause all other processes to be locked out until their ages
mature. For example, if you specify a priority of 2000 for a
large program and all the other processes have an age of less
than 100, your program is the only process executed on the
system until either your program terminates or another process’s
age reaches 2000. If another process’s age reaches 2000, it is
run once and entered back in the queue at its initial priority.
Once again, your program either runs until it terminates or until
another process’s age reaches 2000.
5-11
Chapter 5
The Shell
Wildcard Matching
The shell uses some alternate ways to identify file and directory names. It
accepts wildcards in the command line. The two recognized wildcard
characters are the asterisk and the question mark (* and ?).
An asterisk (*) matches any group of zero or more characters. A question
mark (?) matches any single character. The shell searches the current data
directory or the directory given in a path for matching file names.
For the following examples, a directory containing the following files
is used:
directory of FILES 14:45:20
diary
diary2
form
login.names logistics
logs
setime.c
shellfacts
sizes
form.backup forms
old
oldstuff
sizes.backup utils1
The command list log* lists the contents of login.names, logistics, and
logs. The pattern log* matches all file names beginning with log followed
by zero or more characters. The following commands demonstrate the
function of this wildcard.
Command:
Description:
list s*
Lists all files in the current data directory beginning with s:
Shellfacts, setime.c, and sizes.
del *
Deletes every file in the directory FILES.
dir ../*.backup
Lists all files in the parent directory that end with .backup.
dir –x d*
Lists all files in the current execution directory that start with the
letter d. This can be helpful if you are unsure of the spelling of
a particular utility.
The question mark (?) matches any single character in the position where
the wildcard character is located. For example, the command line list log?
only lists the contents of the file logs. The following commands
demonstrate the function of this wildcard.
Command:
Description:
del form?
Deletes the file forms but not form.
list s????
Lists the contents of sizes, but not setime.c or shellfacts.
In both examples, the shell only searches for names with five characters.
Wildcards may also be used together. For example, the command list *.?
lists any files that end in a period followed by any letter, number, or special
character, regardless of what comes before the period. In this case, list *.?
lists the contents of the file setime.c.
5-12
Chapter 5
The Shell
The shell only attempts to expand a character string containing a wildcard
if the character string could be a pathlist. The shell does not expand
wildcards used in the keyword of a command line. For example, the shell
does not expand the asterisk in the following:
d* forms
Important: The shell disregards wildcard characters enclosed in double
quotes. For example:
echo
“*”
This echoes an asterisk (*) to standard output, which is usually the
terminal. If you left out the double quotes around the asterisk, the shell
would expand the wildcard to include every file name in the current
directory and output each name to the terminal. Try it.
ATTENTION: You must be careful when using wildcards with
utilities such as del and deldir. You should not use wildcards
with the –x or z options of most utilities.
Command Separators
A single shell input line can include more than one command line. These
command lines may be executed sequentially or concurrently. Sequential
execution causes one program to complete its function and terminate
before the next program is allowed to begin execution. Concurrent
execution allows several command lines to begin execution and
run simultaneously.
Execute commands sequentially by separating the command lines with a
semicolon (;). Execute commands concurrently by separating the command
lines with an ampersand (&).
Sequential Execution
When you enter one command per line from the keyboard, programs
execute one after another, or sequentially. All programs executed
sequentially are individual processes created by the shell. After initiating
execution of a program to be executed sequentially, the shell waits until the
program it created terminates. The command line prompt does not return
until the program has finished.
5-13
Chapter 5
The Shell
For example, the following command lines are executed one after another.
The copy command is executed first, followed by the dir command.
$ copy myfile /D1/newfile
$ dir >/p
Specify more than one program on a single shell command line for
sequential execution by separating each program name and its parameters
from the next one with a semicolon (;). For example:
$ copy myfile /D1/newfile;
dir >/p
The shell first executes copy and then dir. No command line prompt
appears between the execution of the copy and dir commands. The
command line executes exactly as the previous two command lines, unless
an error occurs.
If any program returns an error, subsequent commands on the same line are
not executed regardless of the –nx option. In all other regards, a semicolon
(;) and a carriage return act as identical separators.
The following example copies the contents of oldfile into newfile. When
the copy command is finished, oldfile is deleted. Then, the contents of
newfile are listed.
$ copy oldfile newfile; del oldfile; list newfile
In the next example, the output from dir is redirected into myfile in the d1
directory. The output from list is then redirected to the printer. Finally,
temp is deleted.
$ dir >/d1/myfile ; list temp >/p; del temp
Multi-tasking: Concurrent Execution
Use the ampersand (&) separator to execute programs concurrently. This
allows programs to run at the same time as other programs, including the
shell. The shell does not wait to complete a process before processing the
next command. Concurrent execution is how a background program
is started.
Use the concurrent execution separator for multi-tasking. The number of
programs that can run at the same time is not fixed; it depends on the
amount of free memory in the system and the memory requirements of the
specific programs.
Here is an example:
$ dir >/P&
5-14
list file1&
copy file1 file2 ; del temp
Chapter 5
The Shell
The dir, list, and copy utilities run concurrently because they are separated
by an ampersand (&). del does not run until copy terminates because
sequential execution (;) was specified.
If you add an ampersand (&) to the end of a command line, regardless of
the type of execution specified, the shell immediately returns command to
the keyboard, displays the $ prompt, and waits for a new command. This
frees you from waiting for a process or sequence of processes to terminate.
This is especially useful when making a listing of a long text file on a
printer. Instead of waiting for the listing to print to completion, you can use
the concurrent execution separator to use your time more efficiently.
If you have several processes running at once, you can display a status
summary of all your processes with the procs utility. procs lists your
current processes and pertinent information about each process. The procs
utility is discussed later in this chapter.
Pipes and Filters
The third kind of separator is the exclamation point (!) used to construct
pipelines. Pipelines consist of two or more concurrent programs whose
standard input and/or output paths connect to each other using pipes.
A pipe is simply a way to connect the output of a process to the input of
another process, so the two run as a sequence of processes: a pipeline.
Pipes are one of the primary means by which data is transferred from
process to process for interprocess communications. Pipes are first-in,
first-out buffers. They may hold up to 90 bytes of data at a time.
All programs in a pipeline are executed concurrently. The pipes
automatically synchronize the programs so the output of one never gets
ahead of the input request of the next program in the pipeline. This ensures
that data cannot flow through a pipeline any faster than the slowest
program can process it.
Any program that reads data from standard input can read from a pipe.
Any program that writes data to standard output can write data to a pipe.
Several utilities are designed so that the standard output of one can be
piped to the standard input of another. For example:
$ dir –e ! pr
This example causes the standard output of dir to be piped to the standard
input of the pr utility instead of on the terminal screen. pr reads the output
of dir even though pr reads standard input by default. pr then displays
the result.
5-15
Chapter 5
The Shell
The standard output of the dir –e command is piped to the standard input
of the pr command through an un-named pipe. The pr utility displays the
results of the dir –e command.
dir –e
(WRITES)
pr
(READS)
/pipe/temp
OS-9 uses two types of pipes: named pipes and un-named pipes.
Un-named Pipes
Un-named pipes are created by the shell when an input line with one or
more exclamation point (!) separators is processed. For each exclamation
point, the standard output of the program named to the left of the
exclamation point is redirected by a pipe to the standard input of the
program named to the right of the exclamation point. Individual pipes are
created for each exclamation point present. For example:
$ update <master_file ! sort ! write_report >/p
In this example, the input for the program update is redirected from
master_file. update’s standard output becomes the standard input for the
program sort. sort’s output, in turn, becomes the standard input for the
program write_report. write_report’s standard output is redirected to
the printer.
Named Pipes
Named pipes are similar to un-named pipes with one exception: a named
pipe works as a holding buffer that can be opened by another process at a
different time.
Create named pipes by re-directing output to /pipe/<file>, where <file> is
any legal OS9 file name. For example:
$ list letters >/pipe/letters
The output from the list command is redirected into a named pipe,
/pipe/letters. The information remains in the pipe until it is listed, copied,
deleted, or used in some other manner.
merge this that >/pipe/these
5-16
/pipe/these
Chapter 5
The Shell
The output from the merge command is redirected to the named pipe,
/pipe/these. /pipe/these remains open until the contents are used in some
way. In this example, another user could later grep for a word in the
file /pipe/these:
grep newone /pipe/these –nc
Once the file has been used, the named pipe is deleted.
/pipe/these
grep newone /pipe/thse –nc
You can also create named pipes by writing to the named pipe from a
program. Named pipes are similar to mass-storage files. Named pipes have
attributes and owners. They may be deleted, copied, or listed using the
same syntax one would use to delete, copy, or list a file. You may change
the attributes of a named pipe just as you would change the attributes of
a file.
dir works with /pipe. This displays all named pipes in existence. A dir –e
command may be deceiving. If any utility other than copy creates a named
pipe, the pipe size equals 90 bytes. copy expands the size of the pipe to the
size of the file. This indicates that the first 90 bytes of the output are in the
named pipe. However, if the procs utility is executed, you will see that a
path remains open to /pipe. If you were to copy or list the pipe, for
example, the pipe would continue to receive input and pass it to its output
path until the input process is finished. When the pipe is empty, the named
pipe is deleted automatically.
Some of the most useful applications of pipelines are character set
conversion, data compression/decompression and text file formatting.
Programs which are designed to process data as components of a pipeline
are often called filters.
Command Grouping
You can enclose sections of shell input lines in parentheses (()). This
allows you to apply modifiers and separators to an entire set of programs.
The shell processes them by calling itself recursively as a new process to
execute the enclosed program list. For example, the following commands
produce the same result:
$ (dir /d0; dir /d1) >/p
$ dir /d0 >/p; dir /d1 >/p
5-17
Chapter 5
The Shell
However, one subtle difference exists. The printer is continuously
controlled by one user in the first example, while in the second case,
another user could conceivably use the printer in between the
dir commands.
Command grouping can be used to cause a group of programs to be
executed sequentially with respect to each other and concurrently with
respect to the shell that initiated them. For example:
$ (del *.backup; list stuff_* >p)&
This command begins to sequentially delete all files ending in .backup and
then list to the printer the contents of any files that start with stuff_. At the
same time, a $ prompt will appear, indicating that the shell is waiting for a
new command.
A useful extension of this form is to construct pipelines consisting of
sequential and/or concurrent programs. For example:
$ (dir CMDS; dir SYS) ! makeuppercase ! transmit
This command line outputs the dir listings of CMDS and SYS, in that
order, through a pipe to the program makeuppercase. The total output from
makeuppercase is then piped to the program transmit.
It is important to remember that OS-9 processes commands from left to
right. In the following example, the dir command is executed first, instead
of the procs and del commands located inside the parentheses.
$ dir& (procs; del whatever)
Shell Procedure Files
A procedure file is a text file containing one or more command lines that
are identical to command lines manually entered from the keyboard. The
shell executes each command line in the exact sequence given in the
procedure file.
A simple procedure file could consist of dir on one line and date on
another. When the name of this procedure file is entered from the
command line, dir would run, followed by date.
5-18
Chapter 5
The Shell
Procedure files have a number of valuable applications. They can:
eliminate repetitive manual entry of commonly used
command sequences
allow the computer to execute a lengthy series of programs in the
background unattended, or while you are running other programs in
the foreground
initialize your environment when you first log in
In addition, you can use a procedure file to redirect the standard input,
standard output, and standard error paths from programs and utilities to
procedure files. This has many useful purposes. For example, instead of
receiving the sometimes annoying output of shell messages to your
terminal at random times, you could redirect the shell’s output to a
procedure file and review the messages at a more convenient time.
You can also run procedure files in the background by adding the
ampersand operator:
$ procfile&
+4
ATTENTION: If a procedure file is run in the background, it
should not contain any terminal I/O. Any terminal I/O caused
by a background procedure file will minimally cause confusion
as two or more processes try to control the same I/O path.
Notice the +4 returned by the shell in the example above. This is the
process number assigned to the shell running procfile. You could achieve
the same effect by using [Ctrl-C] interrupt:
$ procfile
[Ctrl-C]
+4
Using [Ctrl-C] to place a procedure in the background only works if the
procedure has not yet performed I/O to the terminal. Another limitation of
the [Ctrl-C] interrupt occurs when the shell has not had time to set up the
command for execution. If the shell has not loaded files from the disk,
established pipelines, etc., the [Ctrl-C] causes the shell to abort the
operation and return the shell prompt. For this reason, you should usually
use the ampersand to place a procedure in the background.
5-19
Chapter 5
The Shell
OS-9 does not have any limit on the number of procedure files that can be
simultaneously executed as long as memory is available.
Important: Procedure files themselves can cause sequential or concurrent
execution of additional procedure files.
The Login Shell and Two Special Procedure Files: .login and .logout
The login shell is the initial shell created by the login sequence to process
the user input commands after logging in.
The .login and .logout procedure files provide a way to execute desired
commands when logging on to and leaving the system.
To make use of these files, they must be located in the home directory.
.login is
executed each time the login command is executed. This allows
you to run a number of initializing commands without remembering each
and every command. .login is processed as a command file by the login
shell immediately after successfully logging on to a system. After all
commands in the .login file are processed, the shell prompts the user for
more commands. The main difference in handling .login is that the login
shell itself actually executes the commands rather than creating another
shell to execute the commands.
You can issue commands such as set and setenv within .login and have
them affect the login shell. This is especially useful for setting up the
environment variables PATH, PROMPT, TERM, and _sh.
Here is an example .login file:
setenv PATH ..:/h0/cmds:/d0/cmds:/dd/cmds:/h0/doc/spex
setenv PROMPT “@what next: ”
setenv _sh 0
setenv TERM abm85h
querymail
date
dir
5-20
Chapter 5
The Shell
.logout is
executed to exit the login shell and leave the system. .logout is
processed before the login shell terminates. It only processes the .logout
file when given to the login shell; other subsequent shells simply terminate.
You could use this to execute any cleaning up procedures that should be
performed on a regular schedule. This might be anything from instigating a
backup procedure of some sort to printing a reminder of things to do. Here
is an example .logout file:
procs
wait
echo “all processes terminated”
* basic program to instigate backup if necessary *
disk_backup
echo “backup complete”
The Profile Command
The profile built-in shell command can be used to cause the current shell to
read its input from the named file and then return to its original input
source, which is usually the keyboard. To use the profile command, enter
profile and the name of a file:
profile setmyenviron
The specified file (in this case, setmyenviron) may contain any utility or
shell commands, including commands to set or unset environment
variables or to change directories. These changes will remain in effect after
the command has finished executing. This is in contrast to calling a normal
procedure file by name only. If you call a normal procedure file without
using the profile command, the changes would not affect the environment
of the calling shell.
Profile commands may be nested. That is, the file itself may contain a
profile command for another file. When the latter profile command is
completed, the first one will resume.
A particularly useful application for profile files is within a user’s .login
and .logout files. For example, if each user includes the following line in
the .login file, then system-wide commands (common environments, news
bulletins, etc.) can be included in the file /dd/SYS/login_sys:
profile /dd/SYS/login_sys
A similar technique can be used for .logout files.
5-21
Chapter 5
The Shell
Setting Up a Time-Sharing
System Startup Procedure
File
OS-9 systems used for timesharing usually have a procedure file that
brings the system up by means of one simple command or by using the
system startup file. This procedure file initiates the timesharing monitor for
each terminal. It begins by starting the system clock and initiating
concurrent execution of a number of processes that have their I/O
redirected to each timesharing terminal.
tsmon is a special program which monitors a terminal for activity.
Typically, tsmon is executed as part of the start-up procedure when the
system is first brought up and remains active until the system shuts down.
tsmon is normally used to monitor I/O devices capable of bi-directional
communication, such as CRT terminals. However, you can also use tsmon
to monitor a named pipe. If you do this, tsmon creates the named pipe and
then waits for data to be written to it by some other process.
You can run several tsmon processes concurrently, each one watching a
different group of devices. Because tsmon can monitor up to 28 device
name pathlists, you must run multiple tsmon processes when more than 28
devices are to be monitored. Multiple tsmon processes can be useful for
other reasons. For example, you may want to keep modems or terminals
suspected of hardware trouble isolated from other devices in the system.
Here is a sample procedure file for a timesharing system with terminals
named T1, T2, T3, and T71:
* system startup procedure file
echo Please Enter the Date and Time
setime
tsmon /t1 /t2 /t3&
tsmon /t71
* This terminal has been mis–behaving
Important: This login procedure will not work until a file called
/d0/SYS/Password with the appropriate entries has been created.
Important: For more information on tsmon, see the OS-9 Utilities section.
5-22
Chapter 5
The Shell
The Password File
A password file is found in the SYS directory. Each line in the password
file is a login entry for a user. The line has several fields separated by a
comma. The fields are:
Field:
Description:
User name
The user name may contain up to 32 characters including
spaces. If this field is empty, any name will match.
Password
The password may contain a maximum of 32 characters
including spaces. If this field is omitted, no password is
required for the specified user.
Group.user ID number
Both the group and the user portion of this number may be
from 0 to 65535. 0.0 is the super user. The file security system
uses this number as the system-wide user ID to identify all
processes initiated by the user. The system manager should
assign a unique ID to each potential user.
Initial process priority
This number may be from 1 to 65535. It indicates the priority of
the initial process.
Initial execution directory
This field is usually set to /d0/CMDS. Specifying a period (.) for
this field defaults the initial execution directory to the
CMDS file.
Initial data directory
This is usually the specific user directory. Specifying a period (.)
for this directory defaults to the current directory.
Initial Program
This field contains the name and parameters of the program to
be initially executed. This is usually shell.
Important: Fields left empty are indicated by two consecutive commas.
The following is a sample password file:
superuser,secret,0.0,255,.,.,shell –p=“@howdy”
suzy,morning,1.5,128,.,/d0/SUZY,shell
don,dragon,3.10,100,.,/d0/DON,Basic
For more information on password files, see the login utility in the OS-9
Utilities section.
Creating a Temporary
Procedure File
You can create temporary procedure files to perform tasks which require a
sequence of commands. The cfp utility creates a temporary procedure file
in the current data directory and calls the shell to execute it. After the task
is complete, cfp automatically deletes the procedure file, unless you use the
–nd option to specify that you do not want the procedure file deleted.
The following is the syntax for the cfp utility:
cfp [<opts>] [<path1>] {<path2>} [<opts>]
5-23
Chapter 5
The Shell
To use the cfp utility, type cfp, the name of the procedure file (<path1>),
and the file(s) (<path2>) used by the procedure file. The name of the
procedure file may be omitted if the s=<string> option is used.
All occurrences of an asterisk (*) in the procedure file are replaced by the
given pathlist(s) unless preceded by the tilde character (~). For example,
~* translates to *. The command procedure is not executed until all input
files have been read.
For example, if you have a procedure file in your current data directory
called copyit that consists of a single command line: copy *, you could put
all of your C programs from two directories, PROGMS and MISC.JUNK,
into your current data directory by typing:
$ cfp copyit ../progms/*.c ../misc.junk/*.c
If you do not have a procedure file, you can use the –s option. The –s
option causes the cfp utility to read the string surrounded by quotes instead
of a procedure file. For example:
$ cfp –s=“copy *” ../progms/*.c ../misc.junk/*.c
In this case, the cfp utility creates a temporary procedure file to copy every
file ending in .c in both PROGMS and MISC.JUNK to the current data
directory. The procedure file created by cfp is deleted when all the files
have been copied.
Using the –s option is convenient because you do not have to edit the
procedure file if you want to change the copy procedure. For example, if
you are copying large C programs, you may want to increase the memory
allocation to speed up the process. You could allocate the additional
memory on the cfp command line:
$ cfp “–s=copy –b100 *” ../progms/*.c ../misc.junk/*.c
You can use the –z and –z=<file> options to read the file names from either
standard input or a file. The –z option is used to read the file names from
standard input. For example, if you have a procedure file called count.em
that contains the command count –l * and you want to count the lines in
each program to see how large the programs are before you copy them, you
could type the following command line:
$ cfp –z count.em
5-24
Chapter 5
The Shell
The command line prompt does not appear because the cfp utility is
waiting for input. Type in the file names on separate command lines.
For example:
$ cfp –z count.em
../progms/*.c
../misc.junk/*.c
When you have finished typing the file names, press [Return] a second
time to get the shell prompt.
If you have a file containing a list of the files that you want copied, you
could type:
$ cfp –z=files “–s=copy *”
For more information, read the cfp utility discussion in the OS-9
Utilities section.
Multiple Shells
Like all OS-9 utilities, the shell can be simultaneously executed by more
than one process. This means that in addition to each user having their own
shell, an individual user can have multiple shells.
New shells can be created with procedure files. For example, to execute a
shell whose standard input is obtained from procfile, type:
$ shell <procfile
The new shell automatically accepts and executes the command lines from
the procedure file instead of a terminal keyboard. This technique is
sometimes called batch processing.
Shells can also fork new shells by simply processing the procedure file:
$ procfile
Basically, both of the above commands execute the commands found in the
procfile file.
By creating new shells, you can also move around the file system more
efficiently. To demonstrate this concept, the directory system in Figure 5.1
is used.
5-25
Chapter 5
The Shell
Figure 5.1
An Example Directory
Root directory of device d0:
DIRECTORY_2
DIRECTORY_1
DIR_4
file_5
file_1
DIR_5
DIR_6
DIR_9
file_6
file_2
DIRECTORY_3
file_3
file_4
DIR_7
DIR_8
file_7
file_8
If your current data directory is DIR_9 and you want to work on file_8,
you would normally change your current data directory to DIR_8 and
access the file by typing:
chd /d0/DIRECTORY_3/DIR_8
To return to DIR_9 you would execute a similar command. This is
somewhat inconvenient and involves always knowing the path to
each directory.
Instead, you can create a shell and change directories:
$ (chd /d0/DIRECTORY_3/DIR_8)
This makes your current directory DIR_8, but you can return to DIR_9 by
pressing the [Esc] key. By this method, you may use any directory as a
base directory and fork a shell out to any other directory.
You may continue to imbed as many shells as you like. Each time you
press the [Esc] key, you are taken to the previous shell. In this fashion
you could conceivably escape from DIRECTORY_2 to DIR_8 to DIR_6
to DIR_9.
Important: Because of the nature of jumping from shell to shell, it is easy
to get lost. pd displays a complete pathlist from the root directory to your
current data directory. Likewise, when running multiple shells, it is easy to
forget how many shells are running. If the _sh environment variable is set
to 1 and the shell prompt includes an “at” sign (@), the number of shells
replaces the @ in the prompt. For example, if three shells are run under
each other, the prompt might look like this:
3.what next:
You should experiment with the multiple shell aspects to fully use OS9.
5-26
Chapter 5
The Shell
The Procs Utility
Because of OS-9’s multi-tasking abilities, you often have more than one
process executing at a time. You may become confused as to which
processes are still running and which processes have run to completion.
The procs utility displays a list of processes running on the system that are
owned by the user running procs. This allows the user to keep track of their
current processes.
Processes can switch states rapidly, usually many times per second.
Therefore, the procs display is a snapshot taken at the instant the command
is executed and shows only those processes running at that exact moment.
procs displays ten pieces of information for each process:
Information:
Description:
Id
The process ID
PId
The parent process ID
Grp.usr
The group and user number of the owner of the process
Prior
The initial priority of the process
MemSiz
The amount of memory the process is using
Sig
The number of any pending signals for the process
S
The process status:
w
s
a
*
Waiting
Sleeping
Active
Currently executing
CPU Time
The amount of CPU time the process has used
Age
The elapsed time since the process started
Module & I/O
The process name and standard I/O paths:
<
>
>>
Standard input
Standard output
Standard error output
If several of the paths point to the same pathlist, the identifiers for the
paths are merged.
5-27
Chapter 5
The Shell
The following is an example of procs:
$ procs
Id PId Grp.Usr Prior MemSiz Sig S
2
1
0.0
128
0.25k
0 w
3
2
0.0
128
4.75k
0 w
4
3
0.0
5
4.00k
0 a
5
3
0.0
128
8.50k
0 *
6
0
0.0
128
4.00k
0 s
7
0
0.0
128
4.00k
0 s
CPU Time
0.01
4.11
12:42.06
0.08
0.02
0.01
Age
???
01:13
00:14
00:00
01:12
01:12
Module & I/O
sysgo <>>>term
shell <>>>term
xhog <>>>term
procs <>>term
tsmon <>>>t1
tsmon <>>>t2
procs –a displays nine pieces of information: the process ID, the parent
process ID, the process name and standard I/O paths, and six new pieces
of information:
Information:
Description:
Aging
The age of the process based on the initial priority and how
long it has waited for processing
F$calls
The number of service request calls made
I$calls
The number of I/O requests made
Last
The last system call made
Read
The number of bytes read
Written
The number of bytes written
The following is an example of procs –a:
$ procs –a
Id PId
2
1
3
2
4
3
5
3
6
0
7
0
Aging
129
132
11
128
130
129
F$calls I$calls Last
5
1 Wait
116
127 Wait
1
0 TLink
7
4 GPrDsc
2
7 ReadLn
2
7 ReadLn
Read Written Module & I/O
0
0 sysgo <>>>term
282
129 shell <>>>term
0
0 xhog <>>>term
0
0 procs <>>>term
0
0 tsmon <>>>t1
0
0 tsmon <>>>t2
The –b option displays all information from procs and procs –a. The –e
option displays information for all processes in the system.
For more information on procs, see the OS-9 Utilities section.
5-28
Chapter 5
The Shell
Waiting For The Background Procedures
If you use OS-9’s multi-tasking ability, there will be times when a number
of procedures are running in the background. If it is important to wait for
these tasks to finish before running a new procedure, use the w or wait
built-in shell command.
Command:
Description:
w
waits for a child process to be executed to finish.
wait
waits for all child processes running in the background to finish.
Important: A child process is a process that the current shell or a child of
the shell is executing.
For example, if a document needs to be created from three different files
and each file has to be sorted by different fields, the following procedure
files can be used to create the same result:
*start of first procedure file*
qsort –f=1 file1&
qsort –f=2 file2&
qsort –f=3 file3&
wait
merge file1 file2 file3 >report
*start of second procedure file*
qsort –f=1 file1
qsort –f=2 file2
qsort –f=3 file3
merge file1 file2 file3 >report
The first procedure file is much quicker because each of the files are
processed concurrently.
Stopping Procedures
You can use two methods to stop a procedure. The first method involves
the [Ctrl-C] or [Ctrl-E] signals. The second method uses the kill utility.
5-29
Chapter 5
The Shell
The shell handles these keyboard generated signals in the following
manner. If either of these signals are received while the shell is waiting for
keyboard input, the following messages are issued:
$ Read I/O error – Error #000:002
$ Read I/O error – Error #000:003
[ ^E typed ]
[ ^C typed ]
These are the standard messages given whenever an I/O error occurs when
reading command input data. These keyboard signals are useful to get the
shell’s attention while it is waiting for a process to terminate.
If the shell is waiting for keyboard input and [Ctrl-E] is typed, the shell
forwards the keyboard abort signal to the current process and immediately
prompts for command input:
$ sleep 500
[ ^E is typed]
abort
$
The abort message is typed by the shell to acknowledge receipt of
the interrupt.
If the shell is waiting for keyboard input and [Ctrl-C] is typed, the shell
stops waiting for the current process to terminate and prompts for
command input. This action is similar to using an ampersand on the
command line. For example:
$ sleep 500
[ ^C is typed]
+8
$
It is important to remember that using [Ctrl-C] in this fashion is possible
only if the command in question has not yet performed I/O to the terminal.
The signal is only received by the last process to perform I/O. If the shell
has not yet finished setting up the command for execution, the signal
causes the shell to abort the operation and return the prompt.
5-30
Command:
Description:
[Ctrl-C]
stops the shell from waiting for the process to terminate and
returns a prompt for a command.
[Ctrl-E]
forwards the keyboard abort signal to the process and
immediately prompts for input.
Chapter 5
The Shell
You can also use the kill utility to terminate background processes by
specifying the process number of the process to kill. Obtain the process
number of the process to kill from procs. kill is used in the
following manner:
kill <proc num>
For example, if you want to terminate a process called xhog, you would
first execute a procs:
$ procs
Id PId Grp.Usr Prior MemSiz Sig S
3
2
7.03
128
4.75k
0 w
4
3
7.03
5
4.00k
0 a
5
3
7.03
128
8.50k
0 *
CPU Time
Age Module & I/O
4.11 01:13 shell <>>>term
12:42.06 00:14 xhog <>>>term
0.08 00:00 procs <>>term
From procs, you can see that the process number for xhog is 4. You
then type:
$ kill 4
When you execute procs again, xhog is no longer shown.
To use the kill utility:
1.
Get the process number using the procs utility.
2.
Type kill <proc num>
Either of these methods terminate any process running in the background
with one exception: if a process is waiting for I/O, it may not die until the
current I/O operation is complete. Therefore, if you terminate a process
and procs shows it still exists, it is probably waiting for the output buffer to
be flushed before it can die.
Important: You must either own the procedure or be the super user to kill
a specified process.
Error Reporting
Many programs, including the shell, use OS-9’s standard error reporting
function. This displays a brief description of the error and an error number
on the standard error path. An appendix listing all of the standard error
codes is included with this manual.
If a longer description of errors is desired, set the –e and the –v shell
options. This prints error messages from /dd/SYS/errmsg on
standard output.
5-31
Chapter 5
The Shell
Running Compiled
Intermediate Code Programs
Before the shell executes a program, it checks the program module’s
language type. If its type is not 68000 machine language, the shell calls the
appropriate run-time system for that module. Versions of the shell supplied
for various systems are capable of calling different run-time systems
For example, if you wanted to run a BASIC I-code module called
adventure, you could type either of the two commands given below; they
accomplish exactly the same thing:
$ BASIC adventure
$ adventure
5-32
Chapter
6
Making Files
The Make Utility
Many types of files are dependent on various other files in their creation. If
the files that make up the final product are updated, the final product
becomes out-of-date. The make utility is designed to automate the
maintenance and re-creation of files that change over a period of time.
make maintains the files by using a special type of procedure file known as
a makefile. The makefile describes the relationship between the final
product and the files that make up the final product. For the purpose of
this discussion, the final product is referred to as the target file and the
files that make up the target file are referred to as dependents.
A makefile contains three types of entries:
dependency entries
command entries
comment entries
A dependency entry specifies the relationship of a target file and the
dependents used to build the target file. The entry has the following syntax:
<target>:[[<dependent>],<dependent>]
The list of files following the target file is known as the dependency list.
Any number of dependents can be listed in the dependency list. Any
number of dependency entries can be listed in a makefile. A dependent in
one entry may also be a target file in another entry. There is, however, only
one main target file in each makefile. The main target file is usually
specified in the first dependency entry in the makefile.
A command entry specifies the particular command that must be executed
to update, if necessary, a particular target file. make updates a target file
only if its dependents are newer than itself. If no instructions for update are
provided, make attempts to create a command entry to perform
the operation.
6-1
Chapter 6
Making Files
recognizes a command entry by a line beginning with one or more
spaces or tabs. Any legal OS-9 command line is acceptable. More than one
command entry can be given for any dependency entry. Each command
entry line is assumed to be complete unless it is continued from the
previous command with a backslash (\). Comments should not be
interspersed with commands. For example:
make
<target>:[[<file>],<file>]
<OS–9 command line>
<OS–9 command line>\
<continued command line>
A comment entry consists of any line beginning with an asterisk (*). All
characters following a pound sign (#) are also ignored as comments unless
a digit immediately follows the pound sign. In this case, the pound sign is
considered part of the command entry. All blank lines are ignored.
For example:
<target>:[[<file>],<file>]
* the following command will be executed if the
dependent
* files are newer than the target file
<OS–9 command line> # this is also a comment
Any entry may be continued on the following line by placing a space
followed by a backslash (\) at the end of the line to be continued. All
entries longer than 256 characters must be continued on another line. All
continuation lines must adhere to the rules for its type of entry. For
example, if a command line is continued on a second line, the second line
must begin with a space or a tab:
FILE: aaa.r bbb.r ccc.r ddd.r eee.r \
fff.r ggg.r
touch aaa.r bbb.r ccc.r \
ddd.r eee.r fff.r ggg.r
Important: Spaces and tabs preceding non-command, continuation lines
are ignored.
To run the make utility, type make, followed by the name of the file(s) to be
created and any options desired.
make
6-2
processes the makefile three times.
Chapter 6
Making Files
During the first pass, make examines the makefile and sets up a table of
dependencies. This table of dependencies stores the target file and the
dependency files exactly as they are listed in the makefile. When make
encounters a name on the left side of a colon, it first checks to see if it has
encountered the name before. If it has, make connects the lists
and continues.
After reading the makefile, make determines the target file on the list. It
then makes a second pass through the dependency table. During this pass,
make tries to resolve any existing implicit dependencies. Implicit
dependencies are discussed below.
make does a third pass through the list to get and compare the file dates.
When make finds a file in a dependency list that is newer than its target
file, it executes the specified command(s). If no command entry is
specified, make generates a command based on the assumptions given in
the next section. Because OS-9 only stores the time down to the closest
minute, make re-makes a file if its date matches one of its dependents.
When a command is executed, it is echoed to standard output. make
normally stops if an error code is returned when a command line
is executed.
To understand the relationship of the target file, its dependents, and the
commands necessary to update the target file, the structure of the makefile
must be carefully examined.
Implicit Definitions
Any time a command line is generated, make assumes that the target file is
a program to compile. Therefore if the target file is not a program to
compile, any necessary command entries must be specified for each
dependency list. make uses the following definitions and rules when forced
to create a command line.
Comand entry type:
object files
relocatable files
source files
default compiler
default assembler
default linker
default directory for all files
Definition:
Files with no suffixes. An object file is made from a relocatable
file and is linked when it needs to be made.
Files appended by the suffix: .r. Relocatable files are made
from source files and are assembled or compiled if they need
to be made.
Files having one of the following suffixes: .a, .c, .f, or .p.
cc
r68
cc
current data directory (.)
Important: The default linker should only be used with programs
using Cstart.
6-3
Chapter 6
Making Files
Macro Recognition
In addition to recognizing compilation rules and definitions, make
recognizes certain macros. make recognizes a macro by the dollar sign ($)
character in front of the name. If a macro name is longer than a single
character, the entire name must be surrounded by parentheses. For
example, $R refers to the macro R, $(PFLAGS) refers to the macro
PFLAGS, $(B) and $B refer to the macro B, and $BR is interpreted as the
value for the macro B followed by the character R.
Macros may be placed in the makefile for convenience or on the command
line for flexibility. Macros are allowed in the form of <macro name> =
<expansion>. The expansion is substituted for the macro name whenever
the macro name appears.
If you define a macro in your makefile and then redefine it on the
command line, the command line definition overrides the definition in the
makefile. This feature is useful for compiling with special options.
To increase make’s flexibility, special macros can be defined in the
makefile. make uses these macros when assumptions must be made in
generating command lines or when searching for unspecified files. For
example, if no source file is specified for program.r, make searches either
the directory specified by SDIR or the current data directory for program.a
(or .c, .p, .f).
make
recognizes the following special macros:
Macro:
ODIR=<path>
Definition:
make searches the directory specified by <path> for all files
with no suffix or relative pathlist. If ODIR is not defined in the
makefile, make searches the current directory by default.
SDIR=<path>
make searches the directory specified by <path> for all source
files not specified by a full pathlist. If SDIR is not defined in the
makefile, make searches the current directory by default.
RDIR=<path>
make searches the directory specified by <path> for all
relocatable files not specified by a full pathlist. If RDIR is not
defined, make searches the current directory by default.
CFLAGS=<opts>
These compiler options are used in any necessary compiler
command lines.
These assembler options are used in any necessary assembler
command lines.
These linker options are used in any necessary linker
command lines.
make uses this compiler when generating command lines. The
default is cc.
make uses this assembler when generating command lines.
The default is r68.
make uses this linker when generating command lines. The
default is cc.
RFLAGS=<opts>
LFLAGS=<opts>
CC=<comp>
RC=<asm>
LC=<link>
6-4
Chapter 6
Making Files
Some reserved macros are expanded when a command line associated with
a particular file dependency is forked. These macros may only be used on a
command line. When you need to be explicit about a command line but
have a target program with several dependencies, these macros can be
useful. In practice, they are wildcards with the following meanings:
Macro:
Definition:
$@
Expands to the file name made by the command.
$*
Expands to the prefix of the file to be made.
$?
Expands to the list of files that were found to be newer than the
target on a given dependency line.
Make Generated Command Lines
make
can generate three types of command lines:
compiler command lines
assembler command lines
linker command lines
Compiler command lines are generated if a source file with a suffix of .c,
.p or .f needs to be recompiled. The compiler command line generated by
make has the following syntax:
$(CC) $(CFLAGS) –r=$(RDIR) $(SDIR)/<file>[.c, .f, or .p]
Assembler command lines are generated when an assembly language
source file needs to be re-assembled. The assembler command line
generated by make has the following syntax:
$(RC) $(RFLAGS) $(SDIR)/<file>.a –o=$(RDIR)/<file>.r
Linker command lines are generated if an object file needs to be relinked
in order to re-make the program module. The linker command line
generated by make has the following syntax:
$(LC) $(LFLAGS) $(RELS)/<file>.r –f=$(ODIR)/<file>
6-5
Chapter 6
Making Files
ATTENTION: When make is generating a command line for
the linker, it looks at its list and uses the first relocatable file
that it finds, but only the first one. For example:
prog: x.r y.r z.r
generates
cc x.r
not
cc x.r y.r z.r or cc prog.r
Make Options
Several options allow make even greater versatility for maintaining
files/modules. These options may be included on the command line when
you run make or they may be included in the makefile for convenience.
When a command is executed, it is echoed to standard output, unless the
–s, or silent, option is used or the command line starts with an “at” sign
(@). When the –n option is used, the command is echoed to standard
output but not actually executed. This is useful when building your
original makefile.
make normally stops if an error code is returned when a command line is
executed. Errors are ignored if the –i option is used or if a command line
begins with a hyphen.
Sometimes, it is helpful to see the file dependencies and the dates
associated with each of the files in the list. The –d option turns on the
make debugger and gives a complete listing of the macro definitions, a
listing of the files as it checks the dependency list and all the file
modification dates. If it cannot find a file to examine its date, it assumes a
date of 1/00/00 00:00, indicating the necessity to update the file.
If you want to update the date on a file, but do not want to remake it, you
can use the –t option. make merely opens the file for update and then closes
it, thus making the date current.
6-6
Chapter 6
Making Files
If you are quite explicit about your makefile dependencies and do not want
make to assume anything, you may use the –b option to turn off the built-in
rules governing implicit file dependencies.
Option
–?
–b
–bo
–d
–dd
–f–
–f=<path>
–i
–n
–s
–t
–u
–x
–z
–z=<path>
Description:
Displays the options, function, and command syntax of make.
Does not use built in rules.
Does not use built in rules for object files.
Prints the dates of the files in makefile (Debug mode).
Double debug mode. Very verbose.
Reads the makefile from standard input.
Specifies <path> as the makefile. If <path> is specified as a hyphen (),
make commands are read from standard input.
Ignores errors.
Does not execute commands, but does display them.
Silent Mode: executes commands without echo.
Updates the dates without executing commands.
Does the make regardless of the dates on files.
Uses the cross-compiler/assembler.
Reads a list of make targets from standard input.
Reads a list of make targets from <path>.
Examples of the Make Utility
The rest of this chapter is designed to show you different ways to maintain
programs with make. These examples are not meant to be totally inclusive
of the ways in which make can be used.
Example One:
Updating a Document
The following example shows how make can be used to maintain current
documentation that is made up of different sections:
utils.man: chap1 chap2 apdx
del utils.man.old;rename utils.man utils.man.old
merge chap1 chap2 apdx >utils.man
chap1: c1a c1b c1c c1d
del chap1.old rename chap1 chap1.old
list c1a c1b c1c c1d ! lxfilter >chap1
chap2: c2a c2b c2c
del chap2.old rename chap2 chap2.old
list c1a c1b c1c c1d ! lxfilter >chap1
apdx: functions header footer
del apdx.old rename apdx apdx.old
qsort functions >/pipe/func
list header /pipe/func footer ! lxfilter >apdx
6-7
Chapter 6
Making Files
The above makefile creates the file utils.man. utils.man is created from
three files: chap1, chap2, and apdx. Each of these files is in turn created
from the files listed in their dependency lists.
If chap1, chap2, and/or apdx have dependencies with a more recent date,
the commands following their respective dependency entries are executed.
If chap1, chap2, and/or apdx are re-created, the commands following the
initial dependency entry are executed.
Example Two:
Compiling C Programs
In this example, make is used to compile high level language modules.
Each command and dependency is specified.
program: xxx.r yyy.r
cc xxx.r yyy.r –xf=program
xxx.r: xxx.c /d0/defs/oskdefs.h
cc xxx.c –r
yyy.r: yyy.c /d0/defs/oskdefs.h
cc yyy.c –r
This makefile specifies that program is made up of two .r files: xxx.r and
yyy.r. These files are dependent upon xxx.c and yyy.c respectively and
both are dependent on the oskdefs.h file.
If either xxx.c or /d0/defs/oskdefs.h has a date more recent than xxx.r, the
command cc xxx.c r is executed. If yyy.c or /d0/defs/oskdefs.h is newer
than yyy.r, then cc yyy.c –r is executed. If either of the former commands
are executed, the command cc xxx.r yyy.r xf=program is also executed.
In this example, make specifies each command it must execute. Often this
is unnecessary as make uses specific definitions, macros, and built-in
assumptions to facilitate program compilation to generate its
own commands.
Refining the C Compiler Example
Knowing how make works and understanding the implicit rules can
simplify coding immensely:
program: xxx.r yyy.r
cc xxx.r yyy.r –xf=program
xxx.r yyy.r: /d0/defs/oskdefs
6-8
Chapter 6
Making Files
The above makefile now exploits make’s awareness of file dependencies.
No mention is made of the C language files; therefore, make looks in the
directory specified by the macro definition SDIR = <path> and adjusts the
dependency list accordingly. In this case, make looks in the current
directory by default. make also generates a command line to compile xxx.r
and yyy.r if one or both needs to be updated.
Further simplification would be possible, if program was made up of only
one source file:
program:
make
assumes the following from this simple command:
program has no suffix. It is an object file and therefore needs to rely on
relocatable files to be made.
No dependency list is given; therefore, make creates an entry in the
table for program.r.
After creating an entry for program.r, make creates the entry for a
source file connected to the relocatable file.
Assuming it found program.a, it checks the dates on the various files and
generates one or both of the following commands if required:
r68 program.a –o=program.r
cc program.r –f=program
Example Three:
A Makefile that Uses Macros
Using these inherent features of make can be especially helpful if you have
several object files you want make to check:
* beginning
ODIR = /d0/cmds
RDIR = rels
UTILS = attr copy load dir backup dsave
SDIR = ../utils/sources
utils.files: $(UTILS)
touch utils.files
* end
6-9
Chapter 6
Making Files
looks in rels for attr.r, copy.r, etc. and looks in ../utils/sources for
attr.c, copy.c, etc. make then generates the proper commands to compile
and/or link any of the programs that need to be made. If one of the files in
UTILS is made, the command touch utils.files is forked to maintain a
current overall date.
make
Example Four:
Putting It All Together
The following example is a makefile to create make:
* beginning
ODIR = /h0/cmds
RDIR = rels
CFILES = domake.c doname.c dodate.c domac.c
RFILES = domake.r doname.r dodate.r
PFLAGS = –p64 –nh1
R2 = ../test/domac.r
RFLAGS = –q
make: $(RFILES) $(R2) getfd.r
linker
$(RFILES): defs.h
$(R2): defs.h
cc $*.c –r=../test
print.file: $(CFILES)
pr $? $(PFLAGS) >–/p1
touch print.file
*end
The makefile in this example looks for the .r files listed in RFILES in the
directory specified by RDIR: rels. The only exception is ../test/domac.r,
which has a complete pathlist specified.
Even though getfd.r does not have any explicit dependents, its dependency
on getfd.a is still checked. The source files are all found in the
current directory.
Notice that this makefile can also be used to make listings. By typing make
print.file on the command line, make expands the macro $? to include
all of the files updated since the last time print.file was updated. If you
keep a dummy file called print.file in your directory, make will only print
out the newly made files. If no print.file exists, all files are printed.
6-10
Chapter
7
Making Backups
Incremental Backups
Whether it’s caused by system failure or accidental erasure, loss of stored
data is a programmer’s nightmare. Consequently, backups of files,
programs, and disks are a normal part of existence. Backing up a hard disk
is usually slow and tedious because the entire system is backed-up.
You can use incremental backups instead of full system backups.
Incremental backups save only the files that have changed since the last
backup. You must still perform a full system backup, but by using
incremental backups you can perform them less often.
OS-9 provides two utilities that may be used with either tape or disk media
to facilitate the use of incremental backups:
fsave
frestore
Certain terms must be defined to discuss incremental backups. A full
system backup is referred to as a level 0 backup. Consequent incremental
backups are referenced by different level numbers. For example, a level 5
backup includes all files changed since the most recent backup with a level
less than 5. While this sounds complex, it is actually quite easy to use and
extremely helpful.
Two other terms need to be defined. A source device is the directory
structure or file you are backing up. A target device is the tape or disk you
are using to hold your backup information.
Making an Incremental
Backup: The fsave Utility
The fsave utility performs an incremental backup of a directory structure to
tape(s) or disk(s). The syntax for the fsave utility is:
fsave [<opts>] [<path>] [<opts>]
Typing fsave by itself on the command line makes a level 0 backup of the
current directory onto a target device with the name /mt0.
Important: /mt0 is the default OS-9 device name for tape device just as
/h0 is the default OS9 device name for a hard disk.
7-1
Chapter 7
Making Backups
/h0/sys/backup_date is a backup log file maintained by fsave. Each
time you execute an fsave, the backup log is updated. The backup log
keeps track of the name of the backup, the date it was created, and more
importantly, the level of the backup. When you execute fsave, this backup
log is examined to find the specified level of the current backup and the
previous backups with the same name. Once the backup is finished, a new
entry is made in the file indicating the date, name, level, etc. of the
current backup.
During the discussion of the actual fsave procedure, references to fsave’s
options are made. The options are:
Option:
Description:
–?
Displays the use of fsave.
–b[=]<int>
Allocates <int>k buffer size to read files from the source disk.
–d[=]<dev>
Specifies the target device to store the backup. The default is /mt0.
–e
Does not echo file pathlists as they are saved to the target device.
–f[=]<path>
Saves to the file specified by <path>.
–g[=]<int>
Specifies a backup of files owned by group number <int> only.
–j[=]<number>
Specifies the minimum system memory request.
–l[=]<int>
Specifies the level of the backup to be performed.
–m[=]<path>
Specifies the pathlist of the date backup log file to use. The default is
/h0/sys/backup_dates.
–p
Turns off the mount volume prompt for the first volume.
–s
Displays the pathlists of all files needing to be saved and the size of
the entire backup without actually executing the backup procedure.
–t[=]<dirpath>
Specifies the alternate location for the temporary index file.
–u[=]<int>
Specifies a backup of files owned by user number <int> only.
–v
Does not verify the disk volume when mounted.
–x[=]<int>
Pre-extends the temporary file. <int> is given in kilobytes.
The fsave Procedure
Upon starting an fsave procedure, fsave prompts you to mount the first
volume to use. Volume in this case refers to the disk or tape used to store
the backup:
fsave: please mount volume.
(press return when mounted).
7-2
Chapter 7
Making Backups
If a disk is used as the backup medium, fsave verifies the disk and displays
the following information:
verifying disk
Bytes held on this disk: 546816
Total data bytes left:
62431
Number of Disks needed: 1
Important: The numbers above are used only as an example.
If a tape is used as the backup medium, no preliminary information is
displayed and the backup begins at this point.
As each file is saved to the backup device, its pathlist is echoed to the
terminal. If this is a long backup, you may want to use the –e option to turn
off the pathlist echoing.
If fsave receives an error when trying to backup a file, it displays the
following message and continues the fsave operation:
error saving <file>, error – <error number>, its
incomplete
Important: The most common error found when executing fsave is a
record lock error. Record lock errors are caused when another user has the
file in question open.
Important: To prevent record lock errors, perform fsave operations only
when no one else is using the system.
If the backup requires more than one volume, fsave prompts you to mount
the next volume before continuing.
At the end of the backup, fsave prints the following information:
fsave: Saving the index structure
Logical backup name:
Date of backup:
Backup made by:
Data bytes written:
Number of files:
Number of volumes:
Index is on volume:
The index to the backup is saved on the last volume used.
fsave performs recursive backups for each pathlist if one or more
directories are specified on the command line. You can specify a maximum
of 32 directories on the command line.
7-3
Chapter 7
Making Backups
The following options are provided:
Option:
Description:
–d
Specifies an alternate target device. The default device is /mt0.
–m
Specifies an alternative backup log file. The default pathlist is
/h0/sys/backup_dates.
–l
Specifies different levels of backups. A higher level backup only saves
files that have changed since the most recent backup with the next
lower number. For example, a level 1 backup saves all files changed
since the last level 0 backup.
ATTENTION: When using disks for backup purposes, fsave
does not use an RBF file structure to save the files on the target
disk. It creates its own file structure. This makes the backup
disk unusable for any purpose other than fsave and frestore
without reformatting the disk. Any data stored on the disk
before using fsave is destroyed by the backup.
Example fsave Commands
Typing fsave by itself on a command line specifies a level 0 backup of the
current directory. This assumes the /mt0 device is used and that
/h0/SYS/backup_dates is used as the backup log file for this backup.
The following command specifies a level 2 backup of the current directory
using the /mt1 device. /h0/misc/my_dates is used as the backup log file:
$ fsave –l=2 –d=/mt1 –m=/h0/misc/my_dates
The following command specifies a level 0 backup of all files owned by
user 0.0 in the CMDS directory, if CMDS is in your current directory:
$ fsave –pb=32 –g=0 –u=0 –d=/d2 CMDS
This backup uses /d2 as the target device and /h0/sys/backup_dates as the
backup log file. The mount volume prompt is not generated for the first
volume. A 32K buffer is used to read the files from the CMDS directory.
Restoring Incremental
Backups: The frestore Utility
The frestore utility restores a directory structure from multiple volumes of
tape or disk media. The syntax for the frestore utility is:
frestore [<opts>] [<path>] [<opts>]
7-4
Chapter 7
Making Backups
Typing frestore by itself on the command line attempts to restore a
directory structure from the /mt0 device to the current directory.
Specifying the pathlist of a directory on the command line causes the files
to be restored in that directory. fsave creates the directory structure and an
index of the directory structure.
If more than one tape/disk is involved in the fsave backup, each tape/disk
is considered to be a different volume. The volume count begins at one (1).
When you begin an frestore operation, you must use the last volume of the
backup first because it contains the index of the entire backup.
frestore first attempts to locate and read the index of the directory structure
of the source device. frestore then begins an interactive session with you to
determine which files and directories in the backup should be restored to
the current directory.
During the discussion of the actual frestore procedure, references are made
to frestore’s options. The options are:
Option:
Description:
–?
Displays the use of frestore.
–a
Forces access permission for overwriting an existing file. You must
be the owner of the file or a super user to use this option.
–b[=]<int>
Specifies the buffer size used to restore the files.
–c
Checks the validity of files without using the interactive shell.
–d[=]<path>
Specifies the source device. The default is /mt0.
–e
Displays the pathlists of all files in the index, as the index is read
from the source device.
–f[=]<path>
Restores from a file.
–i
Displays the backup name, creation date, group.user number of the
owner of the backup, volume number of the disk or tape, and
whether the index is on the volume. This option will not cause any
files to be restored. The information is displayed, and frestore
is terminated.
–j[=]<int>
Sets the minimum system memory request.
–p
Suppresses the prompt for the first volume.
–q
Overwrites an already existing file when used with the –s option.
–s
Forces frestore to restore all files from the source device without an
interactive shell.
–t[=]<dirpath>
Specifies an alternate location for the temporary index file.
–v
Displays the same information as the –i option, but does not check
for the index. This option will not cause any files to be restored. The
information is displayed and frestore is terminated.
–x[=]<int>
Pre-extends the temporary file. <int> is given in kilobytes.
7-5
Chapter 7
Making Backups
The Interactive Restore Process
Once you call frestore, the following prompt is displayed:
frestore> mount the last volume
(press return when ready)
When you are ready, frestore attempts to read in the index and create the
directory structure of the backup. It then displays the prompt:
frestore>
This prompt tells you that you are in the interactive shell. If the index is
not on the mounted volume, frestore displays an error message and again
prompts you to mount the last volume.
Once in the interactive shell, the frestore commands and options are
displayed when you type a return at the prompt:
frestore> commands:
add [<path>] [–g=<#> –u=<#> –r –a] –– marks files for restoration
del [<path>] [–g=<#> –u=<#> –r –a] –– unmarks files for restoration
dir [<dir names>] [–e] –– displays a directory or directories
chd <path> –– changes directories within the restore file structure
pwd –– gives the pathlist to current dir in the restore file structure
cht <path> –– changes directories on target system
rest [<path>] [–f –q] –– restores marked files in and below the current dir
check [–f] –– checks validity if marked files in and below the current dir
dump [<file>] –– dumps the contents of a file to stdout
$
–– forks a shell
quit –– quit frestore program
options:
–g=<group#> –– only mark files with ’group#’
–u=<user#> –– only mark files with ’user#’
–r –– mark directories recursively
–e –– display directory with extended format
–f –– force restoration of already restored files
–q –– overwrite already existing files without question
–a –– force marking or unmarking of an already restored file or dir
* –– matches any string of characters on ’add’ or ’del’ only
? –– matches any single character on ’add’ or ’del’ only
frestore>
The index from the source device sets up a restore file structure that
parallels the usual OS9 file/directory structure.
7-6
Chapter 7
Making Backups
Use the dir and chd shell commands to display the restore file structure.
For example:
frestore>dir
DIR1
Directory of .
file1
file2
file3
All files to be backed up on to the source device appear in the restore file
structure regardless of what volume they appear in. Information
concerning the file structure is available using the –e option with the
dir command:
frestore>dir –e
Directory of .
Owner
––––––
1.23
1.23
1.23
1.23
Last modified Attributes Volume Block Offset
–––––––––––––– ––––––––––– –––––– ––––– ––––––
89/08/22 16/14 ––––r–wr
1
0
0
89/08/25 11/00 ––––r–wr
1
2
0
89/08/21 11/12 ––––r–wr
1
4
0
89/08/24 10/57 d–ewrewr
0
5
0
Size
–––––
CF12
A356
45F0
120
Name
––––––
file1
file2
file3
DIR1
The interactive shell allows you to mark the files you want restored with
the add command. You can mark groups of files using the options of the
add command:
Option:
Description:
–g
Marks files by group number.
–u
Marks files by user number. You can mark all directories within a
specified directory using the –r option.
Files may be marked one at a time by specifying relative or complete
pathlists within the restore file structure.
Entire directories may be marked by specifying a pathlist of a directory.
Marking files does not restore them. It merely marks them as to be
restored. You can see this when you use the dir command. Each file added
to the “to be restored” list is marked by a plus sign (+) by its filename.
7-7
Chapter 7
Making Backups
For example, the following directory has file1 and file2 marked for
restoration, but file3 is not marked. The directories DIR1 and DIR2 also
have marked files:
frestore>add file1 file2 dir1/file5 dir1/file6 dir2/file7
frestore>dir
+DIR1
file3
Directory of .
+DIR2
+file1
+file2
frestore>dir dir1
Directory of DIR1
file4
+file5
+file6
frestore>dir dir2
Directory of DIR2
+file7
file8
The del command can unmark files. Entire directories may be unmarked
by specifying the directory’s name on the command line. If the –r option is
also used, all files and directories included in the specified directory are
unmarked. For example:
frestore>del –r dir2
frestore>dir
+DIR1
file3
Directory of . 10:42:32
DIR2
+file1
+file2
frestore>dir dir2
Directory of DIR2
file7
file8
Once files are marked, the rest command may be used to restore the target
device’s current directory.
Files existing on the target system with the same name are overwritten
without prompting if del –q is used. Otherwise, frestore displays the
following prompt:
frestore> file1 already exists
write over it or skip it (w/s)
The cht command allows you to change directories on the target device.
This allows you to selectively restore files to specific directories.
7-8
Chapter 7
Making Backups
After restoring files, you may continue marking and unmarking files. Files
previously restored have a hyphen (–) displayed next to their names in the
restore file structure:
frestore>dir
Directory of . 10:42:32
DIR2
–file1
–DIR1
file3
–file2
frestore>dir dir1
file4
–file5
Directory of DIR1
–file6
An asterisk (*) preceding the name of a file in a dir listing indicates an
error occurred while backing up this file. This file is incomplete and should
not be restored.
There are two methods of restoring files more than once. The first method
uses the –a option with the add command. This forces the file(s) previously
marked as restored to be marked as “to be restored.” The second method
requires the –f option to be used with the rest command. This forces any
file previously marked as restored to be restored in the current directory.
The –s option forces frestore to restore all files/directories of the backup
from the source device without the interactive shell.
Using the –d option allows you to specify a source device other than /mt0.
For example, to restore all files/directories found on the /mt1 source device
to the directory BACKUP without using the interactive shell, type:
$ frestore –d=/mt1 –s BACKUP
The –v option causes frestore to identify the name and volume number of
the backup mounted on the source device. The date the backup was made
and the group.user number of the person who made the backup is also
displayed. This option does not restore any files. For example:
$ frestore –v
Backup:
Made:
By:
Volume:
DOCUMENTATION
1/16/91 10:10
0.0
0
7-9
Chapter 7
Making Backups
The –i option displays the above information and also indicates whether
the index is on the volume. Both the –v and –i options terminate frestore
after displaying the appropriate information. These options are useful when
trying to locate the last volume of the backup if any mix-up has occurred.
The –e option echoes each file pathlist as the index is read off the
source device.
Example Command Lines
To restore files/directories from the source device /mt0 to the current
directory by way of an interactive shell, type:
$ frestore
The following example restores files/directories from the source device /d0
to the current directory using a 32K buffer to write the restored files. As
each file is read from the index, the file’s pathlist is echoed to the terminal.
$ frestore –eb=32 –d=/d0
Incremental Backup
Strategies
7-10
Many different strategies are available for those concerned with regularly
scheduled backups. Most strategies are well documented in computer
books and magazines. The following two strategies are offered as
examples of methods that can be used.
Chapter 7
Making Backups
The Small Daily Backup Strategy
This strategy requires making a level 0 backup once every four weeks.
Level 1, level 2, level 3, and level 4 backups are made on the weeks
following the level 0 backup. Between each major backup, four daily
backups would be made: level 5, 6, 7, and 8. A recommended daily
schedule is graphically presented below (Figure 7.1).
Figure 7.1
Small Daily Backup Strategy
Level
⇒
8
⇒
⇒
7
⇒
⇒
6
⇒
⇒
⇒
⇒
5
⇒
⇒
⇒
⇒
⇒
⇒
⇒
⇒
4
⇒
3
⇒
2
⇒
1
0
*
S
*
M
T
W
T
F
M
T
W
T
F
M
T
W
T
F
M
T
W
T
F S
Day of Backup
This strategy is ideal for small microcomputer systems backed up by
floppy disks. Mounting disks is much easier and faster than tapes. Each
daily backup can usually be kept on one disk to make warehousing simple.
This strategy is perfect for small timely backups with little redundancy in
the backups.
One major disadvantage of this scheme is the restore time necessary in
case of a major system failure such as a hard disk being formatted, erased,
or corrupted. Because of the lack of redundancy, more frestore operations
are necessary to re-create the systems file structure. On large systems with
tape backups, this is a major consideration.
7-11
Chapter 7
Making Backups
The Single Tape Backup Strategy
While most strategies rely on scheduled backup level changes, the single
tape backup strategy depends on the size of the backup. The idea behind
this strategy is to increase the level of the backup only when the backup
cannot fit on a single tape. The only scheduled level backup is the level 0
backup. The level 0 backup occurs only when a higher level backup would
not fit on a single tape or once a month, whichever occurs first. An
example month’s schedule is graphically presented below (Figure 7.2).
Figure 7.2
Single Tape Backup Strategy
Level
⇒
⇒
⇒
⇒
⇒
3
⇒
⇒
⇒
⇒
⇒
⇒
⇒
⇒
2
⇒
⇒
⇒
⇒
⇒
1
⇒
⇒
0
*
S
*
M
T
W
T
F
M
T
W
T
F
M
T
Day of Backup
7-12
W
T
F
M
T
W
T
F S
Chapter 7
Making Backups
Single Tape Backup Strategy
This strategy is designed for tape backups of larger systems. Tapes are used
efficiently because a question as to how many tapes are needed never
arises. This strategy also cuts down on person hours, tape mounting, and
storage space used for tapes. It allows for enough redundancy to make
restoring a full system fairly painless.
Disadvantages, however, do exist. Each time you do a backup, you must
determine the size of the back using fsave –s. As you near a full tape’s
worth of data, this takes an increasing amount of time.
Use of Tapes/Disks
Whatever strategy you use, you must make a decision concerning the
number of tapes or disks to use. This decision must weigh the emphasis
placed on redundancy, resources, person-hours, and storage. It must be
offset with the possibility of tape or disk failure and system restoration.
In the first example strategy, you must make the daily backups on different
volumes to overcome the lack of redundancy. You can use the four daily
volumes week after week as daily backup volumes because of the lower
level backups at the beginning of each week.
In the second example, theoretically, you could use the same tape for each
day until a new level backup is reached. This insures no redundancy and
minimal storage. It is also the most dangerous in case of tape failure. Using
a number of alternating tapes for each level cuts down on storage and still
allows a safety net in the case of tape failure. Using alternating level 0
tapes is another possibility.
The tape Utility
OS-9 provides a tape controller utility to facilitate setting up, reading, and
rewinding tapes from the terminal. When using tape media to backup or
restore your system, the tape utility is very practical. The syntax of the tape
utility is:
tape {<opts>} [<dev>] {<opts>}
tape uses the default device /mt0 if you do not specify the tape device
<dev> on the command line and you do not use the –z option.
7-13
Chapter 7
Making Backups
tape has the following available options:
Option:
Description:
–?
Displays the use of tape.
–b[=<num>]
Skips a specified number of blocks. Default is one block. If <num> is
negative, the tape skips backward.
–e=<num>
Erases a specified number of blocks of tape.
–f[=<num>]
Skips a specified number of tapemarks. Default is one tapemark. If
<num> is negative, the tape skips backward.
–o
Puts tape off-line.
–r
Rewinds the tape.
–s
Determines the block size of the device.
–t
Retensions the tape.
–w[=<num>]
Writes a specified number of tapemarks. Default is one tapemark.
–z
Reads a list of device names from standard input. The default is
/mt0.
–z=<file>
Reads a list of device names from <file>.
If you specify more than one option, tape executes each option function in
a specific order. Therefore, it is possible to skip ahead a specified number
of blocks, erase, and then rewind the tape all with the same command. The
order of options executed is as follows:
1.
gets device name(s) from the –z option
2.
skips the number of tapemarks specified by the –f option
3.
skips the number of blocks specified by the –b option
4.
writes a specified number of tapemarks
5.
erases a specified number of blocks of tape
6.
rewinds the tape
7.
puts the tape off-line
For example, the following command skips four files on the /mt0 device,
erases the next two blocks, rewinds the tape, and takes the tape off-line:
tape –e=2 –f=4 –ro
The next example determines the block size of the device:
tape –s
The next example retensions the tape, rewinds it, and then takes it off-line:
tape –rot
7-14
Chapter
8
OS-9 System Management
System managers have a range of options to consider. OS-9 allows system
managers to tailor their system to the needs of users by changing system
modules, setting up the system defaults, etc. OS-9 also allows system
managers to maximize the performance of their system by using RAM
disks, making bootfiles, making a startup file, etc.
This chapter discusses the following topics of importance to
system managers:
setting the system defaults using the Init module
adding customization modules
changing system modules
making bootfiles
using a RAM disk
making a startup file
shutting down the system
installing OS-9 on a hard disk
managing processes in a real-time environment
using the tmode and xmode utilities
using termcap
Setting Up the System
Defaults: the Init Module
The Init module is sometimes referred to as the configuration module. It is
a non-executable module located in memory in the OS9Boot file or in
ROM. The Init module contains system parameters used to configure OS-9
during startup. The parameters set up the initial table sizes and system
device names. For example, the amount of memory to allocate for internal
tables, the name of the first program to run (usually either SysGo or shell),
an initial directory, etc. are specified. You can examine the system limits in
the Init module at any time.
Important: The Init module MUST be present in the system in order for
OS-9 to work.
8-1
Chapter 8
OS-9 System Management
The values in the Init module’s table are the system defaults. You can
change these defaults in two ways. The first method involves editing the
CONFIG macro in the systype.d file. The systype.d file is located in the
DEFS directory. After systype.d is edited, the Init module is remade and
placed in the new bootfile. The second method involves modifying the Init
module with the moded utility. Both methods are discussed later in this
chapter. Regardless of the method you use, the changes become the
system defaults.
The following is a list of the system defaults listed in the Init module. The
term offset refers to the location of a module field, relative to the starting
address of the module. Module offsets are resolved in assembly code by
using the names shown here and linking the module with the relocatable
library: sys.l or usr.l .
Offset:
Name:
Description:
$30
Reserved
This field is currently reserved for future use.
$34
M$PollSz
Number of Entries in the IRQ Polling Table
This is the number of entries in the IRQ polling table. One entry is required for
each interrupt generating device control register. The IRQ polling table has
32 entries by default. Each entry in the IRQ polling table is 18 bytes long.
$36
M$DevCnt
Device Table Size
This is the number of entries in the system device table. One entry is required
for each device in the system. The system device table has 32 entries by
default. Each entry in this table is 18 bytes long.
$38
M$Procs
Initial Process Table Size
This indicates the initial number of active processes allowed in the system. If
this table becomes full, it automatically expands as needed. By default, 64
active processes are allowed. Each entry in the initial process table requires
4 bytes.
$3A
M$Paths
Initial Path Table Size
This is the initial number of open paths in the system. If this table becomes
full, it automatically expands as needed. By default, 64 open paths are
allowed. Each entry in the initial path table requires 4 bytes.
$3C
M$SParam
Offset to Parameter String for Startup Module
This is the offset to the parameter string (if any) to be passed to the first
executable module. An offset of zero indicates that no parameter string is
required. The parameter string itself is located elsewhere, usually near the
end of the Init module.
$3E
M$SysGo
First Executable Module Name Offset
This is the offset to the name string of the first executable module; usually
SysGo or shell.
$40
M$SysDev
Default Directory Name Offset
This is the offset to the initial default directory name string; usually /d0 or /h0.
The kernel does a chd and chx to this device prior to forking the initial device.
If the system does not use disks, this offset must be zero.
8-2
Chapter 8
OS-9 System Management
Offset:
Name:
Description:
$42
M$Consol
Initial I/O Pathlist Name Offset
This is the offset to the initial I/O pathlist string. This offset usually points to
the /TERM string. This pathlist is opened as the standard I/O path for the
initial process. It is generally used to set up the initial I/O paths to and from a
terminal. This offset should contain zero if no console device is in use.
$44
M$Extens
Customization Module Name Offset
This is the offset to a name string of a list of customization modules (if any). A
customization module is intended to complement or change OS-9’s existing
standard system calls. These modules are searched for during startup.
Typically these modules are found in the bootfile. They are executed in
system state if found. Modules listed in the name string are separated by
spaces. The default name string to be searched for is OS9P2. If there are no
customization modules, set this value to zero.
NOTE: A customization module may only alter the d0, d1, and
ccr registers.
NOTE: Refer to the following section for more information on
customization modules.
$46
M$Clock
Clock Module Name Offset
This is the offset to the clock module name string. If there is no clock module
name string, set this value to zero.
$48
M$Slice
Timeslice
The number of clock ticks per timeslice. The number of clock ticks per
timeslice defaults to two.
$4A
Reserved
This field is currently reserved for future use.
$4C
M$Site
This is the offset to the installation site code. This value is usually set to zero.
OS-9 does not currently use this field.
$50
M$Instal
Offset to Installation Name
$52
M$CPUTyp
This is the offset to the installation name string.
CPU Type
CPU type: 68000, 68008, 68010, 68020, 68030, 68040, 68070, or 683XX.
The default is 68000.
$56
M$OS9Lvl
Level, Version, and Edition
This four byte field is divided into three parts:
level: 1 byte version: 2 bytes edition: 1 byte
For example, level 1, version 2.4, edition 1 would be 1241.
$5A
M$OS9Rev
$5C
M$SysPri
Revision Offset
This is the offset to the OS-9 level/revision string.
Priority
This is the system priority at which the first module (usually SysGo or shell) is
executed. This is generally the base priority at which all processes start. The
default is 128.
$5E
M$MinPty
Minimum Priority
This is the initial system minimum executable priority. The default is zero.
M$MinPty is discussed later in this chapter and in the OS-9
Technical Manual.
8-3
Chapter 8
OS-9 System Management
Offset:
Name:
Description:
$60
M$MaxAge
Maximum Age
This is the initial system maximum natural age. The default is zero.
M$MaxAge is discussed later in this chapter and in the OS-9
Technical Manual.
$62
Reserved
This field is currently reserved for future use.
$66
M$Events
Number of Entries in the Events Table
This is the initial number of entries allowed in the events table. If the table
becomes full, it automatically expands as needed. The default is zero. Each
entry in the events table requires 32 bytes. See the OS-9 Technical Manual
for a discussion of event usage. This value is no longer used.
$68
M$Compat
Revision Compatibility
This byte is used for revision compatibility. The default is 0. The following bits
are currently defined:
Bit 0:
Bit 1:
Bit 2:
Bit 3:
Bit 4:
Bit 5:
$69
M$Compat2
Set to save all registers for IRQ routines.
Set to prevent the kernel from using stop instructions.
Set to ignore “sticky” bit in module headers.
Set to disable cache burst operation (68030 systems).
Set to patternize memory when allocated or deallocated.
Set to prevent kernel cold-start from starting system clock.
Compatibility Bit #2
This byte is used for revision compatibility. The following bits are
currently defined:
Bit:
Function:
0
0
1
0
1
0
1
0
1
0
1
1
2
3
7
External instruction cache is not snoopy*
External instruction cache is snoopy or absent
External data cache is not snoopy
External data cache is snoopy or absent
On-chip instruction cache is not snoopy
On-chip instruction cache is snoopy or absent
On-chip data cache is not snoopy
On-chip data cache is snoopy or absent
Kernel disables data caches when in I/O
Kernel does not disable data caches when in I/O
* snoopy = cache that maintains its integrity without software intervention.
$6A
M$MemList
Colored Memory List
This is an offset to the memory segment list. The colored memory list
contains an entry for each type of memory in the system. The list is
terminated by a long word of zero. If this field contains a 0, colored memory is
not used in this system. For a complete discussion on colored memory, see
the OS-9 Technical Manual.
$6C
M$IRQStk
This field contains the size (in longwords) of the kernel’s IRQ stack. The
value must be 0 or between 256 and $ffff. If the value is zero, the kernel uses
a small default IRQ stack. A larger IRQ stack is recommended. The default
value is 256 longwords.
$6E
M$ColdTrys
This is the retry counter if the kernel’s initial chd to the system device fails.
The default value is zero.
Important: Throughout this chapter, the system directories referred to are
the defaults found in the Init module, unless otherwise specified.
8-4
Chapter 8
OS-9 System Management
The following is a portion of the distributed init.a file:
_INITMOD equ 1 flag
CPUTyp set 68000
Level
set 1
Vers
set 2
Revis
set 3
Edit
set 1
IP_ID
set 0
Site
set 0
MDirSz set 128
PollSz set 32
DevCnt set 32
Procs
set 64
Paths
set 64
Slice
set 2
SysPri set 128
reading init module
cpu type (68008/68000/68010)
OS–9 Level One
Version 2.4
Edition
interprocessor identification code
installation site code
initial module directory size (unused)
IRQ polling table size (fixed)
device table size (fixed)
initial process table size (divisible by 64)
initial path table size (divisible by 64)
ticks per time slice
initial system priority
For more information on the Init module, see the OS-9 Technical Manual.
Customization Modules
Customization modules can be attached to OS-9 during the system’s
cold-start procedure to increase OS-9’s functionality and to allow hardware
customization such as special bus arbitration modes. While customization
modules extend its capabilities, OS-9 itself is not changed.
Important: A customization module may only alter the d0, d1, and
ccr registers.
In the Init module, the M$Extens offset points to a list of module names.
By default, the name of the list is OS9P2. If the modules are found during
cold-start, they are called. If an error is returned, the system stops. Two of
these modules are listed here:
Syscache: The syscache module allows the system to enable and control
any hardware caches present. The default syscache module supplied by
Microware controls the on-chip cache(s) for the 68020 and 68030. You
can customize this module to take advantage of any external (off-chip)
cache hardware the system may have. The syscache module installs the
F$CCtl system call routines. If the syscache module is not installed, no
system caching takes place.
SSM: The system security module (SSM) allows memory protection.
The SSM uses the memory management unit (MMU) hardware to grant
and deny users permission to access memory.
8-5
Chapter 8
OS-9 System Management
Changing System Modules
The provided system modules are configured to satisfy the needs of the
majority of users. However, you may wish to alter the existing modules or
create new modules. You can make new system modules and alterations to
existing system modules by either using the moded utility or changing the
defaults in the systype.d file. The system modules most commonly altered
are the device descriptors and the Init module.
Using the Moded Utility
Use the moded utility to edit individual fields of certain types of OS-9
modules. You can change the Init module and any OS-9 device descriptor
modules with moded.
To use the moded utility, type moded, the name of the desired device
descriptor, and any options.
The moded: prompt shows that the editor’s command mode has
been entered.
When moded is invoked, it attempts to read the moded.fields file.
moded.fields contains module field information for each type of module to
edit. Without this file, moded cannot function.
The provided moded.fields file comes with module descriptions for
standard RBF, SBF, SCF, PIPE, NETWORK, UCM, and GFM module
descriptors. It also includes a description for the Init module.
To edit the current module, use the e command. If there is no current
module, the editor prompts for the module name to edit. The editor prints
the name of a field, its current value, and prompts for a new value.
You can enter the following edit commands:
Command:
<expr>
–
.
?
??
<cr.
Description:
A new value for the field
Re-display last field
Leave edit mode
Print edit mode commands
Print description of the current field
Leave current value unchanged
If the definition of any field is unfamiliar, use the ?? command. This
provides a short description of the current field.
Once you have made all necessary changes to the module, exit the edit
mode by reaching the end of the module or by typing a period. At this
point, the changes made to the module exist only in memory. To write the
changes to the actual file, use the w command. This also updates the
module header parity and CRC.
8-6
Chapter 8
OS-9 System Management
Important: moded is mainly used for editing existing descriptors. It is
somewhat restrictive, and as a result, if you are building a device
descriptor or changing a field such as the file manager names, you may not
want to use moded.
Complete documentation is available for the moded utility in the OS-9
Utilities section.
Editing the Systype.d File
The second method of changing system modules requires editing the
systype.d file located in the DEFS directory. The systype.d file contains
macros such as TERM, DiskH0, etc. for each device descriptor and the Init
module. These macros contain basic memory map information, exception
vector methods (for example, vectors in RAM or ROM), I/O device
controller memory addresses, and initialization data, etc. for each device
descriptor and the init module.
The systype.d file consists of five main sections that are used when
installing OS-9:
Init module CONFIG macro
SCF Device Descriptor macros and definitions
RBF Device Descriptor macros and definitions
ROM configuration values
target system specific definitions
The CONFIG macro is used when creating the Init module to determine
six or more system dependent variables:
Name:
Description:
MainFram
MainFram is a character string programs such as login use to print a
banner which identifies the system. You can modify this string.
SysStart
SysStart is a character string the OS-9 kernel uses to locate the initial
process for the system. This process is usually stored in a module called
SysGo. Two general versions of SysGo have been provided in the files:
SysGo.a for disk-based OS-9 and SysGo_nodisk.a for ROM-based OS-9.
SysParam
SysParam is a character string that is passed to the initial process. This
usually consists of a single carriage return.
SysDev
SysDev is a character string containing the name of the path to the initial
system disk. The kernel coldstart routine sets the initial execution and
data directories to this device prior to forking the SysStart process. Set
this label to zero for a ROM-based system. For example, SysDev set 0.
ConsolNm
ConsolNm is a character string that contains the name of the path to the
console terminal port. Messages to be printed during startup appear here.
ClockNm
ClockNm is a character string that contains the name of the clock module.
You can set other system parameters in this macro to override the default
values created by the init.a source file. This allows you to perform “system
tuning” without modifying the generic init.a file.
8-7
Chapter 8
OS-9 System Management
The following is a portion of an example systype.d file:
CONFIG macro
endm
Slice set 10
ifdef _INITMOD
Compat set ZapMem patternize memory
endc
When editing the Init module, constants may use either values or labels.
CPUTyp set 68020 is an example of a constant that uses a value. These
constants may appear anywhere in the systype.d file. Compat set ZapMem
is an example of a constant that uses a label. These constants must appear
outside the CONFIG macro and must be conditionalized to be invoked
only when init.a is being assembled. If these values are placed inside the
CONFIG macro, the old defaults are still used. If a constant that requires a
label is placed outside the macro and not conditionalized, illegal external
reference errors result when making other files. You can use the
_INITMOD label to avoid these errors.
The SCF and RBF device descriptor macro definitions are used when
creating device descriptor modules. Five elements are common to SCF
and RBF:
Name:
Description:
Port
Port is the address of the device on the bus. Generally, this is the lowest
address that the device has mapped. Port is hardware dependent.
Vector
Vector is the vector that is given to the processor at interrupt time. Vector
is hardware/software dependent. Some devices can be programmed to
produce different vectors.
IRQLevel
IRQLevel is the interrupt level (1 - 7) for the device. When a device
interrupts the processor, the level of the interrupt is used to mask out
lower priority devices.
Priority
Priority is the interrupt polling table priority and is software dependent. A
non-zero priority determines the position of the device within the vector.
Lower values are polled first. A priority of zero indicates that the device
desires exclusive use of the vector. OS-9 does not allow a device to claim
exclusive use of a vector if another device has already been installed on
the vector, nor does it allow the vector to be used by another device once
the vector has been claimed for exclusive use.
DriverName
DriverName is the module name of the device driver. This name is
determined by the programmer and is used by the I/O system to attach
the device descriptor to the driver.
RBF macros may also contain an optional sixth element to describe various
standard floppy disk formats. These values are defined in the file rbfdesc.a
in the IO directory.
8-8
Chapter 8
OS-9 System Management
SCF macros contain two additional elements: Parity and BaudRate. The
driver uses these values to determine the parity, word length, and baud rate
of the device. These values are usually standard codes used by device
drivers to access device specific index tables. These codes are defined in
the OS-9 Technical Manual.
You should place definitions such as control register definitions that are
system specific in systype.d. This allows you to maintain all system
specific definitions in a single, system specific file.
Examine the systype.d file. If it does not accurately describe your system,
use any text editor to edit the appropriate macro(s) in the systype.d file.
After editing the macro, change your data directory to the IO directory.
Use the make utility to generate the required descriptors. For example, the
make d0 would generate the descriptors d0 and dd.d0. The output files are
placed in the CMDS/BOOTOBJS directory. Include these new descriptors
in the bootfile.
Important: For more information on the make utility, refer to the chapter
on making files and the make utility description in the OS-9
Utilities section.
Making Bootfiles
A bootfile contains a list of modules to be loaded into memory during the
system’s bootstrap sequence. The provided bootfiles have been configured
to satisfy the majority of users, but you may want to add or remove
modules from an existing bootfile.
Bootlist Files
Bootfiles are usually created using a bootlist file and the –z option of the
OS9Gen or TapeGen utilities. The bootlist files contain a list of files, one
file per line, to use in creating the bootfile. Using a bootlist file is a
convenient way to maintain bootfile contents, as the bootlist file can easily
be edited.
The bootlist files are usually located in the CMDS/BOOTOBJS directory,
along with the individual files used for constructing the bootfile.
8-9
Chapter 8
OS-9 System Management
Bootfile Requirements
The contents and module order of a bootfile are usually determined by the
end-user’s system configuration and requirements. However, note the
following points when you construct a bootfile:
The kernel MUST be present in the system, either in ROM or in the
bootfile. If the kernel is in the bootfile, IT MUST BE THE
FIRST MODULE.
The Init module must be present in the system, either in ROM or in
the bootfile.
All other modules are dependent upon the system configuration.
Making RBF Bootfiles
To make a bootfile for an RBF device (hard disk or floppy disk), you need
to edit the bootlist file to match your requirements and then run the
OS9Gen utility:
chd /h0/cmds/bootobjs
<edit bootlist file>
OS9Gen <device> –z=<bootlist>
The <device> you specify is the disk that you wish to install the bootfile
on. If this device is a hard disk, specify the “format-enabled” device name.
For example, to make a floppy-disk bootfile, type:
OS9Gen /d0 –z=bootlist.d0
To make a hard disk bootfile, type:
OS9Gen /h0fmt –z=bootlist.h0
Important: Some systems may not support boot files that are greater than
64K in length and/or non-contiguous.
Making Tape Bootfiles
To make a bootfile for an SBF device (tape), you need to edit the bootlist
file to match your requirements and then run the TapeGen utility:
chd /h0/cmds/bootobjs
<edit bootlist file>
TapeGen /mt0 –bz=bootlist.tape
8-10
Chapter 8
OS-9 System Management
Using the RAM Disk
OS-9 provides support for RAM disks. These disks reside solely in
Random Access Memory (RAM). The information stored on a RAM disk
can be accessed significantly faster than the same information stored on a
hard or floppy disk. Any files may be stored and accessed on a RAM disk.
To use a RAM disk, you must have a device descriptor, a RAM disk driver,
and the RBF file manager. You may use multiple RAM disks as long as
each RAM disk has a different port address. The only real limitation to the
number of RAM disks is the size of the memory. However, some practical
considerations exist. For example, using one large RAM disk is more
efficient than using many small RAM disks.
In many system configurations, a RAM disk is used as the default system
device. When the RAM disk is used as the default system device, it is
known as device dd, instead of r0. The name of the device descriptor is
dd.r0. Using this descriptor allows compilers to use the RAM disk as a
“fast access” device for temporary files, etc. The RAM disk is usually
initialized at startup with definition and library files, if it is to be used as
the default system device. The init.ramdisk procedure file provided in the
root directory accomplishes this.
Important: RAM disks may be volatile or non-volatile. A volatile RAM
disk disappears when the system is reset or the power is shut off. A
non-volatile RAM disk resides in a place such as battery backed up RAM
and does not disappear when the system is reset or powered down.
Volatile RAM disks may be allocated memory either from free system
memory or from outside free system memory. The number of volatile
RAM disks allocated from free system memory is governed by the port
address. There can be up to 1024 different disks, with each disk having a
unique address from 0 to 1023.
Volatile RAM disks not allocated from the free system memory must not
be part of the system memory list, and they must have a port address
greater than or equal to 1024. This port address indicates the actual start
address of the RAM disk.
A non-volatile RAM disk may not be located in any memory search list
known to the system’s general memory lists. That is, the RAM disk must
be “outside” the system’s knowledge. If it is located in a memory search
list known to the system’s general memory lists, the RAM disk may be
wiped out because the memory is assumed to be un-allocated and may later
be given to another module. In addition, the format protect bit must be set
for non-volatile RAM disks and the port address must be greater than or
equal to 1024.
8-11
Chapter 8
OS-9 System Management
Making a Startup File
Using bootfiles is not the only way of loading modules and devices into
memory at the time of startup. A startup procedure is executed each time
OS-9 is booted and the standard SysGo is used. On disk-based systems, the
startup procedure executes a startup file. The startup file is located in the
root directory of the system disk.
The startup file is an OS-9 procedure file. It contains OS-9 commands to
be executed immediately after booting the system.
While some modules and devices, such as the kernel, should be loaded
from the bootlist file, loading most modules and devices from the startup
file can be advantageous. For example, it is easier to upgrade a system by
adding modules to the startup file, or the files contained in the startup file.
To change these files, you simply use a text editor and make the changes.
To change the bootlist file, you must also use the os9gen utility.
Important: A procedure file is made up of executable commands. Each
command is executed exactly as if it were entered from the shell command
line. Each line that begins with an asterisk (*) is a comment and is
not executed.
From the root directory, you can examine the startup file by entering:
$ list startup
A listing similar to the following is displayed:
–t –np
*
* OS–9
* Copyright 1984 by Microware Systems Corporation
*
* The commands in this file are highly system dependent and should
* be modified by the user.
*
* setime
; * start system clock
link shell cio
; * make “shell” and “cio” stay in memory
load math
; * load math module
* iniz r0 h0 d0 t1 p1
; * initialize devices
* load –z=sys/loadfile
; * make some utilities stay in memory
* load bootobjs/dd.r0
; * get default device descriptor
* init.ramdisk>/nil >>/nil &
; * initialize it if its the ramdisk
* tsmon /t1 &
; * start other terminals
list sys/motd
The first executable line, –t –np, turns on the talk mode option of the shell
and turns off the OS-9 prompt option for the duration of this procedure.
The talk mode option echoes each executed command to the terminal
display. This allows you to see what commands are being executed.
8-12
Chapter 8
OS-9 System Management
The other executable lines in the distributed startup file are followed by a
comment explaining the purpose of the command. Some standard
commands are provided as comments. If you want the command executed
during the startup procedure, use a text editor to remove the asterisk
preceding the command.
For example, to execute the setime command when the startup file is
executed, remove the asterisk preceding the command.
Important: For systems with battery backed clocks, run setime to start
time-slicing, but use the –s option. The date and time will be read from
the clock.
Initializing Devices
iniz r0 h0 d0 t1 p1
The iniz r0 h0 d0 t1 p1 commented command initializes the following
specific devices:
Device:
Description:
r0
RAM Disk
h0
Hard Disk
d0
Floppy Disk
t1
Terminal
p1
Serial Printer
Whenever OS-9 opens a path to a device, it first checks to see if the device
is known to OS9. To be known, a device must be initialized and memory
must be allocated for its device driver. If the device is unknown at the time
of the request, OS-9 initializes the device, allocates memory, and opens the
path. For example, a simple dir /d0 command initiates this sequence of
events if d0 has not been previously initialized.
The iniz utility initializes devices. iniz performs an I$Attach system call on
each device name passed to it. This initializes and links the device to
the system.
To initialize a device after the system has been started, type iniz and the
name(s) of the device(s) to attach to the system. iniz goes through the
procedure of initializing the device(s) and allocating the memory needed
for the device. If the device is already attached, it is not re-initialized, but
the link count is incremented.
For example, to increment the link count of modules, t2 and t3, type:
$ iniz t2 t3
8-13
Chapter 8
OS-9 System Management
You can read the device names from standard input with the –z option or
from a file with the –z=<file> option. To increment the link counts of
devices listed in a file called /h0/add.files, type:
iniz –z=/h0/add.files
You can use the deiniz utility to close a path to a device. deiniz checks the
link count before removing the device from storage. If the link count is
greater than one, deiniz lowers the link count. If the link count is one,
deiniz lowers the link count, making it zero, and removes the device from
the system device table. The device then becomes unknown to OS-9.
To use the deiniz utility, type deiniz followed by the name(s) of the
devices(s) to be removed from the system.
For example, to decrement the link count of module p2, type:
$ deiniz p2
deiniz can read the device names from standard input with the –z option or
from a file with the –z=<file> option. To remove the files listed in a file
called /h0/not.needed, type:
$ deiniz –z=/h0/not.needed
This initialize/de-initialize sequence can result in slower execution of
programs and could cause memory fragmentation problems. To avoid these
symptoms, Microware recommends that all devices connected to the
system at startup be inized in the startup file.
Important: Non-sharable devices must be placed in a bootfile to become
known to the system. If a non-sharable device is iniz-ed, it is unusable
because the link count will have been incremented, causing it to appear to
be in use.
iniz-ing the connected device at startup initializes the device and allocates
memory for its driver for the duration of the time that the system is
running, unless specifically deiniz-ed. For example, a system with two
floppy drives and one hard disk would iniz these devices in the startup file:
iniz h0 d0 d1 t1 p1 p
Important: For more information on the iniz and deiniz utilities, refer to
the OS-9 Utilities section.
8-14
Chapter 8
OS-9 System Management
Loading Utilities Into
Memory
load –z=sys/loadfile
The next line of the startup file loads a number of utilities into memory. If
a utility is not already in memory, it must be loaded into memory before it
is used. Pre-loading basic utilities at startup time avoids the necessity of
loading the utility each time it is executed.
To load utilities into memory at startup, you must create a file containing
the names of each utility to load, one utility per line. While the file may
have any desired name, Microware recommends loadfile for obvious
reasons. This file can be located in any directory as long as you specify its
location on the command line. If loadfile were located in the SYS
directory, the startup file command line is:
load –z=sys/loadfile
Previous versions of the Professional OS-9 package had the following
commented line in the startup file:
load utils
This method involved creating a utils file by merging the desired utilities
into a single file in the commands directory. While this method may still be
used, using loadfile is preferable because it uses less disk space and is
easier to edit.
Loading the Default Device
Descriptor
load bootobjs/dd.r0
Many OS-9 compilers and application programs look for definition files
and libraries in directories located on the default system device. The
default system device is known as dd. dd may be defined as any disk
device, but it is usually synonymous for one of the following devices:
Device:
Description:
r0
RAM Disk
h0
Hard Disk
d0
Floppy Disk
If a default device is to be used (dd) and the device descriptor is not in the
bootfile, then you must load the device descriptor. The next line in the
startup file loads the device descriptor. The default device is the RAM disk
named r0. If you want another device to be the default device descriptor,
change the .r0 extension to reflect the appropriate device. If you have a dd
device in your bootfile or if no default device is to be used, leave this line
as a comment.
8-15
Chapter 8
OS-9 System Management
Initializing the RAM Disk
init.ramdisk>/nil >>/nil &
If you are going to use the RAM disk, a library and definition file structure
may be built on the RAM disk. The next line in the startup file executes the
init.ramdisk procedure file. init.ramdisk is located in the root directory. It
sets up LIB and DEFS directories on /dd. To name the RAM disk /r0, you
must change a single line in init.ramdisk; change chd /dd to chd /r0.
Important: RAM disks are discussed elsewhere in this chapter.
Multi-User Systems
tsmon /t1 &
The tsmon utility is used to make your system a multi-user system. This
utility supervises idle terminals and initiates the login procedure for
multi-user systems. The startup file command line: tsmon /t1& initiates the
time-sharing monitor on the serial port /t1.
tsmon can monitor up to 28 device name pathlists. Therefore, if you have
multiple devices for tsmon to monitor, you can specify up to 28 devices on
each tsmon command line. You can use the ex built-in shell command to
execute tsmon without creating another shell. This conserves system
memory. For example:
ex tsmon term t1 t2 t3 t4 t5&
When a carriage return is typed on any of the specified paths, tsmon
automatically forks login and standard I/O paths are opened to the device.
The login procedure uses the password file located in the SYS directory for
individual login validation. The provided password file has two example
login entries. Each of the fields in an entry in the password file is explained
in the chapter on the shell and in the login utility description in the OS-9
Utilities section. If login fails because you could not supply a valid user
name or password, control returns to tsmon.
For more information on the tsmon utility, refer to the OS-9
Utilities section.
System Shutdown
Procedure
8-16
There will be times when, for one reason or another, you want to bring
your system down. When you reset or power down your system, you may
need to do more than just press the reset button. Certain programs need to
be shut down gracefully. For example, most network communications,
print spoolers, and inter-system processes need special attention. These
processes may have options or other arrangements that need to be
considered before shutting down your system.
Chapter 8
OS-9 System Management
In addition to taking care of processes that require special attention, you
should prepare the system’s users for the shutdown. If at all possible, allow
users enough time to save their files and get off the system. One way of
alerting users that the system is going down is by echoing a message using
the echo and tee utilities. However, you should realize that messages sent
over the system in this manner will not be seen by users who do not press a
carriage return after the message has been sent. For example, if a
programmer is sitting at a shell prompt, the message will not appear on the
terminal screen until a carriage return is entered.
In this case, verbal warnings are important. This means that in addition to
sending a warning message out over the system, you may want to use
either an intercom system or the telephone to talk to each person connected
to the system.
You can simplify the process of actually shutting down your system by
creating a procedure file. Once created, you can run the procedure either
from the shell command line prompt or you can create a separate password
entry for the sole purpose of shutting down the system.
For example, if you have a procedure file called shutdown.sys, you could
create the following password file entry:
sys,shutdown,0.0,128,.,sys,shell shutdown.sys
Once you login as user sys with password shutdown, the shut down
procedure begins because the system immediately has the shell execute the
shutdown.sys file.
The following is an example of a useful procedure file for shutting down
the system:
–t –nx –np
*
* System Shutdown Procedure
*
echo WARNING The system will shut down in 3 minutes !
tee /t1 /t2 /t3 /t4 /t5
sleep –s 60
echo WARNING The system will shut down in 2 minutes !
tee /t1 /t2 /t3 /t4 /t5
sleep –s 115
echo WARNING 5 seconds to system shut down ! tee /t1
/t2 /t3 /t4 /t5
sleep –s 5
spl –$
; * terminate spooler
nmon /n0 –d ; * shutdown network
sleep –s 3
; * wait 3 seconds
break
; * call ROM debugger
8-17
Chapter 8
OS-9 System Management
The first six commands after the comment identifying the function of the
procedure broadcast three warnings to the terminals on the system. The
first warning tells the users that the system is going down. The other two
warnings serve as reminders. Remember that you should also give
verbal warnings.
The remaining command lines shut down the system:
Installing OS-9 On Hard Disk
Command:
Description:
spl –$
This command terminates the spooler. All unfinished jobs are lost when
the spooler is terminated.
nmon /n0 –d
This command brings the network down. Users from other networks will
no longer be able to login to the system being shut down.
sleep –s 3
This command causes the system to wait three seconds before executing
the next command line. This allows the previous commands time to
complete execution.
break
This command sends a break call to the ROM debugger. When the ROM
debugger receives this call, the system shuts down.
Once you have brought up the system and tested its basic operations,
install OS-9 on the hard disk and use it as the system boot device.
Installing the distribution software on the hard disk involves five steps:
checking the hard disk device descriptor
formatting the hard disk
copying the distribution software on to the hard disk
making the hard disk the system boot disk
test-booting from the hard disk
Checking the Hard Disk Device Descriptor
The installed hard disk may not necessarily match the parameters in the
provided /h0 and /h0fmt device descriptors. For example, the number of
cylinders, heads, etc. for your hard disk may be different than the default
parameters specified in the device descriptors. Before attempting to use the
hard disk, carefully examine the disk macros in systype.d.
If the parameters match the drive in use, the supplied descriptors will
work. If not, edit systype.d and remake the descriptors or use the moded
utility to remake the descriptors. The moded utility makes/changes any
device descriptor module and updates its CRC.
Once the descriptors are made, make a new bootfile with the new
descriptors replacing the old ones.
8-18
Chapter 8
OS-9 System Management
Formatting the Hard Disk
Once the descriptors match the type of drive in use, format the hard disk.
Formatting the hard disk builds an OS-9 file structure on the media and
tests the media for defective areas. Any new descriptors are also checked.
ATTENTION: If you have any vital information such as data
or programs on this disk, you should perform backups to floppy
or tape of this information. The format process completely
erases any data on the disk.
To turn off page pause and format the hard disk, enter:
$ tmode nopause
$ format /h0fmt –c=<cluster size>
Important: /h0fmt must be the device name, as /h0 is format protected.
Use the –c option for large drives only.
The format utility asks whether you want to perform a physical format and
a physical verify. Answer y to both questions. The physical format
operation is a lengthy process. The larger your hard disk is, the longer you
can expect to wait. The logical verify reads each cluster from the disk.
Copying the Distribution Software on to the Hard Disk
Once the hard disk has been formatted correctly, use the dsave utility to
copy the distribution software on to the hard disk.
To copy the distribution files:
1.
Insert the first system disk in drive /d0. The first system disk contains
the CMDS directory.
2.
Change your current data directory to /d0:
$ chd /d0
3.
Copy all files from /d0 to /h0:
$ dsave –eb50 /h0
If you have more than one floppy disk to copy:
4.
Remove the disk in /d0 and replace it with the new disk to copy.
8-19
Chapter 8
OS-9 System Management
5.
Change your execution directory to /h0/CMDS:
$ chx /h0/cmds
The hard disk is now your current execution directory.
6.
Copy all files from /d0 to /h0:
$ dsave –eb50 /h0
Repeat this step until all floppy disks have been copied to the
hard disk.
Important: The first disk copied to the hard disk is the distribution disk
containing the CMDS directory.
Making the Hard Disk the System Boot Disk
Copying files on to the hard disk installs the software on the hard disk. It
does not make the hard disk a bootable disk. To make the hard disk the
system boot disk, use the os9gen utility.
The OS9Boot file is distributed with your system software. An
OS9Boot.h0 bootfile may also be included. The only difference between
these files is the default system device name string in the Init module.
OS9Boot refers to /d0, while OS9Boot.h0 refers to /h0.
Assuming that these files have been copied on to the hard disk, do the
following to make the hard disk bootable:
1.
Change your current data directory to /h0:
$ chd /h0
2.
Rename OS9Boot to retain a copy to use with a floppy system:
$ rename OS9Boot OS9Boot.d0
3.
Make the hard disk bootable with the correct bootfile.
$ os9gen /h0fmt OS9Boot.h0
Important: You must specify /h0fmt as the device.
8-20
Chapter 8
OS-9 System Management
Test Booting from the Hard Disk
Once you have completed the above steps, test that the system actually
boots from the hard disk.
If the system fails to boot correctly, reboot the system. Carefully examine
the results of the actions previously described.
Managing Processes in a
Real-Time Environment
The ability to manage processes in a real-time environment is one of
OS-9’s advantages. OS9 has three main methods by which system
managers can manage processes in a real-time environment:
manipulating process’ priority
using D_MinPty and D_MaxAge to alter the system’s
process scheduling
having system state processes and user state processes
Manipulating Process’ Priority
When you execute processes on the command line, you can change their
initial priorities using the process priority modifiers discussed in the
chapter on the shell. This allows you to set the priority on crucial tasks
higher so that they run sooner and more often than processes that are
less crucial.
Important: The initial priority is also a parameter for the fork and chain
system calls.
Using D_MinPty and D_MaxAge to Alter the System’s Process
Scheduling
The way OS-9 schedules processes can be affected by the D_MinPty and
D_MaxAge system global variables. D_MinPty and D_MaxAge are
available to super users through the F$SetSys system call. These system
variables can be used to effect the aging of processes.
Important: A process’ initial priority is aged each time it is passed by for
execution while it is waiting for CPU time.
D_MinPty defines a minimum priority below which processes are neither
aged nor considered candidates for execution. Processes with priorities less
than D_MinPty remain in the waiting queue and continue to hold any
system resources that they held before D_MinPty was set.
8-21
Chapter 8
OS-9 System Management
D_MinPty is usually set to zero. All processes are eligible for aging and
execution when this value is set to zero because all processes have an
initial priority greater than zero.
If you have a critical process that needs to be run and several other users
have processes that they want to run, use the process priority modifier to
increase the priority of the critical process. Then, set D_MinPty to a value
that is less than the priority you assigned to the critical process but greater
than the priority of the other processes. The critical process now continues
using the CPU until another process with a priority greater than D_MinPty
is entered into the waiting queue or the critical process is finished.
For example, if D_MinPty is set to 500 and you set the priority of your
process at 600, your process continues to use the CPU while processes
with priorities less than 500 cannot run until D_MinPty is reset.
ATTENTION: D_MinPty is potentially dangerous. If the
minimum system priority is set above the priority of all running
tasks, the system will completely shut down and can only be
recovered by a reset. It is crucial to restore D_MinPty to zero
when the critical task finishes or to reset D_MinPty or a
process’ priority in an interrupt service routine.
D_MaxAge defines a maximum age over which processes are not allowed
to mature. By default, this value is set to zero. When D_MaxAge is set to
zero, it has no effect on the processes waiting to use the CPU.
When set, D_MaxAge essentially divides tasks into two classes: low
priority and high priority. A low priority task is any task with a priority
below D_MaxAge. Low priority tasks continue aging until they reach the
D_MaxAge cutoff, but they are not executed unless there are no high
priority tasks waiting to use the CPU.
A high priority task is any task with a priority above D_MaxAge. A high
priority task will receive the entire available CPU time, but it will not be
aged. When the high priority task(s) are inactive, the low priority tasks
are run.
For example, if D_MaxAge is set to 2000 and three processes with initial
priorities of 128 are in the active queue, the processes run just as if
D_MaxAge had not been set. Then, if a process with an initial priority of
2500 is entered into the active queue, it receives CPU time when the
process currently in the CPU has finished. Once using the CPU, the high
priority process runs uninterrupted until a process with a higher priority
enters the active queue or the process finishes. When the process finishes
executing, the low priority processes will again be able to use the CPU.
8-22
Chapter 8
OS-9 System Management
Important: Any process performing a system call is not pre-empted until
the call is finished, unless the process voluntarily gives up its timeslice.
This exception is made because these processes may be executing critical
routines that affect shared system resources and could be blocking other
unrelated processes.
Using System-State Processes and User-State Processes
The second method that OS-9 uses to manage real-time priority processing
is the existence of system-state processes. System-state processes are
processes running in a supervisor or protected mode. System-state
processes basically have unlimited access to system memory and other
resources. When a process in system state wants to use the CPU, it waits
until it has the highest age. Once it is available to use the CPU, a process in
system state runs until it finishes instead of running for a
specified timeslice.
Processes that are in user state do not have access to all points in memory
and do not have access to all of the commands. When a process in user
state gains time in the CPU, it runs only for the time specified by the
timeslice. When it finishes using its timeslice, it is entered back in the
waiting queue according to its initial priority.
Using the Tmode and
Xmode Utilities
The tmode and xmode utilities are also available to help you customize
OS-9. Use the tmode utility to display or change the operating parameters
of the user’s terminal. tmode affects open paths, not the device descriptor
itself, so the changes made by it are temporary. The changes made by
tmode are inherited if the paths are duplicated, but not if the paths are
opened explicitly.
The xmode utility is similar to tmode. Use xmode to display or change the
initialization parameters of any SCF-type device such as a video display,
printer, RS-232 port, etc. xmode actually updates the device descriptor.
The change persists as long as the computer is running even if paths to the
device are repetitively opened and closed. Some common uses of xmode
are to change the baud rates and control definitions.
In SSM systems, you must have write permission for the descriptor module
in order for xmode to work. You can use the fixmod utility to change
the permissions.
Important: tmode and xmode work only on SCF and GFM devices.
8-23
Chapter 8
OS-9 System Management
Using the Tmode Utility
To use the tmode utility, type tmode and any parameter(s) to change. If you
give no parameters, the present values for each parameter are displayed.
Otherwise, the parameter(s) given on the command line are processed. You
can give any number of parameters on a command line. Use spaces or
commas to separate each parameter.
If a parameter is set to zero, OS-9 no longer uses the parameter until it is
re-set to a code OS-9 recognizes. For example, the following command
sets xon and xoff to zero:
tmode xon=0 xoff=0
Consequently, OS-9 will not recognize xon and xoff until the values
are re-set.
To re-set the values of a parameter to their default as given in this manual,
specify the parameter with no value.
Use the –w=<path#> option to specify the path number affected. If a path
number is not provided, standard input is affected.
Important: If you use tmode in a shell procedure file, you must use the
–w=<path#> option to specify one of the standard paths (0, 1, or 2) to
change the terminal’s operating characteristics. The change remains in
effect until the path is closed. To effect a permanent change to a device
characteristic, you must change the device descriptor. You may alter the
device descriptor to set a device’s initial operating parameters using the
xmode utility.
Five parameters need driver support in order to be changed by tmode: type,
par, cs, stop, and baud. If you try to change these parameters without driver
support, tmode has no effect.
The tmode parameters are documented in the OS-9 Utilities section.
Using the Xmode Utility
To use the xmode utility, type xmode and any parameter(s) to change. If
you give no parameters, the present values for each parameter are
displayed. Otherwise the parameter(s) given on the command line are
processed. You can give any number of parameters on a command line.
Use spaces or commas to separate each parameter. You must specify a
device name if the given parameter(s) are to be processed.
8-24
Chapter 8
OS-9 System Management
Like tmode, if a parameter is set to zero, the device no longer uses the
parameter until it is re-set to a recognizable code. To re-set the values of
parameters to their default, specify the parameter with no value. This
re-sets the parameter to the default value as given in this manual.
Five parameters require further explanation: type, par, cs, stop, and baud.
xmode changes these parameters only if the device is iniz-ed directly after
the xmode changes and the driver supports these changes. Changing these
parameters is usually done in the startup file or by first deiniz-ing a file.
For example, the following command sequence changes the baud rate of
/t1 to 9600:
$ deiniz t1
$ xmode /t1 baud=9600
$ iniz t1
This type of command sequence changes the device descriptor and
initializes it on the system. Only the five parameters mentioned above need
this special sequence to be changed. All other xmode parameters are
changed immediately.
xmode’s parameters are documented in the OS-9 Utilities section.
The Termcap File Format
The termcap file is a text file that contains control code definitions for one
or more types of terminals. Each entry is a complete description list for a
particular kind of terminal.
The first section of a termcap entry is divided into three parts.
a two character entry
the most common name
a long name
Each part is a different way of naming the terminal. A | character separates
the parts of a termcap entry. The first part is a two character entry. This is a
holdover from early UNIX editions. The second part is the most common
name for the terminal. This name must contain no blanks. The final part is
a long name fully describing the terminal. This name may contain blanks
for readability. For example:
kh|abm85h|kimtron abm85h:
The TERM environment variable must be set to the name used in the
second part of the name section. In the following example, TERM is set
to abm85h:
$ setenv TERM abm85h
8-25
Chapter 8
OS-9 System Management
Important: You can check the values stored in TERM by using the
printenv command:
$ printenv
TERM=abm85h
The rest of the entry consists of a sequence of control code specifications
for each control function. Use a colon (:) character to separate each item in
the list. You can continue an entry on to the next line by using a backslash
(\) character as the last character of the line. It must appear after the last
colon of the previous item. The next line must begin with a colon.
For example:
ka|amb85|kimtron abm85:\
:ct=\E3: ...
Each item begins with a terminal capability. Each capability is a two
character abbreviation. Each capability is either a boolean itself or it is
followed by a string or a number. If a boolean capability is present in the
termcap entry, then the capability exists on that terminal.
All numeric capabilities are followed by a pound sign (#) and a number.
For example, the number of columns capability for an 80 column terminal
could be described as follows:
co#80:
All string capabilities are followed by an equal sign (=) and a character
string. You can enter a time delay in milliseconds directly after the equal
sign (=) if padding is allowed in that capability. The padding characters are
supplied by tputs() after the remainder of the string is transmitted to
provide the time delay. The time delay may be either an integer or a real.
The time delay may be followed by an asterisk (*). The asterisk specifies
that the padding is proportional to the number of lines affected.
Important: It is often useful to specify the time delay using the real
format. For example, the clear screen capability is specified as ^z with a
time delay of 3.5 milliseconds by the following entry:
cl=3.5*^z:
8-26
Chapter 8
OS-9 System Management
Escape sequences may be indicated by an \E to indicate the escape
character. A control character is indicated by a circumflex (^) preceding
the character. The following special character constants are supported:
Parameter:
Description:
Value (octal)
\b
Backspace
($08)
\f
Formfeed
($0C)
\n
Newline
($0A)
\r
Return
($0D)
\t
Tab
($09)
\\
Backslash
($5C)
\^
Circumflex
($5E)
Characters may be specified as three Octal digits after a backslash (\). For
example, if a colon must be used in a capability definition, it must be
specified by \072. If it is necessary to place a null character in a capability
definition use \200. C routines using termcap strip the high bits of the
output, therefore \200 is interpreted as \000.
Termcap Capabilities
The following is a list of termcap capabilities recognized by termcap. Not
all of these capabilities need to be present for most programs to use
termcap. They are provided for completeness. (P) indicates that padding
may optionally be specified. (P*) indicates that the optional padding may
be based on the number of lines affected:
Name:
Type:
Padding:
Description:
ae
string
(P)
End alternate character set
al
string
(P*)
Add new blank line
am
boolean
as
string
bc
string
bs
boolean
bt
string
bw
boolean
Backspace wraps from column 0 to last column
CC
string
Command character in prototype if terminal settable
cd
string
(P*)
Clear to end of display
ce
string
(P)
Clear to end of line
ch
string
(P)
Horizontal cursor motion only, line stays some
cl
string
(P*)
Clear screen
cm
string
(P)
Cursor motion
co
numeric
cr
string
(P*)
Carriage return (default ^M)
cs
string
(P)
Change scrolling region (VT100), like cm
End alternate character set
(P)
Start alternate character set
Backspace if not ^H
Terminal can backspace with ^H
(P)
Back tab
Number of columns in line
8-27
Chapter 8
OS-9 System Management
Name:
Type:
Padding:
Description:
cv
string
(P)
Vertical cursor motion only
da
boolean
Display may be retained above
dB
numeric
Number of milliseconds of backspace delay needed
db
boolean
Display may be retained below
dC
numeric
dc
string
dF
numeric
dl
string
dm
string
Delete mode (enter)
dN
numeric
Number of milliseconds of newline delay needed
do
string
Down one line
dT
numeric
Number of milliseconds of tab delay needed
ed
string
End of delete mode
ei
string
End insert mode
eo
string
ff
string
hc
boolean
Hardcopy terminal
hd
string
Half-line down (1/2 linefeed)
ho
string
Home cursor (if no cm)
hu
string
Half-line up
hz
string
Hazeltime: cannot print tildas (~)
ic
string
if
string
Name of file containing initialization string
im
boolean
Insert mode (enter).
in
boolean
ip
string
is
string
Terminal initialization string
k0–k9
string
Sent by other function keys 0-9
kb
string
Sent by backspace key
kd
string
Sent by down arrow key
ke
string
Take terminal out of keypad transmit mode
kh
string
Sent by home key
kl
string
Sent by left arrow key
kn
numeric
Number of other keys
ko
string
Termcap entries for other non-function keys
kr
string
Sent by right arrow key
ks
string
Put terminal in keypad transmit mode
ku
string
Sent by up arrow key
l0–l9
string
Labels on other function keys
li
numeric
Number of lines on screen or page
Number of milliseconds of carriage return delay needed
(P*)
Delete character
Number of milliseconds of formfeed delay needed
(P*)
Delete line
NOTE: If ic is used, enter :ec=:
Can erase overstrikes with a blank
(P*)
(P)
Hardcopy terminal page eject (default ^L)
Insert character
NOTE: If ic is specified use :im=:
8-28
Insert mode distinguishes nulls on display
(P*)
Insert pad after character inserted
Chapter 8
OS-9 System Management
Name:
Type:
ll
string
Padding:
Last line, first column (if no cm entry)
ma
string
Arrow key map
mi
boolean
OK to move while in insert mode
ml
string
Memory lock on above cursor
ms
boolean
OK to move while in standout and underline mode
mu
string
Turn off memory lock
nc
boolean
Carriage return down not work
nd
string
Non-destructive space
nl
string
ns
boolean
Terminal is a non-scrolling CRT
os
boolean
Terminal overstrikes
pc
string
Pad character (rather than null)
pt
boolean
Has hardware tabs
se
string
End stand out mode
sf
string
sg
numeric
so
string
(P)
Begin stand out mode
sr
string
(P)
Scroll reverse
ta
string
Tab (other than ^I or without padding)
tc
string
Entry of terminal similar to last termcap entry
te
string
String to end programs that use cm
ti
string
String to begin programs that use cm
uc
string
Underscore one character and move past it
ue
string
End underscore mode
ug
numeric
Number of blank characters left by us or ue
ul
boolean
Terminal underlines but doesn’t overstrike
up
string
Upline (cursor up)
us
string
Start underscore mode
vb
string
Visible bell
ve
string
Sequence to end open/visual mode
vs
string
Sequence to start open/visual mode
xb
boolean
Beehive terminal (f1=<esc>, f2=^C)
xn
boolean
Hewline is ignored after wrap
xr
boolean
Return acts like ce \r\n
xs
boolean
Standout not erased by writing over it
xt
boolean
Tabs are destructive
(P*)
(P)
Description:
Newline character
Scroll forwards
Number of blank characters left by se or so
8-29
Chapter 8
OS-9 System Management
Of the capabilities, the most complex and important capability is cm:
cursor addressing. The string specifying the cursor addressing is formatted
similar to the C function: printf(). It uses % notation to identify addressing
encodings of the current line or column position. The line and the column
being addressed could be considered the arguments to the cm string. All
other characters are passed through unchanged. The following is the
notation used for cm strings:
Notation:
Description:
%d
a decimal number (origin 0)
%2
same as %2d
%3
same as %3d
%.
ASCII equivalent of value
%+x
adds x to value, then %
%>xy
if value > x adds y, no output
%r
reverses the order of row and column, no output
%i
increments line/column (for 1 origin)
%%
gives a single %
%n
exclusive or row and column with 0140
%B
BCD (16*(x/10) + (x%10), no output
%D
reverse coding (x–2*(x%16)), no output
The following examples illustrate the use of the preceding notations:
8-30
Notation:
Description:
cm=6\E&%r%2c%2Y:
This terminal needs a 6 millisecond delay, rows and columns
reversed, and rows and columns to be printed as two digits.
The <esc>& and Y are sent unchanged. (HP2645)
cm=5\E[%i%d;%dH:
This terminal needs a 5 millisecond delay, rows and columns
separated by a semicolon (;), and because of its origin of 1,
rows and columns are incremented. The <esc>[, ; and H are
transmitted unchanged. (VT100)
cm=\E=%+ %+ :
This terminal uses rows and columns offset by a blank
character. (ABM85H)
Chapter 8
OS-9 System Management
Example Termcap Entries
ka|abm85|kimtron abm85:\
:ce=\ET:cm=\E=%+ %+ :cl=^Z:\
:se=\Ek:so\Ej:up=^K:sg#1
If two entries in the same termcap file are very similar, one can be defined
as identical to the other with certain exceptions. To do this, tc is used with
the name of the similar terminal. This capability must be the last in the
entry. All exceptions to the other terminal must appear before the tc listing.
If a capability must be cancelled, use <cap>@. For example, this might be
a complete entry:
kh|abm85h|kimtron abm85h:\
:se=\EG0:so\EG4:tc=abm85:
8-31
Chapter
9
The OS-9 Utilities
System Command
Descriptions
This chapter contains descriptions and examples of each of the OS-9
command programs. While you generally execute these programs from a
shell command line, you can also call them from most other
OS-9 programs.
At the time of this edition, OS-9 supports 78 utilities and built-in shell
commands. They range from commonly used functions such as dir, chd,
and copy to advanced system management tools such as dcheck and iniz.
For quick reference purposes, the format of the information on the utilities
is standardized. Each utility has a section concerning syntax, function,
options (if any), examples, and any special uses.
The utilities are broken down into three categories:
Basic Utilities
Every user should become familiar with these utilities. Many of them have
been discussed in the earlier chapters because of their importance.
Table 9.A
Basic Utilities
attr
build
chd
chx
copy
date
del
deldir
dir
echo
edt
free
help
kill
list
makdir
merge
mfree
pd
pr
procs
rename
set
setime
shell
w
wait
9-1
Chapter 9
The OS-9 Utilities
Programmer Utilities
These utility programs are extremely helpful to the intermediate or
advanced programmer. They allow greater exploration of OS-9’s
timesharing environment and more dynamic file manipulation.
Table 9.B
Programmer Utilities
binex
cfp
cmp
code
compress
count
dump
ex
exbin
expand
grep
load
logout
printenv
profile
qsort
save
setenv
tape
tee
touch
tmode
tr
unsetenv
System Management Utilities
These utility programs are used primarily by system managers and
advanced assembly language programmers. Beginning programmers rarely
need to use these commands:
Table 9.C
System Management Utilities
9-2
break
dcheck
deiniz
devs
events
fixmod
ident
iniz
irqs
link
login
mdir
moded
setpr
sleep
tapegen
tsmon
unlink
xmode
Chapter 9
The OS-9 Utilities
Formal Syntax Notation
Each command section includes a syntactical description of the command
line. These symbolic descriptions use the following notations:
Notation:
Description:
[]
Enclosed items are optional
{}
Enclosed items may be used 0, 1, or many times
<>
Enclosed item is a description of the parameter to use:
<path>
A legal pathlist
<devname>
A legal device name
<modname>
A legal memory module name
<procID>
A process number
<opts>
One or more options specified in the command description
<arglist>
A list of parameters
<text>
A character string ended by end-of-line
<num>
A decimal number, unless otherwise specified
<file>
An existing file
<string>
An alpha-numeric string of ASCII characters
General Notes
The utility syntax specified in the command section does not include the
shell’s built-in options like alternate memory size, I/O redirection,
piping, etc. The shell filters out these options from the command line
before processing the program being called.
The equal sign (=) used in many utility options is generally optional.
The k used in the alternate memory size option is also generally
optional. For example, you may write –b=256k as –b256, –b256k,
or –b=256.
Utilities that use the –z option expect one file name to be input per line.
If you use the –z=<file> option of a utility, <file> may
contain comments.
Unless otherwise specified, command line options may appear
anywhere on the command line. For example, the following command
lines provide the same results:
attr –a junk –pw
attr junk –a –pw
attr junk –pw –a
9-3
Chapter 9
The OS-9 Utilities
Utilities with only the –? option do not allow you to list any other
options on the command line. Also, built-in shell commands, such as
chd and set, do not have any options including the –? option.
cio, the utility trap handler, must be in the execution directory or
pre-loaded into memory. By using special I/O techniques, cio allows the
utilities to be much smaller. Most utility programs fail to execute if cio
is missing. cio is typically loaded into memory at startup.
attr
Change/Examine File Security Attributes
Syntax
attr [<opts>] {<path>} {<permissions>}
Function
attr is used to examine or change the security attributes (<permissions>) of
the specified file(s).
To use the attr utility, type attr, followed by the pathlist for the file(s)
whose security permissions you want to change or examine. Then, enter a
list of permissions to turn on or off.
You turn on a permission by giving its abbreviation preceded by a hyphen
(–). You turn it off by preceding its abbreviation with a hyphen followed
by the letter n (–n). Permissions not explicitly named are unaffected.
If no permissions are specified on the command line, the current file
attributes are displayed.
You cannot examine or change the attributes of a file you do not own
unless you are the super user. A super user can examine or change the
attributes of any file in the system.
The file permission abbreviations are:
Abbreviation:
d
s
r
w
e
pr
pw
pe
9-4
Description:
Directory file
Single user file. s denotes a non-sharable file.
Read permission to owner
Write permission to owner
Execute permission to owner
Read permission to public
Write permission to public
Execute permission to public
Chapter 9
The OS-9 Utilities
Important: The owner is the creator of the file. Owner access is given to
any user with the same group ID number as the owner. The public is any
user with a different group ID number than the owner. You can determine
file ownership with the dir –e command.
Important: You can use attr to change a directory file to a non-directory
file if all entries have been deleted from it. You may also use the deldir
utility to delete directory files. You cannot change a non-directory file to a
directory file with this command. The directory attribute can only be
turned on when a directory is created with the makdir utility.
Options
Option:
Description:
–?
Displays the options, function, and command syntax of attr.
–a
Suppresses the printing of attributes.
–x
Searches for the specified file in the execution directory. The
file must have execute permission to be found using –x.
–z
Reads the file names from standard input.
–z=<file>
Reads the file names from <file>.
Examples
This example displays the current attributes of myfile.
$ attr myfile
This example turns off the public read and public write permissions.
$ attr myfile –npr –npw
This example turns on both the public and owner read, write, and
execute permissions.
$ attr myfile –rweprpwpe
This example displays the attributes of the file names read from
standard input.
$ attr –z
This example displays the attributes of the file names read from file1.
$ attr –z=file1
9-5
Chapter 9
The OS-9 Utilities
This example turns off public write and turns on public read for all files in
the directory.
$ attr –npwpr *
This example lists the attributes of all files that have names ending in .lp.
$ attr *.lp
binex/exbin
Convert Binary Files to S-Record/S-Record to Binary
Syntax
binex [<opts>] [<path1> [<path2>]]
exbin [<path1> [<path2>]]
Function
binex converts binary files to S-record files. The exbin utility converts
Srecord files to binary.
S-record files are a type of text file containing records that represent binary
data in hexadecimal form. This Motorola-standard format is often directly
accepted by commercial PROM programmers, emulators, logic analyzers,
and similar devices that use the RS-232 interface. It can be useful for
transmitting files over data links that can only handle character type data. It
can also be used for converting OS-9 assembler or compiler generated
programs to load on non-OS-9 systems.
converts the OS-9 binary file specified by <path1> to a new file
with Srecord format. The new file is specified by <path2>. S-records have
a header record to store the program name for informational purposes and
each data record has an absolute memory address. This absolute memory
address is meaningless to OS-9 because OS-9 uses positionindependent code.
binex
binex
currently generates the following S-record types:
Record type:
S1 records
S2 records
S3 records
S7 records
S8 records
S9 records
9-6
Description:
Use a two byte address field
Use a three byte address field
Use a four byte address field
Terminate blocks of S3 records
Terminate blocks of S2 records
Terminate blocks of S1 records
Chapter 9
The OS-9 Utilities
To specify the type of S-record file to generate, use the –s=<num> option.
<num> = 1, 2, etc., corresponding to S1, S2, etc.
exbin is
the inverse operation. <path1> is assumed to be an S-Record
format text file which exbin converts to pure binary form in a new file,
<path2>. The load addresses of each data record must describe contiguous
data in ascending order. exbin does not generate or check for the proper
OS-9 module headers or CRC check value required to actually load the
binary file. You can use ident to check the validity of the modules if they
are to be loaded or run. exbin converts any of the S-record types
mentioned above.
Using either command, standard input and output are assumed if both paths
are omitted. If the second path is omitted, standard output is assumed.
Options
Option:
Description:
–?
Displays the options, function, and command syntax of binex/exbin.
–a=<num>
Specifies the load address in hex. This is for binex only.
–s=<num>
Specifies which type of S-record format is to generate. This is for
binex only.
–x
binex searches for <path1> in the execution directory. This is for
binex only.
Examples
The following example downloads a program to T1. This type of command
downloads programs to devices such as PROM programmers.
$ binex scanner.S1 >/T1
The next example generates prog.S1 in S1 format from the binary
file, prog .
$ binex –s1 prog prog.S1
The following example generates CMDS/prog in OS-9 binary format from
the S1 type file, program.S1 .
$ exbin prog.S1 cmds/prog
9-7
Chapter 9
The OS-9 Utilities
break
Invoke System Level Debugger or Reset System
Syntax
break
Function
break executes
an F$SysDbg system call. This call stops OS-9 and all user
processes and returns control to the ROM debugger. The debugger g[o]
command resumes execution of OS-9.
You should only call break from the system’s console device, because the
debugger only communicates with that device. If break is invoked from
another terminal, you must still use the system’s console device to
communicate with the debugger.
Only super users can execute break.
Important: break is used only for system debugging. It should not be
included with or run on a production system.
Important: If there is no debugger in ROM or if the debugger is disabled,
break will reset the system.
ATTENTION: You must be aware of any open network paths
when you use the break utility as all timesharing is stopped.
Option
9-8
Command:
Description:
–?
Displays the function and command syntax of break.
Chapter 9
The OS-9 Utilities
build
Build a Text File from Standard Input
Syntax
build <path>
Function
build
creates a file specified by a given pathlist.
To use the build utility, type build and a pathlist. A question mark prompt
(?) is displayed. This requests an input line. Each line entered is written to
the output file. Entering a line consisting of only a [CR] causes build to
terminate. The build utility also terminates when you enter an end-of-file
character at the beginning of an input line. The end-of-file character is
typically [Esc].
Option
Option:
Description:
–?
Displays the function and command syntax of build.
Example
$
?
?
?
build newfile
Build should only be used
in creating short text files.
[RETURN]
$ list newfile
Build should only be used
in creating short text files.
9-9
Chapter 9
The OS-9 Utilities
cfp
Command File Processor
Syntax
cfp [<opts>] [<path1>] {<path2>}
Function
creates a temporary procedure file in the current data directory and
then invokes the shell to execute it.
cfp
To create a temporary procedure file, type cfp, the name of the procedure
file (<path1>), and the file(s) (<path2>) to be executed by the
procedure file.
All occurrences of an asterisk (*) in the procedure file (<path1>) are
replaced by the given pathlists, <path2>, unless preceded by the tilde
character (~). For example, ~* translates to *. The command procedure is
not executed until all input files have been read.
For example, if you have a procedure file in your current data directory
called copyit that consists of a single command line, copy *, all of your C
programs from two directories, PROGMS and MISC.JUNK, are placed in
your current data directory by typing:
$ cfp copyit ../progms/*.c ../misc.junk/*.c
If you use the “–s=<string>” option, you may omit the name of the
procedure file, but you must enclose the option and its string in quotes. The
–s option causes the cfp utility to use the string instead of a procedure file.
For example:
$ cfp “–s=copy *” ../progms/*.c ../misc.junk/*.c
Important: You must use double quotes to force the shell to send the
string s=copy * as a single parameter to cfp. The quotes also prevent the
shell from expanding the asterisk (*) to include all pathlists in the current
data directory.
In the above examples, cfp creates a temporary procedure file to copy
every file ending in .c in both PROGMS and MISC.JUNK to the current
data directory. The procedure file created by cfp is deleted when all the
files have been copied.
9-10
Chapter 9
The OS-9 Utilities
Using the –s option is convenient because you do not have to edit the
procedure file to change the copy procedure. For example, if you are
copying large C programs, you may want to increase the memory
allocation to speed up the process.
You can allocate the additional memory on the cfp command line:
$ cfp “–s=copy –b100 *” ../progms/*.c ../misc.junk/*.c
You can use the –z and –z=<file> options to read the file names from either
standard input or a file. Use the –z option to read the file names from
standard input. For example, if you have a procedure file called count.em
that contains the command count –l * and you want to count the lines in
each program to see how large the programs are before you copy them,
enter the following command line:
$ cfp –z count.em
The command line prompt does not appear because cfp is waiting for
input. Enter the file names on separate command lines. For example
$ cfp –z count.em
../progms/*.c
../misc.junk/*.c
When you have finished entering the file names, press the [CR] a second
time to get the shell prompt.
If you have a file containing a list of the files to copy, enter:
$ cfp –z=files “–s=copy *”
Options
Option:
–?
–d
–nd
–e
–ne
Description:
Displays the options, function, and command syntax of cfp.
Deletes the temporary file. This is the default.
Does not delete the temporary file.
Executes the procedure file. This is the default.
Does not execute the procedure file. Instead, it will dump to standard
output. This option causes –d and –nd to have no effect because the
temporary procedure file is not created.
–s=<str>
Reads <str> instead of a procedure file. If the string contains characters
interpreted by the shell, the entire option needs to be enclosed in quotes.
It does not make sense to specify both a procedure file and this option.
–t=<path>
Creates the temporary file at <path> rather than in the current
working directory.
Reads the file names from standard input instead of <path2>.
Reads the file names from <file> instead of <path2>.
–z
–z=<file>
9-11
Chapter 9
The OS-9 Utilities
Examples
In this example, test.p is a procedure file that contains the command line
list * >/p2. The command cfp test.p file1 file2 file3 produces a procedure
file containing the following commands:
list file1 >/p2
list file2 >/p2
list file3 >/p2
The following command accomplishes the same thing:
$ cfp “–s=list * >/p2” file1 file2 file3
9-12
Chapter 9
The OS-9 Utilities
chd/chx
Change Current Data Directory/Current Execution Directory
Syntax
chd [<path>]
chx <path>
Function
and chx are built-in shell commands used to change OS-9’s working
data directory or working execution directory.
chd
To change data directories, type chd and the pathlist to the new data
directory. To change execution directories, type chx and the pathlist to the
new execution directory. In both cases, a full or relative pathlist may be
used. Relative pathlists used by chd and chx are relative to the current data
and execution directory, respectively.
If the HOME environment variable is set, the chd command with no
specified directory will change your data directory to the directory
specified by HOME.
Important: These commands do not appear in the CMDS directory as they
are built-in to the shell.
Examples
$ chd /d1/PROGRAMS
$ chx ..
$ chx binary_files/test_programs
$ chx /D0/CMDS; chd /D1
9-13
Chapter 9
The OS-9 Utilities
cmp
Compare Two Binary Files
Syntax
cmp [<opts>] <path1> <path2>
Function
cmp opens two files and performs a comparison of the binary values of the
corresponding data bytes of the files. If any differences are encountered,
the file offset (address), the hexadecimal value, and the ASCII character
for each byte are displayed.
The comparison ends when an end-of-file is encountered on either file. A
summary of the number of bytes compared and the number of differences
found is displayed.
To execute cmp, type cmp and the pathlists of the files to be compared.
Options
Option:
–?
–b=<num>[k]
–s
–x
Description:
Displays the options, function, and command syntax of cmp.
Assigns <num>k of memory for cmp to use. cmp uses a 4K memory
by default.
Silent mode. Stops the comparison when the first mismatch occurs and
prints an error message.
Searches the current execution directory for both of the specified files.
Examples
The following example uses an 8K buffer to compare file1 with file2.
$ cmp file1 file2 –b=8k
Differences
(hex) (ascii)
byte
#1 #2 #1 #2
======== == == == ==
00000019 72 6e
r
n
0000001a 73 61
s
a
0000001b 74 6c
t
l
Bytes compared: 0000002d
Bytes different: 00000003
file1 is longer
The following example compares file1 with itself.
$ cmp file1 file1
Bytes compared: 0000002f
Bytes different: 00000000
9-14
Chapter 9
The OS-9 Utilities
code
Print Hex Value of Input Character
Syntax
code
Function
prints the input character followed by the hex value of the input
character. Unprintable characters print as a period (.). The keys specified
by tmode quit and tmode abort terminate code. tmode quit is normally
[Ctrl-E], and tmode abort is normally [Ctrl-C].
code
The most common usage of code is to discover the value of an unknown
key on the keyboard or the hex value of an ASCII character.
Option
Option:
Description:
–?
Displays the function and command syntax of code.
Example
$ code
ABORT or QUIT characters will terminate CODE
a –> 61
e –> 65
A –> 41
. –> 10
. –> 04
$
9-15
Chapter 9
The OS-9 Utilities
compress
Compress ASCII Files
Syntax
compress [<opts>] {<path>}
Function
compress reads
the specified text file(s), converts it to compressed form,
and writes the compressed text file to standard output or to an optional
output file.
To use compress, type compress and the path of the text file to compress.
If no files are given, standard input is used.
compress replaces
multiple occurrences of a character with a three
character coded sequence:
aaaaabbbbbcccccccccc would
be replaced with ~Ea~Eb~Jc.
Each compressed input file name is appended with _comp. If a file with
this name already exists, the old file is overwritten with the new file.
Typical files compress about 30% smaller than the original file.
compress reduces
the size of a file to save disk space. See the expand
utility for details on how to expand a compressed file.
ATTENTION: Only use compress and expand on text files.
Options
9-16
Option:
Description:
–?
Displays the options, function, and command syntax of compress.
–d
Deletes the original file. This is inappropriate when no pathlist is specified
on the command line and standard input is used.
–n
Creates an output file.
–z
Reads file names from standard input.
–z=<file>
Reads file names from <file>.
Chapter 9
The OS-9 Utilities
Examples
In the first example, file1 is compressed, file1_comp is created, and file1
is deleted.
$ compress file1 –dn
In this example, file2 is compressed, file3 is created from the redirected
standard output, and file2 is deleted.
$ compress file2 –d >file3
9-17
Chapter 9
The OS-9 Utilities
copy
Copy Data From One File to Another
Syntax
copy [<opts>] <path1> [<path2>]
Function
copies data from <path1> to <path2>. If <path2> already exists, the
contents of <path1> overwrites the existing file. If <path2> does not exist,
it is created. If no files are given on the command line and the –z option is
not specified, an error is returned.
copy
You can copy any type of file. It is not modified in any way as it is copied.
The attributes of <path1> are also copied exactly.
Important: You must have permission to copy the file. You must be the
owner of the file specified by <path1> or have public read permission in
order to copy the file. You must also be able to write to the specified
directory. In either case, if the copy procedure is successful, <path2> has
your group.user number unless you are the super user. If you are the super
user, <path2> has the same group.user number as <path1>.
If <path2> is omitted, the destination file has the same name as the source
file. It is copied into the current data directory. Consequently, the following
two copy commands have the same effect:
$ copy /h0/cmds/file1 file1
$ copy /h0/cmds/file1
copy is also capable of copying one or more files to the same directory by
using the –w=<dir> option. The following command copies file1 and file2
into the BACKUP directory:
$ copy file1 file2 –w=backup
If used with wildcards, the –w=<dir> option becomes a selective dsave.
The following command copies all files in the current data directory that
have names ending with .lp into the LP directory:
$ copy *.lp –w=lp
Data is transferred using large block reads and writes until an end-of-file
occurs on the input path. Because block transfers are used, normal output
processing of data does not occur on character-oriented devices such as
terminals, printers, etc. Therefore, the list utility is preferred over copy
when a file consisting of text is sent to a terminal or printer.
9-18
Chapter 9
The OS-9 Utilities
Important: copy always runs faster if you specify additional memory with
the –b option. This allows copy to transfer data with a minimum number of
I/O requests.
Options
Option:
Description:
–?
Displays the options, function, and command syntax of copy.
–a
Aborts the copy routine if an error occurs. This option effectively cancels
the continue (y/n) ? prompt of the –w option.
–b=<num>k
Allocates <num>k memory to be used by copy. copy uses a 4K memory
by default.
–f
Rewrites destination files with no write permission.
–p
Does not print a list of the files copied. This option is only for copying
multiple files.
–r
Overwrites the existing file.
–v
Verifies the integrity of the new file.
–w=<dir>
Copies one or more files to <dir>. This option prints the file name after
each successful copy. If an error such as no permission to copy occurs,
the prompt continue (y/n) ? is displayed.
–x
Uses the current execution directory for <path1>.
–z
Reads file names from standard input.
–z=<file>
Reads file names from <file>.
Examples
The following example copies file1 to file2. If file2 already exists, error
#218 is returned.
$ copy file1 file2
This example copies file1 to file2 using a 15K buffer.
$ copy file1 file2 –b=15k
This example copies all files in the current data directory to MYFILE.
$ copy * –w=MYFILE
9-19
Chapter 9
The OS-9 Utilities
This example copies all files in the current data directory that have names
ending in .lp.
$ copy *.lp –w=MYFILE
This example copies /d1/joe and /d0/jim to FILE.
$ copy /d1/joe /d0/jim –w=FILE
This example writes file3 over file4.
$ copy file3 file4 –r
9-20
Chapter 9
The OS-9 Utilities
count
Count Characters, Words, and Lines in a File
Syntax
count [<opts>] {<path>}
Function
counts the number of characters in a file and optionally prints a
breakdown consisting of each unique character found and the number of
times it occurred.
count
To count the number of characters in a file, enter count and the pathlist of
the file to examine. If no pathlist is specified, count examines lines from
standard input.
count recognizes the tab, line feed, and form feed characters as
line delimiters.
By using the –w option, count counts the number of words in a file. A
word is defined as a sequence of nonblank, non-carriage-return characters.
By using the –l option, the number of lines in a file is displayed. A line is
defined by zero or more characters ending in a [CR].
Options
Option:
–?
–b
–c
–l
–w
–z
–z=<file>
Description:
Displays the options, function, and command syntax of count.
Counts characters and gives a breakdown of their occurrence.
Counts characters.
Counts lines.
Counts words.
Reads file names from standard input.
Reads file names from <file>.
Example
$ list file1
first line
second line
third line
$ count
“file1”
”file1”
“file1”
–clw file1
contains 34 characters
contains 6 words
contains 3 lines
9-21
Chapter 9
The OS-9 Utilities
date
Display System Date and Time
Syntax
date [<opts>]
Function
displays the current system date and system time. The system date
and time are set by the setime utility.
date
Options
Option:
Description:
–?
Displays the options, function, and command syntax of date.
–j
Displays the Julian date and time.
–m
Displays the military time (24 hour clock) after the date.
Examples
$ date
December 18, 1990 Tuesday 2:20:20 pm
$ date –m
December 18, 1990 Tuesday 14:20:24
The following example redirects the current date and time to the printer:
$ date >/p
9-22
Chapter 9
The OS-9 Utilities
dcheck
Check the Disk File Structure
Syntax
dcheck [<opts>] <devname>
Function
is a diagnostic tool used to detect the condition and the general
integrity of the directory/file linkages of a disk device.
dcheck
To use dcheck, type dcheck, the option(s) desired, and the name of the disk
device to check.
dcheck first
verifies and prints some of the vital file structure parameters.
It moves down the tree file system to all directories and files on the disk.
As it moves down the tree file system, the integrity of the file descriptor
sectors (FDs) is verified. Any discrepancies in the directory/file linkages
are reported.
From the segment list associated with each file, dcheck builds a sector
allocation map. This map is created in memory.
If any FDs describe a segment with a cluster not within the file structure of
the disk, a message is reported:
*** Bad FD segment (xxxxxx–yyyyyy)
This indicates that a segment starting at sector xxxxxx (hexadecimal) and
ending at sector yyyyyy cannot be used on this disk. The entire FD is
probably bad if any of its segment descriptors are bad. Therefore, the
allocation map is not updated for bad FDs.
While building the allocation map, dcheck ensures that each disk cluster
appears only once in the file structure. If a cluster appears more than once,
dcheck displays a message:
Sector xxxxxx (byte=nn bit=n) previously allocated
This message indicates the cluster at sector xxxxxx has been found at least
once before in the file structure. byte=nn bit=n specifies in which byte of
the bitmap this error occurred and in which bit in that byte. The first byte
in the bitmap is numbered zero. For dcheck’s purposes, bits are numbered
zero through seven; the most significant bit is numbered zero. The message
may be printed more than once if a cluster appears in a segment in more
than one file.
9-23
Chapter 9
The OS-9 Utilities
Occasionally, sectors on a disk are marked as allocated even though they
are not associated with a file or the disk’s free space. This is most
commonly caused by media defects discovered by format. These defective
sectors are not included in the free space for the disk. This can also happen
if a disk is removed from a drive while files are still open, or if a directory
containing files is deleted by a means other than deldir.
If all the sectors of a cluster are not used in the file system, dcheck prints
a message:
xxxxxx cluster only partially used
The allocation map created by dcheck is then compared to the allocation
map stored on the disk. Any differences are reported in messages:
Sector xxxxxx (byte=nn bit=n) not in file structure
Sector xxxxxx (byte=nn bit=n) not in bit map
The first message indicates sector number xxxxxx was not found as part of
the file system but is marked as allocated in the disk’s allocation map. In
addition to the causes previously mentioned, some sectors may have been
excluded from the allocation map by the format program because they
were defective. They could be the last sectors of the disk, whose sum is too
small to comprise a cluster.
The second message indicates that the cluster starting at sector xxxxxx is
part of the file structure but is not marked as allocated in the disk’s
allocation map. This type of disk error could cause problems later. It is
possible that this cluster may later be allocated to another file. This would
overwrite the current contents of the cluster with data from the newly
allocated file. All current data located in this cluster would be lost. Any
clusters reported as previously allocated by dcheck have this problem.
Repairing the Bitmap
dcheck is
capable of repairing two types of disk problems using the –r and
the –y options. If a cluster was found in the file structure but not in the
bitmap, the bit may be turned on in the bitmap to include the cluster. If the
cluster was marked in the bitmap but not in the file structure, the bit in the
bitmap may be turned off.
ATTENTION: Do not use either of these options unless you
thoroughly understand what you are doing. These errors could
be caused by previously mentioned problems and perhaps
should not be repaired.
9-24
Chapter 9
The OS-9 Utilities
Restrictions
Only the super user (user 0.n) may use this utility.
dcheck should
have exclusive access to the disk being checked. dcheck
can be fooled if the disk allocation map changes while it is building its
bitmap file from the changing file structure.
Options
Option:
Description:
–?
Displays the options, function, and command syntax of dcheck.
–d=<num>
Prints the path to the directory <num> deep.
–r
Repair mode. Prompts to turn on or off bits in the bit map.
–y
Repair mode. Does not prompt for repair, but answers yes to all prompts.
This option must be used with the –r option.
Example
$ dcheck /d2
Volume – ’Ram Disk (Caution: Volatile)’ on device /dd
$001000 total sectors on media, 256 bytes per sector
Sector $000001 is start of bitmap
$0200 bytes in allocation map, 1 sector(s) per cluster
Sector $000003 is start of root dir
Building allocation map...
$0003 sectors used for id sector and allocation map
Checking allocation map...
’Ram Disk (Caution: Volatile)’ file structure is intact
5 directories, 60 files
580096 of 1048576 bytes (0.55 of 1.00 meg) used on media
9-25
Chapter 9
The OS-9 Utilities
deiniz
Detach a Device
Syntax
deiniz [<opts>] {<modname>}
Function
When a device is no longer needed, use deiniz to remove the device from
the system device table. deiniz uses the I$Detach system call to
accomplish this. Information concerning I$Detach is located in the OS-9
Technical Manual.
To remove a device from the system device table, type deiniz, followed
by the name of the module(s) to detach. <modname> may begin with a
slash (/). The module names may be read from standard input or from a
specified pathlist if the –z option is used.
ATTENTION: Do not deiniz a module unless you have
explicitly iniz-ed it. If you do deiniz a device that you have not
iniz-ed, you could cause problems for other users who may be
using the module.
Options
Option:
Description:
–?
Displays the options, function, and command syntax of deiniz.
–z
Reads the module names from standard input.
–z=<file>
Reads the module names from <file>.
Example
$ deiniz t1 t2 t3
9-26
Chapter 9
The OS-9 Utilities
del
Delete a File
Syntax
del [<opts>] {<path>}
Function
deletes the file(s) specified by the pathlist(s). You must have write
permission for the file(s) to be deleted. You cannot delete directory files
with this utility unless their attribute is changed to non-directory.
del
Options
Option:
Description:
–?
Displays the options, function, and command syntax of del.
–e
Erases the disk space that the file occupied.
–f
Delete files with no write permission.
–p
Prompts for each file to be deleted with the following prompt:
delete <filename> ? (y,n,a,q)
y = yes. n = no. a = delete all specified files without further prompts. q =
quit the deleting process.
–x
Looks for the file in the current execution directory.
–z
Reads the file names from standard input.
–z=<file>
Reads the file names from <file>.
Examples
The following examples use the following directory structure.
$ dir
Directory of /D1 14:29:46
junk
myfile
number_five
old_test_program
newfile
test_program
This example deletes newfile.
$ del newfile
This example deletes all files in the current data directory with an
underscore character in their name.
$ del *_*
9-27
Chapter 9
The OS-9 Utilities
After executing the preceding two examples, the directory has the
following files:
$ dir
Directory of /D1 14:30:37
junk
myfile
To delete all files in the current directory, type:
$ dir –u ! del –z
See Also
The attr and deldir utility descriptions
9-28
Chapter 9
The OS-9 Utilities
deldir
Delete All Files in a Directory
Syntax
deldir [<opts>] {<path>}
Function
deldir deletes
directories and the files they contain one file at a time.
deldir is only used to delete all files in the directory.
When deldir is run, it prints a prompt message:
$ deldir OLDFILES
Deleting directory: OLDFILES
Delete, List, or Quit (d, l, or q) ?
A d response initiates the process of deleting files. An l response causes
dir e to run so you can have an opportunity to see the files in the directory
before they are deleted. A q response aborts the command before action is
taken. After listing the files, deldir prompts with:
delete ? (y,n)
The directory to be deleted may include directory files, which may
themselves include directory files, etc. In this case, deldir operates
recursively (that is, lower-level directories are also deleted). The
lower-level directories are processed first.
You must have correct access permission to delete all files and directories
encountered. If not, deldir aborts upon encountering the first file for which
you do not have write permission.
deldir automatically
calls dir and attr, so they must reside in the current
execution directory. When deldir calls dir, it executes a dir –a command to
show all files contained in the directory.
Important: You should never delete the current data directory (.).
Options
Option:
–?
–f
–q
–z
–z=<file>
Description:
Displays the options, function, and command syntax of deldir.
Deletes files regardless of whether write permission is set.
Quiet mode. No questions are asked. The directory and its sub-directories
are all deleted, if possible.
Reads the file names from standard input.
Reads the file names from <file>.
9-29
Chapter 9
The OS-9 Utilities
devs
Display System’s Device Table
Syntax
devs
Function
displays a list of the system’s device table. The device table contains
an entry for each active device known to OS-9. devs does not display
information for uninitialized devices.
devs
The devs display header lists the system name, the OS-9 version number,
and the maximum number of devices allowed in the device table.
Each line in the devs display contains five fields:
Name:
Description:
Device
Name of the device descriptor
Driver
Name of the device driver
File Mgr
Name of the file manager
Data Ptr
Address of the device driver’s static storage
Links
Device use count
Important: Each time a user executes a chd to an RBF device, the use
count of that device is incremented by one. Consequently, the Links field
may be artificially high.
Option
9-30
Option:
Description:
–?
Displays the function and command syntax of devs.
Chapter 9
The OS-9 Utilities
Example
The following example displays the device table for a system named Tazz:
$ devs
TAZZ_VME147
Device
––––––––––
term
h0
d0
dd
t10
t11
t12
t13
t20
t21
t22
t23
5803
3803
mt2
n0
nil
socket
lo0
le0
pipe
pk
pkm00
3807
pcd0
pks00
OS–9/68030 V2.4.x82
Driver
––––––––––
sc8x30
rbsccs
rb320
rbsccs
sc335
sc335
sc335
sc335
sc335
sc335
sc335
sc335
rb320
rb320
sbgiga
n9026
null
sockdvr
ifloop
am7990
null
pkdvr
pkdvr
rb320
rb320
pkdvr
File Mgr
––––––––––
scf
rbf
rbf
rbf
scf
scf
scf
scf
scf
scf
scf
scf
rbf
rbf
sbf
nfm
scf
sockman
ifman
ifman
pipeman
pkman
pkman
rbf
pcf
scf
(128 devices max)
Data Ptr Links
––––––––– ––––––
$007fda40
7
$007fcbe0 31175
$007e94a0
1
$007fcbe0
23
$006d3a70
5
$006d3850
5
$006d3630
5
$006d3410
5
$006d31f0
5
$006d2fd0
5
$006d2db0
5
$006d2b90
5
$007e94a0
20
$007e94a0
1
$006d9640
1
$006d63a0
372
$006d6340
10
$006c0500
4
$006c0380
4
$006bed60
1
$0068ecc0
3
$0048dc90
1
$00427b50
1
$007e94a0
12
$007e94a0
3
$004279b0
2
See Also
The iniz and deiniz utilities
9-31
Chapter 9
The OS-9 Utilities
dir
Display Names of files in a Directory
Syntax
dir [<opts>] {<path>}
Function
displays a formatted list of file names of the specified directory file on
standard output.
dir
To use the dir utility, type dir and the directory pathlist, if desired. If no
parameters are specified, the current data directory is shown. If you use the
–x option, the current execution directory is shown. If a pathlist of a
directory file is specified, the files of the indicated directory are shown.
If the –e option is included, each file’s entire description is displayed: size,
address, owner, permissions, date, and time of last modification. Because
the shell does not interpret the –x option, wildcards do not work as
expected when this option is used.
Unless the –a option is used, file names that begin with a period (.) are
not displayed.
Unformatted Directory Listing
You can print an unformatted directory listing using the –u option. This
allows only the names of the entries of a directory to be displayed. No
directory header is displayed. Entries are printed as follows:
$ dir –u
file1
file2
file3
DIR1
The output of a dir –u can be sent through a pipe to another utility or
program that can use a pipe. For example:
$ dir –u ! attr –z
This displays the attributes of every entry in the current directory.
The –e option can be used to display an extended directory listing without
the header by adding the –u option.
9-32
Chapter 9
The OS-9 Utilities
Options
Option:
Description:
–?
Displays the options, function, and command syntax of dir.
–a
Displays all file names in the directory. This includes file names beginning
with a period.
–d
Appends a slash (/) to all directory names listed. This does not affect the
actual name of the directory.
–e
Displays an extended directory listing excluding file names beginning with
a period.
–n
Displays directory names without displaying the file names they contain.
This option is especially useful with wildcards.
–r
Recursively displays the directories. This does not include file names
beginning with a period.
–r=<num>
Displays the directories recursively up to the <num> level below the
current directory. This does not include file names beginning with a period.
–s
Displays an unsorted listing. This does not include file names beginning
with a period.
–u
Displays an unformatted listing. This does not include file names
beginning with a period.
–x
Displays the current execution directory. This does not include file names
beginning with a period.
–z
Reads the directory names from standard input.
–z=<file>
Reads the directory names from <file>.
Examples
The first example displays the current data directory:
$ dir
Directory of . 12:12:54
BK
BKII
ed11.c
ed2.c
RELS
ed10.c
In the second example, the parent of the working data directory
is displayed:
$ dir ..
This example displays the NEWSTUFF directory:
$ dir NEWSTUFF
9-33
Chapter 9
The OS-9 Utilities
The next example displays the entire description of the current
data directory:
dir –e
Owner
–––––––
1.78
1.78
1.78
1.78
1.78
1.78
0.0
1.78
1.78
1.78
1.78
1.78
1.78
1.78
0.78
1.78
Directory of . 13:54:44
Last modified Attributes Sector Bytecount
––––––––––––– –––––––––– –––––– –––––––––
90/11/28 0357 d–ewrewr
383C8
160
90/11/28 0357 d–ewrewr
383E8
608
90/11/28 0357 d–ewrewr
383D8
160
90/11/14 0841 ––––––wr
F4058
438
90/11/12 0859 ––––––wr
F4068
538
90/11/09 0852 ––––––wr
F2AB0
312
90/04/27 1719 ––––r–wr
71EC8
4626
90/11/14 0911 ––––––wr
B4548
636
90/11/14 0910 ––––––wr
B4AA8
815
90/10/18 1259 ––––––wr
BD418
619
90/06/06 1009 –––wr–wr
82B8
5420
90/11/28 1102 ––––––wr
E0C68
1478
90/11/28 1102 ––––––wr
E1D08
1075
90/09/07 0848 ––––––wr
708B8
274
90/04/12 1206 –––wr–wr
70EE8
1065
90/11/13 1544 ––––––wr
B1650
112
Name
––––
NOTES
PROGRAMS
TEXT
arrayex.c
arrayex.r
asciiinfo
atari.doc
bobble.c
bobble.r
cd.order
cdichanges
checks.c
checks.r
datafile
drvr.a
exloop
To display the execution directory, type:
$ dir –x
To display the entire description of the execution directory, type:
$ dir –xe
To display the contents of the current directory and all directories one level
below this directory, type:
$ dir –r=1
The next example displays the entire description of all files within the
current directory. This includes files within all subdirectories of the
current directory.
$ dir –er
This example displays all directory and file names that begin with B.
$ Dir –n B*
9-34
Chapter 9
The OS-9 Utilities
dump
Formatted File Data Dump in Hexadecimal and ASCII
Syntax
dump [<opts>] [<path> [<addr>]]
Function
produces a formatted display of the physical data contents of <path>.
<path> may be a mass storage file or any other I/O device. dump is
commonly used to examine the contents of non-text files.
dump
To use this utility, type dump and the pathlist of the file to display. An
address within a file may also be displayed. If <path> is omitted, standard
input is used. The output is written to standard output. When <addr> is
specified, the contents of the file are displayed starting with the appropriate
address. <addr> is presumed to be a hexadecimal number.
The data is displayed 16 bytes per line in both hexadecimal and ASCII
character format. Data bytes that have non-displayable values are
represented by periods in the character area.
The addresses displayed on the dump are relative to the beginning of the
file. Because memory modules are position-independent and stored in files
exactly as they exist in memory, the addresses shown on the dump are
relative to the load addresses of the memory modules.
Options
Option:
Description:
–?
Displays the options, function, and command syntax of dump.
–c
Does not compress duplicate lines.
–m
Dumps from a memory resident module.
–s
Interprets the starting offset as a sector number. This is useful for RBF
devices with a sector size not equal to 256.
–x
Indicates that <path> is an execution directory. You must have execute
permission for the pathlist.
9-35
Chapter 9
The OS-9 Utilities
Examples
This example displays keyboard input in hex.
$ dump
This example dumps myfile to printer.
$ dump myfile >/P
This example dumps shortfile.
$ dump shortfile
Sample Output
(starting
address)
Addr
––––––––
00000000
00000010
00000020
9-36
(data bytes in hexadecimal format)
0 1
––––
6d61
0d09
7328
2 3
––––
696e
0d09
293b
4 5
––––
2829
6765
0d09
6 7
––––
0d7b
745f
783d
8 9
––––
0d09
7465
6d65
A B
––––
696e
726d
6e75
C D
––––
7420
5f64
2829
E F
––––
783b
6566
3b0d
(data bytes in
ASCII format)
0 2 4 6 8 A C E
––––––––––––––––
main().{..int x;
....get_term_def
s();..x=menu();.
Chapter 9
The OS-9 Utilities
echo
Echo Text to Output Path
Syntax
echo [<opts>] {<text>}
Function
echo echoes its parameter to the standard output path. echo is typically
used to generate messages in shell procedure files or to send an
initialization character sequence to a terminal.
To use the echo utility, type echo and the text to output. echo reads the text
until a [CR] is encountered. The input then echoes on the output path.
A hexadecimal number representing a character may be imbedded in a
character string but you must precede it with a backslash (\). The shell
removes all but one imbedded space from character strings passed to echo.
Therefore, to allow for more than one blank between characters, you must
enclose the string with double quotes. A single backslash (\) is echoed by
entering two backslashes (\\).
Important: Do not include any of the punctuation characters used by the
shell in the text unless you enclose the string with double quotes.
Options
Option:
–?
–n
–r
–z
–z=<file>
Description:
Displays the options, function, and command syntax of echo.
Separates the text with carriage returns.
Does not send a carriage return after <text>.
Reads the text from standard input.
Reads the text from <file>.
Examples
$ echo “Here is an important message!”
Here is an important message!
This example sends an [Esc] character to a printer (/p1).
$ echo \1b >/p1
$ echo column1
column2
column1 column2 column3
column3
$ echo “column1
column2
column3”
column1
column2
column3
9-37
Chapter 9
The OS-9 Utilities
edt
Line-Oriented Text Editor
Syntax
edt [<opts>] <path>
Function
is a line-oriented text editor that allows you to create and edit
source files.
edt
To use the line-oriented text editor, type edt and the pathlist desired. If the
file is new or cannot be found, edt creates and opens it. edt then displays a
question mark prompt (?) and waits for a command. If the file is found, edt
opens it, displays the last line, and then displays the ? prompt.
The first character of a line must be a space if text is to be inserted. If any
other character is typed in the first character position, edt tries to process
the character as an edt command. edt command format is very similar to
BASIC’s editor.
determines the size of the file to edit and uses the returned size plus 2K
as the edit buffer. If the file does not already exist, the edit buffer is
initialized to 2K. When the end of the edit buffer is reached, a message
is displayed.
edt
Options
9-38
Option:
Description:
–?
Displays the options, function, and command syntax for edt.
–b=<num>k
Allocates a buffer area equal to the size of the file plus <num>k bytes. If
the file does not exist, a buffer of the indicated size is assigned for the
new file.
Chapter 9
The OS-9 Utilities
EDT Commands
All edt commands begin in the first character position of a line.
Command:
Description:
<num>
Moves the cursor to line number <num>.
[Esc]
Closes the file and exits. q also does this.
[CR]
Moves the cursor down one line ([CR]).
+<num>
Moves the cursor down <num> lines. Default is one.
–<num>
Moves the cursor up <num> lines. Default is one.
<space>
Inserts lines.
d[<num>]
Deletes <num> lines. If <num> is not specified, the default value of <num>
is one.
l<num>
Lists <num> lines. <num> may be positive or negative. The default value
of <num> is one.
l*
Lists all lines in the entire file.
q
Quits the editing session. Command returns to the program that called the
editor or the OS-9 shell.
Important: For the following search and replace commands, <delim> may
be any character. The asterisk (*) option indicates that all occurrences of
the pattern are searched for and replaced if specified.
Search command: searches for the occurrences of a pattern. For example:
s[*]<delim><search string><delim>
This example find the first occurence of and:
s/and/
This example finds all occurences of Bob:
s*,Bob,
Replace command: finds and replaces a given string. For example:
c[*]<delim><search string><delim><replace string><delim>
This example replaces the first occurrence of Tuesday with Wednesday:
c/Tuesday/Wednesday/
This example replaces all occurrences of employee with employees:
c*“employee”employees“
9-39
Chapter 9
The OS-9 Utilities
events
Display Active System Events
Syntax
events
Function
events displays
a list of the active events on the system and information
about each event. The events header line lists the system name and the OS9
version number.
Each line in the events display contains six fields:
Field:
Description:
event ID
Event ID number
name
Name of the event
value
Current contents of the event variable
W-inc
Wait increment. Assigned when the event is created and does not change.
S-inc
Signal increment. Assigned when the event is created and does
not change.
links
Event use count. When the event is created, links is assigned the value
one. links is incremented each time a process links to the event.
An event cannot be deleted unless the link count is zero.
If no active events are currently on the system, events displays the message
“No active events.”
Option
9-40
Option:
Description:
–?
Displays the function and command syntax of events.
Chapter 9
The OS-9 Utilities
Example
The following example displays the active system events for a system
named Calvin:
Calvin
event ID
–––––––––
10000
20001
30002
40003
50004
60005
70006
80007
90008
a0009
b000a
c000b
d000c
e000d
f000e
10000f
130012
140013
OS–9/68K V2.4
name
value
W–inc S–inc links
–––––––––––– –––––––––– –––––– –––––– ––––––
evtfffe4000
1
–1
1
1
irqfffe4000
0
–1
1
1
SysMbuf
121952
0
0
1
net_input
0
–1
–1
1
Sur00227750
0
0
0
1
Str002261f0
0
0
0
1
Stw002261f0
0
0
0
1
Str00227380
0
0
0
1
Stw00227380
0
0
0
1
Str00232a50
0
0
0
1
Stw00232a50
0
0
0
1
Str0020ac30
0
0
0
1
Stw0020ac30
0
0
0
1
pkm00i
0
0
0
1
pkm00o
0
0
0
1
teln.1
0
–1
–1
1
Str0020adf0
0
0
0
1
Stw0020adf0
0
0
0
1
See Also
F$Event service request in the OS-9 Technical Manual
9-41
Chapter 9
The OS-9 Utilities
ex
Execute Program as Overlay
Syntax
ex <path> [<arglist>]
Function
is a built-in shell command that causes the process executing the
command to start executing another program. It permits a transition from
the shell to another program without creating another process, thus
conserving system memory.
ex
ex is often used when the shell is called from another program to execute a
specific program, after which the shell is not needed. For example,
applications which use only BASIC need not waste memory space on shell.
ex should always be the last command on a shell input line because any
command lines following it are never processed.
Important: Because this is a built-in shell command, it does not appear in
the CMDS directory.
Examples
$ ex BASIC
$ tsmon /t1& tsmon /t2& ex tsmon /term
9-42
Chapter 9
The OS-9 Utilities
expand
Expand a Compressed File
Syntax
expand [<opts>] {<path>}
Function
expand restores
compressed files to their original form. It is the
complement command of the compress utility.
To expand a compressed file, type expand and the name of the file to
expand. If no file names are given on the command line, standard input
is assumed.
Options
Option:
Description:
–?
Displays the options, function, and command syntax of expand.
–d
Deletes the old version of the file. This option is not appropriate when no
pathlist is specified on the command line and standard input is used.
–n
Sends output to a file instead of the standard output. The file has _exp
appended to it, unless the file name already has a _comp suffix. In this
case, the _comp is removed.
–z
Reads the file names from standard input.
–z=<file>
Reads the file names from <file>.
Examples
This example expands and then deletes data.a, creating data.a_exp.
$ expand data.a –nd
This example expands file1_comp and displays output on standard output.
$ expand file1_comp
In this example, file2_comp is expanded and then deleted, creating file2
with the expanded output.
$ expand –nd file2_comp
9-43
Chapter 9
The OS-9 Utilities
fixmod
Fix Module CRC and Parity
Syntax
fixmod [<opts>] {<modname>}
Function
fixmod verifies
and updates module parity and module CRC (cyclic
redundancy check). You can also use it to set the access permissions and
the group.user number of the owner of the module.
Use fixmod to update the CRC and parity of a module every time a module
is patched or modified in any way. OS-9 cannot recognize a module with
an incorrect CRC.
You must have write access to the file in order to use fixmod.
Use the –u option to recalculate and update the CRC and parity. Without
the –u option, fixmod only verifies the CRC and parity of the module.
The –up=<perm> option sets the module access permissions to <perm>.
<perm> must be specified in hexadecimal. You must be the owner of the
module or a super user to set the access permissions. The permission field
of the module header is divided into four sections from right to left:
owner permissions
group permissions
public permissions
reserved for future use
Each of these sections are divided into four fields from right to left:
read attribute
write attribute
execute attribute
reserved for future use
The entire module access permissions field is given as a four digit
hexadecimal value. For example, the command fixmod –up=555 specifies
the following module access permissions field:
–––––e–r–e–r–e–r
The –uo<g>.<u> option allows the super user to change the ownership of a
module by setting the module owner’s group.user number.
9-44
Chapter 9
The OS-9 Utilities
Options
Option:
Description:
–?
Displays the options, function, and command syntax of fixmod.
–u
Updates an invalid module CRC or parity.
–ua[=]<att.rev>
Changes the module’s attribute/revision level.
–ub
Fixes the sys/rev field in BASIC packed subroutine modules.
–up=<perm>
Sets the module access permissions to <perm>. <perm> must be
specified in hexadecimal.
–uo<g>.<u>
Sets the module owner’s group.user number to <g>.<u>. Only the super
user is allowed to use this option.
–x
Looks for the module in the execution directory.
–z
Reads the module names from standard input.
–z=<file>
Reads the module names from <file>.
Examples
This example checks parity and CRC for module dt.
$ fixmod dt
This example checks parity and CRC for module dt and updates them
if necessary.
$ fixmod dt –u
See Also
Refer to the OS-9 Technical Manual for more information concerning CRC
and parity. For a full explanation of module header fields, see the
ident utility.
9-45
Chapter 9
The OS-9 Utilities
free
Display Free Space Remaining on a Mass-Storage Device
Syntax
free [<opts>] {<devname>}
Function
displays the number of unused 256-byte sectors on a device available
for new files or for expanding existing files. free also displays the disk’s
name, creation date, cluster size, and largest free block in bytes.
free
To use the free utility, type free followed by the name of the device to
examine. The device name must be the name of a mass-storage,
multi-file device.
Data sectors are allocated in groups called clusters. The number of sectors
per cluster depends on the storage capacity and physical characteristics of
the specific device. This means that small amounts of free space, given in
sectors, may not be divisible into the same number of files.
For example, a given disk system uses 8 sectors per cluster. A free
command shows the disk has 32 sectors free. Because memory is allocated
in clusters, a maximum of four new files could be created even if each had
only one sector.
Options
Option:
Description:
–?
Displays the option, function, and command syntax of free.
–b=<num>
Uses the specified buffer size.
Examples
$ free
“Tazz: /H0 Wren V” created on: Oct 6, 1990
Capacity: 2347860 sectors (256–byte sectors, 8–sector clusters)
1508424 free sectors, largest block 1380120 sectors
386156544 of 601052160 bytes (368.26 of 573.20 Mb) free on media (64%)
353310720 bytes (336.94 Mb) in largest free block
9-46
Chapter 9
The OS-9 Utilities
grep
Search a File for a Pattern
Syntax
grep [<opts>] [<expression>] {[<path>]}
Function
grep
searches the input pathlist(s) for lines matching <expression>.
To use the grep utility, type grep, the expression to search for, and the
pathlist of the file to search. If no <path> is specified, grep searches
standard input.
If grep finds a line that matches <expression>, the line is written to the
standard output with an optional line number of where it is located within
the file. When multiple files are searched, the output has the name of the
file preceding the occurrence of the matched expression.
Expressions
An <expression> is used to specify a set of characters. A string which is a
member of this set is said to match the expression. To facilitate the creation
of expressions, some metacharacters are defined to create complex sets of
characters. These special characters are:
Character:
.
~
Name:
ANY
BOL or NEGATE
Description:
The period (.) is defined to match any ASCII character except new line.
The tilde (~) is defined to modify a character class as described above
when located between square brackets ([ ]). At the beginning of an entire
expression, it requires the expression to compare and match the string at
only the beginning of the line.
The NEGATE character modifies the character class so it matches any
ASCII character not in the given class or newline.
[]
CHARACTER
CLASS
The square brackets ([ ]) define a group of characters which match any
single character in the compare string. grep recognizes certain
abbreviations to aid the entry of ranges of strings:
[a–z]
Equivalent to the string abcdefghijklmnopqrstuvwxyz
[m–pa–f] Equivalent to the string mnopabcdef
[0–7]
Equivalent to the string 01234567
*
CLOSURE
The asterisk (*) modifies the preceding single character expression, so it
matches zero or more occurrences of the single character. If a choice is
available, the longest such group is chosen.
9-47
Chapter 9
The OS-9 Utilities
Character:
$
Name:
EOL
\
ESCAPE
Description:
The dollar sign ($) requires the expression to compare and match the
string only when located at the end of line.
The backslash (\) removes special significance from special characters. It
is followed by a base and a numeric value or a special character. If no
base is specified, the base for the numeric value defaults to hexadecimal.
An explicit base of decimal or hexadecimal can be specified by preceding
the numeric value with a qualifier of d or x, respectively. It also allows
entry of some non-printing characters such as:
\t
\n
\l
\b
\f
=
=
=
=
=
Tab character
New-line character
Line feed character
Backspace character
Form feed character
Example Expressions
You can combine any metacharacters and normal characters to create
an expression:
Expression:
abcd
ab.d
“ab *d”
~abcd
abcd$
~abcd$
[Aa]bcd
abcd[0–9a–zA–z]
bcd[~a–d]
Same as:
abcd
abcd, abxd, ab?d, etc.
“abd”, “ab d”, “ab d”, “ab d”, etc.
abcd (only if very first characters on a line)
abcd (only if very last characters on a line)
abcd (only if abcd is the complete line)
abcd, Abcd
abcd followed by any alphanumeric character
bcd followed by any ASCII char except a, b, c, d, or new line
Options
Option:
–?
–c
–e=<expr>
–f=<path>
–l
–n
–s
–v
–z
–z=<path>
9-48
Description:
Displays the options, function, and command syntax of grep.
Counts the number of matching lines.
Searches for <expr>. This is the same as <expression> in the
command line.
Reads the list of expressions from <path>.
Prints only the names of the files with matching lines.
Prints the relative line number within the file followed by the matched
expression.
Silent Mode. Does not display matching lines.
Prints all lines except for those that match.
Reads the file names from standard input.
Reads the file names from <path>.
Chapter 9
The OS-9 Utilities
Important: –l and –n cannot be used at the same time. –n and –s cannot be
used at the same time.
Examples
To write all lines of myfile that contain occurrences of xyz to standard
output, enter:
$ grep xyz myfile
This example searches myfile for expressions input from words, counts the
number of matches, and gives the line number found with each occurrence:
$ grep –f=words myfile –nc
9-49
Chapter 9
The OS-9 Utilities
help
On-Line Utility Reference
Syntax
help [<utility name>]
Function
help
displays information about a specific utility.
For information about a specific utility, type help and the name of the
desired utility. help displays the function, syntax, and options of the utility.
After the information is displayed, control returns to the shell.
For information about the help utility, type help by itself. help lists the
syntax and function of the help utility.
Important: Built-in shell commands do not have help information.
Examples
$ help build
$ help attr
9-50
Chapter 9
The OS-9 Utilities
ident
Print OS-9 Module Identification
Syntax
ident [<opts>] {<modname>}
Function
displays module header information and the additional information
that follows the header from OS-9 memory modules. ident also checks for
incomplete module headers.
ident
ident
displays the following information in this order:
module size
owner
CRC bytes (with verification)
header parity (with verification)
edition
type/language, and attributes/revision
access permission
For program modules it also includes:
execution offset
data size
stack size
initialized data offset
offset to the data reference lists
ident prints the interpretation of the type/language and attribute/revision
bytes at the bottom of the display.
With the exception of the access permission data, all of the above fields are
self-explanatory. The access permissions are divided into four sections
from right to left:
owner permissions
group permissions
public permissions
reserved for future use
Each of these sections are divided into four fields from right to left:
read attribute
write attribute
execute attribute
reserved for future use
9-51
Chapter 9
The OS-9 Utilities
If the attribute is turned on, the first letter of the attribute (r, w, e)
is displayed.
All reserved fields are displayed as dashes unless the fields are turned on.
In that case, the fields are represented with question marks. In any case, the
kernel ignores these fields as they are reserved for future use.
Owner permissions allow the owner to access the module. Group
permissions allow anyone with the same group number as the owner to
access the module. Public permissions allow access to the module
regardless of the group.user number. The following example allows the
owner and the group to read and execute the module, but bars access to
the public:
Permission:
$55
–––––––––e–r–e–r
Options
Option:
Description:
–?
Displays the options, function, and command syntax of ident.
–m
Searches for modules in memory.
–q
Quick mode. Only one line per module.
–s
Silent mode. Quick, but only displays bad CRCs.
–x
Searches for modules in the execution directory.
–z
Reads the module names from standard input.
–z=<file>
Reads the module names from <file>.
Example
$ ident –m ident
Header for:
ident
Module size:
$1562
#5474
Owner:
0.0
Module CRC:
$FA8ECA
Good CRC
Header parity:
$2471
Good parity
Edition:
$C
#12
Ty/La At/Rev:
$101
$8001
Permission:
$555
–––––e–r–e–r–e–r
Exec. off:
$4E
#78
Data size:
$15EC
#5612
Stack size:
$C00
#3072
Init. data off: $1482
#4250
Data ref. off:
$151A
#5402
Prog mod, 68000 obj, Sharable
9-52
Chapter 9
The OS-9 Utilities
iniz
Attach Devices
Syntax
iniz [<opts>] {<devname>}
Function
performs an I$Attach system call on each device name passed to it.
This initializes and links the device to the system.
iniz
To attach a device to the system, type iniz and the name(s) of the
device(s) to be attached to the system. OS-9 searches the system module
directory using the name of the device to see if the device is
already attached.
If the device is not already attached, an initialization routine is called to
link the device to the system.
If the device is already attached, it is not re-initialized, but the link count
is incremented.
The device names may be listed on the command line, read from standard
input or read from a specified pathlist.
Important: Do not iniz non-sharable device modules as they become
“busy” forever.
Options
Option:
–?
–z
–z=<file>
Description:
Displays the options, function, and command syntax of iniz.
Reads the device names from standard input.
Reads the device names from <file>.
Examples
This example increments the link counts of modules h0 and term.
$ iniz h0 term
This example increments the link count of any modules with names read
from standard input.
$ iniz –z
This example increments the link count of all modules whose names are
supplied in /h0/file.
$ iniz –z=/h0/file
9-53
Chapter 9
The OS-9 Utilities
irqs
Display System’s IRQ Polling Table
Syntax
irqs
Function
displays a list of the system’s IRQ polling table. The IRQ polling
table contains a list of the service routines for each interrupt handler
known by the system.
irqs
The irqs display header lists the system name, the OS-9 version number,
the maximum number of devices allowed in the device table, and the
maximum number of entries in the IRQ table.
Each line in the irqs display contains seven fields:
Field:
Description:
vector
Exception vector number used by the device. A second number, the
hardware interrupt level, is displayed for auto-vectored interrupts.
prior
Software polling priority.
port addr
Base address of the interrupt generating hardware. The operating system
does not use this value, but passes it to the interrupt service routine.
data addr
Address of the device driver’s static storage.
irq svc
Interrupt service routine’s entry point.
driver
Name of the module which contains the interrupt service routine, usually a
device driver.
device
Name of the device descriptor.
NOTE: If no device name is displayed, the entries relate to IRQ handlers
that support “anonymous” devices (for example, the clock ticker, DMA
devices associated with other peripherals).
Option
9-54
Option:
Description:
–?
Displays the function and command syntax of irqs.
Chapter 9
The OS-9 Utilities
Example
The following example displays the IRQ polling table for a system
named Calvin:
$ irqs
Calvin
OS–9/68K V2.4
(max devs: 32, max irqs: 32)
vector prior port addr data addr irq svc
driver
device
––––––– ––––– ––––––––– ––––––––– ––––––––– ––––––––– ––––––
68
0 $fffe1800 $00230b90 $00215084 am7990
69
5 $fffe4000 $003bd560 $00012ad2 scsi147
70
5 $fffe4000 $003bd560 $00012ad2 scsi147
72
0 $fffe1000 $00000000 $0000ccda tk147
88
5 $fffe3002 $003be3f0 $0000dacc sc8x30
term
88
5 $fffe3000 $003bd300 $0000dacc sc8x30
t1
89
5 $fffe3800 $002044a0 $0000dacc sc8x30
t3
89
5 $fffe3802 $003bbeb0 $0000dacc sc8x30
t2
90
5 $ffff1001 $003bc560 $0000e6b6 sc68560
t4
91
5 $ffff1041 $003bc120 $0000e6b6 sc68560
t5
255
5 $ffff8800 $00245a50 $002458e0 n9026
n0
See Also
F$IRQ system state service request in the OS-9 Technical Manual.
9-55
Chapter 9
The OS-9 Utilities
kill
Abort a Process
Syntax
kill {<procID>}
Function
is a built-in shell command. It sends a signal to kill the process
having the specified process ID number. This unconditionally terminates
the process.
kill
To terminate a process, type kill and the ID number(s) of the process(es)
to abort. The process must have the same user ID as the user executing the
command. Use procs to obtain the process ID numbers.
If a process is waiting for I/O, it cannot die until it completes the current
I/O operation. Therefore, if you kill a process and procs shows it still
exists, the process is probably waiting for the output buffer to be flushed
before it can die.
The command kill 0 kills all processes owned by the user.
Important: Because kill is a built-in shell command, it does not appear in
the CMDS directory.
Examples
$ kill 6 7
$ procs
Id PId Grp.Usr Prior MemSiz Sig S
2
1
0.0
128
0.25k
0 w
3
2
0.0
128
4.75k
0 w
4
3
0.0
5
4.00k
0 a
5
3
0.0
128
8.50k
0 *
6
0
0.0
128
4.00k
0 s
7
0
0.0
128
4.00k
0 s
CPU Time
0.01
4.11
12:42.06
0.08
0.02
0.01
Age
???
01:13
00:14
00:00
01:12
01:12
Module & I/O
sysgo <>>>term
shell <>>>term
xhog <>>>term
procs <>>term
tsmon <>>>t1
tsmon <>>>t2
$ kill 4
$ procs
Id PId Grp.Usr Prior MemSiz Sig S
2
1
0.0
128
0.25k
0 w
3
2
0.0
128
4.75k
0 w
4
3
0.0
128
8.50k
0 *
9-56
CPU Time
Age Module & I/O
0.01
??? sysgo <>>>term
4.11 01:13 shell <>>>term
0.08 00:00 procs <>>term
Chapter 9
The OS-9 Utilities
link
Link a Previously Loaded Module into Memory
Syntax
link [<opts>] {<modname>}
Function
is used to link a previously loaded module into memory. To use this
utility, type link and the name(s) of the module(s) to lock into memory.
The link count of the module specified is incremented by one each time it
is linked. Use unlink to unlink the module when it is no longer needed.
link
Options
Option:
Description:
–?
Displays the options, function, and command syntax of link.
–z
Reads the file names from standard input.
–z=<file>
Reads the file names from <file>.
Examples
$ link prog1 prog2 prog3
This example links modules from linkfile.
$ link –z=linkfile
This example links modules from standard input.
$ link –z
9-57
Chapter 9
The OS-9 Utilities
list
List the Contents of a Text File
Syntax
list [<opts>] {<path>}
Function
list
displays text lines from the specified path(s) to standard output.
To use the list utility, type list and the pathlist. list terminates upon
reaching the end-of-file of the last input path. If more than one path is
specified, the first path is copied to standard output, the second path is
copied next, etc. Each path is copied to standard output in the order
specified on the command line.
list
is most commonly used to examine or print text files.
Options
Option:
Description:
–?
Displays the options, function, and command syntax of list.
–z
Reads the file names from standard input.
–z=<file>
Reads the file names from <file>.
Examples
To redirect the startup listing to the printer and place the entire command
in the background, enter:
$ list /d0/startup >/P&
The following example lists text from files to standard output in the same
order as the command line:
$ list /D1/user5/document /d0/myfile /d0/Bob/text
To list all files in the current data directory, enter:
$ list *
The following example reads the name(s) of the file(s) to list from
namefile and lists their contents.
$ list –z=namefile
9-58
Chapter 9
The OS-9 Utilities
load
Load Module(s)
Syntax
load [<opts>] {<path>}
Function
load
loads one or more modules specified by <path> into memory.
Unless a full pathlist is specified, <path> is relative to your current
execution directory. Consequently, if the module to load is in your
execution directory, you only need to enter its name:
load <file>
If <file> is not in your execution directory and if the shell environment
variable PATH is defined, load searches each directory specified by PATH
until <file> is successfully loaded from a directory. This corresponds to the
shell execution search method using the PATH environment variable. By
using the –l option, load prints the pathlist of the successfully loaded file.
The names of the modules are added to the module directory. If a module
is loaded with the same name as a module already in memory, the module
having the highest revision level is kept.
File Security
The OS-9 file security mechanism enforces certain requirements regarding
owner and access permissions when loading modules into the module
directory.
You must have file access permission to the file to be loaded. If the file is
loaded from an execution directory, the execute permission (e) must be set.
If the file is loaded from a directory other than the execution directory and
the –d option is specified, only the read permission (r) is required.
Important: Unless the file has public execute and/or public read
permission, only the owner of the file or a super user can load the file. Use
the dir –e command to examine a file’s owner and access permissions.
9-59
Chapter 9
The OS-9 Utilities
You must have module access permission to the file being loaded. This is
not to be confused with the file access permission. The module owner and
access permissions are stored in the module header; use ident to examine
them. To prevent ordinary users from loading super user programs, OS-9
enforces the following restriction: if the module group ID is zero (super
group), then the module can be loaded only if the process’ group ID and
the file’s group ID is also zero.
If you are not the owner of a module and not a super user, the public
execute and/or read access permissions must be set. The module access
permissions are divided into three groups: the owner, the group, and the
public. Only the owner of the module or a super user can set the module
access permissions.
Options
Option:
Description:
–?
Displays the options, function, and command syntax of load.
–d
Loads the file from your current data directory, instead of your current
execution directory.
–l
Prints the pathlist of the file to be loaded.
–z
Reads the file names from standard input.
–z=<file>
Reads the file names from <file>.
Example
$ mdir
Module Directory at 14:44:35
kernel
init
p32clk
h0
p32fd
d0
r0
dd
mdir
rbf
d1
p32hd
ram
rbf
d1
mdir
p32hd
ram
$ load edit
$ mdir
Module Directory at 14:44:35
kernel
init
p32clk
h0
p32fd
d0
r0
dd
edit
9-60
Chapter 9
The OS-9 Utilities
login
Timesharing System Login
Syntax
login [<name>] [,] [<password>]
Function
login is
used in timesharing systems to provide login security. It is
automatically called by the timesharing monitor tsmon, or you can
explicitly invoke it after the initial login to change a terminal’s user.
login requests a user name and password, which is checked against a
validation, or password file. If the information is correct, the user’s system
priority, user ID, and working directories are set up according to
information stored in the file. The initial program specified in the password
file is also executed. This initial program is usually the shell. The date,
time, and process number are also displayed.
If you cannot supply a correct user name and password after three
attempts, the login attempt is aborted.
Important: If the shell from which you called login is not needed again,
you may discard it using the ex utility to start the login command:
ex login.
To log off the system, you must terminate the initial program specified in
the password file. For most programs, including shell, you can do this by
typing an end-of-file character [Esc] as the first character on a line.
If the file SYS/motd exists, a successful login displays the contents of
motd on your terminal screen.
The Password File
The password file must be present in the SYS directory being used:
/h0/SYS, /d0/SYS, etc. The file contains one or more variable-length text
entries; one for each user name. These entries are not shell command lines.
Each entry has seven fields. Each field is delimited by a comma. The
fields are:
User name
This field may be up to 32 characters long. It cannot include spaces. The
user name may not begin with a number, a period, or an underscore, but
these characters may be used elsewhere in the name. If this field is empty,
any name matches.
9-61
Chapter 9
The OS-9 Utilities
Password
This field may contain up to 32 characters including spaces. If this field is
omitted, no password is required for the specified user.
Group User ID number
This field allows 0 to 65535 groups and 0 to 65535 users. 0.n is the super
user. The file security system uses this number as the system-wide user ID
to identify all processes initiated by the user. The system manager should
assign a unique ID to each potential user.
Initial process priority
The initial process priority can be from 1 to 65535.
Initial execution directory pathlist
The initial execution directory is usually /d0/CMDS. Specifying a period
(.) for this field defaults the initial execution directory to the CMDS file
located in the current directory, usually /h0 or /d0.
Initial data directory pathlist
This is the specific user directory. Specifying a period (.) for this field
defaults to the current directory.
Initial Program
The name and parameters of the program to initially execute. This is
usually shell.
Sample Password File
superuser,secret,0.0,255,.,.,shell –p=“@howdy”
brian,open sesame,3.7,128,.,/d1/STEVE,shell
sara,jane,3.10,100,/d0/BUSINESS,/d1/LETTERS,wordprocessor
robert,,4.0,128,.,/d1/ROBERT,Basic
mean_joe,midori,12.97,100,Joe,Joe,shell
Using password file entries, login sets the following shell environment
variables. Programs can examine these environment variables to determine
various characteristics of the user’s environment:
Name:
Description:
HOME
Initial data directory pathlist
SHELl
Name of the initial program executed
USER
User name
PATH
Login process’ initial execution directory. If a period (.) is specified, PATH
is not set.
Important: Environment variables are case sensitive.
9-62
Chapter 9
The OS-9 Utilities
To show how login uses the password file to set up environment variables,
examine the previous sample password file. Assume login’s data and
execution directories are /h0 and /h0/CMDS, respectively, logging in as
mean_joe executes a shell with the data directory of /h0/Joe and the
execution directory of /h0/CMDS/Joe. The environment variables passed
to the shell are set as follows:
HOME=/h0/Joe
SHELL=shell
USER=mean_joe
PATH=/H0/Cmds
Option
Option:
Description:
–?
Displays the function and command syntax of login.
9-63
Chapter 9
The OS-9 Utilities
logout
Timesharing System Logout
Syntax
logout
Function
logout terminates
the current shell. If the shell to terminate is the login
shell, logout executes the .logout procedure file before terminating
the shell.
To terminate the current shell, type logout and a [CR]. This terminates the
current shell in the same manner as an end-of-file character, with one
exception. If the shell to be terminated is the login shell, logout executes
the procedure file .logout. The login shell is the initial shell created by the
login utility when you log on the system. In order for logout to execute the
.logout file, .logout must be located in the directory specified by the
HOME environment variable.
Example
3.lac list .logout
procs
wait
date
echo “see you later. . .”
3.lac logout
2.lac logout
1.lac logout
Id PId Grp.Usr Prior MemSiz Sig S
2
1
0.0
128
0.25k
0 w
3
2
0.0
128
4.75k
0 w
4
3
0.0
128
8.50k
0 *
5
0
0.0
128
4.00k
0 s
July 7, 1989 11:59 pm
see you later . . .
9-64
CPU Time
Age Module & I/O
0.01
??? sysgo <>>>term
4.11 01:13 shell <>>>term
0.08 00:00 procs <>>term
0.02 01:12 tsmon <>>>t1
Chapter 9
The OS-9 Utilities
makdir
Create a Directory File
Syntax
makdir [<opts>] {<path>}
Function
makdir creates
a new directory file specified by the given pathlist.
To create a new directory, type makdir and the pathlist specifying the new
directory. You must have write permission for the new directory’s parent
directory. The new directory is initialized and does not initially contain
files except for the pointers to itself (.) and its parent directory (.). All
access permissions are enabled except single use, or non-sharable.
It is an OS-9 convention to capitalize directory names to distinguish them
from lower case file names. This is not required; it is just a convention.
Options
Option:
Description:
–?
Displays the options, function, and command syntax of makdir.
–x
Creates the directory in the execution directory.
–z
Reads the directory names from standard input.
–z=<file>
Reads the directory names from <file>.
Examples
$ makdir /d1/STEVE/PROJECT
$ makdir DATAFILES
$ makdir ../SAVEFILES
$ makdir RED GREEN BLUE ../PURPLE
9-65
Chapter 9
The OS-9 Utilities
mdir
Display Module Directory
Syntax
mdir [<opts>] [<modname>]
Function
displays the present module names in the system module directory.
The system module directory contains all modules currently resident in
memory. By specifying individual module names, only specified modules
are displayed if resident in memory.
mdir
If you use the –e option, an extended listing of the physical address, size,
owner, revision level, user count, and the type of each module is displayed.
The module type is listed using the following mnemonics:
Mnemonic:
Prog
Subr
Mult
Data
Trap
Sys
FMan
Driv
Desc
Type of module:
Program Module
Subroutine Module
Multi Module
Data Module
Trap Handler Module
System Module
File Manager
Device Driver Module
Device Descriptor Module
Important: User-defined modules not corresponding with this list are
displayed by their number.
By using the –a option, the language of each module is displayed instead of
the type in an extended listing. The language field uses the
following mnemonics:
Mnemonic:
Obj
Bas
Pasc
C
Cobl
Fort
Module language:
68000 Machine Code
Basic09 I Code
Pascal I Code
C I Code
Cobol I Code
Fortran I Code
Important: If the language field is inappropriate for the module, a blank
field is displayed. For example, d0, t1, or init.
9-66
Chapter 9
The OS-9 Utilities
ATTENTION: Not all modules listed by mdir are executable as
processes; always check the module type code to make sure it is
executable before executing an unfamiliar module.
Options
Option:
–?
–a
–e
–t=<type>
–u
Description:
Displays the options, function, and command syntax of mdir.
Displays the language field instead of the type field in an extended listing.
Displays the extended module directory.
Displays only the modules of the specified type.
Displays an unformatted listing used for piping the output etc.
Examples
To save space, the following examples are fairly incomplete. Module
directories are generally much larger.
$ mdir
Module Directory at 15:32:38
kernel
rtclock
syscache
rbf
ssm
init
tk147
$ mdir –e
Addr
Size
Owner
Perm Type
–––––––– –––––––– ––––––––––– –––– ––––
00006f00
27562
0.0
0555 Sys
0000daaa
368
0.0
0555 Sys
0000dc1a
1682
0.0
0555 Sys
0000e2ac
622
0.0
0555 Sys
0000e51a
322
0.0
0555 Sys
0000e65c
494
0.0
0555 Subr
0000e84a
8952
0.0
0555 Fman
Revs Ed # Lnk Module name
–––– ––––– ––––– ––––––––––––––
a000
83
2 kernel
a000
10
1 syscache
a000
29
1 ssm
8000
20
0 init
a000
7
1 tk147
a000
8
0 rtclock
e000
79
26 rbf
$ mdir –ea
Addr
Size
Owner
Perm Lang
–––––––– –––––––– ––––––––––– –––– ––––
00006f00
27562
0.0
0555 Obj
0000daaa
368
0.0
0555 Obj
0000dc1a
1682
0.0
0555 Obj
0000e2ac
622
0.0
0555
0000e51a
322
0.0
0555 Obj
0000e65c
494
0.0
0555 Obj
0000e84a
8952
0.0
0555 Obj
Revs Ed # Lnk Module name
–––– ––––– ––––– ––––––––––––––
a000
83
2 kernel
a000
10
1 syscache
a000
29
1 ssm
8000
20
0 init
a000
7
1 tk147
a000
8
0 rtclock
e000
79
26 rbf
9-67
Chapter 9
The OS-9 Utilities
merge
Copy and Combine Files to Standard Output
Syntax
merge [<opts>] {<path>}
Function
copies multiple input files specified by <path> to standard output.
merge is commonly used to combine several files into a single output file.
merge
Data is copied in the order the pathlists are specified on the command line.
merge does no output line editing such as automatic line feed. The standard
output is generally redirected to a file or device.
Options
Option:
Description:
–?
Displays the options, function, and command syntax of merge.
–b=<num>
Allocates a <num>k buffer size for use by merge. The default memory
size is 4K.
–x
Searches the current execution directory for files to be merged.
–z
Reads the file names from standard input.
–z=<file>
Reads the file names from <file>.
Examples
$ merge compile.list asm.list >/p
$ merge file1 file2 file3 file4 >combined.file –b=32k
$ merge –x load link copy >Utils1
$ merge –z=/h0/PROGS/file1 >merged_files
9-68
Chapter 9
The OS-9 Utilities
mfree
Display Free System RAM
Syntax
mfree [<opts>]
Function
displays a list of areas in memory not presently in use and available
for assignment. The address and size of each free memory block
are displayed.
mfree
Options
Option:
Description:
–?
Displays the option, function, and command syntax of mfree.
–e
Displays an extended free memory list.
Examples
$ mfree
Current total free RAM: 1392.00 K–bytes
mfree –e
Minimum allocation size:
4.00 K–bytes
Number of memory segments:
25
Total RAM at startup:
4095.00 K–bytes
Current total free RAM:
1392.00 K–bytes
Free memory map:
Segment Address
Size of Segment
–––––––––––––––––
––––––––––––––––––––––––––
$55000
$7000
28.00 K–bytes
$6A000
$B000
44.00 K–bytes
$80000
$8A000
552.00 K–bytes
$10E000
$1A000
104.00 K–bytes
$12F000
$1E000
120.00 K–bytes
$151000
$60000
384.00 K–bytes
$1B5000
$2000
8.00 K–bytes
$1B8000
$E000
56.00 K–bytes
$1DE000
$1000
4.00 K–bytes
$208000
$4000
16.00 K–bytes
$21C000
$5000
20.00 K–bytes
$245000
$1000
4.00 K–bytes
$249000
$1000
4.00 K–bytes
9-69
Chapter 9
The OS-9 Utilities
moded
Edit OS-9 Modules
Syntax
moded [<opts>] [<path>]
Function
is used to edit individual fields of certain types of OS-9 modules.
Currently, you can use moded to change the Init module and any OS-9
device descriptor module. moded can edit modules which exist in their
own files and modules which exist among other modules in a single file
such as a bootstrap file. moded updates the module’s CRC and header
parity if changes are made.
moded
Regardless of how you invoke moded, you always enter the editor’s
command mode. This is designated by the moded: prompt.
If no parameters are specified on the moded command line, no current
module is loaded in memory.
If a file is specified on the command line, it is assumed to contain a
module of the same name. This module is loaded into the editor’s buffer
and becomes the current module.
If the –f option is used, the specified file is loaded into the editor’s
memory. If a module of the same name exists in the file, it becomes the
current module. If no such module exists, there is no current module.
If the –f option is used and a module name is specified on the command
line, the specified module becomes the current module.
The following commands may be executed from command mode:
Command:
e(dit)
f(ile)
l(ist)
m(odule)
w(rite)
q(uit)
$
?
Description:
Edits the current module.
Opens a file of modules.
Lists the contents of the current module.
Finds a module in a file.
Updates the module CRC and writes to the file.
Returns to the shell.
Calls the OS-9 shell.
Prints this help message.
Once moded is invoked, it attempts to read the moded.fields file. This file
contains module field information for each type of module to edit. Without
this file, moded cannot function.
9-70
Chapter 9
The OS-9 Utilities
moded
searches for moded.fields in the following directories in this order:
Search device /dd first.
Search the default system device, as specified in the Init module
(M$SysDev). If the Init module cannot be linked to, the SYS directory
is searched for on the current device.
If this file cannot be found, an error is returned.
Selecting the Current Module
If you do not specify a module or file on the command line, you may open
a module or file from command mode using the e or f commands,
respectively. The e command prompts for a file name and a module name
if different from the file name. This module then becomes the
current module.
The f command prompts for the name of a file containing one or more
modules. If a module in the file has the same name as the file, it becomes
the current module by default. Use the m command to change the
current module.
Edit Mode
To edit the current module, use the e command. If there is no current
module, the editor prompts for the module name to edit. The editor prints
the name of a field, its current value, and prompts for a new value. At this
point, you can enter any of the following edit commands:
Command:
<expr>
–
.
?
??
[CR]
Description:
A new value for the field.
Re-displays the last field.
Leaves the edit mode.
Prints the edit mode commands.
Prints a description of the current field.
Leaves the current value unchanged.
If the definition of any field is unfamiliar, use the ?? command for a short
description of the current field.
Once you have made all necessary changes to the module, exit edit mode
by reaching the end of the module or by typing a period. At this point, the
changes made to the module exist only in memory. To write the changes to
the actual file, use the w command. This also updates the module header
parity and CRC.
9-71
Chapter 9
The OS-9 Utilities
Listing Module Fields
To examine the field values of the current module, use the l command.
This displays a formatted list of the field names and their values.
The Moded.fields File
The moded.fields file consists of descriptions of specific types of modules.
Each module description consists of three parts: the module type, the field
descriptor, and the description lines. Comments may be interspersed
throughout the file by preceding the comment line with an asterisk.
For example:
* this is a comment line
* it may appear anywhere in the moded.fields file
The Module Type
This is a single line consisting of the module type as specified in M$Type
in the module header and the device type as specified in PD_DTP in the
device descriptor. Both values are specified as decimals and are separated
from each other by a comma. The module type line is the only line which
begins with a pound sign (#). The following example line describes an
RBF device descriptor module:
#15,1
Two module type values are accepted:
Value:
12
15
Description:
System Module (Init module only)
Device Descriptor Module
The device type value is only used when a device descriptor module is
being described. The following device type values are accepted:
Value:
0
1
2
3
4
6
11
Description:
SCF
RBF
PIPE
SBF
NET
UCM
GFM
The Field Descriptor
This consists of two lines. The first is a textual description of the module
field; the baud rate, parity. and descriptor name. moded uses this
description as a prompt to change this field’s value.
9-72
Chapter 9
The OS-9 Utilities
The second line has the following format:
<type>,<offset>,<base>,<value>[,<name>]
<type> specifies the field size in bytes. This is a decimal value. The
following values are accepted:
Value:
1
2
3
4
5
6
Description:
byte
word
3 byte value
long word
long word offset to a string
word offset to a string
<offset> specifies the offset of the field from the beginning of the module.
This is a hexadecimal value.
Important: For device-specific fields (see <name> below), this offset is
the offset of the field within the DevCon section of the descriptor (and not
the module start).
<base> specifies the numeric base in which the field value is displayed in
moded. The following bases are supported:
Value:
0
8
10
16
Description:
ASCII
Octal
Decimal
Hexadecimal
<value> specifies the default value of the field. This is currently unused;
set it to zero.
<name> specifies the driver name for this and each field description that
follows until a new <name> is specified or a module type line is
encountered. This field is optional. For example, <name> allows
descriptors with DevCon sections specific to certain drivers to be edited.
The following lines describe a “descriptor name” field:
descriptor name
5,c,0,0
The field consists of a long-word offset to a string. It is offset 12 bytes
from the beginning of the module. The display base is in ASCII.
9-73
Chapter 9
The OS-9 Utilities
Description Lines
After the Field Descriptor lines, you can use any number of lines to
describe the field. This description is displayed when the edit mode
command, ??, is used. Each description line must begin with an
exclamation point (!) to differentiate it from a Field Descriptor. These lines
are optional, but they are useful when editing uncertain module fields. The
following lines might be used to describe the example used for the
Field Descriptor:
! This field contains the name that the descriptor
! will be known by when in memory.
Example Module Description in Moded.fields
The following example shows how you could set up a module description:
************************************************************
*the following section describes an RBF device descriptor *
************************************************************
#15,1
descriptor name
5,c,0,0
! This field contains the name that the descriptor will
! be known by when in memory.
port address
4,30,16,0
! This is the absolute physical address of the hardware
! controller.
irq vector
1,34,10,0
! This is the irq vector that the device will assert.
! Auto–vectored interrupt devices will use vectors 25–31.
! Vectored interrupt devices will use vectors 64–255.
The Provided Moded.fields File
The provided moded.fields file comes with module descriptions for
standard RBF, SBF, SCF, PIPE, NETWORK, UCM, and GFM module
descriptors. It also includes a description for the Init module.
Options
Option:
–?
–d=<path>
–e=<path>
–f=<path>
9-74
Description:
Displays the help message.
Use <path> for the field descriptions (moded.fields).
Use <path> for the error message file.
Specifies a file consisting of one or more modules to be loaded into the
moded buffer.
Chapter 9
The OS-9 Utilities
pd
Print the Working Directory
Syntax
pd [<opts>]
Function
displays a pathlist showing the path from the root directory to your
current data directory. Programs can use pd to discover the actual physical
location of files or by users to find their whereabouts in the file system. pd
–x displays the pathlist from the root directory to the current
execution directory.
pd
Options
Option:
Description:
–?
Displays the option, function, and command syntax of pd.
–x
Displays the path to the current execution directory.
Examples
$ chd /D1/STEVE/TEXTFILES/MANUALS
$ pd
/d1/STEVE/TEXTFILES/MANUALS
$ chd ..
$ pd
/d1/STEVE/TEXTFILES
$ chd ..
$ pd
/d1/STEVE
$ pd –x
/d0/CMDS
9-75
Chapter 9
The OS-9 Utilities
pr
Print Files
Syntax
pr [<opts>] {<path>}
Function
pr
produces a formatted listing of one or more files to the standard output.
To use the pr utility, type pr and the pathlist(s) of the files to list. The
listing is separated into pages. Each page has the page number, the name of
the listing, and the date and time printed at the top.
pr can produce multi-column output. When printing multiple output
columns with the –m option, if an output line exceeds the column width,
the output line is truncated. pr can also print files simultaneously, one
per column.
If no files are specified on the command line and the –z option is used,
standard input is assumed to be a list of file names, one file name per input
line, to print out. If no files are specified on the command line and the –z
option is not used, standard input is displayed on standard output.
Files and options may be intermixed.
A typical page of output consists of 66 lines of output. Consequently, pr
uses the following default parameters: 61 lines of output with 5 blank lines
as a trailer. The 61 lines of output contain one line for the title, 5 blank
lines for a header, and 55 lines of text. The trailer can be reduced or
eliminated by expanding the number of lines per page.
9-76
Chapter 9
The OS-9 Utilities
Options
An equal sign (=) in an option specification is optional.
Option:
–?
–c=<char>
–d
–f
–h=<num>
–k=<num>
–l=<num>
–m
–n=<num>
–o
–p=<num>
–r=<num>
–t
–u=<title>
–x=<num>
–z
–z=<file>
Description:
Displays the options, function, and command syntax of pr.
Uses <char> as the specified column separator. A <space> is the default
column separator.
Specifies the actual page depth.
Pads the page using a series of \n (new line), instead of a \f (form feed).
Sets the number of blank lines after title line. The default is 5.
Sets the <num> columns that the output file will be listed in for
multi-column output.
Sets the left margin to <num>. The default is 0.
Prints files simultaneously, one file per column. If three files are given on
the command line, each file is printed in its own column on the page.
Specifies the line numbering increment: <num>. The default is 1.
Truncates lines longer than the right margin. By default, long lines are
wrapped around to the next line.
Specifies the number of lines per page: <num>. The default is 61.
Sets the right margin to <num>. The default is 79.
Does not print title.
Uses specified title instead of file name. <title> may not be longer than 48
characters.
Sets the starting page number to <num>. The default is 1.
Reads the file names from standard input.
Reads the file names from <file>.
Examples
The following example prints file1 using the default values of 55 lines of
text per page, one line for the title, and 5 lines each for the header
and trailer:
$ pr file1 >/p1
The following example prints file1 with no title. This uses 56 lines of text
per page:
$ pr file1 –t >/p1
The following example prints file1 using 90 lines per page. Pagination
begins with page 10:
$ pr file1 –x=10 p=90 >/p1
To display a numbered, unformatted listing of the data directory, type:
$ dir –u ! pr –n
9-77
Chapter 9
The OS-9 Utilities
printenv
Print Environment Variables
Syntax
printenv
Function
printenv prints
any defined environment variables to standard output.
Example
$ printenv
NAME=andy
TERM=abm85
LIST=/p1
As_long_as_you_want=long_value
See Also
setenv and unsetenv utility descriptions and the discussion of the shell
environment in the chapter on the shell
9-78
Chapter 9
The OS-9 Utilities
procs
Display Processes
Syntax
procs [<opts>]
Function
procs displays
a list of processes running on the system owned by the user
invoking the routine. Processes can switch states rapidly, usually many
times per second. Consequently, the display is a snapshot taken at the
instant the command is executed and shows only those processes running
at that exact moment.
procs
with no options displays ten pieces of information for each process:
Information:
Description:
Id
Process ID
PId
Parent process ID
Grp.usr
Owner of the process (group and user)
Prior
Initial priority of the process
MemSiz
Amount of memory the process is using
Sig
Number of any pending signals for the process
S
Process status:
w
s
a
*
Waiting
Sleeping
Active
Currently executing
CPU Time
Amount of CPU time the process has used
Age
Elapsed time since the process started
Module & I/O
Process name and standard I/O paths:
<
>
>>
Standard input
Standard output
Standard error output
If several of the paths point to the same pathlist, the identifiers for the
paths are merged.
9-79
Chapter 9
The OS-9 Utilities
–a displays nine pieces of information: the process ID, the parent
process ID, the process name, and standard I/O paths and six new pieces
of information:
procs
Information:
Description:
Aging
Age of the process based on the initial priority and how long it has waited
for processing
F$calls
Number of service request calls made
I$calls
Number of I/O requests made
Last
Last system call made
Read
Number of bytes read
Written
Number of bytes written
The –b option displays both sets of information. The –e option displays
information for all processes in the system. Detailed explanation of all
information displayed by procs is available in the OS-9 Technical Manual.
Options
Option:
Description:
–?
Displays the options, function, and command syntax of procs.
–a
Displays alternate information.
–b
Displays regular and alternate procs information.
–e
Displays all processes of all users.
Examples
9-80
$ procs
Id PId Grp.Usr
2
1
0.0
3
2
0.0
4
3
0.0
5
3
0.0
6
0
0.0
7
0
0.0
Prior MemSiz Sig S
128
0.25k
0 w
128
4.75k
0 w
5
4.00k
0 a
128
8.50k
0 *
128
4.00k
0 s
128
4.00k
0 s
$ procs –a
Id PId Aging
2
1
129
3
2
132
4
3
11
5
3
128
6
0
130
7
0
129
F$calls I$calls Last
5
1 Wait
116
127 Wait
1
0 TLink
7
4 GPrDsc
2
7 ReadLn
2
7 ReadLn
CPU Time
0.01
4.11
12:42.06
0.08
0.02
0.01
Age
???
01:13
00:14
00:00
01:12
01:12
Module & I/O
sysgo <>>>term
shell <>>>term
xhog <>>>term
procs <>>term
tsmon <>>>t1
tsmon <>>>t2
Read Written Module & I/O
0
0 sysgo <>>>term
282
129 shell <>>>term
0
0 xhog <>>>term
0
0 procs <>>>term
0
0 tsmon <>>>t1
0
0 tsmon <>>>t2
Chapter 9
The OS-9 Utilities
profile
Read Commands from File and Return
Syntax
profile <path>
Function
profile causes
the current shell to read its input from the named file and
then return to its original input source which is usually the keyboard.
The file specified in <path> may contain any utility or shell commands,
including those to set or unset environment variables or to change
directories. These changes remain in effect after the command executes.
This is in contrast to calling a normal procedure file by name only, which
would then be executed by a child shell. This would not affect the
environment of the calling shell.
You can nest profile commands. That is, the file itself may contain a profile
command for another file. When the latter profile command is completed,
the first one will resume.
A particularly useful application for profile files is within the .login and
.logout files of a system’s users. For example, if each user includes the
following line in their .login file, system-wide commands (common
environments, news bulletins, etc.) can be included in the
file /dd/SYS/login_sys:
profile /dd/SYS/login_sys
A similar technique can be used for .logout files.
9-81
Chapter 9
The OS-9 Utilities
qsort
In-Memory Quick Sort
Syntax
qsort [<opts>] {<path>}
Function
is a quick sort algorithm that sorts any number of lines up to the
maximum capacity of memory.
qsort
To use qsort, type qsort and the pathlist(s) of the file(s) to sort. qsort sorts
the file(s) by a user-specified field or field one by default. The field
separation character defaults to a space if no separation character is
specified. If no file names are given on the command line, standard input
is assumed.
ATTENTION: Multiple separation characters in a row are
counted as a single field separator. For example, if a comma is
specified as the field separation character, three commas in a
row (,,,) signify only one field separator. If the intent is to create
two null fields, a space must be inserted between each
comma (, , ,).
Options
Option:
Description:
–?
Displays the options, function, and command syntax of qsort.
–c=<char>
Specifies the field separation character. If an asterisk (*), question mark
(?), or comma (,) are used as field separation characters, the option and
the character must be enclosed by quotation marks.
–f=<num>
Specifies the sort field.
NOTE: Only one –f field is allowed on a command line.
9-82
–z
Reads the file names from standard input.
–z=<file>
Reads the file names from <file>.
Chapter 9
The OS-9 Utilities
Examples
This example sorts files and displays.
$ qsort file1 file2 file3
This example sorts extended directory listing by entry name, field 7.
$ dir –ue ! qsort –f=7
This example sorts file by field 2 using an asterisk (*) as the field
separation character.
$ qsort file –f=2 “–c=*”
This example sorts file by field 2 using a comma (,) as the field
separation character.
$ qsort file –f=2 “–c=,”
This example reads file names from standard input.
$ qsort –z
9-83
Chapter 9
The OS-9 Utilities
rename
Change File Name
Syntax
rename [<opts>] <path> <new name>
Function
rename assigns
a new name to the mass storage file specified in
the pathlist.
To rename a file, type rename, followed by the name of the file to rename,
followed by the new name. You must have write permission for the file to
change its name. You cannot use the names “.” or “..” for <path>.
Options
Option:
Description:
–?
Displays the option, function, and command syntax of rename.
–x
Indicates that <path> starts at the current execution directory. You must
have execute permission for the specified file.
Examples
$ dir
Directory of . 16:22:53
blue
myfile
$ rename blue purple
$ dir
Directory of . 16:23:22
myfile
purple
$ rename /h0/HARRY/test1 test2
$ rename –x screenclear clearscreen
9-84
Chapter 9
The OS-9 Utilities
save
Save Memory Module(s) to a File
Syntax
save [<opts>] {<modname>}
Function
copies the specified module(s) from memory into your current data
directory. The file(s) created in your directory have the same name(s) as
the specified module(s).
save
To save a specified module, type save, followed by the name(s) of the
module(s) to save. <modname> must exist in the module directory when
saved. The new file is given access permissions for all modes except
public write.
If you specify more than one module, each module is stored in a separate
file, unless you use the –f option. In that case, all modules listed are saved
in the specified file.
Important: To save a module, the module must have read access
permission for either your group or user ID.
Important: save uses the current execution directory as the default
directory. Executable modules should generally be saved in the default
execution directory.
Options
Option:
Description:
–?
Displays the options, function, and command syntax of save.
–f=<path>
Saves all specified modules to <path>.
–r
Rewrites existing files.
–x
Changes the default directory to the current execution directory.
–z
Reads the module names from standard input.
–z=<file>
Reads the module names from <file>.
Examples
$ save –x dir copy
$ save –f=/d1/math_pack add sub mul div
9-85
Chapter 9
The OS-9 Utilities
set
Set Shell Options
Syntax
set [<opts>]
Function
changes shell options for the individual shell in which they
are declared.
set
To change the options for your current shell, enter set and the desired shell
options. This command is the equivalent of typing the options directly after
the shell prompt on the command line. This is a preferred method of
changing shell parameters within procedure files because of its clarity.
The hyphen that usually proceeds declared options is unnecessary when
using the set command.
The options specified by set change the shell parameters only in the shell
in which they are declared. All descendant shells have the default
parameters unless changed within the new shell.
Important: set is a built-in shell command. Therefore, it is not in the
CMDS directory.
Options
Option:
?
e=<file>
Description:
Displays the options, function, and command syntax of set.
Prints error messages from <file>. If no file is specified, the default file
used is /dd/sys/errmsg. Without the –e option, shell prints only error
numbers with no message description.
ne
l
nl
p
np
p=<string>
t
nt
v
Prints no error messages. This is the default.
Must log off system with logout.
Must log off system with [Esc].
Displays prompt. The default prompt is $.
Does not display prompt.
Sets current shell prompt equal to <string>.
Echoes input lines.
Does not echo input lines. This is the default.
Verbose mode. Displays a message for each directory searched when
executing a command.
Turns off verbose mode.
Aborts process upon error. Default.
Does not abort on error.
nv
x
nx
9-86
Chapter 9
The OS-9 Utilities
Examples
All commands on the same line have the same effect:
$ set x
$ set –x
$ –x
$ set xp=“JOE”
$ set –xp=“JOE”
$ –xp=“JOE”
9-87
Chapter 9
The OS-9 Utilities
setenv
Set Environment Variables
Syntax
setenv <eparam> <evalue>
Function
setenv sets
environment variables within a shell for use by the individual
shell’s child processes.
<eparam> and <evalue> are strings stored in the environment list by shell.
These variables are known to the shell in which they are defined and are
passed on to descendent processes from that shell.
Important: setenv should not be confused with the shell’s set command.
It has a completely different function. setenv is a built-in shell command.
Therefore, it is not in the CMDS directory.
Examples
$ setenv PATH ../h0/cmds:/d0/cmds:/dd/cmds
$ setenv TERM abm85
$ setenv _sh 0
$ setenv As_long_as_you_want long_value
9-88
Chapter 9
The OS-9 Utilities
setime
Activate and Set the System Clock
Syntax
setime [<opts>] [y m d h m s [am/pm]]
Function
setime sets
the system date and time. Once set, it activates the system
interrupt clock.
To set the system date and time, type setime, and enter the year, month,
day, hour, minute, second, and am or pm as parameters on the
command line.
setime does
not require field delimiters, but allows you to use the
following delimiters between the year, month, day, etc.:
colon (:)
semicolon (;)
slash (/)
comma (,)
space ( )
If semicolons are used as field delimiters, the date and time string must be
enclosed by quotes. For example:
$ setime “91;1;15;1;25;30;pm”
If no parameters are given, setime issues the prompt:
$ setime
yy/mm/dd hh:mm:ss [am/pm]
Time:
When no am/pm field is specified, OS-9 system time uses the 24 hour
clock. For example, 15:20 is 3:20 pm. Midnight is specified as 00:00.
Noon is specified as 12:00. Using the am/pm field allows you to use the 12
hour clock. If a conflict exists between the time and the am/pm field (such
as 15:20 pm) the system ignores the am/pm designation.
Entering setime echoes the date and time when set.
Important: You must execute this command before OS-9 can perform
time-sharing operations. If the system does not have a real-time clock, you
should still use this command to set the date for the file system.
9-89
Chapter 9
The OS-9 Utilities
Systems with Battery Backed Up Clocks
setime should
still be run to start time-slicing, but you only need to give
the –s. The date and time are read from the clock.
Options
Option:
Description:
–?
Displays the options, function, and command syntax of setime.
–d
Does not echo date/time when set.
–s
Reads time from battery backed up clock.
Examples
The next three examples are set to January 13, 1991, 3:45 PM.
$ setime 91 01 13 15 45
$ setime 910113 154500
$ setime 91/01/13/3/45/pm
This example is for systems with a battery-backup clock.
$ setime –s
In the next example, no parameters are specified, therefore a prompt
is given.
$ setime
yy/mm/dd hh:mm:ss [am/pm]
Time:
9-90
Chapter 9
The OS-9 Utilities
setpr
Set Process CPU Priority
Syntax
setpr <procID> <number>
Function
setpr
changes the CPU priority of a process.
To use setpr, type setpr, the process ID, and the new priority number of
the process to change. setpr may only be used with a process having your
ID. The priority number is a decimal number in the range of 1 (lowest) to
65535 (hex FFFF).
Use procs to obtain the ID number and present priority of any
current process.
Important: This command does not appear in the CMDS directory as it is
a built-in shell command.
Example
This example changes the priority of process number 8 to 250.
$ setpr 8 250
9-91
Chapter 9
The OS-9 Utilities
shell
OS-9 Command Interpreter
Syntax
shell [[set] <arglist>]
Function
is OS-9’s command interpreter program. It reads data from its
standard input which is usually the keyboard or a file and interprets the
data as a sequence of commands. The basic function of shell is to initiate
and control execution of other OS-9 programs.
shell
Usually you enter the shell automatically upon logging into OS-9. The
shell displays a dollar sign ($) prompt to show that it is ready and waiting
for a command line. You can create a new shell by typing shell optionally
followed by a command line.
The shell reads and interprets one text line at a time from standard input.
After interpreting each line, the shell reads another line until an end-of-file
condition occurs, at which time it terminates itself.
An exception occurs when the shell is called from another program. In this
case, the shell processes the specified command as if it was typed on a
shell command line. Control returns to the calling program after the single
command line is processed. If no command is specified (shell[CR]) or the
command is a shell option or built-in command (chd, chx, etc.), more lines
are read from standard input and processed as normal. This continues until
an end-of-file condition or the logout command is executed.
ATTENTION: The shell’s ex command does not recognize
utility options unless they are separated from the utility name
with a space. For example, ex procs –e works properly, but ex
procs–e does not.
9-92
Chapter 9
The OS-9 Utilities
The shell uses special characters for various purposes. Special characters
consist of the following:
Modifiers
Character:
Description:
#
Memory allocation
^
Process priority modification
>
Standard output redirection
<
Standard input redirection
>>
Standard error output redirection
Separators
Character:
Description:
;
Sequential execution
&
Concurrent execution
!
Pipe: interprocess communication
Wildcards
Character:
Description:
*
Stands for any string of characters
?
Stands for any single character
To send one of these characters to a utility program, you must use a
method called quoting to prevent the shell from interpreting the special
character. Quoting consists of enclosing the sequence of characters to be
passed to a routine in single or double quotes. For example, ‘<char>’
or “<char>”.
The following command line prints the indicated string:
$ echo “Hello; goodbye”
Hello; goodbye
However, the following command displays the string Hello on your
terminal screen and then attempts to execute a program called goodbye.
$ echo Hello; goodbye
The shell expands the two wildcards to build pathlists. The question mark
(?) wildcard matches any single character. The asterisk (*) wildcard
matches any string of characters.
9-93
Chapter 9
The OS-9 Utilities
dir ???? displays the names of files in the current directory that are four
characters long. dir s* displays all names of files in the current directory
that begin with s.
Any command that uses a pathlist on the command line accepts a pathlist
specified with wildcards. When shell expands the wildcards, if no explicit
directory is given, the files in the current data directory are searched for the
matched expansion. If an explicit directory name is given in the pathlist,
the specified directory is searched.
Important: If a command uses an option to search for a file in the current
execution directory, wildcards may produce unexpected results. The shell
simply reads the current directory or the given relative pathlist containing a
wildcard and passes these file names to the command. If the command then
tries to find the files relative to the execution directory, the search will
most likely fail.
Setting Shell Options
There are two methods of setting shell options. The first method is to type
the option on the command line or after the command, shell. For example:
Command:
Description:
$ –np
Turns off the shell prompt.
$ shell –np
Creates a new shell that does not prompt.
The second method uses the special shell command, set. To set shell
options, type set, followed by the options desired. When using set, a
hyphen (–) is unnecessary before the letter option. For example:
Command:
Description:
$ set np
Turns off the shell prompt.
$ shell set np
Creates a new shell that does not prompt.
As you can see, the two methods accomplish the same function. They are
both provided for your convenience. Use the method that is clearer for you.
The Shell Environment
For each user on an OS-9 system, the shell maintains a unique list of
environment variables. These variables affect the operation of the shell or
other programs subsequently executed. They are programmable defaults
that you can set to your liking.
9-94
Chapter 9
The OS-9 Utilities
All environment variables can be accessed by any process called by the
environment’s shell or descendent shells. This essentially allows you to use
the environment variables as global variables.
Important: If a subsequent shell redefines an environment variable, the
variable is only redefined for that shell and its descendents.
Important: Environment variables are case sensitive.
Several special environment variables are automatically set up when you
log on a time-sharing system:
Variable:
Description:
PORT
This specifies the name of the terminal. This is automatically set up by
tsmon. /t1 is an example of a legal PORT name.
HOME
This specifies your home directory. The home directory is the directory
specified in your password file entry. This is also the directory used when
the command chd with no parameters is executed.
SHELL
This is the process that is first executed upon logging on to the system.
USER
This is the user name you type when prompted by login.
Four other important environment variables are available:
Variable:
Description:
PATH
This specifies any number of directories. Each directory must be
separated by a colon (:). The shell uses this as a list of commands
directories to search when executing a command. If the default
commands directory does not include the file/module to execute, each
directory specified by PATH is searched until the file/module is found or
until the list is exhausted.
PROMPT
This specifies the current prompt. By specifying an “at” sign (@) as part of
your prompt, you may easily keep track of how many shells you personally
have running under each other. The @ is used as a replaceable macro for
the shell level number. The environment variable _sh sets the base level.
_sh
This specifies the base level for counting the number of shell levels. For
example, set the shell prompt to “@howdy: ” and _sh to 0:
$ setenv _sh 0
$ –p=“@howdy: ”
howdy: shell
1.howdy: shell
2.howdy: eof
1.howdy: eof
howdy:
TERM
This specifies the specific terminal being used. This allows word
processors, screen editors, and other screen dependent programs to
know what type of terminal configuration to use.
9-95
Chapter 9
The OS-9 Utilities
The Environment Utilities
Three utilities are available to manipulate environment variables:
setenv declares
the variable and sets its value. The variable is placed in
an environment storage area accessed by the shell. For example:
$ setenv PATH ..:/h0/cmds:/d0/cmds:/dd/cmds
$ setenv _sh 0
unsetenv clears
the value of the variable and removes it from storage.
For example:
$ unsetenv PATH
$ unsetenv _sh
printenv prints
the variables and their values to standard output.
For example:
$ printenv
PATH ..:/h0/cmds:/d0/cmds:/dd/cmds
PROMPT howdy
_sh 0
The Profile Command
The profile built-in shell command can be used to cause the current shell to
read its input from the named file and then return to its original input
source, which is usually the keyboard. To use the profile command, enter
profile and the name of a file:
profile setmyenviron
The specified file (in this case, setmyenviron) may contain any utility or
shell commands, including commands to set or unset environment
variables or to change directories. These changes will remain in effect after
the command has finished executing. This is in contrast to calling a normal
procedure file by name only. If you call a normal procedure file without
using the profile command, the changes would not affect the environment
of the calling shell.
Profile commands may be nested. That is, the file itself may contain a
profile command for another file. When the latter profile command is
completed, the first one will resume.
9-96
Chapter 9
The OS-9 Utilities
A particularly useful application for profile files is within a user’s .login
and .logout files. For example, if each user includes the following line in
the .login file, then system-wide commands (common environments, news
bulletins, etc.) can be included in the file /dd/SYS/login_sys.
profile /dd/SYS/login_sys
A similar technique can be used for .logout files.
The Login Shell, .login, and .logout
The login shell is the initial shell created by the login program to process
the user input commands after logging in. Two special procedure files are
extremely useful for personalizing the shell environment:
login
logout
To make use of these files, they must be located in your home directory.
The .login and .logout files provide a way to execute desired commands
when logging on to and leaving the system.
The login shell processes .login as a command file immediately after
successful login. This allows you to run a number of initializing commands
without remembering each and every command. After processing all
commands in the .login file, the shell prompts you for more commands.
The main difference in handling the .login file is that the login shell itself
actually executes the commands rather than creating another shell to
execute the commands. You can issue such commands as set and setenv
within the .login file and have them affect the login shell. This is especially
useful for setting up the environment variables PATH, PROMPT, TERM,
and _sh.
The following is an example .login file:
setenv PATH ..:/h0/cmds:/d0/cmds:/dd/cmds:/h0/doc/spex
setenv PROMPT “@what next: ”
setenv _sh 0
setenv TERM abm85h
querymail
date
dir
.logout is executed when logout is executed to exit the login shell and
leave the system. The .logout file is executed before the login shell
terminates. Use this to execute any cleaning up procedures that are done on
a regular schedule. This might be anything from instigating a backup
procedure of some sort to printing a reminder of things to do.
9-97
Chapter 9
The OS-9 Utilities
The following is an example .logout file:
procs
wait
echo “all processes terminated”
* basic program to instigate backup if necessary *
disk_backup
echo “backup complete”
Shell Command Line Syntax
The shell command line consists of a keyword and optionally any of the
parts listed below. The keyword must appear first on a command line. The
order of the optional parts depends on the nature of the command and the
desired effect. The command line consists of:
Command line unit:
Description:
Keyword
A name of a program or procedure file, a pathlist, or built-in shell
command. The shell’s built-in commands are:
ex
chd
chx
kill
logout
Executes a process as overlay.
Changes your data directory.
Changes your execution directory.
Aborts a specified process.
Terminates the current shell and executes the .logout
procedure file if the login shell is terminated.
profile
Causes the current shell to read its input from the named file
and returns to the original input source.
set
Sets shell options.
setenv
Sets environment variables.
setpr
Sets process priority.
unsetenv Clears environment variables.
w
Waits for any one process to finish.
wait
Waits for all immediate child processes to finish.
Parameter
File or directory names, values, variables, constants, options, etc. to be
passed to the program. Wildcards may be used to identify parameter
names. The recognized wildcards are:
*
?
9-98
Matches any character.
Matches any single character.
Chapter 9
The OS-9 Utilities
Command line unit:
Description:
Execution Modifiers
These modify a program’s execution by redirecting I/O or changing the
priority or memory allocation of a process:
#<mem size>
^<priority>
<
>[– or +]
>>[– or +]
Allocates specified memory to a process.
Sets the priority of the process.
Redirects standard input.
Redirects standard output.
Redirects standard error output.
The hyphen (–) following the modifiers above signify to write over a
specified file. The plus (+) appends the file with the redirected output.
Separators
Separators connect command lines together in the same command line.
They specify to the shell how they are to be executed. The separators are:
;
&
!
Indicates sequential execution.
Indicates concurrent execution.
Creates a communication pipe between processes.
Pipes connect the standard output of one process to
the standard input of another.
Command Line Execution
The shell command line syntax indicates that a keyword may be a program
name, procedure file name, a pathlist, or built-in shell command. Built-in
commands are executed immediately by the shell; no directory searching is
required, nor is a process created to execute the command. If the specified
command is not a built-in command, the shell must locate the program to
execute from a number of possible locations. The following procedure
describes the actions of the shell when processing a command:
1.
Get command line.
2.
Prepare command:
3.
a.
Validate syntax.
b.
Isolate keyword, parameters, and execution modifiers.
c.
Expand wildcard names if given.
If the keyword is a built-in command, execute the command.
Otherwise, search the following directories until the command is
found or the directory search is exhausted:
a.
the module directory
b.
the execution directory
c.
each directory specified by the PATH environment variable
9-99
Chapter 9
The OS-9 Utilities
4.
If the command could not be found in the above directories, return
error: can’t find command.
5.
If the command is found, load the command into the
module directory.
6.
If the load fails, execute shell command (command is assumed to be a
procedure file for the shell).
7.
If the load succeeds and the module is executable object code,
execute command.
8.
If the load succeeds and the module is BASIC I-code, execute Runb
command. Command is an argument for RunB.
9.
If either of the above command execution fails, return error: can’t
execute command.
Commands and procedure files in the current execution directory must
have the e and/or pe file attribute set or the file will not be found.
If the PATH environment variable is set, its value is interpreted as a list of
directories to search if the initial search of the execution directory fails. If
an absolute pathlist, a path beginning with a slash (/) is given as the
command, the shell does not perform the PATH directory search. The
following are examples of setting up the PATH variable:
setenv PATH /d0
setenv PATH /h0/cmds:/n0/jack/h0/cmds:/n0/jill/h0/cmds
setenv PATH kim:../kim:.../cmds
Each directory name is separated by a colon (:). Shell isolates the directory
name and appends it to the command name and uses this pathlist to load
the command. If the load fails, the next directory given is used until the
command is successfully loaded or all directories are tried. Regardless of
the error encountered, the shell continues with the next directory. If a
directory given is a relative pathlist, the pathlist is relative to the
execution directory.
To assist in determining the directory from which a command was loaded
or not loaded, turn on the –v option to display the shell’s progress while
searching the directories.
The login program automatically sets the PATH variable to the execution
directory from which login itself was loaded if the password entry gives an
execution directory other than “.”. The period (.) tells the shell to use the
login’s execution directory.
9-100
Chapter 9
The OS-9 Utilities
Example Command Lines
The following example displays a numbered listing of the data directory.
dir is a keyword indicating the dir utility. –u is a parameter for dir. The
exclamation point (!) is a pipe that redirects the unformatted output of dir
to the standard input of pr. pr is a keyword indicating the pr utility. –n is a
parameter for pr.
dir –u ! pr –n
The following command line lists all files in the current data directory that
have names beginning with s. list is the keyword. s* identifies
the parameters.
list s*
update uses
master as standard input in this next example. The output
from update is used as input for sort. The output from sort is redirected to
the printer.
update <master ! sort >/p1
Options
Option:
Description:
–?
Displays the options, function, and command syntax of shell.
–e=<file>
Prints error messages from <file>. If no file is specified, the default file
used is /dd/sys/errmsg. Without the –e option, shell prints only error
numbers with no message description.
–ne
Prints no error messages. This is the default.
–l
The logout built-in command is required to terminate the login shell. <eof>
does not terminate the shell.
–nl
<eof> terminates the login shell. The [Esc] key normally sends an <eof>
to the shell.
–p
Displays prompt. The default prompt is $.
–np
Does not display prompt.
–p=<string>
Sets current shell prompt equal to <string>.
–t
Echoes input lines.
–nt
Does not echo input lines. This is the default.
–v
Verbose mode. Displays a message for each directory searched when
executing a command.
–nv
Turns off verbose mode.
–x
Aborts process upon error. This is the default.
–nx
Does not abort on error.
9-101
Chapter 9
The OS-9 Utilities
sleep
Suspend a Process for a Period of Time
Syntax
sleep [<opts>] <num>
Function
puts your process to sleep for a number of ticks. It is generally used
to generate time delays in procedure files.
sleep
To use the sleep utility, type sleep, followed by the number of ticks you
want the process to sleep. A tick count of one causes the process to give up
its current time slice and return immediately. A tick count of zero causes
the process to sleep indefinitely, usually until awakened by a signal. The
duration of a tick is system-dependent.
sleep
is generally used to generate time delays in procedure files.
Options
Option:
Description:
–?
Displays the option and command syntax of sleep.
–s
Changes count representation to seconds.
Important: Only one option may be used on the command line. If not
specified, <num> defaults to zero.
Examples
This example is sleep for 25 ticks.
$ sleep 25
This example is sleep for 1000 seconds.
$ sleep –s 1000
9-102
Chapter 9
The OS-9 Utilities
tape
Tape Controller Manipulation
Syntax
tape {<opts>} [<dev>]
Function
provides a means to access a tape controller from a terminal. tape can
rewind, erase, skip forwards and backwards, and write tapemarks to a tape.
tape
If the tape device <dev> is not specified on the command line and the –z
option is not used, tape uses the default device /mt0.
Options
Option:
Description:
–?
Displays options, function, and command syntax of tape.
–b[=<num>]
Skips the specified number of blocks. The default is one block. If <num> is
negative, the tape skips backward.
–e=<num>
Erases a specified number of blocks of tape.
–f[=<num>]
Skips the specified number of tapemarks. The default is one tapemark. If
<num> is negative, the tape skips backward.
–o
Puts tape off-line.
–r
Rewinds the tape.
–s
Determines the block size of the device.
–t
Retensions the tape.
–w[=<num>]
Writes a specified number of tapemarks. The default is one tapemark.
–z
Reads a list of device names from standard input. The default device
is /mt0.
–z=<file>
Reads a list of device names from <file>.
If you specify more than one option, tape executes each option function in
a specific order. Therefore, you can skip ahead a specified number of
blocks, erase, and then rewind the tape all with the same command.
The order of option execution is as follows:
1.
Gets device name(s) from the –z option.
2.
Skips the number of tapemarks specified by the –f option.
3.
Skips the number of blocks specified by the –b option.
4.
Writes a specified number of tapemarks.
9-103
Chapter 9
The OS-9 Utilities
5.
Erases a specified number of blocks of tape.
6.
Rewinds the tape.
7.
Puts the tape off-line.
Examples
This example rewinds tape on device /mt0.
$ tape /mt0 –r
This example skips forward five files on device /mt0, erases the next two
blocks, and then rewinds the tape.
$ tape –f=5 –e=2 –r
9-104
Chapter 9
The OS-9 Utilities
tapegen
Put Files on a Tape
Syntax
tapegen [<opts>] <filename> <filename>
Function
tapegen creates
the “bootable” tape. tapegen is a standard utility that
performs a function similar to the os9gen utility. Both utilities place the
bootstrap file on the media and mark the media identification block with
information regarding the bootstrap file. In addition, tapegen can
optionally place initialized data on the tape, for applicationspecific purposes.
To use the tapegen utility, type tapegen followed by any desired options.
Options
Option:
–?
–b=<bootfile>
–bz
–bz=<bootlist>
–c
–d=<dev>
–o
–t=<target>
–i=<file>
–v=<volume>
–z
–z=<file>
Description:
Displays the options, function, and command syntax of tapegen.
Installs an OS-9 boot file.
Reads boot module names from standard input.
Reads boot module names from the specified bootlist file.
Checks and displays header information.
Specifies the tape device name. The default is /mt0.
Takes the tape drive off-line when finished.
Specifies the name of the target system.
Installs an initialized data file on the tape. This is usually a RAM disk
image.
Specifies the name of the tape volume.
Reads filenames from standard input.
Reads filenames from the specified file.
Examples
The following example makes a bootable tape. The disk image is derived
from the /dd device.
$ tapegen –b=OS9Boot.tape –i=/dd@ “–v=OS–9/68K Boot Tape” –t=MySystem
This example makes a bootable tape with no initialized data file. The
“header” information is displayed after writing the tape.
$ tapegen –b=OS9Boot.h0 –c
9-105
Chapter 9
The OS-9 Utilities
tee
Copy Standard Input to Multiple Output Paths
Syntax
tee {<path>}
Function
is a filter that copies all text lines from its standard input to its standard
output and any other additional pathlists given as parameters.
tee
To use the tee utility, type tee and the pathlist(s) to which standard input is
to be redirected. This utility is generally used with input redirected through
a pipe.
Option
Option:
Description:
–?
Displays the function and command syntax of tee.
Examples
The example below uses a pipeline and tee to simultaneously send the
output listing of dir to the terminal, printer, and a disk file:
$ dir –e ! tee /printer /d0/dir.listing
This example sends the output of an assembler listing to a disk file and
the printer:
$ asm pgm.src l ! tee pgm.list >/printer
This example broadcasts a message to three terminals:
$ echo WARNING System down in 10 minutes ! tee /t1 /t2 /t3
9-106
Chapter 9
The OS-9 Utilities
tmode
Change Terminal Operating Mode
Syntax
tmode [<opts>] [<arglist>]
Function
tmode
displays or changes the operating parameters of your terminal.
Important: tmode can only be used for SCF or GFM devices.
To change the operating parameters of your terminal, type tmode and any
parameters you want changed. If no parameters are given, the present
values for each parameter are displayed. Otherwise, the parameter(s) given
in the parameter list are processed. You can give any number of
parameters, separated by spaces or commas.
If a parameter is set to zero, OS-9 no longer uses the parameter until it is
re-set to a recognizable code. For example, to set xon and xoff to
zero, type:
tmode xon=0 xoff=0
Consequently, OS-9 does not recognize xon and xoff until the values are
reset.
To re-set the value of a parameter to its default, type tmode and specify the
parameter with no value. This re-sets the parameter to the default value
given in this manual.
Use the –w=<path#> option to specify the path number to be affected. If
none is given, standard input is affected.
Important: If you use tmode in a shell procedure file, you must use the
option –w=<path#> to specify one of the standard paths (0, 1, or 2) to
change the terminal’s operating characteristics. The change remains in
effect until the path is closed. For a permanent change to a device
characteristic, you must change the device descriptor. You may alter the
device descriptor to set a device’s initial operating parameters using
xmode. See the xmode utility for more information.
9-107
Chapter 9
The OS-9 Utilities
You cannot change the following five parameters by tmode: type, par, cs,
stop, and baud. These are included in tmode for informational purposes
only. You can only change these by altering the device descriptor and using
iniz. See xmode for more information.
tmode can work only if a path to the file/device has already been opened.
The OS-9 Technical Manual contains full information on
device descriptors.
Table 9.D
Tmode Parameter Names
9-108
Name:
Function:
upc
Upper case only. Lower case characters are converted automatically to
upper case.
noupc
Upper and lower case characters permitted. Default.
bsb
Erase on backspace. Backspace characters are echoed as a
backspace-space-backspace sequence. Default.
nobsb
No erase on backspace. Echoes single backspace only.
bsl
Backspace over line. Lines are deleted by sending
backspace-space-backspace sequences to erase the same line for video
terminals. Default.
nobsl
No backspace over line. Lines are deleted by printing a new line
sequence for hard-copy terminals.
echo
Input characters echoed back to terminal. Default.
noecho
No echo
lf
Auto line feed on. Line feeds are automatically echoed to terminal on input
and output carriage returns. Default.
nolf
Auto line feed off
null=n
Set null count. Number of null ($00) characters transmitted after carriage
returns for return delay. The number is decimal. The default null count
is 0.
pause
Screen pause on. Output suspended upon full screen. See pag parameter
for definition of screen size. Output can be resumed by typing any key.
nopause
Screen pause mode off
pag=n
Set video display page length to n lines, where n is in decimal. Used for
pause mode, see above.
bsp=h
Set input backspace character (normally [Ctrl-H], default = 08). Numeric
value of character in hexadecimal.
del=h
Set input delete line character (normally [Ctrl-X], default = 18). Numeric
value of character in hexadecimal.
eor=h
Set end-of-record input character (normally [CR], default = 0D). Numeric
value of character in hexadecimal.
eof=h
Set end-of-file input character (normally [Esc], default = 1B). Numeric
value of character in hexadecimal.
reprint=h
Set reprint line character (normally [Ctrl-D], default = 04). Numeric value of
character in hexadecimal.
Chapter 9
The OS-9 Utilities
Name:
Function:
dup=h
Sets the duplicate last input line character (normally [Ctrl-A], default = 01).
Numeric value of character in hexadecimal.
psc=h
Set pause character (normally [Ctrl-W], default = 17). Numeric value of
character in hexadecimal.
abort=h
Abort character (normally [Ctrl-C], default = 03). Numeric value of
character in hexadecimal.
quit=h
Quit character (normally [Ctrl-E], default = 05). Numeric value of character
in hexadecimal.
bse=h
Set output backspace character (default = 08). Numeric value of character
in hexadecimal.
bell=h
Set bell (alert) output character (default = 07). Numeric value of character
in hexadecimal.
type=h
ACIA initialization value: shows parity, character size, and number of stop
bits. Value in hexadecimal. This value is affected by changing the
individual par(ity), cs (character length), and stop (stop bits) values. This
value cannot be changed by tmode.
par=s
Shows parity using one of the following strings: odd, even, or none.
Changing parity will affect the type value. Parity cannot be changed
by tmode.
cs=n
Shows character length using one of the following values:
n = 8, 7, 6 or 5 (bits)
Changing character length will change the type value. Character length
cannot be changed by tmode.
stop=n
Shows number of stop bits used:
n = 1, 1.5 or 2 (stop bits)
Changing the stop bit value affects the type value. The number of stop bits
used cannot be changed by tmode.
baud=n
Baud rate: The baud rate may currently be set to the following values:
n=
50
75
110
134.5
150
300
600
1200
1800
2000
2400
3600
4800
7200
9600
19200
38400
extern
The baud rate cannot be changed by tmode.
xon=h
DC1 resume output character (normally [Ctrl-Q], default = 11). Numeric
value of character in hexadecimal.
xoff=h
DC2 suspend output character (normally [Ctrl-S], default = 13). Numeric
value of character in hexadecimal.
tabc=h
Tab character (normally [Ctrl-I], default = 09). Numeric value of character
in hexadecimal.
tabs=n
Number of characters between tab stops. The number is in decimal. The
default is 4 characters between tab stops.
normal
Set the terminal back to its default characteristics. This will not affect the
following values: type, baud rate, parity, character length, and stop bits.
9-109
Chapter 9
The OS-9 Utilities
Options
Option:
Description:
–?
Displays the option, function, and command syntax of tmode.
–w=<path#>
Changes the path number <path#> affected.
Examples
$ tmode noupc lf null=4 bse=1F pause
$ tmode pag=24 pause bsl noecho bsp=8 bsl=C
$ tmode xon xoff quit=5
9-110
Chapter 9
The OS-9 Utilities
touch
Update the Last Modification Date of a File
Syntax
touch [<opts>] {<path>}
Function
updates the last modification date of a file. Usually, this command is
used with a make command’s makefile. Associated with every file is the
date the file was last modified. touch simply opens a file and closes it to
update the time the file was last modified to the current date.
touch
To update the last modification date of a file, type touch and the pathlist of
the file to update. touch searches the current data directory for the file to
update if another directory or the –x option is not specified.
Important: If the specified file is not found, touch creates a file with a
current modification date.
Options
Option:
Description:
–?
Displays the options, function, and command syntax of touch.
–c
Does not create a file if not found.
–q
Does not quit if an error occurs.
–x
Searches the execution directory for the file.
–z
Reads the file names from standard input.
–z=<path>
Reads the file names from <path>.
Examples
$ touch –c /h0/doc/program
$ touch –cz
$ dir –u ! touch
9-111
Chapter 9
The OS-9 Utilities
tr
Transliterate Characters
Syntax
tr [<opts>] <str1> [<str2>] [<path1>] [<path2>]
Function
transliterates characters from <str1> into a corresponding character
from <str2>. If <str1> contains more characters than <str2>, the final
character in <str2> is used for each excess character in <str1>.
tr
To use the tr utility, type tr and the characters to search for (<str1>), and
optionally, the replacement characters (<str2>), the input file’s pathlist
(<path2>) and the output file’s pathlist (<path2>).
<str1> is required. If <str2> is missing, all characters in <str1> are deleted
from the output. If <path1> and <path2> are missing, standard input and
output are assumed. If only one path is specified, it is used as the input
file pathlist.
<str1> and <str2> are interpreted as character classes. To facilitate creating
character classes, use the following metacharacters:
Character:
Name:
Description:
–
RANGE
The hyphen (–) is defined as representing all characters lexicographically
greater than the preceding character and less than the following character.
For example:
[a–z] is equivalent to the string abcdefghijklmnopqrstuvwxyz.
[m–pa–f] is equivalent to the string mnopabcdef.
[0–7] is equivalent to the string 01234567.
See the ASCII chart in Appendix A for character values.
\
ESCAPE
The backslash (\) removes special significance from special characters. It
is followed by a base and a numeric value or a special character. If no
base is specified, the base for the numeric value defaults to hexadecimal.
An explicit base of decimal or hexadecimal can be specified by preceding
the numeric value with a qualifier of d or x, respectively. It also allows
entry of some non-printing characters such as:
\t
\n
\l
\b
\f
=
=
=
=
=
Tab character
New-line character
Line feed character
Backspace character
Form feed character
Important: Do not confuse <str1> and <str2> with the character class
regular expression. <str1> and <str2> do not need surrounding brackets.
Brackets are merely treated as characters in the character class.
9-112
Chapter 9
The OS-9 Utilities
Options
Option:
Description:
–?
Displays the options, function, and command syntax of tr.
–c
Transliterates all ASCII characters (1 through $7F) to <str2>, except for
the set of characters in <str1>.
–d
Deletes all matching input characters and expressions.
–s
Squeezes all repeated output characters or expressions in <str2> to single
characters or expressions.
–v
Same as –c.
–z
Reads standard input for list of file names.
–z=<path>
Reads the file names from <path>.
You can generally give options anywhere on the command line. If you
wish to use the pathlists but not <str2>, you must specify the –d option
prior to the pathlists. Similarly, if you use the –z option to read pathlists
from standard input, the –z must precede <path2>.
The –s option does not differentiate between characters originally in <str2>
and transliterated characters. It always returns a string with no
consecutively repeated characters. For example, the command tr –s abcde x
transliterates the string exasperate into xspxrxtx.
The –s and –d options are mutually exclusive.
If you use the –c option to change all but a certain sequence of characters,
it also changes carriage returns and newlines unless they are specified in
the sequence of characters.
ATTENTION: tr always deletes ASCII nul ($00).
Examples
The following examples use standard input for the input to tr. The output is
sent to standard output. Thus, the first line following each command line is
the standard input, and the second line is the standard output.
This example transliterates standard input, converting a to j, b to k, c to l,
and d to m.
$ tr abcd jklm
aabdc_efg
jjkml_efg
9-113
Chapter 9
The OS-9 Utilities
This example transliterates standard input, converting each a, b, c, and d
to j.
$ tr abcd j
abcd_efgh
jjjj_efgh
This example transliterates standard input, converting each character
contained in the expression abcd to k.
$ tr a–d k
abc_abcd–efgh
kkk_kkkk–efgh
This example transliterates standard input, deleting each a, b, c, and d.
$ tr abcd
abcd_efgh
_efgh
This example transliterates standard input, deleting each a, b, c, and d.
$ tr –d abcd
abcdefg
efg
This example transliterates standard input converting d to e, c to o, b to c,
and a to d. Consecutively repeated output characters, the matching eocd,
are squeezed into a single character.
$ tr –s dcba eocd
edenbcada
encoded
This example transliterates standard input, converting all non–alphabetic
characters to newline characters.
$ tr –c a–zA–Z \n
one word per line
one
word
per
line
9-114
Chapter 9
The OS-9 Utilities
tsmon
Supervise Idle Terminals and Initiate the Login Command
Syntax
tsmon [<opts>] {/<dev>}
Function
supervises idle terminals and starts the login utility in a timesharing
application. Typically, tsmon is executed as part of the start-up procedure
when the system is first brought up and remains active until the system
shuts down.
tsmon
The parameter /<dev> specifies a terminal to monitor. This is generally an
SCF device.
You can specify up to 28 device name pathlists for tsmon to monitor. When
you type a [CR] on any of the specified paths, tsmon automatically forks
login, with standard I/O paths opened to the device. If login fails because
you could not supply a valid user name or password, control returns to
tsmon.
Most programs terminate when an end-of-file character (normally [Esc])
is entered as the first character on a command line. This logs you off the
system and returns control to tsmon.
tsmon
prints a message when you log off:
Logout after 11 minutes, 30 seconds. Total time 3:57:46.
The Total time figure is the total amount of time that the terminal has
accumulated on-line since the tsmon was started.
tsmon is normally used to monitor I/O devices capable of bi-directional
communication, such as CRT terminals. However, you may use tsmon to
monitor a named pipe. If this is done, tsmon creates the named pipe, and
then waits for data to be written to it by some other process.
When data arrives, tsmon starts a shell with its input redirected to the pipe
file. This is useful for starting remote processes in a
networked environment.
You can run several tsmon processes concurrently, each one watching a
different group of devices. This must be done when more than 28 terminals
are to be monitored, but is sometimes useful for other reasons. For
example, you may want to keep modems or terminals suspected of
hardware trouble isolated from other devices in the system.
9-115
Chapter 9
The OS-9 Utilities
forks login with the PORT environment variable set to the SCF
device name and all other environment variables cleared.
tsmon
Options
Option:
Description:
–?
Displays the options, function, and command syntax of tsmon.
–d
Displays statistics when a ^\ character (control-backslash or hex $1C) is
typed on a monitored terminal.
–l=<prog>
Forks <prog>, an alternate login program.
–p
Displays an “online” prompt to each timesharing terminal being monitored
by tsmon.
–r=<prog>
Forks an alternate shell program.
–z
Reads the device names from standard input.
–z=<path>
Reads the device names from <path>.
Examples
This command starts timesharing on term and t1, printing a welcome
message to each. The second line is confirmation by tsmon. A similar
command might be used as the last line of a system startup file.
tsmon –dp /term /t1&
2 devices online
The –d option causes tsmon to print various statistics about the devices
being monitored whenever control-backslash (^\) is typed on either
terminal. The statistics might look something like this:
tsmon started 12–11–90 20:38:15 with 2 devices
/term
quiet at 0:08:07
cumulative time
*/t1
quiet at 0:36:03
cumulative time
0:36:06
3:29:30
logins: 1/9
3:57:46
logins: 2/4
Important: The standard input device shown for tsmon by the procs utility
always indicates the last device to gain tsmon’s attention.
You must implement the SS_SSig I$SetStat function (send signal on data
ready) on any device to be monitored by tsmon. Because this function is
used (for example, instead of I$ReadLn), it is possible to output data to a
terminal that is not logged in without having to wait for someone to press
a key.
9-116
Chapter 9
The OS-9 Utilities
unlink
Unlink Memory Module
Syntax
unlink [<opts>] {<modname>}
Function
unlink tells
OS-9 that you no longer need the memory module(s) named
To unlink an attached module, type unlink and the name(s) of the
module(s) to unlink. The link count is then be decremented by one. If the
link count becomes zero, the module directory entry is deleted and the
memory is de-allocated. It is good practice to unlink modules whenever
possible to make most efficient use of available memory resources.
ATTENTION: Never unlink a module you did not link to or
load. Unlinking a module more than once may prematurely
lower its link count and possibly destroy the module while it is
still in use.
Options
Option:
Description:
–?
Displays the options, function, and command syntax of unlink.
–z
Reads the module names from standard input.
–z=<file>
Reads the module names from <file>.
Examples
This example unlinks pgm, pgm5, and pgm9 and lowers the link count of
each module by one.
$ unlink pgm pm5 pgm9
This example pipes an unsorted listing of the current data directory to
unlink. This unlinks all modules contained in the directory and lowers the
link count of each module by one.
$ dir –u ! unlink –z
9-117
Chapter 9
The OS-9 Utilities
This example unlinks each module listed in namefile and lowers the link
count of each module by one.
$ unlink –z=namefile
$ mdir
Module Directory at 14:44:35
kernel
init
p32clk
h0
d0
r0
$ unlink edit
$ mdir
Module Directory at 14:44:35
kernel
init
p32clk
h0
d0
r0
9-118
rbf
edit
p32hd
mdir
rbf
mdir
p32hd
Chapter 9
The OS-9 Utilities
unsetenv
Clear Environment Parameter
Syntax
unsetenv <eparam>
Function
unsetenv deletes
the specified environment variable from the
environment list.
To use setenv, type unsetenv, followed by the environment parameter to
delete. This removes the variable from the environment list.
Important: If the specified variable has not been previously defined,
unsetenv has no effect and it gives you no message.
Examples
$ unsetenv _sh
$ unsetenv TERM
See Also
setenv and printenv utility
descriptions
9-119
Chapter 9
The OS-9 Utilities
w/wait
Wait for One/All Child Process(es) to Terminate
w
wait
Function
causes the shell to wait for the termination of one child process before
returning with a prompt. wait causes the shell to wait for all child
processes to terminate before returning with a prompt.
w
Type w or wait and a [CR]. When the shell prompt is displayed, the child
process(es) have terminated.
Examples
$
$
$
$
list file1 >/p1&
list file2.temp ! filter >file2&
wait
list file2 >/p1
In this example, the prompt returns when the first of these three processes
(one, two, or three) terminates:
$
$
$
$
$
9-120
one&
two&
three$
w
Chapter 9
The OS-9 Utilities
xmode
Examine or Change Device Initialization Mode
Syntax
xmode [<opts>] <devname> [<arglist>] {<devname>}
Function
xmode displays or changes the initialization parameters of any SCF-type
device such as a video display, printer, RS-232 port, etc. Some common
uses are to change the baud rates and control key definitions.
Important: xmode can only be used for SCF or GFM devices.
To use the xmode utility, type xmode and any parameters to change. If no
parameters are given, the present values for each parameter are displayed.
Otherwise, the parameter(s) given in the parameter list are processed. You
can give any number of parameters, separated by spaces or commas. You
must specify a device name to process the parameter(s) given in the
parameter list.
If a parameter is set to zero, the device no longer uses the parameter until it
is re-set to a recognizable code. For example, set xon and xoff to zero:
xmode /term xon=0 xoff=0
/term will not recognize xon and xoff until the values are re-set.
To re-set the values of a parameter to its default, type xmode and specify
the parameter with no value. This re-sets the parameter to the default value
given in this manual.
is similar to the tmode utility. tmode only operates on open paths so
it has a temporary effect. xmode actually updates the device descriptor. The
change persists as long as the computer is running, even if paths to the
device are repetitively opened and closed.
xmode
Five parameters need further explanation: type, par, cs, stop, and baud.
These parameters are changed by xmode only if the device is iniz-ed
directly after the xmode changes are made. This is usually done in the
startup file or by first deiniz-ing a file. For example, the following
command sequence changes the baud rate of /t1 to 9600:
$ deiniz t1
$ xmode baud=9600
$ iniz t1
This type of command sequence changes the device descriptor and
initializes it on the system. Only the five parameters mentioned above need
this special sequence changed. All other xmode parameters are
changed immediately.
9-121
Chapter 9
The OS-9 Utilities
Options
Option:
–?
–z
–z=<file>
Description:
Display the options, function, and command syntax of xmode.
Reads device names from standard input.
Reads device names from <file>.
Xmode Parameter Names
Name:
upc
noupc
bsb
nobsb
bsl
nobsl
echo
noecho
lf
nolf
null=n
pause
nopause
pag=n
bsp=h
del=h
eor=h
eof=h
reprint=h
dup=h
psc=h
abort=h
9-122
Function:
Upper case only. Lower case characters are converted automatically to
upper case.
Upper and lower case characters are permitted. Default.
Erase on backspace. Backspace characters are echoed as a
backspace-space-backspace sequence. Default.
No erase on backspace. Echoes single backspace only.
Backspace over line. Lines are deleted by sending
backspace-space-backspace sequences to erase the same line for video
terminals. Default.
No backspace over line. Lines are deleted by printing a new line
sequence for hard-copy terminals.
Input characters echoed back to terminal. Default.
No echo
Auto line feed on. Line feeds are automatically echoed to terminal on input
and output carriage returns. Default.
Auto line feed off
Set null count. Number of null ($00) characters transmitted after carriage
returns for return delay. The number is decimal. By default, the null count
is set to zero.
Screen pause on. Output suspended upon full screen. See pag parameter
for definition of screen size. Output can be resumed by typing any key.
Screen pause mode off
Set video display page length to n lines. n is a decimal number. Used for
pause mode, see above.
Set input backspace character (normally [Ctrl-H], default = 08). Numeric
value of character in hexadecimal.
Set input delete line character (normally [Ctrl-X], default = 18). Numeric
value of character in hexadecimal.
Set end-of-record input character (normally [CR], default = 0D). Numeric
value of character in hexadecimal.
Set end-of-file input character (normally [Esc], default = 1B). Numeric
value of character in hexadecimal.
Set reprint line character (normally [Ctrl-D], default = 04). Numeric value of
character in hexadecimal.
Set duplicate last input line character (normally [Ctrl-A], default = 01).
Numeric value of character in hexadecimal.
Set pause character (normally [Ctrl-W], default = 17). Numeric value of
character in hexadecimal.
Abort character (normally [Ctrl-C], default = 03). Numeric value of
character in hexadecimal.
Chapter 9
The OS-9 Utilities
Name:
quit=h
bse=h
bell=h
type=h
Function:
Quit character (normally [Ctrl-E], default = 05). Numeric value of character
in hexadecimal.
Set output backspace character (default = 08). Numeric value of character
in hexadecimal.
Set bell (alert) output character (default = 07). Numeric value of character
in hexadecimal.
ACIA initialization value. Sets parity, character size, and number of stop
bits. Value in hexadecimal. This value is affected by changing the
individual par(ity), cs (character length), and stop (stop bits) values. This
value is not affected by the xmode normal command. This value is not
changed until the specified device is iniz-ed.
par=s
Sets parity using one of the following strings: odd, even, or none. Setting
parity affects the type value. This value is not affected by xmode normal.
This value is not changed until the specified device is iniz-ed.
cs=n
Sets character length using one of the following values:
n = 8, 7, 6 or 5 (bits)
Setting character length changes the type value. This value is not affected
by xmode normal. This value is not changed until the specified device
is iniz-ed.
stop=n
Sets the number of stop bits used:
n = 1, 1.5 or 2 (stop bits)
Setting the stop bit value affects the type value. This value is not affected
by xmode normal. This value is not changed until the specified device is
iniz-ed.
baud=n
Baud rate. The baud rate may currently be set to the following values:
n=
xon=h
xoff=h
tabc=h
tabs=n
normal
50
75
110
134.5
150
300
600
1200
1800
2000
2400
3600
4800
7200
9600
19200
38400
extern
This value is not affected by xmode normal and is not changed until the
specified device is iniz-ed.
DC1 resume output character (normally [Ctrl-Q], default = 11). Numeric
value of character in hexadecimal.
DC2 suspend output character (normally [Ctrl-S], default = 13). Numeric
value of character in hexadecimal.
Tab character (normally [Ctrl-I], default = 09). Numeric value of character
in hexadecimal.
Number of characters between tab stops. The number is in decimal. By
default, there are four characters between tab stops.
Set the terminal back to its default characteristics. This does not affect the
following values: type, baud rate, parity, character length, and stop bits.
Examples
$ xmode /term noupc lf null=4 bse=1F pause
$ xmode /t1 pag=24 pause bsl noecho bsp=8 bsl=C
9-123
Chapter 9
The OS-9 Utilities
Notes
9-124
Appendix
A
ASCII Conversion Chart
ASCII is an acronym for American Standard Code for Information
Interchange. It consists of 96 printable and 32 unprintable characters. The
following conversion table includes Binary, Decimal, Octal, Hexadecimal,
and ASCII. The unprintable characters are defined below:
ASCII Symbol Definitions
Symbol:
Definition:
Symbol:
Definition:
ACK
acknowledge
FS
file separator
BEL
bell
GS
group separator
BS
backspace
HT
horizontal tabulation
CAN
cancel
LF
line feed
CR
carriage return
NAK
negative acknowledgement
DC
device control
NUL
null
DEL
delete
RS
record shipment
DLE
data link escape
SI
shift in
EM
end of medium
SO
shift out
ENQ
enquiry
SOH
start of heading
EOT
end of transmission
SP
space
ESC
escape
STX
start of text
ETB
end of transmission
SUB
substitute
ETX
end of text
SYN
synchronous idle
FF
form feed
US
unit separator
VT
vertical tabulation
A-1
Appendix A
ASCII Conversion Chart
A-2
Binary:
Decimal:
Octal:
Hex:
ASCII:
0000000
0
0
0
NUL
0000001
1
1
1
SOH
0000010
2
2
2
STX
0000011
3
3
3
ETX
0000100
4
4
4
EOT
0000101
5
5
5
ENQ
0000110
6
6
6
ACK
0000111
7
7
7
BEL
0001000
8
10
8
BS
0001001
9
11
9
HT
0001010
10
12
A
LF
0001011
11
13
B
VT
0001100
12
14
C
FF
0001101
13
15
D
CR
0001110
14
16
E
SO
0001111
15
17
F
SI
0010000
16
20
10
DLE
0010001
17
21
11
DC1
0010010
18
22
12
DC2
0010011
19
23
13
DC3
0010100
20
24
14
DC4
0010101
21
25
15
NAK
0010110
22
26
16
SYN
0010111
23
27
17
ETB
0011000
24
30
18
CAN
0011001
25
31
19
EM
0011010
26
32
1A
SUB
0011011
27
33
1B
ESC
0011100
28
34
1C
FS
0011101
29
35
1D
GS
0011110
30
36
1E
RS
0011111
31
37
1F
US
0100000
32
40
20
SP
0100001
33
41
21
!
0100010
34
42
22
“
0100011
35
43
23
#
0100100
36
44
24
$
0100101
37
45
25
%
0100110
38
46
26
&
0100111
39
47
27
’
Appendix A
ASCII Conversion Chart
Binary:
Decimal:
Octal:
Hex:
ASCII:
0101000
40
50
28
(
0101001
41
51
29
)
0101010
42
52
2A
*
0101011
43
53
2B
+
0101100
44
54
2C
,
0101101
45
55
2D
–
0101110
46
56
2E
.
0101111
47
57
2F
/
0110000
48
60
30
0
0110001
49
61
31
1
0110010
50
62
32
2
0110011
51
63
33
3
0110100
52
64
34
4
0110101
53
65
35
5
0110110
54
66
36
6
0110111
55
67
37
7
0111000
56
70
38
8
0111001
57
71
39
9
0111010
58
72
3A
:
0111011
59
73
3B
;
0111100
60
74
3C
<
0111101
61
75
3D
=
0111110
62
76
3E
>
0111111
63
77
3F
?
1000000
64
100
40
@
1000001
65
101
41
A
1000010
66
102
42
B
1000011
67
103
43
C
1000100
68
104
44
D
1000101
69
105
45
E
1000110
70
106
46
F
1000111
71
107
47
G
1001000
72
110
48
H
1001001
73
111
49
I
1001010
74
112
4A
J
1001011
75
113
4B
K
1001100
76
114
4C
L
1001101
77
115
4D
M
1001110
78
116
4E
N
1001111
79
117
4F
O
A-3
Appendix A
ASCII Conversion Chart
A-4
Binary:
Decimal:
Octal:
Hex:
ASCII:
1010000
80
120
50
P
1010001
81
121
51
Q
1010010
82
122
52
R
1010011
83
123
53
S
1010100
84
124
54
T
1010101
85
125
55
U
1010110
86
126
56
V
1010111
87
127
57
W
1011000
88
130
58
X
1011001
89
131
59
Y
1011010
90
132
5A
Z
1011011
91
133
5B
[
1011100
92
134
5C
\
1011101
93
135
5D
]
1011110
94
136
5E
^
1011111
95
137
5F
_
1100000
96
140
60
‘
1100001
97
141
61
a
1100010
98
142
62
b
1100011
99
143
63
c
1100100
100
144
64
d
1100101
101
145
65
e
1100110
102
146
66
f
1100111
103
147
67
g
1101000
104
150
68
h
1101001
105
151
69
i
1101010
106
152
6A
j
1101011
107
153
6B
k
1101100
108
154
6C
l
1101101
109
155
6D
m
1101110
110
156
6E
n
1101111
111
157
6F
o
1110000
112
160
70
p
1110001
113
161
71
q
1110010
114
162
72
r
1110011
115
163
73
s
1110100
116
164
74
t
1110101
117
165
75
u
1110110
118
166
76
v
1110111
119
167
77
w
Appendix A
ASCII Conversion Chart
Binary:
Decimal:
Octal:
Hex:
ASCII:
1111000
120
170
78
x
1111001
121
171
79
y
1111010
122
172
7A
z
1111011
123
173
7B
{
1111100
124
174
7C
|
1111101
125
175
7D
}
1111110
126
176
7E
~
1111111
127
177
7F
DEL
A-5
Appendix
B
The ROM Debugger
This appendix documents the debug version of the ROM debugger. A new
ROM debugger, RomBug, is also available. RomBug is documented in the
OS-9 ROM Debugger’s User Manual.
The ROM Debugger
The ROM debugger is an optional part of the Professional OS-9 package.
The ROM debugger is not a conventional program because you cannot
invoke it from the command line. Assuming the ROM debugger is present
and enabled, it is invoked in the following situations:
when the machine is turned on and the UseDebug routine in the sysinit.a
file returns the Zero flag of the CCR as false
when the abort signal (auto vector level 7) is encountered
when a bus error, address error, illegal instruction error, or trace
exception is encountered
Overview of Debugger
Functions
The ROM debugger loads and tests OS-9 and I/O drivers. The debugger’s
command set allows you to analyze programs by tracing, single instruction
stepping, and breakpointing. It can disassemble instructions as the
instructions are traced or stepped, or as a block. Commands can also
examine or alter memory or CPU registers.
Depending on the type of debugger options selected, you can communicate
with the host system as a terminal and download programs into RAM for
testing via the communications link.
The debugger accepts command lines from the console. The command
lines consist of a command code followed by a return key. Use the
backspace ([Ctrl-H]) and line delete ([Ctrl-X]) keys to correct errors. If
the system’s ioxxx.a files resemble the standard Microware versions, you
can use xoff ([Ctrl-S]) and xon ([Ctrl-Q]) to suspend and resume
output, respectively.
B-1
Appendix B
The ROM Debugger
Expressions and Register
Names
In some commands, the debugger can accept number expressions, shown
as <num> or <len>, and address expressions, shown as <addr>. Both types
of expressions have the same syntax. Expressions can be numbers or a
combination of numbers, operators, and register names. Expressions are
evaluated from left to right without priority, unless parentheses are used.
All numbers are assumed to be hexadecimal unless preceded with a pound
sign character (#). For example, 200 is interpreted as a hex number but
#200 is interpreted as a decimal number.
Register names consist of a period (.) followed by the usual assembly
language name. For example, .a3 refers to register A3. Register names can
be used freely in expressions.
The operators recognized by the debugger are:
Type:
Operator:
Description:
One-Operand Operators:
–
negative
~
bit-by-bit NOT
+
add
–
subtract
*
multiply
/
divide
>
shift right; A>B shifts A right B bits
<
shift left; A<B shifts A left B bits
&
bit-by-bit AND
|
bit-by-bit OR
^
bit-by-bit XOR (exclusive OR)
Two-Operand Operators:
The debugger has a special internal register called the relocation register.
This is used to add a constant offset to addresses. You can change the value
of the relocation register at any time using the .r command.
Important: The display mode and change memory mode commands for
the debugger are not affected by the relocation register offset.
It is often convenient to set the relocation register to the beginning physical
address of a program code section or data area. Subsequent address
commands can use the same offsets printed on assembler listings. Any
address expression consisting of only a number (no operator) automatically
has the relocation value added. The value of the relocation register can also
be used in expressions or changed by referring to the register as “.r”.
B-2
Appendix B
The ROM Debugger
The Debugger and Traps
Many of the debugger functions are implemented using traps. In particular,
breakpoints cannot be used in ROM because breakpoints work by
transparently replacing the existing instruction opcodes with opcodes that
cause an “illegal instruction” trap. Obviously, instructions in ROM cannot
be replaced in this manner.
The e command alternately enables and disables the debugger. When the
debugger is enabled, it handles all address errors, bus errors, illegal
instructions, and trace traps. The level 7 autovector trap is also reserved for
use with an optional abort switch. Before the OS-9 kernel is started, traps
not deliberately set by the debugger cause appropriate diagnostic messages
to be displayed on the console.
When the debugger is disabled, all traps are passed to OS-9. To run the
OS-9 user debug utility after the system is up, the ROM debugger must
be disabled.
Breakpoints and Caching
The debugger uses traps to set up breakpoints. Consequently, systems such
as 68020 systems that contain instruction caches may have occasional
problems with missed breakpoints. This occurs when a breakpoint is set at
an instruction location that is currently cached. The debugger sets an
“illegal instruction” trap in the code location specified, but the CPU
executes the cached version of the instruction, causing the breakpoint to be
missed.
To avoid this problem, Microware recommends that all cache resources for
the system be disabled while using the ROM debugger, if possible.
The Talk-Through Command
The second communications port on the target system is used for
communications with the host system to provide download and
talk-through functions. You can make versions of the debugger that omit
the download or both download and talk-through functions in order to save
ROM space.
Talk-through mode makes the debugger transparently pass data between
the target system’s terminal and the communications port to the host
system. This effectively makes the target system terminal act as a host
system terminal. The target system’s terminal can be used to edit,
assemble, etc., on the host system. This eliminates the need for two
terminals. Use the following command to enter talk-through mode:
tm <EscChar>
B-3
Appendix B
The ROM Debugger
This mode is exited when the specified [Esc] character is typed.
Obviously, you should select the escape character carefully so it will not be
the same as one used in normal communications with the host. Infrequently
used characters such as the tilde (~) are recommended.
The Download Command
The download command passes a command to the host system which
causes it to send program data to the target system via the communications
link. The program is loaded into RAM memory.
The program must be in the industry-standard Motorola S-record format.
Only S1, S2, S3, S7, S8, and S9 record formats are recognized. The binex
utility must be used to convert the OS-9 linker output from its normal
binary format to S-record format. binex is a standard utility on professional
OS-9 systems, licensed OS-9 distribution packages, and Port Paks. A Unix
version is included in the distribution packages for VAX systems.
Important: Refer to the OS-9 Utilities section for more information on the
binex utility.
The S-record format has data records that include a load address that
specifies where to load the program in memory. OS-9 programs are
position-independent, so the load address always starts at address zero. As
S-records are received, the load addresses are added to the debugger’s
relocation register value to determine the actual address in RAM where the
program is stored.
Important: You must download all program modules before OS-9 is
executed for the first time. Otherwise, the modules will not be found by the
search.
The relocation register to the area of RAM reserved for downloaded code
in the boot.a special search table must be set. The two versions of the
download command are:
B-4
Type:
Description:
l <HostCmd>
Downloads data in Motorola S-record format. <HostCmd> is sent to
the host as a command line to trigger the download. I/O delay must
be set in register .d0 before the download. The load addresses are
displayed every 512 bytes.
le <HostCmd>
Same as l <HostCmd> except received S-records are also
displayed on the console instead of load addresses.
Appendix B
The ROM Debugger
The <HostCmd> sent to the host is the command required to dump the
S-record file. For OS9 hosts, the screen pause must be turned off using the
tmode nopause command. A sample download command for an OS-9 host
system is:
.r f1000 l binex objs/boot320
A sample download command for a Unix host system is:
l cat s.rec.file
The debugger transmits the command string to the host and then expects
the host to begin transmitting S-records. The download ends when an S9
type record is received.
Sometimes the target system cannot keep up with a sustained high data rate
when downloading. Therefore, the debugger sends xon and xoff to the host
for flow control. If the host system does not respond immediately to xoff,
you must set up a buffering delay count in register .d0 before using the
download commands. A value of 20 works well in most cases with a data
link running at 9600 baud, but you may have to experiment with this value
as it is dependent on a combination of characteristics of the host system:
xoff response lag time
The target system CPU speed
The baud rate
If the download command seems to hang up, a [Ctrl-E] character aborts
the download and also sends an abort signal to the host system. This may
happen if the I/O buffer delay is not large enough or if the OS-9 host’s
screen pause is on.
Downloading using these commands should only be attempted after a
hardware reset or after a debugger rst command. Otherwise, stack/data
conflicts may occur within OS-9 and may produce strange results.
If you are debugging only one module, the module should be kept in a
different file than the main OS-9 download file. This allows the main OS-9
code already in memory to be used and only the new version of the module
will have to be downloaded. This will save a considerable amount of time.
The rst command must be used first.
B-5
Appendix B
The ROM Debugger
Basic Debugger Commands
Command:
Description:
b
Display addresses of all breakpoints.
b <addr>
Set breakpoint at <addr>. <addr> is relative to the default
relocation register.
c <mod> <addr>
Enter change memory mode starting at <addr>. <mod> applies until
change mode is exited. The default data length is one byte (8 bits).
The <mod> options are:
w
l
n
m
o
v
R/W words (16 bits)
R/W long words (32 bits)
No read for match or print
No reread for match test
R/W odd addresses, bytes only
R/W even addresses, bytes only
Change mode commands are:
[CR]
<num>
–
+
.
Move to next location
Store new value, reread, verify match, move to next
location
Move to previous location
Move to next location
Exit mode
Commands may be strung together. For example, the following
command changes one location and then exits change mode:
c .a5+3c FF .
d <addr> [<len>]
Enter memory display mode beginning at <addr>. Contents of
memory are displayed in hex and ASCII. If <len> is not specified,
256 bytes are displayed. Display mode commands are:
[CR]
.
other
Display next <len> bytes
Exit mode
Exit mode, interpret as command
NOTE: The display mode and change memory mode commands for
the debugger are not affected by the relocation register offset.
di <addr> [<len>]
Disassemble and display <len> instructions beginning at <addr>. If
<len> is not specified, 20 instructions are displayed. Disassemble
mode commands are:
[CR]
.
other
Display next <len> bytes
Exit mode
Exit mode, interpret as command
e
Enable/disable debugger.
g
Execute program starting at <PC>.
g <addr>
Execute program starting at <addr>.
NOTE: If the program is stopped at a breakpoint, it is necessary to
trace one instruction before using the g command.
B-6
k <addr>
Kill (remove) breakpoint located at <addr>. <addr> is relative to the
default relocation register.
k*
Kill all breakpoints.
l<hostcmd>
Download data in Motorola S-record format. <hostcmd> is sent to
the host as a command line to trigger the download. I/O delay must
be set in .d0 before the download. The load addresses are displayed
every 512 bytes.
Appendix B
The ROM Debugger
Command:
Description:
le<hostcmd>
Same as l<hostcmd>, except received S-records are displayed
instead of load addresses.
rst
Reset system; PC = Initial PC, SSP = Initial SSP, and SR =
Supervisor state interrupts masked are set to level 7. This allows a g
command to restart the system.
t <num>
Enter trace mode and trace <num> instructions. Trace mode
commands are:
[CR]
.
other
Trace <num> more instructions
Exit trace mode
Exit trace mode, interpret as command
tm <EscChar>
Enter talk-through mode. This mode is exited when the specified
escape character is typed.
.
Display all registers.
.<reg> <num>
Set register <reg> to value <num>.
.pc <addr>
Set program counter to <addr>.
.r <num>
Set relocation register to <num>.
B-7
Appendix
C
Error Codes
This appendix lists OS-9 error codes in numerical order. They are
categorized as follows:
Range:
Description:
000:001 - 000:067
Miscellaneous errors.
000:102 - 000:163
Processor Exception errors. Error codes in this range are
reserved to indicate that a processor related exception ocurred
on behalf of the program. Only those listed within this range
can occur on behalf of the user program. All other numbers
between 100-163 are reserved. Unless the program provides
for special handling of the exception condition (F$STrap), the
error is fatal and the program terminates. The listed errors that
fall between 100-163 represent the hardware exception vector
plus 100.
000:164 – 000:176
Miscellaneous errors.
000:200 – 000:239
Operating system errors. These errors are normally generated
by the kernel or file managers.
000:240 – 000:255
I/O errors. These error codes are generated by device drivers
or file managers.
C-1
Appendix C
Error Codes
Error number:
Description:
000:001
Process has aborted.
000:002
KEYBOARD QUIT - The keyboard abort signal (S$Abort) was sent. This is usually
generated by typing control E.
000:003
KEYBOARD INTERRUPT - The keyboard interrupt signal (S$Intrpt) was sent. This is
usually generated by typing control C.
000:004
MODEM HANGUP - The modem hangup signal (S$HangUp) was sent. This is
usually generated when the device driver detects loss of data carrier.
000:064
E$IllFnc
ILLEGAL FUNCTION CODE - A math trap handler error.
000:065
E$FmtErr
FORMAT ERROR - A math trap handler error.
000:066
E$NotNum
NUMBER NOT FOUND - A math trap handler error.
000:067
E$IllArg
ILLEGAL ARGUMENT - A math trap handler error.
000:102
E$BusErr
BUS ERROR - A bus error exception occurred.
000:103
E$AdrErr
ADDRESS ERROR - An address error exception occurred.
000:104
E$IllIns
ILLEGAL INSTRUCTION - An illegal instruction exception occurred.
000:105
E$ZerDiv
ZERO DIVIDE - An integer zero divide exception occurred.
000:106
E$Chk
CHECK - A CHK or CHK2 instruction exception occurred.
000:107
E$TrapV
TRAP - A TRAPV, TRAPcc, or FTRAPcc instruction exception occurred.
000:108
E$Violat
PRIVILEGE VIOLATION - A privilege violation exception occurred.
000:109
E$Trace
UNINITIALIZED TRACE EXCEPTION - An uninitialized trace exception occurred.
000:110
E$1010
1010 TRAP - An A Line emulator exception occurred.
000:111
E$1111
1111 TRAP - An F Line emulator exception occurred.
000:113
COPROCESSOR PROTOCOL VIOLATION
000:114
FORMAT ERROR
000:115
UNINITIALIZED INTERRUPT OCCURRED
000:124
SPURIOUS INTERRUPT OCCURRED
000:133–000:147
C-2
E$Trap
Uninitialized user TRAP 1-15 executed.
000:148
E$FPUnordC
FPCP ERROR - Branch or set on unordered condition error.
000:149
E$FPInxact
FPCP ERROR - Inexact result.
000:150
E$FPDivZer
FPCP ERROR - Divide by zero error.
000:151
E$FPUndrFl
FPCP ERROR - Underflow error.
000:152
E$FPOprErr
FPCP ERROR - Operand error.
000:153
E$FPOverFl
FPCP ERROR - Overflow error.
000:154
E$FPNotNum
FPCP ERROR - NAN signaled.
000:155
FPCP ERROR - Unimplemented Data Type
000:156
PMMU CONFIGURATION ERROR
000:157
PMMU ILLEGAL OPERATION
000:158
PMMU ACCESS LEVEL VIOLATION
000:164
E$Permit
NO PERMISSION - The process or module must be owned by the super-user to
perform the requested function.
000:165
E$Differ
DIFFERENT ARGUMENTS - F$ChkNam arguments do not match.
000:166
E$StkOvf
STACK OVERFLOW - F$ChkNam can cause this error if the pattern string is too
complex.
000:167
E$EvntID
ILLEGAL EVENT ID - An invalid or illegal event ID number is specified.
Appendix C
Error Codes
Error number:
Description:
000:168
E$EvNF
EVENT NAME NOT FOUND - An attempt to link to or delete an event is made, but
the name is not found in the event table.
000:169
E$EvBusy
EVENT BUSY - An attempt to delete an event is made and its link count is non-zero.
This can also occur if an attempt to create an already existent named event is made.
000:170
E$EvParm
IMPOSSIBLE EVENT PARAMETER - This error returns when impossible parameters
are passed to F$Event.
000:171
E$Damage
SYSTEM DAMAGE - A system data structure has been corrupted.
000:172
E$BadRev
INCOMPATIBLE REVISION - The software revision is incompatible with the
operating system revision.
000:173
E$PthLost
PATH LOST - The path became lost. This usually occurs when:
• a network node has gone down
• a serial connection has lost data carrier
• a pipe path has been broken due to an SS_Break SetStat
000:174
E$BadPart
BAD PARTITION - Bad partition data or no active partition.
000:175
E$Hardware
HARDWARE DAMAGE HAS BEEN DETECTED - E$Hardware usually occurs when
the driver fails to detect the correct responses from the hardware. This can occur due
to hardware failure or an incorrect hardware configuration.
000:176
E$SectSize
INVALID SECTOR SIZE - The sector size of a RBF device must be a binary multiple
of 256 (256, 512, 1024, etc.). The maximum sector size is 32768.
000:200
E$BPNum
PATH TABLE FULL - A user program has tried to open more than 32 I/O paths
simultaneously. When the system path table gets full, the kernel automatically
expands it. However, this error could be returned if there is not enough contiguous
memory to expand the table.
000:201
E$BPNum
ILLEGAL PATH NUMBER - The path number was too large, or for a non-existent
path. This could occur whenever passing a path number to an I/O call.
000:202
E$Poll
INTERRUPT POLLING TABLE FULL - An attempt was made to install an IRQ
Service Routine into the system polling table, and the table was full. To install another
interrupt producing device, one must first be removed. The system’s INIT module
specifies the maximum number of IRQ devices that may be installed.
000:203
E$BMode
ILLEGAL MODE - An attempt was made to perform an I/O function of which the
device or file was incapable. This could occur, for instance, when trying to read from
an output file (for example, a printer).
000:204
E$DevOvf
DEVICE TABLE FULL - The specified device cannot be added to the system
because the device table is full. To install another device, one must first be removed.
The system’s INIT module specifies the maximum number of devices that may be
supported, but this may be changed to add more.
000:205
E$BMID
ILLEGAL MODULE HEADER - The specified module cannot be loaded because its
module sync code is incorrect.
000:206
E$DirFul
MODULE DIRECTORY FULL - The specified module cannot be added to the system
because the module directory is full. To load or create another module, one must first
be unlinked. Although OS-9 expands the module directory when it becomes full, this
error may be returned because there is not enough memory or the memory is too
fragmented to use.
000:207
E$MemFul
MEMORY FULL - The process will not execute because there is not enough
contiguous RAM free. This can also occur if a process has already been allocated the
maximum number of blocks permitted by the system.
000:208
E$UnkSvc
ILLEGAL SERVICE REQUEST - The specified service call has an unknown or
invalid service code number. This can also occur if a Getstat/Setstat call is made with
an unknown status code.
000:209
E$ModBsy
MODULE BUSY - An attempt was made to access a non-sharable module that is in
use by another process.
C-3
Appendix C
Error Codes
C-4
Error number:
Description:
000:210
E$BPAddr
BOUNDARY ERROR - A memory deallocation request was not passed a valid block
address or an attempt was made to deallocate memory not previously assigned.
000:211
E$EOF
END OF FILE - An end of file condition was encountered on a read operation.
000:212
E$VctBsy
VECTOR BUSY - A device is trying to use an IRQ vector that is currently being used
by another device.
000:213
E$NES
NON-EXISTING SEGMENT - A search was made for a disk file segment that cannot
be found. The device may have a damaged file structure.
000:214
E$FNA
FILE NOT ACCESSIBLE - An attempt was made to open a file or device without the
correct access permissions. Check the file’s attributes and the owner ID.
000:215
E$BPNam
BAD PATH NAME - There is a syntax error in the specified pathlist (illegal character,
etc.). This can occur whenever referencing a path by name.
000:216
E$PNNF
PATH NAME NOT FOUND - The specified pathlist cannot be found. This could be
caused by misspellings or incorrect directories, etc.
000:217
E$SLF
SEGMENT LIST FULL - A file is too fragmented to be expanded any further. This can
be caused by expanding a file many times without regard to allocation of memory. It
also occurs on disks with little free memory or disks whose free memory is too
scattered. A simple way to solve this problem is to copy the file (or disk). This should
move it into contiguous areas.
000:218
E$CEF
FILE ALREADY EXISTS - An attempt was made to create a file using a name that
already appears in the current directory.
000:219
E$IBA
ILLEGAL BLOCK ADDRESS - A search for an illegal block address has occurred.
An invalid pointer or block size has been passed or the device’s file structure is
damaged.
000:220
E$HangUp
TELEPHONE (MODEM) DATA CARRIER LOST
000:221
E$MNF
MODULE NOT FOUND - A request is made to link to a module that is not found in
the module directory. Modules whose headers have been modified or corrupted will
not be found.
000:222
E$NoClk
NO CLOCK - This error returns when a request is made that uses the system clock
and the system has no clock running. For example, a timed SLEEP request returns
this error if there is no system clock running. SETIME is used to start the system
clock.
000:223
E$DelSP
SUICIDE ATTEMPT - A user requested deallocation and return of the memory where
the user’s stack is located. This could be caused, for example, by using the F$Mem
system call to contract the data memory of the specified process.
000:224
E$IPrcID
ILLEGAL PROCESS NUMBER - A system call was passed a process ID to a
non-existent process or a process that the user may not access.
000:225
E$Param
BAD PARAMETER - A service request has been passed an illegal or impossible
parameter.
000:226
E$NoChld
NO CHILDREN - An F$Wait request was made and the process has no child process
for which to wait.
000:227
E$ITrap
ILLEGAL TRAP CODE - An unavailable (already in use) or invalid trap code is used
in a TLINK call.
000:228
E$PrcAbt
PROCESS ABORTED - A process is aborted by the kill signal code.
000:229
E$PrcFul
PROCESS TABLE FULL - The system process table is full (too many processes
currently running). Although OS-9 automatically tries to expand the table, this error
may occur if there is not enough contiguous memory to do so.
000:230
E$IForkP
ILLEGAL PARAMETER AREA - Ridiculous parameters were passed to a fork call.
000:231
E$KwnMod
KNOWN MODULE - A call was made to install a module that is already in memory.
000:232
E$BMCRC
INCORRECT MODULE CRC - The specified module being checked or verified has a
bad CRC value. To generate a valid CRC, use the FIXMOD utility.
Appendix C
Error Codes
Error number:
Description:
000:233
E$USigP
UNPROCESSED SIGNAL PENDING
000:234
E$NEMod
NON-EXECUTABLE MODULE - A process tries to execute a module with a type
other than program/object.
000:235
E$BNam
BAD NAME - There is a syntax error in the specified name.
000:236
E$BMHP
BAD PARITY - The specified module has bad module header parity.
000:237
E$NoRAM
RAM FULL - There is no free system RAM available at the time of the request for
memory allocation. This also occurs when there is not enough contiguous memory to
process a fork request.
000:238
E$DNE
DIRECTORY NOT EMPTY - An attempt was made to remove the directory attribute
from a directory that is not empty.
000:239
E$NoTask
NO TASK NUMBER AVAILABLE - All task numbers are currently in use and a
request was made for execution or creation of a new task.
000:240
E$Unit
ILLEGAL DRIVE NUMBER
000:241
E$Sect
BAD SECTOR - Bad disk sector number.
000:242
E$WP
WRITE PROTECT - Device is write protected.
000:243
E$CRC
CRC ERROR - CRC error on read or write verify.
000:244
E$Read
READ ERROR - Data transfer error during disk read operation, or SCF (terminal)
input buffer overrun.
000:245
E$Write
WRITE ERROR - Hardware error during disk write operation.
000:246
E$NotRdy
NOT READY - Device has “not ready” status.
000:247
E$Seek
SEEK ERROR - Physical seek to non-existent sector.
000:248
E$Full
MEDIA FULL - Insufficient free space on media.
000:249
E$BTyp
WRONG TYPE - Attempt to read incompatible media (that is, attempt to read
double-side disk on single-side drive).
000:250
E$DevBsy
DEVICE BUSY - Non-sharable device is in use.
000:251
E$DIDC
DISK ID CHANGE - The disk media was changed with open files. RBF copies the
disk ID number (from sector 0) into the path descriptor of each path when it is
opened. If this does not agree with the driver’s current disk ID, this error returns. The
driver updates the current disk ID only when sector 0 is read. Therefore, it is possible
to swap disks without RBF noticing. This check helps to prevent this possibility.
000:252
E$Lock
RECORD IS LOCKED-OUT - Another process is accessing the requested record.
Normal record locking routines will wait forever for a record in use by another user to
become available. However, RBF may be told to wait for a finite amount of time with a
Setstat. If the time expires before the record becomes free, this error returns.
000:253
E$Share
NON-SHARABLE FILE BUSY - The requested file or device has the single user bit
set or it was opened in single user mode and another process is accessing the
requested file. A common way to get this error is to attempt to delete a file that is
currently open.
000:254
E$DeadLk
I/O DEADLOCK - Two processes are attempting to use the same two disk areas
simultaneously. Each process is locking out the other process, producing the I/O
deadlock. One of the two processes must release its control to allow the other to
proceed.
000:255
E$Format
DEVICE IS FORMAT PROTECTED - An attempt was made to format a disk that is
format protected. A bit in the device descriptor may be changed to allow the device to
be formatted. Formatting is usually inhibited on hard disks to prevent erasure.
C-5
Appendix
D
Glossary
application program
A program that needs an operating system
environment to execute. For example, word
processing, accounting, or
spreadsheet programs.
ASCII
The standard code of symbols, including
alphanumerics, used in a computer environment.
ASCII stands for American Standard Code for
Information Interchange.
attributes
A set of status codes that control access to a file
for security. Also indicates if a file is a directory
or not.
bit
An abbreviation for binary digit. This is the
most basic unit of information used by a
computer. It is capable of two values: one
and zero.
bit map
A binary table in which each bit represents a
specific location of memory accessable to the
central processing unit (CPU).
backup
A utility provided with OS-9 that allows you to
create a duplicate copy of an existing disk. Also,
the copied disk.
boot (bootstrap or cold start)
A startup function that initially loads the
operating system into memory and starts it after
the computer is first turned on or after it is reset.
byte
Unit of memory consisting of 8 binary on/off
switches (bits).
cold start
see boot.
command
A request made from the keyboard for the
execution of a specific operation. Also,
sometimes refers to one of the utilities provided
with OS-9.
D-1
Appendix D
Glossary
command interpreter
Software that translates input commands into
machine language commands causing the
computer to perform the requested actions. The
name of OS-9’s command interpreter program
is shell.
command line
A single line of input including a keyword that
the operating system can understand and act
upon. A command line may also include an
object and the parameters of the command.
concurrent execution
The act of deliberately running a program at the
same time as another program; also the effect
multitasking has on programs.
See also: multi-tasking, sequential execution.
cross-development
This refers to programs developed on one
computer for the purpose of translating
instructions for/to another computer.
data directory
A directory used by OS-9 to locate data files
used by programs. You can change which
directory is the current data directory. See
also: directory.
data module
A type of module used for shared variable
storage by two or more tasks. See also:
memory module.
default system device
This refers to the system device (disk, RAM,
etc.) used for information and program storage
used by a computer. The OS-9 mnemonic for
this device is /dd.
device descriptor module A type of module which contains the
identification and initialization values for a
specific I/O device. The name of the device
descriptor module is also the logical name by
which the device is referred to by the software.
device driver module
D-2
A program module that contains the software
necessary to interface OS-9 to a particular type
of I/O device. A single driver module is often
shared by many identical types of I/O ports
(such as for terminals).
Appendix D
Glossary
directory
A special file used by OS-9 which contains the
names of other files or directories. A directory
allows you to organize your files by placing all
files to be grouped together in one place.
DMA
Abbreviation for Direct Memory Access. This is
a procedure or method used to gain direct access
to the computer’s main storage without
involving the central processing unit (CPU).
environment
The shell environment is a list a variables that
may be accessed by the shell and any user
applications to be used as global variables. Each
user’s shell maintains a unique environment.
exception
A special control signal that diverts the attention
of the computer from the main program because
of a particular event, signal, or set
of circumstances.
execution directory
A directory used by OS-9 to locate files
containing programs (utilities). You can change
which directory is your current execution
directory at will, but usually the system-wide
commands directory (CMDS) is used.
See directory.
execution modifier
A character in a command line recognized by
the shell that changes the default execution of
the command. Modifiers are used to change the
memory size (#), process priority (^), and
standard I/O paths (>, <, >>).
FPCP
An abbreviation for a Floating Point
Co-Processor (for example, 68881, 68882).
file
An ordered sequence of bytes used for mass
storage. A file may contain a program, text, a list
of commands, etc.
file pointer
An indicator of where the next access in a file
will occur.
file system
The logical organization of mass storage and all
other I/O devices into a common and compatible
system based on paths, files, and directories.
D-3
Appendix D
Glossary
D-4
filter
A special type of utility command program
specially designed for use with pipes. A filter
typically performs some useful function on the
data flowing through it such as sorting, editing,
etc. See also: pipe.
format
A utility provided in OS-9 to initialize a disk
before it is used. New disks must be formatted
prior to being used. Also refers to the physical
division of a disk into sectors, clusters, etc.
group.user ID
This number is used for file system security
purposes. Files have owner and public access
permissions. If no public access permissions are
set, only the owner of a file may access it. There
are two types of file ownership: by the group
and by the user. Each file is stored with a
group.user ID. Any user with the same user ID
as the file is considered an owner. Any user with
the same group ID as the file is also considered
an owner. This allows people who work on the
same project to be able to access the same files
via their group number.
interrupt
A control signal caused by an event, signal, or
set of circumstances that cause a break in the
normal flow of a system or routine such that the
flow can be resumed from that point at a
later time.
keyword
A program, procedure file, or built-in command
that the shell recognizes in a command line.
link
An OS-9 function used to request the location of
a memory module of a given name prior to its
use. Causes the user count of the module to be
increased by one. unlink is the opposite
function. See also: memory module and
module directory.
memory module
A named block of program code or data that is
or can be loaded into memory. Memory modules
use a special standardized format. See also: data
module, module directory, and program module.
Appendix D
Glossary
MMU
Abbreviation for Memory Management Unit.
MMU is special hardware used to provide
logical to physical address translation and to
protect system memory from accidental
modification. Some MMU hardware also
provides virtual memory capabilities. MMU is a
super-set of SPU. See SPU.
module directory
A list automatically maintained by OS-9 of the
name, location, and user count of each memory
module which is present in memory. See also:
link and memory module.
multi-tasking
A feature of the operating system which allows
multiple programs to be run at the same time.
multi-user
A function of the operating system which allows
multiple users to use the system at the same
time; provides security for the system and each
user’s files. Sometimes referred to as
timesharing.
NFM
The Network File Manager is the OS-9 network
file manager module that supports networking.
NFM is responsible for maintaining accurate
communication between device drivers across
a network.
operating system
The master control program that manages the
operation of the computer and provides
commonly-used functions such as I/O for
other programs.
owner attributes
Owner read, owner write, and owner execute.
An owner of a file is a user with the same group
number or user ID associated with the file. If set,
the owner attributes allow access to the file by
the owner. See public attributes.
parameters
A character or symbol recognized by the shell in
a command line that specifies additional
conditions for the execution of the command.
password
A user-unique code word used to log on to a
timesharing system that validates identity
for security.
D-5
Appendix D
Glossary
password file
A file that contains a list of all valid user names
and passwords for users on the system.
path
The routing of input or output between a
program and a file or I/O device.
path descriptor
A data structure used by file managers and
device drivers to perform I/O functions. A path
descriptor contains information specific to an
open path. Every open path is represented by a
path descriptor. Path descriptors are allocated
and deallocated as paths are opened and closed.
pathlist
A list of names that specifies the location of the
file or I/O device to be associated with a path. It
may in various combinations include a device
name, one or more directory names, and a
file name.
permission
Term used to indicate that a certain attribute is
set for a file. For example, owner read
permission. Also sometimes used for the
term attribute.
pipe
A special type of I/O path that connects and
synchronizes the standard output of a program to
the standard input of another simultaneously
running program. Chains of piped programs are
called pipelines. See also: filter and standard
I/O paths.
pipeline
See pipe.
position independent code
Code that does not reference absolute addresses.
All OS-9 code must be position independent.
D-6
procedure file
A file that contains a list of commands to be
performed by the shell as if they were typed in
from a keyboard.
process
An individual running program; synonymous
with task.
process ID
A unique code number assigned by OS-9 when a
new process is created. It identifies the process
in subsequent commands or system calls.
Appendix D
Glossary
program module
A memory module which contains executable
code. All OS-9 programs must be kept in
memory module format. See also:
memory module.
public attributes
Public read, public write, public execute. The
public is defined as any user not having the
same user ID or group number as the file. If set,
these attributes allow anyone access to the file.
See owner attributes.
RAM disk
A special device driver module that allows the
part of the system’s main memory to behave as a
disk drive. This permits high speed, but
non-permanent, storage for small, commonly
used files.
RBF
The Random Block File manager is the OS-9
file manager module that supports random
access, block oriented mass storage devices
(disk systems, etc.). RBF can handle any number
or type of such systems simultaneously. It is
responsible for maintaining the logical and
physical file structure for OS-9.
record locking
A special function built into OS-9’s file
management system which eliminates problems
caused by two or more users trying to update the
same part of a file at the same time.
redirection
A method of changing the normal input and/or
output of a program to alternate files or I/O
devices. This is done at the time the program is
run through the use of modifiers in the command
line, as opposed to at the time it is written. See
also: standard I/O paths.
re-entrant code
Code shared by two or more programs. This
saves program memory space that would be
duplicated in each program. Re-entrant code
must not alter itself in any way.
root directory
The directory entered when the user first logs on
to the system. This directory is specified in the
password file.
D-7
Appendix D
Glossary
D-8
SBF
The Sequential Block File manager is the OS-9
file manager module that supports sequential
access, block oriented mass storage devices
(tape systems). SBF can handle any number or
type of such systems simultaneously.
SCF
The Sequential Character File manager is the
OS-9 manager module that supports sequential
access, character oriented devices (terminals,
printers). SCF can handle any number or type of
such systems simultaneously.
self-modifying code
Code that alters itself during execution. OS-9
code must not be self-modifying.
separator
A special character recognized by shell in the
command line that specifies the sequential or
concurrent execution of more than one process.
The special characters are: a semicolon (;) for
sequential execution and an ampersand (&) for
concurrent execution.
sequential execution
The act of deliberately running programs one at
a time in the order specified as opposed to
concurrently. This is done when it is necessary
for one program to be completed before the next
one in a sequence is begun. See also:
multi-tasking, concurrent execution,
and separator.
shell
OS-9’s command interpreter program. This
program acts as an interface between your and
the operating system. See also:
command interpreter.
signal
A software interrupt that can be sent from one
process to another or from OS-9 to a process.
For example, the [Ctrl-E] abort key causes an
abort signal to be sent to a program.
single user
A mode of operation where only one user
utilizes the computer. Also, a file attribute that
allows only one user at a time to access the file.
Appendix D
Glossary
SPU
Abbreviation for System Protection Unit. SPU is
special hardware used to protect system memory
from accidental modification. If a process tries
to access any part of system memory or any
other process’ memory, the SPU hardware
causes a bus error and the system aborts
the process.
standard I/O path
The default I/O path used by a program for
routine input and output. Every process has three
standard I/O paths: input, output, and error
output. See also: path and redirection.
system call
A request from a programming language that
causes OS-9 to perform a specific function such
as input/output.
system disk
A disk which contains the system boot file plus
other common system-wide files such as the
utility command set.
task
See process.
timesharing
See multi-user.
UNIX
An operating system similar to OS-9.
user name
A name used externally to identify each user
when logging on to the system. Based on the
contents of the password file, the system
converts this name to the corresponding user ID
number for subsequent internal use. See also:
user ID and password file.
user ID
A unique code number used to identify the
user’s files and processes. See also: user name
and password file.
utility
One of the set of programs supplied with OS-9
that is used to perform housekeeping,
maintenance, customization, and
convenience functions.
D-9
Appendix D
Glossary
Notes
D-10
Index
Symbols
.login file, 5-20, 9-97
.logout file, 5-5, 5-20, 5-21, 9-64,
9-97, 9-98
_sh environment variable, 5-3, 5-26,
9-88, 9-95, 9-96, 9-97, 9-119
A
Abort process, 9-15, 9-19, 9-29, 9-56,
9-86, 9-101, 9-109, B-3, B-5
abort process, 3-4, 5-1, 5-5, 5-19,
5-30
Access to files/directories, 4-8
access to files/directories, 4-4, 4-5,
4-15, 4-18
Additional memory size modifier, 5-8
application program, 1-1
ASCII conversion Table, A-1
attach device, 8-13
Attr utility, 9-4
attr utility, 4-18
Attributes, 9-4
Abbreviations, 9-4
Attr utility, 9-4
Changing, 9-4
Copied, 9-18
Displaying, 9-32
attributes, 4-18
attr utility, 4-18
changing, 4-18
displaying, 4-18
file security, 4-4
B
background process, 1-1, 1-3, 3-4,
5-14, 5-19, 5-29, 5-31
Backup procedure, 2-5
backup procedure, 2-3, 2-6
frestore utility, 7-4
fsave utility, 7-1
incremental, 7-1
incremental strategies, 7-10
multiple drive, 2-6
single drive, 2-7
backup utility, 2-3, 2-5, 2-6
Binary conversion table, A-2
Binex utility, 9-6, 9-7, B-4
boot, 2-1, 8-20
bootfiles, 8-9
Break utility, 9-8
build utility, 4-3, 4-17
built–in comm, 5-3
built–in command, unsetenv, 5-5
Built–in shell com, 4-12
Built–in shell commands, 5-4, 9-98
Chd utility, 4-12
built–in shell commands
chd, 4-7, 5-3, 5-5
chx, 5-5
ex, 5-5
kill, 5-5, 5-31
logout, 5-5
profile, 5-5, 5-21
set, 5-5
setenv, 5-4, 5-5
setpr, 5-5
unsetenv, 5-4
w, 5-5
wait, 5-5
C
Cfp utility, 5-24, 9-10
cfp utility, 5-23
chd, 4-7, 4-12, 5-3, 5-5, 5-6
Chd utility, 4-12, 9-13
chx, 4-13, 5-5, 5-6
Chx utility, 4-12, 9-13
Cio, 9-4
clusters, 3-7
Cmp utility, 9-14
Code utility, 9-15
Command interpreter, 9-92
command interpreter, 3-2
Command line
Execution modifiers, 9-93
Processing, 9-93
Separators, 9-93
Wildcards, 9-93
command Line, separators, 5-7
I–I
Index
command line, 3-3, 4-23, 5-1, 5-2,
5-5
concurrent execution, 5-14
execution modifiers, 5-5, 5-6, 5-7,
5-8, 5-11
Function, 3-3
grouping, 5-17
keyword, 5-5, 5-6
parameters, 5-5, 5-6
processing, 5-5, 5-7, 5-15
separators, 5-5, 5-13
sequential execution, 5-13
wildcards, 5-7, 5-12
Command separators, Command lin,
9-93
command separators, command line,
5-13
Compress utility, 9-16
concurrent execution, 5-7
command line, 5-14
CONFIG macro, 8-2, 8-7
control keys, 3-4
Copy a file, 4-19, 9-18
copy a file, dsave utility, 4-21
Copy utility, 4-19
copy utility, 4-19
Count utility, 9-21
current data directory, 4-6, 4-8, 4-10,
4-11, 4-12, 4-15
current execution directory, 4-6, 4-8,
4-11, 4-12, 4-13
D
D_MaxAge, 8-21
D_MinPty, 8-21
data files, 4-3
Date utility, 2-2, 9-22
Decimal conversion chart, A-2
Deiniz utility, 9-26
deiniz utility, 8-14
Del utility, 9-27
del utility, 4-25
deldir utility, 4-25
Delete a file/directory, 4-25
destination disk, 2-5
Device table, Display, 9-30
I–II
Devs utility, 9-30
Dir utility, 9-32
dir utility, 4-10
Directory
Dir utility, 9-32
Displaying, 9-32
Home, 9-95
Makdir utility, 9-65
directory
accessing, 4-8, 4-15
att, 4-18
attributes, 4-7
changing, 4-13, 5-3
characteristics, 4-7
creating, 4-15
current data, 4-6, 4-8, 4-10, 4-11,
4-12, 4-15
current execution, 4-6, 4-8, 4-11,
4-12, 4-13
deldir utility, 4-25
deleting, 4-25
dir utility, 4-10
displaying, 4-10
extended listing, 4-11
function, 4-1
home, 4-7, 5-3
name rules, 4-16
parent, 4-6
pathlist, 4-8
root, 4-5
dsave utility, 4-21
Dump utility, 9-35
E
Echo utility, 9-37
Edt utility, 9-38
edt utility, 4-17
Environment variable, HOME, 9-64
environment variable, _sh, 5-3
Index
Environment variables
_sh, 9-95
HOME, 9-62, 9-95
PATH, 9-62, 9-95
PORT, 9-95
PROMPT, 9-95
SHELL, 9-62, 9-95
TERM, 9-95
USER, 9-62, 9-95
environment variables, 5-2
_sh, 5-3
changing, 5-4
HOME, 4-7, 5-3
PATH, 5-3
PORT, 5-3
PROMPT, 5-3
SHELL, 5-3
TERM, 5-3
USER, 5-3
Events utility, 9-40
ex, 5-5
Ex utility, 9-42
Exbin utility, 9-6, 9-7
executable program module files, 4-3
executio, 5-11
Execution modifiers, Command line,
9-93
execution modifiers
additional memory size modifier,
5-8
command line, 5-5, 5-6, 5-7, 5-8
I/O redirection modifiers, 5-8
process priority, 5-11
Expand utility, 9-43
F
Files
Creation of files, Edt utility, 9-38
File pointer, 4-1
List utility, 9-58
Listing, 9-58
Password, 9-61
Printing, 9-76
Procedure files
Password, 9-61
Rename utility, 9-84
files
accessing, 4-4, 4-8, 4-15
attributes, 4-4, 4-18
copying files, 4-19, 4-21
creating, 4-17
build utility, 4-17
edt utility, 4-17
uMACS, 4-17
deleting, 4-25
directory, 4-7
executable program module, 4-3
function, 4-1
list utility, 4-19
name rules, 4-16
ownership, 4-4, 4-18
password, 5-23
pathlist, 4-8
procedur, 4-21
procedure file, startup file, 8-12
procedure files, 5-18
.login, 5-20
.logout, 5-20
cfp utility, 5-23
security, 4-4
text, 4-3
filters, 5-17
Fixmod utility, 9-44
foreground process, 1-3, 3-4
format utility, 2-3, 2-5
multiple disk, 2-4
parameters, 2-3
procedure, 2-4
single disk, 2-4
Free utility, 9-46
free utility, 3-7
G
Grep utility, 9-47
group.user ID, 4-4
grouping commands, 5-17
Applications, 5-19
I–III
Index
H
hard disk, installing OS–9, 8-18
Help utility, 9-50
help utility, 3-7
Hexadecimal conversion chart, A-2
Home directory, 9-95
home directory, 4-7, 5-3
HOME environment variable, 4-7,
5-3, 9-62, 9-64, 9-95
I
Ident utility, 9-51
Init module, 8-1
CONFIG macro, 8-7
initializing devices, 8-13
iniz utility, 8-13
Irqs utility , 9-54
K
keyword, 5-5
command line, 5-6
kill, 5-5, 5-29, 5-31
Kill utility, 9-56
L
Link utility, 9-57
List utility, 9-58
list utility, 4-19
Load utility, 9-59
load utility, 8-15
login procedure, 3-2
Login utility, 9-61
logout, 5-5
M
Makdir utility, 9-65
makdir utility, 4-15
Mdir utility, 9-66
memory allocation, mfree utility, 3-7,
3-8
Merge utility, 9-68
Mfree utility, 9-69
mfree utility, 3-7, 3-8
Moded utility, 9-70
moded utility, 8-6
I–IV
modifiers
ex, 5-5
memory size, 5-7
process priority, 5-7
redirection, 5-7
Module, Identifying, 9-51
Modules
Access permissions, 9-51
De–initializing, 8-13
Display directory, 9-66
Editing, 9-70
Extension, 8-5
Fixmod utility, 9-44
Ident utility, 9-51
Initializing, 8-13
Linking, 9-57
Listing fields, 9-72
Loading, 9-59
Mdir utility, 9-66
Moded utility, 9-70
Module access permissions, 9-44
Repairing CRC, 9-44
Saving, 9-85
Selecting current, 9-71
Unlinking, 9-117
modules
editing
moded utility, 8-6
systype.d file, 8-7
execut, 4-3
library, 1-4
loading, 8-15
memory, 1-4, 8-16
program, 1-4
multi–tasking features, 1-2
multi–user features, 1-2
multi–user systems, 8-16
Multiple shells, 5-25
N
named pipes, 5-16
Naming conventions,
Files/directories, 4-16
naming conventions, I/O devices, 5-9
Index
O
Octal conversion chart, A-2
operating system
definition, 1-1
function, 1-1
functions, 1-2
OS9Boot file, 2-1, 8-1
owner attributes, 4-5, 4-18
P
page pause, 3-5
parameter, command line, 5-6
parameters, command line, 5-5
parent directory, 4-6
Password file, 9-61
password file, 5-23
PATH environment variable, 5-3,
9-62, 9-95
pathlist, relative, 4-13
Pd utility, 9-75
pd utility, 4-15
permission, defined, 4-4
Pipe (line), Definition, 5-15
pipe (line)
construction, 5-7
filters, 5-17
named, 5-16
un–named, 5-16
pipes (line), 5-15
PORT environment variable, 5-3,
9-95
Pr utility, 9-76
Printenv utility, 9-78, 9-96
printenv utility, 5-4
priority
age, 5-11, 8-21
D_MaxAge, 8-21
D_MinPty, 8-21
manipulating, 8-21
modifier, 5-11
setting, 5-7
procedure file, startup file, 8-12
Procedure files
Applications, 5-19
Pa, 9-61
procedure files
.login, 5-20
.logout, 5-20
cfp utility, 5-23
definition, 5-18
dsave utility, 4-21
Process
Setpr utili, 9-91
Sleep utility, 9-102
process
age, 5-11
child, 5-8
definition, 1-3
parent, 5-8
priority, 5-7, 8-21
scheduling, 8-21
system state, 8-23
user state, 8-23
Procs utility, 9-79
procs utility, 5-15, 5-27
profile, 5-5, 5-21
PROMPT environment variable, 5-3,
9-95
Q
Qsort utility, 9-82
R
RAM disk
initializing, 8-16
non–volatile, 8-11
volatile, 8-11
RAM disks, 8-11
redirecting output, 5-7
Rename utility, 9-84
root directory, 4-5
S
Save utility, 9-85
sectors, defined, 4-1
Separators
Command line, 9-93
Sequential execution, 5-7
I–V
Index
separators
command line, 5-5, 5-7
concurrent execution, 5-7
pipes, 5-7
sequential execution, 5-7
Sequential execution, 5-7
sequential execution, 5-7
command line, 5-13
set, 5-5
setenv, 5-4, 5-5
Setenv utility, 9-88, 9-96
Setime utility, 9-89
setime utility, 2-1
setpr, 5-5
Setpr utility, 9-91
SHELL environment variable, 5-3,
9-62, 9-95
Shell environment variables, 9-94
shell uti, 5-4
Shell utility, 9-92
Built–in Command, Setenv utility,
9-88
Built–in command, 9-119
Kill utility, 9-56
Setenv utility, 9-96
Setpr utility, 9-91
Unsetenv utility, 9-96
W utility, 5-29
Built–in Commands, Wait utility,
5-29
Built–in commands, Ex utility,
9-42
Syntax, 9-92
shell utility, 3-2, 5-3
built–in command, 5-4
chd, 5-5
ex, 5-5
kill, 5-5
logout, 5-5
profile, 5-5
set, 5-5
setenv, 5-5
setpr, 5-5
unset, 5-4
I–VI
unsetenv, 5-5
w, 5-5
wait, 5-5
built–in commands
chx, 5-5
kill, 5-29
environment, 5-2
changing, 5-4
function, 5-1
multiple shells, 5-25
options, 5-1
procedure files, 5-18
Sleep utility, 9-102
source device, 7-1
source disk, 2-5
startup file, 2-1, 8-12
startup procedure, 5-22, 8-12
super user, defined, 4-4
Syntax notation, 9-3
system disk, directories, 2-8
system security, 4-4
System Shutdown Procedure, 8-16
systype.d file, 8-2, 8-7
T
Tape utility, 9-103
tape utility, 7-13
target device, 7-1
Tee utility, 9-106
TERM environment variable, 5-3,
9-95
termcap file, 8-25
Tmode utility, 9-107
tmode utility, 3-5, 8-23
Touch utility, 9-111
Tsmon utility, 9-115
tsmon utility, 5-22, 8-16
U
un–named pipes, 5-16
Unlink utility, 9-117
unsetenv, 5-4, 5-5
Unsetenv utility, 9-96, 9-119
USER environment variable, 5-3,
9-62, 9-95
Index
Utility trap handler, 9-4
W
w, 5-5
W utility, 5-29, 9-120
wait, 5-5
Wait utility, 5-29, 9-120
Wildcards, 9-93
wildcards, 5-7, 5-12
X
Xmode utility, 9-121
xmode utility, 8-23
I–VII
With offices in major cities worldwide
WORLD
HEADQUARTERS
Allen-Bradley
1201 South Second Street
Milwaukee, WI 53204 USA
Tel: (1) 414 382-2000
Telex: 43 11 016
FAX: (1) 414 382-4444
EUROPE/MIDDLE
EAST/AFRICA
HEADQUARTERS
Allen-Bradley Europe B.V.
Amsterdamseweg 15
1422 AC Uithoorn
The Netherlands
Tel: (31) 2975/43500
Telex: (844) 18042
FAX: (31) 2975/60222
Publication 1771-6.5.102 May 1993
Supersedes 1771-6.5.102 September 1992
As a subsidiary of Rockwell International, one of the world’s largest technology
companies — Allen-Bradley meets today’s challenges of industrial automation with over
85 years of practical plant-floor experience. More than 11,000 employees throughout the
world design, manufacture and apply a wide range of control and automation products
and supporting services to help our customers continuously improve quality, productivity
and time to market. These products and services not only control individual machines but
integrate the manufacturing process, while providing access to vital plant floor data that
can be used to support decision-making throughout the enterprise.
ASIA/PACIFIC
HEADQUARTERS
Allen-Bradley (Hong Kong)
Limited
Room 1006, Block B,
Sea View Estate
28 Watson Road
Hong Kong
Tel: (852) 887-4788
Telex: (780) 64347
FAX: (852) 510-9436
CANADA
HEADQUARTERS
Allen-Bradley Canada
Limited
135 Dundas Street
Cambridge, Ontario N1R
5X1
Canada
Tel: (1) 519 623-1810
FAX: (1) 519 623-8930
LATIN AMERICA
HEADQUARTERS
Allen-Bradley
1201 South Second Street
Milwaukee, WI 53204 USA
Tel: (1) 414 382-2000
Telex: 43 11 016
FAX: (1) 414 382-2400
PN 955114-95
Copyright 1993 Allen-Bradley Company, Inc. Printed in USA