1
Downloading the Azure PCR Driver:
1. Open your internet browser and navigate to http://cloud.azurepcr.com.
2. Login to the Cloud using the username and password provided.
3. Under Download Azure PCR Driver, click the Download button. A setup file will
be downloaded to your PC.
4. Locate the setup file and double click it to run it.
5. Follow the on-screen instructions to complete installation.
6. It is recommended that you restart your computer on completion of
7. the installation.
By default, the Driver will open every time you start your computer.
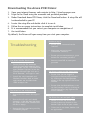
Unable to log in
Troubleshooting
»» Ensure you’re connected to the
Internet.
»» Check you are typing your
information correctly.
»» Ensure you are not entering a space
before the username/password.
The Driver installer doesn’t work
»» Ensure that the file extension
(.exe) has not been removed when
downloaded. To add a file extension,
open Windows Explorer, locate the
Installer file and right click on it.
Click “Rename,” and type in ‘.exe’.
»» Contact Azure PCR to reset your
password
The Driver screen says No Permissions
»» Install the .net framework and
Windows Installer. Both of these
applications are available from
cloud.azurepcr.com
»» Ensure that you are logged in
with your username and password
by clicking on the Configuration
option at the top right of the Driver
window.
The Driver has not analysed a file
»» Ensure that the Node Address is set
to cloud.azurepcr.com by clicking on
the Configuration (top right of the
Driver window).
»» Ensure that the correct file type is
used.
»» Ensure that all wells are labeled
correctly - if the file does not have
any labels, the Driver assumes that
the file is empty.
»» Ensure the file is not being used by
a different program
The Driver has not analysed a file
»» Double-click on the Driver icon
in the system tray located in the
bottom right corner of your screen
»» If the icon is not there, double click
on application.