1
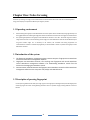
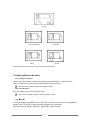
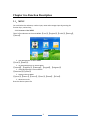
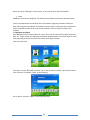
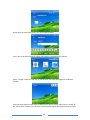
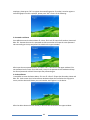
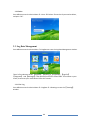
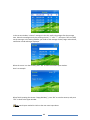
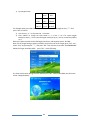
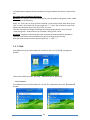
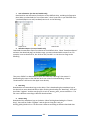
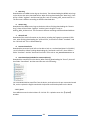
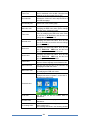
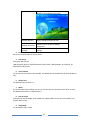
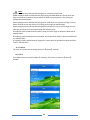
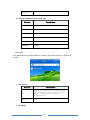
Fingerprint Time Attendance Terminal User Manual Rev: 1.10 1 Content Chapter One: Notice for using ......................................................................................................... 4 1.1 Operating environment.................................................................................................... 4 1.2 Introduction of the system............................................................................................... 4 1.3 Description of pressing fingerprint .................................................................................. 4 1.4 Quick guides for the menu ............................................................................................... 5 1.4.1. Turning on the device ........................................................................................................ 5 1.4.2. Enter the menu.................................................................................................................. 5 1.4.3. 【User】 ........................................................................................................................... 5 1.4.4. 【LogData】 ...................................................................................................................... 6 1.4.5. 【U-Disk】 ........................................................................................................................ 6 1.4.6. 【Setting】........................................................................................................................ 6 1.4.7. 【About】 ......................................................................................................................... 6 Chapter two Function Description .................................................................................................. 7 2.1. MENU ................................................................................................................................ 7 2.1.1. Structure of the MENU ...................................................................................................... 7 Chapter Three Guide in Details...................................................................................................... 8 3.1. Install the Fingerprint Time Attendance Device ................................................................. 8 3.1.1. Fix the Fingerprint Time Attendance Device to the wall ................................................... 8 3.2. User Management ............................................................................................................... 8 3.2.1. Enroll................................................................................................................................. 9 3.2.2 Delete ............................................................................................................................... 14 3.3. Log Data Management ....................................................................................................... 14 3.3.1 View Log ........................................................................................................................... 14 3.3.2 Log Setup .......................................................................................................................... 16 3.3.3 Message (Optional for some models) .............................................................................. 17 3.3.4. Log Info ............................................................................................................................ 20 3.3.5. t.Segment ........................................................................................................................ 20 3.4. U-Disk................................................................................................................................. 21 3.4.1. Download ........................................................................................................................ 21 3.4.2. Upload ............................................................................................................................. 23 3.5. Setting................................................................................................................................. 24 3.5.1. System ............................................................................................................................. 25 3.5.2 Comm. .............................................................................................................................. 28 3.5.3. Sensor .............................................................................................................................. 31 2 3.5.4. Alarm ............................................................................................................................... 32 3.5.5. Power............................................................................................................................... 32 3.5.6. S-Test ............................................................................................................................... 34 3.6 About ................................................................................................................................... 35 Chapter 4 FAQ ............................................................................................................................... 36 4.1. How to remove the manager privilege on the device ........................................................ 36 4.1.1 we could remove the privilege through the software..................................................... 36 4.1.2. we could also remove the admin privilege by pressing a key on the mainboard. .......... 36 3 Chapter One: Notice for using Thanks for purchasing our Fingerprint Time Attendance Terminal. Please refer to this user manual carefully before using, which helps you improve the efficiency of using this product. 1.1 Operating environment Avoid installing the Fingerprint Time Attendance Terminal at places where irradiated by strong light directly. The strong light affects the collecting of fingerprints which would lead to the failure of the fingerprint authentication. The operating temperature of Fingerprint Time Attendance Terminal is 0℃–45℃. Avoid the long term outdoor usage of the terminal. The normal working of the Fingerprint Time Attendance Terminal will be affected by the long term outdoor usage. If it is necessary to use outdoor, the sunshade and cooling equipment are recommended in summer and warm keeping facility is recommended in winter to protect the Fingerprint Time Attendance Terminal. 1.2 Introduction of the system The fingerprint attendance management system contains two parts: fingerprint time attendance terminal and attendance management software. Fingerprint time attendance terminal is for enrolling user fingerprints and normal attendance record. Attendance management software is for downloading attendance record from the terminal and managing the attendance record. Communication methods between the fingerprint time attendance terminal and the attendance management software in the Computer: USB, TCP/IP, and USB Flash Drive. 1.3 Description of pressing fingerprint Correct pressing method: Press with your finger right on the fingerprint collecting window, with the fingerprint’s center aligning to the center of the gathering window as much as possible. Finger pressing method is shown as follows: 4 Correct Too perpendicular Too deflective Too low Tilting Attentions: please press the finger correctly during the authentication. 1.4 Quick guides for the menu 1.4.1. Turning on the device Plug the 12V power adapter to the terminal. When the power adapter is connected to the power, the device will turn on automatically. (Default to auto turning on.) Note: the power adapter for this series models: DC 12V. 1.4.2. Enter the menu Press the “MENU” key to enter the device menu. Note: There’s no default Admin to enter this series models. 1.4.3. 【User】 In the main window of the MENU, select 【User】 or press key 1 to enter the User management window. Press 【Enroll】 to register the new employee info in the device. Two submenus in the 【User window】: 【1.Enroll】 and 【2.Delete】 5 Note: Four role settings for the employee: 【User】,【Manager】,【LogQuery】and 【Registrar】, when set the “Manager” role to enter the Device MENU, only the people in Role=Manager can enter the Device MENU and change the setting on the device. And people in Role=User cannot enter the Device MENU. People in Role=LogQuery can enter the submenu of 【LogData】, and change the setting and enter 【About】 to check the device system info. People in Role=Registrar can enter the submenu of 【User】to register new employee info to the device and enter 【About】to check the device system info. When not set the “Manager” role to anyone, so any one can enter the Device MENU. 1.4.4. 【LogData】 In the main window of the MENU, select 【LogData】 or press key 2 to enter the LogData management window. There’re some submenus in the 【LogData】window: 【ViewLog】, 【LogSetup】, 【Message】, 【LogInfo】,【 tSegment】. Note: the 【message】function not for all the series models. If you can’t find it in your menu, that means no 【message】for your model. 1.4.5. 【U-Disk】 In the main window of the MENU, select 【U-Disk】 or press key 3 to enter the U-Disk management window. There’re two submenus in 【U-Disk】window: 【Download】,【Upload】. 1.4.6. 【Setting】 In the main window of the MENU, select 【Setting】 or press key 4 to enter the settings management window. There’re six submenus in 【Setting】window:【System】, 【Comm.】 , 【Sensor】, 【Alarm】, 【Power】, 【S-Test】. 1.4.7. 【About】 In the main window of the MENU, select 【About】 or press key 4 to enter the System info window. You could check the device system info in 【About】window. 6 Chapter two Function Description 2.1. MENU You could select the submenu, number input, name and messages input by pressing the function keys, number keys, 2.1.1. Structure of the MENU There’re five submenus in the main MENU: 【User】,【LogData】,【U-Disk】,【Setting】, 【About】. User Management on Device MENU 【Enroll】,【Delete】. Log Data Management on Device MENU 【ViewLog】, 【LogSetup】, 【Message】, 【LogInfo】,【 tSegment】 U-Disk Management on Device MENU 【Download】【Upload】 Setting on Device MENU 【System】,【Comm.】,【Sensor】,【Alarm】,【Power】,【S-Test】. About Device info. Show the device system info. 7 Chapter Three Guide in Details 3.1. Install the Fingerprint Time Attendance Device 3.1.1. Fix the Fingerprint Time Attendance Device to the wall Position: decide the position to fix the device, and mark 4 hole sites according to the wall plate comes along with the device. Punching holes: punch 4 holes according to the hole sites. Fixing wall plate: fixing the wall plate to the wall according to the 4 hole you punch. Fixing device: hang the Time Attendance Device to the wall plate that you already fixed to the wall. Turning on the device: plug the 12V power adapter to the device, and connect the adapter to the power. Then the device will turn on automatically. 3.2. User Management Press MENU to enter the main menu of the device as the following: Select the item by pressing the direction keys or number keys on the keyboard. For example: select 【User】press “OK” key to enter its submenu or just press key “1” to enter its submenu, as the following: 8 There’re two submenus under 【User】: 【Enroll】,【Delete】. 3.2.1. Enroll Select 【Enroll】under 【User】to register new employee info on the device: input the ID, Name, Role. We will take an example here for the following steps: Name=Amaris, ID=1001, Role=Manager. ID Input the ID and press “OK”, such as, Amaris’s ID is 1001, input “1001” and press “OK”. Name There’re 2 ways to set the username to the employee on the device: Method A: input the name while you enroll the employee. According to the input tips on the screen: “Next-OK” “Set-MENU” “Esc-ESC”, we need to set username “Amaris” on the device directly: press “MENU” to the name input window: Press key 2 and select “A”, press “OK”: 9 When you finish the name input, please press “OK” to set the name to the employee and back to the enrollment window. Note: 1) Input English letter: 1 2 3 ABC DEF 4 GHI 5 JKL 6 MNO 7 PQRS 8 TUV 9 WXYZ For Example: when you need a letter B: press “2”, and select “B” through the Key “▽”. And press “OK” to confirm. 2) Press the key “ ← “ or the power key ☉for delete. 3) Press “MENU” to change the input Mode: A, a, # and 中. (A is for capital English letter(A,B,C,D,etc.), a is for lowercase English letter(a,b,c,d,etc.), # is for punctuation(!?#$%() etc.)) Method B : Use the software to upload the username to device. This method is easy, we recommend this method for the username setting. Please refer to the Quick_Guide(TimeAttendanceDeviceUsing).pdf for the setting. Or refer to the software manual. Role Press MENU key to select the role for the current employee and press “OK” to confirm. There’re 4 role: User, Manager, LogQuery, Registrar. Note: when set the “Manager” role to enter the Device MENU, only the people in Role=Manager can enter the Device MENU and change the setting on the device. And people in Role=User cannot enter the Device MENU. People in Role=LogQuery can enter the submenu of 【LogData】, and change the setting and enter 【About】 to check the device system info. People in Role=Registrar can enter the submenu of 【User】to register new employee info to the device and enter 【About】to check the device system info. 10 When not set the “Manager” role to anyone, so any one can enter the Device MENU. Notes Add Notes to the current employee. The words input method is same as the username above. There’re 3 authentication methods for this series models: Fingerprint, Password, RFID card. Note: when register the employee in the device, need to keep in mind that every employee has his/her unique ID number. And this ID number should be same as his/her Enroll ID in the software. 1. Fingerprint enrollment Press MENU to enter the Device Menu 1.User 1.Enroll input the ID number, Name and Role 1. Finger to enter the fingerprint enrollment window and press the same finger for three times according to the tips and press ESC to back to the upper window: Enter the main menu press key 1 or select 【Enroll】and press “OK” to the enrollment window, input the ID number , such as Amaris’s ID number is 1001, as the following: Go to “Name” and press “MENU” key to input the name: 11 When finish the name input, press “OK” to the upper window: Press “OK” to the next window to register the fingerprint, password and Card info: Select “1.Finger” and press “OK” key, or just press key 1 to enter the fingerprint enrollment window: Press the same finger for three times according to the tips on screen, when there’s a sound “Di Di”, that it shows “continue” on the screen. If you need to register two fingerprint for the same 12 employee, please press “OK” to register the second fingerprint. If you don’t need to register a second fingerprint for this employee, please press “ESC” to exit. As the following: 2. Password enrollment Press MENU to enter the Device Menu 1.User 1.Enroll input the ID number, Name and Role 2. Password to enter the password enrollment window and input the same password twice according to the tips and press ESC to back to the upper window: After input the same password twice, and press “OK”, it will back to the upper window if the two password are the same. If not the same, it stays in the password enroll window and keep the second password as blank. Please input the password again. 3. Card enrollment Press MENU to enter the Device Menu 1.User 1.Enroll input the ID number, Name and Role 2. Card to enter the Card enrollment window and put the Card below the Fingerprint sensor, and the device will detect your card number. And register it in the device. After the device detect the card number, It will auto save and back to the upper window. 13 3.2.2 Delete Press MENU to enter the Device Menu 1.User 2.Delete enter the ID you need to delete, and press “OK”. 3.3. Log Data Management Press MENU to enter the Device Menu 2.LogData to enter the Log Data Management window: There’re five submenus under 【LogData】:【ViewLog】,【LogSetup】,【LogInfo】 【tSegment】. And 【Message】is the optional function for some models. If not shown on your screen, that means your model doesn’t have this function. 3.3.1 View Log Press MENU to enter the Device Menu 2.LogData 1.ViewLog to enter the 【ViewLog】 window: 14 Select 【View GLog】, press “OK” to the next window: Enter the ID you want to check, and press “OK” to the GLog viewing window, press “ESC” to Esc. Same operation steps to check the Slog of those who enter the deviceMENU. Note: GLog = General Log, that means all the attendance logs of employee’s punch in and punch out. Slog = Super Log, that means menu action logs for those who enter the device MENU. For example: we check ID=1 Slog, in the Slog viewing window, it shows: 2012/11/01 10:37 S_T : It means the ID=1 enter the menu and change the time settings at 2012/11/01 10:37. Form 0-1 Descriptions for the Abbreviation items on the View GLog window Abbreviations Descriptions V-F Verification Mode: Fingerprint V-P Verification Mode: Password V-FP Verification Mode: Fingerprint + Password V-C Verification Mode: ID card V-FC Verification Mode: Fingerprint + ID card V-FPC Verification Mode: Fingerprint + Password + ID card N Attend CI ClockIn 15 CO ClockOut OI OvertimeIn OO OvertimeOut O Out I In U1 UserDefined1 U2 UserDefined2 Form 0-2Descriptions for the Abbreviation items on the View SLog window Abbreviations Descriptions E_U Enroll the new user(new employee info) E_SM Enroll the manager E_EM Enroll the registrar E_VM Enroll the Log Query person E_DF Delete the fingerprint E_DP Delete the password E_DC Delete the RFID card D_GL Delete the GLog(attendance records) D_SL Delete the SLog(menu action logs) D_EL Delete all the employee info on device S_S System settings S_T Time settings S_L Log Setup settings S_C Communication settings 3.3.2 Log Setup Press MENU to enter the Device Menu 2.LogData 2.LogSetup to enter the 【LogSetup】 window: 16 Form 0-3 Description of LogSetup settings Settings SLog Wrn. GLog Wrn. Re-verify (Min.) GLog Delete Descriptions The SLog(menu action logs) capacity is 1000. When the free space is 100 for SLog, there’s a notification to inform the manager when s/he enter the Device Menu. It defaulted to 100, you could press “OK” to the notification to change the warning settings. The GLog(attendance logs) capacity is 100,000. When the free space is 1000 for GLog, there’s a notification to inform employee when they punch in or punch out. It defaulted to 1000, you could press “OK” to change the warning settings. It defaulted to “3 mins”. The Max is 255mins. When you set it to 3mins, it means when the same employee punch in/out more than once, the device only keeps the record for the earliest punch in/out during 3 mins. Example: when Amaris put her finger on the sensor for authentication at 9:05:30, 9:07:20, 9:08:05. Totally 3times in 3 minutes. But the device only keeps the record for the first time 9:05:30. When she punches at 9:05:30, the LCD shows “Verify, OK!”. When she punches at 9:07:20 and 9:08:05, the LCD shows “Already in!” Once you click this item, it will delete all the attendance records in the device. Before you click this item, make sure you already downloaded all the GLog. SLog Delete Delete all the SLog(menu action logs) in the device. Delete Enrolls Once you click this item, it will delete all the Enroll info in the device including the fingerprint, password and card info. Please make sure you already downloaded all the enroll info. 3.3.3 Message (Optional for some models) Press MENU to enter the Device Menu 2.LogData Message to enter the 【Message】 window: 17 In the current window, it shows 7 messages in the LCD, totally 10 messages fort the message item. Select the message item by the pressing the key “△” and “▽”, then press “OK” to modify set the message. In this setting window, you could set the message content, begin and end time, notification sound and target employee. When the cursor is on the content, press “OK” to enter the content input window: Here’s an example: When finish inputting the content “Happy Birthday!”, press “OK” to save the content, and press “ESC” to back to the upper window. Note: words input method is similar to the user name input above. 18 1) Input English letter: 1 2 ABC 3 DEF 4 GHI 5 JKL 6 MNO 7 PQRS 8 TUV 9 WXYZ For Example: when you need a letter B: press “2”, and select “B” through the Key “▽”. And press “OK” to confirm. 2) Press the key “ ← “ or the power key ☉for delete. 3) Press “MENU” to change the input Mode: A, a, # and 中. (A is for capital English letter(A,B,C,D,etc.), a is for lowercase English letter(a,b,c,d,etc.), # is for punctuation(!?#$%() etc.)) Back to the upper window and set the begin & end time, and target to Amaris, ID=1001. Note: for the target setting to Amaris, ID=1001, move the cursor to the Target, press “OK" and select “User” by pressing the “▽” , and press “OK”. Then it shows a new item “ID 00000000000” below the Target. And input 1001, press “OK” , as the following: So, when Amaris punch during this time 2012/11/02 07:00 – 2012/11/02 18:00, the LCD screen shows “Happy Birthday!”. 19 3.3.4. Log Info Press MENU to enter the Device Menu 2.LogData 3. LogInfo to enter the 【LogInfo】 window: 3.3.5. t.Segment Press MENU to enter the Device Menu 2.LogData 4.tSegment to enter the 【tSegment】 window: The tSegment status settings will show on the homepage of the LCD, refer to the following, “ClockIn” status: The status setting is for the status on homepage of LCD, such as Clockin, ClockOut, OvertimeIn, OvertimeOut, etc. And this status is related to the log status on the software.(More convenient for the manager to check the attendance records. ) Note: For the status showing on the LCD homepage, when it shows “ClockIn” when employee do the attendance, the log downloaded to software will show as “status=Clock-in”, when the status 20 is ClockOut when employee do the attendance, the log on software will show as “status=Clockout”. We have 2 ways to change the LCD status: Method A: the company have a fixed working time, such as people working time is 9:00 – 18:00. We could set as the following: Select “01”, press “OK” to enter input the time 8:00 – 10:00, status ClockIn, when finish, press “ESC” to save it. Then select “02” by pressing he key “▽”, press “OK” to input the time 17:00 – 20:30, status ClockOut, when finish, press “ESC” to save it. Then the LCD status will change according to this settings automatically. It turns “ClockIn” status during 8:00 – 10:00, and turns to “ClockOut” during 17:00 – 20:30. Method B: employee could change the status each time the employee do the attendance. Employee could choose the status before they punch the finger or put the card. Note: we could choose the status by pressing the key “△”and “▽”. 3.4. U-Disk Press MENU to enter the Device Menu 3.U-Disk to enter the 【U-Disk】 management window: There’re two submenus under 【U-Disk】:【Download】and 【Upload】. 3.4.1. Download Press MENU to enter the Device Menu 3.U-Disk 1. Download to enter the 【Download】 window: 21 1. User Information (For the excel models only) Download the user information from device to the USB flash drive, excluding the fingerprint data. When you download the “User Information”, there’re two files in your USB flash drive: \UserData\DeptList.csv and \UserData\UserList.csv. as the following: DeptList.csv UserList.csv 2. Attendance Report (For excel models only) Download the attendance report from device to the USB flash drive. Select “Attendance Report” and enter the download page, set the date range you want to download the report from. For example, I want to download 1st, Oct. 2012 to 31th, Oct.2012. so I set the time range as the following: Then press “MENU” to download the report, the LCD shows “Working!” that means it’s downloading the report to the USB flash drive now. when finish downloading, it shows “Download OK!” then back to the upper menu directly. 3. New GLog Download the new attendance logs on the device. That is downloading the attendance logs on the device that never download before. When finishing downloading the “New GLog”, there will be a folder “LogData”. And the new GLog file is such as: NewGlog_0001_20121113224024.csv . The file name is different according to different download date. 4. Historic GLog Download all the attendance logs on the device. When finishing downloading the “Historic GLog”, there will be a folder “LogData”. And the historic GLog file is such as: HisGLog_0001_20121113.csv. The file name is different according to different download date. 22 5. New SLog Download the new MENU action logs on the device. That is downloading the MENU action logs on the device that never download before. When finishing downloading the “New SLog”, there will be a folder “LogData”. And the new SLog file is such as: NewSlog_0001_20121113225112.csv . The file name is different according to different download date. 6. Historic SLog Download all the MENU action logs on the device. When finishing downloading the “Historic SLog”, there will be a folder “LogData”. And the historic SLog file is such as: HisSLog_0001_20121113.csv. The file name is different according to different download date. 7. All Enroll Info Download all the enroll information on the device, including the fingerprint, password, RFID num. when finishing downloading the “All Enroll Info”, there will be a folder “UserData”. And the “All Enroll Info” file is: AllEnrollData.fps. 8. Personnel Enroll Info Download the personnel enroll info on the device. Such as , we download Amaris’s (ID=1001 ) enroll information. When finishing downloading the “personnel enroll info”, there will be a folder “UserData”. And the “Personnel Enroll Info” file is such as: OD_000000000000001001.db. 9. Sound Download (available for some models only) Download the sound file from the device. When finishing downloading the “Sound”, there will be a folder “SoundData”. And the sound files are as the following: You could download the sound files from the device, and replace it with your customized sound file, such as replace the English sound with the Spanish sound. And upload it to the device. 3.4.2. Upload Press MENU to enter the Device Menu 3.U-Disk 2. Upload to enter the 【Upload】 window: 23 1. All Enroll Info Upload all the enroll information that backup in the USB flash drive to the device. 2. Personnel Enroll Info Upload the personnel enroll info from USB flash drive to the device. It prompts you to input the ID that you need to upload. For example, 00000000001, that means upload user id=1’s enroll info from USB flash drive to the device. 3. Sound Upload (available for some models only) You could download the sound files from the device, and replace it with your customized sound file, such as replace the English sound with the Spanish sound. And upload it to the device. Note: Be careful for this uploading, if some mistake, there will be no any sound for the device. 4. Firmware Upgrade Be careful about this function. If not professional, it’s better not to upgrade the firmware. During the firmware upgrading, cannot turn off the device, cannot enter the MENU or plug out the USB flash drive. Or it would damage the device and cannot power on any more. 3.5. Setting Press MENU to enter the Device Menu 4.Setting to enter the 【Setting】 window: 24 There’re six submenus under 【Setting】:【System】,【Comm.】,【Sensor】,【Alarm】, 【Power】,【S-Test】. 3.5.1. System Press MENU to enter the Device Menu 4.Setting 1. System to the following window: 1. Language We can set the device LCD language: English, Chinese, etc. 2. UI-Themes (available for some models only) UI-Theme settings Background Descriptions There’s defaulted to be 3 different background here. And it’s defaulted to be the NO.2 background. 25 Time Font Set main title Set standby title Main title color Time color Second color Date color Week color There’s defaulted to be 3 different time font. And it’s defaulted to be the NO.3 font.(the time showing on the home page of the LCD) Set the title of the LCD homepage. It’s defaulted to “Welcome” on the top left corner of the LCD homepage. Set the title of the standby page. Set the color for the LCD homepage title bye modifying the RGB color value. (that is change the color of the “Welcome” color) Set the color for the time (hour and minute font color) by modifying the RGB color value. Such as, the time is 11:12:35 now, and this item will change the color for the 11:12 Set the color for the time (second font color) by modifying the RGB color value. Such as, the time is 11:12:35 now, and this item will change the color for the 35. Set the color for the date (date font color) by modifying the RGB color value. Such as, the date is 2012/11/14 WED now, and this item will change the color for the 2012/11/14. Set the color for the date (week font color) by modifying the RGB color value. Such as, the date is 2012/11/14 WED now, and this item will change the color for the WED. Lunar color The lunar item only defaulted for the Chinese devices. Others language are defaulted to NO. Menu title color Set the color for the title of the submenu by modifying the RGB color value. Menu item color Set the color for the item name of the submenu by modifying the RGB color value. Set the color for the selected item. Example: we select “1.System”, so the color is different from other items. Checked color V-ID color V-name color V-message color Set the color for the ID number when in attendance. Set the color for the employee name when in attendance. Set the color for the message. (Available for some models only.) The message will show in the following window 26 during attendance. for example Birthday!”, the defaulted color is blue. Standby Bg-color Set the standby background color. Standby Font-color Set the color for the font in standby background. Restore settings Restore all the UI-Theme to the default settings. default “Happy 3. Date & Time Set the current date and time for the device. 4. Date format Setting the date format: YMD (example: 2012/11/14),DMY(example: 14/11/2012 ), MDY(example: 11/14/2012). It’s defaulted to YMD format. 5. Lunar Calendar It’s function for the Chinese lunar calendar. It’s Defaulted to be available for the Chinese devices only. 6. Volume level The defaulted volume level is 3. 7. Admin It’s the max admin count. When you set it to 5, that means you could set max 5 admin to enter the MENU of the device. It’s defaulted to 5. 8. User ID Length Setting for the user ID length. Some models can support 18bit ID num. for some models, only support 11bit ID num. 9. Verify Mode It’s defaulted to F/P/C mode. 27 Note: F/P/C: employee could authenticate by fingerprint, password or RFID card. F+P+C: employee need to authenticate by fingerprint+password+RFID card. If only punch the finger and input the password, but not detect the RFID card on the device, s/he cannot get through the authentication. F+C: employee need to authenticate by fingerprint +RFID card. If only punch the finger, but not detect the RFID card on the device, s/he cannot get through the authentication. F+P: employee need to authenticate by fingerprint+password. If only punch the finger, but not input the password, s/he cannot get through the authentication. C: employee need to authenticate by RFID. Cannot punch the finger or detect the RFID card for authentication. P: employee need to authenticate by password. Cannot punch the finger or detect the RFID card for authentication. F: employee need to authenticate by fingerprint. Cannot input the password or detect the RFID card for authentication. 10. Init device This item will initialize all the settings under the 【System】 settings. 3.5.2 Comm. Press MENU to enter the Device Menu 4.Setting 2.Comm. to enter the 【Comm.】 window: 28 1. Device ID. Settings Descriptions 1~9999 Device ID for the devices. When you need to connect the software to more than one device, you need to use different Device ID to differentiate the devices. The Device ID could set from 1 to 9999 Defaulted 1 Note: the Device ID is the only one unique mark for different devices. When you need to connect the software to the more than one device, you need to use different Device ID to differentiate the devices. Otherwise, you cannot do the correct operation on software. And the attendance records that downloaded from different devices, would make you confuse. 2. Comm. Key Settings Descriptions 0~99999999 Set the TCP/IP communication key. Defaulted 0=No 3. Port No. (available for some models only) Settings Descriptions 1~65534 Set the TCP/IP communication port for the software. Defaulted 5005 Note: this Port No. should be the same with the port of your computer that installed the software. Otherwise, the software cannot connect to the device. 4. IP Address (Available for some models only) Settings Descriptions 192.168.1.224 Set the IP for the TCP/IP communication. This IP must be the free IP address in your LAN network. Defaulted 192.168.1.224。 Note: need to make sure the IP address in your LAN network is unique. No one use it. 5. Subnet Mask (Available for some models only) Settings Descriptions 29 255.255.255.0 Set the LAN subnet mask for the TCP/IP communication. Defaulted 255.255.255.0 6. Default Gateway (Available for some models only) Settings Descriptions 192.168.1.1 Set the LAN default gateway for the TCP/IP communication. Default 192.168.1.1 Note: the subnet mask should be the same with the LAN network subnet mask. And the default gateway should be the same with the LAN default gateway. 7. Server IP (available for some models only) Settings Descriptions 192.168.1.224 When you need to use the UDP function. Need to set the server IP address to the device for TCP/IP communication. Defaulted 000.000.000.000。 Note: some models have the UDP function. When you need to use the UDP function, you need to set the Server IP and enable the Server Req. to “UDP”. UDP function: it’s the real-time monitoring function. The device will push the real-time log from device to the server in real-time automatically. For example, I need to use the real-time monitoring for the device, I install the software on my computer, and my computer IP address is 192.168.1.160. then I turn to the device menu, set the Server IP=192.168.1.160 , and set the Server Req.=UDP. 8. Server Port No. (available for some models only) It’s defaulted to 5055. Coz this port is not normal port. But if your network already uset he 5055 port. Please change the SerPortNo. on the device menu. 9. Server Req. (available for some models only) When you need to use the UDP function(real-time monitoring function), need to enable the Server Req.=UDP. It’s defaulted to NO. 10. RS485 Comm. (available for some models only) Settings Yes or no Descriptions Enable the RS485 communication or not. 30 Defaluted no 11. Baud rate (available for some models only) Settings Descriptions 9600 Baudrate=9600bps。 19200 Baudrate=19200bps。 38400 Baudrate=38400bps。 57600 Baudrate=57600bps。 115200 Baudrate=115200bps。 Defaulted 115200 3.5.3. Sensor Press MENU to enter the Device Menu 4.Setting 3.Sensor to enter the 【Sensor】 window: 1. Auto Learning Settings Descriptions Yes When set the sensor to auto learning. Each time the employee punch the finger on the sensor, the device will refresh the fingerprint data. Defaulted Yes 2. Auto Bright 31 When the fingerprint sensor is not good for detect the fingerprint. Please use this function to adjust the sensor. 3.5.4. Alarm Press MENU to enter the Device Menu 4.Setting 4.Alarm to enter the 【Alarm】 window: Set the alarm time to the device. and the device will enable the belling during the setting time. Just like an alarm clock. It’s a internal bell. Cannot connect to the external bell. For example: I need to set the alarm time 11:45, cycle = Day, the alarm stays for 5 seconds. (the device will belling at 11:45 for 5 seconds everyday.) Press “OK” to enter the alarm setting, and set the alarm and press “ESC” to save the setting, as the following: 3.5.5. Power Press MENU to enter the Device Menu 4.Setting 5.Power to enter the 【Power】 window: 32 1. Auto Return Time(Seconds) Settings Descriptions 5~255 For example, we set it to 25 seconds. When you enter the MENU and 25seconds without any operation, the device will ESC the menu to the Homepage of the LCD automatically. Defaulted 20。 2. Power Off Time You could set 24 shutdown time. For example, when you set it to 19:00, the device will shut down at 19:00 automatically. 3. Auto Off Settings Descriptions 0~255 (Minutes) When set it to 50mins, the device will turn off after turn on for 50minutes. Defaulted No 4. Standby Time(Min.) Settings Descriptions 0~255 (Minutes) When we set it to 10mins, the device will turn to standby mode after 10mins without any operation. Defaulted No 5. Alarm in Standby Settings Yes Descriptions When the device is on standby mode during the alarm time, enable the alarm or not? 33 Defaulted Yes 6. Auto Power On Settings Descriptions Yes When the device is connected to the power, it power on auto? Defaulted Yes 7. Enable Shutdown Settings Descriptions Yes Enable the power key or not? When you disable it, and people press the power key“☉", s/he cannot turn on the device. Defaulted Yes 3.5.6. S-Test Press MENU to enter the Device Menu 4.Setting 6.S-Test to enter the 【S-Test】 window: 1. Check Sensor Move the cursor to the “Check Sensor” and press “OK” to check the sensor. Press the finger on the sensor according to the LCD tips. When there’s the fingerprint image on the LCD, that means the sensor works well. 2. Check RFID Move the cursor to the “Check RFID” and press “OK” to check the RFID detection. Put the RFID card on the detection zone according to the LCD tips. When the RFID num shows on the LCD , that means the RFID function works well. 3. Check LCD 34 Move the cursor to the “Check LCD” and press “OK” to check the LCD. Check the LCD color according to the tips. When all the color matches the LCD tips, that means the LCD works well. 4. Check Sound Move the cursor to the “Check Sound ” and press “OK” to check the sound. Check if there’s the sound comes out, if yes. That means the speaker works well. 5. Check Keyboard Move the cursor to the “Check Keyboard” and press “OK” to check the keyboard. Press the keyboard according to the LCD tips. 3.6 About Press MENU to enter the Device Menu 5.About to enter the 【About】 window: 35 Chapter 4 FAQ 4.1. How to remove the manager privilege on the device 4.1.1 we could remove the privilege through the software It’s recommend that enroll at least 2 admin to the device. so when lose one admin, still can enter the menu of the device. When you lose the only one admin, and cannot enter to the Device MENU, please connect the device to the software, and cancel the privilege on the software. Details: 1) Connect the device to the software through the USB connection. (if your device supports TCP communication, you could use the TCP connection also.) 2) Run the software, enter the “Device Management” window, connect the device to the software, and click “Cancel privilege”, as the following: 3) When you need to enroll the admin to the device again, please refer to the enrollment details above. 4.1.2. we could also remove the admin privilege by pressing a key on the mainboard. 1) Turn off the device 2) Open the back case, fine the SW2 key on the mainboard as the following: 36 3)Turn on the device, and press the SW2 key again. 4)And there’s a tips on the LCD now: And press “OK” to remove the admin privilege. 37