1
EUS
Complete Tender Management
Buyer
User Guide
March 2013
CTM_Tender_CA EN 6.9.4.doc
Page 1
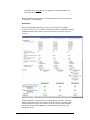
Version
Control
Version
Date
Amendment
1.0
March 2012
1.1
1.0
1.1
April 2012
July 2012
February 2013
Split Tender and Contract
Management manuals NEW
versions
Include Release 6.9
Include Release 6.9.1
Include release 6.9.4
CTM_Tender_CA EN 6.9.4.doc
Page 2
Table of Contents
SECTION 1: INTRODUCTION TO TENDER MANAGEMENT AND
CONTRACT MANAGEMENT ............................................................5
SECTION 2:
2.1
Modules and settings within tender management .................................... 6
SECTION 3:
3.1
3.2
3.3
3.4
3.5
5.2
5.3
5.4
INITIATE TENDER PROCESS ................................22
Initiate Tender process and create first Lot ............................................ 22
4.1.1 Process alternatives ................................................................... 22
4.1.2 Create Tender with a single process and a Lot ......................... 28
Create Tender with several steps ........................................................... 33
4.1.3 Editing the Tender and setting up response .............................. 34
4.1.4 Multiple lots within a Tender ...................................................... 61
SECTION 5:
5.1
MANAGEMENT OF INFORMATION .........................7
”Projects”/Workspace ................................................................................ 7
Create a ”Project”/Workspace................................................................... 8
Assign team to ”Project” ............................................................................ 8
”Project” Document Folder ...................................................................... 10
Bill of Quantities (BoQ) Manager /Price Schedule .................................. 10
3.5.1 Create rows directly within Tender Management ...................... 12
3.5.2 Import of data from external system .......................................... 13
3.5.3 Import of data from received request ......................................... 15
3.5.4 Formatting and Editing BoQ-file data ......................................... 16
3.5.5 Navigation .................................................................................. 17
3.5.6 Manage Break-ups ..................................................................... 18
3.5.7 Attaching documents ................................................................. 19
3.5.8 Pricing the entire BoQ-file .......................................................... 19
3.5.9 Closing an Department or Tender ............................................. 20
SECTION 4:
4.1
ACCESSING TENDER MANAGEMENT ...................6
MANAGE REQUEST FOR TENDER PHASE ..........63
Issue the Tender ..................................................................................... 63
5.1.1 Add suppliers ............................................................................. 64
5.1.2 Pre-register a missing supplier .................................................. 70
5.1.3 Invite supplier ............................................................................. 71
5.1.4 Remove and Lock/Unlock .......................................................... 73
5.1.5 Publish the Tender notice .......................................................... 75
5.1.6 Opening proposals (optional) ..................................................... 78
5.1.7 Confidential documents (separate setting) ................................ 79
Analyse responses .................................................................................. 80
5.2.1 Select supplier BoQ rates .......................................................... 85
5.2.2 Select supplier total quotes ........................................................ 85
Evaluation ............................................................................................... 86
Addenda .................................................................................................. 89
5.4.1 Buyer makes changes ............................................................... 90
5.4.2 Inform suppliers ......................................................................... 93
CTM_Tender_CA EN 6.9.4.doc
Page 3
5.5
5.6
5.7
5.4.3 Amending the notice .................................................................. 94
5.4.4 Buyer receives addenda from suppliers .................................... 96
Messaging ............................................................................................... 97
5.5.1 Send a message ........................................................................ 98
5.5.2 Message archive ........................................................................ 99
Short-list suppliers for next step within Tender ..................................... 100
Award preferred supplier ....................................................................... 101
5.7.1 Using the Alcatel directive........................................................ 101
SECTION 6:
SID4HEALTH MODULE ........................................103
6.1.1
Setting ...................................................................................... 103
SECTION 7:
MINI-QUOTE MODULE .........................................105
SECTION 8:
QUESTIONS AND ANSWER (Q&A) MODULE .....107
8.1
User view .............................................................................................. 108
SECTION 9:
9.1
9.2
9.3
9.4
9.5
9.6
9.7
GENERAL USER INFORMATION .........................109
Edit user profile ..................................................................................... 109
Digital signatures................................................................................... 111
9.2.1 Verification of digital certificate against external validation service
114
Approvals .............................................................................................. 116
9.3.1 Request an approval ................................................................ 116
9.3.2 Respond to received approval request .................................... 117
Document folders .................................................................................. 118
9.4.1 Upload documents from PC ..................................................... 118
9.4.2 Version management ............................................................... 120
Reporting ............................................................................................... 121
My tasks ................................................................................................ 124
Other areas ........................................................................................... 126
9.7.1 Simplified graphical user interface ........................................... 126
9.7.2 Planned System (CTM) down time .......................................... 126
9.7.3 Check in / check out functionality ............................................ 127
9.7.4 Opening and Tender Protocol (separate module) ................... 127
9.7.5 Contract number (separate module) ........................................ 129
9.7.6 IP check (separate module) ..................................................... 131
9.7.7 Printshops ................................................................................ 131
CTM_Tender_CA EN 6.9.4.doc
Page 4
Section 1: Introduction to Tender Management
and Contract Management
EUS Tender Management (CTM) is a comprehensive tool that allows tenders to be
created, distributed and evaluated without the need to create and manage paper
documents. CTM makes the tendering process easier for both buyers and suppliers
and covers the entire process including the contract management phase.
Tender Management is used by government organisations and general contractors
to improve the efficiency of the tendering process. For those who respond to
tenders, for example general contractors, sub-contractors and trades people, tender
management simplifies and speeds up the process of formulating tender responses.
You can add all of the necessary drawings, specifications, schedules, tender
documents and other attachments to the Request for Tender you issue or receive.
Buyers have access to a rich database of their chosen suppliers when issuing a
Request for Tender. If appropriate, you can source potential new suppliers,
complete with pre-qualification details, from the supplier database.
Suppliers are able to present information to initiating organisations at the time and
place that purchasing decisions are made.
Tender Management offers you the following advantages:
•
•
•
•
•
•
Saves you time and money compared with traditional methods
Greatly improves the exchange and management of information
Improves accuracy throughout the tendering, quotation and contract process
Reduces time wasted on low value administration (faxes, phone, travelling)
Increases traceability
Web-based for easy access to information – anytime, anywhere
CTM_Tender_CA EN 6.9.4.doc
Page 5
Section 2: Accessing Tender Management
EUS CTM (Contract Tender Management) is only available if your company has
registered to use this system.
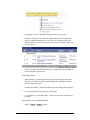
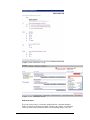
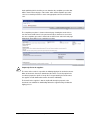
To access EUS CTM:
1.
Open your web browser and go to your CTM logon page.
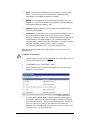
Insert your Username and Password into the appropriate fields then click on
the [Log in] button.
The EUS Tender Management Welcome Page displays.
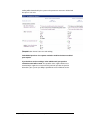
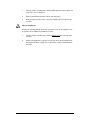
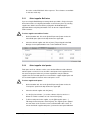
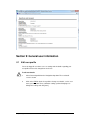
2.1
Modules and settings within tender management
Tender management has modules and settings which can be switched on or off.
This guide describes all modules and settings available within the tendering
process. If you do not find specific links or modules when accessing the system it is
likely that certain modules are switched off. To see the modules you can access,
review your personal profile described in section Edit user profile within this
document.
Modules that can be switched off are for example E-Auctions, Approvals,
Dynamic Purchase System, Meta Data and Dynamic Forms.
To read in detail about the contract module and process within CTM please
read the Contract Management manual.
If you would like certain modules switched on, contact your company administrator
or your CTM support.
CTM_Tender_CA EN 6.9.4.doc
Page 6
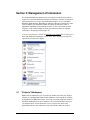
Section 3: Management of Information
The Tender Management solution can be run ”Project” based if desired. ”Project´s”
enable re-use of information between Request for Tenders, collection of all ”Project”
related documents in a ”Project” document folder and gives access to the Bill of
Quantities (BoQ) Manager. Depending on authority setting and semantics the word
”Project” might in your configured solution be called e.g. workspace, folder or
department depending on your authority structure. In this user manual the word
”Project” is used as the possibility to group your tenders into either for example:
tender types, category procurement types etc.
To access your ”Project´s”, click on the My Request for Tenders link. You may see a
link in both the Buyer and Supplier services area. This is because you may have
registered as a buyer and a supplier.
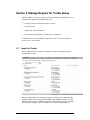
3.1
”Projects”/Workspace
Within ”Projects”/Workspace you can create any number of Tenders, the ”Project”
functions as a grouping with similar Tenders within the same area OR for example
by department etc. Within the ”Project” you assign your team or group of members
that will be working in the ”Project” and there is also a document folder where you
can upload ”Project” specific documents such as ”Project” plan. Each of the
uploaded documents can be linked in to any of the Tenders within the ”Project”.
CTM_Tender_CA EN 6.9.4.doc
Page 7
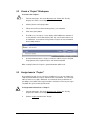
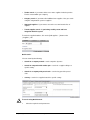
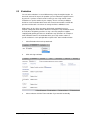
3.2
Create a ”Project”/Workspace
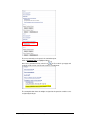
To create a new ”Project”:
1.
From the home page, click on the My Request for Tenders link. The My
Request for Tenders screen displays.
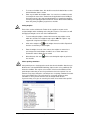
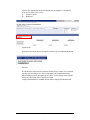
2.
Click the [Create new Project] button.
3.
Fill out the form. Ensure that mandatory fields (*) are completed.
4.
Click on the [Save] button.
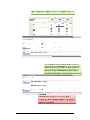
5.
The Edit access for ”Project” screen displays. Click Add/Remove members. If
no new members can be added at this point, click cancel. New members can
be added later, see Section 9.4 Assign team to ”Project” for more information
about adding members.
6.
General information about a ”Project” can later be edited. Just press the [Edit
Project] button for the required ”Project” and edit the information.
When creating Tenders the ”Project’s” general information will be used.
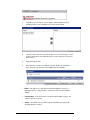
3.3
Assign team to ”Project”
By assigning team and users to a ”Project” you will give access to users within your
company to work within the ”Project” and all Tenders created within. You can assign
editor or viewer access rights. Afterwards on actual tender level you will have the
possibility to select which of the project members should also receive any messages
sent within the system for that specific tender.
To assign teams and users to a ”Project”:
1.
From the home page, click on the My Request for Tenders link. The My
Request for Tenders screen displays.
2.
Click the Assign team link for the ”Project”.
CTM_Tender_CA EN 6.9.4.doc
Page 8
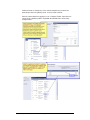
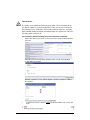
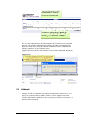
3.
The Edit access for ”Project” screen displays. Click the [Add / Remove
members] button, a list of available users and teams will show.
4.
Select the teams and users you want to give access to your ”Project”, use the
arrows to move them to the right hand pane. Use the Ctrl-key to select more
than one user.
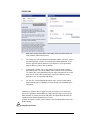
5.
Click [Save] when done
6.
Select the roles a team or user will have in your ”Project” by clicking the
boxes for each user and team. The following roles are available.
•
Editor – Can both access and change information within the ”Project”, i.e.
adding documents, creating Tenders, change any of the Tenders within the
”Project”.
•
Limited editor – Can edit Tenders or created contracts within ”Project”, but
cannot create any new ones
•
Viewer – The viewer can see all the ”Project” information, but cannot edit
anything within the ”Project”.
CTM_Tender_CA EN 6.9.4.doc
Page 9
•
3.4
Limited viewer – The limited viewer has the same access as the viewer, but
cannot see the supplier quotations sent in.
7.
Click [Save] when the selecting of roles is completed.
8.
Change owner - You also have the possibility at later stage to change owner
of this project (same functionality exists on tender level)
”Project” Document Folder
The”Project” document folder is a way for you as user to store all”Project” related
documents in one place. The documents can be used within each of the Tenders in
the ”Project” by linking them in.
To access ”Project” document folder
3.5
1.
From the home page, click on the My Request for Tenders link. The My
Request for Tenders screen displays.
2.
Click on the Documents link for the required ”Project”. The Document folder
screen displays. For more information about the functionality within a
document folder, see Section 9.4 Document Folders.
Bill of Quantities (BoQ) Manager /Price Schedule
Please note that at any place within CTM where it says BoQ (Bill of Quantities) this
is the same as Price Schedule or Price List depending on authority.
The BoQ Manager offers tools to work efficiently with entire bill files. Using the BoQ
Manager you can exchange data with estimating Lots, break-up a BoQ-file into
separate files for later distribution within Tender Lots and follow-up on prices at
BoQ-file level.
To access the BoQ Manager:
1.
From the home page, click on the My Request for Tenders link. The My
Request for Tenders screen displays.
2.
From the My Request for Tenders screen click the BoQ Manager link.
CTM_Tender_CA EN 6.9.4.doc
Page 10
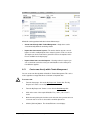
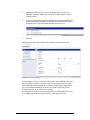
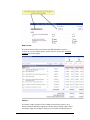
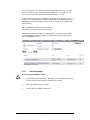
3.
The list all BoQ-files, if applicable, within the ”Project” are displayed.
To create a new BoQ-file:
1.
2.
From the home page, click on the My Request for Tenders link. The My
Request for Tenders screen displays.
From the My Request for Tenders screen click the BoQ Manager link.
3.
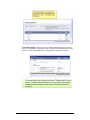
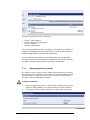
Click the [Create BoQ file] button. The Create BoQ file screen displays.
4.
Enter the name of the BoQ file and click on the [Save] button.
5.
Click on the BoQ file name to open the new BoQ-file.
BoQ Tabs:
A created BoQ-file has the following tabs:
•
Items – Contains the entire BoQ-file in a long list. From this tab you import data
from estimation Lots, edit/delete items etc.
•
Break-ups – Contains the break-ups created. From this tab you can create
break-ups, view items per break-up and split a BoQ-file into break-ups using
the assembler.
•
Pricing – A pricing view of the entire BoQ-file by break-up. On this tab you can
see the prices selected for each break-up and a link to the relevant Tender.
•
Documents – Contains all the documents attached on all the items within the
BoQ file. The items are displayed as folders and in a tree view. You can easily
attach documents to each item from this view
CTM_Tender_CA EN 6.9.4.doc
Page 11
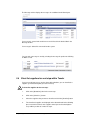
A BoQ-file can be populated with data in three different ways:
•
Create rows directly within Tender Management – Single items can be
created manually within the tendering solution
•
Import data from external system – The tender solution supports “one-off”
imports as well as multiple imports if the external system is used as a master.
The import can also be made from a generic Excel sheet. A template for the
Excel is available on the import page.
•
Import of data from a received request – If having received a request you
can use the data received to create your own BoQ-file used to collect prices
from different suppliers.
3.5.1
Create rows directly within Tender Management
You can create rows directly within a BoQ-file in Tender Management. This can be
used to populate an empty BoQ-file or to add rows to imported data.
To create a row:
1.
From the home page, click on the My Request for Tenders link. The My
Request for Tenders screen displays.
2.
From the My Request for Tenders screen click the BoQ Manager link.
3.
Click on the name of the required BoQ-file. The { Items } tab screen is
active.
4.
Mark the row by ticking the checkbox to the left of the item you want to insert
a new row after. If no row is selected the row will be placed last.
5.
Click the [Add row] button. The Create/Edit row screen displays.
CTM_Tender_CA EN 6.9.4.doc
Page 12
6.
Select what type of row you want to create (Item / Header / Note) from the
Type dropdown and complete the required information.
7.
Estimated rate is optional information. It can be used as benchmark for prices
received.
8.
Click the [Save] button.
9.
When an item has been created it displays as draft (Working version). Any
item which is being a draft is not available to be used in any Tender. To make
the items available, select the items and click the [Update to new version]
button. If you publish a tender that contain working version BoQ the system
will warn you that you have items in working versions.
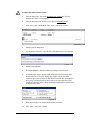
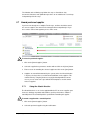
3.5.2
Import of data from external system
The tender tool supports import of BoQ-file data from external systems. After import
the data can be edited in the same way as any data created on the tender solution.
CTM_Tender_CA EN 6.9.4.doc
Page 13
To import data from external system:
1.
From the home page, click on the My Request for Tenders link. The My
Request for Tenders screen displays.
2.
From the My Request for Tenders screen click the BoQ Manager link.
3.
Click on the name of the BoQ-file. The { Items } tab screen is active.
4.
Click the [Import data] button.
5.
Use the Browse function to select the file to be imported from your computer.
6.
Click the [Import] button.
7.
The import BoQ-file is displayed. Make any changes and click Import.
8.
The import report page is displayed with information about the import that is
about to take place. The page displays the number of items that will be
created on the system. If errors are found in the import file they are displayed
and you are asked to proceed or cancel. If there are more than three errors
found in the import file there is likely something wrong with the import file and
no import can be done.
9.
Click on [Proceed] to execute the import and OK to confirm.
10.
The { Items } tab screen is active.
CTM_Tender_CA EN 6.9.4.doc
Page 14
11.
Click on the { Breakups } tab to view any break-ups imported.
Multiple imports (if supported by external system):
If you continue making changes after the BoQ-file has been imported you can
import the same BoQ-file again. Upon the second import the Import report will
display the following information:
•
Number of new items – The number of items that will be created.
•
The updated items – A list of all items changed. You can decide to update all
or only a sub-set of the items.
•
Not updated items – A list of all items that will NOT be updated. They may
have been CREATED on the tender solution AFTER the previous IMPORT or
have been DELETED in the EXTERNAL system. If deleted, you need to go
down the list and delete them in the tender solution as well.
When [Proceed] is clicked the update is executed. You may run any number of
consecutive imports.
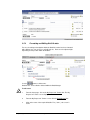
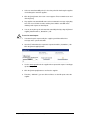
3.5.3
Import of data from received request
(Only for users with access to Multi level tendering)
If you have received a request you can use the data received to create your own
BoQ-file to collect prices from different suppliers. This feature is only available if
having the supplier membership and the buyer membership.
To import data from received request:
1.
From the home page, click on the My Request for Tenders link. The My
Request for Tenders screen displays.
2.
3.
From the My Request for Tenders screen click the BoQ Manager link.
Click on the name of the BoQ-file. The { Items } tab screen is active.
4.
Click the [Copy from Tender] button.
5.
Select the tender that you want to import data from.
6.
Click [Copy all rows] or [Copy selected rows] to add the items to your BoQ
file. If the buyer owner of the incoming Tender has selected you to copy the
break-up information you will see a drop-down to select the break-up to copy.
CTM_Tender_CA EN 6.9.4.doc
Page 15
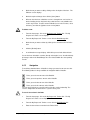
3.5.4
Formatting and Editing BoQ-file data
For ease of reading and navigation within the BoQ-file, header levels are formatted
with a difference in size of text, use of bold, italic etc. Rows are also adjusted right
depending on their position within the BoQ-file
Use the
buttons to indent rows.
BoQ-file rows can be edited or deleted within the BoQ Manager.
To edit a row:
1.
From the home page, click on the My Request for Tenders link. The My
Request for Tenders screen displays.
2.
From the My Request for Tenders screen click the BoQ Manager link.
3.
Click on the name of the required BoQ-file. The { Items } tab screen is
active.
CTM_Tender_CA EN 6.9.4.doc
Page 16
4.
Mark the row you want to edit by clicking on the description of the item. The
Edit Item screen displays.
5.
Make the required changes then click the [Save] button.
6.
When an item has been edited the version is changed from “real” version to
draft of working version. Any item being a draft version is not available to be
used in any Tender. To make an item available for use in the Tenders, select
the item(s) and click the [Update to new version] button.
To delete a row:
1.
From the home page, click on the My Request for Tenders link. The My
Request for Tenders screen displays.
2.
From the My Request for Tenders screen click the BoQ Manager link.
3.
Mark the row you want to delete by clicking in the checkbox to the left of the
item.
4.
Click the [Delete] button.
5.
A confirmation message displays. Click OK to proceed and delete the item.
If a row has been included in a tender (directly or through a Lot as described below)
all changes made in the BoQ Manager also are reflected within the corresponding
Tender.
3.5.5
Navigation
To avoid long download times a BoQ-file is always presented as 40 rows at a time.
The following toolbar is always available for navigation within a BoQ-file:
Takes you to the next 40 rows of the BoQ-file.
Takes you to the previous 40 rows of the BoQ-file
Takes you to the last 40 rows of the BoQ-file
Takes you to the first 40 rows of the BoQ-file
You can also go directly to a specific row by using the search functionality. The
search is independent of what reference system is being used.
To search for an item in the BoQ:
1.
From the home page, click on the My Request for Tenders link. The My
Request for Tenders screen displays.
2.
From the My Request for Tenders screen click the BoQ Manager link.
3.
Enter the item reference number in the Find ref field.
CTM_Tender_CA EN 6.9.4.doc
Page 17
4.
Click on the [Search] button.
5.
You are positioned at the first occurrence of the reference within the BoQ-file.
3.5.6
Manage Break-ups
The break-up functionality provides a way to top-down split a BoQ-file into breakups that are suitable for the procurement. One or more break-ups can then be
included in a Tender.
All rows included in one break-up are by default presented in the same order in
relation to each other as they were within the BoQ-file.
By default the rows also have the same formatting within a break-up as they had
within the BoQ-file. You can create specific formatting that differs from the BoQ-file
using the
buttons. When the break-up is assigned to a Tender the group
specific formatting will be used.
To split a BoQ-file into break-ups:
1.
From the home page, click on the My Request for Tenders link. The My
Request for Tenders screen displays.
2.
From the My Request for Tenders screen click the BoQ Manager link.
3.
Click on the required BoQ file. The Bill of Quantities screen displays.
4.
Click on the [Break-ups] tab.
5.
Click on the [Add break-up] button to create a break-up. The break-up details
screen displays.
6.
Type the name of the break-up then click the [Save] button.
7.
Click the [Assembler] button to access the Lot assembler. The BoQ Lot
Assembler screen displays.
CTM_Tender_CA EN 6.9.4.doc
Page 18
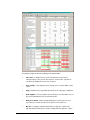
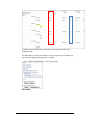
8.
Select a break-up on the right hand side to assign rows to. (1)
9.
Select the rows to be assigned on the left hand side by clicking the checkbox
to the left of the item. (2)
10.
Click the
button. The item is removed from the left hand list and moved
to the right hand list. (3)
11.
When the required items are added to the right hand side Lot click the [Close
Window] button.
12.
To unassign a row from a break-up, select the item/s within the group and
click the
3.5.7
button. The row can now be included in another group.
Attaching documents
Each item within the BoQ file can have documents assigned to them. The
documents tab is a quick way of getting a complete overview of the documents
attached to the items within the BoQ file.
To upload documents from the documents tab:
1.
From the home page, click on the My Request for Tenders link. The My
Request for Tenders screen displays.
2.
From the My Request for Tenders screen click the BoQ Manager link.
3.
Click on the required BoQ. The Bill of Quantities screen displays.
4.
Click on the { Documents } tab, the items are displayed as a folder list.
5.
Use the [Upload files…] to upload files to each of the items. Any documents
uploaded are also available from the Main items list and the Folder icon for
each item.
3.5.8
Pricing the entire BoQ-file
Within the different Tenders issued you can follow-up on prices received within that
specific break-up. The pricing tabs within the BoQ Manager gives you a complete
CTM_Tender_CA EN 6.9.4.doc
Page 19
view of prices for the entire BoQ-file based on selected suppliers within the Tender.
The pricing information is displayed per break-up or for the whole BoQ file.
To view pricing of an entire BoQ-file:
1.
From the home page, click on the My Request for Tenders link. The My
Request for Tenders screen displays.
2.
From the My Request for Tenders screen click the BoQ Manager link.
3.
Click on the required BoQ-file. The BoQ-file screen displays.
4.
Click on the { Pricing } tab.
5.
Click on the desired BoQ break-up.
If you continue negotiations with a supplier that has been selected above, any
changes in prices from that supplier will also be reflected on the pricing tab.
From the item price tab a priced BoQ-file can be exported for further use of the price
data in any external system.
3.5.9
Closing an Department or Tender
Close Tender
After having finished the process you can close the Tender or a whole ”Project”. All
closed Tenders and ”Project´s” are moved to the Completed tab, both for you as a
buyer and on the supplier side.
After closing no changes can be made to either the ”Project” or the Tender.
To close/archive the RFT you should go to one of the last points in the checklist:
Once you have archived your tender it is then not editable with exception of user
rights and internal documents.
You can find your archived tender in the completed tab of your tender list
CTM_Tender_CA EN 6.9.4.doc
Page 20
A closed tender can be reopened again, should the need araise. To reopen the
tender go to the administration view next to checklist and click on the activate
button.
Any user with “editor” rights to the tender kan reopen it and the reopening will be
logged in the audit trail
Close Project
When all work and all tenders within a certain ”Project” is finished, the ”Project” can
be closed. When closing a ”Project”, all of the Tenders within that ”Project” that are
not already closed will be so. Closing also means that the ”Project” and all
containing data such as Tenders cannot be edited.
Closing a ”Project” will not delete it from the CTM system. It will just be moved from
the { Ongoing } tab and can later be found on the { Completed } tab.
To close a ”Project”:
1.
From the home page, click on the My Request for Tenders link. The My
Request for Tenders screen displays.
2.
Click the [Close ”Project”] button for the ”Project” that you want to close.
3.
If you have open Tenders within the ”Project” that you are trying to close a
message will display saying that the open Tenders will be closed when
closing the ”Project”. If this is ok, press the Ok button. Else press Cancel to
keep the ”Project” open and continue to work with the Tenders.
CTM_Tender_CA EN 6.9.4.doc
Page 21
Section 4: Initiate Tender process
CTM supports Tender Management, eAuctions and contract management. The
administrator decides and can design the “process templates” to be available for the
users within the system. A process template may contain any number of “phases”
and multiple phases of the same type. That means that you can run a process with
multiple Tender phases, e.g. one for pre-qualification/PQQ and one for
tendering/quotation and if needed one for negotiation. The following types of phases
are available within the system:
Types of phases:
Tender phase – Tendering phase where you can send out information to potential
suppliers, configure a response form to be filled out by the suppliers and evaluate
responses received. The Tender phase can consist of any number of steps, for
example first a pre-qualification phase and then any number of negotiation steps.
eAuction phase – A possibility to make the received quotes transparent among the
suppliers, still with confidentiality.
Contract phase – Enables management of the contracts online. You can create a
contract file, collaborate with the supplier and receive the formal acceptance.
You can either issue a Tender within a specific ”Project” or separately from a
”Project” (non-”Project” based procurement). When working within a ”Project” you
get access to the ”Project” information management tools described in Section 3:
Management of Information.
4.1
Initiate Tender process and create first Lot
The initiation process contains configuration of the actual process to be run and the
creation of the Lots containing information to be distributed to the suppliers. The
amount and type of information can vary between processes but the system allows
for documents, data on data layer or general text descriptions.
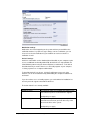
4.1.1
Process alternatives
The following details/settings can be used within a Tender. These are set up by your
system administrator in how they should work for a particular procedure. For
example Restricted Procedure should be a PQQ/Qualifying phase with certain
parameters and then Quotation phase with other parameters (price schedule for
example). If you have chosen a simple 3 quote procedure you will for example not
have to take any decision regarding the 10 day standstill as this setting should have
been set as NO and hidden. But for over OJEU threshold it should be 10 day
standstill on (IF you want to have the additional functionality that this entails such as
automatic award message and possibility to dispute. It is imperative to be sure not
to switch on functionality without knowing the full impact of it.
CTM_Tender_CA EN 6.9.4.doc
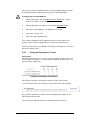
Page 22
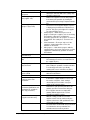
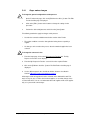
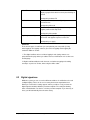
Setting
Description
Settings on main RFT level
Standalone template
Only for information and documents NOT possible to
express interest on.
Allow automatic addition of
Allow automatic addition of questions created the the
questions from template
questions/requirement library within company admin
interface
Pre Qualification tender
Mini-Quote tender
This is if you have the personalisation module switched
on, it is not call-off/mini quote on framework agreemet.
Number of process steps
The number of process steps, use two steps if you want
to start with a pre-qualification without quote information
and then short-list suppliers to the quote step.
Include auction
Decides whether the RFT should end with an online
auction, the auction is not counted in the number of
steps. You can also create a template to include an
auction only
Initial estimated value
Sets if the initial value should be used or not when using
guidance, is not visible for suppliers
Currency
Currency of the FRT
Minimum Standstill period/
Within public procurement and EU, the Alcatel directive
(Alcatel directive rules)
may apply to certain tenders. The Alcatel directive is a
set of rules for how long between intend to award a
contract and the actual awarding. The suppliers not
selected are in a position to challenge the award within
ten days and receiving a detailed report describing the
award reason.
Enable selection of CPV
Use classification from the Common Procurement
codes from checklist
Vocabulary. Classifying your tender makes it easier to
attract suppliers with appropriate expertise.
Enable quicker upfront
If the tender will contain more than one lot/package,
definition of Multiple
select this option. This will take the creator of the tender
packages
to an intermediate step where multiple lots can be
created simultaneously.
DPS Qualification
To be used when you wish to create an Dynamic
Purchases System process for the qualification phase,
for DPS qualification also assure that you set following
extra settings later on: Tender box – NO, Allow authority
access to supplier responses... - YES
DPS Tender
To be used when you create the process for the actual
tender phase within a DPS process using a specific
previous qualification. Also assure that you set following
setting “Enable selection of suppliers and invitation of
those” - YES
Hide authority procurer´s
This setting hides the procurer´s contact details from the
user information in the
suppliers taking part in this tender.
audit train
Hide supplier names for all
The offers/quotations will be shown “anonymously”
user throughout the entire
hence the buyer should/will not see which supplier sent
process (for design
in the quotation as the supplier name will be hidden until
contest)
the buyer/authority awards a specific quotation. Per
default set as no and hidden
Hide Metadata Forms
There is a possibility to hide the metadata forms within
the tender checklist. The setting are used as any other
regular setting from the process template and can also
be edited when creating the tender if the process allows
editing of the setting.
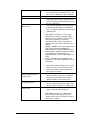
CTM_Tender_CA EN 6.9.4.doc
Page 23
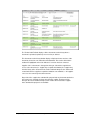
Publish qualified suppliers
for DPS qualification
Prohibit Archive if not all
contracts are signed
Enable use of complaint
procedure
Set evaluation model
The setting is only available if the customer has the
metadata forms module switched on
Show which suppliers are qualified openly on the DPS
when people search for DPS qualifications
Archiving not possible at the bottom of the checklist if
the contracts are not status final and signed.
Should the complaint procedure be available to use by
each procurement officer in each tender created.
Define if the company or this type of tenders shoul have
relative weighting or value added as evaluation model
Make the tender documentation available public and
poss to download after deadline has passed.
Automatically make
attached documents
publically downloadable
after response deadline
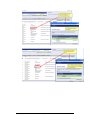
Settings for each step within the RFT
General Keys
Require supplier´s
If desired you can include tender conditions that you
acceptance of standard
wish the suppliers to accept. This is considered as
conditions to enable access separate from the response to the RFT and acceptance
to any tender
can be required either before access is given to the
documentation
Tender information or as part of the response.
Allow suppliers to also
When using multiple packages within the RFT, the
make discount bid if
supplier can be prompted to set a discount bid, which
awarded all of multiple
will be a total discount price if the supplier is awarded for
packages
all the packages within the proposal.
Enable selection of
Decides whether the buyer is allowed to search and
suppliers and the invitation
invite suppliers. If this option is not selected suppliers
of those
will only be added through the publishing
Require supplier´s
Unless alternative bid is enabled by the procurer in the
acceptance of standard
process template the supplier will not be able to give
conditions in attached
any quotation without accepting the stated document, if
documents
supplier chooses to answer not compliant and the
alternative bid setting is enabled the supplier will only be
able to give an alternative quotation.
Minimum number of
Forces the supplier to attach certain amount of
documents required to be
documents that you want to be attached before he can
attached by the supplier in
make any submit. Submission unavailable unless same
order to submit
amount of documents attached that the procurer has
stated.
Lock data after respons
If you have this setting as Yes the consequence is that
deadline
the procurement officer cannot change any of his own
data efter the RFQ deadline. (such as QQ, documents
etc) If any changes have to be made to the original
tender documents the ETQ will have to be moved
forward/opened.
Tender box keys
Tender Box
The buyer can if desired set up a Tender box. Through
using a tender box offers cannot be read until the box
has been opened. When creating the RFT a set of keys
can be specified that are required for the opening of the
tender box.
Tender box opening delay
Amount of days that should take place after end time
quotation before the tender box can be opened.
Minimum amount of listed
The procurer can use this key to determine which of the
users required to open the
users and foremost how many of the users assigned to
tender box
this particular project should open the actual tender box
Double envelope
The response submitted by suppliers is split into two
parts with separation of the commercial and technical
CTM_Tender_CA EN 6.9.4.doc
Page 24
Allow authority access to
supplier
quotations/responses
before deadline
Automatic e-mail (issue of
minutes of opening) sent to
suppliers upon tender box
opening
Proposal submission key
Require explicit total price
quotation (besides any
PS/BoQ pricing) in bid to
enable supplier submission
Allow late submission of
proposals ie after deadline
for step
Allow supplier download of
docs prior to accepting
invitation
Allow suppliers to revise
their quotation
Enable Encryption of
supplier proposal
Allow suppliers to start
working on their proposals
after accepting their public
invitations
Disable submit of
alternative bid
CTM_Tender_CA EN 6.9.4.doc
offer. Supplier offers cannot be read until the envelopes
have been opened.
Any quotations received are displayed directly when
received unless tender box is used.
Upon tender box opening the system send an e-mail to
all suppliers informing them of this.
This setting will force the supplier to give a
total price in separate place irrespective of if
there is an Bill of Quantity/Prise Schedule
attached with a total or not.
By default all suppliers are locked upon End
time Quotation (ETQ).
Through accepting late offers the buyer allows
suppliers to send in offers also after ETQ and
manually controls the locking of suppliers.
Suppliers can make changes until locked by
the buyer. (All proposals will however be time
stamped)
Allowing the supplier to download documents
prior to accepting the invitation of the RFT, if
not selected the suppliers will only see a list of
documents prior to accepting the invitation.
The suppliers are allowed to update a
quotation once sent and re-send the quotation.
It is the latest sent in quotation that will be
used.
The encryption and offline editor is a way for
the buyer to protect themselves from the CTM
system provider. When selecting this option,
the supplier has to download an offline editor
and creates his proposal in that application.
When submitting he uploads the whole
proposal to the site including his public
encryption key. To see the proposals the
buyer has to decrypt with his private key.
Allow suppliers to start working on their
proposals after accepting their public
invitations
This setting gives you the possibility to disable
submission of any alternative pricing/bid,
(should you also have entered any compliance
documentation that the supplier would not
comply with then the result of this setting
enabled would be that the supplier cannot
Page 25
Disable submit of online
proposals
Show supplier progress
bar(supplier side)
Show supplier proposal
progress (buyer side)
Bill of Quantities/Price
Schedule keys
Request pricing of items in
bid
Require pricing on all
attached items
Allow supplier to add own
items to BoQ
Evaluation keys
Enable manual update of
category status after
evaluation
Use two step
evaluation(qualification and
evaluation for example in
one step procedure)
Allow evaluation of single
supplier at the time only.
Use strict evaluation
CTM_Tender_CA EN 6.9.4.doc
make any submission)
Should per default be NO as this setting stops
any online submission.
Enables the supplier to see his own progress
in answering the quotation by showing the
green amount of percentage completed tender
bar.
The status of each supplier with the response
is displayed to you before the ETQ has been
passed. This gives you insight of if a supplier
has started working or not
Show progress – Allows the buyer to see all
progress made by the supplier, such as answering
the invitation, setting prices to BoQ-items,
answering questions etc. this progress is shown in
the audit trail. The actual prices or answers are
shown.
Show downloads – The buyer only sees if the
supplier is viewing information such as the
invitation or documents.
Hide progress – Hides all the progress with the
supplier progress, the buyer cannot even see if the
supplier has submitted any quotation or viewed
the invitation.
Suppliers are requested to fill in BoQ prices.
The authority procurer has to create items for
the supplier to price
The supplier must fill in prices on all items
prior sending his quotation, he will not be able
to send empty rows unless specifically
entering that a row is included or excluded
Allowing the supplier to amend the BoQ list
with own created items
If desired the supplier database can be split
into various categories. If this setting is
checked the process includes a step for
update of this category status.
Evaluation is split up in two parts where all
gateway questions answered are first partthose suppliers that do not comply with
gateway will not appear in the second
evaluation in analytics engine.
With this setting you will not see all the
supplier answers side by side but only one
supplier at the time in both qualification view
and analytical engine view.
The team that is involved with the procurement
is not allowed to do any evaluation; the
evaluation must be made by another
Page 26
evaluation team. None of the supplier names
are shown during the evaluation process. All
this to assure completely un bias evaluation.
General publication keys
Publish on client public site
Setting if the RFT should be published or not
on the local CTM-site (Should preferable never
be set as Hide if Yes)
CTM supports exporting and direct publishing
to third-party publishing sites. CTM will take
care of sending the publication to the following
publishing sites:
Publish notification.
External sites
•
•
•
•
•
This setting should preferably never be set as
Hide (if Yes) due to fact that if any mistakes
are made in contract notice you will not be
able to go back and edit.
This setting automatically guarantees certain
minimum amount of days set in creating the
tender between publication and end time
quotation/deadline for allowed response.
Once the awarded supplier is selected you can
choose to publish the awarded supplier. This
can help third-level suppliers in finding quotes
Same as for the notification publication, CTM
supports publication and integration
Minimum lead time
between publication and
response time
Publish awarded supplier
on client public site
Publish supplier award.
External sites
•
CTM_Tender_CA EN 6.9.4.doc
OJEU (Official Journal EU) – The common
publish place for all of EU, all public entities
within EU have to publish the RFT to OJEU, if
above threshold value. For the OJEU
notifications CTM currently support Form 2
(Contract notice) and Form 5 (Contract notice –
Utilities)
BOAMP – BOAMP is the French equivalence to
OJEU, when publishing to BOAMP, the
publication will be sent from BOAMP to OJEU
Udbudsvagten – Danish equivalence to OJEU,
when publishing to Udbudsvagten, the
publication will be sent from Udbudsvagten to
OJEU
Doffin – Norweigian national publishing site
TenderNed – The national publishing site in the
Netherlands
OJEU (Official Journal EU) – Within OJEU,
CTM currently has the support for Form 3
(Contract award notice) and Form 6 (Contract
award notice – Utilities)
Page 27
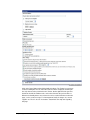
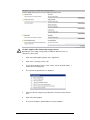
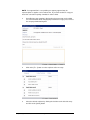
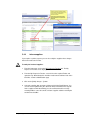
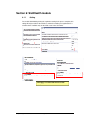
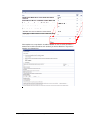
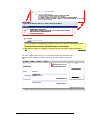
4.1.2
Create Tender with a single process and a Lot
Initiate process:
1.
From the home page, click on My Request for Tenders link (Buyer services).
The My Request for Tenders screen displays.
2.
Click on the [Create TENDER] button within the ”Project” or, if not ”Project”
related, within the non ”Project” related area.
Enter a reference (not mandatory) this reference will be part of the short
description of the tender.
Short description is the tender name advertised and visable for all parties.
Detailed description (not mandatory) is shown as an overall description for
the entire tender, (not on lot/package level)
Select the desired one step process template
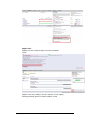
3.
4.
5.
6.
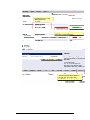
The page is reloaded and the different phases and the settings for each phase are
displayed. Depending on configurations made by the company administrator
settings may be editable or not. Some of the settings can have been set to hidden
by the company administrator, and is not displayed to the creator of the Tender.
(table above)
CTM_Tender_CA EN 6.9.4.doc
Page 28
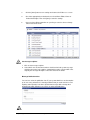
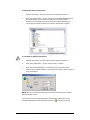
Click on the [Save] button when finished with all settings. The Tender has now been
created, including the first Lot, and Edit Tender checklist is displayed containing all
the steps that are to be performed for this Tender. On the right hand side you have
the below checklist in workflow order, and on the left hand side you have links to
different functionality that to some extent also can be reached from the tender main
page, such as create message, Task management, Notify of changes etc, remove
suppliers etc. There is also an “Instructions” button with some help text regarding
this page.
CTM_Tender_CA EN 6.9.4.doc
Page 29
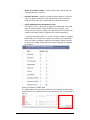
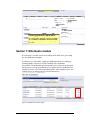
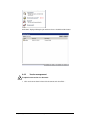
See left hand side of the checklist screen – Administration part where you can
perform several tasks-this is not in any workflow order but simply activites possible
during entire process. At the bottom of the administrationscreen you can cancel a
tender, delete it and copy it.
If you cancel the RFT it will be clearly marked
On your list of tenders it will have the cancelled icon
The tender will not be shown on the public tender list within CTM after cancellation.
You can only delete a tender if no suppliers have been added or entered.
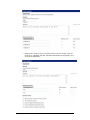
If you copy a tender you will be abel to chose if you want to copy the whole tender
or specific parts of it.
CTM_Tender_CA EN 6.9.4.doc
Page 30
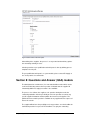
You also have the possibility to directly set the tender deadline of the new tender.
The parts of the tender not listed in this page are not copied to the new tender.
NOTE!
Publications to TED, Udbudsvagten and Doffin must be cancelled manually by the
contracting authority. The integrations for those sites do not allow any automatic
cancellation/with-draw of a publication. A publication to TED can be cancelled by
using amendment notice.
Publications to Tenderned will be automatically with-drawn from the TenderNEd
publication site
Example of right hand side checklist, look depending on selected modules etc.
CTM_Tender_CA EN 6.9.4.doc
Page 31
At the bottom of the checklist you can: view the tender, edit the tender settings if
any are available to edit, Change owner of the tender, Add lot/package and Add
step if a several steps procedure.
CTM_Tender_CA EN 6.9.4.doc
Page 32
Create Tender with several steps
Initiate process:
1.
From the home page, click on the My Request for Tenders link. The My
Request for Tenders screen displays.
2.
Click the [Create TENDER] button within the ”Project” or, if not ”Project”
related, within the non ”Project” related area.
3.
Select the desired multiple step process template
4.
The page is reloaded and the different phases and the settings for each
process step are displayed. For easier handling it is recommended that you
separate the process steps by changing their names.
5.
Click on the [Save] button when finished with all settings.
CTM_Tender_CA EN 6.9.4.doc
Page 33
The Tender has now been created, including the first Lot, and Edit Tender checklist
is displayed containing all the steps that are to be performed for this Tender.
The difference between a single step process and multiple process steps:
When using two process steps you are able to qualify suppliers separately in the
first step. The checklist will contain all steps after eachother. After suppliers have
answered the PQQ in step one it is possible to evaluate which suppliers that should
be invited into the tender step.
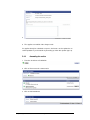
4.1.3
Editing the Tender and setting up response
The checklist is the edit page as well as a page for seeing the steps to be done
within a Tender; some of the steps are steps to be completed outside CTM. Each of
the steps is optional, and does not have to be filled in. When a step is filled
completed the marker in the checklist turns green. You can set it back to pending
(yellow) by clicking the image, and also set not completed tasks to green to mark a
completed task.
Manage Lots:
You can here add and edit existing Lot, Lots contain the information to be filled in by
the suppliers, e.g. prices for Bill of Quantities, Qualification questionnaires,
documents and a total quote. Using the Lots will allow you to split up the Tender in
different parts where you are requesting different prices, but still are inviting the
same suppliers. For more information about Lots, see section 4.1.5.
Please note that it is important to enter more detailed description regarding your
procurement. In here you have space of 500 characters to enter detailed description
text, to make it easier for the possible supplier to choose to participate. This text is
shown at early stage of the publication/invitation of the tender.
Assign team
You can assign team members to work with this Tender (only applicable to Tenders
outside a ”Project”, for Tenders within a ”Project” all team-member administration
are administrated on ”Project” level). Members can be given editor or viewer rights
depending on what type of tasks they will be performing within the Tender. See the
”Project” section above for more detailed information. You can also change the
owner of the tender.
NB This option is only available when creating a Tender outside of a ”Project”.
Otherwise, the management of team members is performed for the entire ”Project”.
1.
On the Edit access screen you can see which team members can access the
Tender. If there are no members in the list or if you want to remove members,
click the [Add/Remove members…] button.
2.
In the left box the available team members are listed. By selecting one or
more members and clicking the right arrow button, the users are assigned to
the Tender.
CTM_Tender_CA EN 6.9.4.doc
Page 34
3.
Click the [Save] button to save settings and return to the Edit access screen.
4.
Check the appropriate box whether the user should have Editor, Viewer or
Limited viewer rights. Then click [Save] to store the settings.
5.
Once you have different members on your list you can also select to change
owner of the enire tender.
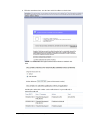
Set message recipients
1. Click on Set message recipient
2. Select which ones of the team members should receive both system messages
and direct messages from suppliers regarding this tender. If you do NOT select
anybody the message will only be sent to the creator of the tender
Manange Publication Sites
You can here select the publication sites IF your system admin has set the template
up in such a way, otherwise it is already predefined and you need not to do or save
anything. Subsequently if selection is preticked and not possible to change then
predefined by admin otherwise you can tick or untick and finally Save.
CTM_Tender_CA EN 6.9.4.doc
Page 35
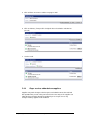
Tender dates
From here you edit all the dates relevant to the Tender, end-times, publishing etc.
1.
On the Edit dates screen, select which dates to use by selecting the checkbox. If you have created an Tender from a template you may be obliged to fill
in some of the dates. Enter the dates and click [Save].
2.
You also have option to set some dates for information purpose towards the
supplier.
a) Deadline of clarification question: deadline for supplier to send
clarification questions to owner of the tender
b) Validity of tender: For how long the buyer wants this tender/answer to
be valid
c) Planned award date: the estimated date for tender to be awarded
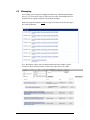
Setting the CPV-codes:
Within EU the standard to categorise a public Tender is the CPV tree (Common
Procurement Vocabulary). Each public Tender should be tagged with one or more
CPV codes.
1.
2.
On the add CPV codes screen, click the [Add] button. The CPV is displayed
in a pop-up window.
Select one or more categories for your Tender. Scroll down the list and go
further down in the tree to find the exact category.
CTM_Tender_CA EN 6.9.4.doc
Page 36
3.
When finished selecting, click the [Save] button at the top. The window is
closed and the screen below is refreshed and the selected categories are
listed. Click the [Done] button to go back to the checklist.
4.
If you are uncertain of which CPV code you need, simply enter a search
word in the search string field to get some options from the system.
Print shops
Print shops can be set up for use with the Tender. For further reference see section
3.5.
NB This option is only available when creating a Tender outside of a”Project”.
Otherwise, the management of print shops is performed for the entire ”Project”.
Selecting requested pricing:
Click on the link by the Pricing required section to make changes to the pricing
requested.
CTM_Tender_CA EN 6.9.4.doc
Page 37
The following configurations are available:
•
Request Total Quote from supplier – IF you select total quote per lot and you
have a tender with several lots the consequence will be that the suppliers will
have to price at least one lot in order to be able to submit.
•
Optional total quotes – The supplier can fill in any optional add on quotes to
the total quote. When entering quotes the buyer can use these to add to the
total quote received from the supplier
•
Disable alternative quote – By default suppliers has two fields for entering
total quotes, one for a fully compliant quote and one for alternative quote i.e. a
total quote that does not cover all the requirements. You can here disallow the
supplier from entering an alternative quote not fulfilling all the requirements.
•
Pricing of BoQ file requested – request a priced bill from suppliers, this option
requires you to upload a list of BoQ items to the Tender for the suppliers to
price
•
Pricing of all items required – requests suppliers to price all items within the
BoQ, suppliers cannot submit a proposal until the all rows are priced.
•
Allow supplier to add items – decide if suppliers should be able to create own
items or edit existing items or not. Suppliers can if permitted create own items
or create substitutes for existing items.
•
Allow suppliers to use break-up inheritance – if any break-ups added to the
Lot, allowing the supplier to see them and re-use them in a multi level tender.
CTM_Tender_CA EN 6.9.4.doc
Page 38
•
Header on comments column – Set the header for the comment field to be
something other than “comment”.
•
Overview document – Upload of an HTML-document with links to each item
code. The supplier will be able to click a link of the item code and open the
HTML-document at the correct position with more details about the item.
•
Set up additional product information for items
The changes in these settings will be logged in the audit trail with a new audit
action “Product information settings for BoQ have been updated”. If any
changes take place after any supplier has registered interest in the tender, the
‘Changes not notified’ warning is displayed to the contracting authority.
The product information fields can each be selected as hidden or mandatory.
Hidden fields are not shown to the supplier and cannot be priced. Mandatory
fields are treated as mandatory requirements and will give suppliers warnings
at submission if unfilled, but they will not prevent the supplier from submitting
the response.
Setting up mandatory or hidden fields
The supplier will get notification about which fields are mandatory, the down arrow is
marked red if there are mandatory fields and the mandatory fields are marked with a
red star.
CTM_Tender_CA EN 6.9.4.doc
Page 39
Supplier online pricing
The supplier also gets a warning about the mandatory fields in the main response
page. It will not stop the supplier from submitting a response.
Warning
The offline pricing Excel includes the product information fields, the mandatory ones
are marked with a star.
Offline pricing
If the supplier tries to import a file exported prior rel 6.9.1, he will have to download
a new file from the server with the new format in order to import. The supplier will be
displayed with a warning.
When evaluating the supplier prices, the warning about not properly filled production
information is shown in the BoQ comparison page.
Set up additional custom product information fields for itemsIt is possible
to define up to three custom fields for which the contracting authority can
request the suppliers to fill in additional information. The contracting authority
can mark these as mandatory in the same way as the product information.
CTM_Tender_CA EN 6.9.4.doc
Page 40
Setting up custom fields
The custom fields are shown to the supplier in the same manner as the product
information.
•
Pricing custom fields
1.
To change the settings, check the appropriate boxes.
2.
Click on the [Save] button to save the settings.
Lot categories:
If the company administrator for the buyer has uploaded a category tree including
questions, a category can be added to the Lot with questions. To upload a category
tree within the buyer profile, contact your local support for more information.
1.
Click on the link in the checklist for categories. The categories screen is
displayed.
2.
Click the [Add…] button. A pop-up window with the category tree is
displayed. Select one or more categories for your Lot and click [Save] at the
top. The pop-up window is closed and the screen below is refreshed.
3.
Categories added are shown in a list, click on the View questions link to see
the questions for each of the categories added. When done, click the [Done]
button to go back to the checklist.
Adding qualification questions:
Qualification questions are the list of requirements for the Tender; here both
gateways (mandatory requirements) and any other criteria can be specified.
Questions relevant to the Lot can be added for the supplier to answer. Questions
can be added from a predefined template or added directly to the Lot. Go to the link
of the questions for the Lot. If any category containing questions already has been
CTM_Tender_CA EN 6.9.4.doc
Page 41
added, a list of questions is displayed with the added questions. When creating a
question it can be maximum 5000 characters.
Creating questions directly on the Lot:
•
Click on the [Create question…] button
•
Select a question type and click [Next].
•
Note is an information text that can be used as extra information to the
suppliers.
•
For Multiple and single choice questions you can set autoscores that will be
automatically counted as points into the analytics engine when evaluation
process starts. Please note that gateway questions cannot be autoscored as
they work on the presumption in or out.
•
Multiple question can be used if there can be more than one answer. The sum
of scoring must be maximum 100.
CTM_Tender_CA EN 6.9.4.doc
Page 42
•
Single choice question can be used if there only can be one answer. If you are
using this as a Gateway question, remember that Gateway should only be used
at one of the alternatives.
CTM_Tender_CA EN 6.9.4.doc
Page 43
•
Free text question can be used if you can’t give the supplier any alternatives.
They can be short text (100 characters) or long text (2500 characters)
•
Number question can be used if the supplier should be answer in numbers.
You can choose to make this a Gateway question and add a minimum and a
maximum value.
More choices that can be made at the bottom of your questions:
Internal question – The question is not shown to the supplier, can be used as a
group scoring and weight for a number of questions.
Answer to expire – When answering the supplier has to set a date for the answer
is not valid any more.
Allow document attachment – The supplier can upload a document as part of his
answer
Require document attachment – The supplier must attach a document with the
answer to the question
Gateway question – Only for number or choice questions, one of the choices or a
numeric scale where the supplier has to be within the correct range. These types of
questions are also called as “knock-out” criteria.
CTM_Tender_CA EN 6.9.4.doc
Page 44
•
Click [Save] to save the question and go back to the list of questions.
•
Questions created are now created as a draft/working version and will not be
visible to supplier until updated to a new version. Any changes made to any
question will also be saved in a draft version and not seen until push of the new
version is made.
•
Push the changes by selecting the questions to update and click the [Update to
new version] in the questions list.
Insert table questions:
•
Table question is a question type where you have question rows and columns.
The row is an ordinary question, and the supplier can enter different answers
for each column on the row.
•
Click the [Insert table…] from the question list to start creating a table question
•
Enter the main table question name and click [Save]
•
Use the [Add row…] and [Add column…] buttons to enter rows and columns to
the table.
Add questions from a predefined template:
•
Click on [Link…] or [Copy…] button
CTM_Tender_CA EN 6.9.4.doc
Page 45
•
The list of questions within the template is displayed, select the questions you
want to link or copy into your tender.
When linking questions from a set template that come from a company library
these questions are NOT editable, with exception of the autoscoring values and
value added values (separate module) and if gateway(mandatory) question or not.
To edit any template questions value – please read the following text.
When creating the template questions, for certain questions such as single choice
and multiple choice scores, gateway values and value added amounts can be set
up. If the procurement officer wants to link a question from the templates to his
CTM_Tender_CA EN 6.9.4.doc
Page 46
tender and needs to change any scores from the template or if you wish for a
particular question to be gateway or not it can be made as below:
Please be aware that when copying a Lot, or a complete Tender, if questions are
selected to be copied they will be copied with their default values and not any
changed values.
CTM_Tender_CA EN 6.9.4.doc
Page 47
If you have copied the questions from a question template/library to your tender
and lose your template sections this is how to continue on the tender level to create
your own sections and distribute the copied questions into relevant sections
CTM_Tender_CA EN 6.9.4.doc
Page 48
When in Sort mode “Rearrange questions page” do as described in picture below:
CTM_Tender_CA EN 6.9.4.doc
Page 49
Importing questions:
•
Questions can be imported from a generic Excel. Click the [Import] button to go
to the import screen. Here you can also find a link to download a template for
the question import (for more information see next page).
•
Select the file to import and click [Import]. A validation of the file is displayed;
click the [Proceed] to fully import the questions.
CTM_Tender_CA EN 6.9.4.doc
Page 50
Creating Excel sheet templates:
1.
2.
From the Tender checklist page, click the Manage Qualification
Questionnaire link. The Prepare qualification questionnaire page is displayed.
Click the [Import] button to go to the import screen. The Import question page
is displayed.
3.
Click on one of the Download import format links. The empty import format
just contains the correct settings and columns. The other one also contains
question examples.
4.
For more information about how to work with the excel sheet see the
PowerPoint document QQ template Instruction.ppt that can be downloaded
from the homepage.
The supplier view of your questions:
The supplier will see what scores/values you have determined for certain questions,
see example of the supplier screens below to show how your autoscoring will affect
the supplier in answering:
CTM_Tender_CA EN 6.9.4.doc
Page 51
(Supplier screen of autoscores 1 or 2)
(Supplier screen of autoscores 2 of 2)
Evaluate answers:
The result of autoscoring is seen both in qualification view, evaluation (Analytics
Engine) and on the page where you awards supplier of the contract. See below the
screens to show result. You will have both score and ranking and this score and
CTM_Tender_CA EN 6.9.4.doc
Page 52
ranking will be determined by the system on the parameters autoscore decided and
best price if such exist.
(The qualification view of autoscores and ranking)
Value Added questions is a separate evaluation model and a feature enabled
upon request.
If you decide to work according to value added model your previous
evaluation model will not work. The quotation of the supplier will decrease
automatically if supplier has answered to this particular question the question
alternatives gives you the possibility to put different value on different answer.
CTM_Tender_CA EN 6.9.4.doc
Page 53
(The analytics engine view of autoscores and ranking)
CTM_Tender_CA EN 6.9.4.doc
Page 54
(the award supplier view of autoscores and ranking)
Prepare documents:
This is a task to be performed outside of CTM, any documents that should be part of
the Tender should be prepared prior uploading when completed just click the red
ticker to set it completed.
Adding documents:
In addition to documents attached to specific bill items, documents can be attached
to an entire Lot. Each Lot has a separate document folder where files and folders
can be created (see 9.4 Document Folders for more information).
The documents can be uploaded into two main folders, one for documents that is
sent to suppliers, such as specifications, drawings etc. The other folder is the
internal documents, i.e. documents that will not be visible to suppliers, they are only
internal for the buyer on this Tender, could be documents of tender strategy or
similar.
Documents can be added to a Lot in the following two ways:
Upload document from your PC:
•
Click on the [Upload files] button.
•
A window displays all files and folders on your PC.
CTM_Tender_CA EN 6.9.4.doc
Page 55
•
Select the required file by clicking the checkbox to the left of the file name then
click the [Upload] button.
•
The documents are uploaded:
•
The uploaded documents are displayed in the Lot document folder.
Add documents from your personal/ company/ ”Project” document folder:
•
Click on the [Add from shared folder] button.
•
A window displays all files and folders within your ”Project” document folder.
You can change to your personal/ company document folder in the drop-down
box.
•
Select the file or folder you want to add and click the [Add selected document]
or [Add selected folder] button. Any changes within the linked folder or
document will be recognized also within the Lot such as deletes of documents,
additions or new documents and revisions of versions.
•
The selected file or folder is displayed in the Lot document folder.
Adding documents for compliance:
If desired, suppliers can be requested to confirm compliance with the specifications,
e.g. documents included in the Lot information
1.
To request confirmation of compliance, click on the link by the compliance
confirmation section
2.
Click the [Add document] button by the Document compliancy section to add
a document that you want suppliers to confirm compliance with. The
document has to be uploaded within the Tender to be able to select.
3.
Select a document in the document list by clicking the checkbox to the left of
the document then click on [Save].
4.
The document compliance list is displayed. The document is added to the
compliance documents list.
5.
If all documents have been added, click on the [Done] button
Creating invitation letter:
The invitation letter is shown to the supplier when viewing the Tender online. You
can write any information about the Tender and also use a pre-defined template to
create the invitation letter. Note that the invitation letter is the first thing a supplier
views for an Tender (except any published form to national or EU-sites) and the
description here should be short and concise, with small description of you as a
buyer and information about the Tender
CTM_Tender_CA EN 6.9.4.doc
Page 56
1.
2.
To create an invitation letter, click the link next to the invitation letter section.
A blank invitation letter is shown.
Enter any text within the invitation letter. You can also use variables to add,
for example the name of the Tender from the application instead of filling in
the name yourself. If the company administrator has created any templates,
click the [Load template] button to fetch from archive. When finished with the
letter click [Save] and [Done] to go back to checklist
Setting weights:
Each of the sections added to the Tender for the supplier to answer can be
assigned weights when evaluating and scoring the responses. The total score will
then apply the weights set for each of the individual items.
1.
To start setting the weights, click the link next to the Set weights section
within the checklist. The analytical engine opens. NB! This option is only
supported if using Internet Explorer as a web browser
2.
Click on the weights icon
for the weights view to be visible. Expand all
the items to show the pre-filled weights
3.
Enter the weights for each of the sections; the weights are entered as a
percentage of the total. Weights should be set as 100 or 200% total
maximum in order to divide per lot created.
4.
When finished, click save
the checklist.
and close the Analytical engine to go back to
Select opening committee:
Select which persons should open the tender box after the deadline. Note that you
MUST do this selection BEFORE Publishing (if this tender is to be published) and
before the deadline! This only has to be made IF it has been decided that for the
particular procedure that you are using a tender box has to be opened. You can
however at any stage change the selected persons of opening committee if needed.
If you yourself want to bee one of the openers of your own tender you must
remember to select yourself and move over to the right hand side box..
If you have many users you can search by first name or last name in the top field
CTM_Tender_CA EN 6.9.4.doc
Page 57
Publish/Amend:
The Tender can be published and thereby made public. This means that it will be
possible for suppliers to search through public Tenders and choose to take part in
the tendering process. Publication can be made to different target sites. Currently
OJEU, BOAMP, Doffin,TenderNed and Udbudsvagden are supported as well as the
EU-Supply public (external) site.
Prior starting to publish following points must have been completed:
- Publish date have to have been set and saved in the section of dates within the
check-list.
-
Publication sites must have been determined and saved in the Publication
section within the checklist
-
Opening committee must be defined within the opening committee section of
the checklist
1.
To publish the Tender, click the Publish link and the Publish sites screen will
show.
CTM_Tender_CA EN 6.9.4.doc
Page 58
Click on the contract notice link to select which notice you wish to fill in and
send. Fill in the official form and save.
2.
The Tender must now be activated for publication and this is done by clicking
the [Activate] button. Tender is now activated and will be published. (If you
have the approval module switched on you will have to seek approval first
before it will be possible to click on Activate.
3.
To deactivate a Tender, e.g. if some changes need to be made, click the
[Deactivate] button. The Tender will then not be published. The deactivation
can only be done if only publishing to the Eu-supply external web-site, for the
other sites an email or direct publication is made to the different country
publications sites and cannot be with-drawl.
4.
You can also send amendment through the same screen. The Amendmet
button/form will only be available if you have already sent and published the
form/tender.
Publishing an Tender to the eu-supply local site also enables you to mark some
documents uploaded as downloadable by supplier prior they log in and accept the
public invitation. It could be documents with more description which will affect the
supplier decision about participation in the Tender.
To mark documents as public, you’ll need to go to the document folder and use the
[Public display]
Complaints procedure
CTM_Tender_CA EN 6.9.4.doc
Page 59
At the publishing link in checklist you can determine the complaints procedure that
will be shown in the web pages of the tender. Click on Edit complaints procedure,
select to use default procedure or enter new appropriate text in the text field and
save.
The complaints procedure is shown on the web page showing the tender. It does
not show on the OJEU form it is the procurement officers that have to assure that
the same complaints procedure is hown both on OJEU forms and on this web page.
Alternatively ignore filling in any complaints procedure
Prepare zip file for the suppliers:
The owner of the tender is responsible for initiating zipping of the tender documents.
When all documents have been downloaded, the owner uses the zip option in the
checklist to prepare the zip file. If the zip file is not generated by the tender owner,
the supplier can still download the tender documents individually.
The benefit for the suppliers is that the zip file will already be prepared so the
documents are available for downloading without the supplier having to initiate the
zipping process.
CTM_Tender_CA EN 6.9.4.doc
Page 60
Suppliers:
Suppliers can be manually added to the Tender to later be invited. To access the
supplier database click on the Search link. See section 5.1.1 Add suppliers. This
option is only available if no publication is made.
Send invitations:
When suppliers are added they can be selected to receive an invitation to tender. To
send an invitation, click on the Invite link. See section 5.1.2 Invite supplier.
Evaluation
To analyse the suppliers that have submitted responses there is the evaluation
facility. A link to the evaluations is available in the checklist, click on the Edit link. See
section 5.2 Analyse Responses.
4.1.4
Multiple lots within a Tender
You can, if desired create multiple Lots within the same Tender. This enables you to
split a bigger Lot into multiple Lots to receive and compare prices both from
suppliers that can deliver all Lots and suppliers that can deliver single Lots.
To create an additional Lot:
CTM_Tender_CA EN 6.9.4.doc
Page 61
1.
From the Tender checklist page, click the [Add Lot] button at the bottom. The
create Lot screen is displayed
2.
Enter the information about the new Lot and click [Save]
3.
BoQ, questions and documents can now be added to the new Lot from the
checklist
Copy an existing Lot
A whole Lot including all BoQ, documents, questions set up on the original Lot can
be copied to be an additional Lot within the Tender.
1.
From the Tender checklist page, click the Manage Lots link at the top of the
checklist.
2.
Click the [Copy] button to copy the Lot selected, when copying all data from
the original Lot will be copied, such as documents, settings and qualification
questions.
CTM_Tender_CA EN 6.9.4.doc
Page 62
Section 5: Manage Request for Tender phase
Here the activities for a phase of type Tender are described. The management of an
Tender can be split into the following major steps:
•
Set up the Tender (described in previous sections)
•
Issue the Tender
•
Analyse and evaluate responses
•
Select the preferred supplier, or short-list for a coming phase
In addition there are tools available to support the process. These are described
under “Process Tools” below.
5.1
Issue the Tender
On the supplier tab of the Tender main page you manage the suppliers involved
through out the process.
From the beginning the list is empty and suppliers need either to be added from the
supplier database or to answer a public invitation. After invitation suppliers can start
working on their response. Additional suppliers can be involved at any time until End
Time Quotation. Suppliers can also be removed or “locked” during the process.
CTM_Tender_CA EN 6.9.4.doc
Page 63
If a supplier is not registered in the system you can still run the process and “preregister” them. They will then go through the registration process as a part of
answering their first Tender.
5.1.1
Add suppliers
Suppliers are added to a Tender from the supplier database. Each supplier should
have an updated profile including the following information:
•
A summary tab with general company information.
•
A Performance tab showing KPIs related to responding to Tenders such as
average response time in days, % won Tenders etc.
•
An Tender tab with links to previous Tenders the supplier has participated in.
•
A Contract performance tab showing contract history KPIs such as delays,
variations etc.
•
A comments tab enabling you to make comments about this supplier’s
performance. Can be shared or personal.
There are five main search capabilities:
•
Quick search - if you know what suppliers you want to involve. Here you can
search by name, address etc.
CTM_Tender_CA EN 6.9.4.doc
Page 64
•
Tender search – if you want to invite one or more suppliers invited to previous
Tenders created within your company.
•
Category search - if you want to find additional new suppliers. Here you search
using the categorisation system of suppliers.
•
Approved suppliers - if you want to save and re-use own favourite lists of
suppliers.
•
TransQ supplier search – if you belong to utility sector and have
integration with this system
To reach the supplier database, click on the [Add suppliers…] button on the
{ Suppliers } tab.
Quick search:
You can search by the following:
•
Search for a company named – search companies by name.
•
Search for companies with market span – search for a supplier selling to a
specific country.
•
Search for a company with postal code – search using part of the postal
code.
•
Country – search for a supplier located in a specific country.
To search using Quick Search:
1.
Select the required search parameters.
CTM_Tender_CA EN 6.9.4.doc
Page 65
2.
Click on the [Search] button. The result is presented in a list presenting
twenty companies at a time.
3.
To view the profile of a company, click on the company name.
4.
To add a company to the Tender, select the company by clicking the
checkbox to the left of the company and click on the [Add] button. The
supplier is added to the list.
Tender search:
In the Tender search you can search within the previous Tenders you have created
on the system
To search using Tender Search:
1.
Enter the name of the Tender you are searching for and click [Search].
Search result is displayed with the Tenders
2.
Alternatively, enter the postal code (zip code) for the area that the company
should be in and click [Search].
3.
Click on the Tender to add suppliers from, a pop-up window is displayed with
the suppliers in the Tender
4.
Select the suppliers to add and click [Add]. The selected suppliers are added
to the Tender
Category search:
In the category search you can search using the categorisation structure of the
supplier database. You can use product/service categories combined with
geographical areas when creating the search condition. There is also a possibility to
search using the free text keywords that the suppliers enter into their profiles.
To find suppliers using the category search it is required that suppliers has updated
their supplier profile.
CTM_Tender_CA EN 6.9.4.doc
Page 66
To add a supplier to the Tender using Category search:
Depending on your settings and operator you will have different choices of
categories to choose from.
1.
Click on the [Add suppliers] button on the supplier tab.
2.
Click on the { Category search } tab.
3.
To specify the product/services search criteria, click on the [Add criteria…]
button for each category type.
4.
The selected categorisation tree is displayed.
5.
Select the desired categories by clicking in the checkbox to the left of the
item.
6.
Click on the [Save] button.
7.
The search condition is updated with the selected categories.
CTM_Tender_CA EN 6.9.4.doc
Page 67
8.
To specify the market span search criteria, click on the [Add criteria…] button
to search the Geography categorisation.
9.
The geographical areas are displayed.
10.
Select the desired categories.
11.
Click on the [Save] button.
12.
The search condition is updated with the selected geography.
13.
Keywords are added by typing a keyword and the pressing the [Add] button,
then typing the next keyword and pressing [Add] and so on.
14.
Keywords can be deleted by checking the box in front of them and then
clicking the [Delete] button.
15.
Click on the [Search] button.
16.
Select one or more of the suppliers.
17.
Click on the [Add] button to add the suppliers to the Tender.
Approved/qualified suppliers:
You are able to store your qualified suppliers in separate lists for easy retrieval.
Lists can either be private or shared with your colleagues.
CTM_Tender_CA EN 6.9.4.doc
Page 68
To add a supplier to the tender using approved folders:
1.
Click on the [Add suppliers…] button on the supplier tab.
2.
Click on the { Approved suppliers } tab.
3.
Select Personal suppliers or Company suppliers.
4.
Select the supplier list you are interested in.
5.
Select the suppliers you want to include and click on the [Add to Tender]
button. Suppliers are added to the Tender
TransQ supplier search
Search and add suppliers from third party system TransQ/Sellicha (developed by
Achilles)
Selecting the search criteria from the TransQ search list is the same as previous.
1
2
3
CTM_Tender_CA EN 6.9.4.doc
Page 69
After selecting the file of suppliers to import, the result of the import is shown, note,
no suppliers imported or added yet.
1. Suppliers which can be added to the tender in CTM, click on the Information icon to
see list of supplier
2. Suppliers which, for some reason, are inactive in CTM. Please contact support for
further details. Inactive supplier cannot be added to a tender in CTM
3. Suppliers which cannot be imported, due to invalid data from TransQ/Sellicha. You
would need to contact the supplier and ask them to update their profile in
TransQ/Sellicha
By clicking ‘Add suppliers’ you will add the suppliers in number 1 to the tender. After
adding the suppliers, the search is removed from CTM and cannot be reused. You
will have to create additional searches in TransQ/Sellicha
Suppliers added verification screen, click on the information icon to see the list of
added suppliers.
5.1.2
Pre-register a missing supplier
If a supplier has not registered yet, you can still involve them in a Tender through
pre-registering them. This is an alternative to calling them, then waiting for them to
be registered and approved and thereby made available. Pre-registering the
supplier will make the registration easier for them and also from the start connect
them to the Tender.
To pre-register a supplier company:
1.
Click on the [Pre-register supplier…] button on the supplier tab.
2.
Fill out the form with contact information of the supplier company and click on
the [Save] button. Fields marked with (*) are mandatory.
CTM_Tender_CA EN 6.9.4.doc
Page 70
3.
5.1.3
The company is presented in the supplier list and can be managed as any
other company i.e. invite them to participate in the tender. The company is
marked with a
sign until fully registered. When the company is fully
registered it can fill in a response and submit a quotation.
Invite supplier
Suppliers have to be invited separately for each of the phases in the Tender
process. You can invite both fully registered suppliers and pre-registered suppliers.
To invite a supplier:
1.
Click on the quotations tab for desired phase/step.
2.
Click on the [Invite suppliers…] button.
CTM_Tender_CA EN 6.9.4.doc
Page 71
NOTE: If an approval flow is set up within your company approval may be
requested prior to suppliers can be invited. Also, IF you have tender box usage you
must have selected an opening committee in order to invite.
3.
A pre-filled message template is displayed and your own text can be added
to it. For information about changing the pre-defined message, please refer to
the company administration guide.
4.
Click on the [To…] button to select recipients of the message.
5.
Select the desired recipients by clicking the checkbox to the left of the entry
and click on the [Select] button.
CTM_Tender_CA EN 6.9.4.doc
Page 72
6.
Add any complementary text and click on the [Invite] button to send the
invitation message. (The message is sent through email or as a system
message depending on the settings of the recipient.)
7.
The status of the invited companies is updated to “invited” for the phase.
Suppliers invited can now log in and start working on their response and send
the quotation.
5.1.4
Remove and Lock/Unlock
There are two ways to exclude a supplier from participation in a Tender. This can be
done throughout the process which enables you to limit the number of participators
after negotiations.
•
Remove
This removes the supplier fully from the Tender. Remove can be done until
you have sent an invitation and informed the supplier of the Tender. After
invitation, only locking can be used.
•
Lock/unlock
A supplier that is locked cannot create or edit their response. Through locking
(and unlocking) suppliers you control which suppliers are active at what time
in the process. At End time quotation all suppliers are locked by the system
unless you have selected to accept late responses when creating the Tender.
When selecting to unlock suppliers after end-time you can choose to open
certain areas of the response for them to amend and change certain areas of
their response, for example correcting obvious errors or within a negotiation.
You can lock and unlock a supplier as many times as you want during the
process. When a supplier is locked or unlocked, a system message notifies
them.
CTM_Tender_CA EN 6.9.4.doc
Page 73
To lock a supplier:
1.
From the Administration page or Quotation tab, click on the [Lock/Unlock
suppliers…] button.
2.
On the Lock/Unlock screen select the supplier to be locked then click on the
[Lock] button, if this is after tender deadline all suppliers are locked, in case
you wish to completely unlock any supplier click as below, be aware that the
supplier then has access to his entire tender and can amend accordingly
(prices, documents, QQ responses or whatever functions you have set on
this tender)
To partially unlock a supplier:
1.
From the Quotations screen, click on the [Lock/Unlock suppliers…] button.
2.
Click the link of the Lot name in the right most column.
3.
Within the left hand side, select the area to unlock in the drop-down. A list of
items is displayed. You can for example allow the supplier to ONLY add
documents or ONLY respond again to one particular question etc.
CTM_Tender_CA EN 6.9.4.doc
Page 74
4.
Select the items to unlock and use the arrows in the middle to move them to
the unlocked area.
Items moved to the unlocked area will be open for the selected supplier to
change until you manually lock the specific item again.
Make sure you inform the supplier of how long and what part is unlocked and
that the supplier needs to submitt the changes in order for you to receive
them. (in this example adding documents)
5.1.5
Publish the Tender notice
If you are in a public process and cannot search and invite suppliers within the
system, you should publish the Tender for suppliers to find an answer.
Currently we support six “sites” for publishing a notice:
•
Eu-supply site or client site – The local publishing to the eu-supply site and
the client site. From this publish page the suppliers can go in directly and
accept the public invitation and start working with their responses.
•
OJEU – The official journal and publication place within the EU. All public
tenders within the European Union must be published to OJEU, or
TED/SIMAP as it also is called.
CTM_Tender_CA EN 6.9.4.doc
Page 75
•
Doffin – Norwegian official publication site for publication of tenders within
Norway. If the tender is above EU threshold value it publication will be
automatically sent to SIMAP for publication via Doffin.
•
BOAMP – French publication site for all public tenders within France. The
BOAMP has a connection to SIMAP and a publications made to BOAMP are
automatically published to SIMAP as well.
•
Udbud.dk – Danish publication site for all public tenders within Denmark.
(previously Utbudsvagten)
•
TenderNed - The publication process to TenderNed is basically the same as
for any other national publication site in CTM, however, there is one big
difference. TenderNed requires each contracting authority to be registered on
TenderNed with a contracting authority id. The contracting authority id is
required in order to publish from CTM to TenderNed. For questions on how to
obtain the contracting authority id, please contact TenderNed.
The contracting authority id can be set up in the company profile.
Depending on modules installed and country origin you may or may not see all
publication sites.
To publish a Tender notice:
1.
From the Tender checklist, click the Publish link next to the publish section. A
list of pre-defined publish sites is displayed.
2.
To add additional sites, click the [Edit…] button.
3.
Set the publication date, same date for all publish sites, select the desired
publish sites and click [Save].
4.
If selecting OJEU, BOAMP, Doffin, Udbud.dk (previously Utbudsvagten)or
TenderNed as publication site, you’ll need to fill in a form prior to publishing
the Tender. Click the [Edit…] button next to the publication site and fill in the
forms. The forms are the same you are required to fill in at any of the
publication sites. CTM will pre-fill some of the values from the system for you
as a help. See no 7. for utbud.dk specifics
CTM_Tender_CA EN 6.9.4.doc
Page 76
5.
When finished with the forms, click the [Publish] button. The forms and
publication notification will be sent and the Tender will be published on the
set date and time.
6.
To amend a publication go into the publish link and amend the publication by
clicking on [Add amendment] fill in the amendment form and activate. (more
information can be found in heading Amending the notice 5.4.3)
7.
Utbud.dk
National Danish tenders within CTM can be published to the Udbud.dk portal.
Example of one section to fill in
The actual filling of a form is a bit different than for the current TED forms, the forms
have been split into sections (see above image for an example) and each section
can be filled and saved individually. Once the form is fully filled the complete form
has to be reviewed and finalized, last point in the checklist on the left, after the
finalisation the form can be published to udbud.dk.
The flow within the tender is the same for Udbud.dk as for TED, Udbud.dk is listed
as an additional publication site and Activation is done at the same place.
CTM_Tender_CA EN 6.9.4.doc
Page 77
The forms supported in version 6.9 of CTM are:
•
•
•
•
Form 01 – Tjenesteydelser
Form 02 - Bygge- og anlægsopgaver
Form 03 – Varekøb
Form 04 – Indkøbsplaner
For version 6.9 publishing of tenders are supported. The deletion, cancellation and
updating of a publication is planned for later versions of CTM, and will currently be
handled manually until they have been fully implemented.
The new Udbud.dk is replacing the current Udbudsvagten and new publications
after the 6.9 update have to be published to udbud.dk instead. There will still be the
possibility to view any publications previously made to Udbudsvagten.
5.1.6
Opening proposals (optional)
The supplier responses can be locked for viewing until any tender box or envelopes
have been opened. The tender box and envelopes are mainly used within the public
procurement process to hide any responses prior end-time. The tender box and
envelopes can be used individually or together.
To open the tender box:
1.
2.
Click on the [Opening procedure…] button from the quotations tab. A pop-up
window is displayed with the users that are allowed to open the tender box.
The people selected to open the tender box at creation stage are displayed.
CTM_Tender_CA EN 6.9.4.doc
Page 78
3.
Click on the [Open] button for each of the users. The user is requested to
verify him by filling in his user name and password to the site. If the current
user is logged in, there will not be an extra verification step.
4.
The tender box is opened and the quotation information is accessible.
To open double envelopes:
1.
Click on the [Opening procedure…] button from the quotations tab
2.
Click on the
3.
The first envelope is opened. After review of the technical information the
second envelope may be opened. That is done in the same way. The second
button for each of the envelopes to open them.
envelope can also be rejected, done by clicking the
button. The
rejection means that the buyer will not see the content of the second
envelope and that the supplier did not comply with the requirements within
the first envelope
5.1.7
Confidential documents (separate setting)
This is to define if supplier response documents are confidential or not. The
flow is that the supplier can request confidentiality, the procurement officer
can then grant partial or entire confidentiality, in this point in the checklist.
After the contracting authority has opened any tender box he can from the
checklist view the confidentiality requests and mark
CTM_Tender_CA EN 6.9.4.doc
Page 79
Click on Edit next confidentiality documents to mark the status.
5.2
Analyse responses
On the quotation tab for the step you can follow the progress of the suppliers
involved and review their responses. Once opened you can see the last submission
date/time on each tender respons.
The following can be reached from the Quotation tab:
•
Quotation (1-by-1 presentation)
CTM_Tender_CA EN 6.9.4.doc
Page 80
By clicking on the Proposal link for a supplier you reach their quotation in a
printer friendly version.
Details about pricing of BoQ items can be reached from here. Also any comments
on documents can be displayed.
Qualification
By clicking the [Qualification] button you get to a presentation of all supplier
responses side by side. The comparison includes all response information excluding
the BoQ information and provides a quick first comparison view of the responses
received.
[Download all (ZIP)...] button under each supplier will give you all the documents
that the supplier has attached in his tender: documents from the documents folder,
documents attached as part of an answer to a question in the system and finally
also the documents that the supplier has sent as attachment in any message
through the system.
CTM_Tender_CA EN 6.9.4.doc
Page 81
You may also download all documents uploaded by all suppliers as one Zip File.
There are two steps to the process.
(i)
Prepare a zip-file
(ii)
Download.
Prepare zip file
The prepare zip is there to pack all supplier documents to one downloadable zip-file.
Download
The zip-file does only have to be prepared/created once per tender, if it is prepared;
any other person having access to the tender will be able to download directly
without having to prepare the zip-file again. If there are any changes to the supplier
documents, the total zip have to be prepared again.
Prepare and download are available from the online comparison/evaluation view,
CTM_Tender_CA EN 6.9.4.doc
Page 82
BoQ overview:
The BoQ overview provides an overview of the Bill of Quantities responses
received. To see more details about a specific response, click on the “View BoQ
quotation” link for the supplier.
Analysis:
The analysis engine provides a view of all data received in the responses and
includes rating functionality to support the selection of the preferred supplier. Since
the analysis engine runs locally it is handy to use also when not rating responses.
CTM_Tender_CA EN 6.9.4.doc
Page 83
The analysis engine contains the following main functionalities:
•
Set scores – A weighted score can be calculated for each response.
Through setting scores you rate the responses received. The system then
calculates the weighted score for each response.
•
Save settings – Any settings that you change such as column widths can be
saved.
•
Copy – All data can be copied directly into Excel etc using copy to clipboard.
•
Hide suppliers – If many suppliers are involved you can select which ones to
present to avoid data that you are not interested in.
•
Own price column – When reviewing BoQ prices received you can save
your “own price column” based on the responses for any later use.
•
My rate – A setting is available which allows the “My rate” column to be
populated with estimated rates. Another setting allows the “My rate” column
CTM_Tender_CA EN 6.9.4.doc
Page 84
also to be used to fill in blanks in the responses. These features are available
in “Set rate” mode only.
5.2.1
Select supplier BoQ rates
If you are using the BoQ Manager to manage break-ups within a ”Project” it may be
desired to be able to see all pricing information received in one place. By selecting
supplier rates within issued Tenders the pricing tab in the BoQ Manager is
populated with the real pricing information. This can then be compared with the
earlier estimates.
To select supplier rates within a Tender:
1.
On the Quotation tab, click on the [Select/Export rates] button. Select the
Select BoQ quotes option in the drop-down to the upper right.
2.
Select the desired supplier and click on [Save]. The pricing tab in the BoQ
Manager is now updated with the rates received within this Tender.
5.2.2
Select supplier total quotes
Total quotes and Lots estimates can be set to calculate difference with estimated
total and quotes received. You can also fill in a total quote for the supplier if he has
not sent in the proposal online or if you have negotiated a new price with the
supplier. Note, the new total quote does not override the supplier original quote and
it is not shown anywhere else than on the total quotes screen.
To select supplier total quotes:
1.
On the Quotation tab, click on the [Select/Export rates] button. Select the
“Total quotes” option in the drop-down to the upper right.
2.
Select the desired supplier and click [Save].
3.
Use the [Set Lot estimates…] to set the estimates of the Lot and see %
difference. Fill in the estimates of each Lot and click [Save].
4.
To fill in a total quote for the supplier, use the [Edit supplier quotes…].
Fill/change in the total quotes and click [Save]. The supplier quotes updated
are now shown on the overview screen, but marked with a blue corner. To
remove the filled in supplier total quotes, just leave the total quote field blank.
CTM_Tender_CA EN 6.9.4.doc
Page 85
5.3
Evaluation
You can make evaluations in several different ways using the analytical engine. As
the actual creator of the request for quotation you can evaluate the supplier answers
by yourself. If you have created several sections you can assign certain section
evaluation to a specific member of your company. There is also the possibility to
decide for a team evaluation which means that several team members evaluate the
questions and the total score is then an average of all these individual scores.
All the above can also be in some ways decided and overridden by process
template settings that decide what is allowed for example if 2-step evaluation should
be used (where all gateway questions are step 1 and only companies/suppliers
complying with gateway questions are shortlisted to step 2) Below is an example of
team evaluation, however, the evaluation where you assign certain sections to
specific evaluators is same principle with exception of the “team evaluation” button.
1.
Select Evaluation view at the quotation tab.
2.
Click on Assign evaluators
3.
Select evaluators click the Team evaluation if you want this functionality
CTM_Tender_CA EN 6.9.4.doc
Page 86
CTM_Tender_CA EN 6.9.4.doc
Page 87
CTM_Tender_CA EN 6.9.4.doc
Page 88
This is a new setting at buyer side which indicates the Tender has been evaluated
by buyer. This feature is implemented by adding a checkbox at evaluation page.
Buyer checks this box if he decides that the evaluation has been completed and
want the supplier to see the evaluated scores.
Supplier will see just his/her own evaluated score not others (QQ, BoQ, Quotation).
5.4
Addenda
Changes as well as negotiation may continue throughout the entire process. As a
buyer you can make changes until the Tender is closed. Suppliers may make
changes until End time quotation has passed or they are locked (see Section 5.1.4
Remove and Lock/Unlock).
CTM_Tender_CA EN 6.9.4.doc
Page 89
5.4.1
Buyer makes changes
To change the general configurations of the process:
1.
On the Tender main page, click on the [Edit from checklist…] button. The Edit
Tender checklist page is displayed.
2.
Click on the [Edit…] button at the bottom to change the settings for the
procedure
3.
Perform the desired adjustments and click on the [Save] button.
The following restrictions apply for changes of the process:
•
A tender box cannot be added/removed after creation of the Tender
•
The tender conditions cannot be changed after having been accepted by a
supplier.
•
No changes can be made to the process after the awarded supplier has been
selected.
To change the content of a Lot:
1. From the home page, click on the My Request for Tenders link. The My
Request for Tenders screen displays.
2. From the My Request for Tenders screen click on the required Tender.
3. Click on the [Edit from checklist…] button. The Edit Tender checklist page is
displayed.
4. Use the different parts in the checklist to edit the content as described in
Section Editing the Tender and setting up response.
All changes made are logged and can be reviewed on the Audit trail list tab. This
way it is easy for you, as well as the involved suppliers, to see what changes have
occurred and when. You can see information about all suppliers while each supplier
only sees your and his own changes.
CTM_Tender_CA EN 6.9.4.doc
Page 90
The Tender Audit Trail tab displays a link to document version history when a
document is uploaded, updated (to a new version) or deleted.
This document version history window displays all prior and newer versions of the
document; all versions are enabled for view/download. The version clicked in the
audit trail is highlighted and an icon indicates if a version has been removed.
Supplier side: If a document is changed on the buyer side and the supplier have
access to the document (i.e. supplier has accepted the invitation), the supplier may
view the history of the document in the Tender audit trail. Only versions valid at and
created after the first supplier accepted the invitations are available, i.e. all suppliers
can access the same buyer document versions.
Buyer side: If the supplier has submitted his proposal and any document attached to
the response are changed, the buyer may view the supplier document version
history in the Tender audit trail. Only versions valid at and created after supplier
have submitted the proposals are available.
CTM_Tender_CA EN 6.9.4.doc
Page 91
CTM_Tender_CA EN 6.9.4.doc
Page 92
5.4.2
Inform suppliers
If you require a quicker response you can also notify the suppliers when changes
have been made to the Tender.
To notify the involved suppliers:
1. From the home page, click on the My Request for Tenders link. The My
Request for Tenders screen displays.
2. From the My Request for Tenders screen click on the required Tender and
quotation step. Alternatively this should be made from the left hand side of the
Checklist - from the Administration page
3. Click on the [Notify changes…] button.
4. Select the suppliers that you want to inform and click the [Notify] button. You
can also click on [Attach files] the “attached” will be found in the message tab
for the supplier to find. Alternatively you select to Broadcast this message
meaning it will be sent to all current och future suppliers added or entering the
tender before deadline.
CTM_Tender_CA EN 6.9.4.doc
Page 93
5.
6. The suppliers are notified of the changes made.
If a supplier already has submitted a response, their status can also updated to “reconfirm quotation” if you decide this by answering yes when this question pops-up.
5.4.3
Amending the notice
1. From the checklist go to Publish link
2. Click on View next to the contract notice
3. Click on Add amendment
CTM_Tender_CA EN 6.9.4.doc
Page 94
4. Fill in the amendment form, save the form and click on Done to exit the form
NOTE: You need to state the orginal contract notice reference number in this
field.
And the place where this number can be verified from is in your audit trail, se
below from audit trail.
CTM_Tender_CA EN 6.9.4.doc
Page 95
5. Click on Done once more to exit the next page as well
6. Click on Activate, (if not possible it might be due to fact that the end-time has
passed)
7. See the result
5.4.4
Buyer receives addenda from suppliers
Suppliers may make changes to their response and submit new versions until end
time quotation has passed or they are locked. In the same way as the suppliers can
follow the buyer changes through the audit trail you as a buyer can see any
changes made by suppliers in the audit trail.
CTM_Tender_CA EN 6.9.4.doc
Page 96
5.5
Messaging
A messaging system supports the logging and trail of any communication during the
process. You can send messages to and receive messages from the different users
involved from the supplier companies and involved colleagues.
On the first page after login all unread messages are listed to ensure that messages
are not left unattended.
The { Messaging } tab presents all communication taken place within a specific
Tender in a discussion forum format. To view a message, click on the subject.
CTM_Tender_CA EN 6.9.4.doc
Page 97
The system generates messages to inform you when important events occur. The
events are listed in Section 9.1 Edit user profile. Within your user profile you can
also select to receive these automatic generated messages as emails.
To ensure that sub messages are left unread by mistake because they are not
visible in case expansion button is clicked, a new feature is developed in Messaging
to highlight any such unread sub messages for the user (both on the supplier and
the buyer side).
This is highlighted by an unread sub message icon.
Unread message at the top is presented as bold.
Similarly, to ensure that any draft message prepared is not left unsent by mistake,
an Unsent Draft icon is presented to the user (both on the supplier and the buyer
side) and highlighted in red.
5.5.1
Send a message
To send a message within a Tender:
1.
Go to the desired Tender and the { Messaging } tab, alternatively go directly
to create a message from the left hand side of the checklist
2.
Click on the [New message…] button.
3.
The New message window is displayed.
CTM_Tender_CA EN 6.9.4.doc
Page 98
4.
Click on the [To…] button to select the recipients and click the [Select] button.
5.
There is the option to broadcast the message to all suppliers invited, and all
that will be invited to the Tender. If the broadcast option is selected, no
recipients need to be selected.
6.
Enter a suitable subject.
7.
To attach a document from the PC, click on the [Attach files…] button and
select the file(s) to upload. For more information about Document
Management, see Section 9.4.1 This document will NOT be attached as a email attachment-the supplier has to log into the system, go the the messages
tab and download the attachment from there.
8.
Click on the [Send] button to send the message.
When sending a message you have the option to check the notification box. This
sends an immediate email notification that there is a new message available on the
system.
5.5.2
Message archive
If you want to review all messages independent of Tender you can use the Message
archive. The Message archive is reached through the Navigation bar.
CTM_Tender_CA EN 6.9.4.doc
Page 99
The Message archive displays the messages in a traditional email client layout.
If a message is created and saved but not sent it is listed in the drafts folder in the
Message archive.
If a message is deleted it is removed from the system.
You can mark a message as read by selecting the message in question and clicking
on Mark as read.
5.6
Short-list suppliers for next step within Tender
If you run a multi-step process and are done with evaluations you can short-list the
suppliers you want to bring with you to the next step.
To short-list suppliers for the next step:
1.
Click on the [Quotations] tab for the current step.
2.
Click on the [Short list…] button.
3.
Select the suppliers that you want to short-list and click the [Short list] button.
4.
The short-listed suppliers are displayed on the Quotation tab for the following
phase and can be invited, same supplier contact persons that had rights in
step 1 will be possible to send to for step 2.
CTM_Tender_CA EN 6.9.4.doc
Page 100
The invitation to the following step follows the steps as listed above. Any
documents, BoQ items and qualification questions can be added to the second step
independently of the first step.
5.7
Award preferred supplier
If you have run through one or multiple Tender steps, and have decided to award
one or more suppliers, the award can be managed online independently of if you
are to run the contract management process online or not.
To select the preferred supplier:
1. Click on the [Award supplier..] button.
2. Select the supplier that you want to continue with and click on the [Save] button.
3. Enter a reason for awarding the selected supplier and click on the [Save] button.
4. Suppliers are not notified automatic by the system (unless the Alcatel directive
is in place), the buyer has to send the award notification to the suppliers. This
could be done by using the [Create message] functionality within the award
screen, you can select from a pre-defined email template to send the award
notice to suppliers.
5.7.1
Using the Alcatel directive
The Alcatel directive is a set of rules applied within the EU to ensure suppliers get a
chance to challenge any award made within a specific period of time, called the
standstill period. The standstill period is specified when awarding the supplier.
To award a supplier with a standstill period:
1. Click on the [Award supplier..] button.
2. Select the preferred supplier using the radio buttons
CTM_Tender_CA EN 6.9.4.doc
Page 101
3. Select an award standstill period, i.e. the time period for how long the suppliers
can challenge the award of suppliers.
4. Click the [Save] button, the reason screen appears. Enter a award reason and
click the [Save]
5. Any suppliers not awarded will now receive an automatic message saying they
were not successful in the tender, and they have until the standstill end to
challenge and request an award report.
6. You can at any time go in and extend the standstill period by using the [Award
supplier] button from the { Quotations } tab
To send an award report:
1. If an award report is requested by the supplier you will be notified via a
message on the system and email.
2. Go to the Tender where the report was requested and the { Quotations } tab.
Click the [Award supplier] button
3. Use the Send report link for the supplier who requested the report. A small popup window opens.
4. Click the [Send report] button to send it to the supplier.
5. From the { Audit trail } you can click on a link to see the full report sent to the
supplier.
CTM_Tender_CA EN 6.9.4.doc
Page 102
Section 6: Sid4Health module
6.1.1
Setting
You enable Sid4Health by ticking the equivalent setting in the process template, this
setting will only be visible if the module is switched on within your organization. It is
a module that is available only for the NHS sector in the UK market.
CTM_Tender_CA EN 6.9.4.doc
Page 103
CTM_Tender_CA EN 6.9.4.doc
Page 104
Section 7: Mini-Quote module
The mini-quote is a simpler version of an ordinary tender which also is preceeding
by a pre-qualification of suppliers.
The whole process starts with a supplier pre-qualification, where the contracting
authority publishes or invites to a tender containing only a qualification
questionnaire. The qualification questionnaire will serve as a base for the upcoming
mini-quotes based on the pre-qualification. The suppliers fill in the qualification and
submit their answers. The contracting authority gathers all the supplier answers and
evaluates if they are approved to be used for the mini-quotes.
Fig 20. Pre-qualification overview screen
CTM_Tender_CA EN 6.9.4.doc
Page 105
Fig 21. Edit the pre-qualification status for a supplier
A company administrator is the only role who can update the pre-qualifications.
After the qualification the contracting authority can start creating their mini-quotes, a
mini-quote is essentially a mini-tender and can include any information an “ordinary”
tender includes, such as Price Schedules, documents and total quotes.
Searching and adding suppliers to a mini-quote can only be done in one way and
that is by selecting a search criterion (see picture below) using the pre-qualification
questionnaire. The search result will display a list of suppliers compatible with the
search criteria, and the user can only select to add the result of suppliers, no more
suppliers can be added or removed from the mini-quote.
CTM_Tender_CA EN 6.9.4.doc
Page 106
Fig 22. Search screen of the mini-quote
After adding of the suppliers, the process is as any normal tender with any options
the contracting authority chooses.
Selecting a tender as pre-qualification and mini-quote is done by defining process
templates for each part.
The pre-qualification/mini-quote is a system module, please contact EU-Supply or
one of our partners for commercials.
Section 8: Questions and Answer (Q&A) module
The Q&A (Questions and Answers) is a new module within a tender which can be
used for broadcasting anwers when a question is initiated from the supplier. All
functionality within messaging in a tender is also available
The process is as follows, the suppliers asks questions during the tender, the
contracting authorities have the possibility to revise the questions to remove any
specific supplier information and then publish the answers to all suppliers. The
published answer and the question is available to any supplier who has expressed
interest in a tender.
The supplier will not have the possibility to ask any questions once the deadline for
clarification questions has passed. The deadline is set up by the contracting
CTM_Tender_CA EN 6.9.4.doc
Page 107
authority in each tender, if no deadline is specified then the suppliers can ask
questions until tender deadline.
Please contact your local EU-Supply sales office for license details of the Q&A
module.
8.1
User view
The contracting authority will see all questions asked by suppliers during the tender
process. Access to the questions asked by suppliers and the possibility to answer
them is available from the tender checklist.
You as a contracting authority and owner of a tender will be notified via email when
there is a new question asked by a supplier.
Questions asked by suppliers are listed as “Questions and answers” on the Q&A
page in CTM. In that list you seewhen the question was recived and which supplier
that asked the question.You access and answer the question by clicking on the
subject of the question.
Once an answer has been given, the question is shown in the “Answers ready to
publish” list below the and can be published. Select the answer to publish and click
the Publish button. Once the answer has been published it cannot be edited or republished. The question and answer will be able to read by all suppliers.
Once a question has been published you can access it and see which suppliers who
have read the answer.
There is also a printer friendly version of the Q&A section.
CTM_Tender_CA EN 6.9.4.doc
Page 108
Section 9: General user information
9.1
Edit user profile
You as the logged in user have access to settings and the details regarding your
user profile and can also change them on the site.
To edit user details:
1.
Select Personal profile from the Navigation dropdown. The user details
screen is shown
2.
Click on the Edit link by the User profile to change user details, such as user
name, password, time zone, notification settings, preferred language etc.
Change the settings and click [Save].
CTM_Tender_CA EN 6.9.4.doc
Page 109
Notification settings
Notifications are events happening on the system and how you would like to be
notified about them. A system message is always sent for a notification, you can
choose for each of the notifications if you would like to receive an email as a
notification as well.
Active X settings
ActiveX is control which can be downloaded and installed on your computer to gain
access to additional functionality within CTM, the ActiveX’s are only available on a
client Windows platform using the Internet Explorer as web browser. To be able to
install the ActiveX you need to have access to install programs on your computer,
i.e. being a power user or computer administrator.
To install the ActiveX’s one by one, click the [Load] button next to each of the
ActiveX. You can also install them all by downloading the complete installation Lot
and install.
If you do not have access to install programs, you can download an installation Lot
and ask your local support to install the ActiveX-Lot.
The below ActiveX’s are currently available
ActiveX
Analytical engine
Upload manager
Description
The analytical engine is used within an Tender to score
and evaluate responses received from the suppliers.
Developed by eu-supply
The upload manager is a tool to upload multiple files
and folder structures from you local disk to any of the
document archives on the system.
Developed by eu-supply
CTM_Tender_CA EN 6.9.4.doc
Page 110
Chart FX
The Chart FX is used within the eAuction module to
display a graph of bids which has been placed during an
auction
CAPICOM
Developed by Software FX
The Capicom is used to create digital signatures to be
used on the site
Flash
Developed by Microsoft
The Flash is used to display graphics, for example in a
supplier profile and the map-chart.
Digital signature utility
Developed by Macromedia
Digital signature utility allows you to digitally sign
documents and supplier responses on the site.
Developed by eu-supply
Certificate
There are two types of certificates you can upload to your user profile (i) Using
when logging in and signing contracts (ii) used for encrypting and decrypting the
tender box within an Tender.
i – The digital certificate to be used when logging in and signing contracts are
uploaded from the page where you edit the main user information such as time zone
and language.
ii - Digital certificate within the main view are used when encrypting and sending
envelopes as part of an Tender, when using the offline editor.
9.2
Digital signatures
Within the system you can use and set different variations of certification to be used
for digital signing. These can be set on country level and on organization level.
Below you see that these settings appear and are possible to set (if you have the
digital signature module) within the procedure template. The setting for allowing
letter of authentication can also be set in the procedure template. If you have any of
these you will automatically have the other setting.
CTM_Tender_CA EN 6.9.4.doc
Page 111
If the template are set up that this should be editable on each occasion you will as a
normal user be able to decide for each tender if you wish to allow/force any of these
functions. See bottom lines.
CTM_Tender_CA EN 6.9.4.doc
Page 112
This is the supplier page where you can see that the supplier gets information and a
button to print the authentication letter if you have chosen to let them respond this
way.
CTM_Tender_CA EN 6.9.4.doc
Page 113
9.2.1
Verification of digital certificate against external
validation service
It’s now possible for buyers to validate the certificate used by suppliers when
sending the proposal against an external validation service (Unizeto). Suppliers can
also check any certificate before sending the proposal if the certificate is valid. On
the supplier side there is also a link to view the certificate used for signing.
Buyer side:
Clicking on the digital signature icon will show the certificate used for signing and
validation of the certificate will be done against an external validation service.
CTM_Tender_CA EN 6.9.4.doc
Page 114
Supplier side:
Suppliers can test a certificate against an external validation
service
Suppliers have the possibility to view the certificate used for signing.
Checking certificate against an external validation service
CTM_Tender_CA EN 6.9.4.doc
Page 115
9.3
Approvals
The system allows you to set up approval rules that require approval of certain
documents at different stages throughout a transaction. The administrator manages
the set-up of the approval relationships for your company (see the Administrator
Guide).
9.3.1
Request an approval
To request approval:
1.
When needed, request approval for a document.
2.
The approval configuration window is displayed with the different alternative
persons available.
CTM_Tender_CA EN 6.9.4.doc
Page 116
3.
Select the desired approvers and click [Save].
4.
The request is created and sent to the selected approvers. It can be sent in
parallel or sequential flow depending on the configuration made by the
administrator.
5.
To see the status of the approval, from home page My Approvals and the
{ Sent requests } tab
9.3.2
Respond to received approval request
A message is sent to you when someone has requested your approval. Your
approvals are also accessible directly from the service menu on the main page.
Click on My Approvals link from the home page to reach the outstanding approvals.
A list is displayed and status can be set. To view the information to be approved or
enter a comment, click on the related links.
When clicking the [Save] button the approvals are saved and a message is sent to
the user that sent the Request for approval or to the next approver.
If a request is disapproved the user can send a new request later when the
appropriate changes have been made.
CTM_Tender_CA EN 6.9.4.doc
Page 117
9.4
Document folders
The Document folders enable storage of documents on the system for use in
Tenders or quotations without having to upload the same document multiple times.
Also distribution of new versions etc. becomes easier.
The following document folders are available:
•
Company document folder – The place to store documents that are shared
throughout the company and used in Tenders. Any user within your company
can link or copy these documents to any Tender or contract. Only the company
administrator can update documents within the company folder.
•
User document folder – The place to store your personal documents. They are
not available for any other users.
•
”Project” document folder – The place to store documents related to a
specific ”Project”. Any user having access rights to the ”Project” can download
these files, any editor can change, delete or add documents to the ”Project”
folder
When a Tender is created documents or folders can be “linked” from the folders to
be included in the Tender. When a document or folder is linked any changes to the
document/folder also are reflected in the Tenders that have included the
document/folder.
9.4.1
Upload documents from PC
Documents are uploaded using the upload facility. Documents can either be
uploaded directly or scheduled to take place during off office hours if large amounts
of data are about to be uploaded.
CTM_Tender_CA EN 6.9.4.doc
Page 118
To upload documents from your PC:
1.
From the home page, go to the archive/folder to upload documents to.
2.
Click on the [Upload files…] button. This presents the Upload Manager where
files and/or folders can be selected. If folders are selected the folder
hierarchy can be uploaded as well. It is therefore recommended that you
structure the documents in folders as desired on the PC prior to upload.
To schedule an upload of documents:
1.
From the home page, go to the archive/folder to upload documents to.
2.
Click on the [Upload files…] button. Select the files to upload.
3.
Click on the [Schedule] button. In a window you can set the time of the
Upload. Your computer will then, if connected to the Internet, start the Upload
at the desired time.
NOTE! The PC must be left on with an open internet connection for the schedule
upload to be able to start.
If you want to cancel a scheduled upload or review status of them, click on the
Scheduled Upload link on the main page. Or click the
CTM_Tender_CA EN 6.9.4.doc
Page 119
in the tray of your PC.
A window is displayed listing the jobs that have been scheduled and their status.
9.4.2
Version management
To upload a new version of a document:
1. Click on the arrow down in front of the document and select Edit….
CTM_Tender_CA EN 6.9.4.doc
Page 120
2. The document details are displayed.
3. Click on the [Upload new version…] button to upload a new version of the
document.
4. The action list for all Tenders including this document will now include an entry
regarding the change of version.
9.5
Reporting
The CTM application supports different types of reporting. If running the solution
using own HW infrastructure there is the possibility to develop any own reports
desired. If running hosted we can also provide reports meeting almost any needs.
The standard configuration includes a set of reports using XSL/XML or Excel. We
are happy to tailor additional reports using this technology or integrate standard
reporting tools on a need basis such as Crystal Reports or Business Objects.
You can also reach tender specifik reports from the Reporting tab within the tender
CTM_Tender_CA EN 6.9.4.doc
Page 121
The most commonly used report is the evaluation report
Click on Generate new as highlighted above
Once it has generated click on refresh icon
or F5 to refresh your page and
show the excel version of it. The top version is in wordformat.
The example below shows the weights assigned to the questions and the scores
assigned by the buyer.
CTM_Tender_CA EN 6.9.4.doc
Page 122
In addition to the Evaluation and scoring report you can generate a full Tender
Evaluation report.
This will provide a summary, the weighted score per question for each supplier and
any comments added by the buyer at time of scoring.
-
Go to ‘Tender Evaluation Report’ – View or Export data
View mode:
CTM_Tender_CA EN 6.9.4.doc
Page 123
Export data mode:
9.6
My tasks
From the home page a link is available to “My tasks”. This shows an overview of the
tasks that the logged in user is involved in.
CTM_Tender_CA EN 6.9.4.doc
Page 124
The user that is the owner of the contract can assign tasks to different users and
external persons. The tasks assigned to other users by the logged on user can be
viewed on the tab { Sent requests }. There, the owner of the task is shown together
with start and end dates. The external sent tasks appear at the senders list to set at
ready (this due to fact that external person has no access to system thus the task
could otherwise never be set as completed)
The user that has been assigned different tasks can review the list of tasks as well.
On the tab { Received requests } are the tasks that can be assigned to this user by
other contract owners.
When a task is set to complete by the assigned user, the task will be taken off the
Requests tab. It can then be found on the { Completed } tab instead.
CTM_Tender_CA EN 6.9.4.doc
Page 125
9.7
Other areas
This section describes the areas not covered in any section above
9.7.1
Simplified graphical user interface
Simplified graphical user interface is a setting that each user or company
administrator can set on his user profile.
The simplified user interface is used for more “beginners” of the system and those
users that only will be using basic functionality. Having the simplified graphical
interface enabled will allow users to enter directly into the My Tenders list and when
working with an Tender it will only show the check-list view with easy access to the
different parts.
9.7.2
Planned System (CTM) down time
To give end users a notification of coming CTM down times, there is a page
accessible from the main menu, which lists the planned CTM down times, see
image below.
As an additional warning when the downtime is closing there will be a warning text
displayed on the top of the most often accessed pages (see image below). The
pages with the additional warning: Home, My Tenders and Tender checklist.
CTM_Tender_CA EN 6.9.4.doc
Page 126
As a contracting authority, you will want to know if the end time you have set or are
setting on your tender is conflicting with a planned downtime - for that purpose there
is an additional warning in the MyTenders list next to the end time.
Warning in My Tenders list
Also, when setting the end times for your tenders you will be given a pop-up
warning if the times conflict.
9.7.3
Check in / check out functionality
The check in / check out functionality is a way of locking items within the system for
editing, for example when working with a qualification questionnaire a single
question can be locked (checked out). Other users will see the lock and get
warnings if they try to update the locked (checked out) question. Once the owner of
a question is completed he unlocks (checks in) the questions. The locking is not
explicit other users can still make changes.
Items within the supporting the check out / check in are:
Questions – Within Tender and templates
BoQ items – Within each Tender and within the ”Project”
Documents – Within any folder, ”Project”, Tender or company
NOTE, to have this functionality your company administrator have switch it on within
the company profile.
9.7.4
Opening and Tender Protocol (separate module)
Opening protocol is available on each step within a tender and the tender protocol is
available for the whole tender, regardless how many steps included.
The opening protocol has additional logo and address to the contracting authority.
The logo and address is taken from the company profile.
The protocol will be available for editing after opening of tender box or opening of
envelops and it will be lock for editing after you invite any supplier to the next step if
you have a multi-step tender, otherwise it will be lock after you award a supplier.
CTM_Tender_CA EN 6.9.4.doc
Page 127
Opening protocol
Tender protocol is available for the whole tender. It has a new section of linked
opening protocols. The protocol will be available for editing after the “intention of
award supplier”.
Tender protocol
CTM_Tender_CA EN 6.9.4.doc
Page 128
9.7.5
Contract number (separate module)
Contract number is a property on a contract, it is an editable field and is default set
to <contract reference> - <ctm internal contract id>. The purpose of the field is for
the contracting authority to have a field which can be used both as reference and
unique id at the same time.
Reference is defaulted to contract number for Amendment RFT contracts – if you
have the contract number functionality switched on.
When creating a contract for an Amendment RFT the reference field will be
defaulted with the contract number from the awarded supplier’s base contract (the
contract the amendment RFT was created from).
Below is a schematic image on how the contract numbers and references are prefilled
CTM_Tender_CA EN 6.9.4.doc
Page 129
All related contracts (contracts that are created on the same base RFT, including
amendment RFT contracts) are listed in the Main contract page for a supplier.
Ensuring the supplier finding of any related contracts
CTM_Tender_CA EN 6.9.4.doc
Page 130
9.7.6
IP check (separate module)
This exists if a company wants to limit the access to CTM to only be allowed from
specific IP addresses.
9.7.7
Printshops
A print shop is a third-party business to where you can send documents for printing,
for example large drawings. A print shop needs to have access to the system for
you to be able to use it, and your company administrator must have set it up for
usage within your company. If you are missing any print shop, contact your
company administrator. Any documents you may send for printing to a print shop
are to be charged to your company.
Setting up a print shop
When setting up a print shop to be used within a ”Project” or Tender, you allow
suppliers invited to participate in the Tenders to print free of charge any documents
you have assigned to the Tender. Any prints requested by the suppliers invited will
be charged to your company.
To set up a print shop for use within a ”Project”:
CTM_Tender_CA EN 6.9.4.doc
Page 131
1.
From the home page, click on the My Request for Tenders link. The My
Request for Tenders screen displays.
2.
From the My Request for Tenders screen click the Print shops link. The list of
available print shops within your company displays.
3.
Select the print shops you want to set up for free printing for the suppliers,
edit the tariff and service information if needed and click [Save].
4.
The selected print shop(s) are now available to use free of charge by the
suppliers to print any documents you may attach to the Tenders. All prints
ordered within your company can be viewed from the Printshops link from the
home page.
CTM_Tender_CA EN 6.9.4.doc
Page 132