1
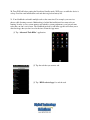
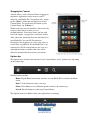
How To Set Up Android Tablet
Charge It Up
A fully charged battery will serve you well during your initial tablet setup. You will need a few
hours of charge or a regular power source to complete everything in one pass. Either plug in your
new tablet a few hours before you want to configure it, or make sure there's an outlet nearby to
keep the power going while you work.
Set Up Your Account
You need a Google account in order to set up the basic functions of an Android tablet. Once your
tablet is charged up and you've powered it on, you will be taken through the initial account setup
steps. While you may be prompted to add other accounts, go ahead and ignore this for now.
Get Connected
An internet connection is
critical for pretty much
every step in the setup
process. Unless you have
a built-in 3G connection
to a wireless carrier, you
will need to configure
your tablet's wifi. You can
set up your wifi in just
four steps.
1. Tap the clock in
the bottom right
corner of the
screen.
2. Underneath the
clock, select the sliders icon, then wifi.
3. In the wireless & networks section, make sure there is a check mark next to wifi
(enabling the antenna), and then select wifi settings.
4. Select your wireless network from the list provided, and enter your wireless password. If
your wireless is set to not broadcast its name, scroll down to the bottom of the list and
select "Add wifi network" to manually enter your information.
Set Up Your Email
The initial setup for your tablet also configures your first Gmail account. But what if you want to
add additional Gmail accounts to your tablet? No problem. After you've finished setting up your
wifi, select Settings > Accounts & sync. Tap Add Account in the top right corner, and follow
the provided instructions. Not a Gmail account? Select Corporate if you wish to configure a work
address that uses Microsoft Exchange, or choose Email to set up an account using POP3 or
IMAP.
Keep Your Tablet Yours
Security is critical for owners of any web-enabled device. Android uses a lock screen to secure
devices; when your device goes into standby or sleep mode and is brought back online, it will
display a screen requiring some kind of authentication before it lets you back in. You can secure
the lock screen in one of three ways: a pattern, a PIN, or a password.
After your email setup, select Settings > Location & security. Tap Configure lock screen, and
choose your preferred security method. From there, you will be prompted to either enter a PIN or
password, or to walk through the pattern setting process.
Get Your First Apps
Your Android tablet is nothing without the apps to run on it! The Android Market contains
thousands of apps, all ready to be installed. You can access the Market in either of two ways —
from your tablet by launching the Market app, or from your computer's browser. Because you've
set up your tablet with your Google account, you can easily direct the downloading of apps to the
right device in the browser version of the Market.
Add Some Media Content
One of the best parts of tablet ownership is being able to read ebooks, watch movies, and listen
to music on the go. The Android Market is currently working to expand its movie and ebook
offerings, and you have plenty of alternatives. The Kindle and Nook apps for Android lets you
access both Kindle and Nook books you've bought directly from your tablet.
While listening to music can be as simple as installing Pandora or Spotify, getting access to your
own music is just as easy. New cloud storage services like Amazon Cloud Drive and Google's
own Google Music (www.music.google.com) let you stream your own collection back to you
from the cloud. If you'd like to be able to transfer music from your computer to store locally on
your tablet, consider using doubleTwist (www.doubletwist.com) to sync your music collection to
your Android device. You can access media available in your Dropbox folders, or simply
connect your tablet to your computer via USB and drag and drop music files onto your tablet as
well.
Widgetize Home Screen
If the tablet is
your first Android
device, the concept
of widgets may be
a foreign one.
Widgets are apps
that provide
specific content on
your tablet's home
screen, such as a
weather widget
that tells you the
current weather.
Widgets tend to be
a bit larger in size
than app icons, as
they deliver
information directly on your home screen rather than standing in for something that needs to be
clicked. This is not usually a problem on an Android tablet, given the larger display size
compared to Android phones.
Add widgets by tapping the plus icon in the top right corner of the screen. If not already selected
by default, click Widgets on the screen and flip through the pre-installed options.
Some Extras
There are a few things you can pick up to stretch functionality and convenience. A screen
protector keeps your tablet's display from getting damaged by everyday wear and tear.
If your tablet has the ability to add external storage, consider purchasing a microSD card to
expand your tablet's storage space. Purchasing an additional storage card is significantly cheaper
than purchasing your tablet with the maximum amount of storage, and installing the memory
card is a breeze. Just pop the card into the designated slot and your tablet will detect the card as a
new storage device.
If you do a lot of text input, then a Bluetooth keyboard is a nice addition. Bluetooth headphones
are also available so you can listen to music privately and without any wire connections.
Obtaining an additional charger for road warriors is a good idea. Most tablets still charge via
proprietary connections on the tablet, so forgetting a cable at home when you're traveling can be
productivity suicide since it's not easy to borrow one from someone.
Tips and Tricks for Nextbook Next Android eReader
1. To turn on the device, press and hold the Power button on the unit until you see the
boot-up screen then release.
2. To turn off the device, press and hold the Power button until you see the option “Power Off”,
tap on “Power Off”and then tap on “OK”.
Tip: This device will sleep with the screen off if it stays inactive for a few seconds. You can
briefly press the Power button to turn on the screen and wake it up
3. Long-press page-forward (right edge) button to access Menu.
4. Long-press page-back (left edge) button to go Home from anywhere.
5. Press Menu from the Home screen then select “Add” to add widgets, folders, shortcuts,
change wallpaper, etc.
6. You can add a folder to the Home Screen by holding your finger on the screen and then
choose Folders > New Folder. You can drag shortcuts or widgets to the
folder.
7. To rename a folder, tap to open the folder, hold your finger on the title bar of
the opened folder until the Rename window pops up, input folder name.
8. To move a Home Screen item, hold your finger on it until it is highlighted, then
drag it to the desired location, and release it.
9. To remove a Home Screen item, hold your finger on it until it is highlighted, drag it
to the recycle bin and then release your finger.
10. To change the System Settings, from the Home Screen, tap on the Menu icon and then tap
on “Settings”. Choose a category: “Wireless & Networks”, “Sound & Display”, “Date &
Time”, etc.
11. The Next6 user manual and quick start guide are located in the reading app on the second
page of books.
12. The Adobe Digital Edition application allows you download e-books protected by DRM
to your NextBook.
A. Access the website
http://www.adobe.com/products/digitaleditions/,
and then install the Adobe Digital Editions
software following the instructions.
B. Authorize your computer with your Adobe ID
and Password.
C. Activate your NextBook. Connect your NextBook to computer with the USB cable and
start up the Adobe Digital Editions. Click “Authorize Device” to authorize your
NextBook
D. Download DRM-protected PDF files to your computer. Access an online bookstore and
search for e-books. Choose your favorite e-books and download them. If the e-book is
protected by DRM, you should be prompted by DRM license information. Click “Open”
to start downloading the DRM-protected e-book.
E. Click “Purchase”, and then you should see your downloaded e-book at the right panel of
the Adobe Digital Editions user interface.
F. Connect your NextBook to the computer with the USB cable, and the Adobe Digital
Editions should recognize your NextBook.
G. Click “Purchase”to see your downloaded e-book and then drag it to your NextBook.
Note: The Adobe ID can be used only for six times. It should expire after 6 tries of
authorizing device Later on, you need to delete the expired ID by pressing CTRL+SHIFT+D
on the computer keyboard or using the Erase Activation Record setting on the device and
then get a new one. The device remembers the ebooks downloaded with the latest Adobe ID
only, and will overwrite the eBooks downloaded with the previous Adobe ID.
13. Delete ebooks from the built-in reading app and other apps – From the home screen, open
the app drawer (middle grid icon at the bottom of the screen) and tap “Explorer”. Navigate to
SD card or internal memory to find the ebooks to delete, depending on where they are located.
Long-press them to bring up options to delete.
14. Adjust volume – Go to the home screen, tap Settings (the icon in the lower right that looks
like a wheel), then Sound and Display, then adjust media volume.
15. Installing apps – Install apps by tapping the App Store icon in the app drawer. Or, visit
Amazon.com to install the Amazon Appstore on the Nextbook. You can install everything from
games, calendars, other e-reading apps, media players, notepads, an app for library ebooks, etc.
16. Try different web browsers for a better browsing experience. Some suggestions, Dolphin HD
and Opera Mini, and Skyfire for watching web videos.
17. Uninstall apps – Go to Settings, Applications, Manage Applications, and then tap the app
for the option to uninstall.
18. Connect to a computer using the USB cable to add or delete files (ebooks, pictures, movies,
etc) on the internal memory and on a SD card. The files and folders you create and add remain
the same on the Nextbook and can be found by using the “Explorer” app.
19. Reset – Hold down the power button for 15 seconds or jab a paperclip into the small reset
hole located on the back of the device. This doesn’t erase personal information or the installed
apps, it just forces the device to power down.
20. Turn WiFi off before putting the Next6 into Standby mode. WiFi stays on while the device is
asleep. Good for email notifications and such but not good on battery life.
21. Your NextBook can handle multiple tasks at the same time. For example, you can view
photos while listening to music. Multitasking is helpful but inefficient if too many tasks are
running. In order to save system memory and enhance system performance, you can end some
tasks that you don’t use for now. The NextBook includes a task killer app that will allow you to
shut down apps that you don’t need at the time. From the App menu.
(1) Tap “Advanced Task Killer” application.
(2) Tap the task that you want to end.
(3) Tap “KILL selected apps” to end the task.
Tips for Kindle Fire Android Tablet Users
Status Bar
At the top of the screen, you’ll see indicators that inform you about the status of your Kindle
Fire.
Notifications: Notifications can come from the system, a game, an application such as e-mail, or
the music player.
Quick Settings: Tap to display settings for commonly performed tasks, including locking and
unlocking screen rotation, adjusting volume, setting display brightness, accessing Wi-Fi settings,
syncing, and controlling the playback of music. Tap More to access additional Kindle Fire
settings.
Wi-Fi indicator: The more bands that are filled in with white, the stronger the Wi-Fi
signal. An X next to the Wi-Fi icon indicates that you have a Wi-Fi connection but are not
connected to the Internet. This can occur if you are at a Wi-Fi hotspot, such as an airport or hotel.
Open your web browser to view access options that may be available.
Battery indicator: This icon shows how much your battery is charged. When fully charged, the
charging indicator light will turn green and the battery indicator will appear filled.
Search
Tap to activate the Search field. You can search your Content libraries or the web.
Content
Access the web or one of your Content libraries by tapping the corresponding name at the top of
the Home screen: Newsstand, Books, Music, Video, Docs, Apps, or Web.
Carousel
Recently accessed books, music, videos, newspapers, magazines, web pages, and apps are
automatically added to the Carousel. Swipe your finger to advance through the Carousel to view
items in chronological order, with the most recent appearing first. If you no longer want to show
an item in the carousel, press and hold on the item to display the contextual menu, then select
Remove from Carousel. Your content will not be deleted and it will reappear on the Carousel the
next time you access it.
Favorites
To add a book, magazine, newspaper, album, playlist, video, website, or app to Favorites, press
and hold on the item to display the contextual menu, then select Add to Favorites. Favorites will
still appear in the library for that content type. To remove an item from Favorites, press and hold
on the item to display the contextual menu, then select Remove from Favorites.
Power On/Off
To turn on your Kindle Fire, press and release the power button.
To put it in sleep mode, press and release the power button. To turn off your Kindle Fire, press
and hold the power button until a message displays asking if you want to shut it down.
If your device becomes unresponsive during use, you can shut it down by pressing and holding
the power button for 20 seconds. You can then press the power button to restart it.
Shopping for Content
Amazon offers a wide selection of books, newspapers,
magazines, applications, music, movies, and TV
shows for your Kindle Fire. To purchase titles, simply
tap the “Store >” link in the top right corner of any
Content library. To exit the store and return to your
Content library, tap “Library >.”
Within each store you can search for a title, browse by
category, check out best sellers, or view
recommendations. You can try before you buy with
free book samples, song previews, and movie trailers.
After your order, Amazon delivers the title directly to
your Kindle Fire via your Wi-Fi connection.
Newspapers and magazines are sent to your device as
soon as they are published. If your Kindle Fire is not
connected to a Wi-Fi network when a new issue of a
subscription becomes available, that issue will be
delivered automatically the next time you connect.
Options bar
The Options bar is located at the bottom of every Content library screen. Options vary depending
on the content type.
Standard options include:
Home: Tap the Home button from anywhere on your Kindle Fire to return to the Home
screen.
Back: Use this button to retrace your steps.
Menu: Select Menu to view additional options related to the content type.
Search: Tap this button to search your Content library.
The Options bar may be hidden when some applications are running.
It can be expanded by tapping the arrow at the bottom of the screen or by swiping upwards from
the bottom of the device.
Content libraries
Newsstand
You can view your magazines and newspapers by tapping Newsstand on the Home screen. To
switch between grid and list views of your content, tap the Menu icon in the Options bar.
Back issues are grouped to keep your Newsstand organized. Note that for most periodicals,
Kindle Fire automatically deletes issues that are more than seven issues old to free up space for
new content. To keep an issue that has been downloaded to your device, press and hold on the
item to display the contextual menu and select Keep. If you add any issue to your Favorites, it
will also be kept on your Kindle Fire until you delete it.
Your Kindle Fire displays magazines in several formats. Magazines and newspapers that are
purchased from the Newsstand store will be stored in your Newsstand library. Some magazines
and newspapers are available as interactive apps. You can purchase these interactive periodicals
from the Appstore and view them in your Apps library.
Magazines
Most magazines on Kindle Fire include two views for reading.
•
Page view: Your magazines look just like the pages of the printed edition of the
magazine.
•
Text view: You can read text of the article easily without the custom formatting of the
printed edition.
Using Page view. To turn pages of a magazine in Page view, swipe your fingers or tap the right
side of the screen to go the next page. To go to the previous page, tap the left side of the screen.
To navigate through the magazine, tap the center of the screen and use thumbnail images in
lower half of the screen. To view a page, tap the thumbnail of the page you want to see, then tap
the center of the screen to hide the thumbnails.
Kindle Fire also provides a quick way to preview all the articles in a magazine. To access this
list, tap the center of the screen to bring up the Options bar at the bottom of the screen, then tap
the Contents icon.
Page view is not available for all magazines. Some magazine publishers choose to make their
content available only in Text view. Magazines that support Page view are marked with
“Includes Page View” in the Newsstand store, and will open in that view automatically. You can
switch to Text View by tapping the Text view button at the top right of the screen.
Using Text view. To read an article in Text view, simply tap on the Text view button on the top
right screen area of the magazine. Note that the Text view button is only available on pages with
articles, not advertisements.
Kindle Fire provides a quick way to adjust the appearance of Text view by changing the font
style, typeface, line spacing, margins, and color mode. To access these settings, tap the middle of
the screen to bring up the Options bar, then tap the Text icon Aa.
To go to the next page of an article, tap the right side of the screen. To go to the previous page,
tap the left side. To determine your progress within an article, tap the middle of the screen. The
Progress bar appears and indicates which page of the article you’re on. To go to the next article,
tap the N.
To preview all the articles in a magazine, tap the Contents icon in the Options bar.
Newspapers
You can view your newspapers by tapping Newsstand on the Home screen. To open a
newspaper, tap on its cover. When you first open a newspaper, it displays a list of all the articles
in it. You can swipe up and down to move through the article list, then tap on the article you
want to read.
To search inside the issue, tap on the search icon in the Options bar, type in the text to search,
and tap Go.
Books
You can view your books by tapping Books on the Home screen. Tap a book on the shelf to read
it. To go to the next page in a book, tap the right side of the screen. To go to the previous page,
tap the left side of the screen.
To determine your progress within a book, tap the middle of the screen. A progress bar indicates
the location and what percentage of the book you have read. To navigate a book, tap the Menu
icon on the Options bar to go to the cover, Table of Contents, beginning, or a specific location, or
to sync to the furthest page.
To add a note, press and hold on a word, or press and drag to select multiple words. When the
contextual menu appears, tap Note and use the onscreen keyboard to type your note. To highlight
a passage, press and hold until the magnifying box appears, then drag your finger to the last word
you want to highlight and release. When the contextual menu appears, tap Highlight. Your
Kindle Fire saves your place in whatever content you’re reading, or you can manually add a
bookmark. To add a bookmark, tap the screen, then tap the bookmark icon at the top right of the
screen. To delete a bookmark, tap it. To view your notes, highlights, and bookmarks, tap the
screen to bring up the Options bar, then tap the Menu icon.
Music
You can view your music library by tapping Music on the Home screen. Once you’ve chosen the
music you want to listen to, tap the name of the song to play it. You can create a playlist from the
Playlists tab.
To play a group of songs—such as an album, all songs by an artist, or a playlist—tap any song in
the group. The entire group will begin playing from the song name you selected.
While listening to music, view the music you have queued to play by tapping the music player
control at the bottom of the Music library or store, then tapping the list view icon in the upper
right of the Now Playing screen. You can adjust the volume by using the music player controls
or by tapping the Quick Settings icon in the Status bar.
You can add music to your Music library in three ways:
• Purchase it from the Music store. Tap “Store >” in the top right corner of the Music
library screen to browse the Amazon Music store. When you purchase music, you will be
asked whether to store your music in the cloud or download it to your device. If you
download your purchase, it will not be stored in the cloud. If you choose to store it in the
cloud, you can later download it from there to your device.
• Upload it from the music collection on your computer (such as iTunes) to your Amazon
Cloud Drive via Amazon’s Cloud Player website (www.amazon.com/cloudplayer). The
Cloud Player website supports uploading from both Mac OS and Windows computers.
• Transfer it directly from your computer to your Kindle Fire via a micro-USB cable. Note
that only MP3 (.mp3) and AAC (.m4a) files are supported in your Music library.
You can make music stored in the cloud available offline so you can play it when you don’t have
connectivity. Simply tap Cloud in your Music library, then press and hold any playlist, artist,
album, or song and select the “Download” option. Your downloaded music will be available in
the Device tab of your Music library for playback offline.
Video
You can watch videos by tapping Video on the Home screen. The Video store on your Kindle
Fire provides access to more than 100,000 movies and TV shows. Amazon Prime members get
streaming access to over 10,000 movies and TV shows at no additional cost (restrictions apply).
To rent or purchase a movie or TV show, from within the Video store either browse or enter a
title in the search bar. Upon purchase, tap Watch Now for instant playback, or tap Download to
save the video to your device to watch later. Instant playback and downloading require a Wi-Fi
connection, while downloaded videos can be watched offline. To watch a movie or TV show
you’ve already purchased or rented, tap Library and select a title.
During video playback, you can tap the screen to access movie controls such as volume and
pause. Amazon’s Whispersync technology keeps track of your location in the video, so you can
resume watching where you left off on your Kindle Fire, PC, Mac, or any of hundreds of
compatible TVs, blueray players, and other devices.
Docs
You can view your personal documents by tapping Docs on the Home screen. You and your
approved contacts can send documents to your Kindle Fire by using your Send-to-Kindle e-mail
address, which can be found in your Docs library under the sort options. To edit the address or
add addresses to your approved list of senders, go to www.amazon.com/myk. The Send-toKindle e-mail address is only used for sending documents to your Kindle. To set up your
personal e-mail, go to the Apps library and tap the E-mail icon.
To access personal documents that you transfer to your Kindle Fire, tap Docs on the Home
screen. You can send Microsoft Word (DOC, DOCX), PDF, HTML, TXT, RTF, JPEG, GIF,
PNG, BMP, PRC, and MOBI files to your Kindle and read them in Kindle format. You can also
read documents in PDF format natively.
Apps
You can view your applications by tapping Apps on the Home screen. Apps can be purchased by
tapping “Store >” in the top right corner of the Apps library screen to go to the Amazon
Appstore. Once you’ve chosen an app, tap the orange price button and confirm your purchase by
pressing the green Get/Buy App button. The app will be downloaded, installed, and placed in
your Apps library.
To launch an application, tap the app’s icon in the Apps library, Carousel, or Favorites, or tap the
Open button on a product page in the Store. Tap the Menu icon on the Options bar to display the
app-specific menu. Tap the display to hide it when you’re done.
To add an app to Favorites, press and hold the app’s icon in the Apps library and select Add to
Favorites. To see a list of apps currently installed on your device, tap Device at the top of the
Apps library.
If you want to uninstall an app, press and hold its icon, select Remove from Device, and follow
the directions on the screen. If you want to install it again at a later time, you can find it in your
Apps library under Cloud.
Setting up E-mail
The Kindle Fire contains an e-mail app that allows you to view multiple e-mail accounts from
one unified Inbox or view one account at a time. To launch the app, tap the E-mail icon in the
Apps library. Kindle Fire e-mail supports Google Gmail, Yahoo! Mail, Hotmail, and AOL along
with most industry-standard IMAP and POP e-mail systems. Simply tap the E-mail icon in the
Apps library to launch the setup wizard and configure your account.
With the provided Quickoffice® document viewer, you can view Word documents, Excel
spreadsheets, and PowerPoint presentations that are sent to you as attachments. Tap the Open
button next to the attachment you want to view. If the attached file does not automatically open,
then select Quickoffice.
Managing your content
The Manage Your Kindle page on Amazon.com (accessible from www.amazon.com/myk) offers
a handy way to manage your Kindle devices, books and periodical purchases and more.
Transferring content to your Kindle Fire
You can transfer a variety of content types to your Kindle Fire via its micro-USB connector,
including music, videos, photos, and documents. Please note that personal content transferred to
your Kindle Fire is only stored on your device and not archived in the cloud.
To transfer content from your computer to your Kindle Fire, do the following:
1. Connect your Kindle Fire to your computer with a micro-USB cable.
2. Slide the arrow from right to left to unlock your Kindle.
3. Open the Kindle Fire drive on your computer. Your Kindle Fire will appear as an external
storage drive or volume on the computer’s desktop. Note that Kindle Fire is not usable as
a device while connected to your computer as a storage drive or volume.
4. Drag and drop your content into the applicable content folder, such as Music or Pictures.
5. When you are done transferring files, press the Disconnect button at the bottom of the
Kindle Fire screen and eject it from your computer, then unplug the USB cable.
Removing content from your Kindle Fire
To remove content, press and hold on an item to display the contextual menu, then select
Remove from Device. Content purchased from Amazon will remain stored in the Amazon
Cloud in case you want to download it again at a later date.
Install Dropbox on Your Kindle Fire
Dropbox isn’t available in the Amazon App store. You’ll need to make a couple of adjustments
to your Kindle Fire to install it. You don’t need to root your device to install it.
First tap Settings (gear icon) at the top of your Fire then select More.
Next, select Device from the Settings menu.
Set Allow Installation of Applications to On.
Now, launch the web browser and type: https://www.dropbox.com/android into the address
bar. Then tap Download App.
Give a few seconds to download then tap the notifications next to your Kindle Fire’s name. Then
tap the Dropbox.apk.
You’ll see a description of the Dropbox app.
At the bottom of the description screen tap Install.
After Dropbox installs, tap Open at the bottom of the screen.
Tap through the Dropbox tour screens, then log into your Dropbox account.
Now you have access to all of the files stored in
your Dropbox.
You can upload, share and manage files in your Dropbox account just like you can from any
other device or computer you have Dropbox installed.
The Dropbox icon will show up when you go to the Apps section on your Kindle Fire. If you
want quick and easy access to it, pin it to Favorites.