1
Restrictions
END-
USER
TERMS
The data ( Data)
is provided
for your personal,
internal
use only and
not for resale.
It is protected
by copyright,
and is subject
to the
following
terms and conditions
which are agreed to by you, on the one
hand,
and
Navigation
Technologies
Corporation
and its licensors
(including
their licensors and suppliers)
on the other hand.
The
Data
perm ission
Queen
for
from
in Right
areas
of
Canadian
of Canada,'
TERMS
Canada
includes
authorities,
Queen
AND
information
including:
s Printer
'
Her
taken
with
Majesty
The
for Ontario.
CONDITIONS
Personal
Use Only
You agree to use this Data for the sOlely personal,
non-commercial
purposes for which you were licensed,
and not for service bureau, timesharing
or other sim ilar purposes.
Accordingly,
but subject
to the
restrictions
set forth in the following
paragraphs,
you may copy this
Data only as necessary
for your personal
use to (i) view it, and (ii) save
it, provided
that you do not remove
any copyright
notices that app~ar
and do not modify
the Data in any way.
You agree not to otherwIse
reproduce,
copy, modify,
decompile,
disassemble
or reverse
engineer
any portion
of this Data, and may not transfer
or distribute
it in any
form, for any purpose,
except to the extent
permitted
by mandatory
laws.
Except where you have been specifically
licensed to do so by Navigation
Technologies
Corporation
and without
limiting
the preceding
paragraph,
you
may
not (a) use this Data
with
any products,
systems,
or
applications
installed
or otherwise
connected
to or in communication
with vehicles
capable
of vehicle
navigation,
positioning,
dispatch,
real
time route guidance,
fleet management
or similar applications;
or (b)
with or in communication
with any positioning
devices or any mobile or
wireless-connected
electronic
or computer
devices,
including
without
limitation
cellular
phones,
palmtop
and handheld
computers,
pagers,
and personal
digital assistants
or PDAs.
No Warranty
This Data is provided
to you
as is, and you agree to use it at your own
risk.
Navigation
Technologies
Corporation
and its licensors
(and their
licensors
and suppliers)
make
no guarantees,
representations
or
warranties
of any kind, express or implied,
arising by law or otherwise,
including
but not limited
to, content,
quality,
accuracy,
completeness,
effectiveness,
reliability,
fitness for a particular
purpose,
usefulness,
use
or results to be obtained
from this Data, or that the Data or server will
be uninterrupted
or error-free.
Disclaim
er of Warranty
NAVIGATION
TECHNOLOGIES
CORPORATION
AND
ITS
LICENSORS
(INCLUDING
THEIR
LICENSORS
AND SUPPLIERS)
DISCLAIM
ANY
WARRANTIES,
EXPRESS OR IMPLIED,
OF QUALITY,
PERFORMANCE,
MERCHANTABILITY,
FITNESS fOR A PARTICULAR
PURPOSE OR NONINFRINGEMENT.
Some States, Territories
and Countries
do not allow
certain warranty
exclusions,
not apply to you.
so to that
extent
the above
exclusion
may
Disclaimer of Liability
Export Control
NAVIGATION TECHNOLOGIES CORPORATION AND ITS LICENSORS You agree not to export from anywhere any part of the Data provic"(INCLUDING THEIR LICENSORS AND SUPPLIERS) SHALL NOT BE to you or any direct product thereof except in compliance with, and
LIABLE TO YOU IN RESPECT OF ANY CLAIM, DEMAND OR ACTION, all licenses and approvals required under, applicable export laws,
IRRESPECTIVE OFTHE NATURE OFTHE CAUSE OFTHE CLAIM, DEMAND and regulations.
OR ACTION ALLEGING ANY LOSS, INJURY OR DAMAGES, DIRECT OR
INDIRECT, WHICH MAY RESULT FROM THE USE OR POSSESSION OF Indemnity
THE INFORMATION; OR FOR ANY LOSS OF PROFIT, REVENUE, You agree to indemnify, defend and hold Navigation Technolog's
CONTRACTS OR SAVINGS, OR ANY OTHER DIRECT, INDIRECT,
Corporation and its licensors (including their respective licens '5
INCIDENTAL, SPECIAL OR CONSEQUENTIAL DAMAGES ARISING OUT suppliers,
assignees, subsidiaries,
affiliated
companies,
and '-~
OF YOUR USE OF OR INABILITY TO USE THIS INFORMATION, ANY respective officers, directors, employees, shareholders, agents a :
DEFECT IN THE INFORMATION, OR THE BREACH OF THESE TERMS OR representatives of each of them) free and harmless from and agai ..CONDmONS, WHETHER IN AN ACTION IN CONTRACT OR TORT OR any liability, loss, injury (including injuries resulting in death), dema ,
BASED ON A WARRANTY, EVEN IF NAVIGATION TECHNOLOGIES action, cost, expense, or claim of any kind, including but not limited 'C
CORPORATION OR ITS LICENSORS HAVE BEEN ADVISED OF THE attorney's fees, arising out of or in connection with any use 0POSSIBILITY OF SUCH DAMAGES.
Some States, Territories and possession by you of this Data.
Countries
do not allow certain liability
exclusions
or damages
limitations, so to that extent the above may not apply to you.
Entire Agreement
These terms and conditions constitute the entire agreement betwe
Disclaimer of Endorsement
Navigation Technologies Corporation (and its licensors, including the'Reference to any products, services, processes, hypertext links to third
licensors and suppliers) and you pertaining to the subject matter hereof,
parties or other Data by trade name, trademark, manufacturer, supplier
and supersedes in their entirety any and all written or oral agreements
or otherwise does not necessarily constitute or imply its endorsement,
previously existing between us with respect to such subject matter.
sponsorship or recommendation by Navigation Technologies Corporation
or its licensors.
Product and service information
are the sole Governing Law
responsibility of each individual vendor. The Navigation Technologies
The above terms and conditions shall be governed by the laws of the
Illinois, without giving effect to (i) its conflict of laws provisions, or (ii)
name and logo, the NAVTECH ~ and NAVTECH ON BOARD ~ trademarks
the United Nations Convention for Contracts for the International Sale
and logos, and other trademarks and trade names owned by Navigation
of Goods, which is explicitly excluded.
You agree to submit to the
Technologies Corporation may not be used in any commercial manner
jurisdiction of Illinois for any and all disputes, claims and actions arising
without the prior written consent of Navigation Technologies.
from or in connection with the Data provided to you hereunder.
2
',ed States government, (i) for
t of Defense, the NAVTEC~
and; (ii) for civilian agency acquisitions, the NAVTECH~Data is licensed
in accordance with the rights set forth at FAR 52.227-14(g)(1),
RIGHTS
IN DATA-GENERAL (Protection of limited rights data and computer software). In the event that the Contracting Officer requires the delivery
of limited rights NAVTECH~ Data that has been withheld or would otherwise be withhold able in accordance with FAR 52.227-14(g)(1),
the
NAVTECH~ Data is licensed with "limited Rights" as set forth in the following "Limited Rights Notice" at FAR 52.227-14(g)(2)
(Alternate II),
which shall be affixed to the NAVTECH© Data and the NAVTECH~ Data
shall be treated in accordance with such Notice (which shall be marked
on any reproduction of these data, in whole or in part):
LIMITED RIGHTS NOTICE (JUN 1987)
Navigation Tech222
Mer-
These data may be reproduced and used by the Government with the
express limitation that they will not, without written permission of the
Contractor, be used for purposes of manufacture nor disclosed outside the Government;
except that the Government may disclose
these data outside the Government for the following purposes, if any,
provided that the Government makes such disclosure subject to prohibition against further use and disclosure:
There are no additional
purposes permitting disclosure of such Data.
The manufacturer/supplier
of the Data is Navigation Technologies
Corporation, 222 Merchandise Mart Plaza, Suite 900, Chicago, Illinois
60654.
3
If the Contracting Officer refuses to use either of the licenses provided
in (i) or (ii), herein, the Contracting Officer must notify Navigation
Technologies Corporation prior to seeking additional or alternative
rights in the NAVTECH<!:lData.
Part Number: 00000:0000
2002 Navigation TechnologiesCorporation. All rights reserved.
NAVTECH<!:l
is a registered trademark of NavigationTechnologiesCorporation
4
1
2
3
4
5
6
General Operation•...•.•..•...7
Radio Operation ..•..••..••.•.15
CDOperation ........•....•.••.37
Optional CDCOperation .•47
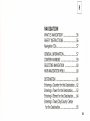
Navigation •••.••••••••••••••••••
53
Clock Operation .•••.•••.•••••
91
8
Service Menu ..•..•••••••••••
103
7
User Menu
97
5
GENERAL
OPERATION
Buttons and Knobs
Interpreting the Display
Turning the Radio On and Off
Adjusting Volume
Adjusting Sound Quality
8
10
11
12
12
7
General Operation
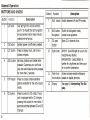
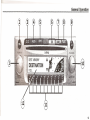
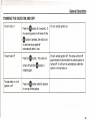
BUTTONS AN 0 KNOBS
Multi-funcRAD
button
Switch
between
AM
and
FM
modes.
Function
Select
letters
in toprompts.
NAV
button
Access
context-sensitive
features,
based
on
AM/FM:
Switch
to
Navigation
mode;
CD
Display
eject
See
Eject
page
CD
indisplay
6,
Description
internal
Interpreting
drive.
The DisRight
Dial
knob
left/right
to
tune
the
cancel
route
guidance.
Button
speller
for city/street
and then
push NAVIGATION:
in to confirm
tion
buttons
button
next/previous
station. destination.
Navigation
7 button
AUD
CD
button
access
context-sensitive
Left
Function
knob
ON
OPT
button
11
Set
Press
bass,
to
switch
balance
to
CD
and
mode.
treble
If
when
your
12
C/C
button
9
10
display
clock,
set
time
or
Description
p~y.
I
Dial
left/right
for
volume
control;
System
power
on/off
when
pressed.
Button
I
for
more
than
2features
seconds.
seconds
switches
between
CD
and
CD
mode.
announcement
mated
time-of-arrival.
and
to
hear
the
estiChanger.
pressed.
Customize
your
unit's
disoptions
available
for
the
active
audio
8compass.
push
inequipped
to
repeat
the
navigation
play
and
audio
when
pressed
access
unit
pressing
is
this
button
with
for
alast
CD
more
changer,
than
2
I
II
I
I
8
General Operation
9
General Operation
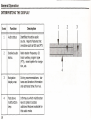
INTERPRETING
THE DISPLAY
tance
and
disdirection
information
Audio
Text
Detailed
Function
above
statusIdentifies
audio
additional
the
features
active
available
audio
Reports
features
that
track
keys
number,
press
to
program
access
type
Navigation
smart
speller
Driving
forto
navigarecommendations:
Description
Radio
Informs
station
you
which
frequency,
multifunction
CD for
Area
and
estimated
time
of arrival.
ivesource.
this
such
audio
as RDS
mode.
and PTY.
etc.
(PTY),
1
2
4
10
3
General Operation
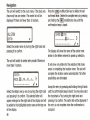
TURNING TH E RADIO ON AND OFF
turn vehicle
ignition
off. off is turned back on.
Or turn vehicleOrignition
on. radio
ignition
The
will turned
turn
It will
on automatically
theoff.
To turn radio
on turn The
radio will If when
of
turning
off
the
ignition
button
for
2 seconds.
within
5 seconds
Press
the.
button.
ds after
the vehicle ignition
is
automatically
after 1 hour.
thenisshuts
itselfthe
off radio turns
he
•on and
button
pressed,
11
General Operation
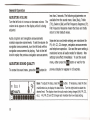
ADJUSTING
VOLUME
Turn the left knob to increase or decrease volume. The
volume level appears on the display while it is being
adjusted.
Audio programs and navigation announcements
maintain separate volume levels. To set the volume for
navigation announcements, turn the left knob while a
navigation announcement is playing. Push in the left
knob to replay the previous navigation announcement.
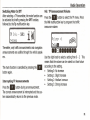
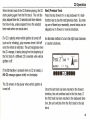
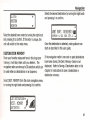
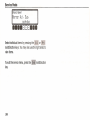
ADJUSTING
SOUND QUALITY
To access the sound menu, press the
E
button for
less than 2 seconds. The following adjustments are
available from the sound menu: Bass (Bas), Treble
(Trb), Balance (Bal) and Flat Frequency Response (Fit).
Flat Frequency Response means that bass and treble
return to their default values.
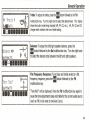
Separate bass and treble settings are maintained for
FM, AM, CD, CD changer, navigation announcements
and telephone operation.
One and the same setting is
maintained across all audio modes for balance. New
settings take effect immediately. To exit the sound
menu, either press the
E
button or wait for the
previous display to reappear in 10 seconds.
E
Bass: To adjust the bass, press the
button.
If necessary, press the Bas
multifunction key to display the bass menu. Turn the right knob to select the
desired level. The display shows the audio mode being changed (AM, FM, CD,
etc.).
AM, FM, CD and CD changer each maintain their own bass setting.
12
•
Ft'l
T r··E'b 1 E' 0
~a=-BalFlt
• G ••••••••
E
~~:
General Operation
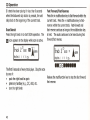
Treble: To adjust the treble, press the
button followed by the Trb
multifunction key. Turn the right knob to select the desired level. The display
shows the audio mode being changed (AM, FM, CD, etc.). AM, FM, CD and CD
changer each maintain their own treble setting .
•••••••
~
~".
E
Balance: To adjust the left/right speaker balance, press the
button followed by the Bal multifunction key. Turn the right knob
to select the desired ratio between the left and right speakers .
E
·IUIIIIIIIIIIIIIIII
"Tone flat?" will be displayed. Press the Fit multifunction key again to
II'U'III·IIIIIIIIII
1;3t··~·
Flat
bass and treble levels to a flat
multifunction
frequency key.
response, press
theFrequency
button Response:
followed byTo
thesetFit
(such as
cause
the FM)
tonetoadjustments
be reset to mid-level
bass and treble
(zero).for the current audio source
f
13
RADIO OPERATION
Radio Operation
Switching to Radio
Selecting the FM Band..............................
The FM Display
17
17
17
17
Channel Selection for FM Radio
Seek....................................................
Scan
Manual FM Tuning
Storing an FM Station
:
Recalling an FM station
18
18
18
19
19
19
OPT BUTTON DURING FM
Choose Display
Display Clock
Display Frequency
20
20
21
21
15
Man ual Tun ing
RDS Mod e
Regional Links On/Off
Program Types
To select a program type
Switch RDS Text On/Off
Set Up Traffic Program
Automatic Tracking
Direct Prog ramming
Activating/Quitting
the TP Menu
Switch Traffic Program On/Off
Setting Automatic TP Tracking
Selecting/Deselecting
Direct Programming
Deleting Direct Programming
Deactivating the TP
Switching Mute On/Off
Interrupting TP Announcements
TP Announcement Volume
Selecting the AM Band
The AM Display
16
22
22
24
24
25
26
27
27
27
28
28
29
29
30
30
31
31
31
32
33
Channel Selection for AM Radio
See k
33
33
S ca n
33
Stori ng an AM Station
Recalling an AM station
34
34
OPT BUTTON DURING AM
AM Autostore
Manual Tuning
35
35
36
Radio Operation
RADIO OPERATION
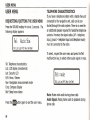
SELECTING THE FM BAND
The navigation radio processes these signals:
FM 87.9 MHz to 107.9 MHz
AM 530 KHz to 1700 KHz
RDS
While listening to any radio station, press the
but_
ton again to switch between the AM and FM bands.
Be
•
•
•
•
E
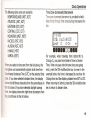
THE FM DISPLAY
sure to read about:
channel selection methods
all of the features available when listening to FM
differences in radio behavior when RDS is active
compared to when RDS is not active
options available via the OPT hardkey when listening to FM radio
SWITCHING
E
TO RADIO
Press the
button at any time to listen to the radio.
The radio tunes to the last AM/FM band and station
played. The display shows the station frequency, band
and time-of-day.
1.
2.
3.
4.
12 FM preset stations
PS name ("Program Service name","call letters"), if
available, or station frequency;
band is FM
RDS appears while FM RDS is active. PlY appears if
program type is active.
17
Radio Operation
5.
6.
7.
8.
9.
stereo indicator appears while radio is receiving
stereo signals
compass appears when navigation is not active;
while navigation is active, turn-by-turn
driving recommendations appear here
TP indicator appears if the RDS transmitter is
equipped with a traffic program. An inverted
icon appears on the display while the traffic program is active.
press the multifunction key below this symbol to
access FM preset stations 7 through 12.
TUNE appears here while manual tuning is active.
Program type appears here if PTY is active. Otherwise, time of day is displayed.
m
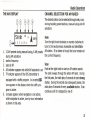
CHANNEL SELECTION
FOR FM RADIO
Methods to select FM radio stations are seek, scan,
storing/recalling
preset stations and manual tuning.
Seek
Turn the right knob clockwise or counter-clockwise to
tune to the next/previous receivable and identifiable
FM station. If no FM station is found, the tuner remains
at the current frequency.
Scan
Push in the right knob to start an FM station search.
The radio sweeps through the entire FM band. During
the first pass, the radio plays 5 seconds of each strong
station. For second and subsequent passes, the radio
plays 5 seconds of every available station. The scan
icon ~
flashes while the radio scans.
Scan continues until it is stopped by one of:
•
right knob is pushed in again
•
right knob is turned clockwise or counter-clockwise
18
•
•
•
Radio Operation
any preset button is pressed
ClK, AUD, OPT, CD, RAD,NAV or any multifunction key is pressed
vehicle ignition is turned off.
7 through 12 until you hear the confirmation beep.
Press the -> multifunction key to access multifunction
keys 7 through 12.
Volume adjustments do not stop the scan. When RDS
is active, scan stops only at RDS stations.
When PTY is active, scan stops only at programs of the
selected program type (for example, R&B, Classical).
Manual FM Tuning
Refer to page 22 of this user manual for instructions
turn on/off FM manual tuning.
to
When RDS is active, manual tuning only stops at RDS
stations.
Recalling an FM station
Press one of the multifunction keys r.:JiI through
.~, or
through
for a brief moment. The
radio tunes to the station associated with the multifunction key. The following is displayed:
•
Program Service name (if available) or station frequency
•
PTY "program type" appears in the display if it is
available.
Storing an FM Station
Up to 12 stations can be stored. To store the active FM
station, press one of multifunction keys 1 through 6 or
19
Radio Operation
If the active station is assigned to a multifunction key,
the number above the multifunction key is inverted as
ami
shown by multifunction
ami + Tun: turn
ami + Rds: turn
ami + Txt: turn
key 2 in the diagram below.
mil + Tp:
OPT BUTTON DURING FM
mil
While listening to an FM station, press the
button
immediately followed by a multifunction key to access
the following additional features.
Ln·:=!'-'=
~'~
~
••..-.11".
c'". T.
T"~=Txt
GJ •••••••••
20
+ Dis: choose which appears in the display:
clock, frequency or program type
~J'I'
W
]
on/off manual FM tuning
on/off RDS
on/off RDS text display
access Traffic Program set-up
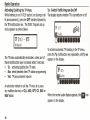
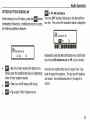
ami + Dis: Choose Display
While listening to an FM station, press the OPT hardkey
followed by the Dis multifunction key. Repeatedly
press the Dis multifunction key until your choice of
PTY, frequency or clock appears in the display.
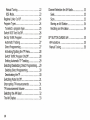
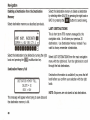
Radio Operation
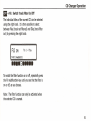
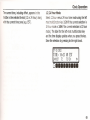
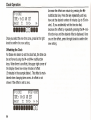
Display Clock
Display Frequency
While listening to FM radio, press the OPT button.
Then press the Dis multifunction key until
Disp. Frequency appears in the display.
The radio waits a few seconds and then the display
shows the current FM station and local time. Time is
3:26 in the example shown below.
The radio waits a few seconds and then the display
shows the FM station frequency. The frequency is 97.9
in the display shown below.
HjR
1 2 3
STEREO
97.9
TP
4 5 :5 -)
21
mil + RDS:
The radio waits a few seconds and then the TUNE icon
RDS Mode
The navigation radio receives RDS signals in the FM
band. RDS is a technology that some radio stations
use to broadcast inaudible information for the radio to
evaluate. It is important for you to be aware of whether
the radio is in RDS mode because this will affect which
radio stations are available to you and the methods
available to select the radio stations. Access to PTY
(program type selection) and Reg (regional links) is
only available when RDS is on.
appears in the display.
While listening to FM radio, press the OPT hard key. If
RDS is not active, the following display appears:
Turn the right knob clockwise or counter-clockwise to
tune up/down in the FM waveband in steps of 200 kHz.
Manual tuning is disabled after 20 seconds with no
turns to the right knob, and TUN disappears from the
display. When RDS is active, manual tuning stops only
at RDS stations. When PTY is active, manual tuning
only stops at stations with the selected PTY.
22
If RDS is active, the following display appears:
Radio Operation
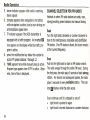
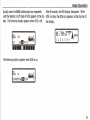
Quickly press the RDS multifunction key repeatedly
until the desired on/off state of RDS appears in the display. The following display appears when RDS is off.
After 8 seconds, the RDS display disappears. When
RDS is active, the RDS icon appears on the top line of
the display.
Ot
_.,RPSSTEREO
.J..§.
s i-H
TP .•.&.
1. 2 7
3 i i i .,)
5• 6 -)
.£..1::.
=
r';JRTH
<+
The following display appears when RDS is on.
23
Radio Operation
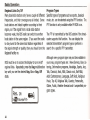
Regional Links On/Off
Program Types
Many local radio stations only have a couple of different
frequencies, and their coverage area is limited. Some
local stations are linked together according to their
region, so if the signal from a local radio station
becomes weak, the RDS radio can switch to another
local station in the same region. If you want the radio
to stay tuned to the same local station regardless of
the signal strength or quality, then you should turn the
Regional facility on.
Specific types of programs such as sports, classical
music, etc. can be selected using the PTY function. The
PTY function is only available while FM RDS is on.
RDS must be on to access the display to turn on/off
regional links. Repeatedly press the Reg multifunction
key until you see the desired Reg. On or Reg. Off
state.
24
The PTY is transmitted by the RDS station if the broadcaster supports this function. You can display the
selected transmitter's program type or perform a
search for a specific PTY transmitter.
Although every program type may not be available in
your area, program types are: News Service, Easy Listening, Information programs, Nostalgia, Sports, Jazz,
Talk, Classical, Rock, R&B, Classic rock, Soft R&B,
Adult Contemporary, Language, Soft Rock, Religious
Music, Top 40, Religious Talk, Country, Personality,
Oldies, Public, Weather forecast and 4 unspecified program types.
Radio Operation
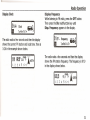
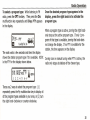
To select a program type: While listening to FM
radio, press the OPT hardkey. Then press the Dis
multifunction key repeatedly until Disp. PTY appears
Once the desired program type appears in the
display, press the right knob in to activate the
program type.
in the display.
I~:::
_.i.fi==f-'·.
PTY
TtnRdsTxt. Tp
~,i'
",]
~
The radio waits a few seconds and then the display
shows the station program type if it is available. ROCK
is the PTY for the display shown below.
When a program type is active, turning the right knob
only stops at the active program type. If only 1 program of that type is available, turning the knob does
not change the display. If no PTY is available for the
station, the time appears on the display.
During scan or manual tuning when PTY is active, the
radio only stops at stations of the chosen type.
There are 2 ways to select the program type: (1)
repeatedly press the Pty multifunction key to display all
of the program types available in your area, or (2) turn
the right knob clockwise or counter-clockwise.
25
Radio Operation
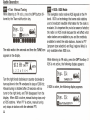
Switch RDS Text On/Off
Broadcasters can transmit short messages to receivers
using RDS. For example, the name of the current program the title of the song or a phone-in number.
You must be listening to an FM station to activate RDS
text. Then press the OPT button followed by the Txt
multifunction key.
..'
[~i:=r::·. i--'l!
~-.!"'.
Rds
Radio text cannot be displayed unless the selected station transmits radio text. If the station does not transmit radio text, the display shows "Waiting for
E
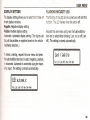
button to stop radio
Radiotext ..." Press the the
text from appearing on the display.
Unfavorable reception conditions, including interference, can garble or even block a radio text display.
~
Warning - Danger of Accident.
DO NOT READ RADIO TEXT WHILE DRIVING!
When radio text is turned on, the radio interprets information from the data transmitted by the station and
displays it in the form of radio text.
TI-fG STHTICif'j
Dis
26
RCO(S!
Rds
Please read the radio text only while the vehicle is
parked. Radio text contents change constantly and
may distract the driver.
Radio Operation
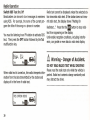
mil
+ TP: Set up Traffic Program
Direct Programming
If an RDS station transmits Traffic Program announcements, it is possible to have CD, CDC and AM operation
interrupted so that the transmitted TP announcements
can be played. It is also possible to listen to one FM
station while receiving TP announcements from another
FM station.
Direct programming makes it possible to have a TP
transmitter different from the current FM station. For
example, one FM station and TP announcements transmitted by another FM station can be received simultaneously.
There are two ways to select a TP transmitter:
•
automatic tracking
•
direct programming
this is indicated by the
Automatic Tracking
Automatic tracking always uses the current FM station
as TP transmitter. If the selected FM station has poor
signal quality or cannot function as a TP transmitter
the radio searches for a new TP transmitter.
'
If an RDS station is equipped with traffic programming,
An inverted
is active.
•
TP
icon in the display.
icon on the display indicates that TP
Your radio plays traffic announcements as they are
broadcast from time-to-time from a TP radio station.
III
icon appearing in the display, no trafWithout the
fic announcements are available to you.
If reception from the programmed TP transmitter is
poor, the unit switches to automatic tracking until the
programmed TP transmitter can receive.
27
Radio Operation
Activating/Quitting
the TP Menu
Tp: Switch Traffic Program On/Off
While listening to an FM RDS station (not during a traffic announcement), press the OPT hardkey followed by
the TP multifunction key. The Traffic Program set-up
menu appears as shown below.
The display reports whether TP is currently
on or off.
St.a !...101
]
The TP menu automatically terminates
unless one of
these multifunction keys is pressed within 8 seconds:
•
Tp: activating/quitting
the TP menu
• Sta: select/deselect direct TP station programming
• Vol: TP announcement volume
An alternate method to exit the TP menu is to press
any multifunction key or ClK, AUD, OPT, CD, RAD or
NAV button.
28
To activate automatic TP tracking in the TP menu,
press the Tp multifunction key repeatedly until Tp on
appears in the display.
~~,
8•••••••••
]
When the normal audio display appears, the
appears in the display.
IiiI
icon
Radio Operation
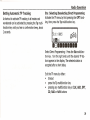
Setting Automatic TP Tracking
Sta: Selecting/Deselecting Direct Programming
A shortcut to activate TP tracking in all modes and
wavebands can be activated by pressing the Tp multifunction key until you hear a confirmation beep, about
2 seconds.
Activate the TP menu by first pressing the OPT hardkey, then press the Tp multifunction key.
S+.;::d.: BBC3
I~'.'"
.-.cP
TpillUol
~
1\
.8 ••••••••
Select Direct Programming:
Press the Sta multifunction key. Turn the right knob until the desired TP station appears in the display. The selected station is
accepted after a short delay.
Exit the TP menu by either:
•
timeout
•
press the Tp multifunction
•
pressing any multifunction
CD, RAD or NAV buttons
key
key or CLK, AUD, OPT,
29
Radio Operation
Deleting Direct Programming
Deactivating the TP
Activate the TP menu by first pressing the OPT hardkey, then press the Tp multifunction key. Then turn the
right knob until Autoselect appears in the display.
In all modes and wavebands, TP can be turned on or
off by pressing the Tp multikey for more than 2 sec-
~3t :3t.:
~ut.ose lee t.
_-.0.
Push the right knob in to confirm.
is deleted after a short delay.
•••..l
To deactivate TP in the TP menu, press the Tp multifunction key repeatedly until TP off appears.
Direct programming
Exit the TP menu by either:
•
timeout
•
press the Tp multifunction key
•
pressing any hardkey: CD, CDC, AM, etc.
~<f
j5t~':';1
8•••••••••
['V
]
When the normal audio display appears, you may still
see the TP icon if the current station has a TP transmitter. When TP is off, the inverted TP icon.
pears from the display.
30
inverse sym-
1\
.8••••••••
~I
onds. The display changes from liilthe
bol to TP
disap-
Radio Operation
Vol: TP Announcement Volume
Switching Mute OnlOff
After selecting a TP transmitter, the mute function can
be activated by briefly pressing the OPT hard key
followed by the Tp multifunction key.
TF~ Info
1·~
~
Thereafter, only traffic announcements and navigation
announcements are audible through the vehicle speakers.
The mute function is cancelled by pressing the _
button again.
Interrupting TP Announcements
Press the"
button to select the TP menu. Press
the Vol multifunction key to program the traffic
announce volume.
h: ~~m;;
+1
•• 8•••••••~J)
I
Use the right knob to select a setting from 0 - 3. This
means that the volume can be raised to a fixed value
according to the setting.
•
Setting 0: No increase
•
Setting 1: Slight increase
•
Setting 2: Medium increase
•
Setting 3: Strong increase
Press the _
button during an announcement.
The current announcement is interrupted and the system automatically returns to the previous mode.
31
Radio Operation
it
a
SELECTING THE AM BAND
Warning - Danger of Accident.
Too high a volume can be dangerous.
Adjust the volume to a level that allows you to still hear
traffic noises (horns, sirens, etc.)
Press the
button at any time to listen to the radi •
The radio tunes to the last AM/FM band and station
played. The display shows the station frequency ba
and time-of-day.
.
'
a
While listening to any radio station, press the
button again to switch between the FM and AM bands.
The display confirms that the AM band is active by displaying AM.
32
THE AM DISPLAY
CHANNEL SELECTION
Radio Operation
FOR AM RADIO
The desired station can be selected through seek, scan,
storing/recalling preset stations, manual tuning and AM
autostore.
1 2 3 4
1.
2.
3.
4.
5.
6.
5
H5
Eo
TP
A.
..... !'IORTH
12 AM presets during manual tuning, 6 AM presets
during AM autostore
station frequency
band is AM
AS indicator appears only while AM autostore is on
TP indicator appears if the RDS transmitter is
equipped with a traffic program. An inverted ~
icon appears on the display when the traffic program is active.
compass appears when navigation is not active;
while navigation is active, turn-by-turn information
is shown in this area
Seek
Turn the right knob clockwise or counter-clockwise to
tune to the next/previous receivable and identifiable
AM station. If no station is found, the tuner remains at
the current frequency.
Scan
Push in the right knob to start an AM station search.
The radio sweeps through the entire AM band. During
the first pass, the radio plays 5 seconds of each strong
station. During the second and subsequent passes, the
radio plays 5 seconds of every available station. Scan
continues until it is stopped by one of:
33
Radio Operation
•
•
•
•
•
right knob is pushed in again
right knob is turned clockwise or counter-clockwise
any CIC, AUD, OPT, etc. button is pressed
any hardkey is pressed
vehicle ignition is turned off.
Volume adjustments
icon ~
do not stop the scan. The scan
flashes while the radio scans.
Recalling an AM station
Press one of the multifunction keys 1 through 6 or->
to access 7 through 12 for a brief moment. The radio
tunes to the station associated with the multifunction
key, and the station frequency appears in the display.
If the station playing is assigned to a multifunction key,
the number above the multifunction key is inverted, as
shown in multifunction
Storing an AM Station
Up to 12 stations can be stored via manual tuning. To
store the active AM station, press one of multifunction
keys 1 through 6 or 7 through 12 until you hear the
confirmation beep. Press the -> multifunction key to
access multifunction keys 7 through 12.
~~~J ••••
TP
:11-.
~
34
..-.
2
~--.....
3
4
AS
5
Eo
A mRTH
key 2 in the diagram below.
Radio Operation
OPTION BUTTON DURING AM
mil
While listening to an AM station, press the
button
immediately followed by a multifunction key to access
the following additional features.
mil + As: AM Autostore
Press the OPT hardkey following by the As multifunction key. The current AM autostore status is displayed.
Repeatedly press the As multifunction key until the display shows AM Autostore on or off, as you choose.
• mil + As: the
6 best-received AM stations are
stored under the multifunction keys in descending
order of their reception quality
• mil + Tun: turn on/off manual AM tuning
• mil + Tp: access Traffic Program set-up
Press the As multifunction key for longer than 3 seconds to begin AM autostore. The six best AM stations
are stored. Use multifunction keys 1 through 6 to
access.
35
Radio Operation
When AM autostore
is on, AS appears in the display.
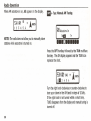
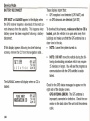
NOTE: The radio does not allow you to manually store
stations while autostore is turned on.
mil + Tun:
Manual AM Tuning
1H1·=~
..
T.
~
.]
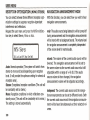
Press the OPT hardkey followed by the TUN multifunction key. The AM display appears and the TUNE icon
replaces the clock.
Turn the right knob clockwise or counter-clockwise to
tune up or down in the AM band in steps of 10 kHz.
If the right knob is not turned within a short time,
TUNE disappears from the display and manual tuning is
turned off.
36
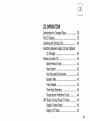
CD OPERATION
Instructions for Compact Discs
The CD Display
Inserting and Ejecting CDs.......................
Switching Between Single CD and Optional
CD Cha nger
Playing an Audio CD.................................
Next/Previous Track
Scan Search
Fast Forward/Fast Reverse
Random Play
Track Repeat
Time Mode Selection
Temperature Protection Circuit..
OPT Button During Single CD Mode
Display Tracks Played
Display CD Totals
38
39
40
40
40
41
42
42
43
43
44
44
44
45
45
37
CD Operation
CD OPERATION
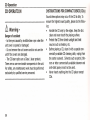
&. WarningDanger of accident
- to the eyes caused by invisible laser rays when the
unit cover is opened or damaged
- Do not remove the unit covers and do not use the
unit if the covers are damaged.
- The CD laser optics are a Class 1 laser product.
There are no user-serviceable components in the unit.
For safety, any maintenance work must be performed
exclusively by qualified service personnel.
38
INSTRUCTIONS
FOR COMPACT DISCS (CDs)
Sound interruptions may occur if the CD is dirty. To
ensure the highest sound quality, please do the following:
•
Handle the CD only by the edges. Keep the disc
clean and never touch the playing surface.
•
Protect the CD from direct sunlight and heat
sources such as heaters, etc.
•
Before playing a CD, clean it with a special commercially available CD cleaning cloth, wiping from
the center outward. Solvents such as petrol, thinners or other commercially available cleaners and
anti-static sprays must not be used.
•
Never insert anything into the CD player except
CDs.
CD Operation
THE CD DISPLAY
Ti IL.-.-~-L·
a._"'....1 CD;:::;:07
> 1<
TP
>1 Pt."'!
A
.i.
~jClRTH
1. track number
2. CD icon appears when a single CD is the active
audio source; CDC indicator appears when the CD
changer is the active audio source
3. either track elapsed time or time-of-day
4. Traffic Program indicator or scan indicator
5. compass appears when navigation is not active;
while navigation is active, turn-by-turn information
is shown in this area
6. choose whether track elapsed time (Ptm) or timeof-day (Clk) appears on the display
7. next track
8. previous track
9. fast forward in current track
10. fast reverse in current track
11. repeat current track
12. play tracks in random order
39
CD Operation
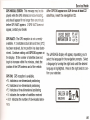
INSERTING
AND EJECTING CDs
Inserting a CD
Insert the disc into the CD slot with the printed side
facing up. The unit pulls in the CD and starts playing
the first track. A CD can be loaded even when the unit
is turned off.
If a nonmusic CD is loaded into the CD player,
a CD ROM message appears briefly in the display, and
then the previous audiO mode resumes. The nonmusic
CD remains in the player until the eject button is
pressed. The CD player is not harmed by this.
Ejecting a CD
0
Press and hold the
button to eject a CD. The unit
partially rejects the CD and waits for the CD to be manually removed. The previous audio mode resumes.
The CD player pulls the CD back into the player if the
partially ejected CD is not manually removed within 20
seconds. The unit continues in its previous audio
mode. The eject button is recognized both when the
unit is on and off.
40
SWITCHING BETWEEN SINGLE CD AND
OPTIONAL CD CHANGER
Press the CD hard key to switch between single CD and
CD changer play. The CD hard key is ignored if no CD is
present in the player being switched to (i.e., single CD
or CD changer).
The t=l icon appears in the display
when single CD is the active audio source. The CDC
icon appears in the display when the CD changer is the
active audio source.
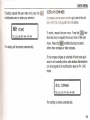
PLAYING AN AUDIO CD
A CD begins playing as soon as a CD is loaded into the
single CD player. While listening to AM or FM radio,
press the CD hard key when a CD is present to begin
playing a CD.
The CD icon appears in the display while CD is the
active audio source.
The Clk/Ptm multifunction key determines whether the
track elapsed play time or time-of-day is displayed.
CD Operation
When the last track of the CD finishes playing, the CD
starts playing again from the first track. The unit displays elapsed time for 10 seconds and then restores
the time-of-day, unless elapsed time is the selected
time mode when new tracks start.
If a CD is playing when vehicle ignition is turned off
(such as for refueling), play resumes where it left off
once the vehicle is restarted. The unit recognizes when
the CD changes; it starts playing from the beginning of
the first track if a different CD is inserted while vehicle
ignition is off.
If the CD hardkey is pressed when no CD is loaded, a
NO CD message appears briefly on the display.
The CD remains in the player when vehicle ignition is
turned off.
Next/Previous Track
Press the skip forward> I or skip backward < I multifunction key to play the next/previous track. By pressing one of these keys repeatedly, several tracks can be
skipped over in forward or reverse directions.
An alternate method is to turn the right knob clockwise
or counter-clockwise.
i f "o._i"-. L OO=-:-, TP
T,.- ..---!.. "J' CD - > I<: >1 elk
Rncl Rpt <:
••••
Once the last
direction, the
the first track
tion, the unit
track.
r':;RTH
~
..
I
.,
G)~ •••
track has been reached in the forward
unit switches back to the first track. If
has been reached in the backward direcswitches from the first track to the last
41
CD Operation
If a track has been playing for less than 8 seconds
when the backward skip button is pressed, the unit
skips back to the beginning of the current track.
Scan Search
Pressthe right knob in to start SCAN operation. The
1mJ icon appears in the display while scan is active.
Fast Forward/Fast Reverse
Pressthe> multifunction key to fast-forward within the
current track. Pressthe < multifunction key to fastreverse within the current track. Fast-forward and
fast-reverse continue as long as the multifunction key
is held. The audiO continues to be heard during fast
forward/fast reverse.
~
Tr-a=k
Rnd RPt. < 2> c~J;Jm
1< >1 ,~1l,m -.Jr=';;;T.'-!
The first 8 seconds of every track plays. Stop the scan
by one of:
• push the right knob in again
• press any hardkey (e.g., C/C, AUD, etc.
• turn the right knob
42
•.
t·-·a:v=::
!
Rnd RPt. <
~
L
CD
00:15
TP
> 1< >1 elk
•• GJ~_
•••
Releasethe multifunction key to stop the fast forward/
fast reverse.
CD Operation
Random Play
Press the Rnd multifunction
key to play the tracks on
the same CD in random order. The multifunction key
label Rnd is displayed inverted Ii1iIiI when random play is
active.
No track repeats until all tracks have played once.
Stop the random play function by pressing the Rnd
multifunction key again.
Track Repeat
Activate the track repeat function by pressing the Rpt
multifunction key. The track currently playing is
repeated as long as this mode is active. The multifunction key label Rpt displays inverted when repeat mode
is active.
Press the Rpt multifunction
repeat mode.
key again to stop track
43
CD Operation
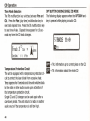
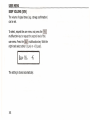
Time Mode Selection
OPT BUTTON DURING SINGLE CD MODE
The 7th multifunction key switches between Ptm and
Clk. Press the Ptm (play time) multifunction key to
see track elapsed time. Press the Clk multifunction key
to see time-of-day.
Elapsed time appears for 10 seconds any time the CD track changes.
The following display appears when the OPTION hardkey is pressed while playing an audio CD:
]
Temperature Protection Circuit
The unit is equipped with a temperature protection circuit to protect the laser diode from excessive heat.
Temp appears for 8 seconds and the unit switches back
to the radio or other audio source upon activation of
the temperature protection circuit.
Single CD and CD changer can be used again after a
cool-down period. The unit returns to radio or another
audio source if the temperature is still too high.
44
mil + Trk: information
mil + Ttl: information
up to current place on the CD
about the whole CD
CD Operation
mil
+ Trk: display number of tracks played to this
point on the CD, and display total time played since the
start of the CD
mil
+ Ttl: display total number of tracks on this CD,
and total time of all tracks on the CD
The normal CD display returns after a few seconds.
Is
!~
i1:'~J
IjITtl
G•••••••••
]
The normal CD display returns after a few seconds.
45
CD CHANGER
OPERATION
Loading/Ejecting the CD Magazine
Playing CDs
OPT Button During CD Changer Mode
Display CD Name
Enter CD Name
Change Existing CD Name
Switch Track Filter On/Off
48
48
49
50
50
50
51
47
CD Changer Operation
CD CHANGER OPERATION
If a CD changer is connected to the car radio, it is
ready for operation when loaded with a CD magazine
containing at least 1 CD. Close the sliding tray after
loading the magazine to protect the system from dust.
Further operation is performed using the front panel
controls.
Loading/Ejecting the CD Magazine
To remove the CD magazine, open the sliding cover on
the changer and press the eject button on the changer.
The magazine is ejected and can be removed.
When inserting CDs in the magazine, note the arrow
imprint on the magazine so you insert the CDs correctly.
To allow for the fastest possible change of CDs, CDs
should be loaded in consecutive slots in the magazine,
beginning with tray 1.
48
NOTE: Incorrectly inserted CDs are not played. The display shows "Bad CD #" to indicate which CD is not
working properly.
Playing CDs
Press the CD hardkey to switch between single CD and
CD changer operation. The CD Changer menu is active
if CD Changer was previously active or if there is no
audio CD in the single CD player.
The last CD played resumes from its last position
before the unit was switched off. The display shows
Loading CD X while the CD is loading. The display
shows the magazine compartment number or the name
assigned to the CD using the OPTION hard key. The
right knob selects discs loaded in the magazine.
~JJ
:=-'._-.
T, '.".
II'-'~'
RPV:
--Rnri ~
'_i
TP'·
coc
> 1<: >1 Pt.') •_ ... _
, i1-.""-~ •
~,,_~",(;H
]:...
CD Changer Operation
If no CD is loaded in a selected magazine tray, the next
CD # appears on the display and the next CD tray
loads.
The next CD automatically plays after the last track of a
CD has finished playing. The CD changer cycles back to
the first CD in the magazine after the last track of the
last CD in the magazine has played.
Refer to the CD instructions earlier in this section
for complete CD player operation instructions.
NOTE: The CD function Rpt is not available when using
the CD changer.
The radio displays "Mech. Err." if a mechanical problem
is detected. Check the CD magazine to make sure it is
properly loaded. If the problem persists, the CD
changer may require service.
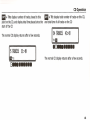
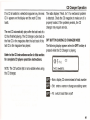
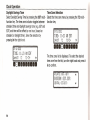
OPT BUTTON DURING CD CHANGER MODE
The following display appears when the OPT hardkey is
pressed while the CD Changer is playing.
coc
TrkTtl i'!a",EcltFil
mil + Nam: display CD name instead of track number
mil + Edt: enter a name or change an existing name
mil + Fil: switch track filter on/off
49
CD Changer Operation
mil
+ Nam: display CD name instead of track
number
mil + Edt:
enter name or change existing name
a
INa~:
~T""Ttl ""o£om;
••
If you have assigned a name for the current CD using
mil
the
+ Edt function, then after a few seconds, the
display returns to the normal CD Changer display, and
the name you assigned to the CD appears in the display instead of the CD disc number.
To delete an existing name, press the Nam multifunction key. Turn the right knob to select which name to
delete. Push in the right knob to delete the displayed
name.
50
]
GJ •••••••
Spell the name you want to give to the CD using the
right knob. Turn the knob clockwise or counter-clockwise until you see the letter you want in the display.
Press in the knob to confirm your chosen letter. A
maximum of 8 letters can be entered. After several
seconds without touching the right knob, the name is
saved and the CD Changer OPTIONS menu disappears.
irkit!
~ja!'1Ea't.Fil
..GJ_.....
CD Changer Operation
mil + FiI:
Switch Track Filter On/Off
The individual titles of the current CD can be selected
using the right knob. It is then possible to select
between Play (track not filtered) and Skip (track filter
out) by pressing the right knob.
•••• 8•••••
To switch the filter function on or off, repeatedly press
the Fil multifunction key until you see that the filter is
on or off, as you choose.
Note: The filter function can only be activated when
the selected CD is named.
51
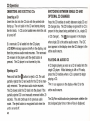
NAVIGATION
WHAT IS NAVIGATION?
SAFETY INSTRUCTIONS
Navigation CDs
56
56
57
GENERAL INFORMATION
CONFIRM WARNING
SELECTING NAVIGATION
MAIN NAVIGATION MENU
57
59
60
60
DESTINATION
61
Entering a Country for the Destination .. 62
Entering a Town for the Destination
62
Entering A Street for the Destination
64
Entering a Town/City/County
Center
for th e Desti nation
65
S3
DESTINATION MEMORy
Deleting a Destination from the
Destination Memory
Destination Memory Full
67
ROUTE GUIDANCE CALCULATION
Recalculating Route
77
77
68
68
STOPOVER.......................................
Entering a Stopover
Starting Route Guidance to a Stopover
Deleting a Stopover
Arriving at a Stopover
77
77
78
78
79
TRAFFIC JAM....................................
Entering the Length of a Traffic Jam
Cancel Traffic Jam
79
79
80
CANCELING ROUTE GUIDANCE
NOTES ON ROUTE GUIDANCE
80
80
LAST DESTINATIONS
Deleting a Destination from
Last Destination Memory
68
P.O.I.
P.O.I.
P.O.I.
P.O.I.
69
70
70
72
(POINTS OF INTEREST)
- Local Area or Near Destination.
- Town/City/County
- Nationwide
69
ROUTE MENU
72
Entering a House Number
Selecting an Intersection
Selecting the Route Settings
73
74
75
Saving a Destination
76
54
Warning
••• •••••
81
INFORMATION DURING ROUTE
GUIDANCE
Displaying Route Settings
Destination Information with Stopover.
Requesting Current Position
83
84
85
85
1. ••••••
••••••••••••••
Requesting Route List
86
SYSTEM SETTINGS
Save Position
Language
Female/Male Voice
86
87
88
89
Animation
Measuring System
Announcement
Estimated Time of
Arrival
89
90
90
55
Navigation
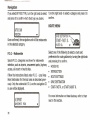
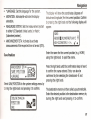
NAVIGATION
Note: The compass (accessed by pressing the AUD
reasons, route guidance is predominantly in spoken
form, supported by a direction indicator on the display.
button for more than 2 seconds) always points north,
but the arrow when navigation is active always points
to the destination.
SAFETY INSTRUCTIONS
WHAT IS NAVIGATION?
•
The GPS antenna receives latitude and longitude signals from GPS satellites orbiting the earth. These signals give the navigation system an indication of the
vehicle location. Vehicle movement is measured by an
electronic signal related to the vehicle speed. A built-in
gyro sensor measures the vehicle rate of change of
steering angle. The navigation system uses all of these
signals to determine the current vehicle position relative to the digitized map stored on the navigation CDs.
•
The navigation system then determines the route to
the selected destination and provides instructions as
the vehicle moves toward the destination. For safety
56
•
To avoide an accident, enter navigation instructions
only while the vehicle is stopped.
Observation of traffic signs and local traffic regulations must always take priority.
Traffic guidance is restricted to passenger vehicles.
Special driving recommendations and regulations
for other vehicles, such as commercial vehicles, are
not included.
GPS Notes:
1. If the GPS antenna is located on the dashboard,
items placed on the dashboard could interfere with the
Global Positioning System.
2. Electronic equipment such as laptops, video games,
cellphones, etc. can interfere with the GPS.
Navigation
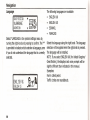
Navigation CDs
The navigation unit is provided with two navigation
CDs. One CD contains data for the western half of the
USA and some of the major cities in Hawaii and Canada
(Western USA Navigation CD) and the other CD contains data for the eastern half of the USA and some of
the major cities in Canada (Eastern USA Navigation
CD). Data for North Dakota, South Dakota, Nebraska,
Kansas, Oklahoma and Texas are contained on both
CDs to allow for an uninterrupted crossing between the
two regions.
The navigation CDs contain digitized street maps. Highways, state and county roads, as well as local streets,
are detailed in this map. Many of the streets have the
ability to route to individual house numbers and
addresses. Larger cities and communities are covered.
Regional and unclassified roads or through-roads and
own centers are included for smaller towns and comunities. The CDs also contain P.O.I.s (Points of Interests) which include gas stations, airports, restaurants,
ospitals, etc.
One-way streets, pedestrian zones, no-turn intersections and other traffic regulations are covered where
possible. There may be discrepancies between the data
on the navigation CDs and the actual local situation,
due to continuous changes to the road systems and
traffic regulations. You must follow the posted regulations even if they contradict the navigation announcements in all cases.
GENERAL INFORMATION
In navigation mode, the radio, CD and optional CD
changer continue.
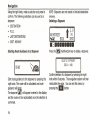
The distance to the next directional announcement and
estimated time of arrival will be shown on the right side
of the display.
Press the
a
button to select radio mode once route
guidance is active. Press the"
button repeatedly
to toggle between CD and CD changer audio mode
once route guidance is active.
57
Navigation
The route guidance display is automatically shown
when directional announcements are given.
Repeat the current navigation announcement
ing the left knob.
Use the smart speller and the right knob to enter
addresses. The display shows only those letters, numbers and symbols that can be used to make a valid
address. Entries are automatically completed. An
empty space between words such as in New York, must
be entered with an underscore C).
Adjust the navigation announcement volume by turning the left knob during a navigation announcement.
The multifunction keys 1 through 10 may also be used
to select letters, numbers and symbols. Select individual symbols by pressing the appropriate multifunction
keys under the desired symbol repeatedly until that
symbol appears on the display.
Press the"
button to quit the current menu and
return to the previous menu.
The system recalculates a route if a change is made.
58
by press-
Adjust the tone settings by pressing the.
button
during the announcement.
Press the left knob to request additional information
during route guidance, or the current position when
route guidance is not active. If the right knob is
pressed during route guidance, WAY ROUTE is displayed.
Press the left knob to interrupt
announcement.
the current navigation
Turn off announcements by pressing the left knob for
more than 2 seconds during a navigation announcement. Route guidance will only then be shown on the
display. Turn the navigation announcements on by
pressing the left knob again.
Navigation
The scroll marks ..•..and ..•..indicate a selection list
through which you can scroll by turning the right knob.
Select the highlighted entry by pressing the right knob.
The confirmation beep will not be heard if the optional
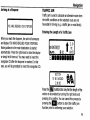
checkmark " is used, when available, to confirm selection.
The navigation unit prompts you to insert the navigation CD as needed, such as when programming destinations, when deviating significantly from a
programmed route, etc. Please insert the navigation
CD to maintain proper route guidance when prompted.
You can replace the navigation CD with an audio CD
once the route information is loaded. The CD indicator
on the display will disappear from the display when the
route information has been loaded ..
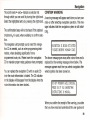
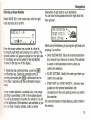
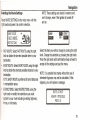
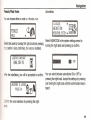
CONFIRM WARNING
A warning message will appear each time you turn your
radio on after selecting navigation operation. This message indicates that the navigation system is still initializing.
~RUIGATION IS BEING ~CTIUATED!
PLERSE OBSERUE HIGHWRY CODE
The above message goes away after a short time and is
replaced by the warning message shown below. The
message appears each time you select navigation after
vehicle ignition has been turned on.
DO NO! ~~OG~~M WHILE D~IUING.
PRESS OK IF YOU UNDERSTRND
INSTRUCTIONS IN M~NU~L.
When you confirm the receipt of the warning, you state
that you have read and understood this user guide and
S9
Navigation
that you are aware of the dangers associated with the
use of this navigation equipment. The navigation system will not operate until this prompt is confirmed,
Press the right knob to confirm the selection,
SELECTING
NAVIGATION
E!I
ring data from the CD to the navigation system.
will disappear. Once the route calculation has been
completed, you may remove the navigation CD and
insert an audiO CD.
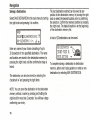
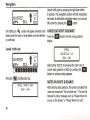
MAIN NAVIGATION
Press the"
button. If necessary, confirm the
warning as described previously.
DES
Select one of the following by turning the right knob
and pressing it to confirm.
•
•
The navigation
mode requires the navigation CD con-
E!I
taining the data for the destination.
will flash
on the display during route calculation while transfer60
:'1Et'1CiR,,'
! I
['EST ;~IHT ~)N
P.o ..I.
Next, the main navigation menu appears.
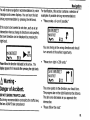
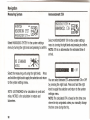
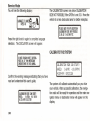
NOTE: When starting navigation mode for the first
time, you must load the navigation CD. The system will
prompt you to take a drive for calibration of the navigation system if calibration has not been completed. If
this occurs, see System Calibration.
i.
MENU
•
DESTINATION:
Enter a destination using data
from the navigation CD.
DEST. MEMORY: Select a destination from your
list of saved destinations, up to 50.
P.O. I.: Enter a destination from the Points of Interest information on the navigation CD. Points of
Navigation
•
Interest include gas stations, airports, restaurants,
hospitals, etc.
LAST DESTINATIONS:
Choose from a list of your
last 20 destinations.
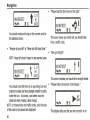
NOTE: The map information database is updated on a
regular basis. When you use new navigation CDs with
updated map information, you may see a display similar to this:
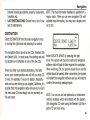
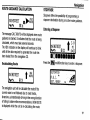
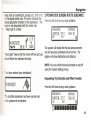
DESTINATION
Select DESTINATION from the main navigation menu
by turning the right knob and pressing it to confirm.
The navigation data is stored on two CDs: Western USA
and Eastern USA. In most cases, the starting and ending locations are contained on one of the two CDs.
When you enter your desired destination, the radio
knows your current position and will tell you which CD
to load. For example, if you are in Boston, Massachusetts and you are driving to Los Angeles, California, it is
possible that the navigation radio will ask you to insert
the west coast CD even though you are currently on
the east coast.
.•.
E::·::ECIJTE
Back
UF~[;I=ITE (.p,.,.EAST10
G_lJEST10 '"II'"
Select EXECUTE UPDATE by pressing the right
knob. The system will check the radio and navigation
software and will load all data required for navigation.
When switching CDs, the ignition should be on and the
vehicle should be parked. After a short time, the system
will restart the navigation software and you will need to
confirm the warning message again.
NOTE: You can not use last destination or destination
memory locations which were stored with the Eastern
USA Navigation CD while using the Western USA Navigation CD and vice versa.
61
Navigation
Entering a Country for the Destination
"-"
"-'--'Ii
.•..
STREET
~
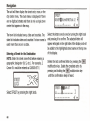
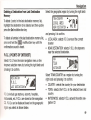
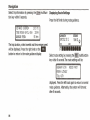
Entering a Town for the Destination
U5!=l
HINSDALE
Select the country by turning the right knob and
pressing it in to confirm.
USH
To change countries, turn the right knob and press it
in to confirm.
NOTE: The default is USA. It is necessary to change
the country only when traveling from the USA to
Canada or from Canada to USA. A route between
Hawaii and the USA is not possible. Hawaii can only
be selected if your vehicle is located in Hawaii.
62
STREET
Select the highlighted town by pressing the right knob
to enter a new destination town. Select STREET or
CENTER by turning the right knob to select a street or
center of town, within the highlighted town, and
pressing it to confirm.
i OlJr'~~
HBCDEFGInJKLMNOPQR5TUUW.YL
H
Enter the name of the town highlighting the letters one
by one, by turning the right knob and pressing it to
confirm. The selected letter will appear enlarged on the
right side of the display and will be added to the
highlighted town name on the top row of the display.
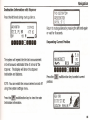
Navigation
:OlJ~·~:
_IC
••••••••
I •••••
BOSTIC
O •••••••
\!I.....
........................ ./
l,l
.•.
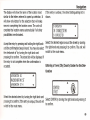
The display shows the name of the location most similar
to the letters entered to speed up selection. It will show
only letters for the selection that make sense in
completing the location name. The unit completes the
location name automatically if all other possibilities are
eliminated.
Delete the last confirmed letter by pressing the ••
ultifunction key. Delete the complete entry by
ressing and holding the ~
multifunction key until
~e confirmation beep is heard.
ccept the entry by pressing and holding the right knob
ntil the confirmation beep is heard. You may also select
e checkmark " by turning the right knob and
ressing it to confirm. The town list will be displayed if
e entry is not complete when the right knob is
ressed.
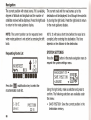
80STOr"i
HEIGHTS
Select the desired town by turning the right knob and
pressing it to confirm.
You can also enter counties. This is sometimes
necessary to find a road name.
The state list is displayed if the selected town exists in
more than one state.
IN MHSSACHUSETTS
Select the state where the desired town is located by
turning the right knob and pressing it to confirm.
63
Navigation
The unit will then display the street entry menu or the
city center menu. The route menu is displayed if there
are no digitized streets and there is only a single town
center that appears in the map.
The town list includes towns, cities and counties. The
state list includes states and counties if a town name is
used more than once in a state.
Entering a Street for the Destination
NOTE: Enter the street name first before entering a
geographic designator eN, S, etc.). For example, E.
Carson St. would be entered as CARSON ST E.
Select STREET by pressing the right knob.
64
..•••••••.•
4 ••••••••••
Select the letters one by one by turning the right knob
and pressing it to confirm. The selected letter will
appear enlarged on the right side of the display and will
be added to the highlighted street name on the top row
of the display.
Delete the last confirmed letter by pressing the
••
multifunction key. Delete the complete entry by
pressing and holding the ".'
multifunction key
until the confirmation beep is heard.
S i ~t:.t:.! ~ Bll3URt·i ST
.8
1..............
I
Navigation
The display will show the name of the location most
similar to the letters entered to speed up selection. It
will show only letters for the selection that will make
sense in completing the location name. The unit will
complete the location name automatically if all other
possibilities are eliminated.
If the entry is unclear, the street distinguishing
shown.
Accept the entry by pressing and holding the right knob
until the confirmation beep is heard. You may also select
the checkmark '" by turning the right knob and
pressing it to confirm. The street list will be displayed if
the entry is not complete when the confirmation is
accepted.
Select the desired region around the street by turning
the right knob and pressing it to confirm. The unit will
switch to the route menu.
lJHSHn·iGTOr'i 5T
Entering a Town/City/County
tination
list is
Center for the Des-
r"i
STREET
Select the desired street by turning the right knob and
pressing it to confirm. If the entry is unique, the unit will
switch to the route menu.
Select CENTER by turning the right knob and pressing it
to confirm.
65
Navigation
The unit will switch to the route menu if the place you
chose only has one center. The center list will be
displayed if there are fewer than 10 centers.
.
]
DnCirli..i
w ••...•
-= W;"';
i
[~LLSWN
The unit will switch to center entry mode if there are
more than 9 centers.
i t:.r<;
R8CDE ••
IIL].. [·it-i •••
R5 •••
tJ...
'"
Il',.-'
..............
Select the center name by turning the right knob and
pressing it to confirm.
CEr"i
Press the •.••
multifunction key to delete the last
confirmed letter. Delete the complete entry by pressing
and holding the
multifunction key until the
confirmation beep is heard.
H
..
Select the letters one by one by turning the right knob
and pressing it to confirm. The selected letter will
appear enlarged on the right side of the display and will
be added to the highlighted center name on the top row
of the display.
66
II.. R........
0
..;
...
The display will show the name of the center most
similar to the letters entered to speed up selection.
It will show only letters for the selection that make
sense in completing the location name. The unit will
complete the location name automatically if all other
possibilities are eliminated.
Accept the entry by pressing and holding the right knob
until the confirmation beep is heard. You may also select
the checkmark " by turning the right knob and
pressing it to confirm. The center list will be displayed if
the entry is not complete when the confirmation is
accepted.
Navigation
Select the desired destination
and pressing it to confirm.
HLL:o TCir·i
by turning the right knob
BRIGHTm'i
Select the desired town center by turning the right knob
and pressing it to confirm. If the entry is unique, the
unit will switch to the route menu.
DESTINATION
AUHT
HHRV,
URSHIHGTO
II!
cm'iPHf'N H, r·iEU 'iORK C!TV, U .•••.
Once the destination is selected, route guidance can
start as described in this user guide.
MEMORY
Store your favorite restaurant here in this long term
memory; it will stay there until you delete it. The
navigation radio can store up to 20 selections which can
be used either as destinations or as stopovers,
If the navigation radio is new and no past destinations
have been stored, the Dest. Memory choice is not
displayed. Refer to Saving A Destination later in this
chapter for instructions to save a destination in
destination memory.
Select DEST. MEMORY from the main navigation menu
y turning the right knob and pressing it to confirm.
67
Navigation
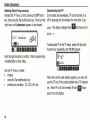
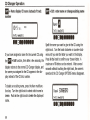
Deleting a Destination from the Destination
Memory
Select destination memory as described previously.
HU~-iTt1HR~:l, !'!H~3HIti~;T~)
•••••••••
COMPANY
H, NEW
YORK
III
CITY, W
8
~
Select the destination to be deleted by turning the right
knob and pressing the
multifunction key.
a.:I
Destination Memory Full
D~~!INA!ION
~ULL
-_._-- MEMORY
_ ..
t:lt.L~j t. = Ut:~
BACK = i"iAU
This message will appear when trying to save data and
the destination memory is full.
68
Select the destination memory to delete a destination
by
BACKby
selecting
pressing
either the"
DEL~
pressing
button tothe
cancel
right saving.
knob or
LAST DESTINATIONS
This is short term FIFO memory managed by the
navigation radio. It will store your previous 20
destinations. Use Destination Memory instead if you
want to always remember a destination .
Select LASTDESTINATIONSfrom the main navigation
menu with the right knob. Turn the right knob to scroll
through the last destinations.
Destination information is available if you press the left
knob before you confirm your selection with the right
knob.
NOTE: Stopovers are not stored as last destinations.
Navigation
Deleting a Destination from Last Destination
Memory
To delete 1 entry in the last destination memory list,
highlight the destination to be deleted and then quickly
press the Del multifunction key.
To delete all entries in the last destination memory list,
press and hold the;.'"'
multifunction key until the
confirmation sound is heard.
P.O.I. (POINTS
Select the geographic region by turning the right knob
NEHR
DESTINHTION
and pressing it to confirm.
• LOCAL AREA: selects P.O.1.s around the current
location
• NEAR DESTINATION: selects P.O.1.s for stopovers
near the selected destination.
OF INTEREST)
Select P.0.1. from the main navigation menu or the
stopover selection menu by turning the right knob and
pressing it to confirm.
.0.1.s include gas stations, airports, hospitals,
staurants, etc. P.O.I.s are stored on the navigation
'CD. P.O.1.s can be displayed based on the geographic
;egion you select as shown below.
U5H
Select TOWN/COUNTRY as a region by turning the
right knob and pressing it to confirm.
• COUNTRY: selects the country for your destination
• TOWN: selects the P.O.1.s in the selected town and
country
• NATIONWIDE: selects P.O.I.s around the entire navigation CD
69
Navigation
P.O.I. - Local Area or Near Destination
Select P.O.I.s within the current surroundings of the
vehicle or near your destination as a stopover by turning
and pressing the right knob.
CHILDREr·i'S
HOS
~i!=fTIOr-i'Ill'"
1.2
1.3
12TH 5T
Confirm selection with the right knob to select the route
menu.
MI.
t'll-t
A maximum of 20 destinations are listed according to
proximity. The straight-line distance from the current
location to the P.O.1. will be shown for each entry. The
arrows following the distance information indicate the
direction to the respective point of interest (e.g.
P.O.I. lies in the direction of travel, or ..•..P.O.I. lies in
the opposite direction).
"1'-
70
Destination information is available if you press the left
knob before you confirm your selection with the right
knob.
lJH5HIr·iGTOt·i,20017, 4500
CHR DEHLERSHIP
PROUIDEHCE
Select the desired P.0.1. with the right knob and press
it to confirm.
P.O.I. - Town/City/County
You may select a P.O.I. from any location on the
navigation CD. Select TOWN by turning the right knob
and pressing it to confirm.
Navigation
H8CDEFGIIIJKLI'lr·iOF'QRSTUi.,iU
.•tr'Z
....................... J.
H
Enter the town name by turning the right knob and
pressing to confirm each letter.
As before, you can press and hold the right knob prior
o finishing spelling the name to select the town/city/
ounty name from a list. Once the spelling or selection
is complete, press the right knob to confirm.
ollow the instructions listed under P.O.I. - Local Area
, ear Destination for the local area as described
reviously. In this casel only those P.O.I.s in the
s ecified town will be displayed.
OTE: If you select RESTAURANTI another menu
_ pears when you press the right knob. This feature is
:J Iy available when choosing P.O.I. by TOWN.
..•..
If you select BY NAME, all available restaurants in the
specified area will be displayed in a list. If there are
more than 9 items in the list, you will be prompted to
start spelling the restaurant name (similar to entering a
town or street name.
HBCDE ••
!lLJ ..
l,ir"i.... " RS .... " U.....
H
J .••
Enter the restaurant name using the right knob and
pressing it to confirm.
NOTE: A list of possible P.O.I.s will display when you
press the right knob until the confirmation beep is
heard, without having selected any letters.
71
Navigation
If you select BY FOOD TYPE, turn the right knob to select
and press it to confirm which food type you desire.
Turn the right knob to select a category and press it to
confirm.
ROUTE MENU
AFRICAN
H;'iERICHr"i
..•.
Once confirmed, the navigation unit will list restaurants
in the selected category.
P.O.I. - Nationwide
Special P.O.!. categories are shown for nationwide
selection, such as airports, amusement parks, highway
access, ski resort or tourist sites.
Follow the instructions listed under P.0.1. - Local Area
Near Destination for the local area as described previously. Only the nationwide P.O.I.s on the navigation CD
in use will be displayed.
STHRT
-FH~3T ~~.
HOUSE r·iO.
Select one of the following to select a route and
preferences for route guidance by turning the right knob
and pressing it to confirm.
• HOUSE NO.
• INTERSECTION
• ROUTE SETTINGS
• SAVE DESTINATION
• START-FAST R. or START-SHORT R.
For more information
next in this section.
72
on these features, refer to them
Navigation
Entering a House Number
Select HOUSE NO: in the route menu with the right
nob and press it to confirm.
intersection to get close to your destination.
You can start route guidance once the right knob has
been pressed.
SRUE D~~!INRTION
5
ROUTE SETT n·iGS
..• Oi2341b789 ...••.
=nter the house number one number at a time by
- rning the right knob and pressing it to confirm. The
::elected number will appear enlarged on the right side
::~ the display and will be added to the highlighted
~ mber on the top row of the display.
Select one of the following by turning the right knob and
pressing it to confirm.
• SAVE DESTINATION: Store the entered destination
by a name of your choice (or no name). The selection
is saved in the destination memory when you
confirm the selection.
-
•
delete the last confirmed letter, press the _
ill
multifunction
key is
for
::cssing
Itifunction
holding
key. Delete~.
the:
e complete
entrybeep
~
- re
thanand
2 seconds
untl "lieconfirmation
-eard.
se number selection is available only in the range
£l-ecified in parenthesis (1-99 in the example above).
.
will be prompted to re-enter the number if it is not
-~
e digital map. If the address is not available, or you
:z not enter a nearby address, select a nearby
ROUTE SETTINGS: Modify the route type when you
confirm this selection.
• START-FAST R.or START-SHORT R.: Activate route
guidance to the entered destination with
consideration of the route settings when you confirm
this selection.
For more information on these features, refer to them in
this section.
73
Navigation
Selecting an Intersection
If the house number is not available on the digitized
map, you may enter a nearby intersection for guidance.
NOTE: If you do not enter an intersection, the
navigation system will take you to the nearest entry
point on the selected road.
Select INTERSECTION in the route menu with the right
knob and press it to confirm.
Select the intersecting street by turning the right knob
and pressing it to confirm.
Only the streets that intersect the entered destination
will appear in the list.
You can start route guidance once the right knob has
been pressed.
74
Select one of the following by turning the right knob and
pressing it to confirm.
• START-FAST R. or START-SHORT R.: Activate route
guidance to the entered destination with
consideration of the route settings when you confirm
this selection.
• SAVE DESTINATION: Store the entered destination
by a name of your choice (or no name). The selection
is saved in the destination memory when you
confirm the selection.
•
ROUTE SETTINGS: Modify the route type when you
confirm this selection.
•
For more information
them in this section.
on these features, refer to
Navigation
Selecting the Route Settings
-elect ROUTE SETTINGS in the route menu with the
"ght knob and press it to confirm selection.
NOTE: These settings are stored in memory and
won't change, even if the ignition is turned off
and on.
:=.HOt(i ROUTE
FAST ~~(JUTE
RESTR leT IOr"iS
FAST ROUTE: Select FAST ROUTE using the right
knob to obtain the shortest possible time to your
destination.
SHORT ROUTE: Select SHORT ROUTE using the right
knob to obtain the shortest possible distance to your
destination.
GTE: SHORT ROUTE is preferred for short distances
in metropolitan areas.
ESTRICTIONS: Select RESTRICTIONS using the
'ght knob to modify the restrictions you want
applied to your route including avoiding highways,
ferries, or toll roads.
Select the item you wish to change by turning the right
knob. Change the selection by pressing the right knob.
Press the right knob until confirmation beep is heard to
accept all the settings and quit the menu.
NOTE: It is possible that routes without the use of
interstate highways may not be calculable. If this
happens, you will receive a message.
i'::OU i
to.
H!GHW~Y
lJ Ii HOU i
IMPOSSIBLE
75
Navigation
Saving a Destination
Select SAVE DESTINATION in the route menu by turning
the right knob and pressing it to confirm.
t·~Ht'lt:.:
HBCDEFeIIIJt<Lt'it·-IOPQRSTUi')lJ::~:~lZ
f::iuO-0123456789&',/()-.
'"
H
A total of 20 destinations
can be saved.
.••
Enter any name of your choice consisting of up to
20 characters for the specified destination. The name
and location are stored in the destination memory by
pressing the right knob until the confirmation beep is
heard.
The destination can also be stored by selecting the
checkmark '" and pressing the right knob.
NOTE: You can store the destination in the destination
memory without a name by pressing and holding the
right knob for more than 2 seconds. You will hear a beep
confirming your entry.
76
The last destination entered can be saved at any
position in the destination memory by turning the right
knob to select the desired location prior to confirming
the selection. Confirm the memory position by pressing
the right knob. The default location is at the beginning·
of the destination memory list.
To complete storing a destination in destination
memory, either start route guidance or enter a new
destination by selecting NEW DESTINATION.
Navigation
Using the right knob, make a selection and press to
confirm. The following selections can be used as a
stopover:
• DESTINATION
•
P.O.I.
•
•
LAST DESTINATIONS
DEST. MEMORY
Starting Route Guidance to a Stopover
NOTE: Stopovers are not stored in the last destination
memory.
Deleting a Stopover
Press the ~
multifunction
key to delete a stopover.
r",i...i
•...u·"j:
i..-"i-i-i-L.. iI i...
i- cTnwnll
-J i Wi W"o,,·""i" •• :
BHCK
Start route guidance to the stopover by pressing the
right knob. The route will be calculated and route
guidance
will r.»::J
~<U!J.. will appear inverted in the display
The
stopover
and the route will be recalculated once the selection is
confirmed.
78
=
[·Hi!.)
Confirm deletion of a stopover by pressing the right
knob within 8 seconds. The navigation system will then
recalculate the route. You can exit this menu by
pressing the"
button.
Navigation
t
Cancel traffic jam by pressing the right knob within
8 seconds. The navigation system will then recalculate
MI
3.0
10:23
The traffic jam ~
symbol will appear inverted in the
display and the route is recalculated once the selection
is confirmed.
the route.
this
action As
by with
pressing
other the
nav~
~
menus,
button. you can quit
CANCELING ROUTE GUIDANCE
Press the"
display.
button from the route guidance
Cancel Traffic Jam
Select either DELETE by pressing the right knob to
cancel route guidance or BACK by pressing the ••
button to continue route guidance.
Press the _
multifunction
CHNC~L
key.
iRH~FIC JHM?
NOTES ON ROUTE GUIDANCE
After starting route guidance, the system calculates the
route and announces: "We can start now." This may be
followed by other messages such as "Please follow the
arrows on the display" or "Please follow the road".
80
Navigation
•
t1~I t~~:iT
~:EET
~;III·lIl
lEI :.•:.
t 3.0
MI
10:23
You should continue driving on the current road for
the distance shown.
•
"Please take the third turn on the right."
"Prepare to turn left" or "Move into left-hand
This arrow shows you which exit you should take
from a traffic circle.
lane."
•
"Now go straight."
NOTE: Keep left doesn't mean to use express lanes.
t1R! t~~3TF~EET
You should note that there is an upcoming turn and
prepare to make any lane changes needed to safely
make the turn. As always, road safety must be
observed when making a lane change.
NOTE: At intersections and traffic circles, only the ends
of the roads to be passed are displayed.
82
•
This arrow indicates you should drive straight ahead.
"Please follow the arrows in the display."
~
RORC!
OFF
This display tells you that you are currently
in an
Navigation
area, such as a parking lot, garage, etc., that is not
on the digital street map. The arrow indicates the
actual geographic direction of the destination. The
arrow is not associated with the street map.
"Keep right in 2 miles."
INFORMATION
DURING
ROUTE
GUIDANCE
Press the left knob during route guidance.
DISTHr"iCE
(:HF~1T~)L ~3T E
! ~t-'
"'Keep right" means that the street will fork and you
should follow the indicated direction.
l'IULJ
The system will repeat the the last announcement
and will anounce estimated time of arrival. The
display will show destination and distance.
NOTE: You can switch the announcement
using the system settings menu.
on and off
ou have reached your destination."
[HHIHSTREET
A]
- e specified destination has been reached and
e guidance is terminated.
Requesting Trip Duration and Miles Traveled
Press the left knob during route guidance.
DI5THi'iCE
500 N1
~
8•••••••••
83
Navigation
Select trip information by pressing the
tion key within 8 seconds.
Hi..Jt:.~HGE SPEED;
"h)"
multifunc-
Displaying Route Settings
Pressthe left knob during route guidance.
DIST~
55 t'lph
TRP
The
tripdisplayed.
duration, miles
traveled
theoravera~ed
will be
Pressthe
rightand
knob
the ~
button to return to the route guidance display.
MOD
9)) t1! Q)
r;)•••••••••
Select route setting by pressing the"
multifunction
key within 8 seconds.The route settings will be
H IGf-HJP.'." lJITH
FERRV:
tJITHOUT
TOLL: UITH
displayed. Pressthe left knob again to return to normal
route guidance. Alternately, the system will timeout
after 8 seconds.
84
Navigation
Destination Information with Stopover
Press the left knob during route guidance,
lJHSH H'iGTOr"i
TRP
:'10r;. fIIlI
====!Z'l
••••• 8••••
Requesting Current Position
he system will repeat the the last announcement
and will anounce estimated time of arrival of the
stopover. The display will show the stopover
destination and distance.
OTE: You can switch the announcement
sing the system settings menu.
Press the
destination
III
multifunction
information.
Return to route guidance by pressing the left knob again
or wait for 8 seconds.
on and off
Press the
position.
I:!I
multifunction
key to select current
key to view the main
l1li38.34t·i 54~49..14E
85
Navigation
The current position with street name, if it is available,
degrees of latitude and longitude and the number of
satellites received will be displayed. Press the right knob
to return to the route guidance display.
The current road and the road names up to the
destination will be displayed. Scroll though the route list
by turning the right knob. Press the right knob to return
to the route guidance display.
NOTE: The current position can be requested even
when route guidance is not active by pressing the left
knob.
NOTE: It will take a short time before the route list is
compiled, after entering the destination. The time
depends on the distance to the destination.
t
8•••••
Requesting Route List
!1R I
H~3TF~EET
••••
~
",.~
lID
:.:
Press the
_
multifunction
recommended route list.
86
Em.
Press the
button in the main navigation menu to
request the system settings menu.
3M"IO
10:23
key to select the
Using the right knob, make a selection and press to
confirm. The following selections are available under
this menu:
I-'~O E
US-14 E
SYSTEM SETTINGS
•
300 'iD
SAVE POSITION: Save the current position in the
destination memory.
Navigation
•
•
*LANGUAGE: Set the language for the system.
ANIMATION: Activate/de-activate
the display
animation.
•
MEASURING SYSTEM: Set the measurement system
to either US Standard (miles/yards) or Metric
(kilometers/meters)
.
ANNOUNCEMENT ETA: Activate/de-activate
announcement of the expected time of arrival (ETA).
•
r·iHl'iE~
HBC[)EFtClIJKLr'i~10PQRSTUUlJ::<:\i2
f::itiO-0123456?89&
',/()-.
'"
H
.••
Enter the name for the current position (e.g. HOME)
using the right knob to spell the name.
Save Position
*LHf'1GUHGE
Select SAVE POSmON in the system settings menu by
L rning the right knob and pressing it to confirm.
i1:38.AE
The display will show the coordinates (degrees of
latitude and longitude) for the current position. Confirm
by pressing the right knob and the following display will
appear.
54;49.14[-1
Press the right knob until the confirmation beep is heard
to confirm the name entered. Entry can also be
confirmed by the selecting the checkmark '" and
pressing the right knob.
The destination memory is then called up automatically.
Select the desired position in the destination memory by
turning the right knob and pressing it to confirm.
P051 I 101-1
87
Navigation
Language
SH!..JE r-=OSI
i IOr"i
Select *LANGUAGE in the system settings menu by
turning the right knob and pressing to confirm. The \\*"
is provided to indicate which selection is language, even
if you do not understand the language that is currently
selected.
ENGLISH UK
Ei"-iGLISH
88
us
The following languages are available:
• ENGLISH UK
• ENGLISH US
• ESPANOL
• FRANCAIS
Select the language using the right knob. The language
selection will be applied when the right knob is pressed.
The language will be installed.
NOTE: If you select ENGLISH UK (for United Kingdom/
Great Britain), the displays and voice prompts will be
slightly different than indicated in this manual.
Examples:
Fuel is called petrol.
Traffic circles are roundabouts.
Navigation
Animation
Female/Male Voice
You can choose either a male or a female voice.
fEMALE!
-elect the voice by turning the right knob and pressing
-: "0 confirm. Once confirmed, the voice is installed.
Select ANIMATION in the system settings menu by
turning the right knob and pressing to confirm.
./
-""er the installation,
you will be prompted to confirm.
OFF
You can select between animations ON or OFF by
pressing the right knob. Accept the settings by pressing
and holding the right knob until the confirmation beep is
heard.
firm the voice selection by pressing the right
89
Navigation
Measuring System
Announcement ETA
Select MEASURING SYSTEM in the system settings
menu by turning the right knob and pressing to confirm.
Select ANNOUNCEMENT ETA in the system settings
menu by turning the right knob and pressing to confirm.
NOTE: ETA is an abbreviation for estimated time of
arrival.
!'iETRIC
Select the measuring unit using the right knob.
Press
and hold the right knob to apply the selection and return
to the system settings menu.
NOTE: US STANDARD is for calculation in yards and
miles. METRIC is for calculation in meters and
kilometers.
90
E;::;: ~:
./
OFF]
You can select between ETA announcement ON or OFF
by pressing the right knob. Press and hold the right
knob to apply the selection and return to the system
settings menu.
NOTE: The calculated ETA is based on the time zone
where the trip originated unless you manually change
the time zone during the trip.
CLOCK OPERATION
CLOCK OPERATION
DISPLAYING TH E CURRENT TIM E
TIME SET-UP MENU
12/24 Hour Mode
Daylight Savings Time..............................
Time Zone Selection.................................
Time Zone Increment/Decrement
Offsetting the Clock.................................
92
92
92
93
94
94
95
96
91
Clock Operation
CLOCK OPERATION
The clock on the navigation unit receives its time from
the GPS receiver in the radio. This time is known as
Coordinated Universal Time (UTC), which is colloquially
"Greenwich Mean lime (GMT)." You must choose your
local time zone to display the current local time by
setting the clock.
DISPLAYING
THE CURRENT TIME
Display the time by pressing the Em button. The current time remains in the display until another button
AUD, ClK, OPT, CD, RAD, NAV or any preset is
pressed. The selected time zone is displayed (e.g. EST
for Eastern Standard Time). The current route guidance
92
information, or compass if route guidance is not active,
appears in the right side of the display.
12/512003
_2:00
~t
PM EST
_A A., ru<:;"
.-----..J
TP
1..••"'lF
G•••••••••
TIME SET-UP MENU
Display the time setup menu by pressing the SET
multifunction key.
12/5/2003
TIME: 02:09 PM EST
12HDST IT
TZ-12+
;,;+
The current date appears in the upper left corner of the
display. Any offset from the received time (e.g. 00:05
if the clock is set 5 minutes fast) appears in the upper
right corner.
Clock Operation
he current time, including offset, appears in the
iddle in the selected format (12 or 24 hour) along
'lith the current time zone (e.g. EST).
12/24 Hour Mode
Select 12 hour versus 24 hour time mode using the left
most multifunction key (12H if the current selection is
24 hour mode or 24H if the current selection is 12 hour
mode). The label for the left-most multifunction key
and the time display updates when you press the key.
Save the selection by pressing in the right knob.
07/11.·..·2002
TIME: 10:23 AN EST
24HDST
TZ
TZ-TZ+
8•••••••••
93
Clock Operation
Daylight Savings Time
Time Zone Selection
Select Daylight Saving Time by pressing the DST multifunction key. The time zone indicator toggles between
standard time and daylight savings time (e.g. EST and
EDT) and time will be offset by one hour (based on
standard or daylight time). Save the selection by
pressing in the right knob.
Select the time zone menu by pressing the TZ multifunction key.
07./11.· ..·2002
TINE: 11:23 AM EDT
24H CoST
TZ
TZ-TZ+
1.·.·.2002
TZ
TZ-TZ+
.8 ••••••••
94
The time zone list is displayed. To select the desired
time zone from the list, turn the right knob and press it
in to confirm.
Clock Operation
The following time zones are available:
NEWFOUNDLAND
(NST, NDT)
ATLANTIC (AST, ADT)
EASTERN (EST, EDT)
CENTRAL (CST, CDT)
MOUNTAIN (MST, MDT)
PACIFIC (PST, PDT)
ALASKA (AST, ADT)
HAWAII (HST)
SAMOA (SST)
en you select a time zone from the list above, the
-: ~gation unit automatically adjusts local time from
- rdinated Universal Time (UTC) to the selected time
"', If you have selected standard time, the display
--~?/s the left three characters from the parentheses in
=-= list above. If you have selected daylight savings
'=, the display shows the right three characters from
arentheses in the list above.
Time Zone Increment/Decrement
Time z ne increment/decrement
is provided to facilitate driving through time zones during the course of a
trip.
T I r1E :
24HDST
1 0 : 2=3 Rt1
TZ
TZ-TZ+
•••••88•••
For example, when traveling from Detroit MI to
Chicago IL, you pass from Eastern Time to Central
Time. When you pass into the new time zone going
west, press the TZ- multifunction key. As seen in the
example below, the time is decreased by one hour for
Chicago time and the display updates from EST to CST.
When returning to Detroit, press the TZ+ multifunction
key to return to Eastern time.
-=
95
Clock Operation
0(/11/2002
TIME: 9:23 RH CST
24HDST
TZ
T2-T2+
•••••88•••
Once you select the new time zone, press in the right
knob to confirm the new setting.
Offsetting the Clock
For those who desire to set the clock fast, the time can
be set forward using the M- and M+ multifunction
keys. When there is an offset, the upper right corner of
the display shows how many minutes of offset
(5 minutes in the example below). This offset is maintained when changing time zones. An offset is not
shown if the offset is set to zero.
Ot.·.·.i:L..·2002
Oi-FSET;
00;05
TI~[: 10:28 RN EST
24H DST
1"2 T2-T2+
•••••••
96
88
Increase the offset one minute by pressing the M+
multifunction key. Press the key repeatedly until you
have set the desired number of minutes (up to 59 minutes). If you accidentally set the time too fast,
decrease the offset by repeatedly pressing the M- multifunction key until the desired offset is displayed. Once
you set the offset, press the right knob to confirm the
new setting.
USER MENU
Requesting/Quitting
The User Menu
Telephone Characteristics
Display Setting
Flashing Security LED
Reception Optimization (Mono/Stereo)
Navigation Announcement Mode
Display Compass
Beep Volume (BEV)
98
98
99
99
100
100
101
102
97
USER MENU
TELEPHONE CHARACTERISTICS
USER MENU
REQUESTING/QUITTING
THE USER MENU
Press the SOUND hardkey for about 2 seconds.
following display appears:
The
To-.l
: -=.!.;:
If you have a telephone system with a hands-free unit
connected to the navigation unit, calls can be conducted through the radio system. There is no need for
an additional speaker required for handsfree telephone
systems. However, the signal cables (AF - telephone
input, ground - telephone input and telephone mute)
must be connected to the radio.
To select, request the user menu and press the Tel
multifunction key, to select either audio signal or mute.
Tel: Telephone characteristics
Lcd: LCD display characteristic
Led: Security LED
MIS:
Mono I Stereo
Nav: Navigation announcement
Cmp: Compass Display
BeV: Beep tone volume
Press the mm1button
98
T E'1::: rrul.E·
mode
again to exit the user menu.
Mute: Mutes radio audio during phone calls
Audio Signal: Route phone audio to speakers during
phone calls
USER MENU
DISPLAY SETTING
FLASHING
The display setting allows you to select from three diferent display versions.
Negativ: Negative display setting
Positiv: Positive display setting
utomatic: Automatic display setting (The display set. 'ng will be positive or negative based on the vehicle
eadlamp selection.)
The flashing of the LED can be turned on or off with this
function. The LED flashes when the unit is off.
SECURITY LED
Request the user menu and press the Led multifunction key to select either blinking (Led: on) or off (Led:
off). The setting is stored automatically.
- select a setting, request the user menu and press
- e Lcd multifunction key to select negative, positive,
-- automatic. Automatic is controlled using the head- p input. The setting is stored automatically.
LCD
i
EutCfrat c
99
USER MENU
RECEPTION OPTIMIZATION
(MONO/STEREO)
You can select between three different reception optimization settings to suppress reception-dependent
interference and reflections.
Request the user menu and press the M/S multifunction key to select Stereo, Mono or Auto.
NAVIGATION
ANNOUNCEMENT
MODE
With this function, you can select how you wish to hear
navigation announcements.
only: The audio source being listened to will be turned off
during announcement and the navigation announcements
will be heard with no background sound. The volume level
for navigation announcement is completely independent
of the volume level for normal audio.
mixed: The volume of the current audio source will be
Auto: Normal operation (The system will switch from
stereo to mono and back depending upon reception
level. It will provide the optimum setting for almost all
reception area).
Stereo: Exceptional reception conditions (The unit will
be constantly set to stereo.)
Mono: Reception conditions in which reflections constantly occur (The unit will be constantly set to mono.)
The setting is stored automatically.
100
lowered. The navigation announcement will be set to
the same volume as the current audio source but still
adjustable within a range of +/-6 dB. If the audio
source volume is then changed, the navigation
announcement volume will be adjusted accordingly.
independ: The current audio source and the navigation announcements can be set to different levels. Both
the current audio source and the navigation announcement will be heard simultaneously at their selected volumes.
USER MENU
To select, request the user menu and press the
ultifunction key to make your selection.
e setting will be stored automatically.
H&~'
DISPLAY COMPASS
A compass can be shown on the right side of the display when the route guidance is not active.
To select, request the user menu. Press the
multifunction key to request the second level of the user
menu. Press the
multifunction key to select
either show compass or hide compass.
If the compass display is switched off and route guidance is not currently active, radio station abbreviations
can be assigned to 9 multifunction keys in FM - DAS
mode.
The setting is stored automatically.
101
USER MENU
BEEP VOLUME (BEV)
The volume of signal tones (e.g. storage confirmation)
can be set.
To select, request the user menu and press the 1!S>i
multifunction key to request the second level of the
user menu. Press the I]ful] multifunction key. With the
right knob select either 0 (Low) or +5 (Loud).
]
The setting is stored automatically.
102
SERVICE MENU
Battery Reconnect
Calibrate the System
Triggering Reset
Request/Quit Service Menu
104
106
107
107
103
Service Mode
BATTERY RECONNECT
GPS WAIT and ALM:OO appear in the display when
the GPS receiver requires a download of the most current almanacs from the satellite. This happens when
battery power has been reapplied following a battery
disconnect.
If this display appears following two brief start-up
screens, remove the CD from the navigation radio ..
1
L. .::. 4-
5 E.->
!3PS !.•.:HIT
F::J 5;::J
H-l'l:
OCi
The ALMANAC screen will display when no CD is
loaded:
104
These displays report that:
•
GPS reception is not detected (GPS WAIT) and
•
no GPS almanacs are detected (ALM 00)
To download the almanacs, make sure that no CD is
loaded, park the vehicle in an open area away from
buildings and make sure that the GPS antenna has a
clear view to the sky.
•
NOTE: Leave the system turned on.
•
NOTE: DO NOT move the vehicle during the following downloading procedure which may require
15 minutes or longer. You will see the progress as
communication with the GPS satellite is established.
Check for the GPS status messages to appear on the
right side of the display screen.
GPS ANTENNA ERROR: The GPS antenna is
improperly connected or defective. Check the connector on the back side of the unit and the antenna
cable.
Service Mode
GPS MODUL ERROR: This message may be displayed while the GPS almanacs are downloading,
and should appear for no longer than one minute
before GPS WAIT appears. If GPS WAIT does not
appear, contact your dealer.
GPS WAIT: The GPS reception is not currently
available. F: 1 indicates actual date and time (UTC)
has been received, but no position has been determined. Continue waiting until GPS OK appears on
the display. If the number of satellites does not
begin to increase within five minutes, check the
position of the GPS antenna and of the vehicle.
GPS OK:
GPS reception is available.
of: 1 indicates a one-dimensional positioning
of: 2 indicates a two-dimensional
positioning
of: 3 indicates a three-dimensional
positioning
• S: indicates the number of satellites received
• ALM: indicates the number of downloaded almaacs.
After GPS OK appears or ALM shows at least 22
satellites, insert the navigation CD.
The LANGUAGE display will appear, requesting you to
select the language for the navigation prompts. Select
a language by turning the right knob until the desired
language is highlighted. Press in the right knob to confirm your selection.
105
Service Mode
You will see the following display:
The CAliBRATION screen may show CAliBRATION
RIDE NOT POSSIBLE if the GPS fix is not 3-D. Move the
vehicle to a less obstructed area for better reception.
Press the right knob in again to complete language
selection. The DISCLAIMER screen will appear:
CALIBRATE THE SYSTEM
CRLltH,,;::!
tJHEEL ~
Confirm the warning message indicating that you have
read and understood this user's guide.
106
i Iot·i
t<:ID~ C::!t·j 5
0:: GVRO
i Rt<:i !
-10, 5TH!";8
The system will calibrate automatically as you drive
your vehicle. After successful calibration, the navigation radio will be ready for operation and the main navigation menu or destination menu will appear on the
display.
Service Mode
NOTE: The vehicle should be in an area without
obstructions for better satellite reception.
f the system does not calibrate, see your dealer.
TRIGGERING
RESET
the navigation radio fails to respond as described in
" is user manual, reset the internal navigation radio
software by pressing the first multifunction key, the
-<
Ell
ird multifunction key and the
button at the
:Sametime. Then insert the navigation CD to reconfigre the navigation operation and complete the reset
:: cedure.
REQUEST/QUIT
SERVICE MENU
e service
enu allows the service technician to view
radio characteris' ics. The following information can be
called up in the service menu.
Model-No.: Displays model number
CD Changer Reset: Resets the CD changer if connected
CD: Serial Number
Radio Software: Displays Radio software version
Radio Bolo: Displays radio Bolo version
Navi Rom: Displays Navi Rom/Lib version
Navi Flash: Displays Navi Flash version
RTC Value: Displays RTC value
Select the service menu by pressing the"
button
and multifunction key 10 at the same time during radio
mode.
107
Service Mode
Select individual items by pressing the t·ht or Le£iJ
multifunction keys. You may also use the right knob to
view items.
To exit the service menu, press the
key.
108
rEt~d:lmultifunction
DaimlerChrysler
81-170-05044
Corporation
Second Edition
Printed in U.S.A.