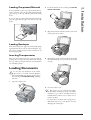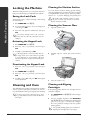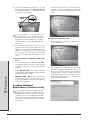
1
;^e`Z\hf;^e`Z_ZqMF0*) Nl^kfZgnZe Mabl_Zqlahplrhnpahbl\Zeebg` Zg]Zeehplrhnmhl^g]Zg]k^\^bo^LFLf^llZ`^l' G^^]mhdghpfhk^Z[hnm;^e`Z\hfÃlLfZkmL^kob\^l8 <Zee)1))..1))mhee&_k^^ @hmhhg^h_hnk;^e`Z\hflZe^lhnme^ml Lnk_mhppp'[^e`Z\hf'[^(l^kob\^l In purchasing this multifunction machine, you have decided on a quality Belgacom product. The features of your machine meet the many needs that arise in modern home office environments. You can use your machine to scan, print, copy and fax—both in black-and-white and in colour. As a fully functional photo printer, your machine has the card slots required for all typical photo storage media as well as an option for directly connecting a digital camera. The image and text enhancement function Crystal Image ensures the best possible printing and copying quality for your black-and-white and colour documents. Crystal Image also helps you to retouch annoying “red eye” effects in your flash photographs (red eye reduction). The multifunction machine offers you the convenience of a fold-out illuminated colour display for menu operation and photo selection. You can connect the multifunction machine to your PC (Microsoft Windows 2000 (SP 3) · XP). Install the included software package and use the multifunction machine as a (network) printer. In addition, you can send and receive faxes via the PC, manage the telephone book, scan, edit and save documents and send SMS messages. A WLAN adapter can be connected for wireless PC communication. You can also send files to the multifunction machine for printing from all devices with an Infrared interface (e.g. camera phones, handhelds). (WLAN is optional and functions only with an original adapter.) The Belgafax 710 has a built-in modem with which you can send and receive SMS messages without using a PC. Your multifunction machine prints using state-of-theart inkjet technology. Two free ink cartridges are provided with your machine (black and colour). Install these and you can immediately try out the many features of your multifunction machine. Have fun! Introduction About this User Manual Please read the user manual carefully and follow the safety instructions to ensure proper operation of your multifunction machine. Symbols Used and Basic Terms: Warns about improper operations that could lead to injuries, errors or damage to the machine or refers to features that are specific to a country or machine type. Indicates tips for effective use of your multifunction machine and helps to avoid possible difficulties in the execution of individual functions. Document: Original that is copied, scanned or transmitted as a fax or SMS message with your machine. Paper: Printing medium that you insert into the paper tray and onto which your multifunction machine prints. Pre-Printed material: Printed paper (e.g. stationary, postcards) onto which you can print with your machine. Menu: Settings options for functions that are shown on the display for selection. Photo memory media: Data storage media that is compatible with the multifunction machine (e.g. digital cameras, memory cards, mobile devices). Starting mode: Machine operating mode. Stand-by mode: Energy-saving mode for times when the multifunction machine is not in use. Æ ² Introduction Dear Customer! For simpler orientation, the user manual is divided into two sections. In the Machine Functions section you will find the functions that can be operated directly on the machine; the PC Functions section explains the settings that can be performed via the PC. We constantly strive to implement improvements and innovations. It is possible that individual functions are not yet activated for your machine firmware. Update the firmware of your machine (see section PC Functions / Using Companion Suite IH / Firmware Update). 3 Trademarks The term PictBridge® and the PictBridge logo are registered trademarks of CIPA (Camera and Imaging Products Association). All rights reserved. No part of this publication may be reproduced, stored in a retrieval system, or transmitted in any form or by any means, electronic, mechanical, photocopying, recording, or otherwise, without the prior written permission of Belgacom. The information contained herein is designed only for use with this product. Belgacom is not responsible for any use of this information as applied to other machines. Neither Belgacom nor its affiliates shall be liable to the purchaser of this product or third parties for damages, losses, costs, or expenses incurred by the purchaser or third parties as a result of accident, misuse, or abuse of this product or unauthorized modifications, repairs, or alterations to this product, or failure to strictly comply with Belgacom operating and maintenance instructions. Belgacom shall not be liable for any damages or problems arising from the use of any options or any consumable products other than those designated as original products. Belgacom shall not be held liable for any damage resulting from electromagnetic interference that occurs from the use of any interface cables other than those designated as Belgacom products. Notes on Statutory Limitations, Data Protection and Legal Validity ¿ The reproduction of certain documents (e.g. by scanning, printing, copying) is prohibited in many countries. The list of such documents below is not intended to be complete, it only offers a general overview. In case of doubt, consult your legal advisor. • Passports (personal identification) • Entrance and exit visa papers (immigration papers) • Military service documents • Bank notes, travel checks, payment orders • Postage stamps, tax stamps (stamped or unstamped) Crystal Image® is a registered trademark of Sagem SA. • Loan papers, certificates of deposit, bonds Microsoft® and Windows® are registered trademarks of Microsoft Corporation. • Documents protected by copyright Apple® and Macintosh® are registered trademarks of Apple Computer, Inc. Intel® and Pentium® are trademarks of Intel Corporation. CompactFlash® is a registered trademark of SunDisk Corporation. MEMORY STICK® is a registered trademark of Sony Corporation. ¿ Follow the statutory regulations of your country with regard to the legal validity of fax transmissions—particularly in connection with the validity of signatures, meeting delivery deadlines or disadvantages resulting from the loss of quality in the transmission, etc. ¿ Take care to maintain the statutory regulations of your country regarding telecommunications secrecy and data privacy. SmartMedia™ is a trademark of Toshiba Corporation. Secure Digital® is a registered trademark of Toshiba Corporation. Microdrive® is a registered trademark of Hitachi Global Storage Technologies. MultiMedia Card® is a registered trademark of Siemens AG and/or Infineon Technologies AG; MultiMedia Card™ is a trademark of MultiMedia Card Association. xD-Picture Card™ is a trademark of Fuji Photo Film Co., Ltd. DPOF® is a registered trademark of Fuji Photo Film Co., Ltd. IrDA® is a registered trademark of Infrared Data Association. USB™ is a trademark of USB Implementers Forum, Inc. General Notice: The mentioned references in this manual are trademarks of the respective companies. The lack of the trademarks ® and ™ does not justify the assumption that these dedicated terminologies are free trademarks. Other product names used herein are for identification purposes only and may be trademarks of their respective owners. Belgacom disclaims any and all rights in those marks. 4 Introduction Safety Instructions . . . . . . . . . . . . . . . . . . . . . . . . . . . . . . . 6 Machine Functions . . . . .8 Description of the Multifunction Machine . . . . . . . . . . . . 8 Panel with Display . . . . . . . . . . . . . . . . . . . . . . . . . . . . . . . 9 1. Installation . . . . . . . . . . . . . . . . . . . . 11 Package Contents . . . . . . . . . . . . . . . . . . . . . . . . . . . . . . Setting Up the Multifunction Machine. . . . . . . . . . . . . . Loading Printing Media . . . . . . . . . . . . . . . . . . . . . . . . . . Loading Documents . . . . . . . . . . . . . . . . . . . . . . . . . . . . Connecting the Telephone Cord. . . . . . . . . . . . . . . . . . . Connecting the Power Cord . . . . . . . . . . . . . . . . . . . . . . Language Selection . . . . . . . . . . . . . . . . . . . . . . . . . . . . . Entering Telephone Number and Name . . . . . . . . . . . . Entering the Dateand Time . . . . . . . . . . . . . . . . . . . . . . Inserting Cartridges . . . . . . . . . . . . . . . . . . . . . . . . . . . . Aligning Cartridges . . . . . . . . . . . . . . . . . . . . . . . . . . . . . Connecting Additional Devices . . . . . . . . . . . . . . . . . . . 11 11 11 13 14 14 14 14 14 15 16 16 2. Settings . . . . . . . . . . . . . . . . . . . . . . . 17 Entering the Date and Time . . . . . . . . . . . . . . . . . . . . . . Entering Telephone Number and Name . . . . . . . . . . . . Setting Language . . . . . . . . . . . . . . . . . . . . . . . . . . . . . . . ISDN Connection . . . . . . . . . . . . . . . . . . . . . . . . . . . . . . Private Branch Exchange (PABX) . . . . . . . . . . . . . . . . . Calling Line Identification (CLIP) . . . . . . . . . . . . . . . . . Energy Saving Mode . . . . . . . . . . . . . . . . . . . . . . . . . . . . 17 17 17 17 17 18 18 3. Crystal Image . . . . . . . . . . . . . . . . . . 19 Using Crystal Image . . . . . . . . . . . . . . . . . . . . . . . . . . . . Activating Crystal Image . . . . . . . . . . . . . . . . . . . . . . . . Deactivating Crystal Image . . . . . . . . . . . . . . . . . . . . . . Printing photos with Crystal Image . . . . . . . . . . . . . . . . 19 19 19 19 4. Copier K . . . . . . . . . . . . . . . . . . . . . 20 Sending Black & White Faxes . . . . . . . . . . . . . . . . . . . . . Sending Colour Faxes . . . . . . . . . . . . . . . . . . . . . . . . . . . Manually Sending Faxes . . . . . . . . . . . . . . . . . . . . . . . . . Resolution . . . . . . . . . . . . . . . . . . . . . . . . . . . . . . . . . . . . Sending a fax later . . . . . . . . . . . . . . . . . . . . . . . . . . . . . . Printing a Transmission Report . . . . . . . . . . . . . . . . . . . Receiving Faxes . . . . . . . . . . . . . . . . . . . . . . . . . . . . . . . . Setting Advanced Reception Options . . . . . . . . . . . . . . Clearing the Message Memory . . . . . . . . . . . . . . . . . . . . Deactivating Automatic Fax Printout . . . . . . . . . . . . . . Polling Faxes . . . . . . . . . . . . . . . . . . . . . . . . . . . . . . . . . . . Fax Settings . . . . . . . . . . . . . . . . . . . . . . . . . . . . . . . . . . . 32 32 32 32 33 33 33 33 34 34 34 34 9. SMS » . . . . . . . . . . . . . . . . . . . . 36 SMS Requirements . . . . . . . . . . . . . . . . . . . . . . . . . . . . . Sending SMS Messages . . . . . . . . . . . . . . . . . . . . . . . . . . Receiving SMS Messages . . . . . . . . . . . . . . . . . . . . . . . . . Clearing the Message Memory . . . . . . . . . . . . . . . . . . . . Changing the SMS Settings . . . . . . . . . . . . . . . . . . . . . . 36 36 36 37 37 12. Troubleshooting . . . . . . . . . . . . . . . . 39 Removing a Paper Jam . . . . . . . . . . . . . . . . . . . . . . . . . . Changing Cartridges . . . . . . . . . . . . . . . . . . . . . . . . . . . . Inserting Photo Cartridge . . . . . . . . . . . . . . . . . . . . . . . Fixing Printing Problems . . . . . . . . . . . . . . . . . . . . . . . . Displaying the Ink Level . . . . . . . . . . . . . . . . . . . . . . . . . Printing the Journal . . . . . . . . . . . . . . . . . . . . . . . . . . . . . Editing Jobs. . . . . . . . . . . . . . . . . . . . . . . . . . . . . . . . . . . . Locking the Machine . . . . . . . . . . . . . . . . . . . . . . . . . . . . Cleaning and Care . . . . . . . . . . . . . . . . . . . . . . . . . . . . . . Service Codes . . . . . . . . . . . . . . . . . . . . . . . . . . . . . . . . . Restoring the Factory Settings. . . . . . . . . . . . . . . . . . . . Power Cycling . . . . . . . . . . . . . . . . . . . . . . . . . . . . . . . . . 39 39 40 41 41 41 41 42 42 43 43 43 PC Functions . . . . . . . .44 PC Requirements . . . . . . . . . . . . . . . . . . . . . . . . . . . . . . 44 Wireless Network Requirements . . . . . . . . . . . . . . . . . 44 Making Copies with the Factory Settings . . . . . . . . . . . 20 Making Copies with Custom Settings . . . . . . . . . . . . . . 20 Changing the Copy Settings . . . . . . . . . . . . . . . . . . . . . . 21 1. Installing the Driver and Software . 44 5. Photo Printer . . . . . . . . . . . . . . . . . . . . 22 Wireless Networks . . . . . . . . . . . . . . . . . . . . . . . . . . . . . 48 Setting Up Wireless Networks (WLAN) . . . . . . . . . . . . 48 Requirements. . . . . . . . . . . . . . . . . . . . . . . . . . . . . . . . . . Using Photo storage media . . . . . . . . . . . . . . . . . . . . . . Reading Image Files. . . . . . . . . . . . . . . . . . . . . . . . . . . . . Printing DPOF Files . . . . . . . . . . . . . . . . . . . . . . . . . . . . Printing Image Files from the Photo Menu . . . . . . . . . . PictBridge-Directly Printing Files . . . . . . . . . . . . . . . . . Slideshow . . . . . . . . . . . . . . . . . . . . . . . . . . . . . . . . . . . . . Transferring a Scan to a Memory Card . . . . . . . . . . . . . Reanalysing Image Files . . . . . . . . . . . . . . . . . . . . . . . . . Removing Storage Media . . . . . . . . . . . . . . . . . . . . . . . . Editing Memory Card Contents on the PC . . . . . . . . . . Changing Printer Settings . . . . . . . . . . . . . . . . . . . . . . . 22 22 23 24 24 25 25 25 26 26 26 26 6. Telephone Book m . . . . . . . . . . . . . 28 Creating Entries. . . . . . . . . . . . . . . . . . . . . . . . . . . . . . . . Creating Groups . . . . . . . . . . . . . . . . . . . . . . . . . . . . . . . Editing Entries and Groups . . . . . . . . . . . . . . . . . . . . . . . Deleting Entries and Groups . . . . . . . . . . . . . . . . . . . . . Searching for Entries . . . . . . . . . . . . . . . . . . . . . . . . . . . . Using the Telephone Book . . . . . . . . . . . . . . . . . . . . . . . Printing the Telephone Book . . . . . . . . . . . . . . . . . . . . . Chain Dialling (Combining Numbers) . . . . . . . . . . . . . . 28 28 28 28 28 28 29 29 Table of Contents 8. Fax Y . . . . . . . . . . . . . . . . . . . . . . . . 32 Content 2. Networks . . . . . . . . . . . . . . . . . . . . . 48 3. Using COMPANION SUITE IH . . . . . . . . 51 Telephone Book . . . . . . . . . . . . . . . . . . . . . . . . . . . . . . . . Faxing . . . . . . . . . . . . . . . . . . . . . . . . . . . . . . . . . . . . . . . . SMS . . . . . . . . . . . . . . . . . . . . . . . . . . . . . . . . . . . . . . . . . . Printing . . . . . . . . . . . . . . . . . . . . . . . . . . . . . . . . . . . . . . . Scanning Á . . . . . . . . . . . . . . . . . . . . . . . . . . . . . . . . . . . Displaying the Ink Level . . . . . . . . . . . . . . . . . . . . . . . . . Firmware Update . . . . . . . . . . . . . . . . . . . . . . . . . . . . . . 51 52 54 55 55 57 57 4. Uninstalling the Driver and Software 59 Appendix . . . . . . . . . . .61 Glossary . . . . . . . . . . . . . . . . . . . . . . . . . . . . . . . . . . . . . . Abbreviations . . . . . . . . . . . . . . . . . . . . . . . . . . . . . . . . . . List of Functions . . . . . . . . . . . . . . . . . . . . . . . . . . . . . . . Technical Data . . . . . . . . . . . . . . . . . . . . . . . . . . . . . . . . . Warranty . . . . . . . . . . . . . . . . . . . . . . . . . . . . . . . . . . . . . EC-Declaration of Conformity . . . . . . . . . . . . . . . . . . . . 61 63 64 65 66 67 7. Fax Switch . . . . . . . . . . . . . . . . . . . . 30 Setting SM Modes . . . . . . . . . . . . . . . . . . . . . . . . . . . . . 30 Activating the Timer U . . . . . . . . . . . . . . . . . . . . . . . . . . . . 30 Setting the Fax Reception Mode . . . . . . . . . . . . . . . . . . 30 Using External Telephones (Easylink) . . . . . . . . . . . . . . 31 Using an External Answering Machine . . . . . . . . . . . . . 31 Table of Contents 5 Safety Instructions In order to avoid possible dangers, damage or malfunctions, please heed the following safety instructions for the setup and operation of your fax machine. Setup Location ¿ The multifunction machine should rest stably and securely on a flat, smooth and vibration-free surface. If your machine sits at an angle, proper functioning cannot be guaranteed. Do not place the machine on beds, blankets, pillows, sofas, carpets or other soft surfaces due to the danger of overheating and the resulting risk of fire. Ensure sufficient air circulation around the machine and do not cover the machine. Do not operate the machine in enclosed boxes, cabinets, cupboards, etc. The distance to other machines or objects must be at least 10 cm. Leave 30 cm of space in front of the machine because the printouts are output on the front side. Power Supply ¿type plate of your multifunction machine matches Check whether the mains voltage specified on the the mains voltage available at the setup location. In case of doubt, consult your electrical company. Only use the supplied power cord. ¿cessible because your multifunction machine does Set up your machine so that the socket is easily ac- not have an on/off button. Lay all cables out of the way to prevent tripping. ¿machine will not function (saved data is retained). Never touch the telephone and/or power cord if the ¿insulation is damaged until you have first disconIn the event of a power failure, your multifunction nected the telephone and power plugs from the network. Disconnect your machine from the power and telephone networks if: ¿ the housing and/or the telephone or power cords are damaged. ¿ a thunderstorm is approaching. In this case, persons operating the machine are at risk to lightning strikes and/or the machine could be damaged. If you cannot pull the plug, do not operate the machine. ¿ you would like to clean the surface of your machine. ture fluctuations and/or high humidity. ¿ ¿touch the power plug, power connection or the liquids or foreign bodies have entered the machine. There is a risk of electric shock and/or damage to the machine. ¿ the machine overheats and starts on fire or smoke comes out of the machine. ¿ Protect the multifunction machine from direct sunlight, exposure to intense light and excessive heat. Never place the machine in the immediate vicinity of heaters, radio or television equipment or air-conditioners. ¿kept away from this product at all times. Avoid the influence of dust, water and chemicals. ¿Do not subject the machine to extreme tempera- To prevent the spread of fire, open flames should be Do not plug in the device in moist rooms. Never telephone socket with wet hands. ¿chine damage and/or personal injuries, particularly Should the multifunction machine fall, serious ma- in the case of small children, can result. Do not allow children to handle the machine without supervision. 6 Safety Instructions Photo Memory Media ¿yourself. Improper maintenance can result in ma- ¿the multifunction machine (see section Machine Never attempt to perform repairs on the machine Only use memory media that are compatible with chine damage, fire or electrical shock (see Appendix / Warranty). Only have your device repaired by an authorised service centre. Functions / Photo Printer / Using Photo Memory Media). ¿ Do not press forcefully on the scanner cover when you scan thicker documents or three-dimensional items, this could damage the scanner cover and/or the scanner glass. ¿time! Never interrupt the connection between the photo ¿memory medium and the multifunction machine Never use more than one storage medium at a Never open the paper jam door while the multifunction machine is printing. while data on the memory medium is being accessed. Do not disconnect the machine from the power supply. job; never open the paper jam door at this time. Insert paper. ing the print job. This could cause data to be damaged or lost. ¿ If you have not inserted any paper, the multifunction Never pull out the memory card while the ¿machine attempts to load paper upon receiving a ¿multifunction machine is accessing it and execut¿the multifunction machine, always keeping it in a ¿storage medium to ensure proper use. Use care when operating, storing or transporting Be sure to read the operating instructions for your horizontal position; otherwise ink may leak out. ¿ Before cleaning the surface, disconnect the machine from the telephone and power networks. Never use liquid, gaseous or easily flammable cleansers (sprays, abrasives, polishes, alcohol) to prevent damage to painted parts. ¿breaks, a mildly corrosive liquid may escape. Should Use a soft, dry cloth to clean the display. If the display you come into contact with this liquid, rinse the affected areas with large amounts of water. If complaints or vision problems occur, consult a physician immediately. Ink Cartridges Safety Instructions Handling and Maintenance General Information ¿0.7 amperes to ensure USB functionality. Do not The power load on all USB ports may not exceed connect more than one high-power device to your multifunction machine at a time. Do not connect additional devices—such as batteries, fans, charging devices—to your multifunction machine. ¿telephone, keep the base station of the cordless If you would like to use an additional cordless telephone at least 15 cm away from the multifunction machine, otherwise acoustic disruptions may occur in the telephone handset. ¿time, always use the enclosed Plug’n’Print card; ¿can be recycled. When you wish to dispose of the When loading original ink cartridges for the first This electronic device contains many materials that only this way is all necessary information saved to allow for faultless replacement and reuse of the cartridges. Other ink cartridges may damage the device (see Appendix / Warranty). machine, please obtain information on the regulations in your country for the recycling of electronic equipment. ¿ Store temporarily removed cartridges either in the photo cartridge storage box or pack them individually in closed plastic bags. For safety reasons, always keep ink cartridges out of the reach of children. ¿ting ink on clothing or other objects. Do not shake Handle used ink cartridges carefully to prevent get- the ink cartridges. Avoid all contact with your skin and eyes. Remove ink flecks with large amounts of water. If complaints or vision problems occur, consult a physician immediately. ¿ Take the ink cartridges out of the machine during ¿transport. Dispose of the empty cartridges according to the ¿regulations of your country. Do not perform any alterations on the original ink cartridges; this can damage the printing heads. Safety Instructions ¿fort, stay away from the multifunction machine If you have a pacemaker and experience discom- and consult your doctor. ¿conformity with standards EN 60950-1 and IEC Your multifunction machine has been tested in 60950-1 and should only be operated with telephone systems and power equipment that meet these standards. ¿sively for use in the indicated sales region. It con- The multifunction machine was developed exclu- forms to the regulations of the telephone company of the country. Do not make any changes or settings that are not described in this user manual. 7 Machine Functions Machine Functions Description of the Multifunction Machine Scanner cover Machine cover USB port for WLAN adapter* Speaker Panel with display Slot for Plug’n’Print card Four slots for ten different memory card types Printout tray output Paper stopper Infrared port Front paper guide with tab Paper tray Side paper guide Front USB port for digital cameras EXT. socket—Connection for external devices (telephones, answering machines, etc.) USB port for the PC LINE socket telephone cable connection Paper jam door 8 * WLAN is optional and functions only with an original adapter. Power cord connection Overview m Access telephone book functions À Broadcasting—Send faxes or SMS messages to multiple recipients K Create colour copy; start photo printing Á Transfer scan to PC X Cancel current jobs; return to the starting mode K Create black-and-white copy; start photo printing PAUSE/R When dialling or saving telephone numbers: insert a dialling pause(/); when connected to a private branch exchange: enter outside line access code (R) Overview Panel with Display h/f/F/COL Set fax resolution (standard, fine h, superfine f, photo F and colour fax COL) Y Start fax transmission, copy or print job v If this indicator light is blinking, please read the information on the display z Speaker for listening while a connection is established (no two-way communication) ³ Open redial list—’ received calls (max. ten); ‘ dialled numbers (max. ten) » Read, edit and send SMS messages; the indicator light next to the button blinks when new messages have arrived Number keypad Crystal Image photo and text enhancement: create high-quality printouts and copies (in colour or black-and-white) Crystal Image red eye reduction: retouch “red eyes” in your flash photographs Light on (blue): Crystal Image is activated Light blinking (blue): Crystal Image executing a job Light off: Crystal Image is deactivated MENU/OK Access the menu functions; confirm entries / Select options; move the cursor on the display; enter numbers C Fold-out backlit colour display with and letter keypad Overview Clear entries; return to last menu function U/M/S Switch timer U on/off; switch between modes S (day) and M (night) 9 Symbols on the eight-line display Fax resolution: h For texts and drawings f For finely printed texts and drawing F For photos COL Send colour faxes Machine Functions I Calls received while away (with caller ID (CLIP)) ²colour display. You can adjust the contrast of your 1 Press MENU/OK and 270. 2 Set the contrast with /: `: less contrast; ^: more contrast. 3 Confirm with OK. W Received SMS messages $ Completely silent ring settings (even devices connected to the EXT. socket do not ring) ² You can change the colour settings for the display with function 87. S/M/U Selected mode (day/night) 1 Press MENU/OK and 87. ´ Message memory status 2 Use / to select the desired display colours. 3 Confirm with OK. The selected menu function is indicated with a coloured bar. Letter Keypad under Fold-out Cover In addition to the letters, special characters are also available: +—To enter upper case letters: Press the + button and (simultaneously) the respective letter button to enter upper case letters. ½—To enter a space Ctrl—To enter special characters: Press Ctrl and (simultaneously) the respective letter button to insert the special character shown above it. J—Next line; insert line breaks 10 Overview Installation Package Contents Setting Up the Multifunction Machine 1 The following parts are included in the package: Remove the transport protection (e.g. tape). Any sticker can be pulled off without leaving any residue. Æeasily accessible because your multifunction Set up your machine so that the socket is Multifunction machine machine does not have an on/off button. (To disconnect your machine from the power supply, pull the power plug out of the socket—see the chapter Safety Instructions.) 2 Insert the printout tray into the slot provided in the paper output until reaching the stop. 3 Pull the printout tray as far out as possible and fold the paper stopper up to prevent a paper jam. 1. Installation 1. Printout tray Two ink cartridges (black and colour) User manual Installation guide Loading Printing Media Installation-CD Power cord with plug Telephone cord with plug USB cable ² If a part is missing that is not one of the country-specific items or if parts are damaged, please contact your retailer or our customer service. 1. Installation Load paper into the paper tray before plugging in the machine. Your multifunction machine supports numerous paper formats and types. You can use both preprinted material and refill paper of the supported paper types (see chapter Appendix / Technical Data). Loading Paper Use only undamaged paper that is suitable for use with inkjet printers. ²ensure good printing quality. Do not use any paper lighter than 75 g/m2 to 1 Separate the paper sheets by fanning them out, then align them by tapping edge of the stack lightly against a flat surface. This will prevent several sheets of paper from being drawn in all at once. 11 Machine Functions 2 Lift up and hold the printout tray. Pull the front paper guide as far out as it will go. Lay a maximum of 150 sheets of paper (standard format A4, 210×297 mm, 80 g/m2) into the paper tray with the short edge out, inserting them up to the stop. Loading Photo Paper ²signed for your multifunction machine in or- The original photo paper was specially de- der to achieve the best possible printing quality and durability. If you use other types of paper, it is possible that the paper could be drawn in incorrectly or the ink could smudge. Lay the photo paper in the paper tray with the coated side (= glossy side) facing down and the short side out, inserting it until it reaches the stop. Also enclose 10×15 paper with the tab on the front paper guide. Æthickness of the printing medium loaded. In- The capacity of the paper tray depends on the sert a stack no higher than the height limit of the two side paper guides (see indicator marking printed on the machine). 3 Enclose the paper with the two side paper guides and the front guide. Be sure not to enclose it so tightly that it bends. ²serting at least two sheets of paper (up Protect the surface of the photo paper by in- to max. 20 sheets) together into the paper tray. After printing a photo on 10×15 format, load A4 or letter paper into the paper tray; otherwise incoming faxes will not be printed out completely. (Set the paper format and the paper type with the functions 241 and 242.) Instruction on the Use of Photo Paper ¿fingerprints and flecks on the coated side or in the Only hold the photo paper by the edges to avoid 4 Carefully return the printout tray back to its original position. Instructions on the Use of Paper ¿not use moist or damaged paper. Do not add paper To prevent paper jams and poor printing quality, do while the machine is printing. If the paper curls in the printout tray after printing, remove it immediately. Instructions for removing a paper jam can be found in the chapter Troubleshooting / Removing a Paper Jam. printing area. ¿not use the photo paper in environments with high Avoid contact with moisture and liquids, and do humidity, extreme temperatures or in direct sunlight. ¿cool and dry location, and do not expose it to ulStore the photo paper in the original package in a traviolet light. ¿conditions for at least 24 hours. Lay acid-free paper Allow the printouts to dry under normal room between the individual printouts. Æmultifunction machine is printing. Use photo albums of acid-free material, and avoid Printouts with high printing density (e.g. due to ¿ that contain PVC to prevent your photos ¿complex graphics) can remain damp for a longer fromplastics fading. time. Leave the printout in the printout tray for 30 to Follow these instructions to achieve the best pos60 seconds to dry. ¿sible durability and printing quality with the photo Never open the paper jam door while the paper. 12 1. Installation 2 Lay the document onto the scanner glass with the written side down. 3 Align the document with the rear left corner of the scanner glass (arrow marks). 4 The markings on the scanner border for the A4 and A5 formats will help you to position the document correctly. 5 Close the scanner cover. If you would like to print on pre-printed material (e.g. forms, stationary), place the pre-printed material in the paper tray up to the stop with the printed side facing down. If you are using pre-printed material with a letterhead, place the paper into the paper tray with the top edge in first. 1. Installation Loading Pre-printed Material Loading Envelopes Insert the envelopes into paper tray with the flap facing upward and the short side out until reaching the stop. Also enclose smaller envelope formats with the tab on the front paper guide. Inserting Transparencies Insert the transparencies into the paper tray with the printing side (= rough side) facing down until reaching the stop. Only use transparencies that are intended for use with inkjet printers. Loading Documents Æthat are wet or to which correction fluid has Do not place any documents on the scanner been applied! Make sure that the scanner glass is clean (see chapter Troubleshooting / Cleaning and Care). 1 Open the scanner cover. ²able hinges, allowing you to lay even thicker The scanner cover is equipped with adjust- documents (e.g. books) in the flatbed scanner. Carefully lift the scanner cover so that it rests as evenly as possibly. Use clear sheets of plastic when copying threedimensional objects (e.g. coins, flowers) to avoid damaging the scanner glass. 1. Installation 13 Positioning Documents Machine Functions Position the document with the long edge against the back side of the scanner glass. Insert the paper into the paper tray with the short side out. This is particularly important for printing photos in the 10×15 format! ²chine switches to the energy saving Stand-by When not in use, your multifunction ma- mode (see Settings / Energy Saving Mode). Language Selection 1 Press OK. 2 Use / to select the desired display language. 3 Press OK twice. Entering Telephone Number and Name If you would like your telephone number and name to appear on outgoing messages as a sender identification (= header), enter your sender identification here: Connecting the Telephone Cord Connect the telephone cord to the multifunction machine by inserting the small plug of the telephone cord into the socket designated by the word LINE on the rear side of the machine. Insert the telephone plug into your PTT line socket. ²type of message individually (see chapter You can suppress the header line for each Fax / Fax Settings or SMS / Changing the SMS Settings). Number Entry (max. 20 digits) Enter your telephone number using the number keypad, then press OK. (For a plus sign, press Ctrl and Q on the letter keyboard at the same time. For a space, press the button ½.) Name Entry (max. 20 characters) Connecting the Power Cord Fold open the cover for the letter keypad. To enter upper case letters, press + and the desired key at the same time. The available special characters are printed above and to the right of the keypad buttons and can be entered by pressing the Ctrl button simultaneously with the corresponding letter button (for example, press Ctrl and ½ at the same time to enter @). Press ½ to enter a space. Insert the small plug of the power cord into the power cord socket on the rear side of your machine. Connect the large plug to the wall power socket. If you have entered an incorrect number or letter, you can correct the entry with / and C. Press OK after completing the entry. Entering the Date and Time When the multifunction machine is in the starting mode, the date and time are shown on the display. Once you have connected your multifunction machine to the power supply, it will lead you through the following basic configuration process. You can change these settings at any time (see chapter Settings). 14 Æday—month—year—hour—minute Note the order for entering the date and time: (two digits). 1. Installation Enter the date and time with the number keypad and confirm the entry with OK (e.g. press 08 08 05 14 00 for August 8, 2005, 2:00 pm). 2 If you have entered an incorrect number, you can correct the entry with / and C. 3 Confirm with OK. 2 Press on the spring catch of the cartridge holder to open it. 3 Take the ink cartridges out of the packaging, remove the packaging material and carefully pull off the protective strip. ²a power failure), you must enter the date and If the power supply is interrupted (e.g. after time again. Inserting Cartridges Ink cartridges must be installed in your multifunction machine for scanning, copying and printing. Two ink cartridges (black and colour) have been included with your machine to allow you to use these functions right away. The ink level memory for the cartridges is preset at the factory. You do not need a Plug’n’Print card to update the cartridges. For instructions on changing cartridges or inserting a photo cartridge, please consult the chapter Troubleshooting. Æ When first setting up your machine, only use the ink cartridges included in the package! 1 Fold the colour display back to the original position. Æhas been completely removed. Be careful not Please make certain that the protective strip to touch the nozzles or contacts. 4 Insert the cartridges with the “nose” pointing down and tilted back at an angle; the black cartridge on the left, the colour cartridge on the right. 5 Close the holder. You will hear a click when the cover of the holder snaps into place. Open the machine by taking hold of the moulded grip under the machine cover … … and lifting the housing upward. 1. Installation 1. Installation 1 15 6 Close the machine ²vices directly to the multifunction machine We recommend connecting additional de- because its built-in active fax switch will then function optimally and is capable of controlling the additional devices (see chapter Fax Switch / Setting the Fax Reception Mode). Machine Functions Connection to the Telephone Line ÆPOSITIONS appears on the display, you If you connect additional telecommunications devices to the same telephone wall socket, make sure the multifunction machine is the first device connected to the line. If the error message CHANGE CARTRIDGE have inserted the cartridges incorrectly. Open the machine and insert the cartridges correctly (see steps 1 to 6). Variant 1 Aligning Cartridges Press OK. After the ink cartridges are inserted, your multifunction machine prints out a test page and automatically configures the correct parameters for the best possible printing result; this process can take some time. Remove the test page. This completes the installation process. Connecting Additional Devices Variant 2 You can operate other devices on a telephone line in addition to your multifunction machine, for instance cordless telephones, answering machines, charge counters or modems. If you would like to use special peripheral equipment with your multifunction machine, you should contact a specialised dealer. Connection to the Multifunction Machine You can connect additional devices directly to your multifunction machine. Insert the telephone cord of the additional device into the EXT. socket on the back side of your multifunction machine. ADSL Connection In the event that you use a ADSL modem: Connect the multifunction machine after the modem! For additional information, please consult the user manual of your ADSL system. ISDN Connection Details for ISDN connections can be found in the instructions provided with the terminal adapter or the dial-up router. 16 1. Installation Settings Press MENU/OK and 29. You will receive a printout of the menu functions of your machine; an additional sheet provides information about the current settings. There are two ways to access functions in the menu: ²mode, press any button to return to the op- If your machine is in energy saving Stand-by erating mode; only then can you access the functions (see Energy Saving Mode). 1 Access a menu function, by pressing MENU/OK and page through the menu entries with /. The selected function is marked by a coloured bar. Confirm with OK to select a menu function. 2 Access a menu function directly by pressing MENU/OK and entering the corresponding menu numbers with the number keypad. Direct menu access offers a quick and simple method for selecting functions. ² Return to the last menu entry with C; return to the starting mode with X. If you would like to change the current settings, the following functions are available: Entering the Date and Time Setting Language Set the desired language by pressing MENU/OK and282. Use / to select the language and confirm with OK. ISDN Connection Your multifunction machine is not an ISDN device (group 4), it is an analogue device (group 3). For this reason, it cannot be operated directly on an ISDN connection; either an (analogue) adapter or an ISDN system with connections for analogue devices is required for this. For additional information, please consult the operating instructions of your ISDN system or ask your telephone service provider. Private Branch Exchange (PABX) Private branch exchanges are typical in many offices and private households. To obtain a connection to the local telephone network from such a line (extension), you must dial an outside line access code. Æwith the multifunction machine on one tele- An additional telephone connected together phone line is not considered an extension! Configure the following settings if you would like to operate your multifunction machine on a PABX: 1 Press MENU/OK and 21. 1 2 Enter the date and time, and save the settings with OK (see chapter Installation / Entering the Date and Time). Press MENU/OK and 231. Use / to select PABX:YES and confirm with OK. 2 Use / to select the function 232>Prefix and press OK. 3 Enter the number of digits for designating an external telephone number. The necessary number depends on the internal telephone number organisation of your telephone system (e.g. if you use four-digit extension numbers, you must enter 5). Confirm with OK. 4 Enter the outside line access code that is required in order to reach the public telephone network. This is usually 0. Confirm with OK. ² If the power supply is interrupted (e.g. after a power failure), you must enter the date and time again. Entering Telephone Number and Name 1 Press MENU/OK and 22. 2 Enter your telephone number and your name, then save with OK (see chapter Installation / Entering Telephone Number and Name). Æedge of every page (= header) together with Your name and number are sent on the top the date, time and page number if you have saved this information with the functions 21 and 22. 2. Settings 2. ²the outside line access code when you dial an With this setting, it is not necessary to enter external number. The machine will automatically add the outside line access code in front of numbers that are longer than the configured direct dial numbers. Æaccess code can be (R) (also called FLASH). For older telephone systems, the outside line Press PAUSE/R to enter the outside line access code (R). Confirm with OK. 2. Settings 17 If (R) is indicated in your PABX as the outside line access code but it is still not possible to obtain an outside line, your system does not correspond to the newest standard. If necessary, you may want to ask your telephone system provider. Machine Functions Calling Line Identification (CLIP) For incoming calls, your multifunction machine shows the number and name of the caller on the display. To make use of this function, Calling Line Identification Presentation (CLIP) must be enabled for your telephone line. Contact your telephone company to inquire about whether or not this additional function is available for your line. ²saved for the subscriber in the machine’s tele- Your machine will display the name you have phone book. The number and name will not be shown if the caller suppresses his number. If you receive a telephone call during your absence, the symbol I will appear on the display. Your multifunction machine saves the last ten calls in the redial list. You can use the redial list for entering telephone numbers: 1 Press ³. A list of the last ten calls appears on the display (marked by ’). 2 Use / to select an entry. New entries are marked with a star “*”. 3 Start the message transmission as described in the corresponding chapters (see chapter Fax, SMS). Æ(0) (see chapter Fax Switch / Setting the If you have set the number of rings to zero Fax Reception Mode), the telephone numbers of callers will not be displayed on additional connected telephones. Energy Saving Mode With the standard settings, your multifunction machine switches to the energy saving Stand-by mode when not in use. If you press any button or receive a message or a call, your machine switches immediately from stand-by mode to operating mode. Only in starting mode can you enter information or access functions. ²off in Stand-by mode to save power. The colour display illumination is switched 18 2. Settings Your multifunction machine has the image and text enhancement function Crystal Image with which you can achieve optimal printing and copying quality for your image files and documents—both in colour and in black-and-white. ² Crystal Image functions independently from a PC! Crystal Image consists of three components that can be used depending on the specific requirements: ¿ Text enhancement (in colour or black-and-white) ¿ Image enhancement (in colour or black-and-white) ¿ Red eye reduction Activating Crystal Image 1 At the start of the print or copy job press the Crystal Image button on the panel. When Crystal Image is activated, the Crystal Image button glows blue. 2 Follow the steps for the specific application (see chapter Copier, Photo Printer). 3 If you would like to retouch “red eyes”, use / to select Reduction, and confirm with OK. 4 Start the print or copy order as described for the specific applications (see chapter Copier, Photo Printer). 5 Wait until the data for the Crystal Image quality enhancement have been processed. During this process, the Crystal Image light blinks blue. ² Æone photo per page. The format option Using Crystal Image Deactivating Crystal Image Red eye reduction is a complex process and can take some time. Confirm the query rED EYE on the display only if needed with Reduction. Crystal Image text and image enhancement can be used on documents that you have scanned with the flatbed scanner, loaded from a memory card or transferred for printing via Infrared. You can also use Crystal Image for PictBridge print jobs. ²hanced with Crystal Image to the inserted Transfer the image files that you have en- memory card to save them for later use (see chapter Photo Printer / Transferring a Scan to a Memory Card). Crystal Image automatically performs all adjustments and corrections with regard to image sharpness, colour management and contrast in order to obtain the best possible printing quality. Exposure errors are also corrected (underexposed images are brightened or parts of the image with extremely different contrasts are brought into balance). The red eye reduction retouches “red eyes” in flash photographs. 3. Crystal Image 3. Crystal Image 3. Crystal Image With Crystal Image, you can print out 10×15’A4 (= two 10×15 photos on A4) and multiple printouts (e.g. index printout) are therefore not possible. After completing the print or copy order, press the Crystal Image button to deactivate the Crystal Image function. The blue light goes out. Your multifunction machine automatically returns to the last configured settings or to the standard settings. Printing photos with Crystal Image ²hancement, we recommend using photo paFor printing photos with Crystal Image en- per (see chapter Installation / Loading Printing Media / Loading Photo Paper) combined with photo cartridges (see chapter Troubleshooting / Inserting Photo Cartridge). 19 4. Copier K Machine Functions With your multifunction machine, you can create high quality colour and black-and-white copies on various paper types and formats. You can either copy automatically—in other words, using the factory settings—or you can use custom settings. ²Crystal Image to create quality copies in col- Use the image and text enhancement function our or black-and-white. At the start of the copy process, press the Crystal Image button to activate Crystal Image (see chapter Crystal Image). Making Copies with the Factory Settings 1 Lay the document onto the flatbed scanner with the written side facing down (see chapter Installation / Loading Documents). DRAFT—For documents without drawings or details. This is the fastest setting for copying. However, the printing quality may appear worse. Confirm with OK. NORMAL—For documents with small print or drawings. This setting is the best option for most copying needs. Confirm with OK. QUALITY—For the highest resolution. The copy process is slower than with the other two settings. This setting produces the highest printing quality for image files or photos. Confirm with OK. ²quality photos, we recommend using photo For the special requirements of printing high paper (see chapter Installation / Loading Printing Media / Loading Photo Paper) combined with photo cartridges (see section Troubleshooting / Inserting Photo Cartridges). 5 Under Scan SIZE use / to select the format of the loaded document and confirm withOK. 10×15 cm 6 Under PapER SIZE use / to select the format of the desired printing medium and confirm with OK. 10×15 cm 7 If the scan and paper formats are the same (see steps 5 and 6), you can copy a document scaled to as small as 25 % of the original size or magnified as large as 400 %. The proportions of the original are retained. Enter the desired value using the number keypad (or with /) and confirm with OK. ZOOM 250% ²of the scanner glass. Align the document with the rear left corner 2 Press one of the two K buttons (copy in colour or black-and-white) twice. The copy is created. ²have to press the button three times. If the machine is in energy saving mode you Making Copies with Custom Settings 1 Lay the document onto the flatbed scanner with the written side facing down (see chapter Installation / Loading Documents). 2 Press one of the two K buttons (copy in colour or black-and-white) once. You have the following options available: 3 Use the number keypad (or use /) to enter the desired number of copies (1 to 99) and confirm with OK. COPIES 1 4 20 You have a higher resolution available to you for copying than you have for fax transmissions. Select the desired resolution with /: If you would like to copy a detail (such as a graphic) of your document, position the document such that the corner of the detail is up against the origin. Using the zoom function, you can separate the desired area from rest of the document. 8 For a colour copy: Use / to set the saturation (colour density). The saturation is measured in relation to the contrast: - diminishes the colours (down to the grey range), + intensifies the colours. Confirm with OK. 4. Copier Use / to set the brightness of the copy: - darkens the copy; + brightens the copy. Confirm with OK. 10 Use / to select whether you want to copy onto normal or coated paper, photo paper or a transparency. Confirm with OK. PHOTO ²ing medium used. Use appropriate paper to The printing result also depends on the print- achieve the best results. 11 For colour copy with Crystal Image: If you want Crystal Image to implement the red eye reduction, use / to select REDUCTION and confirm with OK. ² Red eye reduction is a complex process and can take some time. Confirm the query only when needed. Setting the Zoom Parameter 1 The standard setting for the zoom function (factory setting: 100%) can be changed by pressing MENU/OK and 253. 2 Use / to select the scaling value (25%—400%), or set the scaling value yourself. Confirm with OK. ²to the starting mode with X. Return to the last menu entry with C; return Setting the Saturation (for colour copies) Æcontrast: - diminishes the colour (down to The saturation is measured in relation to the the grey range), + intensifies the colour. 1 The standard setting for the saturation (factory setting: medium saturation) can be changed by pressing MENU/OK and 254. 2 Use / to select the desired colour intensity. Confirm with OK. 12 The copy is created with the defined custom settings. ²ing from any step in the process. With the Press K (or the Y button), to start the copy- X button, you can cancel the copy process and return to the starting mode. ²to the starting mode with X. Return to the last menu entry with C; return Changing the Copy Settings Setting the Brightness All custom settings are reset to the factory settings after the copy is created, unless you save them as the new standard settings. 1 The standard setting for brightness (factory setting: medium brightness) can be changed by pressing MENU/OK and 255. 2 Use / to select the desired level of brightness. Confirm with OK. Setting the Resolution 1 The standard setting for the resolution (factory setting: NORMAL) can be changed by pressing MENU/OK and 251. 2 Use / to select the desired resolution and confirm with OK. QUALITY ²to the starting mode with X. Return to the last menu entry with C; return Setting the scan format 1 The standard setting for the scan format can be changed by pressing MENU/OK and 252. 2 Use / to select the format of the loaded document. Confirm with OK. 4. Copier 9 Æprintout. - makes the printout darker, + brightens the ²to the starting mode with X. Return to the last menu entry with C; return Reducing the Moire effect You can copy your document with double resolution in order to prevent stripes (= Moire effect) appearing on your printout. 1 Press MENU/OK and 256. 2 Use / to select reduction, and confirm with OK. ²to the starting mode with X. Return to the last menu entry with C; return ²to the starting mode with X. Return to the last menu entry with C; return 4. Copier 21 5. Photo Printer Machine Functions Your multifunction machine has all the features and connections to be used as a fully functional photo printer. You can print your digital photos from a memory card or directly from a digital camera. You can also send image files for printing via Infrared. If you have installed the included software package and connected your machine to a PC, you can manage image files on the PC and print them from there (see section PC Functions / Using Companion Suite IH / Printing). Requirements Supported Photo Media Numerous paper types are available for printing out your photos. You can also select the format BORDERLESS as a special option to print out your digital photos using the entire paper area. The following format options are available for your image files: ¿ ¿ ¿ ¿ ¿ 10×15 standard 10×15 BORDERL. 10×15’A4 (two 10×15 photos on A4) A4 standard A4 BORDERLESS ²machine will remove the image margin, if With borderless printing, your multifunction necessary, to create a borderless printout while retaining the original proportions. After printing a photo on 10×15 format, load A4 or letter paper into the paper tray; otherwise incoming faxes will not be printed out completely. (Set the paper format and the paper type with the functions 241 and 242.) Photo formats are measured in inches. The typical product names are rounded values. Take note of the inch values in connection with standardised photo accessories. Product Name (cm) Millimetre-Format Inch-Format 10×15 102×152 Supported Image Files You can use image files that satisfy the following requirements: Media Format DCF (Design Rule for Camera File System) compatible (Version 1.0) File Format JPG (JPEG) format BASELINE Image Size up to 3 MB Detectable Files up to 999 Using Photo storage media Inserting a Memory Card If your digital camera uses a memory card for saving the image files, you can insert this into your multifunction machine and print out the image files—assuming that the memory card is compatible with the machine. It is also possible to scan in a photo with the flatbed scanner and transfer the scan to the inserted memory card (see Transferring a Scan to a Memory Card). Compatible Memory Cards Your multifunction machine supports the following memory cards: CompactFlash (I, II), SmartMedia, MultiMedia Card (MMC), Secure Digital, Memory Stick, Memory Stick Duo (Pro), Memory Stick Pro, Microdrive, XD-Picture-Card. Four slots are available; take note of the configuration of the slots: Upper Left Memory Stick, Memory Stick Duo (Pro), Memory Stick Pro Upper Right MultiMedia Card (MMC), Secure Digital (SD) Lower Left CompactFlash (I, II), Microdrive Lower Right XD-Picture-Card, SmartMedia (SM-Card) 4×6 With Infrared, you can transfer up to 24 image files to the multifunction machine. The data will be lost in the event of a power failure. For the special requirements of printing high quality photos, we recommend using photo paper (see chapter Installation / Loading Printing Media / Loading Photo Paper) combined with photo cartridges (see chapter Troubleshooting / Inserting Photo Cartridges). Æcarefully to ensure proper use and to learn Read the user manual of your memory card about the capabilities and requirements. 22 5. Photo Printer Instruction on the Use of Memory Cards ¿slot, note the correct insertion direction (see also Never use force to insert the memory card into the the information printed on the machine near the slot). ¿time! Do not use more than one storage medium at a With function 85, you can load the memory contents of your connected digital camera (mass storage class). Press MENU/OK and 85. Transmitting Image Files via Infrared You can send files to your multifunction machine for printing from all devices (e.g. camera phones, handhelds) with an infrared interface (OBEX-protocol). 1 ¿serted memory card, check whether you have used If your multifunction machine cannot read the in- Position your infrared-capable device such that both infrared ports face each other. a compatible memory card and whether you have inserted the memory card correctly. ¿multifunction machine has executed the print job. The name of the file folder on your memory card ¿should not contain any periods. With function 84, you can load the memory ²contents of the inserted memory card. Press Only pull out the inserted memory card once the 5. Photo Printer For the Memory Stick Duo (Pro), you need an adapter (generally included with the memory card). MENU/OK and 84. Directly Connecting a Digital Camera Your multifunction machine is compatible with digital cameras of the mass storage class and imaging class and supports the PictBridge standard. Æ Read the user manual for your digital camera carefully to ensure proper use and to learn about the capabilities and requirements. The power load on all USB ports may not exceed 0.7 amperes to ensure USB functionality. Do not connect more than one high-power device to your multifunction machine at a time. Connect the digital camera with a USB cable to the front USB port of your multifunction machine. Æ20 cm and that the angle of your device to the Ensure that the distance does not exceed multifunction machine is no greater than about 15 °. Never use more than one storage medium at a time! 2 On the mobile device, select the image files you would like to send. Please consult the user manual of your mobile device for precise instructions. 3 Confirm with OK to access the photo menu of your multifunction machine (see Printing Image Files from the Photo Menu). ²tory. You can deactivate the infrared function The infrared function is activated at the fac- by pressing MENU/OK and 941 on your multifunction machine. Use / to select OFF and confirm with OK. Reading Image Files ²multifunction machine only once all pendConnect your digital camera to your ing print orders are completed and the machine is in the starting mode. 5. Photo Printer After you have established the data transmission in one of the ways described above, a message appears on the display indicating the number of image files your multifunction machine has detected (up to 999). Your multifunction machine automatically detects existing DPOF files and PictBridge signals. You can also print out your photos from the photo menu. ²photos may take a few moments. For large amounts of data, reading of the 23 Printing DPOF Files Machine Functions Your multifunction machine meets the DPOF (Direct Print Order Format) standard (file format 1.10). With the digital print order format DPOF you can select photos for printing directly on your digital camera and configure the desired settings. The machine reads the DPOF files on the memory card and detects which photos have been selected for printing. If you print DPOF files with your multifunction machine, the print settings of your machine are overwritten, i.e. the selected image files are printed with the DOPF settings configured on the digital camera. Ænail of an image file if the storage medium It is only possible to create an index thumb- provides the required EXIF information. The index number may differ from the number or name on your storage medium! Each change (such as adding or deleting photos on the storage medium) requires a new index printout in order to obtain the current index numbers for selecting photos (see Reanalysing Image Files). 1 In the photo menu, use / to select PRINT INDEX, and press OK. Use / to select from the following options: Æ ALL—Press OK. An index of all detected photos is printed. 1 Start the DPOF printout by confirming PRINT DPOF with OK on your multifunction machine. 2 Use / to select the desired paper format of the printout and confirm with OK. 10×15 cm RANGE—Press OK. Individually set the series of photos for the index printout: Use the number keypad to enter the number for the first photo and confirm with OK. Then enter the number of the last photo of your index printout. Confirm with OK. If your multifunction machine does not support any of the configured DPOF options, the display will show possible print settings or the print job will not be executed. Please note the printing parameters of your multifunction machine (see Requirements). 3 Use / to select whether you want to use normal or coated paper, photo paper or a transparency. Confirm the selected paper type with OK. PHOTO 4 For Colour printout with Crystal Image: If you want Crystal Image to implement the red eye reduction, use / to select REDUCTION and confirm with OK. 5 Your multifunction machine starts printing. ²your multifunction machine, you can load the If you would like to access the print settings of photo menu by using / to select Photo menu and confirming with OK. Printing Image Files from the Photo Menu LATEST 24—Press OK. An index of the last 24 photos taken is printed. ²than 24 photos are contained on your stor24 index images fit on one A4 page. If more age medium, you can use the RANGE function to divide the memory contents onto multiple userdefined index pages. Your multifunction machine displays the detected photos on the display. You can page through the photos with /. Press OK to select one or more image files for printing. The selected photo is marked with a coloured border. 2 Use the number keypad (or /) to enter the desired number of copies (1 to 99) and confirm with OK. No. of copies 1 3 Use / to select whether you want to use normal or coated paper, photo paper or a transparency. Confirm with OK (or with K or the Y button). 4 Your multifunction machine starts the index printout. The photo menu of your multifunctionmachine offers the following functions: 1 PRINT INDEX 2 PRINT PICTURES 3 SLIDESHOW 4 SCAN TO CARD 5 ANALYSE MEDIA 6 EXIT Index Printout With the index function, your multifunction machine prints thumbnail views of the digital photos and assigns each image a unique index number that can be used to quickly and easily select photos for printing. 24 ²may terminate the print job with the X but- Return to the last menu entry with C. You ton. The page is ejected. 5. Photo Printer ²tion Crystal Image to create quality printouts Use the photo and text enhancement func- in colour or black-and-white. At the start of the printing process, press the Crystal Image button to activate Crystal Image (see chapter Crystal Image). 1 In the photo menu, use / to select PRINT PICTURES and confirm with OK. Use / to select from the following options: ALL—Press OK to print all detected photos. RANGE—Press OK. Individually set the series of photos for the printout: Use the number keypad to enter the number for the first photo and confirm with OK. Then enter the number of the last photo of your printout. Confirm with OK. SELECTed—Use / to select one or more photos for printing. Add additional photos with OK. If you would like to delete a photo, load it with / and press OK again; the photo is removed from the selection. End the selection process with K or Y. ²sponds to which photo, first create an index If you are not certain which number corre- printout (see Index Printout). PictBridgeDirectly Printing Files Your multifunction machine meets the PictBridge standard. With PictBridge, the digital camera directly access the photo printer. If you have connected a PictBridge compatible digital camera to the multifunction machine, the message PICT BRIDGE appears on the display. The PictBridge function displays the print settings supported by the multifunction machine (resolution, paper format and type, file format, Crystal Image image enhancement, etc.) on the display of your digital camera. Perform all the required steps on the digital camera. Start the PictBridge printout directly from your digital camera. ²era during the direct printing or make certain Connect the power supply of the digital cam- that the battery is fully charged to prevent loss of data. Do not disconnect the USB connection until the multifunction machine has completed all print orders (see chapter Safety Instructions / Photo Memory Media). 2 Use the number keypad (or /) to enter the desired number of copies (1 to 99) and confirm with OK. No. of copies 1 Slideshow 3 Use / to select the desired paper format and confirm with OK. 10×15 borderl. With this function, all photos detected on the storage medium are shown on the colour display for five seconds each. 4 Use / to select whether you want to use normal or coated paper, photo paper or a transparency. Confirm with OK. (or with K or the Y button) PHoto Activate the function by using / in the photo menu to select slideshow and confirm with OK. The slideshow is started. After all the photos have been displayed, the machine returns to the photo menu. 5 For Colour printout with Crystal Image: If you want Crystal Image to implement the red eye reduction, use / to select reduction and confirm with OK. ²to the starting mode with X. It is only possible to display an image file if the Æstorage medium provides the required EXIF ²can take some time. Confirm the query only Red eye reduction is a complex process and 5. Photo Printer Printing Image Files Return to the last menu entry with C; return information. when needed. 6 Your multifunction machine starts the printing with the user-defined settings. ²may terminate the print job with X. The Return to the last menu entry with C. You page is ejected. Transferring a Scan to a Memory Card With this function, you can scan a document with the flatbed scanner and transfer the scan to the inserted memory card. ²Crystal Image to create a quality scan of the doc- Use the image and text enhancement function ument (in colour or black-and-white). Press the Crystal Image button to activate Crystal Image (for more detailed information, see chapter Crystal Image). 5. Photo Printer 25 Machine Functions 1 Lay the document onto the flatbed scanner with the written side facing down (see chapter Installation / Loading Documents) 2 Insert the memory card into your multifunction machine (see Using Photo Storage Media). 3 In the photo menu, use / to select SCAN TO CARD and confirm with OK. ²pressing MENU/OK and 86. You can also access this function directly by 4 Use / to select the desired paper format for the scan and confirm with OK. photo 10×15 5 Select the resolution. Depending on the document requirements, use / to change the standard settings for the current scan: TEXT—For documents without drawings or details NORMAL—For documents with small print or drawings Photo—For the maximum resolution Reanalysing Image Files If you make changes after the data transfer and reading of the image files (e.g. if you add or delete photos using the PC), you must read in the image files again in order to obtain the current index numbers for selecting the photos. In the photo menu, use / to select ANALYSE MEDIA and press OK. The multifunction machine analyses the modified image files and reassigns the image numbers. Removing Storage Media Æyour multifunction machine and the storage Never disconnect the connection between medium during a data transfer or printing of a photo! Wait until all print jobs are completed (see chapter Saftety Instructions / Photo Memory Media). Confirm with OK. 6 Use / to select the quality with which you would like to save the scan: LOW—The scan is saved with low quality and requires less memory space. 1 If you would like to leave the photo menu, use / to select exit and confirm with OK. MEDIUM—The scan is saved with average quality. 2 It is now safe to disconnect the connection between the storage medium and the multifunction machine by pulling out the memory card or the USB cable. hIGH—The scan is saved with high quality and requires more memory space. Confirm with OK. 7 For Colour scan with Crystal Image: If you want Crystal Image to implement the red eye reduction, use / to select Reduction and confirm with OK. ²can take some time. Confirm the query only Red eye reduction is a complex process and Editing Memory Card Contents on the PC You can edit and manage image files from the PC using the card reader of your multifunction machine. 1 Connect the machine to your PC with a USB cable (see section PC Functions / Installing the Driver and Software). 2 Insert the memory card into your multifunction machine (see Inserting Memory Cards). The storage medium appears as a removable drive on the PC in Windows Explorer. Access this drive to add, copy, move, save or delete images. when needed. 8 Confirm with OK. The scan is created and transferred to the inserted memory card. Ætransfer is complete, otherwise data could be Only remove the memory card after the data lost. The file name is assigned according to the DCF (Design Rule for Camera File System) standard. If you have not inserted a memory card (if you have accessed the function via the menu, for example), an error message appears on the display asking you to insert a memory card. If the data transfer does not function, it may be that your memory card is write-protected. 26 ²card with an image editing program (e.g. You can edit photos directly on the memory Photo Impression). 3 Only remove the inserted memory card after you have disconnected the connection; otherwise, data may be lost. In Windows Explorer, right-click on the removable drive and disconnect the connection. The removable drive no longer appears in Windows Explorer. 5. Photo Printer You can change the factory settings with the following functions. ²only in event of frequent use. We recommend changing the standard settings Setting the Paper Format 1 The standard setting for the paper format (factory setting: A4) can be changed by pressing MENU/ OK and 241. 2 Use / to select the desired paper format and confirm with OK. 10×15 cm ²to the starting mode with X button. Return to the last menu entry with C; return 5. Photo Printer Changing Printer Settings Setting the Paper Type 1 The standard setting for the loaded paper type (factory setting: NORMAL) can be changed by pressing MENU/OK and 242. 2 Use / to select the desired paper type and confirm with OK. COATED ²to the starting mode with X button. Return to the last menu entry with C; return 5. Photo Printer 27 Machine Functions 6. Telephone Book m Editing Entries and Groups 1 Press MENU/OK and 13. You can create individual entries (with name and the associated number or e-mail address) and groups (consisting of multiple entries) in the telephone book. The memory will hold up to 200 entries. 2 Load a telephone book entry by entering the initial letters on the keypad or selecting the desired entry with /. Press OK. 3 Correct the entry and form each step with OK. Use / to move the cursor within the entry; you can delete characters with C. If you have installed the included software package and connected your machine to a PC, you can transfer the telephone book to the PC and edit it there (see section PC Functions / Using Companion Suite IH / Telephone Book). Creating Entries 1 Press MENU/OK and 11. 2 Use the keypad to enter a name (max. 20 characters). Confirm with OK. 3 Use the number keypad to enter a telephone number (max. 30 numbers) or use numbers from the redial list by pressing ³ and selecting the desired number with /. Confirm with OK. Deleting Entries and Groups 1 Press MENU/OK and 14. 2 Load a telephone book entry by entering the initial letters on the keypad or selecting the desired entry with /. Press OK. 3 Confirm the deletion of the entry or group with OK. ²from the telephone book, but also any links Please note that this not only deletes entries to a group. Press PAUSE/R to enter a dialling pause (/). 4 You can also enter an e-mail address of up to 30 digits and characters. Press OK. The entry is saved. Æ Please note that e-mail addresses cannot contain any spaces! Creating Groups You can collect multiple entries of the telephone book into groups, for instance to send a message to multiple persons. Your multifunction machine can save up to ten groups. 1 Press MENU/OK and 12. 2 Enter a group name (max. 20 characters). Confirm with OK. 3 Load the a telephone book entry by entering the initial letters on the keypad or selecting the desired entry with /. Press OK to add the entry to the group. Repeat the process until all members of the group have been added. End the selection with the Y button (or the m button). Searching for Entries Use the option for alphabetic quick search. Press the m button (while in the starting mode) and enter the first letter of the entry or group using the keypad. For a large telephone book, you can reduce the number of hits by entering additional letters. Using the Telephone Book 1 Press the m button. 2 Load the desired telephone book entry by entering the initial letters on the keypad or selecting the desired entry with /. Confirm with OK. 3 Start the transmission (for example, press the Y button for a fax transmission) or follow the additional steps for the respective application (see chapter SMS). If you would like to delete an entry, load it with / and press OK again; the entry is removed from the selection. ²in the telephone book with (L). You do not Entries you have added to a group are marked need to include the (L) in the alphabetic quick search. 28 6. Telephone Book Press MENU/OK and 16. The multifunction machine will print out your saved contacts in alphabetical order. All configured groups will be listed on an additional sheet. Chain Dialling (Combining Numbers) You can freely combine telephone book entries, manually entered numbers and numbers from the redial list before starting the dialling operation. For example, if you have saved the telephone number prefix of an inexpensive telephone service provider (call-by-call) as a telephone book entry, select this entry and manually enter the subsequent telephone number or select another number from the telephone book or the redial list. 6. Telephone Book 6. Telephone Book Printing the Telephone Book 29 7. Fax Switch Machine Functions The active fax switch allows you to use and control additional devices (e.g. external answering machines or telephones) that are connected to the same telephone line as your multifunction machine. The fax switch checks whether an incoming call is a fax transmission or a call, independently forwards the call to the respective device and determines the ringing behaviour of the additional devices. While the multifunction machine is checking the call, it continues to ring. With the modes S (day) and M (night), you can specify how often your multifunction machine should ring in the respective mode before it picks up and receives faxes (e.g. you can receive faxes silently (= without ring) to avoid being disturbed). With activated timer function U, your multifunction machine automatically switches between modes S (day) and M (night). Setting SM Modes With the following functions, you can set the number and volume of rings for the modes S (day) and M (night). Display Setting Options TOTAL RINGS 0, 1, 2, 3, 4, 5, 6, 7, 8, 9 FAX RINGS 0, 1, 2, 3, 4, 5, Manual RINGER VOL. Off, low, high 1 Select function 61 (S day) by pressing MENU/ OK and 61. 2 Use / to select Fax rings and confirm with OK. Use the number keypad (or /) to enter the number of rings after which the fax switch separates faxes from calls. Press OK. FAX RINGS 3 3 Use / to select total rings and confirm with OK. Use the number keypad (or /) to enter the total number of rings. That is the number of rings before the multifunction machine starts the fax reception (including “silent” faxes) or takes a call. Confirm with OK. TOTAL RINGS 5 4 Use / to select RINGER VOL. and confirm with OK. You can select between three volume levels with /. Save with OK. high Activating theTimer U With the timer function, you can individually configure the durations for the modes S (day) and M (night). If the timer U is activated, the device automatically switches between day and night modes. The display shows the current mode. To switch the timer on or off, press the U/M/S button until the symbol U appears or disappears on the display. Æthat your machine switches to night mode The timer is programmed at the factory such (M/U) at 10:00 pm and returns to day mode (S/U) at 7:00 am. 1 Select function 63 by pressing MENU/OK and 63. 2 Use / to select DAY TIME and confirm with OK. Use the number keypad (or /) to enter the time at which the machine should switch to S (day) (e.g. 08 00 for 8:00 am) and save with OK. 3 Use / to select night TIME and confirm with OK. Use the number keypad (or /) to enter the time at which the machine should switch to M (night) (e.g. 23 30 for 11:30 pm) and save with OK. ²to the starting mode with X. Return to the last menu entry with C; return Setting the Fax Reception Mode Silent Fax Reception If you would like to receive faxes without ringing first, set the number of rings to 0 under fax rings. Your multifunction machine will not ring. Silent Ring Setting $ ²tones while the machine is in the starting If you would like to not be disturbed by incoming calls or faxes, for instance at night, you can set the number of rings to 0 for both call types (fax rings and total rings). Your machine automatically switches to silent fax reception and even external devices (e.g. telephones, answering machines) will not ring. 5 Æexternally connected telephones. No mes- You can also change the volume of the ring mode: Press / and select the desired volume. Confirm with OK. Select function 62 (M night) by pressing MENU/ OK and 62. Repeat steps 2 to 4. ²to the starting mode with X. Return to the last menu entry with C; return 30 If you cannot receive any faxes, you may have set both ring numbers too high (see steps 2 and 3). Set the number of rings to a value less than 5. With this setting, you are not reachable via sages are recorded on your external answering machine. However, you can continue to receive faxes, and SMS messages. 7. Fax Switch If you select the option manual in the setting Fax rings (see also Setting SM Modes), faxes are not received automatically. You must start the fax reception manually: press the Y button on your multifunction machine (or *5 on your external telephone). This is useful if you would like to receive your faxes on the PC via an external modem. Using External Telephones (Easylink) The Easylink function offers you additional options for managing external devices that are connected to the same telephone line as your multifunction machine. To this end, additional telephones must be set to the tone dialling mode (DTMF tones). Please consult the user manual for your external device on how to set the device to tone dialling mode. Æ Only change these codes if it is absolutely necessary. Please note that the codes must be different. Otherwise the following message will appear on the display: CODE NOT OK. Starting Fax Reception If you pick up on an additional telephone and notice that the call is a fax transmission (whistling tone or silence), you can start the fax reception either by pressing the Y button on the multifunction machine or *5 on the external telephone. ²code, press MENU/OK and 641. Enter If you would like to change the predefined Using an External Answering Machine Connect the external answering machine as described in chapter Installation / Connecting Additional Devices. For the best possible operation, the external answering machine must be set to one or two rings. Set total rings and Fax rings to at least two more rings than your external answering machine to prevent calls from being automatically accepted by the fax switch. If you switch off the answering machine, calls will be accepted by the fax switch. Setting example: Number of rings on answering machine 2 FAX RINGS 3 TOTAL RINGS 5 7. Fax Switch Manual Fax Reception ²swering machine should be shorter than ten The outgoing message of your external an- seconds. Avoid music in the outgoing message. If your external answering machine has a “conserving function” (i.e. a function that changes the number of rings as soon as new messages have been recorded), it is best to deactivate this function. It can occur that the answering machine counts fax calls in addition to the received messages. If your external answering machine records fax signals, but your multifunction machine cannot receive faxes, you should inspect the connection of your external answering machine (see chapter Installation / Connecting Additional Devices). the new code and confirm with OK. The code should start with * or #! Taking Over the Line If you pick up on an external telephone and the multifunction machine continues to ring or attempts to receive faxes, you can disconnect the multifunction machine from the line and accept the call by pressing ** on the external telephone. ²code, press MENU/OK and 643. Enter If you would like to change the predefined the new code and confirm with OK. The code should start with * or #! 7. Fax Switch 31 8. Fax Y With your multifunction machine, you can receive and send both black-and-white faxes and colour faxes. 5 ²machine will call the number again at speci- If the subscriber is busy, your multifunction fied intervals. If you would like to cancel the redial attempts, you must delete the document from memory (see chapter Troubleshooting / Editing Jobs). Machine Functions If you have installed the included software package and connected your machine to a PC, you can also take advantage of the option of electronic fax transfer (see section PC Functions / Using Companion Suite IH / Faxing). Sending Black & White Faxes 1 While the machine is in starting mode, lay the document onto the flatbed scanner with the written side facing down (see chapter Installation / Loading Documents). If you would like to interrupt the fax transmission and return to the starting mode, press X twice. After the transmission, the machine prints out a transmission report, depending on the settings (see Printing a Transmission Report). Sending Colour Faxes 1 Activate the colour fax mode by pressing COL/h/ f/F until COL appears on the display. 2 Insert the colour document and follow the steps described under Sending Black & White Faxes. Æcation (= header). Colour faxes are sent without sender identifi- If your multifunction machine detects that the fax machine of the recipient can only receive black-and-white faxes, it cancels the transmission. If you would like to send the fax anyway, switch to black-and-white fax mode. 2 Enter the telephone number of the recipient. There are multiple ways to do this: Manual dialling: Enter the fax number of the recipient with the number keypad. Telephone book: Press m. Load the desired telephone book entry by entering the initial letters on the keypad or selecting the desired entry with /. Confirm with OK. Redial list: Load the redial list with ³ and use / to select the desired number (’ indicates received calls and ‘ indicates dialled numbers). Broadcast: You can send the fax document to multiple recipients. Enter the telephone numbers in one of the ways described above and press À after every entry. You can enter up to ten numbers in this way. 3 After entering the telephone number, press the Y button. ²it to check the quality. Press one of the two Print out the fax messages before sending K buttons (Colour or Black & White). 4 32 If you would like to send a single document page, use / to select Send and press OK. If you would like to send a multi-page document, load another page and use / to select NEXT PAGE. Press OK. Manually Sending Faxes If the Message Memory is full, no additional fax documents can be received (see also Clearing the Message Memory). However, you can still send faxes manually. You can also use the speaker function to acoustically monitor the establishment of the connection. 1 Insert the document. 2 Press the speaker button z. 3 Enter the fax number of the recipient or select an entry from the telephone book or the redial list. 4 Press the Y button; the fax message is sent. Æsible! The manual sending of colour faxes is not pos- Your multifunction machine does not have a microphone. You cannot answer if the subscriber picks up. Resolution At the start of the fax process, press the COL/h/f/ F button until the symbol for the desired resolution appears on the display: 8. Fax h—For black-and-white documents with small print or drawings f—For black-and-white documents with many details F—For black-and-white photos COL—For colour faxes Receiving Faxes If you have not changed the factory settings for fax reception, received faxes will be printed out automatically If there is no paper in the paper tray or no ink cartridges inserted, the machine saves incoming fax messages (see also Clearing the Message Memory). ²A4 or letter paper into the paper tray; otherAfter printing a photo on 10×15 format, load wise incoming faxes will not be printed out completely and will be lost. (Set the paper format and the paper type with the functions 241 and 242.) ²determine the correct settings. Press one of Make a copy with the selected resolution to the two K buttons (Colour or Black & White). The setting only affects the current fax transmission. After the fax transmission, the multifunction machine returns to the factory settings. Sending a fax later When sending faxes (in Colour or Black & White) via the menu, the following setting options are available: Setting Advanced Reception Options Printing Multiple Copies You can apply settings to your fax machine in advance to print out multiple copies of fax transmissions upon reception. Press MENU/OK and 351. Enter the desired number (1 to 99) and press OK. 1 Insert the document. If you would like to send a colour fax, activate the colour fax mode. 2 Press MENU/OK and 31. 3 Enter the fax number of the recipient or select an entry from the telephone book or the redial list. Press OK. 4 Use the number keypad to enter the time at which the fax should be transmitted (within 24 hours), e.g. 17 30 for 5:30 pm. Press OK. Press MENU/OK and 352. Use / to select off. To activate it, select on. Confirm with OK. 5 Set the contrast with / : + increases the contrast, - decreases the contrast. Press OK. Receiving Faxes on the PC 6 If you would like to send a single document page, use / to select send and press OK. If you would like to send a multi-page document, load another page and use / to select NEXT PAGE. Press OK. Printing a Transmission Report The transmission report informs you of the result of a message transmission. 1 Press MENU/OK, 361 and OK. Use / to select an option: ON—The transmission report is printed out after every transmission. 8. Fax If no symbol appears on the display, the standard resolution is selected (for black-and-white documents without special features). Sorted Printouts A multi-page fax is sorted by the page number when printed. The pages that were received last will be printed first. You have the option of turning this function off: If you have installed the included software package and connected your machine to a PC, you can configure whether you would like to receive faxes on the PC and/ or on the machine (see section PC Functions / Using Companion Suite IH / Faxing). ÆPC. It is not possible to receive colour faxes on the 1 Press MENU/OK and 38. 2 Use / to select the desired option: off—Faxes will be received exclusively on your multifunction machine. automatic—If the PC is turned on and the connection to your machine is active, incoming faxes will be received on the PC. 3 Confirm with OK. on error—The transmission report will only be printed when the fax transmission was interrupted. 2 Confirm with OK. 8. Fax 33 Printing Out Reduced Size Faxes Incoming fax messages will be printed out somewhat reduced in size so that no information is lost. Machine Functions You have the option of turning this function off. Press MENU/OK and 275. Use / to select off. To activate it, select on. Confirm with OK. Clearing the Message Memory Received fax messages are printed out immediately and deleted from the Message Memory unless … ¿ the multifunction machine is currently executing a print or copy job. ¿ no paper is loaded. ¿ no ink cartridges are inserted or the cartridges are empty. ¿ you have deactivated the automatic printout with a code. The display informs you about the memory status. If the memory is full, you cannot receive or send faxes and some functions cannot be executed. Clear the memory by loading paper and pressing the Y button and/or inserting ink cartridges to start the fax printout. Deactivating Automatic Fax Printout If you would like to prevent the automatic printout of received faxes, you can protect access with a lockout code. Faxes are received in the Message Memory and only printed out after entry of the corresponding code. Polling Faxes Time-delayed Fax Polling Using this function, you can receive documents that are waiting for you in a dialled fax machine. 1 Press MENU/OK and 32. 2 Enter the telephone number from which you would like to poll a fax. Press OK. 3 Enter the time at which the document should be polled (within 24 hours), e.g. 17 30 for 5:30 pm. Press the Y button. Polling Send You have the option of providing a document on your multifunction machine for polling by other machines. 1 Lay the document onto the flatbed scanner with the written side facing down (see chapter Installation / Loading Documents). 2 Press MENU/OK and 33. 3 Use / to select one of the following options: simple—The document can be polled a single time. It is then deleted from the memory. Press OK. multiple—The document can be polled from the memory any number of times. Press OK. (Clear the document from the memory to end the polling—see chapter Troubleshooting / Editing Jobs). 4 Use / to set the desired contrast and confirm with OK. 5 If you would like to send a single document page, use / to select Send and press OK. If you would like to send a multi-page document, load another page and use / to select NEXT PAGE. Press OK. 6 The document is ready for polling. Saving the Lock Code Press MENU/OK and 343. Use the number keypad to enter a four-digit lock code, then press OK. ² If you have already saved a code, you must first enter the old lock code before you can change it. Deactivation / Activation Press MENU/OK and 342. Enter the lockout code and press OK. Use / to select yes and press OK to receive faxes in the memory. To deactivate the lock, use / to select NO and press OK. Printing Faxes Press MENU/OK and 341. Enter the lockout code and press OK. The received faxes are printed out and deleted from the Message Memory. 34 Fax Settings You can change the factory settings with the following functions. ²tings only in event of frequent use. We recommend changing the standard set- Return to the last menu entry with C; return to the starting mode with X. Fax Resolution If you frequently send fax documents that require a different resolution, you can change the standard setting (= plain): 1 Press MENU/OK and 271. 8. Fax Use / to select the resolution that you would like to use as the new standard setting for fax transmission. Confirm with OK. Suppressing the Header If you do not want your sender identification (= header) to appear on outgoing messages, you can suppress the display of the header: Æured their machines to reject messages with- Printing a Time Stamp Your multifunction machine prints an additional receipt stamp (= time stamp) on the lower edge of incoming fax transmissions. You have the option of turning this function off. 1 Press MENU/OK and 277. 2 Use / to select off. To activate it, select on. Confirm with OK Please note that many recipients have config- out sender identification. 1 Press MENU/OK and 272. 2 Use / to select OFF, and confirm with OK. The header will be suppressed. Reception Speed If you frequently receive fax messages from networks with poor line quality, you can reduce the reception speed. 1 Press MENU/OK and 278. Setting the Transmission Speed 2 Use / to select the desired reception speed. Confirm with OK. If you frequently send messages to networks with poor line quality, you can reduce the transmission speed. E.C.M. 1 Press MENU/OK and 273. Your multifunction machine is equipped with Error Correction Mode (E.C.M.). E.C.M. prevents data losses resulting from poor telephone lines by requesting faulty data packets again. E.C.M. must be supported by both the transmitting and receiving machines. 2 Use / to select the desired transmission speed. Confirm with OK. Ævated because this does not result in increased Æ A slower transmission speed ensures better transmission quality, but increases the time required for the transmission. With the standard settings, E.C.M. is acti- telephone charges when the telephone lines are good. Echo Protection Particularly for transmissions overseas, feedback (= echo) can result in disruptions. Activate the echo protection to ensure flawless transmission. Æmission time. However, the data are transmit- Transmission with echo increases the trans- ted with greater reliability. 1 Press MENU/OK and 274. 2 Use / to select ON and confirm with OK. The echo protection is activated. 8. Fax 2 1 Press MENU/OK and 279. 2 Use / to select OFF and confirm with OK. E.C.M. is deactivated. ²to the starting mode with X. Return to the last menu entry with C; return Display Information Configure which information should be shown on the display during transmission. 1 Press MENU/OK and 276. 2 Use / to select one of the following options: speed—The transmission speed is displayed page number—The page number of the page currently being sent is displayed 3 Confirm with OK. 8. Fax 35 9. SMS » You can send and receive SMS (Short Message Service) messages using your multifunction machine. Machine Functions If you have installed the included software package and connected your machine to a PC, you can also manage SMS messages on the PC (see chapter PC Functions / Using Companion Suite IH / SMS). SMS Requirements Your device is preconfigured for the use of SMS services. In order for SMS to function, CLIP must be activated for your telephone line (see chapter Settings / Calling Line Identification (CLIP)). Should problems occur with SMS transmissions, the problem could be that you are using a private number or your multifunction machine is operating on an older ISDN system (see chapter Settings / ISDN Connection). It is possible that you will not be able to send and receive SMS messages from a private branch exchange (depending on the country and network). 3 Enter the telephone number of the recipient. There are multiple ways to do this: Manual dialling: Enter the telephone number of the recipient with the number keypad. Telephone book: Press m. Load the desired telephone book entry by entering the corresponding initial letters on the letter keypad or selecting the desired entry with /. Redial list: Load the redial list with ³ and use / to select the desired number (’ indicates received calls and ‘ indicates dialled numbers). Broadcast: You can send your SMS message to multiple recipients. Enter the telephone numbers in one of the ways described above and press À after every entry. You can enter up to ten numbers in this way. 4 With a sub-address, you send an SMS message to a certain fax machine that is connected to a telephone line along with several other devices. If the recipient has a sub-address, enter it here. 5 After entering the telephone number, press OK; your SMS message is sent. ²mission and return to the starting mode, If you would like to cancel the SMS trans- Consult your service provider about • whether you must register for SMS functionality. • which mobile telephone providers you can send SMS messages to and which mobile telephone providers you can receive SMS messages from. • the costs charged for sending and possibly for receiving an SMS. • which additional services and functions are available. Sending SMS Messages 1 Press » twice (or MENU/OK and 51). 2 Enter the text that you would like to send. You can enter a maximum of 160 characters. Fold open the cover for the letter keypad. To enter upper case letters, press + and the desired key simultaneously. The available special characters are printed above and to the right of the keypad buttons and can be entered by pressing the Ctrl button simultaneously with the corresponding letter button (for example, press Ctrl and Q at the same to enter a “+”). Press ½ to enter a space. If you would like to enter a line break, press J. If you have entered an incorrect number or letter, you can correct the mistake with / and C. Press OK after completing the text entry. press X twice. If the subscriber is busy, your multifunction machine will call the number again at specified intervals. If you would like to cancel the redial attempts, you must delete the SMS message from memory (see chapter Troubleshooting / Editing Jobs). After the transmission, the machine prints out a transmission report, depending on the settings (see chapter Fax / Printing a Transmission Report). Receiving SMS Messages If you have received an SMS message, the indicator light next to the » button blinks and the W symbol appears on the display. Received SMS messages are printed out automatically. If you have switched off the automatic printout (see also Changing the SMS Settings), new SMS messages are saved to the message memory. You can print out the SMS message before sending. Press one of the two K buttons; the SMS message is printed out. 36 9. SMS 1 Press » and OK (or MENU/OK and 52). 2 Use / to select the SMS message you would like to read, then press OK. (Unread messages are marked with a star “*”.) 3 Use / to move the cursor through the text. The sender and time of receipt are displayed at the end of the SMS message. ²to the starting mode with X. Return to the last menu entry with C; return Printing SMS Messages If you have deactivated the automatic printout (see also SMS Settings) or you would like to print out an SMS message again, you can print saved SMS messages via the menu. 1 2 Press » and K (Colour or Black & White) (or MENU/OK and 53). Changing the SMS Settings ²tings only in event of frequent use. We recommend changing the standard set- SMS Provider All the numbers that you need for sending and receiving SMS messages are stored in your multifunction machine at the factory. If you would like to switch to a different telephone provider or receive SMS messages from other providers as well, you must save the corresponding numbers for the SMS centre (you can obtain the required information from your telephone provider). 1 Press MENU/OK and 551. 2 Use / to select send no. and confirm with OK. Enter the number that your machine must dial to send an SMS. Confirm with OK. 3 Use / to select receive no. and confirm with OK. Enter the provider number that your machine must dial to receive an SMS. Confirm with OK. 4 You can also receive SMS messages from a second SMS centre. Press MENU/OK, 552 and OK, then confirm with OK. Enter the second provider number for SMS reception. 5 Return to the last menu entry with C; return to the starting mode with X. Use / to select which SMS messages you would like to print out: select—Press OK and use / to select the SMS message that should be printed. Confirm with OK. new—Confirm with OK. All unread SMS messages are printed out. all—Press OK. All saved SMS messages are printed. Clearing the Message Memory If the message memory is full (up to 2 MB of storage space), no additional messages can be received. The ´ symbol on the display informs you about the memory status. Keep the message memory ready for reception by deleting the messages. 1 Press MENU/OK and 54. 2 Use / to select which SMS messages you would like to delete: select—Press OK and use / to select the message that should be deleted. Confirm with OK. Received—Confirm with OK. All read messages will be deleted. all—Press OK. All saved messages will be deleted. 9. SMS Reading SMS Messages Automatic SMS Printout Your multifunction machine automatically prints out SMS messages. You can deactivate the automatic printout. 1 Press MENU/OK and 553. 2 Use / to select off and confirm with OK. SMS messages are received and saved in memory. ²to the starting mode with X. Return to the last menu entry with C; return Sub-address (Terminal ID) If you have several devices with SMS functionality connected to one telephone line, you can assign sub-addresses to these devices. SMS messages can then be sent to a specific device. 1 Press MENU/OK and 556. 2 Enter a number from 0 to 9 as the sub-address. The sender can send an SMS message directly to this device by appending the sub-address to the telephone number. Confirm with OK. ²to the starting mode with X. Return to the last menu entry with C; return 9. SMS 37 Message Signals Machine Functions You will be informed by a notification tone whenever an SMS message has arrived. You have the option of turning this function off. 1 Press MENU/OK and 57. 2 Use / to select OFF and confirm with OK. New SMS messages will be received without a notification tone. ²to the starting mode with X. Return to the last menu entry with C; return 38 9. SMS 1 Open the machine by taking hold of the moulded grip under the machine cover … Removing a Paper Jam Æmultifunction machine is printing. Never open the paper jam door while the 1 2 In the event of a paper jam, an error message appears on the display and the print job is stoped. Press on the catch on the rear side of your machine to open the paper jam door. Carefully pull out the paper, then close the paper jam door. Confirm with the Y button. Changing Cartridges … and lifting the housing upward. 2 Press on the spring catch of the cartridge holder to open it. 3 Remove the cartridge. 10. Troubleshooting 12. Troubleshooting The display will inform you when a cartridge is low and must be replaced. If one of the ink cartridges is empty, your machine will stop printing, even if ink still remains in the other cartridge. Each new cartridge that you insert into your machine must be updated with the enclosed Plug’n’Print card to set the ink level memory to 100 %. ²timal printing quality. Use only original ink cartridges to obtain op- 10. Troubleshooting 39 Æthe regulations of your country. Handle the Dispose of the empty cartridges according to 8 Insert the enclosed Plug’n’Print card into the slot below the panel with the contacts facing up. 9 It may take a moment to update the cartridge. When the process is completed, the following appears on the display: ACTION COMPLETED / Remove Card. ink cartridges carefully to prevent getting ink on clothing or other objects. Avoid skin and eye contact (see chapter Safety Instructions / Ink Cartridges). Machine Functions 4 Take the ink cartridge out of the packaging, dispose of any packaging material and carefully pull off the protective strip. Æ Please make certain that the protective strip has been completely removed. Be careful not to touch the nozzles or contacts. 5 6 7 Insert the cartridge with the “nose” pointing down and tilted back at an angle; the black cartridge on the left, the colour cartridge on the right. Close the cartridge holder. You will hear a click when the cover of the holder snaps into place. Close the housing. 10 Pull the Plug’n’Print card out of the machine. The newly inserted cartridge is activated. ²the enclosed Plug’n’Print card will be recog- A cartridge that has once been activated with nised by your machine, even if you remove the cartridge temporarily. You do not need to update the cartridge again when you reinsert it! 11 For optimal printing quality, we recommend realigning the cartridges after each cartridge switch. Confirm the display query ALIGN. NEW with OK. Press the X button if you do not want to realign the cartridges (see also Cleaning and Care / Cleaning and Aligning Cartridges). Inserting Photo Cartridge For the special requirements of high-quality photo printing, we recommend using a photo cartridge. 1 Open the machine and the catch of the cartridge holder as described under Changing Cartridges. 2 Take out the black cartridge and insert the photo cartridge in its place. Update this with the enclosed Plug’n’Print card (see also Changing Cartridges). The photo cartridge is activated. 3 For optimal printing quality, we recommend realigning the cartridges after each cartridge switch. Confirm the display query ALIGN. NEW with OK. Press the X button if you do not want to realign the cartridges (see also Cleaning and Care / Cleaning and Aligning Cartridges). ²to cartridge with the black cartridge to save After printing your photos, replace the pho- money! Store temporarily removed cartridges in the corresponding storage box (suitable for black, col- 40 10. Troubleshooting Printing the Journal The journal contains a list of the last 30 message transmissions (fax, SMS messages). The journal is either printed out automatically after 30 transmissions or you can print it out when needed: Press MENU/OK and 37. The journal is printed. Editing Jobs Fixing Printing Problems Poor Printing Quality If your machine does not print correctly, the problem may be that the protective strip was not completely removed from the cartridge. Open the machine and remove the cartridges. Remove any strip remains that are present. Reinsert the cartridges and close the machine. ² For optimal printing quality, we recommend realigning the cartridges after each cartridge switch. Confirm the display query ALIGN. NEW with OK. Press the X button if you do not want to realign the cartridges (see also Cleaning and Care / Cleaning and Aligning Cartridges). Vertical Stripes If your printouts have vertical stripes, the scanner glass may be dirty. Clean the scanner glass (see also Cleaning and Care). Displaying the Ink Level The machine keeps track of the cartridge use and calculates the ink level. Æif you update each new cartridge with the Your multifunction machine maintains a list of all transmission orders (fax, SMS messages) that are currently being processed, are ready for polling or should be sent later. Loading or Changing Jobs The status provides information about the order. Documents in the list can fall into the following categories with regard to their status: tx—Delayed transmission doc—Polling send pol—Delayed fax polling IN progress—Order being executed SMS—SMS transmission 10. Troubleshooting our and photo cartridges) to protect them from dust and to keep them from drying out. Press MENU/OK and 72. Use / to select the job you would like to change and press OK. Enter the desired changes and confirm by pressing OK. Immediate Job Execution Press MENU/OK and 71. Use / to select the job you would like to execute first and press OK. The job is executed immediately. Deleting an Job Press MENU/OK and 73. Use / to select the job you would like to delete and press OK. Confirm the deletion of the job by pressing OK. Printing an Job Press MENU/OK and 74. Use / to select the job you would like to print, and press OK. The indicated ink level is only meaningful Plug’n’Print card that is provided with the cartridge! 1 Press MENU/OK and 822. 2 Use / to select the cartridge for which the ink level should be displayed. Press OK. Printing the Job List Press MENU/OK and 75. The machine will print out a list of all pending jobs. ²to the starting mode with X. Return to the last menu entry with C; return ²to the starting mode with X. Return to the last menu entry with C; return 10. Troubleshooting 41 Locking the Machine With the locking function, you can prevent unauthorised persons from using your multifunction machine. Saving the Lock Code Machine Functions You must first enter a code for activating or deactivating the lock function. 1 Press MENU/OK and 811. 2 Use the number keypad to enter a four-digit lock code, then press OK. 3 Cleaning the Machine Surface Use a soft, lint-free cloth for cleaning. Special cleaning cloths are available from our order service. Never use liquid or easily flammable cleansers (sprays, abrasives, polishes, alcohol, etc.), to prevent damaging the painted parts! Æing. Do not allow any moisture to reach the The inside of the machine requires no clean- interior of the fax machine. Cleaning the Scanner Glass 1 Open the scanner cover. 2 Carefully wipe the scanner glass with a lint-free cloth. 3 Close the scanner cover. Enter the code again for confirmation, then press OK. ²first enter the old lock code before you can If you have already saved a code, you must change it. Activating the Keypad Lock 1 Press MENU/OK and 812. 2 Enter the code you previously saved and press OK. 3 Use / to select ON and press OK. ² The keypad lock is activated. Only after entering of the correct code will it be possible to access functions or enter numbers. The lock will turn itself back on again automatically after each use. Deactivating the Keypad Lock 1 Enter the code you previously saved and press OK. 2 Press MENU/OK and 812. 3 Enter the code you previously saved and press OK. 4 Use / to select OFF and press OK. The keypad lock is deactivated. Cleaning and Care Your multifunction machine is designed for low-maintenance operation and requires very little care. Disconnect the machine from the power supply before cleaning! ²a power failure), you must enter the date and If the power supply is interrupted (e.g. after time again. Cleaning and Aligning Cartridges If the printing quality declines, the cartridges must be cleaned or realigned. 1 Press MENU/OK and 8211. The cartridges are cleaned. 2 Start the cartridge alignment with MENU/OK and 8212. Your multifunction machine will print out a test page to automatically configure the correct parameter settings for the best possible printing quality. ²aligning the cartridges after every change. For optimal printing quality, we recommend 42 10. Troubleshooting 1 Open the machine and take the cartridges out of the holder (see also Changing Cartridges). Clean the contacts (A) with a dry, lint-free cloth. ²can cancel the entry with ARE YOU SURE: If you have entered the incorrect code, you NO. Deactivating the Button Sounds Every button press is accompanied by a sound. You can switch off the button sounds on your machine. 2 Lay a lint-free cloth on a flat surface. Moisten half the cloth (A). Hold the cloth firmly to prevent it from wrinkling. Place the “nose” (= nozzle side) of the cartridges against the moistened area (A) and pull the cartridge a single time in the direction indicated by the arrow (B) into the dry area (C). 1 Press MENU/OK and 83. 2 Enter the following code using the number keypad: 102300, then press OK. 3 Use / to select ARE YOU SURE: YES, and confirm with OK. The button sounds are deactivated. Follow steps 1 to 3 to reactivate the button tones. ²can cancel the entry with ARE YOU SURE: If you have entered the incorrect code, you NO. 10. Troubleshooting If the printing quality is still unsatisfactory, you must manually clean the cartridges: Restoring the Factory Settings Æbook entries as well as saved fax and This function deletes all telephone SMS messages. All settings that have been changed will be reset to factory settings. Archive the telephone book with Companion – Address Book or copy the entries to the Windows address book. Print the saved fax or SMS messages to prevent loss of data. Æsition according to the figure above to prevent Be sure to hold the cartridge in the correct po- damaging the nozzles! Never touch the nozzles and contacts with bare fingers and do not shake the cartridges. 1 Unplug the power cord. 2 Press Y, 9 and 3 simultaneously. Service Codes 3 Hold down the buttons while you plug back in the power cord. With function 83 you can check and configure the factory settings. 4 Wait until erase param appears on the display before you let go of the buttons. The machine starts with the factory settings. Checking the FirmwareVersion The firmware defines the basic functions and capabilities of your multifunction machine. Power Cycling Check our homepage for information on the current firmware version that is available for your machine and update the firmware, if necessary (see section PC Functions / Using Companion Suite IH / Firmware Update). If a problem occurs that cannot be corrected with the instructions in this user manual, follow the steps below. 1 Press MENU/OK and 83. 2 Enter the following code using the number keypad: 704100, then press OK. 3 Use / to select ARE YOU SURE: YES, and confirm with OK. The display shows the current firmware version of your machine. 10. Troubleshooting 1 Unplug the power cord. 2 Wait at least ten seconds, then plug the power cord back in. 3 If the same problem continues to occur, please contact our technical customer service or contact your retailer. 43 PC Functions PC Requirements Æto a PC (Microsoft Windows operating sys- You can connect your multifunction machine tem). The machine is not compatible with Linux® or Apple Macintosh®. Operating system: Windows 2000 (SP 3) · XP Processor: 800 MHz for Windows 2000 1 GHz for Windows XP The Companion Suite IH CD-ROM contains: RAM: faxes, SMS messages, etc.). With the USB connection, you can use all the functions of Companion Suite IH: You can use the multifunction machine as a colour or photo printer, send and receive messages (fax or SMS) with the PC and transmit or edit data (e.g. telephone book entries). With a wireless network connection, you can use the device as a network printer. 128 MB for Windows 2000 192 MB for Windows XP Free hard drive space: 700 MB of free hard drive space for complete installation of Companion Suite IH Connections: USB port Wireless adapter Æware Companion Suite IH, then restart the USB installation: First install the soft- PC. Only afterward should you connect your multifunction machine to the PC with a USB cable. WLAN installation: First connect your multifunction machine to the PC (or network) with the WLAN adapter and configure the required settings on the multifunction machine so that your machine can be included in the network (see Setting Up Wireless Networks (WLAN)). Only afterward should you install the Companion Suite IH software. PC Functions 1. Installing the Driver and Software ¿and communication applications (telephone book, Companion Suite IH—Installs device drivers ¿proved printing quality for your digital photos. Paper Port—For scanning in and managing your ¿documents. Acrobat Reader—For displaying and printing ¿PDF files. Photo Impression—For creative editing and im- Close all open programs and applications before beginning the installation process. Enabled antivirus programs can also disrupt the installation. Place the installation CD in the CD-ROM drive of your PC. The installation process starts automatically. (If the installation program does not start, locate your CD-ROM drive in Windows Explorer and double-click on the program Setup.exe). The start window Companion Suite IH appears on your screen. Wireless Network Requirements Æoriginal adapter. WLAN is optional and functions only with an 44 1. Installing the Driver and Software Installing All Applications 4 Windows 2000 · XP users: Your multifunction machine was tested and developed for Belgacom to guarantee complete compatibility with Windows 2000 and Windows XP. Click on Next to continue with the installation. 5 Click on Install to start installation of the device drivers. This process may take a few minutes. ÆIH, then restart the PC. Only afterward First install the software Companion Suite should you connect your multifunction machine to the PC with a USB cable. 1 Click in the Companion Suite IH start window on the button Install products and select All products in the following window to install all applications on the installation CD (scanner and printer driver as well as the programs Photo Impression and Paper Port). 6 Æstalled separately (see Installing Individual The program Acrobat Reader must be in- The programs of the software suite are saved in the Program Files folder of your PC by default. Applications). 2 The program Photo Impression is installed; this process may take some time. The installation wizard will guide you through the rest of the installation; confirm with Next. 3 Before continuing the installation, read the license agreement and accept it with Yes. Click on Next to start the installation of the programs Paper Port and the application One Touch. 7 After the installation, you will be asked to restart the PC. Remove any diskettes from the drives and click on Finish. Take the installation CD out of the CD-ROM drive after Windows has restarted and the installation is completed. ²to allow you to continue working with other You can also restart the PC at a later time open programs or save unsaved data. 1. Installing the Driver and Software 1. Installing the Driver and Software The shortcuts Companion – Director and Companion – Monitor are created on the desktop of your PC (see Using Companion Suite IH). 45 8 Connect the multifunction machine to your PC with a typical USB cable only after the restart. You will find the USB port of the machine located on the back of the machine. Click in the start window on the button Install products and select Customized in the following window to install the available applications separately. ²connectivity by cable connection (USB) is Upon installation of all applications, the activated by default. You can also connect the multifunction machine wirelessly to the PC or a wireless network (see Installing Individual Applications). 9 Example: COMPANION SUITE IH 1 Select Companion Suite IH by clicking on the corresponding button. 2 The installation wizard will guide you through the rest of the installation; confirm with Next. Accept the license agreement with Yes. The installation program suggests a folder to install Companion Suite IH into. You can choose a different destination folder by clicking on Browse... and selecting a folder. Confirm with Next. Your multifunction machine is detected as a new peripheral device and registered. The icons for the applications One Touch and MF Monitor are added to the system tray on the lower right of your PC screen (next to the clock).This process may take a few moments. Wait until the installation is complete. 10 Final installation for Windows 2000 · XPusers: If your operating system is Windows XP (SP 2), an additional window will appear during the final installation: Select No, not this time, and click on Next. Under Windows XP, select Install software automatically (recommended) during the final installation and click on Next. PC Functions Windows 2000 · XP: Even if the installation wizard informs you that the peripheral device has not passed the Windows Logo Test, click on Yes to complete the installation. Installing Individual Applications (Custom Install) ²larly if you would like to install Companion You should select custom installation particu- Suite IH with the drivers required for network operation. Locate your CD-ROM drive in Windows Explorer and double-click on the program Setup.exe to open the Companion Suite IH start window. 46 1. Installing the Driver and Software 3 Select the desired connection type and click on Next. You can also select both connection options! 4 Windows 2000 · XP users: Your multifunction machine was tested and developed for Belgacom to guarantee complete compatibility with Windows 2000 and Windows XP. Cick on Next to continue with the installation. 5 Follow the instructions of the installation wizard and restart the PC. Do not remove the installation CD from the CD-ROM drive until after the PC has restarted. 6 USB Connection: Only after restarting should you connect your multifunction machine to the PC with a USB cable. 7 Final installation for Windows 2000 · XPusers: see Installing All Applications (step 10). USB Connection Select USB Connection if you would like to connect your multifunction machine to a PC with a USB cable. The driver for the USB connection is installed. With the USB connection, all the functions of the Companion Suite IH are available. Only after restarting should you connect a USB cable. You cannot connect the multifunction machine directly to a network over the USB cable! Wireless Network (WLAN) Select Network printing if you would like to integrate your multifunction machine into a wireless network with a WLAN adapter. The drivers for the network printer are installed. With the wireless network connection, you can only use your multifunction as a network printer (see the section Networks / Setting Up Wireless Networks (WLAN)). ²the installation of Photo Impression, Paper The installation CD will guide you through Port and Acrobat Reader in the same way. User Manuals 1 Locate your CD-ROM drive in Windows Explorer and double-click on the program Setup.exe to open the Companion Suite IH start window. 2 Click in the start window on the button View user guides to learn about the functions of Paper Port. ²bat Reader on your PC, install it from the If you do not yet have the program Acro- installation CD in order to read the user manual in PDF format. 1. Installing the Driver and Software 1. Installing the Driver and Software Æyour multifunction machine to the PC with 47 2. Networks You can connect your multifunction machine to a PC with a USB cable or to a PC or network via a wireless connection. With the USB cable, you can connect your multifunction machine to a PC that is connected to a network. Other PCs on this network can then access the multifunction machine if it is shared for use on the network. You cannot connect the machine directly to a network over the USB cable! With a WLAN adapter, it is possible to integrate the multifunction machine into an existing wireless network as a network printer. It functions only with an original adapter. Wireless Networks One refers to a wireless network or WLAN (Wireless Local Area Network) if at least two computers, printers or other devices communicate in a network over radio waves (high frequency waves). The data transmission in the wireless network is based on the TCP/IP protocol. Depending on the way the network is structured, it is referred to either as an infrastructure or ad-hoc network. Infrastructure Wireless Network PC Functions In an infrastructure network, multiple devices communicate via a central access point (gateway, router). All data are sent to the access point (gateway, router) and distributed from there. Setting Up Wireless Networks (WLAN) Three steps are required to integrate your multifunction machine into a wireless network (WLAN): 1 Configure the network on your PC. 2 Configure your multifunction machine for network operation. 3 Install the software Companion Suite IH with the required printer drivers on your PC after you have configured the machine. Æchine, the network must be set up on your PC Before you configure the multifunction ma- and, if applicable, on all connected devices (other PCs, access point, gateway, router) and must be functioning. All required information for configuration of the machine, such as network names (SSID), radio channel, WEP key, IP address or subnet mask must match the information of the network. You can find this information on your PC under Start > Settings > Network Connections. Select the WLAN there. Consult the user manual of your WLAN adapter for instructions on how to configure the wireless network on your PC. In larger networks, consult your network administrator. ²also use an original adapter on your PC. Faultless communication is ensured if you Ad-hoc Wireless Network In an ad-hoc network, the devices communicate with each other equally, without an access point (gateway, router) acting as intermediary. The transmission rate in an entire ad-hoc wireless network depends on the worst connection in the network. The transmission rate depends on the spatial distance as well as obstacles between the sender and receiver such as walls or ceilings. 48 Setting Up the Multifunction Machine Insert the WLAN adapter into the side USB port of your machine. 2. Networks ²machine transmits data via the wireless pro- Select a mode with / and confirm with OK. The wireless adapter of your multifunction tocol IEEE 802.11g but can also easily be integrated into an existing IEEE 802.11b network. Use only an original adapter for connecting to the multifunction machine. Other wireless adapters can damage the machine. Regardless of whether you use your multifunction machine in an infrastructure or ad-hoc network, you must configure certain network and security settings (e.g. the Service Set ID (SSID) and the WEP key). The settings must match the information for the network. Searching for networks Your multifunction machine can automatically search for existing wireless networks. Press MENU/OK and 911. The machine searches for active wireless networks and shows the networks found on the display. Use / to select your network and confirm with OK. Depending on the security settings of your wireless network, the machine will also ask for the authentication mode (see Setting the Network Type) and the WEP encryption (see Activating WEP Encryption). After searching for the network, you must still manually enter the IP address and subnet mask with function 915 or select automatic assignment (see Selecting the Connection Mode). Setting the Network Type ²must enter a WEP key with the function If you select open, shared or both, you 914. Entering the Network Name (SSID) Press MENU/OK and 913 to enter the network name (Service Set ID, SSID). Enter the SSID and confirm with OK (default is Crystal_mfp). You can find the network name in the network settings of your PC. The SSID must match the SSID on the PC or on the access point. Activating WEP Encryption Æto others! Always protect your network against Unprotected wireless networks are accessible unauthorised access with the WEP (Wired Equivalent Privacy) standard. You must use the same WEP key on your multifunction machine and on all connected PCs and the access point (gateway, router). WEP encryption is deactivated at the factory. Press MENU/OK and 914. Use / to select 64 Bit or 128 Bit. Confirm with OK. Enter the WEP key and confirm with OK. ²be either 5 characters (ASCII) or 10 numbers With 64-bit encryption, the WEP key must (hexadecimal). With 128-bit encryption, the WEP key must be either 13 characters (ASCII) or 26 numbers (hexadecimal). You can enter four different WEP keys. You can find the WEP key in the network settings of your PC. Press MENU/OK and 912 to select the network type. Use / to select Ad-hoc or Infrastruc. (see the section Wireless networks). Confirm with OK. a b If you select Ad-hoc, you will be asked to set the radio channel for transmission (default is 10). You can enter any channel if conflicts with nearby wireless networks arise. The radio channel must be the same as the channel selected on the PC. Enter the radio channel and confirm with OK. none—No authentication takes place and data is transmitted unencrypted. open—No authentication takes place, but data is transmitted encrypted. shared—The multifunction machine authenticates itself on the access point (gateway, router) with the entered WEP key, and data is transmitted encrypted. both—The authentication mode is selected arbitrarily by the machine. 2. Networks With the connection mode, you set the IP address and subnet mask. In an infrastructure network, you can select whether the settings should be made automatically or whether you would like to manually enter the IP address and subnet mask. In an ad-hoc network, you must make the settings manually. Press MENU/OK and 915 to select the connection mode. Use / to select Auto (DHCP) or Manual and confirm with OK (default is Auto (DHCP), in an ad-hoc network you must select manual). ²and subnet mask on the connected network The automatic configuration of IP address PCs may take a moment. If you select Manual, you must manually enter the IP address and subnet mask: a The IP address is the address of the machine in the network. It must be different from the IP address of the PC or other network components, but must be within the same IP range. You can find the IP address in the network settings of your PC. 2. Networks If you select Infrastruc., you will be asked to select the authentication mode. This specifies whether the multifunction machine authenticates itself on the access point (gateway, router) with the WEP key or whether the data should be encrypted for transmission in the wireless network. The following options are available: Selecting the Connection Mode 49 Press MENU/OK and 916. Enter the IP address (for example 192.168.001.×××—the first three sets of numbers are the IP range, these values must match the IP address on your PC. The last three digits determine are the individual IP address of the machine. You can enter any number between 000 and 255. However, this number must be unique within the network; it may not be used on any other PC or network component. Confirm with OK. b In a network with a gateway or router, the subnet mask indicates whether the respective data packets are addressed to an internal recipient in the network or whether they should be sent to a recipient outside of the network. You can find the subnet mask in the network settings of your PC. Press MENU/ OK and 917. Enter the subnet mask (for example 255.255.255.000). Confirm with OK. Entering the Host Name Your multifunction machine will log onto the network with the host name. Entry of a name is optional; if you do not change the factory settings, the machine will log on as Crystal. Press MENU/OK and 918. Enter any host name and confirm with OK. ²and on all other connected PCs or the acAll entries must match the settings on the PC cess point (gateway, router). The radio channel, the network name (SSID), the WEP key and the subnet mask must be the same; the IP address must be within the same IP range, but must be unique within the network. You can find the necessary information in the network settings of your PC. Select Install a network printer and confirm with Next. Select Crystal Printer and click on Install the Selected Printer. Printing a Network Report You can print an overview of all network settings. Press MENU/OK and 95. The network report is printed out. Restoring the Factory Settings You can restore the factory settings with the function 919. 1 Press MENU/OK and 919. 2 Use / to select are you sure: yes, and confirm with OK. All WLAN settings are reset to the factory settings. Installing Printer Drivers PC Functions After you have configured your multifunction machine, you must install Companion Suite IH with the required printer drivers. If you have not yet installed the software, select custom installation of Companion Suite IH (see Installing Individual Applications (Custom Install)). During the installation, select Network printing as the connection type. If you have already installed Companion Suite IH, you can start the setup process again from the installation CD and select Modify. You can also click on Start > Programs > Companion Suite > Companion Suite IH > Add or Remove a Device. 50 2. Networks 3. Using COMPANION SUITE IH With the selection window Companion – Director, you can use numerous functions of your multifunction machine from the PC. You can access and edit the telephone book of your multifunction machine, scan documents and convert them to the desired file format with the help of the OCR software or send documents and images for printing. Programs are also available for graphical editing of your image files (Photo Impression) and for file management (Paper Port). Your messages (faxes or SMS) can be sent and received directly on the PC. Click in the selection window Companion – Director on the button Address book; the dialog Companion – Address Book appears. ²dress Book, you can copy entries back and With the function Companion – Ad- Open the selection window Companion – Director by … forth between the address books of Windows, Microsoft Outlook and your multifunction machine. To do this, select a telephone book entry and drag it to the desired telephone book folder by holding down the mouse button. • double-clicking on the shortcut Companion – Director on the desktop or • right-clicking on the icon Companion – Monitor in the system tray on the lower right of the PC screen and selecting Companion – Director, Creating Entries Click in the toolbar on New and select Contact. 2 Enter the name, telephone number (or e-mail address) as well as the speed for fax transmission. 3 Click on . The entry is saved in the telephone book of your multifunction machine. (Press to cancel the current function.) • Selecting Start > Programs > Companion Suite > Companion Suite IH > Companion – Director. ²change the colour and shape of the selection By pressing the right mouse button, you can window. Telephone Book The Address book application loads the telephone book of your multifunction machine (see also section Machine Functions / Telephone Book). All changes that you make on the PC are automatically saved in the telephone book of your multifunction machine. 3. Using Companion Suite IH Creating Groups 1 Click in the toolbar on New and select Group. 3. Using Companion Suite IH 1 51 2 3 Enter a group name. Click on Select the Members and add entries by selecting a contact under Address Book and clicking on >. (With < you can remove an entry from the group.) Faxing Click in the selection window Companion – Director on the button Fax; the dialog Companion – Manager Fax appears. You can view, edit and send your fax documents. . The group is saved in the telephone Click on book of your multifunction machine. (Press to cancel the current function.) Æmaximum of 20 characters and 30 numbers Your multifunction machine can display a on the display. Editing Entries and Groups 1 In the dialog Companion – Address Book, select the entry that you would like to edit and click in the toolbar on Properties. 2 Make the desired changes and click on to cancel the current function.) . (Press Deleting Entries and Groups 1 2 In the dialog Companion – Address Book, select the entry that you would like to delete and click in the toolbar on Erase. Sending Faxes COMPANION – MANAGER FAX 1 Click in the toolbar on New, Document, and select Fax. a Faxing a scan: Click on Scanner and lay the document with the printed side face down in the flatbed scanner (see also section Machine Functions / Installation / Loading Documents). b Faxing/forwarding a PC document (file formats: *.tif (*.tiff); *.fax): Click on Memory and select Programs > Companion Suite IH > Documents > Fax. Here you will find all the documents that you have sent and received via the PC. In the Received folder, you can select received faxes and forward them to another recipient. 2 Enter the telephone number of the recipient. There are multiple ways to do this: Enter the telephone number of the subscriber in the field Recipient and click on ^, or select a telephone book entry under Adress book and click on >. You can also send your fax to multiple recipients. Confirm the deletion of the entry or group. ²from the telephone book but also any links Please note that this not only deletes entries to a group. Printing the Telephone Book Click in the toolbar on Print. If you have not selected any entries, your multifunction machine prints a list of all existing telephone book entries. Importing / Exporting the Telephone Book PC Functions With the function Companion – Address Book, you can save/archive the telephone book of the multifunction machine on your PC or load entries into your machine. ² The file import and export must take place with the file format *.EAB. 1 Click in the menu bar on File > Export, to copy the telephone book entries of your multifunction machine to the PC. Select the desired archive folder. 2 Click in the menu bar on File > Import, to copy entries to your multifunction machine. Select the file that you would like to import. ²on Select an entry in the recipient list and click to remove a subscriber from the list. 52 3. Using Companion Suite IH If you are operating your multifunction machine on a private branch exchange, enter the configured outside line access code for PC fax transmission (see section Machine Functions / Settings / Private Branch Exchange (PABX)). 3 Click on Cover page to include sender identification. Use a saved version or create a new title page (see also Fax Settings on PC). Confirm your entries . with 4 Click on Advanced Options to set the desired resolution or to send your fax at a later time. Click on . 5 Then click on 6 The fax management folder Outbox informs you about the transmission status of your faxes. If you would like to cancel a fax transmission, select the fax message and click in the toolbar on Stop. ²mately 30 entries, your multifunction maIf the received faxes folder contains approxi- chine automatically prints out a journal. Changing PC Fax Settings Print and Send Options 1 Click in the menu bar on Tools > Options > Fax. 2 With the dialog Logs and reports you can configure custom print settings for your faxes, transmission reports and journals on the PC. Multiple selection is possible. . The fax is sent. ²plate, click on If you would like to save your fax as a tem. (Press to cancel the current function.) After the transmission, the machine prints out a transmission report, depending on the settings (see also Changing PC Fax Settings). In the Fax-Parameters window, you can configure custom settings for PC fax transmission. Fax Transmission via PC Applications You can send a document as a fax from any Windows program. 1 Within the application, click on File > Print and select Companion Suite Fax as the printer name. 2 The Fax dialog appears. You can use this to send the document as a fax. Receiving Faxes Æception on your multifunction machine with Please note that you must activate PC fax re- function 38 (see section Machine Functions / Fax / Setting Advanced Reception Options). When a new fax message arrives, the symbol t appears on the lower edge of the Companion – Manager Fax dialog. If you have not changed the factory settings for fax reception, faxes are automatically received in the fax management folder Inbox and printed out. 3 Click on to save your settings. (Press cel the current function.) to can- Profile and Title Page With the Profile function, you can enter and save your personal sender identification to be sent with your fax messages as the title page. Reading Fax Messages 1 Click in the menu bar on Tools > Profile. Select the desired fax message in the folder Inbox and click in the toolbar on Preview to read the fax. 2 Enter the data that should appear on the title page. Printing Fax Messages 3 Save your profile by clicking cel the current function.) Select the desired fax message in the folder Inbox and click in the toolbar on Print to print the fax. 3. Using Companion Suite IH . (Press to can- 3. Using Companion Suite IH If the fax send folder contains approximately 30 entries, your multifunction machine automatically prints out a journal. 53 SMS 6 Click in the selection window Companion – Director on the button Sms; the dialog Companion – Manager SMS appears. The SMS management folder Outbox informs you about the transmission status of your SMS messages. If you would like to cancel an SMS transmission, select the SMS message and click in the toolbar on Stop. ²as a template, click on If you would like to save your SMS message . (Press to cancel the current function.) After the transmission, the machine prints out a transmission report, depending on the settings (see also Changing PC SMS Settings). If the SMS send folder contains approximately 30 entries, your multifunction machine automatically prints out a journal. Receiving SMS Messages Sending SMS Messages 1 Click in the toolbar on New and select SMS. When a new SMS message arrives, the symbol t appears on the lower edge of the Companion – Manager SMS dialog. If you have not changed the factory settings for SMS reception, SMS messages are automatically received in the SMS management folder Inbox and printed out. Reading SMS Messages Select the desired SMS message in the folder Inbox and click in the toolbar on Preview to read the SMS. Printing SMS Messages Select the desired SMS message in the folder Inbox and click in the toolbar on Print to print the SMS. ²ly 30 entries, your multifunction machine If the SMS send folder contains approximate- automatically prints out a journal. PC Functions 2 Enter the text you would like to send in the field Content of the message. You can add “smilies” as well as the date and time to your message by clicking on one of the symbols on the left, next to the text entry field. Æit could be that your SMS is too long. You can Changing PC SMS Settings Printing Options 1 Click in the menu bar on Tools > Options > SMS. 2 In the Logs and reports window, you can configure custom printing settings for your SMS messages, transmission reports and journals on the PC. Multiple selection is possible. If problems occur during sending of the SMS, enter a maximum of 160 characters. 3 In the field Telephone number:, enter the telephone number of the subscriber and click on ^, or select a telephone book entry under Contact list: and click on >. You can also send your SMS message to multiple recipients (max. ten). ²on Select an entry in the recipient list and click or < to remove a subscriber from the list. 54 4 if you would like to send your SMS at Click on a later time or assign it a priority. 5 Click on ; your SMS message is sent. 3. Using Companion Suite IH 3 Click on to save your settings. (Press cel the current function.) to can- ²(= duplex You can print on both sides of the paper printing). Your multifunction machine stops the printout halfway through the printing process and a message appears on the PC screen asking you to turn the paper and insert it back in so that the duplex printing can be continued. Profile With the Profile application, you can enter and save your personal sender identification to be sent with your SMS messages as the header. 1 Click in the menu bar on Tools > Profile. Click in the Crystal Printer dialog on I Want To to configure additional specific printing settings. 2 Enter the data that should appear as the sender identification. Saving Printing Settings 3 Save your profile by clicking cel the current function.) . (Press to can- ²counts as text and reduces the number of Please note that your sender identification characters available for your SMS message. All printing settings that you configure are reset to the factory settings after the printout is created, unless you save them as the new standard settings. Click in the Crystal Printer dialog on Save Settings to save or select a settings profile or to delete profiles that are no longer needed. Printing When you install the Companion Suite IH on your PC, the multifunction machine is installed as a (network) printer under Windows. You will find the multifunction machine in the Windows printer menu as Crystal Printer. Displaying Printing Help Editing Printing Settings Click on Properties to edit the printing settings. The Crystal Printer window appears. Under Quality/Copies you can select the desired paper type and printing speed and define the number of copies. Click in the Crystal Printer window on Options if you need specific information and help on printing. Scanning Á With Companion Suite IH you can scan documents and edit them on the PC. 1 Lay the document onto the flatbed scanner with the written side facing down (see section Machine Functions / Installation / Loading Documents). 2 You can start the scanning process from the PC or from the multifunction machine. You have the following options: Under Paper Setup you can select the desired paper format and the orientation of the paper. Under Print Layout you can configure the layout settings and define the order of the individual pages in the printout. 3. Using Companion Suite IH 3. Using Companion Suite IH You can access your multifunction machine from any program and create printouts in colour or black-andwhite. 55 Variant 1—SCAN TO Open the Scan To window on the PC screen by pressing Á on the multifunction machine. The scanning process is started. If you have installed the program Paper Port, the document is scanned and assigned to the application Paper Port by default. (You can also change the default settings—see also Variant 2—One Touch). Variant 2—ONE TOUCH 2 You can also configure special settings for these applications and change the standard settings (by right-clicking on the corresponding button). Select Destination: If you would like to link the Scan To function to a program other than Paper Port, you can select another program to which the scan should be transferred by default. Click on Folder copy ... and under Button click on the option Show All Destinations to assign new target programs for the scan. Click on the icon in the system tray on the lower right of your PC screen (next to the clock). The One Touch selection window appears. 1 This selection window allows you to choose among various options for document editing: PC Functions Cust.—Select any program to which the scan should be transferred. Email—The scan is attached to an e-mail. OCR—You can correct, modify or convert the scanned document for other programs using the OCR software (Optical Character Recognition). Fax—The scan can be sent as a fax. Copy—A copy is made of the scan. Select configuration: You can create profiles here. You can save settings that you would like to use frequently for scanning. Select Format and Page(s): You can combine multiple scans into one document or save them as separate documents. Variant 3—MF-Twain Open the program Paper Port by … • double-clicking on the shortcut Companion – Director on the desktop and clicking on Doc – Manager in the selection window or • selecting Start > Programs > ScanSoft Paper Port > Paper Port on the PC. Scan—The scanned document is opened with the program Paper Port. Click on the desired symbol. The scan is started and transferred to the selected application. ²any other graphics program if the program You can also start the scanning process from supports Twain Drivers. 56 3. Using Companion Suite IH Click on Start > Programs > Companion Suite > Companion Suite IH > Solution Center (Printer); the dialog Crystal Solution Center appears: Set the Twain driver under Scan. Select whether you would like to scan a document or a photograph. Click on Scan. The following selection window appears. Firmware Update The firmware defines the basic functions and capabilities of your multifunction machine. We constantly strive to implement improvements and innovations. With Companion Suite IH you can perform a firmware update. You can select whether you would like to scan in black-and-white or colour mode with the buttons under the sliders. Check our homepage www.belgacom.be for information on the current firmware version available for your multifunction machine. 2 The firmware version with which your machine is operating can be checked by clicking on Start > Programs > Companion Suite > Companion Suite IH > Companion-Update Device. The MFUpdateDevice window appears: Set the desired scan resolution under Resolution. Under the menu item Pre-selection, you can create different profiles. In a profile, you may save settings that you would like to use fairly often, for example, for scanning of a frequently-used document type. First configure the settings. Then click on New and enter a name for the profile. Click on Save. To scan documents with the saved settings, select the new profile from the selection menu. Click on the button Start scan to commence with the scanning process. After the scanning is finished, the document appears in the main window of Paper Port. You can save the scan or edit it in a graphics program (e.g. Photo Impression) or the OCR software. Displaying the Ink Level With the Companion Suite IH you can display the remaining ink level of the ink cartridges on the PC. 3. Using Companion Suite IH Click on Version information to see the current firmware version of the machine. 3. Using Companion Suite IH By moving the sliders, you can select the orientation and filter settings for the scan. 1 57 ²firmware version directly on the machine. With menu function 83 you can check the Press MENU/OK and 83. Enter the following code using the number pad: 704100. The display shows the current firmware version. 3 Download the firmware file from our homepage and save it on your PC. Æephone book entries as well as saved The firmware update deletes all tel- fax, and SMS messages. Archive the telephone book with Companion – Address Book or copy the entries to the Windows address book. Print the saved messages before performing the firmware update to prevent loss of data. 4 In the MFUpdateDevice window under Firmware file to load select the saved firmware file. Then click on Start upload to transfer the current firmware file to the multifunction machine. ÆWriting appears on the display because Check whether the message Bootloader your machine should be in bootloader mode for the update process. Never disconnect the USB connection during the update process! Wait until the firmware update is completed before performing more operations on your multifunction machine. 5 During the first firmware update, windows appear on the screen which must be handled differently depending on the operating system: Windows 2000 (SP 3): Select No, not this time and click on Next. Follow the further instructions to complete the firmware update. PC Functions Windows XP (SP 2): Select No, not this time and click on Next. Follow the further instructions to complete the firmware update. 58 3. Using Companion Suite IH 4. Uninstalling the Driver and Software 3 Your PC will now prepare for the uninstall process. Select Remove to delete the device driver. Click on Next and confirm with Ok in the following window. Uninstalling with the CDROM 1 In the Companion Suite IH start window, click on the button Uninstall Products and click on All Products and select All in the following window to uninstall. ²tions, click on the button Customized. The If you would like to remove specific applica- ²You can change the PC connection type either For custom uninstall settings, select Modify. by uninstalling the USB connection or adding a wireless network. You can also configure your multifunction machine as a network printer. 4 Click on Next to continue the removal of Paper Port. You can repair or remove the program settings for Paper Port. Select Remove and click on Next. 5 Select Remove files to delete the settings for Paper Port from the PC. Click on Remove Files and complete the removal of Paper Port by clicking on Finish in the following window. CD-ROM will uninstall the selected application. 2 You can change, repair or remove the program settings for Photo Impression. Select Remove and click on Next. In the next window, confirm the removal of Photo Impression with Finish. ²ess, click on Cancel. If you would like to cancel the uninstall proc- 4. Uninstalling the Driver and Software 4. Uninstalling the Driver and Software Close all open programs and applications before beginning the removal process. Place the CD-ROM in the CD-ROM drive of your PC. (If the program does not start, locate your CD-ROM drive in Windows Explorer and double-click on the program Setup.exe.) 59 6 After removal of the device driver and the software, you must restart your PC. Disconnect the multifunction machine from the PC before restarting. Click on Finish. Do not remove the CDROM from the CD-ROM drive until after the restart. Variant 2 Click on Start > Settings > Control Panel > Add or Remove Programs to view which programs are installed on the PC. 1 Click on the program that you would like to delete and select Change/Remove. 2 Follow the further instructions on the PC screen to delete the selected program from the hard drive of your PC. ²to allow you to continue working with other You can also restart the PC at a later time open programs or save unsaved data. Uninstalling via the Start Menu You can also uninstall Companion Suite IH without using the CD-ROM. Close all open programs and applications before beginning the removal process. Variant 1 Click on Start > Programs > Companion Suite > Companion Suite IH > Uninstall on the PC. PC Functions You can either repair the device driver or remove it. Select Remove and click on Next. You will be asked to confirm the uninstall. After you have clicked on OK, Companion Suite IH will be removed from your PC. At the conclusion of the uninstall process you must restart your PC. Disconnect the multifunction machine from the PC before restarting. ²Port are not deleted and remain available for The programs Photo Impression and Paper use. 60 4. Uninstalling the Driver and Software Appendix Glossary Access Point: Central access point in a WLAN. All network devices must register themselves with the access point to be able to communicate with other devices in the network. All devices send the data to the access point, which distributes the data within the network. Active Fax Switch: The passive fax switch distinguishes incoming calls according to fax transmissions and other calls based on the calling tone (CNG signal, 1100 Hertz). The active fax switch also controls the ring behaviour of the devices and coordinates externally connected devices (see Additional Devices, see Fax Switch). Additional Devices: You can connect additional devices to your fax machine, such as answering machines, telephones, charge meters and computer modems; these can be connected either in series or in parallel. Parallel connection means that the devices are connected to another telephone socket of the same line. If you connect the devices to the external socket of your fax machine, they are connected in series. CNG Tone (Calling Signal): A tone (CalliNG) with which a fax transmission is announced. When the CNG tone occurs, the fax switch of the device recognises an incoming fax call and starts the fax reception. Combining Numbers (Chain Dialling): You can individually combine and edit telephone book entries, manually entered numbers and numbers from the redial list before starting the actual dialling process. For example, if you have saved the prefix of an inexpensive telephone provider (see Callby-Call) as a telephone book entry, select this entry and enter the desired telephone number. Crystal Image: An image and text enhancement function developed specially for your multifunction machine for printing and copying your blackand-white and colour documents. Dialling Pause: Long-distance numbers or telephone numbers with subaddresses/extensions sometimes require the insertion of a dialling pause to prevent the dialling from occurring too quickly and resulting in a loss of the connection. Ad-Hoc-Network: see Network Dongle: see Wireless Adapter Automatic Redial: If the subscriber is busy, your machine will dial the number again after a specified interval). Easylink: Coordinates externally connected telephones on the same line (forwarding voice calls, starting fax reception, etc.)—see also Additional Devices. Broadcasting: With this function you can send a message to multiple fax recipients. Calling Line Identification Presentation (CLIP): see Identification Presentation Call-by-Call: It is possible to place telephone calls through different private service providers. With prefixes added before the actual telephone number, each telephone call can be placed through a different provider. Chain Dialling: see Combining Numbers Appendix E.C.M (Error Correction Mode): Reduces transmission errors that result from poor line quality, thereby reducing the transmission time. Both of the connected fax machines must support E.C.M. Encoding: A process with which the information of a fax transmission is encoded and compressed. The minimum standard is MH (Modified Huffmann). Your multifunction machine uses the superior encoding processes MR (Modified Read) and MMR (Modified Modified Read) as long as the other machine also supports these modes. Encryption: Security for the transmitting of network data (see also WEP Standard). Energy Saving Mode: After not being used for about two minutes, the machine switches to the energy saving mode. If the device is called (e. g. by a fax transmission) or if you would like to create a printout or a copy, the machine activates the starting mode. EXIF-Information: Detailed image information about your photos (e.g. recording time, aperture, exposure). Almost all modern digital cameras support the EXIF standard. Fax Groups: Fax machines are classified in terms of internationally standardised fax groups based on their transfer type and speed. Connections between two devices of different groups is possible; the lowest common transfer rate is selected. The determination of the speed takes place during the handshake. Fax groups 1 to 3 are analogue fax machines. Nowadays, groups 1 and 2 are hardly to be found any longer; fax machines of group 3—which have a transfer speed that ranges from 9,600 to 33,600 bps—are currently most standard. Group 4 fax machines are digital devices that function exclusively on ISDN systems. They have a maximum transfer speed of 64,000 bps. Fax Polling: The option of retrieving documents from another fax machine (active) or making documents available to be retrieved by other fax machines (passive). Fax Switch: If you operate the multifunction machine and an external telephone on the same line, the (passive) fax switch distinguishes fax calls from other calls. Fax switches can be either “active” or “passive”. Your multifunction machine has an active fax switch (see Active Fax Switch). 61 Fax Tone (CNG Signals): see CNG Tone (Calling Signal) Firmware Upload: Updating the device functionality. Firmware: Program code stored in Flash memory that controls the basic functions of a device. Sometimes also referred to as the device driver. Gateway (Router): Devices for transferring data between networks. The router forwards the data that arrive at the gateway. If your network communicates with other networks, you may have to configure the gateway IP address (please contact your network provider). High-Power Connection: see USB Identification Presentation (Calling Line Identification Presentation, CLIP): There are two types of caller ID: Telephone number display for incoming calls and sending of the telephone number for outgoing calls. The sending of the telephone number can be disabled temporarily or completely (= telephone number suppression). Infrared (also IrDA-Infrared Data Association): Data transmission via infrared at distances up to one meter. A visual connection must exist between the IrDA ports. With the OBEX protocol (Object Exchange Protocol) you can transfer files unidirectionally from infrared-capable devices to your multifunction machine. Infrastructure Network: see Networks. Ink Level Memory: Your multifunction machine keeps track of the ink consumption of each printout and uses this information to calculate the ink level of the cartridges. The indicated ink level is only meaningful if you update each new ink cartridge with the Plug’n’Print card that is provided with the cartridge (see also Plug’n’Print Card). IP Address: Sequence of numbers separated by periods (= address) for identification of computers that are connected to the Internet or a WLAN network (see also TCP/IP). Journal: A report of the documents sent and received. The journal is either printed out automatically after 62 30 transmissions or you can print it out manually when needed (see section Machine Functions / Troubleshooting / Printing the Journal) Low-Power Connection: see USB Dual Tone Multi-frequency (DTMF): see Tone Dialling Modem: A modem converts digital computer signals into acoustic signals and vice versa. Networks: Connection between two or more computers and/or other network devices, such as printers, modems or routers. In a LAN (Local Area Network), network components can also be connected by radio instead of by cables: Wireless Local Area Network (WLAN). Networks have different structures (= architecture). In an infrastructure network, all devices are connected to a single access point. Data is exchanged in the network through this access point. In an ad-hoc network, the devices communicate with each other directly, without an access point. Outside Line Access Code: The outside line access code is the number (usually “0”) that must be dialled before the actual telephone number on a private branch exchange in order to establish a connection to the public telephone network. Parallel Connection: see Additional Devices Plug’n’Print Card: Chip card for updating newly inserted ink cartridges. A cartridge that has once been activated with the corresponding Plug’n’Print card will be recognised again, even if you remove the cartridge temporarily. Polling: see Fax Polling POP (Post Office Protocol): Internet protocol for downloading email. Protocols: Standardised rules and conventions for transmitting data in networks (e. g. TCP/IP: the most wellknown protocol for Internet communication, used by almost all operating systems; IEEE 820.11b: typical wireless network protocol; standard ITU T30 for fax transmissions). Pulse Dialling: A dialling process that is used in older telephone networks. Resolution: Number of dots per inch (dpi). The following settings are available to you for fax transmissions: standard, fine h, superfine f, photo F and for colour faxes COL. For copying, the available resolutions are draft, NORMAL and photo. Scanning: Reading a document via the flatbed scanner for sending as a message, copying, faxing or editing on the PC. Sender identification (= header): Display of the telephone number, name, date and time on outgoing messages. Serial Connection: see Additional Devices Stand-alone: Your multifunction machine even functions independently of a PC or network connection. TCP/IP (Transmission Control Protocol over Internet Protocol): Fundamental Internet connection protocol, often also used as a collective term for the Internet protocol suite. Telephone Book Index: The entries saved in the telephone book are automatically sorted alphabetically and can be accessed quickly by pressing the initial letters. Tone Dialling (Dual Tone MultiFrequency): A dialling process that is used in modern telephone networks. Each number dialled is assigned a specific tone (called DTMF tones). Transmission error reduction: see ECM Transmission Speed: CCITT / ITU has published international standards for the transmission of data over telephone lines. The most important transmission speeds for fax transmissions are: V.17—7.200 to 14.400 bps V.21—max. 300 bps V.22—max. 1.200 bps V.22 bis—max. 2.400 bps V.27 ter—max. 4.800 bps V.29—max. 9.600 bps V.32 bis—max. 14.400 bps V.34—max. 33.600 bps URL (Uniform Resource Locator): Standardised form for objects in the Internet, usually WWW pages, but also files on FTP servers or e-mail addresses. Appendix WEP Standard (Static Encryption): Your multifunction machine supports the WEP standard: All devices in the network use the same encryption. The following types of WEP encryption can be used in the network: 64-bit (max. ten characters) and 128-bit (max. 26 characters). Wireless Adapter: Internal or external transceiver on a device. WLAN: Grouping of at least two computers, printers and other devices that are connected via radio waves. Requirement: All participating devices must have a wireless adapter. DHCP: Dynamic Host Configuration Protocol SSID: Service Set ID (network authentication) dpi: Dots per Inch (see Resolution) TCP/IP: Transmission Control Protocol over Internet Protocol DTMF: Dual Tone Multiple Frequency (see Tone Dialling) DPOF: Direct Print Order Format E.C.M.: Error Correction Mode EXIF: Exchangable Image File GAP: Generic Access Profile (radio protocol for cordless handsets) ITU: International Telecommunications Union (UN organisation) JPG (JPEG): Joint Photography Expert Group LCD: Liquid Crystal Display LED: Light Emitting Diode MH: Modified Huffmann (encoding process for faxes, see Encoding) MHC: Modified Huffmann Code (encoding process for faxes, see Encoding) MR: Modified Read (encoding process for faxes, see Encoding CCITT: Comite Consultatif International Telephonique et Telegraphique (predecessor of ITU) MRC: Modified Read Code (encoding process for faxes, see Encoding) CLIR: Calling Line Identification Restriction (telephone number suppression)—see Identification Presentation CNG: Calling Signal (see CNG Tone) DCF: Design Rule for Camera File System WLAN: Wireless Local Area Network ISDN: Integrated Services Digital Network bps: Bits per second (transmission speed) CLIP: Calling Line Identification Presentation (see Identification Presentation) WEP: Wired Equivalent Privacy (network encryption) IrDA: Infrared Data Association MMR: Modified Modified Read (encoding process for faxes, see Encoding) CEPT: Conference Européenne des Administrations des Postes et des Télécommunications (association of postal service administrations) USB: Universal Serial Bus (computer port) HCRP: Hardcopy Cable Replacement Profile Abbreviations CE: Conformité Européenne TWAIN: Tool Without An Interesting Name (standard for scanner drivers) Appendix USB Connection: Additional devices can be connected to the USB port (Universal Serial Bus) of the multifunction machine. One differentiates between high-power and low-power connections. High-power devices are also supplied with power through the USB port; they do not have their own power supply. Lowpower devices receive power from their own power supply, the do not need power from the USB port. You can only connect one high-power device and no more than two low-power devices to your multifunction machine at a time. OBEX: Object Exchange Protocol (Infrared protocol) OCR: Optical Character Recognition PABX/PBX: Private Automatic Branch Exchange POTS: Plain Old Telephone Service (analogue telephone service with low transmission speed) PSTN: Public Switched Telephone Network RAM: Random Access Memory RJ-11: Registered Jack 11 (also called Western plug, standardised telephone plug) SMS: Short Message Service Appendix 63 List of Functions On the multifunction machine, press MENU/OK and 29. You will receive a printout of the menu functions offered by your machine. An extra page informs you about the current settings. 1 Phonebook 11 ADD NAME . . . . . . . . . . . . . . . . . . . . . . . . . . . . . . . .28 Add entries to the telephone book ADD GROUP . . . . . . . . . . . . . . . . . . . . . . . . . . . . . . .28 Collect multiple entries into a group MODIFY ENTRY . . . . . . . . . . . . . . . . . . . . . . . . . . .28 Change entries/groups DELETE ENTRY . . . . . . . . . . . . . . . . . . . . . . . . . . 28 Delete entries/groups PRINT . . . . . . . . . . . . . . . . . . . . . . . . . . . . . . . . . . .29 Print the telephone book 12 13 14 16 2 Settings 21 DATE/TIME . . . . . . . . . . . . . . . . . . . . . . . . . . . . . .17 Set the date and time Number/Name . . . . . . . . . . . . . . . . . . . . . . . . . . . .17 Enter your telephone number / name TEL.NETWORK . . . . . . . . . . . . . . . . . . . . . . . . . . . .17 Configure PSTN/PABX operation PRINTER . . . . . . . . . . . . . . . . . . . . . . . . . . . . . . . . .17 Configure printer settings FLAT BED SCAN . . . . . . . . . . . . . . . . . . . . . . . . . . .21 Configure scanner settings TECHNICALS . . . . . . . . . . . . . . . . . . . . . . . 10, 34, 35 Configure special settings GEOGRAPHICAL . . . . . . . . . . . . . . . . . . . . . . . . . . .17 Set display language FUNCTION LIST . . . . . . . . . . . . . . . . . . . . . . . 17, 64 Print out the list of functions 22 23 24 25 27 28 29 54 55 57 6 Fax Switch 61 DAY MODE . . . . . . . . . . . . . . . . . . . . . . . . . . . . . . . .30 Set S operating mode NIGHT MODE . . . . . . . . . . . . . . . . . . . . . . . . . . . . . .30 Set M operating mode SET Timer . . . . . . . . . . . . . . . . . . . . . . . . . . . . . . .30 Switch between S/M operating modes Easylink . . . . . . . . . . . . . . . . . . . . . . . . . . . . . . .31 Control additional telephones 62 63 64 7 Commands 71 PERFORM . . . . . . . . . . . . . . . . . . . . . . . . . . . . . . . . .41 Immediately execute jobs in the queue MODIFY . . . . . . . . . . . . . . . . . . . . . . . . . . . . . . . . . .41 Modify jobs in the queue DELETE . . . . . . . . . . . . . . . . . . . . . . . . . . . . . . . . . .41 Delete jobs from the queue PRINT . . . . . . . . . . . . . . . . . . . . . . . . . . . . . . . . . . .41 Print jobs in the queue PRINT LIST . . . . . . . . . . . . . . . . . . . . . . . . . . . . . .41 Print a list of jobs 72 73 74 75 8 Extras 81 LOCK . . . . . . . . . . . . . . . . . . . . . . . . . . . . . . . . . . . .42 Enable keypad lock PRINT CARTR. . . . . . . . . . . . . . . . . . . . . . . . . 41, 42 Clean and align cartridges, display ink level SERVICE CODE . . . . . . . . . . . . . . . . . . . . . . . . 43, 57 Turn button sounds on/off;. . Check firmware version DETECT CARD . . . . . . . . . . . . . . . . . . . . . . . . . . . .23 Access the inserted memory card DETECT CAMERA . . . . . . . . . . . . . . . . . . . . . . . . . .23 Access a connected digital camera SCAN TO CARD . . . . . . . . . . . . . . . . . . . . . . . . . . . .25 Transfer data to the inserted memory card COLOUR SCHEME . . . . . . . . . . . . . . . . . . . . . . . . . .10 Change colour settings for the display 82 83 84 3 Fax 31 TRANSMIT . . . . . . . . . . . . . . . . . . . . . . . . . . . . . . .33 Send faxes via the menu POLLING RX . . . . . . . . . . . . . . . . . . . . . . . . . . . . . .34 Poll faxes from another machine POLLING TX . . . . . . . . . . . . . . . . . . . . . . . . . . . . . .34 Allow faxes to be polled from your machine FAX ANSWERING . . . . . . . . . . . . . . . . . . . . . . . . . .34 Configure protected fax reception RX SETTINGS . . . . . . . . . . . . . . . . . . . . . . . . . . . .33 Configure fax reception settings TX SETTINGS . . . . . . . . . . . . . . . . . . . . . . . . . . . .33 Configure transmission settings PRINT JOURNAL . . . . . . . . . . . . . . . . . . . . . . . . . .41 Print a list of the last 30 transmissions FAX ON PC . . . . . . . . . . . . . . . . . . . . . . . . . . . . . . . .33 Select fax reception 32 33 34 35 36 37 38 5 Messaging 51 SEND . . . . . . . . . . . . . . . . . . . . . . . . . . . . . . . . . . . .36 Send SMS message READ . . . . . . . . . . . . . . . . . . . . . . . . . . . . . . . . . . . .37 Read SMS messages PRINT . . . . . . . . . . . . . . . . . . . . . . . . . . . . . . . . . . .37 Print SMS messages 52 53 64 DELETE . . . . . . . . . . . . . . . . . . . . . . . . . . . . . . . . . .37 Delete SMS messages SMS SETUP . . . . . . . . . . . . . . . . . . . . . . . . . . . . 37, 38 Configure special messaging settings MESSAGE BEEP . . . . . . . . . . . . . . . . . . . . . . . . . . .38 Turn message signal on/off 85 86 87 9 Networking 91 wireless lan . . . . . . . . . . . . . . . . . . . . . . . . 49, 50 Configure WLAN (optional) Infrared . . . . . . . . . . . . . . . . . . . . . . . . . . . . . . .23 Activate/deactivate infrared PRINT SETUP . . . . . . . . . . . . . . . . . . . . . . . . . . . .50 Print out the network settings 94 95 Appendix General Information Dimensions (W×D×H) Weight Power supply Power Consumption: Stand-by mode Starting mode Connection type Standards: Circuit breaker Emissions Interference immunity Other Ambient conditions Image processing 447×385×239 mm 7.8 kg 220—240V / 50—60 Hz 7 Watt 10 Watt PSTN, PABX max. 150 sheets standard paper (A4, 80 g/m2) max. 50 sheets standard paper (A4, 80 g/m2) 10×15, A4, letter 76.2 mm–215.9 mm 127 mm–431 mm 0.08–0.28 mm 75–272 g/m2 normal paper, coated paper, transparencies, photo paper Copier Type Resolution Multiple copies Zoom range Digital camera connection USB port Supported standards up to 200 Internet Connection Type Modem speed Encoding (data compression Internet protocol PSTN—V.34 33k6—V.34 V.42bis, MNP5 TCP/IP Type Compatibility Encoding (datacompression) Connection type Dialling mode Dialling type Modulation Transmission speed Message memory Resolution Correction mode RTC (G3), group 3 T.30 MH, MR, MMR, JPEG (JPG) main line (PSTN) extension (PABX) tone dialling DTMF V.29,V.27ter,V.21,V.17 33k6—V.34Fax up to 2 MB standard: 100×100 dpi fine: 200×200 dpi photo: 200×200 dpi super Fine: 400×400 dpi COL: 200×200 dpi T.30 ECM MB SMS Gateway SMS memory Message length V.23 see Fax / Message memory 160 characters PC Connection stand-alone colour draft: 300×300 dpi normal: 600×600 dpi quality: 1200×1200 dpi up to 99 pages 25 %–400 % Photo Printer Card slot: Telephone book entries Fax EN60950-1 EN55022 Class B EN55024 Energy Star, CE perm. temperature: 15–35 ° C relative humidity: 10 %–80 % (non-condensing) Crystal Image photo and text enhancement Printing Media Maximum capacity of paper tray Maximum capacity of output tray Paper sizes Width Length Paper thickness Paper weight Supported printing media Telephone Book Appendix Technical Data CompactFlash (I, II), Smart Media, MultiMedia Card (MMC), Secure Digital, Memory Stick, Memory Stick Duo (Pro), Memory Stick Pro, Microdrive, XD-Picture-Card USB host 1.1, USB 2.0 Full Speed DPOF, PictBridge Connection type Supported operating systems Scanner driver USB 2.0 Full Speed Windows 2000 (SP 3) · XP TWAIN, WIA (Windows XP) Scanner Type Resolution Scanning speed Scanning area Colour depth flatbed, CIS max. 1200×4800 dpi b/w 3.9 seconds/A4 page colour 7.9 seconds/A4 page 216×300 mm b/w 16-bit colour 48-bit Technical specifications subject to change without notice. Printer Type Warm-up time (scanner) Resolution Printing speed Printing width Appendix bubble inkjet colour max. 1 second max. 4800×1200 dpi b/w up to 22 pages/minute colour up to 15 pages/minute 203 mm 65 Warranty The Equipment you have bought has been carefully selected by Belgacom and is covered by a two-year warranty on spare parts and labor in the event of any material or manufacturing defect, unless otherwise specified. The warranty shall be valid from the date on which the equipment is collected or delivered. If you have any problems with the equipment, you should take it to a Teleboutique or to one of our authorized agents, in its entirety and in its original packaging, or in packaging providing the same degree of protection, together with the original receipt. The addresses for our Teleboutiques and authorized agents are given in the Information Section of the White Pages. Your equipment will be repaired or replaced free of charge, on presentation of the receipt, in the event of any material or manufacturing defect. Belgacom alone shall determine what repairs and/or replacements are necessary. The warranty on the repaired or replaced equipment shall end on the date on which the original warranty on the purchased equipment expires, but shall not be less than 3 months. The warranty shall not cover: - damage of any kind that does not predate the sale; - any damage, faults or defects attributable to the Customer or to causes unrelated to the Equipment: lightning, power surges, humidity, accidental damage, improper use or poor maintenance, failure to comply with the instructions in the user manual, and force majeure; - the repair or replacement of movable parts (cords, wires, plugs, aerials, etc.), consumables (cells, batteries, paper, ink, etc.) needing regular replacement and the supply of cleaning products. The warranty shall not apply: - to any changes or repairs to the terminal Equipment undertaken by the Customer himself/herself or through the services of persons not designated by Belgacom; - if the Customer removes or tampers with the manufacturer’s serial numbers and/or brand names on the terminal Equipment. Belgacom shall not be liable for any indirect or immaterial loss sustained by the Customer as a result of the malfunctioning of the terminal Equipment, such as any loss of production, revenue or contracts. The General Terms and Conditions for the Sale of Terminal Equipment can be obtained on request from any Belgacom service available to the public or at www.belgacom.be Belgacom SA under public law, Bd. du Roi Albert II 27, B-1030 Brussels VAT BE 0202.239.951, Brussels Register of Legal Entities 66 Appendix ______________________________________________________________________________________________________________ EC-DECLARATION OF CONFORMITY EG-KONFORMITÄTSERKLÄRUNG CE-DECLARATION DE CONFORMITE EG-VERKLARING VAN OVEREENSTEMMING Appendix EC-Declaration of Conformity Reference number/ Referenznummer/ Numéro de référence/ Referentienummer: 761-05-0086 We Wir Nous Wij Sagem Communication Austria GmbH Gutheil-Schoder-Gasse 17 A-1230 Wien, Österreich declare under our responsibility that the product erklären unter unserer Verantwortung, daß das Produkt déclarons sous notre responsabilité que le produit verklaren onder onze verantwoording, dat het product BelgafaxTM 710 to which this declaration relates is in conformity with the following standard(s) or other normative document(s): auf das diese Deklaration verweist, mit den folgenden Normen oder anderen normativen Dokumenten übereinstimmt: qui est l’objet de la présente déclaration, est conforme aux normes suivantes ou à d’autres documents normatifs: waarnaar deze declaratie verwijst, aan de volgende normen of andere normatieve documenten voldoet: Safety / Sicherheit / Sécurité / Veiligheid: EN 60950-1:2001 Electromagnetic Compatibility / Elektromagnetische Verträglichkeit / Compatibilité électromagnétique / Elektromagnetische compatibiliteit: EN 55022:1998 + A1:2000 + A2:2003 class B EN 55024:1998 + A1:2001 + A2:2003 EN 61000-3-2:2000 EN 61000-3-3:1995 + A1:2001 following the provisions of the Directive 1999/5/EC on radio equipment and telecommunication terminal equipment and the mutual recognition of their conformity. gemäß den Bestimmungen der Richtlinie 1999/5/EG über Funkanlagen und Telekommunikationsendeinrichtungen und die gegenseitige Anerkennung ihrer Konformität. d’après les dispositions de la Directive 1999/5/CE concernant les équipements hertziens et les équipements terminaux de télécommunications et la reconnaissance mutuelle de leur conformité. conform de bepalingen in de richtlijn 1999/5/EG betreffende radioapparatuur en telecommunicatie-eindapparatuur en de wederzijdse erkenning van hun conformiteit. Oliver SCHMEER, Managing Director ____________________________________________ Name and Function of authorised person Name und Funktion der zeichnungsberechtigten Person Nom et Fonction de la personne autorisée Naam en functie van bevoegd persoon Vienna, 2005-11-04 ________________________ Place and date of issue Ort und Datum der Ausstellung Lieu et date de signature Plaats en datum van handtekening ________________________________ Signature of authorised person Unterschrift der zeichnungsberechtigten Person Signature de la personne autorisée Handtekening van bevoegd persoon Sitz: Wien, Österreich Firmenbuchgericht: Handelsgericht Wien Firmenbuchnummer: 219483 w Appendix 67 68 Appendix Appendix Appendix 69 70 Appendix The CE mark confirms that the machine corresponds ot the relevant guidelines of the European Union. This user manual was printed on recycled paper bleached without chlorine. This satisfies the highest standards for low environmental impact. The cardboard packaging used and the packaging inserts of paper and cardboard can be disposed of as waste paper. The plastic foil may be submitted for recycling or disposed of with waste not intended for recycling, depending on the requirements in your country. The equipment that you bought has required the extraction and use of natural resources for its production. It may content hazardous substances for the health and the environment. In order to avoid the dissemination of those substances in our environment and to diminish the pressure on the natural resources, we encourage you to use the appropriate take-back systems. Those systems will reuse or recycle most of the materials of your end life equipment in a sound way. The crossed-bin symbol invites you to use those systems. If you need more information on the collection, reuse and recycling systems, please contact your local or regional waste administration. You can also contact us for more information on the environmental performances of our products. This user manual is a document that does not represent a contract. Errors, printing errors and changes are excepted. Copyright © 2005 252235567-A BE gb (Belgafax 710)