1
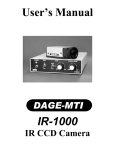
User’s Manual
VE-1000-SIT
Intensified Camera
DAGE-MTI
701 N. Roeske Ave.
Michigan City, IN 46360
PH: 219-872-5514 FAX: 219-872-5559 [email protected]
971004-01 (4/18/05)
TABLE OF CONTENTS
1.
INSTALLATION
1.0
General
1.1
Location
1.2
Connections
1.3
Obtaining Picture
1.4
Front Panel Control Functions
1.4.1
1.4.2
1.4.3
1.4.4
1.4.5
1.5
Gain/KV
Black Level
Gamma
Enhance
Shading Correction
Rear Panel Control Functions
2.5.1 Gain Range Switch
2.5.2 External Drive Lock
2.
SPECIFICATIONS
3.
WARRANTY
INSTALLATION
1.0
GENERAL
The VE-1000 SIT intensified camera is designed to meet the stringent requirements of
video microscopy and other instrumentation applications requiring high performance,
flexibility and maximum stability.
The VE-1000 SIT provides locking micrometer controls for gain, KV, and black level.
Additionally, the user has access to auto or manual black level, auto or manual gain/KV,
enhancement control, variable gamma, shading correction including diagonal shading for
DIC procedures and a switchable reference test signal to allow quick contrast setup of a
monitoring system.
The best equipment available must be installed with care if it is to perform satisfactorily
and give long service. Following the recommendations outlined below will help assure
long quality service from your camera. Although these units have been designed for
“instrumentation” use, it should be remembered that they are complex electronic
instruments and should be treated accordingly.
1.1
LOCATION
1.
Mount the camera head assembly to the microscope or lens assembly.
Stop the lens to minimum aperture and/or extinguish light source.
WARNING: THE VE-1000 SIT IS A LOW LIGHT IMAGING
CAMERA! INSURE INPUT LIGHT LEVEL IS NOT EXCESSIVE!
1.2
2.
Locate the control unit within a convenient working and viewing distance,
making sure that the camera cable will reach the rear of the control unit.
3.
Mount the monitor assembly on top of the control unit if desired.
CONNECTIONS
CAUTION: DO NOT connect the AC power until all other system signal
connections are made.
1. Connect the camera head to the control unit by means of the camera cable
assembly.
NOTE: DO NOT turn power on before connecting the camera head to the
control unit.
2. Using a BNC cable, connect the camera control’s video output, VID 1, to the
video input on the monitor.
NOTE: If no other equipment is being utilized, be sure that the monitor’s
video input terminating switch is set to 75 ohms.
3. Connect the AC power input cord to an appropriate electrical outlet.
WARNING: Before connecting AC power, verify that the system is
configured for your available AC power. Check power input of camera
control unit. The voltage select switch is located adjacent to the fuseholder of
the AC power input block on the rear of the control unit.
1.3
OBTAINING PICTURE
The VE-1000 SIT camera is factory set for optimum performance. Please ensure
the switches are set in the following positions when first obtaining an image.
1.
2.
3.
4.
5.
6.
Enhance control
Set to FLAT
Gamma control
Set to maximum CCW (1)
Black Level
AUTO
Gain/KV
AUTO
Shading
OFF
Gain Range
LOW
(Switch on back of camera control unit)
7.
8.
9.
Turn control unit power ON.
Turn monitor power ON.
Turn on reference test signal by pressing REF SIG button on control. A
green light should come on and the test signal should now be displayed on
the monitor.
Adjust brightness control on the monitor such that the darkest shade of
grey is at black or extinguished. Adjust the contrast control to set the
white level to the desired amount.
Turn REFERENCE SIGNAL off by pushing REF SIG button.
Turn on light source to camera or open the camera lens. Place a scene in
view of the camera and focus the optical system.
Adjust the light input level until the signal level indicator (SIG LVL,
located on the control front panel) is lit green. Avoid operation with “SIG
LVL” in red condition.
The camera picture should now be on the monitor screen and initial set-up
is complete.
10.
11.
12.
13.
14.
If you need additional sensitivity, you can switch the gain range to “high”
on the back of the camera control unit.
1.4
FRONT PANEL CONTROL FUNCTIONS
The VE-1000 SIT front panel controls allow the operator to set the camera
operation to fully automatic or manual operation. Additionally, one can use the
individual controls to enhance various aspect of the picture depending on specific
areas of interest.
1.4.1
CONTROL
FUNCTION
Gain/KV
Sets image whites to desired level to optimize
contrast. When selection switches are set as
follows:
AUTOmatic:
Camera automatically tracks and adjusts gain and
KV at optimum values to maintain whitest portion
Of picture to an internally factory preset level.
MANual:
Camera maintains a fixed gain that can be set to
desired levels by adjusting the gain control.
Camera maintains a fixed intensifier voltage (KV)
that can be set to desired levels by adjusting the
KV control.
WARNING: KV control must be set so “SIG
LVL” LED is either off or green. Operation in
red may damage image tube.
REF SIG:
Provides internally generated grey scale reference
signal for use in establishing proper contrast
settings on monitor and other system components.
1.4.2
Black Level
Varies contrast level for darkest portion of image.
Control is a 10-turn potentiometer, which can be
locked at a desired setting to prevent movement.
When selection switches are set for:
AUTOmatic:
Camera automatically tracks and sets darkest
portion of image to a black reference signal.
MANual:
Camera maintains a fixed black reference,
regardless of variations in image contrast. The
black reference can be set to desired levels by
adjusting the black level control.
1.4.3 Gamma
Turning gamma CW stretches signal in blacks and
compresses whites to improve low contrast images.
With gamma full CCW, camera provides linear grey
scale reproductions for quantitative measurements.
1.4.4 Enhance
This control, when in the center position, gives a
flat bandwidth response. Turning this control CW
enhances picture sharpness. Turning the control
CCW reduces bandwidth and noise level.
1.4.5 Shading Correction
Dynamic real time shading correction is used to
correct for camera and optical image shading errors.
ON/OFF:
Turn shading correction function ON or OFF.
HOR:
This control changes the video amplitude from
right to left of the image.
VERT:
This control changes the video amplitude from
top to bottom of the image.
PAR:
This control changes the video amplitude from the
center to edges of the image in a parabolic function.
DIAG:
This control, along with the direction switch,
changes the video amplitude diagonally from the
center to opposite corners of the image. This
function is primarily used to correct the optical
shading encountered during a DIC measurement.
1.5
REAR PANEL CONTROL FUNCTIONS
1.5.1
Gain Range Switch
This switch may be placed into the “HI” position
if additional sensitivity is required when
encountering very low light level images. This
switch should be in the “LO” position
for all other applications.
1.5.2
External Sync Lock
The VE-1000 SIT is supplied with external sync
or drive lock provisions. Composite sync and/or
video may be fed into the sync input connector
(sync level .2 volts min). As an alternative, two
input BNC connectors, located on the rear panel, are
75 ohm terminated and require standard negative
going 2 to 4 volt drive signals. When a lock signal
is not supplied, the camera automatically reverts to
internal sync operation.
SPECIFICATIONS
CAMERA ELECTRICAL:
Input Voltage:
98 to 135 VAC, 50/60 Hz
195 to 250 VAC, 50/60 Hz
Vertical Sweep Rate:
60 Hz Standard (50 Hz, 625 line system)
Horizontal Sweep Rate:
15,750 Hz Standard. Optional rates available.
Scanning:
2:1 Interlace, 525/60 or 625/50 standard. Optional
rates available.
Sync Type:
EIA RS-170, RS-330, RS-343 optional
Camera Tube Type:
SIT 4804/HP2
Sensitivity:
75 nA of average tube signal current for 1V
composite output. Usable pictures can be obtained
down to faceplate illumination of .00001 fc.
Resolution:
750 TV lines.
Enhancement:
Adjustable 0 to +12 db @ peaking frequency. 7 mHz
bandwidth: 5.5 mHz peaking frequency.
Auto Gain/KV Range:
> 300:1 at full bandwidth
Video Output:
Composite 1Vpp terminated in 75 ohms.
Black to White: 0.65 Vpp
Sync: 0.3 Vpp
Dual isolated video outputs.
Geometric Distortion:
Within Major Circle:
Overall:
Linearity Distortion:
Horizontal:
Vertical:
External Lock:
Lockable to external H&V drive or composite sync
Video Amplifier:
> 10 mHz Bandwidth
DC Coupled Output
White Clipper
Variable Bandwidth/Enhance
Auto Video Level
Auto Black Level
Variable Gamma Correction
2%
3%
1.5%
1.5%
CAMERA MECHANICAL
Head (less lens):
3 15/16” H x 2 ¾” W x 10 5/8” L
Head Weight:
4.5 lbs., 2 kg.
Control Unit:
4.25” H x 12.25” W x 16.75” L
Control Weight:
14 lbs., 6.35 kg
Lens Mount:
16mm C-Mount
Camera Mount:
Two ¼” x 20 tapped holes
ENVIRONMENTAL SPECIFICATIONS
Ambient Temperature Limits:
-20 deg. C to +55 deg. C
Air Pressure Limits:
Sea Level to 10,000 ft.
Humidity Limits:
0 to 95%, non-condensing
WARRANTY
The VE-1000 SIT camera is warranted to be free of defects in material and workmanship in normal
use for a period of one year from the original date of purchase from Dage-MTI.
This warranty does not apply to units which have been subject to abuse, neglect, accident, improper
installation, or on which the serial number has been removed or damaged. Units that have been
altered with permission of Dage-MTI are not covered by this warranty.
This warranty does not apply to other equipment furnished by Dage-MTI, which is listed or
otherwise identified as manufactured by another and therefore shall be covered by the “other
manufacturers” applicable warranty.
LIMITATIONS
1.
This warranty is valid only if the malfunctioning unit is returned to Dage-MTI
service depot. This warranty does not cover on-location service. If warranty work
is needed, the following should be contacted:
Dage-MTI
Service Department
701 N. Roeske Ave.
Michigan City, IN 46360
PH: 219-872-5514
FX: 219-872-5559
[email protected]
2.
This warranty does not cover:
a. Problems caused by or inflicted upon associated equipment such as digitizing
systems, video tape recorders, cameras, microscopes, etc.
b. Damage caused by accident, misuse, improper power source, fire, flood,
lightning, other acts of God, war and repair or alteration by other than a DageMTI authorized service organization.
c. Labor or incurred charges required in removing or installing the Product, down
time, failure of the Product to perform properly, and any consequential
damages.
d. Transit damage.
3.
Unit must be properly packaged (in original packing, if possible) when being
returned under warranty.