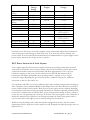
1
Getting Started with NMRA DCC with specifics & examples for S Scale Third Edition Getting Started with NMRA DCC Copyright 1998, 1999, 2001, 2002 by Charles Michael Greene, Jr. All rights reserved. Printed in the United States of America. Except as permitted under United States Copyright law, or under the provision immediately below, no part of this publication may be reproduced or distributed in any form or by any means, or stored in a data base retrieval system or on any intranet/Internet worldwide web site without prior written permission of the copyright holder. All trademarks, service marks and registered trademarks are the property of their respective owners/companies. Third Edition Revision B – February 2002 Special Provision for No-Fee Paper Reproduction The copyright holder specifically grants permission in advance for the reproduction of this document in paper form for distribution under the following terms and conditions: • The entire document must be reproduced and distributed in its original form under terms of this provision. Reproduction and distribution of less than the entire document is specifically not permitted. Reproduction and distribution must be in the original form; alternative forms and/or formats are not permitted. • The reproducer and/or distributor is not permitted to collect any fee for copies of this document produced under these provisions, except that an up to $5.00 (US Dollars, or equivalent in local currency) fee may be collected to help defray the cost of reproduction. Under no circumstances may a fee of greater than $5.00 be collected without prior written permission of the copyright holder. The copyright holder requests that any reproduction or distribution of this document that does not conform to these provisions be reported immediately to the copyright holder. The copyright holder may be contacted at: Michael Greene 167 Westford St. Dunstable, MA 01827-2405 USA Electronic mail: [email protected] Getting Started with NMRA DCC Third Edition Rev B – page 2 Introduction to Third Edition The Third Edition comes fast on the heels of the release of the Second Edition. We had not planned for such a fast update cycle but there were a number of corrections to the Second Edition, as well as new material we wanted to bring into the guide. We hope you find it useful. So it’s being released in time for the Fall “S” Get Together hosted by the Central Jersey “S” Scalers in September 2001. Introduction to Second Edition Since this guide was originally written in 1998, and updated in 1999, there have continued to be a number of changes in the DCC world. The major change is that more manufacturers have entered the DCC market with more products. In addition the number of locomotive manufacturers that are producing DCC ready locomotives has substantially increased. In the addition the US market has seen the delivery of the first locomotive from a US manufacturer that is factory equipped and ready to run on either DC or DCC layouts (Atlas, HO scale). More recently the market has seen the first US manufacturer announcement of a locomotive that is factory equipped with DCC and integrated sound and light control (S Helper Service, S scale). As a result we have updated this guide to more accurately reflect the current state of the market. As with any printed document, once it is in print, it will soon be out of date. But a larger portion of the content is not time sensitive. And we hope that with the many reference and pointers to other sources of information provided herein that the reader will be able to enhance their model railroad experience with DCC. We’re releasing this edition at the NASG National Convention 2001 in Scranton, PA. Getting Started with NMRA DCC Third Edition Rev B – page 3 Introduction to First Edition This guide was developed as a handout for the 1998 National Association of S Gaugers (NASG) convention held in Worcester, MA. It’s designed to provide some basic information for anyone considering installing a Digital Command Control (DCC) system based on Standards and Recommended Practices of the National Model Railroad Association (NMRA). In addition it has a special focus on issues of interest to those modeling in S scale of any type including American Flyer, hi-rail and scale wheels. Much of the information contained herein will apply equally or with minor adjustments to other modeling scales. This guide is NOT designed as a comprehensive treatment of NMRA DCC. Specifically it does not include highly detailed technical information on the NMRA DCC Standards & Recommended Practices nor does it include extensive historical information on the development of NMRA DCC or any other command control environment. Also the guide is not meant to be an extensive treatment or review of all NMRA DCC compatible products available on the market. The NMRA DCC market is developing fairly rapidly, and attempts to be all-inclusive would make the guide out of date when initially printed. Products are generally cited in the guide to provide examples of commercially available solutions to specific needs, and any mention in the guide does not necessarily represent a product endorsement. Other sources for these types of information are included in the guide. Model railroaders interested in the application of NMRA DCC developed this guide. It was developed specifically as a handout for attendees of the 1998 NASG convention. It is a copyrighted work, and as such may be reproduced only in accordance with the details provided on the copyright page, and in accordance with US and international copyright laws. In a document such as this one, it is very difficult to acknowledge all of the contributors. The reason for this is very simple – NMRA DCC has been developed and extended by a large number of modelers and manufacturers throughout the world working together. Obviously key contributors to the content of this document include Bill Clark, Helen Lenart, Tom Robichaud, and Michael Greene – the clinicians presenting this topic at the 1998 NASG National Convention. The authors have also attempted to sift through a wealth of additional information, tips, examples, ideas, etc. in the preparation of this document. As such many others – modelers and manufacturers alike, have provided examples, ideas and tips provided in this guide. Many, many individuals and companies have contributed to the success of NMRA DCC. Recognizing all of them is simply not possible. However, the authors would specifically like to acknowledge two individuals without whom NMRA DCC would not have been possible -- Stan Ames for his ideas, leadership, and energy in shepherding NMRA DCC from concept to reality, and Rutger Friberg, for both his ideas and energy given to the NMRA DCC effort as well as his focus on involving a new generation in the hobby of model railroading. One of the most important characteristics of NMRA DCC has been the combined worldwide efforts of modelers and manufacturers in producing an environment that is built on a series of agreed upon Standards & Recommended Practices that: 1) can be manufactured cost effectively, 2) provides space for individual creativity, and 3) will support extensions as future needs require. Add to this the willingness of users to share ideas, the significant efforts of commercial manufacturers, the efforts of the NMRA, MOROP, and others in standards maintenance and conformance & inspection programs, and you have today’s NMRA DCC Getting Started with NMRA DCC Third Edition Rev B – page 4 environment. Finally the authors submit that model railroaders are only beginning to see the impact of NMRA DCC on the hobby – there is still much more to come in the future. While the authors have attempted to insure the accuracy of all information provided, we must specifically note that your use of the information provided is at your own individual risk, and the authors do not provide any specific or implied warranties. Most of the information included comes from the authors’ actual experiences, but additional information provided by others has been included. If you wish to contact the authors of this document, please use the contact information provided on the copyright page. Getting Started with NMRA DCC Third Edition Rev B – page 5 Table of Contents GETTING STARTED WITH NMRA DCC ..........................................................................................................1 INTRODUCTION TO THIRD EDITION .........................................................................................................3 INTRODUCTION TO SECOND EDITION ......................................................................................................3 INTRODUCTION TO FIRST EDITION............................................................................................................4 TABLE OF CONTENTS........................................................................................................................................6 WHAT IS NMRA DCC? ..........................................................................................................................................7 COMPONENTS OF A NMRA DCC SYSTEM ...............................................................................................................8 THE DCC SPECIAL INTEREST GROUP (DCCSIG)..................................................................................................12 DCC ON THE INTERNET .......................................................................................................................................13 DO-IT-YOURSELF..................................................................................................................................................14 THE NMRA DCC WORKING GROUP ....................................................................................................................14 THE NMRA CONFORMANCE & INSPECTION PROGRAM ........................................................................................14 BOOKS AND OTHER PRINTED INFORMATION ON DCC .........................................................................................15 SELECTING A NMRA DCC SYSTEM...............................................................................................................16 DCC POWER STATIONS (AKA BOOSTERS) AND THEIR POWER SUPPLIES ......................................23 DCC POWER STATIONS FOR S SCALE LAYOUTS.....................................................................................................25 LOCOMOTIVES, NMRA DCC DECODERS, AND INSTALLATIONS .......................................................27 NMRA DCC MOBILE DECODERS FOR S SCALE LOCOMOTIVES ............................................................................27 INSTALLATIONS IN S SCALE LOCOMOTIVES ...........................................................................................................29 INSTALLING A DCC DECODER IN AN AMERICAN FLYER #322 HUDSON ...............................................................30 LIGHTS, SOUND, ACTION! ..............................................................................................................................31 BULBS / LAMPS .....................................................................................................................................................31 SOUND & DCC .....................................................................................................................................................32 DECODER FUNCTIONS AND CONTROLLING OTHER ITEMS.....................................................................................33 S SCALE TURNOUTS AND DCC..............................................................................................................................34 AMERICAN FLYER ACCESSORIES AND DCC...........................................................................................................34 SMOKE UNITS & DCC...........................................................................................................................................35 SUMMARY .............................................................................................................................................................35 Getting Started with NMRA DCC Third Edition Rev B – page 6 What is NMRA DCC? For a number of years model railroaders have had several options available to them for command control of their layout. While each of the systems have/had unique advantages, they all share a number of deficiencies: • Typically only one manufacturer producing each product line • Little or no interchange (interoperability) between systems from different manufacturers • High prices, primarily due to low product volumes, but also due to lack of competition • Proprietary system designs In 1991-1992 a number of modelers approached the National Model Railroad Association (NMRA) with a proposal to investigate and potentially define a standard for command control. Given that most of the existing command control systems at the time were analog in nature and already incompatible, the group focused on the opportunity for standardization in digital command control. Digital command control was used only by a couple of manufacturers in Europe. In addition, among the key contributors were individuals very familiar with the concepts and implementation details of computer digital networks and the advantages that these concepts, when applied to model railroading, might afford to the operation of model railroads. As a result of the initial investigation, the NMRA established the DCC Working Group (DCCWG) within the purview of the NMRA Technical Department’s Electrical Committee. The DCCWG began the long and arduous task of establishing formal NMRA standards for digital command control. This process has involved several years of work by volunteers both inside and outside of the NMRA, manufacturers and potential manufacturers, and the other key organization that establishes model railroad standards, MOROP in Europe. The net outcome of this effort is that today there are: • a number of approved NMRA Standards and Recommended Practices which define the Digital Command Control (DCC) environment, focused on the requirements for interchange • a single worldwide standard (approved by both the NMRA and MOROP) that defines a consistent wiring color code as well as standard interfaces (plugs/sockets) for controllers for locomotives and other rolling stock – this is the first formal worldwide standard in model railroading that was established by the two major organizations working together and with manufacturers • the establishment of a department within the NMRA’s Technical Department to manage the DCC activities • a number of manufacturers building both complimentary and interoperable DCC products • a formal testing program by the NMRA to verify compliance with the DCC Standards and applicable Recommended Practices • a significant growth in the availability and deployment of command control systems in model railroading • a competitive market, including competition in a number of areas such as features, support, and pricing • a number of traditional model railroad manufacturers who have incorporated support for DCC into their product lines (e.g., DCC equipped locomotives) Getting Started with NMRA DCC Third Edition Rev B – page 7 Why has all of this been possible? It is possible for two simple reasons – a lot of people working together for the betterment of the hobby, and the multitude of opportunities that the NMRA DCC environment provides. Some of these possibilities are: • Independent control of locomotives – control your trains, not your track! Each locomotive is independently addressed • Independent control of functions in locomotives – headlight, backup light, smoke unit, ditch lights, Mars light, operating couplers, etc. • Ability to customize the operating characteristics of each device, using DCC programming capabilities, and store the characteristics in the locomotive – e.g., adding momentum or inertia to a locomotive • Optional ability to run a non-DCC equipped locomotive on the layout • Ability to take a DCC equipped loco from your layout to any other DCC equipped layout • Ability to independently control accessories on the layout like turnout switch machines, grade crossing signals, etc. • Ability to interface personal computers with the layout as desired • Ability to build multi-unit lash-ups (consists) composed of locomotives with different operating characteristics, and operate them as a single train • Substantially improved speed control • Special lighting effects - Mars lights, strobes, firebox flicker • Substantially improved sound options for the model railroad layout • Automatic reversing loops • Wireless controls (radio & infrared) • Ability to implement command control in ANY scale from Z to Large Scales, indoors or out In short NMRA DCC is responsible for substantially advancing the operation of model railroads, and offering the model railroader, who desires, the capability to operate much closer to prototype practice, all at a price model railroaders can more realistically afford. Components of a NMRA DCC system The NMRA DCC environment is designed to be flexible and expandable – able to meet the needs of model railroads both today and in the future. Let’s consider a basic and expanded DCC system. Getting Started with NMRA DCC Third Edition Rev B – page 8 Basic Components of a DCC System Decoder DCC Signal (incl. Track Power) Booster (aka Power Station) Control Bus Command Station Cab Bus Cab Figure 1: Basic Components of a DCC System Figure 1 shows the basic components of a NMRA DCC system. The components are: Cab The device used by the model railroader to control the layout. Often times referred to as a throttle. We make a distinction in this document, using cab to describe the device that is connected. A throttle is used to control a mobile decoder, and a cab might contain 1, 2, 3, 4, or more throttles per cab. Throttles also generally refer to speed control only, while cab is more encompassing term that describes the control of multiple items such as speed, direction, lights, horn, whistle, etc. Cabs on the market today support only one of the Cab Bus protocols, and are not interoperable across different cab busses. Cab Bus Used to connect the cabs to the command station. The Cab Bus generally supports the connection of multiple cabs. The wiring, signaling method, and protocol used by the cabs to communicate over the cab bus to the command station are proprietary and are not covered by NMRA Standards or Recommended Practices. The major Cab Bus protocols on the market are Lenz XpressNET™ (used by Lenz Electronik GmbH, ZTC, and Atlas), NCE Cab Bus used by Wangrow Electronics, NCE, and Power Systems, Inc., Digitrax LocoNet™ used by Digitrax, and CVP Cab Bus used by CVP Products’ EasyDCC. At this time, cabs are designed to connect to a particular cab bus, although Lenz Electronik and NCE are previously announced plans to work on interoperability of their cabs on both Lenz XpressNET and NCE Cab Bus, and CVP products currently Getting Started with NMRA DCC Third Edition Rev B – page 9 has their wireless cab products on the market for both their EasyDCC system (CVP Cab Bus) and the Lenz, Atlas & ZTC systems (Lenz XpressNET cab bus). Command Station The heart of the DCC system. Generates the DCC instructions (also referred to as “packets” because they are packets of information or instructions placed on the rails) that are used to control the layout. Generally accepts input from the operator via cabs connected to the cab bus. Control Bus Used to connect the command station to power station(s) (also known as booster(s)). This bus is responsible for transferring the DCC signal from the command station to the DCC power stations. While there is some interoperability among command stations and power stations from different manufacturers, at this time there is no NMRA Standard or Recommended Practice specifying this bus. The NMRA DCCWG has a draft of Recommended Practice (RP-9.1.2) for the Control Bus that is being reviewed by manufacturers and others. In addition the NMRA has a draft on a Power Station Instruction which is designed to allow software control of power station setup, instead of having to use switches, jumpers, etc. Power Station Takes the DCC signal provided over the Control Bus, amplifies it, and provides a signal to the track which of sufficient magnitude to power DCC devices on the layout. Power Stations also typically have short circuit detection capability, which means that when a short is detected, the DCC signal is temporarily shut off from the section of the layout controlled by the power station. Power Stations are the key DCC component in terms of providing sufficient power to DCC controlled devices on the layout. Power Stations are also known as boosters. Booster Same as a power station (see above). Terms used interchangeably. Track Signal This is really what is covered by the phrase NMRA DCC. The NMRA has two approved Standards (S-9.1 and S-9.2) and four approved Recommended Practices (RP-9.2.1, RP-9.2.2, RP-9.2.3 and RP-9.2.4) that describe the DCC environment – i.e., the track signal, and it contents. The support by DCC manufacturers of these standards and optionally the Recommended Practices are what allows interchange and interoperability of DCC components from different manufacturers. Decoder The DCC component installed to control the layout device. It is typically a microprocessor-controlled device that can read and interpret the DCC Track Signal. Each decoder typically has its own unique address on the layout, in order that specific instructions can be issued to that device. Decoders also have their own internal storage for decoder specific values. These storage locations are referred to as Configuration Variables. Older decoders may refer to these as registers. Decoders come in two basic types: Mobile (generally used in locomotives) and Accessory (generally used to control switch machines, and other accessories on the layout). The NMRA Getting Started with NMRA DCC Third Edition Rev B – page 10 has a Recommended Practice (RP-9.1.1) which describes a common wiring color code and standardized interfaces for decoders in locomotives and other rolling stock. The important thing to remember about Figure 1 is that it represents the “logical” components of a basic NMRA DCC environment. It DOES NOT necessarily represent how systems available in the commercial market are actually packaged. Some manufacturers have chosen to combine components into a single package when they bring a system to market. Here are some examples: • Lenz Electronik’s SET02 system combines a cab with throttle and the command station all into the packaging of a cab • Digitrax’s Chief system combines a command station and a power station into a single package. • MRC’s Command 2000 combines a command station, power station, and cab with 3 throttles all into a single package. Manufacturers generally choose to do this sort of packaging as it allows them to reduce the cost of the system. Figure 2 illustrates an expanded NMRA DCC environment. Let’s examine some of the additions over the basic DCC components. First you will note that the track has been divided into sections, which we will refer to as power districts. Simply insulating these sections of the rail, and then supplying DCC from another power station create the power districts. Doing this has two added benefits. The first benefit is that it provides a mechanism for adding additional power to the layout. For example if the first power station was a 3amp power station, you can have a total of 3amps available to DCC controlled devices on the layout. By creating a second power district and feeding it via a second 3amp power station, you now have 3amps available in each of the two sections of the layout. The second benefit is that each power district has a separate short detection capability, so that a short in one section (e.g., a locomotive derails and creates a short), temporarily shuts down that section only and not the entire layout. Getting Started with NMRA DCC Third Edition Rev B – page 11 Expanded NMRA DCC System Environment Decoder Accessory Decoder DCC Signal (incl. Track Power) Booster Booster Booster (aka Power Station) (aka Power Station) (aka Power Station) Control Bus Computer Interface Command Station Feedback Bus Cab Bus Wireless Cab Base Cab Cab Cab Figure 2: Expanded DCC Environment Another addition to this environment in Figure 2 is an accessory decoder. This could be used to control a switch machine for a turnout, or perhaps a signal at a grade crossing, or perhaps animate some other item on the layout. Accessory decoders must be connected to the track to receive the DCC signal, but they also often have the ability to receive power from an external AC or DC power source. This is useful in that the power for the accessory is not deducted from the power station. In addition notice that the accessory decoder has an additional connection via the Feedback Bus to the command station. This allows the accessory decoder to provide additional feedback to the command station. An additional bus is necessary, as the DCC signal on the track is not currently a two-way communication channel. Another addition to the environment above is additional cabs. These are wireless cabs (perhaps radio or infrared). Wireless cabs usually need a base or receiver connected to the cab bus via a cable. Typically the wireless base can support multiple wireless cabs. Another addition to the environment is a computer. It is connected via a computer interface which itself is connected to the command station. The computer could be used for a number of different tasks, including layout status, additional throttle control, as a CTC panel, etc. One item of note is that the feedback bus and the computer interface could be connected into the environment in one of several ways. In the example above they are connected back to the command station. Some commercial products connect them via the command station, while others connect them via the cab bus. Again remember that these additional components could in fact be packaged with other components in commercial products on the market. The DCC Special Interest Group (DCCSIG) Getting Started with NMRA DCC Third Edition Rev B – page 12 Interest Area (as defined by the DCC SIG board): The DCC SIG is a group of people who are interested in any aspect of Digital Command Control (as defined by NMRA DCC Standards S-9.1, S-9.2, and related NMRA DCC Recommended Practices). The SIG mission is to encourage the collection, evolution and dissemination of DCC knowledge. The SIG offers periodic educational activities and publications to further the knowledge and understanding of DCC and related topics. The SIG provides an unbiased forum for discussing issues concerning DCC. NMRA disclaimer notice The Digital Command Control Special Interest Group (DCC SIG) is an independent, not-forprofit group affiliated with the National Model Railroad Association (NMRA). The NMRA is not responsible for the actions or publications of the DCC SIG. SIG type (as defined by NMRA): Open model railroad groups - A SIG may adopt a membership policy that permits anyone to join regardless of NMRA membership status. The SIG Coordinator for an open-membership group must be the leader of the SIG and an NMRA member. Paper communications can be sent to: DCC SIG 3077 Williamsburg Drive State College, PA 16801-3016 The DCCSIG operates an electronic mail distribution list. To subscribe to the DCC SIG email list server, send an email to: [email protected] with SUBSCRIBE DCCSIG-L Your Real Name on a line by itself in the message body. DCC on the Internet Without a doubt there is a lot of information about DCC scattered on the World Wide Web. The NMRA’s web site includes the official Standards and Recommended Practices related to DCC. It can be found at http://www.nmra.org. From this site you can also review the NMRA’s Conformation and Inspection program, including a listing of the Conformance Warrants issued since 1996 for DCC related products. The DCC Special Interest Group (DCCSIG) is located at http://jdb.psu.edu/nmra/dccsig.html Beyond these two web sites, there are numerous other web sites with DCC related information. All of the major DCC manufacturers have web sites with information on their products. The manufacturers typically offer product information, electronic versions of their manuals, tech tips, and more. Many dealers offer their own web sites with product information and pricing. A good example of a dealer’s web site by a dealer who carries multiple DCC manufacturer’s products, and whose web Getting Started with NMRA DCC Third Edition Rev B – page 13 site include not just product lists and pricing, but also technical tips, and links to the manufacturer’s web sites, is the web site of Tony’s Train Xchange at http://www.ttx-dcc.com/. Other good web sites include Allan Gartner’s Wiring for DCC located at http://www.wiringfordcc.com, and Don Crano’s DCC Tips located at http://www.mrwithdcc.com/. Check out the SoundTraxx Digital Sound Decoders at http://www.soundtraxx.com. You can even listen to them at their web site! For S scale specific information in the world of DCC, visit the Bristol S Gauge Railroaders web site at http://www.bristol-s-gauge.com. On their DCC web pages you will find an electronic version of this document, as well as information on installing decoder in S scale locomotives, and other technical tips for S scale DCC users. Do-It-Yourself It is possible to build DCC components yourself. It may not be worth it for decoders as they can be purchased for as little as $20. Through the DCCSIG or the Web pages, you’ll find a number of modelers building their own DCC systems. The NMRA DCC Working Group The NMRA DCC Working Group is part of the NMRA Technical Department. Its focus is on the NMRA’s DCC related Standards and Recommended Practices. The Working Group manages all facets of the NMRA’s standardization activities for DCC. You can contact the Working Group through the NMRA Technical Department. The DCC Working Group periodically publishes the Standards and Recommended Practices. If you would like to purchase a current copy, please contact the NMRA Headquarters office, and ask for the DCC Green Book (it has a green cover). The NMRA Conformance & Inspection Program The NMRA operates a Conformation & Inspection Program for its Standards & Recommended Practices. Manufacturers interested in participating voluntarily submit their DCC products to the NMRA Conformance & Inspection group for inspection & testing. This is done using a standardized set of test procedures, which are documented and available to the public. While official test results are provided confidentially to manufacturer, the NMRA awards a Conformance Warrant to products passing the tests. Manufacturers who have a warrant can display the NMRA Conformance Seal on their product and literature about that product. Independent testing of DCC products is vital to the success of DCC, and it helps insure the modeler that DCC products from various manufacturers are interoperable. More information on the NMRA’s Conformance and Inspection program can be obtained directly from the NMRA. Getting Started with NMRA DCC Third Edition Rev B – page 14 Books and other Printed Information on DCC The first major book on NMRA DCC was published in July 1998, and as has been updated as it has been reprinted. The book is: Digital Command Control – The Comprehensive Guide to DCC By Stan Ames, Rutger Friberg, and Ed Loizeaux ISBN 91-85496-49-9 Allt Om Hobby AB, Stockholm, Sweden is the publisher. Suggested retail price is $18.75. Published in cooperation with the NMRA, the book is available through a number of sources including the NMRA, Marklin dealers, Highland Station, Inc. (the publishers of Model Railroading magazine), and other dealers. Or from Allt Om Hobby direct (FAX: +46-8-99 88 66, e-mail: [email protected]). Everyone using DCC will likely want a copy of this book, as it is destined to be the classic work on DCC. Another book available on DCC is The Digitrax Big Book of DCC, published by Digitrax, Inc. in 1999. While using Digitrax products as examples throughout the book, the book also provides a very good review the DCC environment, and a number of technical concepts. Every DCC user should have this in their library. Most of the major magazines have previously run and continue to run articles on various facets of DCC. One excellent series worth mentioning is the DCC column written by Larry Puckett that appears regularly in Model Railroading magazine. Mr. Puckett’s column covers topics and products of interest to users and prospective users of DCC. Additional printed information is available from number of sources, mostly from either NMRA National Convention Clinic handouts, or from books on model railroading electronics written by Rutger Friberg, and published by Allt Om Hobby AB (and available from the publisher of Model Railroading magazine). Getting Started with NMRA DCC Third Edition Rev B – page 15 Selecting a NMRA DCC System Selecting a NMRA DCC compatible system is a very personal activity. It is much like selecting a car or a television set. Typically everyone has specific tastes and desires that influence their purchase. It’s the same way with DCC. Also like these other types of consumer purchases, its very helpful if the consumer does some homework before making the purchase. Since it is a relatively personal decision, below you will find some tips on selecting a DCC system. Selecting a NMRA DCC compatible system By Michael Greene Rev: 10 (July 2001) I'm an owner and user of a number of NMRA DCC compatible systems & components (Wangrow, Lenz, Digitrax, NCE, SoundTraxx, Digitoys, Model Rectifier Corp.(MRC), Zimo and some others). Also in the interest of full disclosure, I'm a past chair of the NMRA's DCC Working Group, which is responsible for establishing and maintaining the NMRA DCC standards and Recommended Practices. At home, I have a Digitrax 8A Radio Chief with a variety of Digitrax cabs, a Wangrow System One, a Lenz SET01, a Lenz SET02, a NCE PowerHouse Pro with a variety of NCE cabs, and decoders from most of manufacturers. The layout and workbench have been wired so that I can easily swap one DCC system for another. Decoders with plugs are occasionally moved from a locomotive in one scale to a locomotive in another scale. Here are a few personal thoughts, which may or may not be useful to you. Nothing earth shattering, but perhaps useful to consider in selecting a DCC system. Shopping for a NMRA DCC compatible system for your model railroad is much like shopping for any other consumer purchase. Consumers who do their homework before making a purchase will, in the long run, get a system more suited to their needs and wishes. As with most other consumer purchases, the user will avoid unnecessary expenses. 1) Regarding command stations: List the features, and prioritize the ones you care most about. Buy the best you can afford. The Command Station is the heart of any DCC system. The features available in the command station you select will enable or restrict the use of certain DCC capabilities on your layout. For example, if your command station supports access to only two special functions in a decoder, then it doesn’t really matter how many more functions beyond two available in your decoders. Without a command station that can access them, they won’t be of much use! Your selection of a command station will also directly affect your choices of cabs, since it's the command station that establishes your cab bus protocol. 2) Regarding documentation: Are you the type of person who reads the documentation? If so look over the manufacturers' offerings before purchasing. They are not all created equal. Thickness is not the correct metric. Quality, ease of access, good indexing, and organization should be the metrics. Many manufacturers have put Acrobat PDF versions on the Web -- look at these and look at the paper documentation. Get input from existing users on their thoughts about the documentation on the DCC systems that they own. Of course if you never open the documentation, then it is not an important consideration. Getting Started with NMRA DCC Third Edition Rev B – page 16 3) Regarding the Cab Bus: As noted in item 1, your selection of a command station will automatically select your Cab Bus protocol, and therefore what devices are available for it. See items 4 and 4A below for some thoughts about cabs. Also remember that other devices such as computer interfaces, fast clock displays, and the feedback bus may also attach to the Cab Bus or the command station. There are basically three different, “major” DCC Cab Bus protocols available in the market: • Lenz XpressNET (the previous generation was known as X-Bus) • NCE Cab Bus • Digitrax LocoNet With the exception of MRC & CVP, each of which has its own bus, the other DCC manufacturers have selected one of these buses as the Cab Bus protocol that they have implemented. (In this context, the description “major” indicates that more than one manufacturer has implemented the cab bus protocol, and has the product on the market.) While they have technical differences and manufacturers may promote those differences, the reality is that all of them are very capable of doing the job required. All have sufficient performance. All have room for growth and expansion. I’ve seen them all operate on large layouts without any problems. So my advice is to avoid the marketing hype about Cab Bus protocols. Don’t get caught up in the all frenzy about “is the cab bus fast enough?” or “can it handle enough cabs?” Just let your cab bus selection happen as a result of choosing the features you want in your command station, and the user interface (cab) you want in your hand. The manufacturers take very good care of everything in between. And if you have any problems contact the manufacturer directly. Here’s a quick note about connectors on cab bus devices. Each manufacturer had typically chosen from among three connector types for their cabs – 5 pin DIN, modular plug (like on your telephone cord), and the traditional stereo phone plug. Each has its strengths and weaknesses. They all work fine. And in most cases if you prefer one that the manufacturer did not choose, it is a relatively simple matter to change to the one you prefer. 4) Regarding cabs: This is tied to item 1. Try to avoid purchasing any system until you have had a chance to use the cabs of the various systems, and in particular the cabs of your prospective purchase. In my opinion two minutes at a show or in a shop does NOT constitute 'use'. The choice you make here will be with you for a while. Consider the range of cabs that are available for each system -- low end to high end. Also consider if there are other manufacturers of cabs which are compatible/usable on the system you purchase. For example, Lenz Electronik, CVP and Atlas all make cabs that can be interchangeably used on XpressNET. Having several alternatives for cabs may be valuable. For example you might want a relatively simple cab for new operators on your layout, to make it easier for them, and to allow you to restrict what functions they can perform, while also having sophisticated cabs that provide access to all features for other operators. And all of the cabs you need do not necessarily have to come from the same manufacturer, depending on the cab bus you select. Another point to consider is that access to certain features in the DCC environment may be restricted by either the command station or by the cab. In item one above, we cited an example regarding access to decoder functions, where the command station limited access. Note that a cab could also be the limiting component. The command station might support access to all functions, but a particular cab might only have access to a few of them. Or it might require either multiple button presses, or multi-key use to access them. In short in my opinion THE MOST Getting Started with NMRA DCC Third Edition Rev B – page 17 IMPORTANT single criteria for selecting a system is the cab(s) and how they operate. Do they fit your needs? Do they fit your style? 4A) Re: wireless cabs: Wireless DCC cabs will likely have a major positive impact on model railroaders. Many modelers will find operation and movement around the layout much easier with wireless cabs. At this time, wireless cabs are available on the market for four major cab bus environments (LocoNet, CVP, NCE and XpressNET). Three manufacturers have delivered wireless cabs, and others have announced plans. If you're interested in wireless cabs and don’t have an urgent desire for them, you may want to wait a bit to consider the selections. Like wired cabs, the Cab Bus selection will dictate which wireless cabs are options for your DCC system. Even so, each cab bus protocol may have several wireless cab options available. Should you purchase infrared or radio frequency wireless cabs? Do they communicate in a single direction (from cab to command station, but not back) or in both directions (cab to command station, and command station to cab). Today’s wireless cab offerings will add $175+ to the cost of the DCC environment to get started with a wireless base unit and one wireless cab. Additional wireless cabs will add to this cost. So consider if you really need wireless. Many folks with smaller layouts can work just fine with the standard wired cabs, and can save the $175+ necessary for this item, and use it somewhere else on the railroad. Keep in mind that the available or announced wireless cabs can either be added later, or wired cabs can be upgraded to be wireless at some future time. 5) Regarding upgrades/expansions: Most systems are expandable to some degree Expansions for most systems can be accomplished by adding additional components to extend the functionality of the initial DCC environment. Another approach is to upgrade the software component of a command station or cab to provide additional features. You should check with the manufacturers of the products you are considering to see how they provide feature upgrades. In addition you should check to see how the manufacturer would provide bug fixes when found. Remember that a substantial component of the DCC environment is software and all software has errors – they may not be critical, and they may not affect your use of the product, but they do exist! Also the market for used, working command stations & attachments (at a less than retail price) should be reasonable, so you can consider the option of purchasing something, using it a while, and then re-sale. Very few people buy 'used' decoders from what I can see, so this is probably not an option for decoders. 6) Mobile Decoders: Once you install a decoder in a locomotive you'll probably never change it unless it fails. Look at all the features available in decoders, and set your minimum standards -- for example I won't purchase a decoder if it does not support 4-digit addressing. Why? I use the locomotive’s road number as the DCC address – it makes it very easy to remember. Don't violate your personal standards when selecting a decoder without thinking long and hard before doing so. Don't be afraid to mix and match decoders with command stations. Despite some minor glitches, interoperability in this arena is very good. Don't be afraid to buy a command station made by one manufacturer and decoders made by another manufacturer. I do it all the time. Pick each based on your needs, preferences, ability to pay, etc. Also decoder functionality/price performance is much like PC processor pricing -- if you wait a little while you'll get more features at the same price, or the same features at a lower price. Competition is good! The moral of this story is don’t buy decoders before you're ready to install! 7) Dealer Support: Buy your DCC products only from dealers who offer support -- this can come in many forms. But at a minimum, you should select dealers who will take defective returns without question or charge to you. There are excellent retailers & mail order sources for DCC Getting Started with NMRA DCC Third Edition Rev B – page 18 products. Many dealers only stock items that they feel will sell relatively quickly, but will order other items you want. One recommendation is to make your DCC selections, then select a dealer who sells those products. Doing it in reverse may get you great dealer support, but not the products you want. One other thought about purchases from dealers – it has to do with what to do if the item is not in stock at the dealer. There are obviously multiple opinions on this topic. I’ve discovered that getting on the waiting list is not necessarily the right approach for me. In general I avoid ‘backordering’ the item, unless the dealer will allow passing on the item when it finally arrives. Of course, sometimes you want something really bad, and you want to be early on a dealer’s list, so that you can get the item as soon as it arrives. This is OK! Just do it with you eyes wide open! Unfortunately some DCC manufacturers have long lead times on deliveries, and as a result, by the time it arrives there may be something else you prefer. Or you may find the item at some other dealer before it arrives where you have it back-ordered. Please also note that this delivery problem is not usually the dealer’s issue – dealers generally want to get you the product as quickly as possible. But if they can not get the item from the manufacturer, then they cannot deliver it to you. 8) Manufacturer Support: Overall, manufacturer support in this product space is excellent -manufacturers are very responsive to customer inquiries, support needs, etc. However each manufacturer does have different warranties and support models. Check this out before buying. Make sure you are satisfied with the warranties & support models of the vendors' equipment you plan to purchase BEFORE purchasing. Make sure you ask about the support available when you screw up (e.g., smoke the decoder) and when there is a manufacturer defect. You may also want to inquire about their approach to product updates/bug fixes. Remember that much of the DCC environment is software, and like all software there are bugs. What happens when you find one? What is their approach to 'critical' bugs and what is their approach to 'non-critical bugs'? As noted with decoders, manufacturers often evolve the software in their products (slipstreaming in the trade vernacular) -- again don't stock for future use, instead buy when ready to use. One other note -- the best support from the manufacturer is obtained by picking up the telephone and calling the manufacturer directly. Not whining on some e’mail list, calling a friend, etc. While friends and list members may assist you, you'd be amazed at the blatantly wrong info I've seen passed around about DCC over the years in these forums. Manufacturers are customer-friendly -- just call them. One additional option is DCC knowledgeable dealers. Some of these are very customer oriented. If you find one, stick with them. 9) Interoperability: Check into whether the manufacturers you are considering do interoperability testing with other vendors’ products. Some use the NMRA Conformance & Inspection program, some don't. Personally I prefer to purchase products with the NMRA Conformance Warrants, but for me it's not mandatory. It's like looking for a UL label on an electrical product, other 'seals of approval' etc. -- most folks have purchased products without them at some time, but they offer an additional outside analysis of the product. If the product has a conformance warrant, then it's one more plus for that vendor's product. I believe the value of the NMRA Conformance & Inspection program to me as a consumer is in the testing which occurs when completed prior to a product being delivered to market. This testing will often uncover interoperability issues, before they are delivered to the market. Alternatively some manufacturers deliver a product to market which can be upgraded, then submit the item for testing, and issue updates to users if problems are found during testing. This is also a viable approach as well. What is mandatory when I purchase a product is that the manufacturer has a demonstrated track record in addressing interoperability problems PROMPTLY, and without major headaches and costs on my part. Getting Started with NMRA DCC Third Edition Rev B – page 19 10) Power: A typical question I get asked is how much power do I need? Or how do I choose among these DCC components -- some are 3 amps, some are 5 amps, some are 10 amps, etc.? First, we should make sure about terms. In the market you will find manufacturers that sell individual components (a DCC command station only, a DCC power station (also known as booster)), or combinations (e.g., command station & power station in a single box). As examples: • Lenz Electronik’s SET-01 separates command station & power station into two separate boxes, but their SET-02 bundles the command station and cab into a single item (the cab), and leaves the power station as a separate box • Wangrow currently separates the command station & power station, but they also produce a single box which has two 5amp power stations in the same box • NCE provides a starter system with both the command station and 5A power station in a single box, but also offers power stations separately for expansion • Digitrax's Genesis II, Empire Builder, and Chief all are integrated command station & power station, and they also offer power stations separately • MRC integrates the command station, power station, and cab in a single box. • CVP’s Easy DCC separate the command station and power station • Atlas’s Commander combines the cab, command station and power station in a single box For any power station (whether standalone or integrated with a command station) you need to supply power, typically via a 16-18VAC transformer or 16-18VDC power supply. For the purposes of this discussion we are really talking about the power station component of the system. (The command station typically uses a very small amount of current, and isn't generally significant to the discussion.) The question usually being asked is a combination of how much power should my transformer be able to supply and how do I decide which of the power stations will fit my layout needs? To answer this question you need to look at the power requirements of your layout. Is it a single electrical environment, or is it divided into several 'sections', 'power districts', or 'blocks'? There are really two questions that need to be asked: 1. How much current is needed in this power district on my layout? 2. How much current can this DCC component supply continuously? To answer question 1, you need to add up the current draw (amps) of all items that will draw power through the rails from the DCC power station in this power district (section) of the layout. Typically this will include operating locomotives, any lighted passenger cars, any powered rolling stock, and may include any turnout controllers powered off this DCC supply, and any additional accessories running off this supply. There are two key numbers: the total current of all devices operating SIMULTANEOUSLY in the DCC power district, and the start-up current draw of all devices in this district. Be careful here, as the startup current draw of some lighted items in larger scales (e.g., passenger cars) can add substantially to the operating current draw. Also don't just add up the current draw of everything you own unless you're able to operate them all AT THE SAME TIME IN THE SAME SECTION on the layout. Now with these two numbers, you can move to question 2. All manufacturers rate their power stations, with numbers like 3 amps, 5 amps, etc. or some number xx VA (volt-amps). Without getting hung up on the electronics detail, if the manufacturer only provides a VA rating, you can convert VA to amps, by dividing the VA number by the output voltage supplied (e.g. 16V). Then Getting Started with NMRA DCC Third Edition Rev B – page 20 you can compare based on amps. How does a specific product match your needs? Note that in general these ratings are continuous ratings, as compared with peak current which might be support for a very short time (in milliseconds). One more note is that in our tests with various power stations, on our layouts, indicates that not all power stations will continuously run at their maximum current rating. You may want to inquire of the manufacturer as to how long the power station will run at the rated maximum before shutting down, or if any other conditions are required to achieve the maximum power from the power station, like the addition of an external fan for cooling, etc. In S scale, if you run American Flyer locomotives, you should also verify with the manufacturer that the power station will be able to supply the maximum current rating at the higher track voltages. Some S scale modelers who run American Flyer and have converted to DCC are using higher track voltages (16-18V). The has the advantage that it provides higher voltage to smoke units that are powered from track power, but has the disadvantage that some DCC sound decoders do not run at track voltages at above 16V. So consider this before you make your decision. Most of these DCC components also have the option to choose the DCC output voltage at one of two or three levels (e.g., N, HO or O-G) which you can use to set track voltage level. We recommend that S scale layouts run at the “HO”, “Standard”, or 16V (or less) settings as provided by the various manufacturers. 11) Programming. Another feature that varies among different systems on the market is the programming features that are included. Many of the entry-level systems support what is called “blind” programming. This means that you can write now values in a decoder’s configuration variables (CVs) but you cannot read them back. Mid range systems and larger usually also offer the ability to read them back, so you can check the currently programmed value. Another feature difference between systems is whether or not they offer “independent programming track output”. Some systems switch off the mainline track outputs when you switch to use the programming track, while others allow both to run simultaneously. Does it matter? If your layout is a single operator layout, then it probably does not matter to you. But if you have multiple simultaneous operators on your layout, then shutting down an operating session to reprogram the decoder in a single locomotive may not be what you want to happen. Please note that there are other solutions to programming that may make this a non-issue. For example you could use a separate system (perhaps an entry level system) on your workbench for programming. This is what I do. Another solution is to use a PC with a Digitrax PR1 and either the PR1DOS or PR1WIN software. The PR1 is a small, low priced power station that connects to you PC’s serial port. PR1DOS and PR1Win are two applications (one running under DOS and one running under Microsoft Windows) that allow you to read and program most decoders without ever using your DCC system. This has the added advantages that you can change multiple CVs at one time, and save the values of the CVs to a PC based file, so that they can be used later to re-program that decoder, or to program additional locomotives to the same values. Another programming related feature to be aware of is what programming modes are supported by the DCC system. The NMRA Recommended Practice on programming includes three methods of programming on the programming track (called register, paged and direct mode programming modes), and the NMRA Recommended Practices also support one mode of programming on the mainline (called operations mode programming). In order to use a particular form of programming, both the DCC system and the decoder must support that particular form of programming. Not all DCC systems and DCC decoders support all forms of programming. The NMRA DCC Working Group is working reduce the multiple forms of programming in order to Getting Started with NMRA DCC Third Edition Rev B – page 21 reduce the problems associated with so many programming forms and multiple vendor implementations. For the future it appears the focus will be on all decoders fully supporting the direct mode form of programming on the programming track and operations mode programming on the mainline. Command stations into the foreseeable future need to support all modes of programming in order to provide users with the ability to mix and match decoders with their system. My advice when buying a new DCC decoder is to look for decoders that fully support the direct mode form of programming on the programming track, and fully support operations programming on the mainline. And then try to standardize on your use of these for all decoders possible. Another bit of advice is to give operations mode programming (also known as “programming on the main”) a try. You’ll be pleasantly surprised at how easy it makes programming. I still recommend that the locomotive go first to the programming track after a decoder is installed, since the programming track is a low current environment, and you will be less likely to “toast” your decoder if you have made an installation error. While it is on the programming track, set the address. Then use operations mode programming for setting or changing all other CVs. This will reduce the need for a programming track to a very minimal need, and for certain CVs like sound volume, sound effects, and lighting effects, by use operations mode programming to set/change their values, you will be able to see and/or hear the effect of the change immediately. 12) Fast Clock. Are you interested in having an integrated fast clock for your DCC environment? For some time manufacturers such as GML Enterprises have made fast clock systems available for model railroad use. Some DCC manufacturers have integrated fast clocks into their systems, and include the display of the “fast clock" time on some of the higher end cabs. Both Digitrax and NCE include fast clock support in certain of their products. In addition there are larger fast clock displays available for the NCE Cab Bus (from NCE) and for the LocoNet cab bus (from Logic Rail Technologies). Summary I hope this section helps you think about features you need or want as you are selecting a DCC system. As I indicated earlier, it's not rocket science, just prudent purchasing research and decisions, and knowing what questions to ask. Feel free to contact me if you have particular questions... Getting Started with NMRA DCC Third Edition Rev B – page 22 DCC Power Stations (aka Boosters) and their Power Supplies For each DCC power station, you will need a power supply. It is recommended that you use a power supply that is approximately 1-2 amps greater than the expected maximum output of the DCC power station. For example if you’re using a 5 amp DCC power station, use at least a 6-7 amp power supply for it. Also most DCC power stations on the market today have a switch that lets you select the output voltage to the layout. Be sure your power supply is rated at or higher than the voltage you plan to select from the DCC power station. This should help insure that your power supply does not become a limiting factor in power supplied to the layout. Power supplies can come from a great many places. What you use really depends on what you already may have, or if you need to purchase something, whether you want to assemble it yourself, or want something pre-packaged. Remember that it is not necessary to spend significant dollars to get a supply with levers, handles, dials, meters, etc. They’re generally not needed for DCC. You should be able to purchase a power supply in the $40-$100 range depending on size, where you purchase it, and whether it is or is not UL approved. Some examples: • • • • • Larger wattage American Flyer transformers make reasonable power supplies – just leave the lever set at a voltage setting higher than that selected on the DCC power station. Many smaller model railroad transformers DO NOT make good power supplies for DCC power stations, as they typically have very low wattage or Volt-Amp (VA) ratings. As such they do not produce much power. Old & new electronics components are perhaps a good place to salvage a power supply. For example, laptop power supplies are often rated at 2-3 amps. Look for something at 16-20VAC, with sufficient amps to meet your needs. A number of DCC dealers offer transformer kits. The may come partially assembled, and you usually need to complete assembly yourself. Note that these are NOT UL approved, and should obviously be used with care. Also note that if you have kids around your layout you should be sure to exercise appropriate caution with placement, etc. For example, Tony’s Train Xchange (TTX) offers three “kits”- XFR8 (8amp), XFR10(10amp), XFR12(12amp). These all come pre-wired with an AC plug, AC switch, and an appropriately sized circuit breaker, but without a case. Another example is Mansfield Hobbies which offers 5 amp and 10 amp kits, including transformer(s), AC line cord, fuse holder, fuse, and case. The modeler assembles these. Remember that all of these should be used with appropriate care! Another choice for a pre-packaged UL approved power supply is the Lionel PowerHouse transformers – either the: PH-1 model #L6-12866 or the PowerHouse 180 model #6-22983. The L6-12866 power supply is rated at 18VAC, 7.3A, and includes a lighted on-off switch, and a 7A circuit breaker with reset button. The L6-22983 is rated at 18VAC, 10A, 180VA and also includes a lighted on-off switch and a circuit breaker with reset button. When purchased at Getting Started with NMRA DCC Third Edition Rev B – page 23 mail-order prices, these represent one of the most cost effective, pre-packaged, UL approved, high current power supplies on the market. Tips: - Good cabinet for the TTX XFR8 is Radio Shack #270-253A ($5.99) – utility case, with non-marring rubber feet, louvers Install an “on” light so you know when power is applied – example is Linrose Pilot Light B6012M5 (Green neon, 105V-125V, 3/8” hole) – can be installed across the 120VAC input terminals of power supply. Radio Shack sells similar lights. To determine what size power supply you should use for the power station, check the rating of your power station or integrated command station/power station. You need to be concerned about the specifications: • Current Rating • Input Voltage Range Supported First let’s look at Current Rating (or Amps). Once you have the maximum rating for the power station, add 1-2 amps -- that's how I choose the size. For example, I just installed an 8 amp Digitrax Chief. For that we're using an 18VAC, 10 amp supply. I've also got a Wangrow System One set installed. Since it has a dual 5 amp (total 10 amps) power station in a single box, I'm using an 18VAC, 12amp supply to feed it. For a MRC Command 2000 (rated at 2.5amps, peak 5amps), I'm using a 5amp supply. This rule of thumb will insure that you'll get the max current available from the power station, as opposed to being limited by the power supply. But remember this might be overkill. If you're operating a small N or HO layout which won't ever draw more than 3 amps, you could use a transformer with a smaller current rating, e.g., 4 amps. I recommend that all transformers used have a breaker or fuse installed to insure the transformer shuts down in an overload situation. (Most manufacturers also build this capability into their power stations.) Now let’s consider voltage. Obviously the voltage of the power supply you choose should be within the range supported by the command station or power station. In addition, you need to consider the voltage at which you will run the layout. Many power stations have the ability via a switch to select the output voltage to be supplied to the layout. One consideration in the choice of power supply is the fact that the output voltage will be less than the input voltage. As such the voltage of a power supply may restrict the output voltage of the power station. NCE provides this guideline regarding power supply selection in their PB110 User Manual: “The maximum track voltage adjustment is also constrained by the input power source according to the following formulae: If DC Power Source: Maximum Track Voltage = Source Volts – 4 volts If AC Power Source: Maximum Track Voltage = (Source Volts – 4 volts) * 1.4 ” While the formulae may be slightly different based on manufacturer design of the booster electronics, it does offer a general guide. To provide some examples of the output voltage supplied, we measured with an oscilloscope the output voltage of the following units. The table also indicates what is being used for the input supply. Getting Started with NMRA DCC Third Edition Rev B – page 24 DCC Power Station Digitrax DCS100 (8amp) Digitrax DB100+ (8amp) Output Voltage Setting N Input Power Supply Measured Output Voltage 18 VAC ~ 11V HO O/G N 18 VAC 18 VAC 18 VAC ~ 13V ~ 18V ~ 11.5V HO O/G 18 VAC 18 VAC 18 VAC ~ 13V ~ 17.5V Lenz LV100 ~ 15V Lenz LV101 Adjustable Adjustable from 11.5V to 22V ** North Coast PB110 Scale 18 VAC ~ 15V Adjust setting Adjustable from 11.5V to 22V ** Wangrow Dual 5amp N 18 VAC ~ 9V HO 18 VAC ~ 15V O 18 VAC ~ 19V ** Not measured, information based on manufacturer’s documentation. One final note is that using a source that supplies voltage substantially higher than required may result in the power station having to shed excess heat, or in the worst case may damage your power station. So review carefully the manufacturer’s recommendation for a power supply for the power station, based on the voltage out that you desire. DCC Power Stations for S Scale Layouts As you might expect S scale locomotives require a little more operating current than the small scales such as N and HO. An easy rule of thumb is that S scale locomotives with a drive system composed of modern can motors and flywheels will draw approximately 0.5A to 1.0A per locomotive running on the layout. On the other hand you will find that American Flyer locomotives will require substantially more operating current – typically in 1A to 3A per locomotive range, depending the age of the locomotive, condition of the motor, additional accessories on the loco like smoke, etc. Our experience with DCC on S layouts indicates that S scale modelers using modern locomotives from companies such as American Models and S-Helper Service will likely find most of the DCC power stations suitable for their needs. More than one power station may be required depending of the number of locomotives being operated simultaneously. Modelers operating American Flyer locomotives would be better served with DCC power stations rated at 8amps or above, unless of course they are only operating one locomotive at the time. The one exception to the 8 amp rule of thumb for American Flyer operators is the Wangrow System One Dual 5 Amp power station – our tests show that it will support a layout with operating Flyer locomotives. Modelers using the rolling stock, other than decoder-equipped locomotives, that has current requirements need to figure these in the equation as well. Examples are lighted passenger cars or a lighted caboose. Getting Started with NMRA DCC Third Edition Rev B – page 25 American Models Heavyweight passenger cars Follow the American Flyer rule of thumb and use 8amp power stations at a minimum. These cars each have three high current draw bulbs per car (in parallel), and without a sufficient sized power station, it will not be possible to start the layout without removing one or more of these cars. (An alternative to this (that we recommend) is to remove the bulbs supplied by American Models, and replace them with much more efficient bulbs like the 16V, 30ma bulbs available from Miniatronics. S Helper Service Lighted caboose Draws approximately 0.08A when on the layout due to its lighting. This caboose has a special power circuit that works on AC, DC, or DCC. The lighted coach draws approximately 0.225A. Have not yet measured the other lighted cars in the set. Like the heavyweight bulbs, you can lower your current needs, by replacing the bulbs in these cars with the Miniatronics bulbs. American Models Budd passenger cars So be sure to include these current needs in your count. As well as any other lighted rolling stock you may have on your layout. More information on bulbs can be found later in this document. Getting Started with NMRA DCC Third Edition Rev B – page 26 Locomotives, NMRA DCC Decoders, and Installations NMRA DCC Mobile Decoders for S Scale Locomotives S scale modelers have a wide variety of mobile decoders to select from for installations in locomotives. As noted above modelers need to consider the various features available in mobile decoders. In addition, the stall current of the locomotives motor needs to be considered. The stall current is the maximum current that will be drawn by the locomotive if it “stalls” for some reason – for example, under heavy load, etc. Each type of locomotive will have a unique stall current. There are there are several ways to determine the stall current of a particular locomotive. By far the easiest is to consult a table that someone else has prepared, which lists the stall current of various locomotives, including the one of interest to you. The table below contains the stall currents, as measured by the authors, of some common S scale locomotives. Locomotive Stall Current @14VDC 3.7 Amps 2.6 Amps 2.7 Amps 2.3 Amps Operating Current @14VDC 2.5 Amps 1.25 Amps 1.9 Amps 0.9 Amps American Models Baldwin Switcher American Models Pacific (4-6-2) American Models GP-9 American Models FP-7 American Models RS-3 American Models GG-1 American Models F40PH 1.6 Amps 2.6 Amps 1.6 Amps 1.4 Amps 1.6 Amps 1.4 Amps 1.6 Amps 0.7 Amps 0.65 Amps 0.5 Amps 0.5 Amps 0.5 Amps S Helper Service SW-9 (with DC shorting plug) S Helper Service F-3 (with DC shorting plug) 1.2 Amps 2.25 Amps 0.4 Amps 0.65 Amps River Raisin Models NYC 2-8-2 H10a 2.25 Amps 0.8 Amps American Flyer #312 American Flyer #322 Hudson (universal motor) American Flyer GP7 (universal motor) American Flyer GP7 (Lionel with DC motor) American Flyer PA1 Another way to determine the stall current is by consulting magazine reviews where available for the locomotive in question. Reviews in Model Railroader, Rail Model Journal, and Model Railroading generally include the stall currents as one of the electrical measurements. Another way to determine the stall current is to measure it. Two methods of measuring the stall current are: 1. Connect a DC ammeter (analog preferred) with at least 5 amps capacity in line between the power supply and the track. Place the loco on the track. While holding the loco to keep it from moving, turn the power supply up to 14V, while allowing he wheels to spin. This is the Getting Started with NMRA DCC Third Edition Rev B – page 27 operating current. DO THIS NEXT STEP QUICKLY. Now press the loco solidly down on the track to stop the wheels from turning. This will stall the motor. DO NOT KEEP IT PRESSED DOWN OR YOU WITH BURN UP THE MOTOR! Watch the reading on the ammeter. This will be the stall current or peak current draw of the loco. Repeat this several times to develop an average measurement. 2. Using your multi-meter measure the resistance across the two motor leads. While doing this turn the motor to obtain the lowest resistance reading. On a can motor, you can usually turn the flywheels to accomplish this same effect since you cannot actually reach the motor to turn it. Once you have the resistance measurement, you can use the formula: Stall current = voltage / resistance Where voltage is the voltage level of the DCC power station output (see table on page 15) The other measurement that is quite handy is the operating current. This value can usually be obtained by measuring the amps while your locomotive is operating at close to top speed on your layout, although the “wheel spinning test” in option 1 above may provide a more accurate measurement. Once you have the stall current and operating current from one of the above sources, you need to determine what decoders are available to meet your needs. DCC Decoders generally have a current rating, as well as a peak current rating. For example a decoder advertised as a 1amp decoder generally can support an operating current of 1amp. This current rating should be equal to or greater than the operating current of the locomotive. The manufacturer of the same decoder may also advertise a peak current rating. This peak value should be greater than the stall current of the locomotive. NOTE: If you select a decoder with a smaller operating and/or peak current rating than the locomotive measurements, you will likely burn out the decoder. This is where your having investigated different warranties from the various manufacturers might be useful! Once you have the possibilities for decoders to meet you current needs, now you can compare their other features to see which ones meet your other requirements. Consider the example in the next section. DCC Sound Decoders for High Current Draw Locomotives Let’s consider one additional tool you might find useful. Let’s assume that you really want to install one of the Soundtraxx Digital Sound decoders so that you have both a DCC decoder and full sound. These units are rated at a maximum of 1.5amps operating current, which is less than many of the American Flyer steam locomotives. Tony's Train Xchange sells a small "booster" circuit rated at 4 amps, which you use with a normal decoder. This is available either as a simple kit you assemble or pre-built. This booster circuit is coupled with the motor outputs of the decoder and track power to provide a higher current rating to the motor. The circuit for this “booster” circuit is also documented in one of Larry Puckett’s DCC Update columns published in a past issue of Model Railroading magazine. Getting Started with NMRA DCC Third Edition Rev B – page 28 For diesel locomotives with EMD power and where you need a DCC decoder that will support more than the 1.5A supported by the SoundTraxx DSD150, you might consider purchasing one of the S Helper Service DCC sound decoders. While these were designed for the S Helper Service F3s, they can also be used for other applications where the locomotive has an EMD engine. Installations in S Scale Locomotives Each installation is a little different as a result of difference in the locomotive, choice of decoder, and special consideration such as lighting effects and/or sound effects desired. If you have one of the recently released F-3 sets from S Helper Service, this installation is the easiest of all. Your loco could be ordered with DCC controlled sound & lights already installed by S Helper Service. If you had one of the early orders, or purchased a version without DCC already installed, then installation is a snap. Just remove the shell and plug it in! You can find more about Getting Started with DCC in your F3 including pictures of the installation and other tips on the Bristol S Gaugers web site DCC pages at: http://www.bristol-s-gauge.com. If you have one the DCC ready locomotives offered by S Helper Service (SW-9/1200 and SW-1), then installation is also very easy. Select a decoder with the NMRA Type M (2x4) plug, remove the shell and plug it in the socket provided. All the other S scale locomotives require a bit more work. As such it is not practical to document each installation in a guide such as this one. However we have completed a number of different installations in S scale and we are happy to consult if you have questions. In addition we have started the process of documenting some of the installations we have done in S scale. If you check the Bristol S Gaugers web site at on the DCC pages you will find the following installations already documented with instructions and pictures: • Installing a DCC decoder + SoundTraxx DSX decoder & speaker in a S Helper Service SW-1 • Installing a DCC decoder in an American Models S12 Baldwin switcher • Installing a DCC decoder and working strobe lights in an American Models F40PH • Installing a DCC decoder to control the lights in an American Models Budd passenger car Also in the next section of this document you will find the installation of a DCC decoder in an American Flyer #322 Hudson. These installation instructions will soon appear on the web site. In addition to these installations, some of the other DCC installations we have complete in S scale are: • SoundTraxx DSD150 DCC sound decoder & speaker in a Lionel Flyer GP7 • DCC decoder + working smoke unit in Lionel Flyer GP7 • DCC decoder (NCE DA102EU) in American Model RS-3 • DCC decoder + SoundTraxx sound decoder & speaker in American Models RS-3 • DCC decoder in American Models GG-1 • DCC decoder + Dallee sound unit & speaker in American Models GG1 • DCC decoder + SoundTraxx DSX decoder & speaker in American Models 4-6-2 • Crown/Port Lines Reefer with SoundTraxx DSX decoder & speaker • DCC decoder in a Pennsylvania Heritage Models RDC Getting Started with NMRA DCC Third Edition Rev B – page 29 • DCC decoder in a Scenery Unlimited brass Gas Electric For each of the installations immediately above, we do not yet have detailed installation instruction, but we do have some photos (and in some case notes) showing the installation. We hope to get these up on the Bristol Club Web site soon. DCC Decoder Tester Before installing a decoder in a locomotive where the decoder wiring connections will be soldered, it is a good idea to test the decoder prior to installation to insure all facets of it are functioning correctly. This way if a problem is found, the decoder can be returned to the manufacturer BEFORE you spend all the time soldering it in and then having to remove it. Manufacturers generally document a simple test circuit that can be used to conduct the test, but if you install many decoders, you will find that decoder tester is a very valuable tool, since it allows you to very quickly connect the decoder and conduct the test. The September 2001 issue of Railroad Model Craftsman magazine includes an article by Jeff Scherb on building a DCC decoder test fixture. Alternatively if you prefer to buy instead of build, you can purchase a similar decoder tester ready-to-use from Loy’s Toys. Information can be found on their web site can be found at: http://www.loystoys.com/pddectester.html#tester. Installing a DCC Decoder in an American Flyer #322 Hudson By Bill Clark Here is my method for installing a DCC decoder in an AF #322 Hudson: 1. Convert the loco to DC operation by removing the E-unit, and installing a Radio Shack bridge rectifier. This procedure is documented in Greenberg's American Flyer Operating and Repair manual, p18. The bridge rectifier costs a couple of dollars, and is available from a variety of sources including Radio Shack. 2. Install a decoder the normal way. I used the standard AF plug, and put the decoder in the tender. The 2 outside wires on the plug go to the motor, the two inside go to the smoke unit and headlight, which are wired in parallel. This requires a little re-wiring in the loco. I used a Radio Shack 12V relay to run the lights and smoke, as they draw too much current for the function leads. My 322 tested out at 3 amp stall current, and 2 amp full speed. I used a Digitrax DH83FX that is rated at 2 amps. It worked fine, but I was pushing the limit. As alternative choices there are 2.5amp, 3amp, 4amp, and 5 amp (operating current) decoders on the market from a variety of manufacturers. Getting Started with NMRA DCC Third Edition Rev B – page 30 Lights, Sound, Action! Bulbs / Lamps Model railroaders using DCC should pay attention to those bulbs/lamps that are in use on their railroads, where the bulb is drawing power from the track. Bulbs come in a large variety of sizes. As regards DCC, three bulb specifications are important: • Voltage the bulb is designed for Bulbs last longer when used at or below the rated voltage. Modelers assume the manufacturer considered this rating when installing bulbs in locomotives, cars, and accessories. If you decide to replace a bulb you should be sure to select one with a rated voltage not lower than the normal operating voltage. • Current draw of the bulb on startup Bulbs draw several times their operating current at “cold startup time”. The user of DCC should therefore take this into account when calculating the maximum current draw on a power district on the layout. A simple way to get a reasonable estimate of the startup current draw of a bulb is to remove it from its circuit and measure the resistance across the bulb. Then divide the operating voltage of the layout by the resistance. Consider the following examples: Bulb Manufacturer Rating Resistance Measured Miniatronics #18-014-10 Miniatronics #18-016-10 From American Models 70’ Passenger Car From American Models S12 Baldwin loco From American Flyer #370 Diesel (#1447) From American Models Pacific (4-6-2) From S Helper Service SW9 14V at 30mA 16V at 30mA ~ 50 Ω ~ 55 Ω ~ 18 Ω ~ Startup Current at 14V 280 mA 255 mA 780 mA ~ 12 Ω 1170 mA ~ 10 Ω 1400 mA ~ 29 Ω ~ 60 Ω 480 mA 230 mA As you can see from the above table the cold startup current draw can be very high for some bulbs. As a result, DCC users may wish to measure the bulbs that are drawing power from the DCC track power (either in locomotives, cars, or accessories that may be directly connected to the track). The modeler should consider replacing these bulbs with more efficient bulbs in order to reduce the current draw of the layout and hence reduce the current requirements for a Getting Started with NMRA DCC Third Edition Rev B – page 31 DCC power station. Why? Simply stated the startup current draw will be seen every time a power district is started (or restarted in the case of a fault/short). Consider an example with a loco (1 bulb @ 1200 mA) and 5 passenger cars (each with 1 bulb @1200 mA) – the power district in which this train is located would need to have 7.2 Amps available to insure reliable startup! Any additional power requirements in the district would be incremental! DCC decoders generally support only 100-200 mA current draw on a function. If the user wants to control a high current bulb via a DCC function (e.g. a headlight), then the bulb needs to be replaced with a more efficient one, or the user cannot power the bulb directly from the decoder function leads. For bulbs with a current draw near the maximum rating for a decoder’s function outputs, you should install a resistor in the circuit to lower the risk of burning out the function output. Also a small resistor inline with any bulb will help reduce in the startup (inrush) current. I like to use a 22Ω resistor with Miniatronics 16V 30mA bulbs. • Current draw of the bulb when running As noted immediately above, the function outputs are rated for a specific current draw. Obviously the operating current requirement of the bulb needs to be lower than this rating, unless additional electronics is being added. In addition most decoders provide a total current rating for the decoder, and the sum of all items being controlled in a locomotive needs to be lower than this rating. For example if you install a headlight, reverse light, ditch lights, and a Mars light, the operating current draw of these bulbs need to be added up, and figured in the total current draw. Sound & DCC Among the DCC compatible products on the market today are sound units. DCC compatible sound units are available from Dallee Electronics for both Diesel & Steam locomotives. SoundTraxx offers digital sound decoders (a DCC decoder + sound unit + lighting effects fully integrated) for both Diesel and Steam locomotives. Also there are of a number of do-it-yourself approaches. Remember those greeting cards sold a couple of year ago by Hallmark? They let you record a greeting to a relative or friend. Ever consider using them for a low cost sound unit for something on your layout? Put them together with DCC control and you have a low cost sound solution for your model railroad. One additional note is that speaker selection can make a real difference. Both Dallee and Soundtraxx offer a range of speakers for their products. Using one of these will save a lot of trial and error on your part searching for a good speaker. Another good manufacturer of speakers for this application is Korbitone, available from Mouser Electronics and other sources. The 1.5” Korbitone (Mouser #2SP015) makes a nice choice for S scale. You may want to avoid miniature speakers from Radio Shack, as the authors’ experiences with these speakers have been less than stellar. Getting Started with NMRA DCC Third Edition Rev B – page 32 Supplier Soundtraxx Soundtraxx Soundtraxx Dallee Dallee Dallee Dallee Dallee Mouser Mouser Mouser Part # 810055 810078 664 662 663 661 660 2SP015 2SP002 2SP009 Size 7/8” round 1.5” round Oval 1.6” x 2.8” oval 1.2” x 1.7” oval 1.1” round mylar 1.5” round mylar 2.0” round mylar 1.5” round paper 2.0” round paper 1.75” round paper Manufacturer Intervox S150RA Intervox S11-16VN MCI M039 Intervox S11x16VN RDIE HSP-28SA-8 RDIE HSP-36SA-8 RDIE HSP-50SA-8 Korbitone Korbitone Korbitone Speaker Info 20E-8 2 H 8Ω 0.1W 8Ω XB 8Ω 2W 55302 8Ω WD 1.5W 8Ω 0.3W 0595 8Ω 0.5W 0696 8Ω 0.5W 0596 8Ω 0.1W 8Ω 0.2W 8Ω 0.1W Specifications 280Hz – 20kHz 350Hz – 15kHz 550Hz – 12kHz 320Hz – 10KHz 400Hz – 20KHz 800Hz – 5kHz 500Hz – 5kHz 800Hz – 5kHz Decoder Functions and controlling other items As noted in the section above on Bulbs, DCC functions are designed for low current draw. If you wish to use them for controlling functions in your locomotive, or other accessories, be sure the function’s current draw will be below the function’s current rating. If it is not, either use a relay or an optoisolator. Using a relay is discussed in the section below on Smoke Units. If you prefer you might use an optoisolator (e.g., 4N35) plus a 2200Ω resistor on the function lead, along with track power. Getting Started with NMRA DCC Third Edition Rev B – page 33 S Scale Turnouts and DCC DCC Accessory Decoders offer the option of controlling turnouts remotely from the cab or from an attached computer. In some cases turnout switch machines draw more current than the accessory decoder is designed to support. American Flyer remote control turnouts draw over 3 amps to throw the turnout, and American Models remote control turnouts draw approximately 1.25 amps. To meet this need, we designed this small relay circuit to allow an accessory decoder to drive one of these turnouts. The circuit uses two SPST normally open reed relays, and takes power to the throw the turnout from an external AC transformer. Resistor R1 has been installed in the circuit to reduce the brightness of the AF turnout lamp, and is not required. Everything needed here is available from Radio Shack, except for the resistor (we used a 3W, 82ohm resistor). American Flyer Accessories and DCC There are a number of possibilities for the control of American Flyer operating accessories with DCC. In many cases you can use them with few modifications. For example, on a DCC layout you can use the Railroad Crossing Flasher with standard 696 Track Trips. Just connect the two posts of the flasher as follows – one post directly to one rail, and the other post to the Track Trips. No other connections required, since full power is available on the rail at all times. In another example, one of the authors added a DCC decoder (1amp) to the American Flyer Barrel loader. Now the worker (speed & direction) can be controlled from the controls on the DCC cab, and the platform light can be turned on and off independently. In another case, one of the authors wired up the Mail Pickup accessory on the DCC layout, without adding a DCC decoder, using a modification of the standard American Flyer wiring. Getting Started with NMRA DCC Third Edition Rev B – page 34 Smoke Units & DCC Those who enjoy smoke emanating from their model railroad layout will find DCC a very smokefriendly environment. Since the DCC power station puts full power on the layout at all times, smoke units will really smoke! Smoke units also tend to draw more current than most decoder function leads are designed to provide. To avoid the risk of burning them out, we use a simple 1A 12VDC SPST normally open (N.O.) reed relay (Radio Shack) in the circuit. We connect the decoder function cross the coil, and the smoke unit to track power, with one side via the relay contacts. In this manner the smoke unit is powered directly from the track, and the decoder is just use to control the application of power to the smoke unit. Another trick we use is to wire the smoke unit in parallel with the front headlight function. This certainly is not necessary, but it provides a visual indicator that the smoke unit is turned on when the headlight is on. This is particularly valuable when you run out of smoke fluid, and forget the unit is on – perhaps the visual cue from the headlight will remind you to turn it off, or add more smoke fluid. Summary That’s the end of this third edition. We hope it is of some value as you consider DCC for your S scale layout, and we fervently hope you’ll add DCC to your model railroad. We think it will provide you many hours of enjoyable operation of your model railroad. Getting Started with NMRA DCC Third Edition Rev B – page 35