1
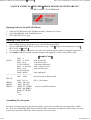
Student User Manual for Franklin Software PROVIEW
1 de 2
http://www.ee.bilkent.edu.tr/~ee212/Proview32_guide.html
A QUICK GUIDE TO PROVIEW FROM FRANKLIN SOFTWARE INC.
(32-Bit Version 3.3 for Windows)
Opening Software from START Menu
1. Click the START button in the Windows desktop. Bottom Left Corner.
2. Under PROGRAMS, click Franklin Software.
3. Click PROVIEW 32 to open.
Opening a New ASM File
1. In the taskbar at the top left of the screen, click FILE and then NEW.
2. Choose ASSEMBLER FILES for your file choice type. (Don t forget to save and name new file
FILE, SAVE AS NAME )
3. You can write (or copy and paste) your code in the opening window and save using the top task bar.
4. See Sample Code for example program. Sample code toggles P1 of 8051 using 55H & AAH
Sample Code
ORG 0
MOV A, #55H
MOV P1,A
LCALL DELAY
MOV A , #0AAH
MOV P1,A
LCALL DELAY
SJMP BACK
;----------------------------------------ORG 300H
DELAY:
MOV R5, #9
HERE1:
MOV R4,#242
HERE2:
MOV R3,#255
HERE3:
DJNZ R3, HERE3
DJNZ R4, HERE2
DJNZ R5, HERE1
RET
BACK:
;load A with 55h
;send 55H to port 1
;time delay subroutine
;load A with AA (hex)
;send AAH to port 1
;keep toggling P1
;put time delay at address 300h
;R5=9 , the counter
;stay here until R3 becomes 0
END
Assembling The Program
In order to load the program to the microcontroller, you need to assemble the code and produce a HEX
file. Then, you will burn the HEX file to the ROM. When running the assembler for the first time, you may
need to set it to produce HEX files. This is shown in next three steps.
09-10-2009 10:53
Student User Manual for Franklin Software PROVIEW
2 de 2
http://www.ee.bilkent.edu.tr/~ee212/Proview32_guide.html
1. First, click OPTIONS and under options click PROJECT. (be sure not to get the two project labels
confused)
2. To set the assembler to produce a hex file double click L51, then Linker. This will then open the
settings and enable you to choose INTEL HEX under Misc:.
3. Click O.K. to keep settings.
4. After settings are correct, click PROJECT and MAKE or F9 to assemble and produce your HEX
file. (note: your hex file will be placed in the same directory your project and file exist in)
1. Also notice that if any ERRORS exist in your code the assembler will note the errors in another
dialog box at the bottom of your work area.
After setting the assembler to produce the HEX files for the first time, you will not need to repeat steps 1-3
when you run the assembler again.
Debugging and Tracing an assembled program
1. After assembling and producing all the files, you can use the Virtual Debugger to simulate your
program.
2. To perform this, click DEBUG and then START. Select Virtual Machine (Simulator) and the processor
(8051) under Microcontroller. Note: be sure that your cursor is sitting at the top of the code because
when you debug a program sometimes it will start from the point the cursor sits.
3. A box will appear showing all the registers and ports.
4. Now to trace the code, use the STEP INTO command from the DEBUG menu or its shortcut F7 key.
This will single step through the program while allowing you to examine and change the registers.
5. You can view the contents of the registers and the memory by opening the corresponding window
from the VIEW menu.
6. Using breakpoints will provide great help during the debugging. Instead of going step by step, to run
the program up to a specific line of the code, click on that line and choose TOGGLE BREAKPOINT
from the DEBUG menu or use the shortcut F5. Then, again from the DEBUG menu, choose RUN or
use the shortcut CTRL+F9. The program will run up to the specified line and stop. (Long delay
procedures may take a long time to simulate, so you may need to shorten them before debugging your
program.)
Loading Hex File to the Trainer
1. You are now ready to burn your hex file into memory of the 8051.
2. The hex file as stated before will be contained in the directory you placed your work in.
3. Refer to the document How to Test and Program the 8051 Trainer Board to continue.
BACK TO THE LABORATORY HOMEPAGE
09-10-2009 10:53