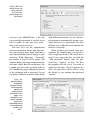
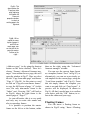
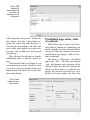
1
EBooksWriter
User’s Manual
(C) 1998-2010 Visual Vision
(C) 1996-2010 Aldo Ghigliano
Web site:
www.ebookswriter.com
Visual Vision Web site:
www.visualvision.com
Credits: Paolo Bevilacqua, Chris Paris - EYK Associates
Welcome
Whether or not the printed page will be around forever is
unknown. What I do know for certain is that it has now a
powerful, much cheaper brother, the electronic book.
The true power of the electronic book is not the possible
musical content, the animations, the videos and the attractive
images, but the hyperlinks, the text search capabilities and the
ease of distribution.
Imagine hyperlinks on the paper... imagine a paper book
where you can input "mickey" and find where that word is
written, what page and what line, with pages that automatically
browse... imagine a book that costs almost nothing...
With our EBooksWriter software, the creation of electronic
books with all these features, and even more, is finally
available to all. If you have something to say you just need to
type it, and then with a click you can have a self-installing .exe
ebook, or alternatively a .mobi or a .epub ebook.
Add this to the Web (should you need this, VisualVision has
products also for creating a good Web site), and you can
distribute your book to the whole world, just like the Big
Publishers do with the printed paper versions.
It's a nice world isn't it? We are proud to think that our little
contribution may have added something to that.
We wish you success working with EbooksWriter, and feel
sure you will gain almost as much satisfaction using it, as we
did while designing and writing it.
Ing. Aldo Ghigliano
President, Visual Vision
3
Welcome
3
Table of Contents
4
Introducing EBooksWriter
5
1. Your first work
7
Inserting links; browsing links; Links and reading path
2. Publishing a compact ebook exe mobi epub
11
3. Protecting an ebook
17
4. Main functions
22
5. Frames and frame sets
31
6. The “Special” links
36
7. Forms
43
8. Shopping cart
47
9. Multimedia objects
49
10. Graphics and paging pages
53
11. Frequent questions
60
Self installing exe ebook; Reader screen / show options;
Placing links is mandatory; Embedded files; Mobi and
Epub ebooks; Distribution, ecommerce, marketing;
Protections; Different password(s) for each reader /
user; Multiple password generation;
T a b le of C on t en t s
Text format; Styles; Links; Images; Thumbnails; Tables
Creating frames; Links; Copying layout of existing
frames; Floating frames
Anchors; Showing windows; Links inside/to a frame set;
Showing windows without a click
Inserting forms;
Sounds and video; Headers and footers; Slides;
Keywords; Table of contents, predefined page order
Displaying information on the screen - Everything's
relative - Invisible tables - Backgrounds - Clickable
maps, hot spots and browsing bars - Frames - Don't
exaggerate!
4
Introducing
E B ook s W rite r
E
booksWriter is a fast and easy to
use tool for creating electronic books, or, in
short, ebooks.
Thanks to its multimedia and hypermedia capabilities, the program even adapts
very well for creating manuals, product
catalogues, guides, brochures, and, in a
more general way, every kind of documentation that can be considered the electronic
version of a book. So, a book, but with lots
of additional features, by the way.
No technical knowledge is required to
use EBooksWriter (more concisely,
EBW), as EBW was conceived for
“normal people” and everyday utilization.
You don’t have to write codes or html,
and you don’t need external software. Of
course you can reuse text you have written
within MSWord or so, but an external
editor is not required. Unlike some other
ebook programs, EBooksWriter is not a so
called “compiler”, but a feature rich, standalone environment, where you write, edit,
page, protect and pack the stuff as compact
ebook. It encompasses all you need to get
from the page editor to the standalone
ebook, and it supports all the common
standard ebook formats. You just have to
think about what you want to write... yes,
at the present time, this is still needed!
There are essentially two major differences when comparing ebooks with ordinary books / documents written to be printed on the paper. Firstly, you actually
“print” on the reader’s screen rather than
on paper: this requires to think about the
horizontal size not as “fixed” but as variable - because the ebook page layout must
look good also for small screens. Secondly,
within ebooks there are hypertextual links
between pages (i.e. words or pictures you
can click on to be taken to other sections or
to show external documents).
EBooksWriter’s original interface has
been specifically designed and optimized
for this.
With the default settings, pages are
“reflowable”, so the end user will see information on the screen in a pratical way,
without having to repeatedly zoom / pan on
5
the page, no matter what device / what
monitor is used for reading the ebook.
With its special WYSIWYL (What
You See Is What You Link) all links
between pages can be defined “visually”
(= you don’t have to type codes or remember file names - you select from a preview,
and can navigate within that preview, so
you can search/reach the required destination page by either page title or navigation)
and they are immediately “active”, enabling you to follow them from within the
editor (= you don’t have to move to
“preview mode” - just double-click).
This is really much easier to use than to
explain, and it adds unbelievable speed.
And there is more under the hood. The
simple yet powerful built-in editor provides
you with the opportunity to use text styles,
hot spots, audio and video, frame sets,
slides, popup windows and much more...
easily. It is all visual (WYSIWYG What
You See Is What You Get), that means
what you see in editing mode is really what
you get when you publish your ebook.
So you have what you need to create a
good ebook, and quickly. And you have
also what you need to protect your work, if
required. Every page of an ebook can be
protected with a password. You can also
define different passwords for different
page sets, and/or leave some pages unprotected (e.g. sample pages). Furthermore,
you can set different passwords for each
user. In addition to that, the program allows you to disable the copy and paste
functions and to define an expiry date for
the document.
Despite the completeness of the available functions, which may seem too much at
first sight, all has been designed around
6
immediacy and speed for everyday work.
The editor is optimized to act on a
whole ebook, which is saved as a single
file in .AEH format (the same format used
by other Visual Vision products). Pages
are managed as a complete set, rather than
as stand-alone pages.
This is very handy as you can archive a
complex work in one single compact file,
with one click. A single click is sufficient
to perform a lot of other global / multiplepages actions. With a single click you do
global searching and substitutions. With a
single click you can save your ebook as an
.exe file, which can be read on any PC
without the need for additional software
(i.e. you won’t need Firefox or Internet
Explorer), as an .AEH file that can be read
by the free EBooksReader, and now also as
.Opf / .Mobi / .Epub - the new popular
formats that you can read on PC, Macintosh, Palm, Pocket PC, Windows Mobile /
CE, SymbianOS, iLiad, eBookMan, Kindle, Blackberry, Mac OS X, Sony Reader,
Handheld PC and several new cell phones.
But this is already too long as introduction... To say it concisely, EBooksWriter is
a powerful tool for people who want to be
free to think about what they’re writing,
instead of getting confused with programming, files or code.
The application requires a PC with
MSWindows 95 osr2, 98, Me, NT, 2000,
2003, XP, Vista, 7, and at least a old
Pentium I 100MHz, 32Mb of RAM and
32MB of free Hard Disk space.
We are sure you will appreciate both
our software, and the vast effort behind
producing it. Enjoy!
1 . Y our f irs t w ork
O
nce you have EBooksWriter
installed on your PC, either from a CD or
the Internet distribution release, you will
doubtless be impatient to make your first
page.
The first thing to keep in mind is that
EBooksWriter operates on a whole ebook,
not on single pages. This means that multiple pages are loaded in memory at the same
time. This set of pages is also called
“hypertext”. At any time, once they are
created, it is possible to browse pages,
create new links, navigate throughout a
file, or carry out a search. The easiest way
to pass from one page to another is using
CTRL+ and CTRL- keys.
Inserting links
Linking pages is really very simple:
let’s make a simple example now, by creating a hypertext/ebook consisting of two
pages, each linked to the other.
Let’s run EBooksWriter: the window in
Fig.1 will appear, ready for you to type
some text into the page. We enter a line or
two of text about vegetables and we include the word “potatoes”.
The number “0” shown in the central
text-box at the bottom of the current page,
indicates that we are on page “0”. Please
notice that the page numbering in this box
is just for your own use - for the end user
you can set any reading path, also nonlinear, with links and with the “Hypertext
>Predefined page order - TOC” feature.
Now we can select a word, which is
done in the same way as in many other
applications; simply drag your mouse over
the word or double-click it: let’s select
“potatoes” (See Fig.2), and now click the
Link button on your toolbar (the one with
the chain and a page on) as shown
here:
The window in Fig.3 will display; this
is one of the most important dialog windows, because it allows us to define many
link types, by simply choosing one of the
tabs on the top.
But let’s get on: Choose the “New
7
Fig.1 –
EBooksWriter main
window: to write
something, just
type on your
keyboard…
page” tab (the last on the right) and press
the “OK” button. EBooksWriter will define the link
and, at the
same time,
A hypertextual link
will take us
looks like an underlined
to a new
word or sentence: with a
page, where
click on it you will switch
we
could
to a related page (a double click when in the
provide more
EBW edit window, acinformation
tually).
about potatoes.
Fig.2 – Let’s
choose a word
within the text,
"potatoes" for
example
8
If you check the text-box at the bottom,
you’ll see the current page number has
switched to “1”. Let’s add a little text now,
as shown in Fig.4. At this point we need to
insert a link to the previous page (page 0),
the one about vegetables.
Now type then select the text “Back to
previous page”, and click again on the Link
button (chain picture). The window, as
shown in Fig.5, is displayed showing us a
list of all available pages within the hypertext (page #0 and page #1 in this case). We
can now directly choose the link destina-
Fig.3 – The Link
to... window where
you can define
simple links: just
select the last tab
tion on the screen, so let’s choose
“Vegetables”.
Click on the “OK” button and
EBooksWriter takes us to the page in Fig.6
(page #0). Notice here that the link to
“potatoes” is underlined blue text (by default - this can be changed with the Styles).
If we double-click on the word “potatoes”,
the editor will automatically switch to the
“Potatoes” page (page #1).
From this page, we can double-click on
“Back to previous page” to return again to
page #0, and so on. As you can see, creating links and navigating through them with
EBooksWriter is really very easy.
There are several ways provided to
move from page to page: you can type the
page number directly in the page number
text-box; use the up and down arrows beside it; use the right mouse button over the
same text-box (a list of recently visited
pages will be shown); you can also use the
red arrow buttons at the top left to go to
previous or next visited pages.
Using the Hypertext menu at the top,
click “Hypertext > Read-only” to switch to
a non-editable preview of the ebook: This
is handy as you won’t need to click twice
Fig.4 – Let’s write
something in
page 1.
9
Fig.5 – The window
where you can
visually choose the
target for your link.
Fig.6 – We’re back
to page 0, and can
see that the link to
the "potatoes" page
is already active.
on links, and table grids will be hidden, but
more on that later.
It’s now time to save your work:
Choose “File > Save ebook” and the whole
ebook will be archived into a single file
with the .AEH extension. The process is
the same whether 1, 2 or 1000 pages; 1, 2
or 1000 images, in this way EBW keeps
your work compact and simplifies the tasks
of making back-ups and exchanging files.
Links and reading path
The end user can not use/see the “page
number” facility (which is provided just as
10
a quick means to switch between pages
during development). To define the path for
the reader, you have to place some links.
This is mandatory for .exe and .aeh ebooks,
while it is optional for .opf .mobi .epub (for
these formats you must define a linear path
with “Hypertext >Predefined page order TOC”). You have full control: you can
move the user from page 0 to 45 and then
to 3 and to 2. It is not necessary to adopt
the structure of a regular printed book and
to have only one linear order. Just be sure
to put some links, starting from the cover
page (“Hypertext >Cover” menu) that is
the first page shown to your readers.
2 . P ub l is h ing a com p a ct
e b ook a s e x e , m ob i,
e p ub , . . .
T
he most appreciable qualities of
a printed book are the compact size and its
being handy.
An ebook created with EBW is as well
compact and handy. You can distribute it
either as a compact .exe file (executable
format, for Windows PC; the final user
will be able to read it by simply doubleclicking the file on his/her computer,
without additional software) or you can
save also into the more widely used compact ebook formats: .mobi and .epub (they
work on almost any device including Mac,
PC, Kindle, Sony Reader, iPhone, Blackberry and several cell phones, Palm and
almost all handheld PCs, Windows CE,
Mobile and much more; a reader software
is required although it is either usually
provided when you purchase the device, or
downloadable from the Internet).
Self installing .EXE ebook
The self-installing format (.exe file) is
the most powerful format you can choose
for your ebook, as all EBW features are
widely supported. To obtain a .exe ebook,
Fig.13 - The
window where you
can insert your
ebook’s license
message
11
Fig.15 – Here you
can choose to
show your
presentation in full
screen...
you use the menu function “File> Save
SFX .exe ebook”, (SFX = self-installing)
there is no compiling or other intermediate
steps required. The program will show a
window where you can insert a license
message for the ebook (Fig.13); if you
click on OK, then a compact self-installing
.exe file will be immediately generated.
Additionally, if you wish, you can save
your ebook as .AEH file (the native format
used by EBW to save your ebooks), with
“File >Save ebook”. In this case, your
users will need the free EBooksReader
software for reading the ebooks.
Last but not least it is useful to notice
that when you choose to protect your pages
with passwords (see next Chapter), you
will also find on your Hard Disk a .EWP
file. This file must not be delivered to the
readers; and must not be deleted, because it
contains the passwords/seeds.
Reader screen / show options
As you can see from Fig. 15 you can set
several show options for the ebook.
You can show it with a predefined size
and position (but be careful - there are a lot
of different monitors and a lot of different
12
video resolutions out there), you can show
the ebook in full screen and even “force”
the full screen (if “force” is selected, the
ebook window can not be resized by the
end user).
You can hide the menu, the toolbars,
and also the top bar. Additionally, for the
GOLD edition only:
− you can force the page title to be
shown on the title bar
− at the first run, you can force the
program to ask the end user his/her
name/email; if she/he agrees, this data
can be sent to you through email or
through a web script (this way you
can track your end users, create newsletters, etc.);
− within the small dialog that prompts
for name and email, you can show a
“Ask pass” button. When the end user
presses this button he/she will automatically prepare an email with the
user data (then the end user may send
the email to you)
Placing links is mandatory!
As said in Chapter 1, the end user can
not see/use the “page number” facility that
you see on the bottom of the EBW application window (which is provided just as a
quick means to switch between pages during development), so you actually have to
place some links, or your users will be
stuck in the cover page and won’t be able
to see the other pages. With links you can
control the reading path, and say you can
move the user from page 0 to 45 and then
to 3 and to 2... and wherever you want. It is
not necessary to adopt the structure of a
regular printed book. You can provide
multiple paths.
The important thing is, before attempting to create a selfinstalling ebook, to be
sure to put some links starting from the
cover page (the one shown with
“Hypertext >Cover” menu; it is the first
page shown to your readers).
Embedded files
The ebook can carry on and show
“internal” (embedded) files: these files are
stored within the ebook document. You can
create this kind of link with “Insert >Link”,
4th tab.
By default, a click on an embedded file
link does prompt a “Save / Execute” dialog
window (a Web browser does always
show this dialog); there is a checkbox if
you don’t want to bother users with this
dialog (as your ebook will run as a separate process, it does not rely on Internet
Explorer or any other Web browser, so its
behavior can be different).
The selected file will be inserted in the
internal album, so “Hypertext >Images files - link archive and erase” is the only
way to remove the file from the album (and
so from the AEH file / ebook file).
.MOBI and .EPUB ebooks
In alternative or in addition to the .EXE
and .AEH formats, you can quickly save
your ebook also as IDPF OPF / OEB
(Open Packaging Format, OPS Open Publication Structure / OEB OEBPS standard) and Mobipocket / MOBI and Adobe
digital editions / EPUB (Macintosh, Palm,
Pocket PC, Windows Mobile / CE, SymbianOS, iLiad, eBookMan, Kindle, Blackberry, iPhone, Mac OS X, Sony Reader,
Handheld PC, Hanlin, Bookeen Cybook,
Mentor, Irex, Lbook, Neolux Nuut, Astak
EZ Reader, BeBook, COOL-ER and several new cell phones and devices every day
or so...).
Fig.16 – The export
dialog, where you
choose the export
format (OPF and
Mobi, EPub, or
else) and some
useful options...
13
Fig.17 – Here you
setup some options
that are proper to
the mobi and/or
epub format;
additionally, as
these formats have
limitations, you can
choose what limits
apply
There is no effort: EBooksWriter can
automatically save to these formats (under
the hood your ebook - even the ebooks
created with old versions of EBooksWriter
- is automatically converted, no additional
editing is needed).
From the main menu, choose “File
>Save .mobi .epub ebook (Kindle, Palm,
Mac, iPhone, Cell...)” and the Export dialog will be shown (Fig.16). First of all you
choose the format from the drop down list
at the top of the Export dialog. Then you
press the Export button and the export is
done.
The OPF / Mobi format will generate
both the OPF file set (a file .Opf, several
Html and Gif and Jpeg files) and the .Mobi
file. The Epub format will generate a single .Epub file.
After the export, the program will show
you the folder where the output file(s)
is(are).
Before pressing the Export button, you
may want to choose the folder where it will
put the exported file(s) - use the Path tab.
Also, there are several options to fine
tune the ebook. With the Ebook tab
(Fig.17) you can define some settings that
are useful for both OPF, MOBI and EPUB.
14
The first option on the top left is about
the page order (the path of the reader / end
user).
For Opf, Mobi, Epub it is not always
mandatory to define links within the text to
create a reading path (for Aeh/Exe, it is
mandatory, as we said before). In fact,
most Mobi and Epub readers will show the
ebook pages in a linear order. However,
please notice that this order will not be the
internal EBooksWriter's "page number" the internal page number is for the author
only (you). The order for the reader / end
user can be either the order specified in the
first tab of this Export dialog (see above)
or it can be the order specified in the
"Hypertext >TOC - Predefined Page Order" (the TOC button shows this dialog).
This versatility permits you to reorganize your work document anytime, and to
define for the reader any path, without
limits.
If you check the "TOC -> ncx" box,
most Epub readers will be able to show the
TOC tree besides the ebook content. The
Mobi readers we have tested will not (but,
maybe in future, who knows? this world
evolves very fast!).
The other parameters on the top right
are for the fine tuning. Due to their constraints, the Opf, Mobi and Epub formats
do not support some of the EBooksWriter's
features (only the AEH/EXE supports all
the features), and any formats has some
limits. For example, some devices do not
support added Javascript, Html, CSS, multimedia or Flash, so you can disable this
content (this way you won't have to delete
the content from the source Aeh file).
For "strip size from CSS" we can spend
some more words.
Both EBooksReader and the Mobi Reader provide a font size control to the end
user: in both cases the user has a sort of
"zoom" button that permits to increase and
decrease the font size - this by keeping the
existing proportions (example, for a
zoom+, the font A that is already big on the
ebook will become more big; the smaller
font B will also become bigger, but not as
big as the A).
Instead, most Epub readers are more
limited. Some are unable to do this autoscale when the font size is defined within
the CSS. But if you check the option "strip
size from CSS", then EBooksWriter will
remove the font size information from the
CSS. This destroys almost all the font si-
zes, but it allows the Epub to auto-resize (a
feature that can be very important on small
devices and/or for visually impaired readers/end users).
Last but not least, on the bottom left,
you can add informations (metadata) about
ebook contributors (for the author and the
copyrights, they are specified within the
Current Hypertext Properties - you can
access this dialog also with the Hypertext
Options button), and on the bottom right
you can define some "special pages"
(guide) - you can choose them visually
with buttons.
Please notice that the behavior of the
reading devices will not be identical for all
these parameters. Some devices will show
to the end user the informations about the
contributors. Some will ignore. Some devices will permit you to access the "special
pages" with a drop down menu or with
special buttons. Some will ignore. You
should specify all what you are able to
specify, then don't count on these settings they are optional things that can be shown
or not to the end user.
Now let's see the Mobi tab (Fig.19):
here you can specify some settings that are
specifical for the Mobi format, such as the
Fig.18 – The
“Hypertext >
Predefined page
order - TOC”
dialog, where you
can define the
linear path for
printing (all
formats, when
enabled) and
reading (opf, mobi,
epub)
15
Fig.19 – Some
additional options
for .mobi /
Mobipocket only...
"cover image".
On the right side, you can set the Mobi
compiler software (EBooksWriter will
preset it, and/or will help you in this). With
the "command line options" you can add
advanced Mobi features, such as protections and much more (the inventors of the
Mobi format provide documentation on
this).
The Export dialog permits you also to
export in RTF, ASCII and HTML.
EBook distribution, Web,
ecommerce, marketing
EBooksWriter does not lock you to a
particular distribution system, or to a predefined seller or ecommerce.
You can choose any of the several options that are available on the market.
Usually you can market your ebook
through existing popular web sites
(Amazon, Ebay, ebook collection sites
such as EbooksLibrary.com), and/or with
your own Web site.
To advertise, market, distribute your
ebook through your own Web site is quite
easy, you firstly have to obtain a Web
space (take a look at www.visionhost.info)
16
and you need an editor to create your Web
pages : for example EasyWebEditor, or
1SITE www.1site.info or HyperPublish
www.hyperpublish.com.
As for the ebook file, the file may be
placed to a folder on your web site; with a
direct link if it is a free ebook, or into a
secret folder if the customer must pay before being allowed to download (to do the
transfer to your web site, you eventually
need a FTP program, for example Cute
FTP, Ws_FTP or 1SITE / HP internal
“Generic FTP” feature).
You can deliver this file to your customers by email, as well.
And some ecommerce services can deliver the file automatically to the customer,
after purchase.
We do not deal with the ecommerce
part but there are hundreds of ecommerce
services that you can use to sell your ebook
through your web site, or through popular
ebook sites. There are threads on the user’s
forum about these things:
www.ebookswriter.com/forum/
3 . P rote cting th e e b ook
I
n the same way that real books are
often pirated, piracy is also a real risk for
ebooks. EBooksWriter offers you several
interesting options to help you to protect
your work.
With the “Hypertext > Current hypertext properties” menu, first tab, you can
disable the printing and/or the clipboard
copy (cut and paste). When printing is
globally disabled you can still enable a
single page to be printed (use “Insert
>Special link”, and the “print current
frame” feature; see Fig, 23).
From within the same window you can
also set an expiry (expiration) date for the
ebook / brochure: for example, you could
inhibit reading after the 11-5-2012.
Then you can define a “editing password” to completely prevent unauthorized
changes to the text by EBW users (the
ebook is always “read only”, this “editing
password” is to prevent editing in case the
Fig.22 - With
“Hypertext
>Current hypertext
properties” you set
up copy and print
protection, expiry
(expiration) data,
and a “edit”
password (the
ebook is always
“read only”, this is
to prevent editing in
case the end user
owns
EBooksWriter...)
17
Fig.23 – With insert
special link you can
place a link such
as “click here to
print the page” (or a
print button)
end user owns EBooksWriter...). Be sure
you record this password: if you lose it you
will be unable to edit your own work there is no way to recover it.
But now let’s see the sophisticated
password protection feature that does permit you to protect your ebook with one or
more password that you will supply to your
end users. With “Hypertext > Password”
the window in Fig.24 will be shown. The
simplest thing is to assign one password for
the entire ebook. But you can do more. For
example you can create an ebook with ten
free introductory pages and protect the rest
of the document with a password. Or you
can protect different sections of the ebook
Fig.24 – The
password dialog we added the
password “mickey”
and we agreed to
apply it to all
pages, then we
unchecked the first
pages, so for
example the cover
and the copyrights
page are not
password protected
and everybody will
be able to see
them...
18
with different passwords. Or you can have
the program to automatically assign a personal password (or passwords) for each
different user, while the ebook remains the
same for everybody.
When you have just created a new presentation, the simplest thing you can do is
add a single password to the whole document. If you want to do this, just click the
“Add password” button, enter the password (e.g. “mickey”, see Fig. 24), then
the program will ask you if you want to
assign it to all pages. Say Yes and you are
done. All your users will be able to read
the ebook by just entering the password
“mickey”.
Fig.25 – If you
check “custom
password for each
user” this window
becomes a “on the
fly” password
calculator. You can
see that the
password
calculated for peter
sellers is
kP_VUp...
The ebook prompts for the password the
first time you attempt to enter a password
protected page: usually it is wise to not
protect the cover page (select the password
“mickey” on the left, then just search for
the cover page on the right list and uncheck
it), this way if the user forgets about the
password, well at least he/she will be able
to know what ebook she/he is holding!
If you wish to apply the password
“mickey” just to a page set, select the
password in the left box, then check in the
right section every page you want to protect with this password.
To leave a page unprotected, just click
the “See pages without pass” and check
every page you want to leave unprotected.
Different password(s) for
each reader / user
If you wish to set a different password
for each user (we call this “reader password”, while the unique password or password seed is the “author password”), you
just have to put a check-mark on “custom
password for each user”, then save the file
(Save ebook), then create the SFX ebook,
and keep the source file (AEH) you used
for creating the ebook in a safe place.
Fig.26 – For the
same ebook, the
password for the
user john smith is...
19
When this option is selected, the ebook
remains the same for all users (just like
when there is just one password), it is the
match username / email and password(s)
that changes. You can distribute infinite
copies of the ebook as the ebook “knows”
all the passwords, even the ones that you
have not generated yet. This is because it
does not actually verify the password, it
verifies the match. You can have infinite
users (there will be infinite passwords).
When you sell an ebook to a given user,
you open the ebook source file, you use
“Hypertext > Passwords”, you enter the
user data, and the password(s) is calculated
on-the-fly and can be printed / faxed /
emailed to the user.
Example: say we have the document
abc.aeh, with the author password mickey
associated to all the pages; say this ebook
is enabled to personal passwords for each
user (“custom password for each user” is
checked); say you are the end user peter
sellers [email protected]. The author will
give you the password kP_VUp (see
Fig.25), this will enable you to see the
ebook. In other words, for this ebook, the
password for peter is kP_VUp and will
always be asked the first time he enters one
of the protected pages. It will work ONLY
if peter enters the data peter sellers peFig.27 – The
automatic
password draft
message facility..
20
[email protected] when the ebook asks for
them (to enter these data the end user may
also click the right mouse button and
choose “User data” from the menu).
For the same file, for the end user john
smith [email protected], the password will
be as in Fig.26 (bXaRQs).
You will supply the same ebook to John
and to Peter, each with their own password(s). The end user knows nothing (and
should not know) about the author password.
The program includes a facility to help
you print/email the password to the end
user: just insert the user data, then press the
button “>” on the bottom right. For john
you will have what is in Fig. 27.
Please notice that when “custom password for each user” is checked the author
password is just a “seed” used for calculating the user’s passwords. It won’t work
for accessing the ebook.
For test purpose we do recommend you
to test the ebook on a different PC. This
way you will avoid mistakes (your PC will
preset you as user and you should not
change the preset). If the user needs to
“reset” (clear) his name/email or the passwords due to a mistake, he/she can use the
right mouse button (User data and Reset
passwords) or the “?” menu.
When a page is password protected, it
is crippled with a strong 128 bit algorithm.
Your passwords are stored in a .EWP file
(don’t distribute and don’t delete!!), saved
in the same directory of your AEH file.
When you test the ebook it may generate a
.ERP file (don’t distribute it!).
Multiple password generation
When you have to generate a lot of passwords, you may find useful the “Mass
generation” button. It takes in input a file
with the format (each line):
john;smith;[email protected]
it outputs a file (each line):
john;smith;[email protected];WyJh3
With the Gold edition you may also use
this mass generation by calling EBooksWriter “command line” with these parameters:
/mass seed inputfile outputfile
21
4 . M
a in f unctions
N
ow we’ve had some practice
with the simplest ways to manage pages
and links, let’s have a look at the main text
functions and how we can use them.
Text format
Nowadays, all word-processors have
standard buttons to let you apply ‘bold’
and ‘italic’ characteristics to the text and
EBW is no different; you can also change
the color, size and character (font). In addition, EBW offers you the ability to define
your own text styles, in much the same way
as MS Word or Word Perfect do. Links
can have their own properties (you have to
use styles to modify them).
Styles
Text styles can be used to save different
paragraph settings. Styles can be defined
and/or applied to the text using the
“Paragraph” toolbar or from the “Format”
menu.
22
The easiest way to understand the advantages of using styles is to consider this
document you’re reading now: every single
page has a title; the title style is the same
for all pages and is different from the text
style (Titles are larger and use a different
font, or typeface).
Saving different styles for titles and
normal text offers these advantages:
− You save time in applying a set of
attributes (if we hadn’t used the
‘Title’ style for this book, we would
have needed to select each chapter’s
title, applied a font and a size, applied
bold,...);
− You can immediately modify multiple
pages, or even the whole document,
by simply changing one little thing. If
you decide to use green for the titles,
you just need to modify ‘Title’ style,
and it will be applied to all pages
instantly;
You can use styles in many different
ways. The easiest way to create a new style
is to apply text attributes to a text block.
As an example, you can select any number
Fig.30 – Here you
can define a new
Style or modify an
existing one; you
can even copy a
Style from another
hypertext using
"Import".
of words, set a size of 15 and apply bold to
the text; then write a name for the new
style in the styles combo on the toolbar and
press Enter. A window will appear asking
you to confirm the new style’s parameters.
Another way to create a new style is by
using “Format >New style” directly from
the menu: the window in Fig.30 is
displayed, allowing you to define all the
parameters for your new style.
To apply a style to a paragraph or a text
block, you must click on the Styles combo
box arrow. The help file (indexE.aeh - you
may find it with the MSWindows Start
>Find feature) for example, contains many
different styles including List, Text and
Title. Clicking on any of these items, will
reformat the selected text or paragraph
using the selected style. Another way is to
type an existing style name in the Styles
combo and to press Enter.
If you want to change style settings
simply select a text block and apply modifications; then click in the styles’ combo
and press Enter. A window will be displayed asking if you wish to make changes to the style, select “Modify style by
using selected text as example”. An alter-
native method is to use “Format
>Styles...”, then select the style and apply
your changes.
If you simply apply a style to a paragraph, pre-existing formatting is retained.
To clear all existing formatting, and keep
all
paragraphs true
to style, use
Before starting a new
“ Format
project it is always a
>Reformat”.
good idea to spend a few
minutes to set up the
T h e
styles you will use. This
“style” conwill save a lot of time if
cept is a relayou later need to make
tively recent
modifications.
thing, originating from
word processing and desktop publishing applications.
The majority of applications distinguish
between style and format:
− “Style” means all properties defined
in the Style applied to a paragraph.
− “Format” applies to the same attributes, but those applied locally with
toolbar buttons or with “Format
>Font...”
You can have two paragraphs that ap23
pear identical on the screen, but are in fact
different. EBooksWriter maintains this distinction, as does MS Word and certain
other editors, because this is what users of
styles expect.
−
Links
Let’s take a look now at some different
link types, in addition to the ones we’ve
seen in Chapter 1. As already stated, creating a link is as simple as selecting a text
block and clicking the chain tool-button,
but we can also choose “Insert >Link”
from the menu. In the displayed window,
depending on the tab we select, the following links can be established:
− Link to other pages of the hypertext
(see Chapter 1);
− Link to other hypertexts: Fig.31
shows how we can select another hypertext and the page we want to link
to. Select the destination page for the
link visually, as the program provides
us with a preview of the pages, and
enables us to surf through them;
− Link to an Internet address: EBW
keeps track of all URLs referred to in
the current hypertext. As shown in
Fig.31 - Here you
can define a link to
a page in another
hypertext. The
simplest ones are
when both
hypertexts are in
the same directory.
24
−
−
−
−
−
Fig.32, we can choose the address to
link to from a list, or we can add a
new one by clicking on the “+” key;
Link to an embedded file: we can
include a text file or a ZIP or a PDF
or any other file within a hypertext
(.AEH file). We can browse for a file
in the file system using the window
displayed in Fig.33. Clicking on the
link will display the file. If the selected file has an unknown extension,
EBW will ask for instructions;
Link to a page copied from a template: You can link to a new page
copied on-the-fly from a template
(Fig.34);
Link to a new page copied from an
existing one within the current hypertext (ebook);
Link to a new page copied from an
existing one in another hypertext;
Link to a new empty page: this is the
simplest link that you can add detail
to later;
Link to images: It is not only possible
to link to images, but also sections of
a picture using hot-spots; These
methods will be dealt with later;
Fig.32 – Here you
can insert a link to
an Email, or
Internet address
(URL) ; this is
accessed using
"Insert >Link".
Fig.33 - This
window allows you
to include any file
within your
hypertext; access it
using "Insert
>Link".
Expert users will be able to use additional special links (Chapter 6).
Images
It is possible to insert an image by
clicking the ‘Insert Image’ tool-button, or
by selecting “Insert >Image/Map” from the
menu.
The window shown in Fig.35 displays,
allowing us to select the source of the
image to include. This can be from disk,
from an existing image in the internal album or from another hypertext.
To take an image from the internal
clipart collection, you must select “From
disk” and then click on the “Clipart” button (the icon with the mountain and the
sun).
Once an image is inserted you can:
− assign a link to the image: using the
right mouse button you can “Define a
link” the same way as for the text
links shown above. Details of special
links follows later.
− define one or more clickable zones or
“hot-spots” (an image with hot spots
is also called “image map”): using the
25
Fig.34 - This
window allows you
to create a link to a
new page, created
by copying it from a
template.
right mouse button you can select
“Add area / hot spot”. Hot-spots can
be moved and resized; it‘s possible to
define a link for each hot-spot using
the right mouse button, the “image”
menu or the toolbar. Use DEL key to
delete a hot spot.
Several properties are available for
images; you can access the editing window
using the right mouse button or through the
“Image > Properties” menu item. Figs.3941 show the related windows with all concerned tabs.
You can also apply transparency to
your images and enlarge or reduce them.
Fig.35 - You can
insert an image
from the internal
album or from a
disk using "Insert
>Image".
26
It is also possible to use images that
change when the mouse cursor passes over
them. This method uses two different images that are shown depending on the cursor
position (see Fig.40). Of course, these images can link to a new page.
Another useful feature allows you to
replace an image, either on a single page,
or using automatic substitution throughout
the entire hypertext (see Fig.39). In addition, using the “Album” window
(“Hypertext >Images- files -link archive
and erase”), you can globally interact with
all images included in the hypertext.
Last but not least it is important to
Fig.36 - Inserting a
clickable zone (hotspot) into an
image.
underline that the correct way to position a
image somewhere is by using “invisible”
tables: please see the Chapter 10
“Graphics and paging pages” for learning
the reasons and more details about this
positioning technique (that is usually not
used when producing documents for the
paper and instead is fundamental for paging documents for the video). You should
never use spaces to position images: this is
wrong and usually it causes problems.
There is a simple way to test against problems: move EBooksWriter in “window”
mode (not full screen - you do this with a
double click on a title bar) then resize the
EBooksWriter dialog horizontally, and
take a look at your layout. The ebook
should look good also in a very tight window (a lot of ebook reader devices have a
small screen). If something wrong happens,
then you must try to repeat the examples is
Chapter 10. Yes open a test file and try to
redo what explained, to just read the text
passively could be insufficient!
Icons, thumbnails, photo
album
With “Insert >Image gallery / photo
album” (Fig.37 and 38; Gold edition only)
you can automatically create a photo album
/ image gallery quickly, by selecting a
group of images (maybe from a digital
camera). Say you select 10 images, then
Fig.37 - It is very
easy to create a
photo album - you
drag and drop a
group of photos
from the hard disk
or from your digital
camera...
27
Fig.38 -...then you
select the options
(the program can
automatically
create thumbnails
and can link them
to popup
windows...) and
you press
“Create”...
the program will automatically create ten
thumbnails and will link them to either a
simple page (image + title), a popup window, or a given frame. You may force the
program to resample the large image (say
Fig.39 – Use the
image properties
window to define
alternative text for
the image, together
with many other
settings.
Fig.40 - It is
possible to choose
an alternative
image to display
when the mouse
cursor is over it.
28
your images are 2400 x 1600 and you need
images with a more reasonable size for the
Web, such as 640 x 400). If the thumbnails
link to popup dialogs (the popup contains
the large image) you can set up the popup
Fig.41 - This
window allows you
to replace every
occurrence of an
image used in the
whole hypertext in
one hit.
properties, including a background image
or color.
Alternatively, you may manually create
thumbnails with a graphic program... then
you can link them to popup dialogs with
“Special links”, see Chapter 6.
Tables
Tables are not merely a way to put
numbers and letters into columns. In video
publishing, tables with transparent borders
are the best way to position objects on the
screen. Other programs designed for the
paper book allow “absolute” positioning
on the screen, but this feature has to be
avoided or viewing pages becomes strongly dependent on the user’s PC video resolution. Users viewing your ebook with a
lower/higher screen resolution would not
see the ebook as you had intended.
Fig.43 - This
window allows you
to define and insert
tables.
Fig.44 – Once a
new table is
Inserted, it can be
resized by dragging
the gray rectangles,
or with the Table
Properties (right
click)
29
Fig.45 - TheTable
properties window;
the cell / row /
column properties
Using “Insert >Table” will display the
window shown in Fig.43, where you can
choose from several predefined table
layouts. You can modify these tables if
required, using the “Tables” menu or by
using the tool-buttons on the toolbar (e.g.
you can add or delete rows and columns,
change the background color of a cell,
etc…).
Placing your cursor over a table cell
and using your right mouse button gives yet
another modification option. Choose
“Properties” and the window in Fig.45 will
be displayed, allowing you to define the
properties for your table, such as border’s
width or the background. From here you
can also assign a fixed size for your table
or a percentage relative to the main win-
30
dow.
Using the tab in Fig.46 you can act on a
cell’s background, on a row or on a column. It’s interesting to note that each cell
can have a colored background, an image
or can be transparent.
What’s more, tables can be “nested”,
that means you can build a table inside a
cell of another table, and so on. Notice: at
present, mobi and epub don’t allow nested
tables.
You can select a whole table using the
right mouse button (click it with the rigth
mouse button) and “Select table”.
To copy a whole table, simply select it
and press CTRL+INS; then move to your
required
destination
and
press
SHIFT+INS, it really is that easy.
5 . F ra m e s a nd
f ra m e s e ts
A
common method to make
ebooks more appealing and usable is to
split the screen into different sections, or
frames.
EBW offers you many tools to simplify
the creation and modification of frames. It
also enables you to copy your frame
layouts to different pages.
Creating frames
Creating frames with EBW is really
very easy: all you need to do is to drag and
release one of the notched bars that are on
the screen sides.
As you will notice, in most of its windows, EBW treats pages that contain frames as a single page. In particular, the
master page of the frame-set will always
be referred/displayed. The master page is
the page shown when the frames button is released.
You can use this button to switch
between “Frames” and “No frames” mode.
This button has no effect on the page’s
structure, it’s just a display option for the
editor. In addition to showing the master
frame of a frame-set, this button is useful
to quickly test how your hypertext will be
viewed with browsers that do not support
frames (such as palmtop, tv-box etc.).
Let’s make a simple example. Start by
creating a new hypertext with “File >New
ebook”, and split the page (#0) into two
sections by dragging the notched bar on the
left (see Fig.50). If you do not see the
notched bar on the left, click the ‘Show
frames’ button. You will notice that pressing and releasing this button shows the
master page, the one on the right.
Now we want to build a structure where
“page A” and “page B” can be selected
from a list displayed in the left window e.g.
a simple menu. The selected page is displayed in the right window, without the
left frame being affected or changed in any
way.
To demonstrate this, we’re going to
create a new page with “File >Add new
page”, then drag out a frame using the bar,
31
Fig.50 - We’ve just
created two frames
by simply dragging
the left bar across
to the right, and are
currently entering
text in the right
frame.
as we did before (Fig.51). Now click in the
left frame, then using your right mouse
button, click and select “Choose page in
frame…”; the window in Fig.52 will open.
In the box “Page in frame” we will select
“Choose existing one”: the window will
change as in Fig.53, allowing us to insert
the “Index” page into the frame. In this
way, the “Index” page will be shared by
Fig.51 - Recreating
the same frames
layout in a new
page of the
hypertext…
Fig.52 - Let’s fill the
left frame with the
same page as used
in the previous
frame-set…
32
the two frame set.
Please note that by changing the value
of the “Size” box, we can set the same size
for both “Page A” and “Page B” left
frame, for example 25%.
Links
All we have to do now is to insert links.
Fig.53 - It’s
possible to insert
any page of the
hypertext into the
frame…
Fig.54 - Let’s
complete the page
by writing "page B"
in the frame on the
right. Now we just
need to set up the
links.
Fig.55 - Our first
frame-set: clicking
in the left menu will
display our
selected page in
the right frame.
Selecting the text-block “page B” and
choosing “Insert >Link” will display the
window in Fig.5, allowing us to select
"Page B" as the destination. Now do the
same for “Page A”.
When finished, it should look like
Fig.55. Clicking on “Page A” or “Page B”
in the left frame should display the corre-
sponding page on the right.
Several ways are given to build a set of
frames like the one just demonstrated. In
the example just created, the page changing is achieved by replacing both frames;
but since the frame on the left is the same,
only the one on the right appears to change
to the user.
33
Fig.56 – A view
from the Advanced
frame management
window, showing
properties of the
current page: here
you can also
specify frame
borders, disable
scrolling, etc...
In fact, it would be possible to only
change the right frame, keeping the one on
the left unchanged. This requires us to use
special links, as described in Chapter 6.
Copying layout of existing
frames
Now we’re going to see a simple way to
copy and edit frame layouts. The following
method is available using “Format
>Advanced frameset manager”. This will
open the window in Fig.56 and is called
from Page B.
The page layout is shown on the right.
Fig.57 - The
Advanced frame
management
window when
called from an
empty page.
34
Clicking on a frame, the preview of the
page contained in the frame itself will be
displayed at the bottom of the dialog, helping us when choosing the page to display
in the frame. On the left side the program
shows all the parameters of the selected
frame (name and properties).
The tab “Copy from other page” is
useful for replacing the current page layout
(we could have a frame-set or simply a
single page) with the layout of another
page of the hypertext.
As an example, let’s try to create page
“C”, identical to page “A” and “B”. First
let’s create a new empty page with “File
Fig.58 – This
demonstrates the
"Copy from other
page" tab being
used within the
Frame-set
properties window,
to select an
existing page in the
hypertext
Fig.60 - We’ve
copied the same
layout of pages A
and B into an
empty page; now
we can write in the
page (the master
section on the
right)…
>Add new page” (or by using the shortcut
button on the lower toolbar). Then let’s
choose “Format >Advanced frameset manager” from within the new page; this will
open the window in Fig.57. Here we select
the tab “Copy from other page” and choose
“Page A” (Fig.58). At this point we need
to click on “Copy also non master frames”
to copy the full layout of page “A” (in this
case, the only non-master frame is the
“Index” one). Pressing “OK” will lead us
to Fig.60, where the right frame is the
master page of “Page C”.
As you will notice, this is a very quick
and easy way to create side menus and,
also to reproduce frames.
It is possible to position the master
frame on the left or at the bottom, rather
than on the right, using the “Advanced
frameset manager” window.
You can save the current frame layout
as a template (button “Save” in Fig.56), or
alternatively, you can use a previously saved template as the current page, using the
“Load from template” tab (Fig.61). From
this tab simply choose the template you
want to use and click on “Copy layout”. A
preview will be displayed, as shown in
Fig.56. All that’s needed now is to confirm
your choice with the “OK” button, to return to the editor and your copy.
Floating frames
You can insert a floating frame as
shown in Fig.62 using “Insert >Floating
35
Fig.61 - You can
save time by
copying layouts
from the
templates, or
save new
templates to
save time in the
future.
Fig.62 - A page
containing a
floating frame...
Fig.63 - The
dialog window
for independent
frames. You can
also call it by
clicking on a
frame with the
right mouse
button, and
selecting
"Properties".
frame”. A dialog window will display as
shown in Fig.63 and you have the option to
include any hypertext page within the
frame. A floating frame can be positioned
everywhere, just like an image. Like images, the correct way to position a floating
frame somewhere is by using “invisible”
36
tables, see the Chapter “Graphics and paging pages” for learning more details about
this positioning technique (that is usually
not used when producing documents for the
paper and instead is fundamental for paging documents for the video).
6 . T h e “ s p e cia l ” l ink s
T
he simplest links available in
EBooksWriter are the “normal links”. As
seen in Chapter 1 you can insert them by
highlighting a text block and using “Insert
>Link”. If you need something more elaborate and powerful, you have to use “Insert
>Special link” or “Image >Define special
link” if you want to associate a link to the
selected image (you may also right click
the image then “Define special link”).
We suggest that you don’t attempt
using special links until you are familiar
with the normal ones (Chapter 1).
There are many available options for
special links. Firstly, you can link to
another page:
− with a click, a window will show
− a new browser window will show
− the destination page replaces the
frame that contains the link
− the destination page will show in
another frame or window
− the destination page will show as a
popup window
− the destination page is opened at a
fixed row, marked by an anchor (see
below)
Additionally, you can set up the following behaviors:
− a click on the link will close a window
− link to a different position on the
page, using anchors
− a click on the link will show the search by keyword window (click to
show the search window: this works
only in the editor/reader)
− a click will print the current page or a
frame
Within this chapter we will also see
how to open windows automatically, when
the user enters a page, without any click.
You can setup all these things visually,
i.e. you do not have to do anything difficult
or write any code. However note that some
special links work only with the editor in
read only mode (“Hypertext >Read only”),
or within the ebook; with the double click
you just go edit the page referred by the
37
Fig.100 – Showing
an anchor within a
page (the anchor
icons are not
visible out of edit
mode).
link, you do not test the actual behavior of
the special link.
Last but not least, please notice that
most “special links” are not supported by
the mobi and epub formats (these formats
have constraints). In this case, EbooksWriter will automatically convert these links to
“normal links”, when you create the epub
or a mobi ebook.
Anchors
The simplest of the special links are the
links to a place within the same page, that
is called an “Anchor”. Anchors act like a
bookmark and allow jumping to sections
within a given page. This kind of link is
useful when you have a very long page; but
it is preferable to create short pages instead
of using too much links of this kind.
To insert this kind of link, first of all
you must insert the anchors (the landing
points for the links). Move the cursor to the
link destination and use “Insert >Anchor”
from the main menu (or SHIFT+F5). An
anchor icon appears. Selecting it with your
right mouse button allows you to edit its
number, each anchor has a different number. Now select the text block or the image
you want to link to your anchor, and use
“Insert >Special link” (on an image, use
your right mouse button and click “Define
38
special link”). Click on OK in the window
that will be displayed. You will then see a
dialog where you can select the destination
Anchor, either by number or visually on
the page. Click on the anchor within the
preview (a number is assigned to each
anchor and will be displayed in the box at
the bottom right), and then click OK. Then
you can test the result in “read only” mode
(Hypertext >Read only).
If you later need to modify the link
destination, place the cursor on the link,
use the right mouse button and select “Link
properties”. In the dialog window displayed, select “Visual edit...” (Fig. 103)
or “Link target page...”.
You can also link to an anchor inserted
on another page. Select a text block, use
“Insert >Special link” and select the second tab (Fig.104). In the “Target page
shows:” area, choose “in current window”
and click OK. You will then select both a
destination page and an anchor (see
Fig.105).
Showing windows
From the special link dialog, choosing
the third tab allows you to show the destination page within a separate window. You
must define a name for the new window
(see Fig.106), this name can be used later
Fig.101 - The
special link window
Fig.102 - Here you
can select the
destination anchor
Fig.103 - Properties
of the link just
inserted...
to change the window content for example.
If two links use the same name for a
window (e.g. “Goofy”), and you click first
on the link #1, then on the link #2, you will
not show two different windows, so it is
imperative that each window has a unique
name, unless you really want to show the
same window from two different links
(maybe with a different content; sometimes
this can be very useful).
The separate window can be shown as
an ordinary window, or as a popup win39
Fig.104 - More link
types
dow. The difference is that a popup closes
whenever a user clicks on it, or clicks on
another window. If the destination page is
a frame-set, you can choose to show the
whole frame-set or just the “master” page
(see Chapter 5 to learn about the master
page).
Choosing the second tab (see Fig.104)
and selecting “opening a new browser window”, will show the destination page in
another instance of the browser (this is
different from a normal “window”, as it
will include the navigation bar).
With the 5th tab you can close any
window, by name.
Fig.105 - Let’s
choose a
destination page for
the link, and an
anchor. The link
dialog allows many
different link types.
40
Links inside/to frame sets
Now we will see some useful links that
work within frame-sets.
Suppose that we have the layout as
shown in Fig.107: We want a link from a
word or text block in the right window, that
replaces the content of the same window
while leaving the left window unchanged.
To obtain this, we simply choose “in current window, replaces caller page” in the
tab shown in Fig.104: when we click OK,
the program asks for the destination page
which can, as usual, be chosen visually.
Another possible choice is more difficult to explain than to use: The tab shown
in Fig.108 which allows you to visually
Fig.106 - More
available link types
and properties...
choose the frame where the destination
page will be shown. Please note that you
can also manually insert the destination
frame name (frames can be named using
“Format >Advanced frameset manager”).
This is useful for linking to “floating frames” (see Chapter 5) or to link to a separate window, or a frame within a separate
window. Any window with the specified
name will have its content replaced by the
destination page when the user clicks this
type of link.
A popular use of special links and
frame sets is to creating a left side (or right
side) menu. A step by step tutorial on this
issue is available within the internal online
manual (hit the F1 key or use the “?
>Help” menu)
Using the last tab, it is possible to
activate additional special links: you can
for example display the “Search” window
which is very useful; you can enable the
end user to print the current frame with a
click on the link (as the link can be from an
image, you can add an image of a “print”
button then you may associate this kind of
link to the image).
As anticipated, all these links work
with text blocks, single words, images and
also with hot spots (Fig.36).
Showing windows without a
click
Using “Insert >Page functions >Open/
Close windows” you can open or close a
window as soon as the user enters the
specified page. A “functional block” will
be inserted in the page, and will be activated when the page is shown.
The “functional block” properties may
be modified using the right mouse button,
(see Fig.109). Here you can define the
window attributes, or supply the name of
the window to be closed.
In the online guide (“? -Help >Help”),
file specialLinksEBW.aeh (you may find it
with the MSWindows Start >Find feature),
you will find live examples that can be
opened in the editor. There are lots of
tricks to enable full use of these resources.
Trick: to show two windows with a
click, use “Insert >Special link” to place a
link to popup. Inside the popup, use “Insert
>Page functions >Open/Close windows” to
show the second window (use a different
name for the window!).
41
Fig.107 - A simple
frame set, used as
an example
Fig.108 - You can
visually select the
link destination
frame, and the
linked page
Fig.109 - Show /
close windows
42
7 . T h e f orm s
F
orms allow the users of your
ebook to send you data by the Internet, if
they have an Internet connection. The data
are usually sent to a program called a
script, or CGI function, that runs on the
WWW-server computer, or by email.
Forms are available in EBooksWriter
GOLD only.
Your host may include in your hosting
account a pre-installed set of form script
programs: there are many Web sites where
you can find programs such as these for
free, or for a nominal fee. You can also set
up the form so that the data is sent to an
e-mail address (this is the most common
way if you don’t have direct access to the
server).
A form typically consists in one or
more edit boxes and buttons. Each edit box
has its own identifier e.g. “Name” or
“Address”. When you click the form button, usually “Submit”, the edit box identifiers and their contents are passed to the
CGI program or sent to an e-mail address.
The form start marker’s properties determine what happens when the form is submitted.
Inserting forms
Using “Insert >Form >Form element”
we can insert any kind of form element.
Firstly, you will be asked for a “form start
marker” (Fig.71). The form start marker is
mandatory and specifies the action taken
by the browser when the user presses a
form “Submit” button. If you are unsure of
where to position the marker, simply press
OK. You have the option to change the
form start marker properties at any time,
using the right mouse button and
“Properties”.
In the next dialog (Fig.72), you could
select the first tab for example, and insert
your email address if you decide to have
the input data sent by email.
Then with the next window (Fig.73),
you can insert edit boxes, memo, lists and
other elements useful when creating a
form. It is very important to assign a diffe43
Fig.70 – An
example page
containing a simple
form
Fig.72 – A Form
start marker
contains
information such as
where to send the
form content, once
a submit button is
clicked
rent identifier for each element, apart from
the “radio buttons”. “Radio-buttons” are
used in groups offering your user a choice,
and only one item may be selected. The
identifier must be the same for all buttons
within a group, while the “button name”
identifies the actual button.
Fig.70 shows a simple form, with a text
cell and a button. To insert a button, use
“Insert >Forms >Button”. There are two
kinds of button, submit and reset. The reset
button simply resets all form fields to their
original state. The submit button starts the
action specified in the form start marker.
The button can be a “classic” button or an
image. To use an image as a button, simply
44
click on “select image” (you can select any
image from the internal album).
You can insert more than one form
within the same page. No “form end”
marker is required. If you include two
forms on the same page, the form start
marker of the second form will also act as
the “form end” marker for the first form.
Each “Send” button will be active only for
the form that contains it.
Fig.74 shows an interesting example:
we define a form that will toggle a page
change. Firstly we must ensure that the
form start marker is defined as in Fig.75.
Then, for each included button, we have to
define the destination page, as in Fig.76,
Fig.73 – This
window displays all
of the available
form elements
Fig.74 - A slightly
more complex
form...
Fig.75 – An
alternative form
start marker
demonstrating how
page jumps are
used with forms...
45
Fig.76 - Here we
select a page to
show when the
user clicks the
submit button
Fig.77 –
Demonstrating
Image buttons in
use.
using the “Advanced” tab of the button
properties window.
By the way, for normal jumps / links it
is better to use a simple image and a simple
46
link (right click the image, then from the
menu choose “Define Link”, or “Define
special link”).
8 . S h op p ing ca rt
E
BooksWriter includes a visual
shopping cart facility that can be useful for
creating a product catalog ebook (Gold
edition only). A click on a text block or on
a image can be used to add a product in the
shopping cart. The shopping cart is shown
in a popup window: the window can be
printed and sent by fax or postal mail, or its
content can be sent to your email address
(if the user is connected).
To define the shopping cart properties
use “Hypertext >Current hypertext properties”, then the “Cart” tab (Fig. 201). To
add a shopping cart link, select a text block
and use “Insert >Link to shopping cart”, or
select an image and use “Image >Define
special link...” (then last tab). Each link
contains the product price, currency, description and the product code.
The shopping cart properties window is
Fig.200 - Use
“Insert >Link to
shopping cart” to
allow the user to
add a product in
the shopping cart...
47
Fig.201 - the
shopping cart
properties dialog
(Hypertext
>Current hypertext
properties...)
Fig.202 - We
inserted two
products in the
cart... (to view the
cart, Insert >Link to
shopping cart, then
click on the link, or
double click if in
the editor)
shown in Fig.201: you can define an email
address (the cart content will be sent to that
email) or the path of a CGI script, a fax
number, a remark for users, and you can
choose the colors for the shopping cart
48
rows.
If the user closes the cart window or
uses the “Reset” button the cart content is
deleted.
9 . M
ul tim e dia ob j e cts
T
he following multimedia objects
are directly supported:
− pages with background music
− pages with buttons to start music
− pages with avi video; mpeg; wmv...
will use to start the sound or video.
The “loops” box indicates how many
loops are allowed, if “loop” is selected as
the action. For example if you choose “1”
you can insert an action that will be executed once, when entering the page.
Headers and footers
Sounds and video
Use “Insert >Animation - sound” to
insert an animation or a sound. Interesting
isn’t it? You will see the dialog shown in
Fig.80. To choose the audio or video file,
click “choose file”. The window shown in
Fig.81 will be displayed. For audio, you
can use any wav, mp3 or midi file, together
with any format supported by your MS
Windows install. If you have already used
a song on another page of your hypertext,
you can easily select it using the second tab
(Fig.82). For video files, the process is
very similar.
With “action kind” you can choose if
you want a loop action (e.g. background
sound, or repeated animation) or to show a
“console”, a set of buttons that the user
Each page can have a header and / or a
footer. There is no special edit area for
headers and footers, these are managed
separately. Concisely: you can use any
page as a header or a footer for any other
page (so instead a special edit area, you
use a whole page - or some pages)
If you want a global header for the
entire site:
− Create a page and insert all the things
you want in your header (a logo, a
sentence, etc.).
− Select “Hypertext >Current hypertext
properties”, click the second tab
(Fig.94), and the “browse...” button
near “header”. In the window that
will be displayed, choose the page
that you have just created
49
Fig.80 – Insert
animation and
sounds using this
window: you can
insert any format
supported by the
browser
With “Format >Page properties” you
can define a private header for any page
(Fig.95) or choose None. Footers are handled in the same way.
Fig.97, where you can set up a whole slide
sequence: pages (slides) may be selected
from the whole hypertext, and you can
simply change the sequence using “drag &
drop”.
Slides
Using “Insert >Page functions >Slides”
you can instruct the program to replace the
current page with a different one, after N
seconds. The window shown is the one in
Fig.96. This is the function used in “? Help >Show presentation”.
With “Hypertext >Slides” you can use
the more comprehensive window shown in
Fig.81 - Here you
can insert a file
(sound or
animation) that will
be embedded in the
hypertext
50
Keywords
The program permits you to create a
global list of keywords for the whole
ebook, and you can assign some of these to
each page.
In other words, to assign a keyword to a
page, it has to be added to the global list,
first. You can setup the global keyword list
Fig.82 - EBW
mantains an
internal album with
all sounds and
animations used in
the hypertext
with “Hypertext >Keywords”. In the window shown, click the “Add global key”
button (the yellow key with the green +).
Then use the drag &drop or the other button to add a given global key to the selected page. You can add up to 20 keywords
to each page.
This will work for aeh and exe ebooks.
Additionally there is full-text search engine.
With Special Links (see Chapter 6) you
can prompt users to press “Search” to start
a search, or you can even place a link or an
image/button that shows the search window when clicked.
Predefined page order, table
of contents
EBW allows you to create a tree structured table of contents for organizing your
ebook. Actually for mobi and epub ebooks
you must define this structure (at least a
basical linear list of pages), while for exe /
aeh it is optional.
The menu is “Hypertext> Predefined
page order - TOC”. For mobi epub and opf
/ oeb / idpf formats, such a structure will be
utilized to allow the end user to browse the
ebook in a linear order (e.g. when the user
presses the previous and next keys on a
Kindle) and some readers can show this
Fig.94 - Global
header and footer
for the ebook...
51
Fig.95 - Header
and footer for a
page (Page
properties dialog)
Fig.96 - The
simplest way to
switch a page to
another one
(shown) after N
seconds...
Fig.97 - Using this
dialog we can
easily set up a
page or slide
sequence...
tree/list besides the text; the exe format can
show it on the left side of the video (if you
enable this within the show options); additionally this can be utilized by the final
user to get a sequential print of the ebook.
By choosing “Insert > Contents...” the
52
program will automatically create a hypertextual index containing all links to the
ebook's pages: you can choose whether to
order pages alphabetically or by page number, or even by following the treestructure’s predefined order.
1 0 . G ra p h ics a nd
p a ging p a ge s
B
esides the powerful features offered by EBW to create “well built” pages,
we would like to provide some useful suggestions about creating and paging ebooks,
although this is really not the aim of this
manual.
Creating a good ebook is not merely
dependent on the richness of graphics or
special effects, nor an on-paper paging
experience. Even if the usual communication and marketing rules are adopted, as
for commercial publications, the ebook is a
media apart from all traditional ones.
In this chapter we give some tips for
making an effective ebook, even without
super-graphics and expensive software
Displaying information on the
screen
Displaying information on the screen is
very different from presenting it on paper.
In traditional publishing, the page-maker
just needs to choose the page’s size and
can then begin adding text and pictures.
Using the same methods for on-screen
paging may well result in ineffective displays, since the dimensions are dependent
on the video resolution set by the user, not
by the author of the page. Typical screen
resolutions can vary between 640x480 and
1600x1280 pixels on different monitors,
going from 10 inch to 21 inch screens. So,
how can we cater for everyone’s requirements?
There are different solutions. By considering the fact that a minimal resolution of
640x480 is available to everyone, we
could set such values as typical during the
design of pages. Actually, this is the choice
adopted for many professional works on
CD. Nevertheless, this solution may be
considered very limited by the user, who
would like to take advantage of a more
powerful video card, leaving our work appearing to be of a low quality.
Another simple solution may consist of
preparing the work as if it were a book or
paper magazine. For example, we can de53
Fig. 134 - A correct
page when shown in
different windows
fine the A4 or US Letter format for all
pages, and then provide the user with a
reader that has zoom capabilities for use on
a small monitor. If we do this, pages will
have a fixed size and the content will be
the same for all video resolutions.
This is the method adopted for a lot of
works provided with Acrobat Reader. In
our personal opinion, this method is not
ideal for users who have small monitors or
with monitors working at a low video resolution.
54
Everything is relative
EBW adopts a third method based on
automatic justification. Using this method
the displayed content has no absolute position value, but is dependent on the width of
the current window. Firstly, text fits according to the window’s width: this means that
if you narrow the window, the length of
each text line will change accordingly, as
shown in the example in Fig.134.
This is also called “reflowable” text, or
“reflowable” layout. To be effective, when
using this strategy, it is essential to position
all objects on the page using percentage or
relative values, rather than absolute values.
Looking at Fig. 134 and Fig.135 we can
make a comparison using the two methods:
unfortunately, with absolute positioning
(Fig. 135), the user’s screen must have the
same video resolution and the same window size you used, in order to get the
correct display. To quote a statistic, this
scenario may apply for only 10-15% of
users; this suggests that the highest percentage of users instead would see a badly laid
out page.
With a reflowable layout (Fig. 134) all
the end users will see a more or less reasonably laid out page. All things considered,
it would be better to accept the inpercentage tables philosophy, since it is
evident that it has a reason of being.
Invisible tables
How can we insert in-percentage tables
making them fit for all resolutions? Well,
it’s very easy indeed, since they are the
default used by EBW.
Let’s make an example now, by recreating what is shown in Fig.135, but this time
changing the absolute references which
make the page video resolution dependent.
The example shown in Fig. 135 is a
page we found somewhere on the Internet.
We “rob” the images and the text for our
example. Firstly let’s save the three images
or let’s create them. Then let’s run EBW
and define the page’s background as white
using “Format> Page properties”. If you
wish, you can also insert an image as the
background. Now we have to put the three
images saved previously (“Insert >
Image”) and an invisible table (“Insert
>Table”) with two columns to put text in.
We can define the percentage for the two
columns simply by right-clicking within
the two cells shown on screen (second tab,
as shown in Fig.44). The result should look
like the example in Fig.139. At this point
we can insert the text, and the page should
then look like Fig.140: enlarging or narrowing the window should not affect the
page quality.
Please notice that you can insert a table
within another table, so you can create
more sophisticated structures, if needed.
Again, we suggest you to try and try again,
as this is the best way to learn how to use
the advanced features offered by EBW.
Backgrounds
One of the greatest differences between
video and paper publications is the use of
backgrounds.
Printing backgrounds on a paper-made
publication is very expensive and sometimes may affect the readability and spoil the
overall appearance. This same treatment,
when applied to an ebook, may well result
in a visual enhancement.
In Fig. 141, 143 and 148, we can see
some examples that demonstrate the use of
backgrounds.
We can assign a background to a table’s cell through the usual window shown
in Fig.44. It is however important not to
over use this feature. In general, we discourage the use of backgrounds that have
too much contrast, saturated colors or too
much detail, because these can affect text
readability and take focus away from the
subject matter. If you really wish to use
them, we suggest that you put a colored
table where you want to insert a text block
(see Fig. 143, where we have used nested
tables).
55
Fig. 135 - A page
with fixed tabes seen
at different screen
resolutions.
It is a Web site, yes,
this is an old
example and we are
too lazy to change
it...!
The example is valid
for an ebook as well.
Clickable maps, hot spots and
browsing bars
An interesting way to link different pages is to create special images that contain
some intelligent areas, which, when
clicked, will generate the loading of the
linked page. In Fig.154 we show a sophisticated example, but we could simplify
this by making a bare horizontal bar.
We can insert a clickable zone (hot
spot) by positioning the cursor over the
chosen area and right-clicking with the
56
mouse (“Add area / hot spot”). A small
rectangle appears with four white corners.
We can then move the rectangle and resize
it by dragging the white corners in order to
define the intelligent (clickable) zone. By
right-clicking on the newly created hot
spot, we could go on to define a link.
It is important to take into consideration
that some users may not be able to take
advantage of the graphic links. To provide
them with the opportunity of browsing our
pages, it would be advisable to replicate
Fig. 139 - Let’s insert
the images and let’s
create a table with
two coloumns,
without borders...
Fig. 140 - ...then let’s
write (you will see the
dotted lines just in
the editor; they aren’t
shown in the
published ebook).
the links elsewhere on the page in a simple
text format, even if only in small sized
characters at the foot of the page.
Accompanying the program, you are
provided with many different examples of
button-bars and clickable maps. Using the
same bars throughout the same ebook will
improve uniformity and will contribute to
the overall style of your work.
Taking all of these points into consideration, we should say that designing button
bars or maps is not as easy as it could at
first seem. If you are not experienced with
graphics software, it may take some time
before you obtain a satisfying result. Ne-
vertheless don’t give up, but try to get
some help from an experienced friend or
from a specialized video-graphics publication
Frames
Frames are a very useful feature, especially while designing complex ebooks.
Frames allow us to split pages into more
sections. A very common implementation
consists of using an index or box containing a selection-list on the left side of each
page. Using frames so that we don’t have
to physically repeat the same menu for
every page; and at the same time, make
Fig. 141 - Page with
a repeated square
background
57
Fig. 143 - If you
apply a coloured
background to the
table the text is more
readable
browsing much easier.
Some authors discourage the use of
frames. Actually, the practice of discouragement should not be applied to the correct
use of frames, but rather for those making
bad use of them.
It is interesting to note that by choosing
‘0’ as the value for the borders of a frame,
the borders will be invisible to your readers, and you can also hide any scroll-bars.
Using these features, you can easily create
some interesting effects for your EBW
works.
Please refer to chapters 5 and 6 for
more details concerning the use of frames
and related special links.
Don't exaggerate!
With a little practice and your powers
of observation, you will soon get excellent
results with the several opportunities offeFig. 148 - Lens
effect. You can do
this with two different
backgrounds, similar
but with different
color tone.
58
red by invisible tables, frames, backgrounds and clickable maps.
To further enhance your work, some
graphics software is almost a necessity.
Use it to develop effects such as texture,
lens, aliasing and fading and also to create
your own buttons, image maps, split-line
and backgrounds.
Having said all that, only one more rule
requires attention. In order to create really
efficient and optimized pages: “don’t exaggerate!”. With so much power in your
hands it's very difficult to set a limit, but to
keep your readers interest, it’s necessary to
create light, quick and efficient pages, so
don’t overdo the effects.
With this same aim in mind, we suggest
that you use the same background for all
pages, that you don’t use more than two
different fonts (one for the text blocks and
one for titles) and no more than 3 font
sizes. Following these recommendations,
Fig. 154 - A nice
image with hot
spots (www.
fantascienza.
com).
we are sure you will cope with creating
attractive and well-made pages. Nothing
else is needed.
Have fun with EBooksWriter!
59
1 1 . F re q ue nt q ue s tions
F
or any question, email the support
staff: [email protected] or
check the user’s forum that has a powerful
search box, www.ebookswriter.com/forum/
For immediate response to frequent questions, read below!
− tutorials, basic questions
− link and pages, hypertext functions
− tables
− images, hot spots, areas, backgrounds,
icons, thumbnails
− styles and fonts (CSS)
− frames
− templates
− HTML - Applets - AEH - ASP
− download / .DOC / .ZIP / .PDF / Flash
/ Import files
− ebook protection and publishing
− generic questions
− purchase
about the mouseover? The popup windows?
Can it create .EXE .EPUB .MOBI with a click?
Does it protect my work? Does it make the
coffee...?
The answer is always yes (well... not for the
coffee, but we’re working on it...!), please better
read this manual for details. Please notice that
some features are not supported by some ebook
formats: regrettably mobi and epub have internal
constraints and do support only very basic things
- them, not EBooksWriter.
I have used another editor before, and I can’t
understand how to manage HTML files with
EBooksWriter...
EBooksWriter is a standalone tool with a full
featured text editor, not only a “compiler” of
external pages... within EBW pages are memorized in a format that is more secure than HTML,
and you don’t need to deal with HTML or codes
as EBW is all visual. That said, if needed, you
can import old HTML pages with “File
>Import”. The epub, mobi, opf, idpf formats that
are someway based on HTML / XML, are generated automatically, with a procedure that automatically assures to produce a “correct” coding.
TUTORIALS, BASIC
Can EBooksWriter manage frames? And what
60
I am very interested in your compiler. What
program would you suggest that I write my
document in so that I can take advantage of the
features but is not too complex?
EBooksWriter is an all-in-one tool, so you don’t
need external programs actually. EBW includes
a powerful multi-page editor with all the common text features, and with much more, designed
for speed when managing hypertext documents.
I saved the ebook as an exe file just as stated in
the help file. When I opened the aeh file, it only
displayed the cover page. There is no way of
getting to another page. How do I do this?
For exe/aeh ebooks, you must place links to let
the user browse the other pages. The ways to
browse pages provided INSIDE the Writer are
for authors only. The reader can just follow the
links YOU place. If you don't place links, they
will not see any other page other than the cover.
For epub/mobi ebooks, you must define a TOC
with “Hypertext >Predefined page order - TOC”.
I want to evaluate your program, but I can't get
started. I have a manuscript all ready. I want to
know how to get it into the program in order to
continue and eventually see how your program
compiles it. What are my first steps?
From your question I guess that your work is in
another text format, use "File >Import" then
choose the format. Not everything is imported
automatically, but any word processor software
can save in RTF, so if with File >Import you can
not see the file you’d like to import, go within the
program you used for creating the file (e.g WordPerfect, Word), choose the “File >Save as...”
menu, then from the pull down menu choose
“Rich Text Format RTF” so your program will
save a RTF file. Then go back to EBW and use
“File >Import” to import this RTF file.
You may also use the Windows clipboard copy
and paste.
Remember that an external editor is not needed,
you can just start the program and type on the
keyboard. CTRL+ for adding new pages.
EBooksWriter has its own editor for creating
ebooks, you don't need external programs. See
also the Tutorials, "?-Help" "Help" then
"Tutorials".
Can two pages be viewed at once, just like a
real book?
You can do this if you’d like. You can use a table with two columns or you can create frames
and then place links. It’s very simple. Please remember that the page number in the bottom box
is just a facility for you, the author, and you can
show the reader a completely different page
number (just type it at the bottom of the page).
The page number displayed in the bottom box
has nothing to do with your book's page number.
I imported HTML pages, but nothing is showing
up!!
Use CTRL+ & CTRL- to move between pages.
I want to create a Web site.
See www.hyperpublish.com or www.1site.info
then.
LINK AND PAGES, HYPERTEXT
FUNCTIONS
I don’t understand the way EBooksWriter saves
pages.
All ebook pages are saved in a whole “AEH”
file. With “File >Save all” or with the toolbar
button, you save all ebook / hypertext pages with
a single click.
...in the tutorial it says:...then, let’s press the
link button in the toolbar (sheet and chain, or
> "Insert >Link" from the main menu)... but
there is no button labeled "link" in the toolbar...and which toolbar?
Select a text block, then choose from the main
menu “Insert” then “Link” if you aren't able to
find the button with the image of the sheet and
the chain. If you are on an image, use the right
mouse button, and choose “Define link”.
How can I set the size of a page?
You can’t set the size of the page, as you can’t
know what monitor and what window will be
used by the people that will see your site. The
61
safe way is to always use % tables (it is the
default in EBW) and not to assume that the
pages have a fixed size. Please read Chapter 10
(Graphics and paging pages).
I want to change the page numbering as I want
to insert a page between page 1 and 2, but I
can’t.
Please remember that the end user will not see
the EBooksWriter page numbers. Ok, if you
really need to do that, you can insert say a page
#3, copy the #2 to #3 with “Edit >Paste page
from...”, then delete all the text within page #2.
Agreed this is not quite what you are looking for,
but the page number box is only for internal use.
You define the path for the reader with links, or
with Hypertext >Predefined page order - TOC.
The end users see only the page titles, so it really
makes no difference. If you were to label page 24
as "Page 1" and page 45 as "Page 2" this would
have no effect on your readers, e.g. they do not
know that page 45 is the internal page under
Page 2. The EBW page number is just a facility
to allow you to switch pages fast, without having
to remember the proper page names.
Can I change the number of page #0?
This is not possible. If you want to set another
page as home page, simply choose “Hypertext
>Current hypertext properties”, and click on the
left, on “cover”. Any page can be used as cover,
not just the #0. The #0 is just the default. As
said, the end user won’t see the page number,
whatever it is.
How can I place a link inside the same page?
The links within the same page are called
“Anchors”. You need first to place the
“Anchors”. In order to do this, move the cursor
to the link destination and use “Insert >Anchor”
from the main menu (or SHIFT+F5). You will
see an anchor icon. If you select it with the right
mouse button you can edit its properties. A
number is assigned to each anchor.
Now select the text block or the image you want
to link, and use “Insert >Special link” (on an
image, right mouse button, “Define special
62
link”). Click on OK in the window that will be
shown. Then you will see a dialog where you can
select the destination Anchor. Click on the anchor, then click OK. You can test the result in
“read only” mode (Hypertext >Read only).
How can I link to an anchor placed in a different page?
Select the text block you want to link, then
“Insert >Special link”. In the dialog that will be
shown, do not choose the first tab but one of the
others (e.g. second tab “Normal”), then OK, and
select the destination page. Within the preview
of that page you can click on the destination
Anchor (the number will be copied in the box
that’s on the right at the bottom of the window).
I've not been able to find out if I can have
different colors for links in the same frame...
You should define different text styles. Each text
style can have its own color/style for the links.
Use "Format >Styles", then the last tab ("link").
You can also set up the style of the link
(underlined, bold, or so).
Where can I find information about pages contained in an ebook? How can I manage pages?
Creation: "Insert >New page", "Insert >Link",
"Insert >Special link".
Deletions, management: "Hypertext >Images /
files /link archive and erase".
Access: "Hypertext >Go to page", the bottom
center page number box, right mouse button on
this box.
When I'm editing an *.aeh file, how can I delete
a page (in my case page 0 as it is empty)?
Page 0 can't be deleted. For other pages, use
"Hypertext >Images /files /link archive and
erase". You can also cut & paste another page to
fill the page 0.
I don't understand how to insert a link.
Select a text block, then press the button with a
page and chain. In the window displayed, you
can link to an existing page in the hypertext, or to
a newer one - more options are also available.
If for example you choose "new page", then press
OK, EBooksWriter will create the new page for
you, and will show the page in the editor. If you
link to an existing page, you can choose it from
an active preview - active means that you can
navigate through it like in a browser. When you
press OK, the link is made and EBW shows the
destination page in the editor. See also the tutorial.
How can I link an external Html page, for
example an Html page that already exists on my
Web site?
Hightlight a text block, chain button (or “Insert
>Link”), choose the “Internet” tab (third tab),
click the “Add+” button and write in the left box
the
address
(e.g.
“http://mysite.com/
mpage.htm”), then press "OK".
How can I manage the pages different from the
main one? Just with links?
In the bottom center there is a box with the
current page number. Click on it with the right
mouse button, you will have a list of the most
recent visited pages. You can also use
“Hypertext >Images - files - link archive and
erase”, “Hypertext >Go to page...”, “File >All
pages...”.
How can I copy a page within another in same
hypertext (with Html I can do it with "save as",
then "open". Is there another way in EBooksWriter)?
"Insert >New page", then "New page by copying
existing one"; or "New page by copying from
another hypertext", ...
You can also use "Edit >Paste page from...".
How can I manage headers and footers?
In short, you can use any page as header or footer
for any other page, i.e. if you want a global
header for the whole site:
- create a page and insert within it all things you
want in your header (a logo, a sentence, etc.).
- choose "Hypertext >Current hypertext properties", second tab, and press the "browse..." button near “header”. In the window that will be
shown, choose the page you just created.
With “Format >Current page properties” you can
define a private header (or no header) for any
page.
Do you have some step by step guidelines on
how to create, open, and close popup windows?
To open a popup, select a text block, "insert
>special link", 3rd tab (independent window or
popup). To close a popup, in the page where the
popup should be closed, use "insert >page functions >open/close windows", then specify the
name of the popup. The popup is closed on
entering the page. You can open the .aeh files
used as examples (speciallinks.aeh).
I can only get to non-linked pages when I am in
the "edit/preview" mode, by using the page
scroller (the box at the bottom of the screen,
with the page number) or CTRL+-. Is this
normal? Will normal keyboard/mouse paging
work when this ebook is "published"?
For exe ebook you have to place links, this is
mandatory. The other ways to manage pages are
only active in the editor (this simplifies the creation / management of pages). For epub / mobi,
you can define a linear page order with Hypertext
>Predefined page order - TOC.
Will your program allow me to create an index
at the top of a page, create a paragraph or
graphics several lines down the page, use the
indexed item as a heading for the paragraph or
graphics and link to it, also add a 'return to top
of page' at the end of each paragraph?
You can insert any kind of links but usually you
have to insert links manually. You can use
"anchors" for links within the page. The program
can create an automatic hyperlinked index with
"Insert >Index". To repeat a block on the top of a
page, use the Header function (Format menu).
TABLES
Does percent % size mean the table will automatically be sized to the content?
It means the table will fit the screen pixel width,
63
using a %. When you insert a new table, the
software use 100% as the default. Unless you
have a particular requirement, do not change this
setting. It will fit automatically any end user
screen / window.
I inserted an image in a table. Why does it
appear in all cells?
Perhaps you inserted the image as the table
“background”. If you want to insert an image as
a single “cell” background, use the right mouse
button on the cell, “Properties”, second tab, then
click the Sun and Cactus icon.
When I have to write words in 3 columns do I
have to insert a table or can I just use the space
bar?
You should use a table. Never use the space bar
as, if you view the page from another PC, or with
a small device, the size of the space might be
different and you will lose the alignment.
How can I create a table with more than a
column within a row?
You can insert a new table with any rows or
columns within a cell of another table.
How can I delete/copy a table?
Delete: There are many ways. For example put
the cursor on a cell, press the right mouse button,
then choose "Select table", then press DEL.
Copy: Select the table as above, then press
CTRL+INS. Move the cursor to the destination,
then press SHIFT+INS.
I'm having a problem formatting text in a table.
The table text automatically formats itself to
Times New Roman (my default font is Arial) and
I also can't select the entire table, column or
row to apply the required formatting.
The table default style is "[no style in tab]".
Simply change that style with "Format >Styles".
How do I lock the position of text within a table,
so that it does not reposition when the browser
window is resized? I know in many instances
locking the text position is not desirable, because the size of monitor used to view the
64
ebook will vary. Despite that, I have certain text
that I do not want to reflow, regardless of what
the visitor does with his browser window.
Simply fix the width of the table column containing the text. Use the right mouse button, properties, second tab, then choose "fixed" for the
table cell width.
IMAGES, AREAS, HOT SPOTS,
THUMBNAILS, BACKGROUNDS,
ICONS
Animated GIFs don't play in the editor!
Move to preview mode (Hypertext >Read only).
How can I move images and position them
somewhere in the page? I can’t position an
image as I would like.
The “fixed” position for an image is good when
you create a text that will be printed on paper,
but has no sense for an ebook, where the reader
can see your work inside an unknown width
window. Your user might use a 200 pixel or a
1200 pixel width window, and you don’t know
that. The best thing to do then is to create a work
that will be seen well on any PC, in other words
a work that all readers will like. To do this,
simply use “invisible” tables (i.e. tables without
any border) to position images on the page. See
Chapter 10 “Graphics and paging pages”.
If I want to add a caption near to an image is it
better to use tables or frames?
Better to use a table.
How can I delete an image inside a table?
Select the image and press DEL two times. If the
image is a background, choose “Table
>Properties”. To delete the table, right mouse
button, “select table”, DEL.
Can I write some text over an image, similar to
using layers in a graphics program?
No, you should use PaintShop PRO, Photoshop,
Corel Photo Paint, or a similar graphics program
to achieve this.
How can I set a background image or a background color for a page?
“Format >Page properties”, then click the icon
with the cactus and the sun.
You can also insert tables using an image as the
background (click on a table or on a table cell
with the right mouse button, then properties).
Is there a fast way to change the image background for all pages of a site?
There are two ways. If the background for all
pages is already an image, use “Hypertext
>Images - files - link archive and erase”, select
the image, then press “Replace...”. Otherwise
there is a button in the bottom right of the second
tab of “Hypertext >Current hypertext properties”
dialog.
How can I place text beside an image?
Create a simple table with one row and two
columns. Inside the first column, insert the
image. Inside the second one, insert the text.
I am having trouble inserting an image with
transparent background. Sometimes it works
and sometimes not.
It should work for the large majority of GIF
images. However, not all images are suitable to
be automatically converted using the included
transparent-color processor, so you may have to
proceed manually with external paint programs
such as Paint Shop PRO, Corel, etc.
I see the "paste from clipboard" can perform
the automatic conversion of a WMF to a GIF /
JPG format with a lower byte size. As I already
inserted WMF images, can I convert them to
GIF in some way or must I reinsert them?
Unfortunately, you must reinsert.
I can't insert animated GIFs with "Insert
>Animation"!
Please use "Insert >Image".
Where can I find the included clip art?
In the “Insert >Images” dialog, “From disk”;
click on the icon with the mountain and the sun.
In a hypertext with lots of images, it seems as
though there are problems with previews.
Use “Tools >Program options” to increase the
image cache settings.
How can I insert pictures that will be enlarged
in a separate window when you click on them?
Should I use the click area / hot spots? What can
I do with a click area?
A click area is useful when you want to assign
different destination links to different sections of
a single image. For example let’s say you have a
picture of yourself. You can assign an area to the
eyes, an area to the mouth, and so on. A click on
the eyes may display a page where you talk about
your wonderful blue eyes and so on... :o)
If you want to create a gallery with some thumbnails linked to larger images in a separate window, you don’t need to use hot spots. You can
use the “Insert >Image gallery / photo album”
(Gold edition). Or simply create a page containing a series of small images, then insert a new
page for each enlargement and assign links to
each small image (right mouse button, “Define
special links”). Inside the “special link” dialog
you can specify to use a popup to display the
destination link (the page containing the larger
image), and you can specify a name for the
popup.
Is there a way to place icons of thumbnails on
my page, then click to view a larger image?
Yes, you can use the “Insert >Image gallery /
photo album” (Gold edition). Or just insert a
little image (you can do it with a paint program)
then insert a link (right mouse button, "Define
link") to a page that contains the larger image. If
you use "Define special link" you can also show
the larger image in a popup.
I designed a navigation bar in Paint Shop PRO,
how do I insert that into a page and add links to
each button?
“Insert >Image” then add hot spots (clickable
areas) with the right mouse button, then define
links with right mouse button.
65
I have an image and some text on one page. I
want the text to line up on the right of the image,
and I suppose using a frame will do it, but I
can’t get my image into a frame.
Better to use a simple table, rather than a frame.
Just use “Insert >Table” then use a table with 2
columns, 1 row (if you want to create frames,
simply drag the top or left border of the edit
window).
I imported a picture into my document. Is there
any way to add a border or is that something
only available in the full version?
You can do this with a paint program. We
decided to not add border features as in any case
most would not be supported within epub and
mobi ebooks. Better to edit the image.
Is there any way to assign an image as a border
for a page? I have an image that is about 1 inch
wide and I want it wrapped around the page.
Can this be done?
Yes, you can create a table with 3 rows x 3
columns, and use the image as background of the
8 externals cells (right mouse button from within
the cell, then select "Properties"). If you edit the
Style of the paragraph that contains the table
("Format >Styles"), you can eliminate the upper
and external borders that this solution often leaves.
STYLES AND FONTS
If I change the font height, sometimes this is lost
when I write additional text. Why?
Do not move the cursor after changing the font
format. Immediately start to type.
Can I save a style?
Yes. Simply write its name in the styles cell, then
press ENTER, and the settings of the current
paragraph will be saved as style. You can also
import styles from another hypertext. For creating new styles you can also choose “Format
>Styles”. See also the proper chapter for more
info!
66
How can I recall a style I saved?
Simply click on the styles cell and select the
required style!
How can I change the style of the links within a
table?
Like any style, i.e. by using "Format >Styles".
The default style for tables is [no style in table]
I have created an ebook and used some of the
fonts installed on my computer for the page. The
problem I have is when other people install and
view it, the fonts are not the same as the ones I
used to create the ebook. Should I use just fonts
that are universal on all computers?
Yes, Times New Roman, Arial and Courier
New. If the user has MSWindows + Office
usually also Verdana and some others. It is
usually not possible to distribute fonts due to
copyrights. If you want to use a fancy font for
titles, you may use transparent images - we have
a free "plugin" that permits you to do this automatically (you select a text, you click a button,
the text is instantly transformed into an image by
using the current font). The image will be identical for all the end users. Please see
www.visualvision.com/plugin/ "text to image"
plugin.
FRAMES
How can I delete some frames I inserted?
You should delete them frame by frame. To
delete a frame you should move its border to the
top or to the left (depending of the kind of the
frame). It may be faster to choose “Format
>Advanced frameset manager”, then load a simplest frame set from a template, then press OK.
How can I remove the frames border?
Choose "Format >Page properties >Frame properties" (or use the right mouse button). In the
dialog, uncheck the box “show rectangle border”
and write 0 inside the “border between frames"
box.
I am working with frames and I noticed that the
frames will not allow me to align text/images to
the top right-hand corner. It looks like the frames have a top margin of about .5". Can I get
rid of this?
Yes, within “Hypertext >Current hypertext properties”, second tab, put the Margin setting to 0
(default is -1). Or you may also define a style
where the top margin of the style is something
with a negative number (-0.01 should be sufficient) and apply that style to the first paragraph,
then you may insert a table within that paragraph
and experiment within it.
I want to add a page with frames. I want to use
as an existing page as a frame.
Create a new frame set. Within a frame, use the
right-click mouse menu to select which page will
fit the frame. You can also use "Format
>Advanced frame set management". See the
chapter about frames.
I have a page with too many frames. I went to
"hypertext", then "images - files - hyperlink
archives and erase" and tried to delete the
pages with the frames. When I go back to the
page, the frames are still there. What am I doing
wrong?
You probably deleted another page. When
working in the page with the frames, press the
"frame/no frame" button at the bottom of the
page (it’s besides the page number box). That
switches the view to "no frame" mode, (note: it
doesn't actually delete the frames, it is just a
display option). This way you will see which is
the master page for the frame set. Delete it and
the frame set will be deleted. Another way to
delete a frameset is to replace it with another,
(Format >Advanced frame set manager).
I've tried to create frames, but why does the
page reappear on the previous page or the following one when you ...
Please read the complete manual. Each new
frame is in fact a new page, so if you create a
frame-set in page 0, containing 3 frames, if you
go to page 1 you will find the 1st frame created
in page 0, if you go to page 2, the 2nd and so on.
Any frame exists as a “single page”. This allows
you to re-use the same frame (e.g. a menu) in
different frame-sets without having to copy it
(and without having to update every time you
change it). To select the page that fits a frame,
just use the right mouse button within a frame,
then select "Choose page in frame".
TEMPLATES
The templates seem to be in Italian or Spanish!
Where could I get English ones?
The templates are not in Italian. It is a dummy
latin-like language that has no meaning. The text
is there purely to fit the page for demonstration
purposes. You can replace it with anything you
like.
.EXE, SELFEXTRACTING,
EBOOKSREADER
How is an e-book supposed to look after it is
downloaded? Can a user edit it?
You can save an ebook either as standalone
.EXE file, as an .AEH file, as a MOBI file and as
a EPUB file.
If you distribute the AEH file you need to deploy
the EBooksReader; if you distribute the MOBI or
the EPUB, the end user needs a reader software this is included with some devices, for some
other devices the end users finds several reader
products on the Internet, usually free.
If you distribute the .EXE, instead, nothing else
is needed.
Any user without EBooksWriter installed who
loads an .EXE ebook will see the ebook in a
read-only environment. In the same way, a user
that loads an AEH file and tries to read it with
the free EBooksReader will have the same readonly environment. The end user/reader would not
normally have EBooksWriter installed on their
PC, but you can however setup a password to
prevent editing even in such a case).
What does self extracting (or EXE) ebooks do?
"Self-extracting" means you'll provide a single
67
file to your user which the user clicks on to see
the ebook (without the need of external programs
such Internet Explorer etc.). In other words selfextracting means very easy to read for the final
user.
I [mis]understand that the whole program has
to be downloaded to view the book. However...
whenever someone downloads my book this
way, it is on their EDIT screen. Is there a way I
can save it so when others download it, it will be
in read only or preview mode???
No, the end user has not EBooksWriter, like you
do, and you should not supply EBooksWriter to
the user. Use "File >Save SFX ebook", and you'll
have an autoinstall ebook that will show in rad
mode. Supply this to the reader and she/he will
read your book. Alternatively, you can save as
EPUB, MOBI, or AEH.
What can I do with an "AEH"? Can I only see it
with EBooksWriter / EBooksReader?
If not protected, you can see an "AEH" with
almost all Visual Vision products.
In case I want to distribute .AEH files (that
needs EBooksReader) can I distribute EBooksReader from my Web site?
Yes, sure.
Do I put a hyperlink to the free ebook reader
(EBooksReader) on my website, or do I put the
ebook reader itself on my website?
You can put EbooksReader itself on your website (or you can supply the SFX exe that contains
the EbooksReader).
How can I distribute your free reader with my
Web site?
Please download and distribute the packed autoinstalling file that you can get from
www.visualvision.com/software/
ebooksreader_e.html.
To distribute it, simply load the file somewhere
in your site, for example in http://
www.yoursite.com/EbooksReaderFREE-e.exe
(you need WS_FTP or a similar FTP program to
68
do this). Then place a graphic, select it, use the
right mouse button, define link, 3rd tab, press "+
Add",
insert
http://www.yoursite.com/
EbooksReaderFREE-e.exe
I created the SFX and when I click the .exe it
installs but I see a blank page!
Please use “Hypertext >Current hypertext properties”, second tab, then click the “Cover page”
button on the bottom left, and choose a nonempty page as cover page.
When I save my Ebook as SFX.EXE, and put the
EXE file on another computer and install it, all
I get in the free browser is an empty, gray page
and cannot see or read the book
This is because the default "cover" and
"summary" is page 0. If your page 0 is empty,
nothing is shown. If you want the user to see
other pages, you must properly set the Cover and
Summary pages, and you MUST place links. All
the internal methods that EBooksWriter provides
for browsing pages are available only to the
author. The reader must click on links to switch
pages, so YOU decide what can be read by
whom, and in what order. For epub and mobi
ebooks, you can define the linear reading path for
the reader with “Hypertext >Predefined page
order - TOC”.
When I am writing my ebook and save it as an
SFX.exe, when I try to look at the book on
screen, it only shows the cover page and
nothing else, even though I saved it with 5+
pages in it. Can you please help?
You must insert some links for the other pages,
either arrows, text links, or some way for the
reader to navigate through your Ebook. Remember that the end user can not use the "page
number" facility, which is provided just as a
quick means to switch between pages during
development. With links you can move the user
from page 0 to 45 and then to 3 and to 2, it is not
necessary to adopt the structure of a regular
printed book.
How do I keep the file size to a minimum? I
downloaded Oz and the only difference I see is
that my book has more frames in it. Do the
frames increase the file size?
Humm no, the thing that increases the file size is
the number and type of the images included. Use
a graphics program such as Paint Shop PRO in
order to compress the images: for photos, the
best format is .JPG. For line art, cartoons, etc, the
best one is .GIF.
Once I set up my E-Book on the Web can a
person print the entire 50 pages at once with
one click or do they need to print each page one
at a time?
Yes they can use File >Print all. It prints the
ebook in the order you defined with "Hypertext
>Predefined page order TOC".
When you self extract the book, it shows a little
brown book with an E on it. Is there a way to
change what that looks like ... say if they place
it on their desktop? Does it always have to look
like little brown book or can I change that icon
to something different?
At present, you
can't change that
"programmatically". This is the program icon,
and in MSWindows a file shows the icon of the
pertaining program. The user can change the
icon as usual in MSWindows.
Can ebook CD's be started using autorun?
See http://www.cdfrontend.com for autorun.
CDFrontEnd can use EBooksWriter files and
can create autorun CDs with them (with the
same protections provided by EBooksWriter).
Just recently I have written a small eBook. I'm
using the full screen setting and would like to
have a link on each page for closing the ebook,
but I can’t locate the information about how to
do this. Should I reset the eBook to be viewed in
a window rather than full screen to be able to
have closing controls?
Close is available using the right mouse button.
Also, you can insert a “exit” link that will close,
once clicked. This is available as “special link”.
DISTRIBUTION / SELLING
How is an e-book supposed to look after it is
downloaded? Can a user edit it?
Any user will see the ebook in a read-only environment. The end user/reader is not supposed to
have the EBooksWriter, you can however setup
an editing password and so disable editing even
in such cases ("Hypertext >Current hypertext
properites").
Does the EBooksWriter have a function to accept credit cards online?
This is a function provided by various credit card
services. With a direct account you can insert a
form or some codes in your Web pages in order
to take orders; Some third party services that
provide you with the ability to accept credit cards
are swreg.org, clickbank.com, kagi.com and a lot
more. You are free to choose. We don’t lock you
to a precise service.
How can I sell my ebooks? I know I can put a
sample ebook on my site for free downloading,
but is there a way to send the .AEH or .EXE file
of the full book only to customers who have
paid?
There are companies that can provide ESD
(electronic software delivery) i.e. deliver a file
only after payment is received. Try for example
www.swreg.org. (You will find others at
www.upload.it).
Can I collect end user’s email / data?
Yes, set up this with Hypertext >Current hypertext properties (Gold edition).
PROTECTIONS: PASSWORDS,
COPY, PRINT, EXPIRY
Can I protect my pages with a password? Can I
leave some pages without a password, so the
user can see a sample before buying?
Yes, sure.
Can I protect my ebook with passwords? Can
the clipboard copy be disabled? Can printing be
disabled? Can I set an expiry date? Can I force
69
the ebook to be shown "full screen"?
Yes.
Is the protection strong?
Yes, it is a 128 bit strong encryption.
My target is big business with lots of employees
and I don’t know how to protect my book from
sharing. Now lets assume that in one office
there are 10 employees and that 5 of them want
to buy my book. How do I make sure that if I
give the password to one of them he or she will
not share the password with the others?
The passwords for the ebooks created with
EBooksWriter can be personalized for each user
without any effort. The first time someone reads
your ebook, they will be prompted to enter a
name and email address. In EBooksWriter there
is a dialog where you can insert that user name
and email address, and you will get a personalized password that you can send to the user. The
password will work for this user only. This
feature can be enabled or disabled, it's your
choice. You may also add an additional protection with www.ebookswriter.com/virtualvault
I’ve tried the sample with different passwords
for different users but the user password doesn’t work, and also the author password,
“mickey”, doesn’t work!
When using personal passwords, the author
password works within EBooksWriter only. It
doesn’t work in EBooksReader. To obtain the
proper user password, you must insert a user
name and email address in the “Hypertext
>Password” dialog. You must use the same user
name and email address in EBooksReader, that’s
why it is called “personal”, it doesn’t work with
different personal data!! You might have to delete the .ERP file.
I am struggling to get to grips with the password. I am happy assigning an author pasword, but the reader password is beyond me.
Your examples do not explain what happens.
What does the reader have to do to get the
70
password and how does it relate to the password window and boxes.
You can set a fixed password for all readers, or a
password that changes for each reader. Each
page can have a different password. The online
help gives you an example. In the example the
writer has added to the hypertext the password
"mickey". That password is known by the writer
only, and will be changed to a different password
for any reader. You should not to give the password "mickey" to the reader. For the reader
called "aldo ghigliano", that password is
"S\ZTOg". If you change the reader name you
will have another password. It is your responsibility to give the correct password to each reader.
To disable that feature, uncheck the box "custom
password for each user". If this box is unchecked, when you save the ebook, the password
"mickey" will be valid and identical for any
reader.
The password "mickey" is assigned to the pages
that are in the list on the right and are checked.
In a new hypertext, to add a new password press
the "Add +" button, then enter the password. To
assign that password to one or more pages,
check the box in the list on the right.
Is there a way to only let the users print certain
pages?
If you want, you can disable printing totally
using: ("Hypertext >Current hypertext properties"), then, with special links, you can add print
links / buttons to certain pages only - within a
page that you wish to print, just insert an image
or a text such as "Click here to print", select it,
then use "Insert >Special link" and the tab
"Other".
I was reading about all the security features
that your eBook software offers, but I did not
see anything on how you prevent individuals
from making mass copies and distributing the
exe for free. For example, if a customer purchases an eBook from my site created with your
software, there is nothing technically that prevents the individual from making multiple exe
copies and distributing it for free. Do you have
a solution?
Yes, he can makes multiple copies, but provided
you protected the ebook with an individual password, the password must match his name and
email address.
For example, you sell the ebook to Mark Smith
[email protected]. If he copies the ebook, he
would have to give away his name and email
address, so it will publicly broadcast that he is a
thief.
By the way you can prevent also this with a
Internet lock, we offer this at
www.ebookswriter.com/virtualvault
I saved my ebook to SFX but I just see a gray
page.
This is because the default "cover" and
"summary" is page 0. If the page 0 is empty,
nothing is shown. If you want the user to see
other pages, you must set the Cover and Summary properly (Hypertext >Current hypertext
properties) and MUST place links to the other
pages. All the internal methods that EBooksWriter provides for browsing pages, are only available to the author.
The reader is only able to click and follow links,
this way YOU get to decide what can be read,
and in what order. For epub and mobi (and opf
idpf) ebooks you can define the linear reading
path with “Hypertext >Predefined page order TOC”.
Acrobat Reader for PDF (but AEH pages are
reflowable and so more adapt for the video,
while PDF has been designed for the paper). An
AEH file contains a whole ebook, so your work
becomes easy to share. If you password protect
the AEH, it can be seen only with EBooksWriter
or EBooksReader. AEH means “Advanced Encapsulated Hypertext”.
Can I insert Java Applets, JavaScripts, Flash
within a page? Can I use ASP?
No.
Why does the size of the AEH remain the same
even if I delete some multimedia files ?
It is not sufficient to delete a link, a button or a
video with the CANC that deletes the button.
EBooksWriter archives each thing you use in an
internal archive or “album”. If you delete the
link, the file remains inside the album, to enable
fast reuse. If you want to delete the file, please
choose “Hypertext >Images - files - link archive
and erase”, search the file then delete it with
DEL.
How can I insert an external file? For example
a ZIP, a PDF, etc.?
You can embed the file within the ebook. Select
a text block, then "Insert >Link", then the 4th
tab, then select the file you want to insert from
the file system.
Can I save in PDF format?
Indirectly you can. If you have the Adobe product installed, choose "File >Print" then print to
the "Acrobat Distiller". There are many other
utilities on the Web (for example do a search on
www.soft14.com). Otherwise you can install a
fake PostScript printer (an Apple LaserJet for
example), print to FILE: (instead of LPT1), save
the file as filename.ps then use the free Ghostscript (you can find it on simtel.net) to convert
from PS to PDF. A correct Ghostscript command
on the DOS prompt is gswin32c -q -d dPDFSETTINGS=/printer
dCompatibilityLevel=1.3
-dNOPAUSE
dBATCH
-sDEVICE=pdfwrite
sOutputFile=c:\nomeoutputfile.pdf nomefile.ps).
What can I do with an "AEH"? Can I see it only
with EBooksWriter?
You can see an "AEH" with different VisualVision products and also with the free EBooksReader which works on the same principle as
How can I import files?
To import, use "File >Import" and choose a file
format (RTF; HTML; ASCII), then search for the
files you want to import in the file system
(shown on the left) and drag them to the right.
AEH - DOC - ZIP - PDF - FLASH JAVA - ASP
71
The program can import multiple files at a time
and automatically divide a single file into pages.
Use CTRL+ CTRL- after the import to see the
pages. The import functions sometimes discard
the text format, so it would be better to use the
native EBooksWriter functions once you have
learnt them.
When I import RTF, how does the system split a
single file into multiple pages, how does it decide when to end a page and start a new one?
It uses an internal criteria.
You can choose (in the import format menu) one
file/one page or one page/one page. The latter
option ensures that page breaks in the existing
document are maintained in your created pages.
I have imported RTF pages, but most of them do
not include the "continue" link on the new pages.
Well you are supposed to write the pages INSIDE the EBooksWriter program. If you import
the pages from another program, the program
attempts to do something automatically, but
YOU have the responsability to add all the links
that are needed. With the program you can place,
quickly, very powerful links, not only the sequential links expected for a sequential piece or
book.
After importing, the very first page is blank and
I can not get rid of it.
Simply copy another page inside it. Alternatively, change the settings of the program so that
the cover page and the summary page are not
using the first page (Hypertext >Current Hypertext properties), then second tab, then click on
the left on "cover" or "summary" and choose the
required page.
I imported an .rtf document and set up some
links to certain portions of it (hypertext?). The
links work fine, but in the non-edit, preview
mode, I can only get to the linked pages, not the
ones without links.
This is normal, as the preview mode is designed
to work as if published, and no pages would be
72
available in a live situation, unless linked. Well
on epub / mobi ebooks you can also see the non
linked pages, because these formats do follow
the Predefined page order (Hypertext menu) to
define the read path.
We have user manuals which were created
using another program. If we choose to use
your software, will we be able to maintain/edit/
revise the old manuals in it, or will they have to
be recreated?
If your other program is able to save in RTF,
HTML or ASCII formats, or at least allows
copying to the clipboard, you will be able to
import the data to our software (possibly some
reformatting will be required).
Can your program import Word Perfect format
(WPF files)?
No, but within Word Perfect you can choose
"Save as..." then save your file in RTF format,
that can be imported by EBooksWriter (with
“File >Import”).
GENERIC QUESTIONS
I can’t find the answer to my question!
No problem, just write to us! As you see... we
respond to all! Or use the user’s forum,
www.ebookswriter.com/forum/
I can’t delete some objects with DEL.
Use DEL twice.
The XYZ dialog window displays too small for
me!
Please resize the window. EBooksWriter stores
and remembers window settings.
I’m writing a manual for an application and I
need to include multiple copies of the application logo and application name. Is there a quick
way?
Create a new page, insert the name and the logo
of the application.
Then you can use "Edit >Paste page from..." to
insert the logo anywhere you want.
I can’t use tabs!
You can use the "reduce indent" and "increase
indent" buttons.
The copy and paste procedure sometimes discards the text format.
This can happen for short text, as EBooksWriter
tries to use intelligent behavior when you cut
& paste. Sometimes the behavior is not exactly
as you might expect.
How can I make floating windows?
When a user browses your site / hypertext, there
are two ways a window can show:
- when user clicks on a special link ("Insert
>Special link")
- when user enters a page that contains an "open
window" component ("Insert >Page functions
>Open / close windows"
See samples in "? >Examples".
In a hypertext with lots of images, it seems as
though there are problems with previews.
Use “Tools >Program options” to increase the
image cache settings.
I can’t “minimize” the application.
Select “Tools >Program options” then “Reset
dialogs settings”, then exit from the application.
I have a problem with the program locking up.
It seems to be related to the file I am working in
because I had a few other files I was working
with and I am not having the problem there. If
the file is corrupted in some way is there
anything I can do about saving some of the
pages? Help! I don’t want to start over!
When a file is corrupted the most practical way
is to open a new file, and copy the pages (the
non-corrupted ones) from the old file, using "Edit
>Paste page from...".
I have EBooksWriter. What is the difference
with iPer Hyper Publish PRO (HP)?
HyperPublish can create and publish Web sites
and autoinstall CD/DVDs. EBooksWriter can
read HP files, HP can read non-protected EBW
files. There is a very affordable bundle offer on
the web if you want both products.
Do you have a Mac or Linux edition?
No, but EBooksWriter is fast so it will run on
any common PC emulator software (there are
many both for Mac and Linux). The epub and
mobi ebooks can be read in any case on Mac,
Linux, Palm, Kindle, Sony Reader, handheld
PCs, cell phones, and a lot of other systems.
I have an icon for email - I've checked the
tutorial and can't find out how to make this
work!
Very simple: select the image, right mouse button on it, "define link", 3rd tab, "+ Add" button,
then enter mailto:[email protected]
Can I insert forms in EbooksWriter?
Yes, in EbooksWriter GOLD. You may also link
to a page that contains a form in your Web site..
I can't get the spell check working!
There are solutions within the user’s forum.
In a hypertext with lots of images, it seems as
though there are problems with previews.
Use “Tools >Program options” to increase the
image cache settings.
The program says “Access Violation XXXX”,
then hangs...
The error numbers like 00231245E are no use to
us at all. If this happens and you are able to
provide us with step by step instructions on how
to reproduce the error, (e.g. open the program,
write "mickey", press "save" and the error
ALWAYS happens) we can correct the problem.
Often it is not a problem with the program, but a
problem of limited handles within MSWindows.
If I switch to “read only” (Edit/Preview button),
the slides don’t appear to work.
You have to use "Hypertext >reload page" to
start the slide sequence. To obtain this at load
time, configure the hypertext as "Read only"
73
using "Hypertext >Options".
I have noticed that in some of my work, when I
resize the windows (larger or smaller), some
tables or images move and don't retain their
position. Is there a solution to this problem?
You would benefit from practising with the
"invisible" tables, and learn how to use them to
correctly position images and text. You must
remember that the final users screen and window
sizes are unknown. In the Chapter “Graphics and
paging pages” of this manual you find some
useful suggestions on how to create this kind of
positioning.
I have worked with several ebooks in the past,
although I do not have any of them now. My
question is related to the size. I have created
most of these pages and you have to scroll them.
I do not want that. In the past with other ebook
programs, it automatically saved to open in the
current screen and there was no scrolling needed. What do I have to do to make this work?
Exe ebook tends to have a web-like layout because the vertical scrolling is quite handy on a
74
PC; so you should divide your pages into different small pages if you want small pages. If you
save as Epub or Mobi, the readers for these
formats do automatically divide in small pages
(because some readers such as the Kindle are
designed with prev/next buttons instead of scrolling).
PURCHASE - REGISTRATION
How to purchase?
Go to www.ebookswriter.com/buy/
I created some pages with the LITE version, can
I use the project with the registered edition,
without having to redo it all?
Yes, sure.
For any additional question, email the support
staff: [email protected]
Or see the forum with the powerful SEARCH
BOX:
www.ebookswriter.com/forum/