1
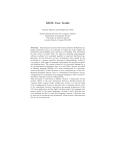
QTest User's Manual
For QTest Version 1.4, October 13, 2009
Jay Berkenbilt
QTest User's Manual: For QTest Version 1.4, October 13, 2009
Jay Berkenbilt
Copyright © 1993–2009 Jay Berkenbilt
Table of Contents
Acknowledgments .............................................................................................................................. iv
1. Installing and Using QTest ............................................................................................................... 1
2. Basic Operation .............................................................................................................................. 2
2.1. Overview and Testing Philosophy ........................................................................................... 2
2.2. Test Framework Features ....................................................................................................... 2
2.3. How To Create a Test Suite ................................................................................................... 3
2.4. QTest Output Files ............................................................................................................... 4
3. Using QTest on Windows ................................................................................................................ 6
4. Testing Multithreaded Software ......................................................................................................... 7
5. Examples ..................................................................................................................................... 10
6. Tips and Tricks ............................................................................................................................ 11
6.1. Meaningful Output .............................................................................................................. 11
6.1.1. Multistage File Transfer ............................................................................................ 11
6.1.2. Program That Generates No Output ............................................................................. 11
6.2. Transient Information .......................................................................................................... 11
6.2.1. Timestamps ............................................................................................................. 11
6.2.2. Usernames and Paths ................................................................................................ 12
6.3. Including Manual Tests ....................................................................................................... 12
6.3.1. Printer Driver .......................................................................................................... 12
6.3.2. Electronic Highligher ................................................................................................ 12
6.4. Manually Created Output ..................................................................................................... 12
7. Automated Test Coverage ............................................................................................................... 14
7.1. Introduction ....................................................................................................................... 14
7.2. Test Coverage System Overview ........................................................................................... 14
7.3. A Quick Example ............................................................................................................... 15
7.4. Running the Coverage System .............................................................................................. 15
7.5. Test Coverage System Details ............................................................................................... 16
7.5.1. Coverage Calls ........................................................................................................ 16
7.5.2. Coverage Case Registry ............................................................................................. 16
7.5.3. Coverage Analyzer ................................................................................................... 17
7.6. Example Code: search ......................................................................................................... 17
7.7. Performance and Security ..................................................................................................... 22
7.8. Real-World Examples .......................................................................................................... 22
7.8.1. Unprintable Characters .............................................................................................. 22
7.8.2. Journal Issue With No Articles ................................................................................... 22
7.8.3. Waiting for Worker Thread ........................................................................................ 23
7.9. Test Coverage Tips and Tricks .............................................................................................. 23
7.10. Coverage Call Implementation ............................................................................................. 24
7.11. Help for Emacs Users ........................................................................................................ 26
iii
Acknowledgments
QTest has been released under the terms of Version 2.0 of the Artistic License [http://www.opensource.org/licenses/
artistic-license-2.0.php], a copy of which appears in the file Artistic in the source distribution.
QTest was originally created in 1993 as part of BCS, the Baseline Configuration System, which has since become
inactive. I would like to acknowledge my previous employer, Apex CoVantage [http://www.apexcovantage.com] and
my current employer, Argon ST [http://www.argonst.com] for allowing me to republish modifications that I made to
QTest on “company time” while under their employment. I am lucky to have worked for such organizations as these.
iv
Chapter 1. Installing and Using QTest
QTest is implemented in Perl. It doesn't use any modules that aren't distributed with Perl. QTest requires Perl version
5.8 or newer. It also requires GNU diff. As long as these requirements are satisfied, it should work fine on any UNIXlike system.
To use QTest on Windows, you can either use Cygwin (which is really more like a UNIX environment anyway), or,
starting with QTest version 1.4, you may use ActiveState Perl along with MSYS (from the MinGW project). Although
QTest itself passes its own test suite in this environment, there are a number of caveats to keep in mind. See Chapter 3,
Using QTest on Windows, page 6 for details.
To use QTest, extract the distribution to the location of your choice and make sure that qtest-driver, located in the
bin directory of the QTest distribution, is in your path. Alternatively, on systems that support symbolic links, you may
put a symbolic link to qtest-driver in your path. The qtest-driver program looks for the TestDriver.pm module in the
module directory of the QTest distribution. 1 You don't have to take any specific action to get TestDriver.pm in your
path: qtest-driver does this automatically when it invokes your test suites.
If you are going to use QTest's coverage system (see Chapter 7, Automated Test Coverage, page 14), you will need
to ensure that you have a suitable implementation of the coverage call available in your development environment.
Sample implementations are provided for several programming languages.
If you would like to embed QTest in your own application's source tree, it is sufficient to create a directory with bin
and module directories. Copy bin/qtest-driver into bin and module/TestDriver.pm into module. These are the only files
required to actually run qtest-driver. The qtest-driver program looks for TestDriver.pm in ../module relative to itself.
If you use coverage from your test suite, you may wish to copy some of the coverage implementations from the QTC
directory as well. You can place those anywhere as long as your application knows where to find them. You should
also include some indication of QTest's licensing terms and some acknowledgment that you are using it.
1
The qtest-driver command finds the grandparent directory of the absolute path to itself and treats that as the top of the QTest distribution. It
looks for the module directory there.
1
Chapter 2. Basic Operation
In this chapter, we describe QTest's basic functionality and describe how to create a test suite.
2.1. Overview and Testing Philosophy
There are a variety of approaches to automated software testing, each of which has its own advantages and
disadvantages. The QTest automated test framework supports the approach of designing for testability and subsequent
creation of what might be called self-testing software. When using this approach, deciding how a specific area of
functionality will be tested is central to the design. Every requirement and every piece of code must be testable, and
the way in which it will be tested must be planned before any implementation is done.
Applications or modules implemented in this fashion will often have an embedded test mode in which the application
itself or an external driver that “lives” with the software and is closely linked with it may exercise the code in a preset
way, comparing the software's output with an established baseline. The software may contain code whose sole purpose
is to assist with the testing process. This type of testing is performed largely by the developer. Test suites are coded
incrementally at the same time as the software is being written. As defects in the software are found and corrected,
the test suite is modified to exercise the defect before the problem is fixed, thus ensuring that the problem stays fixed.
After all, the fact that the test suite did not enable the bug to be caught in the first place can well be considered a
bug in the test suite!
This form of testing is complementary to the more traditional software testing that may be performed manually
by a testing team or automatically using external tools to play back sequences of prerecorded events. It is also
complementary to the normal Alpha and Beta testing cycles that should precede most software releases. All of these
types of testing should be used together to ensure maximum software quality.
An important aspect of QTest's philosophy is that as many tests as possible should be able to be boiled down comparing
generated text with known text. This approach is very powerful: designing your software in a way that makes it this
easy to test is generally good for the software as well as for the testing process. Software that is easier to test is also
easier to understand and maintain, and simple but thorough test cases are an invaluable tool to new programmers who
are trying to become familiar with the software. This approach can be applied to a wide range of software including
GUIs, multithreaded software, distributed software, and others as well. It's all about properly decomposing the problem
and providing visibility into the internals of a system.
There are some types of testing that do not lend themselves to this approach. For example, if one has to determine
whether an audio stream is intelligible, there is no substitute for having someone actually listen to the stream. Likewise,
usability testing for graphical interfaces must be done by human operators. The challenge, then, is to decompose the
problem and organize the software in such a way that the vast majority of testing can be automated, and the part of
the testing that must be done manually is minimal and simplistic. Figuring out how to structure code and testing to
support this goal is why writing good test suites is an art as well as a science. In this document, we focus primarily on
the science: we describe the structure of the test suite, the features of the test framework, how to organize test suites,
etc. We will also include some discussion in the form of examples and anecdotes that should help to provide insights
into the art portion as well, though there is no substitute for experience when it comes to creating good test suites.
2.2. Test Framework Features
The QTest framework essentially gives you the tools to create what amounts to a script that runs your software in a
particular way and examines its output. If you would be able to write a script to test your code, then you will be able
to write a QTest-based test suite. The QTest framework invokes your software from the command line and studies
the output that it creates. It may be complementary to tools such as cppunit or junit but does not require anything
like that to operate.
2
Basic Operation
When we say that a test suite passes, we must be very clear about exactly what this means. A good test suite must have
the property that an overall “pass” is a very strong indicator of correctly working software. The overall pass condition
must be defined in such a way that any unexpected error condition in the application or in the test suite itself will cause
the test suite to fail. We define a test suite as passing when all of the following conditions are met:
• Each individual test case passes.
• The expected number of test cases is run.
• The test driver itself terminates normally.
An individual test case is considered to pass when its output and exit status match those expected by the test suite.
Notice that the conditions described above are stronger than just saying that the test suite passes when all individual
test cases pass. If there is a logic error in the test suite itself that causes a test case to be skipped entirely, this should
make the test suite fail. Likewise, if the test driver crashes part way through but all tests up to that point have passed,
the test suite should fail. By requiring the test driver to terminate normally after executing the correct number of test
cases, we add some extra security to the test suite.
In the context of a test suite in this framework, a test case is simply the comparison of an input to an output. The input
may be a fixed string, the contents of a file, or the output of a program. As part of the input specification, any of the
above may be passed through a specified filter. The output may either be a fixed string, a file, or a perl-compatible
regular expression that must match the input. If the input is the output of running a program, the expected output must
also include the expected exit status of the program. The simple comparison of input and output strings may also be
modified by telling the test system to normalize newlines and/or whitespace. Normally, a test case is expected to pass.
There are some situations, however, in which it may be desirable to mark a test case as being known to fail. Examples
may include test cases that exercise known bugs or regressions that have not yet been fixed, place-holder test cases
for features that have not yet been completed, or test cases that are conditional upon some optional component of the
system or some platform-specific functionality. If a test case is marked as expected to fail, the test driver requires that
test case to fail in order for the overall test suite to pass. This alleviates the need to do things like “comment out”
problematic test cases that you're not going to fix right away. An expected failure serves as a reminder that there is
still something to do but is less strong than leaving an actual failing test case in the suite since an overall test suite
passing may be a prerequisite to some other operation such as making a release.
A coverage condition is simply a situation inside of the software that must happen. Analysis of coverage conditions
as included in this test framework should not be confused with coverage analysis as performed by standard code
coverage tools. This framework is concerned with checking for specific programmer-specified conditions. Essentially,
the developer writes a line of code that says, “This condition just happened,” and that line of code logs this fact to a
file that is analyzed by the test framework itself. The test coverage system adds still further security to the test suite
by ensuring not just that we have seen the correct number of test cases, but also that they have actually exercised the
code as the developer intended. For further detail about this test coverage feature, please see Chapter 7, Automated
Test Coverage, page 14.
2.3. How To Create a Test Suite
A QTest test suite is a perl script whose name ends with the extension .test. A template for a QTest test suite may
be found in the file template in the misc directory of the QTest source or installation directory. The test framework
invokes the perl script with its include path set such that it can use the statement require TestDriver; to include the
TestDriver object. The TestDriver object is a perl module that includes several public methods:
notify
notify the user by printing a string
emphasize
notify the user by printing a string with emphasis
3
Basic Operation
prompt
read input from the user by specifying a prompt, an override environment variable, and a default value
get_start_dir
return the directory from which the test suite was originally invoked
runtest
run an actual test case
report
report that a test suite has concluded, and specify the number of test cases that should have been run
Note
The purpose of reporting the number of test cases with report is to perform an extra check to make sure that
the test suite itself didn't have a logic error that caused some test cases to be skipped. The argument to report
should therefore be a hard-coded number or a number computed only from static features in the test suite. It
should not be a number that is counted up during the process of running the test suite. Computing this number
as a side effect of running test cases would defeat the purpose of the number. For example, if the test suite
consists of an array of test cases, and the test suite code iterates through that loop and calls runtest twice for
each element, it would be reasonable to pass an expression that calculated twice the size of the array as an
argument to report, but it would not be appropriate to have a variable that is incremented each time runtest
is called and then passed to report.
For details on how to use runtest itself, please see the extensive comments in module/TestDriver.pm in the test
framework's source or installation directory. The TestDriver.pm source code contains comments on how to use all
the public methods. To locate TestDriver.pm on your system, run qtest-driver --print-path. This prints the top-level
directory of the QTest installation. The TestDriver.pm file can be found in the module directory.
The intended mode of invoking a program's test suite is that the check or test target of the build system should be
run. The build system should enable support for the QTest framework if a qtest directory exists. Each file in the qtest
directory that ends with the .test extension is expected to be a test suite. The TESTS environment variable may be set
to a space-separated list of words to specify which tests should be run. (TESTS="one two" would result in qtest/
one.test and qtest/two.test being run.) Additionally, QTest sets the IN_TESTSUITE environment variable to 1 while
running test suites. This can be useful for programs that have to behave slightly differently in a test suite, such as
suppressing timestamps, simulating failure conditions, etc.
Note that the qtest directory contains the test suites and any ancillary files required by the test suites including data,
filter scripts, etc. The code being tested does not live in the qtest directory. If set up properly, the test system invokes
the test driver so that all programs being tested are at the beginning of the path.
Note
If you are invoking programs by hard-coding relative paths to them, particularly if those paths contain the
names of platform-specific object file directories, you are probably doing something wrong, or there is a
problem with the way the test system is configured.
It is very important when writing test suites to be sure to avoid putting things in your test output files such as user
names, absolute paths names, etc. Filters can be used to avoid these traps. Please see the example test suite (Chapter 5,
Examples, page 10) for details.
2.4. QTest Output Files
The QTest test framework creates two output files in the directory from which it is invoked: qtest.log, and qtestresults.xml. They contain a summary of the test results along with details about any test case that unexpectedly failed.
The qtest.log file is the primary file you will use to study the results of failing test suites.
4
Basic Operation
The qtest-results.xml file contains the same information as qtest.log, but it is in an xml format. The primary purpose
of qtest-results.xml is to make it easier for other tools to integrate with QTest. Examples may include build managers
(such as CruiseControl [http://cruisecontrol.sourceforge.net/]) metrics gathering tools, or even graphical front ends to
displaying of test results. For details on the format of qtest-results.xml, please see the file misc/qtest-results.dtd in the
source directory. Although it is possible that, under some unusual circumstances (such as if a disk fills up or the user
interrupts a test run), QTest may not create valid xml, QTest makes an effort to create valid xml as much as possible.
In particular, if a user-supplied test suite exits abnormally, QTest will still generate a valid xml file in that situation.
If coverage (see Chapter 7, Automated Test Coverage, page 14) is active for a given run of the test suite, then the
file called scope.cov_out will also be created. You don't ordinarily need to look at this file; its primary purpose is to be
read by the coverage analyzer to determine whether all coverage cases have been exercised. If coverage analysis passes,
the coverage output file is copied to scope-passed.cov_out. If coverage analysis fails in a subsequent invocation
of the test suite, you can compare the contents of that file with the new coverage output file to figure out where the
missing cases used to be covered.
5
Chapter 3. Using QTest on Windows
QTest is known to pass its test suite on Windows both when running under Cygwin and when running with MSYS
and ActiveState Perl. Although QTest itself works on Windows, it was originally designed with a UNIX environment
in mind. As such, you would be best to have a UNIX-like environment. With Cygwin, this is not a problem. If QTest
detects that it is running under ActiveState Perl, it assumes that it is running in an MSYS/MinGW environment. In this
case, it will attempt to discover the Windows path to /bin/sh, and it will use this explicitly when invoking commands.
This is to enable UNIX-like command syntax to work properly in the arguments to runtest.
If you wish to have your test suite work with ActiveState Perl, you must take care to avoid UNIX-specific constructs
in your test suite. Here is a list of issues you should keep in mind:
• Using backquotes (`...`), system, or fork and exec are not likely to work properly. ActiveState Perl (at least as
of 5.10.1) appears to use cmd.exe to run the commands regardless of the value of COMSPEC. In particular, this
means there is no way to run shell scripts that start with #! from system or `...`. QTest emulates this itself using
a function called winrun, which you can find in TestDriver.pm. This function writes out a shell script and then
runs it using /bin/sh.exe. Note that running commands using QTest's own runtest method works fine even if those
commands include embedded `...` calls. This is exercised in the test suite.
• Use of exit values of SIG:n signals is unreliable. Although signals are somewhat emulated inside the MSYS
environment, you really can't count on them since they aren't really supported in Windows.
• If QTest detects that it is running on a terminal, it will try to use ANSI colors for PASSED, FAILED, etc., in its
output. When running MSYS's sh.exe without rxvt, the ANSI terminal codes are not properly interpreted. There
is a module available from CPAN called Win32::Console::ANSI. If you have it installed, QTest will use it, and
you will see the nice, pretty colors. If you don't have it installed, you should probably set the environment variable
ANSI_COLORS_DISABLED to 1 to avoid seeing “garbage” characters around your test outcome indications.
In general, there are other issues to keep in mind about using ActiveState perl. It's really a native Windows perl, and Perl
does little to shield you from the underlying operating system. However, if you are writing software that is supposed
to run in both UNIX and native Windows environments, you are probably well aware of the issues. You generally
have to manually handle differences between Windows paths and UNIX paths and make sure to avoid doing things
that don't work in a Windows environment. There is plenty of documentation on this included with ActiveState's Perl
distribution and in the perlwin32 manual page included with the Perl distribution.
6
Chapter 4. Testing Multithreaded
Software
Testing multithreaded programs in inherently difficult because the order in which output is generated may vary from
one run to another. Within a single thread, however, the order of output should be predictable. The problem with
simply separating output by thread is that important sequence information is lost. Although it may not be possible to
predict the strict sequence of output messages, it should be possible to indicate a strict order among specific groups of
items that span across threads. For example, if one thread reacts to an event in another thread, the reaction must follow
the original event. QTest provides tools to assist with testing multithreaded programs by providing a mechanism to
separate a program's output by thread and to create sequence groups within the output for output lines that span thread
boundaries but must appear in a fixed relative order.
In order to make use of these facilities, each thread must be identified by a unique and predictable string, and that
thread's name must be prepended to each line of output that could potentially be immediately followed by output from
a different thread. The exact syntax that QTest expects is that each line is prepended with [[id]]: where id is the
name of the thread that generated the output. For example:
[[id]]:output line
A good strategy for doing this is to create a logging thread that logs messages on behalf of other threads and identifies
the thread on whose behalf the log message is created. Having log messages written to a thread-safe queue to be
read by a specific logging thread ensures that log messages from different threads will not be arbitrarily interleaved
(even within a single line) without requiring expensive locking of the calls that actually perform the log operations
themselves.
When using QTest's multithreaded testing capabilities, the expected output file for a test case must contain lines that
are prepended by the name of the thread that generated each line, but the lines do not have to be in the exact same
sequence that they will be output by the program being tested. The test framework will require all lines labeled with the
same thread ID to appear in the proper relative order but will compensate for interleaving of other lines. Additionally,
if it is necessary to enforce that certain lines in one thread appear in a specific relative sequence with other lines in
other threads, a sequence group identifier may be inserted in the line after the thread id. The exact syntax is
[[id]]:((seq1,seq2,...))output line
When QTest reads the expected output file, it actually splits it into separate expected output files for each thread and
for each sequence group. When QTest reads the actual output, it uses the thread identifier to match the actual output
line with the next expected line from the expected output file. If the next line from the expected output file is marked
with sequence identifiers, the sequence identifiers are stripped from the line before the comparison is made. Then, in
addition to comparing the line against the thread-specific expected output file, it is also compared with the expected
output file for the sequence group. If there are any mismatches or errors during this process, sequence checking is
abandoned for the remainder of the test case.
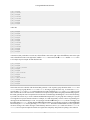
This is all best explained with an example. Suppose event1 from thread A must precede both event2 from thread B
and event3 from thread C and that no other ordering constraints are present including the relative order of event2
and event3. The combined output could look like this:
[[A]]:msgA1
[[C]]:msgC1
[[C]]:msgC2
[[A]]:msgA2
7
Testing Multithreaded Software
[[B]]:msgB1
[[A]]:event1
[[B]]:msgB2
[[C]]:event3
[[B]]:event2
[[B]]:msgB3
[[C]]:msgC3
[[A]]:msgA3
or like this:
[[A]]:msgA1
[[A]]:msgA2
[[A]]:event1
[[C]]:msgC1
[[B]]:msgB1
[[B]]:msgB2
[[B]]:event2
[[C]]:msgC2
[[C]]:event3
[[A]]:msgA3
[[B]]:msgB3
[[C]]:msgC3
or numerous other possibilities. In each case, all the A lines came in the right order, all the B lines came in the right
order, all the C lines came in the right order, and A's event1 came before both B's event2 and C's event3. Here
is an example expected output file that illustrates this:
[[A]]:msgA1
[[A]]:msgA2
[[A]]:((a,b))event1
[[B]]:msgB1
[[B]]:msgB2
[[B]]:((a))event2
[[C]]:msgC1
[[C]]:msgC2
[[C]]:((b))event3
[[A]]:msgA3
[[B]]:msgB3
[[C]]:msgC3
Notice that each line is labeled with the thread that generates it. The sequence group identifiers label event1 and
event2 as being in group a and event1 and event3 as being in group b. In this way, we ensure that event1
precedes both event2 and event3 without imposing any order constraints on event2 and event3 relative to each
other. Note that the overall order of lines is different in our expected output. When designing multithreaded programs,
the author generally has some conceptual notion of the order in which things should happen, even if some interleaving
is possible. The easiest way to create combined multithreaded output files is to just group lines relating to a specific
event together for a specific thread. In the above example, we could conceptually view the software as generating two
messages from thread A relating to event1, two messages from thread B relating to event2, and two messages from
thread C relating to event3. Perhaps threads A, B, and C immediately start generating messages, but threads B and C
block waiting for event1 before generating event2 and event3. Then after each thread does its event, it generates
one more message. The earlier messages could arbitrarily interleaved, and msgA3 could come before event2 or
event3, but our expected output file enables us to ignore this complexity and pretend everything is nice and neat.
8
Testing Multithreaded Software
In order for the test framework to interpret an expected output file as input to a multithreaded test case, the
THREAD_DATA key has to be passed in as part of the output hash passed to runtest. It must contain a list of all the
threads and sequence groups that are expected to appear. Please see TestDriver.pm and the example test suite for the
exact syntax of the call to runtest. The test driver then generates t+s+3 test cases where t is the number of threads
and s is the number of sequence groups. This includes a test that runs the actual program and, if applicable, checks
its exit status, one output comparison test for each thread, one comparison test for each sequence group, one test to
indicate that we saw the correct threads and sequence groups, and a final test that dumps the unfiltered actual output in
comparison to the expected output. 1 Being able to compare the actual output of the program with the expected output
may be useful to help figure out what went wrong, but keep in mind that it will not compensate for reordering due to
interleaving of messages from different threads and will therefore likely contain irrelevant differences. (These are, in
fact, the differences that this system is designed to work around, but when the test case fails, experience shows that
it's sometimes easier to find the failure in context when the actual output is available than by looking separately at
each individual thread and sequence group.)
1
The final test runs only if at least one of the other test fails. Otherwise, it is an empty test case to keep the number of test cases consistent.
9
Chapter 5. Examples
There is an example test suite in the example directory of the QTest distribution. You can run the test suite there
by typing make check from the example directory. You must have the qtest-driver program in your path. The
README.txt file in that directory contains a guided tour of the example test suite with plenty of commentary to explain
how to use all the features of the test system.
Additionally, QTest has its own test suite implemented in itself. The test framework's test suite may be a bit confusing
at first glance because it actually contains other test suites within it. The test framework's test suite combined with
the self-contained test suites that are used within it exercise the complete functionality of the test framework and also
illustrate some techniques that are useful for designing software for use with this test framework such as filtering out
date strings and other things that interfere with storing expected program output. Please see the qtest directory within
the test framework's source code to find the test suites. The top-level Makefile in the QTest source directory contains
an invocation of the test suite in its check target.
10
Chapter 6. Tips and Tricks
Here we discuss a few anecdotes and suggestions of things to keep in mind while designing test cases. These examples
come from issues encountered over years of using this test framework.
6.1. Meaningful Output
Make sure a program's output is meaningful and detailed enough to make sure that the right thing is happening for the
right reason. Here are some examples of test suite problems that have resulted from not having adequately meaningful
output.
6.1.1. Multistage File Transfer
An application was designed to do automated transfer of files from one area to another. The file transfers were arranged
in stages where each stage was identified by a regular expression. The transfer application would transfer all files
whose names matched the regular expression for the first stage. Then, once it finished, it would scan until it found a file
whose name matched the next stage, at which point it would switch to the next stage and start the process over again.
One feature of this application was support of optional stages. Say, for example, that stage 1 and 3 were mandatory
and stage 2 was optional. When the application finished transferring all stage 1 files, it would look not only for stage
2 files but also for stage 3 files. If it found no stage 2 files and at least one stage 3 file, it would skip stage 2 because
stage 2 was optional. To test this program, the test suite created several stage 1 files, several stage 3 files, and no stage
2 files, and verified that the program transferred the files in the correct order: all stage 1 files, then all stage 3 files.
There was a subtle bug in the program: the stage 2 regular expression accidentally matched the stage 3 files, so all
the stage 3 files transferred in stage 2 instead of stage 3, which meant the test suite passed even though the optional
nature of stage 2 had not been exercised. If the software had printed diagnostic messages indicating which stage was
currently in progress, the correct output would have been generated only if the files were transferred in the correct
stages, not just in the correct order.
6.1.2. Program That Generates No Output
An application that was supposed to check a file for correctness reported errors if it found errors but reported nothing
if it found no errors. The test case in the test suite for the normal case expected no output. If the program actually
failed to run any checks at all, the test case would still pass. The program should have been tested in some kind of
verbose mode that would ensure that all its checks were actually being run. Alternatively, some kind of coverage cases
should have been generated. Be especially careful about this with programs named test as you may accidentally be
running /bin/test instead.
6.2. Transient Information
Another common issue that comes up with testing is handling of information that is not constant but is instead a
function of some transient aspect of the environment. Here are some examples of this.
6.2.1. Timestamps
If a program generates timestamps, you might be tempted to just skip over the timestamp generation entirely and replace
it with some fixed string when running in the test environment. Be careful if you do this to make sure that the timestamp
function itself is tested. For example, have the function that creates the timestamp itself by callable separately from
some testing hook. Have one test case that generates a timestamp and compares it to a regular expression and perhaps
subjects it to some additional verification to make sure that it is a valid and accurate timestamp. Then, when running
in the test suite, have the program generate some phony but predictable string so that the test suite's output doesn't
11
Tips and Tricks
actually contain any time strings. QTest's own test suite uses this technique. An alternative technique is to have a filter
that recognizes valid timestamps and replaces them with fixed strings.
6.2.2. Usernames and Paths
It is not uncommon for a program to contain absolute path names or users' login names. In this case, it is useful to have
a filter in the test suite that replaces the current directory with --CWD-- or the current username with --USER--,
for example. This makes the test output independent of who is running the test suite or where it is being run from. To
be sure, it's a good idea to run test suites from different locations or with different login credentials. Similar techniques
may be desirable for normalizing path separators across platform boundaries.
6.3. Including Manual Tests
Many programs will contain some aspects that can't be tested automatically. In these cases, it should be a goal to
structure the software in such a way as to minimize the amount of testing that has to fall into that category. Here are
some examples of how certain test suites have handled this problem. One common theme in these examples is that the
test suite would prompt the user to perform the manual tests and would tell the user exactly what to do and what to
expect. In this way, having the test suites include a few manual tests didn't compromise the goal of having the tests
be runnable by people who were not familiar with the software.
6.3.1. Printer Driver
A driver was written that processed certain types of input to send them to the printer. For the most part, it was sufficient
to just check the data that was actually going to the printer to ensure that it was correct, but at some point, it was
also necessary to make sure that the page actually printed. The driver's test suite itself had one test case that actually
prompted the user for a printer name and sent a page to the printer. The test suite then asked the user whether the page
printed properly by asking the user to verify certain features on the page. Then, for all other test cases for the driver
and for applications that use the driver, the driver implemented a special spool directory from which the application
could pick up the data that was being sent to the printer. In this way, by verifying that the one test case that actually
printed a page was working properly, all other applications that used the print driver could be tested automatically
without actually having to print pages, and those applications' test suites could actually inspect the data from the special
spool directory.
6.3.2. Electronic Highligher
An emacs mode for highlighting text was developed. It included a feature that would enable the user to hit n and p
to move to the next and previous highlighted block. The application software would log to a file the positions within
the file being edited at which the highlighting started and stopped. However, at some point, it was necessary to have
an operator actually verify that the highlighted text was actually highlighted and readable. This test suite included one
manual test case in which it put the operator into a file and told the operator to hit n and p in a certain way and to
verify that certain text was highlighted. The operator would then verify whether the system behaved according to a
specifically described behavior pattern. Once it was known that the actual highlighting code itself was working, all
other tests could be run by simply inspecting the numerical file positions of the highlighted text.
6.4. Manually Created Output
A very important rule to follow when creating test output is to hand-create all your expected output files. This can be
difficult and tedious, but in the end, it is a big time saver. Countless incorrect test results have been “locked in” by
people who just eyeballed the output of a program and, if it looked right, saved it in the test suite. Although, in an ideal
world, we would never compromise on this rule, realistically there are going to be circumstances under which this is
impossible. In such cases, there are several things that can be done instead. In some cases, it may make sense to use a
12
Tips and Tricks
different program to help with generating the test output as long as the other program is not exercising exactly the same
code. For example, using complex keyboard macros in emacs to generate test output may be completely legitimate
if the actual software is generating the output another way. Another possibility is to have the test suite not actually
directly match the output but rather to have a filter that process the output and generates a summary. This technique
can be used for processing audio files or image files looking for certain features. Finally, if generation of the output
is simply too difficult, the test suite developer can create a written list in advance of what they will do to inspect the
output. This is safer than just looking at it and making sure it looks right.
13
Chapter 7. Automated Test Coverage
7.1. Introduction
All software test enthusiasts know the value and importance of thorough automated test suites. By requiring every
piece of code to have an automated test suite, we enforce a designing for testability mentality among our developers
and produce software whose quality is much higher than the norm. To test software thoroughly, it is necessary to
build test suites that include not only black box tests, but also white box, or more aptly named clear box tests that are
carefully crafted to exercise the code in particular ways. By ensuring that our test suites fully exercise our code, we
can produce code that is as close to bug free as any code ever comes.
Even the most thorough black box/clear box test suite may be subject to a few weaknesses. Consider the following
scenarios:
• If the last test case were removed from any passing test suite, all prior cases would still pass. How would you know
whether any functionality exercised by the last test case was still being exercised by the test suite?
• Suppose a particular test case were crafted to exercise a specific boundary condition, but internal parameters were
changed in a way that moved the boundary. The test case may still generate the expected results and therefore still
pass. How would you know whether the boundary condition is still being tested?
• If a programmer who is maintaining a piece of software modifies a test case or a test output file, how can you be
sure the modification hasn't undermined an existing test case, making it no longer exercise the code it was designed
to test?
• If you are reviewing someone's code, how can you easily guarantee that a particular condition is and will always
be exercised by the test suite?
The automated test coverage system included in QTest addresses these and other issues by creating a tight coupling
between the test suite and the conditions in the code that the test suite is supposed to exercise. Specifically, it introduces
a mechanism by which the overall test suite will fail unless all tested scenarios are exercised, even if every individual
test case in the test suite passes. This is achieved with minimal impact on existing test suites and minor impact on
the code being tested, and it works in a wide range of languages and platforms without the need for expensive thirdparty tools.
The techniques discussed here are programming and testing techniques: they require explicit implementation by
software developers while a system is being coded. These techniques are distinct from (and complementary to) the
use of “black-box” tools that analyze running software for code coverage in the traditional sense; i.e., which “lines
of code” are covered during a specific collection of program executions. Although such coverage tools are valuable,
their goals are orthogonal to the goals of QTest's coverage system.
7.2. Test Coverage System Overview
We define the following terms as they are used in this document:
coverage case
any “event” within the software that we wish to detect using the automated test coverage system
coverage scope
a way of assigning coverage cases to a specific test suite, allowing multiple test suites to exercise different coverage
conditions within one body of code
The automated test coverage system consists of three components:
14
Automated Test Coverage
coverage calls
function calls to the coverage system made from inside the code being tested to tell the system that a specific
coverage case has occurred
coverage case registry
a file that lists all the coverage cases that belong to a given scope
coverage analyzer
the program that compares the coverage calls and their results to the coverage case registry
The three components of the coverage system are implemented transparently inside of the QTest framework.
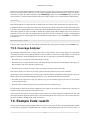
7.3. A Quick Example
Before discussing the details of the coverage system, we present a minimal coverage example. Here is a simple C++
code fragment that tests a condition and takes one of two actions:
if (condition)
{
do_something(val1);
}
else
{
do_something_else();
}
Any test coverage system could ensure that both halves of this branch were executed in a given test suite. Suppose,
however, that we wanted not only to ensure that both branches had been executed, but that the first branch had been
executed at least once with the value of val1 greater than 5 and at least once with the value of val1 not greater than 5.
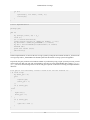
Using our coverage system, we could add coverage calls to encapsulate these conditions. The resulting code fragment
would then look like this:
if (condition)
{
QTC::TC("example", "something", (val1 > 5 ? 0 : 1));
do_something(val1);
}
else
{
QTC::TC("example", "something else");
do_something_else();
}
The call to the function QTC::TC() is an example of a coverage call. It tells the coverage system that a specific event
occurred, perhaps under a specific set of circumstances. We will now explore coverage calls and the rest of the system
in depth.
7.4. Running the Coverage System
The test coverage system is integrated with QTest. It will be active if exactly one file that has the .testcov extension
appears in the directory from which qtest-driver is invoked. Alternatively, if qtest-driver is being invoked from other
than the source directory (such as from a platform-specific object file directory), qtest-driver can be invoked with the
-covdir flag to tell it where to look for coverage files. These details are ordinarily hidden in the integration of QTest
with a specific build environment.
15
Automated Test Coverage
In order to use the coverage system, you will need an implementation of the coverage calls. In the QTest distribution you
can find a Perl implementation in QTC.pm in the top-level directory. Additional implementations for Java, C/C++, and
GNU Make can be found in the QTC directory. You can easily provide your own coverage call implementation in any
language. We provide a simplified example implementation in both Perl and C++ in this document (see Section 7.10,
“Coverage Call Implementation”, page 24). The actual implementations included in the QTC directory may be
somewhat more portable or complete.
7.5. Test Coverage System Details
Here we describe each component of the test coverage system in detail.
7.5.1. Coverage Calls
Each individual coverage case appears in the code as a call to the function QTC::TC(). This function takes three
parameters: a string literal containing the name of the scope, a string literal containing the name of the coverage case,
and an optional numeric argument, which may be an expression. The numeric argument is used to distinguish different
circumstances under which a specific coverage call may be made. In our first example above:
QTC::TC("example", "something", (val1 > 5 ? 0 : 1));
the scope is example, the coverage case name is something, and the numeric argument is dependent upon the value
of the variable val1. With QTest, we require the scope name and coverage case name to be string literals and to appear
lexically on the same line as the coverage call. We also require the coverage call to be preceded only by optional
whitespace. 1 The numeric argument may appear on a subsequent line of the source file if desired. This enables the
coverage system to distinguish between whether this part of the code was executed with the value of val1 greater
than 5 or not and to require that both cases occur in the test suite.
In this scheme, the code being tested is sprinkled with test coverage calls such as the one above. These calls serve both
as the interface from the code into the test coverage system and as a promise to the reader that the code in question
is exercised by the test suite. In effect, this enables the code to test the test suite in addition to having the test suite
test the code. It also enables the developer to add coverage calls to the code while it's being implemented. This is
when the list of boundary conditions, confusing corner cases, etc., is as fresh in the programmer's mind as it ever
will be. The programmer could just keep a running list of ideas for the test suite, but by coding a coverage case, the
programmer guarantees that the code will be exercised in the test suite in exactly the intended way. It is often the
case that development of the code stays a few steps ahead of development of the test suite. Having coverage cases for
new sections of code that have not net been exercised in the test suite prevents the test suite from passing and thereby
prevents the developer from forgetting to test those new sections of code.
Although addition of coverage cases is intended to be done by the programmer, this functionality can also be very
useful for the reviewer. When reviewing someone's code, insertion of a test coverage case into the code is a great way
to determine whether the test suite is exercising the code in a particular way. It also ensures that if it is not, this missing
functionality will be added to the test suite before it will pass again.
7.5.2. Coverage Case Registry
All coverage cases have to be registered in the coverage case registry. The coverage case registry lists all the coverage
cases that are expected to appear in a specific coverage scope along with the maximum expected value of the numeric
argument passed as the third argument to the coverage call. The coverage case registry is an ASCII file named
scope.testcov, where scope is the scope whose cases it lists.
1
This is because the coverage analyzer uses a lexical approach to verifying that all coverage cases are registered. We discuss the registry and
analyzer later in this section.
16
Automated Test Coverage
Exactly one coverage call must appear in the code for every coverage case in a given scope. That call must be made at
least once with each numeric value from zero up to and including the number indicated in the coverage case registry.
In the above example, the numeric argument to the something coverage case in the example scope may have the
value of either 0 or 1 under normal conditions. Therefore, the file example.testcov would contain the following line:
something 1
This indicates that this coverage call must be called at least once with the value 0 and at least once with the value 1.
In addition to the list of coverage cases in this scope, the registry file contains a list of other scopes to allow but ignore
in the code. Any scope that appears in a coverage call in the code other than the primary scope or the explicitly declared
other scopes generates an error. The ability to declare other ignored scopes allows multiple scopes to be present in a
collection of source files while still ensuring that coverage cases won't be overlooked as a result of a typographical
error in the scope name. If the example above also contained coverage calls for a scope called other, we would expect
to see this line:
ignored-scope: other
in the coverage registry file as well. This tells the system that it may safely ignore coverage calls in the other scope.
7.5.3. Coverage Analyzer
The remaining component of the coverage system is the coverage analyzer. The coverage analyzer is a short block
of code that is run once at the beginning and once at the end of the test suite. The coverage analyzer is built into the
QTest test framework. At the beginning of the test suite, the coverage analyzer performs the following tasks:
• Ensure that every coverage case listed in the registry is unique.
• Ensure that every coverage call in the source code either belongs to the current scope and appears in the registry or
that it belongs to one of the explicitly ignored scopes.
• Ensure that every coverage case in the current scope appears exactly one time in the code.
If all of these checks succeed, the test coverage system is activated. Otherwise, the test suite is aborted.
QTest imposes lexical constraints upon coverage calls so that the analyzer can find them without having to have any
ability to parse the programming languages that may be in use. We impose the following restrictions:
• The names of the scope and coverage case must be string literals and must appear on the same line as the name
of the coverage function.
• The name of the coverage function may be preceded on its line by whitespace only.
No restrictions are placed on the numeric argument. It may appear on the same line or a different line, and it may be
a numeric literal or any expression with a numeric value.
At the end of the test suite, the coverage analyzer ensures that every coverage call has been called at least once with
each required numeric argument. It then reports a list of all missing and extra coverage cases. The coverage analyzer's
checks are cumulative throughout the entire test suite run.
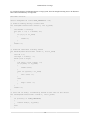
7.6. Example Code: search
Here we present a simple example application that uses our test coverage system. This is a program that finds a number
in a sorted array using either a straight linear scan or a binary search, depending upon the size of the array. This is a
17
Automated Test Coverage
toy program for purposes of illustrating the test coverage system, but it has enough interesting cases to be illustrative.
Here is the code without any coverage calls:
#include <vector>
static unsigned int const SCAN_THRESHOLD = 10;
// Find an item by doing a linear scan
int scan(std::vector<int> const& v, int to_find)
{
int nitems = v.size();
for (int i = 0; i < nitems; ++i)
{
if (v[i] == to_find)
{
return i;
}
}
return -1;
}
// Find the item with a binary search
int bsearch(std::vector<int> const& v, int to_find)
{
int low = 0;
int high = v.size() - 1;
while (low <= high)
{
int test = (low + high) / 2;
if (v[test] == to_find)
{
return test;
}
else if (v[test] < to_find)
{
low = test + 1;
}
else
{
high = test - 1;
}
}
return -1;
}
// Call one of scan() or bsearch() based on the size of the vector
int search(std::vector<int> const& v, int to_find)
{
if (v.size() <= SCAN_THRESHOLD)
{
return scan(v, to_find);
}
else
{
18
Automated Test Coverage
return bsearch(v, to_find);
}
}
The function's implementation is quite straightforward: if the list is smaller than a certain threshold, do a linear scan;
otherwise, do a binary search. The binary search algorithm is just a classic textbook implementation of binary search.
We don't handle cases like detecting that the array isn't sorted, handling duplicate items, etc. This code is to demonstrate
test coverage, not to talk about searching algorithms!
Although this code is simple and straightforward, there are a lot of conditions that a good test suite should exercise.
For example:
• Did both types of search get exercised both for numbers that were found and numbers that were not found?
• Did we have numbers that were not found because they were too low, too high, and in the right range but just not
there?
• Did all three branches of the binary search code get exercised (increasing the lower bound, decreasing the upper
bound, and finding the value)?
This code also presents a good example of how a test case may later no longer test the condition for which it was
originally designed. For example, consider the SCAN_THRESHOLD variable. If we make it too low or too high, we
may find that cases designed to exercise a condition in one type of search suddenly find themselves getting processed
with the other type of search. What we really need is some assurance that the test suite exercises the conditions in
the code that we want it to. The test coverage system allows us to make these assurances into a permanent part of
the test suite.
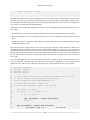
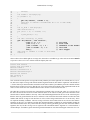
Here is the code again. This time, we're also including a small main() routine to test the search() function as well as
several coverage calls. The main routine just creates an array of consecutive multiples of 3. In a real application, we
might want to test with other arrays, but again, our purpose here is only to illustrate the test coverage system.
01
02
03
04
#include
#include
#include
#include
<iostream>
<stdlib.h>
<vector>
"QTC.hh"
05
06
07
// If you change this threshold to something greater than 15 or less
// than 4, the test suite passes but coverage fails.
static unsigned int const SCAN_THRESHOLD = 10;
08
09
10
11
12
13
14
15
16
17
18
19
20
21
// Find an item by doing a linear scan
int scan(std::vector<int> const& v, int to_find)
{
int nitems = v.size();
for (int i = 0; i < nitems; ++i)
{
if (v[i] == to_find)
{
QTC::TC("search", "linear scan found");
return i;
}
}
QTC::TC("search", "linear scan not found",
((to_find < v[0]) ? 0 :
// too low
19
Automated Test Coverage
22
23
24
25
(to_find > v.back()) ? 1 :
2));
// too high
// just not there
}
26
27
28
29
30
31
32
33
34
35
36
37
38
39
40
41
42
43
44
45
46
47
48
49
50
51
52
53
54
55
// Find the item with a binary search
int bsearch(std::vector<int> const& v, int to_find)
{
int low = 0;
int high = v.size() - 1;
while (low <= high)
{
int test = (low + high) / 2;
if (v[test] == to_find)
{
QTC::TC("search", "bsearch found");
return test;
}
else if (v[test] < to_find)
{
QTC::TC("search", "bsearch increased low");
low = test + 1;
}
else
{
QTC::TC("search", "bsearch decreased high");
high = test - 1;
}
}
QTC::TC("search", "bsearch not found",
((to_find < v[0]) ? 0 :
// too low
(to_find > v.back()) ? 1 :
// too high
2));
// just not there
return -1;
}
56
57
58
59
60
61
62
63
64
65
66
67
// Call one of scan() or bsearch() based on the size of the vector
int search(std::vector<int> const& v, int to_find)
{
if (v.size() <= SCAN_THRESHOLD)
{
return scan(v, to_find);
}
else
{
return bsearch(v, to_find);
}
}
68
69
70
71
72
int main(int argc, char* argv[])
{
if (argc != 3)
{
std::cerr << "Usage: search n-items to-find" << std::endl;
return -1;
20
Automated Test Coverage
73
74
75
76
77
78
79
80
81
82
83
84
85
86
87
88
89
90
91
92
93
94
95
96
97
exit(2);
}
int nitems = atoi(argv[1]);
if (nitems < 1)
{
QTC::TC("search", "nitems < 1");
std::cerr << "search: n-items must be >= 1" << std::endl;
exit(2);
}
int to_find = atoi(argv[2]);
std::vector<int> v;
for (int i = 0; i < nitems; ++i)
{
v.push_back(i * 3);
}
int idx = search(v, to_find);
QTC::TC("search", "idx location",
((idx == -1) ? 0 :
// not found
(idx == 0) ? 1 :
// first item
(idx < nitems - 1) ? 2 :
// somewhere in the middle
(idx == nitems - 1) ? 3 :
// last item
999));
// can't happen
std::cout << "index: " << idx << std::endl;
return 0;
}
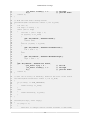
Observe that we have added eight test coverage calls, shown above in boldface type. These calls are all in the search
scope. Here is the search.testcov file that would accompany this code:
linear scan found 0
linear scan not found 2
bsearch found 0
bsearch increased low 0
bsearch decreased high 0
bsearch not found 2
idx location 3
nitems < 1 0
Now we'll look at some specific coverage calls to study what they do. Of the eight calls, five of them (lines 16, 36, 41,
46, and 78) are simple coverage calls with the numeric argument omitted. (The numeric argument's value defaults to
0.) These calls are just inserted into the normal flow of the code to tell the system that the part of the code that contains
them has been executed. You can see that this type of coverage call has been placed at each significant branch in the
code as well as for the one error condition that we want to be sure to exercise in the test suite.
The other three coverage cases make use of the numeric argument to the coverage call. There is a coverage case at
the end of each of the two lower-level search functions (lines 20–23 and 50–53) that gets invoked when the search
function fails to find the number in the array. These calls both distinguish between the case of the value being less
than the first item, greater than the last item, or otherwise. This ensures that the search routines are both tested with
numbers that fall out of range in each direction as well as with in-range numbers that are not in the array. These
are important boundary conditions. The last coverage call in the main routine (lines 89–94) also uses the numeric
argument. In this case, we're making sure that other important boundary conditions are tested including finding the
first and last numbers in the array. Notice that this coverage call may potentially pass the value 999 as the numeric
argument (line 94), but the coverage case is registered with a maximum numeric argument of 3. This illustrates a
useful technique: use numbers greater than the registered maximum for cases that can't happen. If that case were ever
21
Automated Test Coverage
to happen, it would result in the test coverage system reporting idx location 999 as an extra coverage case. Just
as it's often better to have an explicit else clause when coding conditionals, it's often better to use this type of technique
when coding expressions to be used as the numeric argument to a coverage call. This is safer than just assuming you
haven't missed any possibilities.
This code, along with its accompanying test suite, can be found in the example/search directory in the QTest
distribution. See README.txt in that directory for details on how to run it.
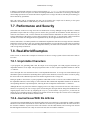
7.7. Performance and Security
Notice that some of the test coverage cases here are called inside of a loop. Although coverage calls have a nominal
performance impact when the coverage system is inactive (they just check an environment variable and return), in
critical or time-sensitive code, even this function call overhead could be undesirable. In some cases, there may be
security implications of having the coverage calls accessible by the end user—a user who knew which environment
variables to set could cause the application to append data to any file the application had write access to.
In cases such as these, it would be possible to use conditional compilation to omit the test coverage calls for a releasable
build of the software. If this is done, it is especially important that the coverage calls have no side effects (a good idea
in any case). To be sure, test suites should be designed so that they can still be run on releasable versions of the code
with coverage analysis turned off.
7.8. Real-World Examples
In this section, we discuss three examples of actual uses of the test coverage system to detect and correct faults in
test suites.
7.8.1. Unprintable Characters
A perl program was generating XML from the output of an OCR program. The OCR program sometimes put
unprintable characters in its output. This perl program had a line of code to replace unprintable characters with the
“?” character.
One of the input files was constructed to have several unprintable characters. A coverage case ensured that the perl
substitution operator returned true (indicating that it replaced some characters) at least once in the test suite by using
the return value of the substitution operator in the numeric argument to the coverage call.
During an update to the software, a junior programmer edited that test file to exercise some condition unrelated to
the unprintable characters, and in doing so, removed the line that contained the unprintable characters. He made the
corresponding edit in the expected output file, removing the line of output that contained the “?” characters.
Although that test case passed, the character stripping code was no longer exercised in the test suite. This caused a
failure to be reported by the test coverage system, thus alerting the developer that his change had undermined the
original purpose of the test case. By comparing the scope.cov_out file with the scope-passed.cov_out file from an
earlier run, it was possible to discover which test case used to exercise the coverage case. The test case was redesigned
so that both the new and old conditions could be tested.
7.8.2. Journal Issue With No Articles
A program was generating XML for some but not all of the articles in a journal issue. Certain articles would be excluded
based on a series of rules. Sometimes an issue would have no articles to be generated because all of the articles met
the exclusion conditions. A special case in the code existed to test this valid situation, and a coverage case ensured
that this happened in the test suite. Only one issue in the test suite exercised this condition.
22
Automated Test Coverage
Six months later, the exclusion rules were changed. As it happened, one of the articles in the special test issue now
no longer met the exclusion conditions. The test coverage system alerted us to the fact that the special “all articles
excluded” case was no longer being exercised, thus enabling us to remove that article from the test issue. The coverage
system further ensured that removing that article didn't undermine any other test conditions.
7.8.3. Waiting for Worker Thread
A multithreaded image manipulation program had a worker thread that calculated information that was not needed
to draw the screen but that was needed to do certain specific manipulations on the image. Upon performing the first
operation that required the results of the calculation, the main thread would block waiting for the worker thread to
finish. This case was exercised in the test suite by having an input image for which the worker thread's calculations
took a long time. A coverage case was associated with code that got executed only when the worker thread was still
running when the main thread first needed the information.
A year later, this code was tested on a much faster machine. The machine was fast enough that the worker thread
finished its calculations on the test image before the main thread needed them. All test cases passed, but the coverage
system alerted us to the fact that the thread waiting code was no longer being exercised. The code was then updated
to force an artificial delay when the IN_TESTSUITE variable was set, thus guaranteeing that the condition would be
tested on a machine of any speed. This turned out to be particularly important because the faster machine was using a
newer implementation of the underlying threading system with which this application had not been previously tested.
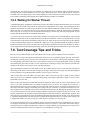
7.9. Test Coverage Tips and Tricks
Here are a few tips and tricks that can be used with the test coverage system to further increase its usefulness.
Pick names for coverage cases that start with the name of the source file in which they appear. This way, the lexically
sorted listing of missing or extra coverage cases reported by the coverage analyzer will be grouped together by source
file. Using naming conventions in this way to cause related coverage cases to be grouped together can also be useful
when running only part of the test suite. You can inspect the list of missing coverage cases and make sure that none
of them are for the part of the code that you're currently working on.
Agree on naming conventions for certain kinds of cases. For example, put the word ERR after the source file name in
all coverage cases that are associated with issuing error messages. This causes all coverage cases that should happen
in error conditions to be grouped together within the cases for a given source file.
Add coverage calls to the code while it is being written—that's when you're best able to think of all the detailed
clear-box test cases you couldn't have thought of during design. This makes it impossible to forget to exercise certain
functionality in the test suite.
Make coverage calls themselves conditional upon the circumstances under which you want to ensure that the event
occurs, even if this information has to be passed in explicitly by the test driver. For example, the test suite for a
configuration file parser may want to make sure that a particular construct appears in a file that contains no errors. It
may not be sufficient to simply avoid making the coverage call if no errors have yet been detected because an error
may still appear in the configuration file after the construct has already been seen. Although the application may have
no way to know that, the test suite knows in advance whether a specific run is supposed to have errors or not. It can
pass this information to the program being tested through an environment variable or command-line argument. The
code being tested can make the coverage call conditional upon that information instead. In other words, don't be afraid
to exploit knowledge that the test suite may have beyond what the application knows even if this means writing code
in the application that exists solely to help it be tested. These are clear-box test cases after all.
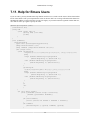
Use numerical arguments not only for conditions that are expected to happen but also for conditions that are expected
not to happen. Expected cases are numbered consecutively from 0 to n, where n is the number listed in the registry.
Unexpected cases are numbered greater than n. That way, missing conditions generate missing test coverage cases,
and extra conditions generate extra test coverage cases. For example, this coverage call:
23
Automated Test Coverage
QTC::TC("image", "border placement",
((left && (! right)) ? 0 :
(right && (! left)) ? 1 :
999)); // 999 not expected
when accompanied by this registry line:
border placement 1
would cause generation of the extra coverage case “border placement 999” if left and right were either both
true or both false. This would result in a coverage failure.
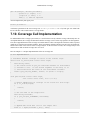
7.10. Coverage Call Implementation
To understand how this coverage system works, it is useful to know exactly what the coverage call actually does. In
our implementation, the coverage call determines whether coverage is active in the scope passed as its first argument.
If so, then it appends the name of the coverage case and the numeric value to an output file. The names of the scope and
output file are read from environment variables. These environment variables will have been set by the test framework
based on the results of the first run of the coverage analyzer. At the end of the test suite, the coverage analyzer will
read this file to find out which coverage cases were seen.
Here are sample C++ and perl implementations of the test coverage call:
// C++ implementation
// Determine whether coverage is active in the current scope
static bool tc_active(char const* const scope)
{
std::string value;
// The return value of get_env indicates whether an environment
// variable is set. If the second argument is non-null, it is
// initialized with the value of the environment variable.
return (get_env("TC_SCOPE", &value) && (value == scope));
}
void QTC::TC(char const* const scope,
char const* const ccase, int n /*= 0*/)
{
// Return immediately if coverage is not active for this scope.
if (! tc_active(scope))
{
return;
}
// Get the name of the output file.
std::string filename;
if (! get_env("TC_FILENAME", &filename))
{
return;
}
// Append data from this call to the output file.
FILE* tc = fopen(filename.c_str(), "ab");
24
Automated Test Coverage
if (tc)
{
fprintf(tc, "%s %d\n", ccase, n);
fclose(tc);
}
}
# Perl implementation
package QTC;
sub TC
{
my ($scope, $case, $n) = @_;
local $!;
$n = 0 unless defined $n;
return unless ($scope eq ($ENV{'TC_SCOPE'} || ""));
my $filename = $ENV{'TC_FILENAME'} || return;
my $fh = new FileHandle(">>$filename") or return;
binmode $fh;
print $fh "$case $n\n";
$fh->close();
}
In these implementations, we activate the test coverage system by setting the environment variable TC_SCOPE to the
coverage scope and TC_FILENAME to the absolute path of the file that the coverage system will append to.
In perl code, the QTC.pm file has to be loaded at runtime. If you don't ship a copy of QTC.pm with your code, you will
want to make sure that your code will work whether or not QTC.pm can be found. Rather than a simple require
QTC;, you can use the following block of code to load QTC if present or fall back to an empty stub implementation
otherwise:
# If QTC is not available, create a stub so we can run without it.
{ # local scope
my $have_qtc = 0;
eval
{
require QTC;
$have_qtc = 1;
};
if (! $have_qtc)
{
eval
{
&QTC::TC();
$have_qtc = 1;
}
}
if (! $have_qtc)
{
*QTC::TC = sub { }
}
}
25
Automated Test Coverage
7.11. Help for Emacs Users
If you use emacs, you may find this emacs lisp function useful. To use it, make sure the testcov file has been loaded
into an emacs buffer. Then you can position the cursor on the line with a test coverage call and run this function to
automatically add the coverage call to the coverage case registry. If you want a numeric argument of other than zero,
run CTRL-U n M-x qtc-register to specify the value.
(defun qtc-register (num)
(interactive "P")
(setq num
(cond ((null num) 0)
((listp num) (car num))
(t num)
)
)
(let (comment)
(save-excursion
(goto-char (line-beginning-position))
(skip-chars-forward " \t")
(setq comment (skip-chars-forward "/# \t"))
(let (scope case)
(cond ((looking-at
"&?QTC\\(::\\|\\.\\)TC(\"\\([^\"]+\\)\", \"\\([^\"]+\\)\"")
(setq
scope (buffer-substring-no-properties
(match-beginning 2) (match-end 2))
case (buffer-substring-no-properties
(match-beginning 3) (match-end 3))
)
)
((looking-at
"[^#\n]*\\$(call QTC\\.TC,\\([^,]+\\),\\([^,)]+\\)")
(setq
scope (buffer-substring-no-properties
(match-beginning 1) (match-end 1))
case (buffer-substring-no-properties
(match-beginning 2) (match-end 2))
)
)
(t
nil
)
)
(if (not (null scope))
(let* ((bufname (concat scope ".testcov"))
(buffer (get-buffer bufname))
)
(if (null buffer)
(error (concat "no buffer " bufname " exists"))
)
(if comment
(delete-region (- (point) comment) (point))
)
26
Automated Test Coverage
(set-buffer buffer)
(goto-char (point-max))
(insert case " " (int-to-string num) "\n")
(save-buffer)
)
(error "this line does not contain a test coverage call")
)
)
)
)
)
If you would like to copy this code into your emacs environment, you can find the code in a CDATA block in the
XML sources of the QTest manual, manual-src/qtest-manual.xml in the QTest source distribution.
27