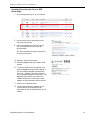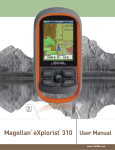
1
Magellan eXplorist 310
®
®
User Manual
www.magellan.com.au
MiTAC Digital Corporation
471 El Camino Real, Santa Clara, CA 95050 USA
www.magellanGPS.com
Revisions
Initial Release
B/1/201
Initial release with basic functions
Safety Warnings
The Magellan eXplorist is a navigation aid designed to assist you in arriving at your selected destination. When using the
Magellan eXplorist, these safety rules must be followed to prevent accidents that can result in injury or death to yourself
or others:
IN THE INTERESTS OF SAFETY, DO NOT USE THIS NAVIGATION DEVICE WHILE DRIVING A
VEHICLE.
Please do not try to change any settings on the Magellan eXplorist while driving. Come to a complete stop or ask a
passenger make any changes. Taking your eyes off the road is dangerous and can result in an accident in which you or
others could be injured.
USE GOOD JUDGEMENT
This product is an excellent navigation aid, but does not replace the need for careful orienteering and good judgement.
Never rely solely on one device for navigating.
USE CARE
The Global Positioning System (GPS) is operated by the U.S. Government, which is solely responsible for the accuracy
and maintenance of the GPS network. The accuracy of position fixes can be affected by the periodic adjustments to
GPS satellites made by the U.S. government and is subject to change in accordance with the Department of Defence
civil GPS user policy and the Federal Radionavigation Plan. Accuracy can also be affected by poor satellite geometry
and obstructions, like buildings and large trees.
USE PROPER ACCESSORIES
Use only Magellan cables and antennas; the use of non-Magellan cables and antennas may severely degrade
performance or damage the receiver, and will void the warranty.
No part of this guide may be reproduced or transmitted in any form or by any means, electronic or mechanical,
including photocopying and recording, for any purpose other than the purchaser’s personal use without the prior written
permission of MiTAC Digital Corporation.
Federal Communication Commission Interference Statement
This equipment has been tested and found to comply with the limits for a Class B digital device, pursuant to Part 15 of
the FCC Rules. These limits are designed to provide reasonable protection against harmful interference in a residential
installation. This equipment generates, uses and can radiate radio frequency energy and, if not installed and used
in accordance with the instructions, may cause harmful interference to radio communications. However, there is no
guarantee that interference will not occur in a particular installation. If this equipment does cause harmful interference to
radio or television reception, which can be determined by turning the equipment off and on, the user is encouraged to try
to correct the interference by one of the following measures:
•
Reorient or relocate the receiving antenna.
•
Increase the separation between the equipment and receiver.
•
Connect the equipment into an outlet on a circuit different from that to which the receiver is connected.
•
Consult the dealer or an experienced radio/TV technician for help.
This device complies with Part 15 of the FCC Rules. Operation is subject to the following two conditions: (1) This device
may not cause harmful interference, and (2) this device must accept any interference received, including interference
that may cause undesired operation.
FCC Caution: Any changes or modifications not expressly approved by the party responsible for compliance could void
the user’s authority to operate this equipment.
IMPORTANT NOTE:
FCC Radiation Exposure Statement:
This equipment complies with FCC radiation exposure limits set forth for an uncontrolled environment. End users must
follow the specific operating instructions for satisfying RF exposure compliance.
This transmitter must not be co-located or operating in conjunction with any other aerial or transmitter.
In order to maintain compliance with FCC regulations, shielded cables must be used with this equipment. Operation with
non-approved equipment or unshielded cables is likely to result in interference to radio and TV reception. The user is
cautioned that changes and modifications made to the equipment without the approval of manufacturer could void the
user’s authority to operate this equipment.
The Magellan eXplorist must be installed and operated at a distance no closer then 8 inches (20 cm) from the user.
This Class B digital device meets all requirements of the Canadian Interference-Causing Equipment Regulations.
IC statement
Operation is subject to the following two conditions:
This device may not cause interference.
This device must accept any interference, including interference that may cause undesired operation of the device.
IMPORTANT NOTE:
IC Radiation Exposure Statement:
This equipment complies with IC radiation exposure limits set forth for an uncontrolled environment. End users must
follow the specific operating instructions for satisfying RF exposure compliance.
This transmitter must not be co-located or operating in conjunction with any other antenna or transmitter.
The information provided in this document is subject to change without notice. Improvements and enhancements to the
product may occur without any formal notification. Check the Magellan website (www.magellanGPS.com) for product
updates and additional information.
www.magellan.com.au
Maximum normal use temperature is 66°C.
© 2011 MiTAC International Corporation. The Magellan logo, Magellan, eXplorist and OneTouch are registered
trademarks of MiTAC International Corporation.
112-0017-001 B
Table of Contents
Using the Magellan eXplorist.......................................................1
Installing the Batteries...................................................................................... 1
Replacing the Batteries.................................................................................................................... 1
Setting the Battery Type................................................................................................................... 1
Powering the Magellan eXplorist....................................................................... 2
Turning the Receiver On................................................................................................................... 2
Turning Receiver Off......................................................................................................................... 2
Conserving Power.............................................................................................. 2
Setting Active Suspend Timer.......................................................................................................... 2
Setting Power OFF Timer................................................................................................................. 2
Setting Backlight Brightness........................................................................................................... 2
Setting Backlight Timer.................................................................................................................... 3
Dashboard............................................................................................................................................3
Accessing the Dashboard................................................................................................................ 3
Main Menu............................................................................................................................................3
Accessing the Main Menu................................................................................................................ 3
Options Menu.......................................................................................................................................3
The BACK Button............................................................................................... 4
Entering Text and Numeric Data........................................................................ 4
Map Screen..................................................................................5
Map Screen Overview......................................................................................... 5
Changing Zoom Levels..................................................................................................................... 5
Setting the Number of Data Fields................................................................................................... 5
customising
Customizing the Data Fields............................................................................................................ 5
Displaying a Compass on the Map Screen..................................................................................... 5
Navigation Lines................................................................................................ 6
Hiding/Showing Active Track........................................................................................................... 6
Clearing Active Track........................................................................................................................ 6
Starting a New Track......................................................................................................................... 6
Viewing Track Summary................................................................................................................... 6
Viewing an Overview of the Active Track........................................................................................ 6
Backtrack........................................................................................................... 6
Creating a Backtrack Route............................................................................................................. 6
Pan Mode........................................................................................................... 7
Accessing Pan Mode........................................................................................................................ 7
Creating a Waypoint in Pan Mode.................................................................................................... 7
Maps.................................................................................................................. 7
Accessing Loaded Maps.................................................................................................................. 7
Dashboard Screens......................................................................9
Displaying the Dashboard Screen................................................................................................... 9
Changing the Dashboard Screen..................................................................................................... 9
Compass Screen ................................................................................................................................................. 9
Road Screen ......................................................................................................................................................... 9
Strip Compass Screen ....................................................................................................................................... 9
Satellite Status Screen .................................................................................................................................... 10
Altimeter Screen ................................................................................................................................................ 10
Data Only Screen .............................................................................................................................................. 10
Customising
Customizing Data Fields.................................................................................. 11
Setting the Number of Fields Displayed....................................................................................... 11
Changing Displayed Data............................................................................................................... 11
Waypoints.................................................................................. 13
Accessing the Waypoint List......................................................................................................... 13
Sorting the Waypoint List.............................................................................................................. 13
Searching for a Saved Waypoint................................................................................................... 13
Editing a Saved Waypoint.............................................................................................................. 13
Go to a Waypoint from the Waypoint Description........................................................................ 14
Viewing the Waypoint on the Map................................................................................................. 14
Marking a Waypoint as a Favorite................................................................................................. 14
Waypoints and the Map Screen........................................................................ 14
Creating a Waypoint while Panning............................................................................................... 14
Saving Your Current Location as a Waypoint.............................................................................. 14
Waypoint Projection......................................................................................... 14
Projecting a Waypoint..................................................................................................................... 14
Geocaches.................................................................................. 15
Installing Geocaches (Send to GPS) ................................................................. 15
Installing Geocaches with ‘Send to GPS’ (List Page).................................................................. 15
Installing Geocaches with ‘Send to GPS’ (Detail Page)............................................................... 16
The Magellan Communicator........................................................................... 17
www.magellan.com.au
Direct installation of the Magellan Communicator from www.magellangps.com..................... 17
Installing Geocaches (Drag n Drop).............................................................................................. 17
Installing Geocaches with Drag ‘n Drop....................................................................................... 17
Geocache List................................................................................................... 18
Accessing the Geocache List........................................................................................................ 18
Sorting the Geocache List.............................................................................................................. 18
Searching for a Saved Geocache.................................................................................................. 18
Go to a Geocache on the Geocache List...................................................................................... 18
Editing a Stored Geocache............................................................................................................. 18
Adding/Editing/Deleting a Field Note............................................................................................ 18
Go to a Geocache from the Geocache Description..................................................................... 19
Viewing the Geocache on the Map................................................................................................ 19
Go to a Geocache While Viewing on the Map............................................................................... 19
Marking a Geocache as a Favorite................................................................................................ 19
Adding a Geocache........................................................................................... 19
Saving Your Current Location as a Geocache Waypoint............................................................ 19
Geocache Summary......................................................................................... 19
Accessing the Geocache Summary.............................................................................................. 19
Points of Interest (POI)............................................................... 21
Accessing POIs................................................................................................. 21
Finding a POI by Category............................................................................................................. 21
Finding a POI Using Search by Name........................................................................................... 22
Creating a Route to a POI .............................................................................................................. 22
Viewing POI Details......................................................................................................................... 22
eXplorist Tools........................................................................... 23
The Tools Menu................................................................................................ 23
Accessing the Tools Menu............................................................................................................. 23
Settings...............................................................................................................................................23
Accessing Receiver Settings......................................................................................................... 23
Track Summary..................................................................................................................................23
Viewing Track Summary................................................................................................................. 23
Geocache Summary.......................................................................................................................... 23
Viewing Geocache Summary......................................................................................................... 23
Waypoint Projection.......................................................................................................................... 23
Projecting a Waypoint..................................................................................................................... 23
Best Fishing & Hunting Times.......................................................................................................... 24
Using Best Fishing & Hunting Times............................................................................................ 24
Sun & Moon Rising and Setting Times............................................................................................ 24
Using Sun & Moon Times............................................................................................................... 24
Help.....................................................................................................................................................24
Accessing Help Files...................................................................................................................... 24
Play Product Demo............................................................................................................................ 24
Accessing the Product Demo........................................................................................................ 24
Stopping the Product Demo........................................................................................................... 24
Screen Capture..................................................................................................................................24
Activating Screen Capture............................................................................................................. 24
Owner Information............................................................................................................................. 24
Setting Owner Information............................................................................................................. 24
Settings...................................................................................... 25
The Settings Menu........................................................................................... 25
Accessing the Settings Menu........................................................................................................ 25
Settings............................................................................................................ 25
Brightness and Volume..................................................................................................................... 25
Adjusting Brightness...................................................................................................................... 25
Setting the Backlight Timer............................................................................................................ 25
Adjusting Volume............................................................................................................................ 25
Muting the Volume.......................................................................................................................... 25
Power..................................................................................................................................................25
Setting Active Suspend Timer........................................................................................................ 25
Setting Power Off Timer.................................................................................................................. 25
Selecting Battery Type.................................................................................................................... 25
Date and Time....................................................................................................................................26
Selecting the Date Format.............................................................................................................. 26
Selecting the Time Format............................................................................................................. 26
Selecting the Calendar Format...................................................................................................... 26
Selecting the Time Zone (Auto or Manual).................................................................................... 26
Maps....................................................................................................................................................26
Selecting Map..................................................................................................................................26
Map Options.......................................................................................................................................26
Setting Map View (2D or 3D)........................................................................................................... 26
Setting Map Orientation.................................................................................................................. 26
Setting the Number of Map Fields................................................................................................. 26
Defining Quick Info Details............................................................................................................. 26
Toggling Position Destination Lines (On/Off)............................................................................... 26
Toggling Origin Destination Lines (On/Off).................................................................................. 26
Toggling Track Lines (On/Off)........................................................................................................ 27
Setting Map Detail Level................................................................................................................. 27
Toggling Topo Lines
Lines (On/Off).
(On/Off)........................................................................................................
when optional Topo Map is purchased
27
Setting Shaded Relief Level........................................................................................................... 27
Setting Geocache Waypoints Display Criteria............................................................................. 27
Setting Waypoint Display Style...................................................................................................... 27
Toggling POI Waypoints (On/Off)................................................................................................... 27
Selecting Current Location Icon.................................................................................................... 27
Toggling Auto Zoom (On/Off)......................................................................................................... 27
Map Draw Mode............................................................................................................................... 27
Units (Units of Measure)................................................................................................................... 27
Setting Distance Units of Measure................................................................................................ 27
Setting Speed Units of Measure.................................................................................................... 27
Setting Elevation Units of Measure............................................................................................... 28
Setting Area Units of Measure....................................................................................................... 28
Tracks.................................................................................................................................................28
Setting Track Logging Mode.......................................................................................................... 28
Alarms.................................................................................................................................................28
Setting the Off Course Alarm......................................................................................................... 28
Toggling Arrival Alarm.................................................................................................................... 28
Defining the Arrival Alarm.............................................................................................................. 28
Setting the Waypoint Proximity Alarm.......................................................................................... 28
Night Mode.........................................................................................................................................28
Setting Night Mode Use.................................................................................................................. 28
Joystick Functions............................................................................................................................ 28
Assigning Joystick Functions....................................................................................................... 28
Compass.............................................................................................................................................28
Assigning Compass Graphic......................................................................................................... 28
Background........................................................................................................................................29
Satellite...............................................................................................................................................29
Viewing the Satellite Status Screen............................................................................................... 29
GPS.....................................................................................................................................................29
Turning the GPS Receiver On/Off.................................................................................................. 29
Navigation..........................................................................................................................................29
Setting Primary Coordinate System.............................................................................................. 29
Setting Primary Coordinate Type................................................................................................... 29
Setting Primary Coordinate Accuracy........................................................................................... 29
Setting Primary Coordinate Datum................................................................................................ 29
Setting Secondary Coordinate System......................................................................................... 29
Setting Secondary Coordinate Type.............................................................................................. 29
Setting Secondary Coordinate Accuracy...................................................................................... 29
Setting Secondary Coordinate Datum........................................................................................... 29
Selecting North Reference............................................................................................................. 29
Setting Altimeter Source................................................................................................................. 29
Memory...............................................................................................................................................30
Clear Memory from Device............................................................................................................. 30
Restoring Factory Defaults............................................................................................................ 30
Connectivity.......................................................................................................................................30
Setting Receiver Connectivity........................................................................................................ 30
Diagnostics........................................................................................................................................30
Running the Audio Test.................................................................................................................. 30
Running the Video Test................................................................................................................... 30
Running the Keypad Test............................................................................................................... 30
Language............................................................................................................................................30
Selecting Language........................................................................................................................ 30
Product Information.......................................................................................................................... 30
Viewing the Receiver Serial Number............................................................................................. 30
Viewing the SW Version, EULA or Copyright Information........................................................... 30
Using the Magellan eXplorist
The Magellan eXplorist GPS receiver is designed to be easy enough for the casual ‘explorer’ as well as having
all of the advance features the ‘enthusiast’ requires. This chapter provides information on the basics of using
the Magellan eXplorist GPS receiver.
Use of the Joystick to Select or ENTER. Throughout this manual you will be asked to ‘select’ a button or icon.
This is done by using the joystck (left, right, up, down) to highlight the item on the display. Pressing down on the
joystick provides the ENTER command to the receiver.
Installing the Batteries
The Magellan eXplorist GPS receiver uses two
AA batteries that provides 16 hours of normal use.
(See the section on Power Settings for details as to
how to extend the battery life.) Lithium, alkaline or
rechargeable batteries can be used but both batteries
need to be of the same type and should be defined
in the Tools > Power function in the receiver (see
Setting Battery Type).
Replacing the Batteries
1. Remove the battery door by raising the arm
on the battery door lock and turning it counter
clockwise for one-quarter of a turn.
2. Remove the battery door. The battery
door pivots from the bottom. The
pivot points will release when the top
of the battery door is being raised.
4. Replace the battery door by first aligning the
pivot tabs at the bottom of the door with the
receiver.
5. Lower the battery door until it seats firmly
against the receiver. (Note: you may need to
turn the battery door lock counter clockwise to
allow the door to seat against the back of the
receiver.)
6. Turn the battery door lock clockwise, locking
the door in place.
Setting the Battery Type
1. With the receiver on and the Map screen
displayed, press the BACK button.
2. The Menu screen is displayed. Use
the joystick to highlight the Tools
icon. Press the joystick to Enter.
3. Select Settings (use the joystick to highlight
Settings and press the joystick for Enter.)
3. Install two AA batteries as shown.
4. Select Power.
5. Select Battery Type. A drop-down menu is
displayed.
6. Select the type of battery installed; Alkaline,
Rechargeables or Lithium.
7. Use BACK button to return to the Menu
screen.
Magellan eXplorist 310 User Manual
1
Using the Magellan eXplorist
8. Select the Map icon to return to the Map
screen.
Powering the Magellan eXplorist
Turning the Receiver On
The power button is recessed and requires that you
hold it down for 2 seconds to prevent accidental
power on.
1. Press and hold the Power button (top left of
the receiver) for 2 seconds.
Turning Receiver Off
When turning the receiver off you have two options,
Suspend, Sleep or Power OFF.
Suspend: Turns off the receiver display but the
GPS information will continue updating. Also if
you have an alarm set, it will continue to alert you
at the appropriate times. Use the Power button
to active the display while suspended.
Sleep: (Option is displayed only when an alarm is
set.) Turns off the display and the GPS receiver
but alarms will continue to function, providing
alerts for the current alarm settings. Use the
Power button to active the display and GPS while
asleep.
Power OFF. Shuts the receiver off completely.
1. Press the Power button.
2. Select Suspend, Sleep (when available), or
Power OFF.
Setting Active Suspend Timer
This option sets the time duration that if the display
is not touched that the receiver will automatically go
into Suspend Mode. Press the Power button to exit
Suspend Mode.
1. With the receiver on and the Map screen
displayed, press the BACK button.
2. Select the Tools icon at the bottom of the
display.
3. Select Settings.
4. Select Power.
5. Select Active Suspend Timer. A drop-down
menu is displayed.
6. Select the duration that the receiver will
automatically go into suspend mode when the
display is not touched.
Setting Power OFF Timer
This option sets the time duration that the receiver
will power off if the display is not touched. (Useful
for times when you forget that you set the receiver in
suspend or sleep mode.)
1. With the receiver on and the Map screen
displayed, press the BACK button.
2. Select the Tools icon at the bottom of the
display.
3. Select Settings.
4. Select Power.
5. Select Power OFF Timer. A drop-down menu
is displayed.
Warning: Use caution when setting the
receiver in Suspend or Sleep mode. The
receiver will appear off but is still using
battery power. Be sure to turn the receiver off using
Power OFF whenever not in use.
Conserving Power
customised
The Magellan eXplorist can be customized to extend
the battery life of the AA batteries installed. There are
four functions, (Backlight Timer, Brightness, Active
Suspend Mode, and Power OFF Timer) that can be
set to help extend battery life.
6. Select the duration that the receiver will
automatically power off when the display is not
touched.
Setting Backlight Brightness
The receiver backlight is one of the primary drains
on the battery life. Setting the brightness to about
40% and the backlight timer to 1 minute provides
a good user experience as well as extends the
battery life.
1. With the receiver on and the Map screen
displayed, press the BACK button.
2. Select the Tools icon at the bottom of the
display.
3. Select Settings.
Magellan eXplorist 310 User Manual
2
Using the Magellan eXplorist
4. Select Brightness & Volume.
5. Select the Brightness slider to set the desired
backlight brightness.
Setting Backlight Timer
This option sets the time duration that the backlight
will turn off if the displayed is not touched. Touch
the display to restore the backlight.
Main Menu
The Main Menu provides access to the Map screen,
waypoint tools, track tools, geocaches, route tools,
address book, POI and media tools. The Main Menu
is also provides access to the eXplorist tools and
settings.
1. With the receiver on and the Map screen
displayed, press the BACK button.
2. Select the Tools icon at the bottom of the
display.
3. Select Settings.
4. Select Brightness & Volume.
5. Select the Backlight Timer. A drop-down menu
is displayed.
6. Select the duration that the backlight will turn
off when the display is not touched.
Dashboard
The Dashboard is an optional navigation screen that
can be used in conjunction with the Map screen.
There are eight different dashboard styles that can be
selected. (See the chapter on the Dashboard screen
for additional information.)
Accessing the Dashboard
1. With the receiver on and the Map screen
Accessing the Main Menu
1. With the receiver on and the Map screen
displayed, press the BACK button.
Options Menu
The Options Menu can be found on many screens
in the lower right corner of the display. This menu
provides quick access to the most commonly used
functions associated with the screen being displayed.
displayed, press the BACK button.
2. Select the Dashboard icon.
Note: The icon displayed changes to
reflect the type of dashboard being used.
Magellan eXplorist 310 User Manual
3
Using the Magellan eXplorist
The BACK Button
The BACK button is used to access the previously
viewed screen unless you are viewing the Map
screen and then it is used to access the Main
Menu.
Entering Text and Numeric Data
Entering text and numbers is done by the use of a
displayed keyboard.
Accessing the different keyboard
layouts is done by Selecting on
the left or right arrows.
Uppercase characters can also be
used by Selecting the shift key.
Entering a space is done using
the space bar key.
To backspace, Select the
backspace key.
To save the text entered, Select
the green accept button.
To cancel and return to the
previous screen Select the back
button.
Magellan eXplorist 310 User Manual
4
Map Screen
The Map screen will be the screen you most commonly use and a good understanding of its workings will
enhance your experience with the Magellan eXplorist. The Map screen can be displayed in two modes,
Navigate and Pan. In Navigate Mode your current location is displayed along with a graphical indication of
where you’ve travelled (track) and information about where you are going (route). In Pan Mode you can ‘pan’
around the map looking for places to go or places to create a waypoint.
Battery Life
Backlight
Time
Mode
Satellite Status
Current Location
Icon
Map Scale
North Indicator
Data Fields
Map Screen Overview
Changing Zoom Levels
1. Use the Zoom + or the Zoom - buttons to
change the zoom level.
2. The map scale will change and can be
3. Use the joystick to set the number of data
fields.
4. Press BACK to finish.
Customizing the Data Fields
Customising
1. Press MENU button while viewing the Map
screen.
identified by the map scale in the lower right
portion of the map.
2. Select Edit Nav Fields.
NOTE: If you are in a route the map scale
can change automatically to a scale that best
displays the route. You can turn autoscale off
in Tools > Settings > Map Options.
4. Select on the data type field from the list
Setting the Number of Data Fields
1. Press MENU button while viewing the Map
screen.
2. Select Edit # of Fields....
Magellan eXplorist 310 User Manual
customised
3. Select the Data Field to be customized.
displayed.
5. Use the BACK button to exit.
Displaying a Compass on the Map Screen
1. Press MENU button while viewing the Map
screen.
2. Select Show Compass.
5
Magellan eXplorist Map Screen
Navigation Lines
Navigation lines are displayed on the map providing
you with route destination indicators and active track.
Active Track. Displays a history
of your travels when you are
routing to a destination.
Active Track. Displays a history
of your travels when you are not
routing to a destination.
Origin Destination Line.
Originally computed route from
point of origin to your destination.
Route Line. Computed multi-leg
route.
Point Destination Line. Guidance
from your current position to the
destination.
Hiding/Showing Active Track
1. Press the BACK button while viewing the Map
screen.
2. Select on the Tracks icon.
3. Press the MENU button.
4. Select Hide Active Track or Show Active
Track.
Clearing Active Track
1. Press the BACK button while viewing the Map
Viewing Track Summary
1. Press the MENU button while viewing the Map
screen.
2. Select Track Summary.
3. A summary of the current track is displayed.
Viewing an Overview of the Active Track
1. Press the MENU button while viewing the Map
screen.
2. Select Active Track Area.
3. The Map screen is scaled to display the entire
area covered by the active track. The top of
the display provides information about the area
and the perimeter that the track covers.
Backtrack
You can use the track of your current travels to
navigate back to your point of departure by creating
a Backtrack route. This will provide you with the
information needed to travel back to where you
started following the same path used to get where
you are.
Creating a Backtrack Route
1. Press the MENU button while viewing the Map
screen.
2. Select Backtrack.
screen.
2. Select on the Tracks icon.
3. Press the MENU button.
4. Select Clear Active Track.
Starting a New Track
1. Press the BACK button while viewing the Map
screen.
2. Select Start. (If a track is already being saved,
you will need to select the Save icon first.)
3. Confirm that you want to delete the current
active track and start a new track.
This track can be paused/restarted and saved
to the receiver.
Magellan eXplorist 310 User Manual
6
Magellan eXplorist Map Screen
Pan Mode
Accessing Pan Mode
1. Use the joystick to move the cursor while
viewing the Map screen.
2. The Map screen goes into pan mode.
3. Keep using the joystick to display a point that
you would like to create a route to or a make a
waypoint.
Using the Zoom In and Zoom Out buttons
will help you pick the location quickly and
accurately.
Creating a Waypoint in Pan Mode
1. Select on the map the point at which you want
to create a waypoint.
2. Press MENU.
3. Modify and save the waypoint as described in
Maps
Additional maps for the eXplorist may be available
from the Magellan Store at www.magellangps.com.
Once the map has been purchased and installed you
will need activate it in your receiver.
www.magellan.com.au
Accessing Loaded Maps
1. Press MENU while viewing the Map screen.
2. Select Maps.
3. Choose World Maps or Detailed Maps to see
the individual maps installed.
4. If the map has a checkmark before its name
it has been activated and is in use by your
receiver. You can toggle the map on or off by
Selecting on the check mark box to the left of
the map name.
5. Select the map name to get more detailed
information about the map that is installed.
the chapter on Waypoints.
Magellan eXplorist 310 User Manual
7
Dashboard Screens
The Dashboard provides a secondary screen that can be used to assist you in your travels. There are nine
screens, most of them customizable, that you can select from.
customisable
Accessing the Dashboard
Road Screen
Displaying the Dashboard Screen
1. While viewing the Map screen, press BACK.
2. Select the Dashboard icon.
3. The currently chosen Dashboard screen is
displayed.
Changing the Dashboard Screen
1. Access the Dashboard screen.
2. Press MENU.
3. Select Switch Dashboard.
4. Select the icon of the Dashboard screen you
want to display.
Types of Dashboard Screens
Compass Screen
The Road screen displays a graphical road with
a strip compass above the road. This compass
displays your heading and your heading’s relation
to the sun, moon and your destination (black arrow)
when they are within 50 degrees on either side of
your heading. The data fields at the top of the display
are customizable (see Customizing the Data Fields).
customisable
Strip Compass Screen
Customising
recognisable
The Compass screen displays a recognizable
compass that can be used to display your heading
and your heading’s relation to the sun, moon and your
destination (black arrow). The data fields at the top
of the display are customizable (see Customizing the
Data Fields). The graphic displayed that is used for
the compass is customizable as well.
customisable
Customising
The Strip Compass screen displays a strip compass
(similar to the Road screen but the Strip Compass
screen provides more room for additional data
fields). This compass displays your heading and
your heading’s relation to the sun, moon and your
destination (black arrow) when they are within 50
degrees on either side of your heading. The orange
arrows under the strip compass will show which way
to turn to head towards your destination. The data
fields at the top of the display are customizable (see
Customizing the Data Fields).
customisable
Magellan eXplorist 310 User Manual
Customising
9
Magellan eXplorist Dashboard
Satellite Status Screen
Dashboard Screen
customisable
The Satellite Status screen displays a graphical
representation of the satellites overhead in relation
to you current location (the center of the circle) The
color of the satellite graphics, as well as the bar
graph, indicate the signal strength of the signals
being received. The numbers indicate the assigned
satellite designation. The data fields at the bottom of
the display are customizable (see Customizing the
Data Fields).
customisable
The Dashboard Screen displays a small compass and
up to eight customizable data fields. The data fields
displayed are customizable (see Customizing the
Data Fields).
customisable
Customising
Data Only Screen
Customising
Altimeter Screen
customisable
The Data Only Screen displays the most number of
data fields available to be viewed at one time in the
receiver. Up to 12 customizable data fields can be
viewed at one time. The data fields displayed are
customizable (see Customizing the Data Fields).
The Altimeter Screen displays detailed elevation
information using the GPS signal. The area on the
graph can be expanded by Selecting the icon in the
lower right corner and defining the area to be used.
Also a line can be moved along the graph to pinpoint
an exact point on the graph and display detailed
information on that point.
Magellan eXplorist 310 User Manual
customisable
Customising
10
Magellan eXplorist Dashboard
Customizing Data Fields
Customising Setting the Number of Fields Displayed
1. Access the Dashboard screen you want to
change the number of displayed fields.
2. Press MENU.
3. Select Edit # of Fields. (Not available on the
Satellite Status screen.)
4. The current number of fields being displayed is
shown with an arrow above and below it.
5. Use the joystick up or down to change the
number of fields to be displayed. (Note: it
stops increasing when it gets to the maximum
number of fields available for the viewed
dashboard screen. The number of displayed
fields can be set to 0 except for the Data Only
screen which has a minimum of 1.)
Changing Displayed Data
1. Access the Dashboard screen you want to
change the data displayed.
2. Press MENU.
3. Select Edit Nav Fields. (Not available on the
Satellite Status screen.)
4. Select the type of data to be displayed from
the displayed list.
5. The Dashboard screen is displayed with the
data selected displayed.
Magellan eXplorist 310 User Manual
11
Waypoints
Waypoints are fixed locations with a specified longitude and latitude that can be saved to your receiver.
Waypoints can mark a destination, a point along the way to a destination, or a point of reference. In the
eXplorist receiver you can edit saved waypoints with unique names and descriptive icons to help you identify the
waypoint from a list or on the map.
The Waypoint List
Accessing the Waypoint List
5. Use the keyboard to enter the first few
characters of the waypoint name being
searched.
1. From the Map screen press BACK.
6. Select the green checkmark.
2. Select the Waypoints icon. All the waypoints
7. The Waypoint List is displayed with the results
you have saved will be displayed as a list.
of the search.
Editing a Saved Waypoint
1. Access the Waypoint list.
2. Select the name of the waypoint to be edited.
3. The Waypoint Description page is displayed.
Sorting the Waypoint List
1. Access the Waypoint list.
2. Press MENU.
3. Select Sort & Search.
4. Select sort by Nearest, Date Created, Type or
Name.
Icon: Select the waypoint icon to select a new
icon.
Use the Show drop-down menu to select All or
just show Favorites.
Name: Select the waypoint name and enter a
new name using the keyboard.
5. Select the Back button to return to the list of
waypoints.
Searching for a Saved Waypoint
1. Access the Waypoint list.
2. Press MENU.
3. Select Sort & Search.
Description: Select the Description button.
Select the screen below the Description
button. Use the keyboard to enter a
description for the waypoint. Select the Back
icon when done.
Location: Select the Location button. Select
the Primary or Secondary coordinates fields.
Select the coordinated to be changed and use
the keyboard to enter the new values.
4. Select the Search by Name button.
Magellan eXplorist 310 User Manual
13
Magellan eXplorist Waypoints
Go to a Waypoint from the Waypoint
Description
1. Access the Waypoint list.
2. Select the name of the waypoint to be routed
to.
3. Press MENU.
4. Select GO.
Viewing the Waypoint on the Map
1. Access the Waypoint list.
2. Select the name of the waypoint to be viewed.
3. The Waypoint Description page is displayed.
4. Press MENU.
5. Select View on map.
Marking a Waypoint as a Favorite
1. Access the Waypoint list.
2. Select the name of the waypoint to be added
to your Favorites list.
3. Press MENU.
4. Select Favorite.
5. The Waypoint Description page is displayed
with a yellow star added to the icon in the
upper left corner indicating that this waypoint is
part of your favorites.
Waypoints and the Map Screen
Waypoints can be viewed on the Map screen using
the default icon or the icon you select while editing
the waypoint.
Creating a Waypoint while Panning
1. Select the Map screen.
2. Use the joystick to move the cursor.
3. This will put the Map into Pan mode. Keep
using the joystick in the direction of the map
you want to go to. Using the zoom buttons will
assist in getting to the desired point quickly
and accurately.
4. When you can see the point on the map you
want to create a waypoint for, press the MENU
button.
5. Select Add Waypoint.
6. The Waypoint Description page is displayed.
Magellan eXplorist 310 User Manual
7. Edit the waypoint as needed.
8. Select the Disk icon.
9. Select Save as Waypoint.
10.Confirm the save.
Saving Your Current Location as a Waypoint
1. While viewing the Map screen press MENU.
2. Select Add Waypoint.
3. Edit the waypoint as desired.
4. Select the Disk icon at the bottom of the
display.
5. The waypoint is saved and you are returned to
the Map screen.
Waypoint Projection
A waypoint can also be created by entering the
distance and heading for the waypoint from your
current location.
Projecting a Waypoint
1. Select the Map screen.
2. Select the Main Menu icon in the lower left
corner.
3. Select the Waypoints icon.
4. From the Waypoint List press the MENU
button.
5. Select Add Waypoint.
6. Select Projection.
7. Select the Bearing field. Use the keypad to
enter the degrees that the projected waypoint
is from your current position.
8. Select OK.
9. Select the Distance field. (Note that you can
Select the units of measure drop-down menu
to change the units to be used.
10.Use the keypad to enter the distance from
your current location that you want to project a
waypoint.
11.Select OK.
12.Select Next>.
13.The Waypoint Description page is displayed.
Make the necessary edits and Select the Disk
icon at the bottom to save.
14
Geocaches
Geocaching is an outdoor activity that uses your receiver to find hidden treasures (geocaches) that can be
placed anywhere in the world. A typical cache is a small, waterproof container containing a logbook and
“treasure”.
organising
The Magellan eXplorist receiver is designed to connect with millions of passionate adventure seekers at www.
geocaching.com. Geocaching.com is the premier website for organizing the world’s geocaches. Whether
you want to learn about geocaching, hide or seek a cache, log your experiences, or find out about a local
geocaching event, Geocaching.com is your one-stop shop for all things geocaching! No need to worry about
clumsy data conversion as the eXplorist receiver connects seamlessly with the website for popular features such
as Send to GPS, Upload Field Notes, and transfer Pocket Queries.
Installing Geocaches (Send to GPS)
Installing Geocaches with ‘Send to GPS’ (List
Page)
1. Go to www.geocaching.com on your browser.
2. Use the search tools on geocaching.com to
view a list of geocaches.
Magellan Communicator only needs to be
installed the first time a connection is made
between an internet browser and the receiver.
6. Click on the “Download” button.
7. The geocache selected is uploaded to your
GPS receiver and can be accessed from the
Geocaches function of the Main Menu on your
receiver.
3. In the row indicated above with the red box,
click on the ‘Send to GPS’ icon which opens
the “Send to GPS” window.
4. Select the Magellan tab in the “Send to GPS”
window.
5. The Send to GPS function first detects if you
have the Magellan Communicator installed. If
not, the message “Magellan Communicator
not found...” appears. Select the “click here”
link to install the Magellan Communicator. The
Magellan eXplorist 310 User Manual
If these buttons are greyed out, check to
see if your browser is requesting you to run
Active X.
15
Magellan eXplorist Geocache Waypoints
Installing Geocaches with ‘Send to GPS’
(Detail Page)
1. Go to www.geocaching.com on your browser.
2. Use the search tools on geocaching.com to
view a list of geocaches.
3. In the row indicated above with the red box,
click on the geocache name to open the
geocache page.
The ‘GPX eXchange File button is greyed out
for non-premium users.
4. Select the “Send to GPS” button.
5. Select the Magellan tab in the “Send to GPS”
window.
6. The Send to GPS function first detects if you
have the Magellan Communicator installed. If
not, the message “Magellan Communicator
not found...” appears. Select the “click here”
link to install the Magellan Communicator. The
Magellan Communicator only needs to be
installed the first time a connection is made
between an internet browser and the receiver.
7. Click on the “Download” button.
8. The geocache selected is uploaded to your
receiver and can be accessed from the
Geocaches function of the Main Menu on your
receiver.
Magellan eXplorist 310 User Manual
16
Magellan eXplorist Geocache Waypoints
The Magellan Communicator
ID can be found in the upper right corner of the
web page describing the geocache.
The Magellan Communicator is used to communicate
between geocaching.com and your Magellan GPS
receiver. You can install the plug-in by using the
steps above or by going to the Magellan web site as
explained here.
5. A “Save File” dialog window will open on your
Direct installation of the Magellan
Communicator from www.magellangps.com
6. Turn your receiver on and connect it to your
1. Go to www.magellangps.com and click on the
“Products” tab.
www.magellan.com.au
2. Select “Maps & Software”.
3. In the software section, select “Magellan
www.magellan.
com.au/products/
map.
asp?
tab=0&PRODID=2
301
Communicator”.
4. On the Magellan Communicator page
(www.magellangps.com/products/map.
asp?tab=0&PRODID=2301) select the
Download button.
computer. Save the file to your computer.
(The location of where the file is saved will
depend on your browser and how you have it
set up to save files.)
PC with a USB cable.
7. Select “Connect to PC” on your receiver.
8. (You don’t need to do one geocache at a
time as explained above. Continue saving
geocache files until you have all you want for
this session.)
9. Open the “MAGELLAN” device that has been
installed on your computer.
5. When the download is complete, run the
Magellan Communicator file to install the
drivers. (If you get a Security Warning, press
‘Run’ to continue.)
6. When the Installation Wizard is done installing
the files, select ‘Finish’ to complete the
installation.
10.Open the “Geocaches” folder in the
MAGELLAN directory.
11.Drag the GPX file (GC1FGDZ.gpx in this
Installing Geocaches (Drag n Drop)
Users of geocaching.com who are not premium
members will have the ‘GPX eXchange File’ button
greyed out. It is recommended that non-premium
members use the “Send to GPS” button but it is
also possible to save the geocache as a LOC
Geocache File.
example) to the Geocaches folder in your
receiver.
12.The geocache (or geocaches) are loaded
in your receiver and can be found from the
Geocaches menu option in the Main Menu.
(You need to disconnect or reboot the receiver
to exit the “Connect to PC” screen.)
Installing Geocaches with Drag ‘n Drop
1. Go to www.geocaching.com on your browser.
2. Use the search tools on geocaching.com to
select a geocache to load.
3. Click on the “GPX eXchange File” button.
4. Files are saved to your computer with the
filename <GeocacheID>.gpx. The Geocache
Magellan eXplorist 310 User Manual
17
Magellan eXplorist Geocache Waypoints
Geocache List
Accessing the Geocache List
1. Press the BACK button while viewing the Map
screen.
2. Select the Geocaches icon. All the geocaches
you have saved or loaded will be displayed as
a list.
Sorting the Geocache List
Go to a Geocache on the Geocache List
1. Access the Geocache list.
2. Select the Geocache you want to go to
3. Press MENU.
4. Select Go.
5. The route is created and the Map screen
displayed.
Editing a Stored Geocache
1. Access the Geocache list.
2. Select the name of the geocache to be edited.
3. The Geocache Description page is displayed.
Description: Select the Description button.
Select the screen below the Description
button. Use the keyboard to enter a
description for the geocache. Select the Back
icon when done.
1. Access the Geocache list.
2. Press MENU.
3. Select Sort & Search.
4. Using the drop-down menus for each, set the
display filters for Status, Type, Size, Terrain
and Difficulty.
5. Select the Sort By drop-down menu and select
Geocache ID, Nearest, Date Created, Type
or Name.
6. Use the Show button to toggle between All or
just show Favorites.
7. Use the BACK button to return to the list of
geocaches.
Searching for a Saved Geocache
1. Access the Geocache list.
2. Press MENU.
3. Select Sort & Search.
4. Scroll down and Select the Search by Name
or ID... button.
5. Use the keyboard to enter the first few
characters of the geocache name or the ID.
6. Select the green checkmark.
7. The Geocache List is displayed with the results
Hint: Select the Hint button. Select the
screen below the Hint button. Use the
keyboard to enter or edit the hint for the
geocache. Select the Back icon when done.
Found: Select the Found button. Select
Found, Not Found, Needs Maintenance or Add
a Field Note. (If selecting Needs Maintenance
you will be asked if you want to include any
comments.)
Options: Select the Options button. Use the
Profile drop-down menu to select the profile
desired for this geocache. Select Settings to
change the values for the profile.
(Note: Other items are available on the
Geocache Description page but they can only
be viewed.
Adding/Editing/Deleting a Field Note
1. Access the Geocache list.
2. Select a geocache from the list.
3. Press MENU.
4. Select Add a Field Note, Edit My Last Log,
or Delete My Last Log.
5. Use the keyboard to add or edit the field note.
If you are deleting a field note, you will need to
confirm the deletion.
of the search.
Magellan eXplorist 310 User Manual
18
Magellan eXplorist Geocache Waypoints
Go to a Geocache from the Geocache
Description
1. Access the Geocache list.
2. Select the name of the geocache to be routed
to.
Adding a Geocache
Saving Your Current Location as a Geocache
Waypoint
1. Access the Geocache list.
3. Press MENU.
2. Press MENU.
4. Select Go.
3. Select Add Geocache.
Viewing the Geocache on the Map
1. Access the Geocache list.
2. Select the name of the geocache to be viewed.
3. The Geocache Description page is displayed.
4. Press MENU.
5. Select View on map. The geocache is
displayed with a projected route from your
current position to the geocache.
Go to a Geocache While Viewing on the Map
1. Access the Geocache list.
2. Select the name of the geocache to be routed
to.
3. Press MENU.
4. Select Go. The geocache is displayed with a
projected route from your current position to
the geocache.
Marking a Geocache as a Favorite
1. Access the Geocache list.
2. Select the name of the geocache to be added
to your Favorites list.
3. Press MENU.
4. Select Favorite.
5. The Geocache Description page is displayed
with a yellow star added to the icon in the
upper left corner indicating that this geocache
is part of your favorites.
4. The receiver will calculate the average position
for the geocache providing increased accuracy.
5. Select Done.
6. Select the Geocache Name to edit the name
with the keyboard.
7. Select the Difficulty and Terrain stars to
indicate the level of difficulty. (5 stars is the
most difficult and 5 stars is the roughest
terrain.)
8. Select the Size marker to indicate the size of
the cache.
9. To add a Hint or Description, Select the
Options Menu icon and select Add Hint or Add
Description.
10.When you have completed the entry for the
geocache, press MENU and select Save.
Geocache Summary
When you want to view a summary of your geocache
adventures you can access the Geocache Summary
page. This summary displays, the total geocaches
in the receiver, how many geocaches have been
found, how many not found, and how many you
haven’t attempted. Also displayed is the number
of geocaches in the receiver that are needing
maintenance. Lastly is a summary of the average
time spent in finding a geocache.
Accessing the Geocache Summary
1. Access the Geocache list.
2. Press MENU.
3. Select Geocache Summary.
Magellan eXplorist 310 User Manual
19
Points of Interest (POI)
The Magellan eXplorist has preloaded points of interest waypoints that provide a wide array of locations that you
may seek. These POIs are waypoints for many commonly needed destinations. The POIs are installed along
with the maps used in the eXplorist. The basemap contains some basic POIs and turning on a detailed map will
provide a robust source of POIs.
Accessing POIs
Finding a POI by Category
1. Press BACK from the Map screen.
2. Select the POI icon.
3. Scroll though the list of categories and Select a
category that defines the POI you are looking
for.
This example describes looking for the nearest
hospital emergency room. Scroll down to find
the category “Emergency Services”.
The default sorting criteria is by distance. If
you want to sort the list by name, press MENU
and select “Sort by Name”.
You can also search by name for waypoints in
the list displayed. Press the Menu button and
select “Search by Name”. Enter the first few
characters of the name and Select the green
checkmark.
4. Some POI categories have a subcategory. If
the category chosen does, scroll to find the
subcategory for the POI you are searching.
Select the “Hospital” subcategory.
5. A list of the nearest hospitals are displayed.
Magellan eXplorist 310 User Manual
21
Magellan eXplorist Points of Interest Waypoints
Finding a POI Using Search by Name
1. Press BACK from the Map screen.
2. Select the POI icon.
3. Press MENU.
4. Select Search by Name....
5. Use the keyboard to enter the first few
characters in the name of the POI you are
searching for and select the green checkmark.
6. A list of POIs is displayed, beginning with the
characters entered in step 5.
Note that this search is not case sensitive.
Creating a Route to a POI
1. Access the list of POIs by category or
searching by name.
2. Select the POI to be used as the destination.
3. Press MENU.
4. Select Go.
Viewing POI Details
1. Access the list of POIs by category or
searching by name.
2. Select the POI to be viewed.
Magellan eXplorist 310 User Manual
22
eXplorist Tools
The Magellan eXplorist has a Tools Menu that gives you access to tools that you may find useful while using the
receiver. Additionally, the Tools Menu provides access to the Settings Menu (see the chapter on Settings for
details) which gives you the means to customize the eXplorist for your navigation requirements.
customise
The Tools Menu
Accessing the Tools Menu
1. From the Map screen, press BACK.
2. Select the Tools icon.
3. The Tools Menu is displayed.
Geocache Summary
Provides detailed statistics for all geocaching
activities performed while using the eXplorist receiver.
Viewing Geocache Summary
1. Access the Tools Menu.
2. Select the Geocache Summary button.
Waypoint Projection
A waypoint can also be created by entering the
distance and heading for the waypoint from your
current location.
Projecting a Waypoint
1. Select the Bearing field. Use the keypad to
Settings
customisation
Provides access to the Settings Menu which allows
for customization of the receiver.
Accessing Receiver Settings
1. Access the Tools Menu.
2. Select the Settings button.
(See the chapter on Settings for details.)
Track Summary
Provides detailed statistics for the current active track.
Viewing Track Summary
enter the degrees that the projected waypoint
is from your current position.
2. Select OK.
3. Select the Distance field. (Note that you can
Select the units of measure drop-down menu
to change the units to be used.
4. Use the keypad to enter the distance from
your current location that you want to project a
waypoint.
5. Select OK.
6. Select Next>.
7. The Waypoint Description page is displayed.
Make the necessary edits and Select the Disk
icon at the bottom to save.
1. Access the Tools Menu.
2. Select the Track Summary button.
Magellan eXplorist 310 User Manual
23
Magellan eXplorist Tools
Best Fishing & Hunting Times
This tool displays the best hunting and fishing times
for your current location.
Using Best Fishing & Hunting Times
1. Access the Tools Menu.
2. Select the Fish & Hunt button.
Select the calendar and the arrows to the left
and right of the month to select a day to view.
Sun & Moon Rising and Setting Times
This tool displays the sun and moon rise and setting
times for your current location.
Using Sun & Moon Times
1. Access the Tools Menu.
2. Select the Sun & Moon button.
Select the calendar and the arrows to the left
and right of the month to select a day to view.
4. Confirm that the receiver is no longer in the
Demo mode.
Screen Capture
Activating Screen Capture
Once the Screen Capture is turned on you can use
the Power Button to capture the screen and save it
to the receiver’s internal memory.
Note that when screen capture is on, the power
button cannot be used to turn the receiver off. You
need to access the Screen Capture Tool and set it
to OFF before you can power down the receiver.
1. Access the Tools Menu.
2. Select the Screen Capture button.
3. Select the Screen Capture button to toggle
screen capture on or off.
4. Select View Saved Screen Captures to view
all screen captures currently stored in the
receiver.
Help
Owner Information
Use this tool to access Help files stored in the
receiver.
Setting Owner Information
Accessing Help Files
1. Access the Tools Menu.
2. Select the Help button.
1. Access the Tools Menu.
2. Select the Owner Information button.
3. Select any of the four fields and use the
keyboard to enter the information.
3. Select the help file to view.
Play Product Demo
Accessing the Product Demo
1. Access the Tools Menu.
2. Select the Play Product Demo button.
3. Confirm that the receiver is in the Demo mode.
4. A video will be played demonstrating the
Magellan eXplorist.
Stopping the Product Demo
1. Select the product demo video.
2. Access the Tools Menu.
3. Select the Stop Product Demo button.
Magellan eXplorist 310 User Manual
24
Settings
customise
The Magellan eXplorist has a Settings Menu that allows you to customize how the eXplorist displays
information, run diagnostic tests and other useful functions that will enhance your navigating experience.
The Settings Menu
Accessing the Settings Menu
1. Press the BACK button from the Map screen.
2. Select the Tools icon at the bottom of the
menu.
3. Select Settings from the Tools Menu.
4. The Settings Menu is displayed.
Adjusting Volume
1. Access the Settings Menu.
2. Select the Brightness & Volume button.
3. Highlight the Volume slider and use the joystick
to increase or decrease the speaker volume.
Muting the Volume
1. Access the Settings Menu.
2. Select the Brightness & Volume button.
3. Select the Mute button. When checked the
volume is muted.
Power
Setting Active Suspend Timer
Settings
Brightness and Volume
Adjusting Brightness
1. Access the Settings Menu.
2. Select the Brightness & Volume button.
3. Use the Brightness slider to increase or
decrease the display intensity.
Setting the Backlight Timer
The Backlight Timer turns the backlight off, saving
battery life, if the display has not been touched in
the time selected.
1. Access the Settings Menu.
2. Select the Brightness & Volume button.
3. Select the Backlight Timer drop-down menu
and select the duration that the backlight will
remain on without a screen touch.
Magellan eXplorist 310 User Manual
This sets the duration that the receiver will remain
on before going into active suspend mode if the
screen hasn’t been touched. Active suspend puts
the receiver in a power save mode but continues to
record your track.
1. Access the Settings Menu.
2. Select Power.
3. Select the Active Suspend Timer drop-down
menu and select the duration that the receiver
will remain active without a screen touch.
Setting Power Off Timer
This sets the duration that the receiver will remain
on before powering off if the screen hasn’t been
touched.
1. Access the Settings Menu.
2. Select the Power button.
3. Select the Power Off Timer drop-down menu
and select the duration that the receiver will
remain on without a screen touch.
Selecting Battery Type
1. Access the Settings Menu.
2. Select the Power button.
25
Magellan eXplorist Settings
3. Select the Battery Type drop-down menu and
select the type of battery that are being used.
Date and Time
Selecting the Date Format
1. Access the Settings Menu.
2. Select the Date & Time button.
3. Select the Date Format drop-down menu and
select the format that dates will be displayed
in.
Selecting the Time Format
1. Access the Settings Menu.
2. Select the Date & Time button.
3. Select the Time Format drop-down menu and
select the format that time will be displayed (12
hour or 24 hour).
Selecting the Calendar Format
1. Access the Settings Menu.
2. Select the Date & Time button.
3. Select the Calendar Format drop-down menu
and select how weeks will be formatted (weeks
start on Monday or Sunday).
Selecting the Time Zone (Auto or Manual)
1. Access the Settings Menu.
2. Select the Date & Time button.
3. Select the Time Zone & DST drop-down
menu and select Auto or Manual. If Manual
is selected, you need to Select the Set Time
Zone button and enter your present time zone.
Map Options
Setting Map View (2D or 3D)
1. Access the Settings Menu.
2. Select the Map Options button.
3. Select the Map View drop-down menu and
select how the map will be displayed (2D or
3D).
Setting Map Orientation
1. Access the Settings Menu.
2. Select the Map Options button.
3. Select the Orientation drop-down menu and
select the reference used to define the top of
the display (Track Up, Course Up or North Up.)
Setting the Number of Map Fields
1. Access the Settings Menu.
2. Select the Map Options button.
3. Select the Map Fields drop-down menu and
select how many data fields will be displayed
on the map.
Defining Quick Info Details
This sets what details will be displayed when the
map is in pan mode and popup information is
displayed.
1. Access the Settings Menu.
2. Select the Map Options button.
3. Select the Quick Info drop-down menu and
select what will be displayed when popup
information is displayed.
Toggling Position Destination Lines (On/Off)
Maps
1. Access the Settings Menu.
Selecting Map
1. Choose World Maps or Detailed Maps to see
the individual maps installed.
2. If the map has a checkmark before its name
it has been activated and is in use by your
receiver. You can toggle the map on or off by
Selecting on the check mark box to the left of
the map name.
3. Select the map name to get more detailed
2. Select the Map Options button.
3. Select the Position Destination Line drop-down
menu and select if the line will be displayed on
the map when a route is active.
Toggling Origin Destination Lines (On/Off)
1. Access the Settings Menu.
2. Select the Map Options button.
information about the map that is installed.
Magellan eXplorist 310 User Manual
26
Magellan eXplorist Settings
3. Select the Origin Destination Line drop-down
menu and select if the line will be displayed on
the map when a route is active.
Toggling Track Lines (On/Off)
1. Access the Settings Menu.
2. Select the Map Options button.
3. Select the Show Tracks drop-down menu and
select if track lines will be displayed.
Setting Map Detail Level
Toggling POI Waypoints (On/Off)
1. Access the Settings Menu.
2. Select the Map Options button.
3. Select the POI drop-down menu and select if
POI waypoints will be displayed on the map.
Selecting Current Location Icon
When Smart Arrow is selected the current location
icon will change color, indicating how well you are
on course to reach your destination.
1. Access the Settings Menu.
1. Access the Settings Menu.
2. Select the Map Options button.
2. Select the Map Options button.
3. Select the Map Detail drop-down menu and
3. Select the Current Location Icon drop-down
select the level of detail that will be displayed
on the map.
menu and select Smart Arrow or Standard
Arrow.
Toggling Topo Lines (On/Off) when optional Topo Map is purchased
Toggling Auto Zoom (On/Off)
Toggling Topo Lines (On/Off)
-------------------------------------------1. Access the Settings Menu.
2. Select the Map Options button.
3. Select the Topo Lines drop-down menu and
select if topo lines will be displayed on the
map.
Setting Shaded Relief Level
1. Access the Settings Menu.
Auto Zoom automatically sets the map scale to
best display the active route.
1. Access the Settings Menu.
2. Select the Map Options button.
3. Select the Auto Zoom drop-down menu and
select On or Off.
Map Draw Mode
2. Select the Map Options button.
1. Access the Settings Menu.
3. Select the Shaded Relief drop-down menu and
2. Select the Map Options button.
select how the map will display shaded relief.
Setting Geocache Waypoints Display Criteria
1. Access the Settings Menu.
2. Select the Map Options button.
3. Select the Geocache drop-down menu and
select what criteria will be used to select which
geocache waypoints will be displayed on the
map.
Setting Waypoint Display Style
1. Access the Settings Menu.
2. Select the Map Options button.
3. Select the Waypoints drop-down menu and
select how waypoints will be shown on the
map (Icons, Name and Icons, or Off).
Magellan eXplorist 310 User Manual
3. Select the Map Draw Mode drop-down menu
and select Exclusive or Hybrid.
Units (Units of Measure)
Setting Distance Units of Measure
1. Access the Settings Menu.
2. Select the Map Options button.
3. Select the Distance drop-down menu and
select the desired units of measure.
Setting Speed Units of Measure
1. Access the Settings Menu.
2. Select the Map Options button.
3. Select the Speed drop-down menu and select
the desired units of measure.
27
Magellan eXplorist Settings
Setting Elevation Units of Measure
Defining the Arrival Alarm
1. Access the Settings Menu.
1. Access the Settings Menu.
2. Select the Map Options button.
2. Select the Alarms button.
3. Select the Elevation drop-down menu and
3. Select the Arrival Distance drop-down menu
select the desired units of measure.
Setting Area Units of Measure
1. Access the Settings Menu.
2. Select the Map Options button.
3. Select the Area Units drop-down menu and
select the desired units of measure.
Tracks
This setting sets the interval that track points will be
saved. Auto uses an internal formula that increases
the number of track points saved during turns and
decreases the number of points saved when travelling
in a straight line.
Setting Track Logging Mode
1. Access the Settings Menu.
and select the distance from your destination
that the arrival alarm will sound.
Setting the Waypoint Proximity Alarm
1. Access the Settings Menu.
2. Select the Alarms button.
3. Select the Waypoint Proximity drop-down
menu and define the distance to a waypoint
that an alarm will sound
Night Mode
Setting Night Mode Use
1. Access the Settings Menu.
2. Select Night Mode.
3. Select the desired option (Auto, On or Off).
2. Select Tracks.
Joystick Functions
3. Select the Logging Mode drop-down menu and
This defines what function will be accessed when
pressing on the joystick while viewing the Map
screen.
set the interval for recording track points.
Note if you select “Time” or “Distance” you will
need to set the time or distance intervals from
the additional drop-down menu.
Alarms
Setting the Off Course Alarm
1. Access the Settings Menu.
Assigning Joystick Functions
1. Access the Settings Menu.
2. Select Joystick.
3. Select Add Waypoint (default) or Display
Dashboard.
2. Select Alarms.
Compass
3. Select the Off Course drop-down menu and
This defines what graphic will be used to display the
compass on the Map screen.
define the distance that when off course that
an alarm will sound.
Toggling Arrival Alarm
1. Access the Settings Menu.
2. Select the Alarms button.
3. Select the Arrival drop-down menu and select
if the arrival alarm will sound when you have
reached your destination.
Magellan eXplorist 310 User Manual
Assigning Compass Graphic
1. Access the Settings Menu.
2. Select Compass.
3. Select the left and right arrows to set through
the available compass graphics.
4. Press the joystick to select the compass
graphic.
28
Magellan eXplorist Settings
Background
This defines what graphic will be used as the
background for the receiver
Assigning Background Graphic
3. Select the Primary Coordinate Accuracy dropdown menu and select the desired accuracy.
Setting Primary Coordinate Datum
1. Access the Settings Menu.
1. Access the Settings Menu.
2. Select the Navigation button.
2. Select the Background button.
3. Select the Primary Coordinate Datum drop-
3. Select the left and right arrows to set through
the available graphics.
4. Press the joystick to select the Background.
Satellite
Viewing the Satellite Status Screen
1. Access the Settings Menu.
2. Select the Satellite button.
3. Select the Back Icon to exit.
down menu and select the desired datum.
Setting Secondary Coordinate System
1. Access the Settings Menu.
2. Select the Navigation button.
3. Select the Secondary Coordinate System dropdown menu and select the desired coordinate
system.
Setting Secondary Coordinate Type
1. Access the Settings Menu.
2. Select the Navigation button.
GPS
3. Select the Secondary Coordinate Type
Turning the GPS Receiver On/Off
1. Access the Settings Menu.
2. Select the GPS button.
3. Select the GPS drop-down menu and select
On or Off.
Navigation
Setting Primary Coordinate System
1. Access the Settings Menu.
2. Select the Navigation button.
3. Select the Primary Coordinate System drop-
down menu and select the desired coordinate
system.
Setting Primary Coordinate Type
drop-down menu and select the desired
measurement.
Setting Secondary Coordinate Accuracy
1. Access the Settings Menu.
2. Select the Navigation button.
3. Select the Secondary Coordinate Accuracy
drop-down menu and select the desired
accuracy.
Setting Secondary Coordinate Datum
1. Access the Settings Menu.
2. Select the Navigation button.
3. Select the Secondary Coordinate Datum dropdown menu and select the desired datum.
Selecting North Reference
1. Access the Settings Menu.
1. Access the Settings Menu.
2. Select the Navigation button.
2. Select the Navigation button.
3. Select the Primary Coordinate Type drop-down
3. Select the North Reference drop-down menu
menu and select the desired measurement.
Setting Primary Coordinate Accuracy
and select the north reference.
Setting Altimeter Source
1. Access the Settings Menu.
1. Access the Settings Menu.
2. Select the Navigation button.
2. Select the Navigation button.
Magellan eXplorist 310 User Manual
29
Magellan eXplorist Settings
3. Select the Altimeter drop-down menu and
select the desired source.
Running the Keypad Test
1. Access the Settings Menu.
Memory
2. Select Diagnostics.
This setting is used to view memory usage and
provides access to memory tools.
3. Select the Keypad Test button.
Clear Memory from Device
1. Access the Settings Menu.
2. Select Navigation.
3. Select the Clear Memory from Device button
4. Confirm that you want to clear the devices
waypoint, geocache, route memory.
Restoring Factory Defaults
1. Access the Settings Menu.
2. Select Navigation.
3. Select the Restore Factory Default button.
4. Confirm that you want to restore the factory
defaults.
Connectivity
Setting Receiver Connectivity
Language
Selecting Language
1. Access the Settings Menu.
2. Select Language.
3. Select desired language to use.
4. Confirm changing the language.
Product Information
Viewing the Receiver Serial Number
1. Access the Settings Menu.
2. Select Product Info.
3. The serial number for the receiver is displayed
at the top of the screen.
Viewing the SW Version, EULA or Copyright
Information
1. Access the Settings Menu.
1. Access the Settings Menu.
2. Select Connectivity.
2. Select the Product Info button.
3. Select the Mode drop-down menu and select
3. Select Versions, EULA or Copyright Info.
the desired connectivity mode.
Diagnostics
Running the Audio Test
1. Access the Settings Menu.
2. Select Diagnostics.
3. Select the Audio Test button.
Running the Video Test
1. Access the Settings Menu.
2. Select Diagnostics.
3. Select the Video Test button.
Magellan eXplorist 310 User Manual
30