1
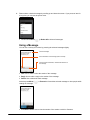
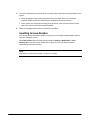
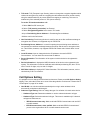
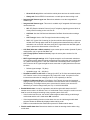
iPECS Communicator for Android User Guide Please read this user guide carefully before operating your set. Retain it for future reference. Copyright © 2013 Ericsson-LG Enterprise Co. Ltd., All Rights Reserved This material is copyrighted by Ericsson-LG Enterprise Co. Ltd. Any unauthorized reproductions, use or disclosure of this material, or any part thereof, is strictly prohibited and is a violation of Copyright Laws. Ericsson-LG Enterprise reserves the right to make changes in specifications at any time without notice. The information furnished by Ericsson-LG Enterprise in this material is believed to be accurate and reliable, but is not warranted to be true in all cases. Ericsson-LG Enterprise and iPECS Communicator are trademarks of Ericsson-LG Enterprise Co. Ltd. Document Information S/W Version Issue Changes Release Date 1.0Ad 1.0 Phase 2 update 2013-11-13 Table of Contents Before Use ......................................................................... 1 Introduction of iPECS Communicator ...................................................................... 1 About This User Guide .............................................................................................. 1 Introduction of the Document ........................................................................................................1 Organization of the Document .......................................................................................................1 Explanation of Symbols .................................................................................................................2 Installation ......................................................................... 3 Before Installation...................................................................................................... 3 Requirements for the Mobile Phone Hardware .............................................................................3 Installation of iPECS Communicator ........................................................................ 4 Phone Registration ........................................................... 6 Login Setting .............................................................................................................. 6 SIP Account Setting .......................................................................................................................6 Phone Registration Status ........................................................................................ 9 Checking SIP Registration Status .................................................................................................9 Checking Subscriber Status Information .......................................................................................9 Unregister and re-register your phone. ...................................................................................... 10 Phone Functions ............................................................. 11 Making Calls ............................................................................................................. 11 Dialing with a Phone Number ..................................................................................................... 12 Redialing the Last Number ......................................................................................................... 12 Dialing with a Finding Number.................................................................................................... 12 Dialing from Call log ................................................................................................................... 12 Dialing from the Contacts ........................................................................................................... 13 Call Option Setting................................................................................................... 14 Setting Outbound Call Type ....................................................................................................... 14 Dialing with Call Back ................................................................................................................. 14 iPECS Communicator User Guide - Issue 1.0 i Alternate Device Call Back ......................................................................................................... 15 Dialing with Call Through............................................................................................................ 16 Answering Calls ....................................................................................................... 18 When the Screen Is Unlocked .................................................................................................... 18 When the Screen Is Locked ....................................................................................................... 18 Hanging Up............................................................................................................... 18 In - Call Option ......................................................................................................... 19 Place a Call on Hold ................................................................................................................... 19 Call Transfer ............................................................................................................................... 20 Conference Calls ........................................................................................................................ 20 Mute ............................................................................................................................................ 21 Call Recording ............................................................................................................................ 21 Answering a General Call during a SIP Call............................................................................... 22 Auto-reject General Call ............................................................................................................. 22 Do Not Disturb ............................................................................................................................ 23 Call Forwarding .......................................................................................................................... 23 Missed Call Notification .............................................................................................................. 24 Service Quality (QoS) ................................................................................................................. 24 Call Log ............................................................................ 25 Checking Call Log.................................................................................................... 25 Viewing Call Log ......................................................................................................................... 25 Using Call log ............................................................................................................................. 26 Contacts .......................................................................... 27 Use of Contacts ....................................................................................................... 27 Searching a Contact ................................................................................................................... 27 Using a Contact .......................................................................................................................... 28 Management of Contacts ........................................................................................ 28 Adding a New Contact ................................................................................................................ 28 Adding a Contact ........................................................................................................................ 29 Adding a Contact from the Call log ............................................................................................. 30 Editing Contacts ......................................................................................................................... 30 SMS .................................................................................. 32 Use of Messages (SMS) ........................................................................................... 32 Sending a Message .................................................................................................................... 32 ii iPECS Communicator User Guide - Issue 1.0 Checking Messages ................................................................................................................... 33 Using a Message ........................................................................................................................ 34 Managing Messages .................................................................................................................. 35 Use of Voice Mail Service ........................................................................................ 35 Checking Voice Messages ......................................................................................................... 35 Inputting Access Number ........................................................................................................... 36 User Environment Setting .............................................. 37 To Set the Environment ........................................................................................... 37 SIP Account Settings .................................................................................................................. 37 Call Options Setting .................................................................................................................... 38 Notifications Setting .................................................................................................................... 41 Audio Settings ............................................................................................................................ 41 Advanced Audio Settings ........................................................................................................... 41 Setting for the Number of List Items and the Backup ................................................................. 43 Do Not Disturb ............................................................................................................................ 44 Call Forward Type ...................................................................................................................... 44 Call Forwarding Number............................................................................................................. 44 Service on OS startup ................................................................................................................ 44 Settings Wizard .......................................................................................................................... 44 Useful Information .......................................................... 46 Guide on Problem Solving ...................................................................................... 46 Problems Related to Use............................................................................................................ 46 Explanation of Error Messages .................................................................................................. 47 Open Source Software Notice ................................................................................. 48 GPL License: .............................................................................................................................. 48 iPECS Communicator User Guide - Issue 1.0 iii Before Use Introduction of iPECS Communicator iPECS Communicator is an Android-based multimedia telecommunication application which supports most of functions used in the IP telephone. The main window of iPECS Communicator is simple as divided into several functional modules, but has been designed for effective use. iPECS Communicator can be used in connection with a high capacity PBX like iPECS CM or KTS system like iPECS-LIK and iPECS-MG, and could have different functions supported and screens according to connected systems. About This User Guide This guide is intended for the iPECS Communicator users, and provides user-related information. Introduction of the Document This guide introduces iPECS Communicator, and explains how to install and correctly use iPECS Communicator. Product figures and screen images used in this guide could be changed without notice for quality improvement. Organization of the Document This guide consists of seven chapters and one appendix in total including Before Use, and the chapters are as follows. Before Use Chapter 1: Installation Chapter 2: Device Registration Chapter 3: Telephone Functions Chapter 4: Call List Chapter 5: Contacts Chapter 6: SMS Chapter 7: User Environment Setting Appendix: Useful Information iPECS Communicator User Guide - Issue 1.0 1 Explanation of Symbols The following is symbols used in this guide. Information presented with these symbols must be observed for the correct use of the application. CAUTION This mark warns a situation in which light injury or product damage (hardware, software or data damage) could occur if the instructions have been violated. NOTE This mark provides additional explanation, emphasis on important information or reference for related information which is required for the correct use of the application. 2 iPECS Communicator User Guide- Issue 1.0 Installation Chapter 1 This chapter explains hardware requirements for installing the application on your phone and the process of iPECS Communicator installation. Before Installation Please check the requirements for your phone hardware before installing the application. Requirements for the Mobile Phone Hardware Minimum requirements for running iPECS Communicator are as follows. Please check the requirements and notices for your phone being used by referring to the following details. Minimum Specification: Operating System: Android 2.3 CPU: 600MHz or higher Storage: 10Mbytes RAM or more of free memory Recommended Specification: Operating System: Android 2.3 or higher CPU: 1GHz or higher Resolution: 480 * 800 Firmware: 2.3.4 or higher Notices: iPECS Communicator is optimized to the 480 x 800 resolution. If the device resolution is not 480 x 800, the UI, image sizes and arrangement of iPECS Communicator could be seen differently. The order or name of adding and viewing the Contacts could be different among mobile phone makers. Functions mentioned in this guide could not normally run in some devices. – Test model: LG Optimus 2X, Samsung Galaxy S2 – Android 3.0 Tablet is not supported. When iPECS Communicator runs in background, there could be a difference in standby time improvement according to the battery efficiency improvement and power saving performance of mobile phones. Bluetooth headset is not supported. iPECS Communicator User Guide - Issue 1.0 3 If connected through Wi-Fi, call or registration cutoff could occur due to the call delay and message loss according to the load applied to the AP (Access Point) and the AP performance. Installation of iPECS Communicator First, system re-installation is explained. The iPECS Communicator application can be downloaded in Play Store and be installed. 1. 4 Direct Installation by Using a Mobile Phone Execute Play Store in your phone. 2. When Play Store has been executed, input iPECS Communicator in the search window and press Search to move to the corresponding screen. 3. Select iPECS Communicator in the list of searched applications. iPECS Communicator User Guide- Issue 1.0 4. Press Install at the right bottom of the iPECS Communicator installation screen and then press Agree and Download to start to install the application. 5. If the installation has been completed, the iPECS Communicator shortcut icon is installed on the home screen, and if the icon is selected, iPECS Communicator will be executed. iPECS Communicator User Guide - Issue 1.0 5 Phone Registration Chapter 2 If the application has been installed, necessary information like the SIP account should be inputted before use. This chapter explains registration environment setting required for using the application. Login Setting Set the SIP account for use before starting iPECS Communicator in your phone. It can be registered in iPECS CM and be used only after the SIP account has been set. SIP Account Setting The SIP server address, display name, name, authentication name, authentication password and protocol can be inputted through this setting. 1. Please execute iPECS Communicator by selecting the shortcut icon. Indicate the registration status of the application-installed in your phone. Icon in the status window indicates non-registration status. 2. 6 Please move to the setting screen by pressing Menu ( ) > Setting. iPECS Communicator User Guide- Issue 1.0 3. Please select SIP Account Settings. Press Back ( previous screen. 4. ) if you want to cancel the setting of the selected item or move to the Please select the item to be set by scrolling up and down the screen. Once an item has been selected, it is possible to select the sub-menu or option, view registered information or set (input or change) a necessary value according to the guidance on the screen. Please refer to 'SIP Account Settings' in page 37 for detailed information. 5. If the setting has been completed, please move to the standby modeby pressing Back ( 6. For registration, press Menu ( ). ) > Register. If each item has been normally inputted and Registration has been selected, the ‘Login succeeded’ message will appear for a short time and ‘Idle (phone number)’ will be displayed in the number input window. iPECS Communicator User Guide - Issue 1.0 7 The login success icon shown in the status bar will be changed according to the set type of transmission protocol. – If the protocol is UDP or TCP, icon failure, respectively. – If the protocol is TLS, icon failure, respectively. and and indicate login success and under login or indicate login success and under login or If SIP setting has been correctly performed, automatic login and registration will be tried when radio communication becomes possible as for the registration failure due to radio communication problems at the time of first registration trial. 7. Please select Service on OS startup. If Launch service on OS startup has been selected, iPECS Communicator can be used without the need of re-registration when the phone has been turned off and on again. If the function has been set, [∨] will be displayed in the box, and if it has been deactivated, the mark will disappear. The default setting is ‘Selected’. 8 iPECS Communicator User Guide- Issue 1.0 Phone Registration Status Use a variety of iPECS Communicator functions if your phone has been registered with SIP. Checking SIP Registration Status If the green icon ( ) has been displayed in the status bar, the device is in the registered status. It is possible to check the current status and registration number by dragging down the status bar or in the number input window. : Indicates your phone is not logged in. : Indicates your phone is in standby mode. : Indicates that your phone DND (Don Not Disturb) or Call Forwarding has been set. Checking Subscriber Status Information It is possible to check the status information of the device subscriber like the user number, SIP account, call option and notification setting. 1. Please move to the setting screen by pressing Menu ( ) > Setting. 2. Please select an item to be checked by scrolling up and down the setting screen. 3. If an item has been selected, it is possible to select the sub-menu or option, view registered information or set (input or change) a necessary value according to the guidance on the screen. Please refer to ‘User Environment Setting’ in page 37 for detailed information. iPECS Communicator User Guide - Issue 1.0 9 Unregister and re-register your phone. If the setting of Wi-Fi has been changed during use, a call has not been ended normally or the icon has been shown in gray though a call has been ended, re-registration is required. 1. Press Menu ( ) > Unregister & Exit. 2. Select OK to Unregister & Exit. Please register your phone again for use. Please refer to ‘SIP Account Setting’ in page 6 for registration. 10 iPECS Communicator User Guide- Issue 1.0 Phone Functions Chapter 3 iPECS Communicator provides telephone functions by use of SIP (Session Initiation Protocol). This chapter explains how to make and get a call by using the application and useful functions which can be used during a call. On the Home screen, touch the application shortcut to run the iPECS Communicator. Making Calls It is possible to make a call in various ways like the direct input of a phone number, or selection of an item in the call list or contacts at the top of the screen. It is possible to make or answer a call. It is possible to check the recent calls you have made or received and make a call or view additional its information. Search an item in the contact list and make a call. Inputted number is displayed here. If a searched item in the recent call list has been lightly pressed, the corresponding number will be displayed. Recent call list is displayed. If it has more than one item, it is possible to search the list by scrolling up and down the screen. Clear the mis-typed number. If it is pressed for a short time, a letter on the left of the cursor position will be deleted. If it is pressed for a long time, all the letters being inputted will be deleted Manually makes a call by using the keypad. If the keypad is pressed, the call screen will disappear. If it is pressed once again, it will appear again. iPECS Communicator User Guide - Issue 1.0 11 Dialing with a Phone Number 1. Press Dial button that is located on the top of the left pane. 2. Input the desired number by pressing the keypad and press Call. Please correct the mis-typed number by pressing Delete and input again. It is possible to adjust the earpiece volume during conversation by pressing the Side Volume button on the left of the phone. 3. Press End when the conversation has ended. CAUTION The ear microphone allows you to answer and end calls easily, but when you use the ear microphone your ability to hear outside sounds may be affected. Do not use the ear microphone where it can endanger your safety. Redialing the Last Number 1. Press and hold Call, the last dialed number will be selected. 2. Pressing once more, the last dialed number will automatically redial. Dialing with a Finding Number 1. Press Call. 2. Input a phone number with four digits or more. The more digits are inputted, the more specific number can be searched. 3. Select one in the list of searched numbers and press Call. If the searched phone number is pressed lightly, the corresponding number will be displayed. If it is pressed for a long time, the popup window will appear. If more than one result has been searched, it is possible to select the next number by scrolling down the recent call list window. Dialing from Call log It is possible to search up to 500 numbers from the recently called or answered phone numbers. 1. 12 Press Call log and search the list. iPECS Communicator User Guide- Issue 1.0 The type of a call list item and the name saved in contacts will be shown. 2. – : Indicates outgoing calls made from your phone. – : Indicates received calls that were answered. – : Indicates missed calls. Press a selected phone number lightly and press to make a call. Dialing from the Contacts It is possible to make a call by using contacts. If many types of phone numbers are assigned in one name saved in contacts, please select the desired phone number among them. 1. Press Contacts. 2. Select the contact search window and input a name or number to be searched. Contact search window It is possible to input a number by pressing a button. 3. Select a searched name and press the Call icon to make a call to the corresponding number. iPECS Communicator User Guide - Issue 1.0 13 Call Option Setting This section explains call option setting which can be conveniently used when making a call. Please refer to ‘Call Options Setting’ in page 38 for details. Setting Outbound Call Type When making a call on the call screen of the mobile phone, iPECS Communicator or mobile phone (General Call) can be selected for calling. 1. Please move to Menu ( ) > Setting > Call Options > Outgoing Type Settings > Outbound Selection Call Type. This menu is only enabled after ‘Outbound Selection Call Type’ has been set. 2. Please select an outbound call type. Default setting is to use the general call. iPECS Communicator only: It is possible to make a call with iPECS Communicator and use Wi-Fi or mobile network. iPECS Communicator, when available: It is possible to make a call with iPECS Communicator if you are in the region where Wi-Fi or mobile network can be used. General Call only: It is possible to make a call with your mobile phone and use the mobile network. Always ask: It is possible to select iPECS Communicator or mobile phone when making a call. NOTE If the call type has been set ‘Always ask’, making a video call will be changed to the general call. This cannot be supported as messages are different according to makers. Dialing with Call Back If a call has been made in iPECS Communicator, the system will call back to the caller by using the mobile network and make a call to your party. To Set 1. Please move to Menu ( ) > Setting > Call Options > Outgoing Type Settings. 2. Select whether to use the ‘Integrated dial features type’ and set Use. If the function has been set, [∨] will be marked in the box. If it is deactivated, [∨] in the box will disappear. 3. Select Call Back in the ‘Integrated dial features type’. This menu is only enabled after ‘Integrated dial features type’ has been set. 4. Select Call Back or Call Through server, and input the server address. Please contact the iPECS system manager for the server address. 14 iPECS Communicator User Guide- Issue 1.0 To Use 1. Press Dial. 2. Input a phone number and press Call. A notification message on the data use fee will show and it is possible to make a call if Confirm is pressed. To turn the above notification message off, select Menu ( Disable mobile data alert. 3. ) > Setting > Call Options > Select Callback in the ‘Callback Select Type’. If you press OK, ‘Callback Request…’ message will show for a short time and the call will be connected. 4. If the phone rings and you get it, the call connection tone will be heard and the call will be connected to your party. Alternate Device Call Back If a call is made with iPECS Communicator, it is possible to get a call in another phone number directly inputted by the caller when the system calls back to the caller by using the mobile network. To Set 1. Please move to Menu ( ) > Setting > Call Options > Outgoing Type Settings. 2. Select whether to use the ‘Integrated dial features type’ and set Use. If the function has been set, [∨] will be marked in the box. If it is deactivated, [∨] in the box will disappear. 3. Select Call Back in the ‘Integrated dial features type’. This menu is only enabled after ‘Integrated dial features type’ has been set. 4. Select Call Back (alternate call back number) and input another frequently used phone number (internal IP phone, mobile phone, etc.) to get the Call Back call. 5. Select Call Back or Call Through server, and input the server address. Please contact the iPECS system manager for the server address. To Use 1. Press Dial. 2. Input a phone number and press Call. 3. Select the phone number inputted in the ‘Callback Select Type’ or, Select ‘Direct Input’ and input another phone number to be called (internal IP phone, mobile phone, etc.). If you press OK, ‘Callback Request…’ message will show for a short time and the call will be connected. 4. If the phone rings and you get it, the call connection tone will be heard and the call will be connected to your party. iPECS Communicator User Guide - Issue 1.0 15 Dialing with Call Through It is a function similar to Call Back. If a call has been made in iPECS Communicator, the mobile phone will make a call to the assigned Call Through phone number of the system by using the mobile network, and the system will make a call to your party. To Set 1. Please move to Menu( ) > Setting > Call Options > Outgoing Type Settings. 2. Select whether to use the ‘Integrated dial features type’ and set Use. If the function has been set, [∨] will be marked in the box. If it is deactivated, [∨] in the box will disappear. 3. Select Call Through in the ‘Integrated dial features type’. This menu is only enabled after ‘Integrated dial features type’ has been set. 4. Select Call Through (phone number of the server) and input a phone number. Please contact the iPECS system manager for the server phone number. The server phone number is iPECS Communicator DID Phone number. 5. Select Call Back or Call Through server, and input the server address. Please contact the iPECS system manager for the server address. To Use 1. Press Dial. 2. Input a phone number and press Call. 3. Select Call Through in the ‘Callback Select Type’. The mobile phone will make a call to the Call Through phone number assigned in the server by using the mobile network. 4. 16 The call connection tone will be heard and the call will be connected to your party. iPECS Communicator User Guide- Issue 1.0 Making a Call with VCC VCC (Voice Call Continuity) is a function which makes it possible to connect a call with Call Through when weak Wi-Fi signal has been detected during a SIP call and switch over to the SIP call when strong Wi-Fi signal has been detected again in order to prevent the disconnection of the user call. To Set 1. Please move to Menu ( ) > Setting > Call Options > Outgoing Type Settings. 2. Select whether to use the ‘Integrated dial features type’ and set Use. If the function has been set, [∨] will be marked in the box. If it is deactivated, [∨] in the box will disappear. 3. Select VCC in the ‘Integrated dial features type’. This menu is only enabled after ‘Integrated dial features type’ has been set. 4. Select Call Through (phone number of the server) and input a phone number. Please contact the iPECS system manager for the server phone number. 5. Select Call Back or Call Through server, and input the server address. Please contact the iPECS system manager for the server address. To Use 1. Press Dial. 2. Input a phone number and press Call. 3. When the call connection tone is heard and your party responds, make a conversation with the party over the phone. Call Through and SIP call switch over to each other according to the strength of the Wi-Fi signal during a call. It could not normally function when a call is made to the extension number. iPECS Communicator User Guide - Issue 1.0 17 Answering Calls If you want to answer an incoming call, press the Call button. If the call comes in with the ear microphone connected, press the Call/End button of the ear microphone to answer it. When the Screen Is Unlocked If the phone rings, press Call to make conversation with your party. If you press the icon for long, you can use the option menu. The name of your party saved in contacts is displayed. It is possible to check the phone number by the caller identification (CID Lookup) function. ‘Work’ is a display name registered in the phone numbers, and can be viewed if inputted by your party. When the phone rings, press the Side Volume button on the left of the phone to adjust the volume of the ring or switch over to the vibration status. If a phone call has been received, the bell rings, the screen turns on and the call ‘receiving’ message is displayed. When the Screen Is Locked If the screen lock has been set, drag the slider to make conversation with your party. Hanging Up When the conversation with your party has ended, press End. If a call has been unanswered and disconnected, ‘End Call (Declined)’ and ‘ ’ will be displayed on the top of the screen. The call time is displayed on the screen in the format of ‘mm:ss’. 18 iPECS Communicator User Guide- Issue 1.0 In - Call Option During a call, usable options and buttons are displayed on the screen. Please use the corresponding option button or other usable button to select a desired function. Indicates the service quality of the SIP call. Please refer to 'Service Quality (QoS)' in page 24 for details. It is possible to hold the current call. It is possible to turn off sound during a call. It is used for making another call or inputting numbers during a call. It is possible to record a call. To activate the speakerphone. To end an active call. It is possible to Call Transfer the current call to the other person or phone. Place a Call on Hold It can be used for holding the current call for a short time to make a call change or receive it again. It is also possible to hold the current call and make another call for the three-party calling. 1. During the call with your party, press Hold. The previous call becomes the held status, and ‘Holding’ is displayed on the screen. 2. The following functions can be used with the current call held. Release Hold: If you want to make conversation again with the held party, press Release. Call Transfer: Press Transfer and enter a phone number for call transfer, then press End when the party receives the call. Three-party Conference: Press Transfer and enter a phone number for a third party, then press Call. iPECS Communicator User Guide - Issue 1.0 19 Call Transfer The Call Transfer feature redirects an active call to another number on the iPECS system Screened Transfer You can talk to the transfer recipient before transferring a call 1. Press Transfer during a call with your party. The previous call becomes the held status. 2. Press a phone number for forwarding and press Call. If the third party responds, let him/her know call transferring. It is possible to cancel transferring by pressing Cancel before the third party gets the call. 3. The call is transferred when you press End to disconnect it. Unscreened Transfer You can transfer the call without announcing it to the recipient. 1. When the phone rings, press the Keypad. 2. If you press a number for transferring and press Call, the call is directly transferred to the number. Conference Calls You can join several calls in a three party conference. 1. The relaying person ‘B’, who has convened a meeting, makes a call to the party ‘A’ and press Transfer during the call. The previous call (A) becomes the held status. If you press Transfer for a long time during a call, you can use the option menu. 2. Press the phone number of the party ‘C’, who will participate in the conference, and then press Call. 3. If the party ‘C’ receives the call, Release the Holding of the previous call (A) and start the conference call. If you press Hold during a call according to need, the corresponding party becomes the held status. 20 iPECS Communicator User Guide- Issue 1.0 Mute During a call, you can turn off the microphone in your phone. The other party cannot hear you, but you can still hear them. 1. During a call with your party, press Mute. If the sound has been cut off, the mute icon ( 2. ) will appear on the screen. If you want to re-send the sound, press Un Mute. Call Recording It is possible to record a call with your party when you should take notes during the call or if necessary. 1. Recording during a Call During a call, press Record on the screen. A notification message, ‘Call to start recording.’ appears, call recording starts and the recording icon ( ) is displayed on the screen. 2. Press Stop on the screen to end the call recording. Playing the Recorded Message Messages recorded by the user can be heard with a media player or file manager application which can play the mobile phone music. iPECS Communicator itself does not support the listening of recorded calls. Directory path of recorded files: sdcard/iPECS-Communicator/yymmddhhmmss.wav Using Speakerphone It is possible to make conversation with the party over the phone within the specified range (about 30cm) by using the microphone and speaker built in the phone. 1. Using Speakerphone Press Speaker to make conversation with the speakerphone. Echo could occur in some phones when using the speakerphone function. 2. Press Speaker again to turn the speakerphone off. Setting Speakerphone If a notification message appears when you have pressed Speaker, please set the function. To set the function: Please move to Menu ( SpeakerPhone On/Off. ) > Setting > Call Options > If the function has been set, [∨] will be marked in the box. If it is deactivated, [∨] in the box will disappear. iPECS Communicator User Guide - Issue 1.0 21 Answering a General Call during a SIP Call It is possible to receive a General Call during a SIP call through iPECS Communicator if automatic refusal of answering General Calls has been deactivated. 1. When you get a General Call during a SIP call, a notification message, ‘SIP call is held automatically when receive the phone call.’ will appear along with the notifying sound. 2. The following functions can be used when a SIP call is being received. Receiving General Call: If you press the Call button, the SIP call becomes the held status. After the CDAM call has ended, you can use the SIP call again. Rejecting General Call: If you press the End button, the CDMA call being received will be disconnected and the SIP call can continue to be used. Auto-reject General Call It is possible to automatically refuse the incoming CDMA call during a SIP call. To set the function, click the check box or title with a mouse to change its status (set or deactivated). This function has been set basically. Setting Auto-reject General Call To set the function: Please move to Menu ( CDMA Call. ) > Setting > Call Options > Auto-reject If the function has been set, [∨] will be marked in the box. If it is deactivated, [∨] in the box will disappear. Function is Set Auto-reject General Call during SIP call: If a general call has been received during a SIP call, the general call will end unanswered. Function is Deactivated Holding of a SIP call during the SIP call: If a General Call has been received during a SIP call, a notification message will appear. If the general call has been answered, the SIP call becomes the held status. Auto-reject General Call: If a SIP call has been received during a general call, the SIP call will end unanswered. 22 iPECS Communicator User Guide- Issue 1.0 Do Not Disturb It is possible to refuse all the incoming calls automatically by setting the receipt refusal function during an important work or when the call cannot be answered. To set the function: Please move to Menu ( ) > Setting > Do Not Disturb. If the function has been set, [∨] will be marked in the box. If it is deactivated, [∨] in the box will disappear. It is possible to move to the Do Not Disturb setting menu by dragging down the status bar and selecting the notification item with the function set. Call Forwarding Call forwarding is a function which is used to directly forward an incoming call to the preassigned number when the user cannot answer the call or is in certain situations. Setting Call Forward 1. Move to Menu ( ) > Setting > Call Forward Type. 2. Select the call forward type. None: If none has been selected, the ‘Call Forwarding Number’ menu is disabled. Uncondition FWD: Forwards all the incoming calls. Busy FWD: Forwards incoming calls during a call. No Answer FWD: Forwards an incoming call after the pre-set no reply time has passed if the call has not been answered. Inputting Forward Number 1. Move to Menu ( 2. Enter a phone number to which a call will be forwarded. iPECS Communicator User Guide - Issue 1.0 ) > Setting > Call Forwarding Number. 23 Missed Call Notification If the unanswered call notification function has been set, the unanswered call icon ( ) will be displayed in the status bar at the top of the screen if a call has not been answered. Dragging down the status bar and selecting the notification item moves you to the call log screen. To set the function: Please move to Menu ( ) > Setting > Notifications > Missed call. If the function has been set, [∨] will be marked in the box. If it is deactivated, [∨] in the box will disappear. Service Quality (QoS) It is possible to measure service quality in the standby mode in the 3G mobile network or during a SIP call. QoS (Quality of Service) indicates service quality related to transmission and error rates on the Internet or in the network. Checking SIP call QoS It is displayed on the screen during a SIP call, and shows voice quality at three levels. 24 : Sunny is Good : Cloudy is Bad : Rainy is Impossible iPECS Communicator User Guide- Issue 1.0 Call Log Chapter 4 The call log keeps track of all calls used in your phone. This chapter explains how to use the call log. Checking Call Log You can search the list by selecting Call log at the top of the screen. Viewing Call Log If a phone number has been saved in contacts, the saved name will be displayed and the call log will be continually updated with a new phone number. 1. 2. Press Call log. A Dialed call: Indicates outgoing calls made from your phone. A Received call: Indicates received calls that were answered. A Missed call: Indicates missed calls. Select the desired call log item by scrolling up and down the screen. You can use the option menu by pressing and holding the item. iPECS Communicator User Guide - Issue 1.0 25 3. Select Menu ( ) > View by to select the type of displayed call list items. Delete All: You can permanently erase all items from your Call log at once. 4. Select the desired view type. All logs: You can view all Call log of your phone. Using Call log You can use a variety of functions by pressing the selected call log item slightly. It is possible to view the type, received date and time of the call list item. If a name has been stored in Contacts for the phone number, the name will be displayed. 26 : Use to make a call to the corresponding number. : Use to write and send a message. : Use to view the contact or add the number to contacts if it has not been iPECS Communicator User Guide- Issue 1.0 Contacts Chapter 5 The Contacts helps you stay in touch with the people by keeping track of all their Contact information. This chapter explains how to use contacts. Use of Contacts You can search a Contact by the desired method and use a variety of functions after the Contact has been selected. Searching a Contact 1. Press Contacts. 2. Press the search window lightly and input the content to be searched. Name search: Use to find a Contact by inputting a name or initial consonant. Phone number search: Use to find a Contact by a phone number. 3. Select the desired Contact by scrolling up and down the screen. It is possible to use the option menu by pressing and holding the item. Edit: Use to modify the selected Contact. iPECS Communicator User Guide - Issue 1.0 27 Using a Contact You can use a variety of functions by pressing the searched contact slightly. It is a name stored in contacts. E-mail will appear only if the e-mail address has been registered in contacts. : Use to select the type of a phone number and make a call to the corresponding number. : Use to write and send a message. : Use to write an e-mail if the e-mail address has been registered in Contacts. Management of Contacts You can save Contact information including name, e-mail address, etc. in the frequently used phone numbers. 28 Adding a New Contact 1. Press Menu ( ) > Add to Contact. 2. The name and phone number must be entered in every Contact, and other information can be selectively inputted if necessary. iPECS Communicator User Guide- Issue 1.0 Contact name: Select the input field and enter a name. Contact phone: Select the input field and enter a phone number. It is possible to save up to 500 contacts in the phone book, and four types of phone numbers can be inputted in each Contact. Contact email: Select the input field and enter an email address. 3. If input has been completed, press Save. If the phone number has been already saved in a Contact, it cannot be saved. Please save it additionally in the existing name. Adding a Contact You can add a Contact by searching the Phonebook registered in the mobile phone. 1. Press Menu ( ) > Phone Contacts. 2. Press the search field slightly and input the content to be searched. Name search: Use to find a Contact entry by inputting a name or initial consonant. Number search: Use to find a Contact entry by a phone number. iPECS Communicator User Guide - Issue 1.0 29 3. Select a Contact entry by pressing and holding it. Call: Use to directly make a call to the searched phone number. View/Add Contact: Use to add the searched phone number to Contacts. 4. If input has been completed, press Save. NOTE If phone Contacts linkage has been set, you can show mobile phone’s Contacts in the Contacts tab. Please refer to 'Call Options Setting' in page 38 for details. Adding a Contact from the Call log You can directly save a received phone number in Contacts. 1. Press Call log and scroll up and down the screen to select a phone number to be saved in Contacts. 2. Select View/Add Contact by pressing and holding the item. 3. Enter Contact information by referring to 'Adding a New Contact' in page 28. Editing Contacts You can modify a registered contact or delete part or all of Contacts. 30 To modify a Contact 1. Select a Contact to be edited by scrolling up and down the screens. 2. Press the Contact for long, and select Edit in the option menu. 3. Modify Contact information such as a name, phone number and email, and press Save. To Delete a Contact 1. Select a Contact to be deleted by scrolling up and down the screen. 2. Press the Contact for long, and select Delete in the option menu. 3. Select OK to delete the selected Contact. iPECS Communicator User Guide- Issue 1.0 To Delete All the Contacts 1. Press Menu ( ) > Delete All. 2. Please select OK to delete all the phone numbers saved in Contacts. iPECS Communicator User Guide - Issue 1.0 31 SMS Chapter 6 By using this menu, you can send and receive common short messages among the phones registered in the iPECS system. This chapter explains how to use the SMS menu. Use of Messages (SMS) It is possible to send and receive common short messages by selecting SMS on the top of the screen and check the receipt of a new message with the status bar or notification sound according to the notification setting. Please refer to 'Notification Setting' in page 41 for details about the setting. Sending a Message It is possible to write a new message. The size of bytes which can be sent at a time can be different according to registered systems. 32 1. Press SMS. 2. Select Write msg. 3. Directly input the phone number of the recipient. iPECS Communicator User Guide- Issue 1.0 You can send the same message at the same time if many phone numbers are inputted in the phone number input field. Ex) Please add a ‘comma’ between two phone numbers as in 6015, 6016, 6017. Simultaneous sending is possible for up to ten persons. 4. Write a message and press Send message to send it. The maximum size is limited to 80 bytes. Please refer to the user's manual of your mobile phone for the detailed text input method. Checking Messages If a new message has been received, an icon ( ) will appear for a short time in the status bar on the top of the screen and then disappear. Dragging down the status bar and selecting the notification item will move you to the message screen. 1. Press SMS. Inbox (2/4), ‘4’ indicates the total number of received messages and ‘3’ means the number of read messages. 2. : Indicates you have received or unread messages. : Indicates that you have sent messages. : Indicates that you have read messages. If you want to view messages according to the type, press ▼ in the bar and then select a message box. Press arrow to select label for message sorting. Please refer to 'Managing Messages' in page 35 for details about the message box. iPECS Communicator User Guide - Issue 1.0 33 3. Please select a desired message by scrolling up and down the screen. If you press an item for a long time, you can use the option menu. Please select Menu ( ) > Delete All to delete all messages. Using a Message You can use a variety of functions by pressing the selected message slightly. View the message. Check the status of the message (read or unread). View the sender information, received date and time of the message. Call: Use to make a call to the sender of the message. Reply: Use to make a reply to the sender of the message. Delete: Use to delete the read message. And also press Menu ( reading the message. ) > Forward to forward the selected message to other people while View/Add Contact: Use to view the number of the sender or add it to Contacts. 34 iPECS Communicator User Guide- Issue 1.0 Managing Messages Messages can be conveniently viewed and managed through four individual message boxes according to their types. Please refer to 'Setting for the Number of List Items and the Backup' in page 43 to change the number of messages shown on the screen. Inbox: Received messages are stored and displayed in the form of ‘Inbox (1/1).’ If a message has been read, the number of read messages on the left is reduced like (0/1). Sent: Normally sent messages are stored. Sent messages are displayed like (1) as there is no read message. Drafts: If a message has failed to be sent, is displayed and the message is stored here temporarily. You can send the draft message again by pressing Re-send in this box. Inbox & Sent: Received and sent messages are shown together. Use of Voice Mail Service If a sender has made a call and left a message in the voicemail box, an icon ( in the status bar on the top of the screen. ) will appear Checking Voice Messages 1. Drag down the status bar and select ‘Unchecked voice message’. 2. Press OK on the pop-up screen to check saved voice messages. iPECS Communicator User Guide - Issue 1.0 35 3. You will be automatically connected to the voicemail system and hear the audio guidance of the system. Press the keypad on the screen and input the access number, when you hear audio guidance. Please contact the iPECS system manager for the access number. Check saved voice messages according to the guidance of the voicemail system. Please refer to the User's Guide of the system for details. 4. When the message check has been completed, press End. Inputting Access Number If the access number has been inputted, receiving a voice message will automatically make a call to the voicemail system. To set the function: After selecting Access Number in Setting > Notification > Voice message box, input the access number of the system in which your device has been registered and then press Confirm. NOTE Please refer to 'Connection number' in page 41 for details. 36 iPECS Communicator User Guide- Issue 1.0 User Environment Setting Chapter 7 It is possible to set a variety of environments of iPECS Communicator. By using environment setting, you can use many functions applied to the product more conveniently. This chapter explains how to set the use environment of the product. To Set the Environment Move to Menu ( ) > Setting to set the environment for iPECS Communicator. Then, select the function to be set. SIP Account Settings It is possible to set or change the SIP account required for login. Please press SIP Account Settings slightly. Then, select the function to be set or follow the guideline on the screen. Please refer to ‘SIP Account Setting’ in page 6 for details. SIP server address or domain: It is possible to input or change the IP address or domain of the system to be accessed. – Main Server: Input or change the active server address when system redundancy is used. – Backup Server: Input or change the standby server address. – Multi Server: Input or change the server address when local redundancy is used. It can be used for IPECS-CM. SIP server port: Select or change the server access port number. If it is 'Custom', SIP server port by user setting is selected and used. SIP server port (user settings): It is used for user setting. It is only enabled if SIP server port has been selected as 'user settings'. Display name: It is possible to input or change the user name to be displayed on the device screen. It could not be inputted if more than twelve symbols like ‘€, ☜, ◀’ which are not common special symbols are entered as the display name. Name: Input or change the phone number notified by the iPECS system manager. Authentication name: Input or change the subscriber phone number notified by the iPECS system manager. Authentication password: Input or change the subscriber password. Protocol: Select or change the transmission protocol for communicating with the system in which the device is registered. If mobile data is used, TCP is recommended. iPECS MG, however, only supports UDP. iPECS Communicator User Guide - Issue 1.0 37 TLS mode: TLS (Transport Layer Security) select or change the encryption algorithm which creates the encryption key used for encrypting the call between the server and the user by using the authentication key to prevent others from tapping or monitoring. This menu is enabled only if the selected protocol is TLS (secure access). To set the TLS mode and make a call: 1. Select ‘5061’ as SIP server port. 2. Select ‘TLS (security connection)’ as Protocol. 3. Select ‘Encryption Algorithm’ to be used in TLS mode. 4. Input ‘Provisioning Server Address’ in Provisioning Server Address. 5. Make a call in the Call screen. Use Provisioning: Provisioning function is used for easy to set like certificate exchange or encryption rule. However, it’s supported only for IPECS CM. Provisioning Server Address: It is used for inputting the provisioning server address to conveniently set certificate exchange between the server and the user or encryption rules, etc. This function, however, only supports IPECS CM. Please make it blank when it is not used. Local IP Adress: Input or change the device IP address to be used in iPECS Communicator. You can check the current local IP address. Server Information: The information of the system in which the device is registered is displayed. Device Information: It displays the IMEI information of the device to be registered in the system. This information is used as certificate and individual provisioning file, when TLS is used. Total is 15 digits, only use end of 12 digits. Wi-Fi Mac Address: It displays Wi-Fi Mac information. This information, however, can be checked only if Wi-Fi is turned on. Call Options Setting It is possible to set or change the call-related environment. Please press Call Options Setting slightly. Then, select the function to be set or follow the guideline on the screen. Please refer to ‘In-Call Option’ in page 19 for details. Use WLAN: It is a function which automatically tries to log in when wireless LAN is accessed for a telephone call through it. Outbound Type Setting: Select or change the type of a call when it is made at the device. – Outbound Type use: Determines whether to use the outbound selection call type. – Outbound Type: Select the outbound call type. This menu is enabled only if outbound call type use has been set. iPECS Communicator only: Make a call with iPECS Communicator and use Wi-Fi or mobile network. iPECS Communicator, when availabl: Make a call with iPECS Communicator if you are in the region where Wi-Fi or mobile network can be used. 38 iPECS Communicator User Guide- Issue 1.0 General Call only: Make a call with the mobile phone and use the mobile network. Always ask: Select iPECS Communicator or mobile phone when making a call. – Integrated dial features type use: Determines whether to use the integrated dial features type. – Integrated dial features type: This menu is enabled only if integrated dial features type use has been set. SIP: SIP (Session Initiation Protocol) is an IP telephony signaling protocol which is mostly used for making a voice call over IP. Call Back: Use the Call Back and Alternative Call Back functions when making a call. Call Through: Use the Call Through function when making a call. VCC: VCC (Voice Call Continuity) is a function which makes it possible to connect a call with Call Through when weak Wi-Fi signal has been detected during a SIP call and switch over to the SIP call when strong Wi-Fi signal has been detected again in order to prevent the disconnection of the user call. – Call Back (Alternate callback number): Input another phone number (internal IP phone, mobile phone, etc.) to get the Call-Back call. – Call Through (Phone number of server): Input the server phone number for Call Through. – Wi-Fi signal strength settings: A Wi-Fi signal strength is set for automatic switchover to the mobile network when the signal strength becomes weaker than the inputted value for a stable call through Wi-Fi. Also, the network will automatically switch over again to Wi-Fi when the Wi-Fi signal strength becomes more than 12 (dbm) better than the userset value. Default signal strength: -70 (dbm) Inputtable range: -60 ~ -80 (dbm) – Useable from Wi-Fi to 3G Voice: It change from Wi-Fi to 3G-Voice automatically when VCC function is used, it’s not changed to Wi-Fi when 3G is used. It’s option for avoid inconveniences because of changing to Wi-Fi or 3G repeatedly on the line – Callback, Callthrough Server: If Call Back or Call Through is set as the integrated dialing function type, input the server address to be used. Server Port is used with TCP 7878 basically, it’s changed server port to xxxx when it’s entered :xxxx at end of IP address if you need to change basic port. Ex) 111.222.333.444:5678 Enable Mobile data: It is set for registration and call through mobile data in the Wi-Fi shadow area or when it is difficult to use it. If mobile data is used, usage fee could occur and data fee could be charged according to the payment system of the user. – If the function has been set, the call info window appears when making a call through mobile data and the call is made when OK is selected. – If the integrated dialing function use has been also set, the 'call through mobile data' selection window is additionally displayed when making a call. – TCP is recommended as the transmission protocol for stable network status. Disable mobile data alert: Determines whether to show the warning window when using mobile data. iPECS Communicator User Guide - Issue 1.0 39 Phone contact interlock: Sets or deactivates the function that the phone contacts are also shown on the Contacts tab. Auto-answer on page: Delivers notifications and others to the registered devices by using the broadcasting function. Sets or deactivates the function of automatic or manual listening of internal broadcasting. – If automatic listening has been set, the device automatically becomes the calling status when receiving the broadcast and the call ends when the broadcast finishes. – Internal broadcasting is an additional function of iPECS CM. Auto-reject CDMA call: Sets or deactivates the function that a general call which comes in during a SIP call is automatically refused. Speaker Phone On/Off: Sets or deactivates the function if the speakerphone is necessary during a call with your party. Trunk Access Code: It provides the function to set Trunk Access Code and SSDP (Station Start Digits Pattern). Set Trunk Access Code, and if necessary, select and set SSDP. The maximum length Trunk Access Code and SSDP is 6 digits. – Trunk Access Code: This code is programmed or added before a call is made if the calling phone number has more than 6 digits. If the number of dialed digits exceeds 6, as the system assumes it can be a trunk call, Trunk Access Code is applied to the trunk calling rule of the PBX system. Generally, ‘9’ is used. – SSDP (Station Start Digits Pattern): Although Trunk Access Code has been programmed, if the starting number is identical to the corresponding field pattern(SSDP) when making a call, Trunk Access Code is not inserted. SSDP is an extension separator. That is, if the calling number has more than 6 digits and to prevent the automatic insertion of Trunk Access Code, input and use the starting number in SSDP. sRTP: sRTP (Secure Real-time Transport Protocol) means a protocol for encrypting data received and transmitted in real time in the secure mode. iPECS Communicator uses AES and ARIA encryption algorithm. It selects one of them and performs encryption and decryption to prevent other persons from tapping or monitoring. – If the function has been set, a notification message, ‘making a call in secure mode’ is displayed when making a call. – Supported encryption algorithm: AES (AES_CM_128_HMAC_SHA1_80), ARIA ARIA_CM_128_HMAC_SHA1_80 DTMF type: Sets or changes the DTMF (Dual Tone Multiple Frequency) type. DTMF is number information transmitted by the phone, which is used in the electronic exchanger. – DTMF type: In Band, RFC2833, INFO – Default setting: INFO Codec sequence: Sets or changes the codec (coder which converts voice signal into digital signal, and decoder which performs inverse conversion). – Supported codec: PCMU, PCMA, G729 – Default setting: G729 40 iPECS Communicator User Guide- Issue 1.0 Notifications Setting It is possible to set or change the call- and message-related environment. Please press Notifications slightly. Then, select the function to be set or follow the guideline on the screen. As for sound and vibration setting, however, those set in the mobile phone take precedence. Missed call: Sets or deactivates the function to notify unanswered calls in the status bar. SMS: Sets or deactivates the function to notify the receipt of new short messages in the status bar. SMS notification: Sets or deactivates the function to notify the receipt of new short messages with a notification sound. This menu is enabled only if ‘SMS Messages’ has been set. Set vibration: Sets or deactivates the function to notify the receipt of a SIP call and message with vibration. Connection number: Sets or deactivates the function to automatically make a call to the voicemail system when a voice message has been received. Audio Settings Sets or changes the sound volume-related environment. Please press Audio Settings lightly. Then, select the function to be set or follow the guideline on the screen. Earpiece gain: Selects the desired sound volume of the speaker by scrolling up and down the screen. Microphone gain: Selects the desired sound volume of the microphone by scrolling up and down the screen. Headset earpiece gain: Selects the desired sound volume of the headset speaker by scrolling up and down the screen. Headset mic gain: Selects the desired sound volume of the headset microphone by scrolling up and down the screen. Advanced Audio Settings iPECS Communicator supports advanced audio setting. By using this menu, you can set or change the audio environment. Please press Advanced Audio Setting lightly. Then, select the function to be set or follow the guideline on the screen. NS (Noise Suppression): It is used for suppressing the input to the amplifier to remove noise between signals. – Use NS: Default setting is use – NS mode: Default setting is 3 0 : NS_UNCHANGED 1 : NS_DEFAULT 2 : NS_CONFERENCE 3 : NS_LOW_SUPPRESSION 4 : NS_MODERATE_SUPPRESSION iPECS Communicator User Guide - Issue 1.0 41 5 : NS_HIGH_SUPPRESSION 6 : NS_VERY_HIGH_SUPPRESSION AGC (Automatic Gain Control): It is used for maintaining the constant output, irrespective of the strength of radio waves. – Use AGC: Default setting is no use – AGC mode: Default setting is 3 0 : AGC_UNCHANGED 1 : AGC_DEFAULT 2 : AGC_ADAPTIVE_ANALOG 3 : AGC_ADAPTIVE_DIGITAL 4 : AGC_FIXED_DIGITAL EC (Echo Cancellation): It is used for removing unnecessary echoes during a call. – Use EC: Default setting is no use – EC mode: Default setting is 5 0 : EC_UNCHANGED 1 : EC_DEFAULT 2 : EC_CONFERENCE 3 : EC_AEC 4 : EC_AES 5 : EC_AECM 6 : EC_NEC_IAD AES Mode, AES Attenuation: not being used. AECM (Acoustic Echo Cancellation Mode): It is used for enabling crystal-clear voice communication in the hands-free or speaker mode by reducing echoes which could occur when the speaker or hands-free device is used. – AECM Mode: Default setting is 3 0 : AECM_QUIET_EARPIECE_OR_HEADSET 1 : AECM_EARPIECE 2 : AECM_LOUD_EARPIECE 3 : AECM_SPEAKERPHONE 4 : AECM_LOUD_SPEAKERPHONE 42 iPECS Communicator User Guide- Issue 1.0 Enable CNG (Comport Noise Generation): It is used for generating a constant noise when VAD is used to make the stability of the call. VAD (Voice Activity Detection): It is a function which differentiates voice from silence. It is used when silence is not transmitted in the packet switching network. – Use VAD: Default setting is no use – VAD mode: Default setting is 0s 0 : VAD_CONVENTIONAL 1 : VAD_AGGRESSIVE_LOW 2 : VAD_AGGRESSIVE_MID 3 : VAD_AGGRESSIVE_HIGH – VAD disable DTX: Check with your mobile operator if the allows this option. Volume scaling : Used for adjusting the sound volume of the speaker. Default setting is 1.2. Setting for the Number of List Items and the Backup You can set and limit the number of saved list items and backup the user data or configuration file. Press List Count and Backup slightly. Then, select the function to be set or follow the guideline on the screen. Count of call log list: Inputs or modifies the number of call list items to be saved in the Call List menu to ‘29~999.’ Old items are deleted in turn from the oldest and new items are listed according to the user-set number of list items. Default number of call list items is 500. Count of contacts list: Inputs or modifies the number of contact list items to be saved in the Contact menu to ‘11~999.’ Old items are deleted in turn from the oldest and new items are listed according to the user-set number of list items. Default number of contact list items is 1000. Count of sms list: Inputs or modifies the number of SMS messages to be shown in the Messages menu to ‘12~3000.’ Old items are deleted in turn from the oldest and new items are listed according to the user-set number of list items. Default number of SMS messages is 500. Data Export/Import: You can back up and restore user data or environment setting. User data: Export and import user data like the address book and messages in the XML format. Environment setting file: Export and import the environment setting and account which have been changed during use. – Data export: Select an item to be exported and press Export. It is possible to view the contents of the data by using a file management application. iPECS Communicator does not support a viewer to check the contents of the exported data. Directory path of user data: sdcard/iPECS Communicator/User_Data.xml. Directory path of environment setting: sdcard/iPECSCommunicator/System_Config.xml. iPECS Communicator User Guide - Issue 1.0 43 – Data import: If you select an item to be imported and press Import, notification messages are shown according to the progress and the data can be viewed in the corresponding menu. Ex) If the address book has been imported, it can be viewed in Contacts. Do Not Disturb It sets or deactivates the function to automatically refuse all the incoming calls by setting the refusal of answering function while performing an important work or when it is impossible to answer calls. It is disabled, however, if the call forwarding function has been set. Call Forward Type It sets or deactivates the function which is used to directly forward an incoming call to the preassigned another number when the user cannot answer the call or is in certain situations. None: If ‘None’ has been selected, the ‘Call Forwarding Number’ menu is disabled. Uncondition FWD: Forwards all the incoming calls. Busy FWD: Forwards incoming calls during a call. No Answer FWD: Forwards an incoming call after the pre-set no reply time has passed if the call has not been answered. Call Forwarding Number If the call forwarding function has been set, enter a number for call forwarding in the input window. If None has been selected, however, as the call forwarding type, this menu is disabled. Service on OS startup It sets or deactivates the function to use iPECS Communicator without the need of additional registration when the mobile phone has been turned off and then on again. Settings Wizard All user-set values like environment and sound volume and data saved in iPECS Communicator by the user will be removed and initialized to the installation status. Reset Settings: SIP account setting, call option setting, notification setting, audio setting, advanced audio setting, number of list items setting, refusal of answering, automatic execution of the service, etc. are initialized. Audio easy setting 1: Voice quality-related data has been optimized for the general office environment. If the product is used in the general office environment, you can change audio setting to the recommended audio setting. Please refer to the following for the details of set audio values. Advanced audio setting for the general office environment – Use of NS : using – NS Mode: 3 44 iPECS Communicator User Guide- Issue 1.0 – Use of AGC : using – AGC Mode: 3 – Use of EC : not being used – AECM Mode: 3 – Use of CNG : not being used – Use of VAD : not being used Audio easy setting 2: Voice quality-related data has been optimized for the environment with a noise. If the product is used in the environment with a noise, you can change audio setting to the recommended audio setting. Please refer to the following for the details of set audio values. Advanced audio setting for the environment with a noise – Use of NS : using – NS Mode: 3 – Use of AGC : using – AGC Mode: 1 – Use of EC : not being used – AECM Mode: 3 – Use of CNG : not being used – Use of VAD : not being used NOTE In noisy environments, voice could be disconnected or talk quality could not be good during the call. iPECS Communicator User Guide - Issue 1.0 45 Useful Information Appendix This chapter provides the guide on solving problems which could occur during the use of iPECS Communicator. It also explains the information on the use of open source software according to the GPL (General Public License) license contract and how to request the source code. Guide on Problem Solving It is possible to check the following and solve problems when iPECS Communicator does not execute normally during use. Problems Related to Use If the call is not ended There could be a case where a call is not ended even when End has been pressed if the call is made in the environment where radio communication is not possible. For this case, if you press Back ( ), then a warning message is displayed. Press OK to normally end the call. If there are much echoes during the call For this case, please use the earphone included in the mobile phone. If the screen is turned off The screen is turned on when the call is first received, and it is turned off after the pre-set lighting time if there is no action in the phone. The screen is turned on again if the phone is slanted at the angle of larger than sixty degrees. The screen is turned off after the pre-set display lighting time, if there is no action when using iPECS Communicator. There could be no response to the angle, however, according to the type of the smart phone. If there is no response when the access number has been inputted for the voicemail system If there is only a message like 'time has passed' after the voicemail system has been connected and the access number has been entered, please check the DTMF type supported by the CM server is set to INFO by moving to Setting > Call Options > DTMF Type > INFO. Default setting is ‘INFO’. If calling or receiving is not possible though standby is displayed If Wi-Fi setting has changed or the call has not ended normally (error), please perform exit after cancellation of registration and register the program again, even when the ‘green’ status is 46 iPECS Communicator User Guide- Issue 1.0 displayed. Please perform exit after cancellation of registration and register it again also for the case where the ‘red’ status is displayed. However, refusal of answering is an exception. If certain functions do not run If Android 2.1 version is used, some functions may not run. Upgrade to Android 2.2 or higher is recommended. If incoming voice is disconnected during the call A phenomenon could occur in which incoming voice is disconnected when talking with the party with the charger connected in some devices. Explanation of Error Messages Errors in Registration Login error (401): Authentication error. Registration error (404): When account information like name, authentication name and authentication password does not match. Registration error (408): Registration timeout - If the device is not connected to the Internet or IP address and port of the server has been entered incorrectly. Errors in Call Trial Call ended (480): Not connected due to a temporary fault. Call ended (busy): If the other party is committed to another call and so unable to take the call. Call ended (unanswered): If the other party does not answer the call. Call ended (unregistered): If it is an unregistered phone number. Call ended (refused): If the other party has hung up. Call ended (connected to another phone 200): The call is ended and it is not put in the call list, when the other place has answered the call by dual forking. Call ended (connected to another phone 400): The call is ended and it is put in the call list, when the other place has answered the call by dual forking. iPECS Communicator User Guide - Issue 1.0 47 Open Source Software Notice This following GPL (General Public License) software used in this product are subject to the GPL License Agreements. You can obtain a copy of the GPL licenses from Ericsson-LG Enterprise Web Site (http://www.ericssonlg.com). GPL License: Used Open Source Applied Function or Application License (GPL, LGPL, MPL, BSD-style) ld-2.3.1.so Shared library LGPL libc-2.3.1.so GNU C library LGPL libcrypt-2.3.1.so Security-related library LGPL libcrypto.so.0.9.8 Security-related library LGPL libdl-2.3.1.so Dynamic linking library LGPL libm-2.3.1.so Math library LGPL libnss_detailed Name service switch library LGPL libpthread-0.10.so POSIX thread library LGPL librt-2.3.1.so POSIX real-time extension LGPL instructions.so interface libssl.so.0.9.8 SSL LGPL libz.so.1.1.4 Compression library LGPL RTP RTP LGPL sRTP sRTP LGPL SIP SIP Protocol LGPL OpenSSL Secure Network BSD Ericsson-LG Enterprise offers to provide source code to you on CD-ROM for a charge covering the cost of performing such distribution, such as the cost of media, shipping and handling upon e-mail request to Ericsson-LG Enterprise at.: [email protected]. This offer is valid for a period of three (3) years from the date of the distribution of this product by Ericsson-LG Enterprise. 48 iPECS Communicator User Guide- Issue 1.0 The contents of this document are subject to revision without notice due to continued progress in methodology design and manufacturing. Ericsson-LG Enterprise shall have no liability for any error or damage of any kind resulting from the use of this document. Posted In Korea http://ericssonlg-enterprise.com © Ericsson-LG Enterprise Co.,Ltd. 2013