1
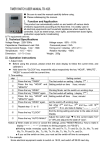
Programmable Digital Timer Instruction Manual
Thank you for your confidence in our product.
We would like to ensure that you obtain the
best possible result from your investment.
If you have any questions call us
Service at +603-8052-0078.
------------------------------------------------ CAUTION:-----------------------------------------------1. For proper installation, wiring must be according to wire diagram. Please see the back of the unit.
2. Press the RESET button before use.
3. Recharge the battery when no readout is in the display window.
BUTTON INSTRUCTIONS:
CLOCK: Current Time Setting (Show, Current Time).
TIMER: Press to enter the Program Mode (There are 17 “ON”and 17 “OFF”programs).
DAY: Sets the day of the week.
HOUR: Sets the hour.
MINUTE: Sets the minutes.
MANUAL: ON/AUTO/OFF selection mode.
P: Reset Button (Cancels all prior settings)
ON: LED lamp indicator. LED light comes on whenever the device is turned on.
TO SET THE CURRENT DAY AND TIME:
1. Hold the “CLOCK”button while pressing the “DAY”button until current weekday is selected.
2. Hold the “CLOCK”button while pressing the “HOUR”button until current hour is selected.
3. Hold the “CLOCK”button while pressing the “MIN”button until current minute is selected.
4. After setting the weekday and time, the seconds will reset automatically.
TO PROGRAM ON/OFF and DAY TIMES:
1. Press the “TIMER”button. “1ON“will appear at the bottom of the display. You can now set
“Program “1ON“options for when you want the device to be turned “On”
2. Press the “DAY”button to select the program period.
There are 15 options:
(1) Mo
(2) Tu
(3) We
(4) Th
(5) Fri
(6) Sa
(7) Su
(8) Mo Tu We Th Fr
(9) Sa Su
(10) Mo Tu We Th Fr Sa Su
(11) Mo Tu We Th Fr Sa
(12) Mo Tu We
(13) Mo We Fr
(14) Th Fr Sa
(15) Tu Th Sa
3. Press the “HOUR”button to set the hour
4. Press the “MIN”button to set the minute.
5. After setting the “1ON“program, press the “TIMER”button. “1OFF“will appear. You can now set
“Program “1OFF“options for when you want the device to be turned “Off”.
6. Repeat Steps 2 through 4 to select day, hour and minute. (There are 17 “ON”and 17 “OFF”
Programs).
www.solarpower-mart.com
Harvest the Sun power!
REVIEW YOUR PROGRAMS:
1. Press the “TIMER”button to review each “ON”and “OFF”program setting.
2. After reviewing days and time for each program, adjust as needed per instructions.
The “MANUAL”button:
1. Press the “MANUAL”button to select either “ON”, “AUTO”, or “OFF”mode.
2. The “AUTO”mode will enable the timer programs to begin.
3. To turn the device on until the program begins, cycle through the options from “ON”directly to
“AUTO”.
4. To turn the device off until the program begins, cycle through the options from “OFF”directly to
“AUTO”.
5. To leave the device in either the On or Off positions, select “ON”or “OFF”accordingly.
www.solarpower-mart.com
Harvest the Sun power!