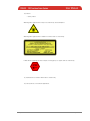
1
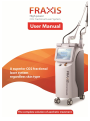
The copyright and all publication rights for this manual are owned by ILOODA Co., Ltd. Any part of this user manual must not be modified, reproduced, or copied without prior permission of ILOODA Co., Ltd. (Hereafter referred to as ILOODA) ILOODA has the right to alter the technical specifications and/or configuration of the apparatus to enhance its performance, reliability or production capability in its discretion without any prior notification. Exemptions The information provided by ILOODA is correct and reliable. However, ILOODA doesn’t take any responsibility for the damage caused by using the equipment for different purposes other than original ones presented in this user manual. ILOODA Co., Ltd. (Manufacturing Company) Address: #801~805 Venture Valley, 958 Gosaek-Dong, Gwonseon-Gu, Suwon City, Gyeonggi-Do, Korea Tel: +82-31-278-4660 Fax: +82-31-278-4661 Website : www.ilooda.com , E-Mail : [email protected] Please check the related local regulations before using the equipment. The use of the apparatus may not be permitted if it is not in conformity with the related local law. 2 / 43 ILOODA CO.,LTD Table of Contents Chapter 1 Chapter 2 Overview 1. Apparatus-verification Data 2. Items Provided 3. How to Use This User Manual Introduction to FRAXIS 1. Introduction to FRAXIS 2. Qualification for Using FRAXIS 3. Essentials for Using Equipment 3.1 Installation of Equipment 3.2 Patient and Cautions 3.3 Eye Protection 3.4 Setting of Equipment Chapter 3 Safety Cautions 1. Cautions for Safe Use of Laser Equipment 1.1 Optical Hazard 1.2 Electrical Hazard 1.3 Fire Hazard 2. Cautions for Safe Use of Equipment 2.1 Cautions for Product Safety 2.2 Cautions before Use 2.3 Cautions during Use 2.4 Cautions after Use 2.5 Cautions in Storage 2.6 Cautions for Maintenance 3. 3 / 43 Labeling ILOODA CO.,LTD Chapter 4 Installation of Equipment 1. Description of Equipment 1.1 External Appearance 1.1.1 Main Body 1.1.2 Probe 1.1.3 Accessories 1.2 Installation of Equipment 1.2.1 Installation of Main Body – Power Supply Part 1.2.2 Installation of main Body – Articulated Arm 1.2.3 Installation of Handpiece (Articulated Arm) - Fractional 1.2.4 Installation of Handpiece (Articulated Arm) – Normal (Option) Chapter 5 Use of Equipment 1. How to Use at Each Mode 1.1 Power On/Off and Use of Main Screen 1.2 Use of Fractional Mode 1.3 Use of Normal Mode (Option) Chapter 6 Equipment Parameters 1. Specification Sheet 2. Setting of Parameters for Patients Chapter 7 Explanations on Error messages Chapter 8 Specifications of Equipment 1. Specifications of Equipment 1.1 Electrical Specification 1.2 Mechanical Specification 2. 4 / 43 Items to Be Mentioned on Equipment ILOODA CO.,LTD Chapter 1 1. Overview Apparatus-verification Data Product Name Model Name : Medical Laser Equipment : FRAXIS Manufacture Serial Number Date of Manufacture 2. : : Items Provided The components (accessories) consisting of this equipment are as follows. 5 / 43 Mani Body and Handpiece Power Cable Goggles for User (Goggles for Doctor) Eye Guards for Patient Remote Interlock Contactor Foot Switch & Cable Power Key User Manual ILOODA CO.,LTD 3. How to Use This User Manual Purpose of This User Manual The purpose of this manual is to make users be fully aware of the structure, installation, manipulation, operation, and maintenance of FRAXIS Laser System. Keeping of This User Manual This manual must be kept together with the equipment or near the equipment so as that you can refer to it if necessary. Expressions Used in This User Manual The expressions Caution, Note, and Warning as below are used in this manual. Note ‘Note’ tells the problem related with the improper use of the equipment as well as warns the user about the possibility that some trouble occurs due to the problem. These problems include the damage to other related property as well as the poor operation of the system. This expression involves the matters to take a full note to avoid this harm. Warning ‘Warning’ warns the user about the possibility of improper use of the system and of injury, death, or serious side effects. Please check the related local regulations before using the equipment. The use of the apparatus may not be permitted if it is not in conformity with the related local law. This equipment is a system that can use CO2 laser Fractional mode and Normal mode (option) and the explanation on the system related with option can be omitted. In addition, the function and screen menu are subject to change according to the options of the handpiece. 6 / 43 ILOODA CO.,LTD Chapter 2 1. Introduction to FRAXIS Introduction to FRAXIS Made by mixing laser and scanner, FRAXIS is a laser equipment to conduct Micro Fractional Laser Resurfacing promoting the reconstruction of both epidermis and dermis by radiating numerous micro laser beams in many divided sections into skin tissues. * What is Micro Fractional Resurfacing? This is a treatment method which radiates laser beams, dividing them into tinier sections than hair, into skin surface partially to generate artificial thermal damage, gets normal skin tissues to recover the laser-damaged skin tissues quickly without any side effects, and then makes new skin tissues through this process. When laser is emitted into skin in innumerable minute points, thousands of tiny holes that can be hardly seen with the naked eye are formed. This treatment is to make the thermal plume that generated these holes stimulate the epidermis and dermis of skin and to regenerate collagen rapidly. This treatment doesn’t affect our daily lives and gets normal tissues to create new tissues because only 10~45% of concerned skin area is treated, leaving normal tissue untouched. Therefore with this equipment, you can see not only the improvement of skin elasticity and tone and pores but also the removal of scars and wrinkles. * Applications of FRAXIS 7 / 43 Acne scars, Burn scars, Surgery scars Aging skin lesions, Pigmentary disorders, Freckles, Dark and dull skin Expanded pores, Wrinkles, Decline of skin elasticity, Striae distensae Various skin renewal, Skin total renewal around face and neck ILOODA CO.,LTD 2. Session Anticipation Effect 1 20 ~ 30% 3 50% 5 70% Interval 3 ~ 4 weeks Qualification for Using FRAXIS It is strictly required that this equipment be used only by the doctor qualified for safety handling and use of laser apparatus. Thus any persons concerned (nurses etc.) except for a doctor holding a license or a certificate on laser device must not use this equipment. It is recommended that all the relevant people (nurse etc.) including medical staffs complete the training on installation procedure, operating method and potential hazards of laser equipment, laser physics, and interactions of tissues and take the respective safety education program according to each country’s regulation in addition to laserrelated safety education. It is also recommended that the doctor wanting to use the laser equipment obtain an approval required for using it from the relevant authorizing organization in the country. 8 / 43 ILOODA CO.,LTD 3. Essentials for Using Equipment The following instructions are the essential guidelines to be surely considered before using the equipment. In case that you don’t observe them, the critical damage like the performance degradation of the equipment can be brought about. 3.1 Installation of Equipment The equipment must be installed and used only in a safe treatment room of hospital. The use of the equipment in other places (i.e. skin care shop, other treatment place etc.) except hospitals is strictly prohibited. The equipment should be moved and installed only in a state of turning-off and placed in a safety flat space. The power and system specifications must be checked in installing the equipment and the ‘installation’ section in this manual should be referred to for proper setting of the each laser connector in installing the laser connectors. 3.2 Patient and Cautions Make sure to give the treatment only to the patient in accordance with the purpose of this equipment after the doctor’s prior diagnosis. The treatment to the patient with other lesion, not with the originally targeted one without the doctor’s prior diagnosis is strictly prohibited. Before treatment, make sure to check the patient’s skin state and sterilize the region to be treated so as that there are no foreign substances. Before treatment, remind a patient of the cautions before, during, and after treatment and notify the possibility of occurrence of unintended abnormal symptoms to him or her. 3.3 Eye Protection All of the persons around the laser equipment in use (doctor, patient, nurse and other supporting staffs) must wear the appropriate eye protection tools. Never take a direct look at the laser tip. 9 / 43 ILOODA CO.,LTD 3.4 Setting of Equipment Set the parameter values in consideration of the patient’s state before setting the equipment. The setting of the equipment must be conducted in standby mode and the handpiece should be put in a safe place (handpiece holder) with the laser radiation part downward when the equipment is set. Increase using amount and intensity gradually from a small value to the desired value when adjusting the setting values. Abide by all the safety-related cautions stated in this manual. Never adjust the equipment at the user’s (doctor’s) discretion with other adjusting method different from the method stated in the manual. Do not make the laser system used by a non-qualified person without the supervision of a trained and experienced specialist. Place the handpiece in a stable location and keep the direction of the handpiece away from other people than patient. All of the persons around the treatment must wear the eye protection tools (goggles and eye guards) and must not take a direct look at the laser tip or reflected ray. It may bring about permanent damage to eyes. When you are to change the setting values, always check the displayed contents on the screen first to see if the application parameters are correctly set. Patient and operator (doctor) should not carry the metallic materials such as rings, watches, necklaces etc. Use the equipment only onto the skin surface in which there are no infection and other damage. Never use the equipment for treatment of different purpose other than original purpose. Make sure to turn off the equipment and pull out the key not to be operated by others when it is not used or even an operator (doctor) leaves for a moment. 10 / 43 ILOODA CO.,LTD Never disassemble the equipment. The disassembly of the equipment can be carried out only by an authorized repair person of the manufacturer. It is impossible for the equipment to conduct the laser treatment in a situation when it is disassembled. Chapter 3 1. Safety Cautions Cautions for Safe Use of Laser Equipment 1.1 Optical Hazard. Laser wavelength in the visible ray range carries the hazard that can damage to the retina unless you conform to the safety cautions. The eye protective glasses for patient should be opaque and not pass any light through them. In occurrence of an accidental radiation of laser, the patient goggles should not reflect light or not conduct heat. Use the patient eye guards provided with this equipment. When the laser light is visible to your sight, stop using the laser equipment immediately and check if the protective glasses are damaged or inappropriate. All of the persons in a treatment room should wear the laser goggles protective against the laser wavelength radiated from this equipment. Do not take a direct look at the tip from which the laser is radiated, even when you are wearing the laser goggles. There are various different types of laser goggles. Wear the goggles made suitable for each wavelength (color). Put the handpiece tip downward all the time and keep the handpiece in the handpiece holder. When the treatment comes to a halt or stops, put the system into the standby mode or turn off the system, and make sure to take the laser goggles off only after the shutdown of the system. Post up a warning label for laser radiation on the outside of a treatment room and have all the staffs of a hospital well-informed of the proper laser use protocol. 11 / 43 ILOODA CO.,LTD 1.2 Electrical Hazard All the users of the equipment should read and observe the following cautions for electrical safety, or electric shocks may take place. Do not touch any part carelessly except the operating part of the system. Turn off the system or remove the plug when executing the ordinary jobs like connecting or removing the laser applicator. Make sure to use the laser system only in a place where there is electric installation, obeying the standards and regulations of each region. Do not use water or other liquid solvents when cleaning electrical parts. Prevent water or other liquid from spilling it on the laser system. Install with care not to fall down on electric wires and pipes or to entwine electric wires. Make sure to install and use the proper parts and accessories and do not use the different products from the accessories provided along with the equipment. Check the damage to the external appearance and electric wires of the equipment on a regular basis. 1.3 Fire Hazard All the users of the equipment should read and observe the following cautions for fire hazard, or fire may take place. Do not put the flammable or combustible materials or substances around the treatment room. If you use alcohol to clean the laser tip or handpiece tip, wait up to the time when it is completely evaporated and dried before operating the system. 12 / 43 Do not radiate the laser to any part except for the part to be treated. ILOODA CO.,LTD Avoid the hair, clothes, fabrics or other foreign substances that may work in reverse with the laser and absorb it. 2. Cut off the power immediately in case of fire. Only use a CO2 or powder extinguisher in case of fire. Cautions for Safe Use of Equipment 2.1 Cautions for Product Safety The owner and user of the laser system are obliged to obey all of the equipmentrelated safety cautions. The following cautions related with the equipment must be observed. Use this stimulating system only for the designated purpose. Use the equipment only when it operates normally (There should not be an error message). Manage this manual and all other related materials always in a good condition and keep them in a place where the laser equipment is installed to use them at any time. Make the stimulating equipment operated, maintained and repaired only by a qualified and authorized person. Do not remove or erase the safety cautions and warning message attached to the laser system. Do not give a shock to the equipment. Keep the main body of the equipment, the handpieces, the connector and the holders in a clean state that has no foreign substances. 13 / 43 ILOODA CO.,LTD 2.2 Cautions before Use I. Make sure to read the instructions and use the equipment before using it. II. Make sure to use the equipment on a doctor’s prescription. III. Do not connect the power on with a wet hand. IV. Be careful not to spill water into the main body. It can cause the damage to the equipment and the fire and electric shock. V. Do not install the equipment in a watery, humid place. It can cause the damage to the equipment and the fire and electric shock. VI. Install the equipment at least a 100mm distance from the wall. VII. Be careful not to make the power cord pressed by heavy weights or touched by sharp materials. The use of a damaged cord can cause fire or electric shock. VIII. Never use the equipment near flammables. It can cause the deformation of the main body, the failure in the system, and the fire. IX. Make this machine used only a professionally trained person. X. Conduct a prior check on the manipulation of the system. XI. Check the switches etc. and then confirm the correct operation. XII. Connect all the cords accurately not to break away easily. XIII. When you use the equipment after a long interval, confirm if it operates normally and safely or not. XIV. Never disassemble or change the equipment by anybody except by an installation and repair technician. It can cause fire or electric shock. 14 / 43 ILOODA CO.,LTD 2.3 Cautions during Use I. Make sure to wear the operator’s goggles and patient’s eye guards. II. Remove all the interruptions around the equipment when it is used. Do not put papers or other materials on the top of the machine and block the vent. III. When the failure in the system takes place, stop using it, and turn off the power and then contact our customer service center. IV. In case of a power outage, turn off the power immediately and put the controlling knob and switches back to the original position. V. Do not use the equipment near a patient monitor. VI. Always check if there are some abnormalities on the patient and the equipment during use. If some abnormalities occur on the patient or the equipment, check the patient’s safety and stop the equipment. When you confirm that the patient and the equipment have no problems after check-up, continue to use it again. VII. Do not make anybody contact the machine except the patient and the doctor. VIII. Make the laser beam not radiated directly toward the other people. IX. Do not smoke while the laser light is emitted. X. Do not look at the laser light reflecting from a reflector or flashing directly at your eyes. XI. Be careful not to install the power cord of another machine at the same time. It can cause the performance degradation of the equipment. XII. Do not operate the machine in a place where chemicals are stored or gas is generated. XIII. Do not pull the cord of the main body by force. It can cause the performance degradation of and the trouble with the machine. 15 / 43 ILOODA CO.,LTD 2.4 Cautions after Use I. After use, put the control knob and switches back to the original position and turn off the power. II. Be careful not to give an excessive force to the connecting part of cords when you pull out the cords. III. Make sure to turn off the power and take out the key so that other people cannot operate the equipment. 2.5 Cautions in Storage I. Do not keep the equipment in a place where there is some slope, shaking, or possible impact. It can cause the performance degradation of the machine or the fire and electric shock. II. Do not keep the equipment in a place where chemicals are stored or some gas is generated. III. Do not keep the equipment in a place where temperature, air pressure, humidity, ventilation, sunlight, and air containing dust, salt and sulfur have a harmful influence on it. IV. Keep the equipment in a place far from water. 2.6 Cautions for Maintenance I. In case of the trouble with machine, make sure to stop using it and contact the store you purchased from or the customer service center. II. Never open the machine and the controller. III. Do not give an impact to the main body. If there had been some impact on it, make sure to use the equipment after check-ups. 16 / 43 ILOODA CO.,LTD 3. Labeling The following safety labels must be attached to the equipment. Do not remove or change the labels attached to the equipment at your own discretion. RADIATION Label: Attached to the back of the main body “LASER RADIATION” means that this laser equipment is classified as the Class 4 laser product. ID Label: Attached to the back of the main body The product & model name and the required labeling by Medical Device Act are written on this label. Laser-radiation Warning Label: Attached to the radiation part of the handpiece (Laser-radiation Warning) 17 / 43 ILOODA CO.,LTD Emergency Stop Label: Attached to the right of the front side (near Emergency Stop Button) in the main body This label means the immediate stop of the laser in emergency situations. STOP Caution Label: This label tells an operator to refer to the user manual carefully. 18 / 43 ILOODA CO.,LTD Chapter 4 1. Installation of Equipment Description of Equipment 1.1 External Appearance 1.1.1 Main Body Upper Part A C B No. A Name Function Articulated Arm Part of Articulated arm connecting part making handpiece Main Body move freely B Scanner Cable Connector Socket connecting scanner C Air Joint Connector Socket passing compressed air through 19 / 43 ILOODA CO.,LTD Front Part D E No. F Name Function D LCD Monitor (THOCH) Touch screen displaying each function and setting E Key Switch Key switch turning on/off equipment F Emergency Stop Switch Emergency stop switch stopping equipment in 20 / 43 emergency ILOODA CO.,LTD Back Part G H J I K No. L M Name Function G Handle Handle used for moving equipment H Air Vent Place discharging heat of equipment I Air Vent Place discharging heat of equipment J Foot Switch Hook Hook hanging foot switch K Power Cord Connector Socket connecting power cord L Foot Switch Connector M Remote Interlock Connector Socket connecting foot switch letting set output 21 / 43 value out Socket connecting interlock ILOODA CO.,LTD 1.1.2 Probe Fractional Handpiece a e c b d No. Name Function Articulated Arm Part Connecting part between handpiece and Articulated of Handpiece arm b Scanner Connector Connecting socket for movement of socket c Air Joint Connector Socket passing compressed air through d Sighting Bar e Laser Radiation Part a Sighting bar for catching a correct region at the time of laser radiation Part from which laser radiates Normal Handpiece(Option) h f i g No. Name Function Articulated Arm Part Connecting part between handpiece and articulated of Handpiece arm g Air Joint Connector Socket passing compressed air through h Sighting Bar i Laser Radiation Part f Sighting bar for catching a correct region at the time 22 / 43 of laser radiation Part from which laser radiates ILOODA CO.,LTD Articulated Arm j m k l o n No. Name Function j/n Scanner Cable Connecting cable for movement of scanner k/o Air Joint Cable Cable passing compressed air through l Main Body Connector Connector connecting main body and articulated arm Connector connecting handpiece and articulated m 23 / 43 Handpiece Connector arm ILOODA CO.,LTD 1.1.3 Accessories The accessories comprising this equipment are as follow. 24 / 43 Power Cable - Power Key Operator’s Goggles (Doctor’s Goggles) - Patient’s Eye Guards Remote Interlock - Foot Switch & Cable User Manual ILOODA CO.,LTD 1.2 Installation of Equipment 1.2.1 Installation of Main Body – Power Supply Part (Refer to the image and numbering of Back Part in ‘1.1.1 Main Body’) 1) Connect the power cord to the power cord connector (K) at the back side of the main body. 2) Put the remote interlock into the remote interlock connector (M) at the back side of the main body 3) Connect the foot switch to the foot switch connector (N) at the back side of the main body The foot switch and remote interlock are distinguished by their colors to prevent confusion between the two connectors. Put them respectively into each connector with the same color as theirs in the arrow direction. 25 / 43 ILOODA CO.,LTD 1.2.2 Installation of Main Body – Articulated Arm (Refer to the Upper Part in ‘1.1.1 Main Body’ and the image and numbering of articulated arm in ‘1.1.2 Probe’) 1) Open the red protective cap of main body’s articulated arm part (A). 2) Put the main body connector (I) of articulated arm perpendicularly into the articulated arm part of main body and connect them tightly, turning the connector clockwise. 3) Connect the scanner cable (j) of articulated arm perpendicularly to the scanner cable connector (B) of main body in the arrow direction. 4) Connect the air joint cable (k) of articulated arm to the air joint connector (C) of main body. When connecting the articulated arm, put it vertically into the connector and turn it clockwise all the way to the end. If it is loosely connected, the movement of the articulated arm may be unstable. When connecting the scanner cable, connect it in the arrow direction until you hear the ‘clack’ sound. Loose connection of it to the main body can cause the trouble with the equipment. The air joint cable is made of elastic rubber hose. Connect it to the air joint connector of main body tightly so that it is not removed from the connector. 26 / 43 ILOODA CO.,LTD 1.2.3 Installation of Handpiece (Articulated Arm) - Fractional (Refer to the image and numbering of ‘1.1.2 Probe’.) . 1) Put the handpiece connector (m) of articulated arm horizontally into the articulated arm part of handpiece (a) and connect it tightly, turning it clockwise. 2) Connect the scanner cable of articulated arm (n) horizontally to the scanner connector of handpiece in the arrow direction. 3) Connect the air joint cable (o) of articulated arm to the air joint connector of handpiece (c). When connecting the articulated arm, put it vertically into the connector and turn it clockwise all the way to the end. If it is loosely connected, the movement of the articulated arm may be unstable. When connecting the scanner cable, connect it in the arrow direction until you hear the ‘clack’ sound. Loose connection of it to the main body can cause the trouble with the equipment. The air joint cable is made of elastic rubber hose. Connect it to the air joint connector of main body tightly so that it is not removed from the connector. Make sure to use the fractional handpiece only in the fractional mode. Change of handpiece once after you enter into each mode can bring about errors with the system. Make sure to exchange the handpiece only in the main screen. 27 / 43 ILOODA CO.,LTD 1.2.4 Installation of Handpiece (Articulated Arm) – Normal (Option) (Refer to the image and numbering of ‘1.1.2 Probe’.) 1) Put the handpiece connector (m) of articulated arm horizontally into the articulated arm part of handpiece (f) and connect it tightly, turning it clockwise. 2) Connect the air joint cable (o) of articulated arm to the air joint connector of handpiece (g). When connecting the articulated arm, put it horizontally into the connector and turn it clockwise all the way to the end. If it is loosely connected, the movement of the articulated arm may be unstable. The air joint cable is made of elastic rubber hose. Connect it to the air joint connector of main body tightly so that it is not removed from the connector. There are two types of the normal handpieces according to focal length from the lens to the target, which are f:50mm and f:100mm. The focal length corresponding to each handpieces are imprinted on the articulated connecting parts of the normal handpieces. f:50mm f:100mm Make sure to use the normal handpiece only in the normal mode. Change of handpiece once after you enter into each mode can bring about errors with the system. Make sure to exchange the handpiece only in the main screen. 28 / 43 ILOODA CO.,LTD Chapter 5 1. Use of Equipment How to Use at Each Mode Refer to ‘1.2 Installation of Equipment’ of Chapter 4 and install the equipment. All the operating modules and displays appear on the LCD monitor (A) at the front of the main body. Operate the machine by touching the touch screen monitor. 1.1 Power On/Off and Use of Main Screen Turn on the power by connecting the power and turning the key switch. 1) The pop-up ‘SYSTEM ALERT’ as below appears when you turn the power on and about 2~3 seconds later the main screen in which two touch boxes are arranged is shown. After 2~3 seconds Fractional: Entry into scanner mode presenting operating screen necessary for using scanner handpiece Normal: Entry into normal mode presenting operating screen necessary for using normal handpiece (option) Information: Change of skin type Help 29 / 43 ILOODA CO.,LTD 2) If you touch the mode box you want, the screen changes into the corresponding mode. 3) If you wish to shut down the equipment, turn the power off by turning the key switch on the current window (main screen) and pull out the key. Make sure to turn the power on only after the equipment installation is completed. If you turn the power on in a situation that the equipment installation is not completed yet or try to entry into some mode, the error message appears and the equipment is unable to be operated. It is impossible to make a simultaneous entry into the two modes at a time. After completing one treatment mode, enter into the other mode. 30 / 43 ILOODA CO.,LTD 1.2 Use of Fractional Mode ④ Output/Sound Control Field ① Parameter Menu Box ③ Spot Size Control Box ② Up/Down ⑤ Other Menu Box Field 1) If you choose ‘Fractional’ on the main screen, the Fractional screen where respective functions and boxes are arranged appears. 2) Set the output value by touching the following menus one by one in ‘parameter menu box (①)’. Touch the menu you wish to set and then adjust the output value using ‘up/down (②)’ at the bottom left. duration: Energy radiation time per pixel - Set range: 100us ~ 5000us repeat: Time interval between energies (areas) radiated repeatedly while you are putting on foot switch - Set range: single, 0.2s, 0.5s, 0.7s, 1.0s, 1.5s and 2.0s overlap: Number of lasers radiated per pixel - Set range: 1st ~ 10th distance: Distance between pixels - Set range: 0.1mm ~ 2.0mm shape: Shapes of radiated lasers (area) , scanning: Directions and styles of radiated lasers , 31 / 43 , , , , , , , , ILOODA CO.,LTD 3) After setting the menu, adjust the energy size to be radiated in ‘spot size control box (③)’. Adjust the size to one you want by touching the arrows and triangle-shaped +/- buttons in the box. – Set range: 1mm ~ 20mm respectively in width and length (1step) Four directional size adjusting button: You can adjust the size upward/downward or to the left/right by touching this button and then white triangle buttons. Fixed-rate size adjusting button: You can adjust the size upward/downward or to the left/right in the same proportion by touching this button and then white triangle buttons. * On the bottom left of the spot size box, the “dot” says the quantity of the radiated laser and the “%” says the ratio of the radiated laser. It is shown from the system, user cannot control them arbitrarily. - Dot : the quantity of the radiated laser on the setting area. - % : the ratio of the radiated laser on the setting area. 4) After controlling the spot size, set the aiming beam representing the shape and region that laser is radiated. The pop-up window as below appears as you touch ‘AIMING’ of ‘other menu field (⑤). If you touch ‘OK’ after adjusting the brightness of aiming beam using the arrows in the pop-up window, the setting is completed and the screen is changed into the mode screen, and if you touch ‘CANCEL’, the setting is cancelled and the screen is changed into the mode screen. - Set value: 1 ~ 10 (1 step) 32 / 43 ILOODA CO.,LTD 5) If you touch ‘STANDBY’ of ‘output/sound control field’ after completing the setting of all the menu output values, the ‘standby’ state is converted into the ‘ready’ state as the purple color is changed into the orange color. At this time if you step on the foot switch, laser is radiated. STANDBY / READY: Laser radiation Standby/Ready 6) If you wish to save the set values, you can save them by using ‘STORAGE’ of ‘other menu field (⑤). If you touch ‘SAVE’ after touching the one of the number buttons in ‘STORAGE’ where you wish to save and setting the values, the pop-up window as above appears, and if you touch ‘OK’ in the pop-up window, they are saved in the number. 7) As for the adjustment of touch (setting) & output sound, you control the sound existence/nonexistence by touching the speaker icon in ‘output/sound control field (④). 8) After completing the treatment, you can go back to main screen by touching ‘BACK’ in ‘other menu field (⑤), and if you want to shut down the equipment, turn the power off by turning the key switch in main screen and pull out the key. 33 / 43 ILOODA CO.,LTD 1.3 Use of Normal Mode (Option) ① Parameter Menu Box 1) If you choose ‘Normal’ on the main screen, the Normal screen where respective functions and boxes are arranged appears. 2) Set the following menus in ‘parameter menu box (①)’ using UP/DOWN buttons at the bottom. mode: Shape of energy radiation - Setting range: CW, Pulse single, Pulse, and Ultra power: Strength of energy - Setting range: 0.5w ~ 30w (0.5w step) on time / width (In case of setting Ultra): Time of energy radiation per cycle - Setting range: The range varies with setting of mode. off time / frequency (In case of setting Ultra): Time of no-energy radiation per cycle – Setting range: The range varies with setting of mode. * One Cycle: This is the time point just before the next laser is radiated from the time point when the first laser is radiated while you are pressing the foot switch. 34 / 43 ILOODA CO.,LTD According to the setting of mode, the menu of ‘parameter menu box (①)’ is changed into ‘on time/off time’ and ‘Width/Frequency’ and the setting range is also changed. 2)-ⅰ. When Mode is CW, Pulse single, and Pulse Set the menu to ‘on time / off time’ In case that mode is set to CW This is the continuous wavelength that radiates energy continuously without break and on/off time while you are pressing the foot switch. Setting range - On time: Inactive Off time: Inactive In case that mode is set to Pulse single This is the single pulse that radiates energy once while you are pressing the foot switch. Setting range - On time: 10ms ~ 100ms (10ms step) 100ms ~ 500ms (20ms step) 500ms ~ 1000ms (100ms step) Off time: Inactive In case that mode is set to Pulse This is the multi wavelength that radiates energy cyclically according to the set time of ‘on/off time’ while you are pressing the foot switch. Setting range – On time: 10ms ~ 100ms (10ms step) 100ms ~ 500ms (20ms step) 500ms ~ 1000ms (100ms step) 35 / 43 ILOODA CO.,LTD Off time: 10ms ~ 100ms (10ms step) 100ms ~ 500ms (20ms step) 500ms ~ 1000ms (100ms step) 2)-ⅱ. When Mode is Ultra Set the menu to ‘width/frequency’ In case that mode is set to Ultra This is the multi wavelength whose energy radiation unit is us (micro sec). In this case, energy is cyclically radiated according to width time per set frequency while you are pressing the foot switch and power is automatically calculated and presented according to the set values of width and frequency (Inactivation). Setting range – width: 100us ~ 200us (10us step) 200us ~ 500us (20us step) 500us ~ 1000us (100us step) frequency: 1Hz ~ 20Hz (1Hz step) 20Hz ~ 1000Hz (2Hz step) 3) After completing the setting of output values of all the menus and then changing STANDBY/READY, step on the foot switch and radiate laser. (Refer to 5) of ‘1.2 Use of Fractional Mode’.) 4) If you wish to save the current settings, you can save the setting values in ‘STORAGE’. (Refer to 6) of ‘1.2 Use of Fractional Mode’.) 5) After completing the treatment, you can go back to main screen by touching ‘BACK’, and if you want to shut down the equipment, turn the power off by turning the key switch in main screen and pull out the key. 36 / 43 ILOODA CO.,LTD Make sure to set the output values only in STANBY state, and change the state into READY state after completing the settings. Make sure to change STANDBY into READY and press the foot switch only under which you aim handpiece at the treatment region of a patient because laser is radiated in case that the foot switch is pressed in READY state. While the foot switch is pressed and laser is radiated, the pop-up window notifying radiation of laser as below appears. Do not move the handpiece to the other direction than the treatment region while laser is radiated. Make anybody not to access to the foot switch except for an operator (doctor). 37 / 43 ILOODA CO.,LTD Chapter 6 1. Equipment Parameters Specification Sheet Laser Type 30W RF CO2 LASER, ALL Metal Sealed Type Laser Power Normal Mode, CW/Pulse/Ultra: 0.5 ~ 30W Fractional Pulse Energy 3.5mJ ~ 175mJ Laser Mode TEMoo (10.6um) Pulse Duration 100 - 5,000us Repetition 0.2-2.0sec / Single Overlap (Degree) 1 – 10 Distance 0.1 – 2.0mm Treatment Area 1mm x 1mm – 20mm x 20mm Pixel Quantity Up to 40,401 Pixel Size ≥ 100 micron Cooling Air Cooling Optical Guide Articulated Arm th Aiming Beam Semiconductor Diode laser/ Max 5mW/ 650mm Optional Accessory Normal(Surgical) Hand-piece, F50/F100 Spot Size, 0.3mm/0.5mm 38 / 43 ILOODA CO.,LTD 2. Setting of Parameters for Patients Indication Gender Duration Acne scar Burn scar Traumatic scar MAN WOMAN MAN WOMAN MAN WOMAN 400 360 300 260 300 260 2 2 2 2 2 2 1.0 1.0 1.2 1.2 1.2 1.2 3~4 3~4 5~8 5~8 5~8 5~8 (us) Overlap (th) Distance (mm) Interval (week) Indication Gender Duration Medium skin Large Pore resurfacing wrinkle skin Resurfacing MAN WOMAN MAN WOMAN MAN WOMAN MAN WOMAN 240 200 340 300 200 160 240 200 1 1 1 1 1 1 1 1 1.0 1.0 0.9 0.9 0.8 0.8 1.0 1.0 3~4 3~4 3~4 3~4 3~4 3~4 5~8 5~8 (us) Overlap (th) Distance (mm) Interval (week) 39 / 43 ILOODA CO.,LTD Chapter 7 Explanations on Error Messages The error message is a warning or notifying pop-up message appearing during use or operation. If you encounter the following message, stop the treatment immediately, check the content of the message, and then readjust the equipment. Screen of Error Message The error message as the left side pops up and the message in the box varies with the content of the error. Refer to the following table for the contents of the errors. Name of Error Content of Error Solutions INTERLOCK ERROR Error message appearing when interlock of INTERLOCK Please check back side of main body is not connected. ERROR the interlock Check if it is connected or not, and if not, ERROR CODE : E0401 reconnect it. FOOT SWITCH ERROR Error message appearing when foot switch FOOT SWITCH Please check ERROR the foot switch ERROR CODE : E0501 LASER ERROR Please check of back side of main body is not connected. Check if it is connected or not, and if not, reconnect it. Error message shown when there is a problem with laser module. Contact the LASER ERROR the RF Tube Laser (OUTPUT) service center.. ERROR CODE : E0304 SCANNER ERROR Error message shown when scanner SCANNER Please check connector is not connected or is pulled out ERROR the Scanner in fractional mode. Check if it is connected ERROR CODE : E1103 40 / 43 or not, and if not, reconnect it. ILOODA CO.,LTD Chapter 8 1. Specifications of Equipment Specification of Equipment 1.1 Electrical Specification 1) Rated Power Input Voltage and Consumptive Power: 100~240VAC±10%, 50/60Hz, 700VA 2) Protection Type and Degree against Electrical Shock: Class 1 Device and B Type Device 3) Laser Hazardous Class by IEC60825-1(2001): Class 4 4) Laser Output - Radiation Beam Medium Used: CO2 Laser Laser Tube Type: All metal sealed off RF CO2 Laser tube Laser Power: 30W Wavelength: 10.6um Spot Size: Max 20mm * 20mm Device cooling: Air cooling - Aiming Beam Medium Used: Semiconductor Diode laser Laser Type: CW Laser Diode Laser Power: Max 5mW Wavelength: 650mm 5) Display Display Light : 10.4" Color TFT LCD Panel with CCFL Back (800*600) 1.2 Mechanical Specification 41 / 43 1) Dimension: 835mm x 410mm x300mm [WxDxH] 2) Handpiece Length: 120mm 3) Weight: About 43kg ILOODA CO.,LTD 2. Items to Be Mentioned on Equipment 1) Product Name: Laser Surgery Unit (A37010) Model Name: FRAXIS 2) Name of Manufacturer: ILOODA Co., Ltd. Address: #801~805 Venture Valley, 958 Gosaek-Dong, Gwonseon-Gu, Suwon City, Gyeonggi-Do, Korea 3) Manufacture Permission Number: No. 2461 Article Permission Number: No. 09-54 4) Using Purpose: Laser Surgical Unit using semiconductor diode laser as a medium. Used for cutting, destruction, and removal of tissues etc. 5) Manufacture Number/Date of Manufacture: To be written when the product is manufactured. 6) Weight and Packing Unit (1) Weight: 43 Kg (2) Packing Unit: 1 Set 7) Performance and Using Method: Refer to the Manual 8) Cautions in Use: Refer to the Manual 9) Rated Power and Voltage (1) Rated Electricity: 100~240VAC±10% (2) Frequency: 50/60Hz (3) Consumptive Power : 700 VA (4) Protection Type and Degree against Electrical Shock: Class 1 Device and Type B Device (5) Laser Hazardous Class by IEC60825-1(2001): Class 4 (Aiming beam and radiation beam are the same as Class 4) 42 / 43 ILOODA CO.,LTD 10) Others - Safety Label Warning label against laser output on main body and handpiece Warning label against laser radiation on back side of main body Label about stoppage of laser output in emergency on upper side of main body 11) Attachment of Labels: Back side of main body 12) This product is a medical apparatus. 43 / 43 ILOODA CO.,LTD