1
Orientation page for TriMetric model 2020
Please read this first:
Rev: February 2003
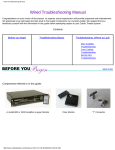
(A) INSTALL: A qualified person should install the TriMetric.
STEP 1: Read (or at least quickly review) section A, pages 2-3 of the manual "METER INSTALLATIONPRELIMINARY":
STEP 2: Study the wiring diagram on last page of manual.
STEP 3: Install according to section B: METER INSTALLATION.
(B) ENTER DATA: To get the TriMetric working the first time, particularly the "Battery % Full"
and "AmpHours from full", you need to enter some system data. For "Battery % Full" to work properly, data in Step 2, Step 3 Step
4 and Step 5 (below) must be entered correctly. For "Amp-Hours from full" and "days since charged" to work properly,
data in Step 2, Step 3 and Step 4 must be correct. For "Amps" to read correctly (not off by a factor of 10) Step 4, shunt
type, must be specified correctly.
STEP 1: Refer to table 1 on page 13 of the instructions, which summarizes the TriMetric programmed data that may be
changed, and shows how to change it. To get started enter the data shown below (steps 2 thru 5); later read the
references to the instructions shown on table 1, the last column to "fine-tune" the data.
STEP 2: Enter the "charged setpoint voltage" (refer to first item of table 1, p. 13): Setting all other programmed data is
done in a very similar manner, so once you've done this one, changing the others should be easy.
2.1 Push SELECT until the display shows volts.
2.2 Press and hold down SELECT--then (quickly!) press RESET. Release both and the volts light should flash and a
number will show in the display -- the "charged setpoint" voltage. (If you hold SELECT too long before pushing
RESET the meter will show “Ahr” and you will have to push SELECT a number of times to display volts again,
and try this again.)
2.3 This displayed number must be set to the correct value. Push RESET a few times to change the numbers. As you
do so notice that the numbers increase by .1 with each push. Holding RESET down scrolls the display. (After
the numbers go above 65.0, they cycle back to 10.0 again.) If you have wet cell lead acid batteries, start by
entering 14.3 if you have a 12 volt system, or 28.7 if you have a 24 V system. (More detail on choosing charged
setpoints may be found in section C1, pages 4-5 of the manual.) Put in the number you desire and press SELECT
again to get out of the program mode.
STEP 3: Enter the "charged setpoint amps": Programming this is similar to STEP 2 except that instead of starting from
the "volts" display, you start from the "Amps" display. Start by programming "OFF". This appears just after 100, and
before 1. "OFF" means that the TriMetric will not use the "amps" data when determining whether the batteries are
charged. If you charge with a generator or other high powered source you should eventually change this or the
TriMetric will declare your batteries are “charged” before they really are. See section C1, pages 4-5 of the manual.
STEP 4: Enter the "charge efficiency factor and shunt type": Programming this is similar to STEP 2 except that instead of
starting from the "volts" display, you start from the "Battery % Full" display. If you have a 500A/50 mV shunt (the most
common) enter "H" (which is the factory default). If you have a 100A/100 mV shunt, enter "L". Use "94" for the
efficiency factor for either H or L. You should end up seeing either "H94" or "L94" displayed. More detail on setting
"shunt type" and "efficiency factor" may be found in section "C2" of the instructions.
STEP 5: Enter "battery capacity": To give a correct "% BATTERY FULL" display the TriMetric must know how large a
capacity your battery system has. Determine your "battery capacity", that is, the total amp-hours which your battery
system can hold when full. Refer to section C4, p.6 of instructions for information about capacity, or ask your dealer who
sold you the batteries what this value is. If you do not plan to discharge your batteries very far we suggest that you
enter a smaller value than calculated capacity--this will expand the scale of your “Batt% ful” display, so that the display
will go down more rapidly as you discharge your batteries. (Alternatively you can have the "%BATTERY FULL"
display show in 1% increments instead of the normal 5% increments: refer to instructions, see section C3.) Please note:
entering the “battery capacity” is a little different from the ones you’ve just done (some people have had problems with
this one!): Follow these steps: (1) while displaying "volts", "amps" or "battery % full", push and hold "SELECT" down
for a few seconds until you see "AH" appear in the display, then release. Now you should
(OVER)
observe the “AH” in the display alternating every few seconds with the number: (“amp-hours from full”). If not, repeat
this step until this happens. (2) Next go to the program mode (in the usual way) as follows: Hold "SELECT" down--then
(quickly!!!) push "RESET" then release both. Now you should observe a number in the display, and the 3 lights (volts,
amps, batt %full) should be simultaneously flashing. If not push the “SELECT” button to start from step 1 again. (3)Enter
the desired "battery capacity" value using the RESET button. You can enter a number from 10 to 2550 amp hours. Start
by entering a value that is 50-75% of your actual battery capacity. Note that while showing the data, if the decimal point
is flashing, that means multiply the number by 1000. For example, 1.20 with flashing decimal point means 1200 amp-hours.
When you are finished push the “SELECT” button again to revert to the display mode.
(C) Read the one-page summary of TriMetric operation (page 12 of
instructions).
Note that "Battery % Full" or "amp-hours from full" will not be correct until the system is fully
charged at least once. To understand these in more detail, read section D6 in the instructions. The factory default setting
on your meter has been set so that all three functions which would illuminate the "battery reminder" light are selected
"off" To activate them, read sections C 5, C6 & C8 of instructions.
(D) Afterwards
Read the instruction manual to become more familiar with the TriMetric. Review section C to
check and "fine tune" the programmed data which is entered. You may also want to read "Using the TriMetric (or other
battery system monitor) to maintain your battery system, conserve energy and troubleshoot system problems.", written
for persons with less technical background. It is available free on the internet at "www.bogartengineering.com" or by
calling or writing Bogart Engineering.
Quick description of what the main numbers mean:
"AMPS" tells how fast energy is being put in or removed from the batteries: useful for conservation
awareness, and checking charging systems. The "minus" sign, when lighted indicates discharging. When
the minus sign is not lighted (and the "charging" lamp is lighted) indicates "charging". Turning on and off an
electrical load will tell you how much current draw the load takes by comparing the difference. Turning on
or off a charging source will tell you how fast it's charging.
"BATTERY % FULL" tells how full the battery is based on the number programmed in (B) Step5,
reverse. This number is not valid until the first time the batteries are charged fully. Also, it will not
be meaningful if the "charged" parameters are not programmed correctly (see section C1,
instructions.) After the batteries are charged the first time causing the "charged parameters" to be attained
"FUL" indicates a full battery. After discharging energy from the batteries for awhile, the number will
show 90, 85, etc. to show about how much battery energy is available. When the number becomes less
than 30, the display will say “LO”—which indicates that the batteries are getting low on energy and
should be recharged. To make this display read out in 1% increments instead of 5%, see section C3 of
instructions. For other information, see sections D6 and C1, of instructions.
For a more detailed explanation of how “Battery % full” is measured refer to section D6 in the
instructions. This is useful for users wishing to optimize this function.
"VOLTS" gives an approximation of how charged the batteries are, especially at the extremes of fully
charged, and almost empty. It is an important diagnostic tool for checking charging systems and
troubleshooting problems.
BOGART ENGINEERING
19020 Two Bar Road, Boulder Creek CA 95006 USA---Tel. (831) 338-0616
www.bogartengineering.com
INSTRUCTIONS FOR
TRI-METRIC
Battery system monitor, Model TM-2020
revised October 2005
INSTALLATION AND OPERATION INSTRUCTIONS (For technical users)
Note: See also the user's instructions (available from Bogart Engineering, and from the
internet at www.bogartengineering.com) written for those with less technical background:
A TriMetric User’s Manual: Using the TriMetric to maintain your battery system,
conserve energy and troubleshoot system problems.
CONTENTS
A. METER INSTALLATION-PRELIMINARY: What you need to know before installing the
TriMetric meter.
B. METER INSTALLATION-How to make connections from meter to battery and shunt.
C. PROGRAM MODES: ENTERING SYSTEM PARAMETER DATA INTO THE TriMetric.
After installing the meter: how to enter data related to your energy system for some of the
TriMetric displays to give you meaningful information.
D. TriMetric OPERATING FUNCTIONS: Description of controls, functions, and operation.
Note: additional TriMetric information including beginning user's guide, troubleshooting, shunt
information and more is available on the internet at: http://www.bogartengineering.com
Limited warranty. Meter is warranted for 1 year against any manufacturing defects. Any meter not meeting
the specification or performance description will be replaced or repaired within one year of purchase, provided it
has not been subject to abuse or misapplication, and provided the defective unit is shipped to us if we request it.
Contact your dealer or us before shipping.
I want you to be satisfied with this product. If for any reason you are unhappy with the performance
of this meter, and you are not sure if it is covered by the warranty, or if it is out of warranty, call your
dealer first. If you are still unsatisfied, call me personally at (831) 338-0616. Comments about
improving this manual are also welcome.-- Ralph Hiesey at Bogart Engineering
BOGART ENGINEERING
19020 Two Bar Road, Boulder Creek CA 95006
phone: (831) 338-0616
fax: (831)338-2337
Web internet address: http://www.bogartengineering.com
A: METER INSTALLATION--PRELIMINARY: What you need to know before installing the
TriMetric meter.
Please follow instructions closely. Failure to follow instructions could result in meter failure if the connections are
made wrongly. Also, substantial "Amps" reading inaccuracy could result. Please refer to wiring diagram on last
page of instructions.
Choosing meter location and some battery monitoring philosophy: To make best use of this monitor, we recommend
that it be located where it can be readily observed in the living area where the electrical power is used, such as a kitchen
or living room. (It is designed to be located up to hundreds of feet away from the battery bank using 4 wires.) One
important use is to learn how much electrical power various appliances draw by looking at the "amps" readout first with
the appliance off, and then observing how much the current increases when you turn it on. This is inconvenient if the
meter is located away from the living area. After a while you will become instinctively familiar with the electrical usage
of your appliances, so you won't need to refer to the meter. Also, you can become familiar with "normal" electrical
usage, and occasionally check that it is not excessive, which would indicate some appliance has been unknowingly left
on. Using the "BATTERY % FULL" display, (or "Amp -hours from full") readout you will be able to see approximately
how much energy you've withdrawn from the battery bank. If you have "lead acid" batteries--the most commonly used
type--the "Volts" readout gives useful information about the "extreme" cases, when your batteries have gotten a nearly
full charge, (which, while charging a 12 volt lead-acid battery will typically show voltage above 14.3 volts) or on the
other hand when they are in a low charge state (which, while discharging a 12 volt lead acid battery will typically show
voltage 10.8 to 11.6 volts depending on how many "amps" are being withdrawn). However “volts” is not too informative
when the batteries are between 20%-90% charged, since in this case exact voltage depends on several factors, including:
whether the batteries are being charged or discharged, how fast they are being charged or discharged, temperature of the
battery, and the recent past history of charge/discharge (in other words, if they are charged hard for awhile, the voltage
will gradually rise, due to what are called "polarization" effects.) The TriMetric, therefore, uses the battery voltage as an
indicator for when the batteries are "charged". Then--when discharging the batteries from there, the "BATTERY %
FULL" (or "amp -hours from full") reading is a better guide for determining intermediate battery state of charge. Voltage
can again be useful for seeing that the batteries are in a state of near discharge--this is useful since it is not good for leadacid batteries to be too often, or remain too long nearly discharged. (Multiply voltages above by 2 for 24 volt systems or
4 for 48 volt systems).
Permissible battery voltage: This meter is suitable for battery systems with nominal voltage from 8 to 30 volts. It should
not be connected to systems which will ever exceed 35 volts without the following adapter: A special adapter, model TM48VA, is available for 32-48 volt systems which will allow operation up to a maximum of 70 volts, and in addition will
provide substantial protection from lightning for use in 12-48 volt systems.
Lightning considerations: The meter is not well protected against lightning. The TM-48VA adapter mentioned in the
paragraph above will greatly increase the resistance to lightning damage in areas where this threat is frequent. Also, the
warranty will extend to lightning damage too.
How current (amps) are measured by this meter: A shunt (a very low resistance, accurate, high power resistor) must be
used with this meter. The “amps” shown on the meter measures whatever current passes through this shunt. Therefore the
shunt must be wired in series with the wire which carries the current to be measured. This is usually the cable from the
negative terminal of the battery to all loads and charging sources. The shunt is usually located near the batteries, since the
high current carrying wires must be kept short. The TriMetric measures the current ("amps") by measuring the very small
voltage drop across this shunt.
If it is desired to measure only total solar input current, or only total load current (and amp-hours): this can be done
by wiring the shunt such that only the solar current, or load current will pass through the shunt. (The "Battery % Full"
display will be meaningless in this case.)
Meter to shunt cable requirements: The meter may be located up to hundreds of feet away from the shunt if desired, in an
indoor location, with four power and control wires connecting between the shunt and the meter. (These 4 wires are
labeled on the connector on the circuit board inside the TriMetric: “G1”, “G2”, “SIG” and “+”.) The meter can be
connected to the shunt with 4 wires, or a cable with 4 conductors. It would be advisable to use twisted pair wires in the
cable if any other power wires are being run near and parallel with these, however it should not be necessary otherwise. If
twisted pair wire is used, it should be connected as shown in the drawing. The simplest way to connect the meter is to use
wire size large enough, as shown by the following:
Maximum cable length from meter to shunt for the following wire sizes are: #26 gauge: 22 feet. #24 gauge: 35 feet.
#22 gauge: 55 feet. #20 gauge: 90 feet. #18 gauge: 150 feet. #16 gauge: 220 feet. #14 gauge :375 feet. (These represent
distances for approximately one ohm wire resistance.)
2
For unusual cases-the more technical description of cable requirements: Use wire with resistance less than 1 ohm total
for the G1 wire. The G2 and SIG wires can each be over ten times higher than this with no problem. If the single wire
connecting from the meter + and M+ terminals to the battery is over 1 ohm, the "volts" will read slightly less than true. (If
the wire is less than 1 ohm, the meter "volts" error will be less then 0.03 volts--almost negligible). However, wires of ten
times this resistance may be used with no "volts" error if a separate (additional) wire is run for the M+ terminal:
Disconnect the short wire between the + and M+ terminals at the meter terminal block, and connect two separate (long)
wires to the fuse at the battery + terminal--and run one of these to the + terminal of the meter, and the other to M+
terminal.
Shunt requirements: The shunt used must be either a 500 amp -50 mV. or else a 100 amp -100 mV. type. Whichever you
select, you must tell the TriMetric which you are using in order that the meter will display the AMPS and AMP-HOURS
FROM FULL correctly --i.e. with the decimal point in the proper position. This is done by properly programming the
TriMetric, as described below in section C2. Incidentally, it is only the shunt ratio between amps to mV. which is
important to the meter--so, for example, a 200 amp -200 mV. shunt can, from the meter's point of view, be considered
equivalent to the 100 amp -100 mV shunt. The implication, when a shunt is rated at "100 amps-100 mV." is that it may
safely carry up to 100 amps maximum--however unfortunately in many cases so-called "100 amp" shunts will not carry
this much without overheating--especially some of the "mini" shunts of this type. For more information, request :
"Information on Shunts" from Bogart Engineering, or get it from the internet address shown on page 1.
Which shunt should you use? Most systems with medium and large inverters should use a 500A- 50 mV shunt, which will
work for systems to 400 amps maximum (4000 watts with 12 V systems and 8000 watts for 24V systems.) With this
shunt you can measure current as low as 1/10 amps. You can use a 100 A/100mV shunt with smaller systems which don't
use or charge with over 75 amps, (800 watts for 12 system, or 1600 watts for 24 volt system) or if the shunt is used only
for measuring solar or wind input with currents less than 75 amps. This shunt has the advantage that it will show an extra
digit to the right of the decimal point, and resolve currents as low as 1/100 amp.
TriMetric maximum current capability: The TriMetric will measure current properly up to 999 amps with the 500 A-50
mv shunt. With the 100 A-100 mv shunt the meter measurements will be OK up to 300 amps. However, at these
currents the shunt is going to get too hot: the 100 A shunt as described will be producing the heat of a 90 watt light
bulb, and the 500 A shunt will produce heat equivalent to a 100 watt light bulb. (The heat produced by the shunt will be
proportional to the square of the current passing through it, so each time the current is doubled the heat increases by a
factor of 4.)
Mounting the meter: TM-2020 model (4-7/16 x 4-1/2 in. front panel), is designed be mounted in any standard “dual
gang” electrical box (used typically to mount two standard light switches in a wall.) The box needs to be mounted 90
degrees from the usual position, so that if wall switches were mounted in the box they would go right-to-left instead of up
and down. A standard metal box may be used, or if surface mounting is desired a Wiremold surface mount “double
gang” plastic box may be used, (Wiremold #2348-2, offered as an accessory) which allows flexible and easy mounting
options. Before installing any box be sure to check that the meter fits, especially if the 48 volt/lightning adapter will
be used. If a metal box is used we recommend using an oversize box that will accommodate the TM-48V lightning
protector/48 volt adapter should the user wish to later retrofit this with the TriMetric. The Wiremold box mentioned will
accommodate the lightning/48V adapter.
B. METER INSTALLATION- Even momentarily connecting “+” wire from battery
to meter incorrectly or backwards will destroy it. Carefully following these steps
will minimize that possibility.
•A qualified person familiar with safe electrical practices and the local electrical code should install this
meter--particularly when installing the shunt.
•Refer to wiring drawing on last page--please read all notes.
•Do not install into a 32V or 48V battery system without TM -48VA adapter. The TriMetric will be
damaged.
•A (2Amp, fast-blow) fuse shown located near the battery in the wiring diagram is for safety. Such "in line"
fuses are available at Radio Shack.
STEP 1: Assuming you want to use the TriMetric in the usual way to measure total "amps" in and out of your battery, the
shunt must be wired in series with the negative lead of the battery system (as shown on diagram last page). You'll usually
need an additional short length of the large cable of a size typically used to connect the inverter to battery, with large bolt
lugs at each end to connect from the negative battery terminal to one side of the shunt. The battery cable size must be
3
large enough to accommodate the maximum system charging or discharge current from the battery. Note that there
should ordinarily be nothing but the (one large) cable connected to the negative of your battery systems to shunt terminal.
Please avoid this VERY common mistake: if there is a wire from the solar array and charge controller which is
connected to the minus terminal of the battery be sure it is moved to the other side of the shunt, on the SAME side
as the inverter is connected, as shown on the wiring diagram, otherwise solar charging current from this source
will not be measured by the TriMetric.
STEP 2 Making connections from meter to battery and shunt: We suggest a cable with different colored wires to reduce
the probability of wiring errors. The cable wires at the TriMetric end of the cable must connect to a terminal block
located on the green circuit board in the TriMetric. If cable with twisted pair wires are used, the wires labeled “G2” and
“SIG” should be run with one twisted pair, and if another pair is used, “G1” and “+” can be run an another pair. The
terminal block on the circuit board accommodates wire size from 16 to 26 AWG.
If twisted pair wires in a cable are used, (which is not necessary unless other power wires run near these wires) clearly
establish which wires in the cable are “paired” together. This often requires stripping quite a bit of insulation to see which
pairs are twisted together. Then choose one twisted pair for G1 and +, and record the wire colors for that pair below in
the chart. You may want to use a piece of tape at each end of the cable to tie these two together, to clearly mark the pair.
Then choose a pair for G2 and SIG and record their colors. Similarly mark these with another piece of tape. If cable with
non twisted pairs is used, just select any 4 wires and record the wire colors here.
CONNECTION
WIRE COLOR
SIG
Twisted pair:
G2
+ and +M
Twisted pair:
G1
STEP 3: There will be visible a terminal block with 5 screws on the green circuit board. The five connections are labeled:
G1, G2, SIG and + and +M. First connect the + and +M terminals together with a short wire. Thread the other wires
through the hole in the box (if necessary) from the outside, and strip insulation off each wire 1/4 inch or so. Use a small
screwdriver to loosen the 4 screws on the connector and insert each wire in a separate connector hole using the chart
above to determine which wire goes to which terminal, and tighten each screw to hold the wires securely, taking care that
there is no danger of shorts between the wires. Install meter in box.
STEP 4: Finally, using the chart above and the wiring drawing on the last page connect the other end of the cable. First
connect the G1 and G2 wires to the correct Kelvin terminal on the shunt farthest from the minus battery terminal lead.
(These two wires must join together only right at this terminal.) Then connect the SIG wire to the other Kelvin
connection, closer to the minus battery connection.
STEP 5: Connect the fuse holder to the battery + terminal, but don't yet put in the fuse. Connect the + wire from the fuse
to the TriMetric + terminal. Then please make a final check of the wiring, and then finally insert the fuse in the
fuseholder. The digits should light up on the meter and battery volts should be displayed.
STEP 6: To check that you’ve wired the meter and shunt properly: you can do a simple check as follows: 1. Turn all
charging sources and all loads off, with the inverter completely off (not even in “standby”). Be sure that the meter
shows very near 0. (0.0 to 0.1 amps. ) 2. Turn on a load and see that it measures correctly. Turning on a 40 W light
bulb should cause the “amps” reading to become more negative by about 3 to 4 amps (12V system) or 1.5 to 2 amps,
(24V system) plus possibly a little more for the inverter power. 3. Check charging from each charging source. As
you turn each charging source on, (solar, wind, battery charger, etc) be sure that the amps become more positive by
about the amount you would expect from that source.
4
C: PROGRAM MODES: entering system parameter data into the TriMetric.
After
installing TriMetric you must enter data characteristic of your system into the TriMetric for some displays to
show correctly.
•First, refer to table 1 (page 13) for summary of program modes which briefly describes all data which can be
entered.
• For step-by-step instructions for how to enter and change the data see Table 1
(page 13).
The following section describes in more detail for each programmable data shown in table 1: (1) the purpose of the
data, and (2) how to choose data appropriate for your system.
C.1. "Charged" setpoint voltage and "charged" setpoint amps. As mentioned above, refer to Table 1 (p. 13) for how to
observe and change these data.
Purpose of data: The "charged" voltage and amp setpoints provide information the TriMetric needs to determine when
your battery set is "charged". As batteries are being charged, their voltage gradually rises, and/or the charging "amps"
gradually falls. The TriMetric determines that the batteries are "charged" when (1) the voltage exceeds the "charged"
setpoint voltage, and (2) the amps drops below the "charged" setpoint amps and (3) both conditions remain true for 20
seconds. When this happens, the "CHARGED" lamp will begin to flash (as indicated on front panel). At the same time
the following happens:
•The "days since charged" display (one of the "extra data" displays shown on the lower part of the front
panel) will reset to 0 days.
Also, if the "automatic reset of amp -hours" preference is selected (which is usually the case--see "Preferences" section
C.3 below) as soon as the batteries begin to discharge again (i.e. the "amps" become negative)
•The "Battery % Full" display will reset to "FUL" or 100.
•The "Amp -hours from full" display will reset to 0.
About voltage and current "charged" setpoints: Of these two setpoints, the “voltage” setpoint is the most critical, and
the “current” setpoint less so. If you have only low current charging sources you can set the current setpoint to “OFF”—
however both should be used if at least one of your chargers is a high current charging source such as a generator charger
or inverter/charger. More specifics follow.
Choosing “charged setpoint volts”:. For a 12 V lead acid battery system, the voltage setpoint will usually be between
14.3 and 14.8 volts. Double these numbers for 24V systems. The main rule for setting the "charged" voltage and current
setpoints in the TriMetric is to follow the lead of the charging system you have, so that the TriMetric "charged" lamp
comes on just before the charging system decides that the batteries are charged and stops charging your batteries. This is
particularly simple with PWM solar controllers such as the Trace C-40, which charges up to a certain voltage (such as
14.4) and then limit the voltage to that value by gradually reducing the charging current. With this type you should set
the TriMetric voltage setpoint to just below the charger's voltage setpoint. If you have two or more chargers, such as solar
and generator, both chargers would normally be set to charge to approximately the same voltage, and the TriMetric
should be set with the voltage low enough for either one to reach when the batteries approach full charge.
If you have an older "on/off" relay type charge controller that charges to 14.7 volts, and then stops charging, set the
TriMetric for slightly below this voltage, say 14.6 or 14.5 volts
Choosing the “charged setpoint amps”: If you have generator or other charger that has high charging current capability it
becomes important to also set the “charged setpoint amps” in the TriMetric . This is because a high current charging
source can force the battery voltage to rise and meet the “charged voltage” setpoint even though the batteries are not yet
well charged. With such a charger, once the voltage reaches its maximum“bulk voltage” the charging current (amps) will
start out high, then gradually reduce as the batteries become more charged. Proper adjustment of the “current setpoint”
will insure that the TriMetric will not consider the batteries “charged” until the charging current goes below the setpoint
amps. The lower you set this value, the more “charged” the battery must be before the TriMetric will declare the battery
to be “charged”. To set this value you must know the amp -hour capacity of your battery system. A reasonable value for
the “current setpoint” setting would be C÷50 to C÷20 where C=battery system capacity in amp -hours. For example if
your battery set has a capacity =700 amp hours, then amps setting=14-35 or so. Some experts recommend a setting as low
as C÷90 for the battery to be really charged—however it may require extra charging hours to reach this lower value.
After you enter the current setpoint the TriMetric will require that both the voltage setpoint be exceeded, and the current
(amps) value be less than the current setpoint (for a continuous 20 seconds) before the TriMetric will indicate that the
batteries are “charged”.
5
Usually in float mode? Another possibility we should address is if your charging system stays much of the time in "float"
mode, which may be true for a “line tied” systems. With a lead-acid liquid electrolyte battery the "float" voltage may be
13.4 volts (for 12V system) For a system that is usually in “float” mode, the TriMetric voltage setting can be just below
13.4, (or whatever the float voltage is) and the "amps" setting can be for some low value, such as C÷90 or so, or to a value
which the "amps" would only go below during the "float" condition. Then the TriMetric will reset only after the "float"
condition is attained.
Important: When the voltage setpoint is above 34.9 volts the TriMetric will go into the "48V mode", which requires
the 48V adapter (TM-48V). Otherwise the voltage will read twice its correct value.
C.2. Shunt type and charge efficiency factor:
Purpose of data "Shunt type": This must be set according to the shunt type you have. This determines the sensitivity of
the "amp" input to the TriMetric, so that it reads correctly for the shunt you have. If your "amps" readings appear to be
off by a factor of 10, the most likely cause is this is not set correctly for your shunt.
Choosing value of "shunt type". If you have a 500A/50 mV shunt enter "H" ("High current shunt"). If you have a
"100A/100 mV" shunt, you should enter "L" ("Low current shunt"). Only the ratio shown is important to the TriMetric,
so that from the TriMetric's point of view a 200A/200 mV or 300A/300 mV shunt is equivalent to a 100A/100mV
shunt.
Changing the data: Note that when adjusting this data, each push of "reset" button causes the shunt type to change. (H to
L to H to L, etc) Every other push changes the efficiency factor by 1%. Once you get the efficiency factor you desire,
you may or may not need to push one more time to set in the correct shunt type.
Purpose of data: "charge efficiency factor" The purpose of the "Charge efficiency factor" is to compensate for the fact
that you don't get as quite as much energy out of the battery as you put in; it causes the "amp -hours from full" display to
discount the charging "amps" slightly compared with discharging amps. The "amp -hours from full" display becomes
gradually more negative when the batteries are discharging, i.e. whenever the "amps" display is negative. For example if
the batteries are discharging with "amps"= minus 10.0, the "amp -hours from full" display always gradually decreases
by exactly 10 for every hour that goes by. Similarly, when amps are positive 10 amps (charging) the "amp -hours from
full" display gradually increases by almost 10 amps for every hour. The "almost" has to do with "charge efficiency
factor". If the efficiency factor is set to 100%, the amp -hours will go up by exactly 10 per hour (in this case), however
if the efficiency factor is 90%, the "amp -hours from full" display goes up by only 90% of 10, or 9 amp -hours for every
hour. The purpose of this is to account for the fact that you don't get as many amp -hours out of the battery as you put in,
so that the TriMetric "amp -hours from full" display will give a reading of amp -hours which reasonably closely estimates
your battery amp -hours.
Choosing values of "charge efficiency factor": If you do not know what efficiency factor to use and if you have leadacid batteries we suggest that you start with 94%. The actual "charge efficiency" factor for lead acid batteries while
they are not at the top of charge is generally higher than 94%, so this will usually give a conservative value for "amp hours from full"-- that is the meter will generally slightly over-estimates the actual amp -hours removed from the
batteries which will give a useful practical result for knowing state of charge.
Optional technical note : Some people familiar with batteries will be surprised that the suggested "efficiency factor" is as high as 94%. Without going
into all the details here, there are two reasons for this: (1) The number entered in the TriMetric is not true battery efficiency, or energy efficiency,
(which is often quoted at 70-80% for lead acid batteries) but charge efficiency. Charge efficiency (the ratio of total amp-hours you get out divided
by total amp-hours to charge the battery) is always greater than energy efficiency. (2) What is entered in the TriMetric is not even the overall charge
efficiency of the battery, but the charge efficiency while the battery is not at the top of charge, and not gassing. A battery is not charge efficient
while at the top of charge, so if this part is excluded the battery is very charge efficient. (We have measured this to be 95-98% with Trojan wet cell
batteries.)
For the perfectionist only: Practical utility doesn't demand perfection--and the reality of changing battery temperature makes this difficult. But if
you wish to try and your batteries are fairly constant in temperature: the ideal is that the TriMetric amp-hours should be at 0 at the time that the
charging system has fully charged the batteries. (This will generally be shortly after the "charged" lamp lights on the TriMetric, as explained in
the next section below.) If you find that the AMP-HR reading is somewhat below 000 (negative) after the charging system has fully charged
your batteries, then you could increase the efficiency factor. If you find that the numbers are going substantially above zero when your
charging system has finished charging, then decrease the efficiency factor. (Note that the amp-hours should read 0 at about the time that your
charging system has just stopped charging, not necessarily when the TriMetric "charged" lamp first comes on, provided your charging system
is not over charging or equalizing your batteries.) But note that if the battery temperature went up since the last "full charge" was reached, the
"amp-hours" will be somewhat negative the next time reaching "charged." And if temperature went down, they'll be somewhat positive.
6
C.3. "Preferences"-changing the way "Battery % Full" is displayed, and "auto reset on/off."
Purpose of data: The "Preferences" allows you to make two (separate) choices as described here:
(1) You can choose the way the "Battery % Full" display shows data: The "Battery % Full" is determined by dividing
the "amp -hours from full" display by the "battery capacity" programmed data (see C.4), and the result is calculated
internally in the TriMetric to 1%. However, realistically the accuracy in an actual battery system is not as good as 1%,
especially as days pass since the batteries have been "charged" resulting in gradual loss of synchronization of "amp hours from full" with the battery. That is the reason that the "normal" display for "Battery % Full" shows "FUL" when
the internally calculated percent is between 92-100% (and over), and "LO" when the internal percent value is less than
27%, and in other cases it shows percent value in 5% increments, for example: 80, 85, 90%. If, however, you wish to
show the data in its raw "1%" form, you can do this by selecting this preference, which will show the data to 1%. The
"normal" display is recommended because it gives a more "honest" view of the accuracy to be expected from the
"Battery % Full" display--and which is normally quite adequate for practical use.
(2) You can turn "auto reset" on or off. Normally the "amp -hours from full" automatically resets its value to 0
whenever the batteries are "charged", i.e, the "charged" criteria are met (as described in full detail in section C1 above).
In fact this is necessary in order that the "BATTERY % FULL" display read correctly. However it is possible to turn
off this feature if you do not want the "amp -hours from full" display to automatically reset. For example if the
TriMetric is being used to measure total load amp -hours for some period, or total solar input amp hours you may not
want this number to reset to 0 by itself. (You can still manually reset this by using the "reset" button while displaying
"amp -hours from full".)
After deciding choices for (1) and (2) above, choose P0, P1, P2 or P3 according to this table:
P00= "Battery % full" display mode ="normal" mode.
Automatic reset = on (normal)
P01= "Battery % full" display mode ="1%" mode.
Automatic reset = on (normal)
P02 = "Battery % full" display mode ="normal" mode
Automatic reset = off
P03 = "Battery % full" display mode ="1%" mode.
Automatic reset = off.
C.4 "Battery capacity"
Purpose of data: This programmed data calibrates the "Battery % Full" display. For the "Battery % Full" display to
work, the TriMetric must know how many amp -hours the battery holds when full. (called "battery capacity"). The
"Battery % full" display shows "FUL" or 100 when the when the "amp -hours from full" equals 0. The "Battery % full"
display shows "0" or "LO" when the "amp-hours from full" equals the "battery capacity" entered.
Choosing battery capacity: The "battery capacity" means the number of amp -hours that your battery system holds when
it is full. A value of battery capacity should usually be selected that is equal or lower than the actual capacity. It's
recommended that you use a conservative (low) value for the TriMetric —50-75% of their factory rated value-considering that the stated capacity numbers for batteries tend to be optimistic. They are also usually measured at 77
degrees F, and capacity will decrease somewhat at lower temperatures. Furthermore, they are rated from when they are
completely and utterly charged, which probably won't happen often in a real system.
Computing battery system capacity: The battery capacity of a set of batteries in series and parallel can be computed if
the capacity (in amp -hours) of each individual battery in the system is known. There are two simple rules: If several
batteries are connected in series, the capacity of the series string is equal to the value (amp -hours) of the least capacity
battery in the series. (This is like a chain whose strength is determined by its weakest link.) After figuring this for each
series string you have, if the battery system has several series strings which are placed in parallel, then add up the
capacity of each series string to get the total for the system.
Measuring battery capacity: Another way to determine actual capacity is to use the TriMetric to measure it directly.
First charge the batteries until they are "charged" according to the "charged" criteria. This means, in reality that they are
"pretty well" charged--perhaps to 90% or so--because to get batteries really fully charged they need to absorb charge
slowly (or equalized) for many hours. When they are charged, reset the "amp -hours from full" to 0. Then discharge by
putting some loads on your system so it is discharging at an "amps" rate of C÷10 or C÷20, where C=approximate rated
capacity of your battery system in amp -hours. For example, if your battery system is about 500 amp -hours, C÷20 is 25
amps (the exact value isn't important at these low discharge rates) until the voltage declines to a "low battery voltage"
of about 11.0 volts. At that time read the "amp -hours from full" which indicates the approximate capacity. You'll need
to be carefully watching the voltage from time to time to be able to catch the system when it is about this voltage. The
capacity is affected by temperature, so you should note the temperature as well--the capacity declines with lower
temperature. You will want to enter a capacity that represents the capacity at the lowest temperature you expect, since
you won't usually know in advance the temperature when the battery is nearly empty. A lead acid battery at 32° F (0°
C.) has about 70% the capacity at 77° F (25° C). It should also be noted that the effective capacity of the battery is less
7
at high current draw--although this is not a significant factor for the "typical" rates in a renewable energy system--it
becomes more significant at rates exceeding C÷5 amperes.
C.5. Days before "time to charge full" reminder, or "recharge interval"
Purpose of data: Every day which elapses in which the batteries are not fully charged will cause the "days since
charged" display, (an "extra data" function) to increase by one. When "days since charged" equals or exceeds this
"recharge interval" the "Time to charge full" (“ Ch.F” ) battery reminnder will flash, to tell the user that the batteries
haven't been fully charged during that interval. This reminds you to fully recharge the batteries periodically. There are
two reasons to recharge your battery system frequently:
(1) it is good for lead-acid batteries to be periodically recharged to completely reconvert the chemistry back to its
"charged" state. (Lead-sulfate back to lead and sulfuric acid) If this is not done the battery reaction products become
gradually more difficult to convert to the "charged" state, which is termed "sulfation". See also below for dis cussion of
"equalization", section C.6.
(2) For the TriMetric to show a realistic value of "Battery % Full" or "amp -hours from full" it must be occasionally fully
charged sufficiently to reach the "charged" criteria so that the meter synchronizes with the battery. The "Battery %
Full" and "amp -hours from full" will be most accurate right after this synchronization takes place--and will gradually
lose accuracy after many days of use. The reminder will indicate that the "% BATTERY FULL" may be becoming less
accurate.
Choosing "days before recharge" time. 1-63 days or "OFF" . We recommend a number from 5 days to 14 days--with
5-7 days being better. Some conservative users will prefer a lower number--however if one tries to charge the batteries
fully very often it may be good for batteries, but may make the system less practical.
If you do not want to have the "battery reminder" feature activate, put "OFF" as the number of days.
C.6. Days between "Time to equalize" reminder
Purpose of data: This causes the "Time to equalize" (Ch.E) battery reminder to flash after this number of days has
elapsed since "equalizing" your batteries--i.e., when this programmed number equals or exceeds the "days since
equalized" display, shown in the “extra data” display group on the bottom front panel. It reminds you when to perform
a periodic “equalization” charge. "Equalization" refers to a process of occasionally overcharging your batteries-which is usually recommended by manufacturers of "wet cell" lead acid batteries--but, however is usually not
recommended for sealed lead acid batteries, and can seriously damage these types. The Trojan battery company, for
example, recommends that their wet-cell batteries be equalized every 1-2 months. This helps to completely recharge the
battery--which helps maintain the battery capacity. Some charge controllers, or battery chargers have an "equalize"
mode which is controlled either manually or automatically. This TriMetric function is intended for use primarily for
systems that require manual equalization--and reminds you to perform this after the programmed time. Placing the
charger in "equalize" mode involves extra charging after the batteries have reached the "charged" criteria which allows
the voltage to rise extra high for a period of time--for example the Trojen Battery Co. recommends charging to 15.5
volts (for 12V systems --double this for 24V systems) and keeping the batteries at that level for 2 hours. Other
manufacturers may have different recommendations. It is usually advisable to check water levels in the batteries after
equalization, as it causes some water loss. After equalization has taken place you must manually reset the "days
since equalized" display (by pushing “reset” when the “days since equalized” extra data is displayed)--this does not
take place automatically. This will turn off the "time to equalize" reminder, which will reactivate only after another
equalization period has elapsed.
Choosing "days between equalization" time. Enter 1-255, or "OFF" The time generally recommended is between 1-2
months--or 30-60 days. Check with the supplier of your batteries. To prevent this reminder from coming on, put
"OFF."
C.7: Reinstall all factory values.
Purpose of this function: This enables you to reinstall all factory values in the programmable values, and will overwrite
any values previously installed. The factory values are shown in column 3 of table 1. To reset all values, first enter the
program mode (from the "maximum voltage" function, as described in table 1.) You will see "FAC" in the display.
Push the reset button until "ALL" flashes 3 times.
C.8. "Low battery" setpoint voltage.
Purpose of data: When the value of "volts" equals or is below this programmed value, the battery reminder lamp will
flash indicating "Batt. volts low". If the battery voltage drops too low this indicates that little energy is left in the
battery. Obviously that means that power could go off soon thereafter. In addition, keeping the battery at low voltage
condition for a long time is not good for a lead-acid battery. These are the reasons for the "low voltage" reminder. Low
voltage is a good indicator of when the battery is nearly out of power (in contrast to the usual case when the battery is
8
30-90% charged, where the "BATTERY % FULL" is usually more reliable.) If you see that your batteries are at low
voltage when your "BATTERY % FULL" indicator shows otherwise, you may want to check that your entered "battery
capacity" (section C 4) above is correct.
Choosing value of "low battery" voltage. A 12 volt lead acid battery system could use from 10.5-11.5 volts. (24V
system 21-23V) A reasonable value could be 11.2 volts, for a 12V system. (Double this for 24V systems). To turn off
reminder about low voltage, put in 10.0 volts.
D: TriMetric OPERATING INSTRUCTIONS: Most questions on TriMetric
indicators and controls will be answered on "TriMetric operation summary" on page
12. The section below contains more detailed information.
D.1. VOLTS: Battery voltage as displayed is accurate to ±0.08 volts from 10 to 35 volts. (With the 48 Volt adapter it
will read up to 70 volts.)
D.2. AMPS: This gives an instantaneous picture of energy entering or leaving your battery system. Use this to check that
your charging system is working properly, and to see how much electricity your loads draw from the batteries. Current
into the battery (charging) is displayed as positive, and discharge current is negative (with lighted minus sign). It is
accurate to ±1%, ±the least significant digit. The CHARGING lamp will be lighted whenever this value is positive.
D.3. How to display the 6 "EXTRA DATA" functions, which are shown on the bottom of the front label: While
displaying "Volts", "Amps" or "Battery % Full", push the "SELECT" button for several seconds, until you see "AH" in
the display. Release "SELECT" and you will find that the letters "AH" will alternate in the display with the actual value
of "amp -hours from full". These will alternate in the display until you push and release "SELECT" again, which will
show "dSC" in the display, which will alternate with the "days since batteries were charged". Likewise, successive
pushing of SELECT will allow you to progress through the remaining 4 "EXTRA DATA" functions, after which the
"Volts", "Amps" or "Battery % Full" displays will reappear.
D.4. Reset functions: Each "EXTRA DATA" display function shown (not "volts", "amps" or "Battery % Full") has a reset
function. These are explained on the front panel below the RESET button. In all cases you need to hold the RESET
button long enough to flash the data 2 or 3 times before the data will be actually reset. The flashing data shows what
the RESET will accomplish, before actually implementing the RESET function. The purpose of this is to avoid resetting
something you didn't intend to if the reset button is accidentally pushed.
D.5. Battery reminders display: See Operation Summary, page 12. This function is described in more detail in sections
C.5, C.6 and C.8, on pages 7-8.
D6-A. “Battery % full”: Exactly how does the TriMetric do this measurement? The water tank analogy: Imagine a
water tank that is closed, so you can’t easily determine the level of water inside the tank-- but you can tell when it is full,
because then the water flows out of the top. This is analogous to a battery, because it is difficult to sense how much
energy is in a battery when it is partially full, but it is not so difficult to sense (using Volts) when it is full. Now, assuming
you know the total volume of the tank, when you withdraw water from the tank you could tell how much was left if you
precisely measure the volume of water that you removed from the tank, and subtract this, and when putting water back in,
add that back. This is analogous to how the TriMetric measures how full the battery is.
The TriMetric first senses that the battery (system) is full by sensing that the “battery voltage” is sufficiently high and
“battery amps” is sufficiently low. (Exactly how the TriMetric determines that the batteries are full is explained in
section C1 in these instructions. Correct parameters must be programmed for your battery system, as explained there.)
When this occurs the “Battery % full” is automatically reset to “FUL or 100%”. Starting from that reference point, flow
of energy out of the batteries is measured by “amps”, analogous to “gallons per minute” flowing out of the water tank.
The TriMetric totalizes the amount of energy removed, by mu ltiplying the “amps” times the time, resulting in “amp hours” flowing out of the batteries, which is analogous to “gallons” in the water tank analogy. This value is subtracted
from the value representing “full”.
To give a percentage full reading, the TriMetric must be programmed (by the user-see section C4) with the “capacity” of the batteries, in total “amp hours”, analogous to total “gallons” capacity of the
water tank.
To complete the analogy, imagine that the tank leaks a small amount of water, which is analogous to what is called
“self discharge” of a battery. To be sure you don’t have an over optimistic view of how full the tank is, you could count
9
the volume removed exactly, at 100% rate, but when adding water back count only 94% of that volume. This is analogous
of the “efficiency factor” which is set at the factory at 94%, however you may set any value from 60-100% into the
TriMetric. (see section C2). A precise, more technical description of how “Battery%FULL” is measured is given in
section D8.
D6-B. You have two options about how to display "BATTERY % FULL: It can display in 5% increments (80%, 85%,
90%, etc.) which is the factory default, or in 1% increments. Refer to section C3-1 for more information.
Keep in mind for "Battery % Full" display to work accurately several conditions must be met . These are (1) The
“Charged setpoints” for voltage and current must be correctly programmed in the TriMetric for your system. (see
section C.1, pages 4-5 ) (2) The correct “battery capacity” must be entered into the TriMetric. (see section C.4). (3)
The battery system must be synchronized with the battery by being fully charged at least once—and thereafter needs
to be periodically fully charged (recommended at least once a week), so as to keep the meter “in sync” with the
battery. The "battery reminders" feature is useful for this. (section C.5) (4) A reasonable value of “EFFICIENCY
FACTOR” should be entered in program memory (see section C.2), and the normal “automatic reset” feature for amp hours must be selected (see section C.3) to allow the meter to periodically synchronize with the battery when charged.
D7. "AMP -HOURS FROM FULL". This is the first display shown in the “Extra” display group, shown on the bottom
half of the TriMetric front panel. As indicated on the front panel, you can view this by holding the “SELECT” button
down for 3 seconds (starting while viewing any normal display).
D7-A: There are two ways that this display can be used. It is most commonly used to show the “amp hours” that
have been removed from a full battery: This is what happens when the TriMetric is used and wired as shown on the
wiring diagram (last page). It starts at a beginning point at 0 amp hours, after the amp -hours are “fully charged”, and
therefore reset to 0. This reset usually happens automatically when the battery is sensed as “charged” as described in
section C1 of these instructions. However this reset can also be manually accomplished by pushing (and holding for 4
seconds) the “reset” button while observing the “amp -hour from full” display. As energy, (or more precisely “charge”),
is withdrawn from the battery the “amp hours from full” decreases in proportion to the “amps” and the time. For example
-2 amps for 5 hours, would cause the amp hours to decrease by 10 amp -hours. When charging, the opposite happens.
However when charging, the “true” amp hours is slightly discounted according to the programmed value of “Efficiency
factor” programmed. So if the battery is charged by 2 amps for 5 hours, and the “Efficiency factor” is 94, then the amp
hours will increase by only 94% of 10, or 9.4 amp hours. This is to compensate for the fact that you don’t get quite as
many amp -hours out of a battery than you put in. See section C2 “Purpose of data, charge efficiency factor” for more
information. When the “amp hours from full” is equal to the amp hour “capacity” of the batteries, you are out of power.
Efficiency factor may be programmed from 60-100%:
D7-B: The TriMetric “amp hours from full” can also be used to monitor only a charging input source (such as solar
or wind charging) or only a load, to see how much accumulated energy (or more precisely, charge) has accumulated over
some period of time. Usually the “efficiency factor” will be set to 100% in this case (see section C2). Also the shunt will
be wired differently: in this case the shunt needs to be wired so that it is in series with the desired current path to be
measured. For example, if it is desired to measure solar input, the shunt must be wired in series with the negative wire to
the solar charge controller. In this case, it is measuring “accumulated amp hours”. In these applications the “automatic
reset” would be turned off (see section C3). Typically you would begin the measurement by manually reset the Amp
hours to 0 by pushing and holding the “RESET” button for 3 or 4 seconds, while observing the “amp hours from full”
display. After that time true amp hours will be accumulated (negative or positive) until the “RESET” button is again used.
Display range of “amp-hours from full”. This display will show amp -hours up to ±9,999 AMP HOURS. When the
number exceeds 999, a flashing decimal point means “multiply the result by 1000.” When you see −1.02, with flashing
decimal point this means −1020 amp -hours.
D.8. A more precise (and technical) description of BATTERY % FULL: The way this is displayed is influenced by the
PREFERENCES which are programmed as described in section C3. This allows a choice of showing BATTERY % FULL in 5% increments, or in
more precise 1% increments. The reasons for this option are explained in section C3.
If the PREFERENCES are selected for the 1% option (see section C3) this is how the TriMetric computes "BATTERY % FULL"
“Amp hours from full” here means displayed Amp Hours from Full.
“Capacity” here means Programmed battery capacity in amp-hours (see section C4)
Case1: If “AMP -HOURS FROM FULL is less than 0 (negative) but not less than “Capacity”
then "BATTERY % FULL"=
Capacity − AmpHoursfromfull
Capacity
10
x 100%
Case2: If “AMP -HOURS FROM FULL is less than (more negative than) “Capacity”
then "BATTERY % FULL"=0%
Case 3: If “AMP -HOURS FROM FULL” is greater than 0, (positive)
then "BATTERY % FULL"=100%
If the PREFERENCES are selected for the 5% option: then this number gets “rounded” to an approximate value. If between 93-100% it will
display “FUL”. When between 27% to 93% it will display the closest 5% value (e.g “65”, “70”, “75”, etc). When it is below 27% it will show “0”.
OTHER EXTRA DATA FUNCTIONS:
D.9. days since charged: Lead acid batteries should not go too long without being fully charged as explained more fully in
section C.5. This display shows how many days have elapsed since the batteries were last charged. It shows with
resolution to .01 day (about 14 minutes) and will read up to 650 days--after which the number will roll over to 0 again.
When the "charged" parameters are met, (see section C.1) this number will be reset to 0. When this number equals or
exceeds the number programmed as "days before recharge time" the Batteries Reminder light will flash, and will show
"Ch.F" in the display (see also section C.5). When the meter is first powered up "days since charged" begins at 0. It may
be reset manually to 0 (while viewing "days since charged") by pushing and holding the RESET button until the display
data flashes 3 times.
D.10. Days since equalized: Equalization is an occasional deliberate overcharge of the batteries, usually recommended
for "wet-cell" lead-acid batteries (not sealed lead acid types). See section C6 for more explanation of "equalization". This
function can be used to tell you how long ago since your batteries were equalized. It is just a simple timer with resolution
to .01 day, and will read up to 650 days which can be used to see how long ago equalization of the battery set was
performed. When this number equals or exceeds the number programmed as "days before equalize time" (see section
C.6) the Batteries Reminder light will flash, and will show "Ch.E" in the display. When you equalize batteries the
"days since equalized" function should be manually reset to 0 with the reset button by pushing and holding the RESET
button until DAYS SINCE EQUALIZED flashes 3 times. This will return this display to 0 and turn off the "Time to
Equalize" reminder (if activated).
D.11. Cumulative battery discharge amp-hours: Displays how many amp-hours have been withdrawn from the
battery system over its lifetime. This number starts at 0 when manually reset which would usually be at the time of
initial installation of the batteries. Every time the current is negative (charge is leaving the battery) the display counts
"amp -hours" down, but doesn't count any charging current (amps=positive).. It analogous to a car odometer to tell how
much service the batteries have seen. When the batteries are replaced, this number can be noted measure the total energy
which your battreies have delivered in their lifetime, which can be used to evaluate performance of the batteries and the
level of care which they received. In case of power interruption to the meter you will only lose a maximum of 3.2 hours of
this data--because this data is automatically stored every 3.2 hours. So if power should be temporarily disconnected from
the meter, the number showing here will usually be slightly less than before, representing the value that was present when
it was last stored into permanent memory, and will continue from that number. This number can be displayed to -999,000
amp hours, which is longer than most batteries would be expected to last. (Should it ever reach this high it should be
reset--since it does not, as of this edition of instruction, just roll over to zero by itself after 999,999.)
Often battery life of "deep cycle" batteries is rated by the number of discharge cycles it will undergo without failure-however this always assumes a fairly complete discharge during each cycle, followed by complete recharge. The life of
deep cycle batteries is increased if the discharge depth is less--in fact the number of cycles of life is inversely related to
the depth of discharge of each cycle--so if one discharges only half the amount during each "cycle" the battery will last
about twice as many cycles. This is really just another way of saying that the battery life is related to the number of amp hours removed.
D.12. Maximum battery voltage: This display shows the maximum battery voltage reached since the display was last
manually reset with the "reset" button. Pushing "reset" (and waiting for display to flash 3 times) resets this to the present
battery voltage. One use for this function is to check that a charging system is reaching the correct voltage specified by
the battery manufacturer when charging your battery system. If this voltage is too high or too low the life of batteries will
be compromised.
D.13. Minimum battery voltage: This display shows the minimum battery voltage reached since the display was last
manually reset with the "reset" button. Pushing "reset" (and waiting for display to flash 3 times) resets this to the present
battery voltage.. This function gives some information which indicates if the battery set was discharged too low.
11
TriMetric (model 2020) operation Summary
General notes: A flashing decimal point in the display means "multiply the number by 1000". The "AMPS", "VOLTS" or "BATTERY
% FULL" lamps flash when the TriMetric is in a program mode. See right for how to enter data in the TriMetric. (program modes)
SELECT button: Momentarily push "SELECT" to view "VOLTS", "AMPS", "BATTERY % FULL" or to "blank" the display. (Blanking
the display reduces the TriMetric current draw from 30 to 16 milliamperes.) Hold the "SELECT" button down for more than 2 seconds to
select the "AMP-HOURS FROM FULL" function, and the other "EXTRA DATA" functions which are shown below on the panel.
VOLTS: Shows volts across the battery.
AMPS: Shows amps charging or discharging. A
positive number means "charging" and a negative
number means "discharging".
CHARGING light: Shows that batteries are charging (i.e. amps are
positive). Starts flashing when the battery is charged--i.e. when "charged"
parameters are being met. See section C1 for information on "charged"
parameters. Then remains flashing until battery first starts discharging.
"BATTERY % FULL" shows amp-hours
expressed as a percentage of a full battery. It is the
"amp-hours from full" (below) divided by the total
battery capacity, in amp-hours. (The correct number of
"amp-hours" battery capacity must be programmed
into the TriMetric. See section C4). Also it is important
to occasionally charge fully to synchronize the
TriMetric with the battery (once a week or more
recommended) for this number to be accurate. There
is a choice of two ways to display this number. (See
section C3 and D6-B.)
T HE TRI-METRIC
2020
CHARGING
=TIME TO CHARGE FULL
BATTERY
REMINDERS
=TIME TO EQUALIZE
=BATT. VOLTS LOW
BATTERY REMINDERS light: lamp flashes
when (1)batteries should be recharged, or (2)should be
equalized, or if (3) battery voltage drops too low. When
flashing, (and when VOLTS, AMPS or BATTERY %FULL
is being displayed) the letters Ch.F, Ch.E, and/or b.LO-whose meaning is explained on panel--will flash in display
every 5 seconds to tell you what the reminder is:
Ch.F="time to charge full" means that too many days
have passed since the batteries were last "fully charged"
(i.e, since the TriMetric "charged" parameters were met-see section C1.) You can program the desired maximum
number of days. (section C5)
Ch.E="time to equalize" means that the (user
programmable) equalization interval (in days) has been
exceeded, and that batteries should again be equalized.
After they have been equalized, it is necessary to
manually reset the "days since equalized" number to 0 to
turn off this reminder. "Equalization" is a controlled
overcharge of the battery. (see section C6)
b.LO="battery low" means that the battery voltage has
dropped below the (user programmable) "low battery
voltage". (See section C8).
Disabling these functions: Any or all of these reminders
may be disabled if they are undesired. (See sections C5,
C6 C8.)
AH = "Amp Hours from Full" display measures the
number of amp-hours which have been removed from a full
battery. It shows about how many amp-hours away from
"full" that your batteries are. For an accurate number, the
battery must be occasionally charged fully so the TriMetric
can synchronize with the batteries--at least once a week is
recommended. See section D7 for more information on this
function.
when flashing-meets "CHARGED" criteria
AMPS
VOLTS
EXTRA DATA: Push
SELECT 3 seconds
BATTERY
% FULL
SELECT
RESET
AMP-HOURS FROM "FULL"............RESET: to 0 Amp-hours
DAYS SINCE "CHARGED"................RESET: to 0 days
DAYS SINCE EQUALIZED................RESET: to 0 days
CUMULATIVE BATT.AMP-HOURS...RESET: to 0 Amp-hours
MAXIMUM VOLTAGE.......................RESET:to present volts
MINIMUM VOLTAGE.......................RESET:to present Volts
BOGART ENGINEERING
Boulder Creek, CA
RESET button: Each "EXTRA DATA" display function (as chosen by the
SELECT button) has a RESET function, which is described below on the panel.
The RESET button does not do anything when "VOLTS", AMPS" BATTERY %
FULL" or if the the display is blanked. To reset a function, you must hold
down the reset button so this display first flashes 3 or 4 times
--to make
times--to
sure you don't accidentally reset something you didn't intend to.
dSC = "Days since charged" display shows how many days ago since the batteries were fully charged--ie., how many days ago since the
batteries met the TriMetric "charged" parameters. See section C5.
dSE = "Days since equalized" display keeps track of how many days ago since the batteries were equalized. When you equalize the
batteries you must use the reset button to manually reset the "Days since equalized" to 0-this will also turn off the "time to equalize" battery
reminder. See section C6.
cAH = "Cumulative battery discharge amp-hours" Shows the total amount of battery discharge that has taken place in the life of the
battery. (Does not count charging--only discharging.) This number should be reset to 0 when changing the battery set--then this is the "bottom
line" number showing how much service your batteries have given so far. This number is not lost if TriMetric power is disconencted. Shows to 999,000 amp-hours--a flashing decimal point means multiply the number by 1000. See section D11.
bLO = "minimum battery voltage" and bHI = "maximum battery voltage" Shows the lowest and highest battery voltage since the this
function was last manually reset. See section D12-D13.
rev. 02
02/20/03
12
TriMetric Program mode summary
entering system data into the TriMetric
After installing the TriMetric, correct data relating to your system should be entered in the "program modes" of the
TriMetric so that the TriMetric data shows correctly. This data is retained even if power is disconnected from the
TriMetric.
Each of the display modes (left column of table) has a program mode which allows you to enter some programmable
data characteristic of your system. Note that column 3 of this table has space for you to record the data you put in, and
also shows the preinstalled factory values . You can reinstall these factory values: see second to the last row of table..
Follow the first 4 steps to change or observe one of the programmable data shown in the table:
(1) Choose a PROGRAMMABLE DATA that you want to change (column 2). Use the SELECT button to select the
DISPLAY MODE (column 1) corresponding to the PROGRAMMABLE DATA you wish to change.
(2) First push SELECT—then (quickly) push RESET so they are both momentarily pushed together—then release both . (If
you don't do it quickly enough you'll get the "A-HR" display instead. In that case, you will have to start with step 1
again.) Flashing volts/amps/Battery % lamp(s) confirms you are in a program mode. The numerical display will now
show the "programmable data" shown in table.
(3) To change data slowly, push "RESET button repeatedly. To change data faster, hold RESET down for several seconds.
(4)When desired data is shown, push SELECT to exit program mode. Now you have set that data into the TriMetric.
(5) Now, decide on the next item you wish to program, and repeat starting at step 1.
DISPLAY
MODE
PROGRAMMABLE DATA
and ADJUSTMENT RANGE
Factory
value.
WHAT IT IS FOR (SUMMARY)
Where to find more information.
Your
value
VOLTS
"Charged" setpoint voltage.
10.0 to 65.0 volts
14.4
AMPS
"Charged" setpoint amps
1 to 100, amps or "OFF"
OFF
Charge efficiency factor, and shunt type
Efficiency factor: 60 to 100.
Shunt type: "H" or "L".
H94
blank display
(after
"BATTERY%
FULL"
Preferences: (1)BATTERY % FULL: data
display: select "Normal" or "1%"
(2) Auto reset of "amp-hours from full":
select "on" or "off.
"P00, P01, P02 or P03
P00
P00=auto reset on, BATT.%FULL display = normal.
P01=auto reset on, BATT.%FULL display=-1%.
P02=auto reset off, BATT.%FULL display=normal.
P03=auto reset off, BATT.%FULL display=1%.
(See section C.3)
(AH)Amp
from full
"Battery capacity" amp-hours
10 to 2500 amp hours. Note: flashing decimal
400
Calibrates "battery % full" display. (see section C.4 , D.6
and D.8)
BATTERY
FULL
%
hours
TriMetric determines that battery is charged when actual
volts is greater than setpoint volttage, and amps is less
than setpoint amps, (see section C.1)
NOTE: When voltage setpoint is greater than 35.0 Volts,
TriMetric goes automatically to 48V mode
Charge efficiency factor determines discount rate for
amp-hours charging. (See section C.2 and D.7).
Shunt type: H = 500A/50 mV. L=100A/100mV.
point means “multiply number by 1000”; so
1.02 means 1020 amp hours
(dSC) Days since
"charged"
Days before "time to recharge" reminder
1-63 days, or OFF
OFF
When Days since "charged" exceeds this, "time to
recharge"(cH.F) reminder will display. (see section C.5)
(dSE) Days since
"equilized"
Days before "time to equalize" reminder.
1-255 days, or OFF.
OFF
When Days since "equalized" exceeds this, "time to
equalize (cH.E) reminder will display. (see section C.6)
(cAH)Cumulative amp hours
(bHI)
Highest
batt. voltage
NONE
N/A
N/A
Puts factory values: Hold RESET until
"ALL" flashes 3 times.
N/A
Reinstalls factory data for all the programmable data as
shown on this table, column 3. (see section C.7)
(bLO)
Lowest
batt. voltage
"Low battery" voltage point.
10.0 to 65.0 Volts
10.0
When "VOLTS" is less than "low battery" volts, "low batt
reminder" will display. (see section C.8)
TABLE 1
13
M+ terminal must be connected to + with
short wire (except as noted on page 3 of
instructions "For unusual cases...").
G2
+
IMPORTANT NOTE: The two wires: G1, G2 must be connected to each other
ONLY right at the shunt terminal at the small screw (Kelvin connection) for
accurate current measurements. Don't connect them together at the meter
and run one wire to the shunt. (Otherwise meter will show residual "amps"
when it should be showing zero.) Also, good connections must be maintained
for accuracy.
NOTE: The SIG wire
must be connected to
the small screw (kelvin
connection) on the
shunt, not the larger bolt
which connects to the
battery. Otherwise
"amps" measurements
will be inaccurate.
TECHNICAL NOTE: The reason the G1 and G2 wires must be connected together ONLY at the
shunt, is that to measure current through the battery the TriMetric measures voltages across the
shunt between the SIG and G2 wires as small as 10 microvolts. On the other hand, the voltage
drop across the G1 wire from the shunt to the meter (due to current flow through the wire) can be
10,000 times this, or 100 millivolts. Only when the connections are made as shown, the G2 wire
carries no current, thus there is no error causing voltage drop across it. (1 volt=1000 millivolts =
1,000,000 microvolts.)
IMPORTANT: Be sure the
negative lead from your
solar charge controller is
NOT connected here-- but
to the other side of the
shunt. Otherwise the
TriMetric will not measure
your solar amps.
KELVIN CONNECTIONS: These are the two smaller
screws on the shunt which should be used for current
sensing wires only. For measurement accuracy,
never connect wires containing high currents to these
connections.
SIG
+
FOR SAFETY: Place a
2 amp (fast blow) fuse
in series with the + wire
near the battery, as
shown. That way, if
there is ever a short
between this wire and
the other wires, you
won't melt down the
wires, you will only blow
the fuse.
G1
G1
G2
SIG
M
+
Back view of TriMetric
battery monitor (without
back cover.)
+
SIG
Magnified view of 5 SCREW
TERMINAL STRIP located on
circuit board.
12 OR 24 VOLT
BATTERY
SYSTEM.
SHUNT TO METER CABLE: Can be up to 150 ft. long if cable has #18 or larger
wires, or 50 feet using #22 wires. Twisted pair wire should not be necessary.
However, if it is used, we recommend wiring it as shown in the diagram. Use
one twisted pair for the G1 and + wires, and another twisted pair for the G2 and
SIG wires (as shown). For long cable runs the M+ terminal can be connected
separately as described on page 3 "For unusual cases...."
G1
G2
SHUNT: 50 MV/500 AMP
OR 100 MV/100 AMP
SYSTEM GROUND (if used)
Be sure the minus terminal of charge controller, inverter,
and all other loads and chargers connect here (not the
negative post of battery).
CHARGING SYSTEM (SOLAR PANELS including
- TO
controller, CHARGER, ETC.) AND ALL LOADS
+(INVERTER, ETC.)
SHUNT NOTE: Use either a 50 mv/500 amp shunt or 100
mv/100 amp shunt. Shunt must be connected to minus
side of battery. To read correct current and amp-hours,
TriMetric battery monitor must be programmed for correct
shunt type being used, as described in instructions.
TriMetric BATTERY MONITOR CONNECTIONS. Please read all notes carefully. (Technical notes optional.)
BOGART ENGINEERING
5/1/98