1
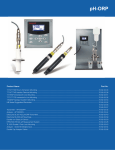
pH Meter
pH Meter
User Manual
Issue 1.2, 2nd January 2007
RESEARCH INSTRUMENTS LIMITED
Bickland Industrial Park, Falmouth, Cornwall TR11 4TA, U.K.
Tel: +44 (0) 1326 372 753 Fax: +44 (0) 1326 378 783
E-mail: [email protected].
website: http://www.research-instruments.com
pH Meter
CONTENTS
Introduction ...............................................................................
Declaration of Conformity ........................................................
Controls ..................................................................................
Display ....................................................................................
Connections/Battery ...............................................................
Calibration ..............................................................................
System Options
Autoread ..............................................................
Display Contrast ...................................................
Select C/F ............................................................
Power Saving .......................................................
Select Language ..................................................
Calibration Buffers ...............................................
Millivolt reading ....................................................
Calibration Data Storage .....................................
Troubleshooting ......................................................................
Reset ...................................................................
Specifications ..........................................................................
Default Settings ......................................................................
Cleaning Procedure ................................................................
Warranty .................................................................................
1
2
3
4
5
7
9
11
11
12
12
13
13
13
14
15
19
20
21
22
24
pH Meter
INTRODUCTION
Caution text here
This symbol with italic text next to it denotes information that is essential
to avoid damage to the equipment or to embryos.
Text like this denotes messages displayed on the screen.
Text like this denotes a button to be pressed on the meter.
Please read this manual and the Quickstart guide carefully and follow
the instructions to ensure that the pH meter system will work reliably
for a long time.
All wetted materials used are in compliance with the demands of the
Food & Drug Administration (FDA) of the United States of America.
There are no serviceable or replaceable parts in this product.
Do not remove any covers as this can damage the instrument
and compromise warranty.
The information in this manual is current at the time of publication. Our
commitment to product improvement requires that we reserve the right
to change equipment, procedures and specifications at any time.
In no event does Research Instruments assume the liability for any
technical or editorial errors, or for any damages arising therefrom.
© This manual is protected by copyright, all rights reserved, and no part
hereof may be photocopied or reproduced in any form without the prior
written consent of Research Instruments.
If your pH meter has this label and you are located in Europe,
it means that if the meter is no longer serviceable it must be
sent back to RI to be destroyed in an environmentally safe way.
Never dispose of the meter with ‘normal’ waste.
2
pH Meter
EC DECLARATION OF CONFORMITY
Application of the Council Directive: EMC Directive – 89/336/EEC
Equipment type:
Industrial and scientific equipment
Unit/trade name:
pH Meter & pH Meter Datalogging
Harmonized European standards which have been applied:
Standard
EN50081-1
Description
Emission standard
EN50082-1
Immunity standard
David Lansdowne
Technical Director
Research Instruments Ltd.
3
Test laboratory, reference
DARE, the Netherlands
Report: 99C00620
DARE, the Netherlands
Report: 99C00620
pH Meter
CONTROLS
The RI pH meter is controlled by the six keys located on the keypad.
The names Power, Enter and Arrow keys (Left, Right, Up and Down)
will be used consistently throughout this manual.
Enter
Up arrow
Left arrow
Right arrow
Down arrow
Power
Figure 1
After starting the meter by pressing Power, the display will briefly
show RESEARCH INSTRUMENTS, the meter type (RI pH meter),
the software revision number and date, and the meter’s serial number.
Then the Main menu will be shown.
As the system is not yet calibrated, the pH value shown in
the display is not reliable.
4
pH Meter
DISPLAY
Display
The pH value can be shown in 1 or 2 decimal resolution and temperature
can be shown or be omitted. In chapter 3 these settings are explained
in detail.
The display contrast can be set over a wide range, allowing easy
reading under virtually any ambient light conditions (page 11).
pH
7.0
AR
CAL
22.2C
Status text
Help
Disp
Calib
AutoR
Store
Config
Probe Status Indicator
Three blocks means that the probe gives maximum performance.
Two blocks means that the probe is working well. Some maintenance
(cleaning procedure, page 21) can bring it up to maximum performance.
If two blocks are shown by new probes, it is advised to fill the probe
cavity with warm water for 20 minutes, and then in buffer pH 4 for 1-2
hours, then recalibrate.
One block is typical for a probe that has been in use for some time.
The probe still gives accurate results, but may require cleaning (see
pade x). Recalibrate using fresh buffers.
If none of the recommended remedial actions lead to probe status
improvement, the probe is near the end of its life and will need to be
replaced in the near future.
5
pH Meter
DISPLAY
pH
7.0
pH value indication
These large digits represent the pH value.
22.2C
Temperature indication
Temperature in C or oF. Note: this is not intended to give an accurate
reading. For an accurate reading we advise purchasing an RI IVF
Thermometer.
Battery status indication
When the remaining operational time is less than approximately 5
hours, a “low” indication will appear. When charging the battery, two
alternating “+” symbols are shown on the right hand side of the battery
symbol.
AR
Autoread activated
When the Autoread function (automatic stability check) is activated,
AR will be shown in the display. Both the pH value and the AR symbol
will blink when the signal is not stable. When the pH measurement
signal is within the stability limits, the pH value and the AR symbol
will be shown continuously, thus providing a clear visual stability
indication.
CAL
Calibration indication
In the bottom left corner the text CAL will be blinking when calibration
is in progress.
Status text
The status text line is used for a wide variety of messages. Examples
can be found throughout this manual.
Help
Disp
Calib
AutoR
Store
Config
This is the menu for changing the meter settings. Use the Arrow keys
to highlight the desired section, then use the Enter key to enter the
submenu.
6
pH Meter
CONNECTIONS
Connect the probe to this connector at the bottom
of the meter. It will only fit in one orientation.
Tighten the screw collar by hand to secure.
Connect the mains power supply adaptor
to this connector. The meter’s batteries
are charged automatically when the
mains adaptor is connected.
Battery
The battery is a rechargeable Nickel Metal Hydride (NiMH) type. The
battery is fully charged before shipment, but we recommend connecting
to mains power for at least 12 hours before relying only on battery
power.
A fully charged battery will typically give 24 hours of use. We advise
recharging the battery as soon as the low battery indicator appears on
the display.
Overcharging the battery is not possible and the supplied NiMH
batteries do not suffer from the so-called “memory effect”.
7
pH Meter
DISPLAY
A prolonged exhausted battery may result in an automatic meter reset.
After recharging a completely exhausted battery, a reset may be
required to restart the meter (see page 18).
First connect the mains adaptor, and then switch off the meter. This
allows a visual check that the battery is charging correctly, indicated by
the “++” signs next to the battery symbol.
Help function
The pH meter is equipped with an onboard help function, designed to
provide instant assistance according to the task being carried out.
If a situation occurs that requires the user to take action (indicated by
an error message ATTxxx on the display) the help text will describe
the situation and the action to be taken.
Display pH and Temperature
The pH value can be shown with either one- or two-decimal resolution,
depending on the calibration method and the meter setting.
The meter measures the sample’s temperature with a sensor built into
the probe and provides automatic temperature compensation for an
accurate pH reading. The temperature can be shown on the display.
The system offers four display settings:
- pH 0.1 without temperature indication
- pH 0.1 with temperature indication
- pH 0.01 without temperature indication
- pH 0.01 with temperature indication
To change between these settings, go to the Main menu. Use the
Arrow keys to go to Disp and press Enter repeatedly until the desired
setting appears.
Note: with a 1-point calibration, the accuracy is not sufficient for a 0.01
pH indication. When selecting the 0.01 pH resolution indication after
a 1-point calibration, the second decimal will blink to indicate that it
is not to be regarded as accurate. We therefore advise performing a
1-point calibration for 0.1 pH accuracy or a 2-point calibration for 0.01
pH accuracy.
8
pH Meter
CALIBRATION
The system must be calibrated before first use, using correct buffers,
and for maximum accuracy the probe and the buffers must be at the
same temperature as the sample i.e. 37C.
The pH Meter has four built-in calibration tables, each corresponding to
a different set of buffers. The RI bufferset is selected by default.
We recommend using a two point calibration using only RI buffers
and bufferset, which have been optimised for IVF needs.
The system automatically stores calibration results for later review.
See page 14.
Make sure that the buffers used during calibration are
identical to the selected bufferset, otherwise significant
variations in measurement values may occur.
Over time, the pH value of a buffer may change. Buffers with values
over pH 7.00 in particular are susceptible to CO2 contamination. To
maintain the accuracy of calibration make sure that the buffers used
are fresh, and not contaminated by other materials.
Research Instruments provides buffers in small bottles specially
designed to facilitate this use. When being used, the bottle should be
opened for the shortest possible time. With minimal exposure to the air
each bottle should last for at least three months.
Before calibrating
If the probe is newly connected to the meter (indicated by ATT021 on the
status text line), or if the meter has been switched off for several hours, it
is necessary to place buffer solution in the probe, with the meter switched
on, for a period of 10 minutes. This allows the probe to set itself for use
after a period of inactivity and is required to ensure stable readings.
Rinse the probe before calibration.
During calibration, the CAL indication will blink in the display.
If a calibration has not been successful, a message to that effect
will be shown on the display. Also, the calibration procedure can be
cancelled before it is finished. In both cases, the meter will use data
from the last successful calibration.
9
pH Meter
CALIBRATION
Performing the calibration
• In the Main menu, go to Calib and press Enter. On the status
indication line the selected bufferset is shown. Fill the probe cavity
with buffer 7.00.
• Go to 2 Pnt and press Enter.
• The display shows First buffer and then Recognized
7.00. Menu item Cal 1 is highlighted.
If the buffer value recognised is not 7.00, go to Set and press
Enter repeatedly until the correct buffer value is shown on the
display, then return to Cal 1.
• With Cal 1 highlighted, press Enter to confirm the selection.
Leave the buffer in the probe for two minutes. The display shows
Next buffer and after some time Recognized XX.XX.
Menu item Cal 2 is highlighted
• Rinse the probe cavity with deionised water and fill with buffer
10.00.
Check the display shows Recognized 10.00. If not, go to
Set and press Enter repeatedly until the correct buffer value is
shown on the display, then return to Cal 2.
• With Cal 2 highlighted, press Enter to confirm the selection.
Leave the buffer in the probe for two minutes.
After completing the calibration, the slope percentage is briefly
displayed and the meter automatically returns to the Main menu. The
slope data is automatically recorded for later use as described on
page 14.
The slope value displayed should be between 98.0 and 105%. If it is
below this please refer to the trouble shooting guide on page 18.
10
pH Meter
SYSTEM OPTIONS
Autoread: Stability Function
The Autoread function provides a clear indication that the measured
pH value is stable.
• In the Main menu, go to AutoR and press Enter.
The dispaly will briefly show Autoread is ON.
The AR symbol is permanently shown in the display (see page 6).
• Pressing Enter once more disables the Autoread function. The
display will briefly show Autoread is OFF, and the AR symbol
is no longer shown in the display.
When the Autoread function is on, the AR symbol and the pH value
will blink if the measured pH is changing at more than 0.02 pH per 30
seconds.
The AR symbol and pH value will blink for the first 8 seconds as the
meter calculates the initial stability.
Display contrast
The display contrast can be adjusted to suit the ambient light
conditions.
• In the Main menu, go to Config and press Enter. Go to LCD and
press Enter.
The status text line will show Contrast: x.
• Use the Up or Down key to change the display contrast setting.
• When you are happy with the contrast press Enter to confirm the
setting and return to the Configuration menu.
• Go to Back and press Enter to return to the Main menu.
Note: it is possible to change the display contrast to a setting where
it is very difficult to read the display at all. Reverse the display setting
immediately to a readable contrast.
11
pH Meter
SYSTEM OPTIONS
Select C/ºF
In the Main menu, go to Config and press Enter.
Go to Params, press Enter again.
Go to Select degree C/F and press Enter.
Press the Up or Down arrow to change between C and ºF, then press
Enter to confirm the selection.
Power saving options
The meter can switch off automatically after a preset time to conserve
battery life.
• In the Main menu, go to Config and press Enter.
• Go to Params, press Enter again.
• Go to Power saving options and press Enter.
• Go to Meter and press Enter.
The display shows Stay ON time of meter (min): xx
• Use the Up or Down key to set the ON time from 1 minute to 55
minutes or Continuous (no automatic power-off).
• Press Enter to return to the Power saving menu.
12
pH Meter
SYSTEM OPTIONS
Select language
The meter can be set to one of four languages: English, German,
French or Spanish
• To change the language, in the Main menu go to Config and
press Enter.
• Go to Params, press Enter again.
• Go to Select language and press Enter.
• Use the Up or Down key to go to the desired language and press
Enter.
• Go to Back and press Enter to return to the Main menu.
Calibration buffers
The buffers supplied by RI are set by default. Other buffersets can be
selected (e.g. DIN, NIST) but we do not recommend changing from
the RI buffers.
mV (millivolt) reading
The ISFET mV output can be directly displayed.
If the meter is not yet calibrated, the actual ISFET mV output will be
shown. If the meter has been calibrated, the corrected mV output
related to the value at pH 7.00 is shown.
• In the Main menu, go to Config and press Enter.
• Go to Params, press Enter again.
• Go to mV reading and press Enter.
The display shows ISFET mVolt: xxx.x . The mV value
reading remains active - press Enter to return to the Configuration
menu.
13
pH Meter
SYSTEM OPTIONS
Calibration data storage
After the meter is calibrated, all calibration data are automatically
stored in the meter’s memory and can be recalled.
Information stored includes the bufferset used, buffer value(s),
temperature, slope(s) and the probe status.
Data can be recalled on the screen.
• In the Main menu, go to Config and press Enter.
• Go to Params, press Enter again.
• Go to Calibration data.
The meter will display the data from the last calibration as shown:
Buffer
Slope
12.34
12.34
Temp
123.4C
123.4C
*****
123.4
Recall 2 pnt calib
Help
Disp
Calib
AutoR
Store
Config
• Go to Prev and press Enter to display the previous calibration
data set. Go to Next and press Enter to display the next data set.
The calibration data is shown, consisting of the probe status and
the chosen bufferset. The buffer value and temperature are shown,
as well as the calculated slope.
14
pH Meter
TROUBLESHOOTING
ATT (Attention) Codes
The pH meter has built in diagnostic functions, allowing it to automatically
detect problems and display an error message. The display will
show ATTxxx , where xxx is a number indicating the nature of the
problem.
If there is more than one error, the pH meter itself handles priorities to
make sure that only one ATT code is shown at a time.
ATT000
ATT001
ATT002
ATT003
ATT004
No probe signal Ensure that the probe is properly
connected to the meter.
Ensure that there is a good contact
between the sample and the probe.
Clean the probe (page 22).
The pH is out of Verify the buffer and the buffer
the 0-14 range. recognition during calibration.
The probe may not have been calibrated
to the meter - recalibrate.
The probe may be contaminated, clean
the probe and recalibrate.
The sample
For the best results, the expected pH
reading is
value should be between the calibration
more than 3
buffers. Recalibrate with a wider
pH units out of calibration range or use more calibration
the calibrated
points.
range.
The pH is out
Check that the probe is properly filled
of the 0-14
with the buffer.
range during
Clean the probe (see page 22) and
calibration.
recalibrate.
The calibration When the calibration points are
points are less too close together, accurate slope
than 0.5 pH
calculation is difficult.
units apart.
Check the buffers and use other
buffers if necessary. Check the buffer
recognition during calibration.
15
pH Meter
TROUBLESHOOTING
ATT005
The calibration
points are more
than 7 pH units
apart.
ATT006
The ISFET
output is too
close to the
ISFET output
in the previous
buffer.
The probe signal Allow 10 minutes stabilisation before
is not stable.
calibration.
Make sure there is good contact
between probe and buffer.
Stir buffer well before reading.
Clean the probe (see page 22) and
recalibrate.
There is no
Without this signal, temperature
thermistor
compensation (ATC) is not possible.
signal.
Check the probe is properly connected
to the meter.
If this does not help, replace the probe.
ATT007
ATT010
ATT011
ATT020
The
temperature
is out of the
probe’s working
range.
There is no
signal from the
ß-resistor.
When the calibration points are too far
apart, the results are less reliable.
Check the buffer recognition during
calibration. Recalibrate using fresh
buffers.
Check that the correct buffer is in the
probe.
Recalibrate using fresh buffers.
If this does not help, replace the probe.
The probe may be damaged.
Check the sample temperature.
Internal probe malfunction.
Check the probe is properly connected
to the meter.
Replace the probe.
16
pH Meter
TROUBLESHOOTING
ATT021
ATT050
The meter
detects a new
probe.
The slope is too
low (slope less
than 90%).
ATT051
The slope is too
high (slope over
110%).
ATT060
Probe status is
too low.
General Meter
unresponsive
Occurrence of
strange pixels
Perform a new calibration with this
probe.
The sensitivity of the sensor is too low.
Recalibrate using fresh buffers.
Check for correct buffer recognition
during calibration.
Check that the buffers used match the
programmed bufferset.
Clean the probe (see page 22) and
recalibrate.
The sensitivity of the sensor is too high.
Check for correct buffer recognition
during calibration.
Check that the buffers used match the
programmed bufferset.
Clean the probe (see page 22) and
recalibrate.
Recalibrate using fresh buffers.
Check for correct buffer recognition
during calibration.
Check that the buffers used match the
programmed bufferset.
Clean the probe (see page 22) and
recalibrate.
Check times used for Power Saving.
(See page 12.)
Reset the meter (See page 19.)
Reset the meter. (See page 19.)
17
pH Meter
TROUBLESHOOTING
General No display
Battery may be completely discharged.
Connect meter to AC power and wait
10 minutes before turning on the meter.
Contrast may be set to extreme value.
Reverse contrast setting to readable
value. (See page 11.)
If unable to find contrast setting menu,
reset the meter. (See page 19.)
Calibration slope values
Slope %
98.0 – 105.0
94.0 – 97.9
90.0 – 93.9
Interpretation
Probe gives maximum performance
Probe functions fine. Some maintenance, cleaning
with water, toothbrush, and a mild detergent as
described on page 22 can bring it up to maximum
performance.
If such low slopes are achieved by new probes,
it is advised to place hand-warm water in the
probe for 20 minutes, and then buffer pH 4.00
for 1-2 hours. This will effectively remove any
KCl crystallisation that may have occurred in the
reference diaphragm due to long storage.
Typical for a probe that has been in use for some
time.
Probe still gives accurate results, but may require
cleaning.
Use water, toothbrush and a mild detergent
as described on page 22 to ensure optimum
performance, then recalibrate.
If the slope remains low, use fresh buffers and
recalibrate.
If the slope is close to 90% and does not improve,
the probe may be aging and a replacement should
be purchased.
18
pH Meter
TROUBLESHOOTING
In high humidity levels, drops in temperature may cause problems
due to condensation.
EMC Immunity: When using the AC adapter some interference may
be observed at EN50082-1 limits. If unstable readings are observed
which cannot be related to the sample, the condition of the probe
or meter; try to obtain stable reading on a different location, by RF
shielding the sample or by disconnecting the AC adapter.
Reset
If the display contrast has been adjusted to an unreadable
setting, it may be necessary to reset the meter. Other unforeseen
circumstances that hamper the meter’s functioning may also require a
meter reset.
• Press and hold the Power key for 40 seconds.
The meter may be seen to switch on and off a number of times.
After releasing the Power key the meter will restart automatically
within 5 seconds.
It may be necessary to reset the display contrast (see page 11).
All other data and parameters are automatically saved and restored
by the system.
Recalibrating the system is recommended.
A prolonged exhausted battery may result in an automatic meter
reset. Recharge the battery promptly when the battery status shows
Low.
19
pH Meter
SPECIFICATIONS
Measuring range:
pH:
0.00 to 14.00.
Temperature: 0C to 60C
Resolution:
pH:
0.1 or 0.01 pH, user selectable.
Temperature: 0.1C.
Accuracy:
pH:
Calibration:
1- or 2-point calibration with automatic buffer
recognition.
Buffer tables:
Sets of DIN, NIST and JIS buffers, a set of 5 RI
supplied, NIST traceable buffers.
Environment:
Temperature: Measurement 0C to 40C
Storage –5C to 70C.
Rel. Humidity: Measurement 85%
Storage 95%.
Power supply:
AC Mains adaptor with NiMH rechargeable
battery backup
± 0.01 + Least Significant Digit
(LSD) using 2 or more point
calibration.
± 0.1 using 1 point calibration.
Temperature: ± 0.5 C *
Battery charging time: 24 hours when empty, with meter off
Dimensions (incl. cradle):
Length:
215 mm
Height:
60 mm
Width:
95 mm
Weight:
325 gram
* Not guaranteed. The temperature indication is
sufficiently accurate to ensure good temperature
compensation for the pH reading, but is otherwise not to
be regarded as being accurate.
For accurate incubator temperature monitoring we recommend a
calibrated thermometer such as the RI IVF Thermometer.
20
pH Meter
DEFAULT SETTINGS
Following table shows the minimum and maximum values and the
factory set default value for various parameters.
Parameter
Power
saving
Options:
Minimum
1 minute
Maximum
Default
Meter
55 minutes/ Continuous
Continuous
Display
1 minute
55 minutes/ Continuous
Continuous
Autoread
On/Off
Off
Stability
0.02 pH/30
sec
Cal. Buffers RI, DIN, NIST, JIS
RI
Display
Contrast
-22
+22
0
pH Resolution 0.1
0.01
0.1
Temperature C
ºF
C
Temperature Not shown Shown
Shown
Language
English, German, French, Spanish
English
21
pH Meter
CLEANING PROCEDURE
In many cases of probes that are returned as faulty, the cause is
contamination from the fluid that the user is measuring.
If the probe is not cleaned regularly, the diaphragm can become blocked.
In this case there is no electrical contact between the electrode and the
ISFET chip and the probe will not work.
To prevent this, the probe must be cleaned regularly. We recommend
cleaning once a week, or if the diaphragm is no longer white.
The probe must be refreshed (page 23) and then calibrated (page 9)
after cleaning.
Cleaning
Fill the probe cavity with MP Biomedicals 7X® detergent solution in
distilled/deionised water at a temperature of 60C and leave for at least
5 minutes. Rinse with deionised or distilled water. Clean the inside of
the cavity with a soft toothbrush and rinse again.
After measurements in proteins we advise trying each of the following
in turn, in this order.
1. Put buffer 10 and buffer 3 alternately into the probe cavity, then rinse
with water.
2. Put 4% NaOH solution into the probe cavity. This must be at room
temperature and for the minimum necessary time.
Scratches
To avoid scratches on the chip/epoxy, clean with a brush only after the
detergent soak and rinse described above. This ensures that particles
are removed before brushing.
Most scratches occur when there are hard particles on the ISFET that
are brushed against the surface. This causes scratches on the surface
of the chip and damages the epoxy around the chip, which can give
bad readings.
FLUSH BEFORE BRUSH!
22
pH Meter
CLEANING PROCEDURE
Refreshing the probe
After cleaning it is necessary to refresh the probe. This process charges
the membrane with the ions needed to ensure correct operation of the
probe.
Fill the probe cavity with saturated KCl (potassium chloride) solution at
room temperature for at least 30 minutes.
Storage
When not in use the probe should be stored correctly to avoid the need
for lengthy refreshing procedures.
• Rinse the probe cavity with distilled/deionised water.
• The probe is supplied with a plastic cap with a fibrous plug. Apply a
few drops of distilled/deionised water to the fibrous plug and gently
push the cap onto the probe.
Do not fit the cap with the cavity filled with liquid as the
resulting pressure may force liquid through the membrane
and damage the probe
Preparing potassium chloride solution
• Add potassium chloride granules to distilled/deionised water and stir
until dissolved.
• Continue adding granules until no more is dissolved, and undissolved
granules are lying at the bottom of the container.
• Allow to stand for two hours to allow remaining particles to settle,
and decant the clear solution into a clean container.
23
pH Meter
WARRANTY
This RI meter is produced, packed and shipped with the utmost care.
If defects do arise, this RI meter is warranted to be free from defects in
material and craftsmanship for the period of 12 months.
Any defect due to misuse of the product is not covered by the
warranty.
All RI probes have a 6 month limited warranty, please refer to the probe
manual for specifics.
RI disclaims any liability to customers, to users of its products, or to any
other person or persons for any special or consequential damage that
might arise out of or that might in any way be connected with the use
of this instrument or its accessories.
The warranty described in this paragraph shall be in lieu of any other
warranty, expressed or implied, including but not limited to any implied
warranty or merchantability or fitness for a particular purpose. The
buyer’s sole and exclusive remedy is for repair or replacement of
defective parts as provided therein.
Representations and warranties made by any person, including
dealers, representatives and employees of RI, which are inconsistent
or in conflict with the terms of this warranty, shall not be binding upon
RI unless in writing and signed by one of its officers.
RI reserves the right to ask for proof of purchase, such as the original
invoice or packing slip.
There are no serviceable or replaceable parts in this
product. Do not remove any covers as this could damage
the instrument and invalidate the warranty.
24