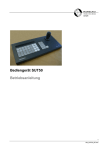
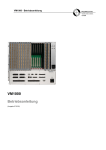
Download User manual SIMATRIX 648 II - Pelweckyj Videotechnik GmbH
Transcript
SIMATRIX 648 II User Manual (Version 07/2015) We reserve all rights in this document and in the subject thereof. By acceptance of the document the recipient acknowledges these rights and undertakes not to publish the document nor the subject thereof in full or in part, nor to make them available to any third party without our prior express written authorization, nor to use it for any purpose other than for which it was delivered to him. 1 1.1 1.1.1 1.1.2 1.1.3 1.2 1.3 Safety ....................................................................................................... 5 Safety ........................................................................................................ 5 Symbol Meaning ....................................................................................... 5 Meaning of Precautionary Statements ...................................................... 5 Authorized Persons ................................................................................... 6 Device-specific Advices ............................................................................ 6 Directives and standards .......................................................................... 8 2 Ordering Data .......................................................................................... 9 3 3.1 3.1.1 3.1.2 3.2 3.3 3.3.1 3.3.1.1 3.3.1.2 3.4 3.4.1 3.4.2 3.5 System Design ...................................................................................... 10 Common features and improvement compared with the SIMATRIX 64811 Common features.................................................................................... 11 New features ........................................................................................... 11 Device Features ...................................................................................... 11 Principle of Operation.............................................................................. 14 Standard Programs ................................................................................. 15 Basic Program ......................................................................................... 15 Alarm processing in alarm program 2 ..................................................... 16 Interfaces ................................................................................................ 17 Interfaces on the front panel ................................................................... 17 Interfaces on the rear panel .................................................................... 18 Peripheral device address allocation ...................................................... 18 4 4.1 4.2 4.2.1 4.2.1.1 4.2.3 4.2.3.1 4.2.3.2 Installation und Inbetriebnahme .......................................................... 19 Safety instructions relating to installation ................................................ 19 Connection of SIMATRIX 648 II .............................................................. 20 Assignments of Sub-D socket ‘ALARM-OUT’ ......................................... 20 Relay switching example ........................................................................ 21 Assignments of 37-contact Sub-D Socket “Alarm x-xx / PTZ” ................ 22 Connection of Domes to Alarm x-xx/PTZ................................................ 22 Connection of TTY PTZ camera to ‘ALARM x-xx/PTZ ’(optional module 648 A16SCU) ......................................................................................... 24 Daisy chain connection of several PTZ camera units ............................. 24 Connection of Alarm Lines ...................................................................... 25 Alarm Line to "ALARM x/PTZ" ................................................................ 25 Assignments of Sub-D Plugs COM 2, COM 3 and COM 4 ..................... 25 External Computer at COM 2, COM 3 or COM 4 ................................... 26 LAN interface .......................................................................................... 26 Connection of Video Inputs ..................................................................... 27 Video signal requirements ...................................................................... 27 Connection of Video Outputs .................................................................. 27 Mains connection .................................................................................... 27 Extension with SIMATRIX 648 II ............................................................. 28 Extension of the video inputs with input module “648 II VME 16” .......... 28 Extension of the video outputs with output module “648 OSD Text” ..... 29 Extension of interfaces of the terminals (interface card for terminals „648 Term 2”.................................................................................................... 30 Extension of the TTY control outputs and alarm inputs with interface card “648 A16/SCU” or “648 II A16/Dome” .................................................... 30 4.2.3.3 4.2.4 4.2.4.1 4.2.5 4.2.5.1 4.2.6 4.3 4.3.1 4.4 4.5 4.6 4.6.1 4.6.2 4.6.3 4.6.4 5 5.1 5.1.1 5.1.2 5.1.3 Setting-up for Operation ...................................................................... 31 Power Supply .......................................................................................... 31 Environmental Conditions ....................................................................... 32 Installing the control software and setting device parameters ................ 33 Standard parameterization of the SIMATRIX 648 II ............................... 33 6 Operation ............................................................................................... 35 3 07.2015 6.1 6.1.1 6.1.1.1 6.1.1.2 6.1.2 6.1.2.1 6.1.2.2 6.1.3 6.1.4 6.1.5 6.1.5.1 6.1.5.2 6.1.5.3 6.1.5.4 6.1.6 6.1.7 6.1.7.1 6.1.7.2 6.2 6.2.1 6.2.1.1 6.2.1.2 6.2.1.3 6.2.1.4 6.3 6.4 6.4.1 6.4.2 6.5 6.5.1 6.5.2 6.5.3 6.6 Basic program ......................................................................................... 36 Manual camera image display on a monitor ........................................... 36 Using keyboard 1 (master device) .......................................................... 36 Using keyboards 2, 3 and 4 .................................................................... 36 Starting and stopping a camera image sequence .................................. 36 Using keyboard 1 (master device) .......................................................... 36 Using keyboards 2, 3 and 4 .................................................................... 37 Controlling cameras with pan/tilt and lens drives .................................... 37 Position control ........................................................................................ 37 Camera image sequences ...................................................................... 37 Revoking password protection for camera image sequences ................ 38 Re-establishing password protection ...................................................... 38 Camera image sequence using keyboard 1 (master device) ................. 38 Camera image sequence using keyboards 2, 3 and 4 ........................... 39 Entering or changing positions ................................................................ 39 Makros..................................................................................................... 40 Recording a macro .................................................................................. 40 Executing a macro .................................................................................. 40 Alarm program 2 (factory setting) ........................................................... 40 Alarm processing in alarm program 2 ..................................................... 41 Revoking password protection for detection group activation ................ 42 Re-establishing password protection ...................................................... 42 Activating detection groups ..................................................................... 42 Deactivating detection groups ................................................................. 45 Switching system time to summer/normal time settings ......................... 46 Resetting and initial system boot ............................................................ 47 System reset ........................................................................................... 47 Rebooting the system (to alarm program 2 factory settings) .................. 47 Network configuration and firmware update ........................................... 48 Configuring the network with „VMnetCfg“ .............................................. 48 Updating the firmware with „VMnetCfg“ .................................................. 49 Activating write protection for network configuration and firmware update50 Webserver ............................................................................................... 51 7 7.1 7.2 Maintenance .......................................................................................... 52 General.................................................................................................... 52 Cleaning .................................................................................................. 52 8 Transport and Storage .......................................................................... 52 9 Accessories with order details ............................................................ 52 10 10.1 10.2 10.3 10.3.1 10.3.2 10.4 10.5 10.6 Appendix ................................................................................................ 53 Technical data ......................................................................................... 53 Glossary .................................................................................................. 54 LAN Operating Device SUT 50 ............................................................... 55 Device Features ...................................................................................... 55 LAN connection of SUT 50 to SIMATRIX 648 II ..................................... 55 List of illustrations: ................................................................................... 56 List of tables: ........................................................................................... 56 Summary of basic and alarm program features ...................................... 57 4 07.2015 Safety 1 Safety 1.1 Safety – Before starting-up operation, maintaining, transporting, or storing this device, read the safety advices for this device, as well as the entire instruction – Pay attention to the warning notices in the succeeding chapters – Keep this document for later use or for handing it over together with the product – In addition, regard the local safety standards or laws for planning, installation, operation, and proper disposal of the product 1.1.1 Symbol Meaning Dangerous situation Useful information 1.1.2 Meaning of Precautionary Statements The seriousness of a hazard is expressed by the chosen signal word. Following signal words will be used in case of an appropriate hazard: Signal word Meaning Danger Indicates a hazardous situation which, if not avoided, will result in death or serious injury. Warning Indicates a hazardous situation which, if not avoided, could result in death or serious injury. Caution Indicates a hazardous situation which, if not avoided, could result in minor or moderate injury. 5 07.2015 Safety 1.1.3 Authorized Persons Danger of life for persons without necessary qualification Only skilled personnel are allowed to work on the device! Disregarding this can cause death, serious injury, or considerable property Warning damage. This document does exclusively address the following target audience: – installer – maintainer Qualification Function Has expert knowledge in the field of electrical installations and knows electrical hazards of any kind. Set-up the product Maintain the product Dismantle the product Comply with the appropriate safety regulations for low voltage systems, especially general safety and installation regulations. 1.2 Device-specific Advices – Proper and safe functioning of the device depends on appropriate transport, storage, installation, and on accurate operation and maintenance. – Connect the device only to appropriate power sources – Comply with the environmental conditions specified by the manufacturer – Modifications of the device are only allowed as far as they are mentioned in this document or explicitly allowed by the manufacturer – Use only spare parts and accessories approved by the manufacturer Danger of life by electric shock Pull the plug before working on the device Warning Improper handling of the device can cause death, serious injury, or considerable property damage – During operation of the device, certain parts inside the device are inevitably energised – Even with a blown device fuse, there can be dangerous voltage inside the device 6 07.2015 Safety Danger of life by electric shock Operate the device only when it is dry and undamaged! Warning – High temperature variations can cause accumulation of moisture inside the device (e.g. after transport). Power-on the device only after the temperature of the device is adapted to room ambient temperature Danger of explosion Only use batteries of the same type Warning Improper battery replacement can cause the battery to explode Electrostatic Discharge Electrostatic discharge can damage or destroy components Do not touch parts at risk (e.g. contacts of plugs) Before touching a device, discharge your body electrostatically (e.g. by touching a grounded metallic object) 7 07.2015 Safety 1.3 Directives and standards European Directive This product complies with the requirements of the European Directives 2014/30/EU “Directive of Electromagnetic Compatibility” and 2014/35/EU “Low Voltage Directive”. European Directive 2014/30/EU "Directive of Electromagnetic Compatibility" Compliance with the European Directive 2014/30/EU has been proven by testing according to the following standards: Electromagnetic emission EN 55022, Class B EN 61000-3-2 EN 61000-3-3 Electromagnetic compatibility EN 50130-4 European Directive 2014/35/EU „Low-Voltage Directive” Compliance with the European Directive 2014/35/EU has been proven by testing according to the following standards: Safety EN 60950, UL 1950 The EU declaration of conformity is available to the responsible agencies at: Pelweckyj Videotechnik GmbH Güterstraße 2 64807 Dieburg 8 07.2015 Ordering Data 2 Ordering Data Order reference Short designation Product SIMATRIX 648 II 648 II SIMATRIX 648 II video matrix V3 16 video inputs, 4 video outputs; PAL version 8 TTY interfaces for PTZ cameras. 16 alarm inputs for alarm lines, 2 TTY interfaces for terminals, with basic program and 4 alarm programs on CD-ROM for Windows Options for extension, not included in delivery! 9-274 648 II VME 16 9-248.8 VKS OSD Text 9-270 648 Term 2 TTY 9-248 648 A16/SCU 9-275 648 II A16/Dome Input module (matrix card 16/8) to extend the video matrix by groups of 16 video input (max. 64 Video inputs) Output module to extend the SIMATRIX 648 II video matrix by 1 video output (4 output modules max.) up to a total of 8 video outputs Interface card for terminals to connect two further terminals (max. 4) Interface card (alarm & PTZ) to extend with 8 TTY (max. 32) control outputs for power supply units and 16 alarm (max. 64) inputs for alarm lines 648 II interface card Alarm16/Dome interface card with 1 serial RS485 bus interface (RS422Simplex) for connecting up to 16 dome cameras (32 at most) and 16 alarm inputs per card (max. 64 when fully equipped) Accessories, not included in delivery! SUT 32 SUT 32 SUT 32 terminal with 32 keys, for selection of video matrix for remote-control of cameras with pan-and-tilt drive and lens control, with optical and audible alarm outputs SUT 50 SUT 50 SUT 50 terminal in desktop housing with 41 keys and 1 joystick, for selection of the video matrix and for remote control of cameras with pan-and-tilt drives and lens control, with optical and audible alarm signaling devices 9-911 power supply Plug-type power supply unit for power supply to terminal SUT 50 230 V, 50 Hz/DC 12 V, 640 mA, VM-AK 02 VM-AK 07 VM-AK 10 Cable – 3 m long – 7 m long - 10 m long VM-PC 02 Cable for connection of an external computer with 9-contact AT connector, 2 m long, for parameterization of video matrix and loading of an alarm program 9-411 RS485-MX16 RS485-Multiplexer distributes a serial input signal to 16 RS485/simplex outputs, or RS422/duplex outputs respectively. 9-170 TTY-8 UNIVERSAL TTY 8 versatile CL 20 mA/TTY distributor for controlling devices with 20 mA current interface. UNIVERSAL TTY 8 can be controlled via TTY or RS232 and has 8 TTY outputs. for connection of terminals to video matrix, with plug connectors Tab. 1 Ordering Data 9 07.2015 System Design 3 System Design The SIMATRIX 648 II permits a compact, modular design of CCTV systems. The SIMATRIX 648 II video matrix not only permits the switching of video signals, it can be additionally used to connect signals to other systems (e.g. IVM, GMA, and SDC) to process alarms. Fig. 1 System configuration 10 07.2015 System Design 3.1 Common features and improvement compared with the SIMATRIX 648 3.1.1 Common features – Parameterization downward compatible with the SIMATRIX 648 – Alarm inputs, serial connectors for operating devices, relays and open collector outputs pin and function compatible with SIMATRIX 648 – Housing dimensions and connector positions are exactly the same as with SIMATRIX 648 – CL/TTY PTZ units can be reused with the optionally available A16/SCU module. 3.1.2 New features – LAN connector for 100Base-T network for – connecting LAN-based operating devices (SUT 50 LAN) – status display via integrated web server – programming via LAN ( No more serial port on actual laptops ) – Web interface for diagnoses – Firmware flash update possible – control by a management system (SDC system) – Macros ease the realization of customer wishes without creating special soft- ware. – Modern switching power supply with a broad input voltage range from 110- 230 volts – Modern ARM processor same as with SIMATIX NEO II – RS485/RS422 outputs for direct PTZ control of dome cameras (2 of 7 available PTZ protocols can be used at the same time, no more DSU/CAK converters necessary) – All 8 video outputs can be used for switching video. (separate signal control ax- is) 3.2 Device Features The SIMATRIX 648 II is an economically priced video matrix system with up to 64 video inputs and 8 outputs. Video Matrix – Modular system in a 3U rack according to IEC 60297 – 75 Ω BNC connectors – Minimum configuration: 16 inputs, 4 outputs – Maximum configuration: 64 inputs, 8 outputs – Video inputs expandable in increments of 16 11 07.2015 System Design – Video outputs expandable in increments of 1 – All 8 video outputs can be used for switching video signal to monitors, due to a dedicated signal loss axis Control – LAN connector for 100Base-T network for – connecting LAN-based operating devices – status display via integrated web server – programming – controlling by a management system – Three serial interfaces (RS232) for connecting external systems, for program- ming via a PC, and for dialing substations – Connection of 2 operating devices (with extension module 4) with freely pro- grammable keys, e.g. SUT50, SUT32, SUT2, CKAXX. Via LAN, up to 16 LAN operating devices can be connected. – Connection option for PTZ cameras and domes with diverse protocols (CCDA, SCU, Sivis Minidome, Pelco D, JVC und Molynx) (expandable to 4 interfaces with 2 protocols) – Up to 8 serial CL/TTY interfaces for connecting PTZ cameras and domes with suitable interface – 16 protected alarm inputs (expandable up to 64 alarm inputs) – Basic program and 6 alarm programs pre-programmed on CD-ROM, for Win- dows 2000/XP/Vista, and Windows 7 – 8 control outputs for control of VCRs and image storage – Master relay with 2 potential-free changeover contacts Operation – Simple graphic user interface and visualization via SDC Videoserver or IVM – Via operating devices SUT50, SUT32, SUT2, CKAXX, functions can be freely assigned to keys Extension module – 648 Term 2 TTY (648 TERM2): interface card for connecting 2 additional operat- ing devices (max. 4) – 648 interface card Alarm16/SCU8 (648 A16/SCU): Alarm/SCU interface card with 8 serial TTY/CL (20mA) interfaces for connecting PTZ drive control units for pan/tilt/zoom cameras (max. 32 when fully equipped) and 16 alarm inputs (max. 64 when fully equipped) – 648 II interface card Alarm16/Dome (648II A16/DOME): interface card with 1 se- rial RS485 bus interface (RS422-Simplex) for connecting up to 16 dome cameras (32 at most) and 16 detection groups (max. 64 when fully equipped) and 16 alarm inputs per card (max. 64 when fully equipped) – 648 II Video input card 16 (648 II VME16): expansion card for additional 16 vid- eo inputs with 75 Ω resistors (max. 64 when fully equipped) – VKS OSD text module (VKS OSD TEXT): Expansion module with text generator for one additional video output (max. 8 when fully equipped) 12 07.2015 System Design Programming – Time and weekday controlled alarm programs – VTR switching contacts for alarm recording – Freely programmable camera image sequence (can be programmed to start up when the system is switched on) – On-screen text and time insertion for each operation place freely editable – Camera text per camera (IBM character set, 12 lines at 24 characters each) – Group and alarm switching (max. 8 cameras) – Alarm positioning of PTZ cameras – Each operation place can be limited regarding switching inputs to outputs – Operating devices with freely programmable keys – Special functions can be realized by macros – Parameter set can be stored as data file (library function) 13 07.2015 System Design 3.3 Principle of Operation The SIMATRIX 648 II permits a compact, modular design for CCTV systems with video inputs and outputs. The video signals applied to the video inputs of the SIMATRIX 648 II video matrix can be connected in any combination to the video monitors, picture storage units, and video printers etc. which are connected to the video outputs. The SIMATRIX 648 II can be selected manually from up to 10 terminals (max. 4 can be connected serial, 6 additionally over LAN), by SDC and by means of alarm signals from external contacts e.g. from the TELEMAT. Fig. 2 Video monitoring system with SIMATRIX 648 II as control center The facility of user-definable parameterization, i.e. combination of the basic functions present in the operating software in any manner, permits easy adaptation of the SIMATRIX 648 II video matrix to the respective system configuration. In addition to the main task of connecting pictures, it is also possible to remotecontrol cameras with a pan-and-tilt drive and lens controller including control of their position. On-screen displays are possible for the date and time as well as texts for identifying cameras and for definition of automatic picture cycles. An important feature is the processing of incoming alarms structures (alarm lines, TELEMAT) with switching of the "Alarm camera" to the envisaged monitor, as well as control of video recorders and picture storage units. Assignment of alarm lines to cameras, assignment of alarm pictures to individual monitors, and selection of group or individual switching can be set as desired. 14 07.2015 System Design 3.3.1 Standard Programs The basic program and 6 alarm programs supplied on CD-ROM already provide operational parameter settings which can be used directly. These programs include the most frequent applications. Based on these, it is easily possible to carry out parameter settings according to customer-specific requirements. NOTE: Alarm program 2 is factory-set 3.3.1.1 Basic Program The basic program operates without alarm processing. Number of connectable: – Cameras: 1 to 16 – PTZ cameras: 1 to 16 – Monitors: 1 to 4 – Terminals: 1 to 4 – IVM terminals: 1 to 3 The following functions are implemented: – Terminal 1 for central selection, terminals 2 to 4 for distributed selection (see Operator's Guide). – The monitor cycles can be defined for all monitors, and also protected by a password. – Camera identification, date, time, camera failure message on screen of monitor. – Using the operating device, it is possible to remote-control the last selected dome or camera with a PTZ drive and lens control via the SIMATRIX 648 II. 15 07.2015 System Design 3.3.1.2 Alarm processing in alarm program 2 All the alarm programs are described in detail in the programming software manual. An overview of the alarm programs is included in the appendix. Alarm program 2 also offers the operating options that have been described for the basic program. Alarm processing is offered as an addition feature. – A detection group feature is included for each camera input. – When an alarm is triggered, the alarm image (camera image of the zone from which the alarm originates) appears on monitors 1. – The alarm can be acknowledged (turned off) by keying MON 1. The original im- ages will now appear on the monitors. – If a second alarm is triggered before the first alarm can be acknowledged, the second alarm image will appear on monitor 2. Fig. 3 Schematic representation of the serial display mode (stepped switching) – Each additional alarm image will overwrite one of the alarm images on display, so that monitors 1 and 2 always display the most recent two alarm images. – The alarm displays on monitors 1 and 2 can be acknowledged. The oldest, next in-sequence image will then appear on the monitor where the image has just been acknowledged. When this alarm image is acknowledged, the next oldest alarm image appears, etc. – Monitor 3 is still available to switch cameras manually or to play the automatic image sequence. – A video recorder connected to output 4 starts up automatically at the first alarm signal. It records the images that appear on monitor 4. – The recorder stops when the last alarm is acknowledged or switches to the pre- set long-term recording setting. 16 07.2015 System Design 3.4 Interfaces The CPU is responsible for controlling and administering the complete SIMATRIX 648 II system with its video inputs and outputs, as well as alarm lines and switching outputs, interfaces to terminals, CDCx or external computers. The control depends on the free parameterization of the user (see parameterization instructions for SIMATRIX 648 II). 3.4.1 Interfaces on the front panel COM-II LAN Fig. 4 Interfaces on the front panel Interface Application COM-II RS232 RS232 communication interface: see parameterization instructions - data exchange with external computers or default: 19,2 kbaud, 8/E/2 systems (V.24) (e.g. SDC, IVM, TELEMAT MD/MDT, SISTORE, logging printer, substation) - for parameterization Selectable baud rate LAN 10/100 Base-T LAN connection: - control, programming, and diagnosis via LAN, communication interface for data exchange with computers or external systems (e.g. SDC) - connection of LAN-based operating devices e.g. SUT 50 Tab. 2 Interfaces on the front panel 17 07.2015 System Design 3.4.2 Interfaces on the rear panel Fig. 5 Interfaces on the rear panel (basic configuration) Interface ALARM xx – xx / PTZ input: CMOS (protected ) output: RS485 or TTY Number Application Selectable baud rate 16 – 64x 8 – 16x 648 II A16/Dome (basic configuration ): interface card with 1 serial RS485 bus interface (RS422Simplex) for connecting dome cameras with a selectable protocol and 16 alarm inputs per card (max. 64 when fully equipped) See parameterization instructions; standard setting depends on the selected dome protocol 648 A16/SCU (optional ) 8 data outputs (TTY/CL (20-mA) interfaces) for CDCx/SCU with TTY control and 16 alarm inputs COM-III, COM-IV RS232 ALARM – OUT alarm relay open-collector outputs 2x 1x 8x RS232 communication interface - for data exchange with external computers or systems (V.24) e.g. SDC, IVM, TELEMAT MD/MDT, SISTORE, logging printer, substation - for parameterization See parameterization instructions; standard setting 19,2 kbits/s / 8/E/2 - Relay for master alarm (e.g. recorder control) or video loss. Double contact, can be parameterized as NO or NC contact. If parameterized as NC it can be used as a power loss indicator. - 8 open-collector outputs for control of external devices via 8-bit parallel (e.g. digital picture storage units, video recorders) Term. 1 - 4 4-wire - CL-20mA-/TTYinterface 2 – 4x Video – output 1 Vss / 75 Ohms PAL / CCIR 4 – 8x BNC sockets for 75 Ohms video outputs. (4 outputs in the basic configuration, additional 4 outputs optional possible) Video – Input 1 Vss / 75 Ohm PAL / CCIR 16 – 64x BNC sockets for video inputs (75 connections, switchable using jumpers). (16 inputs in the basic configuration, additional 48 inputs optional possible) for connection of up to 2 terminals ( one additional module with 2 terminals possible ) See parameterization instructions; standard setting 9600 bits/s - Tab. 3 Interfaces on the rear panel 3.5 Peripheral device address allocation An address must be allocated to all devices, e.g. keyboards, CDCs and dome cameras. Camera head drives, dome cameras and interfaces for camera programming must always be assigned an input. The standard address is identical to the number of the video input to which the remote-drive camera is connected. SIMATRIX 648 II programming software allows allocation of other addresses however. 18 07.2015 Installation und Inbetriebnahme 4 Installation und Inbetriebnahme The SIMATRIX 648 II system is built in modular 19 inch format. The 19 inch component trays have been designed to suit 19 inch frames and cabinets. When installing component tray modules, make sure that: – the maximum supply air temperature of 45°C is not exceeded in any of the com- ponent tray modules 4.1 Safety instructions relating to installation WARNING Installation, connection and commissioning of the devices must only be carried out by qualified personnel. The appropriate safety regulations must be observed, in particular the general installation and safety regulations for working on power systems (e.g. DIN VDE). The failure to observe these regulations may result in death, severe personal injury or extensive damage to property. We recommend that you use the support and services of the appropriate Siemens departments for installation and commissioning. Caution The devices are designed for operation on earthed three-phase networks, socalled TN systems (to VDE 0100 Part 300 or EN 60950). Operation on IT systems, i.e. systems without an earthed conductor (insulated) or via conductors only earthed via impedance is not envisaged. 19 07.2015 Installation und Inbetriebnahme 4.2 Connection of SIMATRIX 648 II Fig. 6 Rear view of the SIMATRIX 648 II 4.2.1 Assignments of Sub-D socket ‘ALARM-OUT’ Fig. 7 View onto socket side ‘ALARM-OUT’ Pin 1 2 3 4 5 6 7 8 9 10 11 Funktion N.C. COM 1 TD COM 1 RD Relay NO contact 1 Relay changeover contact 1 Relay NC contact 1 GND Relay NO contact 2 Relay changeover contact 2 Relay NC contact 2 Connector output/relay control N.C. – N.C. 2 Pin 14 15 16 17 18 19 20 21 22 1 23 24 25 Funktion Open collector D0 Open collector D1 Open collector D2 Open collector D3 Open collector D4 Open collector D5 Open collector D6 Open collector D7 According to connection of protective diodes (DO-D7)(1) GND N.C. N.C. 13 Tab. 4 Assignments of sub-D socket ‘ALARM-OUT’ D D0 to D7 are open-collector outputs for control of external devices such as picture storage units or video recorders. (1) Common connection of protective diodes at the 8 open-collector outputs. Connection need only be made if inductive loads such as relays are to be controlled. The connection must then be made to the positive pole of the relay power supply 20 07.2015 Installation und Inbetriebnahme 4.2.1.1 Relay switching example Fig. 8 Relay switching 4.2.2 Connection of terminals Terminal 1 is always connected as the central terminal; terminals 2 to 4 can be connected as central or distributed terminals. (Whereas every camera can be switched to every monitor in the case of a central terminal, cameras can only be connected to the monitor assigned to the terminal in the case of a distributed terminal; see Section "Operation"). A 4-core cable is required to connect a terminal, max. permissible length approx. 2 km with 0.8 mm conductor diameter. If the power supply is taken from the SIMATRIX, a 6-core cable is required. For lengths greater than 300 meters, a separate power supply in the terminal must be used. Up to 4 terminals can be connected to the "Terminal sockets". Terminal socket 1-2 Terminal Fig. 9 Connection of terminal to terminal socket 1-2 21 07.2015 CAUTION The terminals 3-4 must be powered via an external plug-type power supply unit. Fig. 10 Connection of terminal to terminal socket powered via an external plug type power supply unit 4.2.3 Assignments of 37-contact Sub-D Socket “Alarm x-xx / PTZ” 4.2.3.1 Connection of Domes to Alarm x-xx/PTZ The “alarm/PTZ” interfaces of the VKS648II can be alternatively equipped with “648 A16/SCU” or “648II A16/DOME” cards. Properties: – 648 A16/SCU: alarm interface card with 8 serial TTY/CL (20mA) interfaces for connecting PTZ drive control and 16 alarm inputs per card – 648II A16/DOME: alarm interface card with 1 serial RS485 bus interface (RS422-Simplex) and 16 alarm inputs per card Standard equipment ex factory: Standard equipment ex factory of the first alarm/PTZ interface is one A16/DOME card, supplying: – 16 alarm inputs – 8 RS485 outputs for controlling dome cameras. One protocol per card is select- able by parameterization. Maximum Configuration: – 64 alarm inputs – 2 x 8 RS485 outputs with two selectable protocols (one per card) for controlling dome cameras 22 07.2015 – 2 x 8 TTY outputs for drive control units Advices for Configuration: If both, A16/SCU and A16/DOME cards are required (e.g. if both, drive control units and domes must be controlled), the following is to be regarded: – A16/SCU modules must always be positioned after the last A16/DOME. – If more than one A16/SCU modules are to be installed, use jumpers to configure the first one as "master" and the following ones as "slave". – The A16/SCU module uses always telemetry port 1, whereas A16/DOME mod- ules can be switched to telemetry port 1 or 2 using jumpers. – By programming, configure telemetry port 1 to "SCU", and telemetry port 2 to the desired dome type. Do not connect –TX to GND. This would short-circuit negative operating voltage to GND and put unnecessary load on the power supply unit. CAUTION Fig. 11 View onto socket side “ALARM x-xx / PTZ” A16 SCU/ A16 Dome Pin 1 2 3 4 5 6 7 8 9 10 11 12 13 14 15 16 17 18 19 A16 SCU A16 Dome Function alarm input Pin Function TTY Function RS 485 (TX) Alarm input Alarm input Alarm input Alarm input Alarm input Alarm input Alarm input Alarm input Alarm input Alarm input Alarm input Alarm input Alarm input Alarm input Alarm input Alarm input GND GND GND 20 21 22 23 24 25 26 27 28 29 30 31 32 33 34 35 36 37 –TX TTY 1 +TX TTY 1 –TX TTY 2 +TX TTY 2 –TX TTY 3 +TX TTY 3 –TX TTY 4 +TX TTY 4 –TX TTY 5 +TX TTY 5 –TX TTY 6 +TX TTY 6 –TX TTY 7 +TX TTY 7 –TX TTY 8 +TX TTY 8 GND GND 1 2 3 4 5 6 7 8 9 10 11 12 13 14 15 16 –TX 1 +TX 1 –TX 2 +TX 2 –TX 3 +TX 3 –TX 4 +TX 4 –TX 5 +TX 5 –TX 6 +TX 6 –TX 7 +TX 7 –TX 8 +TX 8 GND GND Tab. 5 Pin allocation for the Alarm 37-pin Sub-D socket bar Technical data and pin assignment are identical to the alarm input modules of the SIMATRIX 648. 23 07.2015 4.2.3.2 Connection of TTY PTZ camera to ‘ALARM x-xx/PTZ ’(optional module 648 A16SCU) The PTZ unit can be directly connected to the 37-contact sub-D socket "ALARM x/SCU" of the SIMATRIX 648 II as follows. Fig. 12 Connection of TTY input to TTY (20-mA) interface 4.2.3.3 Daisy chain connection of several PTZ camera units Fig. 13 Daisy chain connection of several TTY inputs / outputs 24 07.2015 4.2.4 Connection of Alarm Lines In the field alarm lines can be a combination of alarms. One contact from this line can be connected to the SIMATRIX 648 II alarm inputs. Principally every dry contact can be used to initiate an alarm event on the SIMATRIX. If an alarm occurs one or more cameras can be switched to one or more dedicated alarm monitor(s) automatically. The SIMATRIX 648 II can process alarms from alarm lines operating as NC or NO contacts. This is set using the parameterization software. 4.2.4.1 Alarm Line to "ALARM x/PTZ" Alarm contacts or alarm lines must be connected to the 37-contact sub-D socket "ALARM x/SCU" as follows: See Section 4.2.3 for the assignments of the 37-contact sub-D socket. Fig. 14 Connection of alarm line to "ALARM x-xx/PTZ" The maximum distance of the alarm line from the SIMATRIX 648 II is 10 m. 4.2.5 Assignments of Sub-D Plugs COM 2, COM 3 and COM 4 The Sub-D plug „COM2“, „COM3“and „COM4“are interfaces with RS232. Pin Sub-D plug COM2 Sub-D plug COM3 front panel rear panel Sub-D plug COM4 rear panel RX COM2 TX COM2 RX COM3 TX COM3 RX COM4 TX COM4 GND GND GND 1 2 3 4 5 6 7 8 9 Tab. 6 Assignments of COM 2, COM 3, COM 4 25 07.2015 4.2.5.1 External Computer at COM 2, COM 3 or COM 4 In the following Fig shows the connection of the SIMATRIX 648 II (COM 2, COM 3, COM 4) to a computer with a 9-pin or 25-pin sub-D plug for the V.24 interface: Fig. 15 Connection of PC with a 25pin sub-D plug to COM 2, COM 3, COM4 Fig. 16 Connection of PC with a 25pin sub-D plug to COM 2, COM 3, COM4 NOTE! 4.2.6 Only the shown conductors must be connected! LAN interface The 100Base-T LAN connector (specified in accordance with IEEE802.3) on the front offers the following functionalities: – connecting LAN-based operating devices (SUT 50 LAN) (see Appendix 10.3) – programming via LAN ( No more serial port on actual laptops ) – Web interface for diagnosis and simple test of input to output switching. – Firmware flash update possible (see 6.5.2) – control by a management system (e.g. SDC system) 26 07.2015 4.3 Connection of Video Inputs Connect video inputs to the BNC sockets that are labeled Video Input 1 Vss / 75 Ohm. Video sources that are compatible with the SIMATRIX 648 II provide a PAL/CCIR video signal at a voltage of 1VSS and an input impedance of 75 W. Up to 16 video sources can be connected to the BNC sockets per input unit. Each video input terminates in a 75 W feed-through jumper. The plug-in jumpers are located on the PCB next to the appropriate BNC socket. 4.3.1 Video signal requirements The incoming video signal must satisfy the standards defined in the norms (1.0 Vss, 300 mV) for problem-free synchronization with good image quality and to allow text overlay from the SIMATRIX 648 II. The incoming video signal must at least satisfy the following requirements: The amplitude of the synchronization pulse at each video input must be 0.3 V. The peak amplitude of the video signal at each video input must not exceed 1.0 VSS. In the case of color cameras, the burst level at the video input must not exceed 300 mV. If the video pulse level is too low, a cable equalizer must be wired in at the video source. This device must then be set to boost the signal to the levels specified above. 4.4 Connection of Video Outputs Connect monitors, image recording devices or grabber cards to the BNC sockets that are labeled Video Output 1 Vss / 75 Ohm. NOTE: If the signal leads are too long, a cable equalizer must be wired in at the monitor. 4.5 Mains connection If the outer casing of the video matrix device shows signs of damage, do not proceed with electrical connection! Caution If the local electricity supply lies between 115 and 230 VAC (+10% / -15%) at a frequency of between 50 Hz and 60 Hz, the video matrix can be connected to the mains by plugging the mains connection cable into a wall socket in the supply network. Plug the mains connection cable into the video matrix first. The wall socket must be installed in an easily accessible place close to the SIMATRIX 648 II. 27 07.2015 4.6 Extension with SIMATRIX 648 II NOTE: Connection, commissioning and repair must only be carried out by sufficiently qualified staff. Reliable and safe operation of this equipment is dependent on correct transport, storage, installation and assembly, as well as careful operation and maintenance. Do not use the equipment if external damage is visible. Only carry out extensions when the SIMATRIX 648 II is switched off. 4.6.1 Extension of the video inputs with input module “648 II VME 16” 1 Unpack the SIMATRIX 648 II. 2 Unscrew the top cover (2 screws each on the left and right sides). 3 Fit the input modules (16/8) individually from bottom to top. 4 Secure the input modules from the rear using the 4 countersunk screws. 5 Connect the ribbon cable to the input modules. 6 Set the addresses of the input modules (see also component mounting diagram). Fig. 17 6-way sliding switch S1 for setting the address of the input module Tab. 7 Switch segment input module 7 Screw on the top cover again (2 screws each on the left and right sides). 8 Switch on the equipment, adapt the parameter settings to the modified hardware, and check that everything is functioning correctly. 28 07.2015 4.6.2 Extension of the video outputs with output module “648 OSD Text” The output module consists of 1 plug-in module for extension of the basic system by one additional video output (up to 4 output modules) to a total of 8 video outputs. Fig. 18 Extension module Mounting instructions Fig. 19 Mounting instructions output module 1 Unpack the SIMATRIX 648 II; if it has been installed already unplug the power cord. 2 Unscrew the top cover (2 screws each on the left and right sides). 3 Select the module location: 4 output modules are already inserted in the module locations VMA1 to VMA4. The module locations VMA5 to VMA8 are provided for the extension modules. 4 Plug the modules into the sockets in upright position carefully. Make sure the plug connector is inserted into the socket correctly! 5 Screw on the top cover again (2 screws each on the left and right sides). 6 Switch on the equipment, adapt the parameter settings to the modified hardware, and check that everything is functioning correctly. 29 07.2015 4.6.3 4.6.4 Extension of interfaces of the terminals (interface card for terminals „648 Term 2” 1 Unpack the SIMATRIX 648 II 2 Unscrew the top cover (2 screws each on the left and right sides). 3 Unscrew the interface card for terminals (1-2) (MASTER) using a SW4 socket spanner. 4 Plug the second interface card for terminals (3-4) (SLAVE) onto the side of the MASTER interface card for terminals (1-2). 5 Screw into the rear panel as a complete unit (interface card for terminals MASTER + SLAVE) using the 8 screws of the 9-contact Sub-D sockets (terminal sockets). 6 Screw on the top cover again (2 screws each on the left and right sides). 7 Switch on the equipment, adapt the parameter settings to the modified hardware, and check that everything is functioning correctly. Extension of the TTY control outputs and alarm inputs with interface card “648 A16/SCU” or “648 II A16/Dome” 1 Unpack the SIMATRIX 648 II 2 Unscrew the top cover (2 screws each on the left and right sides). 3 Set the address of the interface card ALARM/SCU (see also component mounting diagrams OFF ON 3 1 4 5 6 7 8 2 Fig. 20 8-way sliding switch S1 for setting the address of the interface card Tab. 8 Switch segment A16/SCU or A16/Dome 4 Unscrew the interface card ALARM/SCU 1-16 (MASTER) which is already installed using a SW4 socket spanner. 5 Plug the second interface card ALARM/SCU 17-32 (SLAVE) onto the side of the interface card ALARM/SCU 1-16 (MASTER), etc. . 30 07.2015 Setting-up for Operation 6 Fit into the guide as a complete unit (ALARM/SCU MASTER + n x ALARM/SCU SLAVE), insert all screws of the 37-contact Sub-D plug into the rear panel, and screw hand-tight using the socket spanner. 7 Screw on the top cover again (2 screws each on the left and right sides). 8 Switch on the equipment, adapt the parameter settings to the modified hardware, and check that everything is functioning correctly. Advices for Configuration: If both, A16/SCU and A16/DOME cards are required (e.g. if both, drive control units and domes must be controlled), the following is to be regarded: A16/SCU modules must always be positioned after the last A16/DOME. If more than one A16/SCU modules are to be installed, use jumpers to configure the first one as "master" and the following ones as "slave". The A16/SCU module uses always telemetry port 1, whereas A16/DOME modules can be switched to telemetry port 1 or 2 using jumpers. By programming, configure telemetry port 1 to "SCU", and telemetry port 2 to the desired dome type. 5 Setting-up for Operation 5.1 Power Supply – The device is only provided for operation in TN networks (according to VDE 0100, part 300 or EN 60950-1). For safe operation the device must be protected by an external overcurrent protection rated no more than 16 A. – It is not allowed to use the device in IT networks, i.e. networks without an (insulated) earth lead, or impedance-earthed leads. – The device may be connected to electrical supplies with voltages of 115 or 230 VAC (+10% / -15%) at 50/60 Hz – Only use power cords complying with local permissions or regulations – For connecting the device to the electric power supply, an external insulator must be used for interconnection. The insulator must be installed in an easily accessible place close to the device. Notice for Norway and Sweden: "Utrustning som är kopplad till skyddsjord via jordat vägguttag och/eller via annan utrustning och samtidigt är kopplad till kabel-TV nät kan i vissa fall medföra risk för brand. För att undvika detta skall vid anslutning av utrustningen till kabel-TV nät galvanisk isolator finnas mellan utrustningen och kabel-TV nätet." 31 07.2015 Setting-up for Operation 5.1.1 Environmental Conditions – Comply with the environmental conditions specified by the manufacturer – operating temperature: + 5C to 45C – relative humidity: 30 to 85 %, non-condensing – Protect the device from moisture and fluids – Position the device in a way that grants sufficient air supply – Pay attention to keep the air duct unblocked – Do not expose the device to direct thermal radiation (e.g. heating devices) – Do not operate the device in very dusty environments – Do not operate the device in the neighbourhood of a strong source of electromagnetic waves – Do not expose the device to mechanical shock Danger of life by electric shock Warning Before opening the device, disconnect plug from mains! – Do not connect the device if it is damaged or any parts are missing. – Connect the cameras – Connect the monitors – Connect the keyboards – Connect any other devices Or, if applicable, connect system extensions and any other devices. – Connect the control PC Connect the control PC to COM2, COM3 or COM4 using the null-modem cable. Or connect 648 II via switch / LAN crossover cable with control PC. – Connect the SIMATRIX 648 II to the electrical supply Switch on the SIMATRIX 648 II; the device will now run through a self-test sequence. The following two messages will appear in sequence on all the monitors that have been connected: 32 07.2015 Setting-up for Operation NOTE: The shown date is the compilation date of the firmware Fig. 21 First message following a system start 5.1.2 Installing the control software and setting device parameters – Install the control software Use the CD supplied with the unit to install the control program. Then start up the control program. – Set the system time in the SIMATRIX 648 II You must start the system's real- time clock if it is not active (No Time! Appears in the display), as otherwise a number of important system functions, such as alarm sequencing, will not be available. Control software: System real-time clock and OSD clocks button – Setting basic parameters Basic parameters button Camera and monitor settings – Setting basic alarm parameters Basic alarm parameters button Alarm sensor settings – Setting camera labels Camera texts button – Test cameras, monitors and keyboards Remote control and message receive button – Alarm sensor to camera allocation Alarm lines and camera groups button – Further programming If applicable, enter further parameters in order to tailor the function of the SIMATRIX 648 II to suit individual operating needs and the rest of the system. – Make a back-up of the parameter settings and store the back-up close to the system in a safe place. 5.1.3 Standard parameterization of the SIMATRIX 648 II The SIMATRIX 648 II is factory-set with standard parameter settings (alarm program 2). Alarms can therefore be immediately received and processed. The termi33 07.2015 Setting-up for Operation nals and the IVM PCs can be used to switch cameras and to control cameras with a pan-and-tilt drive and lens control. Please proceed as described in the parameterization instructions in order to load a program or to modify the parameters of a loaded program. 34 07.2015 Operation 6 Operation All the example setups delivered with the parameterization are suitable for the following system configurations: – Serial SDC/IVM systems (on COM2, COM3, COM4) – 2 keyboards with standard key layout (see below) – 16 Cameras with pan/tilt and lens drives (PTZ) – 16 PTZs with position control – 32 Alarm inputs Fig. 22 Keyboard 1 (key layout SUT 50; monitors 1 to 4) Fig. 23 Keyboard 1 (key layout CKAxx; monitors 1 to 4) The labels should be removed from any keys that are not required for keyboards 2 to 4. . 35 07.2015 Operation 6.1 Basic program No alarm processing takes place in the basic program. The description of the basic program below also applies to alarm program 2. The keyboard has a 10-digit keypad and a function pad with 22 grey keys. Number sequences of up to 3 digits can be entered using the digit keypad. All the functions are entered using one of the grey function keys. 6.1.1 Manual camera image display on a monitor 6.1.1.1 Using keyboard 1 (master device) A set key sequence entered via keyboard 1 allows the image from each camera to be switched to each monitor. Key sequence: – Enter the camera number using the digit keys(X).The word Entry and the en- tered camera number will appear on monitor 1. – Select the monitor of your choice by keying MON Y (e.g. MON 2 for monitor 2). The selected monitor will display the image of the selected camera. The display on monitor 1 will go blank. If no monitor key is pressed, the display on monitor 1 will go blank after about 5 seconds. 6.1.1.2 Using keyboards 2, 3 and 4 When using keyboards 2, 3 and 4, it is only possible to display the image from the chosen camera on the monitor that has been allocated to the keyboard in question. Key sequence: – Enter the camera number using the digit keys(X). – The word Entry and the entered camera number will appear on monitor 1. – Select the monitor of your choice by keying MON Y (e.g. MON 2 for monitor 2). 6.1.2 Starting and stopping a camera image sequence 6.1.2.1 Using keyboard 1 (master device) Key sequence: – Start the desired picture cycle by pressing a SEQ key, e.g. SEQ 2. – Stop the sequence by manually switching a camera to this monitor or by pressing the associated monitor key, e.g. MON 2. The monitor screen will go blank. 36 07.2015 Operation 6.1.2.2 Using keyboards 2, 3 and 4 When using keyboards 2, 3 and 4, it is only possible to start a camera sequence that has been allocated to the keyboard in question. Key sequence: – Start the picture cycle using the SEQ key. In the case of keyboard 2 this would be SEQ 2. – Stop the sequence by manually switching a camera to this monitor or by press- ing the monitor key, e.g. MON 2. The monitor screen will go blank. 6.1.3 Controlling cameras with pan/tilt and lens drives It is possible to remotely control cameras with pan/tilt and lens drives manually. This always applies to the camera that was last selected using the keyboard. Key sequence: – Use the ← → ↑ ↓ keys or the joystick to tilt the camera horizontally or vertical- ly. – Adjust the focal length using the Z+ and Z– keys – Use the 6.1.4 ∞ and 0 keys to adjust focus. Position control If the camera head drive incorporates a position control facility (e.g. CDC0402 or SCU-302) the camera can be moved to preset positions. In the case of keyboard 1, this applies to the camera that is currently switched to monitor 1. In the case of the other keyboards, this always applies to the camera that was last switched to monitor in question. Key sequence: – Enter the number of the desired position using the digit keys(X). – Press P. 6.1.5 Camera image sequences A password is required to set or change camera sequences (factory setting is 1234, refer to the programming manual to change this setting). The password must be entered to enable storing or changing of camera image sequences. When finished, you must re-establish password protection. 37 07.2015 Operation 6.1.5.1 Revoking password protection for camera image sequences Key sequence: – Enter digit 1 and 2 of the password. – Press the Alarm ON key – Enter digit 3 and 4 of the password. – Press the Alarm ON key. The monitor will display the following instruction: Password You can now enter new sequences or make changes. 6.1.5.2 Re-establishing password protection When you have finished entering a new sequence or making changes, you must re-establish password protection to prevent unauthorized intervention. Key sequence: – Enter 254 – Press the Alarm ON key. The on-screen instruction, Password, disappears. 6.1.5.3 Camera image sequence using keyboard 1 (master device) Camera image sequences for monitors 1 to 4 can be stored using keyboard 1. Key sequence: – Enter the camera number using the digit keys (X). – Select the monitor of your choice by keying MON Y (e.g. MON 2 for monitor 2). The selected monitor will display the image of the selected camera. – Enter the number of the monitor (Y) where you want to display the camera im- age sequence. – Add the camera to the chosen camera image sequence by keying SEQ + C. Deleting a camera from a camera image sequence Key sequence: – Enter the camera number using the digit keys (X). – Select the monitor where you want to display the camera image sequence by keying MON Y (e.g. MON 2 for monitor 2). – Delete the camera from the chosen sequence by keying SEQ - C. 38 07.2015 Operation 6.1.5.4 Camera image sequence using keyboards 2, 3 and 4 When using keyboards 2, 3, 4, it is only possible to enter or change a camera image sequence for the current monitor. Key sequence: – Mit den Zifferntasten (X) die Kameranummer eingeben. – Enter the camera number using the digit keys (X). – Key in MON Y (e.g. MON 2 for monitor 2). The camera image from the chosen camera appears on the monitor. – Enter the number of the monitor (Y), to which the keyboard has been allocated (e.g. 2 for monitor 2). – Add the camera to the chosen camera image sequence using the SEQ + key Deleting a camera from a camera image sequence Key sequence: – Enter the camera number using the digit keys(X). – Key in MON Y (e.g. MON 2 for monitor 2). – Delete the camera from the chosen sequence using the SEQ - key. 6.1.6 Entering or changing positions Position control of the camera panning drives and lens drives is only possible if each panning drive and lens drive has been initialized during initial system set-up (see programming manual). The keyboards can be used as follows to set, change and store positions for cameras with pan/tilt drives and with lens drives: – Keyboard 1: for the camera switched to monitor 1 – Keyboards 2, 3 and 4: for the camera that was last switched to the monitor Key sequence: – Move the panning drive and lens drive of the selected camera to the desired po- sition by pressing the ← → ↑ ↓ Z– Z+ 0 ∞ keys. – Enter the position number using the digit keys (Z). – Press S to store the position. This saves the position for the corresponding camera head drive to memory, allowing it to be retrieved whenever required (see chapter 6.1.4). 39 07.2015 Operation 6.1.7 Makros The SIMATRIX 648 II can store four macros, which can then be recorded using a keyboard. The stored macros can be triggered through keyboard operation, by a time threshold or an alarm contact. Macros allow automation of complex special functions. Commands for camera head drives cannot be used in macros. Please refer to the description of the configuration program for more details relating to macro programming. 6.1.7.1 Recording a macro For SIMATRIX 648 II, the macros are defined during configuration. Up to 32 macros with 48 functions each can be defined. 6.1.7.2 Executing a macro Depending on the way you have configured macro operation, either press the predefined macro hotkey or enter the macro number and press Macro. 6.2 Alarm program 2 (factory setting) The same operating options offered by the basic program are also available in the alarm programs. Alarm program 2 also offers the operating options that have been described for the basic program. Alarm processing is offered as an addition feature. A detection group feature is included for each camera input. This program allows sequencing of 48 cameras, which are each identified as the next in sequence camera relative to a previous camera Example: – Camera that triggers the alarm: camera 15 – Next in sequence camera: camera 14. The configuration details must be changed as indicated in the programming manual if less than 48 cameras are installed or other sequences are required. Detection groups can be activated and deactivated using a password. The detection group table can be retrieved at any time by pressing the Alarm ON key. The table disappears when the Alarm ON key is pressed again. If the SIMATRIX 648 II has been installed in combination with the Siemens TELEMAT video alarm system, the zone from which the alarm originates will be highlighted in the alarm image when an alarm is triggered. Acknowledging an alarm will then also reset the TELEMAT system. 40 07.2015 Operation 6.2.1 Alarm processing in alarm program 2 Alarm can be processed as follows: – When an alarm is triggered, the alarm image (camera image of the zone from which the alarm originates) appears on monitors 1 and 4 along with the text ALARM! – The alarm can be acknowledged (turned off) by keying MON 1. The original images will now appear on the monitors. – if a second alarm is triggered before the first alarm can be acknowledged, the second alarm image will appear on monitor 2. – Each additional alarm image will overwrite one of the alarm images on display, so that monitors 1 and 2 always display the most recent two alarm images. – If two or more alarm images are active simultaneously, they will all appear as an alarm image sequence on monitor 4. Fig. 24 Display of two alarm images AB AB1-AB2 Kx S A VTR: 1 Alarm image Alarm image display on monitors 1 and 2 Selected camera image sequence on monitor 3 Alarm image sequence on monitor 4 Video recorder for gap-free alarm image recording from output 4 – The alarm displays on monitors 1 and 2 can be acknowledged. The oldest, next in-sequence image will then appear on the monitor where the image has just been acknowledged. When this alarm image is acknowledged, the next oldest alarm image appears, etc. – Monitor 3 is still available to switch cameras manually or to play the automatic image sequence. – A video recorder connected to output 4 starts up automatically at the first alarm signal. It records the images that appear on monitor 4. – The recorder stops when the last alarm is acknowledged or switches to the pre- set long-term recording setting. 41 07.2015 Operation 6.2.1.1 Revoking password protection for detection group activation Key sequence: Enter digit 1 and 2 of the password. – Press the Alarm ON key – Enter digit 3 and 4 of the password. – Press the Alarm ON key. The monitor will display the following instruction: Password – You can now make changes. . 6.2.1.2 Re-establishing password protection When you have finished making changes, you must re-establish password protection to prevent unauthorized intervention. Key sequence: – Enter 254 – Press the Alarm ON key. The on-screen instruction, Password, disappears. 6.2.1.3 Activating detection groups Key sequence: – Press the Alarm ON key 42 07.2015 Operation The following alarm input table appears on the monitor (example): Fig. 25 Detection groups table Key sequence: – Mit den Zifferntasten die Nummer der Meldegruppe eingeben, die aktiv geschal- tet werden soll. Auf dem Monitor erscheint der Text Eingabe und die eingegebene Nummer. – Enter the number of the detection group that you want to activate. The word Entry and the entered number will appear on the monitor. – Press the Alarm ON key. The monitor displays the table with a plus sign at the side of the active alarm input. Activating all alarm inputs simultaneously – Enter 255 to simultaneously activate all the alarm inputs – Press the Alarm ON key. The following table appears on the monitor 43 07.2015 Operation Fig. 26 Detection groups table: all groups activate 44 07.2015 Operation 6.2.1.4 Deactivating detection groups Key sequence: – Press the Alarm ON key. The following alarm input table appears on the monitor (example): Fig. 27 Detection groups table Key sequence: – Enter the number of the detection group that you want to deactivate. The word Entry and the entered number will appear on the monitor. – Press the Alarm OFF key. The monitor displays the table with a minus sign at the side of the activated alarm input. 45 07.2015 Operation Deactivating all alarm inputs simultaneously – Enter 255 and press the Alarm OFF key. The following table appears on the monitor: Fig. 28 Detection groups table: all groups deactivated (see programming manual) 6.3 Switching system time to summer/normal time settings The system time in the SIMATRIX 648 II can be switched to summer time, or switched back to normal time. Repeating the key sequence switches between summer and normal time Key sequence: You can check that the setting has been changed successfully in the camera text display. Alternatively, you can use the configuration program to set the system time in the PC connected to the SIMATRIX 648 II as the system time in the video matrix unit. 46 07.2015 Operation 6.4 Resetting and initial system boot Should the system become inoperable due to programming errors, it can either be reset or rebooted to the delivery configuration, in which alarm program 2 is active. 6.4.1 System reset So setzen Sie die Anlage zurück: – Press the red R (Reset) button on the rear of the SIMATRIX 648 II for a few se- conds, Resetting has the same effect as pulling out the mains plug and then turning the device back on. Fig. 29 Reset / Load 6.4.2 Rebooting the system (to alarm program 2 factory settings) All user-defined settings will be lost when a system reset is performed. We recommend that you back-up all configuration data before resetting. – Press in and hold down the green Load button on the back of the SIMATRIX 648 II. – Next, briefly press the red Reset button while keeping the green Load button depressed. – Release the green Load button. You have successfully rebooted the system. Caution Next, reset the system again using the red Reset button, or switch off by pulling out the mains plug and turn the device back on. 47 07.2015 Operation 6.5 Network configuration and firmware update 6.5.1 Configuring the network with „VMnetCfg“ With the tool “VMnetCfg” you can configure the network parameters of SIMATRIX 648 II and of the SUT50/SUT2 LAN control units. To configure the network parameters: Open the file VMnetCfg.exe. The window that opens provides the buttons Automatic Search and Manual Search, as well as a list of all the SIMATRIX clients in the network. The appearance of the search area partly depends on the net mask settings on the configuration PC used. (Should be in the same network segment) Fig. 30 Client Enquiry The Manual Search button is needed only if the client to be configured or updated is not within the local network and can only be reached via a router or gateway. – Click on Automatic Search. All the SIMATRIX clients that are available in the local network will be displayed in the list. – Click on the desired client in the list. The display window is expanded to a second pane showing the network configuration of the selected client, which can now be edited. 48 07.2015 Operation Fig. 31 Network configuration – To download the changes you have made to the client, click Update client. – To terminate the connection without making any changes, click Abort Connec- tion. 6.5.2 Updating the firmware with „VMnetCfg“ Updating the firmware 1. Open the file VMLANcfg.exe. 2. Click on the desired client in the list. 3. Click on Firmware Update. The update window opens. Fig. 32 Firmware Update 49 07.2015 Operation 4. Click on Browse to search and load the update file. Once the file has been loaded, the content and version of the update file are displayed in the Firmware Info window. 5. Click on Start firmware update. The update is started; it will take about 30 seconds, and the progress is displayed by a progress bar. When the update is completed successfully, a message will appear on the display. This message will remain on the display until one of the menu buttons is pressed. Network configuration and firmware update will not be possible when the write protection mode of the SIMATRIX client is activated (see next Section: Activating write protection for network configuration and firmware update). 6.5.3 Activating write protection for network configuration and firmware update A write protection can be activated to protect the network configuration settings and the firmware of SIMATRIX 648 II against unauthorized access. Activate write protection Press the green "Load" button (next to the "Reset" button at the rear of SIMATRIX 648 II) for approx. 5 to 10 seconds. Deactivate write protection Press the green "Default" button (next to the "Reset" button at the rear of SIMATRIX 648 II, Section 5.4.1) for approx. 5 to 10 seconds. In the delivery configuration the write protection is not activated, which means that the network configuration settings can be changed and a firmware update be made via the network at any time. 50 07.2015 Operation 6.6 Webserver The integrated web server in the SIMATRIX 648-II allows a status check and simple switching from a web browser. For this you have to put in the IP address of the SIMATRIX (can be seen with vmnet_cfg) in your internet-browser. - Main Status - Hardware: Internal supply voltages, mainboard temperature, alarm inputs and video inputs. - Terminals: Status of connected operating devices ( LAN or serial ) - Communication: Status of serial communication ports - Switchboard: Switching of video inputs to outputs for test of signals. - System log: Protocol of system events Fig. 33 Webserver 51 07.2015 Maintenance 7 Maintenance 7.1 General – Only replace a defective fuse by a fuse of the same type, size, and rating Danger of life by electric shock Warning Even after fuse interruption there can be dangerous voltage inside the device (double-pole fuse/fuse in neutral) Before maintenance, disconnect device from mains – Modifications of the device are only allowed as far as they are mentioned in this document or explicitly allowed by the manufacturer – Use only spare parts and accessories approved by the manufacturer – In the event of breakdown, we recommend you contact your local Siemens branch for service and support. – The mains supply voltages and secondary voltages are fused as follows: – Electrical supply – Fuses 7.2 115 / 230 VAC (+10% / -15%), 50 / 60 Hz 2 x T 1,6 A 250 V Cleaning – For cleaning, use only a clean and dry cloth Danger of electric shock while cleaning Do not use liquid cleaning agents or sprays Warning 8 Transport and Storage – Keep the original device packaging for later transports – Do not expose the device to mechanical shocks 9 Accessories with order details Bestellbezeichnung Kurzbeschreibung VKS 648 II SIMATRIX 648 II VKS 648 SIMATRIX 648 9-248.8 VKS OSD-TEXT 9-270 648 Term 2 9-248 648 A16/SCU 9-275 648 II A16/Dome 9-274 648II VME 16 Tabelle 1 Zubehör mit Bestellbezeichnung 52 07.2015 Appendix 10 Appendix 10.1 Technical data Video Video inputs Video outputs Video signal failure recognition Text overlay BNC sockets Uss=1V video, 75 Ω, with plug-in jumpers and switchable terminations BNC sockets Uss=1V video, 75 Ω Vertical synchronisation pulse monitoring Complete IBM character set, internal synchronization, character display: white background, black frame Field size: 12 text lines of 24 characters each Character height: 18 screen lines Cross-talk attenuation 52 dB bei 5 MHz Differential amplification 1% Differential phase 01,5 Frequency response characteristic - 0,5 dB bei 6 MHz Switching point change-over time after command signal reception at the video matrix 80 ms (typical), 200 ms (max.) Control Control computer 1 ARM7-TDMI-Prozessor, 1 RISC-Controller Interfaces for - Parametrier-PC, IVM, TELEMAT, SIPASS, LMS 3 x V.24 interfaces Baud rate: 1200 – 19,200 bit/s Connection: 3 x 9-pin Sub-D connectors - Keyboards max. 4 x TTY(20mA) interfaces with built-in electrical supply for 8 keyboards, (supply max. 800mA total) Cable length: up to 2 km, wire diameter 0.8 mm Baud rate: 1200 – 9600 bit/s Connection: 4 x 9-pin Sub-D connectors - PTZ control (CDC) max. 32 x CDC(20mA) interfaces Cable length: up to 2 km, wire diameter 0.8 mm Baud rate: 1200 – 9600 bit/s Connection: 2 x 37-pin Sub-D socket - Control of telemetry devices max. 2 x RS422/RS485-Ports; Protocols: CCDA, SCU, SIVIS, PELCO-D Connection: 2 x 37-pin Sub-D socket - Sensor groups Alarm sensors, alarm contacts max. 64 x alarm inputs for detection groups Cable length: up to 10 m Connection: 2 x 37-pin Sub-D socket - Video recorder, Picture storage 8 control outputs (open-collector); max. 30 V, max. 50 mA, Relay with 2 voltage-free change-over contacts for collective alarm signaling; max. 48 V, 250 mA; Connection: 1 x 25-pin Sub-D socket - LAN / Ethernet 8P8C modular plug (RJ45) with 10/100 Base-T Ethernet port for configuration via network, connection of LAN components, status request via integrated Web server Power supply 115 – 230 V AC, tolerance: +10%/-15% Switching power supply, 50 to 60 Hz The mains socket is fitted with two micro fuses (1.6 A slow-blow) Power requirement Maximum system size: 30 VA Operating temperature 5 to 45 °C Relative humidity 30 to 85 %, non-condensing Dimensions (w x h x d, chassis without 19”mount) 427 mm x 133 mm x 210 mm (B x H x T), 3 U module rack Tab. 9 Technical data 53 07.2015 Appendix 10.2 Glossary Alarm image switching Alarm image sequence Alarm sequence Auto reset Image sequence Dome cameras CCDA CCTV External detection group Group switching IVM-NT LMS Manual reset An alarm image appears on the monitor until it is acknowledged All as yet acknowledged alarm images are shown repeatedly in sequence on a monitor alarm image sequence See The alarm image disappears from the monitor, as soon as the alarm signal resets. See also manual reset and stack reset Images from several cameras can be switched to a monitor in sequence. The image sequence can be started or stopped by a key on the keyboard. Alternatively, the system can be configured to display preset camera images upon start-up. Ceiling-mounted, rapid-response, remote control camera with a lens drive system. Housed in a glass dome. Siemens dome cameras Closed Circuit Television, independent television system in a delimited area A key on the keyboard is used to switch the images from a camera group to a group of monitors.Video Management System Integrated Location planning system As opposed to auto reset. The alarm image remains on display when the alarm signal resets. Alarm events that have already been displayed are overwritten without being stored in memory. See also auto reset and stack reset Pelco D 3rd party supply dome camera Serial switching, stepped switch- When several alarm images are switched simultaneously, the most recent alarm iming age is displayed on all monitors in turn. This only applies to monitors that have been configured for alarm image switching. transfer switching The most recent alarm image is always displayed on the primary monitor (master monitor) in the monitor group. When several alarm images are displayed simultaneously, the less recent images are transferred to the other monitors. SCU protocol Protocol for controlling telemetry devices SISTORE NT Image storage system Sivis Minidome Siemens dome cameras Stack alarm New alarm images overwrite old alarm images (manual and auto reset) Stack reset As manual reset, but the alarm events are saved to memory before being overwritten by new alarm events. See also auto reset and manual reset SysLink Serial system bus. Allows connection of the extension bay and alarm box TELEMAT MD/MTD Video sensor that recognizes motion in the camera image Time-lapse operation Long-term recording of individual images 54 07.2015 Appendix 10.3 LAN Operating Device SUT 50 The SUT50 Operating Device is a keyboard with joystick and display. It can be used for controlling camera heads and domes as part of a SIMATRIX or VM1000 video matrix system. The robust, powder coated metal case with its simple but enduring design fits for both, harsh operating conditions and prestigious entrance halls. The robust joystick allows proportional control of camera PTZ via video matrix. Fig. 34 SUT 50 10.3.1 Device Features Programming of the operating device is performed by means of keys and joystick “POE” version also over LAN with VMnetCfg. – Operating device with 41 keyswitches and multifunctional proportional-joystick – serial interface (adjustable for TTY/CL, RS485, and RS232) – Ethernet connector – Power over the LAN (PoE – „Power-over-Ethernet” according to IEEE 802.3af) – The LCD display shows the user inputs and programming information. – Can be individually labeled with text plates and correspondingly programmed via video matrix system – Alarms from the video matrix system are signalized optically and acoustically by an indicator lamp and a buzzer. – Can be locked by a password 10.3.2 LAN connection of SUT 50 to SIMATRIX 648 II Up to 8 SUT-50 keyboards can be connected over LAN. The communication uses UDP/IP with the port 7000. Connection is easily be done by entering the IP addresses of keyboard an SIMATRIX 648-II. This can be done with the onboard configuration or with the vmnet_cfg tool. 55 07.2015 Appendix 10.4 List of illustrations: Fig. 1 System configuration............................................................................................................... 10 Fig. 2 Video monitoring system with SIMATRIX 648 II as control center ..................................... 14 Fig. 3 Schematic representation of the serial display mode (stepped switching) ....................... 16 Fig. 4 Interfaces on the front panel ................................................................................................... 17 Fig. 5 Interfaces on the rear panel (basic configuration) ............................................................... 18 Fig. 6 Rear view of the SIMATRIX 648 II ........................................................................................... 20 Fig. 7 View onto socket side ‘ALARM-OUT’ ..................................................................................... 20 Fig. 8 Relay switching ........................................................................................................................ 21 Fig. 9 Connection of terminal to terminal socket 1-2 ...................................................................... 21 Fig. 10 Connection of terminal to terminal socket powered via an external plug type power supply unit .................................................................................................................. 22 Fig. 11 View onto socket side “ALARM x-xx / PTZ” ........................................................................ 23 Fig. 12 Connection of TTY input to TTY (20-mA) interface ............................................................. 24 Fig. 13 Daisy chain connection of several TTY inputs / outputs ................................................... 24 Fig. 14 Connection of alarm line to "ALARM x-xx/PTZ" ................................................................. 25 Fig. 15 Connection of PC with a 25pin sub-D plug to COM 2, COM 3, COM4 ............................... 26 Fig. 16 Connection of PC with a 25pin sub-D plug to COM 2, COM 3, COM4 ............................... 26 Fig. 17 6-way sliding switch S1 for setting the address of the input module .............................. 28 Fig. 18 Extension module .................................................................................................................. 29 Fig. 19 Mounting instructions output module ................................................................................. 29 Fig. 20 8-way sliding switch S1 for setting the address of the interface card ............................. 30 Fig. 21 First message following a system start ............................................................................... 33 Fig. 22 Keyboard 1 (key layout SUT 50; monitors 1 to 4) ............................................................... 35 Fig. 23 Keyboard 1 (key layout CKAxx; monitors 1 to 4) ................................................................ 35 Fig. 24 Display of two alarm images ................................................................................................. 41 Fig. 25 Detection groups table .......................................................................................................... 43 Fig. 26 Detection groups table: all groups activate ........................................................................ 44 Fig. 27 Detection groups table .......................................................................................................... 45 Fig. 28 Detection groups table: all groups deactivated (see programming manual) .................. 46 Fig. 29 Reset / Load ............................................................................................................................ 47 Fig. 30 Client Enquiry ......................................................................................................................... 48 Fig. 31 Network configuration ........................................................................................................... 49 Fig. 32 Firmware Update .................................................................................................................... 49 Fig. 33 Webserver ............................................................................................................................... 51 Fig. 34 SUT 50 ..................................................................................................................................... 55 10.5 List of tables: Tab. 1 Ordering Data ............................................................................................................................ 9 Tab. 2 Interfaces on the front panel .................................................................................................. 17 Tab. 3 Interfaces on the rear panel ................................................................................................... 18 Tab. 4 Assignments of sub-D socket ‘ALARM-OUT’ ....................................................................... 20 Tab. 5 Pin allocation for the Alarm 37-pin Sub-D socket bar ......................................................... 23 Tab. 6 Assignments of COM 2, COM 3, COM 4 ................................................................................ 25 Tab. 7 Switch segment input module ............................................................................................... 28 Tab. 8 Switch segment A16/SCU or A16/Dome ............................................................................... 30 Tab. 9 Technical data .......................................................................................................................... 53 56 07.2015 Appendix 10.6 Summary of basic and alarm program features Features Alarm program 1 Alarm program 2 Alarm program 4 Alarm program 5 Alarm program 3 Alarm program 6 Factory setting Devices Cameras 1 to 48 1 to 48 1 to 48 1 to 48 1 to 48 1 to 48 Camera head controls Monitors Keyboards 1 to 48 1 to 4 1 to 4 1 to 48 1 to 4 1 to 4 1 to 48 1 to 4 1 to 4 1 to 48 1 to 4 1 to 4 1 to 48 1 to 4 1 to 4 1 to 48 1 to 4 1 to 4 IVM-NT operating stations TELEMAT 1 to 3 1 to 3 1 to 3 1 to 3 not recommended for IVM-NT not recommended for TELEMAT not recommended for IVM-NT not recommended for TELEMAT using keyboard 1 using keyboards 2, 3 and 4 on monitors 1 to 4 on all monitors on a maximum of 8 monitors on all monitors 48 cameras via a single operating station per CDC using keyboard 1 using keyboards 2, 3 and 4 on monitors 1 to 4 on all monitors on a maximum of 8 monitors on all monitors 48 cameras via a single operating station pro CDC using keyboard 1 using keyboards 2, 3 and 4 on monitors 1 to 4 on all monitors on a maximum of 8 monitors on all monitors 48 cameras via a single operating station pro CDC using keyboard 1 using keyboards 2, 3 and 4 on monitors 1 to 4 on all monitors on a maximum of 8 monitors on all monitors 48 cameras via a single operating station pro CDC using keyboard 1 using keyboards 2, 3 and 4 on monitors 1 to 4 on all monitors on a maximum of 8 monitors on all monitors 48 cameras via a single operating station pro CDC using keyboard 1 using keyboards 2, 3 and 4 on monitors 1 to 4 on all monitors on a maximum of 8 monitors on all monitors 48 cameras via a single operating station pro CDC per camera configured for external detector groups(48) 2 per camera configured for external detector groups(48) 2 per camera configured for external detector groups(48) 2 per camera configured for external detector groups(48) 1 per camera configured for external detector groups(48) 4 per camera configured for external detector groups(48) 2 2 2 1 1 4 4 no no yes monitor 2 yes monitor 2 no yes monitor 2 monitor 4 Alarm image display alarm image 1 on monitor 1 alarm image 2 on monitor 2 . alarm image 1 on monitor 1 alarm image 2 on monitor 2 alarm image 3 on monitor 1 etc. alarm image 1 on monitor 1 and, alarm image 1 on monitor 1 most recent alarm image (highest until acknowledged, on monitor 4. number) on monitor 1 next most recent on monitors 2 to 4 most recentalarm image 1 on monitor 1 alarm image 2 on monitor 3 Most recent alarm image display (transfer/serial switching) in turn on monitors 1 and 2 in turn on monitors 1 and 2 Switching method (transfer/serial switching) New alarm images overwrite older images Mandatory alarm image acknowledgement serial switching serial switching both images simultaneously on both images simultaneously last in first out (LIFO) monitor 1 and monitor 2 on monitor 1 and monitor 2 on monitor 1 previous image on monitor 3 serial switching serial switching transfer switching last in first out (LIFO) most recent on monitor 1 previous image on monitor 3 transfer switching no yes no yes yes yes on monitors 1 and 2 next image on first free monitor yes on monitors 1 and 2 next image on first free monitor no no Alarm image sequence all as yet unacknowledged alarm images on monitor 4 all as yet unacknowledged alarm images on monitor 4 yes yes on monitor 1 on monitor 1 monitor 2 (neighbouring camera) monitor 2 (neighbouring is also released camera) is also released all as yet unacknowledged all as yet unacknowledged alarm images on monitor 4 alarm images on monitor 4 no no Basic functions (available without alarm processing) Central dial-up Decentral dial-up Monitor sequencing Camera label Date, time Camera breakdown signal Camera and lens control using CDCs Camera position control Alarm processing functions Detector groups Detector groups input configuration Max. no. of alarm images (simultaneous display) Max. no. of alarm events (simultaneous display) Neighbouring camera display Factory settings yes Deviation from the factory setting 57 05.2012 written by Pelweckyj Videotechnik GmbH Güterstraße 2 64807 Dieburg Means of delivery and technical modifications reserved. www.pelweckyj.eu Version 07.2015


