1
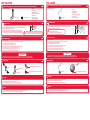
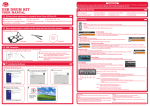
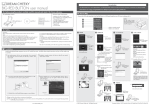
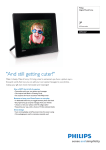
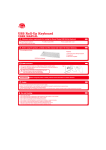
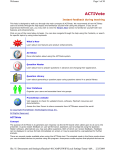
USB CUP WARMER
Before using the product, carefully read this manual and retain it for future reference.
This packaging contains:
USER MANUAL
Minimum system requirements for running the Dream Cheeky USB Gift Set
Features
USB Cup Warmer X 1
USB Gift Set
1. USB Powered
2. Maximum temperature is
50 degrees C
3. On/Off switch
4. Mac & PC compatible
PC and Macintosh platforms
50 MB available hard disk space
32 MB of system RAM
One available USB 1.1 port
AC Adaptor with output 800mA, 5V (optional)
USB Hub
Before using the product, carefully read this manual and retain it for future reference.
USB Connection
This packaging contains:
1. Connect the negative end of the USB cable to the USB port on the side of your Cup Warmer.
2. Insert the USB cable to a USB port located on your PC prior to playing with it (Fig.1).
3. Push the Power switch in to the ON position, the LED light indicator will turn on when there is power.
4. The hot plate will take about 2-4 minutes to heat to its maximum temperature.
Note: Using a USB HUB or docking station may result in the loss of
power to the Cup Warmer. This could create the Unit to not work properly.
Fig.1
USB
Features
1. USB 4 Port Hub
2. Mood Light Pencil Cup
5. Mac & PC compatible
port
TE
U
MP
CO
R
USB Hub X 1
USB Connection
Use and Handling
1. Place the Cup on top of the Hub so it fits comfortably into the slot provided.
2. Connect the negative end of the USB cable to the USB port on the side of your Hub.
3. Connect the USB cable to a USB port located on your PC prior to playing with it.
1. Do not use near water.
2. Do not expose the Cup Warmer to high temperatures, high humidity, or direct sunlight.
3. Do not touch the hot metal plate directly.
4. The Cup Warmer should be switched OFF when not in use.
5. Do not expose the Cup Warmer to dust, smoke or steam.
6. Do not allow small particles to get into the Cup Warmer.
7. Do not place the Cup Warmer on surfaces that are unstable or subject to vibration.
8. Do not throw or drop the Cup Warmer or subject it to physical shock.
9. The Cup Warmer contains sensors and should be handled with care.
Note: Using a USB HUB or docking station may result
in the loss of power to the Hub.
This could create the Unit to not work properly.
Switch & Play
Cleaning
USB
port
TE
U
MP
CO
R
Use and Handling
Introduction
This demonstrates how to use the Cup Warmer. Use these instructions to maximize your playing capability.
Note: Please be sure to plug your Cup Warmer into a USB port in your PC prior to playing with the unit.
USB Cup Warmer
Fig.1
Press this black button
for ON and OFF.
1. Do not use near water.
2. Do not expose the Hub to high temperatures, high humidity, or direct sunlight.
3. The Hub should be plugged out when not in use.
4. Do not expose the Hub to dust, smoke or steam.
5. Do not allow small particles to get into the Hub.
6. Do not place the Hub on surfaces that are unstable or subject to vibration.
7. Do not throw or drop the Hub or subject it to physical shock.
8. The Hub contains sensors and should be handled with care.
Introduction
This demonstrates how to use the Hub. Use these instructions to maximize your playing capability.
Note: Please be sure to plug your Hub into a USB port in your PC prior to playing with the unit.
Plug & Play
1. For safety reasons, unplug the USB cord from your PC before cleaning.
2. Wipe gently with a damp cloth, and then dry the surface.
3. Do not use solvents or other chemicals to clean the exterior of the Cup Warmer.
General
1. Should the Cup Warmer perform unexpected functions, unplug the unit and then reset your computer.
Note: See www.dreamcheeky.com for full online support link and trouble-shooting
USB Hub
Cleaning
1. For safety reasons, unplug the USB cord from your PC before cleaning.
2. Wipe gently with a damp cloth, and then dry the surface.
3. Do not use solvents or other chemicals to clean the exterior of the Hub.
General
1. Should the Hub perform unexpected functions, unplug the unit and then reset your computer.
Note: See www.dreamcheeky.com for full online support link and trouble-shooting
Simply connect the USB plug to the USB Hub.
USB LIGHT
USB VACUUM
Before using the product, carefully read this manual and retain it for future reference.
This packaging contains:
Features
USB VacuumX 1
1. USB Powered
2. Mini keyboard brush
3. Compact for easy portability
4. On/Off switch
5. High power switch
5. Mac & PC compatible
Mini keyboard brush X 1
Features
1. USB Powered
2. Bright LED lights
3. Compact for easy portability
4. On/Off switch
5. Mac & PC compatible
USB Light X 1
USB Connection
USB Connection
Fig.1
1. Connect the negative end of the USB cable to the USB port on the side of your Vacuum.
2. Insert the USB cable to a USB port located on your PC prior to playing with it (Fig.1).
3. Push the On/Off button in to turn the unit on.
4. When not in use, keep the Vacuum securely placed in the docking unit.
5. Located inside the docking unit under the Vacuum is the keyboard brush.
Note: Using a USB HUB or docking station may result in the loss of
To remove this, simply press down on the handle and the brush will flip up.
power to the Vacuum.This could create the Unit to not work properly.
USB
port
TE
MPU
R
CO
1. Connect the negative end of the USB cable to the USB port on the side of your Light.
2. Insert the USB cable to a USB port located on your PC prior to playing with it (Fig.1).
3. Push the On/Off button in to turn the unit on.
Note: Using a USB HUB or docking station may result
in the loss of power to the Light.
This could create the Unit to not work properly.
Fig.1
USB
MP
CO
port
UT
ER
Use and Handling
Use and Handling
1. Do not use near water.
2. Do not expose the Light to high temperatures, high humidity, or direct sunlight.
3. Do not expose the Light to dust, smoke or steam.
4. Do not allow small particles to get into the Light.
5. Do not place the Light on surfaces that are unstable or subject to vibration.
6. Do not throw or drop the Light or subject it to physical shock.
7. Be sure to power OFF before unplugging the Light from your PC.
8. The Light contains sensors and should be handled with care.
1. Do not use near water.
2. Do not expose the Vacuum to high temperatures, high humidity, or direct sunlight.
3. Do not expose the Vacuum to dust, smoke or steam.
4. Do not allow small particles to get into the Vacuum.
5. Do not place the Vacuum on surfaces that are unstable or subject to vibration.
6. Do not throw or drop the Vacuum or subject it to physical shock.
7. Be sure to power OFF before unplugging the Vacuum from your PC.
8. The Vacuum contains sensors and should be handled with care.
Introduction
Introduction
This demonstrates how to use the Vacuum. Use these instructions to maximize your playing capability.
Note: Please be sure to plug your Vacuum into a USB port in your PC prior to playing with the unit.
This demonstrates how to use the Light. Use these instructions to maximize your playing capability.
Note: Please be sure to plug your Light into a USB port in your PC prior to playing with the unit.
Switch & Play
Switch & Play
filter
Before using the product, carefully read this manual and retain it for future reference.
This packaging contains:
Press this black button for ON and OFF.
High power switch
USB Vacuum
Cleaning
1. For safety reasons, unplug the USB cord from your PC before cleaning.
2. Wipe gently with a damp cloth, and then dry the surface.
3. Do not use solvents or other chemicals to clean the exterior of the Vacuum.
General
1. Should the Vacuum perform unexpected functions, unplug the unit and then reset your computer.
Note: See www.dreamcheeky.com for full online support link and trouble-shooting.
Mini keyboard brush designed for easy cleaning.
USB Light
Cleaning
1. For safety reasons, unplug the USB cord from your PC before cleaning.
2. Wipe gently with a damp cloth, and then dry the surface.
3. Do not use solvents or other chemicals to clean the exterior of the Light.
General
1. Should the Light perform unexpected functions, unplug the unit and then reset your computer.
Note: See www.dreamcheeky.com for full online support link and trouble-shooting
Press this black button for ON and OFF.