1
MWconn, Version 5.9, Operating instructions
Page 1 of 49
Internet Access Software for the Mobile Internet
This document contains the information pertaining to installation and configuration of MWconn, as well as
some basic instructions to fulfill the pre-requisites for this operation. This includes the installation of the driver
for the wireless modem and (if nec.) the configuration of the appropriate dial-up connection under
Windows™.
Content
Chapter
Page
0
Quick start
2
1
Introduction
3
2
Installing the device driver
4
3
Firmware-Upgrade
6
4
Create dial-up connection
6
5
Install/uninstall MWconn
7
6
Normal
11
7
Minimal
12
8
Maximal
13
9
Configuration program CONFIG.exe
14
10 Configuration file – MWconn.ini
25
11 Setting of parameters and program control
34
12 Internet Connect and Disconnect
37
13 Monitoring of the Internet Connection
37
14 SMS and PC-remote control
38
15 Prepaid
40
16 Problem solving
42
17 User license
49
18 Copy rights
49
19 Liability
49
20 Thank you…
49
© 16.12.2013 Markus B. Weber, Nürnberg
MWconn, Version 5.9, Operating instructions
0
Page 2 of 49
Quick start
This chapter is significant for all those, who do not tend to get too involved in the instructions and would
rather plunge into the new Software-adventure directly instead. However, please note that higher related or
connection costs can occur as a result of incorrect or absent program settings – especially in cases, when
dial-up is in close connection with foreign networks.
For the following step-by-step implementation, we assume that the wireless modem along with the inserted
SIM card has been deployed in the PC, and that all the drivers have already been installed. Your user
account should contain the authorization for the purpose of creation of a new dial-up connection.
-
Unzip the files contained in the file MWconn.zip.
-
Start the MWconn.exe per double-click mouse action.
-
Select Standard-Installation option.
-
Confirm the creation of the dial-up connection with the name "Internet".
-
Enter the APN, as well as the PIN in the CONFIG.exe program.
-
Start the connection, for example GPRS: Start->Programs->MWconn->GPRS.exe
-
If it operates correctly and connection to the Internet has been established, then drag the program
window of MWconn to the taskbar or another option could be dragging the same directly to the StartButton, so that the program window is now converted into a mini-window. Now, click to end the program
with the right mouse-click action on the mini-window.
-
MWconn saves this window position as the default position and is now ready for use.
-
In case you want to customize MWconn based on your personal requirements, e.g. in order to activate
the connection protocol/connection log or to activate the volume-monitoring, then use the CONFIG.exe.
program for this purpose. This can be found under Start->Programs->MWconn->CONFIG.exe
And – if an error occurs during the installation, or if you wish to know more about the other available options
and functions of MWconn then please read ahead …
© 16.12.2013 Markus B. Weber, Nürnberg
MWconn, Version 5.9, Operating instructions
1
Page 3 of 49
Introduction
We are pleased that you would like to use MWconn. This is not a commercial product. The product is a
result of the effort to overcome certain limitations.
The author had technical difficulties in the beginning of 2006 to initialize dial-up into the mobile Internet with
the programs that were available on the market and decided to develop an alternative for the same. The aim
was to develop very simple software that merely initializes the wireless modem and avoids all other
additional, superfluous functions. Indeed, this software has grown in the interim period. Many users
introduced ideas and error messages. Besides pure installation, MWconn now boasts of including an entire
series of other functions:
- Display of speed, data volumes, online time, operating mode, signal strength, network name, Cell-ID
- Various display forms, like Tray-Icon, mini-window and Start button-Inlay
- Warning in case of exceeding data-volumes- and online time
- UMTS- and GPRS-network analysis
- Connection monitoring and automatic re-establishment of connection, even after blocking
- Receiving/sending SMS, PC-remote control per SMS and call
- Detailed log functions, integrated service terminal
- Timer for program end or shutdown
- Script optimization
- Query- and recharge option for Prepaid-Tariffs
Inspite of the wide range of functional capabilities that it possesses today, MWconn remains handy. It
requires less than 0.3 MB disk space, its processor load is virtually negligible and caters to easy usage. The
user can start the program via a single mouse-click and subsequently establish connection with the Internet.
System requirements
MWconn can be deployed on PCs with the operating system Windows 2000™, XP™, Vista™, 7, 8 and
Embedded. For Ubuntu there is the program ixconn available.
For access into the wireless network, you require a suitable wireless modem inclusive of the respective
drivers. You can find a list of supported modems here:
www.mwconn.info/wiki/index.php/Datenkarten
In case your wireless modem is not located in your PC, it is located in a router of type "Linksys WRT54G3G",
MWconn cannot directly access the modem. Instead it uses the HTML-Menus of the Router. The functions
are then correspondingly restricted. For example, the signal strength can only be displayed in approximate
levels/ranges, SMS-receipt and Prepaid-query is not possible.
Please take note that you must apply the basic settings (network selection, PIN, APN) via the HTML-Menus
of the router.
MWconn does not function with PC modems only, in fact it also works in tandem with few specific mobile
phones. These program modifications are, however, still in trial stages and function only with mobile phones
by Sony-Ericsson (e.g. "K610i"). Unfortunately, the selection of a connection type (GPRS, UMTS) is in this
case not possible per MWconn, as the related commands are not supported by the mobile phone-driver.
The following text will focus on wireless modems. All this naturally holds true and validates also for the trials
of supported mobile phone types.
The actions that have been described in this operating information booklet are with reference to Windows
XP. Similar working procedures are also valid for users of Windows 2000, Vista or Windows 7.
Note w.r.t. Windows Vista and newer: If you insert a modem of the brand Novatel, it could be the case that
the modem does not function correctly with the DLL "NwtGatewayDLL.dll" that has in turn been provided by
Novatel. Should there be problems with this, then copy this DLL-file on an external drive and delete this from
its original folder. Post a re-start action, this DLL will not be used anymore. MWconn has been programmed,
such that it functions correctly even without the Novatel-DLL, because alternatively it can communicate
directly with the modem. Unfortunately, in this case it is subsequently not possible to receive and send SMS
or query the prepaid-account during the program run.
© 16.12.2013 Markus B. Weber, Nürnberg
MWconn, Version 5.9, Operating instructions
2
Page 4 of 49
Installing the device driver
If you have already installed the software-packet of the network operator that accompanies your wireless
device on your PC, the necessary drivers would have been installed along with this.
If you do not want to install the original software, you must at least install the driver for your wireless modem
as a minimum pre-requisite. This can be mostly found in the CD that accompanies the modem. A few
manufacturers also cater to the downloading of the driver.
In case you have no other possibility to obtain the driver that is associated with your corresponding modem,
then you could try to use and retrieve the same from the manufacturer's website (some links:
http://www.mwconn.info/wiki/index.php/Treiber) or per Windows-Update-Service. Post insertion of the
modem, click on Yes, establish connection with Windows Update. Follow the instruction on the screen
and refer to chapter 3 post successful installation of the driver.
Please take note of the special features of specific device types:
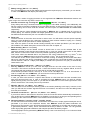
Huawei E220
There can be conflicts with the original software with the usage of this USB-Adapter
(also known as "Mini-Modem" or "Easy Box II"). This apparently also blocks the serial
interface of the USB-Adapters, when the program fails to run at all. If you wish to use
MWconn, you should deactivate the Autostart-function for the USB/CD-ROM-Drive. This
is either a temporary action via pressing of the SHIFT key or a permanent action via a
change in the registry. For more information, refer to en.wikipedia.org/wiki/Autorun or
www.tuneup.de
In case the Start of USB option in the BIOS of your PC is active, you must deactivate it.
If you are unable to deactivate the auto start function, then the only remaining option is
uninstalling of the original-software. As the driver is also deleted along with the process
of uninstalling, you are thus required to manually re-install the driver. The driver is
located in the folder "Driver" in the USB-ROM-Drive of the Adapter.
For this purpose, start the device manager (Start->Run, "devmgmt.msc"), expand the
option "Connections (COM und LPT)" and use the right mouse-click action to click on
the first of the yellow question marks. In the subsequent menu that is invoked, you need
to select “Update driver.” Follow the instructions and repeat the procedure with the
second yellow question mark.
Novatel
With modems by Novatel, a special DLL-file is required, if the entire range of functions is
to be used. MWconn also functions without this file, however in which case certain
limitations need to be accepted: SMS-receipt only during program start, SMS cannot be
sent, no prepaid-query.
Thus it is recommended that this DLL is installed along with both accompanying files. In
case you cannot locate these three files in your PC, (normally, they are located in the
folder Windows\System32), simply copy them from the CD of your modem directly to the
new folder, in which MWconn will be installed or wherein it has already been installed:
NwtGatewayDLL.dll, NwtGatewayConfig.ini, loader.dll
Post copying, open the file NwtGatewayConfig.ini via a double-click and verify, whether
the entry NeedPrimaryPort=NO can be found. In case it cannot be found, then you
must edit the related line from YES to NO.
Novatel MC950D
This USB-Stick installs an external read-only drive post insertion. The Autostart-function
should have already been deactivated by you, as otherwise the Standard-Software is
started. In order to deactivate the drive and facilitate access to the UMTS-Modem, you
can start the file "LiteAuto.exe".
Option GI0225
(black Web'n'Walk Stick) To get the required drivers, you should install the original
software packet delivered with the stick. Eventually, the Autostart entry must be deleted
(see Start->All Programs->Autostart). The driver will install itself as Wireless Network.
It is not required to create the dial-up connection as described in the following chapters.
MWconn will recognize the modem automatically. If the connection cannot be
established successfully, please switch to NDIS commands in the configuration (by
program CONFIG.exe/Connection or by file entry MWconn.ini/MOD=).
Option GS ICON
If you are using this USB-Adapter (known as "Easy Box" at Vodafone), you should first
execute a connection 'connect' and 'disconnect' action with the original-software.
Thereafter, you must access Start->Connect to->Show all connections and deactivate
© 16.12.2013 Markus B. Weber, Nürnberg
MWconn, Version 5.9, Operating instructions
Page 5 of 49
the new wireless network connection that has been created by the software.
Otherwise, at a later stage, on selection of dial-up with MWconn, you will always receive
the "Connection error 633".
Qualcomm Gobi
Some Notebook PCs are equipped with an UMTS module from Qualcomm Incorporated.
MWconn detects this so called Gobi module automatically. However, you need
additional files which have to be copied into your MWconn folder: QCWWAN.dll (or
QCWWAN2k.dll or GobiApi.dll, all from Qualcomm) and MWconnQC.dll. To load or
change the firmware of the Qualcomm Gobi module the command-line tool
MWfwman.exe should be very helpful.
Please consult the MWconn website for download locations of the file MWconnQC.dll
as well as the program MWfwman.exe.
Linksys-Router
Naturally, you do not require a driver for the router Linksys WRT54G3G. The router
must be completely configured via the HTML-Menus (inclusive of network selection, PIN
and APN). The following settings/functions are unfortunately not possible via MWconn:
Cell-ID-display, receiving and sending SMS, audio signal for roaming, PIN, service
console, Netlock-query, network analysis, APN, connection name, identification, active
monitoring (only FRZ is possible), PC-remote control. The data volume display functions
only in 10-kByte-ranges.
Mobile Phones
If MWconn does not recognize your phone automatically, you can enter the required
settings manually. Two settings in CONFIG.exe are mandatory: the serial port on tab
"Device" and the name of the dial-up connection at tab "Connection". After you have
installed the phone's driver, you can retrieve the serial port using Windows device
manager (Start->Run, "devmgmt.msc"). If there is no serial port of the mobile device,
you can use the modem port instead (enter the port followed by NONE, e.g.:
COM3;NONE). In this case some of MWconn displays do not operate during a
connection.
Other devices
Every dial-up connection which has been configured in Windows can be used and
monitored by MWconn. To do so, please enter the name of the dial-up connection on
tab "Connection" in CONFIG.exe. Special initializations can be arranged using the input
fields Serial port and Commands on tab "Device". If no initialization is required, enter
NONE at Serial port.
© 16.12.2013 Markus B. Weber, Nürnberg
MWconn, Version 5.9, Operating instructions
3
Page 6 of 49
Firmware-Upgrade
If you want to update the device-software of your wireless modem to a new version and therefore wish to
execute a so-called Firmware-Upgrade, please use the software that has been exclusively provided by the
manufacturer or supplier of your modem especially for this purpose. As Firmware-Upgrades are not riskfree, and it is thus not a rarity that the data modem has thus been irreparably damaged, execute such an
update as an advantage only in cases, when it is mandatorily required. Given a case, wherein you have
minimal experience with the system configuration of Windows, please allow an expert to execute and
complete this upgrade.
It can happen that you are not able to establish an internet connection even after the correct run of such an
upgrade. In this case, please verify, whether a new driver is required and subsequently install this (refer to
chapter 2). Eventually, you must specifically apply a driver-upgrade via the device manager (Start->Run>"devmgmt.msc"). Subsequently check the device entry in the dial-up connection with the name "Internet".
Possibly, a new device name gets registered via the installation of the new device driver, which in turn needs
to be used by the user instead of the older entry for the purpose of establishing connection.
4
Create dial-up connection
For the purpose of connecting to the Internet, you require a dial-up connection with the name Internet
(exception: you are using the Linksys-Router or a modem, which has been registered as a network adaptor).
If you have already installed an Internet-Software-package of your network operator, then the required dialup connection possibly already exists. You can rename this to Internet and use it for MWconn.
Note: For renaming a dial-up connection, as well as creating a new connection, you may have to be loggedin as an administrator.
With every start action, MWconn verifies, whether the required dial-up connection is available and if
necessary, whether this has been newly created. Subsequently, please verify and check this automatically
created connection.
Only highly experienced users are recommended to create the dial-up connection themselves, in order to
thereby be able to apply personal adaptations or customizations.
In the case of certain networks, it could be necessary that the username and the password be additionally
entered. You must enter this in the configuration (per program CONFIG.exe/Connection or directly in the file
MWconn.ini/PASS=). You can refer to further information in this regard in the chapters 9 and 10 (section
"Connection" or PASS=).
© 16.12.2013 Markus B. Weber, Nürnberg
MWconn, Version 5.9, Operating instructions
5
Page 7 of 49
Install/uninstall MWconn
The easiest way to install MWconn is to unpack the downloaded file mwconn.zip into a new folder, to start
the program MWconn.exe and to answer the program's query with Standard installation. Thereby the
program will be copied to the start menu, including all needed supplementary files. You can find them at the
folder MWconn.
Alternatively, you can install the program into any folder you like if you decide to perform a manual
installation:
Create a folder for MWconn. The location and name are based on user discretion. We use C:\MWconn as
the folder name. Copy the file MWconn.exe in this folder. For MWconn, you require very little space on your
disk, ca. 0.3 MB is enough for each instance of the program.
Tip: In case you do not install MWconn anew, and instead only wish to update to a new version, then it is
enough to start the MWconn.exe program inside an empty folder, to choose Manual installation and select
the folder which contains the old MWconn programs. During the course of an update, MWconn
automatically generates a file with the name MWconn_old.exe. With the help of this EXE, you can revert to
the previous version at a later stage. Please verify all the configuration parameters post every update and
every downdate (per CONFIG.exe or MWconn.ini).
MWconn does not require any parameter to be invoked and does not have any buttons; this makes usage
and operation very easy. Inspite of this, the program fulfills various tasks. For purpose of fulfilling all these
tasks, it orients itself based on the configuration parameters and its name. Rename the programs or create
copies, based on what is required. In our example, we have decided on four instances of the program and
therewith cover the most important of its functions.
First, all program instances initialize the wireless modem at the start and then start the connection with the
Internet. An exception is in the case of both the last mentioned programs that are contained in the following
list. The user specifies the operating mode or function via the respective program name:
GPRS.exe
UMTS.exe
LTE.exe
GPRSUMTS.exe
UMTSGPRS.exe
LTEUMTS.exe
CONN.exe
CONFIG.exe
MENU.exe
CONTROL.exe
accepts only GPRS
accepts only UMTS
accepts only LTE (only if modem is LTE capable)
use GPRS; UMTS only if GPRS is not available (not for all modems)
use UMTS; GPRS only if GPRS is not available
use LTE; UMTS/GPRS only if LTE is not available (only if modem is LTE capable)
use the default operating mode of the modem
edit the configuration settings of MWconn
show context menu of running MWconn program
control surface for an MWconn–Program that runs in the background
As soon as you stop MWconn, the Internet-connection is stopped/disconnected as well. If you do not wish
for the above, then you can define this in the configuration (per Program CONFIG.exe/Connection or file
MWconn.ini/CONA=). Further information in this regard can be found in the related sections of chapters 9
and 10. The same is valid for the case, wherein you would like to prevent the automatic establishment of the
Internet-connection at program start by MWconn.
Just one click!
If you want to save a few clicks with the PC at a later stage, just drag the most frequently required instances
of the MWconn program that you use to the Quick Launch pane.
© 16.12.2013 Markus B. Weber, Nürnberg
MWconn, Version 5.9, Operating instructions
Page 8 of 49
To create space in the Quick Launch pane, you must uncheck the ‘Lock the taskbar’ option. For this
purpose, click with the right mouse-click action on the taskbar down below and uncheck the ‘Lock the
taskbar’ option in the context menu that is invoked.
Drag horizontally, to the right to create space in
the Quick Launch.
Subsequently, drag the program instances that
you use most frequently with the left mouse-key and subsequently drop them into the Quick Launch pane.
Thereafter, you should re-check the ‘Lock the taskbar’ option in the context menu.
Auto-start on log-in
If you want a fully automatic initialization, then drag and drop a reference to MWconn in the Startup-folder.
This folder can be found under Start -> Programs -> Startup.
Auto-start on machine boot-up of PCs
In case it is necessary that MWconn also starts during the booting of the PC even when no users have
logged-in as yet (e.g. for the purpose of remote control per VNC), then this is a task that needs to be
configured for the Windows-Services. MWconn does not only function as a program, instead it can also be
started as a so-called Windows Service, as it fulfils all the necessary pre-requisites for the communication
with the operating system.
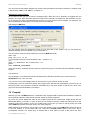
The configuration program CONFIG.exe simplifies the task of setting-up of the Windows-Service for you.
Start as an administrator, go to the register tab "Start/End" and select the program version that needs to be
thus configured (Example: UMTSGPRS.exe). Post clicking on Confirm, MWconn installs itself as a
Windows service. Once again, in order to deactivate this automatic program start, select – nothing – and
likewise, click on Schedule. MWconn will then remove itself as a service from the Windows-Configuration.
The latest time frame by which you should do this is when you delete MWconn from your PC (however, in
case you forget to do this, it does not have any damaging effects; you can always execute the delete action
with the command line sc delete MWconn_Internet).
Please take note that you will have to envisage certain limitations due to the special authorization concept in
the case of Windows Vista™ (and newer): Unfortunately, in this case, the interaction of Windows-Services
with the user is not possible via a direct method, thus, MWconn can only run without a window.
Nevertheless, you can control the program. For this purpose, start the administrative window of WindowsService (per menu or via the command line services.msc), go to the Properties of the service
MWconn_Internet and there use the buttons Pause, Resume as well as Stop. You can thus stop the
existing communication, resume the service or stop the MWconn service completely.
Independently thereof, you can also deploy the program instance of CONTROL.exe in order to retrieve the
status displays of MWconn. This program instance functions practically as a remote control for the regular
MWconn-Programs that run in the background (e.g. UMTS.exe etc.). In case you would like to send
commands as well to the running MWconn service (Establishing communication, Stopping communication),
you must then register the name of the authorized user account in the file MWconn.ini:
IPC=Username (or IPC=Domain\Username).
Note: CONTROL.exe is always started in the screen position and coordinates and in the form, in which the
regular MWconn-Program was last stopped.
Should your wireless modem require a longer initializing at the start of the PC, until it is ready for executing
subsequent operations, it is recommended that the auto start of MWconn be likewise delayed. This can be
accomplished via the next data field, likewise in the registered tab "Start/End" in the CONFIG.exe program.
Several SIM cards or modems
If you alternate different SIM cards, because you use different mobile tariffs, you can create different profiles,
configure them once, and switch easily between them using the program "PROFILE.exe".
Most users will use only one SIM card. So, an integrated profile manager would have the disadvantage of
difficult configuration for most people. Instead, MWconn comes with an external profile switch. To get this
switch installed please follow the steps described by the next sections.
© 16.12.2013 Markus B. Weber, Nürnberg
MWconn, Version 5.9, Operating instructions
Page 9 of 49
Create Profiles
Every profile needs its own configuration file, so that you can enter every setting profile specific. That applies
to the device configuration as well, i.e. you can assign a unique modem device to every profile.
To get these configuration files, please create multiple copies from the standard configuration file
"MWconn.ini" and give these copies specific names, e.g. "Vodafone.ini", "Swisscom.ini", "Orange.ini". It is
necessary to keep the file name extension ".ini".
Create Profile Switch
MWconn contains an external profile switch, which has been integrated into the program. That means, the
profile switch's executable file does not differ from the other executables. So you can create the profile switch
by copying one of the other executables, e.g. "CONFIG.exe", and naming this copy "PROFILE.exe". As you
already know, every MWconn program copy will read its own file name at startup and then act accordingly.
Switching between Profiles
To change the profile you simply need to start "PROFILE.exe". Every start of this program will switch to the
next stored profile – in alphabetical order – and display the profile's name in a splash window.
The chosen profile applies to all MWconn programs, dial-in programs "GPRS.exe", "UMTS.exe" etc., as well
as to the configuration program "CONFIG.exe". The name of the currently active profile will be shown in the
title of the program's main window.
Configure Profiles
At start all created profiles have the same content because you simply copied the standard profile
"MWconn.ini". Therefore these profiles must be configured now with their specific settings by using the
configuration program "CONFIG.exe". Of course, you alternatively can edit the files directly with a text editor
– just double-click them.
If you are going to use several modems, that ought to stay connected to your pc, it is essential to define the
particular command port in the configuration (per configuration program CONFIG.exe/Device or the file
MWconn.ini/COM=, for exact details, refer to chapter 9 or 10).
Using these Profiles
As soon as you got through with the steps described above, the profiles are ready to establish connections
and can be switched by using the profile switch.
Please do not forget to insert the appropriate SIM card every time you switch to another profile. In case the
wrong PIN has been sent to often to the modem, the SIM card will be locked and has to be unlocked with the
PUK (PIN unlock key). You can avoid this situation by setting the PINs of all your SIM cards to the same digit
combination.
Deactivate the Profile Switch
If you plan to use only one profile and want to get rid of the profile switching mechanism, simply delete the
file "profile.ini". Afterwards, only the regular configuration file "MWconn.ini" will be used. To get back to multi
profile mode, start "PROFILE.exe" again.
Separated Installation
Special demands will require separate installations of MWconn, in particular if you want to run different
MWconn versions or DLL versions or if you need to separate SMS management. MWconn is small enough
to be installed more than once.
The easiest way is to carry out these steps:
- Standard installation routine of MWconn.
- Right-click on Start->Programs->MWconn an choose Rename.
- Rename program folder, e.g. "MWconn with Vodafone"
- Repeat the standard installation routine.
- If desired, the new folder may be renamed, e.g. "MWconn with Orange"
© 16.12.2013 Markus B. Weber, Nürnberg
MWconn, Version 5.9, Operating instructions
Page 10 of 49
Now you have two installations with separated configuration data available. Set up with:
- Start->Programs->MWconn with Vodafone->CONFIG.exe
- Start->Programs->MWconn with Orange->CONFIG.exe
Access using the desired tariff resp. modem can be initiated with:
- Start->Programs->MWconn with Vodafone->UMTSGPRS.exe
- Start->Programs->MWconn with Orange->UMTSGPRS.exe
Don't forget to insert the correct SIM card, because the PIN MWconn is sending will only be accepted by the
appropriate SIM. It may be useful, to use the same PIN on both SIM cards. This will help to avoid potential
locks when the wrong PIN is sent repeatedly.
If you use several modems, that ought to stay connected to your pc, it is essential to define the particular
command port in the configuration (per configuration program CONFIG.exe/Device or the file
MWconn.ini/COM=, for exact details, refer to chapter 9 or 10).
Usually, MWconn programs affect each other: starting GPRS.exe will terminate UMTS.exe, CONTROL.exe
controls a parallel-running UMTSGPRS.exe etc. If you want to use several UMTS modems simultaneously, it
is necessary to divide the programs into program groups. Each program must be supplied with the
appropriate group number at start-up. Example: INSTANCE=5
Uninstall?
Naturally, we hope that you are satisfied with MWconn and would not like to discontinue usage immediately.
If you do wish to discontinue usage, then a simple deletion of the program files is enough to do so. In case
you had chosen to install MWconn in a new, empty folder during the process of installation, then simply
delete this folder. A special uninstalling program is not required.
MWconn is a very clean program. This denotes that it does not apply any changes to your system settings. It
does not install any libraries ("DLLs") in system folders, is not registered in the registry and does not install
unnecessary desktop shortcuts or icons in the start pane. This means that you can easily uninstall it when
you wish to discontinue usage, without the program leaving any residual fragments.
© 16.12.2013 Markus B. Weber, Nürnberg
MWconn, Version 5.9, Operating instructions
6
Page 11 of 49
Normal
Post starting, MWconn displays a window with the following information:
Top
Centre-left
Centre
Down-left
Down-centre
Centre-right
Down-right
Network name, to which you as a user are subscribed
(in case of errors, MWconn will display the respective error message instead of the network
name),
active operational network type and acceleration: GPRS, EDGE, UMTS, HSPA, or LTE,
Signal strength in percentage terms and in dBm,
Duration of online time in hours and minutes,
Sum of the transferred data volumes in Kilobytes
(in case of data transfer errors, an error information is displayed instead of the volume),
Speed of data transfer to the Internet in Kilobytes per seconds (Upload),
Speed of data transfer from the Internet in Kilobytes per seconds (Download).
If your wireless modem supports this, then additional information is appended after the network name, e.g.
"[26203.0001.5B51]". The five digit number stands for PLMN (Public Land Mobile Network), this is a
combination of MCC (Mobile Country Code) and MNC (Mobile Network Code). The three digit MCC (in the
example "262") describes the country, the two digit MNC (in the example "03") the cellular network. The four
digit hexa-decimal "0001" in the centre stands for the LAC (Location Area Code) and the latter hexa-decimal
(in the example "5B51") for the Cell-ID.
The counter for the transferred data quantity and the online time that is in use, always restarts at the
beginning of every program. If you wish, you can also define a specific date in the month, on which the
counter is cleared. In this case, the counter is not reset at program start. For exact details, refer to chapter 9,
section "Log", or chapter 10, section DAY=.
In chapter 10 (section ERR=), you can find further information pertaining to the character combinations, with
which MWconn displays the various possible connection errors instead of the data volume when errors
occur. The window then displayed, e.g. Connection error CRC1 for "few checksum errors” to Connection
error CRC9 for "too many checksum errors ".
Please note: The data volumes that are displayed or logged by MWconn, as well as the online time, are not
a reliable basis for the monthly billing. For one thing, the possibility of errors cannot be ruled out, for another
thing the Internet provider bills and does invoicing in a different manner. Often, rounding of up to a full
10 kByte is done, a few in fact round up rather generously much to the disadvantage of their clients, to the
next 100 kByte. MWconn on the contrary calculates exactly to the tune of accuracy of up to 1 kByte.
Changes that could possibly be required for the connection log that is generated by MWconn can be defined
via the configuration (per configuration program CONFIG.exe/Log or the file MWconn.ini/RND=, for exact
details, refer to chapter 9 or 10).
The continous display of signal strength is useful in cases, when the user does not have a permanent
location (train, car) or when the user wants to identify the optimal location and the optimal direction for an
external antenna.
The signal strength is displayed in percentage terms, as well as in unit dBm terms. As a rule, due to the fact
that the wireless modems only distinguish between ca. 30 various types of signal strength levels/ranges, the
percentage display always increases by multiple percentage points during a switch-over.
While you can access GPRS almost comprehensively across regions, the UMTS-network access is,
excluding the primary service areas (areas of high population density), either impossible or only possible with
extreme difficulties. Even more important in this case is a good external antenna. Please take note of the
“antenna gain” during purchase of the same. This value is given in dBi terms and should lie about 10 or more
dBi as far as possible. Many providers refrain from providing information regarding the antenna gain,
© 16.12.2013 Markus B. Weber, Nürnberg
MWconn, Version 5.9, Operating instructions
Page 12 of 49
unfortunately with good reason to do so. A few others provide exaggerated values.
Today there is a wide range of cost-effective UMTS-Antennae. We would recommend the Internet site by Ing.
Friedrich Rappl:
www.brennpunkt-srl.de/eshop.html
7
Minimal
Is the MWconn program window too big or is it coming in the way of your workspace on screen? Then
simply minimize it with the minimize button. The window transforms itself into an icon and integrates itself
into the status bar of the screen. You can select the type of icon yourself in the configuration (refer to chapter
9, section "Global", or chapter 10, section ICON=).
There are five different types of icons that are available:
1
Standard icon
The signal strength is displayed in the form of one to five yellow bars under the MWconn-Logo. The
background is red during a GPRS-Connection; it is blue during an UMTS-Connection.
2
Standard icon with speed icon
In addition to the standard icon that has been described above, a speed-icon is also displayed. It
contains two scales: the one below displays the receiving speed; the one above displays the sending
speed. Depending on the speed range, individual scaling is used: normal GPRS-speed (0 to 6.7 kB/s),
normal UMTS-speed (6.7 to 48 kB/s) and HSDPA-speed (48 to 450 kB/s). The scale that is currently in
use can be detected from the symbol in the icon-centre: Tractor, car or a bullet train/high-speed train.
3
Colored gauge icon
Down, towards the left, there is a character which displays the operating mode: G for GPRS, U for
UMTS, and E for GPRS in the EDGE-speed range, H for UMTS in the HSPA-speed range, L for LTE. On
its right, the signal strength is displayed in the form of one to five vertical bars. The upper part of the icon
contains a 180-degree-pointer-display, which uses three ranges: red for the GPRS-range, blue for the
UMTS-range and yellow for the HSPA-range (full deflection corresponds to 450 kB/s). The sum derived
from the receiving- and sending-speed can always be seen.
4
Monochrome gauge icon
For the benefit of a clearly visible display, the unicolored pointer only moves to the tune of 90 degrees.
Three different pointer types represent the various speed ranges: dotted, thin line, thick line. Under the
pointer, you can see the usual signal strength in the form of one to five small symbols.
In case your taskbar background is not dark, the icon-colors can be switched from white to black (please
refer to chapter 9, section "Global", or chapter 10, section MOD=B for further details in this context).
5
Monochrome digit icon
This icon contains vast information: operating mode, signal strength, receiving speed and – apart from
this – the sending speed. Contrary to the other icons, both speed values are displayed numerically, to the
exact degree of accuracy of up to kB/s.
Even here, you can switch the color to black as described in the section above.
6
Monochrome bar icon
In its classic form, the operating mode is displayed as a character and the signal strength is displayed in
the form of one to five bars. The speed-bars for sending and receiving data are displayed under it. The
GPRS-speed is thereby displayed as a dotted line, the UMTS-range as straight line that has been drawn
through and the HSPA-range in the form of a dotted, filled-out bar.
In order to retrieve a detailed text display, move the mouse pointer to the signal-strength icon. A short tool tip
text is displayed, which in turn displays information pertaining to the signal strength, transfer speed, network
name and, if required, error messages. The format of the text corresponds to the representation in the mini
window can be found in the following section.
In order to retrieve the normal program window once again, click on the icon and select "Normal window ".
Select “Exit” in the menu in order to end the program.
If the simple, graphic representation is not sufficient for you or you wish to receive more exact and
continuous information, then drag the program window down below and drop it into the taskbar. The title row
© 16.12.2013 Markus B. Weber, Nürnberg
MWconn, Version 5.9, Operating instructions
Page 13 of 49
of the window disappears, and the window content remains – placed in the taskbar – and always is in the
foreground.
MWconn now always displays the current signal strength, the speed of data transfer and the network name.
If the transfer speed drops to a level below 0.5 Kilobytes per seconds, then the sum of the transferred data
volumes is displayed in its place (four-digit value in units of Megabyte). You can switch to the usual detailed
representation via clicking per left mouse click action.
If you find the view from top easier to comprehend than a view from below, then you can dock the window on
the upper screen margin. It will be minimized here as well.
At the moment, in order to cater for optimal usage of especially valuable screen surface in notebooks, place
MWconn directly in front of the Windows-Start-Button. This naturally results in a little shrinkage of the start
button, but it does, however, always cater to problem-free access. Independent thereof, most keyboards
have an additional Windows-key that is available to start the programs.
In order to drag such a title-less mini window once again, click via left mouse click action on the window
surface. Subsequently, the normal window is invoked once again, which you can in turn re-set as a mini
window on the screen margin. If you wish to end MWconn from the mini window itself, then use the right
mouse click action and select “Exit" in the context menu that is invoked.
Tip: For a short-term temporary switch-over to the detailed normal window, use the left mouse click action on
the mini window, and to switch-to the previous view, click on the windows surface of the normal window.
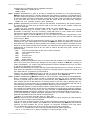
8
Maximal
Someone who has already tried to align an indoor antenna for a television knows the pain-value involved in
constant adjustments, trials and tribulations that one needs to go through to get the direction right for signal
receipt. Mostly, the indoor antenna is located at the window, and the same is, as seen from the PC’s location
and based on the probability of Murphy’s
Law, always at the other end of the room.
With respect to the Mobile Internet,
maximum possible signal strength that can
be detected would be useful. And it is
exactly this that you can activate with
MWconn with the maximize-button of the
program window (not with CONTROL.exe).
Parallel to the visual display, the
percentage details of the signal strength is
displayed in the form of a Morse signal.
Thereby, the abbreviated digit form is used:
0-
1•-
or to
4••••-
5 • • • • • 6 - • • • • or to 9 - •
Such that you are not required to learn the signals by heart, the tone pitch also changes along with a change
in the signal strength. For all the first digits respectively (decile rank), the tone pitch of the previous signal
strength is displayed. So you can immediately hear and identify, whether the last change of the antenna
position has led to an improvement (increasing tone pitch) or a deterioration (decreasing tone pitch).
© 16.12.2013 Markus B. Weber, Nürnberg
MWconn, Version 5.9, Operating instructions
9
Page 14 of 49
Configuration program CONFIG.exe
In order to customize program settings to suit your personal requirements, there is an efficient method of
doing so with effect from Version 2.0: The program CONFIG.exe.
Should this program not be located on your PC, then simply copy one of the other program instances (e.g.
UMTS.exe) and rename it to CONFIG.exe.
Double-clicking on the CONFIG.exe will invoke the program settings of MWconn. These sub-divide
themselves into various sections, which in turn are distributed across nine registered tabs. In order to select
the required section, click on the related tab (the flag on the top of the respective tab). The following sections
of the chapter describe the setting options contained within each of the sections respectively.
Mouse-over action on the data entry fields while navigating through them raises a small message w.r.t., e.g.
"COM=". These messages are related to the associated parameter in the file MWconn.ini, which will be
further described in the following chapter.
[Likewise, here in the chapter, you will find references to the respective parameter in the file MWconn.ini.
These references are represented in square brackets.]
As a rule, many of the setting options are not required for the pure purpose of establishing a connection;
instead they provide the user with additional functionalities or additional comfort. The settings that are
mandatorily required have been marked in yellow in the following sections. The settings that we recommend
you to apply in addition to these have been marked in green.
In case you use the Linksys-Router, you must apply the most important settings via the HTML-Menu of
the router. A few functions of MWconn are not active in this case; the related settings have been identified
with "(not for Linksys)" and are ignored by the program. Also refer to chapter 3.
Please close the instance of the active MWconn-Program, prior to starting the configuration.
Info
You can find information pertaining to the program version and short information w.r.t. copyrights, as well as
legal liability. However, please refer to the exact details explained at the end of this document.
Comment [MWconn.ini/REM=]
You can enter a required comment in this field. This is useful, if you use various initializing files and
would thus like to identify the corresponding file.
In case of a client-specific program version, the field can be used for specific purposes. Please refer to
the additional description provided by your supplier in this regard.
Global
Here, various visual and acoustic outputs of the program can be customized.
≡- Standard settings
In case your Internet provider is listed in this box, you can load the most important parameters very
easily. Afterwards, please check every of these parameters, especially the APN on tab "Network".
In case you did not find your provider on the list, try to update the list form Internet first. If this does not
help, please retrieve the necessary data from the Internet site of your provider or from one of its shops.
We would be very grateful if you could append these informations to the MWconn Wiki so that they will
be available for other users.
≡- Termination query [MWconn.ini/ENDM=]
Here you can select the program's termination behaviour. Choose what the program shall do after you
have clicked on the exit field X: terminate subsequent to an appropriate query, terminate without any
query or minimize to a tray icon.
- Program window always on top [MWconn.ini/MOD=T]
If selected, the normal program window will always be placed in foreground.
Online time in mini window [MWconn.ini/MOD=D]
In the mini window, the online time is displayed additionally. Due to restricted space availability, this is
alternatively displayed with the data volumes – in cycles of app. 5 to 10 seconds.
© 16.12.2013 Markus B. Weber, Nürnberg
MWconn, Version 5.9, Operating instructions
Page 15 of 49
Cell ID in mini window (not for Linksys) [MWconn.ini/MOD=C]
As long as this is supported by your modem, the mini window displays the numerical code instead of the
current network name (e.g. PLMN, LAC, Cell-ID). Further details w.r.t. the numerical code can be found
in chapter 6.
Green mini window if GPRS [MWconn.ini/MOD=O]
You will notice the present mode of operation much better if it is not only represented by a letter, but
shown by a distinct background colour. If you have checked this box, the mini window will display a
green background while a GPRS connection is active. At UMTS, the usual blue background will appear.
≡- Tray icon [MWconn.ini/ICON=]
If you prefer to minimize the program window of MWconn as a taskbar icon, then you can retrieve the
most important status information by moving over the icon with the mouse pointer. Depending on the
selected type of icon, some of this information can also be represented graphically or numerically,
directly in the icon. You can refer to a description of the icons that can be selected for this purpose in
chapter 7.
Monochrome icons in black [MWconn.ini/MOD=B]
Depending on the background color in use (e.g. in the case of “Windows Classic View”), the standard
color of white for the unicolored icons sometimes makes it difficult to identify them. In such cases, switch
over to a black icon color.
Beep at network change [MWconn.ini/MOD=R]
Hereby, you activate the warning tone, which alerts you in case of network switch-over. This is
particularly interesting during automatic switch-over of network selection abroad, as depending on
network operator, various data transfer costs can accrue.
Beep at cell hand over (not for Linksys) [MWconn.ini/MOD=S]
For test purposes, it is sometimes advantageous for the user to be informed about every cell hand over
or switch-over. In case your modem supports the display and output of the Cell-ID, then, post selection of
this option, the user is informed about all cell hand-overs via a short double-beep. You can thus identify
the operating mode via the tone pitch: GPRS 500 Hz, UMTS 1000 Hz.
Device
The required hardware settings for your modem are located in this registered tab. As an additional function
for the purpose of service and analysis, there is also a small terminal that has been provided, with which you
can establish a direct connection to your modem.
≡
Device type (not for Linksys) [MWconn.ini/DEV=]
In exceptional cases MWconn cannot determine the device type correctly. Then it is recommended to
enter it manually.
Serial port [MWconn.ini/COM=]
The command port of the wireless modem that is to be used by MWconn can be defined. Please only
use this option, when the port cannot be automatically identified by MWconn, e.g. because you are
using two different types of modems simultaneously. For a normal case, please do not enter the serial
port manually. Thus, MWconn detects the required information automatically from the Windows Device
Configuration at each start.
Should it still be required to manually enter the details of the port, then do take note that most modems
possess multiple ports:
- For modems' type "Huawei", the "UI Interface" must be given.
- For modems' type "Novatel" the "Primary Port" must be given.
In case the DLL-file "NwtGatewayDLL.dll" is not available, "Primary Port" and "Secondary Port"
must be separated via a semicolon (example: COM=COM5;COM6).
- For modems' type "Option" the "Applications Port" must be given.
- For modems' type "Sierra" the "AT Command Port" must be given.
- For phones' type "Sony Ericsson" the "Device Management" must be given.
As a rule, the correct type description of your modem can be found on the lower side of the modem; the
upper part mostly contains only the label or overprints of network operators.
In case your wireless modem is located in a router type Linksys WRT54G3G, then enter the text
"Linksys" here instead of the serial port. Should you have changed the IP or the username/password in
the router due to security reasons, then append the text "Linksys" according to the following sample:
Linksys 192.168.1.1 admin;admin
If you want MWconn to look for local devices only and not access any router, please enter "NoLinksys".
© 16.12.2013 Markus B. Weber, Nürnberg
MWconn, Version 5.9, Operating instructions
Page 16 of 49
If you are using a device which provides only one serial port and requires to establish the data
connection over this single port, you can switch MWconn to single-port mode:: COM=;NONE
Unfortunately, several displays cannot be made during this single-port connection. In case you want to
forbid MWconn the use of any serial port completely then enter COM=NONE
Manual initialization commands (not for Linksys) [MWconn.ini/DEVI=]
If you want MWconn to send additional commands to the modem right after standard initialization has
finished, please enter them here. Loosely followed the C notation, there may some special sequences
being used: \r for CR, \R for CR with subsequently receiving the answer, \p for 0.5 seconds delay, \P
for 5 seconds delay, \x41 for a character in hex code (here the letter A as an example) and \\ for a
regular backslash. In case you want to suppress the standard initialization, start this line with \*
PIN for inserted SIM (required) (for Linksys only per HTML-Menu) [MWconn.ini/PIN=]
Enter the valid PIN for the module (SIM) that is located in your wireless modem. MWconn will save the
PIN in masked form. This masking is only intended as a visual cover and is not an absolute protection
against unauthorized decoding.
Should you not want the saving of the PIN, then leave this data field empty. MWconn will then
consequently ask you for the PIN with every instance of modem initialization. In case the SIM card does
not require a PIN at all, then likewise, no data needs to be entered here.
In order to subsequently empty this data field, you must check the "new entry" option and delete the field
content thereafter.
Modem reset at Program end [MWconn.ini/MOD=Y]
If selected, MWconn will perform a modem reset each time the program terminates.
No menu entry for... [MWconn.ini/MOD=0..6]
If there are difficulties with one of the modes of operations, you can suppress the corresponding entry of
MWconn's context menu.
Service terminal (not for Linksys)
You have the option to directly establish connection with your wireless modem. This is exclusively
intended for the case of maintenance or technical service or for the detection of errors. Use this option
only when you are well acquainted with its function and please adhere strictly to the service information
of your modem's manufacturer. Details can mostly be found in the Internet, if you enter the modem type
and a few of the AT-commands that have been enlisted below in the search engine.
MWconn will always use the serial port for the service console, which has been entered in the data field
"Serial port". If no data has been entered here, then MWconn identifies the port automatically.
Commands that are supported by most modems:
AT
Test command (modem must respond with "OK")
ATI
Output pertaining to manufacturer information
AT+CGMR
Output pertaining to the firmware-Version of the modem
AT+CPIN?
Query, whether a PIN is required
AT+CPIN=1234
Enter PIN
AT+CGDCONT=1,"IP","aaa"
Enter APN "aaa"
AT+COPS?
Display selected network
AT+COPS=?
List received networks
AT+COPS=1,0,"nnn"
Select network "nnn"
AT+CSQ
Display signal strength (0-31)
Netlock? (not for Linksys)
MWconn can identify, whether your modem is linked to a specific mobile wireless network, thus, in turn,
possessing a so-called Netlock. You can start the related query via clicking on this button. It may take a
few seconds to fetch a result set for the query.
Please note that not all modems do accept the standard query commands. Therefore, in certain
individual case, it is possible that MWconn has not been able to identify the existing Netlock. Likewise,
due to reasons pertaining to hardware incompatibilities, the possibility of an automated query option of
so-called SIM-Locks is foregone (SIM-Locks are locks, which your modem maps to the inserted SIM). In
the case of certain modems, the relevant query commands subsequently demand the user to take out
and re-insert the modem device.
© 16.12.2013 Markus B. Weber, Nürnberg
MWconn, Version 5.9, Operating instructions
Page 17 of 49
Network
This section is dedicated to network analysis, network selection and the defaulting of the APN.
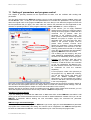
Network analysis (not for Linksys) [MWconn.ini/NET=?]
You can start the network analysis via clicking on this button, as soon as the PIN and, if required, the
serial port has been correctly entered in the registered tab "Device". MWconn then searches for all the
mobile networks currently available and displays them. The list that is thus generated is sorted per
operating mode (UMTS or GPRS) and signal strength.
Please be patient when you start this function. The process duration is – depending on the wireless
modem that is in use and the number of available networks – about two to 8 minutes. The reason for this
has a technical basis (MWconn must select every network of every operating mode individually and
check the signal strength accurately).
As soon as the program has generated the list, you can copy it into your clipboard via the button. Every
row of the list comprises of up to five points of information:
- Operating mode (UMTS or GPRS)
- Signal strength in percentage terms ("??" for “not ascertainable")
- PLMN (refer to chapter 6 for meaning and significance or en.wikipedia.org/wiki/PLMN)
- Network name
- optional after the name: "(locked)" in case your SIM card does not have access for this network.
If you want to manually target a network from the list, then mouse click action suffices in this case. The
relevant network name is thereby applied to the data field that is located under it.
G U (not for Linksys)
Check the box G or the box U if you want to perform the network analysis for GPRS resp. UMTS
networks only. MWconn will then be twice as fast with its network search.
Only this network (recommended) (not for Linksys) [MWconn.ini/NET=]
With most wireless modems, automatic network selection is a standard. Mostly, the network of your
provider will be automatically selected. Should unknown or foreign networks also be available and your
provider allows access of these per "Roaming", then, if req., the modem switches to this network. If you
do not wish for this, e.g. because you want to avoid higher connection costs, you should enter the
network manually. For this purpose, enter the name of the network that you require.
As in this case it is imperative that the exact representation is reproduced, we recommend that a network
analysis be executed (see above) and the name be then selected from this list. Alternatively, you can
enter the numeric PLMN code of the network, e.g. 26203
Automatic, show warning if not… [MWconn.ini/NET=;]
In case your provider allows the access of various networks, you will possibly not avail of the manual
network selection option. At best, use the automatic network selection together with the warning for
foreign or unknown network switch-over option. The networks that you can use in the most cost-effective
manner can be listed in list form. The list is separated via semicolons. Exact written representation is
important; please do not insert any additional empty spaces. At best, use the network analysis here also
and subsequently click on the required network in the result-set list.
Automatic, all networks [MWconn.ini/NET=]
With this setting, your wireless modem decides for itself, with regards to which network it needs to be
logged into. Depending on the network, you will have to cater to varying tariffs and thus varying costs
that are incurred.
APN (required) (for Linksys only with HTML-Menu) [MWconn.ini/APN=]
The Access Point Name (APN) must be entered, which you have in turn received from your provider for
the Internet access. If you leave this field empty, then MWconn tries to detect the APN itself. If this is not
possible, then a list of all the APN that are used worldwide can be found e.g. under:
http://www.mwconn.info/wiki/index.php/Standard_settings
If you want to use an empty APN, enter the word NONE. In anycase, please subsequently verify the
entry and in case of doubt, adhere to the information that has been provided to you by your Provider. In
certain individual cases, an incorrectly selected APN can lead to higher connection costs.
Send now specific USSD Code (nicht bei Linksys)
USSD Codes are being used for special network operations, e.g. querying prepaid credit or selecting a
specific tariff. The required codes differ from network provider to network provider but usually start with
an * and end with a #. Using this button you can send any USSD code. Please consult your network
provider to get a detailed description of the available codes.
© 16.12.2013 Markus B. Weber, Nürnberg
MWconn, Version 5.9, Operating instructions
Page 18 of 49
SMSC (not for Linksys) [MWconn.ini/SMSC=]
Insert the number of your short message service center here if you plan to send SMS. Use international
format, e.g.: SMSC=+15550000
Prepaid credit, query (not for Linksys) [MWconn.ini/PPQ=]
Here, you can define the USSD-Code for the query of the prepaid credit. Standard is *100#. In case
your network operator uses another code, then you must enter this code here, if you wish to use the
option of prepaid credit query.
Prepaid credit, load new credit (not for Linksys) [MWconn.ini/PPC=]
In case you want to simplify the task of loading of the prepaid credit, you can enter a template for the
entry of the load or recharge code here. A defaulted "SMS:" initializes the request for the loading of credit
per SMS. Examples (here for the provider Simyo.de):
PPC=*104*<INPUT>#
PPC=SMS:74696 <INPUT>
The text "<INPUT>" is replaced with the code that needs to be entered at a later stage via invoking of the
load function from the menu.
URL/USSD for Homezone status request [MWconn.ini/HOMU=]
In case you use a tariff with the so-called Homezone option, then it would be interesting for you to know,
whether invoicing is based on the Homezone-Tariff or not. The network operator provides options for this
purpose, which allow the user to query the Homezone-Status per Internet site or USSD-Code. MWconn
can complete this task for you. If you can identify your network in the standard settings, then select it
directly. Otherwise, you will need to enter the query data in the following three data fields manually.
MWconn always verifies the Homezone-Status at the start of the connection, and thereafter within
intervals of ca. 10 minutes and subsequent to every cell hand over (as long as this is supported by the
modem). The display takes place through an "H" in the info section of the taskbar. In case you use a
volume tariff, then do take note of the fact that additional data volumes are required via the Homezonequery. However, contrary to normal surf-activities, this is considerably less or negligible.
In case that you manually enter the parameters for the Homezone-query, enter the address of the related
Internet site or the USSD-Code in this field.
Examples: indikator.o2online.de *130#
Text pattern for "in homezone" [MWconn.ini/HOMI=]
In order to be able to interpret the answers w.r.t. the Homezone-query, MWconn always searches for a
specific sample text in the answer or response. The sample text for the status "within the Homezone"
must be entered in this field. Please take note thereby with regards to the exact spelling and text
representation and usage of HTML-codes. The latter can be retrieved by the user when they chooses to
invoke and view the source text of the Internet site.
Example: You are located within your homezone.
Text pattern for "not in homezone" [MWconn.ini/HOMO=]
The same is valid for this data field, as described in the previous section. The sample that you enter here
is however valid for the case that you are located outside your Homezone.
Example: You are located outside the range of your Homezone.
Disconnect if located outside the Homezone [MWconn.ini/MOD=H]
If you have activated the Homezone display (see above), you can configure via checking this option, such that
the connection is automatically disconnected as soon as MWconn clearly detects, that you are located
outside the Homezone.
Please take note that it can take a few minutes before the connection is disconnected, as the HomezoneStatus is verified approximately only every 10 minutes. Due to security reasons, in the case of a
disconnection, the connection will not be automatically re-established.
Connection
This registered tab contains the settings pertaining to connection and for the identification in the network.
Automatically connect at program start [MWconn.ini/CONA=]
If MWconn, post initialization of the modem, should also immediately establish connection with the
Internet (Standard), then this option must be checked.
Automatically disconnect at program end [MWconn.ini/CONA=]
Here, the option must be checked, if the Internet connection should be immediately disconnected once
the MWconn program has been closed (Standard).
© 16.12.2013 Markus B. Weber, Nürnberg
MWconn, Version 5.9, Operating instructions
Page 19 of 49
Avoid connection [MWconn.ini/ENDC=]
In case you are using a tariff which charges higher costs within a specific time frame of day, you can
MWconn have to popup a corresponding warning message. For this purpose enter start and end of this
period of time. Use the 24-hour representation, e.g. "20:45". Please enter a spaciously laid out period of
time. On the one hand, your PC clock might not be adjusted exactly; on the other hand, MWconn will
wait more than minute before it terminates a connection automatically.
For to get a warning message around midnight (e.g. in case of Dayflats from Fonic or T-Mobile), enter
"23:55 to 00:05".
Avoid connection and end the program afterwards [MWconn.ini/ENDC=E]
If you check this box, MWconn will end itself after having terminated the connection. Optionally you can
advice MWconn to shutdown the Computer (see section "Start/End").
≡
Connection mode (not for Linksys) [MWconn.ini/CON=]
You can specify, which connection setting or which device MWconn should use to establish connection.
Basically, we differentiate between a dial-up connection and a network connection. You can enter the
details manually if required.
In case you do not use various wireless modems, then the "automatic" setting is recommended.
MWconn then searches by itself for the appropriate connection.
Connection name (not for Linksys) [MWconn.ini/CON=]
If you have decided to apply the connection settings manually, then enter the name for a dial-up
connection here (refer to Start Connect to) and for a network connection, enter the name of the
corresponding device from the device list (Start Run "devmgmt.msc"). For the latter, it suffices to
enter only part of the device name, for example "HSxPA".
If you had used the original software of the network operator or at least installed the same, and this in
turn had created a dial-up connection, then please enter the name of this connection. MWconn will then
use this connection. Please always take note of using the correct written representation.
Use NDIS commands, if applicable (not for Linksys) [MWconn.ini/MOD=N]
If your modem needs to be controlled by NDIS commands, please check this box.
Identification, Name and Password (for Linksys only with HTML-Menu) [MWconn.ini/PASS=]
If your network operator requires a specific username and password, then you must enter both of these
entities here. Due to security reasons, all the characters for the name and password are displayed as
masked entries with asterisk.
Graphics compression off, if possible [MWconn.ini/MOD=G]
Most mobile networks compress the images that are present in the websites. This has three advantages:
Firstly, there is not too much load on the network and more users can surf at the same time. Secondly,
the speed at which the sites are invoked is accelerated, as less data also requires less time to get
transferred. Thirdly and finally, graphics compression helps you save costs, in case you use a volumebased tariff plan.
Naturally, compression also has a disadvantage: Graphics are displayed in low quality, and in individual
cases there are also functional problems with the display of websites.
Setting this option (checking this option) will switch-off the graphic compression in general. If the option
has been set, MWconn then sends a compression deactivation packet to the compression server (IP
1.2.3.4). Please note that this general switching-off does not function with all networks.
Delete external initialization commands with APN [MWconn.ini/MOD=Z]
If you start another connection tool from time to time and if that tool changes the APN in modem
initialization commands in the device configuration, check here to have MWconn automatically deleted
these commands at every program start.
Monitoring
MWconn can monitor the quality of your Internet connection and if necessary, it can disconnect from your
Internet connection, as well as re-establish connection anew. With the help of data entry in this registered
tab, you can define the type of monitoring and the error tolerance level.
Signal Strength, query more frequently [MWconn.ini/MOD=F]
For special applications – especially when adjusting an antenna – it is recommended to reduce the query
interval for signal strength gauge by checking this box.
Connection monitoring by DNS ping, soft (recommended) (not for Linksys)
[MWconn.ini/PING=999.111.0.0;999.3.0.0]
© 16.12.2013 Markus B. Weber, Nürnberg
MWconn, Version 5.9, Operating instructions
Page 20 of 49
When no data is transferred, because you are e.g. looking through a single Internet page and thus have
not activated any links, MWconn does not know, whether the lack of data transfer is a voluntary action
on the user’s part or whether there has been a time-out in the connection due to a data transfer error.
This can be identified with the help of a so-called Ping (Test send) to a defined destination address (IP)
in the Internet.
If you activate the sending of the DNS-Ping, MWconn then sends a test packet to the so-called DomainName-Server (DNS) in the case of absence of data traffic. This server is responsible for resolving of
Internet addresses and as a rule always returns a reliable response.
In case the response packet is not received within a specific time frame, then MWconn knows that the
connection is not functioning correctly and will re-establish it anew.
Please note that the active test of the connection per DNS-Ping or ICMP-Ping (also refer to the following
sections) causes additional data traffic (maximum ca. 50 to 150 kBytes/hour). You should consider this
against the backdrop of the selected billing tariffs. In case you are required to pay for each kByte, then it
is better not to use the option of active connection monitoring.
Likewise, please note that through the option of active connection monitoring, you are naturally
responsible for additional data traffic w.r.t. the selected destination address respectively, even if this data
traffic is minimal. This is also valid for destination addresses that are automatically detected if required.
Connection monitoring by DNS ping, frequently (not for Linksys)
[MWconn.ini/PING=999.111.0.0]
This type of connection monitoring is more reliable as the previous option; it however generates more
data traffic. Also, your Domain-Name-Server is subjected to more load than necessary through the
frequent test packets. In case you require a very quick detection of connection errors, you can still select
this type of monitoring. In addition to this, we recommend that in this case, other destination addresses
are also used (refer to the next paragraph).
Connection monitoring by ICMP ping (recommended for Linksys) [MWconn.ini/PING=]
If you select this option, the Internet server of your choice can be used for connection monitoring. As a
destination address, you should always select a reliable Internet server, which you consider as a reliable
source for the return of responses for the test sendings, e.g. your Internet provider. Verify this simply per
Ping command via Start->Programs->Accessories->Command prompt, to determine whether the
server you have selected sends back a response.
If you have determined multiple destination addresses that you consider reliable, enter these in the fields
“1. IP" to "3. IP". MWconn will then always use these destination addresses in the given sequence in
order to test the connection when no data is being transferred.
If you do not enter any data in this line, then the option of detection of connection errors works with less
reliability. In case you enter "000.000.000.000" for 1. IP, MWconn then randomly searches for three
possible IPs for the purpose of connection verification and uses these.
Entering virtual IPs can lead to MWconn sending across test packets less frequently and thus can avoid
heavy data traffic:
The IPs 999.1.0.0 to 999.99.0.0 signify a delay of 1 to 99 cycles per 5 to 8 seconds. For example,
entering the IP 999.3.0.0 will mean that MWconn delays the sending of the test packets by
approximately 20 seconds.
Connection error tolerance (for Linksys only FRZ-value) [MWconn.ini/ERR=]
Here, you can set the degree of tolerance of connection errors by MWconn. If one of the error types
occurs frequently, and you do not want that the connection is re-established anew every time the error
occurs, then increase the number of permissible times for this error type. Then, MWconn will wait for a
little longer in order to establish the connection anew. In case you enter zero, then the related error type
will not be monitored by MWconn anymore.
FRZ
Connection freeze (Data is sent, but no data is received)
CRC Cyclic Redundancy Check
TME Time-outs
ALG Grouping error
FRM Framing error
BUF
Buffer overflows
For the normal case we recommend that standard values be used, which can be entered at any given
time frame via pressing the “Standard values’ button.
≡
Display connection errors [MWconn.ini/ERR=L]
Here, you determine, from when or from what point the connection errors that occur need to be
displayed. Thereby, 0 signifies "immediately", 5 "post encountering half the number of permissible errors
that can be tolerated" and 9 "only shortly prior to connection abort and reconnect".
© 16.12.2013 Markus B. Weber, Nürnberg
MWconn, Version 5.9, Operating instructions
Page 21 of 49
Battery energy [MWconn.ini/BATT=]
If the connected device has its own battery and supports the required query commands, you can decide
in which case MWconn shall display the battery icon.
Log
You can activate a series of logging functions via this registered tab. MWconn differentiates between two
types of logs: the connection log and the service log.
Activate connection log "connlog.txt" (recommended) [MWconn.ini/RND=]
Every dial-up and every connection termination is logged in a file called connlog.txt. Additionally, this
file also contains information regarding the accrued data volumes, as well as the online time. The current
counter reading can be seen under the activate check box option for data volumes and online time
respectively.
Please note that the values displayed and logged by MWconn are no reliable basis for invoicing or
monthly billing. The network operator will always generate the invoice based on the data usage that he
has determined himself and by his own calculation mechanism.
Reset now
The data volumes or the online time counter is reset to zero. You will need to use this option especially
when you have decided for the continuous counting of data volumes instead of opting for a monthly
resetting of the counter (see below for further explanation).
Also, when the option to set the counter reading manually has not been provided to you, this option is
still available. The related description can be found at the end of chapter 10.
≡
Reset monthly [MWconn.ini/DAY=]
MWconn will always set the related counter at 00:00 hours to zero on the calendar date of the
respective calendar month that has been selected here. In case you should not be online on the related
date, then the counter will be reset on the next possible opportunity post this date.
This is also valid if the detected date is not present in the current calendar month, e.g. the 31 st in the
month of February. MWconn then executes the resetting on the 1st day of the following month.
The selection of the "never" option leads to continuous counting. A resetting of the counter then takes
place only manually (see above). Nonetheless, there is naturally also a technical limitation: In case the
counter reaches a value of 1 TByte (1000 GByte) or 10000 hours (more than one year), it automatically
resets itself to zero.
Each connection round to next… [MWconn.ini/RND=]
Basically, MWconn rounds up to the next full kByte and the next full minute at the end of every
connection. This is due to technical reasons – it does not however have any negative effects, as it thus
corresponds with the smallest round-up value that is normal with the providers.
A few Internet providers however, round up to 10, 50 or even 100 kByte or to 10, 15 or 180 minutes. In
order to consider this also in MWconn, you can enter the round-up value here.
Pre-warning [MWconn.ini/MAXV= und /MAXT=]
In case you want to be warned, if a specific data volume or online time limit has been exceeded, then
enter that particular limit here. In case of exceeding this limit, MWconn warns you with an acoustic
signal (two long tones). From this point on, you will see an additional icon in the down right section of the
screen, wherein Euro coins slowly fall from top to bottom.
Warning [MWconn.ini/MAXV= und /MAXT=]
Here, the same occurs as with pre-warning (refer to the section pertaining to this topic), however, in this
case you will hear the acoustic signal three times in succession, And the Euro coins start falling faster
from this point onwards.
Terminate connection at… [MWconn.ini/MAXV= und /MAXT=]
If you enter a value for data volume or time here, then the connection will be automatically terminated, as
soon as this limit is reached. MWconn will not establish a connection for as long as corresponding action
pertaining to this value has been taken or the related counter has been reset.
Generate statistics "connlog_vol.txt", "connlog_tim.txt"
For the data volumes that are accrued, as well as for the online time, simple graphical analyses can be
generated. If you click on the respective buttons, then MWconn writes the related evaluation and
analysis as a semi-graphic in the text file that has be given. Additionally, a CSV-file with the same name
is generated (extension ".CSV"), which summarizes all the day’s values in a table. You can generate
further high quality graphical evaluations and analyses per table calculation program.
The image/graphic that is generated by MWconn directly uses a non-linear resp. a non-continuous linear
© 16.12.2013 Markus B. Weber, Nürnberg
MWconn, Version 5.9, Operating instructions
Page 22 of 49
scale. Six equidistant parts of the common logarithm are used for the data volumes. This means that the
scaling takes place according to the sample 1 1,5 2,2 3,3 4,7 6,8 10 15 22 33 47 68 100 150
etc.
The online time is represented in a discontinuous linear scale. For times to be represented for values of
up to one hour, MWconn uses the 5-minutes-grid, for times greater than one hour, it uses the 30minutes-grid.
Write cell id to connection log (not for Linksys) [MWconn.ini/MOD=I]
In case your modem supports the output and display of the Cell-ID, every cell hand over or switch-over
to roaming is contained in the connection log (PLMN, LAC, CID, refer to chapter 6 for more details).
Write signal strength to connection log [MWconn.ini/MOD=J]
Every change in the signal strength is logged in the connection log. This is – as the logging of the Cell-ID
– mainly useful for test- and analytical purposes.
Maximum log length [MWconn.ini/LLEN=]
This is to limit the file sizes for connlog.txt and servilog.txt (size unit is kiB).
Logfile path [MWconn.ini/LDIR=]
If you want MWconn to write the logs into a separate folder, please enter its location here.
Activate service log "servilog.txt" [MWconn.ini/MOD=P]
A service log can be activated for test and verification purposes. MWconn then generates a file with the
name servilog.txt, in which all the important system steps are entered. This file provides the
experienced user, as well as the developer, with valuable information in case of problems with the
program or with the hardware in use.
Technical note: If the service protocol option has been switched on, then MWconn takes a little longer to
start.
Start/End
You define, whether MWconn starts automatically with the PC-Start, the conditions that can lead to the
closing of the program and what should subsequently happen.
≡
At every PC start, start also…
Here, you define, which MWconn-program instance should start automatically on booting of the PC.
Exact information in this context can be found in chapter 5.
Delay after program start [MWconn.ini/SDLY=]
Especially when you want to start MWconn at a specific point of time (or allow it to auto-start), at which
the wireless modem is not yet ready for use or has not yet been initialized, then it is recommended that
the running of the program at start be delayed. Enter the delay in seconds in this section.
Delay after standby [MWconn.ini/SDLY=;]
Independent of the delay time after program start, you can specify a delay time for resuming after
standby, resp. hibernating.
Terminate program if not connected [MWconn.ini/ERR=NOC]
In case your wireless modem does not detect any available network, then MWconn waits, until these
networks are available and displays “Searching for networks" in the interim process while it executes its
search. If you want to end the program if no network is available post a considerable time lag, then enter
that time/duration here.
Terminate when connection error [MWconn.ini/MOD=E]
MWconn normally disconnects an erroneous connection and re-establishes it anew. Instead of this, if
you want that MWconn terminates itself when there is a connection error, then click on this option.
Terminate when PC goes standby [MWconn.ini/END=Z]
If this box is checked, MWconn will terminate as soon as the computer is going to invoke standby mode.
Countdown [MWconn.ini/END=]
You can define, whether MWconn closes or ends on its own post a pre-defined time period. Thereby,
you can select, whether the connection activity needs to be considered. If yes, then the program will not
be closed, for as long as the connection is active. "Active" signifies that considerable data traffic is taking
place (minimum 1 kByte/s). MWconn then waits until no connection activity takes place over the defined
time period and ends thereafter.
This is especially useful, if you want to execute a large download in your absence and subsequently wish
for the connection to be automatically disconnected or want the PC to shut-down on its own (see down
below for automatic shut-down).
© 16.12.2013 Markus B. Weber, Nürnberg
MWconn, Version 5.9, Operating instructions
Page 23 of 49
During the count-downs, you will see a small icon in the information area of the taskbar (down right in the
screen), which continuously shows you the remaining time in minutes (or in hours, with an ‘h' appended
after it).
After automatic program end [MWconn.ini/END=]
You can define, what should happen post program end. You can configure MWconn, such that the PC
merely shuts-down or shuts-down and subsequently restarts.
However, please take note that an auto shut-down action could result in a loss of unsaved data of other
files. Therefore, always save any possibly open files beforehand.
External
You can enter external programs that need to be started by MWconn in this registered tab.
≡
Execute subsequent to program start [MWconn.ini/CMD1=!]
As soon as MWconn starts, it will execute the given command line.
≡
Execute subsequent to program end [MWconn.ini/CMD1=|]
The command line is executed, as soon as MWconn closes. It does not matter, whether you have
closed the program yourself or whether MWconn has been closed on its own due to one of the predefined values in the configuration.
≡
Execute subsequent to first connection start [MWconn.ini/CMD1=]
The command line located here is executed, as soon as MWconn has established the first connection.
≡
Execute subsequent to every connection start [MWconn.ini/CMD1=,]
The command line is executed after every connection dial-up is established, i.e. also in cases when
MWconn automatically ended the connection due to errors in transfer and has had to re-establish
connection anew.
≡
Execute subsequent to SMS reception (not for Linksys) [MWconn.ini/SMS1=]
The command line entered for this following section is executed, as soon as MWconn has received an
SMS. In case of requirement, you can restrict this to one specific SMS (see below for further details).
If you have clicked on this button, then MWconn knows that you want to use the remote control function
and possibly cannot view details on your PC. Therefore, no SMS notification is displayed on the screen.
Instead, a short acoustic signal rings respectively and the SMS is written to the SMS-Log (maximum
character length of 160 characters).
≡
Execute subsequent to incoming call (when offline) (not for Linksys) [MWconn.ini/SMS1=,]
The same is valid as in the case of " Execute subsequent to SMS reception". However, instead of the
SMS, an incoming call acts as the trigger to execute this function. This functions only as long as
MWconn is not online.
Take note that the recognition of an incoming call is not supported by many modems. A few modems do
in fact support recognition of incoming calls; however, this is then signaled without the call number of the
caller. If required, inquire with the dealer prior to the purchase of a modem specifically in this regard. The
same is valid while finalizing an Internet-Mobile Telephony contract, as incoming calls are fundamentally
blocked in the case of a few providers.
Shell command [MWconn.ini/CMD1=]
The command line that is entered in this section is executed by MWconn – depending on the defined
values (see above) – e.g. directly post the establishing of an Internet connection or post the receipt of an
SMS. For example, if you want to execute an automatic start of the Internet browser, then the entry is as
follows: c:\programs\mozilla firefox\firefox
One of the programs that is started by MWconn in this manner is also closed automatically with the
closing of MWconn. (Should an MWconn session be aborted due to a system- or program error, then
you must end the programs started in this manner manually via the Task Manager.)
If you do not want an automatic end, then use a trick and insert the OS (=Operating System) command
"cmd /c" before the program name. In this case the line is as follows:
cmd /c "c:\programme\mozilla firefox\firefox"
In case you are using the remote control function ("Execute subsequent to SMS reception" or " Execute
subsequent to incoming call", see above), then there are other modified commands that are available. In
addition to the normal command line options, there are also special commands that are permitted:
MWCONN_CONNECT
Establish connection
MWCONN_DISCONNECT
Disconnect connection
MWCONN_RECONNECT
End existing connection and re-connect
MWCONN_END
End MWconn program
© 16.12.2013 Markus B. Weber, Nürnberg
MWconn, Version 5.9, Operating instructions
Page 24 of 49
You can combine such a special command with a command line prompt respectively, wherein the latter
is inserted directly after this, e.g.: MWCONN_CONNECT testprogramm.exe
Furthermore, you can use the following in the command line placeholders:
%0
Number of the sender, without the leading plus sign
%1
Number of the sender
%2
The SMS content; if req. the portion after the keyword (s. below)
%3
Like %2, however only characters, numbers, space character, "_" and full stop is accepted
%%
Is converted to a %-character
As compared to the placeholder %2, the placeholder %3 offers additional security, as using it prevents
the transfer of any control or functional characters. Then, for example, from the command "echo %3" you
do not get "echo hallo & delete c:\datei.txt", instead what we get is "echo hallo _ delete c__datei_txt".
Thus, this does not pose any uncalculated risk for your files.
Browse
Post clicking on the search button, you can navigate within the file system with mouse click supported
action. Use this option to your advantage, in order to avoid errors during the entry of path and program
names.
Execute hidden [MWconn.ini/CMD1=;]
In order to configure, such that the desired program is invisible, i.e. it runs without a window and without
an entry in the taskbar, check this option.
Sender (not for Linksys) [MWconn.ini/SMS1=]
The command defined above is only executed, when the SMS (or the call) originates from the sender
that has been defined here. Please enter the sender’s number in the normal international form with the
prefixed plus characters. Example: +1555111111
If there is more than one number which shall be accepted, enter them all (up to 10) and separate them
by commas. If you do not enter any data for this section, then anyone is accepted.
Keyword (not for Linksys) [MWconn.ini/SMS1=]
Only SMS which contain the keyword that has been defined here, will trigger the execution of the
command that has been defined above. MWconn ignores upper-/lower-case in this context. In order to
avoid problems with various SMS-character sets, only numbers and characters are best used (without
country specific special characters like for e.g. ä, é, ß) for the keyword.
The usage of this option in cooperation with a defined sender number (refer to the previous paragraph) is
recommended due to security reasons.
In case you do not enter anything here, then this will lead to the command execution by SMS with any
kind of content.
SMS (not for Linksys)
There is a small SMS manager integrated in this tab. Switch between Inbox and Outbox by clicking the
corresponding button. Selected SMS can be replied on, new SMS can be created and transmitted.
SMS reception (recommended) (not for Linksys) [MWconn.ini/MOD=M]
If you wish to be able to invoke a display of the SMS (short messages) that have been received by your
modem on the screen, you must set this option. Precise information pertaining to the receipt of SMS can
be found in chapter 14.
Phone book (not for Linksys)
MWconn can display a name left to every phone number in the list. For this, please add the appropriate
entries to the phone book in file sms_name.ini. The easiest way to accomplish this is to write the name
together with the number into addressee input field. If you want to revise the phone book (change or
delete entries), open it by clicking the button Phone book and edit the file which will be opened
afterwards.
Send (not for Linksys)
The entered text will be sent to the selected destination phone number. As long as MWconn is not
attached to a radio network, this SMS is stored in memory and sent at next occasion the program gets a
radio connection. You can identify such temporarily stored SMS by the leading plus sign in SMS outbox
list.
© 16.12.2013 Markus B. Weber, Nürnberg
MWconn, Version 5.9, Operating instructions
Page 25 of 49
10 Configuration file – MWconn.ini
A message is invoked when MWconn is started for the first time, which refers to the file MWconn.ini. An
array of information must be entered in this file. Double-clicking on the file name and update the lines in the
manner described below. MWconn can detect some of the information on its own; you should leave the
corresponding lines empty. All values that are automatically entered must be subsequently verified.
Tip:
Instead of opening the MWconn.ini file via Text editor, you can basically use the configuration
program CONFIG.exe that is easy to use. When you move the mouse cursor over one of the data
fields, a short text (tool tip) is displayed a few seconds later, which mentions the respective
parameter name, for which you will find an exact description in this chapter. Precise description w.r.t.
to working with the CONFIG.exe program has however been dealt with in chapter 9.
[The location in the CONFIG.exe program at which you find the settings that have been described
here, can be identified here in the chapter through the information in the square brackets
respectively.]
Line 01 of the file MWconn.ini should never be manually edited. Should it be required nevertheless under
exception cases that the internal program data like window position, counter reading etc. be edited, then you
can find the exact description of the contents of this line at the end of the chapter.
Important: In case of doubt of data that is to be entered, please adhere to the information provided to you by
your Internet provider. In certain individual cases, it could be that higher connection costs are incurred.
If you are using the Linksys-Router, then you must apply the most important settings via the HTML-Menu of
the router. A few functions of MWconn are not active in this case; the related settings are ignored. You can
refer to further information in this context in chapter 2.
[CONFIG.exe/Button down-left section] Here you can define, whether the program output of
MWconn should take place in German (LAN=Deutsch) or English (LAN=English).
COM= [CONFIG.exe/Device] The command port that is assigned to the wireless modem can be given here
(e.g. COM=COM5). Most of the modems possess multiple ports, therefore please take note of the
following:
- For modems' type "Huawei", the "UI Interface" must be given.
- For car modems ds' type "Novatel" the "Primary Port" must be given.
In case the DLL-file "NwtGatewayDLL.dll" is not available, "Primary Port" and
"Secondary Port" must be separated via a semicolon (example: COM=COM5;COM6).
- For modems' type "Option" the "Applications Port" must be given.
- For c modems ards' type "Sierra" the "AT Command Port" must be given.
- For phones' type "Sony Ericsson" the "Device Management" must be given.
As a rule, the correct type description of your modem can be found on the lower side of the modem;
the upper part mostly contains only the label or overprints of network operators.
In case you do not enter any data for COM=, then MWconn detects the required port name at every
program start automatically from the Windows Device Configuration (recommended).
You can start the physical search for the port via entry of a question mark (not recommended in a
normal case). MWconn then searches for the port itself at the next program start and writes it to the
file. Subsequently, verify the entry. For this type of search you should disconnect all devices that are
connected via serial ports to the PC.
In case your wireless modem is located in a router of type Linksys WRT54G3G, then instead of the
serial port, enter the text Linksys here. Should you have changed the IP or the
username/password in the router due to security reasons, then append the text "Linksys" according
to the following sample: COM=Linksys 192.168.1.1 admin;admin
If you are using a device which provides only one serial port and requires to establish the data
connection over this single port, you can switch MWconn to single-port mode:: COM=;NONE
Unfortunately, several displays cannot be made during this single-port connection. In case you want
to forbid MWconn the use of any serial port completely then enter COM=NONE
DEV= [CONFIG.exe/Device] In exceptional cases MWconn cannot determine the device type correctly.
Then it is recommended to enter it manually: 1 Option, 2 Novatel, 3 Huawei, 4 Sierra, 5 Ericsson, 6
Qualcomm, 7 Samsung, 8 ZTE, 11 Sony phone, 12 LG phone.
DEVI= [CONFIG.exe/Device] If you want MWconn to send additional commands to the modem right after
standard initialization has finished, please enter them here. Loosely followed the C notation, there
may some special sequences being used: \r for CR, \R for CR with subsequently receiving the
answer, \p for 0.5 seconds delay, \P for 5 seconds delay, \x41 for a character in hex code (here
LAN=
© 16.12.2013 Markus B. Weber, Nürnberg
MWconn, Version 5.9, Operating instructions
Page 26 of 49
the letter A as an example) and \\ for a regular backslash.
In case you want to suppress the standard initialization, start this line with \*
PIN= [CONFIG.exe/Device] Update this line with the valid PIN for the SIM card that is located in your
wireless modem. Post the next start of MWconn, the PIN will be automatically written to the file in
masked format (e.g. "CRYPT152637489"). This masking is only intended as a visual cover and is
not an absolute protection against unauthorized decoding. If the SIM card does not require a PIN at
all, then no data needs to be entered for this section.
NET= [CONFIG.exe/Network] Enter the network, to which the user needs to be logged in to. The network
name must be exact and complete in its form, e.g. E-Plus, BASE, T-Mobile D, o2 - de,
Vodafone.de. Please note that the network names can vary depending on the modem and SIM
card that is being used. Alternatively to the network name you can specify the numeric PLMN code
of the network, e.g. NET=26203
If you require an automatic network selection, then do not enter any name here. If you want to
detect, which network is currently available, then insert a question mark in the line: NET=?
MWconn then searches with the next start of the program for all the networks that are currently
available and writes their names to this file. Example:
NET=?BASE;Vodafone.de;o2 - de;T-Mobile D
You must subsequently correct these lines of the file, whereby you will have to delete all the
unknown foreign network names, the semicolons, as well as the question mark. Example:
NET=o2 - de
[While using the CONFIG.exe program, you only need to use the Network analysis button to detect
networks.]
Especially in the case of automatic network selection, please always note the network name that is
displayed by MWconn. It can especially occur in border areas, whereby you use a foreign network
as an oversight and thus have to incur higher costs. Thus, it is best to opt for manual network
selection or use the acoustic warning in the case of network switch-over (MOD=R, see below).
If your provider allows access to various networks, then the question of manual network selection
possibly does not arise at all. At best, use the automatic network selection option together with the
warning to alert on switch-over to foreign or unknown networks. The networks that you can use in
the most cost-effective manner can be provided in list form. The list is separated via semicolons.
Exact written representation is important; please do not insert any additional empty spaces.
Example:
NET=;o2 – de;T-Mobile D
APN= [CONFIG.exe/Network] Enter the so-called "Access Point Name" (e.g. internet.eplus.de or
web.vodafone.de). You can obtain further information from your network operator. In case you do
not enter anything, then MWconn tries to detect the APN itself at the next program start.
Subsequently, verify the entry that is automatically inserted.
A list of all the APN that are used worldwide can be found for example here:
www.mwconn.info/wiki/index.php/Standard_settings
If you want to use an empty APN, enter the word NONE. If you are unsure, whether the APN that has
been entered is correct or not, then please inquire with your network operator. An incorrect APN can
lead to higher connection costs in certain individual cases.
PPQ= [CONFIG.exe/Network]
You can define the USSD-Code for the query of the prepaid credit. Many network operators use
*100#. In case your network operator uses another code, then you must enter this respectively, if
you want to use the option of prepaid credit query.
PPC= [CONFIG.exe/Network] In case you want to simplify the task of loading of the prepaid credit, you can
enter a template for the entry of the load or recharge code here. An "SMS:" as a prefix initializes the
request for the loading of credit per SMS. Examples:
PPC=*104*<INPUT>#
PPC=SMS:74696+491770610000 <INPUT>
The text "<INPUT>" is replaced with the code that needs to be entered at a later stage via invoking
of the load function from the menu.
CONA= [CONFIG.exe/Connection] Here you decide if MWconn connects to and disconnects from the
Internet when the program is started or terminated. Enter the letters S and/or E for this purpose.
CON= [CONFIG.exe/Connection] Normally, MWconn uses the dial-up entry with the name "Internet", in
order to automatically establish an Internet connection and disconnect an existing connection at
program end. In case you want to use another dial-up entry, then you can enter the name here.
In case you do not want to establish an automatic connection through MWconn, insert a semicolon
directly after the equal sign. Correspondingly, the same is valid for the ending of connection.
Example: CON=Internet;
© 16.12.2013 Markus B. Weber, Nürnberg
MWconn, Version 5.9, Operating instructions
PASS=
DAY=
RND=
MAXV=
MAXT=
HOMU=
Page 27 of 49
In this case, MWconn will establish the connection automatically; it will however not disconnect the
connection on its own when the program ends.
If you are using several wireless modems simultaneously, then it is possibly necessary to enter the
type of connection that needs to be established. With a preleading comma, MWconn will only use
the network adaptor for the establishment of connection; with a "|"-character (vertical pipe character)
instead, you will enforce the use of a dial-up connection.
You can also specifically enter a network adaptor, whereby you need to enter a part of the name
behind the comma. Example: CON=,HSxPA
Please take note of the exact written representation in each case.
[CONFIG.exe/Network] In case it is required by your network operator that you enter the username
and the password for the establishment of connection, this line must be filled with corresponding
data. First the username, then a semicolon and then the password. Example:
PASS=user;password
[There are separate data fields that have been provided for CONFIG.exe.] Due to security reasons,
the name and the password of MWconn are saved in masked form (For further information, refer to
the description for PIN=).
[CONFIG.exe/Log] If required, MWconn sums up not only the data volumes that have been
transferred per session, in fact it is also capable of doing the same for all the Kilobytes that have
been transferred for a month. The same is valid for online time. Enter the calendar days here
(always 1 to 31 respectively), on which the counter must re-start respectively. Example: DAY=27;28
In this case, the volume counter will always be reset to zero on the 27 th and the online time counter
will always be reset to zero on the 28 th. To get a reset every day, enter: DAY=32;32
Should it not be required that the counter be automatically reset on a monthly basis, then enter 99
instead of the calendar days. The volumes will then be counted continuously. Obviously, this is not
an infinite count; the counter is reset and restarts from the beginning post 1000 GB or 10000 hours,
else the numbers will then be unmanageable.
[CONFIG.exe/Log] You can configure MWconn to log every connection instance in the file with the
name connlog.txt. For this purpose, enter the round up limits for the data volumes and the online
time that need to be totaled here. kByte and Minutes are the valid units of measurement. Example:
RND= 100;15
MWconn will then round up the data volumes to the next 100 Kbytes and the online time to the next
15 minutes at the end of every connection. The number (in the example "100"), the round up value is
for the number of kBytes, to which round up at the end of every connection should take place; the
"15" represents Online time round up to the next full 15 minutes.
[CONFIG.exe/Log] In case you use a data volume tariff, it is then to your advantage, if MWconn
warns you prior to exceeding the permissible data volume that is included. You can define up to
three various data volume limits in this parameter line. The data represented one after another in
succession refers to the pre-warn-limit, warn-limit and the limit for automatic termination of the
connection. Example:
MAXV=67500k;500M;1G
In this case, MWconn will execute a warning tone post usage of 67,5 MBytes (three short and one
long tone) and display a corresponding icon in the windows status bar. After 500 Mbytes, a more
urgent warning is sounded (three tones and an icon with faster animation), and after 1 GByte of data
volumes, the connection will be automatically terminated. It can only be re-established, when a new
counter cycle begins (refer to the section on DAY=). If you want to establish a connection prior to this,
then you must increase the limit for the automatic termination of connection (here 1 GByte).
Please note that the details without the unit of measurement are always represented as k (kByte).
Decimal commas or decimal points are not valid. Limits, the exceeding of which should not have any
consequences, can be simply set by you to zero, e.g.: MAXV=0;500M;0
[CONFIG.exe/Log] Just as in the case of MAXV= , you can also define a warning prior to the
exceeding of specific online time here. The provision of the three possible limits is according to the
same rules as those for MAXV=. Valid units of measurement are minutes, hours and days (Unit
descriptions are min, h and d). Example: MAXT=90min;4h;1d
[CONFIG.exe/Network] In case you use a tariff with the so-called Homezone option, then it would be
interesting for you to know, whether invoicing is based on the Homezone-Tariff or not. The network
operator provides options for this purpose, which allow the user to query the Homezone-Status per
Internet site or USSD-Code. MWconn can complete this task for you. For this purpose enter the
address of the related Internet site of the USSD-Code in this line. MWconn always verifies the
Homezone-Status at the start of the connection, and thereafter within intervals of ca. 10 minutes and
at every cell hand over (as long as this is supported by the modem). The display takes place through
an "H" in the info section of the taskbar. In case you use a volume tariff, then do take note of the fact
that additional data volumes are required via the Homezone-query. However, contrary to normal surf-
© 16.12.2013 Markus B. Weber, Nürnberg
MWconn, Version 5.9, Operating instructions
Page 28 of 49
activities, this is considerably less or negligible. Examples:
HOMU=indikator.o2online.de
HOMU=*130#
HOMI= [CONFIG.exe/Network] In order to be able to interpret the answers w.r.t. the Homezone-query,
MWconn always searches for a specific sample text in the answer or response. The sample text for
the status "within the Homezone" must be entered in this field. Please take note thereby with regards
to the exact spelling and text representation and usage of HTML-codes. The latter can be retrieved
by the user when they choose to invoke and view the source text of the Internet site. Example:
HOMI= You are located within your homezone.
HOMO= [CONFIG.exe/Network] The same is valid for this data field, as described in the previous section.
The sample that you enter here is however valid for the case that you are located outside your
Homezone. Example:
HOMI= You are located outside the range of your Homezone.
ERR= [CONFIG.exe/Monitoring] As already stated in the sections above, MWconn automatically
terminates a connection, when the connection quality falls short of a few certain basic minimal
requirements. Subsequently, the connection will be re-established anew.
Via this line ERR= in the file MWconn.ini, you can define the minimum requirements for the
connection quality. We recommend the standard setting, which you can also initiate at a later stage
via the entry of ERR=*.
Entering numbers after the three-character keyword, you can define the error tolerance for the
respective error type. CRC5 signifies for example that MWconn should re-establish the connection
anew after five in succession of short intervals of error having occurred. CRC100 increases the error
tolerance of CRC errors manifold, and with CRC0 you define that CRC errors will not lead to the reestablishment of connection anew at all. The same is valid for all other error types. Thereby, the
keywords mean:
FRZ
Connection freeze (Data is sent, but no data is received)
CRC
Cyclic Redundancy Check
TME
Time-outs
ALG
Grouping error
FRM
Framing error
BUF
Buffer overflows
[CONFIG.exe/Monitoring] With the entry of a number after the character L you define the time from
which errors that have occurred are displayed in the program window of MWconn. Thereby L0
means "immediately", L5 means "post reaching half the number of tolerable errors" and L9 refers
to "just prior to termination of connection ".
[CONFIG.exe/Start/End] The number after the keyword NOC defines the time in minutes, for which a
state without an operative or functioning connection is tolerated, before the program is closed on its
own. NOC0 refers to "no time limit" (recommended).
Example: You want that MWconn closes on its own, as soon as 20 minutes have passed by without
a working connection having being established. For this purpose, enter ERR=NOC20.
PING= [CONFIG.exe/Monitoring] MWconn monitors an active connection continuously and re-establishes it
anew, if something is amiss. When no data is transferred, because you are for example looking
through an Internet page and thus have not activated any links, MWconn does not know in this
case, whether the lack of data transfer is a voluntary action on the user’s part or whether there has
been a time-out in the connection due to a data transfer error. This can be identified with the help of
a so-called Ping (Test send) to a defined destination address (IP) in the Internet.
As a destination address, you should always select a reliable Internet server, which you are aware of
and consider as a reliable source for the return of responses for the test sends. Select for example,
your Internet provider. Verify this simply per Ping command via Start->Programs->Accessories>Command prompt, to determine whether the server you have selected sends back a response.
If you have determined multiple destination addresses that you consider reliable, enter these in
semicolon separated format in the INI-file. Format-Example:
PING=0.0.0.255;255.255.255.255;0.0.255.255
MWconn will then always use these destination addresses in the given sequence in order to test the
connection when no data is being transferred.
If you do not enter any data in this line, then the option of detecting connection errors works with less
reliability. In case you enter PING=? [for CONFIG.exe: 000.000.000.000], MWconn then randomly
searches for three possible IPs for the purpose of connection verification and uses these.
You can additionally influence the active connection text with the help of virtual IPs:
999.111.0.0: Destination is the current Domain-Name-Server (DNS) respectively
999.1.0.0 to 999.99.0.0: Delay in sending of 1 to 99 cycles (per 5 to 8s)
© 16.12.2013 Markus B. Weber, Nürnberg
MWconn, Version 5.9, Operating instructions
SDLY=
ENDM=
ENDC=
END=
CMD1=
Page 29 of 49
Please note that the active test of the connection per Ping-command causes additional data traffic
(maximum ca. 50 to 150 kBytes/hour). You should consider this against the backdrop of the selected
billing tariffs. In case you are required to pay for each kByte, then it is better that no data is entered
for PING=.
[CONFIG.exe/Start/End] Enter the start delay time; unit: seconds. This is an advantage, when
MWconn is invoked at a point of time, at which the wireless modem has not been initialized as yet or
is not ready, like in the case of an auto-start of the program at PC boot-up. Separated by a
semicolon, you can add a delay time for resume after computer standby.
[CONFIG.exe/Global] You can terminate MWconn by clicking the the exit field X. This configuration
line decides the the program's behaviour:
ENDM=0 There will be a security query before the program ends.
ENDM=1 The program ends without any query.
ENDM=2 Instead of terminating, the program will minimize itself to a tray icon.
[CONFIG.exe/Connection] In case you are using a tariff which charges higher costs within a specific
time frame of day, you can MWconn have to popup a corresponding warning message. Examples:
ENDC=07:50;18:10
Display a warning message when connected within this time frame. If
the user does not respond within 90 seconds, MWconn will terminate
the connection automatically.
ENDC=23:55;00:05E Display a warning message when connected at midnight. If the user
does not respond within 90 seconds, MWconn will terminate the
connection automatically and end itself afterwards. Optionally you can
advice MWconn to shutdown the Computer (see END=S).
Please enter a spaciously laid out period of time. On the one hand, your PC clock might not be
adjusted exactly; on the other hand, MWconn will wait more than minute before it terminates a
connection automatically.
[CONFIG.exe/Start/End] In case you want to initialize that MWconn closes on its own, as soon as
the Internet connection remains unused for a while (Constant data transfer of less than 1 kByte/s),
then you can enter the required qualifying time here.
This is especially useful, when you want to begin a download and further require that the program
closes automatically post completion of the download. Example:
END=20
Close MWconn post a lapse of a period of 20 minutes of inactive connection (e.g.
20 minutes post end of download).
END=20C
Same as example above, but only the connection will be terminated, the program
continues.
END=120F This setting defines that MWconn is always closed after 2 hours of uninterrupted
online time, irrespective, whether data has been transferred or not.
END=20S
(or END=20FS) Not only is the program closed, but the PC is also shut down.
END=20R
(or END=20FR) The PC will be shut down and subsequently restarted.
END=0S
(or END=0R) Only in combination with ERR=NOC, ENDC=E or MOD=E. Subsequent to
the closing and ending of the program due to an error, the PC will be shut down.
END=0
MWconn starts immediately and does not end in a time-controlled manner; instead it
is ended per mouse-click action (default).
END=Z
Terminate program as soon as the computer is going to invoke standby mode.
You will be able to view a small icon in the info section of the taskbar right until the end of the
countdown time (down right section of the screen), which in turn displays the remaining time in
minutes (or in hours with an ‘h' suffix appended to it).
However, please take note that an auto shut-down action could result in a loss of unsaved data of
other files. Therefore, always save any possibly open files prior to this action.
[CONFIG.exe/External] You can enter an OS command in this line. MWconn will then execute this
command directly post the establishing of the Internet connection. For example, if you want to start
the Internet browser automatically post connection has been established, then the data entered for
the line is as follows: CMD1=c:\programs\mozilla firefox\firefox
The programs that are started in this manner by MWconn are also automatically ended when
MWconn closes. Should MWconn be forced to abort its operations due to a system-generated or
program error, then you must end the program that has been thus started manually and via the Task
Manager.
If you do not wish for an auto-close, then use this trick and insert the OS Command cmd /c before
the program name. The line then looks like this:
CMD1=cmd /c "c:\programs\mozilla firefox\firefox"
In order to configure, such that the desired program is invisible, i.e. it runs without a window and
without an entry in the taskbar, then insert a semicolon as the first character after CMD1=. Example:
© 16.12.2013 Markus B. Weber, Nürnberg
MWconn, Version 5.9, Operating instructions
CMD2=
CMD3=
SMS1=
SMS2=
SMS3=
SMSC=
IPC=
Page 30 of 49
CMD1=;c:\programs\myprogram.exe
MWconn establishes a connection anew if too many data transfer errors occur. If you want that
likewise also the command should be executed anew, then insert a comma as the first character
after CMD1=. Should this result in the command being executed while the start or the close of
MWconn, then use an exclamation mark resp. a vertical pipe character ("|") instead of the comma.
Likewise, the combination with the semicolon that has been mentioned in the previous paragraph is
also possible. Example:
CMD1=,;cmd
[CONFIG.exe/External] In case one command line parameter does not suffice, then you have the
option to insert another one.
[CONFIG.exe/External] And here, a third command line parameter can be entered.
[CONFIG.exe/External] You can remote control your PC with MWconn. Every SMS that is received
can trigger a pre-defined command (refer to CMD1=). In order to achieve this, insert a semicolon in
this line. The command that has been entered for CMD1= is subsequently not executed post
establishing the connection, instead it is executed post receipt of the SMS.
To prevent the execution of the command post receipt of all SMS, you can restrict this function to a
specific sender or a specific SMS-content. For this purpose, enter the telephone number of the
authorized sender in international format (e.g. +1555…) before the semicolon. If there is more than
one number to be accepted, please enter all of them (up to 10) and separate them by commas. In
case you accept commands only from SMS, which contain a specific keyword, then insert this
keyword after the semicolon. For example, a combination of both is as follows:
SMS1=+15551234567;SECRETWORD
Verification of the keyword does not differentiate between upper- and lower-case. In order to avoid
problems with various SMS-character sets, only numbers and letters are best used (without country
specific special characters like for e.g. ä, é, ß) for the keyword.
MWconn offers you the possibility of usaging of several other commands in the line CMD1= while
using the option of remote control per SMS. In addition to the normal command line options, there
are also special commands that are permitted:
MWCONN_CONNECT
Establish connection
MWCONN_DISCONNECT
Disconnect connection
MWCONN_RECONNECT
End existing connection and re-connect
MWCONN_END
End MWconn program
You can combine these special commands with a command line prompt respectively, wherein the
latter is inserted directly after this, e.g.: MWCONN_CONNECT testprogram.exe
Furthermore, you can use the following in the command line placeholders:
%0
Number of the SMS-sender, without the leading plus sign
%1
Number of the SMS-sender
%2
The SMS content; if req. the portion after the keyword
%3
Like %2, however only characters, numbers, space character, "_" and "."
%%
Is converted to a %-character
As soon as you enter a parameter for SMS1=, MWconn knows that you want to use the remote
control function and it is quiet possible that you cannot view details on your PC. Therefore, no SMS
is displayed on the screen. Instead, a short acoustic signal rings respectively and the SMS is written
to the SMS-Log (sms.txt).
Please use the remote control function only with normal SMS (maximum character length of 160
characters).
Remote control per call: In case your modem also supports dial-up connections (e.g. Voice or
CSD), you can parameterize MWconn in such a way that it also reacts to this functionality. For this
purpose, you must insert a comma directly after the"=". The section described above is valid for the
rest of this feature. Naturally, in this case, the keyword, as well as the placeholders %2 and %3, are
not available.
[CONFIG.exe/External] Like SMS1=, however for the second command (CMD2=).
[CONFIG.exe/External] Like SMS1=, however for the third command (CMD3=).
[CONFIG.exe/Network] Insert the number of your short message service center here if you plan to
send SMS. Use international format, e.g.: SMSC=+15550000
[not in CONFIG.exe] For the communication with other programs ("IPC"), MWconn uses a shared
memory amongst other features, which is called "MWCONN_IO". This segment can be read by all
programs. In case you want to write in this segment in order to transfer commands to MWconn, then
you will have to allow free access to the relevant user for this segment. Example:
IPC=myPC\myUserName
or: IPC=myUserName
IPC=ALLUSERS (access for all users)
© 16.12.2013 Markus B. Weber, Nürnberg
MWconn, Version 5.9, Operating instructions
Page 31 of 49
Further information in this context can be found in chapter 11: "Local program control per Shared
Memory"
ICON= [CONFIG.exe/Global] If you would prefer to minimize the program window of MWconn as a taskbar
icon, then you can retrieve the most important status information if you move the mouse cursor over
the icon (tool tip). Depending on the icon type, some of this information is also represented
graphically or numerically directly in the icon. You can select the icon type via the corresponding
number in the ICON=-line:
1: Standard-Icon, 2: Standard-Icon with speed icon, 3: Colored gauge icon,
4: Monochrome gauge icon, 5: Monochrome digit icon, 6: Monochrome bar icon.
You can find an exact description of the individual icons in chapter 7.
BATT= [CONFIG.exe/Monitoring] If the connected device has its own battery and supports the required
query commands, you can decide in which case MWconn shall display the battery icon. Example:
BATT=50;15
At less than 50% battery power the icon is displayed. It will flash at less than 15%.
MOD= In this line, you can insert the so-called flags. These are characters which help to activate specific
program functions. Naturally, the combination of multiple characters is also allowed.
B [CONFIG.exe/Global] Monochrome icons are displayed in black instead of white in the taskbar
and are thus easily visible and identifiable against a lighter background.
If you are using the Vista Operating System or newer, then unfortunately only the black color is
possible for the warn icons.
C [CONFIG.exe/Global] For the display in the mini window, so far as your modem supports this
feature, the numerical code is displayed instead of the current network name (e.g. PLMN, LAC,
Cell-ID). Further information pertaining to numerical codes can be found in chapter 6.
c In the mini window the data volume is displayed permanently, i.e. it does not switch to the data
transfer speed display dynamically.
d In the mini window the data transfer speed is displayed permanently, i.e. it does not switch to the
data volume display dynamically.
D [CONFIG.exe/Global] In the mini window, the online time is displayed additionally. Due to
restricted space availability, this is alternatively displayed with the data volumes – in cycles of
app. 5 to 10 seconds
E [CONFIG.exe/Start/End] This flag will configure MWconn, such that the connection is not reestablished anew for every major connection error, instead that it should end its own instance.
Thus, for example, user-defined actions per batch job can be executed, before MWconn is
started afresh, in order to re-establish connection. Even a controlled re-start of the PC is
possible (refer to END=0;0R).
F [CONFIG.exe/Monitoring] For special applications – especially when adjusting an antenna – it is
recommended to reduce the query interval for signal strength gauge by inserting an F into this
line.
G [CONFIG.exe/Connection] Most mobile networks compress the images that are present in the
websites. This has three advantages: Firstly, there is not too much load on the network and more
users can surf at the same time. Secondly, the speed at which the sites are invoked is
accelerated, as less data also requires less time to get transferred. Thirdly and finally, graphics
compression helps you save on costs, in case you use a volume-based tariff plan.
Naturally, compression also has a disadvantage: Graphics are displayed in low quality and in
individual cases there are also functional problems with the display of websites.
Setting this flag can switch-off the graphic compression in general. MWconn then sends a
compression deactivation packet to the compression server (IP 1.2.3.4). Please note that this
general switching-off does not function with all networks.
H [CONFIG.exe/Network] If you have activated the Homezone-display (refer to HOMU= and HOMO=),
you can set this flag to automatically disconnect a connection, as soon as MWconn clearly detects
that you are located outside the Homezone.
Please take note that it can take a few minutes, before the connection is disconnected, as the
Homezone-Status is verified approximately only every 10 minutes. Due to security reasons, in the
case of a disconnect, the connection will not automatically be re-established.
I
J
K
[CONFIG.exe/Log] In case your modem supports this feature, then with every cell hand-over or
switch-over to roaming, additional information is written to the connection log (PLMN, LAC, CID,
refer to chapter 6 for more details). The prerequisite is naturally that the connection log has been
activated (refer to RND=).
[CONFIG.exe/Log] Every change in signal strength is written to the connection log (also refer to
RND=).
The PIN will not be stored. That may be useful for security reasons if the computer is used by
several people who shall not all gain access to the mobile Internet.
© 16.12.2013 Markus B. Weber, Nürnberg
MWconn, Version 5.9, Operating instructions
Page 32 of 49
[CONFIG.exe/SMS] If you want to receive the SMS (Short messages) received by your Modem
on your screen, then you must activate this flag. Please refer to chapter 14 for exact details
pertaining to the receiving of SMS.
N [CONFIG.exe/Connection] If your modem needs to be controlled by NDIS commands, please
insert the Letter N into this line.
O [CONFIG.exe/Global] If you have primarily activated the mini window option of MWconn, and
would like to view a colored representation of the mode of operation, then it is best that you
switch on this option. In the case of GPRS, the mini window is then displayed in green instead of
blue.
P [CONFIG.exe/Log] A service log is activated for test- and verification purposes. MWconn then
generates a file with the name servilog.txt, in which all the most important system steps are
registered. This file provides the experienced user, as well as the developer, with valuable
information in case of problems with the program or with the hardware in use.
Technical note: If the service protocol option has been switched on, then MWconn takes a little
longer to start.
R [CONFIG.exe/Global] You can activate the warning tone with this flag, which alerts you in case
of network switch-over. This is particularly interesting during automatic switch-over of network
selection abroad, as depending on network operator, various data transfer costs can accrue.
S [CONFIG.exe/Global] For test purposes, it is sometimes advantageous that the user is informed
about every cell hand over or switch-over. In case your modem supports the display and output
of the Cell-ID, then in the case of MOD=S, the user is informed about all cell hand overs via a
short double-beep. You can thus identify the operating mode via the tone pitch: GPRS 500 Hz,
UMTS 1000 Hz.
T [CONFIG.exe/Global] Hereby, the user forces the normal program window of MWconn (not the
mini window) to always be placed in foreground.
Y Perform a modem reset at every program termination.
Z [CONFIG.exe/Connection] If you start another connection tool from time to time and if that tool
changes the APN in modem initialization commands in the device configuration, use this key to
have MWconn automatically deleted these commands at every program start.
0 No context menu entry for "No opmode selection".
2 No context menu entry for "GPRS only".
3 No context menu entry for "UMTS preferred".
4 No context menu entry for "UMTS only".
5 No context menu entry for "LTE preferred".
6 No context menu entry for "LTE only".
REM= [CONFIG.exe/Info] You can enter the required comments in this line. This is subsequently useful,
when you use various initialization data and would like to identify them correspondingly.
In the case of client-specific program versions, the line can be used for special purposes. Please
refer to the additional description in this context that has been provided to you by your supplier.
LLEN= [CONFIG.exe/Log] This is to limit the file sizes for connlog.txt and servilog.txt (size unit is kiB).
LDIR= [CONFIG.exe/Log] If you want MWconn to write the logs into a separate folder, please enter its
location here.
DIR= If you want that the MWconn program instances (GPRS.exe, UMTS.exe etc) do not use their own
folders for their inputs and outputs (MWconn.ini, connlog.txt etc.), but that instead they should
use another folder at another location, then enter the path of the respective folder here. In case no
initialization file MWconn.ini is located there at the start of MWconn, then a new file is generated;
MWconn thereby uses the initialization file from the program folder as a sample template. Important:
The DIR=-line must be located in the 3rd line of the initialization file.
M
© 16.12.2013 Markus B. Weber, Nürnberg
MWconn, Version 5.9, Operating instructions
Page 33 of 49
Please note that the file MWconn.ini should not be edited, for as long as MWconn is active. Please close
the program prior to applying changes in the file.
As stated earlier on, line 01 should not be edited, as it is used as a cache for internal program data.
Nevertheless, under exceptional circumstances, should you be mandatorily required to apply changes, then
the following description w.r.t. the structure of this line will help in better understanding of its contents.
01 3AA999999999-7777888822114-56666660000000000000000
01
3
AA
999999999
77778888
2211
4
5
666666
Rest:
line number with a subsequent space character, should not be edited
recently selected mode of operation: 1=GPRS, 2=UMTS, 3=GPRS/UMTS, 4=UMTS/GPRS,
5=LTE, 6=LTE/UMTS/GPRS, 9=none
currently not used, should not be edited
total sum of data volumes in Kilobyte
separator, should not be edited
x- and y-coordinates of the program window in the screen coordinates (from upper left
corner)
Date and month of the last program run (for the automatic re-setting of the counter)
window view: 1=normal, 2=mini window, 3=Mini window with two rows, 4=Icon
separator, should not be edited
if req.: short information that is to be displayed for CONFIG.exe
total sum of online time in minutes
currently not used, must contain 10 zeroes, and should not be edited
All the numbers entered in line 01 use leading zeroes. This means that, for example, if you wish to enter an
online time of 180 minutes, you must enter the number sequence 000180 after the first
number post second dash of line 01. Under no circumstances should the line length be
changed; it thus cannot be increased or decreased. Each one of the numbers that is to be
edited must be overwritten.
In case you inadvertently change sections of line 01 such that MWconn does not function in the correct
manner anymore, then copy a sample installation of the program in a another/special folder. You can copy a
correct version of line 01 from the newly generated “fresh” MWconn.ini file and insert the contents into your
old initialization file.
© 16.12.2013 Markus B. Weber, Nürnberg
MWconn, Version 5.9, Operating instructions
Page 34 of 49
11 Setting of parameters and program control
This chapter is specially intended for the experienced PC-users, who are confident with working with
parameters.
You can apply settings for the MWconn program not only via the configuration program CONFIG.exe or per
the file MWconn.ini, in fact you can also parameterize via command line parameters. For this purpose,
retain the original name of the program as MWconn.exe, such that you can define the program function with
the first parameter that you apply. The same rules are valid for this parameter as were applicable for the
selection of operating mode for of the program names (e.g. UMTS, GPRSUMTS etc., refer to chapter 5).
1.
2.
In this manner, you can apply additional
settings that are subject to frequent change
directly when the program is called and as a
command line (if present, after the
parameter of the operating mode). The
same syntax as valid for the lines of the file
MWconn.ini (refer to chapter 10) is also
applicable here. The lines that have been
stated in the previous chapter must be
placed within inverted commas when
applied as parameters. These parameters
have precedence over the lines in the file.
Thereby, please take note that on re-writing
of the file, the parameters are automatically
applied by MWconn to the file as well.
This re-writing can be forced by the parameter INIWRITE. INIWRITEEXIT results in
the same, but additionally ends the program.
Example: You possess a SIM, with which
you can log into both the networks of
Vodafone, as well as E-Plus. You would like
to use one initialization file MWconn.ini,
because the data volumes are not meant to
be measured for both the networks
separately.
For this purpose, create a link (shortcut) to
the program file, e.g. UMTS.exe, whereby,
you use the right mouse click action and
select the Create shortcut option.
Alternatively, you can naturally also create a
shortcut in the Quick Launch bar (described
in the next paragraph).
Now, click on the newly created shortcut using the right mouse click action and open its properties. Switch to
the “Shortcut” tab and update data for the “Target” field to include the network specific settings, here the
network name and APN (refer to chapter 10 for the exact information in this context).
Similarly, proceed in the same manner for Vodafone as well. With the help of both these shortcuts, you can
define the required network at the start of every instance of MWconn respectively.
3.
Start/Stop instead of Restart
If you are starting an executable like GPRS.exe or UMTS.exe while another MWconn executable is still
running, that one will be terminated and the new one will be started afterwards. Instead of this you can set
MWconn to terminate without starting the new executable: supply the command line parameter
STARTTOGGLE.
MWconn-Logo and Install Dialogue
In case you do not want the display of the MWconn-Logo at start, apply the word NOSPLASH as a parameter
at program start. Unfortunately, this setting can however not be integrated in the MWconn-Configuration,
because the initialization file MWconn.ini is interpreted only for a few seconds post program start.
© 16.12.2013 Markus B. Weber, Nürnberg
MWconn, Version 5.9, Operating instructions
Page 35 of 49
If you want to install MWconn quietly and having it created the dial-up connection "Internet" without any
query message on the screen, apply the SILENTINSTALL parameter at program start.
You can mute the audio output of MWconn by clicking the appropriate function in context menu (opened with
right mouse key) or supplying the program with the parameter MUTE at startup.
Local program control per file system
As soon as it is started, the settings that have been applied to MWconn cannot be edited anymore. You must
first close MWconn and then re-start the program post editing to apply the new settings.
Nevertheless, you have the option to intervene in limited capacity during the regular program run. MWconn
recognizes different special commands, which you can pass on to the program in the form of a
correspondingly named
empty file
respectively:
MWCONN_CONNECT,
MWCONN_DISCONNECT,
MWCONN_RECONNECT und MWCONN_END.
It is thus possible to control the most important functions from an external program:
Establishing connection, termination of connection and the closing of the MWconn program.
The rather inelegant form of entering command per file has been implemented, because it allows for easy
integration in other external programs. Practically every programming language provides the possibility to
generate files in a very simple manner. For example, in case you are using a Windows-Batch-File (*.bat), the
following line suffices:
echo x > C:\Your_ MWconn_Folder\MWCONN_CONNECT
The file that has been applied as a command is deleted by MWconn, as soon as the command has been
recognized. In order to prevent the accidental loss of valuable data, MWconn does not delete files that are
larger than 30 Bytes. Thus, for the purpose of program control, it is always best to generate empty or almost
empty files.
Local program control per Shared Memory
In case you yourself are a software developer and would like to control MWconn from another program, then
you can also use a direct method for this: Applying of parameters per Shared Memory. Likewise, this method
also ensures that you can read all the outputs of MWconn (signal strength, data volumes etc.). However,
substantial programming knowledge is required for this purpose. The following section represents the code
structure that is required for this purpose and a part of a sample program code (programming language is C).
typedef struct { // structure for data exchange with external programs
unsigned long len; // length of this structure in bytes
unsigned short structure_version; // version of this structure: 3
unsigned short program_version; // version of MWconn program
// (main version * 256 + subversion)
unsigned long res1[3]; // reserved
// data for transfer direction external -> MWconn
char command[100]; // commands to be executed by MWconn
// "MWCONN_CONNECT": connect to Internet
// "MWCONN_DISCONNECT": disconnect from Internet
// "MWCONN_RECONNECT": reconnect to Internet
// "MWCONN_END": close program
// ":::ATI": AT command to be sent to device (hier "ATI");
//
for Novatel devices only with Novatel DLL;
// ":250:4000:ATI": same, but including delay periods:
//
reception starts 250ms post sending,
//
maximum receive time 4 seconds;
// "MWCONN_PATH": retrieve present program path;
// data for transfer direction MWconn -> external
// note: not all data modems supply all types of information;
unsigned long process_counter; // this counter is being incremented by MWconn
// as soon as new data has been written zu shared memory;
unsigned long volume; // cumulated data volume in kBytes
unsigned long time; // cumulated online time in minutes
unsigned long online_time; // actual online time in seconds; ==0: offline
unsigned long offline_time; // actual/last offline time in seconds
unsigned long upspeed; // actual speed of sending data, in Bytes/s
unsigned long downspeed; // actual speed of receiving data in Bytes/s
unsigned char opmode; // mode of operation; 0: unknown; 1: GPRS; 2: UMTS;
unsigned char signal_raw; // signal strength as GSM standard value (0..31)
unsigned char signal_percent; // signal strength in percent (0..100);
// valid only if signal_raw>0
signed short signal_dbm; // signal strength in dBm
char network_name[30+1+1]; // network name
© 16.12.2013 Markus B. Weber, Nürnberg
MWconn, Version 5.9, Operating instructions
char plmn[6+1]; // Public Land Mobile Network, containing MCC and MNC
char lac[4+1]; // Location Area Code
char cid[4+1]; // Cell ID
char message[64+1]; // message text
char mini_message[48+1]; // mini message text
char error_message[32+1]; // if appl., error message text
unsigned char battery; // battery status; 0: unknown;
char rnc[4+1]; // RNC ID
unsigned char internal1[1]; // reserved
unsigned long internal2[6]; // reserved
char answer[600]; // answer to AT command or "MWCONN_PATH"
} mwcio_t;
void __fastcall TForm1::Tick(TObject *Sender) {
// test procedure for output of all program information
HANDLE mwcioh; // handle of shared memory
mwcio_t* mwcio;
static char z[4000];
char* zp;
// open and assing shared memory
mwcioh= NULL; mwcio= NULL; // defaults (case of error)
#define OFN(a,n) if(mwcioh==NULL) mwcioh= OpenFileMapping(a,false,n);
OFN(FILE_MAP_ALL_ACCESS,"Global\\MWCONN_IO");
OFN(FILE_MAP_ALL_ACCESS,"MWCONN_IO");
OFN(FILE_MAP_READ,"Global\\MWCONN_IO");
OFN(FILE_MAP_READ,"MWCONN_IO");
#define MVOF(a) if(mwcioh!=NULL && mwcio==NULL) \
mwcio= (mwcio_t*)MapViewOfFile(mwcioh,a,0,0,sizeof(mwcio_t));
MVOF(FILE_MAP_ALL_ACCESS)
MVOF(FILE_MAP_READ)
if(mwcio==NULL) // shared memory not valid
Display->Caption= "MWconn shared memory could not be read ";
else { // shared memory is valid
zp= z;
zp+= sprintf(zp,"structure length: %lu Bytes, "
"Strukturversion: %u, program version: %u.%u, "
"Prozess-Zähler: %lu\n",
mwcio->len,mwcio->structure_version,
mwcio->program_version>>8,mwcio->program_version&255,
mwcio->process_counter);
zp+= sprintf(zp,"cumulated data volume: %lu kBytes, "
"cumulated online time: %lu minutes\n",
mwcio->volume,mwcio->time);
zp+= sprintf(zp,"actual online time: %lu seconds, "
"actual/last offline time: %lu seconds\n",
mwcio->online_time,mwcio->offline_time);
zp+= sprintf(zp,"upspeed: %lu kBytes/s, "
"downspeed: %lu kBytes/s\n",
mwcio->upspeed/1000,mwcio->downspeed/1000);
zp+= sprintf(zp,"mode of operation: %s, "
"signal strength: %02u(roh) = %u%% = %idBm\n",
mwcio->opmode==1?"GPRS":mwcio->opmode==2?"UMTS":"unknown",
mwcio->signal_raw,mwcio->signal_percent,mwcio->signal_dbm);
zp+= sprintf(zp,"network name: \"%s\", PLMN: \"%s\", "
"LAC: \"%s\", Cell-ID: \"%s\"\n",
mwcio->network_name,mwcio->plmn,mwcio->lac,mwcio->cid);
zp+= sprintf(zp,"Meldung: \"%s\", mini message: \"%s\", "
"error message: \"%s\"\n",
mwcio->message,mwcio->mini_message,mwcio->error_message);
zp+= sprintf(zp,"commend: \"%s\", answer: \"%s\"\n",
mwcio->command,mwcio->answer);
Display->Caption= z;
} // end:
shared memory is valid
if(mwcio!=NULL) { // shared memory is valid
UnmapViewOfFile(mwcio);
mwcio= NULL;
}
if(mwcioh!=NULL) {
© 16.12.2013 Markus B. Weber, Nürnberg
Page 36 of 49
MWconn, Version 5.9, Operating instructions
Page 37 of 49
CloseHandle(mwcioh);
mwcioh= NULL;
}
}
In case you use Pascal as programming language, then the following site can provide you with valuable
information: http://projects.coltishware.com/mwpas
You can send commands to MWconn per Shared Memory. A short description of the valid commands in this
context can be referred to in the sample program code for the structure element "command".
Please take note that due to security reasons, MWconn initially grants the user read-only rights for the
shared memory. If you want to write commands in this segment, then you must register the respective user
with the write-access rights. For this purpose it is necessary to enter the respective username in the line
IPC= of the file MWconn.ini. Refer to chapter 10 for further details.
12 Internet Connect and Disconnect
Start the MWconn instance that corresponds to your dial-up requirement (e.g. GPRS.exe). The program
window with information pertaining to the current status of the initialization is displayed. As soon as the
initialization has been completed, MWconn establishes the Internet connection (exceptions – refer to
chapters 5, 9 or10).
In order to end the Internet connection once again, it suffices that MWconn is merely closed. You can
accomplish this via clicking on the close button (X top right corner of the normal program window) or via
clicking the respective option in the program window or via right click mouse action in the status bar icon.
Please be patient, while MWconn takes a few additional seconds to complete an ongoing process and thus
takes a little while to end an existing connection or end the network search properly. The program in this
case has registered the close option selected by you and is in the process of completing it.
If MWconn has not permitted the ending of the connection (refer to chapter 5), you must end the connection
manually. For this purpose, use the right mouse click action on the icon of the active connection located in
the bottom right section of the info section of the taskbar, or click on the program window of MWconn or click
on the MWconn-Icon in the status bar. Select Disconnect in the menu that is invoked.
13 Monitoring of the Internet Connection
MWconn continuously monitors the Internet connection that has been started by you. It verifies continuously,
whether the connection is still active and exists, and re-starts it in case it has been terminated manually or
due to technical reasons.
The quality of the connection is also monitored on a continuous basis. As soon as too many data transfer
errors occur within a short span of time or the connection is “frozen,” i.e. no data is being transferred,
MWconn will terminate the connection and re-establish it anew. A fine tuning option w.r.t. the tolerance level
can be found in chapter 9 in the section "Monitoring" or in chapter 10 in sections ERR= and PING=.
If you want that MWconn is automatically closed in case of absence of connectivity over a long period of
time, then you can achieve this via the keyword NOC entered for the parameter ERR= (refer to chapter 10). A
significantly more comfortable option is via corresponding entry in the registered tab "Start/End" of the
configuration program CONFIG.exe.
Likewise, the defaulting of values for a maximum online- or inactivity time is also possible. You can also
configure MWconn such that, it not only closes on its own, but also shuts down the PC in this case. You can
find further details pertaining to this option in chapters 9 and 10, in the sections "Start/End" or END=
respectively.
Irrespective of the automatic connection monitoring feature, you can also terminate an existing connection
manually, in order to be able to establish a possibly more reliable connection subsequently with the next
connection that is established anew. For this purpose, use the right mouse click option to click on the
program window or the icon and selection the Reconnect option in the context menu.
© 16.12.2013 Markus B. Weber, Nürnberg
MWconn, Version 5.9, Operating instructions
Page 38 of 49
14 SMS and PC-remote control
In case your modem supports the receiving of SMS (short messages), then the SMS that are received by
MWconn can be selected and displayed on the screen. For this purpose activate SMS-receipt in the
configuration (per Programm CONFIG.exe/Global or in the file MWconn.ini via entering the flag M in the
line MOD= ). To activate transmission of SMS, enter a valid service center number (Program CONFIG.exe/
Network resp. File MWconn.ini, Line SMSC= ). For more details pertaining to configuration, refer to chapters
9 and 10.
In order to prevent that SMS-receipt stops your wireless modem’s functioning due to lack of free space of the
SIM, the read SMS and those with read receipts that have been marked with OK, are deleted from the SIM.
In case you want to read an SMS that you have already received and read at a later stage too, then simply
open the file sms.txt. All the SMS, together with the sender's number, date, time and time zone are saved
in this file.
The last received SMS can be found in the file sms1.txt. If you have created a folder named sms_in in
MWconn directory, every incoming SMS is being stored as single file into this folder.
To administer SMS, a small SMS manager has been integrated into the configuration program CONFIG.exe.
There, you can scroll through all received SMS, reply or send new SMS. While MWconn is not attached to
the radio network, outbound SMS are stored in memory. They will be sent as soon as a connection has been
established. Such SMS are marked with an asterisk in SMS list.
Please note a special feature for modems of type Novatel: In case you were required to remove the DLL file
"NwtGatewayDLL.dll" that you have been supplied with along with Novatel due to technical problems (e.g.
while using OS Vista), then MWconn cannot send any SMS and can read the SMS that have been received
only shortly after program start. This means that you will be able to retrieve a view of SMS that you have
received during the course of your Internet connection only when you start MWconn the next time
subsequently. A remote control of the PC per SMS in this case is only possible with many limitations.
Long SMS
Technically, SMS messages cannot exceed a length of 160 characters. Despite this limitation, many devices
are able to send and receive longer messages, using a special procedure: Every text with more than 160
characters is split into smaller parts by the sender and reassembled to one long message by the receiver.
Because the receiving device needs to know which parts belong to which long message, every message part
is preceded by a header. MWconn will show the contents of these headers in curly brackets. For example,
this is one long message which has been split-up into two smaller ones:
{l0121}This is the first part (exactly 153 characters of text).
{l0122}This is the second (and last) part.
Every header consists of 7 characters. Therefore, the usable length of every text part is limited to 153
characters. This is the header format with details:
{lrrmi}
l lower-case letter l for "long"
rr reference number (important in case you send more than one long SMS to the same phone number)
The reference number must be the same for each part of the same long SMS.
m total number of parts of this long SMS (at least 2)
i index number of this part (starting with 1)
The numbers may appear in hexadecimal representation (0..9, A..F).
MWconn does not automatically split transmitted text messages, but it can send long SMSs; if the user (or
an external program) splits the long texts and supplies the text parts with headers in the format mentioned
above.
Please note: Transmitting long text messages is more expensive than transmitting regular text messages.
This is because Internet providers are charging each text component. For long SMSs, you need to use 7
characters of space for every header, which means this space is no longer available for the text, it is often
cheaper to send several regular SMS text messages than one long message.
© 16.12.2013 Markus B. Weber, Nürnberg
MWconn, Version 5.9, Operating instructions
Page 39 of 49
Sending of SMS by machine
MWconn provides other programs with the option of sending short messages. To make this process
uncomplicated and also facilitate the usage of batch files, data exchange per files is used in this case.
For this purpose, MWconn checks on a regular basis, whether a file whose name meets the format
sms_ExampleApplication__155500123.txt exists in the folder sms_send in MWconn working
directory. If yes then the text that is contained therein is sent and subsequently the file is moved to the folder
sms_out. The destination address must be provided in international format, the plus sign is omitted in the
file name. The maximum text length is 160 characters.
Example of application: In case you want to send an SMS from a new batch file (e.g. senden.bat), then
generate this file with the name "send.bat" and the following content:
echo Hello, this is an automatically sent SMS. >sms_send\sms_test__155500123
Double-clicking on the icon of "send.bat" will send an SMS with the above-mentioned content and to the
number +155500123.
Naturally, you can also write the above-mentioned echo-command directly in the Windows command line or
in the data entry field of Start->Run.
In order to prevent duplication of SMS that is sent or that it is continuously sent across in the case of a
program error, MWconn sends the consecutive SMS with the same destination and same content only post
lapse of a time lag of ca. 3 minutes since the time of the last send action.
Remote control per SMS
If you want to avail of this option, then you can start user-defined commands or programs per SMS and thus
remote control your PC. Ideal for this purpose is an SMS-Flat rate for the individual network.
You can thus, for example, access your PC via remote control through the Internet and post completion of
the task disconnect it from the Internet once again. In fact, even remote controlled shut down of the PC is
possible.
No Internet connection is required for the remote control function. It suffices if the wireless modem is
attached to the mobile network.
Remote control per SMS is considered an especially secure procedure and the threat of unauthorized
access or rogue attacks is very rare. Naturally, basic fundamental security rules are valid hereby as well. If,
for example, you enter the command %2 and define neither a sender number nor a keyword, then any SMSwriter can execute any desired command on your computer.
It is therefore recommended that the placeholder "%2" be used only in places, where it is absolutely and
mandatorily required and that the concrete startup commands are entered with the options that are available
to the user. Likewise, well-defined values for the sender number and keyword should be a standard that
needs to be adhered to. It is always safer to use the placeholder %3 instead of the placeholder %2. The
infiltration of unwanted commands is thus prevented to a certain extent, because no special characters can
be transferred in this case. You can entirely omit the usage of %2 and %3, if the program that is started per
SMS, refers to the content of the last received SMS from the file sms1.txt.
More information pertaining to remote control per SMS can be found in the section "External" in chapter 9
and in the sections "CMD1=" and "SMS1=" in chapter 10.
Remote control per call
You can remote control your PC not only per SMS, in fact you can do this even per call. In case your modem
supports this, it is even possible to interpret the telephone number of the caller. Hereby, you can ensure that
your PC reacts only to your call and not to the call of others, who has possibly just got the wrong number.
MWconn does recognize the call, it however does not accept it, so that as a rule you do not have to incur
any costs for the call. With respect to the parameterization, the same is valid as for SMS (see above). Only
the defining of a keyword, as well as the usage of the placeholders %2 and %3 is not possible.
In case you have problems with the Caller-ID recognition, please verify, whether the incoming call is
identified with a number (refer to the connection log "connlog.txt"). In case of certain modems the Caller Line
Identity Display ("CLIP") does not function; possibly this feature is also deactivated in your telephone
network.
Unfortunately, not all wireless modems and not all mobile providers do support the passing through of calls.
Please inquire with your supplier or your mobile telephony service provider beforehand regarding the
availability of this option.
© 16.12.2013 Markus B. Weber, Nürnberg
MWconn, Version 5.9, Operating instructions
Page 40 of 49
You can find more information pertaining to remote control per SMS in the section "External" in chapter 9 and
in the sections "CMD1=" and "SMS1=" in chapter 10.
Example for remote control
Let us assume that your PC at home is equipped with a SIM card, but is basically not logged onto the
Internet. You are in office and have Internet access that is externally accessible too and would like for your
PC at home to go online and subsequently connect to you per remote control software. For example, you
can use RealVNC by www.realvnc.com as remote control software.
The settings in MWconn:
You will naturally enter the telephone number of your SIM card as the sender, and you can select any
required keyword (secret word) that only you are aware of.
You will need to create a new file called vnc.bat in the MWconn folder:
echo off
ping 127.0.0.1 -n 30
c:\programs\realvnc\vnc4\winvnc4.exe -connect %1
cls
echo *** Terminate the connection? ***
pause
echo x>MWCONN_DISCONNECT
At the PC at home, "RealVNC Server" starts as a service and your PC at office will start "RealVNC Listening
Viewer".
The sequence:
You are sitting in your office and send out an SMS with the following content to your modem at home:
SECRETWORD 110.120.130.140
"110.120.130.140" in this example refers to the current IP of your Internet access at office.
Consequently, your PC at home will dial-up and connect to the Internet and subsequently connect to you. To
end the process, you just need to press the <ENTER> key in the open window of the file vnc.bat. Thus,
your PC at home will terminate the connection.
15 Prepaid
Naturally you can use MWconn also in combination with a prepaid SIM. Prepaid-volume tariffs are suited for
the occasional retrieval of mails and to chat with friends or business partners.
As a rule, the current status and value of your prepaid credit can be retrieved per mobile phone with the
abbreviated dialing of *100#. In order to save you the hassle of having to take the SIM card out of the
wireless modem and inserting it into your mobile phone every time you want to merely query the credit
status, MWconn possess a function for the very same purpose.
While attached to the network, use the right mouse click option to click on the MWconn program window or
in the mini window or on the status bar icon. Select the Prepaid-credit? option in the menu that is
consequently invoked. The credit query is started after a short period of time. If the action has been
© 16.12.2013 Markus B. Weber, Nürnberg
MWconn, Version 5.9, Operating instructions
Page 41 of 49
successful, then the credit status that has been retrieved is displayed on the screen and also written to the
connection log "conlog.txt".
In case you face difficulties with the integrated credit query, then we recommend you to execute a firmware
update of your wireless modem first. If this does not help, then you can also determine the credit via the
service console in CONFIG.exe (registered tab "Device"):
AT+CPIN?
In case the response is "SIM PIN", then enter the correct PIN with the following command:
AT+CPIN=xxxx
Now wait for ca. 15 Seconds.
AT+CUSD=1,"*100#",15
The response from your network operator is displayed after a period of ca. 15 seconds.
Should your provider not use the code *100# for the prepaid query, but another code, then you can
customize MWconn correspondingly. Further information in this context can be found in the chapters 9 and
10 (CONFIG.exe/Network or MWconn.ini/PPQ=).
The current credit can naturally be retrieved only for prepaid cards. In case you call for your bill (so-called
postpaid) as is usually the case with many mobile telephony service providers, then the prepaid query does
not retrieve any result set.
Load prepaid account
Most of the mobile telephony service providers allow the loading of prepaid credit per numerical code. Such
a numerical code is valid only for the purpose of loading credit once. You receive this when you purchase a
recharge card or per print-out from a prepaid vending machine.
Under normal cases, the numerical code is entered per mobile phone with the help of a special key
sequence. To save you the trouble of having to take out the SIM card from your wireless modem every time,
MWconn has an individual load function feature for the prepaid account. For this purpose, use the right
mouse click option on the program window and then select the Load Prepaid option in the menu
subsequently.
Post lapse of a few seconds, a separate window is invoked, wherein you must enter the command code
required for your mobile telephony service provider. This often begins with *104*, followed by the rechargenumerical code, and ended with the hash sign ("#"). For example:
per USSD-Code:
per SMS:
*104*1234567890123456#
SMS:74696+491770610000 1234
(Format: SMS:<Destination number><Short message Service centre><space><Recharge-PIN>)
For certain providers, you must enter another functional number (e.g. 101) instead of 104, or in the case of
reload or recharge per SMS, another keyword needs to be given. Exact information can be found in the
introduction of your prepaid SIM.
In case there are difficulties with this function, then likewise, as described above, you can execute this per
CONFIG.exe. Enter the USSD-code instead of *100#.
Special features in case of certain wireless modems
Unfortunately, the prepaid functions mentioned here, are not supported by certain older modems. A few other
modems (e.g. types Novatel without DLL or Option Colt 129) do not allow these funcions during a
connection. Use the right mouse click action on the instance of MWconn that has been started and select
Disconnect.
© 16.12.2013 Markus B. Weber, Nürnberg
MWconn, Version 5.9, Operating instructions
Page 42 of 49
16 Problem solving
As soon as MWconn determines that it cannot execute its tasks, an error message is raised (red color). The
following section describes the meaning and significance of the various messages.
COM port "COM5" not available.
Read error at COM5.
Modem not responding.
SIM not found.
PIN required in file "MWconn.ini".
PIN is not valid in file "MWconn.ini"!
SIM has to be unlocked with PUK!
PUK is not valid! Caution!
Please read INI file"MWconn.ini".
Connection error xxx.
Connection error 1.
Connection error 2.
Connection error 3.
© 16.12.2013 Markus B. Weber, Nürnberg
Cannot connect to the wireless modem. It is possible that currently
another program is accessing the modem. Check, whether the it
has been correctly inserted and then try to restart the program
anew.
In case you use a Notebook, it could also be the case that the CardBus-Interface has been deactivated. A few Notebooks provide the
option of saving power. Check the power or energy settings of your
Notebook and, if required, activate the Card-Bus-Interface.
No data could be read from the wireless modem. Check, whether it
is correctly connected to the PC.
The wireless modem does not react correctly to the commands that
have been sent. Check, whether the modem is correctly connected
to the PC.
Check, whether the SIM card has been correctly inserted in the
wireless modem.
The SIM card in the wireless modem requires a PIN. Enter the
correct PIN in the file MWconn.ini.
You can easily do this via the "Device” tab in the configuration
program CONFIG.exe.
The PIN that has been registered in the file MWconn.ini is invalid.
Please take this error seriously and enter the correct PIN. Else, you
run the risk of blocking the SIM card.
An incorrect PIN has been entered on a frequent basis. Search for
the 8-digit PUK in your documents and enter this together with the
required new PIN in the file MWconn.ini. The line then displays
e.g.: "PIN=12345678,1234".
The entered PUK is invalid. Take note that a SIM card becomes
unusable in the case of incorrect PUK being frequently entered!
Open the file MWconn.ini per double-click mouse action and
follow the note in line 04 of this file.
Error in trying to establish connection. As a rule, this is a problem
with the network. MWconn will then try to re-establish connection
anew on its own accord. If the problem is still not solved, then you
can refer to a short description of the Microsoft-Error numbers (here
"xxx") in the Internet:
support.microsoft.com/?scid=kb;en-us;824864
Notes pertaining to individual error numbers are also enlisted in the
following sections.
According to the settings defined in the configuration, which
determines a network adaptor is to be used instead of a dial-up
connection in order to establish a connection. However, no
appropriate adaptor was found. Please verify the related
configuration
settings
(CONFIG.exe/Connection
or
MWconn.ini/CON=); In case you have defined an adaptor name,
then please take note of the exact written representation.
Failure in establishing connection per network adaptor. Should you
have entered the adaptor name, then please check the related
setting in the configuration (CONFIG.exe/Connection or
MWconn.ini/CON=).
One reason for this error could also be an incorrectly entered APN
(CONFIG.exe/Network or MWconn.ini/APN=).
It is taking too long to establish a connection per network adaptor
and the action was hence aborted. Refer to " Connection error 2" for
the possible causes for this error
MWconn, Version 5.9, Operating instructions
Connection error 619.
Connection Error 623.
Page 43 of 49
The most common error for this is an incorrectly entered APN.
Further information pertaining to the subject of APN can be found in
the section "Connection" in chapter 9 and in the section "APN=" in
chapter 10. If you are sure that the APN that has been entered is
correct, then another possibility is that external connection software
has registered the APN in the modem configuration. You can
remove this entry via the device manager. For this purpose, click on
Start->Run. The device manager is executed with the command
devmgmt.msc. You will find the entries that need to be deleted in
the “Advanced” tab in the properties section of the modem that you
are using – under Extra Initialization commands.
Alternatively, you can allow MWconn to delete these initialization
commands. For this purpose, click on the data entry field "APN" in
the registered tab "Network" in CONFIG.exe. In case initialization
commands exist, then MWconn will offer an auto-delete of these
entries.
More possible reasons for this error: Your mobile network is
currently overloaded and cannot accept new connections. Your SIM
card has been deactivated or has not been activated yet.
This error occurs frequently if you have installed MWconn as a
service on Windows Vista. If this service is configured to run for a
user, for whom the entry "Internet" is absent in the Windows dial-up
connections, then you should update this entry for the related user
or allow the service to run with that particular user, with whom
MWconn was originally installed and configured.
Thus, you can edit the user of the service: Start->Run
"services.msc", double click on MWconn_Internet, then select the
registered tab Registration. Enter the respective username and the
password for "this account ".
In case you are using a Sony VAIO notebook with an in-built UMTSmodule, it could be that the program was no longer capable if clearly
detecting the connection type. In this case, please enter „dial-up
connection“ as the connection type (CONFIG.exe/Connection or
MWconn.ini/CON=|).
Connection error 633.
Connection error 680.
Connection error 711.
Connection error 756.
Connection error CRC.
© 16.12.2013 Markus B. Weber, Nürnberg
In case you are using a USB-Adapter of the type Option GS ICON
("Easy Box"), please verify if you have deactivated wireless
network connection. This can be found in Start->Network
neighborhood
The reason for this error is mostly an incorrectly selected modem in
the dial-up connection with the name Internet.
This error occurs, when the Windows service "Telephony" has been
deactivated. The service can be activated via Start->Run>"services.msc". Here, search in the list for the service
"Telephony".
In case this is displayed, then a possible cause could be the
incorrect entry of the COM-Port in the configuration
(CONFIG.exe/Device or MWconn.ini/COM=). At best, delete the
entry completely and allow auto–detection of the port by MWconn
itself.
However, in most cases whereby this error occurs, it deals with an
aftereffect. Please take special note of the error that is displayed to
you immediately prior to this.
Instead of the number as described in the previous section,
MWconn can also display a combination of letters. This then points
to errors of greater consequence that occur during a connection. In
this case, MWconn terminates the connection and re-establishes it
anew once again. The significance of the letters has been described
in chapters 9 and 10 in the sections "Monitoring" or ERR=.
In case the "Connection error FRZ" occurs frequently, then this
could be due to an unfavorable configuration in TCP/IP-Parameter
in Windows. Technical information can be found in the Internet:
http://en.wikipedia.org/wiki/Maximum_Transmission_Unit
The values 1000 or 500 have been reserved for MTU and 100000
MWconn, Version 5.9, Operating instructions
No connection accomplished.
Conflict with other MWconn.
MWconn.ini gesperrt/locked.
Volume/time warning
Volume/time exceeded
Shutdown error.
Page 44 of 49
for TcpWindowSize. You can however safely experiment with other
values.
The reason for the "FRZ" error can also be very low signal strength.
Your modem then does indeed receive the signal of the base
station, while on the other hand your modem’s signal is too weak in
order to reach the base station successfully. In this case, only a
change of location or the usage of an external directional antenna
helps.
The maximum time without a functional or active connection entered
for ERR=NOC in the configuration (CONFIG.exe/Start/End or
MWconn.ini/ERR=NOC) has been exceeded. Thus, MWconn is
shutting down on its own.
You have started MWconn, when another program instance is still
active. In this case, the previously opened instance of MWconn
should close on its own. If you receive an error message, then the
auto-shut down of the previous instance was not successful. Then,
please end MWconn manually.
MWconn Could not open the initialization file. Pleas ensure that it is
not being used by another program (for example via an Editor).
The data volumes or the online time warning limits that you have
defined, have been exceeded.
The absolute limit for the data volumes or the online time that you
have defined has been exceeded. MWconn will close the
connection due to this reason. Re-establishing connection anew is
only possible, when you edit the respective limits (refer to the
sections "Log" or MAXV=/MAXT= in the chapters 9 and 10) or if you
have started a new time range for the counter (refer to date entry in
the section DAY=).
Per configuration program CONFIG.exe, you have the additional
option to set both the counters to NULL manually. For this purpose,
select the registered tab "Log".
The shut-down action that has been defined per configuration (refer
to the section "Start/End" or END=S of the chapter 9 and 10) could
not be executed. The reason for this could be the absence of
relevant authorization for the shut-down of the PC.
If none of the above-mentioned measures lead to the solving of the problem, then test, whether the problem
occurs even after a machine re-boot. If the error is frequently identifiable and can be reproduced, then please
activate the service log (configuration program CONFIG.exe, section "Log" or configuration file
MWconn.ini, section "MOD=P", refer to chapter 9 or 10) and post a short error description along with the
generated log servicelog.txt to the MWconn forum.
A few messages that are raised in the program window of MWconn inform you about the current functional
status (Colors are blue or violet).
Modem type: Novatel
© 16.12.2013 Markus B. Weber, Nürnberg
MWconn has found a modem or a mobile phone of the defined
type in the Windows Device Configuration. In case this is not the
device that you would like to use for Internet access, then you
should either deactivate it, so that MWconn detects another
connected device, or you should enter the required device in the
configuration (CONFIG.exe/ Device or MWconn.ini/COM=).
Further information in this context can be found in the relevant
section of chapters 9 or 10.
MWconn, Version 5.9, Operating instructions
Page 45 of 49
Novatel DLL emulation activated.
You are using a modem by the company "Novatel"; however you
have not installed the required DLL-File "NwtGatewayDLL.dll"
for the communication with this modem type. MWconn functions
inspite of this, as it is not dependant on this file. But, due to
technical reasons, SMS-Receipt is then possible only during
program start and not during the program run. The Prepaidquery does not function.
In case you want to install this DLL-file at a later stage, then
proceed
as
per
description
in
chapter
2.
Please take note that you only use the DLL-file that is
associated with your modem. For the case that you install an
inappropriate DLL with the same name, your modem will not
function properly or not function at all.
Searching COM port: COM50
Network determination...
APN determination…
MWconn is capable of automatically detecting the COM-Port,
the available networks or the APN. This process can take a few
seconds. Please be patient during this process.
COM port has been entered.
Network list has been entered.
APN has been entered.
The COM-Port, the automatically detected networks that are
available or the APN have been registered in the configuration
(CONFIG.exe/Device, CONFIG.exe/Network or MWconn.ini).
Subsequently, please verify the entry.
COM port not found.
No network available.
Could not determine APN.
Automatic detection was unsuccessful. In case of network- or
APN detection, a reason for this could be insufficient signal
strength of the network. Please try to find a better location, or
enter the required network or APN manually.
Already connected.
The required connection to the Internet has already been
established at the start of MWconn. MWconn will then monitor
this and display the signal strength continuously. A selection of
operating mode is not executed, as this is not possible during an
active connection.
Note: In the case of modems of type Novatel, then it could lead
to problems if the connection is already established at program
start. Please end the connection manually beforehand.
Operations mode selection failed.
The modem in use has not accepted the defaulted operating
mode (GPRS/UMTS/LTE). The defaulted value of the modem
will be used. In case your modem categorically does not accept
the operating mode, then you best start MWconn as CONN.exe.
Operating mode: GPRS.
The given operating mode is pre-selected.
Searching for network.
The wireless modem is trying to log-in to the network with the
required operating mode. Please be patient, as this process
takes a few seconds.
If the network search lasts for more than 3 minutes, then there is
either no reception or the entry for the manual network selection
is incorrect (CONFIG.exe/Network or MWconn.ini/NET=). Try
a network analysis (Further info in this context can be found in
the relevant section of chapters 9 or 10 ).
No Service
The required network could not be reached. A possible reason
for this can be that a network has been entered via manual
network selection, which in turn is locked for your SIM card.
Sending SMS.
MWconn is capable of sending a new SMS. information can be
found in chapter 14.
Should the sending of SMS not be executed by you or via one of
the programs configured by you to do so, then please close
MWconn immediately. This could possibly be charged to your
credit account by your provider.
© 16.12.2013 Markus B. Weber, Nürnberg
MWconn, Version 5.9, Operating instructions
Page 46 of 49
Graphics compressed only.
You have switched off graphic compression in the configuration.
MWconn has sent the deactivation-packet to the compression
server (IP 1.2.3.4), but has not received any response. Either an
error has occurred at the server, or your network operator uses
another method for compression. In this case, switching-off of
compression via MWconn is not possible. At best, you can
deactivate this function in the configuration.
In conclusion, this chapter deals with a list of frequently asked questions. Updates will take place with each
version.
How do I edit the PIN?
The PIN of the SIM card cannot be edited with MWconn. Should you
want to change your PIN at some point of time, then insert the SIM card
in a customary mobile handset and use its function to change the PIN.
Inspite of correct settings in the
configuration, MWconn does not
receive any SMS.
Probably, there are too many SMS that have been stored in your SIM
card. Insert the SIM in a customary mobile handset and delete all the
SMS from the SIM. Subsequently, the SMS receipt function should start
working.
There are other files in the same
folder, in which the MWconn.exe
program is located – what are
these other files used for?
You start the Internet connection within the domain of the respective
operating mode (e.g. GPRS, UMTS/GPRS or without a defaulted
operating mode) with the program files GPRS.exe, UMTS.exe,
UMTSGPRS.exe, GPRSUMTS.exe and CONN.exe.
The file CONTROL.exe serves as an additional operating surface for one
of the pre-named programs.
In the case of the file MWconn.ini, it pertains to the configuration file
w.r.t. MWconn. You can open the same with the program CONFIG.exe
or with a text editor. All the configuration settings for the program are
stored in this file.
The file connlog.txt contains the connection log. Should a file called
servilog.txt exist, then you can find log outputs for verification
purposes in it. The sms.txt contains all the SMS that have been
received; the file sms1.txt contains the last received SMS respectively.
I want to install a new version of
MWconn. Can I continue to use
the older settings?
Yes. Informations concerning the update process you can find in chapter
5. For security reasons, you must subsequently verify the parameters
post the first program start routine.
Sometimes I start MWconn
anew, because the modem has
initialization problems. Must I
mandatorily close the program
prior to this action?
No. As soon as you start MWconn, while another instance of MWconn
is running with the same user, then the previously opened instance of
the program is automatically closed. The newly started program waits for
the end of the previously opened program and only post this action is
completed does it resume running.
It takes a very long time to detect
a bad connection with MWconn.
- or What can I do in order to end the
connection and re-establish it
anew?
You can either reduce the error tolerance of MWconn (refer to chapter 9,
section "Monitoring", or chapter 10, sections ERR= and PING=) or
occasionally end the connection manually. Use the right mouse click
action on the program window (or the mini window) to end the program
and select Reconnect. MWconn will then terminate the connection and
try to re-establish connection anew on its own.
The connection log
connlog.txt is unclear to me.
How can I generate a table that
only contains data volumes?
Simply filter the log. A table calculation program can undertake this task.
You can however also filter out the rows which contain the volume
details. For this purpose, start command line prompt, switch to the folder
of MWconn and enter the following command:
find "summe" connlog.txt >summen.txt
You will find a simple semi-graphical evaluation in CONFIG.exe in the
registered tab "Log" (refer to chapter 9). A CSV table with daily values
can also be generated via this function.
© 16.12.2013 Markus B. Weber, Nürnberg
MWconn, Version 5.9, Operating instructions
Page 47 of 49
Why can I not pre-select
“HSDPA” as the operating
mode?
In the case of HSDPA (High Speed Downlink Packet Access), it does not
deal with an individual operating mode, instead in this case it deals with
a communication method of the standard UMTS (Universal Mobile
Telecommunication System). HSDPA-capable PC-cards then always use
this communication method automatically, when it is available. The fact
that HSDPA is being used is only identifiable by virtue of the instance of
the Downlink-data transfer speed increasing to more than 48 kBytes/s.
Correspondingly, the same is valid for EDGE (Enhanced Data Rates for
GSM Evolution) as an additional modulation method of the operating
mode GPRS (General Packet Radio Service). Speeds of more than the
otherwise usual 6.7 kBytes/s that is available in case of GPRS are
facilitated via EDGE.
I receive a warning regarding my
firewall a few seconds after
MWconn has established a
connection. What are the
consequences of this warning on
the application?
Presumably, you have entered one or more IP-Addresses to test the
connection (CONFIG.exe/Monitoring or MWconn.ini/PING=) or
deactivated the graphic compression (CONFIG.exe/Network or
MWconn.ini/MOD=G) in the configuration. Your firewall warns you w.r.t.
the program MWconn.exe, because this tries to send packets to the
Internet. However, regular sending of the packets is necessary, in order
to verify the reliability of the connection or in order to switch off the
graphic compression. The test packets for the purpose of testing the
connection do not contain any data; thus no personal data is transferred.
Please allow the program MWconn.exe to send the packets.
Perhaps, your firewall does not warn you about the program
MWconn.exe, instead it raises a warning for the program ping.exe. In
this case, it was not possible for MWconn to directly send the packets; it
therefore had to use the OS command "PING". Even this is correct
functionality, in order that you should allow sending of packets in this
case as well.
There exists a UMTSconnection. Why does the data
transfer speed very often not
exceed more than 20 kBytes/s?
This can be due to bottlenecks in the mobile network of the network
operator that you use. Or it could be that its gateway between the mobile
network and Internet has been weakly dimensioned.
I use two different modems
alternatively for mobile Internet.
Must I mandatorily change the
settings in the file MWconn.ini
every time, or will it work even if I
do not edit the file?
You can use MWconn also with two different initialization files. For this
purpose, create two folders and copy the required program instances of
MWconn together with the original file MWconn.ini into this folder.
If you require different connection settings for both modems, then you
can change the dial-up connection name for one of the modems from
“Internet” to another name of your choice.
Exact information in this context can be found in chapter 10 in the
section CON=.as well as in chapter 11.
Post switching of the operating
mode (UMTS, GPRS) per
context menu, the connection is
disconnected for a short period.
Unfortunately, some wireless modems do not allow the manual switching
of operating mode during a connection. Thus, in these cases, MWconn
disconnects the connection for a short time, switches to the required
operating mode and then re-establishes the connection anew once
again.
During the Update verification, a
browser window is opened, and
my PC sends data. What
information is being sent?
When you click on mwconn.com/update? in the context menu,
MWconn requests an internet page with the number of presently
available download version. Thereafter, the program shows you the
appropriate update information. Besides these two page requests there
is no information sent through the Internet.
When MWconn runs, it always
takes many seconds until the
hibernation or standby mode of
my notebook is activated.
During the program run, MWconn purposely delays the activation of the
standby mode and hibernation. The time is used to end an existing
Internet connection in an orderly manner if required, before the wireless
modem does not receive any power. As soon as you activate the PC
once again, MWconn initializes the modem anew and re-establishes the
Internet connection.
© 16.12.2013 Markus B. Weber, Nürnberg
MWconn, Version 5.9, Operating instructions
Page 48 of 49
I have configured MWconn in
such a manner that my VPNAccess starts post establishing
connection. How can I terminate
the VPN connection before
MWconn closes the Internet
connection?
You can default commands, which MWconn executes at the end of the
program run (Programm CONFIG.exe, registered tab "External").
Unfortunately, the Internet connection is also terminated at this point of
time. Therefore, it is best that you proceed as follows: Do not allow
MWconn to terminate the connection (CONFIG.exe, registered tab
"Connection"). Generate a batch file to end the VPN and the Internet
connection and start this batch file automatically at the end of the
program run (see above). Content of the batch file is for e.g.:
rasdial Your_VPN_connection /d
rasdial Internet /d
The credit query displays one
Euro less than qualified amount.
A few Internet providers have technical difficulties in determining the
exact credit during an active Internet connection, and display a lower
amount to be on the safer side. In case of doubt, end the connection
(menu option Disconnect) and restart the credit query anew.
My virus scan raises an alarm!
The file MWconn.exe
supposedly contains a "P2PVirus".
Please do not despair – this is unfortunately not a rarity of occurrence.
The virus scan investigates every new program and reports suspicious
contents. This also includes code segments, which can establish
connection with the Internet. MWconn naturally contains such program
components (establishing connection, switching-off the graphics
compression, connection to the Linksys-Router). To ensure that you
have not received a virus during download, it is recommended that the
program be verified and checked with an online file scanner. For
example: www.kaspersky.com/scanforvirus
I have just installed MWconn as
a service under Windows Vista
(or newer). A connection is in fact
established, but the MWconn
window cannot be seen.
Due to a limitation of Windows Vista (or newer), programs that are
started as a service do neither display a window nor an icon on the
desktop of the logged-in user. Please start the program CONTROL.exe
additionally, in order to obtain the usual MWconn window.
Should CONTROL.exe not be contained in your MWconn folder, then
you can very easily generate the same yourself: Copy MWconn.exe und
and rename the copy to CONTROL.exe.
Should there be more questions over and above the explanations in this chapter, then please do not hesitate
to contact the respective forums. It is quiet possible that another user has already faced the problem and has
a solution for you. You can find the Internet addresses of the recommended forums on the MWconn
homepage: www.mwconn.com
Helpful are MWconn forum www.mwconn.info and MWconn Wiki www.mwconn.net
Regrettably, forum and Wiki are in German at present. They will be available bilingual (English and German)
soon.
In case the reason for your query is difficulties with the program or with the hardware in use, then if possible,
please start the service log at the earliest (per CONFIG.exe, "Log", service log or per file MWconn.ini,
MOD=P) and attach this to your post in MWconn forum.
© 16.12.2013 Markus B. Weber, Nürnberg
MWconn, Version 5.9, Operating instructions
Page 49 of 49
17 User license
The private as well as the commercial or official usage of MWconn are free.
Your opinion of the program is appreciated and welcome. Please post a few lines in MWconn forum
www.mwconn.info.
Your e-mail ID will be kept confidential and will not be forwarded to a third party without your prior explicit
consent.
18 Copyrights
The program file MWconn.exe, as well as the files with the associated operating information
MWconn_Manual.pdf (this document) and MWconn_Anleitung.pdf may be freely copied and
reproduced. The following terms and condition are to be accepted:
- None of the three files may be changed or edited.
- All three files must always be provided together (missing files can be downloaded from www.mwconn.com
or can be requested from the above-mentioned mail address. Subject: Download).
- Release against payment is not permissible.
- The provision or reproduction in connection with one or more other product(s) or even service(s) is only
permitted with prior consent and approval of the program author.
Important: Program instances, which display a special company logo (not the MWconn logo), are subject to
special copyright; you are not permitted to reproduce the same without written consent.
19 Liability
Inspite of due diligence on our part during programming, a guarantee for error-free functioning cannot be
undertaken. Any liability is excluded, in so far as this is legally permissible. With respect to this document, as
well as the Internet addresses that have been mentioned in the program, it deals with references to external
offers, for which we do not take any responsibility and from which we must distance ourselves due to legal
implications. Competent court of jurisdiction is Nuremberg. To the extent that individual sentences of this
document are not legally effective, the rest retain their validity.
20 Thank you…
…to all, who have supported me during the development of this program. With error messages, ideas and
technical info!
If you would like to financially support the development/further development, as well as download options, we
would appreciate that you click on the Donate button in the MWconn website or that you send a small
amount to:
Markus Weber, IBAN: DE98 7609 0500 0220 6987 09, BIC: GENODEF 1S06
Markus B. Weber, Nuremberg
© 16.12.2013 Markus B. Weber, Nürnberg