1
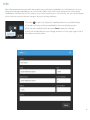
Baltimore
Micah Sheveloff - Exhibitionist
02:01
04:25
Tumble
4:39 Micah Sheveloff - Exhibitionist
Til The End
3:09 Micah Sheveloff - Exhibitionist
Stand Me Up
3:25 Micah Sheveloff - Exhibitionist
Late Train Home
6:25 Micah Sheveloff - Exhibitionist
Fallen at my Feet
3:27 Micah Sheveloff - Exhibitionist
Barren Man
4:23 Micah Sheveloff - Exhibitionist
Baltimore
4:25 Micah Sheveloff - Exhibitionist
Too Many Times
4:31 Micah Sheveloff - Exhibitionist
N
Heaven and Hell
5:43 Micah Sheveloff - Exhibitionist
Heaven Tonight
5:34 Micah Sheveloff - Exhibitionist
Baltimore
Micah Sheveloff - Exhibitionist
Firmware User’s Manual
Manic Moose: S2.0
1
Contents
Introduction to Manic Moose����������������������������� 3
MPD ������������������������������������������������������������������������ 3
Library and Playlist������������������������������������������ 3
File Types����������������������������������������������������������� 3
Orientation������������������������������������������������������������ 4
Adding Music to your Library����������������������������� 5
Media Player: �������������������������������������������������������� 6
Header���������������������������������������������������������������� 6
Default View������������������������������������������������������� 7
Artist View���������������������������������������������������������� 8
Playlist Management��������������������������������������� 9
Reordering Your Playlist���������������������������������� 9
Saving a Playlist������������������������������������������������ 9
Removing a Stored Playlist���������������������������� 9
Info�������������������������������������������������������������������� 10
Settings������������������������������������������������������������� 11
Settings: ��������������������������������������������������������������� 12
System�������������������������������������������������������������� 12
Disk Information��������������������������������������������� 13
Setting a Scratch Disk������������������������������������ 14
Audio Devices�������������������������������������������������� 15
Network Interfaces����������������������������������������� 16
Update Firmware�������������������������������������������� 17
Music Player Daemon������������������������������������ 18
System Log......................��������������������������������� 19
Startup Script..................��������������������������������� 20
Enabling RS232����������������������������������������������� 20
NAS Setup........................��������������������������������� 21
Notes on Network Attached Storage���������� 22
Services������������������������������������������������������������ 23
Services / Service Mode�������������������������������� 24
License�������������������������������������������������������������� 25
Dashboard: ��������������������������������������������������������� 26
TV Mode������������������������������������������������������������ 26
bRadio: Internet Radio���������������������������������� 27
Virtual Front Panel������������������������������������������ 28
Front Panel: ��������������������������������������������������������� 29
Overview���������������������������������������������������������� 29
Navigation and Functions���������������������������� 30
Disk Utility Options���������������������������������������� 13
2
Introduction to Manic Moose
The 3rd major firmware release for the Bryston Digital Players has been rewritten from the ground up
to satisfy the desire for more features, a more attractive and intuitive look and feel, and even greater
stability. Though, none of the improvements disturb the sound quality upon which Bryston has built it’s
sterling reputation. Also unaffected is the ability to use third-party control applications like MPaD (for
iPad) and MPDroid (for Android devices) if that’s how you prefer to interface with your BDP. However, you
may wish to take another look at our built-in interface.
A primary design goal of Manic Moose was to provide the same user interface experience on all
platforms. Despite the screen size differences, and lack or absence of a keyboard and mouse, you should
always be able to control your BDP in a familiar and intuitive way from any device you own.
To make this work, we have developed the user interface with a protocol called WebSockets which is
found in virtually all modern browsers for computer and mobile device applications. If your device of
choice is incompatible, you’ll simply receive a warning saying WebSockets not supported at which point
you can download a more modern version of your browser of choice.
Though you can print this manual for reference, note that subsequent firmware updates may render this
version invalid. So, each time you download a firmware update, check for a new version of the manual as
well, though it may not always be immediately available.
MPD
Library and Playlist
The core of Bryston’s Digital Players is an open source software called MPD, Music Player Daemon.
We build MPD to work specifically with our hardware to catalog your library and play your music bitperfectly. In order to understand how MPD works, think about it in terms of your regular physical media
collection: From your entire collection, you set up a cue (a playlist in MPD parlance). The playlist is simply
an ordered list of tracks. For many of us, a playlist is commonly a single album we wish to listen to. Or,
perhaps guests are coming over, and you want to stack up (just like records!) a few hours of music that
sets the mood through greetings, cocktails, dinner and conversation.
We have designed our software to make playlist building simple and enjoyable. If you have a carefully
organized music library, we provide a method by which you can navigate your library through drives,
folders and tracks. Or, if you prefer to browse by artist with album cover art, we’ve designed an intuitive
interface for that too.
File Types
We build in support for the vast majority of codecs and file types available including WAV, AIFF and other
uncompressed PCM. FLAC, Apple Lossless, and other losslessly compressed files are supported as well
as a variety of popular lossy file types such as MP3, WMA, and OGG. If you have a DAC that will accept
DoP (Direct Stream Digital over PCM), you can play these files as well. It’s unlikely you’ll find a file type we
can’t play.
3
Orientation
Find the IP address of your BDP from the front panel home screen by pressing the
down button once or twice. Your IP address will be shown to the right of eth0 or eth1
depending on the Ethernet port you’ve used on the back of the unit.
View the Dashboard (the home screen) of your BDP from your web browser by entering the IP address
of your player in the address bar. Alternately, you may enter http://bryston-bdp-[1 or 2].local. Use 1 or 2
depending on which model player you have.
1
2
3
4
1. The Media Player Header contains basic controls for playback of your music persistent across all screens.
The upper right corner features a button that will take you to the Media Player where you can interact
with your library and playlists.
2. A message window alerts to you important information about the status of the player such as when a
firmware update is available, or when a serious error has occurred. Note that upon restarting, it may
show that no internet connection is available, but this will resolve after a few moments.
3. A row of special applications described in detail later in the manual.
4. The Settings menu offers access to a wide array of tools and services used to customize your BDP.
4
Adding Music to your Library
There are two basic ways to add music to the library on your BDP-1. The BDP-2 features a third.
1. Locally attached storage: You can attach an external drive or thumb drive via one of the available USB
ports. The BDP-2 also offers an eSATA port on the back and an internal SATA connector for internal drive
installation.
2. Network Attached Storage: Any music library shared on your local area network can be access by the
BDP.
Locally Attached Storage
The most common way to supply music to your BDP is by connecting a drive directly to one of the USB ports.
USB 1.1, USB 2.0, or USB 3.0 (at USB 2.0 speeds) drives are all compatible. If your drive is buss powered (has
no extra power connector), and draws more than 500mA of current, you may need a powered USB hub for it.
Each of the USB ports on the BDP-2 is independently powered and can support buss powered drives, that is
drives with no external power supply. The BDP-1 USB ports share power supplies. The front panel USB ports
are suitable for thumb drives, or self-powered drives. The rear panel USB ports are suitable for buss powered
or self powered drives.
The BDP-2 also features an eSATA connector useful for connecting compatible self-powered hard drives.
Finally, the BDP-2 can also have an internal hard drive or SSD installed. Please refer to your BDP-2 Owner’s
Manual for information on how to install one.
Connecting your USB Drives
Simply insert the USB cable for your music drive(s) into the appropriate USB port on your BDP. The BDP will
automatically scan and index the drive.
The time it takes to index your music is proportional to the size of the library contained within. The BDP gives
two indications that the library is being updated. A capital letter U is displayed in the lower left corner of the
display on the unit, and Update appears in blue rather than white on the web interface. All music on the
entire drive will be scanned and indexed.
5
Media Player:Header
The header is persistent across the entire web user interface of Manic
Moose so that you always have immediate access to basic playback
controls. Even if you are in a settings page, you can always pause, skip
tracks or even update your library database with a single click or tap.
1. From the Media Player, you can jump
back to the Dashboard where you
can adjust configuration settings with
this button.
2. After you add new music to your
drives, click the Update button so it
will be included in your Library
3. Clear the current playlist and stop
playback immediately.
4. Consume mode removes tracks as
they are played. This is especially
useful when used with Shuffle since
12 them
14 together shuffles a playlist
using
without playing the same track twice.
1
2
3
4
5.11The top
13 row is
15the currently playing
track title, and the bottom row is the
artist - album.
6
8
5
10 Playlist. When blue, the
6. Repeat
playlist will be repeated. When gray,
play will stop at the end of the playlist
7
7. Shuffle tracks within the current
playlist. This is often used with
“consume”. See 4.
9
8. Transport controls. Skip forward or
backward, stop or pause the playlist.
When play is stopped or paused, the
12 button
14 changes to a triangle for
pause
Play.3.
5
6
7
8
9
9.11Track13
time bar.
15 The left clock shows
the time elapsed in the current track,
and the right clock indicates time
remaining.
Click anywhere along the
10
bar to instantly jump to that time.
10.Type a search term here to narrow
down your library
11.Initiate a basic metadata editor. See
“Info” on page 10 for details
12 Change Media Player settings. See
1
“Settings”
on page 11 for details.
10
13.Default View to browse your library
3
by directory structure.
11 12
13 14 15
14.Song
View permits detailed browsing
4
of your current playlist.
6
15.Artist View organizes your library by
2
Artist,
then Albums and provides an
attractive cover art view.
Default View
Browse your library and add tracks to the playlist based on your chosen organizational scheme for the files. For
instance, if you have your music collection spread across 3 hard drives: one for classical, one for jazz, and one for
rock, then you have artist folders on each drive, and album folders within those drives, you can easily navigate
your library based on that structure.
2
1
1. Your playlist in order. To edit a playlist,
see “Playlist Management” on page 9
3
2. To save a playlist for later retrieval, click
Save. To delete a saved playlist, see
10
“Removing
a Stored Playlist” on page 9.
4
3. Collapse the Playlist frame by pressing
the < button.
12 playing
14 track is indicated by the ▶.
4. The
Next track is indicated by the N
5.11 Collapse
the15Library frame by pressing
13
the >.
6. Skip quickly to folders beginning with
letters or numbers with this dropdown.
Playlist
5
6
5
8
7. Step backwards in the file structure by
pressing Back
7
7
6
8
9
8.9 Indicates current folder being viewed.
9. Indicates all drives or folders within the
location in item (8). Click + to add drives,
folders or tracks to the playlist.
10. Genres and Playlists are special folders.
Genres organizes your library based on
file tag genre. Playlists include any of
your saved playlists.
10
11. Cover art for your currently playing track.
To setup cover art, see “Setting a Scratch
Disk” on page 14
Library
12.Currently playing track title.
11
13.Currently playing artist -- album.
14.Data rate of currently playing file based
on file type.
15. File type of currently playing track. For
supported file types, see “File Types” on
page 3
16. PCM sample rate of currently playing
track (e.g. 44K1=44,100 samples per
second).
12
13
Now Playing
14
16
15
44K1
17
17. Position in the playlist of currently
playing track out of total number of
tracks cued.
7
Artist View
A beautiful graphical perspective of your library as organized by Artist or Album Artist. From Artist View, you
can instantly play an entire artist’s repertoire, just one album, or stack up a playlist of songs from each album.
Album view works best when the metadata for your music is correct and thorough. See document Metadata Best
Practices. Also, set a scratch drive. See “Setting a Scratch Disk” on page 14.
2
3
4
5
6
1
1. Every artist in your library has an entry. Use “Media Player Settings” (page 11) to select whether to use
metadata for individual track artists (default) or album artists to comprise this list.
2. The currently selected artist, number of albums by that artist, and total number of songs by the artist.
3. Each album by the currently selected artist has it’s own frame anchored on the left by the cover art1 for that
album. The title and release date are listed for the album. Then song titles, track numbers and length are
listed for all tracks in the album. You can add individual songs to your playlist by clicking on them.
4. Add the entire album to the playlist and play it at once by clicking ▶.
5. Add the album to the playlist in shuffled order by pressing the
.
6. Hover over the ••• button to see two options. Either add the entire album to the current playlist, or add the
entire album to another saved playlist.
Buttons 4-6 are also available in the black bar that shows the currently selected Artist. These buttons perform
the same task as described above, but for the entire Artist rather than the album.
8
1See “Setting a Scratch Disk” on page 14 for Album Art
Playlist Management
Once you have stacked up a playlist, it will play back in order unless you have enabled Shuffle. You may
occasionally wish to re-order the playlist or simply remove tracks altogether. You can also save a playlist for later
recall, and remove saved playlists from your library without permanently deleting your tracks.
Reordering Your Playlist
Or
Tap or click and hold the
number beside a track and
drag it into the new position in
a playlist.
1. Press the “M” key on your keyboard. Now Playing turns Green.
Saving a Playlist
Removing a Stored Playlist
You can save a playlist for
later recall by simply clicking
the “Save” button in the Now
Playing frame. In the dialogue
box that appears, enter a
unique name for your playlist
and click “Save”.
2. Click the track you would like to move. Now Playing turns Blue.
3. Click the track above which you’d like to place the track you are moving.
Any stored playlist can
be removed from your
library by clicking and
dragging the playlist
icon corresponding to
that list towards the
middle of the screen.
When it is highlighted
red, release. Note that
the tracks themselves
are not deleted.
9
Info
Manic Moose features a simple editor that enables you to edit basic metadata in an individual track. It is not
designed to manage metadata for your entire library. Rather it’s a useful quick access tool to view and edit
metadata for individual tracks. For instance, if you notice a spelling error in a track title, you can use the Bryston
built in editor to correct it without having to rely upon 3rd party software.
1.Click the
to open the “Song Info” metadata editor from any Media Player.
2.The editor will open and show metadata for the currently playing track.
3.Edit any of the available fields and press Save to save your changes.
4.Once you are satisfied with your changes, press the X in the upper right corner of
the frame to close the editor.
10
Settings
The web browser based interface is designed to be as intuitive and simple to operate as possible. However, we
offer a few settings for you to customize based on your liking.
1.Click the
to open the “Media Player Settings” frame from any Media Player.
2.The editor will open and show available options with currently enabled ones
indicated by checked boxes.
3.Select desired options and press Save.
4.Once you are satisfied with your changes, press the X in the upper right corner of
the frame to close.
Artist Tag lets you choose whether Artist
View should organize by the Album
Artist tag in your metadata or the Artist
Tag. The difference is that, for example,
a compilation album will be sorted by
“Various Artists” and remain together
as an album, or each track will be
independently listed by its artist.
Use File Names Over Tag Data tells
the media player to ignore metadata
and display file names instead when
browsing in Normal View. This is useful if
you have named your files with precisely
the information you want to appear on
screen or if your file names are more
accurate than your tag data.
Show Song Resolution adds indicators
for PCM sample rate and bit depth in the
Normal View. Useful if you would like
to know the resolution of a file before
playing it.
Jump to Currently Playing Song XX
Song Title Marquee permits very long
track titles to scroll at the top of the
Media Player Header.
Cover Art Name Priority determines order in which the library updater will scan album folders looking for cover
art. The example shown indicates that if folder.jpg isn’t found, it will then search for cover.jpg, then front.jpg.
11
Settings:System
The System window gives you non-adjustable information about your BDP. It is divided into two sections.
The MPD section provides statistics on your player and library. The About section indicates currently installed
software versions.
MPD Stats
Number of Songs: A count of all
indexed audio tracks
Music: How much consecutive time
it would take to play each song in
your library once.
Up Time: Length of time since last
restart of your BDP
Play Time: Length of time BDP
has been playing music since last
restart.
About
S2.xx: The version number of your firmware and its associated build date.
Build: Colloquial name for the major firmware version.
MPD: Version of MPD loaded.
Kernel: Linux Kernel version upon which the firmware is built.
Buttons
Reboot BDP: A software restart of the BDP
Reset To Factory: Resets all settings to factory default and clears the library
Shutdown: Powers down the BDP.
12
Disk Information
Disk information is a valuable tool for getting details about the disks connected locally to your BDP. It lists
details about the internal Compact Flash card on which the operating system runs as well as USB and eSATA
attached drives. In the event of trouble with your BDP, diagnostic and repair utilities can be run on the disks
without removing them from the BDP.
Because disk operations are inherently at risk for data corruption, this area is password protected and
shouldn’t be used without knowledge of the processes or without guidance from Bryston technical support.
1. List of attached disks and their
respective partitions.
3
2. Click on a disk or partition to
view information about it in this
window.
2
3. Perform First Aid or Erase a disk
or partition.
4. Buttons providing access to
utilities appropriate for either
the entire disk or a partition
depending on which you have
selected in window (1). See Disk
Utility Options for details.
1
5. Detailed information about the
disk or partition selected.
4
5
Disk Utility Options
Disk Selected:
Partition Selected:
Get Info: A complete accounting of physical details
about the disk
Mount: Mount or unmount the selected partition.
Get S.M.A.R.T.: If the selected disk is compatible with
S.M.A.R.T., this function will report the health of your
disk.
Repair: If the file system structure is found to have
problems, attempt to repair them.
Verify: Verify the file system structure is healthy
Update: Update the music library with the contents of
the selected partition
Bench: Benchmark the performance of the selected
partition.
Scratch: Set the selected partition as a scratch drive
to enable cover art to be used in Artist View. A spare
thumb drive or any other locally connected disk can be
safely used. See “Setting a Scratch Disk” on page 14.
13
Setting a Scratch Disk
In order to create BDP compatible album art used in the Artist View, you need to define a Scratch Drive - a drive
for storing cached copies of this art for quick retrieval. Any locally attached drive formatted as FAT32 can be
used. The drive can be one that is already used for music, or a separate USB drive specifically for scratch. Allow
between 1-5 gigabytes of free space depending on the size of your library.
1. From Disk Information, click the
partition you wish to use as your
scratch drive. You cannot choose any
partitions on the internal flash card.
2. Click the Scratch button.
3. You will receive a confirmation
message in the window saying
“Setting [your chosen partition] as
scratch drive”
4. You can now navigate away from
the Disk Information window.
Subsequent visits to the Disk
Information window will show your
chosen scratch drive in blue text.
14
Audio Devices
A distinguishing feature of Manic Moose is the ability to connect external DACs via USB. This includes standard
USB Audio Class 2 models that can decode DSD (Direct Stream Digital) received via the DoP protocol. In Audio
Devices, identify any connected DoP capable device and place a check next to it to enable DSD playback. Any
USB port on the BDP1 or BDP2 can be used provided the DAC is self powered.
1. Plug your DAC into any available
USB port.
2. Click Restart
3. If your USB DAC is capable of
DSD over PCM (DoP), check
the box next to it. Note that in
our example, the built in audio
device (ESI Juli@) is not DSD
capable, nor is the Bryston BDP2 connected via USB below it.
However, the Schiit USB DAC is
DSD capable, and therefore we
have checked the box next to it.
4. Click Apply to save your changes.
The BDP will remember these settings and they will be applied each time the device is restarted.
If a connected audio device appears
highlighted in RED , it has been
recognized, but MPD needs to be
restarted to enable it. Simply click
the Restart button.
15
Network Interfaces
The BDP-1 features a single 100 mbps Ethernet port, and the BDP-2 features two gigabit Ethernet ports. This
menu lets you view and control settings for these interfaces. When first opened, you will see a default screen
while information about your Network Interfaces is populated.
1. Click the network interface you
wish to view or edit information
about.
2. Choose whether the interface
should receive automatically
assigned information from the
router(DHCP - default), or if you
would like to set it manually
(static1).
3. Once you are satisfied with your
settings, click apply.
2
1
3
4
5
1
You may feel the need to set a static IP address from within the BDP to prevent the BDP from receiving a different IP address from the router each time the BDP is restarted. If you forget to set DNS servers, or if your ISP’s DNS
servers change, the BDP will be usable from the local network, but will not be able to reach the internet to receive
firmware updates and stream internet radio.
Two other methods exist that mitigate the need to keep up with the BDP receiving different IP addresses:
a.Rather than remembering an IP address, devices running zeroconf networking (such as Bonjour or Avahi) can
find the BDP by using the URL http://bryston-bdp-2.local or http://bryston-bdp-1.local. Most computers with
iTunes installed, and all Apple mobile devices can use this method. Or, install Bonjour or Avahi separately.
b.From your router’s settings page, create a DHCP reservation for your BDP which assigns the BDP the same IP
address all the time.
16
Update Firmware
From time to time, Bryston will release updates to Manic Moose which may add features or fix bugs in the
software. When a new firmware update becomes available, you will receive notification on the Dashboard (the
home page) for your BDP. If you click the Update Firmware box in the Settings row at the bottom of the page,
you can view a list of changes for the new update and several previous updates. Based on these changes, you
may elect to update the firmware. Note that firmware updates are never mandatory and are never automatically
installed. If you are perfectly satisfied with the performance and feature set of your BDP, you are free to choose
to ignore any firmware update as you wish.
1
3
2
4
1. Upon viewing the Dashboard - the home screen for your BDP, you may notice an alert indicating new
firmware is available.
2. Click Update Firmware on the settings bar. A window appears with a detail of changes made in each
firmware revision starting with the most recent. Press Update.
3. The change log will be replaced with a status window indicating percent download complete, and the rate
at which the download is progressing. The track time bar will also reflect time elapsed and estimated time
remaining.
4. The new firmware version will install automatically. Then, the BDP will reboot at which time, a countdown
timer of 120 seconds will appear on the screen. At the end of 120 seconds, your BDP will be finished
restarting, and the page will refresh to the dashboard.
17
Music Player Daemon
MPD is the music player engine in the BDP. It’s responsible for cataloging your library, managing playlists, and
playing bit-perfect sound. These settings do not affect sound quality.
MPD Version: This is the version number
of the MPD core. By default, this is 0.17.5.
Choose the version from the dropdown you
wish to use.
Maximum Playlist Length: This defines the
max number of tracks that can be cued in
the playlist at any time. The default is 300
to prevent accidental loading of an entire
drive into the cue which would temporarily
paralyze the BDP. BDP-2s with more RAM
and faster processing than BDP-1s are better
equipped to handle very large playlists.
Enable Update at Startup: Check to have
MPD re-index your library each time the unit
is restarted.
Enable MPD Watch: A utility designed to
watch MPD for crashes and automatically
restart itself. Useful if you play your unit
constantly, otherwise it consumes system
resources unnecessarily.
Enable Tracking of MPD Stats: Tracks the
music you play in order to automatically
generate your Top 40 playlist.
Last.fm: Login to your Last.fm account to
“scrobble” or keep a diary of music you play.
MPD Version Info: Shows currently loaded
MPD version and associated information
including decoders.
18
System Log
In the event you need to contact support, or are experiencing misbehavior, it’s helpful to reference these logs as
we often find clues as to the root of the problem within. The logs are separated into 5 sections each responsible
for a different area of operation. If you contact support, you may be asked to copy and paste portions of the log
into e-mail correspondence. Also, if you are asked to place your BDP into service mode for us to evaluate in real
time, we’ll review these logs.
MPD: MPD logs report the events
generated by Music Player Daemon.
System: These detail information
about the Linux operating system.
Web Server: Activity and errors related
to the built in web server and web user
interface.
Samba: Activity and errors related to
sharing local drives over the network
via the Samba (SMB) protocol.
Bryston FP: Messages generated by
the software running in the Linux OS
that manage communication between
MPD and all Bryston software such as
the front panel controls, Media Player,
and more.
19
Startup Script
Power users may wish to harness the ability of the Linux operating system to perform specific tasks upon startup
of the unit. One example is to enable RS232 control over the unit. This function requires Linux command line
knowledge.
Enabling RS232
By default, RS232 is disabled. To enable it, enter the following in the Startup Script window.
#!/bin/bash
/sbin/getty -l /bin/rs232.pl -L 9600 -n ttyS0 vt100 &
Press Save and restart your BDP. The following commands are available via the RS232 interface:
RS232 Command
BDP_PLAY
BDP_PAUSE
BDP_STOP
BDP_NEXT
BDP_PREVIOUS
BDP_SONG
BDP_PLAYLIST
BDP_INFO
Description
Starts playback of current song
Pauses playback of current song. Remembers position in track
Stops playback. Resets track time to 00:00
Skips to the next track in the playlist
Skips to the previous track in the playlist
Returns information about currently playing track
Returns current playlist
Returns MPD Statistics
20
NAS Setup
Either in place of or in conjunction with locally attached storage, music stored on network accessible drives
can be accessed by your BDP. Unlike locally attached storage, a subfolder can be specified so that not all
music on the shared drive is indexed. To add music on network attached storage, complete the following
steps from the web interface.
Step 1: From the Dashboard, under settings, click
NAS Setup
Step 3: As the list of available
network shares is compiled,
you will see a row of dashes
(----) at the top of the SettingsNAS Setup window
Step 4: Click the Devices dropdown menu and choose the
appropriate device from the list.
If your device is protected by a
user name and password, enter
them.
Note that choosing
a folder is optional
and not available
with AFP shares.
Step 6: Choose the folder
within the drive that contains
your music. Click Next
Step 2: Click Add Share
Step 5: Within the device,
multiple drives may be
available. Choose the drive on
which your music is stored.
Step 7: The window will revert
to one similar to Step 2, and
you will see your drive added.
The Update function will
automatically begin and music
contained on this drive will be
added to your collection.
21
Notes on Network Attached Storage
SMB and AFP Shares
Manic Moose supports adding shares from both SMB (pronounced samba, Windows File Sharing or CIFS) and
AFP (Apple Filing Protocol). When you have the option, SMB is the preferred protocol since AFP support is
hasn’t been tested as thoroughly.
NAS Hierarchy of Organization
Bryston has done our best to minimize the number
of steps required to access network attached storage,
though the series of steps required to select the
desired network share to index may seem to include
unnecessary steps. However, a study of the hierarchy
will lead to greater understanding of this process.
Host Device:
Share:
This may be a computer
on the network with
sharing enabled, or a
dedicated NAS device.
Multiple drives
can be connected
to a single host
device.
Sub-folder:
Shares are comprised of
folders. At least one
should contain music.
Speed
The BDP-1 and BDP-2 include Ethernet network
interfaces capable of 100 megabits per second (100
mbps) and 1 gigabit per second (1000 mbps) respectively. Real world network conditions make it unlikely that
these maximum speeds will ever be realized, but only 3 megabytes (24 megabits) per second are required for
high resolution music playback. If your network is congested or is otherwise functioning improperly, audible
dropouts may occur.
A variety of factors may affect the actual network speed in your home including the speed and quality of your
router, the integrity of cabling, and the amount of traffic generated by other devices on the network. If you are
experiencing audible dropouts, investigate these factors. Note that internal network speed is not related to
your internet speed.
Other NAS Functions
Once an NAS is configured, a variety of tasks can be
performed on it. Select the radio button at the right
of the drive upon which you would like to perform the
task, then click one of the five task buttons below.
EDIT: If you need to choose a different share or folder
within a device, or if you need to change the user
name and password, you can do this through the Edit
function.
UPDATE: Rather than update your entire catalog, you can instruct MPD to update the music collection stored
on a particular NAS device. If your catalog is particularly large and spans multiple physical drives, this can
reduce the time required to re-index the library when new music is added or metadata is changed.
SPEED TEST: If you are experiencing audio dropouts when playing files stored on a network attached storage
device, use Speed Test to determine if access to this device falls beneath the minimum acceptable threshold
of 3 mbps. Typically a BDP-1 should score above 6 mbps and a BDP-2 should score above 20 mbps.
REMOVE: Use this function to remove a network attached storage device from your music catalog. This does
not delete your music, rather it simply removes it from the catalog accessible by the BDP.
22
Services
The Services menu provides access to settings for a variety of optional services that enable a wide variety of
capabilities that may be of particular interest to users. The best practice is to keep services turned off unless you
use them. Each requires some system resources to operate. Since many of these are not essential to primary
intended operation of the BDP, they should be considered in beta testing.
The Services Window also shows the current processor load, RAM usage, and SWAP usage.
MPD: The core audio engine of the BDP. Unless you use
the BDP exclusively as a DLNA or Squeezebox renderer, this
must remain enabled.
SAMBA Server: Enable this to share any locally attached
drives over the local network.
DLNA Server: Publish the music library via DLNA (UPnP)
for access by other compatible devices on the LAN. BDP-2
Only.
DLNA Client: Other DLNA shares on the LAN are made
available for MPD to index into the music library.
USB Mount: If you intend to plug drives directly into the
BDP via USB, this must remain enabled.
Service Mode: Enables Bryston technical support to
remotely log into your BDP for diagnostic purposes.
Shairplay: A Linux emulator for Airplay. When enabled, Apple devices can stream audio directly to the BDP. You
must first clear the MPD playlist for this to work. Since this is not an official Airplay implementation, reliability may
vary. Audio is not bit-perfect.
Squeezeslave: One of two squeezebox clients, be sure to clear the BDP’s current playlist before using and to
disconnect the BDP as the renderer when done using the feature (or turn the service off).
Squeezelite: One of two squeezebox clients, be sure to clear the BDP’s current playlist before using and to
disconnect the BDP as the renderer when done using the feature (or turn the service off).
DLNA Renderer: Allows the BDP to receive audio and be controlled by DLNA control points and servers.
23
Services / Service Mode
Service mode is provided as a convenience to customers who are experiencing difficulties with their BDP. If you
contact Bryston for support, you may be asked to turn this service on. Service Mode sets up a VPN (a secure
Virtual Private Network) tunnel to our engineering department so that we can see first-hand the trouble you
describe, read logs, and perform service.
1. Click Service Mode.
2. Click the Start/Stop button and note that the blue Service Mode text indicates ON.
3. E-mail [email protected] with a description of your trouble and your Service ID number.
24
License
Bryston makes use of a wide variety of open source software to enable features for the BDP devices. Each is
licensed under GNU General Public License. The license is available to read along with a listing of packages
installed under this license. Note that for any given firmware version, the version numbers of these packages
may be incorrect.
25
Dashboard:TV Mode
In order to maintain the best possible sound quality, Bryston deliberately omits a video output from the BDP
since the EMF such devices emit cause distortion in the audio band. However, you may wish for a graphical
display of what’s playing especially if the BDP is part of an audio/video home entertainment system.
TV Mode is a simplified display of the currently playing track and it’s associated artwork that slowly crawls
around the screen. It can be accessed by network-connected television monitors and projectors by opening the
following URL from that device’s web browser:
http://bryston-bdp-[1 or 2].local/bryston/tv-mode/
Or enter your BDP’s IP address followed by /bryston/tv-mode/
You can also access TV Mode from the Dashboard by clicking TV Mode from any web-enabled device that allows
for touch or pointer input.
26
bRadio: Internet Radio
Though it is currently not possible to match the sound quality of your own music collection with streamed
music from the internet, online radio stations can provide an endless stream of music for casual or background
listening. Bryston is currently developing an interface specifically for browsing a wealth of internet radio
stations.
In the mean time, the best way to listen to internet radio is by enabling Squeezelite in Settings:Services, and
installing Logitech Media Server on your computer.
Logitech Media Server provides a web user interface which provides access to a broad list of internet radio
options. There are also a wide variety of free remotes for Android and iOS.
27
Virtual Front Panel
As a matter of convenience, we provide a Virtual Front Panel on the web interface which provides access to
those functions which do not yet have a web counterpart such as saving a playlist to external storage. All
controls detailed in the Front Panel Control section can be done here or on the physical front panel of the player.
28
Front Panel:Overview
Unlike competing digital music players, Bryston uses a simple 2 line VFD display which is unmatched by more
fashionable full color touch screens. For the same reason remote controls supplanted front panel dials on
televisions, smartphones and tablets provide a much more enjoyable way to control your BDP than an on-board
interface.
However, we’ve designed a front panel interface with discrete buttons for basic playback for instant access as
well as a menu-driven interface navigable by 4 directional arrows so that even if your tablet battery is dead, or
you’re closer to the equipment rack than the listening seat, you can control your system.
29
Navigation and Functions
30