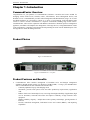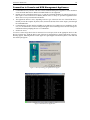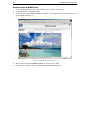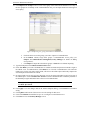
1
User Guide
V2.20
C
UL
US
LISTED
1F61
I.T.E.
Copyright ©2005 Raritan Computer, Inc.
CC-0H-E
May 2005
255-80-3100
Raritan Computer Inc.
400 Cottontail Lane
Somerset, NJ 08873
USA
Tel. 1-732-764-8886
Fax. 1-732-764-8887
E-mail: [email protected]
http://www.raritan.com/
Raritan Computer Europe, B.V.
Eglantierbaan 16
2908 LV Capelle aan den IJssel
The Netherlands
Tel. 31-10-284-4040
Fax. 31-10-284-4049
E-mail: [email protected]
http://www.raritan.com/
Raritan Computer Japan, Inc.
4th Flr. Shinkawa NS Building
1-26-2 Shin-kawa, Chuo-ku
Tokyo 104-0033
Japan
Tel. 81-03-3523-5991
Fax. 81-03-3523-5992
E-mail: [email protected]
http://www.raritan.co.jp
Raritan Computer Taiwan, Inc.
5F, 121, Lane 235,
Pao-Chiao Rd., Hsin Tien
Taipei Hsien
Taiwan, ROC
Tel. 886-2-8919-1333
Fax. 886-2-8919-1338
E-mail: [email protected]
http://www.raritan.com.tw
Raritan Computer France
120 Rue Jean Jaures
93200 Levallois-Perret
France
Tel. 33-14-756-2039
Fax. 33-14-756-2061
E-mail: [email protected]
http://www.raritan.fr
Raritan Computer Deutschland GmbH
Lichstraße 2
D-45127 Essen
Germany
Tel. 49-201-747-9820
Fax. 49-201-747-9850
E-mail: [email protected]
http://www.raritan.de
Raritan Computer U.K. Ltd.
36 Great St. Helen's
London
EC3A 6AP
United Kingdom
Tel. 44-20-7614-7700
Fax. 44-20-7614-7701
E-mail: [email protected]
http://www.raritan.com
Shanghai Representative Office of
Raritan Computer, Inc.
RM 19C-1 Shanghai Shiye Building
18 Caoxi North Road
Shanghai China 2000030
Tel. 86-21-64680475
Fax. 86-21-64627964
E-mail: [email protected]
http://www.raritan.com.tw/
Supported by:
®
Technology Corporation
www.RackitTechnology.com
Copyright and Trademark Information
This document contains proprietary information that is protected by copyright. All rights reserved. No part
of this document may be photocopied, reproduced, or translated into another language without express
prior written consent of Raritan Computer, Inc.
©Copyright 2005, CommandCenter, RaritanConsole, Dominion, and the Raritan company logo are
trademarks or registered trademarks of Raritan Computer, Inc. All rights reserved. Sun and Java are
trademarks or registered trademarks of Sun Microsystems, Inc. Internet Explorer, IE, Windows and
Windows XP are registered trademarks of Microsoft Corporation. Netscape and Netscape Navigator are
registered trademarks of Netscape Communication Corporation. RC4 is a registered trademark of RSA
Corporation. Other trademarks or registered trademarks are the property of their respective holders.
Export Notice
CommandCenter model CC3002 operates with either 56-bit or 128-bit encryption software. Export of this
product is restricted under U.S. law. Information is available from the U.S. Department of Commerce,
Bureau of Export Administration at www.bxa.doc.gov.
CC Version 2.2
CommandCenter V2.2 fully supports the Dominion family, the Dominion SX family, IP-Reach M1 and IPReach TR361. CommandCenter V2.2 offers partial support of IP-Reach M2 and IP-Reach TR362 and
TR364. CommandCenter can launch only the first KVM port of the IP-Reach device. So, in case of devices
with multiple KVM ports like IP-Reach M2, TR362, and TR364, CommandCenter provides access to only
the first KVM port. CommandCenter supports Raritan's Remote Power Control device. Access to Power
Control is provided through Raritan’s Powerboard Application via the Dominion Serial port.
Users desiring Cerebus KVM interoperability with CC V2.2 should upgrade firmware to version 3.01.
Default Login Name and Passwords
Application default login:
Login Name:
ccroot
Password:
raritan0
Client Browser Requirements
Please see your CommandCenter Application Notes for the most current matrix of Client Browser
and PC Platform Requirements.
For assistance in the U.S., please contact the Raritan Technical Support Team
by telephone (732) 764-8886, by fax (732) 764-8887, or by e-mail [email protected]
Ask for Technical Support – Monday through Friday, 8:00am to 8:00pm, EST.
For assistance outside the U.S., please contact your regional Raritan office.
This page intentionally left blank.
Contents
Chapter 1: Introduction............................................................................. 1
CommandCenter Overview........................................................................................................1
Product Photos...........................................................................................................................1
Product Features and Benefits ..................................................................................................1
Package Contents......................................................................................................................3
Chapter 2: Installation .............................................................................. 5
Prepare Network for Remote Operation ....................................................................................5
Initial Configuration ....................................................................................................................5
Change Administrator Password ...............................................................................................6
Strong Password Rules .....................................................................................................................6
Confirm IP Address ....................................................................................................................6
Prepare Devices for Remote Operation.....................................................................................7
Add New Devices.......................................................................................................................8
CommandCenter Window Components ....................................................................................9
Chapter 3: Operation............................................................................... 11
Overview ..................................................................................................................................11
Browser-Based Access ............................................................................................................11
Standalone Client Access ........................................................................................................12
Connection to Console and KVM Management Appliances ............................................................13
Chapter 4: CommandCenter Management ............................................. 15
Overview ..................................................................................................................................15
Configuring CommandCenter Manager Components .............................................................16
Configurable Parameters.................................................................................................................16
User Manager ..........................................................................................................................16
Add User..........................................................................................................................................17
Edit User..........................................................................................................................................18
Change User Password...................................................................................................................18
Change Own Password ...................................................................................................................19
Delete User......................................................................................................................................19
Logoff User(s) ..................................................................................................................................20
Bulk Copy ........................................................................................................................................21
Add User to Group...........................................................................................................................21
Delete User from Group...................................................................................................................22
Add User Group...............................................................................................................................23
Edit User Group ...............................................................................................................................24
Edit User Group Policies..................................................................................................................25
Delete User Group...........................................................................................................................26
Assign Users to Group.....................................................................................................................26
Device Manager .......................................................................................................................27
Add Device ......................................................................................................................................28
Edit Device ......................................................................................................................................30
Delete Device ..................................................................................................................................30
Bulk Copy ........................................................................................................................................31
Backup Device Configuration ..........................................................................................................31
Restore Device Configuration ..........................................................................................................32
Copy Device Configuration ..............................................................................................................32
Upgrade Device ...............................................................................................................................33
Ping Device .....................................................................................................................................33
Reset Device ...................................................................................................................................33
Pause Device ..................................................................................................................................34
Resume Device ...............................................................................................................................34
View Devices............................................................................................................................34
Regular View ...................................................................................................................................34
Custom View ...................................................................................................................................35
Add Custom View ............................................................................................................................36
Edit Custom View ............................................................................................................................36
Delete Custom View ........................................................................................................................37
Topological View..............................................................................................................................38
Special Access to Paragon II System Devices ........................................................................39
Paragon II System Controller (PIISC) ..............................................................................................39
IP-Reach and UST-IP Administration ..............................................................................................40
Device Power Manager............................................................................................................41
Discover Raritan Devices.........................................................................................................42
Device Group Manager ............................................................................................................44
Add Device Group ...........................................................................................................................44
Edit Device Group Name .................................................................................................................45
Delete Device Group .......................................................................................................................46
Add Device Rule ..............................................................................................................................46
Edit Device Rule ..............................................................................................................................47
Delete Device Rule ..........................................................................................................................48
Port Manager ...........................................................................................................................49
Configure Port .................................................................................................................................50
Configure a Serial Port .............................................................................................................50
Configure a KVM Port...............................................................................................................51
Configure an Outlet Port ...........................................................................................................53
Delete Ports..............................................................................................................................54
Bulk Copy .................................................................................................................................55
Connect Port....................................................................................................................................56
Connect to a Serial Port ...........................................................................................................56
Connect to a KVM Port.............................................................................................................57
Connect to an iLO/RILO Port....................................................................................................58
Managing an iLO/RILO Power Port ..........................................................................................59
Disconnect Port ...............................................................................................................................59
Edit Port...........................................................................................................................................60
Edit a Serial Port.......................................................................................................................60
Edit a KVM Port ........................................................................................................................61
View Ports ................................................................................................................................62
Regular View ...................................................................................................................................62
Custom View ...................................................................................................................................63
Add Custom View ............................................................................................................................64
Edit Custom View ............................................................................................................................64
Delete Custom View ........................................................................................................................65
Port Power Manager ................................................................................................................66
Port Group Manager ................................................................................................................67
Add Port Group................................................................................................................................67
Edit Port Group ................................................................................................................................68
Delete Port Group............................................................................................................................68
Association Manager................................................................................................................69
Add Category...................................................................................................................................69
Edit Category ...................................................................................................................................70
Delete Category...............................................................................................................................71
Add Element ....................................................................................................................................71
Edit Element ....................................................................................................................................72
Delete Element ................................................................................................................................73
Policy Manager ........................................................................................................................74
Add Policy........................................................................................................................................74
Edit Policy........................................................................................................................................75
Delete Policy....................................................................................................................................76
Chapter 5: Administration Tools............................................................. 77
Application Manager ................................................................................................................77
Add Application................................................................................................................................77
Edit Application ................................................................................................................................78
Delete Application............................................................................................................................79
Firmware Manager ...................................................................................................................79
Upload Firmware .............................................................................................................................79
Delete Firmware ..............................................................................................................................80
Security Manager .....................................................................................................................81
Authentication and Authorization .....................................................................................................81
General............................................................................................................................................82
LDAP ...............................................................................................................................................83
TACACS+ ........................................................................................................................................86
RADIUS ...........................................................................................................................................87
Certificate ........................................................................................................................................88
IP-ACL .............................................................................................................................................90
Configuration Manager.............................................................................................................91
Network Configuration .....................................................................................................................91
Log Configuration ............................................................................................................................92
Inactivity Timer Configuration ..........................................................................................................92
Time/Date Configuration..................................................................................................................93
Modem Configuration ......................................................................................................................94
Connection Mode.............................................................................................................................94
Device Settings................................................................................................................................96
SNMP ..............................................................................................................................................97
Setting up for SNMP.................................................................................................................97
Configuring SNMP in CommandCenter ....................................................................................97
Cluster Configuration ...............................................................................................................99
Setup Manager.......................................................................................................................104
Reset CommandCenter .................................................................................................................104
Backup CommandCenter ..............................................................................................................104
Restore CommandCenter..............................................................................................................105
Saving and Uploading Backup Files .......................................................................................105
Reports...................................................................................................................................106
Active Users Report.......................................................................................................................106
Active Ports Report........................................................................................................................107
Asset Management Report ............................................................................................................108
Audit Trail Report...........................................................................................................................109
Error Log Report ............................................................................................................................111
Ping Report....................................................................................................................................113
Accessed Devices Report..............................................................................................................114
Group Data Report ........................................................................................................................116
User Data Report...........................................................................................................................117
Users In Groups Report.................................................................................................................118
Query Port Report..........................................................................................................................119
Refresh CommandCenter Display .........................................................................................120
Upgrade CommandCenter .....................................................................................................121
Restart CommandCenter .......................................................................................................122
Shutdown CommandCenter...................................................................................................123
Restart CommandCenter after Shutdown......................................................................................124
End CommandCenter Session ..............................................................................................124
Log Out..........................................................................................................................................124
Exit CommandCenter.............................................................................................................124
Appendix A: Specifications................................................................... 125
Environmental Requirements.................................................................................................125
Electrical Specifications .........................................................................................................125
Appendix B: Initial Setup Process Overview........................................ 127
Appendix C: User Group Features ........................................................ 129
Appendix D: Troubleshooting................................................................ 131
Appendix E: FAQs.................................................................................. 133
Figures
Figure 1 CommandCenter................................................................................................................................1
Figure 2 CommandCenter - rear panel ............................................................................................................1
Figure 3 CommandCenter Connections...........................................................................................................5
Figure 4 Set IP Address with Configuration Manager Commands ...................................................................6
Figure 5 Add Device screen............................................................................................................................8
Figure 6 Add New Device screen.....................................................................................................................8
Figure 7 Security Alert Window......................................................................................................................11
Figure 8 Login Window ..................................................................................................................................11
Figure 9 CommandCenter Application Window (with Devices tree displayed)...............................................12
Figure 10 IP Specification Window ...............................................................................................................12
Figure 11 Security Warning for Signed Console Applet .................................................................................13
Figure 12 RaritanConsole Application............................................................................................................13
Figure 13 CommandCenter Application Window ...........................................................................................15
Figure 14 Add User Screen............................................................................................................................17
Figure 15 Edit User Screen............................................................................................................................18
Figure 16 Change User Password Screen.....................................................................................................18
Figure 17 Change My Profile Screen .............................................................................................................19
Figure 18 Delete User Screen........................................................................................................................19
Figure 19 Logoff Users Screen ......................................................................................................................20
Figure 20 Bulk Copy Screen ..........................................................................................................................21
Figure 21 Add User To Group Screen ...........................................................................................................21
Figure 22 Delete User From Group Screen ...................................................................................................22
Figure 23 Add User Group Screen.................................................................................................................23
Figure 24 Edit User Group Screen.................................................................................................................24
Figure 25 Edit User Group Policies Screen....................................................................................................25
Figure 26 Group Delete User Group Screen..................................................................................................26
Figure 27 Assign Users in Group Screen.......................................................................................................26
Figure 28 Add Device Selection Screen ........................................................................................................28
Figure 29 Add Device Screen for PowerStrip.................................................................................................28
Figure 30 Add Device Screen for Raritan Devices.........................................................................................29
Figure 31 Add Device Screen for iLO, RILO ..................................................................................................29
Figure 32 Edit Device Screen ........................................................................................................................30
Figure 33 Delete Device Screen ....................................................................................................................30
Figure 34 Bulk Copy Screen ..........................................................................................................................31
Figure 35 Backup Device Configuration Screen ............................................................................................31
Figure 36 Restore Device Configuration Screen............................................................................................32
Figure 37 Copy Device Configuration Screen ................................................................................................32
Figure 38 Upgrade Device Screen.................................................................................................................33
Figure 39 Ping Device Screen .......................................................................................................................33
Figure 40 Reset Device Screen .....................................................................................................................33
Figure 41 Devices Tree Regular View Screen ...............................................................................................34
Figure 42 Custom View Screen .....................................................................................................................35
Figure 43 Add Custom View Window.............................................................................................................36
Figure 44 Edit Custom View Window.............................................................................................................36
Figure 45 Custom View Screen .....................................................................................................................37
Figure 46 Delete Custom View Window.........................................................................................................37
Figure 47 Topological View Screen ...............................................................................................................38
Figure 48 Paragon System Launch Admin Menu Option ...............................................................................39
Figure 49 Paragon Manager Application Window ..........................................................................................39
Figure 50 Remote User Station Admin Option ...............................................................................................40
Figure 51 IP-Reach Administration Screen ....................................................................................................40
Figure 52 Device Power Manager Screen .....................................................................................................41
Figure 53 Discover Raritan Devices Screen ..................................................................................................42
Figure 54 Discovered Raritan Devices List Window ......................................................................................42
Figure 55 Add Device Screen ........................................................................................................................43
Figure 56 Device Groups Manager Screen....................................................................................................44
Figure 57 Add Device Group Window............................................................................................................44
Figure 58 Device Groups Manager Screen....................................................................................................45
Figure 59 Edit Device Group Window ............................................................................................................45
Figure 60 Device Groups Manager Screen....................................................................................................46
Figure 61 Delete Device Group Window........................................................................................................46
Figure 62 Device Groups Manager Screen....................................................................................................46
Figure 63 Device Groups Manager Screen....................................................................................................47
Figure 64 Device Groups Manager Screen....................................................................................................48
Figure 65 Delete Rule Window ......................................................................................................................48
Figure 66 Configure Ports Screen..................................................................................................................50
Figure 67 Configure Serial Port Screen for Dominion Unit.............................................................................50
Figure 68 Configure Ports Screen..................................................................................................................51
Figure 69 Configure KVM Port Screen...........................................................................................................52
Figure 70 Configure Ports Screen..................................................................................................................53
Figure 71 Configure Outlet Port Screen.........................................................................................................53
Figure 72 Delete Port Screen.........................................................................................................................54
Figure 73 Bulk Copy Screen ..........................................................................................................................55
Figure 74 Raritan Remote Client Window ......................................................................................................56
Figure 75 Raritan Remote Client Window ......................................................................................................57
Figure 76 HP's Remote Console Applet.........................................................................................................58
Figure 77 Port Power Manager for iLO/RILO targets .....................................................................................59
Figure 78 Active Ports Report ........................................................................................................................59
Figure 79 Edit Serial Port Screen...................................................................................................................60
Figure 80 Edit KVM Port Screen ....................................................................................................................61
Figure 81 Ports Tree in Regular View ............................................................................................................62
Figure 82 Custom View Screen .....................................................................................................................63
Figure 83 Add Custom View Window.............................................................................................................64
Figure 84 Edit Custom View Window.............................................................................................................64
Figure 85 Delete Custom View Window.........................................................................................................65
Figure 86 Port Power Management Screen ...................................................................................................66
Figure 87 Port Groups Manager Screen ........................................................................................................67
Figure 88 Add Port Group Window ................................................................................................................67
Figure 89 Edit Port Group Window ................................................................................................................68
Figure 90 Delete Port Group Window ............................................................................................................68
Figure 91 Association Manager Screen .........................................................................................................69
Figure 92 Add Category Window ...................................................................................................................70
Figure 93 Edit Category Window ...................................................................................................................70
Figure 94 Delete Category Window ...............................................................................................................71
Figure 95 Association Manager Screen .........................................................................................................71
Figure 96 Add Element Window.....................................................................................................................72
Figure 97 Edit Element Window.....................................................................................................................72
Figure 98 Delete Element Window.................................................................................................................73
Figure 99 Policy Manager Screen..................................................................................................................74
Figure 100 Add Appliance Policy Window .....................................................................................................74
Figure 101 Update Policy Window .................................................................................................................75
Figure 102 Edit Appliance Policy Window......................................................................................................75
Figure 103 Update Policy Window .................................................................................................................75
Figure 104 Delete Appliance Policy Window..................................................................................................76
Figure 105 Application Manager Screen ........................................................................................................77
Figure 106 Add Application Window ..............................................................................................................77
Figure 107 Search Window............................................................................................................................78
Figure 108 Edit Application Window ..............................................................................................................78
Figure 109 Delete Application Window ..........................................................................................................79
Figure 110 Firmware Manager Screen ..........................................................................................................79
Figure 111 Search Window............................................................................................................................80
Figure 112 Delete Firmware Window.............................................................................................................80
Figure 113 Manager General Screen.............................................................................................................82
Figure 114 Security Manager LDAP Screen ..................................................................................................83
Figure 115 LDAP advanced configuration options .........................................................................................84
Figure 116 Importing user groups from LDAP to CommandCenter ...............................................................85
Figure 117 Security Manager TACACS+ Screen ...........................................................................................86
Figure 118 Security Manager RADIUS Screen ..............................................................................................87
Figure 119 Security Manager Certificate Screen ...........................................................................................88
Figure 120 Generate Self Signed Certificate Window....................................................................................89
Figure 121 Security Manager IP-ACL Screen ................................................................................................90
Figure 122 Configuration Manager Network Settings Screen ........................................................................91
Figure 123 Configuration Manager Logs Screen ...........................................................................................92
Figure 124 Configuration Manager Inactivity Timer Screen ...........................................................................92
Figure 125 Configuration Manager Time/Date Screen...................................................................................93
Figure 126 Configuration Manager Modem Screen .......................................................................................94
Figure 127 Configuration Manager Connection Screen – Direct Mode or Proxy Mode..................................94
Figure 128 Configuration Manager Connection Screen – Both.....................................................................95
Figure 129 Configuration Settings Device Settings Screen............................................................................96
Figure 130 Configuration Settings Device Settings Screen............................................................................97
Figure 131 Cluster Configuration Screen .......................................................................................................99
Figure 132 Cluster Configuration Screen indicating Primary Node ..............................................................100
Figure 133 Cluster Configuration Advanced Settings ..................................................................................100
Figure 134 Selecting Secondary Node from Cluster Configuration table .....................................................101
Figure 135 Confirmation of Secondary Node Selection ...............................................................................101
Figure 136 Adding a CommandCenter unit manually ..................................................................................102
Figure 137 Remove Cluster Confirmation Window ......................................................................................103
Figure 138 Recovering a node from Waiting status. ....................................................................................103
Figure 139 Reset CommandCenter Screen .................................................................................................104
Figure 140 Backup CommandCenter Screen ..............................................................................................104
Figure 141 Restore CommandCenter Screen..............................................................................................105
Figure 142 Browse to Upload a Backup of CommandCenter.......................................................................105
Figure 143 Active Users Report ...................................................................................................................106
Figure 144 Manage Report Window ............................................................................................................107
Figure 145 Active Ports Report ....................................................................................................................107
Figure 146 Asset Management Report ........................................................................................................108
Figure 147 Audit Trail Screen ......................................................................................................................109
Figure 148 Audit Trail Report .......................................................................................................................110
Figure 149 Error Log Screen........................................................................................................................111
Figure 150 Error Log Report ........................................................................................................................112
Figure 151 Ping Report ................................................................................................................................113
Figure 152 Accessed Devices Screen .........................................................................................................114
Figure 153 Accessed Devices Report..........................................................................................................115
Figure 154 Groups Report ...........................................................................................................................116
Figure 155 All Users’ Data Report ...............................................................................................................117
Figure 156 Users In Groups Report .............................................................................................................118
Figure 157 Query Port Report.....................................................................................................................119
Figure 158 Refresh Shortcut Button.............................................................................................................120
Figure 159 Upgrade CommandCenter Screen.............................................................................................121
Figure 160 Restart Screen ...........................................................................................................................122
Figure 161 Info Window ...............................................................................................................................122
Figure 162 Shutdown CommandCenter Screen ..........................................................................................123
Figure 163 Logout Window ..........................................................................................................................124
Figure 164 Exit Window ...............................................................................................................................124
Figure 165 Association Management Process.............................................................................................127
CHAPTER 1: INTRODUCTION
1
Chapter 1: Introduction
CommandCenter Overview
Congratulations on your purchase of CommandCenter, Raritan’s convenient and secure method for
managing various UNIX servers, firewalls, routers, load balancers, Power Management devices, and
Windows servers. CommandCenter provides central management and administration, using a set of serial
and KVM appliances. It is designed to operate in a variety of environments, from high-density Data
Centers to Service Provider environments to corporate environments handling large remote offices.
CommandCenter, when used in conjunction with Raritan’s Dominion or IP-Reach port-level management
appliances, streamlines and simplifies the management of the target devices, easing administration of data
center equipment by connecting to the IP network and presenting the serial console and KVM ports of all
the target devices within the managed network.
Product Photos
Figure 1 CommandCenter
Figure 2 CommandCenter - rear panel
Product Features and Benefits
•
CommandCenter offers seamless management of Dominion series and Paragon management
appliances through Paragon remote User Stations (UST1R/UST2R) – leverage your embedded base
with a CommandCenter to draw substantial incremental value:
− Constantly updated to keep up with changing needs.
− Streamlines, provides wider process focus and offers productivity improvements, organization
wide.
− Reduces Total Cost of Ownership (TCO); cost savings from high-availability of applications (high
cost for downtime); front-ends and secures and improves reliability of high economic value
equipment.
− Handles scalability elegantly – multiple data centers (primary and backup), growing number of
locations.
− Provides centralized management, Role-Based Access and Control (RBAC), and Reporting
Capabilities.
2
COMMANDCENTER USER GUIDE
•
Uncompromising Security: secure 128-bit encryption (both intranet and Internet); flexibility of access
via SSL, access restriction (by time of day, and/or maximum session duration) as part of user profile in
user management:
− Has the ability to restrict login access to products based on time of day, the ability to restrict
duration of on-line sessions, handle password expiration, and prompt for password changes. All
user operations, including access to port history buffer and access to logs, will be granted or
denied based on user authorization level.
− IP ACL (IP-Filtering) – grants/restricts access by domain name or IP addresses.
− Grants or restricts access on an individual user basis.
− Supports primary and secondary servers.
− Fallback authentication through local database
Single IP address access: reduces the complexities of managing multiple IP addresses with associated
user names and passwords.
Broadest support for third party authentication: leverages existing investment in authentication
protocols and allows centralized authentication and authorization. Streamlines deployment of large
multi-unit systems and centralizes administration and control. Supports LDAP (including AD, iPlanet,
eDirectory), RADIUS, and TACACS+.
Support for Active Directory authorization and the importing of user groups.
Comprehensive administration tools: reduces TCO for managing IT infrastructure; found time can be
used for proactive maintenance:
− Provides powerful multi-tired user and permissions grouping (user/leaf nodes, targets by topology
and by function); CommandCenter’s powerful, user-customizable categorization allows you to
easily tailor your solution and security, for example, create a “Location” attribute and assign all
users in a given LDAP or Active Directory group access to servers in that Location). The
possibilities are limitless!
− Provides powerful user-customizable views of all devices connected to CommandCenter; supports
automatic and manual device discovery.
− Simplifies administration – device upgrade, reset, diagnosis, ping, auto discover, edit, delete –
firmware upgrades, monitoring and access for back up, retrieval and push-down of configuration
to leaf nodes (Dominion Series); simplifies daily maintenance and firmware management.
Flexible reporting: provides adjustable ways to view active devices, users, ports, and asset inventory;
reports include Audit Trail, Error Log, Firmware Report, Ping Report, View By Groups, and Users in
Groups.
Comprehensive logging:
− Logs events locally.
− Can use an external syslog server for event logs (events are immediately posted or exported) and
the ability to have other Raritan products use it as a syslog server.
− Provides full auditing and tracking capabilities.
− Keeps an audit trail for tracking user activity.
Support for SNMP traps.
− Provides System level trap notification of CommandCenter’s operational events.
− Provides Application level trap notification regarding the monitoring of managed devices,
availability events, and the audit events of user access and authorization to CommandCenter.
Infrastructure support for customizable applets via GUI:
− Customizable applets control ranges of devices including power strips, HPs iLO / RILO cards, etc.
− Target systems accessed through applets – remote access to servers and other data center
equipment managed by Raritan management appliances through downloadable applets/COM
controls.
− Power strip outlet user authorization setting, mapping, parameter-passing, target server-mapping.
Operational Flexibility/Ease of Use/Administrator presentation: enhanced system setup entirely
through graphical user interface (state-of-the-art UI standards with professional look and feel).
Designed for high availability:
− ATA Raid-1 card and two ATA hard drivers to provision for fault-tolerance at the hardware and
OS level.
− Two network interfaces for failover or to be configured for public and private IP addresses on
separate NICs.
− Redundant power supplies and ECC memory.
•
•
•
•
•
•
•
•
•
•
CHAPTER 1: INTRODUCTION
•
•
3
− Auto-recovery (watchdog timer).
− Modem access for emergency administration.
− Support for primary and secondary servers.
Support for Clustering and Geographic Redundancy, enabling backup availability with
CommandCenters located on the same or different networks.
Internationalization: language, keyboard, scope of support; documentation available in French,
German, Japanese, Traditional Chinese, Simplified Chinese, and Korean.
Package Contents
CommandCenter is a fully configured stand-alone product that fits in a standard 1U 19” rack mount chassis.
Each CommandCenter unit ships with the following contents:
(1) CommandCenter unit
(1) CommandCenter Quick Setup Guide
(1) CommandCenter User Manual on CD ROM
(1) Set of rack mounting brackets (installed on the unit)
(2) Power cords
4
COMMANDCENTER USER GUIDE
CHAPTER 2: INSTALLATION
5
Chapter 2: Installation
Prepare Network for Remote Operation
Network/Firewall:
To make CommandCenter accessible from outside a network firewall, the following ports must be opened:
• Port 443: for https connection
• Port 8080: for CommandCenter server operations
Please note that Port 80 is not required, as CommandCenter will forward the data from Port 80 to Port 443.
Depending on the connecting devices, the following ports should be opened:
•
Port 5001: for IP-Reach/Dominion KSX/Dominion KX event notification
Initial Configuration
3
1
2
4
Figure 3 CommandCenter Connections
1.
2.
3.
4.
5.
6.
7.
Connect the network LAN cable to the LAN 0 port on the rear panel of the CommandCenter unit.
Connect the other end of the cable to the network.
Attach the included AC power cord to the Primary port on the rear panel of the CommandCenter unit.
Plug the other end or the cord into an AC power outlet.
Power ON CommandCenter.
Connect your keyboard, video, and mouse cables to the corresponding ports on the rear panel of the
CommandCenter unit. When you see the login prompt on the video output, log on using username root
and password raritan.
When the Network Configuration screen appears, click YES and configure your network settings.
When finished, click OK.
CommandCenter will restart (this may take up to 5 minutes).
Once CommandCenter has restarted, launch an Internet browser at any workstation, launch
CommandCenter (see Chapter 3: Operation, Browser-Based Access) and login using the default
login username and password:
−
−
Username: ccroot
Password: raritan0
6
COMMANDCENTER USER GUIDE
Change Administrator Password
After logging on to the CommandCenter unit with the default login name and password (ccroot/raritan0),
we recommend that you change the default user account. Please follow these steps:
1. From the Session menu, click Change My Profile.
2. Click on the checkbox marked Change Password.
3. In the Old Password field, type raritan0.
4. In the Password field, type your new password. By default, the system requires a strong password (the
strong password setting can be changed in your Security Manager screen). Your password must be
between 6-16 characters in length and consist of alphanumeric characters and underscores, without
spaces.
5. Re-type the password in the Retype Password field.
6. Click OK to submit the changes. A message will confirm the success of the modification.
Strong Password Rules
Strong password rules require users to observe strict guidelines when creating passwords, which makes the
passwords more difficult to guess and, in theory, more secure. Administrators can enable or disable this
feature, and when enabled, a password change will be rejected unless it meets the following criteria:
•
•
Passwords must be at least six characters long.
Passwords must contain at least one alphabetical character and one non-alphabetical character (number
or punctuation symbol).
• The first four characters of the password and the username may not match.
Strong password rules apply only to user profiles stored locally. Password rules on an authentication server
must be managed by the authentication server itself. Passwords stored on CommandCenter should be
managed by CommandCenter and whatever rules it defines.
Confirm IP Address
1.
2.
3.
4.
5.
From the Setup menu, click Configuration Manager. The Network Setup screen should be visible; if
not, click on the Network Setup tab.
Ensure that the network setting values default to your personal specifications; if not please follow the
steps below. For detailed instructions, please see Chapter 5: Administration Tools, Configuration
Manager, Network Configuration.
Click Update to submit the changes. A confirmation window asks if you wish to restart
CommandCenter in order to apply changes.
Click OK to log out from your current session and restart CommandCenter.
Access CommandCenter using the new IP address.
Figure 4 Set IP Address with Configuration Manager Commands
CHAPTER 2: INSTALLATION
7
Prepare Devices for Remote Operation
Please make sure all devices are installed according to their manufacturers’ instructions.
These instructions, in addition to those in the section Prepare Network for Remote Operation, above, are
required to bring other devices into the unified view of the CommandCenter unit.
CommandCenter works with Raritan’s Dominion product family (Dominion KX, Dominion KSX, and
Dominion SX), with Raritan Remote Power Control strips, with Raritan’s IP-Reach product family (IPReach TRx and IP-Reach M1 and M2), and with Raritan’s Paragon II System Controller as well as HP
iLO/RILO servers.
1.
Ensure that the device being added to the CommandCenter is already installed on the network.
Important: Make certain no other users are logged into the device being
installed during CommandCenter configuration.
2.
3.
Create an Administrator account on the device. This is a prerequisite for CommandCenter to be able to
manage the unit.
− Note the User Name and Password.
− Note the IP address and the port of the unit.
Ensure that at least one other Administrator account exists on each Dominion Series unit that is to be
connected to CommandCenter.
Note: CommandCenter will remove the Administrator account from the Dominion SX
that is being configured and add a randomly generated login account for increased
security.
8
COMMANDCENTER USER GUIDE
Add New Devices
1.
2.
3.
Log on to CommandCenter as an administrator.
Click on the Devices tab.
On the Devices menu, click on Device Manager, and then click Add Device. The Add Device
selection screen appears.
Figure 5 Add Device screen
4.
5.
6.
7.
8.
9.
10.
11.
12.
13.
Click on the Device Type drop-down arrow and select a device from the list.
Click Next to proceed. The Add Device description screen appears. Depending on the type of device
you selected, you will see a Raritan device, a Dominion, or an iLO/RILO screen. For additional details
on different devices, please see Chapter 4: CommandCenter Management, Device Manager, Add
Device.
Type the new device name in the Device name field.
Type the IP Address or Hostname of the new device in the Device IP or Hostname field.
The TCP port number value will be populated automatically based on the device type.
Type a description (or location) of the new device In the Description field.
Type the name used to log onto this device in the Username field.
Type the password needed to access this device in the Password field.
Type the time (in seconds) that should elapse before timeout between the new device and
CommandCenter in the Heartbeat timeout (sec) field.
Click OK to add the new device. A confirmation message indicates new device creation.
Note: You will not see a TCP port number or Heartbeat timeout field for Dominion SX
and HP iLO/RILO devices.
Figure 6 Add New Device screen
CHAPTER 2: INSTALLATION
9
CommandCenter Window Components
1
2
4
3
5
6
7
8
1.
2.
3.
4.
Ports Selection tab: Click on the Ports tab to display all known target Ports in a Ports tree view. Click
on the + and - signs to expand or collapse the tree.
Users Selection tab: Click on the Users tab to display all registered Users and Groups in a Users tree
view. Click on the + and - signs to expand or collapse the tree.
Devices Selection tab: Click on the Devices tab to display all known Raritan devices in a Devices tree
view. Different device types have different icons. Click on the + and - signs to expand or collapse the
tree.
Quick Commands toolbar: This toolbar offers some shortcut buttons for executing common commands
rapidly.
Note: The Quick Commands toolbar has been upgraded in CC v2.1 and higher to include
“Back” and “Forward” buttons, the left and right-pointing arrows. Please use these as
you would use the Back and Forward commands in your Internet browser. The Back Å
arrow button will return you to the last screen you viewed, and the Forward Æ button
moves you forward to the next screen you viewed, after you have used the Back command.
5.
6.
7.
8.
Operation and Configuration menu bar: These drop down menus offer commands to operate and
configure CommandCenter. Please Note: You can also execute some of these commands by rightclicking on the icons in the Ports/Users/Devices tree view.
Main Display area: The commands you select from the menu bar and/or the tool bar will display in this
main area. Displays here are referred to as ‘screens’ and screens may be broken down into ‘panels.’
User ID: Identification of current logged-in user.
Language Information: Indication of which language version of CommandCenter you are currently
using.
Important: This user guide is written to address CommandCenter
Administrators in the second person. Any phrase that addresses the
reader as “you” is referring to users with Administrator permissions.
Administrators can assign subsets of Administrator permissions to other
users.
10
COMMANDCENTER USER GUIDE
CHAPTER 3: OPERATION
11
Chapter 3: Operation
Overview
Once you have configured CommandCenter with the correct IP address as outlined in Chapter 2, and have
defined at least one user, as described in Chapter 4: User Manager, Add New User, the CommandCenter
unit can be placed at its final destination. Make all necessary hardware connections to make the unit
operational. This section provides a quick overview on how to operate the application.
You can access CommandCenter in several ways, each described in this chapter:
•
Through a browser: CommandCenter supports numerous Web browsers (please see Appendix D:
Troubleshooting for a complete list of browsers and platforms).
• Through a standalone client: Install the executable from the included CD and run this instead of using
the browser-based applet. This executable functions exactly like the downloaded applet.
• Through SSH: Please note that remote devices connected via the serial port can be accessed using this
approach.
Users can be connected simultaneously, using the browser, standalone client, and SSH while accessing the
application.
Browser-Based Access
1.
Using a supported Internet browser, enter the URL of the CommandCenter: https://<IP address> (for
example, https://10.0.3.30). When the security alert window appears, click Yes to continue with the
procedure. CommandCenter is always SSL enabled; when you connect via IE, the Security Alert is
displayed because the CA root certificate is not installed in the browser.
Figure 7 Security Alert Window
2.
The Login window appears.
Figure 8 Login Window
12
COMMANDCENTER USER GUIDE
3.
4.
Type your Username and Password and click Login.
Upon valid login, the CommandCenter application window appears. The menu bar and tool bar, which
contain commands for operating and configuring CommandCenter, are at the top of the screen. The
Ports tab, Users tab, and Devices tab, which contain the Ports selection tree, Users selection tree, and
Devices selection tree, appear on the left side of the window. The central panel is where operations and
configuration screens will appear (this window is described in more detail in the next chapter).
Figure 9 CommandCenter Application Window (with Devices tree displayed)
Standalone Client Access
The standalone CommandCenter client allows you to connect to CommandCenter devices by launching a
Java application instead of running an applet through a Web browser.
1. Install the standalone CommandCenter client located on the included CD ROM onto your PC.
2. Double click on the CC Client icon on your desktop to launch the CommandCenter client. An address
specification window appears.
Figure 10 IP Specification Window
3.
4.
Type the IP address of the CommandCenter unit you wish to access in the IP to Connect field and
press Start. Once you have connected to a CommandCenter device, its IP address is automatically
saved in CommandCenter’s History file and can be selected from the drop-down menu in the future.
After the standalone client connects to CommandCenter, the standard login menu appears, and the
client looks and behaves just like its browser-based counterpart. Type your Username and Password
and click on Login to proceed.
CHAPTER 3: OPERATION
13
Connection to Console and KVM Management Appliances
•
CommandCenter may interface with the Console and KVM management appliances of the Dominion
series and the IP-Reach series. Both serial and KVM devices are supported.
• Raritan provides a standard console access, a vt100 Java terminal emulation for remote target devices
that require a serial connection. In addition, Raritan offers a variety of specialized applications that
allow users to set up a customized look and feel.
• The application interface varies, depending on device type selected. In the case of the KVM device,
Raritan provides the complete keyboard, video, and mouse (KVM) of the remote target system through
the CommandCenter.
• CommandCenter can also interface with HP servers that have iLO or RILO access capabilities. In this
case, CC will launch HP’s own Java management applet when connecting to these devices and log into
iLO/RILO without prompting the user to re-authenticate.
• Serial Port Access
To access a remote target device that is connected via a serial port, click on the appropriate device in the
Devices selection tree, under the Devices tab. If the port is configured for a console application, a Security
Warning appears, indicating that the console applet is a signed applet from Raritan Systems. Click Yes and
the console port appears.
Figure 11 Security Warning for Signed Console Applet
Figure 12 RaritanConsole Application
14
COMMANDCENTER USER GUIDE
Warning: The security warning display (appearing in IE only) appears the first time the
user connects to a serial port. Click Yes when this display appears; if you click No, the
console application will not launch and you must exit CommandCenter, close the
browser, re-launch the browser, and connect to the CommandCenter again.
For additional details about RaritanConsole operation, please refer to Raritan’s RaritanConsole User Guide.
When a custom application is associated with a KVM or serial port, selecting that port launches the
associated application. Raritan Remote Control and RaritanConsole are examples of custom applications
that can be integrated into CommandCenter.
CHAPTER 4: COMMANDCENTER MANAGEMENT
15
Chapter 4: CommandCenter Management
Overview
In addition to providing the capability to aggregate and manage multiple Dominion series serial units and
IP-Reach units from a central location, CommandCenter has powerful built-in features and capabilities for
management and configuration:
•
•
•
•
•
•
•
•
Contains administrative tools to manage the application
Runs health checks on all Dominion and IP-Reach access devices it manages
Automatically refreshes the Ports, Users, and Devices tress when new components are added
Queries and sorts information as it is presented on the display
Configures various authentication schemes, based on operational environment needs
Allows addition, deletion, and modification of users
Allows addition, deletion, and modification of Dominion and IP-Reach access devices managed
Allows addition, deletion, and modification of the applications associated with ports
Menu Bar
(Operation and
Configuration
commands)
Toolbar
(shortcuts for
commands)
Selection tabs
(Ports, Users,
and Devices)
Screen Display Area
Selection tree
(expandable /
collapsible
using + and –
signs)
Figure 13 CommandCenter Application Window
The CommandCenter menu bar displays all operations and configuration commands. Active commands are
based upon the privileges of the user, as established by the CommandCenter Administrator. The user’s
privileges also determine the ports and devices that appear in the Ports and Devices trees.
Clicking on the Ports tab displays the Ports selection tree, clicking on the Users tab displays the Users
selection tree, and clicking on the Devices tab displays the Devices selection tree. Expand and collapse
these trees by clicking on the + and – buttons in front of the icons to view all or a specific set of Ports,
Users, or Devices.
Administrators must configure Ports, Users, and Devices in the CommandCenter system upon setup and
before executing any commands. Please see Appendix B: Initial Setup Process Overview for an overview
of this process.
16
COMMANDCENTER USER GUIDE
Note: The Quick Commands toolbar has been upgraded in CC v2.1 and higher to include
“Back” and “Forward” buttons, the left and right-pointing arrows. Please use these as
you would use the Back and Forward commands in your Internet browser. The Back Å
arrow button will return you to the last screen you viewed, and the Forward Æ button
moves you forward to the next screen you viewed, after you have used the Back command.
Configuring CommandCenter Manager Components
In order to use CommandCenter effectively, you must complete the following configuration steps, as
described in this and the next chapter:
•
•
•
Configure and install Dominion series and IP-Reach appliances (both serial and KVM devices).
− Configure the devices and establish them on your network.
− Load and associate customized applications for serial ports.
− Load and associate customized applications for KVM ports.
− Install and load the KVM client application.
− Define and configure categories and elements to display the information under the all tabs.
Create and define users with appropriate permissions and devices they can manage (please see the
section User Manager, in this chapter, for additional information).
Establish the appropriate security and authentication policies. Only an Administrator who has root
privileges in CommandCenter can do this (please see Chapter 5: Administration Tools, Security
Manager for additional information).
Configurable Parameters
These fields are mandatory and must follow the guidelines as listed:
User Name: Alphanumeric text, 1 – 16 characters in length, underscores permitted.
Password: Alphanumeric text, 6 – 16 characters in length. The first six characters of the password must
contain at least two alpha and one numeric character, and the first four characters cannot be the same as the
user name.
User Manager
User Manager commands are listed in the Users menu and allow you to define the CommandCenter user
list and assign user permissions for performing various functions. CommandCenter maintains a centralized
user access list. Only an Administrator (a user with Administrator privileges) can manage user accounts.
Important! Many of the menu bar commands can be accessed by rightclicking on a User icon in the Selection tree (on the left side of your
CommandCenter window) and choosing a command from the shortcut
menu that appears.
CHAPTER 4: COMMANDCENTER MANAGEMENT
17
Add User
1.
On the Users menu, click Add User. The Add User screen appears.
Figure 14 Add User Screen
2.
3.
Type the user’s name in the Username field (4-16 characters, alphanumeric characters or underscores,
no spaces).
Check the Remote Authentication check box only if the user should be authenticated by TACACS+,
RADIUS, or LDAP (please see Chapter 5: Administration Tools, Security Manager for additional
information).
Note: Checking the Remote Authentication box implies that a remote server is being
used for authentication. If so, a local password is not required.
4.
For local CommandCenter authentication only, type the new password into the Password field (6-16
characters, alphanumeric characters and underscores, no spaces).
5. Re-type password in Retype Password field.
6. Type a dial back number in the Dial Back Number field, if needed.
7. Check the Login Enabled check box to authenticate against the system (if not, user cannot enter the
system).
8. Check the Force Change Password on Next Login check box if you want this user to be forced to
change password the next time he or she logs in to CommandCenter.
9. Check the Force Change Password Periodically check box if you want this user to have to change
his or her password from time to time.
10. Type the expiration period for this user’s password in the Expiration Period field.
11. Click OK to add this user to the system, or Cancel to exit without saving. A User Created
Successfully message indicates the user has been added to the system.
Note: If New User submission fails, an error message appears. Possible explanations
include:
New password is too short. Password should be at least six characters in length.
User Name or Password does not conform to requirements as stated above.
Password and Confirm Password do not match.
A user account with same User Name already exists on CommandCenter.
12. Repeat steps 1 through 11 to add other users.
18
COMMANDCENTER USER GUIDE
Edit User
This command allows you, as Administrator, to edit a user’s parameters.
1. Click on the Users tab. In the Users tab area, a Group icon shows multiple figures, and a User icon
appears as a single person; click on the + sign before a group name to expand and view all users within
it. Select a user from the Users tree.
2. On the User menu, click Edit User. The Edit User screen appears.
Figure 15 Edit User Screen
3.
4.
5.
6.
Edit the Dial Back Number or type a new Expiration Period (in days).
Click on the appropriate check boxes to Force Change Password on Next Login or Force Change
Password Periodically.
Click OK to submit the changes or Cancel to exit without saving. An Updated Successfully message
confirms the edits were submitted.
Repeat steps 1 through 5 to edit other users.
Change User Password
This command allows you to change any user’s password.
1. Click on the Users tab and select a user from the Users tree
2. On the User menu, click Change User Password. The Change User Password screen appears.
Figure 16 Change User Password Screen
3.
4.
5.
6.
Type the new password in the Password field.
Re-type password in the Retype Password field.
Click OK to change user password or Cancel to exit without saving. A User Password Updated
Successfully message confirms the password has been changed.
Repeat steps 1 through 5 to change other users’ passwords.
CHAPTER 4: COMMANDCENTER MANAGEMENT
19
Change Own Password
For security reasons, you may choose to change your own password.
1. On the Session menu, click Change My Profile. The Change My Profile screen appears.
Figure 17 Change My Profile Screen
2.
3.
4.
5.
6.
Type your old password in the Old Password field.
Type your new password in the Password field. You cannot re-use your old password.
Re-type your password in the Retype Password field.
Click OK to change your password or Cancel to exit without saving. A User Profile Updated
Successfully message confirms that your password has been changed.
Repeat steps 1 through 4 to change your password whenever necessary.
Delete User
As an Administrator, you can remove a user account that is no longer needed.
1. Click on the Users tab and select a user from the Users tree.
2. On the User menu, click Delete User. The Delete User screen appears.
Figure 18 Delete User Screen
3.
4.
Click OK to delete the user or Cancel to exit without deleting. A User Deleted Successfully message
confirms that user has been deleted.
Repeat steps 1 through 3 to delete other users.
20
COMMANDCENTER USER GUIDE
Logoff User(s)
Use this command to disconnect any logged-in user from CommandCenter.
1. Click on the Users tab and select a user from the Users tree.
Note: To select more than one user, hold the <CTRL> key and click on additional users.
2.
On the Users menu, click Logoff User(s). The Logoff Users screen appears.
Figure 19 Logoff Users Screen
3.
Click OK to disconnect the users or Cancel to exit without disconnecting users. A User Logged off
Successfully message confirms that the users have been logged off.
CHAPTER 4: COMMANDCENTER MANAGEMENT
21
Bulk Copy
To save time, use the Bulk Copy command to duplicate user profiles or port assignments when creating
new users.
1. Click on the Users tab and select a user from the Users tree whose properties you want to copy to
another user(s).
2. On the Users menu, click Bulk Copy. The Bulk Copy screen appears.
Figure 20 Bulk Copy Screen
3.
4.
5.
6.
7.
In the All Users list select the user name(s) that will be adopting the profile of the user listed in the
Username field.
Click Add to move user name(s) to the Selected Users list.
To remove any user names from the Selected Users list, click on the name(s) and click Delete to move
them back to the All Users list.
Click OK to copy user properties or Cancel to exit without copying. A User Copied Successfully
message confirms that the user profile has been copied.
Repeat steps 1 through 6 to make other bulk copies of user properties.
Add User to Group
To manage users with similar privileges, you can assign them to groups. When you add a user to any group,
you are assigning the group’s privileges to that user (please see the section Add User Group, in this
chapter, for more information about groups).
1. Click on the Users tab and select a group (the Group icon displays multiple people and a User icon
displays a single person).
2. On the Users menu, click Add User To Group. The Add User To Group screen appears.
Figure 21 Add User To Group Screen
22
COMMANDCENTER USER GUIDE
3.
Click on the Username drop-down arrow and select a user from the list to add to the group shown in
the User Group Name field.
Click OK to add the selected user to the group or Cancel to exit without adding. An Added
Successfully To Group message confirms that the user has been added to a group.
Repeat steps 1 through 4 to add more users to this or to other groups.
4.
5.
Delete User from Group
This command removes a user from a specific group, but not from the system. If a user is not assigned to
any other group, that user is moved to Users Not In Group, a non-specific category shown at the base of
the Users tree.
1. Click on the Users tab and select a user to be deleted.
2. On the Users menu, click Delete User From Group. The Delete User From Group screen appears.
Figure 22 Delete User From Group Screen
3.
4.
Click OK to delete the user or Cancel to exit without deleting. A Deleted Successfully From Group
message confirms that the user has been deleted from the group.
Repeat steps 1 through 3 to delete other users from this or other groups.
CHAPTER 4: COMMANDCENTER MANAGEMENT
23
Add User Group
Use the Add User Group command to create specific groups and assign them different privileges,
depending on the needs of your work environment. Groups can help you keep your system organized.
Assign privileges, or features, to Groups upon creating them. These Select Features are features of either a
command type or an event type. Command type features permit users to see and execute commands. Event
type features permit users to view events in the Ports and Devices trees.
Users inherit the features privileges assigned to the group to which they belong. No user can have any
rights other than those assigned to the group. As an example, if a group is assigned the User Management
feature, all users in that group can see and execute the User Manager commands in the Users menu: Add
User, Edit User, Change User Password, etc.
In order to see Ports and Devices trees, a user group has to be assigned the Device and Port Management
feature. To view other events that occur in the system, those privileges must be selected upon Adding or
Editing a User Group. This chapter explains how to assign privileges to groups; please see Appendix C:
User Group Features for more information on what each privilege means.
1. On the Users menu, click Add User Group. The Add User Group screen appears.
Figure 23 Add User Group Screen
2.
3.
4.
5.
6.
Type the group name in the User Group Name field (1-16 characters, alphanumeric characters and
underscores).
Type the group description (for example, based on department, region, or assignment) in the
Description field.
In the Select Features section, check the check box(es) in the Has it column to assign the specific
feature line items to the group. The Type column indicates whether the feature is a Command type
feature or an Event type feature (please see Appendix C: User Group Features for more information).
Click OK to add the group or Cancel to exit without saving. A Group Created Successfully message
confirms that a group has been created.
Repeat steps 1 through 5 to add other groups.
24
COMMANDCENTER USER GUIDE
Edit User Group
This command allows you to rename group and modify its Features.
Important: Please remember that you must be an Administrator to
modify User Groups. The category Users Not In Group cannot be
modified. Members of that group have observation rights only.
1.
2.
Click on the Users tab and select a group.
On the Users menu, click Edit User Group. The Edit User Group screen appears.
Figure 24 Edit User Group Screen
3.
4.
5.
6.
Type a new group name in the User Group Name field.
Type a new description in the Description field.
Check the Select Features check box(es) in the Has it column to assign the specific feature line items
to the group (please see Appendix C: User Group Features for more information).
Click OK to update the group features or Cancel to exit without saving. A Group Updated
Successfully message confirms that group features have been updated.
CHAPTER 4: COMMANDCENTER MANAGEMENT
25
Edit User Group Policies
Groups can be assigned policies, or permissions, that allow them to view and/or control devices and ports.
Depending on which policies are assigned to them, groups might have: No Rights, Some Rights, Control
Rights, or Full Administration Rights. Policies can be set up using Policy Manager commands, as
described in the section Policy Manager, later in this chapter.
1. Click on the Users tab and select a group.
2. On the User menu, click Edit User Group Policies. The Edit User Group Policies screen appears.
Figure 25 Edit User Group Policies Screen
3.
4.
5.
6.
7.
Click on a line item in the Policies list (under the All Policies panel) that you wish to assign to the
group. Scroll up or down to view all policies in this list. Click on the Day(s) check boxes to select
which days of the week the policy should be assigned.
Click Add to add the policy to the Selected Policies panel and assign it to the group.
To remove an assigned policy from the Selected Policies list, select the policy line item and click
Delete.
Click OK to add the policy or policies to the group or Cancel to exit without editing. A Group
Policies Updated Successfully message confirms that policies have been updated.
Repeat steps 1 through 6 to edit other groups’ policies.
26
COMMANDCENTER USER GUIDE
Delete User Group
This command allows you to remove a group name from the system. Users from the deleted group will be
re-assigned to the category Users Not In Group, displayed at the base of the Users tree.
1. Click on the Users tab and select a group.
2. On the User menu, click Delete User Group. The Delete User Group screen appears.
Figure 26 Group Delete User Group Screen
3.
4.
Click OK to delete the group or Cancel to exit without deleting. A Group Deleted Successfully
message confirms that group has been deleted.
Repeat steps 1 through 3 to delete other groups.
Assign Users to Group
Use this command to assign users who are members of one group to a different group. Users can be
members of more than one group.
1. Click on the Users tab and select a group to which you want to add users.
2. On the User menu, click Assign Users To Group. The Assign Users in Group screen appears.
Figure 27 Assign Users in Group Screen
3.
4.
5.
All users in the system are listed in the Users not in group list. Select a user or users to assign to the
group listed in the Group Name field.
Click Add to add the user name to the Users in group list.
To remove any user names from the Users in group list, select the user names and click Delete.
CHAPTER 4: COMMANDCENTER MANAGEMENT
6.
7.
27
Click OK to assign users to the group or Cancel to exit without saving. A Users Assigned
Successfully message confirms that users have been assigned.
Repeat steps 1 through 6 to assign users to other groups.
Device Manager
Device Manager commands allow you to configure Dominion series and IP-Reach units and their
individual ports. From a CommandCenter perspective, connection to a remote target device is made via a
serial or KVM port. You can configure the system on a port-by-port basis in order to easily access remote
target devices.
When you click on the Devices tab and select a device from the Devices tree, the View Device screen will
automatically appear, displaying information about the selected device. For easier identification, KVM,
Serial, and Power devices have different icons in the Devices tree. In addition, availability status of each
device also has a different icon. For a description of what the icons represent, please see the table below.
Icons in Device Tree
ICON
MEANING
Device available
Port available
KVM port connected – in current user session
Port paused – because device is paused
Port unavailable – because device is unavailable
Port busy – other user connected to port
Serial port available – not connected
Serial port connected – in current user session
Serial port busy – other user connected to port
Serial port unavailable – device is down and unavailable
Serial port paused – because device is paused
Device paused
Device unavailable – device restarted and e = 33 is thrown
Power strip available
Outlet port available
Power strip paused
Outlet paused
Important! Many of the menu bar commands can be accessed by rightclicking on a Device icon and selecting a command from the shortcut
menu that appears.
28
COMMANDCENTER USER GUIDE
Add Device
Use this command to add a new device to the system.
1. Click on the Devices tab.
2. On the Devices menu, click Device Manager, and then click Add Device. The Add Device selection
screen appears.
Figure 28 Add Device Selection Screen
3.
4.
Click on the Device Type drop-down arrow and select a type of device from the list.
Click Next to proceed. The Add Device description screen appears. Depending on the type of device
you selected, you will see a Raritan device, a Dominion, or an iLO/RILO screen.
Figure 29 Add Device Screen for PowerStrip
CHAPTER 4: COMMANDCENTER MANAGEMENT
29
Figure 30 Add Device Screen for Raritan Devices
Figure 31 Add Device Screen for iLO, RILO
5.
6.
7.
8.
9.
10.
11.
Type the new device name in the Device name field.
Type the IP Address or Hostname of the new device in the Device IP or Hostname field.
The TCP port number value will be populated automatically based on the device type.
Type a description (or location) of the new device In the Description field.
Type the name used to log onto this device in the Username field.
Type the password needed to access this device in the Password field.
Type the time (in seconds) that should elapse before timeout between the new device and
CommandCenter in the Heartbeat timeout (sec) field.
30
COMMANDCENTER USER GUIDE
12. Click OK to add the device or Cancel to exit without saving. A Device Created Successfully message
confirms that device has been added.
13. Repeat steps 1 through 12 to add other devices.
Note: You will not see a TCP port number or Heartbeat timeout field for Dominion SX
and HP iLO/RILO devices.
Edit Device
Use this command to rename a device and /or modify its properties.
1. Click on the Devices tab and select a device from Devices tree.
2. On the Devices menu, click Device Manager, and then click Edit Device. The Edit Device screen
appears.
Figure 32 Edit Device Screen
3.
4.
5.
Type the new device properties in the appropriate fields on this screen, up to and including selecting
different or new Category and Element properties from the Device Association panel.
Click OK to edit the device or Cancel to exit with modifying. A Device Updated Successfully
message confirms that device has been modified.
Repeat steps 1 through 4 to edit other devices.
Delete Device
1.
2.
Click on the Devices tab and select a device from Devices tree.
On the Devices menu, click Device Manager, and then click Delete Device. The Delete Device screen
appears.
Figure 33 Delete Device Screen
3.
4.
Click OK to delete the device or Cancel to exit without deleting. A Device Deleted Successfully
message confirms that the device has been deleted.
Repeat steps 1 through 3 to delete other devices.
CHAPTER 4: COMMANDCENTER MANAGEMENT
31
Bulk Copy
The Bulk Copy command allows you to copy the assigned categories and elements from one device to
multiple other devices. Please note that categories and elements are the only properties copied in this
process.
1. Click on the Devices tab and select a device from Devices tree.
2. On the Devices menu, click Device Manager, and then click Bulk Copy. The Bulk Copy screen
appears.
Figure 34 Bulk Copy Screen
3.
4.
5.
6.
7.
In the All Devices list, select the device(s) to which you are copying the categories and elements of the
device in the Device Name field.
Click Add to add a device to the Selected Devices list.
To remove a device from the Selected Devices list, select the device, and click Delete.
Click OK to bulk copy or Cancel to exit without copying. A Device Copied Successfully message
confirms that device categories and elements have been copied.
Repeat steps 1 through 6 to copy other categories and elements of other devices.
Backup Device Configuration
Use this command to back up all user configuration and system configuration files. If anything happens to
your system, you can restore your previous configurations from memory.
1. Click on the Devices tab and select a device from the Devices tree.
2. On the Devices menu, click Device Manager, and then click Backup Device Configuration. The
Backup Device Configuration screen appears.
Figure 35 Backup Device Configuration Screen
32
COMMANDCENTER USER GUIDE
3.
Click OK to back up the device configuration or Cancel to exit without backing up. A Device
Configuration Backed Up Successfully message confirms that device configuration has been backed
up.
Repeat steps 1 through 3 to back up other device configurations.
4.
Restore Device Configuration
This command allows you to restore a previously backed-up device configuration.
1. Click on the Devices tab and select a device from the Devices tree.
2. On the Devices menu, click Device Manager, and then click Restore Device Configuration. The
Restore Device Configuration screen appears.
Figure 36 Restore Device Configuration Screen
3.
4.
5.
6.
Click on the Backup Date drop-down arrow and select a date from the list of when you last made a
back up of the device.
Click OK to restore the back up or Cancel to exit without restoring.
When the Restart message appears, click Yes to restart the device or No to close the window without
restarting. A Device Configuration Restored Successfully message confirms that all user and system
configuration data has been restored.
Repeat step 1 through 5 to restore other devices’ configurations.
Copy Device Configuration
This command allows you to copy configurations from one device to another.
1. Click on the Devices tab and select the device whose configuration you wish to copy to another device
from the Devices tree.
2. On the Devices menu, click Device Manager, and then click Copy Device Configuration. The Copy
Device Configuration screen appears.
Figure 37 Copy Device Configuration Screen
3.
4.
5.
6.
Click on the Copy Configuration To drop-down arrow and select the device to which you want to
copy the configuration of the device in the Device Name field.
Click OK to copy the configuration or Cancel to exit without copying. A Restart message appears.
Click Yes to restart the device or No to close the window without restarting. A Device Configuration
Copied Successfully message confirms that device configuration has been copied.
Repeat steps 1 through 5 to copy other devices’ configurations.
CHAPTER 4: COMMANDCENTER MANAGEMENT
33
Upgrade Device
Use the Upgrade Device command to download new versions of device firmware.
1. Click on the Devices tab and select a device from the Devices tree.
2. On the Devices menu, click Device Manager, and then click Upgrade Device. The Upgrade Device
screen appears.
Figure 38 Upgrade Device Screen
3.
4.
5.
6.
Click on the Firmware Name drop-down arrow and select the appropriate firmware from the list
(Raritan or your reseller will provide this information).
Click OK to upgrade the device or Cancel to close the Upgrade Device screen. A Restart message
appears.
Click Yes to restart the device or No to close the window without restarting. A Device Upgraded
Successfully message confirms that the device has been upgraded.
Repeat steps 1 through 5 to upgrade other devices.
Ping Device
You can ping a device to determine if the device is available in your network.
1. Click on the Devices tab and select a device from the Devices tree.
2. On the Devices menu, click Device Manager, and then click Ping Device. The Ping Device screen
appears, showing the result of the ping.
Figure 39 Ping Device Screen
3.
4.
Click Close to clear this screen.
Repeat steps 1 through 3 to ping other devices.
Reset Device
Use the Reset Device command to reset device configurations to factory default.
1. Click on the Devices tab and select a device from the Devices tree.
2. On the Devices menu, click Device Manager, and then click Reset Device. The Reset Device screen
appears.
Figure 40 Reset Device Screen
3.
4.
Click OK to reset the device or Cancel to exit without resetting. A Device Reset Successfully
message confirms that device has been reset.
Repeat steps 1 through 3 to reset other devices.
34
COMMANDCENTER USER GUIDE
Pause Device
You can pause a device to temporarily suspend CommandCenter’s control of it without losing any of the
configuration data stored with CommandCenter.
1. Click on the Devices tab and select a device from the Devices tree.
2. On the Devices menu, click Device Manager, and then click Pause Management. The indicator of
the device being paused is its icon changing from a grey ‘active’ state to a red ‘paused’ state in the
Devices tree.
Resume Device
After pausing a device, have it continue with its normal activity by commanding it to resume.
1. Click on the Devices tab and select the paused device from the Devices tree.
2. On the Devices menu, click Device Manager, and then click Resume Management. The device icon
changes from the red ‘paused’ state to a grey ‘active’ state.
View Devices
Regular View
Select this command to view devices in the Devices tree grouped in default view (you can change the
regular view by assigning new criteria in custom view, see next section).
1. Click on the Devices tab.
2. On the Devices menu, click Change View, and then click Regular View. The Regular View of the
Devices tree appears.
Figure 41 Devices Tree Regular View Screen
CHAPTER 4: COMMANDCENTER MANAGEMENT
35
Custom View
You can customize the Devices tree by organizing devices to appear in a particular format. You might want
to view devices by Country, by Time Zone, or by any other option that helps you differentiate between
them. Set up a Custom View using the next few sessions. Please also see the section Association Manager,
later in this chapter, for more details on adding Categories to CommandCenter.
1. Click on the Devices tab.
2. On the Devices menu, click Change View, and then click Custom View. The Custom View screen
appears.
Figure 42 Custom View Screen
3.
4.
5.
6.
To customize your view, click on the Name drop-down arrow and select a custom view that has
already been saved in the database. Details of the View categories appear in the Custom View Details
field.
Click Set Current to arrange the Devices tree to reflect the selected custom view.
Click Close to close the Custom View screen.
Repeat steps 1 through 5 to change custom view.
36
COMMANDCENTER USER GUIDE
Add Custom View
1.
2.
3.
Click on the Devices tab.
On the Devices menu, click Change View, and then click Custom View. The Custom View screen
appears.
In the Custom View panel, click Add. An Add Custom View window appears.
Figure 43 Add Custom View Window
4.
Type a new custom view name and click OK or click Cancel to close the window. The new view
name appears in the Name field.
5. In the Custom View Details panel, click on the drop-down arrow at the bottom of the panel. This list
contains categories that you can use to filter custom views. Select a detail from the drop-down list and
click Add to add the detail to the Custom View Details panel. Select as many details as needed.
6. To re-order the details in the Custom User Details panel, select a detail and use the Up and Down
buttons to arrange details in the order you want devices sorted. To remove a detail from the list, select
the detail and click the Delete button in the Custom User Details panel.
7. Click Update to update the custom view. A Custom View Updated Successfully message confirms
that the custom view has been updated.
8. Click Set Current to arrange the Devices tree to reflect the selected custom view.
9. Click Close to close the Custom View screen.
10. Repeat steps 1 through 9 to add a new custom view.
Edit Custom View
1.
2.
3.
Click on the Devices tab.
On the Devices menu click Change View, and then click Custom View. The Custom View screen
appears.
Click on the Name drop-down arrow in the Custom View panel and select the custom view to be
edited. Click Edit. An Edit Custom View window appears.
Figure 44 Edit Custom View Window
4.
5.
Type a new custom view name and click OK to confirm or Cancel to close window.
In the Custom View Details panel, click on the drop-down arrow at the bottom of the panel. This list
contains categories that you can use to filter custom views. Select a detail from the drop-down list and
click Add to add the detail to the Custom View Details panel. Select as many details as needed.
CHAPTER 4: COMMANDCENTER MANAGEMENT
37
6.
To re-order the details in the Custom User Details panel, select a detail and use the Up and Down
buttons to arrange details in the order you want devices sorted. To remove a detail from the list, select
the detail and click the Delete button in the Custom User Details panel.
7. Click Update to update custom view. A Custom View Updated Successfully message confirms that
the custom view has been updated.
8. Click Set Current to arrange the Devices tree to reflect the selected custom view.
9. Click Close to close the Custom View screen.
10. Repeat steps 1 through 9 to edit other custom views.
Delete Custom View
1.
2.
Click on the Devices Tab.
On the Devices menu click Change View, and then click Custom View. The Custom View screen
appears.
Figure 45 Custom View Screen
3.
4.
Click on the Name drop-down arrow in the Custom View panel and select the custom view to be
deleted.
Click on the Delete button in the Custom View panel. A Delete Custom View window appears.
Figure 46 Delete Custom View Window
5.
6.
7.
Click Yes to delete the custom view or No to close the window.
Click Close to close the Custom View screen.
Repeat steps 1 through 6 to delete other custom views.
38
COMMANDCENTER USER GUIDE
Topological View
Use the Topological View command to view the structural setup of all the connected appliances in your
configuration.
1. Click on the Devices tab and select a device from the Devices tree.
2. On the Devices menu, click Topological View. The Topological View for the selected device appears.
Figure 47 Topological View Screen
3.
4.
Navigate through the Topological View in the same way you navigate through the Devices tree; click
on the + or – to expand or collapse the view.
Click Close to close Topological View screen.
CHAPTER 4: COMMANDCENTER MANAGEMENT
39
Special Access to Paragon II System Devices
Paragon II System Controller (PIISC)
Paragon II System Integration users can add their PIISC devices to the CommandCenter Devices tree and
configure them via the Paragon Manager application from within CommandCenter. For more detailed
directions on using Paragon Manager for PIISC configuration, please see Raritan’s Paragon Manager /
Paragon II System Controller User Manual.
After adding your Paragon System device (the Paragon System includes the PIISC device, connected UMT
units, and connected IP-Reach units) to CommandCenter, it will appear in the Devices tree. Right-click on
the Paragon System icon in the Devices tree and select Launch Admin to launch the Paragon II System
Controller application in a new browser window and configure your PIISC UMT units.
Figure 48 Paragon System Launch Admin Menu Option
Figure 49 Paragon Manager Application Window
40
COMMANDCENTER USER GUIDE
IP-Reach and UST-IP Administration
You can also perform administrative diagnostics on IP-Reach and UST-IP devices connected to your
Paragon System setup directly from the CommandCenter interface.
After adding the Paragon System device to CommandCenter, it appears in the Devices tree. Right-click on
the device icon in the Devices tree and select Remote User Station Admin. The Remote User Station
Admin screen appears, listing all connected IP-Reach and UST-IP units. Click the Launch Admin button
in the row of the device you want to work with to activate Raritan Remote Console and launch the blue
device configuration screen in a new window.
Figure 50 Remote User Station Admin Option
Figure 51 IP-Reach Administration Screen
CHAPTER 4: COMMANDCENTER MANAGEMENT
41
Device Power Manager
Before using the Device Power Manager view, make a physical connection of a PowerStrip to a Dominion
SX or Dominion KSX unit. When you add the PowerStrip device, define this connection in
CommandCenter. Once the PowerStrip is added, you can associate it with the Dominion SX serial ports or
with Dominion KSX dedicated power ports. The Device Power Manager view displays outlets connected to
devices’ ports and allows you to remotely power on or power off associated ports, as well as monitor power,
voltage, current, and temperature of the device.
1. In the Devices tree, select a device, then on the Devices menu, click Device Power Manager. The
Device Power Manager screen appears.
Figure 52 Device Power Manager Screen
2.
3.
4.
5.
6.
The outlets will be listed in the Outlets Status panel. You may have to scroll to view all outlets.
Click on the On or Off radio buttons for each outlet to power ON or power OFF the outlet.
Click Recycle to restart the device connected to the outlet.
Click Close to close the Device Power Manager screen.
Repeat steps 1 through 5 to monitor and control other devices.
Note: CommandCenter automatically recognizes the outlets of PowerStrips attached to
Dominion KX and PIISC devices as additional ports of those devices; no PowerStrip
association is necessary. These outlets are added and configured the same as any other
device port. See Port Manager, later in this chapter, for instructions on adding and
editing ports.
42
COMMANDCENTER USER GUIDE
Discover Raritan Devices
Use this command to initiate a search for all Raritan devices on your system. The search will automatically
detect all newly attached, and previously existing Raritan devices on your network, including Paragon,
PIISC, IP-Reach, Dominion KX, and Dominion KSX units. After locating the devices, you may connect
them to your CommandCenter system if they are not already connected.
1. On the Devices menu, click Discover Raritan Devices. The Discover Raritan Devices screen appears.
Figure 53 Discover Raritan Devices Screen
2.
3.
Click on the Devices Type drop-down arrow and select the type of device you wish to find. Type the
range of IP addresses where you expect to find the devices in the From Address and To Address
fields. To search for all Raritan devices, select ALL from the drop-down list.
Click OK to start the search or Cancel to exit without searching. Discovered devices appear in a
Discover Raritan Devices list.
Figure 54 Discovered Raritan Devices List Window
CHAPTER 4: COMMANDCENTER MANAGEMENT
4.
43
Select a Raritan device from list and click Add to add the device to CommandCenter or click Close to
exit without adding the device. If you clicked Add, the Add Device screen appears.
Figure 55 Add Device Screen
5.
6.
7.
Type the user name and password (that were created specifically for CommandCenter in the device) in
the Username and Password fields to allow CommandCenter to authenticate the device when
communicating with it in the future. Select a Category or Element to apply to the device.
Click OK to add the new device or Cancel to exit without adding. To return to the previous screen,
click Previous. A Device Added Successfully message confirms that the device has been added.
Repeat steps 1 through 6 to find and add other devices.
44
COMMANDCENTER USER GUIDE
Device Group Manager
Use the Device Groups Manager screen to add, edit, assign, and remove device groups and the rules that
govern them. First add a Device Group, then add a Device Rule(s) to make working with and viewing
devices easier.
Add Device Group
1.
On the Associations menu, click Groups Manager, and then click Device Group Manager. The
Device Group Manager screen appears.
Figure 56 Device Groups Manager Screen
2.
Click Add in the Groups panel. The Add Device Group window appears.
Figure 57 Add Device Group Window
3.
4.
5.
Type a device group name in the Enter Name for Device Group field. Click OK to add the group or
Cancel to close the window. The new group name will appear in the Group Name field.
Click Close to close Device Groups Manager screen.
Repeat steps 1 through 4 to add other device groups.
CHAPTER 4: COMMANDCENTER MANAGEMENT
45
Edit Device Group Name
1.
On the Associations menu, click Groups Manager, and then click Device Group Manager. The
Device Group Manager screen appears.
Figure 58 Device Groups Manager Screen
2.
Click on the Groups drop-down arrow and select the group to be edited from the list. Click Edit and
the Edit Device Group window appears.
Figure 59 Edit Device Group Window
3.
4.
5.
Type the new name for the device group in the Enter New Name for Device Group field. Click OK
to edit the device group or Cancel to close the window. The new name appears in the Group Name
field.
Click Close to close Device Groups Manager screen.
Repeat steps 1 through 4 to edit other device group names.
46
COMMANDCENTER USER GUIDE
Delete Device Group
1.
On the Associations menu, click Groups Manager, and then click Device Group Manager. The
Device Groups Manager screen appears.
Figure 60 Device Groups Manager Screen
2.
Click on the Group Names drop down arrow and select the device group to be deleted. Click Delete
and the Delete Device Group window appears.
Figure 61 Delete Device Group Window
3.
4.
5.
Click Yes to delete the group or No to Cancel and close the window.
Click Close to close Device Groups Manager screen.
Repeat steps 1 through 4 to delete other devices.
Add Device Rule
After adding a device group, apply one or more rules to the group so that devices can be grouped by
matching parameters and you have a navigable Devices tree.
1. On the Associations menu, click Groups Manager, and then click Device Group Manager. The
Device Groups Manager screen appears.
Figure 62 Device Groups Manager Screen
2.
3.
4.
Click on the Group Name drop-down arrow and select the device group for which you want to set
rules.
Click on the Prefix, Category, Operator, and Element drop-down arrows to set up a rule, and type
the name of the rule in the Rule Name field.
Click Add Rule. The new rule appears in the rule table as a short regular expression.
CHAPTER 4: COMMANDCENTER MANAGEMENT
47
Important: You can combine the application of two or more rules by
using operators such as ‘&’ meaning ‘and’ or ‘ ⎜’ (vertical bar that shares
the <\> key on your keyboard) meaning ‘or.’
Note: When you select a category, make sure you select a proper operator that relates to
the element in order for the rule to take effect. For example, if countries of the world
category is selected, relate it to ‘=’operator to equal only the country you pick as an
element of the rule. Devices are grouped according to this rule once added to the system.
5.
6.
7.
8.
Click Validate and the short regular expression expands into a normal expression of the rule in the
lower field of the screen.
Click Update to update the device group. The new rule is associated with this device group from now
on, and any new devices will also comply with rules assigned to this device group.
Click Close to close the Device Groups Manager screen.
Repeat steps 1 through 7 to add other rules to device groups.
Edit Device Rule
1.
On the Associations menu, click Groups Manager, and then click Device Group Manager. The
Device Groups Manager screen appears.
Figure 63 Device Groups Manager Screen
2.
3.
4.
5.
Click on the Group Name drop-down arrow and select the device group with the rule that must be
edited.
Change any of the fields by clicking on the Prefix, Category, Operator, and Element drop-down
arrows and change the rule as necessary.
Click Add Rule. The edited rule appears in the rule table as a short regular expression.
Click Close to close the Device Groups Manager screen.
48
COMMANDCENTER USER GUIDE
Delete Device Rule
1.
On the Associations menu, click Groups Manager, and then click Device Group Manager. The
Device Groups Manager screen appears.
Figure 64 Device Groups Manager Screen
2.
Select a rule to be deleted from the rule table and click Delete Rule. The Delete Rule window appears.
Figure 65 Delete Rule Window
3.
4.
5.
Click Yes to delete the rule or No to close the window.
Click Close to close Device Groups Manager screen.
Repeat steps 1 through 4 to delete other rules.
CHAPTER 4: COMMANDCENTER MANAGEMENT
49
Port Manager
Port Manager commands allow you to configure, connect to, and disconnect from ports of serial and KVM
devices in your CommandCenter system.
Once configured, CommandCenter provides centralized access to Dominion and IP-Reach units through
these attached target device(s). CommandCenter supports Raritan products, as listed in the table below.
NUMBER OF IPS
NUMBER OF PORTS
Dominion SX4
RARITAN UNITS
1
4
Always On
SSL
Dominion SX8
1
8
Always On
Dominion SX16
1
16
Always On
Dominion SX32
1
32
Always On
Dominion KSX440
1
8
Always On
Dominion KSX880
1
16
Always On
Dominion KX116*
1
16
Always On
Dominion KX216*
1
16
Always On
Dominion KX232*
1
32
Always On
Dominion KX416
1
16
Always On
Dominion KX432
1
32
Always On
IP-Reach
1
Model Dependent
Always On
PIISC
1
Varies
Always On
*Requires DKX firmware support
When you click on the Ports tab, the Ports tree displays information about the Ports connected with
CommandCenter. For easier identification, different ports have different icons in the tree. In addition,
availability status of each port also has a different icon. For a description of what the icons represent, please
see the table below.
ICON
MEANING
Device available
Port available
KVM port connected – in current user session
Port paused – because device is paused
Port unavailable – because device is unavailable
Port busy – other user connected to port
Serial port available – not connected
Serial port connected – in current user session
Serial port busy – other user connected to port
Serial port unavailable – device is down and unavailable
Serial port paused – because device is paused
Power strip available
Outlet port available
Power strip paused
Outlet paused
Important! Many of the menu bar commands described in this section
can be accessed by right-clicking on a Port icon and selecting a
command from the shortcut menu that appears.
50
COMMANDCENTER USER GUIDE
Configure Port
Configure a Serial Port
1.
2.
Click on the Devices tab and select a serial device from the Devices tree.
On the Devices menu, click Port Manager, and then click Configure Ports. The Configure Ports
screen appears.
Figure 66 Configure Ports Screen
3.
Click the Configure button that corresponds to the serial port line item you wish to configure. The
Configure Serial Port screen appears.
Figure 67 Configure Serial Port Screen for Dominion Unit
4.
5.
Type a port name in Port Name field.
Click on the Application Name drop-down arrow and select an application name.
CHAPTER 4: COMMANDCENTER MANAGEMENT
51
6.
7.
8.
9.
10.
11.
12.
Click on the Baud Rate drop-down arrow and select a rate.
Click on the Parity/Data Bits drop-down arrow and select a parity value.
Click on the Parity Check check box to enable the parity check.
Click on the Recv/Xmit Pace check box to enable the pace Xon/Xoff if necessary.
Click on the H/W Flow Control check box to enable flow control.
Select the associated category and element from the Device Associations table.
Click OK to configure the serial port or Cancel to exit without configuring. A Port Created
Successfully message confirms that port has been created.
13. Repeat steps 1 through 12 to configure other serial ports.
Configure a KVM Port
1.
2.
Click on the Devices tab and select a KVM device from the Devices tree.
On the Devices menu, click Port Manager, and then click Configure Ports. The Configure Ports
screen appears.
Figure 68 Configure Ports Screen
52
COMMANDCENTER USER GUIDE
3.
Click the Configure button that corresponds to the KVM port line item you wish to configure. The
Configure KVM Port screen appears.
Figure 69 Configure KVM Port Screen
4.
5.
6.
7.
8.
Type a port name in the Port Name field.
Click on the Application Name drop-down arrow and select name.
Select the associated category and element from the Device Associations table.
Click OK to configure the KVM port or Cancel to exit with configuring. A Port Created
Successfully message confirms that port has been created.
Repeat steps 1 through 7 to configure other KVM ports.
CHAPTER 4: COMMANDCENTER MANAGEMENT
53
Configure an Outlet Port
1.
2.
Click on the Devices tab and select a PowerStrip device from the Devices tree.
On the Devices menu, click Port Manager, and then click Configure Ports. The Configure Ports
screen appears.
Figure 70 Configure Ports Screen
3.
Click the Configure button that corresponds to the outlet port line item you wish to configure. A
Configure Outlet Port screen appears.
Figure 71 Configure Outlet Port Screen
4.
5.
Type the port name in the Port Name field.
Click on the Associated Port drop-down arrow and select a name.
54
COMMANDCENTER USER GUIDE
6.
Click OK to configure the outlet port or Cancel to exit without configuring. A Port Created
Successfully message confirms that outlet port has been created.
Repeat steps 1 through 6 to configure other outlet ports.
7.
Delete Ports
Delete a port to remove the port entry from the Ports tree and Cancel all accessibility of the remote target
device.
1. Click on the Ports tab and select a port to be deleted.
2. On the Devices menu, click Port Manager, and then click Delete Port. The Delete Port screen
appears.
Figure 72 Delete Port Screen
3.
4.
Click OK to delete the port or Cancel to exit without deleting. A Port Deleted Successfully window
confirms that port has been deleted.
Repeat steps 1 through 3 to delete other ports.
CHAPTER 4: COMMANDCENTER MANAGEMENT
55
Bulk Copy
To save time, use the Bulk Copy command to duplicate Port names or associations to other ports.
1. Click on the Ports tab and select a port whose data you want to copy to another.
2. On the Ports menu, click Bulk Copy. The Bulk Copy screen appears.
Figure 73 Bulk Copy Screen
3.
4.
5.
6.
7.
In the All Ports list select the port name(s) that will be adopting the profile of the port listed in the
Port Name field above.
Click Add to move port name(s) to the Selected Ports list.
To remove any port names from the Selected Ports list, click on the name(s) and click Delete to move
them back to the All Ports list.
Click OK to copy port properties or Cancel to exit without copying. A Port Copied Successfully
message confirms that the port profile has been copied.
Repeat steps 1 through 6 to make other bulk copies of port properties.
56
COMMANDCENTER USER GUIDE
Connect Port
Having just configured ports in the previous section of this chapter, you are now ready to connect to these
ports and manage them through the RaritanConsole application.
Connect to a Serial Port
1.
2.
3.
Click on the Ports tab and select a serial port to connect to and manage.
On the Ports menu, click Connect Port.
The Raritan Remote Client or JRRC application will launch in a new window. Use the application to
manage the devices and ports.
Figure 74 Raritan Remote Client Window
4.
5.
When you are finished using RRC to manage the port, on the RRC Connection menu, click Exit.
Repeat steps 1 through 4 to connect to and manage other serial ports.
CHAPTER 4: COMMANDCENTER MANAGEMENT
57
Connect to a KVM Port
1.
2.
3.
Click on the Ports tab and select a KVM port to connect to and manage.
On the Ports menu, click Connect Port.
While Raritan Remote Client or JRRC launches, a Connection Status window will inform you of
connection status. Once a connection is established, RC/JRRC opens in a new window.
Figure 75 Raritan Remote Client Window
4.
5.
When you are finished using RRC to manage the port, on the RRC Connection menu, click Exit.
Repeat steps 1 through 4 to connect to and manage other KVM ports.
Note: If the KVM port is on sleep mode and indicates “no video signal,” press the space
bar on your keyboard until you ‘wake up’ the port.
58
COMMANDCENTER USER GUIDE
Connect to an iLO/RILO Port
1.
2.
3.
Click on the Ports tab and select an iLO or RILO target to connect to and manage.
On the Ports menu, click Connect Port.
A new java applet, HP’s Remote Console will launch, once the applet loads, you have KVM access to
the iLO/RILO-enabled server.
Figure 76 HP's Remote Console Applet
4.
5.
When you are finished using Remote Console, close the browser window.
Repeat steps 1 through 4 to connect to and manage other HP iLO/RILO ports.
CHAPTER 4: COMMANDCENTER MANAGEMENT
59
Managing an iLO/RILO Power Port
1.
2.
3.
Click on the Ports tab and select an iLO or RILO Power Supply node for the iLO/RILO target you
want to manage.
On the Ports menu, click Power Port Manager.
The Port Power Management screen for the iLO/RILO target appears.
Figure 77 Port Power Manager for iLO/RILO targets
4.
5.
6.
Click on the On or Off radio buttons for each outlet to power ON or power OFF the target.
Click Recycle to restart the device connected to the target.
Click Close to close the Port Power Manager screen.
Disconnect Port
To disconnect any serial, KVM, or outlet port in the Ports tree, use the Disconnect Port command.
1. On the Reports menu, click Active Ports. The Active Ports report is generated.
Figure 78 Active Ports Report
2.
3.
Select the active port to be disconnected from the list.
Click Disconnect to disconnect the port or click Close to exit without disconnecting.
60
4.
COMMANDCENTER USER GUIDE
Repeat steps 1 through 3 to disconnect other ports.
Edit Port
Edit a Serial Port
1.
2.
Click on the Ports tab and select a serial port to be edited.
On the Ports menu, click Edit Port. The Edit Serial Port screen appears.
Figure 79 Edit Serial Port Screen
3.
4.
5.
6.
7.
8.
9.
10.
11.
12.
Type the new port name in the Port Name field.
Click on the Application Name drop-down arrow and select a new application name.
Click on the Baud Rate drop-down arrow and select a new rate.
Click on the Parity/Data Bits drop-down arrow and select a new value.
Click on the Parity Check check box to enable or disable.
Click on the Recv/Xmit Pace check box to enable or disable Xon/Xoff.
Click on the H/W Flow Control check box to enable or disable.
Click on the Associate Power Strip drop-down arrow and select a new power strip.
Select a new category and element from the Device Associations table.
Click OK to edit the port or Cancel to exit without saving the changes. A Port Updated Successfully
confirms that port has been updated.
13. Repeat steps 1 through 12 to edit other ports.
CHAPTER 4: COMMANDCENTER MANAGEMENT
61
Edit a KVM Port
1.
2.
Click on the Ports tab and select a KVM port to be edited.
On the Ports menu, click Edit Port. The Edit KVM Port screen appears.
Figure 80 Edit KVM Port Screen
3.
4.
5.
6.
7.
Type a new port name in the Port Name field.
Click on the Application Name drop-down arrow and select an application from the list.
Select a new category and element from the Device Associations table.
Click OK to edit the port or Cancel to exit without saving the changes. A Port Updated Successfully
confirms that port has been updated.
Repeat steps 1 through 7 to edit other ports.
62
COMMANDCENTER USER GUIDE
View Ports
Regular View
Select this command to view the Ports tree grouped in default view (you can change the regular view by
assigning new criteria to a custom view, see next section).
1. Click on the Ports tab.
2. On the Ports menu, click Change View, and then click Regular View. The Regular View of the Ports
tree appears.
Figure 81 Ports Tree in Regular View
CHAPTER 4: COMMANDCENTER MANAGEMENT
63
Custom View
You can customize the Ports tree view by organizing your ports to appear in the format of your choice. You
might want to view ports by device, or by rack, or by any other option that helps you differentiate between
them. Set up a Custom View following the instructions in the next sections.
1. Click on the Ports tab.
2. On the Ports menu, click Change View and then click Custom View. The Custom View screen
appears.
Figure 82 Custom View Screen
3.
4.
5.
6.
To customize your view, click on the Name drop-down arrow and select a custom view that has
already been saved in the database. Details of the View categories appear in Custom View Details
field
Click Set Current to arrange the Ports tree to reflect the selected custom view.
Click Close to close the Custom View screen.
Repeat steps 1 through 5 to change custom view.
64
COMMANDCENTER USER GUIDE
Add Custom View
1.
2.
3.
Click on the Ports tab.
On the Ports menu click Change View, and then click Custom View. The Custom View screen
appears.
In the Custom View panel click Add. An Add Custom View window appears.
Figure 83 Add Custom View Window
4.
Type a new custom view name and click OK or click Cancel to close the window. The new view
name appears in the Name field.
5. Under In the Custom View Details panel, click on the drop-down arrow at the bottom of the panel.
This list contains categories that you can use to filter custom views. Select a detail from the drop-down
list and click Add to add the detail to the Custom View Details panel. Select as many details as
needed.
6. To re-order the details in the Custom User Details panel, select a detail and use the Up and Down
buttons to arrange details in the order you want devices sorted. To remove a detail from the list, select
the detail and click the Delete button in the Custom User Details panel.
7. Click Update to update the custom view. A Custom View Updated Successfully message confirms
that the custom view has been updated.
8. Click Set Current to arrange the Devices tree to reflect the selected custom view.
9. Click Close to close the Custom View screen.
10. Repeat steps 1 through 9 to add a new custom view.
Edit Custom View
1.
2.
3.
Click on the Ports tab.
On the Ports menu click Change View, and then click Custom View. The Custom View screen
appears.
Click on the Name drop-down arrow in the Custom View panel and select the custom view to be
edited. Click Edit. An Edit Custom View window appears.
Figure 84 Edit Custom View Window
4.
5.
Type a new custom view name and click OK to confirm or Cancel to close window.
In the Custom View Details panel, click on the drop-down arrow at the bottom of the panel. This list
contains categories that you can use to filter custom views. Select a detail from the drop-down list and
click Add to add the detail to the Custom View Details panel. Select as many details as needed.
CHAPTER 4: COMMANDCENTER MANAGEMENT
65
6.
To re-order the details in the Custom User Details panel, select a detail and use the Up and Down
buttons to arrange details in the order you want devices sorted. To remove a detail from the list, select
the detail and click the Delete button in the Custom User Details panel.
7. Click Update to update custom view. A Custom View Updated Successfully message confirms that
the custom view has been updated.
8. Click Set Current to arrange the Devices tree to reflect the selected custom view.
9. Click Close to close the Custom View screen.
10. Repeat steps 1 through 9 to edit other custom views
Delete Custom View
1.
2.
3.
4.
Click on the Ports tab.
On the Ports menu click Change View, and then click Custom View. The Custom View screen
appears.
Click on the Name drop-down arrow in the Custom View panel and select the custom view to be
deleted.
Click on the Delete button in the Custom View panel. A Delete Custom View window appears.
Figure 85 Delete Custom View Window
5.
6.
7.
Click Yes to delete the custom view or No to close the window.
Click Close to close the Custom View screen.
Repeat steps 1 through 6 to delete other custom views.
66
COMMANDCENTER USER GUIDE
Port Power Manager
Manage the power to outlet ports directly using this screen.
1. Click on the Ports tab and select an outlet port from the Ports tree.
2. On the Ports menu, click Port Power Manager. The Power Port Management screen appears.
Figure 86 Port Power Management Screen
3.
4.
5.
6.
7.
Click the On option button to power ON the port.
Click the Off option button to power OFF the port.
Click Recycle to recycle power to a port, that is, power it OFF, and then power it back ON again.
Click Close to close the Port Power Management screen.
Repeat steps 1 through 6 to manage power for other ports.
CHAPTER 4: COMMANDCENTER MANAGEMENT
67
Port Group Manager
Add Port Group
1.
On the Associations menu, click Groups Manager and then click Port Group Manager. The Port
Groups Manager screen appears.
Figure 87 Port Groups Manager Screen
2.
Click Add in the Group panel to add a new group. The Add Port Group window appears.
Figure 88 Add Port Group Window
3.
4.
5.
6.
Type the name for the new Port Group in the Enter Name for Port Group field.
Click OK to add the new group or Cancel to close the window.
Click Close to close Port Groups Manager screen.
Repeat steps 1 through 5 to add other port groups.
68
COMMANDCENTER USER GUIDE
Edit Port Group
1.
2.
On the Associations menu, click Groups Manager and then click Port Group Manager. The Port
Groups Manager screen appears.
Click on the Group Name drop-down arrow and select a group to edit. Click Edit in the Group panel.
The Edit Port Group window appears.
Figure 89 Edit Port Group Window
3.
4.
5.
6.
Type a new name for the group in the Enter New Name for Port Group field.
Click OK to update the change or Cancel to close the window.
Click Close to close the Port Groups Manager screen.
Repeat steps 1 through 5 to edit other port groups.
Delete Port Group
1.
2.
On the Associations menu, click Groups Manager and then click Port Groups Manager. The Port
Groups Manager screen appears.
Click on the Group Name drop-down arrow and select a group to delete from the list. Click Delete to
delete the group. The Delete Port Group window appears.
Figure 90 Delete Port Group Window
3.
4.
5.
Click Yes to delete the port group or No to close the window.
Click Close to close the Port Groups Manager screen.
Repeat steps 1 through 4 to delete other port groups.
CHAPTER 4: COMMANDCENTER MANAGEMENT
69
Association Manager
Association Manager commands allow you to add, modify, or delete Categories and Elements. In
CommandCenter, each device or port has an associated IP Address and Port Name by default. For further
differentiation, additional types of attributes, known as categories, are associated to the device or port for
ease of administration. Each Category has elements associated with it.
For example, the category “Country” might have the elements “USA,” “Japan,” and “Germany” associated
with it; the category “Location” might have the elements “San Jose,” “San Francisco,” and “New York”
associated with it, and so on. Once the tree view is customized using these attributes, you can easily find,
for example, all Firewall devices located in the New York location without searching through an extensive
list of managed devices/ports.
Once you add a new category and its elements, you can associate CommandCenter’s configured
devices/ports. When configuring devices/ports, you can choose one element from each category to
associate with each device/port.
Please see Appendix B: Initial Setup Process Overview for a summary of this process within
CommandCenter.
Add Category
1.
On the Associations menu, click Association Manager. The Association Manager screen appears.
Figure 91 Association Manager Screen
70
2.
COMMANDCENTER USER GUIDE
Click Add in the Category panel to add a new category. The Add Category window appears.
Figure 92 Add Category Window
3.
4.
5.
6.
7.
Type a category name in the Category Name field (note that spaces are not permitted).
Click on the Value Type drop-down arrow to select a value type of String or Integer.
Click on the Applicable For drop-down arrow to select the type of device this category applies to:
Device, Port, or Both.
Click OK to create the new category or Cancel to exit without creating. The new category name
appears in the Category Name field.
Repeat steps 1 through 6 to add other new categories.
Edit Category
1.
2.
3.
On the Associations menu, click Association Manager. The Association Manager screen appears.
Click on the Category Name drop-down arrow and select the category to be edited.
Click Edit in the Category panel of the screen to edit the category. The Edit Category window
appears.
Figure 93 Edit Category Window
4.
5.
6.
7.
8.
Type the new category name in Category Name field.
Click the Applicable For drop-down arrow to change whether this category applies to Device, Port,
or Both. Please note that a string value cannot be changed to an integer value, and vice versa. If you
must make this type of change, please delete the category, and add a brand new one.
Click OK to edit the category or Cancel to exit without editing. The updated category name appears in
the Category Name field.
Click Close to close the Association Manager screen.
Repeat steps 1 through 7 to edit other categories.
CHAPTER 4: COMMANDCENTER MANAGEMENT
71
Delete Category
Deleting a category deletes all of the elements created within that category. The deleted category will no
longer appear in the Devices tree once the screen is refreshed or the user logs out and logs back into
CommandCenter.
1. On the Associations menu, click Association Manager. The Association Manager screen appears.
2. Click on the Category Name drop-down arrow and select the category to be deleted.
3. Click Delete in the Category panel of the screen to delete the category. The Delete Category window
appears.
Figure 94 Delete Category Window
4.
5.
6.
Click Yes to delete the category or No to close the window.
Click Close to close the Association Manager screen.
Repeat steps 1 through 5 to delete other categories.
Add Element
1.
On the Associations menu, click Association Manager. The Associations Manager screen appears.
Figure 95 Association Manager Screen
72
COMMANDCENTER USER GUIDE
2.
Click Add in the Element for Category panel to add a new element. The Add Element window
appears.
Figure 96 Add Element Window
3.
4.
5.
6.
Type the new element name in the Enter Value of Element field.
Click OK to add the element or Cancel to exit the window. The new element appears in the Elements
For Category panel.
Click Close to close the Association Manager screen.
Repeat steps 1 through 5 to add other elements.
Edit Element
1.
2.
On the Associations menu, click Association Manager. The Association Manager screen appears.
Select the element to be edited from the Element For Category list and click Edit in the Elements
For Category panel. The Edit Element window appears.
Figure 97 Edit Element Window
3.
4.
5.
6.
Type the new name of the element in the Enter New Value of Element field.
Click OK to update the element or Cancel to close the window. The new element name is displayed in
the Element For Category list.
Click Close to close the Association Manager screen.
Repeat steps 1 through 5 to edit other elements.
CHAPTER 4: COMMANDCENTER MANAGEMENT
73
Delete Element
Deleting an element removes that element from all Port associations, leaving association fields blank.
1. On the Associations menu, click Association Manager. The Association Manager screen appears.
2. Select the element to be deleted from the Element For Category list and click Delete in the Elements
For Category panel. The Delete Element window appears.
Figure 98 Delete Element Window
3.
4.
5.
Click Yes to delete the element or No to close the window. The element name disappears from the
Element For Category list.
Click Close to close the Association Manager screen.
Repeat steps 1 through 4 to delete other elements.
Note: Deleting an element removes the element from all device and port category
associations, leaving all pre-associated element fields blank.
74
COMMANDCENTER USER GUIDE
Policy Manager
Policy Manager commands allow you to add, edit, delete, and assign policies to Device and Port groups.
Policies give users rights to control, view, or deny access to groups. Please see Appendix B: Initial Setup
Process Overview for more information on using Policies.
Add Policy
1.
On the Associations menu, click Policy Manager. The Policy Manager screen appears.
Figure 99 Policy Manager Screen
2.
Click Add to add a new policy. The Add Appliance Policy window appears.
Figure 100 Add Appliance Policy Window
3.
4.
5.
6.
7.
8.
9.
Type the name of the new policy in the Enter Name for Appliance Policy field.
Click OK to add the new policy or Cancel to close the window. If you clicked OK, the new policy
name appears in the Name field.
Click on the Device Group drop-down arrow and select a device group.
Click on the Port Group drop-down arrow and select a port group.
Click on the up or down arrows in the Start Time and End Time fields to assign a starting time and an
ending time during a 24-hour period for this policy to be in effect.
Select the appropriate option buttons for this policy to be in effect: Any to apply policy every day,
Weekday to apply policy every working day, Weekend to apply policy Saturdays and Sundays, and
Custom to manually choose the days policy to be applied. If you choose Custom, check on the days of
the week to apply the policy.
Click on the Permission drop-down arrow to select a permission type: Deny, View, or Control.
CHAPTER 4: COMMANDCENTER MANAGEMENT
75
10. Click Update to add the policy. The Update Policy window appears
Figure 101 Update Policy Window
11. Click Yes to add the policy or No to close the window.
12. Click Close to close the Policy Manager screen.
13. Repeat steps 1 through 12 to add other policies.
Edit Policy
1.
2.
On the Associations menu, click Policy Manager. The Policy Manager screen appears.
Click on the Name drop-down arrow to select a policy to edit. Click Edit to edit the policy. The Edit
Appliance Policy screen appears.
Figure 102 Edit Appliance Policy Window
3.
4.
5.
Type a new name for the policy in the Enter Name for Appliance Policy field.
Click OK to rename policy or Cancel to close the window.
Modify other policy elements and click Update to submit changes. Update Policy window appears.
Figure 103 Update Policy Window
6.
7.
8.
Click Yes to update the policy or No to close the window.
Click Close to close the Policy Manager screen.
Repeat steps 1 through 7 to edit other policies.
76
COMMANDCENTER USER GUIDE
Delete Policy
1.
2.
On the Associations menu, click Policy Manager. The Policy Manager screen appears.
Click on the Name drop-down arrow to select a policy to be deleted. Click Delete to delete the policy.
The Delete Appliance Policy window appears.
Figure 104 Delete Appliance Policy Window
3.
4.
5.
Click Yes to delete the policy or No to close the window.
Click Close to close the Policy Manager screen.
Repeat steps 1 through 4 to delete other policies.
Note: Deleting a policy removes the policy and its association from user groups.
CHAPTER 5: ADMINISTRATION TOOLS
77
Chapter 5: Administration Tools
Application Manager
Add Application
You can upload different custom applications to CommandCenter and assign the applications to different
ports in order to access them individually, as needed.
1. On the Setup menu, click Application Manager. The Application Manager screen appears.
Figure 105 Application Manager Screen
2.
Click Add to add a new application. The Add Application window appears.
Figure 106 Add Application Window
3.
Type the new application name in the Enter Name for Application field.
78
COMMANDCENTER USER GUIDE
4.
Click OK to add the new application or Cancel to close the window. If you clicked OK, a search
window appears.
Figure 107 Search Window
5.
6.
7.
Click on the Look In drop-down arrow and navigate to locate the application in your system. When
you find the application, select it, and click Open. The application name will appear in the Location
field in the Application Manager screen.
Click Upload to upload the application. A progress window indicates that the new application is being
uploaded. When complete, a new window will indicate that the application has been added to the
CommandCenter database and is available for configuration and attachment to a specific port.
Click Close to close the Application Manager screen.
Note: Once the application has been loaded into CommandCenter and assigned to a port,
verify that the application is operational.
Edit Application
Use this command to modify an application name or change the location where the application is stored in
your system.
1. On the Setup menu, click Application Manager. The Application Manager screen appears.
2. Click on the Application Name drop-down arrow and select the application to be edited from the list.
3. Click Edit in the Applications panel of the screen to rename the application. The Edit Application
window appears.
Figure 108 Edit Application Window
4.
5.
6.
7.
Type the new application name in the Enter New Name for Application field.
Click OK to edit the application name or Cancel to close the window.
Modify parameters in the Details panel and click the Update button. The parameters will be updated.
Click Close to close the Application Manager screen.
CHAPTER 5: ADMINISTRATION TOOLS
79
Delete Application
Deleting an application from the Application Manager removes it from the CommandCenter database,
although it is still retained in the local directory. When you delete a custom application, the serial port
reverts to using RaritanConsole.
1. On the Setup menu, click Application Manager. The Application Manager screen appears.
2. Click on the Application Name drop-down arrow and select the application to be deleted.
3. Click the Delete button in the Applications panel to delete the application. The Delete Application
window appears.
Figure 109 Delete Application Window
4.
5.
Click Yes to delete the application or No to close the window.
Click Close to close the Application Manager screen.
Firmware Manager
Upload Firmware
This command allows you to upload current versions of firmware to your system.
1. On the Setup menu, click Firmware Manager. The Firmware Manager screen appears.
Figure 110 Firmware Manager Screen
80
2.
COMMANDCENTER USER GUIDE
Click Add to add a new firmware file. A search window appears.
Figure 111 Search Window
3.
4.
Click on the Look In drop-down arrow and navigate to locate the firmware file in your system. When
you find the firmware, select it, and click Open. The firmware name will appear in the Firmware
Name field.
Click Close to close the Firmware Manager screen.
Delete Firmware
1.
2.
3.
On the Setup menu, click Firmware Manager. The Firmware Manager screen appears.
Click on the Firmware Name drop-down arrow and select the firmware to be deleted.
Click Delete. The Delete Firmware window appears.
Figure 112 Delete Firmware Window
4.
5.
Click Yes to delete the firmware or No to close the window.
Click Close to close the Firmware Manager screen.
CHAPTER 5: ADMINISTRATION TOOLS
81
Security Manager
Authentication and Authorization
CommandCenter supports the new Raritan Authentication and Authorization Standard. This standard
specifies password rules, login rules, and IP access list rules to be followed by all products.
CommandCenter conforms to all features in this standard. As a means to slow down hackers, after three
failed attempts, the IP connection is disconnected and the source IP address is temporarily blocked (for
approximately five minutes).
User Accounts must be added to the authentication server in order to use LDAP/TACACS+/RADIUS
authentication. To use CommandCenter for port level authorization, a local account with assigned ports
must be added. The user’s user name on both the authentication server and on CommandCenter must be the
same, although the passwords may be different, and the local password is used only when the
LDAP/TACACS+/RADIUS is disabled. If remote authentication is used, users have to contact their
Administrators in order to change their passwords on the remote server. There is no password to be
changed on the CommandCenter.
Active Directory servers may be used for remote authorization in addition to remote authentication. If a
setup uses Active Directory authentication and authorization there is no need to add users to the
CommandCenter.
When LDAP/TACACS+/RADIUS is enabled, authentication and authorization follow these steps:
1. The user logs in with the appropriate user name and password.
2. CommandCenter connects to LDAP/TACACS+ or RADIUS server and sends the user name and
password.
3. User name and password are either accepted or rejected and sent back. If authentication is rejected, this
results in a failed login attempt.
4. If authentication is successful, local authorization is performed where CommandCenter checks if user
name entered matches a group or “users not in group” and grants privileges per the assigned policy. In
the case of Active Directory authorization, the LDAP server will return a list of group names.
CommandCenter will then match the groups and assign the appropriate privileges.
When LDAP/TACACS+/RADIUS Authentication is disabled, both authentication and authorization are
performed locally on CommandCenter.
82
COMMANDCENTER USER GUIDE
General
The General properties allow you to set the order of your authentication databases. If the first checked
option is unavailable, CommandCenter will try the second, then the third, and so on, until it is successful.
1. On the Setup menu, click Security Manager. When the Security Manager screen appears, click on
the General tab.
Figure 113 Manager General Screen
2.
3.
4.
5.
6.
7.
8.
Check the Use SSL For Client Connections check box if you want SSL encrypted connections to
CommandCenter.
Check the Force Strong Password Check check box, if needed.
The modules in the table represent the multiple authentication options available in CommandCenter.
Select a name from the Modules table and click Up and Down to prioritize the sequence of
engagement.
Check the box under the Authentication column to use a selected module for user authentication.
If the selected module is an Active Directory server or the CC Local Database, check the box under
the Authorization column to use that module for user authorization as well.
Click Update to update the changes.
Click Close to close the Security Manager screen.
CHAPTER 5: ADMINISTRATION TOOLS
83
LDAP
Once the CommandCenter applet is started and a user name and password are entered, a query is forwarded
either through CommandCenter or directly to the LDAP server. The username and password match those in
the LDAP directory and the user is authenticated. The user will then be authorized against the local user
groups, or if Active Directory authorization is enabled, the Active Directory server will return a list of user
groups to be matched against the CommandCenter user groups.
1. On the Setup menu, click Security Manager. When the Security Manager screen appears, click on
the LDAP tab.
Figure 114 Security Manager LDAP Screen
2.
3.
4.
5.
6.
7.
8.
9.
Click on the LDAP1 tab to configure the first LDAP server.
Check Use Active Directory if this server is an Active Directory server.
Type the IP address and port value of the LDAP server in the IP Address and Port fields.
Check Secure Connection for LDAP if using a secure LDAP server.
Type parameters for authentication with LDAP and subsequent search of username entered in Login
screen into the User name and Password fields. Please note: If using Active Directory 2000 or earlier,
use a space to separate the user’s last name and first name; example: cn=Lynch Jennifer). However, if
using Active Directory 2003, you must type a backslash and then a comma ( \,) to separate the user’s
last name and first name: example: cn=Lynch\,Jennifer.
Type user base parameters in the Base DN field.
Type user filter parameters in the User Filter field.
Click Test Connect if you want to test your connection to the LDAP server using the given parameters.
84
COMMANDCENTER USER GUIDE
10. Click Advanced to set advanced configuration options for the LDAP server.
Figure 115 LDAP advanced configuration options
11. Click the radio button for Base 64 or Plain Text depending on whether you want the password to be
sent to the LDAP server with encryption or as plain text.
12. Click on the Default Digest drop-down arrow and select the default encryption of user passwords.
13. Type the user attribute and group membership attribute parameters in the User Attribute and Group
Membership Attribute fields. These values should be obtained from your LDAP directory schema.
14. If you are using Active Directory authorization on this server, type group base parameters in the Base
DN field here.
15. Type group filter parameters in the Filter field.
CHAPTER 5: ADMINISTRATION TOOLS
85
16. Click Import User Groups to retrieve a list of user group values stored on the LDAP server. If any of
the user groups are not already on the CommandCenter unit, you can import them here and assign an
access policy.
Figure 116 Importing user groups from LDAP to CommandCenter
a.
b.
Check the boxes next to the groups you wish to import to CommandCenter.
In the Policies column, assign those groups a CommandCenter access policy (see
Chapter 4: CommandCenter Management, Policy Manager for details on adding
access policies).
c. Click Import to import the selected user groups or Cancel to exit without importing.
17. Type the bind pattern in the Bind Username Pattern field.
18. Check Use Bind if you want CommandCenter to send the username and password entered at login to
the LDAP server for authentication. If Use Bind is not checked, CommandCenter will search the
LDAP server for the user name, and if found, will retrieve the LDAP object and locally compare the
associated password with the one entered.
19. On some LDAP servers such as Active Directory servers, the password cannot be retrieved as part of
the LDAP object. Check Use Bind After Search to instruct CommandCenter to bind the password to
the LDAP object again and send it back to the server for authentication.
Note: If you are using an Active Directory server you must uncheck Use Bind and check
Use Bind After Search.
20. Click Apply to save the changes made to the Advanced Options dialog, or click Cancel to exit without
saving.
21. Click Update at the bottom of the screen to save the settings for this server.
22. Click on the LDAP2 tab and follow steps 3-21 to configure a second LDAP server.
23. Click Close to close the Security Manager screen.
86
COMMANDCENTER USER GUIDE
TACACS+
1.
On the Setup menu, click Security Manager. When the Security Manager screen appears, click on
the TACACS+ tab.
Figure 117 Security Manager TACACS+ Screen
2.
3.
4.
5.
6.
7.
8.
Type the server name in the Server Name field.
Type the port number in the Port Number field.
Type the authentication port in the Authentication Port field.
Type the shared key into the Shared Key field.
Repeat steps 2 through 4 for Server Two fields.
Click Update to update changes.
Click Close to close the Security Manager screen.
CHAPTER 5: ADMINISTRATION TOOLS
87
RADIUS
1.
On the Setup menu, click Security Manager. When the Security Manager screen appears, click on
the RADIUS Tab.
Figure 118 Security Manager RADIUS Screen
2.
3.
4.
5.
6.
7.
Type the server name in the Server Name field.
Type the port number in the Port Number field.
Type the shared key into the Shared Key and Shared Key Confirm fields.
Repeat steps 2 through 4 for Server Two fields.
Click Update to update changes.
Click Close to close the Security Manager screen.
88
COMMANDCENTER USER GUIDE
Certificate
1.
On the Setup menu, click Security Manager. When the Security Manager screen appears, click on
the Certificate tab.
Figure 119 Security Manager Certificate Screen
2.
Please select from one of the following option buttons:
a. Click on the Export Current Certificate Private Key option button. The certificate appears in
the Certificate panel and the private key appears in Private Key panel. Copy the text of the
Certificate and Private Key and submit it by clicking Export.
b. Click on the Import Pasted Certificate and Private Key option button. You can paste Certificate
and Private key and click Import to import them.
c. Click on the Generate Certificate Signing Request option button and click Generate. The
Generate Certificate Signing Request window appears. Type the requested data for the selfsigned Certificate into the fields. Click OK to generate the request or Cancel to exit the window.
If generated, the Certificate Request will appear in the corresponding fields of the Certificate
screen.
CHAPTER 5: ADMINISTRATION TOOLS
d.
Click on the Generate Self Signed Certificate option button and click Generate. The Generate
Self Signed Certificate window appears. Type the data needed for the self-signed Certificate into
the fields, then click OK to generate the certificate or Cancel to exit that window. If generated, the
Certificate and Private Key will appear encrypted in the corresponding fields of the Certificate
screen.
Figure 120 Generate Self Signed Certificate Window
3.
89
Click Close to close the Security Manager screen.
90
COMMANDCENTER USER GUIDE
IP-ACL
1.
On the Setup menu, click Security Manager. When the Security Manager screen appears, click on
the IP-ACL tab.
Figure 121 Security Manager IP-ACL Screen
2.
3.
4.
5.
6.
To change the order of the line items in the Access Control List, select the line item and click the Up
and Down buttons.
To add a new item to the list, type a starting IP in the Starting IP field and an ending IP in the Ending
IP field. Select a Group to apply this range to, and under Action select whether they are allowed or
denied access. Click Add to add this item to the list.
To remove any line item, select it and click Remove.
Click Update to update your system with the new access control(s). A confirmation window will
display indicate a successful update. Click OK to close the window.
Click Close to close the Security Manager screen.
CHAPTER 5: ADMINISTRATION TOOLS
91
Configuration Manager
Network Configuration
1.
On the Setup menu, click Configuration Manager. When the Configuration Manager screen
appears, click on the Network Setup tab.
Figure 122 Configuration Manager Network Settings Screen
2.
3.
Type your domain name in the Domain Name field.
If you have a DNS setup, type your primary DNS in the Primary DNS field. Once the Primary DNS
field is active, the Secondary DNS field can be populated with your secondary DNS value.
4. Type the string for your domain setup in the Domain Suffix field, for example, a Raritan
Administrator would type raritan.com.
5. Click appropriate option button for either Primary/Backup Mode or Active/Active Mode (for
security reasons, you may want to use Active/Active Mode; in the case of an unstable network adapter,
data transfer can continue through a stable adapter).
6. Click on the Configuration drop-down arrow and select a configuration type from the list.
7. Type an IP Address, Subnet Mask, and Default Gateway.
8. Repeat steps 4 and 5 for the second adapter if you selected Active/Active Mode.
9. Type in your Destination Net/IP Address, Mask, and Gateway IP Address.
10. Click Update to update the Network Setup of your system.
11. Click Close to close the Configuration Manager screen.
92
COMMANDCENTER USER GUIDE
Log Configuration
1.
On the Setup menu, click Configuration Manager. When the Configuration Manager screen
appears, click on the Logs tab.
Figure 123 Configuration Manager Logs Screen
2.
3.
4.
5.
6.
Type IP addresses into the Server Address field.
Click on the Level to Forward drop-down arrow to select a level.
Repeat steps 2 and 3 for Server Two fields (note that Server Two is optional).
Click Update to save the server addresses to the system.
Click Close to close the Configuration Manager screen.
Note: These address changes will not be applied to the system until CommandCenter is
rebooted.
Inactivity Timer Configuration
Use this screen to time out inactive sessions.
1. On the Setup menu, click Configuration Manager. When the Configuration Manager screen
appears, click on the Inactivity Timer tab.
Figure 124 Configuration Manager Inactivity Timer Screen
2.
3.
4.
Type the desired time limit for inactivity in the Inactivity Time (in seconds) field.
Click Update to apply the changes to the system.
Click Close to close the Configuration Manager screen.
Note: This change will not be applied to the system until CommandCenter is rebooted.
CHAPTER 5: ADMINISTRATION TOOLS
93
Time/Date Configuration
CommandCenter’s Time and Date stamps must be accurately maintained in order to provide credibility for
its device-management capabilities. Network Time Protocol (NTP) is the protocol used to synchronize the
attached computers’ date and time data with a referenced NTP server. When CommandCenter is configured
with NTP, it can synchronize its clock time with the publicly available NTP reference server and maintain
correct and consistent time.
Only Administrators and ccroot users can synchronize Time and Date.
1. On the Setup menu, click Configuration Manager. When the Configuration Manager screen
appears, click on the Time/Date tab.
Figure 125 Configuration Manager Time/Date Screen
a.
2.
3.
To set the date and time Manually: To set the Date, click on the drop-down arrow to select the
Month, use the up/down arrows to select the Year, and click on the Day in the calendar area. To
set the Time, use the up/down arrows to set the Hour, Minutes, and Seconds, and then click on
the Time Zone drop-down arrow to select the time zone in which you are operating
CommandCenter.
b. To set the date and time via NTP: Click on the Enable Network Time Protocol check box and
enter the IP addresses for both the Primary (NTP) Server and the Secondary (NTP) Server.
Click Update to apply the time and date changes to the system.
Click Close to close the Configuration Manager screen.
94
COMMANDCENTER USER GUIDE
Modem Configuration
1.
On the Setup menu, click Configuration Manager. When the Configuration Manager screen
appears, click on the Modem tab.
Figure 126 Configuration Manager Modem Screen
2.
3.
4.
Type the Server Address, Client Address, and Client Phone.
Click Update to save the modem information to the system.
Click Close to close the Configuration Manager screen.
Connection Mode
When connected to a device, you have the option to pass data back and forth directly with that device
(Direct Mode) or to route all the data through your CommandCenter unit (Proxy Mode). While Proxy
Mode increases the bandwidth load on your CommandCenter, you only need to keep the CommandCenter
TCP ports (80, 443 and 2400). Open in your firewall.
1. On the Setup menu, click Configuration Manager. When the Configuration Manager screen
appears, click on the Connection Mode tab.
2. Click on the radio button before the connection mode you prefer.
a. Click on the Direct Mode radio button to connect to a device directly.
b. Click on the Proxy Mode radio button to connect to a device via your CommandCenter unit.
Figure 127 Configuration Manager Connection Screen – Direct Mode or Proxy Mode
CHAPTER 5: ADMINISTRATION TOOLS
c.
95
Click on the Both radio button if you want to connect to some devices directly, but others through
Proxy Mode. Then specify settings for the devices you wish to connect to directly:
i.
Type the device’s IP Address in the Net Address field at the base of the screen.
ii.
Type the devices’s net mask in the Net Mask field.
iii.
Click the Add button to add the Net Address and Mask to the screen. You may have to use
the scroll bar on the right side of the screen to view the Add/Remove/Update buttons)
Figure 128 Configuration Manager Connection Screen – Both
96
COMMANDCENTER USER GUIDE
Device Settings
1.
2.
3.
On the Setup menu, click Configuration Manager. When the Configuration Manager screen
appears, click on the Device Settings tab.
To update device Default Port, select a Device Type in the table and double-click on the Default Port
value. Type the new Default Port value.
To update device timeout duration, double-click on the Heartbeat (sec) value at the base of the screen.
Type new timeout duration for this device.
Figure 129 Configuration Settings Device Settings Screen
4.
5.
Click Update to save the new device values. You may have to scroll down the screen to view the
Update button. A success message will appear to confirm the update of all associated device settings.
Click Close.
CHAPTER 5: ADMINISTRATION TOOLS
97
SNMP
Simple Network Management Protocol allows CommandCenter to push SNMP traps (event notifications)
to an existing SNMP manager on the network. Only a CommandCenter Administrator trained in handling
an SNMP infrastructure should configure CommandCenter to work with SNMP.
Setting up for SNMP
Because CommandCenter pushes its own set of Raritan traps, you must update all SNMP managers with a
custom MIB file that contains Raritan trap definitions. This custom MIB file can be found on the CD
included with your CommandCenter unit.
Configuring SNMP in CommandCenter
1.
On the Setup menu, click Configuration Manager. When the Configuration Manager screen
appears, click on the SNMP tab.
Figure 130 Configuration Settings Device Settings Screen
2.
3.
4.
5.
6.
Check the box marked Enable SNMP to enable the SNMP feature of CommandCenter.
Click on the radio button before SNMP V1 or SNMP V2, depending on which protocol your SNMP
managers use.
The Read-Only Community and Read-Write Community will populate automatically depending on
your SNMP V1 or V2 selection.
Check the box(es) before the trap(s) you want CommandCenter to push to your SNMP managers:
Under Trap Sources, there is a list of SNMP traps grouped into two different categories: System Log
traps, which include notifications for the status of the CC unit itself, such as a hard disk failure, and
Application Log traps for notifications generated by events in the CC application, such as
modifications to a user account. To enable traps by type, check the boxes marked System Log and
Application Log. Individual traps can be enabled or disabled by checking their corresponding
checkboxes Use Select All and Clear All to enable all traps or clear all checkboxes.
Type the Host IP address and Port number used by SNMP managers in the Trap Destination panel.
98
COMMANDCENTER USER GUIDE
7.
Click Add to add this server to the list of configured managers. To remove a manager from the list,
select the manager and click Remove. There is no limit to the number of managers that can be set in
this list.
When all SNMP traps and destinations are configured, click Update.
8.
CHAPTER 5: ADMINISTRATION TOOLS
99
Cluster Configuration
CommandCenter clustering is using two CommandCenter nodes, one Primary node and one Backup node,
for backup security in case of Primary CommandCenter node failure. Both nodes share common data for
active users and active connections, and all status data is replicated between the two nodes.
Devices in a CommandCenter cluster must be aware of the IP of the Primary CommandCenter node in
order to be able to notify the Primary node of status change events. If the Primary node fails, the Backup
node immediately assumes all Primary node functionality. This requires initialization of the
CommandCenter application and user sessions (all existing sessions originating on the Primary
CommandCenter node will terminate). The devices connected to the Primary CommandCenter unit will
recognize that the Primary node is not responding and will respond to requests initiated by the Secondary
node.
To Set Primary CommandCenter Node:
1. On the Setup menu, click Cluster Configuration. The Cluster Configuration screen appears.
Figure 131 Cluster Configuration Screen
2.
3.
The CommandCenter unit from which you create a cluster is automatically considered the Primary
Node. Type a name for this Primary Node in the Cluster Name field near the bottom of the screen.
When finished, click Create Cluster.
100
4.
COMMANDCENTER USER GUIDE
The Primary Node Cluster Name will appear in the Cluster Configuration table, with the Node Status
(see table headings): Primary.
Figure 132 Cluster Configuration Screen indicating Primary Node
To Adjust Advanced Settings:
1. Select the Primary node just created.
2. Click Advanced. The Advanced Settings window appears.
Figure 133 Cluster Configuration Advanced Settings
3.
For Time Interval, enter how often CommandCenter should check its connection with the other node.
Note: Setting a low Time Interval will increase the network traffic generated by heartbeat
checks. Also, clusters with nodes located far apart from each other may want to set
higher intervals.
4.
5.
6.
For Failure Threshold, enter the number of consecutive heartbeats that must pass without a response
before a CommandCenter node is considered failed.
For Recover After, enter the number of consecutive heartbeats that must successfully be returned
before a failed connection is considered recovered.
Click OK to save the settings or Cancel to exit without saving.
CHAPTER 5: ADMINISTRATION TOOLS
101
To Set Secondary CommandCenter Node (In The Same Subnet):
1. Click Discover CommandCenters at the bottom of the screen. Your CommandCenter will scan the
local network and add any other CommandCenter units it finds to the table above.
2. Select a CommandCenter to add to the cluster as a Secondary Node from the Cluster Configuration
table. This second CommandCenter’s version under the CommandCenter Version column must
match your primary node’s version.
3. Enter an administrator username and password for that unit in the Backup Username and Password
field.
Figure 134 Selecting Secondary Node from Cluster Configuration table
4.
5.
Click Join “Backup” Node.
A confirmation message will appear. Click Yes to assign Secondary status to the selected node, or
click No to Cancel.
Figure 135 Confirmation of Secondary Node Selection
6.
7.
After you click Yes, CommandCenter will restart the newly selected Secondary node. This process can
take several minutes. When restart is complete, a confirmation message appears on your screen.
On the Setup menu, click Cluster Configuration to view the updated Cluster Configuration table.
102
COMMANDCENTER USER GUIDE
Geographic Redundancy:
CommandCenter can add backup nodes from different subnets or different networks entirely, allowing
installations to avoid issues affecting a single network or physical location. However, since
CommandCenter can only discover other units on the same subnet, these external nodes must be added
manually:
1. Enter the IP address of the external CommandCenter node in the CommandCenter Address field.
Figure 136 Adding a CommandCenter unit manually
2.
3.
Click Add CommandCenter. If CommandCenter successfully detects the unit at the specified address,
it will be added to the table above.
Select the newly added CommandCenter and set it as a Secondary Node as described in steps 2-7 in the
Set Secondary CommandCenter Node section above.
To Remove Secondary CommandCenter Node:
1. To remove Secondary Node status from a CommandCenter unit and reassign it to a different unit in
your configuration, select the Secondary CommandCenter Node in the Cluster Configuration table and
click Remove Backup.
2. When the confirmation message appears, click Yes to remove Secondary Node status, or click No to
Cancel.
Note: Clicking Remove Backup does not delete the Secondary CommandCenter unit
from your configuration; it simply removes the designation of Secondary Node.
CHAPTER 5: ADMINISTRATION TOOLS
103
To Remove Primary CommandCenter Node:
1. To remove Primary Node status from a CommandCenter unit and reassign it to another unit in your
configuration, select the Primary CommandCenter Node in the Cluster Configuration table and click
Remove Cluster.
2. When the confirmation message appears, click Yes to remove Primary Node status, or click No to
Cancel.
Figure 137 Remove Cluster Confirmation Window
Note: Clicking Remove Cluster does not delete the Primary CommandCenter unit from
your configuration; it simply removes the designation of Primary Node. Remove Cluster
is only available when no backup nodes exist.
3.
Click Close to exit the Cluster Configuration screen.
To Recover a Failed CommandCenter Node:
When a node fails and failover occurs, the failed node will recover in Waiting status.
1. Select the Waiting node in the Cluster Configuration table.
2. Add it as a backup node by clicking on Join “Waiting” Node.
3. A confirmation message will appear. Click Yes to assign Secondary status to the selected node, or
click No to Cancel. If you click Yes, you will need to wait for the Secondary node to restart just as
with Join Backup.
Note: Once a node is in Waiting mode, it can be started in either Standalone mode or
Backup mode.
Figure 138 Recovering a node from Waiting status.
104
COMMANDCENTER USER GUIDE
Setup Manager
Reset CommandCenter
Use the Reset CommandCenter command to reset CommandCenter database data – please note that this
command will not reset system configuration data.
1. On the Setup menu, click Reset CommandCenter. When the Reset CommandCenter screen
appears, click OK to reset your CommandCenter unit.
Figure 139 Reset CommandCenter Screen
2.
A success message will appear to confirm the reset.
Backup CommandCenter
1.
On the Setup menu, click Backup CommandCenter. When the Backup CommandCenter screen
appears, click OK.
Figure 140 Backup CommandCenter Screen
2.
3.
The backup file will be saved in the CommandCenter file system, and can be restored at a later time.
A success message will appear to confirm CommandCenter backup.
CHAPTER 5: ADMINISTRATION TOOLS
105
Restore CommandCenter
1.
2.
On the Setup menu, click Restore CommandCenter.
When the Restore CommandCenter screen appears, click on the backup that you want to restore to
your CommandCenter unit, and then click OK.
Figure 141 Restore CommandCenter Screen
Saving and Uploading Backup Files
You can also save and load CommandCenter backups to and from your local PC using the Restore
CommandCenter screen.
1. Click on the backup you wish to save to your PC, and then click Download.
2. Specify a location to save your CommandCenter backup file.
3. To upload a backup to a CommandCenter unit, click Upload on the Restore CommandCenter screen
and browse your system for the backup of your CommandCenter configuration.
Figure 142 Browse to Upload a Backup of CommandCenter
106
4.
COMMANDCENTER USER GUIDE
When you have located the file, click Open to add it to the list of available backups on
CommandCenter.
Note: Saving and restoring can be used to move a backup from one CommandCenter unit
to another.
Reports
Reports can be sorted by clicking on the column headers. Click on a column header such as User Name,
Access Time, etc., to sort report data by that value. The data will refresh in ascending order alphabetically,
numerically, or chronologically. Click on the column header again to sort in descending order. Please note
the arrowhead pointing upwards or down next to the cell name, indicating how the report is sorted.
The column width in all reports can be sized by resting your mouse pointer on the column divider in the
header row until it becomes a double-headed arrow. Click and drag the arrow to the left or right to adjust
column width.
The sorting value and column width you use becomes the default report view the next time you log in and
run CommandCenter reports.
Active Users Report
The Active Users report displays current users and user sessions. You can view users and disconnect them
from this report.
1. On the Reports menu, click Active Users. The Active Users report is generated.
Figure 143 Active Users Report
2.
To disconnect user, select the user name to be disconnected and click Logoff to disconnect the selected
users from their current sessions.
CHAPTER 5: ADMINISTRATION TOOLS
3.
107
Click Manage Report Data to save or print the report. Click Save to save the report to a location of
your choice or Print to print the report.
Figure 144 Manage Report Window
4.
5.
Click Close to close the Manage Report window.
Click Close to close the Active Users report.
Active Ports Report
The Active Ports report displays ports that are currently in use. You can view or disconnect ports from this
report.
1. On the Reports menu, click Active Ports. The Active Ports report is generated.
Figure 145 Active Ports Report
2.
3.
4.
To disconnect a port, select the port to be disconnected and click Disconnect to disconnect the selected
ports from their current sessions.
Click Manage Report Data to save or print the report. Click Save to save the report to a location of
your choice or Print to print the report. Click Close to close the window.
Click Close to close the Active Ports report.
108
COMMANDCENTER USER GUIDE
Asset Management Report
The Asset Management report displays data on current devices.
1. On the Reports menu click Asset Management Report. The Asset Management report is generated.
Figure 146 Asset Management Report
2.
3.
4.
5.
Click on the Device Type drop-down arrow to display a list of possible devices for which to run the
report. Select one and click Apply to run the report.
Press Refresh to update the query and generate a new report. Please note that the report may take
several minutes, based on the size of your system configuration.
Click Manage Report Data to save or print the report. Click OK to save the report to a location of
your choice or Print to print the report. Click Close to close the window.
Click Close to close the Asset Management report.
CHAPTER 5: ADMINISTRATION TOOLS
109
Audit Trail Report
The Audit Trail report displays audit logs and access in CommandCenter. It captures actions such as
adding, editing, or deleting devices or ports, and other modifications.
CommandCenter maintains an Audit Trail of the following events:
•
•
•
•
•
When CommandCenter is launched
When CommandCenter is stopped
When a user logs on CommandCenter
When a user logs off CommandCenter
When a user starts a port connection
1.
On the Reports menu, click Audit Trail. The Audit Trail screen appears.
Figure 147 Audit Trail Screen
2.
3.
4.
5.
Select the date range for the report by either typing the date and time in the Start Date and End Date
fields using the format yyyy/mm/dd hh:mm:ss, or by using the <Æ> key on your keyboard to
advance through the sections and click on the up/down arrows to build the date and time.
Type the criteria with which to filter the report in the Message, User Name, Class, or Host fields.
Click on the Level drop-down arrow to select a tracing level for the report.
Click OK to run the report.
Note: Leave some or all fields blank, depending on information desired. Leaving all
fields blank retrieves the audit trail for the entire system.
110
6.
COMMANDCENTER USER GUIDE
The Audit Trail report is generated, displaying data about sessions that occurred during the designated
time period.
Figure 148 Audit Trail Report
7.
8.
9.
Click Manage Report Data to save or print the report. Click Save to save the report to a location of
your choice or Print to print the report. Click Close to close the window.
Click Clear to clear the contents of the report.
Click Close to close the Audit Trail report.
CHAPTER 5: ADMINISTRATION TOOLS
111
Error Log Report
CommandCenter stores error messages in a series of Error Log files, which can be brought up and used to
help troubleshoot system problems.
You can filter the search criteria by date, message type, username, class, host, and level. Messages can be
grouped by fatal, error and warning level. Once filters are selected, you can view the report results and take
precautionary actions.
1. On the Reports menu, click Error Log. The Error Log screen appears.
Figure 149 Error Log Screen
2.
3.
4.
5.
Select the date range for the report by either typing the date and time in the Start Date and End Date
fields using the format yyyy/mm/dd hh:mm:ss, or by using the <Æ> key on your keyboard to
advance through the sections and click on the up/down arrows to build the date and time.
Type the criteria with which to filter the report in the Message, User Name, Class, or Host fields.
Click on the Level drop-down arrow to select a tracing level for the report.
Click OK to run the report.
Note: Leave some or all fields blank, depending on information desired. Leaving all
fields blank retrieves the logs for the entire system.
112
6.
COMMANDCENTER USER GUIDE
The Error Log report is generated, displaying data about sessions that occurred during the designated
time period.
Figure 150 Error Log Report
7.
8.
9.
Click Manage Report Data to save or print the report. Click Save to save the report to a location of
your choice or Print to print the report. Click Close to close the window.
Click Clear to clear the contents of the report.
Click Close to close the Error Log report.
CHAPTER 5: ADMINISTRATION TOOLS
113
Ping Report
The Ping Report displays the status of all connections, showing devices by name and IP address. This
report gives you the full accessibility picture for all devices on your system, and will supply information
that could be useful in case troubleshooting is necessary.
1. On the Reports menu, click Ping Report. The Ping Report is generated.
Figure 151 Ping Report
2.
3.
Click Manage Report Data to save or print the report. Click Save to save the report to a location of
your choice or Print to print the report. Click Close to close the window.
Click Close to close the Ping Report.
114
COMMANDCENTER USER GUIDE
Accessed Devices Report
Run the Accessed Devices report to view information about any accessed devices, when they were
accessed, and the user who accessed them. Filters will help you define the search criteria for a more concise
report.
1. On the Reports menu, click Accessed Devices. The Accessed Devices screen appears.
Figure 152 Accessed Devices Screen
2.
3.
4.
Select the date range for the report by either typing the date and time in the Start Date and End Date
fields using the format yyyy/mm/dd hh:mm:ss, or by using the <Æ> key on your keyboard to
advance through the sections and click on the up/down arrows to build the date and time.
Type the criteria with which to filter the report in the Message, Device Name, Port Name, Username,
or User IP fields.
Click on the Level drop-down arrow to select a tracing level for the report.
CHAPTER 5: ADMINISTRATION TOOLS
5.
115
Click OK to run the report.
Figure 153 Accessed Devices Report
6.
7.
8.
The Accessed Devices report is generated, displaying data about devices accessed during the
designated time period.
Click Clear to clear the contents of the report.
Click Close to close the Accessed Devices report.
116
COMMANDCENTER USER GUIDE
Group Data Report
The Group Data report displays user, port, and device Group information. View user groups by name and
description, view port groups by name, and view device groups by name, all in one screen.
1. On the Reports menu, click Group Data. The Groups report is generated. Use the scroll bars to scroll
through the lists and view all entries.
Figure 154 Groups Report
2.
3.
Click any of the Manage Report Data buttons to save or print the report for any particular section.
Click Save to save the report to a location of your choice or Print to print the report. Click Close to
close the window.
Click Close to close the Groups report.
CHAPTER 5: ADMINISTRATION TOOLS
117
User Data Report
The User Data report displays data on all users in the CommandCenter database. Under the User Name
field you can see the name of every user. The Phone field lists user dial back telephone numbers, and the
Enabled indicates if the user is allowed access to CommandCenter. The Password Expiration shows that
user’s password expiration period in days.
1. On the Reports menu, click User Data. The All Users’ Data report is generated. Use the scroll bar to
scroll through the list and view all entries.
Figure 155 All Users’ Data Report
2.
3.
Click Manage Report Data to save or print the report. Click Save to save the report to a location of
your choice or Print to print the report. Click Close to close the window.
Click Close to close the All Users’ Data report.
118
COMMANDCENTER USER GUIDE
Users In Groups Report
The Users In Group report displays data on users and the groups with which they are associated.
1. On the Reports menu, click Users In Groups. The Users In Groups report is generated. Use the
scroll bar to scroll through the list and view all entries.
Figure 156 Users In Groups Report
2.
3.
Click Manage Report Data to save or print the report. Click Save to save the report to a location of
your choice or Print to print the report. Click Close to close the window.
Click Close to close the Users In Groups report.
CHAPTER 5: ADMINISTRATION TOOLS
119
Query Port Report
The Query Port Report displays all ports according to port status.
1. On the Reports menu, click Query Port. The Query Port screen appears.
Figure 157 Query Port Report
2.
3.
4.
Click on the checkbox to customize the port information you want to see on the report.
Click Apply to generate the report.
Click Close to close the Query Port report.
120
COMMANDCENTER USER GUIDE
Refresh CommandCenter Display
Any edits or modifications made to users, ports, categories, elements, and other system components are not
reflected in the system until the database is updated. If you are logged in while another user is updating the
database, you will not see these changes unless you refresh your screen (or log out of CommandCenter and
log back in).
1. Click on the Refresh shortcut button in the CommandCenter toolbar to refresh your browser.
Refresh
shortcut
button
Figure 158 Refresh Shortcut Button
CHAPTER 5: ADMINISTRATION TOOLS
121
Upgrade CommandCenter
Note: If you are operating a CommandCenter cluster, you must remove the cluster first
and upgrade each node separately.
1.
On the Setup menu, click Upgrade CommandCenter. The Upgrade CommandCenter screen
appears.
Figure 159 Upgrade CommandCenter Screen
2.
3.
If you are upgrading from CommandCenter 2.1, click Browse and navigate to the current location of
your CC files.
Click OK.
122
COMMANDCENTER USER GUIDE
Restart CommandCenter
1.
On the Setup menu, click Restart CommandCenter. The Restart CommandCenter screen appears.
Figure 160 Restart Screen
2.
3.
4.
5.
Type your password in the Password field.
Type a message to display to any users currently online in the Broadcast Message field (for example,
you might give users a brief time period to finish their tasks in CommandCenter or tell them why you
are restarting the system). All users will be disconnected when you restart CommandCenter.
Type how much time (in seconds) should pass before CommandCenter restarts in the Restart after
(sec) field.
Click OK to restart CommandCenter or Cancel to exit the screen without restarting. Once you restart
CommandCenter, your Broadcast Message appears.
Figure 161 Info Window
6.
7.
Click OK to restart CommandCenter.
CommandCenter will restart, and is ready for use.
CHAPTER 5: ADMINISTRATION TOOLS
123
Shutdown CommandCenter
These are the recommended method for Administrators to shut down and restart CommandCenter.
1. On the Setup menu, click Shutdown CommandCenter. The Shutdown CommandCenter screen
appears.
Figure 162 Shutdown CommandCenter Screen
2.
3.
4.
5.
6.
Type your password in the Password field.
Type a message to display to any users currently online in the Broadcast Message field (for example,
you might give users a brief time period to finish their tasks in CommandCenter and tell them when
they can expect the system to be functional again). All users will be disconnected when you restart
CommandCenter.
Type how much time (in seconds) should pass before CommandCenter shuts down in the Shutdown
after (sec) field.
Click OK to shut down CommandCenter or Cancel to exit the screen without shutting down. Once
you shut down, the CommandCenter login window appears.
Log on to CommandCenter again to continue working, or click Exit on the login screen to shut
CommandCenter down completely.
To shut down CommandCenter from the local console port (also called Manual Shutdown):
1. Log on to the CommandCenter host computer as the root user.
2. At the /root/> prompt, type shutdown –h now and press the Enter key.
3. When the Power Down message appears at the bottom of the window, power OFF the
CommandCenter chassis.
Note: If using a Raritan console appliance, make sure Datacomm Baud Rate is set to
9600 and console emulator window is open.
124
COMMANDCENTER USER GUIDE
Restart CommandCenter after Shutdown
After shutting down CommandCenter, use one of these two methods to restart the unit:
1. Log on to the CommandCenter Console as user root (default password is raritan).
2. At the prompt, type service cc start.
OR
1. Recycle the power to your CommandCenter unit.
End CommandCenter Session
Log Out
To exit CommandCenter at the end of a session, or to refresh the database in case you or another user has
made changes while you were logged in, log off from CommandCenter entirely, then log in again.
1. On the Session menu, click Logout. The Logout window appears.
Figure 163 Logout Window
2.
3.
Click Yes to log out of CommandCenter or No to close the window. Once you log out, the
CommandCenter login window appears.
Log on to CommandCenter again, or click Exit to shut down CommandCenter completely.
Exit CommandCenter
If at any time you want to exit CommandCenter, you can exit.
1. On the Session menu, click Exit. The Exit window appears.
Figure 164 Exit Window
2.
Click Yes to exit CommandCenter or No to close the Exit window and continue working..
APPENDIX A: SPECIFICATIONS
125
Appendix A: Specifications
ITEM
CommandCenter
DIMENSIONS
(WXDXH)
WEIGHT
22.1”x 17.32” x 1.75”
563mm x 440mm x 44mm
24.07lb (10.92kg)
Environmental Requirements
OPERATING
Temperature
Humidity
Altitude
Vibration
Shock
0 deg C - 40 deg C (32 deg F - 104 deg F)
20% - 85% RH
Operate properly at any altitude between 0 to 10,000 feet, storage 40,000 feet (est.)
5-55-5 HZ, 0.38mm, 1 minutes per cycle; 30 minutes for each axis (X, Y, Z)
N/A
Temperature
Humidity
Altitude
Vibration
Shock
0 deg C - 50 deg C (3232 deg F -12232 deg F)
10% - 90% RH
Operate properly at any altitude between 0 to 10,000 feet, storage 40,000 feet (est.)
5-55-5 HZ, 0.38mm, 1 minutes per cycle; 30 minutes for each axis (X, Y, Z)
N/A
NON-OPERATING
Electrical Specifications
INPUT
Nominal Frequencies
Nominal Voltage Range
Maximum Current AC RMS
AC Operating Range
50/60 Hz
100/240 VAC
2A
100 to 240 VAC (+-10%), 47 to 63 Hz
OUTPUT
+5 VDC, +12VDC
-5 VDC, -12VDC
Maximum DC Power Output
Maximum AC Power
Consumption
N/A
N/A
N/A
N/A
Maximum Heat Dissipation
Volt-Ampere Rating
N/A
N/A
126
COMMANDCENTER USER GUIDE
APPENDIX B: INITIAL SETUP PROCESS OVERVIEW
Appendix B: Initial Setup Process Overview
Pre-requisites:
•
•
Add Devices with Category/Element clearly identified.
Add Ports with Category/Element clearly identified.
2.
3.
4.
5.
6.
Create Group(s)/Add User(s)
Add Device Group with rule based on Category/Element
Add Port Group with rule based on Category/Element
Add Policy (links 2 and 3 together; controls access time and permission)
Link Groups/Users to Policy of choice
Figure 165 Association Management Process
127
128
COMMANDCENTER USER GUIDE
APPENDIX C: USER GROUP FEATURES
129
Appendix C: User Group Features
USERS GROUP FEATURES
CommandCenter
Setup And Control
AVAILABLE COMMANDS
Application Manager
Security Manager
Configuration Manager
Restart CommandCenter
USER CAPABILITY
Users are able to add new application to
CommandCenter.
Users are able to configure security
parameters.
Users are able to make general configuration
of CommandCenter.
Users are able to restart CommandCenter.
Shutdown CommandCenter Users are able to shutdown CommandCenter.
Add Device
Users are able to add new devices.
Edit Device
Users are able to modify devices name and
parameters.
Users are able to delete devices.
Delete Device
Bulk Device Copy
Ping Device
Users are able to device parameters to other
devices.
Users are able to ping other devices.
Reset Device
Users are able to reset other devices.
Topological View
Users are able to display the actual topology
of devices.
Users are able to turn on and off devices.
Device Power Manager
Discover Raritan Devices
Change Port View
Edit Port
Active Ports
Asset Management Report
Ping Report
Accessed Devices
Device Configuration And
Upgrade Management
Port Access
Users are able to manually discover Raritan
devices.
Users are able to customize port view.
Users are able to modify port name and
parameters.
Users are able to view active users.
Users are able to view asset management
report.
Users are able to view ping report.
Port/Device Trees
Users are able to view report of accessed
devices.
Users are able to view ports and devices tree.
Backup Device
Configuration
Restore Device
Configuration
Copy Device Configuration
Users are able to perform back up of device
configuration.
Users are able to perform restore device
configuration.
Users are able to copy device configuration.
Upgrade Device
Users are able to upgrade device.
Firmware Manager
Users are able to upload firmware.
Devices Tree
Users are able to view devices tree.
Connect Port
Users are able to see port and connect to it.
Disconnect Port
Users are able to see port and disconnect it.
Port Power Manager
Users are able to turn on and off a port.
Change Port View
Users are able to customize port view.
Ports Tree
Users are able to view ports tree.
130
COMMANDCENTER USER GUIDE
USERS GROUP FEATURES
AVAILABLE COMMANDS
User Security Management Association Manager
*Note that these commands
do not appear onscreen; they Device Group Manager
are CommandCenter defaults.
Port Group Manager
Policy Manager
Edit User Group Policies
USER CAPABILITY
Users are able to associate categories and
elements.
Users are able to rename groups and add rules
to device groups.
Users are able to rename groups and add rules
to port groups.
Users are able to add and edit policies.
Group Data
Users are able to modify and assign policies
to groups.
Users are able to view group parameters.
Users Tree
Users are able to view users tree.
Add User
User Management
*Note that these commands
Edit User
do not appear onscreen; they
are CommandCenter defaults. Change User Password
Users are able to add user to the system.
Users are able to modify user name and
parameters.
Users are able to change other user password.
Delete User
Users are able to delete user from the system.
Logoff User
Users are able to logoff user.
Bulk User Copy
Users are able to copy user’s parameters.
Add User To Group
Users are able to add user to a group.
Delete User From Group
Users are able to delete user from group.
Add User Group
Users are able to add user group.
Edit User Group
Users are able to modify user group name and
parameters.
Users are able to delete user group.
Delete User Group
Assign Users To Group
Active Users
Users are able to assign users from other
groups.
Users are able to view active ports.
Users Data
Users are able to view users parameters.
Users In Groups
Users are able to view users logged in the
system.
Users are able to view users tree.
Users Tree
APPENDIX D: TROUBLESHOOTING
131
Appendix D: Troubleshooting
•
•
•
•
In order to launch CommandCenter from your web browser, it requires Java Plug-in 1.4.0 and later. If
your machine does not have Java runtime installed or and has an earlier version of Java Plug-in
installed, CommandCenter will guide you through the installation steps. If your machine has a lower
version of Java2 runtime installed, but no Java-plug in, CommandCenter cannot automatically launch,
and you must uninstall or disable your old Java version to allow CommandCenter serial port
connection to run properly.
If the CommandCenter applet does not load, check your Web browser settings.
− In IE: on the Tools menu, click Internet Options and click on the Advanced tab. Ensure Java
(Sun) is enabled.
− Open Java Plug-in in your Control Panel, click on the Browser tab, and adjust the settings for
your browser.
If you cannot log on to CommandCenter using ccroot/raritan0, and get the error "Unable to login,
incorrect username and/or password," check if the server database is up and running properly.
− Run service postgresql status to see server is running.
− Ensure 127.0.0.1 cc_db exists in file /etc/hosts.
If you have problems adding devices, ensure the devices have the correct firmware versions.
Client Browser Requirements
Please see your CommandCenter Application Notes for the most current matrix of Client Browser
and PC Platform Requirements.
132
COMMANDCENTER USER GUIDE
APPENDIX E: FREQUENTLY ASKED QUESTIONS
133
Appendix E: FAQs
QUESTION:
General
What is CommandCenter?
Why would I need
CommandCenter?
Which Raritan products does
CommandCenter support?
How does CommandCenter
integrate with other Raritan
Products?
Is PDA access possible?
Is the status of
CommandCenter limited by
the status of the devices which
it proxies?
Can I upgrade to newer
versions of CommandCenter
software as they become
available?
How many target devices
(ports) and/or Dominion units
and/or IP-Reach units can be
connected to
CommandCenter?
Is there any way to optimize
the performance of Microsoft
Internet Explorer if it is my
preferred Web browser?
What do I do if I am unable to
add a console/serial port to
CommandCenter?
ANSWER:
CommandCenter is a network management device for aggregating and
integrating multiple servers and network equipment typically deployed
in a datacenter and which are connected to a Raritan IP-enabled
product.
As you deploy more and more datacenter servers and devices, their
management becomes exponentially complex. CommandCenter allows
a systems administrator or manager to access and manage all servers,
equipment, and users from a single device.
CommandCenter supports all Dominion products
- Raritan’s KVM over IP products - Dominion KX
- Raritan’s Secure Console Server products - Dominion SX
- Raritan’s Remote office management products - Dominion KSX
CommandCenter also supports Paragon II when used with the optional
IP user stations.
CommandCenter uses a unique and proprietary search and discovery
technology that identifies and connects to selected Raritan devices with
a known network address. Once CommandCenter is connected and
configured, the devices connected to CommandCenter are transparent,
and operation and administration is extremely simple.
Generic answer: "Yes", as long has PDA has a Java-enabled browser
and supports 128-bit (or lower strength for some geographies) SSL
encryption. Call Raritan Tech Support for further information. No
testing has been done in this area.
No. Because CommandCenter software resides on a dedicated server,
even if a device being proxied by the CommandCenter is turned off,
you will still be able to access CommandCenter.
Yes. Contact your authorized Raritan sales representative or Raritan
Computer, Inc. directly. CommandCenter 2.0 has a CD/ROM drive to
facilitate upgrades. New version upgrades can also be done via FTP.
There is no specified limit to the number of ports and/or Dominion
and/or IP-Reach units that can be connected, but the number is not
limitless: the performance of the processor and the amount of memory
on the hosting server will determine how many ports can actually be
connected.
To improve the performance of Microsoft IE when accessing the
console, disable the “JIT compiler for virtual machine enabled,” “Java
logging enabled,” and “Java console enabled” options. From the main
menu bar, select Tools > Internet Options > Advanced. Scroll down
until you see the above items and make sure that they are not checked.
Assuming the console/serial device is a Dominion, ensure that the
following conditions are met:
- The Dominion unit is active.
- The Dominion unit has not reached the maximum number of
configured user accounts.
134
COMMANDCENTER USER GUIDE
QUESTION:
Which version of Java will
Raritan’s CommandCenter be
supporting?
An administrator added a new
port to the CommandCenter
database and assigned it to me,
how can I see it in my Ports
tree?
How will the Windows
desktop be supported in the
future?
ANSWER:
The earliest version CommandCenter will support will be at least the
Java 2 platform. Users must download the Java 2 plug-in if using IE.
By default, Netscape will use Sun JVM.
For server side, CC supports Java 1.4.0 and later version.
At client side, CC2.0 supports Java 1.4.0 and later versions. The
current version from the Sun’s website is version 1.4.x.
To update the tree and see the newly assigned port, click on the
Refresh shortcut button on the toolbar. Remember that refreshing
CommandCenter will close all of your current console sessions.
Accessing CommandCenter from outside the firewall can be achieved
by configuring the right ports on the firewall. The following ports are
standard ports:
80: for HTTP access via Web browser
443: for HTTPS access via Web browser
8080: for CommandCenter server operations
2400: for Proxy mode connections
5001: for IPR/DKSX/DKX/PIISC event notification
What are some design
guidelines for large-scale
systems - any constraints or
assumptions?
Authentication
How many user accounts can
be created for
CommandCenter?
Can I assign specific port
access to a specific user?
If we had more than 1,000
users, how would this be
managed? That is, do you
support active directory?
What options are available for
authentication with directory
services and security tools
such as LDAP, AD, RADIUS,
etc.
If there is firewall between two cluster nodes, the following ports
should be opened for cluster to be worked properly:
8732: for cluster nodes heartbeat
5432: for cluster nodes DB replication
Raritan provides two models for server scalability: the data-center
model and the network model.
The data center model uses Paragon to scale to thousands of systems in
a single data center. This is the most effective and cost-efficient way to
scale a single location. It also supports the network model with IPReach and the IP User Station (UST-IP).
The network model scales through use of the TCP/IP network and
aggregates access through CommandCenter, so users don’t have to
know IP addresses or the topology of access devices. It also provides
the convenience of single sign-on.
Check your licensing restrictions. There is no specified limit to the
number of user accounts that can be created for CommandCenter, but
the number is not limitless. The size of the database, the performance
of the processor, and the amount of memory on the hosting server will
determine how many user accounts can actually be created. These user
accounts can be any combination of Administrators and Operators with
at least one Administrator account.
Yes, if you have Administrator permissions. Administrators have the
ability to assign specific ports per user.
CommandCenter works with Microsoft Active Directory, Sun iPlanet
or Novell eDirectory. If a user account already exists in an
authentication server, then CommandCenter supports remote
authentication using TACACS+ /RADIUS/LDAP or LDAP(S)
authentication.
CommandCenter permits local authentication as well remote
authentication.
Remote authentication servers supported include: TACACS+,
RADIUS, and LDAP
APPENDIX E: FREQUENTLY ASKED QUESTIONS
QUESTION:
Security
Sometimes when I try to log
on, I receive a message that
states my “login is incorrect”
even though I am sure I am
entering the correct User
Name and Password. Why is
this?
How is a password secure?
Sometimes I receive a “No
longer logged in” message
when I click on any menu in
CommandCenter, after leaving
my workstation idle for a
period of time. Why?
As Raritan has Root access to
server, this may potentially
cause issue with Government
bodies. Can customers also
have root access or can
Raritan provide a method of
auditability / accountability?
Is SSL encryption internal as
well as external (not just
WAN, but LAN, too)?
Does CommandCenter support
CRL List, that is, LDAP list of
invalid certificates?
Does CommandCenter support
Client Certificate Request?
Accounting
The event times in the Audit
Trail report seem incorrect.
Why?
Can audit/logging abilities
track down to who switched
on or off a power plug?
Performance
As a CommandCenter
Administrator, I added over
500 ports and assigned all of
them to me. Now it takes a
long time to log on to
CommandCenter.
135
ANSWER:
There is a session-specific ID that is sent out each time you begin to
log on to CommandCenter. This ID has a time-out feature, so if you do
not log on to the unit before the time-out occurs, the session ID
becomes invalid. Performing a Shift-Reload refreshes the page from
CommandCenter. Or, you may close the current browser, open a new
browser, and log on again. This provides an additional security feature
so that no one can recall information stored in the Web cache to access
the unit.
Passwords are encrypted using MD5 encryption, which is a one-way
hash. This provides additional security to prevent unauthorized users
from accessing the password list.
CommandCenter times each user session. If no activity happens for
pre-defined period of time, CommandCenter logs the user out. The
length of the time period is pre-set to 60 minutes, but can be
reconfigured. It is recommended that users exit CommandCenter when
they finish an operation.
No party will have root access to server once the unit is shipped out of
Raritan Computer, Inc.
Both. The session is encrypted regardless of source, i.e. LAN/WAN.
No.
No.
Log event times are logged according to the time settings of the
computer that CommandCenter is installed on. You can correct this by
adjusting the computer’s time and date settings.
Direct power switch-off is not logged, but the power on -off through
the CommandCenter GUI can be logged to audit logs.
When you, as Administrator, have many ports assigned to you,
CommandCenter downloads all port information for all ports during
the logging process, which slows the process considerably. It is
recommended that Administrator accounts used primarily to manage
CommandCenter configuration/settings do not have many ports
assigned to them.
136
COMMANDCENTER USER GUIDE
QUESTION:
What is the bandwidth usage
per client? Particularly as they
aggregate up over many
systems.
Grouping
Is it possible to put a given
server in more than one
group?
What impact to other usage
that would be blocked through
the active usage of the console
port, for example, some UNIX
variants not allowing admin
over network interfaces?
How do you recommend the
issue of CIMs being moved /
swapped at the physical level
with changes to the logical
database?
Interoperability
How does CommandCenter
integrate with Blade Chassis
products?
To what level is
CommandCenter able to
integrate with 3rd party KVM
tools, down to 3rd party KVM
port level or simply box level?
How would I mitigate the
restriction of four
simultaneous paths through
any IP-Reach box, including
the roadmap for the potential
8-path box?
Will the current Paragon
boxes work with
CommandCenter? If not, what
is the upgrade path?
Authorization
Can authorization be achieved
via RADIUS/TACACS/
LDAP?
ANSWER:
Remote access to a serial console over TCI/IP is about the same level
of network activity as a telnet session. However, it is limited to the
RS232 bandwidth of the console port itself, plus SSL/TCP/IP
overhead.
The Raritan Remote Client (RRC) controls remote access to a KVM
console. This application provides tunable bandwidth from LAN
levels down to something suitable for a remote dial-up user.
It should be possible. Just as one user can belong to multiple groups,
one device can belong to multiple groups.
Edge port groups are simply boolean expressions of attributes. For
example, a Sun in NYC could be part of Group Sun: "Ostype =
Solaris" and Group New York: "location = NYC"
A console is generally considered a secure and reliable access path of
last resort. Some UNIX systems allow root login only on the console.
For security reasons, other systems might prevent multiple logins, so
that if the administrator is logged in on the console, other access is
denied. Finally, from the console, the administrator can also disable the
network interfaces when/if necessary to block all other access.
Normal command activity on the console has no greater impact than
the equivalent command run from any other interface. However, since
it is not dependent upon the network, a system that is too overloaded to
be able to respond to a network login may still support console login.
So another benefit of console access is trouble-shooting and diagnosis
of system and network problems.
Each CIM includes a serial number and target system name. Our
systems assume that a CIM remains connected to its named target
when its connection is moved between switches. This movement is
automatically reflected in the system configuration and is propagated
to CommandCenter. If, instead, the CIM is moved to another server,
an administrator must rename it.
CommandCenter can support any device with a KVM or serial
interface as a transparent pass-through.
3rd party KVM switches integration is typically done through keyboard
macros when the 3rd party KVM vendors do not publicize the
communications protocols for the 3rd party KVM switches. Depending
on the capability of the 3rd party KVM switches, the tightness of
integration will vary.
Currently, the best possible implementation is to aggregate IP-Reach
boxes with CommandCenter. In the future, Raritan plans to increase
simultaneous access paths per box. These plans have yet to complete
development as other projects have taken priority, but we welcome
comments about the market demand and use cases of an 8-path
solution.
The CommandCenter V2.0 will work with Paragon that has 3.0 HW
and firmware version 3.2 and above. If older versions exist, they must
be replaced.
LDAP and TACACS are used for remote authentication only, not
authorization.
APPENDIX E: FREQUENTLY ASKED QUESTIONS
QUESTION:
User Experience
How will I know if someone
else is logged in to leaf nodes?
Does CommandCenter have
the ability to loOK at multiple
screens for devices?
Regarding console
management via network port
or local serial port (for
example, COM2): What
happens to the logging, does
CommandCenter capture local
management or is this lost?
137
ANSWER:
CommandCenter can present the list of users logged in to leaf devices
and can show which users are currently accessing an edge port through
the active users on a edge port features.
If there are many devices under CommandCenter, the user can scroll
through the screens to view them all. A user is able to open many
screens, each one corresponding to one edge port, but the user is
restricted on the KVM side by the actual capacity of KVM over IP
channels to be able to access multiple KVM screens.
Logging on to CommandCenter through the CommandCenter console
itself is the same as gaining the root privilege of the operating system
(Linux) upon with CommandCenter is running. Syslog will record
such event, but what the user types at the CommandCenter console
itself will be lost.
138
255-80-3100
COMMANDCENTER USER GUIDE