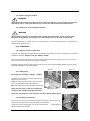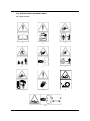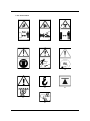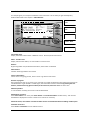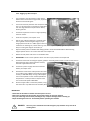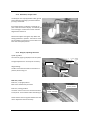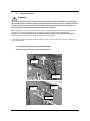
1
Operator’s manual MP 2000 Original operator’s manual, translated version. Published 2013 - According to Directive 2006/42/EC, Annex I 1.7.4.1 Manufacturer: ORKEL COMPACTION AS Johan Gjønnes veg 25 N– 7320 FANNREM Valid from serial number: 20220001 Orkel part-number: 16741 INDEX CHAPTER 1 -GENERAL INFORMATION 1.1 IDENTIFICATION of the MACHINE 1.1.1 Serial number, localization 1.1.2 Declaration of Conformity 1.2 INTRODUCTION 1.2.1 Foreword 1.2.2 Range of Use, limitations 1.3 CONTROL BEFORE DELIVERY 1.3.1 Preparation at customer’s location 1.4 WARRANTY 1.4.1 Certificate of warranty 1.4.2 Warranty, limitations 1.4.3 Normal wear and tear 1.4.4 Warranty procedure 1.4.5 Repairing during guarantee period 1.4.6 Delivery form 1.4.7 Warranty report CHAPTER 2 - SAFETY 2.1 INTRODUCTION 2.2 SAFETY - SYMBOLS 2.3 TO THE OPERATOR 2.4 WARNING AND DANGER 2.5 LABEL SYMBOLS 2.6 SAFETY ROUTINES 2.6.1 Safety. Machine in working progress 2.6.2 Important issues 2.7 OPERATOR PROTECTION 2.7.1 Take care, own safety 2.8 SAFETY PRECATIONS 2.8.1 Know your machine 2.8.2 Personal safety 2.8.3 Equipment control 2.8.4 Cleaning 2.8.5 Environmental protection 2.8.6 Set up, on site 2 2.9 MAINTENANCE, SAFETY 2.9.1 Before maintenance 2.9.2 Control after maintenance 2.10 WORKING SAFELY 2.10.1 Safe work-routine 2.10.2 Operator safety 2.10.3 Taking care of other’s safety 2.10.4 Danger - in working progress 2.10.5 Danger - during maintenance 2.10.6 Risk of overturning 2.11 SAFETY AFER USE 2.11.1 Leaving the machine 2.11.2 Dismantling of the machine 2.12 TRANSPORT 2.12.1 Transport road conditions 2.12.2 Lifting 2.12.3 Strapping 2.13 WARNING LABELS 2.13.1 Labels 2.13.2 Explanation of labels CHAPTER 3 - CONTROL BOX 3.1 CONTROL BOX 3.1.1 3.1.2 3.1.3 3.1.4 3.1.5 Choose menu language Main menu - Start screen Program menus - Basic functions Values and Settings in menu: Settings Error messages 3 CHAPTER 4 - OPERATING THE MACHINE 4.1 MODE OF OPERATION 4.1.1 Main sections 4.2 BREAKING IN 4.2.1 Break in, precaution 4.2.2 PTO 4.3 DRIVING ON ROAD 4.3.1 Stripping down, preparation before transport 4.3.2 Rigging up, after transport 4.3.3 Levelling the compactor 4.4 CONNECTING THE MACINE 4.4.1 Tractor 4.4.2 PTO speed 4.4.3 Electrical connection 4.4.4 Hydraulic, connection 4.4.5 Oil temperature 4.4.6 Function control, before starting up 4.5 NET FILM - BINDING - PLASTIC FILM WRAPPER 4.5.1 Plastic film/net binding in chamber 4.5.2 Adjusting the net-brake 4.5.3 Plastic film, wrapper table 4.5.4 Wrapper, adjusting the knives 4.5.5 Loading/installing a new plastic film roller 4.6 AUTOMATIC OPERATION - WORKING 4.7 PLASTIC/FILM - STORAGE MAGAZINE 4.8 OPERATIONAL HANDLES - HYDRAULIC VALVES 4.9 HYDRAULIC SETTINGS 4.9.1 Hydraulic valves, operation and overview 4.9.2 Wrapper, adjustments 4.9.3 Chamber speed adjustment 4.9.4 Conveyor belts, speed adjustments 4.9.5 Plastic film or net brake. Tension and feeder speed. 4.9.6 Main valves 4.9.7 Chamber pressure, settings 4 CHAPTER 5 - REPAIR AND MAINTENANCE 5.1 OPERATOR MAINTENANCE, Control and adjustments 5.1.1 Electric system 5.1.2 Wheels 5.1.3 Chains 5.1.4 Wrapper 5.1.5 Chamber 5.1.5.1 Chamber-belt front, adjustment 5.1.5.2 Chamber-belt rear, adjustment 5.1.5.3 Chamber-belt, tension 5.1.5.4 Installing, replacing a new chamber-belt 5.1.5.5 Slide bearing, rollers 5.1.6 Hydraulic system 5.1.7 Hopper - Elevator - Belt under 5.1.8 Belt, wrapper table 5.1.9 Frame - Main bolts 5.1.10 Wide film - Net tying 5.2 LUBRICATION 5.2.1 Lubrication system 5.2.2 Refill 5.2.3 Troubleshooting 5.2.4 Lubrication scheme 5.2.5 Approved/Recommended types of Grease and Oil 5.3 CLEANING AND STORAGE 5.3.1 High-pressure washer 5.3.2 Storage 5.4 ELECTRIC - WIRING DIAGRAM 5.4.1 Fuses 5.4.2 Wiring diagram 5.4.3 Sensors, overview 5.5 HYDRAULIC SCHEME 5.6 WELDING AND GRINDING 5.6.1 Precautions before welding 5.7 SERVICE HISTORY 5.7.1 Scheme - Service and maintenance 5 CHAPTER 6 - SPECIFICATIONS 6.1 ELECTRICAL SYSTEM 6.2 PTO 6.3 LUBRICATION SYSTEM 6.4 HYDRAULIC SYSTEM 6.5 WHEELS 6.6 TYRES 6.7 TYRE PRESSURE 6.8 TIGHTENING TORQUE 6.8.1 Wheel nut 6.8.2 Miscellaneous 6.9 DIMENSIONS AND WEIGHT CHAPTER 7 – AUXILLARY COMPONENTS AND EQUIPMENT 7.1 AVAILABLE EQUIPMENT 7.1.1 7.1.2 CHAPTER 8 - CONTACT INFORMATION 8.1 HEAD OFFICE 8.1.1 Sale 8.1.2 Technical Service 8.2 ORKEL POINT OF SERVICE 8.2.1 Norway 8.2.2 Abroad CHAPTER 9 - NOTES 6 CHAPTER 1 -GENERAL INFORMATION 1.1 IDENTIFICATION OF THE MACHINE 1.1.1 Serial number, localization 1.1.2 Declaration of Conformity 1.2 INTRODUCTION 1.2.1 Foreword 1.2.2 Range of use, limitations 1.3 CONTROL BEFORE DELIVERY 1.3.1 Preparation at customer’s location 1.4 WARRANTY 1.4.1 1.4.2 1.4.3 1.4.4 1.4.5 1.4.6 1.4.7 Certificate of warranty Warranty, limitations Normal wear and tear Warranty procedure Repairing during guarantee period Delivery form Warranty report 7 1-1 SERIALNUMBER 1.1.1- Localization A badge with the serialnumber is located on the right side of the machine, near the wrapper zone. In addition, the number is also engraved in the frame. See picture below. The serialnumber must always be provided by contacting the dealer, whether for share purchase or other technical assistance. The serialnumber is a safe way to identify the machine, it is strictly forbidden to change or remove the serialnumber. Serialnumber, localization Multicompactor MP 2000 8 EC DECLARATION OF CONFORMITY Manufacturer: ORKEL COMPACTION AS Address: Johan Gjønnes Veg 25 N-7320 Fannrem Norway Phone: + 47 72 48 80 00 Product description: Agricultural/Industrial - multi compactor Model: Orkel MP 2000 Type: 202 With serial number: 1234567 Orkel Compaction AS hereby declare, that the identified product above is conform to the requirements of: Directive on machinery – 2006/42/EC - Electromagnetic compatibility Directive 2004/108/EC and EN ISO 12100/EN ISO 4413/EN ISO 13850/EN 349+A1/EN ISO 13857 Person in EC authorized to compile technical files: Name: Anders Smaaoien Project engineer Orkel EU Ltd. Address: 28-29 The broadway Ealing broadway London W5 2NP UK Fannrem, November. 16 2012. Leif Haugum (sign) Technical director Bjørn Slupphaug (sign) Logistics Manager - (stamp) 9 1.2 INTRODUCTION 1.2.1- Foreword: The products from Orkel Compaction Ltd is well known for their high quality, reliability and strength. We will therefore congratulate you, choosing of one of our machines. To fulfil our own goals, regarding quality and strength, Orkel Compaction Ltd has implemented a continuing product - developing process. We are also carrying out a thorough quality control on all of our machines, before leaving the factory. You, as a owner or operator must read this operator’s manual with safety instructions before start - up. Read thoroughly, and familiarize with the rules and demands regarding machine - safety, use and maintenance. Make daily maintenance as a routine. By doing this, the machine will be safe to operate, contribute to a long life-span and a effective utilization of the machine. With regards Orkel Compaction Ltd 1.2.2- Range of use, limitations The compactor is designed for compressing soft organic materials to bales. Then wrap them in plastic film for storage or transport. The compactor must only be used for this purpose. Other materials can also be compressed, but have to be confirmed by Orkel Compaction AS in each case. This due to warranty legislations. 1.3 CONTROL BEFORE DELIVERY This machine is tested, controlled and passed the final inspection before leaving the plant. Please check that this operator’s manual correspond with your machine. 1.3.1- Making the compactor ready. (customer site) One of our employees will set up the machine for the customer. A course in handling and operating the compactor will be held at site if necessary. During start-up period we will be helpful with technical assistance and answering questions regarding the compactor. Please see; Delivery - warranty formula in section 1.4. 10 1.4. WARRANTY 1.4.1- Warranty liabilities Orkel Compaction guarantee this machine against failure in production and material error for a period of 12 months or 50.000 bales produced, from date of delivery. 1.4.2- Warranty, limitations: 1. Warranty is limited to the actual value of the machine. According to performed maintenance, range of use and condition. 2. Warranty is limited to the value of damaged components only. 3. Warranty is limited to elapsed time to repair. Assessed and determined by Orkel Compaction AS. 4. Warranty repairs must be agreed with Orkel Compaction AS before repair takes place. 5. A completed warranty form must be submitted to Orkel Compaction within 14 days of delivery. Orkel Compaction Ltd is under no circumstance responsible for consequential damages to 3 party arising out of any matters, relating to the machine. 1.4.3- Normal wear and tear: Normal wear and tear on parts such as; Rubber belts, tyres, hydraulic hoses, knives, chains and bearings is not included in the warranty. PTO: On the PTO shaft there is a warranty form delivered by the manufacturer. Please see manufacturers own warranty coverage in attachment on the axle. Other:: Use of non-original parts, improper use and insufficient maintenance, will lead to the disappearance or reduction of the previously mentioned warranty. The warranty may be withdrawn if the instructions given in this manual are not followed. 1.4.4- Warranty procedure If anything happens to your machine during the warranty - period. Stop the machine immediately to avoid further damage. Contact your local dealer or Orkel Compaction AS. Please see contact information in section 9. Delivery and warranty form must be sent / handed over to Orkel Compaction AS within 14 days after first start-up. The form must be completed in three copies. One for customer, one for local dealer and one for Orkel Compaction AS. This form is located in a envelope, enclosed delivery of the machine. NOTE: All warranty repairs must be agreed in a written form, e-mail or letter, before any repair of the machine could take place. 1.4.5- Repair work and service in warranty period All repair and service work must be carried out by skilled mechanics. If not, (Owners risk) there might be some limitations in the warranty given by Orkel Compaction Ltd. 11 1.4.6- Delivery and Warranty form. Note: This form must be completed in 3 copies. One for the customer, one for supplier and one to be filed at Orkel Compaction AS. Orkel Compaction AS - Delivery form Model/type Serialnumber Date of delivery (customer) Customer: Supplier/Distributor: Address: Address: The delivery is controlled pursuant to order specifications Operator’s manual has been reviewed, along with customer. Safety instructions has been examined, along with customer Remark to delivery: Signature owner Signature Supplier/Distributor 12 1.4.7 Warranty report Orkel Compaction - Warranty report Customer: Supplier: Address: Date of delivery form: No: Date of failure: Serial number: Product: Description of failure: Qty: Part No: Part name: Price EUR: Sum credit EUR: Total amount parts: Hours of work performed: Hour rate EUR: Hours of travel: Hour rate EUR: Mileage: Km at EUR: Total amount exclusive VAT: Orkel Consultant: Invoice new parts: Place and date: Signature: Orkel internal processing: Treatment of complaints Warranty report received date: Warranty parts returned/pictures received: Dismissal: Approved: Ground for dismissal: The claim is considered: Credit Note: 13 CHAPTER 2 - SAFETY 2.1 INTRODUCTION 2.2 SAFETY - SYMBOLS 2.3 TO THE OPERATOR 2.4 WARNING AND DANGER 2.5 LABEL SYMBOLS 2.6 SAFETY ROUTINES 2.6.1 Safe operation 2.6.2 Important issues 2.7 OPERATOR PROTECTION 2.7.1 Personal protecting gear 2.8 SAFETY PRECAUTIONS 2.8.1 Know your machine 2.8.2 Personal safety 2.8.3 Equipment control 2.8.4 Cleaning 2.8.5 Environmental protection 2.8.6 Set up, on site 2.9 MAINTENANCE, SAFETY 2.9.1 Before maintenance 2.9.2 Control after maintenance 2.10 WORKING SAFELY 2.10.1 Safe work-routine 2.10.2 Operator safety 2.10.3 Taking care of other’s safety 2.10.4 Danger - machine in working progress 2.10.5 Danger - during maintenance 2.10.6 Risk of overturning 2.11 SAFETY AFER USE 2.11.1 Leaving the machine 2.11.2 Dismantling the machine 2.12 TRANSPORT 2.12.1 Transport on road conditions 2.12.2 Lifting 2.12.3 Strapping 2.13 WARNING LABELS 2.13.1 Labels 2.13.2 Explanation of labels 14 2.1 SAFETY - INTRODUCTION This operator’s manual is made for describing safe and good routines operating the compactor. On the other hand, it’s not possible to describe every operational and safety matters that may arise. Carefully consider all your actions, if the pose a safety hazard to you, or others close to the compactor. - Accidents may kill you or make you disabled - Accidents can be avoided 2.2 SAFETY AND DANGER SYMBOLS This symbol means: ATTENTION! BE CAUTIOUS! YOUR PERSONAL SAFETY IS EXPOSED! When you see this symbol in the operator’s manual, be aware that violation of instructions given, can cause you or others in the working area of the machine, being injured or killed. 2.3 TO THE OPERATOR Exercise of security As a operator, it’s your responsibility that you read and understand the safety instructions given in this operator’s manual. These instructions must be followed without exception. It’s you who are the key to the safety of this machine, not only for yourself, but for other people in the compactors working area. Follow the safety instructions punctually, and you will experience the compactor as a safe and secure place to work. 15 2.4 DANGER AND WARNING Danger, warning and caution Each time you see the words and symbols shown below, please note the different directions they symbolize. DANGER The symbol and a word DANGER, state a direct or immediate dangerous situation that will cause DEATH OR SERIOUS INJURY if not avoided. WARNING The symbol and the word WARNING, indicates a potentially hazardous situation. If you fail to comply with instructions given it could result in personal injury or loss of life. IMPORTANT: The word IMPORTANT refers to special instructions or procedures that could lead to the destruction of equipment if you fail to comply with them. NOTE: The word NOTE mark items of particular interest for more efficient and convenient operation or repair. 2.5 SYMBOLS, STICKERS AND LABELS WARNING Warning signs, indicating danger or warning attached to the machine, must not be removed or painted. Unreadable signs must be replaced by new ones. These can be ordered from Orkel Compaction Ltd. See chapter 2.13 Description of stickers and labels. 2.6 GOOD SECURITY PRACTICES 2.6.1-Safe operation WARNING No person under 16 year’s of age should under no circumstances operate this machine WARNING Personnel under influence of alcohol or other drugs should not operate this machine 2.6.2- Important issues Be aware of children and other unauthorized persons in the vicinity of the machine. Never allow unqualified persons to operate this machine. 16 2.7 OPERATOR SAFETY 2.7.1- Personal protecting gear WARNING The Compactor might generate a lot of dust and noise, depending on which material being compressed. For your own health, we recommend that operators use protective equipment, such as goggles, mask with air filter, and hearing protection during operation. 2.8 SAFETY PRECAUTIONS - safe use 2.8.1- Knowledge of your machine and equipment It is recommended that the operator when starting-up, is standing up on the platform at the top of the machine. By doing this, you are having a good overview of danger zones. Know your machine. Learn all the functions and actuating mechanisms. You must also know the capacity and limitations of the machine. This is to avoid unnecessary downtime and in the worst case mechanical brakedown 2.8.2- Use of protective and safety equipment Use all available protective and safety equipment. Provide good lighting in the area where the machine is positioned. All covers must remain intact and attached during operation. If pressing of flammable materials, a fire extinguisher must be in close proximity. 2.8.3- Equipment control, checking before start-up Before starting up, make sure that the machine and its equipment is in place and in order. 2.8.4- Cleaning A good cleaning of the machine increases its durability and your safety. Therefore, keep all surfaces clean, remove oil-spills and other dirt. 2.8.5- Environmental protection Hazardous waste, such as rubber, oil and other materials that could harm the environment, must be disposed at approved disposal centres. 2.8.6- Assembly on site The operator must be aware of hazards during alignment and assembly of the machine. - Make a visual check of the complete machine to detect any transport damages. - Ensure that the machine is standing on a firm, levelled surface. WARNING Take care when assembling/mounting the compactor. Squeeze and injuries from falling, can occur when maneuvering the wrapper table and during installation of the covers. 17 2.9 MAINTENANCE - SAFETY 2.9.1- Before maintenance Before any maintenance or adjustments are being made to the machine, we recommend you to make a conference call to your local dealer or Orkel Compaction AS. All repairing work or maintenance should be carried out by skilled mechanics. SAFETY PRECAUTIONS REGARDING REPAIR WORK OR MAINTENANCE: The machine must be stopped before any repair work or maintenance is carried out. The hydraulic safety valves on the tailgate’s lifting cylinders (both sides), must be closed before any person could enter the chamber.( Se chapter 5.1) Caution during cleaning of belts and rollers, must be taken to avoid crushing or squeezing of body parts. Be aware of the large side covers during repair work in windy conditions. Secure the covers in open position, to avoid personal injury. Use proper work wear and shoes to avoid injuries from falling. 2.9.2- Control, after repair work or maintenance. Check that all tools is stowed away and all covers is mounted correctly and in place. NOTE: Orkel Compaction recommend that all repair and maintenance work on the machine is done in daylight conditions. Repair work on the machine in dark conditions is on owner’s risk. 2.10 SAFETY DURING OPERATION 2.10.1-Make good and safe routines This machine must under no circumstances be used for any other purpose than the intended one. If the operator have to leave the site, the tractor or any other power supply must be turned off. Remove key to avoid unattended start. Do not use loose or baggy clothing, due to many rotating parts in the machine. 2.10.2-Operator safety: OPERATOR MUST! - be extra observant during mounting new plastic foil under the knife. - be extra focused on all danger zones during operation. - be cautious, entering the machine to avoid falling. - check all danger-zones before start-up, to avoid danger situations. - pay attention to potential danger, caused by the machines automatic systems. - Carry out a test on emergency-stop switches, and sensors on a regular base, to ensure they are in good working order. - Set the machine in “manual” before any work is done in the HiT unit. (net binding) due to danger of getting fingers or hand cut. - pay attention to fire hazard from overheating in bearings or pressing of very dry materials. - Know the localization of the fire extinguisher. Keep close! - Pay attention to danger of unauthorised personnel entering the machine’s stairway. (danger of falling into hopper/feeder. The stairway is for authorized personnel only. 18 2.10.3-Other peoples safety WARNING The machine has multiple automatic functions, who start without warning. No unauthorized personnel must be close to the machine during operation. 2.10.4 Elements of risk during operation: Pay attention to the risk of: - Squeezing/crushing/cutting of fingers or hands near the knife for widefilm/net - Squeezing/crushing of fingers or hands between conveyor belts and sprockets - Squeezing/crushing of fingers or hands between belt and roller, and under the wrapper table - Squeezing/crushing of body and feet when bale is dropped from the wrapper table - Squeezing/crushing of fingers or hands between wrapper arms and frame - Impact from rotating wrapper arms - Sensor failure at wrapper table, might result in an early bale roll-out - Leakage of hydraulic oil under high pressure, that witch can result in severe injury to eyes and skin 2.10.5 Elements of risk during maintenance: Pay attention to the risk of: - Squeezing/crushing of fingers and hands near chain and sprockets, if side covers are dismounted. Side covers should only be opened when machine is stopped - Squeeze/crushing of finger and hands during cleaning of conveyor belts and rollers . Safeguards should only be dismounted when the machine is stopped - get entangled into PTO axle. Endanger of PTO loosens or brake, might result in body impact. Do not stay in PTO area. - slipping and falling entering the staircase. - getting moderate burns, oil is approximately 70°C - 158°F 2.10.6- Risk of overturning: WARNING The operator must take precautions to the risk of overturning, during rigging, set-up and operating the machine. 19 2.11 PRE-USE SAFETY 2.11.1 Before leaving the machine WARNING Before leaving the machine the operator must turn off tractor engine or any other power source must be switched off, such as power-pack. Remove key or secure the power-pack to avoid unwanted start 2.11.2 Phasing out, or dismantling the machine: WARNING General safety precautions must be taken when stripping down the machine. Centre of gravity might change during dismantling, secure large parts to avoid danger of injury. Be aware of overturning. Hazardous waste like oil, rubber and so one, must be stored in a environmentally safe way, or delivered at a certified waste-disposal plant 2.12 TRANSPORT 2.12.1-Highway transport. Preparation This machine is designed to being towed by the drawbar only. Ensure the tractor is equipped with a drag bar of sufficient strength. Weight on drag bar: 1800 Kg - 3970Lb. Before set-up and mounting of the machine, after being transported. The operator must carry out a visual control of the machine, to reveal any transport damages. Be aware of danger of overturning during transport. Don’t exceed recommended speed limits set by Orkel Compaction Ltd. Maximum speed: 40km/t Picture 1 Picture 2 2.12.2-Lifting points Net weight of the machine is 7800 kg. - 17200Lb. All lift done to the machine must be performed as shown in picture 1 and 2. Front: Use a nylon strap to make a loop round the front crossbeam (Beam Dim: 100 x 100mm) Rear: Use lifting points on the hydraulic jack stands Lifting point, front NOTE: Use long straps or chains to avoid pinched damages to the machine during lifting operation. NOTE: Only use lifting gear witch is approved and with sufficient lifting capacity. 2.12.3-Strapping and tie-down Secure the machine from moving if transported by lorry/train or boat. Only use approved securing straps or chains, designed for the purpose. There is four points of strapping, one on each hydraulic jack Strapping point stand. See picture to the right 20 Lifting point, rear 2.13 DESCRIPTION OF WARNING LABELS 2.13.1 Stick-on Labels 1 4 2 3 5 6 P_038 7 9 8 10 21 2.13.1 Stick-on labels 11 12 13 850 14 15 16 18 19 P_030 17 20 22 2.13.2 Stick-on labels, explanation 1. Do not start operating the machine, until you have read and understood the operating instructions and safety precautions. 2. Always stop the tractor engine before; lubricating, adjusting, maintaining or repairing the machine. Also remove the ignition key to prevent accidentally start . 3. Ensure that there are no people between tractor and machine when connecting and disconnecting. It can quickly result in crushing injuries. 4. Never allow children to stay near the machine during operation. Especially young children can do unpredictable things. 5. Danger. Keep clear of moving parts in chamber. 6. People near the machine must be aware and keep their distance when the bale is released from the pressure chamber or unloaded from the wrapper table. 7. Always use the hydraulic safety valves on the tailgate lifting cylinders, to secure the tailgate in open position. 8. The net or widefilm is cut with a sharp knife. Be careful during loading a new roll or if any adjustment is done to the knife system. 9. All parking of the machine must be on level ground and secured with wheel chocks. 10. Between the tractor and the machine is a rotating PTO - shaft . No person is to stand between tractor and machine while the engine is running. Do not wear loose clothing, scarfs, etc. 11. Safety distance, a minimum of 5 meters. No persons allowed closer than 5 m when the machine is operating. 12. Danger. Film holder/cutter has a sharp knife and there is a risk of cutting/crushing injury. Always keep closed when the machine is not operating 13. Safe distance. Do not enter below hopper. 14. Noise zone. Use ear protection. 15. Danger zone. Access only for operator or mechanic. 16. Make sure the transmission is running with the correct speed and direction. Wrong speed and/or direction can damage machinery and may cause great danger to persons nearby. The machine is designed for 850 rpm. 17. Strapping point. 18. Lifting point. 19. Jacking point. 20. Hydraulics safety device, tailgate lifting cylinders. 23 CHAPTER 3 - CONTROL BOX 3.1 CONTROL BOX 3.1.1 3.1.2 3.1.3 3.1.4 3.1.5 Choose menu language Main menu - Start screen Program menus - Basic functions Values and Settings in menu: Settings Error messages 24 3.1 CONTROL BOX This chapter gives you a simple introduction to the control box. This to make you get started quickly. Software described in this chapter is: MP 2000 5.0 G Information area Menu - Function area Menu Cancel - Back Start Information area: Display information about status in different menus. Also time, date and counters Menu - Function area: Display machine information, on each function in chosen menu. Buttons: By pressing button near/under desired function, the function is activated. Menu button: Used for switching between main menus Cancel - Back button: Use to cancel a on-going process, leave a menu or go back to start menu. Re-start of program: If the programme stop by any reason (e.g. overload), you might complete the interrupted cycle manually to unload the bale. To get started in “AUTO” again, the control box must be restarted. By pressing the tree buttons, marked with a ring (picture above) at the same time, the box is reset. No data is lost. Manual operation: To run functions manually, the sensors must be deactivated. Deactivation of sensors: Press menu button once. Then press menu button and cancel back button simultaneously . Text: Sensors deactivated is displayed on screen. Functions can now be run manually. NOTE: Be careful, no functions is monitored when sensors are deactivated. Risk of colliding machine parts. Activation of sensors: Press cancel - back button once to activate sensors. 25 First start of control box 3.1.1- Choose menu language When connecting the box for the first time, picture to the right appear on screen. Press immediately the button under/side of the language you want. For later start-up, the control box will remember the language your have chosen G Available languages: EN-English, DE-German FR-French, NL-Dutch TR-Turkey, PL– Polish, CS-Czech, SK-Slovak, HU-Hungarian Start-up screen, language 3.1.2– Main menu - Start screen. In this screen you get information of: Ratio of charge and chamber pressure Chamber speed Number of turns of widefilm/net Number of turns of plastic film (wrapper) Possible selections: START WRAP Start , machine Start Net. Widefilm/net in chamber Bale dropping Manual or Auto, Wrapper table Additive, On or Off (Silage additive) Start wrap. (only if a bale is on the table) Start screen 3.1.3– Program menus - Basic functions Press menu button to enter menu: Baler 1 Possible selections: Chamber speed (Tailgate opening speed) Chamber greaser. Manual greasing in progress as long as the button is pressed down Chamber, open close. (Tailgate) Screen Menu, Baler 1 26 Press baler 2 to enter menu Baler 2 Possible selections: Net knife, open - close Net feed, on Belt under, Fast - slow speed Menu Baler 2 Press baler 3 to enter menu Baler 3 Possible selections: Feed table, on - off Elevator, fast - slow speed Run table, on - off. Wrapper table Net revolutions, Set the number of layers of widefilm/net added to the bale in chamber Menu Baler 3 Press menu to enter menu Wrapper 1 Possible selections: Film revolutions, Set the number of layers of plastic film added to the bale on wrapper table Table, up - down. (Wrapper table) Chamber, open - close (Tailgate) Menu Wrapper 1 Press wrapper 2 to enter menu Wrapper 2 Possible selections: Home. Wrapper arm back to start-position Slow - Fast. Wrapper arm speed Auto. Automatic wrapping cycle of bale when it’s loaded on table Film cutter, open - close Menu Wrapper 2 27 Menu Settings, picture 3 Advanced settings: NOTE: These settings must be performed by trained personnel only. To get access to more parameters in menu settings: Enter menu Settings as shown in picture 1 on previous side. Press upper and lower buttons on left side simultaneously. New parameters will now appear in display. See picture 1 and 2 to the right, to see advanced parameters to be changed. Menu, Advanced settings picture 1 Menu, Advanced settings picture 2 NOTE: These settings is only to be set by qualified personnel. Do not change settings if you are not sure. 28 Press Menu to enter menu, settings and counters Counters = List of customers or jobs Press Settings to enter menu settings Main menu, Settings/counters Menu: Settings (Settings carried out by operator) In menu settings you can set/change up to 30 parameters (See screen pictures 1,2 og 3) By pressing button under the arrow in the display you can switch between parameters and screens pages. By pressing button under + or - of the chosen parameter, the value is changed. Yes, On or Increase a parameter, press + No, Off or Decrease a parameter, press - Menu Settings, picture 1 NOTE: Write down old settings as a back-up before you start changing values in menu settings See recommended settings in chapter: 3.1.4 Menu Settings, picture 2 29 Press cancel - back button to return to menu settings - counters Press button to the right for counters in display to enter menu counters. Main menu, settings and counters Counters This menu can store information for up to 50 different customers or jobs. When entering the menu, the first 7 counters is shown in display. View stored information Switch between counters by pressing buttons under arrows in display. Press select button to choose a counter to look into. The chosen line should now be marked with a * behind the counter number in display. Counter 1 Then press details button to view stored information registered on the customer. (Number of bales and time spent) Change text, or add a new customer/job Choose the counter to be changed, Press details button, then modify button. ABC - Skip through alphabet from the start and backwards and then numbers. ZYX– Skip through numbers and alphabet from the end and forwards. Counter 2 Change or write letters and numbers: Press ABC or ZYX button until requested letter is in cursor. Then press arrow button to move to next letter or make a space. Erase a letter, press clear button Counter 3 Confirm changes, press OK button 30 Reset: Counter NOTE: Make sure the correct counter you’d like to reset, is chosen. (Picture, counter 2) Press reset counter. Confirm or invalidate by pressing: Yes or No Erase counter: customer or job: Press delete. Then confirm or invalidate by pressing Yes or No. Counter 4 Press cancel - back button to return to menu; Settings and counters Press menu button to get new main menu. Press user settings button to enter menu; User settings. Main menu User settings Control unit: Information line showing which program and edition. MP 2000 v5.0 G G Changing brightness in display By pressing buttons below Brightness in display, you can adjust to requested intensity with + or Changing contrast in display By pressing buttons below Contrast in display, you can adjust to requested intensity with + or - Menu: User settings 1 Changing background Choose between bright letters on dark background, or dark letters on bright background. By pressing buttons under polarity, you can change background with POS or NEG. Calibration: To calibrate scale for bale on table, if installed. Choose Scale button. (Not in use) 31 Sensor Test Enter main menu, User settings Press button to enter menu; Sensor test. A list of all sensors and their current status is shown in display. Sensor test Sensor Test, procedure: Hold a piece of metal (steel) in front of the sensor, watch at the same time the current sensor status in display. The sensor status should now change between ON and OFF while moving the metal-piece in and out of the sensor front. In that case, the sensor is OK. If there’s no change in status of the particular sensor, there is a failure in sensor or a cable break-down. See sensor’s overview and their numbers in chapter 5.4.3 Start - Up Screen Press Cancel - Back button twice to return to startup screen. Start-up screen 32 Time Enter menu screen; user settings. See previous page Select Clock on the right side of screen to enter menu; Adjust date & time Move cursor along the line by pressing button under the arrow shown in display. Move the cursor to the value you’d like to change Increase/Decrease value, press + or Menu, adjust date & time Confirm new time by pressing OK Fault/error messages, memory Press fault memory in main menu, user settings to enter menu; fault memory. In this menu, the last 30 errors is stored continuously. To browse faults in memory, press button under arrows up or down in display NOTE: Use this menu as a reference if you are about to contact your local dealer or Orkel Compaction Ltd, if a problem has occurred. To look closer at a failure, press button under Details shown in display. Example: Failure code:180 This indicate there is a error in sensor S18. See own chapter 3.1.6 for failure codes 33 3.1.4- Values and settings in menu; Settings Recommended Setting - Values: Text: Description of parameter settings: Chamber max speed Speed of the chamber when filling up with material. Chamber feed speed Chamber speed during net feeding and cutting Chamber net speed Net wrapping speed Chamber bale out speed Speed of the chamber when bale is ejected out of the chamber. Chamber full level Level of chamber filling when elevator slows down Chamber max pressure Setting of a maximum pressure inside the chamber at a point when elevator stops and net/film starts. 180 - 220 bar Elevator stop delay Delay of elevator stop after chamber is full Feed delay Delay of net feed Net feed time Time necessary during net feeding to get it anchored (hooked) between chamber and bale surfaces - regards 4-6s MP's with only net wrapping system Film feed time Time necessary during net (film) feeding to get it anchored (hooked) between chamber and bale surfaces regards machine with alternative film or net wrapping Net revolutions Number of net/film wraps on bale in the chamber. Feed roll closed delay Continue to press the feed rollers together in mid position. 1 Knife delay Delay on net/film knife before cutting. 80 -100% 40 - 50% 80 - 100% 40 - 50% 60 - 80% 0s 0s 4-6s 3 -6 r 0.5 Chamber open delay Delay of opening the chamber after net (film) wrapping completed 0 34 3.1.4- Values and settings in menu; Settings Text: Description of parameter settings: Bale on table delay To allow the bale to go all the way to the table. Film revolutions Revolutions of film laid on the bale on wrapper table First film release First opening of the film cutter Second film release Second opening of the film cutter Third film release Third opening of the film cutter Film cutter open time Operating time from closed to open. Film cutter close time The time from starting to close the film cutter to finish. Net control Setting of the computer for machines with net only wrapping unit. (Stops the machine if net is broken or the roll is empty). Film control Setting of the computer for machines with net/film wrapping unit. (Stops the machine if film/net is broken or the roll is empty). Net type Type of the net/film wrapping unit - for net only (net) or net/film model (plastic) Measure weight Not in use Table down delay Delay of the table from dropping position until it starts to go up again. Bale rotation delay Extra wrap before rotation starts. (for stabilizing) Bale rotation time Makes the bale rotate on the table while dropping Rotate feed-rollers Feed-rollers rotate while opening rollers Bale transport Gives extra oil to the belt under when moving to the table 35 Recommended Setting - Values: 1s 14 (=6 layers) 1 4 6 (or 4) 0.5 s 1-2s ON ON PLASTIC 1-2s 0-4 0-5 Yes/no Fast/Normal 3.1.5– Error and Fault messages in display. Version: MP 2000 v4.6S and later. InformasjonsfeltMeny/funksjonsfelt Also malfunction in control box or circuit board error in the electric cabinet 36 CHAPTER 4 - OPERATING THE MACHINE 4.1 MODE OF OPERATION 4.1.1 Main sections 4.2 BREAK - IN 4.2.1 Break - in, precaution 4.2.2 PTO 4.3 DRIVING ON ROAD 4.3.1 Preparation before transport 4.3.2 Rigging up, after transport 4.3.3 Levelling the compactor 4.4 CONNECTING THE MACINE 4.4.1 Tractor 4.4.2 PTO speed 4.4.3 Electrical connection 4.4.4 Hydraulic, connection 4.4.5 Oil temperature 4.4.6 Function control, before starting up 4.5 NET FILM - BINDING - PLASTIC FILM WRAPPER 4.5.1 Plastic film/net binding in chamber 4.5.2 Adjusting the net-brake 4.5.3 Plastic film, wrapper table 4.5.4 Wrapper, adjusting the knives 4.5.5 Loading/installing a new plastic film roller 4.6 AUTOMATIC OPERATION - WORKING 4.7 PLASTIC/FILM - STORAGE MAGAZINE 4.8 OPERATIONAL HANDLES - HYDRAULIC VALVES 4.9 HYDRAULIC SETTINGS 4.9.1 Hydraulic valves, operation and overview 4.9.2 Wrapper, adjustments 4.9.3 Chamber speed adjustments 4.9.4 Conveyor belts, speed adjustments 4.9.5 Plastic film or net brake. Tension and feeder speed. 4.9.6 Main valves 4.9.7 Chamber pressure, settings 37 4.1 THE COMPACTOR - MODE OF OPERATION The machine is operating automatically , supervised by the control box. The operators main task is to ensure there is enough material in hopper, and stove away bales produced. Mode of operation: The material is loaded on the hopper/feeder by a wheeled loader or excavator or similar. If the compactor is equipped with a low - built hopper, the material can be dumped directly in the hoppers tray. The material is then transported by a conveyor - belt into the chamber, and being pressed to a bale. The amount of material being fed into the chamber is controlled by speed - regulation sensors and parameters set in control box. All functions in the baling process can be adapted and optimized, depending on which material is being pressed/baled. The hopper has a capacity of 7 cubic meter of loose material. The hopper/feeder is also detachable and the elevator might be filled directly by a conveyor - belt or a similar device. When the pressing cycle is finished, a net or widefilm from the HiT - unit is being added to the bale in the chamber. By doing this the bale keep it’s shape while being unloaded from chamber and transported on to the wrapper table. When the bale is loaded onto the wrapper table, the chamber tailgate is closing at the same time and a new bale is in progress. The wrapping cycle start automatically when a bale is registered on the table. Any loss from the baling process is transported back to the elevator by a conveyor belt (belt under), and fed back into the process. Parameters like; chamber pressure, amount of widefilm/net and number of layers of plastic film being added on the wrapper table, and more, can all be set in the control box. 4.1.1- Compactor, main sections 5 3 2 4 Compactor main sections, left side view. Main sections: 1. Hopper 2. Elevator/feeder 3. Press chamber 4. Wrapper table 5. HiT (Hi -tension) - Unit 38 1 4.2 BREAK - IN 4.2.1- Break -in, precaution A new compactor must go through a break - in period and should not be run at maximum capacity at the first 25 hours. The operator must be observant, monitoring that all functions are working correctly, and being aware of unpleasant sounds from the machine. Fine tuning the whole process must be carried out, until the compactor has reached it’s optimum capacity, based on the material being baled. NOTE: Slide bearing clearance is tight when the machine is new. This may result in increased temperature in bearings. The slide bearings must be checked frequently during brake - in period. If the temperature rise in some of the bearings, activate the manual greaser from the control box to increase the amount of grease supplied to bearings. Check: Each bearing, there must be a visible grease collar. Do also check the pressure relief valve on the grease pump, there should be no visible grease present. NOTE: The tension of the elevator belt must be checked the first 1-3-hours of operation. Due to paint remains in the belt segments, you might have to tighten up the belt. WARNING When controlling the slide bearings and performing manual lubrication, the tractors engine or additional power supply must be switched off. NOTE: In the case of having trouble lubricating some of the bearings, remove the hose belonging to the actual bearing. Then mount a special nipple to get the bearing lubricated manually. After lubricating the bearing, remount the hose which was dismounted earlier. Contact Orkel Compaction Ltd if this is relevant. The elevator and sensor, which control the amount of material being fed into the chamber, must also be controlled. An adjustment of this parameter could be carried out manually, please see chapter 3.1.4 NOTE: Before the compactor left the factory, a careful quality control has been taken place. On the other hand, this control has not bees done with the material you are proceeding. A need of complementary adjustments and change in settings is therefore foreseeable. Chamber pressure control. The compactor is designed to stand huge stress and output, but do not exaggerate bale density. An exaggeration in setting of chamber pressure will reduce the life span of the chamber. e materials See chapter: 3.1.4 NOTE: Assorted materials requires different chamber pressure! IMPORTANT: Orkel Compaction Ltd recommend; Visual controls of the compactor must implemented in daily maintenance routines. Active listening and make adjustments, once the requirement is revealed. This to avoid consequential damages to the machine. If not doing so, it might result in a mechanical break down. 4.2.2- PTO - axle The PTO - axle that comes along with this machine, is delivered with it’s own operator’s manual. Attach and service the axle as described in the suppliers manual. NOTE: Make sure the PTO ratio in control box is set to 1,00. See chapter 3.1.3.1 Advanced settings 39 4.3 DRIVING ON ROAD DANGER This machine is designed for a maximum speed of 80 km/t on road conditions. Do not exceed maximum speed! Before driving on road, ensure all the compactors covers and detachable parts is safe and secure. However the speed must be adapted to the actual road conditions and national speed limits. 4.3.1- Preparation before transport 1. Turn the un-loader (fork) backwards against the wrapper table. Rise the wrapper table (control box), to allow free movement of the drag bar. The drag must be fully extended by maneuvering the handle nr 3, until the transport safety lock engages. See chapter 4.3.2 2. Pull the belt tensioner backwards. (Picture to the right) 3. Disconnect the PTO axle from tractor and secure it in transport mode. Se picture below. 4. Dismount the side covers between feeder table and elevator. Put the feeder table’s side covers on to feeder table. Secure the covers along with earlier dismounted covers onto the feeder table. Also dismount the bannister and put stairs in transport mode. 5. Rise the feeder table into transport position, using maneuvering handle nr 6. Se chapter 4.8 6. Secure the feeder table in transport mode, by closing the valves on the feeder tables lifting cylinders. Handle nr.67 og 68 on each side. See chapter 4.9 7. Rise the four hydraulic operated jack stands completely by using the maneuvering handles nr. 1,2,4 and 5. See chapter 4.8 8. Disconnect the battery cable, hydraulic couplings and control cable. Secure all the cables and hydraulic hoses from possible transport damages. 9. Connect the tractor to the drag bar. 10. Connect the light cable and the hydraulic brake hose to tractor. Perform a brake -test and check all lights is working properly before driving off. PTO - axle in transport mode 40 4.3.2- Rigging up, after transport 1. The compactor must be placed on a flat and levelled surface. Disconnect the light cable, hydraulic brake hose and the drag bar. 2. The tractor must be parked on the compactors left side, in a 90° angle to the compactors longitudinal axe. Also aligned with the input shaft on the hydraulic gear box. 3. Connect the hydraulic hoses to a single operating outlet on tractor. 4. Level the compactor, see chapter 4.3.3 5. Pull the ring until the safety pin is released. Hold the ring while maneuvering the drag bar, operating hydraulic handle nr 3. After approx. 10cm of movement on the drag bar, release the ring. Then keep on moving the drag bar all the way in. Hydraulic pump, gear box input-shaft 6. Open the safety valves on feeder table lifting cylinders. Lower the feeder table to ideal working height. Operate lever nr.6. to lower the table. See chapter 4.8 7. Mount the side plates and covers on the feeder table. 8. IMPORTANT: The four main hydraulic valves must be in open position. See chapter 4.8 9. Connect the PTO axle according to supplier guidance. The PTO guard must be in order and secured on both sides with chains. Read operators manual, that was supplied with the axle. 3 Connect the power supply cable to the tractors battery. Se chapter 4.4.3 10. 11. Activate the tractors PTO and hydraulics. Run tractor on idle to allow a RPM on the PTO axle approximately on 300 RPM. Keep running until temperature on the hydraulic oil has reached operational temperature. Confer procedure i chapter 4.4.5. The rise the PTO speed to 850 RPM 12. Set the wrapper table in horizontal position, using the control box. Lay down the bale unloader (fork) Transport safety pin - release ring IMPORTANT: - Check that the direction of rotation and PTO speed is correct. - Before any movement of the drag bar, the transport safety pin must be released. - Carry out a thorough visual control, checking for any transport damages, before starting up. - Repair all damaged covers etc. immediately before operating the machine. DANGER Also carry out a functional test of all emergency stop switches. They must be in working order. 41 4.3.2- Rigging up, after transport 4.3.3- Levelling the compactor 1. Operate the four hydraulic jack stands until the machine is horizontally levelled. See chapter 4.8 2. Use the water pass (4 ea.) attached on the frame to check the levelling of compactor. Water pass NOTE: The levelling of the compactor might change during operation if not placed on steady ground. Check the water pass frequently and adjust if needed. 42 4.4 CONNECTING THE MACHINE. 4.4.1- Tractor The tractor must be placed on the left side of the machine. See section 4.3.2 4.4.2- PTO Speed The machine require a PTO speed of på 850 RPM. Ensure the tractors RPM correspond to this. NOTE: The performance ability of the machine are depending on a constant RPM speed. 4.4.3- Electrical connection The machine is designed to be connected to a 12Volt DC system with negative earth. The electronic is over/ under voltage protected. The voltage must be stabile between 10,6V and 16V. Make sure the tractors electrical system is in good order. Connect the power cable directly to the battery on tractor. The cable is secured by a 40A fuse (on cable). The signal cable from control box must be connected to corresponding socket under the switchboard casing. The control box is equipped with magnets, allowing it to be placed directly on the machine. Preferably it can be placed on the right side, near the wrapper zone. The control box should be disconnected and stored in dry conditions. Always keep connectors clean and dry. 4.4.4- Hydraulic connection IMPORTANT: MAKE SURE ALL MAIN HYDRAULIC VALVES ARE IN OPEN POSITION. (Ea. 4) Hydraulic power supplied from tractor system operate the four hydraulic jack-stands, drag bar and feeder table lifting cylinders. All other hydraulic power is serviced by a integrated hydraulic pump, located on the machines left side. 4.4.5- Oil temperature A temperature indicator is attached to the oil reservoir. Read the oil temperature, if the oil temperature is too cold, do this: Run tractor on idle speed, with 300 RPM on PTO axle, approximately 10 to 25 minutes until the temperature has reached start temperature. A sticker on the oil reservoir, is stating which oil type the machine is equipped with. Type T32 (minimum start temp. ÷ 15°C) Warm up time 10 min. + one minute per minus degree. Type T46 (minimum start temp. ÷ 3°C) Warm up time 10 min + one minute per minus degree. Increase PTO speed to 850 RPM when the oil has reached operating temperature. 4.4.6- Function controls, before starting up The drag-bar must be in operational position (in). Temperature indicator - Wrapper table, up and down function. The table must be set in horizontal position after being checked. - Sensors on wrapper table. Up - horizontal and down . (Sensor test in control box.) - Wrapper arm, low speed. Press ”slow”. Set speed to 10 RPM (basic setting ), by adjusting valve nr. 69 . - Wrapper arm, fast speed. Press ”fast”. Set speed to 25 RPM (basic setting ), by adjusting valve nr. 51 Adjusting the wrapper is described in chapter 4.9.2 43 4.5 NET FILM - BINDING - PLASTIC FILM WRAPPER 4.5.1- Plastic film / Net binding in chamber Binding the bale in chamber with plastic film or net is performed by the HiT unit (High Tension) on top of the machine. When installing a new roller, guide the film as shown in figure 1. ( emphasized line ) Feeder rolls Figure 1. Binding a bale in chamber, mode of operation. After filling up the chamber, and a pre set chamber pressure value have been reached. The feeder motor in HiT unit starts and film/net is being fed into the chamber. When the rope end is long enough, the bale create a drag on the film/net and start pulling it out. At the same time, the feeder motor stops and feeder arms is moving outwards. A freewheel in feeder motor allow the film/net to enter the chamber without any problem. The net-brake is then being activated making a pre-tension applied to the film/net. This ensures a tight and even binding of the bale in chamber. After added a pre set number of film/net layers to the bale, the chamber tailgate is opened and the bale is unloaded. The bale is then transferred to the wrapper table by a transport chain. When entering the wrapper table, the tailgate is closing and a new bale is in progress. Valve:61 4.5.2- Adjusting the net brake, 61 Plastic film, brake 62 Plastic film, speed 63 Net/film brake, disengage Valve:62 Valve:63 44 4.5.3- Plastic film, wrapper table The wrapper unit is equipped with safety guards, interrupting the wrapping cycle if the switches (on top) is activated. If the safety switch is activated, a message appear in the control box’s display. To continue, the error message in control box must be acknowledged and checked out. Remove the object causing the stop. Move the safety guard back in position. The machine must be restarted by a command in control box to continue the interrupted process. 4.5.4- Wrapper, adjusting the knives Speed regulation Use valve 53 (right) og 54 (left) to set the speed. A height adjustment is normally not necessary . Valve:54 Valve:53 Height setting: The film must enter the knife at mid section if possible, when being cut. Valve:52 Knife arm, rollers. Knife arm, in upright position: Both rollers should easily be rolled. Roller, locked Knife-arm, cutting position: The outer roller on each arm should not be able to roll/move. This to hold the film while being cut. Roller, movable Check that the knife is aligned between the two rollers. Adjust the knife if necessary. 45 4.5.5- Loading/installing a new plastic film roller Locking lever Pre-stretch bow Plastic film holder and pre-stretcher Loading a new plastic roller 1. 2. 3. 4. 5. 6. Grab the bow on the pre-stretch unit, and pull to the right. Lift the locking lever and push the bracket upwards, the lock the lever temporary. Replace the empty roller with a new one. Centre the roller on the holders and lover the bracket to secure it. Lock the lever. The plastic film must be thread as shown in figure 2, then grab the bow and lay the pre -stretch unit on to the new film roller. Bind the two plastic film ends together, (from each side) and continue wrapping. Figure 2 Plastic film in pre –stretcher 46 4.6 AUTOMATIC OPERATION IMPORTANT: Ensure the four main hydraulic valves are opened. If somehow you forget to open this valves, there is a great probability of severe damage is harmed to hydraulic motors. See chapter 4.9.1 By pressing the start button in control box, this will happen: The hydraulic motor for chamber belt rotation is starting, the elevator and belt under motor is starting. Material is being fed into the chamber, controlled by a sensor in elevator. When the pre-set value of chamber full level is reached, the elevator speed is reduced to reduce the feeding amount into chamber. The bale is now being pressed until a pre-set value chamber pressure is achieved. The net knife is opening and the net motor is starting feeding net/film into the chamber. A pre-set numbers of layers of film/net is added to the bale, and the film/net is then being cut by the knife. The chamber tailgate opens and the bale is being transported on to the wrapper table. A wrapper sensor is activated and the wrapper table moves to horizontal position, another sensor is then being activated and close the tailgate. A new bale is then being processed. At the same time the wrapper cycle start. Wrapper arms speed is reduced the first turn, until the knife arms release the film. The wrapper arm speed is then increased to “fast” until a pre set number of layers is added to the bale. The number of layers being added to the bale on wrapper table, are depending on which material is being pressed, if the bale is to be stored or transported. Read the user manual from film roller supplier. 47 4.7 PLASTIC FILM - STORAGE MAGAZINE A storage magazine with a capacity of 11 rollers, is mounted on both sides of the compactor. 4.8 OPERATIONAL HANDLES - HYDRAULIC VALVES The compactor is equipped with to set of operating handles on the right side. These handles is used for levelling the machine, moving the drag in or out and for lowering or rising of the feeder table. (transport mode) 4 1 2 5 6 3 Operating handles, rear. Operating handles, front. 4. Jack stand, left rear 5. Jack stand, right rear 6. Feeder table, up/down 1. Jack stand, left front 2. Jack stand, right front 3. Drag, in/out 48 4.9 HYDRAULIC SETTINGS WARNING The machine's hydraulic system is under constant pressure. Check hoses and fittings for any damage. Replace damaged parts immediately. When adjusting the machine's hydraulic valves, it is forbidden to reside in moving range of the wrapper arms. Be careful when adjusting the valves, because the speed of functions can change rapidly. Familiarize with all functions of the machine. Basic settings of the machine is been made during test run at the factory. Before making any changes and surveys on the machine, the hydraulic oil must have reached its normal operating temperature. If the oil is too cold: The pressure switches, might be activated and give faster response than desired. See Chapter 6 specifications, which types of oil that are recommended. In description of how to adjust the valves in chapter 4.9.2, the valves is refer to as numbers. See the overview in chapter 4.9.1. 4.9.1 HYDRAULIC VALVES, OPERATION AND OVERVIEW Numbering of hydraulic valves and operational handles Valve:50 Valve:51 Valve:54 Valve:53 Valve:52 49 4.9.1 HYDRAULIC VALVES, OPERATION AND OVERVIEW Valve:55 Valve:56 Valve:57 Valve:58 Valve:59 Valve:61 Valve:62 Valve:63 50 Valve:60 4.9.1 HYDRAULIC VALVES, OPERATION AND OVERVIEW Valve:66 Valve:64 Valve:65 Valve:67 Valve:69 Valve:70 Valve:68 Valve number: Localization: 50 51 52 53 54 55 56 57 58 59 60 61 62 63 64 65 66 67 68 69 70 In steel cabinet In steel cabinet Outside steel cabinet, front Outside steel cabinet, front Outside steel cabinet, front In steel cabinet Manifold block, outside cabinet, rear Manifold block, outside cabinet, rear Manifold block, outside cabinet, rear Manifold block, outside cabinet, rear Manifold block, outside cabinet, rear Top, on HiT unit Top, on HiT unit Top, on HiT unit Under frame, right side Under frame, right side Under frame, right side Cylinder, right side Cylinder, left side In steel cabinet, on valve block Under frame, near wheel right side. Main distributor valve Wrapper arm, fast speed Wrapper table, tilting speed Wrapper film knife, right side, speed Wrapper film knife, left side speed Chamber tailgate, opening speed Feeder table, speed Belt under, fast speed Belt under, slow speed Elevator, slow speed Elevator, fast speed Net brake Net feeder, speed Net brake, deactivation Main valve Main valve Main valve Feeder table, transport safety valve Feeder table, transport safety valve Wrapper arm, slow speed Main valve 51 IMPORTANT General rule all hydraulic adjustments: Always start adjustment by closing the valve. Open gradually until wanted speed is achieved. The oil must also have correct operational temperature. BASIC: By turning the valve clockwise, the flow is reduced and therefore the speed. The opposite occurs when turning the valve counter clockwise. The exception is; Feeder table speed, (valve 56). By turning this valve clockwise, the speed will increase. 4.9.2 Wrapper, adjustments Wrapper arm, fast speed adjustment Valve 50 is controlling the total flow to the wrapper. If the valve is turned clockwise, the total oil volume will decrease and all the movements in wrapper unit will be slower. Valve 51 is controlling the amount of oil to the wrapper arm. If the valve is turned clockwise the arm speed is reduced. Wrapper arm, maximum allowable rotation speed is 25 RPM HOW TO ADJUST WRAPPER: Close the valve nr.50, then open 3/4 turn (basic setting). Close valve nr. 51 completely, then open gradually until correct speed on the arm is achieved. Maximum 25 RPM. Adjust the speed on the belt with valve 50, to correspond, the rotation of arm and overlap of film layers. Wrapper arm , slow speed adjustment After the fast speed is correctly adjusted, the slow speed must be set. By turning valve nr. 69 adjust and set the slow speed to maximum 10 RPM. NOTE: The slow speed must be correctly adjusted to ensure the film cutter is working properly. The speed will increase when the oil is warm. Observe the wrapper arm carefully and adjust the slow speed once again if necessary. Knife arm, setting The rise and lowering speed of the arms must be correctly set. If the speed is too high, the film is torn instead of a controlled cut. The speed of knife arms is adjusted by turning valve nr. 53 (right arm), and valve nr. 54 (left arm) The speed is reduced by turning clockwise. NOTE: Both sides need to be adjusted equally, the arms should have a smooth motion, and not slammer. Basic setting: Close the valve, then open 1/2 turn. Wrapper table tilt speed By adjusting the wrapper tilt -speed, we can change the bale drop speed. By turning valve nr. 52 clock wise, the drop speed will increase. To avoid the risk of uncontrolled unloading of bale, the drop speed shouldn't be set to fast. Basic setting: Close valve, then open 3/4 turn.. 52 4.9.3- Chamber speed adjustment Chamber tailgate, opening speed. By adjusting valve nr. 55, the speed could be changed. The speed is to be set as fast as possible, without slamming the tailgate. Basic setting Valve 55: Close the valve, then 1/2 turn, counter clockwise. 4.9.4– Conveyor belts, speed adjustments Feeder table , chain belt By adjusting valve nr. 56, the belt speed on the feeder table is set. Note: By turning the valve clock wise the speed is increasing. Opposite of the rest!! Basic setting: Valve 56: Close by turning it counter clockwise. Then turn 1/8 - 1/4 clock wise. Belt under, chain belt Belt under speed is set by adjusting the valve nr. 57 (fast) and nr. 58 (slow). Basic setting: Valve 57. Close the valve, then 2. turns counter clockwise. Valve 58. Open the valve, then 1. turn clockwise. Elevator, belt The conveyor belt speed, in the elevator is adjusted by turning on valve nr. 59 (fast) and nr. 60 (slow) Basic setting: Valve 59. Close the valve by turning it clock wise., then 1. turn counter clock wise. Valve 60. Close the valve by turning it clock wise., then 1. turn counter clock wise. 4.9.5- Plastic film or net brake. Tension and feeder speed. Plastic film, net brake There must be some pre tension added to the film before it’s added on to the bale. Adjust the brake by turning valve nr. 61. By turning the knob clock wise, the tension is increased. Basic setting: Increase the pressure, while reading the manometer. When the film is torn, reduce the pressure by 10%. NOTE: If the oil is cold, the pressure might be higher than the adjustment was made. The film might be torn. Adjust the net brake when oil is cold if the problem occurs. Plastic film or net feeder, speed. Adjust the feeder speed by turning valve nr. 62. the speed is reduced when turning the valve clock wise. Basic setting: Valve 62. Close the valve by turning it clock wise., then 3/4 turn counter clock wise. Plastic film or net, brake release. By closing valve nr. 63, the net brake can be disengaged. This operation is performed when loading a new film og net roller in HiT unit. Basic setting: Valve 63. Closed. 4.9.6- Main valves The machine is equipped with four main valves. Valve number: 64, 65, 66 and 70. These valves must be closed only when repair work is done on the system or if any leakages has occurred. Keep the valves always open. Major harm on hydraulic motors can happen if the valves remain closed during start up. 53 4.9.7- Chamber pressure, settings Setting of the chamber pressure value is done in the control box. During start -up the elevator belt runs at fast speed. When chamber full level (pre set value) is achieved, the speed on elevator is reduced to obtain a higher density on the bale. When the value of chamber pressure is reached, the bale is ready for film or net binding. Parameters to be set in control box is: Fully pressed bale: Start slow speed, elevator belt: Example: Material: Chamber pressure: Chamber full -level: 100 - 240bar 0 - 100% by pre set pressure Wood chips 200bar 80% When the sensor register a chamber pressure of 160bar (80% of 200bar), the elevator belt speed is reduced to “slow speed”. The belt speed will remain slow until chamber pressure reaches 200 bar. IMPORTANT: THE CHAMBER PRESSURE MUST NEVER EXCEED 240 BAR. Chamber sensor, oil-pressure, right side cabinet 54 CHAPTER 5 - REPAIR AND MAINTENANCE 5.1 Operator Maintenance, Control and adjustments 5.1.1 5.1.2 5.1.3 5.1.4 5.1.5 -1 -2 -3 -4 -5 5.1.6 5.1.7 5.1.8 5.1.9 5.1.10 5.2 Lubrication 5.2.1 5.2.2 5.2.3 5.2.4 5.2.5 5.3 Electric system Wheels Chains Wrapper Chamber Chamber-belt front, adjustment Chamber-belt rear, adjustment Chamber-belt, tension Installing, replacing a new chamber-belt Slide bearing, rollers Hydraulic system Hopper - Elevator - Belt under Belt, wrapper table Frame - Main bolts Wide film - Net tying Lubrication system Refill Troubleshooting Lubrication scheme Approved/Recommended types of Grease and Oil Cleaning and storage 5.3.1 High-pressure washer 5.3.2 Storage 5.4 Electric - wiring diagram 5.4.1 Fuses 5.4.2 Wiring diagram 5.4.3 Sensors, overview 5.5 Hydraulic scheme 5.6 Welding and grinding 5.6.1 Precautions before welding 5.7 Service history 5.7.1 Scheme - Service and maintenance 55 5.1 OPERATOR MAINTENANCE, Control and adjustments WARNING All control of functions must be carried out with extreme caution if the machine is running. If controlling wear and tear, the machine must be shut down and PTO axle disconnected. IMPORTANT: Control, simple repair and adjustments mentioned in this book might be carried out by trained operators which have completed a maintenance course. All other major repairs should be performed by qualified mechanics. Note: The machine must be cleaned properly before start doing any maintenance work. This will make control and maintaining the machine easier and no dirt contamination the components if they’re dismantled. 5.1.1- Electrical system Visual control of cable linings. See to that they’re not damaged or running over sharp machine edges. Check the electrical cabinet casing. No damage is made to the cabinet housing and rubber gasket is ok. Se chapter 5.8.2 Electrical scheme for further details. Check that all electrical contacts is in good condition, and correctly mounted. Check the driving lights and other lightening equipment are in working order. Check that all the emergency switches is OK and working properly. Fuses There are three fuses in the machine’s electrical system . Master fuse, directly on power-supply cable. 40 A Fuse for lights, in cabinet. Fuse holder in rubber 15 A Fuse box, in front of cabinet. Content see chapter: 5.8 Light switch cabinet Master fuse, 40 A Fuse box Fuse for lights, 15 A 56 Electrical cabinet 5.1.2- Wheels Check the condition of the tyres, they should have sufficient tread depth and be without tears. Control the tyre inflation and wheel nut torque before transport to a new location. See specifications chapter: 6.5 and 6.6 5.1.3- Kjeder The chain -tension must be controlled and that the chains are supplied with sufficient lubricant oil. Look for abnormal wear and tear on gears and chains. Replace worn parts as needed. Contact your local supplier or Orkel Compaction AS directly if you have any doubts about parts must be replaced. Control: Chain tensioner A: Basic setting: Tighten the bolt until there is a 3mm clearance on chain. See picture to the right. 3mm Adjust: Untighten the bolts holding the bracket. Adjust the chain tension by turning the nut on the bolt. Tighten the bolts holding the bracket when the chain -tension is OK. Chain tensioner A Control: Chain tensioner B og C: The length of the spring should be between 130 - 140mm. Adjust: Increase the chain tension by tighten the nut on the bolt. (Picture to the right) Chain tensioner B Chain tensioner C 5.1.4- Wrapper Check out all the emergency switches is in perfect working order. Check the knife’s condition and its alignment with the rollers. 57 5.1.5- Press Chamber DANGER All repair and maintenance work inside the chamber are attended with great danger. Remember to secure the tailgate lifting cylinders, by closing the securing valves on both sides. The machine must be stopped and PTO disconnected. Securing valve, tailgate lifting cylinders Chamber - rollers - bearings - belts The pressing chamber must be checked frequently. Before performing a control, the chamber must be properly cleaned , preferable using a high pressure washer. Check the tracking of the chamber belt’s and adjust if needed. Look for wear on chamber’s sidewall and check the conditioning of the rollers and rubber belts. The grade of wear and tear is varying, depending on which material being pressed. Replace damaged rollers and belts if excessive worn. If there’s great wear on the chamber sidewalls, if might be considered to weld on wear plate’s. contact Orkel Compaction Ltd if relevant. 5.1.5.1 Adjusting the front chamber belt: Pic. 1 All adjustment of the belt’s tracking is done on the right side of the chamber, the upper front roller. See picture 2. The belt tracking should be correct, and not touching the chamber side walls. If the belt is tracking towards B in picture 1, the distance C in picture 2 must be increased. A B If the belt is tracking against A in picture 1, the distance C in picture 2 must be reduced. Pic. 22 Bilde Attaching bolts Untighten the attaching bolts just a bit, to allow a movement of the bracket. Loosen the counter nut and adjust the distance C by turning on the adjusting nut. Tighten the counter nut and the attaching bolts of the bracket when the belt has a correct tracking. Adjusting nut 58 C 5.1.5.2 Adjusting the rear chamber belt: The adjustment’s of the rear chamber belt is done preferably from the right side of the machine. Dismount the cover and safety net (picture 1) to get access to the adjusting bracket’s and bolts seen in picture 4. Cover The rear chamber belt might be adjusted on two locations. Either changing the bearing point of the tension roller in picture 3, or the bearing point of the chamber roller, shown in picture 1 on next side. Or a combination of these two adjustments. Safety net Pic. 1 Rear tension roller (Picture 2) Adjusting the belt tracking is done by changing the distance C on the rollers bearing point D in picture 3 B By increasing the distance C, the belt tracking will enter towards B in picture 2. When decreasing the distance C, the belt tracking will enter towards A. A If the tracking of the belt is still entering one of the sides, the similar operation must be carried out on the left side bearings, but the opposite way. If reducing the distance C , the belt tracking will enter towards B. Pic. 2 Pic. 4 D C Pic. 3 Bearing point (D), tension roller Adjusting brackets, rear chamber belt 59 5.1.5.2 Adjusting the rear chamber belt: Adjusting the chamber roller, C (Picture 1) Adjusting the belt tracking is performed by changing the distance D on the roller C. Preferably on the right side bracket. Pic. 1 By increasing the distance D, the belt will enter towards A (picture 2) in the chamber. If decreasing the distance the belt will enter towards B (picture 2) in chamber. D C Adjusting bracket, top roller If the tracking of the belt is still entering one of the sides, the similar operation must be carried out on the left side, but in reverse order. If increasing the distance D (picture 1), the belt tracking will enter towards B in picture 2. Bilde 2 B A 60 5.1.5.3 Adjusting the belt tensioning: The tension of the belts is under the influence by the force from the twin springs on the both sides. See picture 1 A= 2mm Basic setting: Turn the nut B, (picture 2) until there’s a clearance A of 2 mm between the coils. See picture 1. NOTE: When pressing very light and dry materials, such as hay and wooden chip, the bale might have some problems start rotating. If such problem occurs, the clearance must be reduced. A = 0 - 1mm. Pic. 1 Belt tensioner, front. Right side. A B Pic. 2 Belt tensioner, rear. Left side. 5.1.5.4 Changing the chamber belts: Clean the chamber as described in chapter 5.1.5. Remember to secure the tailgate lifting cylinders before entering the chamber. Pic. 3 Remove the damaged belt using a knife and cut the belt crosswise. Fit the new belt into place and push the locking rod in, to complete the belt. Secure the locking rod by mounting the two washers on each side. See picture 3. Check the tracking of the belt in chamber and adjust if necessary as described earlier in this chapter. Locking washer 61 5.1.5.5 Slide bearing, rollers IMPORTANT: The slide bearings must be controlled every 5000 bales produced, or when 1000 hours of operation is reached. Whatever comes first. Note: The machine is equipped with slide bearings of different length or diameter. Make sure you have received the right type before dismounting start. IMPORTANT: The distributed load to the bearings will not be even, and therefore the wear is not evenly distributed on the bearing. Clean the bearing carefully to get the right impression of the rate of wear, before inspection. Control: A quick control of the degree of wear (clearance) might be done with a bar and a dial gauge. If no excessive wear is found, there’s no need to further dismantling of the bearings. The load of force onto the bearings is illustrated with arrows in picture to the right. Permissible wear: Load of force - slide bearings. Small Type 40: New bearing: 40 mm inside diameter, 44mm outside diameter Defect bearing: ≥ 42,2 mm inside diameter. Measure the diameter several places to get the correct impression of the bearing ovality. Large type 50: New bearing: 50 mm inside diameter, 55 mm outside diameter Defect bearing: ≥ 52,7 mm inside diameter. Measure the diameter several places to get the correct impression of the bearing ovality. The material thickness in bearings should under no circumstances be ≤ 0,2 mm. If so, the bearing is defect and must be replaced immediately. This to avoid serious damage harmed to the rollers axle’s, and subsequent mechanical break-down. NOTE: Good practice is to change the bearings before reaching the maximum degree of wear and tear. Example in picture 1. New bearing (left) and worn out defect bearing 62 Picture 1, Slide bearing 5.1.6- Hydraulic system Hydraulic oil The oil level is monitored by the control box. A alarm stating “oil level - low” is displayed in the control box. Check oil level frequently, by looking into the level glass on the oil reservoir tank. Top up if necessary. Check the oil - condition minimum once a year. Change oil minimum every third year. See specifications in chapter 5.2.6. Oil - filter: 3 pcs, must be changed minimum once every year. Hydraulic hoses and connections Check the hydraulic system for any leakages, and no hoses is rubbing against sharp edges on the machine. NOTE: The hydraulic hoses has limited time of operation. We recommend to change the hydraulic hoses each 6. year. Hydraulic pump, gearboks Check the input shaft, it’s splines and bearings. Check the bolts holding the gearbox, and retighten if necessary. Check the oil level in gearbox, by unscrewing the dipstick. Dip stick, max. and min. level Level should be between max and min. Top up if necessary. The gear oil must be changed minimum once a year, or when needed. See approved lubricants in chapter 5.2.6 Dip stick Magnet plug Drain plug Gearboks and hydraulic pump note: When changing gear oil, the magnet plug must also be cleaned. Inspect the amount of metal shavings on the plug. If there’s a lot of shavings present, it’s indicating excessive wear in the gear box. 63 5.1.7- Feeder table - Elevator - Belt Under Conveyor belts and feeder dog Feeder table belt, belt under and elevator belt. These belts is of chain type with welded dogs. Check the belt tensioning and look for uneven wear from oblique angel on belts. Adjusting the chain belts: Same procedure on all the three belts. Tighten the belt tensioner, until all clearance is gone. Tighten equally on both sides, and check that the tracking of the belt is centred.. If the wear in the segments is too large to tighten the belt properly, one segment can be removed. Procedure: Chain tensioner, feeder table Attaching bolt x4 Loosen the four bolts holding the bracket. Untighten the counter nut and tighten the Chain bolt on the chain tensioner until correct Tensioner –bolt belt -tension is achieved. Adjust both sides equal. Tighten the counter nut and the attaching bolts on bracket. Attaching bolt x4 Chain Tensioner-bolt Chain tensioner, belt under Chain tensioner, elevator Roller - Bearings The rollers in feeder table, elevator and belt under should be without deformations and cracks. Check the bearing clearances without belt tension. Replace worn ball -bearings and rollers. 64 5.1.8- Belt, wrapper table: Figure 1 The length of the wrapper table’s belt must be adjusted as shown in figure 1. Correct length of wrapper table belt Adjusting the wrapper tables belt. The belt tension can be changed by relocating the roller. There are five alternative holes to mount the roller support. 1 2 Loosen the upper bolt to allow some movement on the bearing housing. Dismount the lower bolt and pull the roller backwards, replace the bolt in a suitable hole. Both sides must be equal mounted. 1 2 3 Pic 1 If the belt tracking is incorrect, try to change location (side) of the belts. 5.1.9- Frame - Main components, fastening points Frame Check the welding for cracks or deformations. Main components, fastening points Check all major bolt connections and retighten if necessary. Pay extra attention to the bolts fixing the drag bar and loop. (574 Nm) Fixing bolts, drag bar and loop IMPORTANT: THE FRAME IS PARTLY HOLLOW AND ARE CONTAINING HYDRAULIC OIL. THE FRAME HAS A FUNCTION AS OIL RESERVOIR AND COOLER. All welding and drilling and other work being done to the frame, must be carried out with great caution. Please consult your local dealer or Orkel Compaction Ltd. 65 5.1.10– Wide film - Net binding The Hit - unit, containing wide film or net is located on top of the chamber. (HiT - High Tension) Control: 1. Clean and lubricate the slides for feeder rollers. 2. Check chain tension and its condition. Adjust the tension by loosen the bolt and turn the nylon eccentric to add more tension to the chain. Then retighten the bolt. 3. Check all movable parts and bearings in the HiT -unit. 4. Check the condition of hydraulic hoses and couplings. Exam the unit for any leakages 5. Control the free wheel’s function (feeder rollers). Free wheel Feeder rollers Feeder, motor 66 5.2 LUBRICATION 5.2.1- Lubrication system, Beka Max EP 1 The compactor is equipped with a fully automatic lubrication system. It lubricates the sleeve bearings (grease) and the chains (oil). Oil lubrication, mode of operation: A single piston pump driven by the hydraulic pressure, supply oil to the chains through brushes which is mounted on strategic locations. Each time the chamber tailgate opens, the piston is activated and supply a fix amount of oil to chains. Grease lubrication, mode of operation: An electrical motor (continuous drive) runs an eccentric. The eccentric drive two single working pistons which press a fix amount of grease through a pressure relief valve, and further on to a main distributor. The main distributor supply then grease to sub-distributors, which deliver the correct amount of grease to each bearing. NOTE: Not the same amount of grease to all bearings! Pump element, pressure phase Pump element, suction phase The grease lubrication system is a progressive system. It operate all types of grease of NLGI kl. 2 type. See recommended lubricants in chapter 5.2.6. A progressive lubrication system, means that all the bearings is lubricated one by one. This progressive system make the lubrication system easily monitored trough a high pressure relief valve. (nr.9, figure 1) If a lubrication line to a bearing is clogged, the pressure will increase (280 bar) and visible grease appears on the relief valve. Please check the pressure relief valve on a regular base. If visual grease is present, a line or a distributor is clogged. An another malfunction could be that a line is broken, but then there’s no visual grease on the relief valve. Beka Max grease lubrication system 1. Reservoir, transparent 2. Stirrer scrape 3. Suction area, pump 4. Screen 5. Eccentric cam 6. Pressure ring 7. Delivery piston 8. Non return valve 9. Pressure relief valve 10. Motor (12V DC) 11. Refill nipple, male sleeve Figure 1 67 NOTE: The slide bearings on chamber rollers is under huge stress and force during operation. It’s of great importance that the lubrication system is in good working order. IMPORTANT: Don’t ever operate the compactor without a proper functioning lubrication system. 5.2.2 Refilling of lubricants. Make sure the level of lubricants is always between max and minimum in the reservoirs. (Oil and Grease) Check the level on a daily regular base, before start –up. Refilling the grease reservoir: The grease lubrication system is sensitive to the influence of external contamination, such as dust and dirt. Keep the cap on and refill through the male sleeve nipple (nr.11 figure 1) when refilling grease. NOTE: Keep the reservoir, male sleeve nipple and pump always clean. NOTE: We recommend to purchase grease in larger containers. Pails of 20 litres/16kg’s in combination with air or electrical operated tools for refilling. Standard grease gun with 0,5 litres cartridges might also be used. A grease gun for cartridges, with special nipple might be ordered as a option. Part number: 58086 Adjusting the amount of grease: The grease lubrication system is set to a maximum delivery of 29cm³. However one of the pumps is adjustable. (PE120V) PE 120 V Remove plug (2) to get access to adjusting screw (3). By turning the screw clockwise, the amount is reduced. 1/2 turn on the adjusting screw reduces the grease added by 0,013cm³. Please conference Orkel Compaction if this is relevant. 3 Bleeding the grease system: If the level in reservoir is too low, it might be needed to bleed the system after refilling. 1. 2. 3. 4. Disconnect the plastic pipeline, mounted under the pressure relief valve on the pump. Activate the function greaser in the control box, until a constant smooth flow from the outlet. Reconnect the plastic pipeline in it’s original position. Activate the function greaser in control box once more. (The pump will run as long as the button in control box is pressed) Maintenance and control: All the parts of the BEKA - max system is maintenance-free. We although recommend a external cleaning of the pump and lines from time to time with a high pressure washer. Don’t wash directly on to electrical contacts. NOTE: New machine: In the first weeks of operation, the system must be checked frequently. Check that there’s a visual grease collar on all lubrication points. This indicates all the bearings is lubricated. Keep also track on grease consumption. Beware if any changes in daily consumption of grease, this might indicate that’s something‘s wrong. Lubrication. Manual greaser points The compactor has a number of greasing points, that need to be lubricated manually. These points has to be greased minimum every 20th. hour of operation. See overview in chapter 5.4.4 68 Long time storage: If you’re using grease of NLGI class 2 with EP additives (extra pressure) there’s no need for special precautions to be made regarding long time or winter storage. Perform a complete lubrication service on the machine before storage. If you’re using a grease type according to lubrication standards, but not having the anti corrosion effect, the system must be filled up with anti corrosive oil. Regular motor oil would be sufficient. Oil filling in the grease lubrication system (preservation). This operation is easily done with a empty grease gun filled up with motor oil. Remove the piston and the coil spring in the gun. Insert a empty grease cartridge and fill the grease gun while holding it vertically. Attach the gun at the inlet on the main distributor and empty the gun into the system. (1/2 litre) 5.2.3 Trouble shooting - Grease lubrication system Problem Pump does not work Cause Fuse defect Cable from control unit to pump broken Problem with pump motor Remedy Replace fuse Replace electric cable Replace pump motor NOTE: Correct motor mounting Pump is working but does not sup- Air pocket in pump ply grease Level in reservoir is too low Pump element not building up pressure (no air pocket) Bleed the pump Refill the reservoir Replace the pump element No grease collar at all points of lubrication Refer to pump not working above. Pump does not work Clogging somewhere in the system See if grease is present on pressure relief valve No grease collar on several bearings A primary hose between main distributor and sub distributor is broken Leakage in fittings Replace hoses No grease collar on one bearing The hose serving the bearing is defect. Leakage in the fitting Replace hose High pressure in system Conduct a complete system check Rum greaser manually 1 or 2 times to lubricate the system. Then start up once more Reduced pump speed Low ambient temperature Grease on pressure relief valve System pressure too high Main distributor clogged System clogged Valve, relief spring defect 69 Retighten fittings or replace Retighten fittings or replace Check the system Replace the distributor Repair clogged bearing (housing) Replace valve 5.2.4- Manual lubrication points The machine has multiple lubrication points. The lubrication interval for each point is listed in line table: Lubrication chart, chapter 5.2.4.1. See specifications for recommended lubricants. Feeder table Drive rollers support 2 pcs on each side Grease nipple No: 1,2,3 and 4 Feeder table, front Stickers on machine showing the lubrication points. Feeder table Rear roller support 1 pcs on each side Grease nipple No: 5 and 6 Base plate, feeder table 1 pcs on each side Grease nipple No: 7 and 8 Feeder table, rear Cylinder feeder table 2 pcs on each side Grease nipple No: 9,10,11, and 12 Cylinder, feeder table 70 Elevator Lower roller, support 1 pcs on each side Grease nipple No: 13 and 14 Elevator, lower Elevator Driving roller, support (upper) 1 pcs on each side Grease nipple No: 15 and 16 Elevator, upper Belt tensioner, rear 3 pcs on each side. Grease nipple No: 17,18,19,20,21 and 22 Belt tensioner, rear 71 Chamber, front and rollers 4 pcs on each side Grease nipple No: 23,24,25,26,27,28,29 and 30 Chamber front and rollers Chamber tailgate lifting cylinders 2 pcs on each side Grease nipple No: 31,32,33 and 34 Chamber tailgate lifting cylinder Belt under, rear support 1 pcs on each side. Grease nipple No: 35 and 36 Belt under, rear support 72 Belt under, driving roller support 1 pcs on each side Grease nipple No: 37 and 38 Belt under, driving roller support Driving roller, wrapper table 2 pcs on each side Grease nipple No: 39,40,41 and 42 Wrapper table, driving roller support Front support roller, wrapper table 1 pcs on each side Grease nipple No: 43 and 44 Front support roller, wrapper table 73 Knife arms, wrapper 6 pcs on each side Grease nipple No: 45,46,47,48,49,50,51,52,53,54,55,56 and 57 Knife arms Cylinder, wrapper table 2 pcs on each side Grease nipple No: 58,59,60 and 61 Cylinder, wrapper table Emergency stop arm, wrapper 1 pcs on each side. Grease nipple No: 62 and 63 Emergency stop arm, wrapper 74 Drag bar and loop 1 pcs on each side of the drag bar and 1 pcs on the loop Grease nipple No: 64,65 and 66 Drag bar and loop Hand brake 1 pcs Grease nipple No: 67 Hand brake Brake shaft, support 3 pcs on each side. Grease nipple No: 68,69,70,71,72 and 73 Brake shaft, support 75 5.2.4.1 Lubrication scheme Grease lubrication: Use only grease of NLGI 2 class with extra protection (EP) additives. Recommended type: Shell GADUS S3 V220C 2, Statoil Greaseway CAH 92 or similar Amount: Approximately number of strokes, grease gun. (until grease become visible) Grease nipple number: Lubrication point: Amount: Hours of operation: Remark: 1,2,3,4 Feeder table 4 50 Driving roller 5,6 Feeder table 4 50 Support roller 7,8 Base plate 2 250 9,10,11,12 Feeder table cylinder 2 50 13,14 Elevator 6 50 Support roller 15,16 Elevator 6 50 Driving roller 17,18,19,20,21,22 Belt tensioner, chamber 2 50 Rear belt 23,24,25,26,27,28,29,30 Belt tensioner, chamber 2 50 Front belt 31,32,33,34 Chamber cylinder 2 50 35,36 Belt under 6 50 Bearing point 37,38 Driving roller, belt under 6 50 Bearing point 39,40,41,42 Driving roller, wrapper table 4 50 Bearing point 43,44 Front roller, wrapper table 2 50 Behind belt edge 45,46,47,48,49,50,51,52,5 3,54,56,57 Knife arm 3 50 Two pcs under bracket 58,59,60,61 Cylinder, wrapper table 2 50 62,63 Emergency stop, wrapper 2 250 Safeguard bow 64,65 Drag 6 x Check before transport 66 Drag loop 2 X Check before transport 67 Hand brake 2 X Check before transport 68,69,70,71,72,73 Brake shaft, support’s 2 x Check before transport IMPORTANT: Always complete a total lubrication service of the machine, after being cleaned with a high pressure washer! 76 5.2.5 Operating Temperature ISO-VG system (International Standardization Organization - Viscosity Grade ) The ISO standard 3448 divide industrial oils in to several ISO-VG classifications. The standard tells which viscosity the oil are suppose to have at 40°C. The lower the ISO -grade is, the thinner the oil gets. NOTE: This machine is designed to operate in temperatures between - 15°C up to + 50°C. 5.2.6 Approved lubrications Hydraulic system: Use hydraulic oil of ISO VG 32 classification when operating in temperatures between ÷15°C til 30°C Recommended type: Shell Tellus 32 Statoil HydraWay HVXA 32 UNO X Rando HD 32 As an alternative, use hydraulic oil of ISO VG 46 classification, if operating in higher ambient temperatures. Between ÷10°C til + 50°C Recommended type: Shell Tellus 46 Statoil HydraWay HVXA 46: UNO X Rando HD 46 Lubrication system: Oil lubricants: Use regular motor oil, SAE 10W - 30 /40 or SAE 15W - 40 to lubricate the chains Recommended type: Shell Helix HX5 Statoil ClassicWay Havoline Premium 15W - 40 Grease lubricants: Use grease of NLGI 2 class, with extra protection (EP) additives. Recommended type: Shell GADUS S3 V220C 2 Statoil Greaseway CAH 92 UNO X Multifak EP 2 Gear box on hydraulic pump, and gear on hydraulic motors Recommended type: Use gear oil, Shell Omala S2 G 220 77 5.3 CLEANING AND STORAGE 5.3.1- High pressure washer. The machine can preferably be cleaned by using a high pressure washer. But don’t direct the jet beam directly on to ball bearings and electrical connections. 5.3.2- Storage. Before long time storage of the machine, a thorough cleaning and lubrication service must be carried out. This to avoid corrosion and remains from pressing material harden inside the pressing -chamber Always keep the control box in a dry, warm place. Paint damage or any abrasion should be touched up to avoid corrosion on frame and chamber. 78 5.4 ELECTRICAL SYSTEM 5.4.1- Fuses A master fuse (40 A) is located on the supply cable from the tractor/power pack. A fuse for lights (15 A) is located in a rubber fuse holder, inside the electrical cabinet. 9 Spare 1 2 3 4 5 6 7 8 10 10A 10A 5A Free 15A 15A 25A Free Spare 11 Spare Fuse box, front electrical cabinet Fuse holder, number: 1. Terminal A og B (printed circuit board) 2. Sensors 3. Lubrication system 4. Free 5. Hydraulic control V1 - V16 6. Hydraulic control V17 - V32 7. Fan, oil cooler 8. Free 9, 10 og 11. 10A 10A 5A 5A (Spare) 15A 15A 25A 10A, 15A og 20A (Spare) 79 5.4.2- Electrical scheme 80 5.4.3- Sensor’s overview 81 5.5 Hydraulic scheme 82 5.5 Hydraulic scheme MP 2000 B A 83 84 D G H I Hydraulic scheme MP 2000 F E D C B A Hydraulic scheme MP 2000 85 F E C G 180 bar H I Hydraulic scheme MP 2000 86 5.5 Hydraulic scheme, name and position Pos. no: Name: Pos. no: Name: 1 Triple pump 18 Hydraulic gear 3.1 : 1 4 Gate flange 90° 1/2” x 30 19 Hydraulic gear 8.4 : 1 5 Gate flange straight 3/4” x 40 20 Throttle valve 1/4” 7 Block 33.3 21 G. Rotor 8 Block 33.4 22 Hydraulic gear 16.4 : 1 9 High pressure relief valve. 1/2” 150 bar 23 G. Rotor 10 Flow Div. 24 G. Rotor 11 Block 33.2 25 Cylinder 50 x 30 x 600 12 G. Roller Br 26 Cylinder 32 x 20 x 150 13 Block 33.1 27 Cylinder 40 x 25 x 500 14 Manometer 0 - 100 bar R1/4” 28 Check valve 3/8” 15 High pressure relief valve. 1/2” 180 bar 29 Throttle valve 16 Solenoid valve 30 Check valve 60 l/h 0,35 bar 16A Coil 12V 32 Return filter 16B DIN Plug 12/24V 33 Pressure relief valve 50 l/min 70 bar 17 G. Rotor 34 Block 35 Check valve 3/8” 40 l/min 0,35 bar 87 5.6 WELDING - CUTTING - GRINDING 5.6.1- Precautions before welding Before any welding work could be done on the machine, the control box and cable must be disconnected. Attach the welders earth connection as near as possible to the place to be welded. Always look out for excessive heat generation, and cool down the area. 5.6.2- Precautions before cutting and grinding. The frame is partly a reservoir and cooler for hydraulic oil. Pay attention if any repair work is made or if any improvements is done to the frame. Please conference Orkel Compaction Ltd before cutting. NOTE: Apply touch up paint after any welding and grinding is done to the machine, to avoid corrosion. Always use personal protective gear, such as goggles, gloves and suitable clothing. Always keep a fire extinguisher nearby, when working with heat generating tools. 88 5.7 SERVICE HISTORY Put down all maintenance history in scheme below, to keep an overview of major repairs and service. Year/Date: Service or major repairs 13.4.1 Example Performed by: Orkel Compaction Ltd Stamp (company) and signature ( mechanic) 89 5.8 No: DAILY MAINTENANCE - CHECKLIST: Check points, before start: 1 Check, all four main valves is open. 2 Check oil level in container, chain lubrication system and level of grease in reservoir for the automatic grease lubrication system. 3 Check the pressure relief valve for any visual grease. If grease appear on the valve, it indicate a clogging in the system. Repair the fault before start. 4 Check the tension on chains and conveyor belts. 5 Look for any leakages in the hydraulic system. 6 Check the levelling of the compactor. 7 Check the oil temperature according to start - up procedure. Chapter 4.4.5 No: Check points, during operation: 1 Observe all machine movements and functions. 2 Check the chamber belts tracking. Adjust if necessary. 3 Check, the automatic greaser pump is running. Frequently 4 Keep an eye on chains if there’s oil present. Dry chains? Check the system. 5 Check the condition of chamber rollers for any build up materials. Be attentive to the rollers and belts. 6 Avoid overfilling of elevator and subsequent too much build up of material in space under the elevator. 90 CHAPTER 6 - SPESIFICATIONS 6.1 ELECTRICAL SYSTEM 6.2 PTO 6.3 LUBRICATION SYSTEM 6.4 HYDRAULIC SYSTEM 6.5 WHEELS AND TYRES 6.6 TYRE INFLATION 6.7 TIGHTENING TORQUE 6.8 CAPASITY 6.9 DIMENSIONS AND WEIGHTS 91 6.1 ELECTRICAL SYSTEM Voltage: Source connection: Fuse: Sensors: 6.2 PTO Type: Moment of force: 6.3 12 DC Minimum 10,6 Volt - Maximum 16,0 Volt Connect directly to battery on tractor. 40A on cable Type: Diameter 18mm Ultra sound and pressure Cat: 6 2300Nm BEKA - MAX LUBRICATION SYSTEM Grease system: Operational voltage: Maximum current draw: Current draw at max pressure: Current draw signal lamp: Fuse: RPM: Pump capacity each revolution: Pump capacity each minute: Maximum pressure: Operating temperature: Enclosure rating Grease type: Volume reservoir: 10 - 30 V 6,0 A 1,0 A 0,4 A 5,0 A 15 RPM Pump 1 (fixed amount) 0,17 cm³ Pump 2 (adjustable) 0,04 - 0,12cm ³ 4,3 cm³/ minute 280 bar ÷35°C til + 75°C IP 65 EP 2 NLGI-2 4,0 l Oil lubrication: Oil type: Oil consumption: Volume container: Motor oil SAE 10W - 30, 15W - 40 6ml each tailgate opening. 0.3 l/hour when pressing 50 bales/hour 4,2 l 6.4 HYDRAULIC SYSTEM Maximum working pressure: 6.5 240 bar WHEELS AND TYRES Tyre: Rim: 385/65 R 22,5 7,5 x 22,5 6.6 Wheel: TYRE INFLATION 5,5 bar / 550 kPa / 80 lb. /in² (psi) 92 6.7 TIGHTENING TORQUE Wheel nuts: Bolts drag and loop: Slide bearing housing: 6.8 350 Nm 385 Nm 47 Nm CAPASITY Number of bales produced/ hour: 20 - 60 6.9 DIMENSIONS AND WEIGHT Total weight: 7800 kg Height: 3760 mm (transport) 4200 mm (drift) Length : 8000 mm (transport) 10000 mm (drift) Width: 2500 Chamber size: 120x115 cm Bale volume: 1,25m³ Feeder table, volume: 7m³ Power requirement: 120hp / 90 kW 93 CHAPTER 7 - ADDITIONAL OPTIONS 7.1 OPTIONS 7.1.1 7.1.2 7.1.3 7.1.4 7.1.5 7.1.6 7.1.7 7.1.8 7.1.9 7.1.10 7.1.11 Feeder table LB, (Low built) Grease gun Air cleaning system Plain belt Protective axle covers, elevator - feeder table Safe guard, wrapper zone Power pack Internal hydraulics, (combination with power - pack) Safety valve, drag bar Additional cooling system 7.2. ADDITIONAL 7.2.1 Service manual 7.2.2 Spare parts, package 94 CHAPTER 8 - CONTACT INFORMATION 8.1 ORKEL AS - HEADQUARTERS Orkel AS Johan Gjønnes veg 25 N– 7320 FANNREM Telephone switch board: Telefax: + 47 7248 8000 Monday - Friday: 08:00 - 16:00 + 47 7248 8011 E-mail: [email protected] Home page: www.orkel.no 8.1.1- Sale Telephone: Telefax: + 47 7248 8054 Monday - Friday: 08:00 - 16:00 + 47 7248 8011 E-mail: [email protected] [email protected] Home page: www.orkel.no 8.1.2- Technical Service Telephone switch board: Technical support: + 47 7248 8000 Monday - Friday: 08:00 - 16:00 + 47 7248 8039 Monday - Friday: 08:00 - 16:00 + 47 7248 8062 Monday - Friday: 08:00 - 16:00 Telefax: + 47 7248 8011 E-mail: [email protected] [email protected] [email protected] Home page: www.orkel.no 95 CHAPTER 9 - NOTES 96