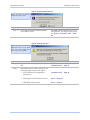
1
® Data Acquisition WTS 160xE Series RS-232/422/485 to IEEE 802.11b Wireless Converters WTS 1601E: Single Port WTS 1602E: Dual Port USER’S MANUAL VER. 1.54 • OCT 2006 No part of this manual may be reproduced without permission ® CyberResearch , Inc. www.cyberresearch.com 25 Business Park Dr., Branford, CT 06405 USA 203-483-8815 (9am to 5pm EST) FAX: 203-483-9024 WTS SDS User’s Manual Introduction Table of contents Table of contents------------------------------------------------------------------------------------------------------------------ i Figures ------------------------------------------------------------------------------------------------------------------------ ii Tables iii Introduction ----------------------------------------------------------------------------------------------------------------------- 1 Understanding how virtual communication ports work-------------------------------------------------------- 2 Understanding MAC and IP addresses and port numbers----------------------------------------------- 2 Identifying operating modes--------------------------------------------------------------------------------------- 3 System requirements ----------------------------------------------------------------------------------------------------- 4 Features ---------------------------------------------------------------------------------------------------------------------- 4 Protocol support------------------------------------------------------------------------------------------------------- 4 Wi-Fi implementation ----------------------------------------------------------------------------------------------- 5 TCP socket services – IntelliSock™ ----------------------------------------------------------------------------- 6 Getting started-------------------------------------------------------------------------------------------------------------- 6 Unpacking your SDS ------------------------------------------------------------------------------------------------ 6 Identifying parts ------------------------------------------------------------------------------------------------------ 8 Understanding LED codes ----------------------------------------------------------------------------------------- 9 Locating serial and network ports------------------------------------------------------------------------------10 Making connections------------------------------------------------------------------------------------------------------------13 Enabling Wi-Fi Device Servers---------------------------------------------------------------------------------------------14 Installing the device drivers ------------------------------------------------------------------------------------------------16 Win NT Device Manager------------------------------------------------------------------------------------------------28 Win NT – Changing port numbers -----------------------------------------------------------------------------28 Uninstalling your SDS --------------------------------------------------------------------------------------------------29 Uninstalling from Windows XP/2000 --------------------------------------------------------------------------29 Uninstalling from Windows NT4 -------------------------------------------------------------------------------29 Alternative installation steps -----------------------------------------------------------------------------------------30 Configuring the SDS using the Web interface -------------------------------------------------------------------------45 Setting network parameters -------------------------------------------------------------------------------------------47 Setting TCP/IP (LAN) and Wi-Fi (Wireless) parameters ------------------------------------------------47 Setting SNMP parameters----------------------------------------------------------------------------------------52 Viewing the serial port parameters----------------------------------------------------------------------------------55 Setting serial port parameters ----------------------------------------------------------------------------------------55 Setting Normal operating mode parameters ----------------------------------------------------------------55 Setting Tunneling operating mode parameters ------------------------------------------------------------58 Setting Raw TCP operating mode parameters--------------------------------------------------------------61 Setting Auto TCP operating mode parameters -------------------------------------------------------------64 Setting Raw UDP operating mode parameters -------------------------------------------------------------68 Running diagnostic tests------------------------------------------------------------------------------------------------73 Using the Port Status screen-------------------------------------------------------------------------------------73 Running the Ping test ----------------------------------------------------------------------------------------------73 Checking wireless status ------------------------------------------------------------------------------------------74 Performing administrative functions -------------------------------------------------------------------------------75 Managing users ------------------------------------------------------------------------------------------------------75 Giving the SDS a descriptive name ----------------------------------------------------------------------------77 Upgrading firmware ------------------------------------------------------------------------------------------------78 Contacting CyberResearch ---------------------------------------------------------------------------------------------79 October 2006 Page i Introduction WTS SDS User’s Manual Troubleshooting and Maintaining an SDS------------------------------------------------------------------------------80 Troubleshooting an SDS ------------------------------------------------------------------------------------------------80 Maintaining an SDS -----------------------------------------------------------------------------------------------------84 Operating conditions -----------------------------------------------------------------------------------------------84 Handling the SDS ---------------------------------------------------------------------------------------------------84 Moving the SDS ------------------------------------------------------------------------------------------------------84 Cleaning the SDS----------------------------------------------------------------------------------------------------84 Servicing the SDS ---------------------------------------------------------------------------------------------------84 Appendix A -----------------------------------------------------------------------------------------------------------------------85 Specifications---------------------------------------------------------------------------------------------------------------85 Figures Figure 1 – Connectors and Indicators ........................................................................................................ 8 Figure 2 - DB-9 pinouts............................................................................................................................. 10 Figure 3 - RJ-45 pinouts (DB-9 to RJ-45 adapter) .................................................................................. 11 Figure 4 - RJ-45 Ethernet port pinout ..................................................................................................... 12 Figure 5 - Connecting an SDS to a serial device ..................................................................................... 13 Figure 6 - Main Menu screen.................................................................................................................... 16 Figure 7 - Welcome screen ........................................................................................................................ 17 Figure 8 - Prepare to Install screen.......................................................................................................... 17 Figure 9 - Search network for Serial Device Server(s) screen ................................................................ 18 Figure 10 - Where is the Serial Device Server attached screen ............................................................. 19 Figure 11 - Network Connectivity Test screen ........................................................................................ 20 Figure 12 - Retrieving Unit Configuration pop-up box ........................................................................... 20 Figure 13 - TCP/IP Network Configuration Parameters screen ............................................................ 21 Figure 14 - Internet Protocol (TCP/IP) Properties dialog box ................................................................ 22 Figure 15 - Restart confirmation pop-up box........................................................................................... 23 Figure 16 - Information pop-up box.......................................................................................................... 23 Figure 17 - TCP/IP Network Configuration Parameters screen ............................................................ 24 Figure 18 - Rerun network connectivity test pop-up box ........................................................................ 24 Figure 19 - Network Connectivity Test screen ........................................................................................ 25 Figure 20 - Retrieving Unit Configuration pop-up box ........................................................................... 25 Figure 21 - TCP/IP Network Configuration Parameters screen ............................................................ 26 Figure 22 - Install the Device Drivers screen .......................................................................................... 26 Figure 23 - Installation Complete screen................................................................................................. 27 Figure 24 - Reconfigure the Serial Device Server screen........................................................................ 30 Figure 25 - Serial Device Server is Configured for a Remote Subnet .................................................... 31 Figure 26 - Internet Protocol (TCP/IP) Properties dialog box ................................................................ 32 Figure 27 - Restart confirmation pop-up box........................................................................................... 33 Figure 28 - Information pop-up box.......................................................................................................... 33 Figure 29 - TCP/IP Network Configuration Parameters screen ............................................................ 34 Figure 30 - Rerun network connectivity test pop-up box ........................................................................ 34 Figure 31 - DHCP confirmation pop-up box ............................................................................................ 35 Figure 32 - SDS Wizard Information DHCP screen................................................................................ 35 Figure 33 - Locate the Serial Device Server screen................................................................................. 36 Figure 34 - Locate the Serial Device Server using direct discovery screen ........................................... 37 Figure 35 - Locate the Serial Device Server on a remote subnet screen ............................................... 38 Figure 36 - Describe the Remote Subnet screen...................................................................................... 39 Figure 37 - Locate the Serial Device Server options screen ................................................................... 40 Figure 38 - Locate the Serial Device Server local discovery screen ......................................................... 41 Figure 39 - Select Desired Serial Device Server from list screen........................................................... 42 Page ii October 2006 WTS SDS User’s Manual Introduction Figure 40 - Specify IP Address screen...................................................................................................... 43 Figure 41 - Network Connectivity Test Failed screen............................................................................. 44 Figure 42 - Home page screen................................................................................................................... 46 Figure 43 - Network Setup screen ............................................................................................................ 48 Figure 44 - IP Address Successful screen ................................................................................................ 51 Figure 45 - Remote Reset screen .............................................................................................................. 51 Figure 46 - SDS is now resetting screen .................................................................................................. 51 Figure 47 - SNMP Setup screen ............................................................................................................... 52 Figure 48 - SNMP Address Update Successful screen............................................................................ 54 Figure 49 - Remote Reset screen .............................................................................................................. 54 Figure 50 - SDS is now resetting screen .................................................................................................. 54 Figure 51 - Serial Port Status screen ....................................................................................................... 55 Figure 52 - Serial Port Setup screen for Normal mode ........................................................................... 56 Figure 53 - Serial Port Setup screen for Tunneling mode ...................................................................... 59 Figure 54 - Serial Port Setup screen for Raw TCP mode........................................................................ 62 Figure 55 - Serial Port Setup screen for Auto TCP mode ....................................................................... 66 Figure 56 - Serial Port Setup screen for Raw UDP mode ....................................................................... 70 Figure 57 - Port Status screen .................................................................................................................. 73 Figure 58 - Ping Test screen ..................................................................................................................... 73 Figure 59 - Ping results screen ................................................................................................................. 74 Figure 60 – Wireless Status screen .......................................................................................................... 74 Figure 61 - Show Users screen ................................................................................................................. 75 Figure 62 - Add/Del Users screen ............................................................................................................. 76 Figure 63 - Network confirmation prompt............................................................................................... 76 Figure 64 - Add/Del Users screen ............................................................................................................. 77 Figure 65 - Show Users screen ................................................................................................................. 77 Figure 66 - Set Descriptive Name screen................................................................................................. 77 Figure 67 - Firmware Upgrade screen ..................................................................................................... 78 Figure 68 - Remote Reset .......................................................................................................................... 78 Figure 69 - Contact Us screen................................................................................................................... 79 Tables Table 1 - SDS LED codes............................................................................................................................. 9 Table 2 - RS-232 signals on DB-9 connector ............................................................................................ 10 Table 3 - RS-422/485 signals on DB-9 connector ..................................................................................... 10 Table 4 - RS-232 signals on RJ-45 connector (DB-9 to RJ-45 adapter).................................................. 11 Table 5 - RS-422/485 signals on RJ-45 connector (DB-9 to RJ-45 adapter)........................................... 11 Table 6 - RJ-45 Ethernet port signals ...................................................................................................... 12 Table 7 - Class A, B, and C address masks.............................................................................................. 49 Table 8 - Complete list of address masks................................................................................................. 49 October 2006 Page iii WTS SDS User’s Manual Introduction Introduction CyberResearch’s line of Serial Device Servers (SDS) is designed to network-enable any device currently using RS-232 or RS-422/485 serial communications protocols. Our Device Servers provide industry-leading hardware and user-friendly software to make connecting your serial devices to an Ethernet network a surprisingly simple process. There are many reasons to network your serial devices using a CyberResearch Device Server, such as: ¾ ¾ A typical scenario: You have a serial device that is operated by a PC. The application software on the PC “talks” to the serial device using COM port 3. Unfortunately, anyone who wants to communicate with that device must come to the local PC. This can be very time consuming if the serial device is located in a remote area, and expensive if you need a PC for every serial device. A Device Server eliminates the need for a local PC and allows anyone with the proper application software, the CyberResearch Device Server drivers, and authorized access to the network, to communicate with the serial device. October 2006 Remote support – support personnel can diagnose and repair many problems by communicating with your serial devices via the Internet or Intranet. Remote management – install new firmware or software upgrades on your serial devices without physically removing them from service. ¾ Efficient communications – instead of having one device communicating with one computer, your device can communicate with any computer on the network. ¾ Wireless freedom – Wi-Fi-enabled Device Servers provide serialto-wireless connectivity to your network. Lower cost of ownership – no need to upgrade serial devices to newer, costlier versions containing built-in Ethernet interfaces – if such an upgrade is even available! Extended service life of software – your existing software can be used to communicate with the serial device as if connected to a local COM port; the network connection is “invisible” to the application. ¾ ¾ After following the simple steps included in the Quick Start Guide to attach your network and serial devices to the appropriate connectors on the Serial Device Server, you’ll need just a few more minutes to install the driver. You’ll then be able to communicate with the serial device via its own application software and with the SDS using a Web browser! To network-enable a serial device, plug it into the serial port located on the Device Server. Plug in the network Ethernet cable and power source, and load the CyberResearch device drivers onto a host PC anywhere on the network, using the instructions provided. The CyberResearch device drivers will install the SDS’ serial ports as if they were additional local COM ports in Windows. Simply change the settings in the serial device’s application software to look for the serial device on the new COM port. It’s that easy! Page 1 Introduction WTS SDS User’s Manual Understanding how virtual communication ports work Note: CyberResearch Device Server technology now allows access to individual serial devices by anyone with access to the network on which they are installed. Note: Anyone in your organization with a PC can connect to the serial device over the network just as though the two devices were directly connected. Note: A protocol is a set of rules that notifies a transmitting device and a receiving device that the other is present and ready to exchange information, when the exchange is complete, and whether it was successful. Single port Device Servers allow you to network individual serial devices such as printers, simple terminals, or medical monitoring equipment that were previously accessible only via a direct link. According to Dataquest, a Device Server is a “specialized networkbased hardware device designed to perform a single or specialized set of functions with client access independent of any operating system or proprietary protocol.” In terms of your new SDS, this means that you can connect any serial device to your network by connecting the serial device to a serial port on your SDS and connecting the Ethernet port on your SDS to your network. The SDS, once it has been correctly configured, makes accessing a single serial device such as a time clock from your network a transparent operation. This means that a PC can perform all the operations in the same way it would if the serial device were plugged directly into its serial port. A network connection allows operation of serial devices at much greater distances than can be accomplished with a direct serial connection. Your SDS uses the TCP/IP protocol suite for network communications. This means that communication through an SDS can actually be more reliable than communication over long serial lines, which lacks the advanced error checking built into TCP/IP. Another benefit of accessing a serial device through an SDS is that you can monitor and manage the device remotely, even from across the world, if you have authorization and the network connection is to the Internet. Understanding MAC and IP addresses and port numbers Identifying the Ethernet (MAC) address Note: You can find the unit’s Ethernet (MAC) address on the product information label located on the bottom of the unit. Ethernet address, hardware address, and MAC address are all equivalent names for a device’s unique network address. In the case of an SDS, the first three bytes identify the unit as a CyberResearch product. The last three bytes are unique to each unit and are assigned when the unit is released from production. Colons separate the bytes. The following is an example of an SDS Ethernet (MAC) address: 00:0B:28:12:34:56 Assigning an IP address Quatech’s Unique product unique identifier identifier Every device that communicates over the Internet must have a unique IP address. You can assign an IP address to your SDS by either of two methods: ¾ ¾ Page 2 Through the Installation Wizard for initial configuration Through the Web interface for reconfiguration and maintenance October 2006 WTS SDS User’s Manual Introduction Using Port numbers Note: You can think of the IP address as a telephone number and the port number as a telephone extension. Note: This information is useful for firewall configuration. In order for devices to communicate via a TCP connection or a UDP datagram, they must know each other’s IP address and port number. The SDS driver automatically sets the unit’s port number for you. A specific port number identifies each SDS serial port. An SDS assigns a port number of 5000 to the first port, and then increments the port number sequentially for each subsequent serial port. SDS drivers must see the first port as IP address: 5000. Identifying operating modes Normal, Tunneling, Raw TCP, Auto TCP, and Raw UDP are all different schemes to make a serial connection across a network using one or more Serial Device Servers. Normal mode Note: Normal is the standard connection mode for an SDS. If you use CyberResearch’s virtual COM port drivers or the IntelliSock™ SDK (see TCP socket services – IntelliSock™ on page 6), you should use the Normal mode to make your network connections. Normal mode is used in the vast majority of applications. Unless you are certain that you need to use a different mode, go ahead and configure your SDS in Normal mode. This mode allows for complete software control of the serial port by an application program. Tunneling mode Note: In Tunneling, a master sends out the configuration information to a slave so that the slave can communicate with it. Serial Tunneling allows two Device Servers and their Ethernet TCP/IP connection to act like a direct cable connection between two serial devices. No host computer is required. Tunneling is very simple to use. Using the SDS’ web interface, designate one SDS’ serial port as the tunneling master and the other SDS’ port as the tunneling slave. Configure the master with the serial port settings desired for the connection as well as the IP address of the tunneling slave. The master makes the connection and automatically configures the slave with the corresponding settings. Raw TCP mode Note: You could use Raw TCP if you were running a simple, custom TCP application. In Raw TCP mode, serial port data travels over the TCP/IP connection without any protocol wrapper. You must configure the serial port settings using the SDS’ web interface. Raw TCP mode works with most third party universal serial device server drivers. Auto TCP mode Note: Auto TCP is the only communication mode that lets an SDS initiate the connection. Auto TCP mode is a special case of Raw TCP mode that allows the SDS to act as a network client and to initiate a TCP connection to a network host. You can configure the SDS so that it makes the connection in one of two possible instances: ¾ ¾ October 2006 It receives serial data (Data mode). It sees that the DSR input is active (DSR mode). Page 3 Introduction WTS SDS User’s Manual As with Raw TCP mode, you must configure the serial port settings using the SDS’ web interface. You must configure the SDS with the IP address and TCP port number of the network host to which it should connect. If the SDS is idle, it will listen for normal Raw TCP mode connections from the network host. Raw UDP mode Note: Raw UDP can provide one-to-many communications. Raw UDP is used primarily for broadcasting messages over a network. It is lightweight and efficient; however, your application program must handle all error processing and retransmission. CyberResearch supports the following modes of UDP communication: ¾ Multicast (transmits to specified group of recipients) ¾ ¾ Broadcast (transmits to unspecified recipients) Point-to-Point (transmits to one recipient) System requirements CyberResearch’s SDS ships with device drivers for Windows 2000, Windows NT4, Windows XP, and Linux. Other operating systems can access the SDS using Raw TCP mode or the IntelliSock™ TCP socket services. CyberResearch will provide reference materials and utilities to assist those who wish to do so. Contact our sales department for details on current software offerings. Most device drivers are available for download from the CyberResearch World Wide Web site at http://www.cyberresearch.com/. Features Note: Device Servers capture data from legacy serial devices without having to go through a PC. CyberResearch Device Servers can connect virtually any serial device to any standard Ethernet network (Intranet or Internet) using TCP/IP protocols. The following list details some of the serial devices an SDS can bring to your fingertips: ¾ ¾ ¾ Security system alarm/access control devices Industrial computers and sensors Point-of-Sale (POS) peripherals ¾ ¾ ¾ Time clocks Banking peripherals and ATM machines Medical equipment Protocol support The SDS communicates over an Ethernet network using the standard IP and TCP protocols to ensure data integrity and accurate targeting. An SDS supports the following protocols: ¾ ¾ Page 4 Network addressing, routing, and data block handling: IP Network communications: TCP, UDP, DHCP, HTTP, and ARP October 2006 WTS SDS User’s Manual Introduction ¾ Network management: SNMP SNMP Network management support Note: Only SDS devices with a firmware revision level of 5.0 and above can support SNMP. To determine the revision level of an SDS, check the bottom of the Home page in the Webbased interface (see page 43). The Simple Network Management Protocol (SNMP) agent running on your SDS collects network statistics such as the amount of data transmitted and received, the number of frames that contain errors, and the speed of the interface. A network management system consists of these four parts: ¾ ¾ Note: SNMP is used to communicate status updates and parameter values between a remote device such as an SDS and a network manager. Note: The SDS is a read-only device. You cannot set any parameters via SNMP. Note: Traps are messages or alarms generated by an SNMP agent to indicate to the SNMP manager that a significant event has occurred. Network manager – One or more workstations used to monitor and manage the elements comprising a network Managed system – Composed of managed devices on the network running the agent process, such as an SDS ¾ Management Information Base (MIB) – Standard organization scheme for storing data records; an SDS device with a firmware revision of 5.0 and above supports MIB-II ¾ Network management protocol – SNMP is a set of rules governing the exchange of management information between a network manager and the elements of a managed system The SDS supports MIB II, which is a standard set of statistics. It includes information on system interfaces, address translation, IP, ICMP, TCP, UDP, transmission, and SNMP group information. For example, the agent running on the SDS collects network statistics including the amount of data transmitted and received, the number of frames that contain errors, the percentage of utilization of the network, maximum packet size, speed, MAC address, and whether the device is up and working. The agent provides a whole tree of information that a management network host can retrieve using the Get command. In addition to providing information upon request, the SDS supports a cold start Trap, which is a spontaneous message the SDS initiates whenever it boots up. Wi-Fi implementation Note: Wi-Fi is a wireless Ethernet communication option. Note: To setup the Wireless SDS, you must first connect to it in wired Ethernet mode to obtain the IP address. Then, use the Web browser to configure the network settings for Wi-Fi communications. Wi-Fi, short for wireless fidelity, allows Wi-Fi-enabled devices to connect to an Ethernet/Internet network without cables or wires. You can use a Wi-Fi network to connect these devices to each other, to the Internet, and to wired networks. Wi-Fi is a fast, powerful, reliable, and secure alternative to wired communication. CyberResearch’s Wi-Fi-enabled SDS devices provide serial-to-wireless network connectivity. They enable you to connect to and communicate with your serial devices over 802.11b wireless networks. These units all have a “W” incorporated in their names, such as WTS 1601. There are two access modes you can use with your Wi-Fi SDS, See Enabling Wi-Fi Device depending on whether or not an access point (AP) is involved. Servers on page 14 for details on installing and configuring ¾ Infrastructure uses an access point to link the SDS to other network devices. your wireless SDS. For example, an SDS connected to a POS device by a serial cable October 2006 Page 5 Introduction WTS SDS User’s Manual will send and receive POS data through an AP to a wireless network. Any PC connected to that network (either by a wired connection or via an AP) can communicate directly with the POS device. Optional WEP and WPA security protocols can encrypt data to protect it during transmission from the SDS to an AP. ¾ Ad hoc directly links a SDS with another device without going through an access point. For example, if you connect a security camera’s serial port to an SDS, a wireless PC can connect directly to the security camera through the SDS without ever going through an AP. Before an SDS can communicate on an 802.11b wireless network, the WLAN settings must match those of the wireless network. By default, an SDS is set to Infrastructure network mode and its wireless Network Name (SSID) is blank, which will allow it to connect to any available wireless network. TCP socket services – IntelliSock™ Note: IntelliSock™ provides the most flexible and powerful TCP socket services available for custom applications. Note: If you do not need the power of the IntelliSock interface, the Raw TCP mode provides a simple way of using a direct TCP connection with the SDS. The SDS implements CyberResearch’s IntelliSock™ TCP socket services. CyberResearch supplies device drivers for Windows 2000, NT4, XP, and Linux to make the SDS look like it is a built-in COM port. IntelliSock offers you the option of interfacing directly to the SDS through a TCP socket programming interface rather than using the virtual COM port device drivers. IntelliSock can be used with any operating system that supports TCP/IP communication. Refer to the IntelliSock Software Developer’s Kit (SDK) folder on the installation CD-ROM for documentation and sample code. Getting started Unpacking your SDS Follow these steps to unpack your SDS. Step Procedure Description Step 1 Remove the SDS from the box. Step 2 Remove all packing material from the SDS. Save the packaging in case you ever need to store the unit or return it to CyberResearch for service. Step 3 Check the contents of the package to make sure you have received everything listed below: The complete SDS package ships in a single box. Page 6 ¾ ¾ ¾ SDS Power cable Power source ¾ ¾ Loopback connector(s) CD-ROM containing the SDS device October 2006 WTS SDS User’s Manual Step Procedure ¾ Step 4 October 2006 Introduction Description drivers and configuration software Quick Start Guide Check the SDS and accessories for shipping Pay particular attention to the SDS’ case damage. and port connectors. If anything is missing or damaged, contact your CyberResearch sales representative. Page 7 Introduction WTS SDS User’s Manual Identifying parts Figure 1 shows the connectors and indicator lights (LEDs) of the SDS. See below for a description of each item shown. Figure 1 – Connectors and Indicators The actual number and location of serial ports will vary according to the model. Data LEDs Power LED Power jack Speed LED Ethernet Link LED jack Power jack Serial ports Status LED Reset button Reset button Status LED Speed LED Link LED Ethernet jack Power LED Data LED Serial ports The SDS has several indicator LEDs: ¾ Power (blue) – indicates when the SDS has line power ¾ Data (red/green) – indicates serial port data activity by blinking red for RS-232 or green for RS-422/485 ¾ Status (green) – indicates when the embedded processor is up and running ¾ Link (green) – indicates when a network link has been established; located in the Ethernet connector ¾ Speed (amber) – differentiates between 100Base-T (glowing) and 10Base-T (off) Ethernet connection speeds; located in the Ethernet connector The DB-9 serial port(s) connect to your serial device(s) and can support RS-232, RS-422, or RS-485 connections. They are located either to the left, to either side of the Ethernet port, or on the front panel, depending on the model. The RJ-45 Ethernet jack connects the SDS to the Internet or to your Intranet. It has two small status LEDs: Link (green) and Speed (amber). The power jack should be connected to a +5V power source, as provided with the SDS. The Reset button puts the SDS through a reset cycle and can also restore the SDS to the factory default settings. The information label (not shown) is on the bottom of the SDS. It includes the following: ¾ MAC address ¾ Serial number ¾ Certifications ¾ Pinout diagram Page 8 October 2006 WTS SDS User’s Manual Introduction Understanding LED codes The SDS LEDs inform you of the communications status and activity of the SDS. The following table lists the possible states of the LEDs and their meaning. Table 1 - SDS LED codes LEDs Meaning Link (green) On steady = connected to network On steady for Wi-Fi SDS units: ¾ Infrastructure = SDS is associated with Access Point ¾ Ad hoc = SDS has found device to communicate with Speed (amber) Off = 10 Mbps network connection established if Link LED is on On steady = 100 Mbps network connection established Data (red/green) Red = RS-232 connection Green = RS-422/485 connection Blinking = data activity Status (green) On = SDS is up and running The Status LED also works in conjunction with the Reset button as follows: Note: If you press and immediately release the Reset button, the SDS restarts automatically with no changes. Also, if you continue holding the Reset button longer than 20 seconds, the Status LED stops flashing and no changes are made. October 2006 1. To restore the SDS to the factory default configuration, push in and hold the Reset button. When the Status LED starts flashing slowly, and before it starts flashing rapidly, release the button. The SDS then restarts automatically. If the Reset button is held during the first 10 seconds of bootup, the Status LED flashes at a rate of 1 flash every 2 seconds for 10 seconds. If the button is released during this time period, the configuration is reset to factory defaults. 2. To restore the SDS to the factory default firmware revision, push in and hold the Reset button. When the Status LED changes from a slow flash to a rapid flash, release the button. The SDS then restarts automatically. If the Reset button is held past the first 10 seconds of bootup, the LED flashes faster at a rate of 1 flash every second for 10 seconds. If the button is released during this time period, the SDS is reset back to the factory default firmware revision. Page 9 Introduction WTS SDS User’s Manual Locating serial and network ports Serial port(s) Note: The location of the serial port(s) varies, depending on the model. SDS serial ports connect via cables to your serial device(s). The number of these ports will vary depending on the SDS model. All SDS models come with DB-9 serial port connectors. RS-232 “M” models include adapter plugs to convert the DB-9 connectors to RJ-45 connectors. See Making connections on page 13 for directions on connecting an SDS serial port to a serial device. The following figures and tables show the serial port pinouts for RS232 and RS-232/422/485 applications. Figure 2 - DB-9 pinouts Figure 3 and Tables 3 and 4 show the RS-232/422/485 DB-9 pinouts and signal descriptions. Table 2 - RS-232 signals on DB-9 connector RS-232 signal description DB-9 Data Carrier Detect (DCD) 1 Receive Data (RxD) 2 Transmit Data (TxD) 3 Data Terminal Ready (DTR) 4 Signal Ground (GND) 5 Data Set Ready (DSR) 6 Request To Send (RTS) 7 Clear To Send (CTS) 8 Ring Indicator (RI) 9 Table 3 - RS-422/485 signals on DB-9 connector Note: Pins labeled NC are indeterminate in two-wire mode and should be left unconnected. Page 10 RS-422/485 signal description four-wire mode DB-9 RS-422/485 signal description two-wire mode Auxiliary Input (AuxIn–) 1 NC Receive Data (RxD+) 2 NC Transmit Data (TxD+) 3 Transmit/Receive Data (Data+) Auxiliary Output (AuxOut–) 4 NC Signal Ground (GND) 5 Receive Data (RxD–) 6 Signal Ground (GND) NC Auxiliary Output (AuxOut+) 7 NC Auxiliary Input (AuxIn+) 8 NC Transmit Data (TxD–) 9 Transmit/Receive Data (Data–) October 2006 WTS SDS User’s Manual Introduction Figure 3 - RJ-45 pinouts (DB-9 to RJ-45 adapter) Figure 4 and Tables 5 and 6 show the RS-232/422/485 -RJ-45 pinouts and signal descriptions. Table 4 - RS-232 signals on RJ-45 connector (DB-9 to RJ-45 adapter) Note: If your serial port cable uses an 8-pin RJ-45 plug, you can use the center eight pins of the SDS’ RJ-45 connector for RS-232 communications. You will lose access to the Ring Indicator signal. RS-232 signal description RJ-45 Ring Indicator (RI) 1 Request To Send (RTS) 2 Data Terminal Ready (DTR) 3 Signal Ground (GND) 4 Transmit Data (TxD) 5 Receive Data (RxD) 6 Data Carrier Detect (DCD) 7 Data Set Ready (DSR) 8 Clear To Send (CTS) 9 No Connection 10 Table 5 - RS-422/485 signals on RJ-45 connector (DB-9 to RJ-45 adapter) Note: Pins labeled NC are indeterminate in two-wire mode and should be left unconnected. October 2006 RS-422/485 signal description RJ-45 RS-422/485 signal description four-wire mode two-wire mode Transmit Data (TxD–) 1 Auxiliary Output (AuxOut+) 2 Transmit/Receive Data (Data–) NC Auxiliary Output (AuxOut–) 3 NC Signal Ground (GND) 4 Signal Ground (GND) Transmit Data (TxD+) 5 Receive Data (RxD+) 6 Transmit/Receive Data (Data+) NC Auxiliary Input (AuxIn–) 7 NC Receive Data (RxD–) 8 NC Auxiliary Input (AuxIn+) 9 NC No Connection 10 No Connection Page 11 Introduction WTS SDS User’s Manual Network port All SDS devices have one eight-pin RJ-45 Ethernet port on the back panel. Figure 4 - RJ-45 Ethernet port pinout Figure 5 and Table 7 show the Ethernet RJ-45 pinouts and signal descriptions. 12345678 Table 6 - RJ-45 Ethernet port signals Page 12 Ethernet signal description RJ-45 Transmit Data (TxD+) 1 Transmit Data (TxD–) 2 Receive Data (RxD+) 3 No connection 4, 5 Receive Data (RxD–) 6 No connection 7, 8 October 2006 WTS SDS User’s Manual Making connections Making connections Figure 5 shows a four-port SDS connected to a printer. You can easily connect each serial port on your SDS to any serial device that you want to make accessible to an Ethernet network. Figure 5 - Connecting an SDS to a serial device Serial device Electrical outlet SDS Power cord Serial cable Power source 10/100 Ethernet connection Follow these steps to connect your SDS to one or more serial devices. Step Procedure Description Step 1 Make sure the serial device you are connecting to the SDS is turned off. The SDS should be unplugged. Step 2 Connect a serial cable between the SDS and your serial device. See Serial port(s) on page 10 for pinout and connector information. Step 3 Connect an Ethernet cable between your Ethernet outlet and the SDS’ 10/100 port. The Ethernet port is located on the back panel. Step 4 Insert the power source jack into the power plug on the back of the SDS. An SDS requires a 5-VDC, 2-A (10-W max) power source. The power source ships with the SDS. Step 5 Plug the power source into a wall socket. The SDS powers up automatically. Step 6 Power up the serial device. Now you are ready to install the device drivers! October 2006 Page 13 Enabling Wi-Fi Device Servers WTS SDS User’s Manual Enabling Wi-Fi Device Servers Note: Wi-Fi Device Servers link via an AP in Infrastructure mode; they connect directly to another device in Ad hoc mode. CyberResearch’s Wi-Fi Device Servers need to have a wireless network connection established before they can be configured for use. To enable the wireless connection, you need to obtain the SDS’ IP address as outlined below. Once you have the IP address, you can configure the SDS for wireless communications via the Web interface. Note: In Ad hoc mode, the Link LED on the Ethernet port will glow green when your wireless SDS finds and communicates with another device. In Infrastructure mode, you can use your wireless SDS just as you would a wired SDS, but it will communicate via an access point on the 801.11b network rather than through an Ethernet cable. The SDS will scan all channels until it finds an AP, at which time the Link LED on the Ethernet port will glow green. The following briefly describes how to obtain the IP address of the SDS and to enable wireless communications. For greater detail, see Installing the device drivers on page 16 and Setting network parameters on page 47. Page 14 October 2006 WTS SDS User’s Manual Step Procedure Enabling Wi-Fi Device Servers Description Step 1 Turn on the power to your computer system. Step 2 Insert the CyberResearch SDS If the CD-ROM does not launch installation CD-ROM into your CD-ROM automatically, select Start – Run from the drive. Task bar, browse to the CD-ROM drive, and select the ThinQ.exe file. Click “OK” in the Run window to launch the installation. Step 3 From the Main Menu, select Install SDS. Click Next. Step 4 Connect the Ethernet port on your SDS either to the NIC port on your computer or to a switch/hub. Step 5 Connect power to the SDS. When the SDS When the SDS is ready, the Status, Power, is ready, click the Next button to search and Link LEDs should glow. for Serial Device Servers. Step 6 When the search is finished, find your SDS and make note of its IP address. Use a CAT5 or better Ethernet cable to attach the SDS. You will need this address for the network configuration. Press Cancel to abort the installation procedure. Step 7 Open your Web browser and type the IP The CyberResearch Device Server Home page address for the SDS in the Web browser’s displays. URL (address) field. Step 8 Click on Network in the selection bar. Step 9 Select Infrastructure as the Access Mode. Step 10 Configure the Device Server’s SSID to match the access point’s SSID. To communicate wirelessly, the AP and the SDS must both use the same SSID. If you don’t know the proper SSID, check with your system administrator. Note: The Channel setting is only used in Ad hoc mode. In Infrastructure mode, the AP determines the channel. Step 11 Press Submit to configure the SDS with your settings. The IP Address Update successful screen displays. Step 12 Reset the SDS. Click on the link to perform a remote reset, and then press Reset. Step 13 Remove the Ethernet cable from the SDS Be sure to remove the Ethernet cable before during the reset process. the reset process is finished. Step 14 Leaving the Ethernet port unconnected, When you are finished, you are ready to perform the procedure shown in Installing install your wireless SDS in its final location. the device drivers starting on page 16, For details on connecting your wireless SDS skipping Step 6. to a serial device, see Making connections starting on page 13, skipping Step 3. October 2006 Page 15 Installing the device drivers WTS SDS User’s Manual Installing the device drivers Note: You must install the drivers on the installation CDROM on every computer that accesses the device(s) attached to the SDS. Hint: Click on Go to Step in the rightmost column to jump to your next step. Step This section explains how to install the SDS software under the Windows 2000, Windows NT4, and Windows XP operating systems. The CyberResearch Device Server Install Wizard helps you to add new SDS hardware. It takes into account a variety of circumstances and directs you to jump to different Steps as needed. Click on the blue “Go to Step” text in the Description column to automatically jump to that step. Continue from that point until you are directed to a different location. Procedure Description Step 1 Turn on the power to your computer system. This is the client PC in which the SDS drivers are to be installed. Step 2 Insert the CyberResearch SDS installation This is the CD that shipped with the SDS. CD-ROM into your CD-ROM drive. Step 3 The CD-ROM should launch automatically. The CyberResearch Serial Device screen displays, followed by the Main Menu screen. Continue with Step 4. If the CD-ROM does not launch automatically, select Start – Run from the Task bar, browse to the CD-ROM drive, click the Software folder, then launch the Qtewizard.exe file. Click “OK” in the Run window to launch the installation. The Software folder shown in Figure 6 contains the Qtewizard.exe file. Continue with Step 4. Figure 6 - Main Menu screen Figure 6 illustrates the Main Menu screen. The Wizard helps you to install the drivers and configure the SDS. This installation adds the SDS to the devices in the Windows Device Manager under Multiport serial adapters and installs the serial port(s) as it would a standard COM port(s) under Ports (COM & LPT). Step Step 4 Page 16 Procedure Description From the Main Menu, select Install SDS. The CyberResearch Install Wizard launches and displays the Welcome screen. October 2006 WTS SDS User’s Manual Installing the device drivers Continue with Step 5. Figure 7 - Welcome screen Figure 7 illustrates the CyberResearch Install Wizard’s Welcome screen. Step Step 5 Procedure Description Click the Next button to continue. The Prepare to Install screen displays. Continue with Step 6. Figure 8 - Prepare to Install screen Figure 8 illustrates the Prepare to Install prompt. Be sure to read this screen carefully before proceeding. Note: Press the Help key for additional information as you go through the installation procedure. Step Step 6 Procedure Connect the Ethernet port on your SDS to one of the following: ¾ Desired installation location, ¾ ¾ October 2006 Hub on your local subnet, or Network Interface Connection (NIC) on your computer using an Ethernet crossover patch cable. Description If you cannot immediately attach the SDS to the target installation site, temporarily attach it to the local hub or your computer’s NIC for configuration purposes. Notes: Use a CAT5 or better Ethernet cable to attach the SDS to your network. If your SDS is pre-configured for your network, attach it now to the appropriate Page 17 Installing the device drivers Step WTS SDS User’s Manual Procedure Description subnet location. Continue with Step 7. Step 7 Connect power to the SDS. Connect the cable attached to the power source to the SDS. Plug the connector of the unattached power cable into the power source’s socket. Plug the other end of the cable into a power outlet. The SDS powers up and the blue Power LED lights. Step 8 Confirm that the SDS is ready to proceed. The Status LED to the left of the power jack should glow green. The Power LED should glow blue and the Link LED should glow green. Step 9 Click the Next button to search for device servers. The Search network for Serial Device Servers screen displays and the Wizard searches the local subnet for active serial device servers. Continue with Step 10. Figure 9 - Search network for Serial Device Server(s) screen Figure 9 shows the search results for all active device servers on the local subnet. Step Page 18 Procedure Description October 2006 WTS SDS User’s Manual Step 10 Installing the device drivers When the search is completed, look in the list of detected devices. ¾ If you find your SDS, highlight it and click on I have selected the device I wish to install. Press Next. If you do not see your SDS, click on the Retry Search button. If it still is not found, click on “My device was not found.” Press Next. Procedure ¾ Step Step 11 One of two possible screens displays: ¾ Where is the Serial Device Server attached? ¾ Reconfigure the Serial Device Server Continue with Step 11. The Locate the Serial Device Server screen displays. Go to □ Step 42. Description If your SDS is directly connected to your computer or to the local subnet, the Where is the Serial Device Server attached screen displays. Continue with Step 12. If your SDS is remotely connected, the Wizard offers you the option to change the configuration and move the SDS to the subnet where it will be permanently installed. The Reconfigure the Serial Device Server screen displays. Go to □ Step 30. Figure 10 - Where is the Serial Device Server attached screen Figure 10 asks you to specify whether the SDS is in its final installation location of if it is temporarily installed while you configure it. Caution! Do not unplug or move the SDS at this time. Step Step 12 October 2006 Procedure Select one of two options: ¾ The SDS is attached to the location where it will be installed and used. Description Choose this option if the SDS is installed where you intend to use it. Continue with Step 13. Page 19 Installing the device drivers Step Step 13 WTS SDS User’s Manual Procedure ¾ The SDS is plugged into a temporary location for configuration purposes. Press Next to continue. One of two possible screens displays: ¾ Network Connectivity Test ¾ Reconfigure the Serial Device Server Description Choose this option if you need to move the SDS to another location before using it. Continue with Step 13. If your SDS is installed in its final location, the Network Connectivity Test screen displays. Continue with Step 14. The Wizard helps you to configure and move the SDS to its permanent spot. Go to □ Step 30. Figure 11 - Network Connectivity Test screen Figure 11 shows the Network Connectivity Test prompt. This prompt informs you that the Wizard is ready to check the IP connectivity of the SDS. Step Step 14 Procedure Description Press the Next button to run the IP connectivity test. The Retrieving Unit Configuration popup box displays briefly. Continue with Step 15. Figure 12 - Retrieving Unit Configuration pop-up box Figure 12 shows the Retrieving Unit Configuration pop-up box. This box shows the configuration retrieval progress and closes when it is complete. Step Step 15 Procedure Depending on whether the test passes or fails, one of two screens displays: ¾ Page 20 Description TCP/IP Network Configuration If the test passes, the TCP/IP Network Configuration Parameters screen October 2006 WTS SDS User’s Manual ¾ Installing the device drivers Parameters displays. Continue with Step 16. Network Connectivity Test Failed If the test fails, the Network Connectivity Test Failed screen displays. Go to □ Step 55. Figure 13 - TCP/IP Network Configuration Parameters screen Figure 13 shows the following TCP/IP network configuration parameters: ¾ Address type ¾ IP Address ¾ Subnet mask ¾ Default gateway Caution! If your address type is Dynamic, the Wizard asks you to confirm that you want the DHCP server to assign the IP address for your SDS. Be aware that if your DHCP server is not configured to assign the same address to the SDS every time, communication with the SDS may fail should the SDS ever be reset. Step Step 16 Procedure Description Note the TCP/IP configuration parameters. The SDS initially ships with a DHCP address type. Note: If the SDS is attached to a network utilizing a DHCP server, it will ask for and obtain a valid IP address from that server. If not, the SDS will default to the IP address 192.168.192.168. ¾ If you need to change the parameters, press the Change Properties button. ¾ If you are satisfied with the parameters, press the Next button. One of two possible screens displays, depending on whether your address type is: Static Address or Assigned by DHCP. October 2006 The Internet Protocol (TCP/IP) Properties dialog box displays. Continue with Step 17. If your address type is Static Address, the Install the Device Drivers screen displays. Go to □ Step 27. If your address type is Assigned by DHCP, the DHCP server will assign an Page 21 Installing the device drivers Step WTS SDS User’s Manual Procedure Description IP address for your SDS. The DHCP confirmation pop-up box displays. Go to □ Step 40. Figure 14 - Internet Protocol (TCP/IP) Properties dialog box Figure 14 shows the current configuration parameters for the SDS. You can change these parameters by keying in the desired values. Step Step 17 Step 18 Procedure Description The Internet Protocol Properties (TCP/IP) dialog box lets you change the SDS configuration so that it can operate in its permanent location. If you are not sure of the configuration parameters, consult your system administrator. Select one of the following options: Note: For reliable operation, we recommend a static IP address. ¾ Use the following static IP address. Continue with ¾ Obtain an IP address automatically from the DHCP server. Go to □ Step 19. Key in any necessary changes to the: ¾ IP address, ¾ Subnet mask, and ¾ Step 19 Page 22 Default gateway. Press Send to send your changes to the SDS. Step 18. If you are not sure of the configuration parameters, consult your system administrator for the specific parameters. The Restart confirmation pop-up box displays. Continue with Step 20. October 2006 WTS SDS User’s Manual Installing the device drivers Figure 15 - Restart confirmation pop-up box Figure 15 shows the Restart confirmation pop-up box. Step Step 20 Procedure Description Press OK to restart the SDS and make your changes active. The SDS reboots and takes on the new configuration. The Information pop-up box displays. Continue with Step 21. Figure 16 - Information pop-up box Figure 16 warns you that the SDS needs time to reset. Wait until the Status LED glows green, and then press OK. Step Step 21 October 2006 Procedure When the Status light glows green, press OK. Description The glowing Status light indicates that the SDS is ready. The TCP/IP Network Configuration Parameters screen displays. Continue with Step 22. Page 23 Installing the device drivers WTS SDS User’s Manual Figure 17 - TCP/IP Network Configuration Parameters screen Figure 17 shows the TCP/IP network configuration parameters including the following: ¾ Address type ¾ IP Address ¾ Subnet mask ¾ Default gateway Step Step 22 Procedure Description Press the Next button to continue. The Rerun network connectivity test popup box displays. Continue with Step 23. Figure 18 - Rerun network connectivity test pop-up box Figure 18 shows the Rerun network connectivity test popup box. Step Step 23 Page 24 Procedure Press the OK button to continue. Description The Network Connectivity Test screen displays. Continue with Step 24. October 2006 WTS SDS User’s Manual Installing the device drivers Figure 19 - Network Connectivity Test screen Figure 19 shows the Network Connectivity Test prompt. This prompt informs you that the Wizard is ready to check the IP connectivity of the SDS. Step Step 24 Procedure Description Press the Next button to run the IP connectivity test. The Retrieving Unit Configuration popup box displays briefly. Continue with Step 25. Figure 20 - Retrieving Unit Configuration pop-up box Figure 20 shows the Retrieving Unit Configuration pop-up box. This box shows the configuration retrieval progress and closes when it is complete. Step Step 25 October 2006 Procedure Description Depending on whether the test passes or fails, one of two screens displays: ¾ TCP/IP Network Configuration Parameters If the test passes, the TCP/IP Network Configuration Parameters screen displays. Continue with Step 26. ¾ Network Connectivity Test Failed If the test fails, the Network Connectivity Test Failed screen displays. Go to □ Step 55. Page 25 Installing the device drivers WTS SDS User’s Manual Figure 21 - TCP/IP Network Configuration Parameters screen Figure 21 shows the TCP/IP network configuration parameters including the following: ¾ Address type ¾ IP Address ¾ Subnet mask ¾ Default gateway Caution! If your address type is Dynamic, the Wizard asks you to confirm that you want the DHCP server to assign the IP address for your SDS. Be aware that if your DHCP server is not configured to assign the same address to the SDS every time, communication with the SDS may fail should the SDS ever be reset. Step Step 26 Procedure Description Press the Next button to continue. The Install the Device Drivers screen displays. Continue with Step 27. Figure 22 - Install the Device Drivers screen Figure 22 informs you that the Wizard is ready to install the device driver(s) and create the serial port(s). Step Step 27 Procedure Press the Next button to continue. Description The Installation Complete screen displays. Continue with Step 28. Note: If dialog boxes appear warning you that the SDS drivers are unsigned, please click through these warnings and continue with the installation. Usually, the device drivers that CyberResearch provides on the CDROM accompanying the SDS are signed, but occasionally we must ship unsigned drivers. In this case, please be assured that we are working to sign the drivers as soon as possible and make them available on our website. Page 26 October 2006 WTS SDS User’s Manual Installing the device drivers Figure 23 - Installation Complete screen Figure 23 illustrates the Installation Complete screen. Note: This screen provides a link to Windows Device Manager where you can view or change the SDS configuration parameters or uninstall the SDS. Hint: To open Device Manager at a later time, select Settings – Control Panel from the Start menu. Open the System folder and select the Device Manager tab. Step Step 28 Win 2000/XP Procedure (Optional) Click on the Open Windows Device Manager link to open the Device Manager panel. Click Finish to close the Installation Wizard. Description Expand the Multi-port serial adapters. Right-click the CyberResearch Device Server and select Properties. Click on the HTTP Connect button to launch the SDS Web interface. The Installation Complete screen closes. Windows briefly displays a Found New Hardware pop-up screen as it installs each serial port on the SDS. Your SDS installation is complete! Step 28 Win NT, only: Click Finish to launch the CyberResearch Device Manager Installation Wizard. The wizard installs CyberResearch’s Device Manager. Follow the prompts. Step 29 Win NT, only: Click Finish on the Installation Complete screen when the Device Manager installation is finished. The SDS installation wizard closes. Your SDS installation is complete! Win NT Win NT October 2006 Note: You may see a warning to reboot your machine. Do not reboot until the installation is completely finished. Note also that there is no need to reboot your machine after installing the first SDS. Only subsequent installations require rebooting. Page 27 Installing the device drivers WTS SDS User’s Manual Win NT Device Manager Note: Use the Device Manager only to make changes to PCrelated settings, such as port numbers. Any settings related to the SDS, such as IP address, should be made only through the Web interface. Windows NT does not provide a Device Manager; however, you can use CyberResearch’s Device Manager to manage all the CyberResearch devices installed on your machine. Double click the Device Manager (DM) icon on your desktop to launch. Expand the CyberResearch Device Server group at the bottom. Select your Device Server and click Properties. Four tabs display: ¾ ¾ ¾ General – information on device type, manufacturer, location, and device status Driver – information on drivers used including location and version Resources – COM port enumeration and first port number SDS Configuration – network information including MAS address, IP address, subnet mask, and default gateway The SDS Configuration tab will be the most useful to you. You can differentiate between SDS units using the MAC address, which is equivalent to the serial number. ¾ The Diagnostic Tools button runs a Ping test. Use the Web Interface button to bring up the Web interface. See Configuring the SDS using the Web interface on page 45 for details on using this interface. Note: Remember, only use the Web interface to make changes to the SDS configuration. Use the Advanced button to repair a broken connection. For instance, if the SDS’ IP address changes and your DM can no longer find it, you can search for the SDS and note its changed IP address. Win NT – Changing port numbers Click on the first port to see its designated port number. You can use the DM to change the port numbers if necessary. Changing the first port causes the others to change sequentially. See page 45 for details. Page 28 October 2006 WTS SDS User’s Manual Installing the device drivers Uninstalling your SDS Uninstalling from Windows XP/2000 Follow these steps in the event that you need to uninstall or reinstall the SDS software on a Windows XP or 2000 system. 1. From the Control Panel, select System. 2. Click on the Hardware tab. 3. Click on Device Manager. 4. Expand Multi-port serial adapters and select your CyberResearch Device Server. 5. Right click and select Uninstall. 6. At the Confirmation screen, click OK. 7. Click Finish at the Completing the Add/Remove Hardware Wizard screen. Uninstalling from Windows NT4 Follow these steps in the event that you need to uninstall the SDS on a Windows NT4 system. 1. Click on CyberResearch Device Manager. 2. Expand the SDS devices and select your CyberResearch Device Server. 3. Click Remove at the bottom of the screen. 4. If desired, use Add/Remove programs to remove the Device Manager. 5. Reboot your machine. October 2006 Page 29 Installing the device drivers WTS SDS User’s Manual Alternative installation steps Note: This section has steps that are used less frequently than those in the preceding section. This section supplements the basic installation procedure by taking you through alternative installation scenarios. It then directs you to the appropriate step in the basic procedure. Figure 24 - Reconfigure the Serial Device Server screen Figure 24 shows the current configuration parameters for the SDS. You can accept these parameters by pressing Next or you can change them by pressing Reconfigure SDS. Step Step 30 Page 30 Procedure Description The Reconfigure the Serial Device Server screen lets you change the SDS’ configuration so that it can operate in its permanent location. If your SDS is temporarily attached to your computer’s NIC port, you may need to attach it to a different subnet when you do a permanent installation. The Serial Device Server is Configured for a Remote Subnet screen displays. Continue with Step 31. The Internet Protocol (TCP/IP) Properties dialog box displays. Go to □ Step 32. ¾ If you do not need to change the configuration, press the Next button to continue. ¾ To change the configuration, click the Reconfigure SDS button. October 2006 WTS SDS User’s Manual Installing the device drivers Figure 25 - Serial Device Server is Configured for a Remote Subnet Figure 25 allows you either to move the SDS to its permanent subnet location and continue the installation or to exit the wizard and install the SDS at a later time. Step Step 31 Procedure Select one of the following options: ¾ ¾ October 2006 Description I’ve already moved the SDS to the remote subnet. Press Next to continue. I’ll move the SDS later and run the wizard again. Press Next to continue. The Network Connectivity Test screen displays. Go to □ Step 14. The Wizard closes and returns you to the desktop. Page 31 Installing the device drivers WTS SDS User’s Manual Figure 26 - Internet Protocol (TCP/IP) Properties dialog box Figure 26 shows the current configuration parameters for the SDS. You can change these parameters by keying in the desired values. Step Step 32 Step 33 Procedure Description The Internet Protocol (TCP/IP) Properties dialog box lets you change the SDS’ configuration so that it can operate in its permanent location. Select one of the following options: If you are not sure of the configuration parameters, consult your system administrator. ¾ Use the following static IP address. Continue with ¾ Obtain an IP address automatically from the DHCP server. Go to □ Step 34. Key in any necessary changes to the: ¾ ¾ ¾ Step 34 Page 32 Note: We recommend that you use a static IP address to ensure reliable operation. IP address, Subnet mask, and Default gateway. Press Send to send your changes to the SDS. Step 33. Your system administrator can provide you with specific parameters. The Restart confirmation pop-up box displays. Continue with Step 35. October 2006 WTS SDS User’s Manual Installing the device drivers Figure 27 - Restart confirmation pop-up box Figure 27 shows the Restart confirmation pop-up box. Step Step 35 Procedure Description Press OK to restart the SDS and make your changes active. The SDS reboots and takes on the new configuration. The Information pop-up box displays. Continue with Step 36. Figure 28 - Information pop-up box Figure 28 warns you that the SDS needs time to reset. Wait until the status LED glows green before pressing OK. Step Procedure Description Step 36 When the Status light glows green, press OK. This indicates that the SDS is ready. Continue with Step 37. Step 37 Depending on your path to this step, one of three possible screens will display: October 2006 ¾ TCP/IP Network Configuration Parameters Continue with ¾ Reconfigure the Serial Device Server Go to □ Step 30. ¾ SDS Wizard Information Go to □ Step 41. Step 38. Page 33 Installing the device drivers WTS SDS User’s Manual Figure 29 - TCP/IP Network Configuration Parameters screen Figure 29 shows the TCP/IP network configuration parameters including the following: ¾ Address type ¾ IP Address ¾ Subnet mask ¾ Default gateway Step Step 38 Procedure Description If you are satisfied with the parameters, press Next to continue. The Rerun network connectivity test popup box displays. Continue with Step 39. If you are not satisfied, press Change Properties to change the TCP/IP properties. The Internet Protocol (TCP/IP) Properties dialog box displays. Go to □ Step 32. Figure 30 - Rerun network connectivity test pop-up box Figure 30 shows the Rerun network connectivity test popup box. Step Step 39 Page 34 Procedure Description Press OK. The Network Connectivity Test screen displays. Go to □ Step 14. October 2006 WTS SDS User’s Manual Installing the device drivers Figure 31 - DHCP confirmation pop-up box Figure 31 shows DHCP server confirmation pop-up box. Only answer Yes if you are sure that the DHCP server will always assign the same IP address to the SDS. Step Step 40 Procedure Description Press Yes to have the DHCP server assign the IP address only if you are sure it will assign the same IP address each time. If you answer Yes, the DHCP server will assign the IP address for your SDS. If this address changes, communication with the SDS may fail. The SDS Wizard Information DHCP screen displays. Continue with Step 41. If you answer No, you return to the TCP/IP Network Configuration Parameters screen. Go to □ Step 16. Otherwise, press No. Figure 32 - SDS Wizard Information DHCP screen Figure 32 informs you that the Wizard going to search for the SDS using the last known IP parameters. Step Step 41 October 2006 Procedure Description Press the Next button. The Search network for Serial Device Servers screen displays. Go to □ Step 10. Page 35 Installing the device drivers WTS SDS User’s Manual Figure 33 - Locate the Serial Device Server screen Figure 33 offers you three options to locate your new SDS: ¾ Find an SDS that is plugged directly into your computer’s NIC. ¾ Find an SDS that is attached to a remote subnet. ¾ Select your SDS model from a list of all supported serial device servers. 3 Step Step 42 Page 36 Procedure Description Select one of the following options: ¾ Search for an SDS attached directly to my computer (Recommended). Press Next to continue. The Locate the Serial Device Server using direct discovery screen displays. Continue with Step 43. ¾ Search for an SDS attached to a remote subnet. Press Next to continue. The Locate the Serial Device Server on a remote subnet screen displays. Go to □ Step 45. ¾ Manually select and install from a list of all supported serial device server models. Press Next to continue. The Select Desired Serial Device Server from list screen displays. Go to □ Step 53. October 2006 WTS SDS User’s Manual Installing the device drivers Figure 34 - Locate the Serial Device Server using direct discovery screen Figure 34 explains how to connect the SDS to your computer for location and configuration purposes. Step Procedure Description Step 43 Connect the Ethernet port on your SDS to the Network Interface Connection (NIC) on your computer. Either a crossover patch cable or a “straight through” cable will work. Continue with Step 44 Connect power to the SDS and confirm that it is ready to proceed. Press Next to continue. The Status LED should glow green. October 2006 Step 44. The Search network for Serial Device Drivers screen displays. Go to □ Step 10. Page 37 Installing the device drivers WTS SDS User’s Manual Figure 35 - Locate the Serial Device Server on a remote subnet screen Figure 35 explains the options you have to search for an SDS on a remote subnet. Step Step 45 Procedure Description Select one of the three following options: ¾ The SDS is preconfigured for the remote subnet. Press Next to continue. The Describe the Remote Subnet screen displays. Continue with Step 46. ¾ The SDS is set to use DHCP. Press Next to continue. The Describe the Remote Subnet screen displays. Continue with Step 46. Note: If DHCP is disabled on the SDS, press the Reset button on the back to enable it. ¾ Page 38 Neither of the above. Press Next to continue. The Locate the Serial Device Server screen displays. Go to □ Step 48. October 2006 WTS SDS User’s Manual Installing the device drivers Figure 36 - Describe the Remote Subnet screen Figure 36 explains how to gather the information you need to search for your SDS on a remote subnet. Step Procedure Description Step 46 Locate the target subnet’s default gateway address. You can get this address from a device already on the target subnet. Your system administrator should also be able to provide this information. Step 47 Enter the target subnet’s default gateway address in the space provided. Press Next to continue. The Wizard initiates a search of the specified target subnet. The Search network for Serial Device Servers screen displays. Go to □ Step 10. October 2006 Page 39 Installing the device drivers WTS SDS User’s Manual Figure 37 - Locate the Serial Device Server options screen Figure 37 illustrates the Locate the Serial Device Server screen. You can either connect the SDS to a local hub or switch or you can connect it directly to your computer. Step Step 48 Page 40 Procedure Select one of two options: ¾ I’ll plug the SDS unit into a local subnet hub or switch. Press Next to continue. ¾ I’ll connect the SDS directly to my computer. Press Next to continue. Description The Locate the Serial Device Server local discovery screen displays. Continue with Step 49. The Locate the Serial Device Server screen displays. Go to □ Step 43. October 2006 WTS SDS User’s Manual Installing the device drivers Figure 38 - Locate the Serial Device Server local discovery screen Figure 38 illustrates the Locate the Serial Device Server local discovery prompt. Step Procedure Description Step 49 Connect the SDS to a local hub or switch. Use a standard Ethernet cable to connect the Ethernet port on the SDS to the hub or switch. Continue with Step 50. Step 50 Connect power to the SDS. Connect the cable attached to the power source to the SDS. Plug the connector of the unattached power cable into the power source’s socket. Plug the other end of the cable into a power outlet. The SDS powers up. Step 51 Confirm that the SDS is ready to proceed. The Status LED to the left of the power jack should glow green and the Power LED should glow blue. Step 52 Click the Next button to continue. The Search network for Serial Device Servers screen displays and the Wizard searches the local subnet for active serial device servers. Go to □ Step 10. October 2006 Page 41 Installing the device drivers WTS SDS User’s Manual Figure 39 - Select Desired Serial Device Server from list screen Figure 39 shows a complete list of all the Quatech serial device servers. This list will change as the SDS family grows. Step Step 53 Procedure Description Locate and highlight your SDS device. This screen shows a complete list of all currently available CyberResearch device servers. The Specify IP Address screen displays. Continue with Step 54. Press the Next button to continue. Page 42 October 2006 WTS SDS User’s Manual Installing the device drivers Figure 40 - Specify IP Address screen Figure 40 prompts you for the IP address of your SDS. Step Step 54 October 2006 Procedure Description Enter the IP address for your SDS in the box provided. Press the Next button to continue. If you are not sure of the IP address, see your system administrator. The Install the Device Drivers screen displays. Go to □ Step 27. Page 43 Installing the device drivers WTS SDS User’s Manual Figure 41 - Network Connectivity Test Failed screen Figure 41 displays when the IP connection test fails. It presents you with these three options: ¾ Change the SDS’ IP configuration and retest ¾ Move the SDS to a different location and retest ¾ Ignore the problem and continue installing Step Step 55 Page 44 Procedure Description Select one of the following options: ¾ Correct the SDS network configuration and retest. Press Next to continue. Click Back to retest current configuration. If you are not sure of the configuration parameters, consult your system administrator. The Internet Protocol (TCP/IP) Properties dialog box displays. Go to □ Step 32. Check with your system administrator for the subnet address. The Locate the Serial Device Server on remote subnet screen displays. Go to □ Step 45. ¾ Move the SDS to a different subnet and retest. Press Next to continue. ¾ Ignore the problem and continue installation. Press Next to continue. The TCP/IP Network Configuration Parameters screen displays. Go to □ Step 16. October 2006 WTS SDS User’s Manual Configuring the SDS using a Web interface Configuring the SDS using the Web interface Note: The firmware and web interface are designed by a third party vendor – if you have an issue and need assistance, please contact CyberResearch, Inc. not Quatech. Note: Wi-Fi units must have their parameters configured before they can communicate wirelessly. See page 6 for Wi-Fi information and page 14 for configuration information. Note: We have eliminated the need to use console ports, DOS shell commands, Telnet and other complicated methods of configuration. Just enter the IP address after the HTTP:// prefix in your Web browser’s Address bar, click Go, and you are ready to reconfigure the Device Server remotely! This section explains how to configure an SDS using a standard Web browser so that it can communicate over a network with a serial device. After the installation program included on the SDS CD-ROM is finished, the Device Server will be ready for use as configured. If you wish to make changes to the configuration at a future time, it is a simple matter of entering the IP address of the Device Server into the address bar of your computer’s Web browser. CyberResearch recommends the use of Microsoft’s Internet Explorer for accessing the Web browser-based configuration utilities built into our Device Servers. Other browsers can be used but be aware that we have not tested the many alternative browsers available, so some graphics and page formatting could be misaligned. The SDS stores its configuration in nonvolatile memory (Flash), which is retained even when the unit is turned off. Once you have installed the drivers on your computer and established an Ethernet connection with the SDS, you can maintain and configure the SDS using a Web interface. Using a Web interface, you can: ¾ ¾ ¾ ¾ ¾ ¾ October 2006 Configure the network settings (static vs. DHCP; if static, you can set the IP address, Gateway address, and Address mask) Configure Wi-Fi encryption settings View and set the serial port parameters (set per serial device application; setup lets you set data rate multiplier, performance mode, heartbeat timer, operating mode and operating mode settings) Perform diagnostic tests (Ping test, view port status list) Perform administrative functions (view, add, or remove users, give the SDS a descriptive name, upgrade software, and perform a remote reset) Contact CyberResearch corporate headquarters, sales, and technical support Page 45 Configuring the SDS using a Web interface WTS SDS User’s Manual Follow these steps to manage your SDS using a Web interface. Step Procedure Description Step 1 Open your Web browser. We recommend Internet Explorer 5.0 or higher. Step 2 Type the IP address for the SDS in the Web browser’s URL (address) field. The format for an IP address is http:// followed by a series of numbers separated by periods, such as http://123.456.789.123. The CyberResearch Serial Device Server Home page displays. Figure 42 - Home page screen Figure 42 denotes main page from the WTS 1601’s web interface. Please do not use the contact information on this page; should you have a problem or question regarding your product, please contact CyberResearch, Inc. with comments or questions about your device. Page 46 October 2006 WTS SDS User’s Manual Configuring the SDS using a Web interface Setting network parameters Note: If you inadvertently lose contact with the SDS, use the Installation Wizard to re-establish contact. Once you have made the initial network connection, you can maintain and configure this connection using CyberResearch’s Web interface. Of course, you can always go back and use the Installation Wizard to program the settings for the SDS. Contact your network administrator if you are unsure of any of these settings. Note: To setup for a Wireless (Wi-Fi) SDS, you must first connect to it using the wired Ethernet mode. See Enabling Wi-Fi Device Servers on page 14 for details. See Setting TCP/IP (LAN) and Wi-Fi (Wireless) parameters below or see Setting SNMP parameters on page 52. Setting TCP/IP (LAN) and Wi-Fi (Wireless) parameters Step Preliminary Step October 2006 Procedure Description Click on Network in the selection bar. The Network Setup screen shown on the following page displays. Page 47 Configuring the SDS using a Web interface WTS SDS User’s Manual Figure 43 - Network Setup screen Step Step 1 Procedure Description Select between a Static IP address and one set by the DHCP server. This must be a unique address in your network. Only let the DHCP server set the IP address if it is configured to always assign the same address to the SDS; otherwise, the connection will fail. For Static only, set the IP address. Note that the SDS’ MAC address is displayed. The MAC address is an Ethernet serial number. Step 2 Page 48 For Static only, set the Gateway IP address. The Gateway address must be within your local network. It should be the same as the IP address for the router that is connected to the same LAN segment as the SDS. October 2006 WTS SDS User’s Manual Step Step 3 Configuring the SDS using a Web interface Procedure Description For Static only, set the Address mask. The Address mask is a string of 0's and 1's that screens out the network part of an IP address so that only the host computer part remains. Most people select the Class C Address mask. ¾ Class A: 24 bits ¾ ¾ Class B: 16 bits Class C: 8 bits Table 7 - Class A, B, and C address masks Class Host bits visible Address mask A 24 255.0.0.0 B 16 255.255.0.0 C 8 255.255.255.0 Table 8 - Complete list of address masks Step 4 For Wired Setup, go to Step 11. For Wireless Setup, continue with Step 5. October 2006 Address mask Host bits 255.255.255.252 2 255.255.255.248 3 255.255.255.240 4 255.255.255.224 5 255.255.255.192 6 255.255.255.128 7 255.255.255.0 8 255.255.254.0 9 255.255.252.0 10 255.255.248.0 11 255.255.240.0 12 … … 255.255.0.0 16 255.254.0.0 17 … … 255.128.0.0 23 255.0.0.0 24 Before the SDS can communicate on an 802.11b wireless network, the WLAN settings must match the wireless network. By default, the SDS is set to Infrastructure network mode and its SSID, which is its wireless Network Name, is blank. This allows it to connect to any available wireless network. Page 49 Configuring the SDS using a Web interface Step WTS SDS User’s Manual Procedure Description The Service Set Identifier (SSID) is the name assigned to your wireless network. All devices on a wireless network must be configured with the same SSID. Step 5 Configure the SSID (network name). Step 6 Select the Access Mode. ¾ Infrastructure (using the access point) If using Infrastructure mode, go to Step 8. In Infrastructure mode, an AP bridges or joins a wireless network (WLAN) to a wired Ethernet network (LAN). ¾ Ad hoc (no access point) If using Ad hoc mode, continue with Step 7. Ad hoc is a wireless communication mode that allows all wireless devices within range of each other to discover and communicate with one another without involving central access points. Devices communicating in ad hoc mode do so in peer-to-peer fashion. All wireless adapters on the ad-hoc network must use the same SSID and the same channel number. Step 7 For Ad hoc only, configure the Channel. As with the SSID, devices sharing a wireless link must be tuned to the same channel. Note: The Channel setting is only used in Ad hoc mode. In Infrastructure mode, the access point (AP) determines which channel all devices associated with it must use. Step 8 Select the wireless security (encryption) mode. ¾ ¾ Open. Continue with WEP. Continue with Step 12. Step 10. ¾ WPA-PSK. Continue with Step 9. Note: In Infrastructure mode, the access point (AP) determines which setting must be used. In Ad hoc mode, all of the wireless devices on the ad hoc network must use the same setting. Open mode disables encryption. WEP provides basic encryption supported by nearly all 802.11 access points. WPA-PSK is more robust than WEP. It is supported by many recently designed access points. Step 9 Enter the WPA-PSK Passphrase. Go to Step 12. The passphrase can be as long as 63 characters. The same passphrase must be used on the access point and on the SDS. Step 10 Select the WEP Key Length. ¾ 64 bit Sets the WEP key length to be used. Selecting 64 bit activates the top row of hex number boxes. Selecting 128 bit activates both rows. ¾ Page 50 128 bit October 2006 WTS SDS User’s Manual Configuring the SDS using a Web interface Step 11 Enter the WEP Keys in hex. These are two digit hex values that will be used for the WEP keys. Valid characters are 0-9, a, b, c, d, e, and f. Step 12 Press Submit to configure the SDS with your settings. The IP Address Update successful screen displays. You must reset the SDS for your changes to take effect. Note: Press the browser’s Back button to make no changes to the original settings. If you press the browser’s Back button, your original settings remain unchanged. Figure 44 - IP Address Successful screen Step Step 13 Procedure Description Click on the link to reset the SDS. The Remote Reset screen displays. Figure 45 - Remote Reset screen Step Step 14 Procedure Description Press Reset to activate your settings. The SDS is now resetting screen displays. Figure 46 - SDS is now resetting screen Step Step 15 Procedure Description Close and reopen the browser. This confirms that the SDS is accessible. ¾ October 2006 Enter the new IP address in the URL address block. Page 51 Configuring the SDS using a Web interface WTS SDS User’s Manual Setting SNMP parameters Note: Only SDS devices with a firmware revision level of 5.0 and above can support SNMP. SDS devices with firmware revision 5.0 and higher have been enhanced with additional Flash RAM to support SNMP. Older hardware does not have sufficient memory to store the SNMP agent. To determine the firmware revision level of an SDS, navigate to the Home page in the Web-based interface (see page 45). The F/W revision level is shown at the bottom of the Home page. Step Preliminary Step Procedure Description Click on Network in the selection bar and then select SNMP Setup from the left panel. The SNMP Setup screen shown on the following page displays. Figure 47 - SNMP Setup screen Step Procedure Description By default, SNMP is disabled and the checkbox is cleared. Step 1 Enable or disable SNMP in the SDS. ¾ Select the Enable SNMP checkbox to enable SNMP. Continue with Step 2. ¾ Clear the checkbox to disable SNMP. Go to Step 5. Step 2 Enter the System Group information. ¾ Contact: ¾ Location: The Contact should be the person responsible for the operation of the SDS. The Location could be as general as Italy or as specific as the 3rd floor storage closet. Note: The System Group Description is the same as the SDS Descriptive Name, which you can set on the Administration screen. Page 52 October 2006 WTS SDS User’s Manual Step Step 3 Procedure Enter the Management Host/Trap Destination information. ¾ IP Address: ¾ Community Name: Configuring the SDS using a Web interface Description The host IP address you set here is where the SDS will send its traps. A community name, which is similar to a password, must always be provided. To receive traps from an SDS, the host must have the same community name. Note: If you set a host address of 0.0.0.0, then you must disable Security. The SDS will not send any traps. Step 4 Step 5 Enable or disable Security. ¾ Check to allow the SDS to accept SNMP packets from any host in the same community group. ¾ Clear the check box to allow the SDS to accept packets only from the host you specify in the Management Host/ Trap Destination configuration. Press Submit to configure the SDS with your settings. By default, the SDS can accept SNMP packets from any host with the same community name. The SNMP Update Successful screen displays. You must reset the SDS for your changes to take effect. If you press the browser’s Back button, your original settings remain unchanged. Note: Press the browser’s Back button to make no changes to the original settings. October 2006 Page 53 Configuring the SDS using a Web interface WTS SDS User’s Manual Figure 48 - SNMP Address Update Successful screen Step Step 6 Procedure Description Click on the link to reset the SDS. The Remote Reset screen displays. Figure 49 - Remote Reset screen Step Step 7 Procedure Description Press Reset to activate your settings. The SDS is now resetting screen displays. Figure 50 - SDS is now resetting screen Page 54 October 2006 WTS SDS User’s Manual Configuring the SDS using a Web interface Viewing the serial port parameters Step Preliminary Step Procedure Description Select Serial Ports from the selection bar and then select Serial Port Status from the left panel. The Serial Port Status screen shown on the following page displays. Note: You cannot make any changes to port parameters from this screen. To adjust these settings, select the Setup link. ¾ In Use indicates whether the port has been opened by a serial port application and so cannot be opened by another user application. If the port is open, In Use further indicates whether the port is open in Normal, Tunneling, Raw TCP, Auto TCP, or Raw UDP mode. Figure 51 - Serial Port Status screen Setting serial port parameters In configuring your Serial Device Server’s serial port parameters, there are two main considerations: ¾ ¾ Which operating mode should you use? Is your serial port connection RS-232, RS-422 or RS-485? Setting Normal operating mode parameters This section explains how to set your RS-232 and RS-422/485 parameters and also provides details on setting up your SDS in the Normal operating mode. In the following sections, you’ll find information on configuring your SDS for Tunneling, Raw TCP, Auto TCP, and Raw UDP operating modes. Note: Normal is the standard connection mode for an SDS. Step Preliminary Step October 2006 In most cases, you will use the Normal operating mode for your SDS. This allows you to use either CyberResearch’s virtual COM port drivers or the IntelliSock SDK to communicate over a network. Procedure Description Click on Serial Ports in the selection bar. The Serial Port Setup screen shown on the following page displays. Page 55 Configuring the SDS using a Web interface Step WTS SDS User’s Manual Procedure Description Note: Setup screens vary slightly between RS-232 and RS-232/422/485 (MEI) units. Note: Click on a link to see a pop-up help screen for that item. For example, if you click on the Normal Mode link, the following help screen pops up. If you have an RS-232/422/485 (MEI) SDS, the Configure Serial Port Interface step will display so that you can select between RS232 and RS-422/485 operation. If you have an RS-232 SDS, the Configure Serial Port Interface step will not display and you will not be presented with any RS422/485 configuration options. Figure 52 - Serial Port Setup screen for Normal mode Note: Click on a link to see a pop-up help screen for that item. Step Procedure Description Step 1 Click on the serial port you want to configure. Clicking on a port number highlights and selects that port. The selections on the screen are automatically populated with the parameters for the selected port. Step 2 Click on the Normal Operating Mode selector. Select Normal mode if you are using the CyberResearch virtual COM port drivers or IntelliSock SDK. You will find directions for configuring ports in Tunneling, Raw TCP, Auto TCP, and Raw UDP modes in the following sections. Step 3a Configure the Operating mode. Click on the desired data Rate Multiplier. The auto setting has no effect on the baud rate you set. However, if you select X2, X4, or X8, the baud rate of the serial port will be the baud rate that you set multiplied by 2, 4, or 8, respectively. Your choices are: ¾ Auto (Recommended) ¾ Force X2 mode ¾ ¾ Page 56 Force X4 mode Force X8 mode Note: Forcing a change in the data rate may cause communication problems with some October 2006 WTS SDS User’s Manual Step Configuring the SDS using a Web interface Procedure Description serial devices. If this is the case, change the setting back to Auto (Recommended). Step 3b Click on the desired Performance Selector. Step 3c Set the Heart Beat Time to a value from 1 to 65534 seconds. Default is 45 seconds. Step 4a (MEI only) Step 4b Heartbeat messages help detect when a connection has been lost between the PC Note: Use a value of 0 to disable the heartbeat driver and the SDS. If you need quick notification that the timer. connection has been lost, set this timer to a shorter value. If you are more concerned about network traffic, set this timer to a longer value. Steps 4a through 4d apply only to RS-232/422/485 (MEI) units Configure the serial port interface. This series of steps only applies to MEI units. Click on the desired interface selector. If you select RS232, the RS422/485 selections will be grayed out. Continue with Step 5. Click on the desired duplex mode selector. Select Full Duplex to always enable transmit and receive drivers. Select Half Rx to only enable the transmit drivers when the SDS is transmitting; receivers will always be enabled. Select Half Rx Tog to disable receivers and enable the transmit drivers only when the SDS is transmitting. Click on the desired connector setup. Select Loopback All to internally loopback RTS and CTS in the SDS. AuxIn and AuxOut are looped at the connector. Select Modem Control to send RTS on the AuxOut signal and to receive CTS on the AuxIn signal. Select 2- or 4-wire communication. Select 2-wire to use the transmit pair for both transmit and receive in RS-422/485. Select 4-wire to use a separate pair of wires for transmit and receive in RS-422/485. (MEI only) Step 4c (MEI only) Step 4d (MEI only) Step October 2006 Choose balanced mode except in those cases where the serial device cannot tolerate the slight delays inherent in normal TCP/IP operation. Balanced mode offers excellent performance for most applications. Low Latency mode heavily favors responsiveness over throughput. Procedure Description Step 4 (non-MEI) / Step 5 (MEI) applies to all units Page 57 Configuring the SDS using a Web interface Step Procedure Step 4 (non-MEI) or Step 5 (MEI only) Repeat the steps above for each port you need to configure and then press Save to implement all of your changes. WTS SDS User’s Manual Description Step 4 (non-MEI) / Step 5 (MEI) applies to all units Close and re-open the port to activate your changes. That’s it! You’re done. Normal is the most common operating mode and the easiest to set up. Setting Tunneling operating mode parameters Note: In Tunneling, a master configures a slave so that the slave can communicate with it. Note: A Tunnel master needs to know the slave’s IP address and serial port number. Serial Tunneling allows two SDS units to create a virtual cable connection between each other’s serial ports with one end configured as a master and the other end as a slave. You set up the master with the slave’s IP address and serial port number that you want use for the virtual connection. The master finds the slave and makes the connection. The master configures the slave’s parameters (baud rate, parity, and so forth) as necessary. A master can connect either to an SDS in Normal mode or to a slave in Tunneling mode. On the slave end, all you have to do is click Slave and leave the rest of the Operating Mode settings blank. The slave waits for a master to connect to it and to provide the configuration parameters. A master connects to one of a slave’s serial ports. A second master can connect to another port on the slave at the same time. However, you can only have one Tunnel master/slave combination working at the same time between any single set of ports. Step Preliminary Step Procedure Description Select Serial Ports from the selection bar. The Serial Port Setup screen shown on the following page displays. Note: Click on a link to see a pop-up help screen for that item. For example, if you click on the Tunnel Slave link, the following help screen pops up. Note: Setup screens vary slightly between RS-232 and RS-232/422/485 (MEI) units. If you have an RS-232/422/485 (MEI) SDS, the Configure Serial Port Interface step will display so that you can select between RS232 and RS-422/485 operation. If you have an RS-232 SDS, the Configure Serial Port Interface step will not display and you will not be presented with any RS422/485 configuration options. Page 58 October 2006 WTS SDS User’s Manual Configuring the SDS using a Web interface Figure 53 - Serial Port Setup screen for Tunneling mode Note: Click on a link to see a pop-up help screen for that item. Step Procedure Description Step 1 Select the serial port you want to configure. Click on a port number to select that port. The selections on the screen are automatically populated with any existing parameters for the selected port. Step 2 Click on the Tunneling Operating Mode selector. Tunneling allows two SDS devices to create a virtual connection between their serial ports. You will find directions for configuring ports in Normal mode in the previous section. Directions for Raw TCP, Auto TCP and Raw UDP modes are in the following sections. Step 3a Configure the Operating mode. The auto setting has no effect on the baud rate you set. However, if you select X2, X4, or X8, the baud rate of the serial port will be the baud rate that you set multiplied by 2, 4, or 8, respectively. Click on the desired data Rate Multiplier. Your choices are: ¾ Auto (Recommended) ¾ ¾ ¾ Step 3b October 2006 Force X2 mode Force X4 mode Force X8 mode Click on the desired Performance Selector. Note: Forcing a change in the data rate may cause communication problems with some serial devices. If this is the case, change the setting back to Auto (Recommended). Choose balanced mode except in those cases where the serial device cannot tolerate the slight delays inherent in normal TCP/IP operation. Page 59 Configuring the SDS using a Web interface Step Procedure WTS SDS User’s Manual Description Balanced mode offers excellent performance for most applications. Low Latency mode heavily favors responsiveness over throughput. Step 3c Set the Heart Beat Time to a value from 1 to 65534 seconds. Default is 45 seconds. Note: Use a value of 0 to disable the heartbeat timer. Step 3d Click on the desired Tunnel End Type selector. If Slave, skip to Step 4. If Master, continue with Steps 3e–3k. Note: Steps 3e–3k are only available if the Tunnel End Type is set to Master. If it is set to Slave, they are grayed out. Heartbeat messages help detect when a connection has been lost between the PC driver and the SDS. If you need quick notification that the connection has been lost, set this timer to a shorter value. If you are more concerned about network traffic, set this timer to a longer value. This selection determines which end of the serial tunnel connection is the Master and which is the Slave. At this point, your Slave ports are completely configured. Master ports must have the following parameters set. Step 3e Set the Baud Rate. The SDS and the serial device(s) to which it is attached must use the same serial connection speed. Step 3f Set the Parity. Parity can be odd, even, or none. Step 3g Set the Data Bits. Data Bits can be 7 or 8. Step 3h Set the Stop Bits. Stop Bits can be 1 or 2. Step 3i Set the Flow Control. Flow control determines the handshake method used between the SDS and the serial device(s) to stop the serial input/output process Step 3j Set the IP Address of the Slave SDS. This selection sets the IP address to be used in Serial Tunneling mode. Step 3k Set the Serial/TCP Port number on the Slave SDS. Step 4a (MEI only) Page 60 This selection sets the serial port for Serial Tunneling mode. For a singleport Slave SDS, enter “1”; for a multiport Slave SDS, enter the port number according to the label next to the connector you plan to use. Steps 4a through 4d apply only to RS-232/422/485 (MEI) units Configure the serial port interface. Click on the desired interface selector. This series of steps only applies to MEI units. If you select RS232, the RS422/485 selections will be grayed out. Continue with Step 5. October 2006 WTS SDS User’s Manual Configuring the SDS using a Web interface Step Procedure Description Step 4b (MEI only) Click on the desired duplex mode selector. Select Full Duplex to always enable transmit and receive drivers. Select Half Rx to enable the transmit drivers only when the SDS is transmitting; receivers are always enabled. Select Half Rx Tog to enable the transmit drivers and to disable receivers when the SDS is transmitting. Click on the desired connector setup. Select Loopback All to internally loopback RTS and CTS in the SDS. AuxIn and AuxOut are looped at the connector. Select Modem Control to send RTS on the AuxOut signal and to receive CTS on the AuxIn signal. Step 4c (MEI only) Step 4d Select 2- or 4-wire communication. Select 2-wire to use the transmit pair for both transmit and receive in RS-422/485. Select 4-wire to use a separate pair of wires for transmit and receive in RS-422/485. Step 4 (non-MEI) / Step 5 (MEI) applies to all units (MEI only) Step 4 (non-MEI) or Step 5 (MEI only) Repeat the steps above for each port you need to configure and then press Save to implement all of your changes. Close and re-open the port to activate your changes. That’s it! You’re done. Your SDS is configured for the Tunneling operating mode. Setting Raw TCP operating mode parameters Note: You could use Raw TCP if you were running a simple, custom TCP application. Note: Raw TCP settings must include the baud rate, parity, data bits, stop bits, and flow control. Step Preliminary Step October 2006 Raw TCP mode allows an application to communicate with an SDS without any custom protocol overhead. In this mode, the only data sent over the TCP connection is that which will be sent or received over the serial port. An SDS port in Raw TCP mode cannot connect to an SDS port in Normal mode because our Normal virtual COM port wraps the data in headers before it transmits. In Raw TCP mode, you can’t send down a packet that says change the baud rate; you have to set up the serial port configuration yourself. Raw TCP lets you write your own simple program to communicate without having to put headers on the packet (no custom protocol overhead). Procedure Description Select Serial Ports from the selection bar. The Serial Port Setup screen shown on the following page displays. Note: Setup screens vary slightly between RS-232 and RS-232/422/485 (MEI) units. If you have an RS-232/422/485 (MEI) SDS, the Configure Serial Port Interface step will display so that you can select between RS232 and RS-422/485 operation. Note: Click on a link to see a pop-up help screen for that item. For example, if you click on the Raw TCP mode link, the following help screen pops up. Page 61 Configuring the SDS using a Web interface WTS SDS User’s Manual If you have an RS-232 SDS, the Configure Serial Port Interface step will not display and you will not be presented with any RS422/485 configuration options. Figure 54 - Serial Port Setup screen for Raw TCP mode Note: Click on a link to see a pop-up help screen for that item. Step Procedure Description Step 1 Select the serial port you want to configure. Click on a port number to select that port. The selections on the screen are automatically populated with any existing parameters for the selected port. Step 2 Click on the Raw TCP operating mode selector. Raw TCP allows an SDS device to communicate without any protocol overhead. You will find directions for configuring ports in Normal and Tunneling modes in the preceding sections. Directions for Auto TCP and Raw UDP modes are in the following section. Step 3a Configure the Operating mode. The auto setting has no effect on the baud rate you set. However, if you select X2, X4, or X8, the baud rate of the serial port will be the baud rate that you set multiplied by 2, 4, or 8, respectively. Click on the desired data Rate Multiplier. Your choices are: ¾ Auto (Recommended) Page 62 October 2006 WTS SDS User’s Manual Step Step 3b Configuring the SDS using a Web interface Procedure ¾ Force X2 mode ¾ Force X4 mode ¾ Force X8 mode Description Click on the desired Performance Selector. Choose balanced mode except in those cases where the serial device cannot tolerate the slight delays inherent in normal TCP/IP operation. Note: Forcing a change in the data rate may cause communication problems with some serial devices. If this is the case, change the setting back to Auto (Recommended). Balanced mode offers excellent performance for most applications. Low Latency mode heavily favors responsiveness over throughput. Step 3c Set the Heart Beat Time to a value from 1 to 65534 seconds. Default is 45 seconds. Note: Use a value of 0 to disable the heartbeat timer. Heartbeat messages help detect when a connection has been lost between the PC driver and the SDS. If you need quick notification that the connection has been lost, set this timer to a shorter value. If you are more concerned about network traffic, set this timer to a longer value. Step 3d Set the Baud Rate. The SDS and the serial device(s) to which it is attached must use the same serial connection speed. Step 3e Set the Parity. Parity can be odd, even, or none. Step 3f Set the Data Bits. Data Bits can be 7 or 8. Step 3g Set the Stop Bits. Stop Bits can be 1 or 2. Step 3h Set the Flow Control. Step 4a Configure the serial port interface. (MEI only) Step 4b (MEI only) October 2006 Flow control determines the handshake method used between the SDS and the serial device(s) to stop the serial input/output process. Steps 4a through 4d apply only to RS-232/422/485 (MEI) units Click on the desired interface selector. Click on the desired duplex mode selector. This series of steps only applies to MEI units. If you select RS232, the RS422/485 selections will be grayed out. Continue with Step 5. Select Full Duplex to always enable transmit and receive drivers. Select Half Rx to only enable the transmit drivers when the SDS is transmitting; receivers always enabled. Select Half Rx Tog to disable receivers and enable the transmit drivers only when the SDS is transmitting. Page 63 Configuring the SDS using a Web interface WTS SDS User’s Manual Step Procedure Description Step 4c (MEI only) Click on the desired connector setup. Select Loopback All to internally loopback RTS and CTS in the SDS. AuxIn and AuxOut are looped at the connector. Select Modem Control to send RTS on the AuxOut signal and to receive CTS on the AuxIn signal. Step 4d (MEI only) Select 2- or 4-wire communication. Step 4 (non-MEI) or Step 5 (MEI only) Repeat the steps above for each port you need to configure and then press Save to implement all of your changes. Select 2-wire to use the transmit pair for both transmit and receive in RS-422/485. Select 4-wire to use a separate pair of wires for transmit and receive in RS-422/485. Step 4 (non-MEI) / Step 5 (MEI) applies to all units Close and re-open the port to activate your changes. That’s it! You’re done. Your SDS is configured for the Raw TCP operating mode. Setting Auto TCP operating mode parameters Note: Auto TCP is the only communication mode that lets an SDS initiate the connection. Note: Auto TCP settings must include the baud rate, parity, data bits, stop bits, and flow control. Note: In Normal and Raw TCP, an outside device such as a computer performs the act of connecting to the SDS. That’s also one of the modes under Auto TCP. A PC can connect to the SDS and start transferring data back and forth using its serial port. In Auto TCP, the SDS acts both as a client and as a server. As a client, it connects to the server at the specified TCP address and port. As a server, it will accept a Raw TCP mode connection. You can configure an SDS port to use either DSR or Data to initiate a connection. As with Raw TCP, you must configure all the connection information (baud rate, data bits, and so forth) on the Serial Port Setup page. There is no way for the application to tell the SDS what to use for that serial port connection. Auto TCP is also somewhat similar to Raw TCP in that only data passes through an SDS serial port – there are no headers and no packet. For this reason, you cannot use Auto TCP with our virtual COM port drivers. You can connect to the SDS via another host and use a port just as you would in Raw TCP. The main differences between Raw and Auto TCP are that Auto TCP operates in two modes (DSR and Data) and that it can enable the SDS to initiate a connection. ¾ Auto TCP–DSR mode: When the SDS port sees DSR become active (raised), it connects, on its own, to the end point specified by the IP address and TCP port on the Serial Port Setup Web page. When DSR is de-activated, the SDS drops the network connection. ¾ Auto TCP– Data mode: When an SDS starts receiving data on its serial port, it connects to the end point specified by the IP address and TCP port on the Serial Port Setup Web page. Auto TCP timeout: When the specified number of seconds passes without any new data, the SDS closes the connection. The Page 64 October 2006 WTS SDS User’s Manual Configuring the SDS using a Web interface Auto TCP Timeout is used only in Data mode, not in the DSR mode. Step Preliminary Step Procedure Description Click on Serial Ports in the selection bar. The Serial Port Setup screen shown on the following page displays. Note: Setup screens vary slightly between RS-232 and RS-232/422/485 (MEI) units. Note: Click on a link to see a pop-up help screen for that item. For example, if you click on the Auto TCP mode link, the following help screen pops up. If you have an RS-232/422/485 (MEI) SDS, the Configure Serial Port Interface step will display so that you can select between RS232 and RS-422/485 operation. If you have an RS-232 SDS, the Configure Serial Port Interface step will not display and you will not be presented with any RS422/485 configuration options. October 2006 Page 65 Configuring the SDS using a Web interface WTS SDS User’s Manual Figure 55 - Serial Port Setup screen for Auto TCP mode Note: Click on a link to see a pop-up help screen for that item. Step Procedure Description Step 1 Select the serial port you want to configure. Click on a port number to select that port. The selections on the screen are automatically populated with any existing parameters for the selected port. Step 2 Click on the Auto TCP Operating Mode selector. Auto TCP allows an SDS device to act as a client and to connect to the server when DSR is active or when data is received. You will find directions for configuring ports in Normal, Tunneling, and Raw TCP modes in the preceding sections. Directions for Raw UDP mode are in the following section. Step 3a Configure the Operating mode. The auto setting has no effect on the baud rate you set. However, if you select X2, X4, or X8, the baud rate of the serial port will be the baud rate that you set multiplied by 2, 4, or 8, respectively. Click on the desired data Rate Multiplier. Your choices are: ¾ Auto (Recommended) ¾ ¾ ¾ Step 3b Page 66 Force X2 mode Force X4 mode Force X8 mode Click on the desired Performance Selector. Note: Forcing a change in the data rate may cause communication problems with some serial devices. If this is the case, change the setting back to Auto (Recommended). Choose balanced mode except in those cases where the serial device cannot tolerate the slight delays inherent in normal TCP/IP operation. Balanced mode offers excellent October 2006 WTS SDS User’s Manual Step Step 3c Configuring the SDS using a Web interface Procedure Description performance for most applications. Low Latency mode heavily favors responsiveness over throughput. Set the Heart Beat Time to a value from 1 to 65534 seconds. Default is 45 seconds. Heartbeat messages help detect when a connection has been lost between the PC driver and the SDS. If you need quick notification that the connection has been lost, set this timer to a shorter value. If you are more concerned about network traffic, set this timer to a longer value. Note: Use a value of 0 to disable the heartbeat timer. Step 3d Set the Baud Rate. The SDS and the serial device(s) to which it is attached must use the same serial connection speed. Step 3e Set the Parity. Parity can be odd, even, or none. Step 3f Set the Data Bits. Data Bits can be 7 or 8. Step 3g Set the Stop Bits. Stop Bits can be 1 or 2. Procedure Description Step Step 3h Set the Flow Control. Flow control determines the handshake method used between the SDS and the serial device(s) to stop the serial input/output process Step 3i Click on the desired Auto TCP Mode selector. Your choices are: This selection determines whether the SDS port will initiate a communications link when DSR becomes active or when data is received at the serial port. Typically, the DTR output of the device to which you are connecting drives the DSR input on the SDS serial port. Step 3j ¾ DSR – Initiate the TCP connection when the SDS serial port’s DSR becomes active ¾ Data – Initiate the TCP connection when the SDS serial port receives data Set the Auto TCP timeout interval if you selected Data as the Auto TCP Mode. Note: This selection is only available if the Auto TCP Mode selector is set to Data. Otherwise, it is grayed out. Sets the number of seconds before the TCP connection is dropped after data stops. Step 3k Set the IP Address of the TCP host to which the SDS will connect. This selection sets the IP address to be used in Auto TCP mode. Step 3l Set the TCP Port number of the TCP host to which the SDS will connect. This selection sets the TCP port for Auto TCP modes. October 2006 Page 67 Configuring the SDS using a Web interface WTS SDS User’s Manual Steps 4a through 4d apply only to RS-232/422/485 (MEI) units Step 4a (MEI only) Click on the desired interface selector. This series of steps only applies to MEI unit. If you select RS232, the RS422/485 selections will be grayed out. Continue with Step 5. Click on the desired duplex mode selector. Select Full Duplex to always enable transmit and receive drivers. Select Half Rx to enable the transmit drivers only when the SDS is transmitting; receivers will always be enabled. Select Half Rx Tog to enable the transmit drivers and to disable receivers only when the SDS is transmitting. Step 4c (MEI only) Click on the desired connector setup. Select Loopback All to internally loopback RTS and CTS in the SDS. AuxIn and AuxOut are looped at the connector. Select Modem Control to send RTS on the AuxOut signal and to receive CTS on the AuxIn signal. Step 4d (MEI only) Select 2- or 4-wire communication. Step 4 (non-MEI) or Repeat the steps above for each port you need to configure and then press Save to implement all of your changes. Step 4b Configure the serial port interface. (MEI only) Select 2-wire to use the transmit pair for both transmit and receive in RS-422/485. Select 4-wire to use a separate pair of wires for transmit and receive in RS-422/485. Step 4 (non-MEI) / Step 5 (MEI) applies to all units Step 5 (MEI only) Close and re-open the port to activate your changes. That’s it! You’re done. Your SDS is configured for the Raw TCP operating mode. Setting Raw UDP operating mode parameters Note: In Raw UDP, your SDS can send messages to multiple receivers simultaneously. Raw UDP is mainly used to broadcast messages over a network. It is a connectionless protocol that offers a direct way to send and receive datagrams over an IP network but provides very few error recovery services. UDP applications must generally be willing to accept some loss, errors, or duplication. Most UDP applications do not require reliability mechanisms and may even be hindered by them. If your application requires a high degree of reliability, you should use a protocol such as TCP. UDP provides no guarantees for message delivery and a UDP sender has no way of telling the status of its messages once it sends them onto the network. For multicast packages, unlimited propagation of UDP packets through routers is prevented by the Time To Live (TTL) scheme. Each router decrements a packet’s TTL value and only Page 68 October 2006 WTS SDS User’s Manual Configuring the SDS using a Web interface forwards those packets whose TTL value is greater than the threshold configured on the router. UDP has three possible modes of communication that you select according to the IP/UDP address you enter: ¾ ¾ ¾ Step Preliminary Step Point to point – key in a specific device’s address to communicate only with that device Broadcast – key in the broadcast address of 255.255.255.255 to send to all devices listening for the transmission Multicast – key in an address in the assigned UDP range of 224.0.0.0 – 239.255.255.255 to send to several devices with the selected address Procedure Description Select Serial Ports from the selection bar. The Serial Port Setup screen shown on the following page displays. Note: Setup screens vary slightly between RS-232 and RS-232/422/485 (MEI) units. Note: Click on a link to see a pop-up help screen for that item. For example, if you click on the Raw UDP link, the following help screen pops up. If you have an RS-232/422/485 (MEI) SDS, the Configure Serial Port Interface step will display so that you can select between RS232 and RS-422/485 operation. If you have an RS-232 SDS, the Configure Serial Port Interface step will not display and you will not be presented with any RS422/485 configuration options. October 2006 Page 69 Configuring the SDS using a Web interface WTS SDS User’s Manual Figure 56 - Serial Port Setup screen for Raw UDP mode Note: Click on a link to see a pop-up help screen for that item. Step Procedure Description Step 1 Select the serial port you want to configure. Click on a port number to select that port. The selections on the screen are automatically populated with any existing parameters for the selected port. Step 2 Click on the Raw UDP Operating Mode selector. Raw UDP allows an SDS device to perform one to many transmissions. You will find directions for configuring ports in Normal, Tunneling, Raw TCP and Auto TCP modes mode in the previous sections. Step 3a Step 3b Page 70 Configure the Operating mode. Click on the desired data Rate Multiplier. Your choices are: ¾ ¾ ¾ Auto (Recommended) Force X2 mode Force X4 mode ¾ Force X8 mode Click on the desired Performance Selector. The auto setting has no effect on the baud rate you set. However, if you select X2, X4, or X8, the baud rate of the serial port will be the baud rate that you set multiplied by 2, 4, or 8, respectively. Note: Forcing a change in the data rate may cause communication problems with some serial devices. If this is the case, change the setting back to Auto (Recommended). Choose balanced mode except in those cases where the serial device cannot tolerate the slight delays inherent in normal TCP/IP operation. Balanced mode offers excellent performance for most applications. Low Latency mode heavily favors October 2006 WTS SDS User’s Manual Step Step 3c Configuring the SDS using a Web interface Procedure Description responsiveness over throughput. Set the Heart Beat Time to a value from 1 to 65534 seconds. Default is 45 seconds. Heartbeat messages help detect when a connection has been lost between the PC driver and the SDS. Note: Use a value of 0 to disable the heartbeat timer. If you need quick notification that the connection has been lost, set this timer to a shorter value. If you are more concerned about network traffic, set this timer to a longer value. Step 3d Set the Baud Rate. The SDS and the serial device(s) to which it is attached must use the same serial connection speed. Step 3e Set the Parity. Parity can be odd, even, or none. Step 3f Set the Data Bits. Data Bits can be 7 or 8. Step 3g Set the Stop Bits. Stop Bits can be 1 or 2. Step 3h Set the Flow Control. Flow control determines the handshake method used between the SDS and the serial device(s) to stop the serial input/output process Step 3i Set the UDP/IP Address. These are your options: This selection determines the destination IP address where data will be sent. ¾ Multicast ¾ Broadcast ¾ Point to point For multicast, enter a valid multicast IP address (244.0.0.0 – 239.255.255.255) to broadcast data to a specific multicast group. For broadcast, enter 255.255.255.255 to broadcast the serial data to all devices ready to accept data. For point to point, enter a specific address to which the SDS can send UDP packets containing serial data. Step 3j Set the UDP port designation. Enter a valid UDP port number to which the SDS can send. The SDS will receive on both port 5000 and on the designated serial port number. Step 3k Set the TTL value. This selection sets the TTL (Time To Live) value for multicast packets. Each router decrements the TTL value of the packet and will only forward a packet if its value is greater than the threshold configured on the router. The following are standard settings: ¾ 0 Restricted to host ¾ 1 Restricted to subnet ¾ ¾ October 2006 15 Restricted to site 63 Restricted to region Page 71 Configuring the SDS using a Web interface Step Procedure Step 4a (MEI only) Configure the serial port interface. Description ¾ 127 Worldwide ¾ 255 Unrestricted Steps 4a through 4d apply only to RS-232/422/485 (MEI) units Click on the desired interface selector. This series of steps only applies to MEI units. If you select RS232, the RS422/485 selections will be grayed out. Continue with Step 5. Click on the desired duplex mode selector. Select Full Duplex to always enable transmit and receive drivers. Select Half Rx to only enable the transmit drivers when the SDS is transmitting; receivers always enabled. Select Half Rx Tog to disable receivers and enable the transmit drivers only when the SDS is transmitting. Step 4c (MEI only) Click on the desired connector setup. Select Loopback All to internally loopback RTS and CTS in the SDS. AuxIn and AuxOut are looped at the connector. Select Modem Control to send RTS on the AuxOut signal and to receive CTS on the AuxIn signal. Step 4d (MEI only) Select 2- or 4-wire communication. Step 4 (non-MEI) or Step 5 (MEI only) Repeat the steps above for each port you need to configure and then press Save to implement all of your changes. Step 4b WTS SDS User’s Manual (MEI only) Page 72 Select 2-wire to use the transmit pair for both transmit and receive in RS-422/485. Select 4-wire to use a separate pair of wires for transmit and receive in RS-422/485. Step 4 (non-MEI) / Step 5 (MEI) applies to all units Close and re-open the port to activate your changes. That’s it! You’re done. Normal is the most common operating mode and the easiest to set up. October 2006 WTS SDS User’s Manual Configuring the SDS using a Web interface Running diagnostic tests Using the Port Status screen Step Preliminary Step Procedure Description Click on Diagnostics from the selection bar. The Port Status screen displays. Figure 57 - Port Status screen Step Procedure Description Step 1 Select the desired port. Click on the port number. Step 2 Press the Clear key to reset the selected port. Pressing Clear lets you halt an unresponsive communications link. Use this procedure to free a com port that locks up. Note that the data trying to get through that port is lost and will need to be resent. Running the Ping test Step Preliminary Step Procedure Description Click on Diagnostics from the selection bar and then click on either of the Ping Test selections from the left panel. The Ping Test screen displays. Figure 58 - Ping Test screen Step Step 1 October 2006 Procedure Description Enter the IP address of a device that is connected to the network. This can be a PC or other device. Use the Ping test to verify connectivity between the SDS and another device on the network as specified by the IP address field. Page 73 Configuring the SDS using a Web interface Step Procedure WTS SDS User’s Manual Description Note: This utility is not intended to ping the SDS from a PC, but for the SDS to ping a PC or other device. To ping the SDS from a PC on the network, use the ping command from a DOS command line. Press Ping to run the test. The Ping results screen displays. Figure 59 - Ping results screen Step Step 2 Procedure Description Press the Ping Test link to return to the Ping Test screen. You can also press the Backspace key to return to the Ping Test screen. Checking wireless status Step Preliminary Step Procedure Description Click on Diagnostics from the selection bar and then click on Wireless Status from the left panel. The Wireless Status screen displays. Figure 60 – Wireless Status screen Step Step 1 Page 74 Procedure Description The wireless status displays the current channel number and a set of metrics that give an indication of the quality of the wireless connection October 2006 WTS SDS User’s Manual Configuring the SDS using a Web interface Performing administrative functions The Admin functions let you update the software, assign a descriptive name to the SDS, and manage users (control who can access the SDS from the Web interface). You can access these functions by selecting Admin from the selection bar. Managing users Note: You can create a maximum of ten users for each SDS. Initially, the SDS is configured to have no exclusive users. This means that anyone with the device drivers installed and who knows the SDS’ IP address can use the Web interface to configure and manage the SDS. You can create users to restrict this type of access to approved personnel only. Once you create a user, only someone using that user ID and password has Web access to the SDS. Showing users Step Preliminary Step Procedure Description Click on Admin in the selection bar and then select Show Users from the left panel. The Show Users screen displays. Passwords appear as asterisks. Figure 61 - Show Users screen Step Step 1 Procedure Description Make note of any users you want to add or delete. Select Add/Del Users to add or remove users. Write down the user’s name exactly as it appears including any spaces. Adding users Step Preliminary Step October 2006 Procedure Description Click on Admin in the selection bar and then select Add/Del User from the left panel. The Add/Del Users screen displays. Page 75 Configuring the SDS using a Web interface WTS SDS User’s Manual Figure 62 - Add/Del Users screen Step Procedure Description Passwords appear as asterisks. Step 1 Enter the user name and password in the boxes provided. Step 2 Select the Add option. Step 3 Press the Submit key. A network confirmation prompt displays. Figure 63 - Network confirmation prompt Step Procedure Description Step 4 Enter the user name and password in the boxes provided. If desired, check the Remember my password box. Be sure to key in the name and password in exactly as you did in the Add/Del Users screen. Both are case-sensitive. Step 5 Click OK. You can now view the new user name and password by selecting Show Users from the Admin screen. Be sure to record the user name and password in a safe place. Procedure Description Deleting users Step Preliminary Step Page 76 Click on Admin in the selection bar and then select Add/Del User from the left panel. The Add/Del Users screen displays. October 2006 WTS SDS User’s Manual Configuring the SDS using a Web interface Figure 64 - Add/Del Users screen Step Procedure Description Be sure to enter them exactly as they were originally keyed in when the user was added. Both the user ID and the password are case-sensitive. Passwords appear as asterisks. Step 1 Enter the user name and password in the boxes provided. Step 2 Select the Delete option. Step 3 Press the Submit key. You can confirm the deletion of this user by selecting Show Users from the Admin screen. See below. Figure 65 - Show Users screen Giving the SDS a descriptive name Step Preliminary Step Procedure Description Click on Admin in the selection bar. The Set Descriptive Name screen displays. Figure 66 - Set Descriptive Name screen Step Procedure Description Step 1 Enter a unique name for this SDS that is descriptive of its function or location. Use a maximum of 60 valid characters (a-z, 0-9, and space). Step 2 Press Submit. Your SDS’ name now appears at the bottom of the Home page screen. Note: You can change or delete the name of your SDS by returning to the Set Descriptive Name screen and either changing or deleting the name and then pressing Submit. October 2006 Page 77 Configuring the SDS using a Web interface WTS SDS User’s Manual Upgrading firmware Step Preliminary Step Procedure Description Click on Admin in the selection bar and then select Upgrade Firmware from the left panel. The Upgrade Firmware screen displays. Figure 67 - Firmware Upgrade screen Note: Only SDS devices with a firmware revision level of 5.0 and above can support SNMP. Determine the revision level of an SDS (check the bottom of the Home page in the Web-based interface) before upgrading the firmware. Step Procedure Description Step 1 Browse to the location with the revised firmware file. Most of CyberResearch’s device drivers are available from our Web site. Step 2 Press Send File. The Remote Reset screen displays. Figure 68 - Remote Reset Step Step 3 Page 78 Procedure Description Press Reset to reset your SDS. The SDS must be reset to implement the new firmware. October 2006 WTS SDS User’s Manual Configuring the SDS using a Web interface Contacting CyberResearch As mentioned in the note at the beginning of “Configuring the SDS using the Web interface,” the firmware for your device is developed by a third-party. Please do not use their contact information should a question or issue arise concerning your device. Always contact CyberResearch, Inc. with any questions or problems pertaining to your product. Figure 69 - Contact Us screen Contact Information ® CyberResearch, Inc. www.cyberresearch.com 25 Business Park Dr., Branford, CT 06405 USA Toll-Free: 800-341-2525 203-483-8815 (9am to 5pm EST) FAX: 203-483-9024 October 2006 Page 79 Troubleshooting and Maintaining an SDS WTS SDS User’s Manual Troubleshooting and Maintaining an SDS Troubleshooting an SDS Note: Any unauthorized repairs or modifications will void the SDS' warranty. This section lists some common problems and their causes. If the information below does not provide a solution, contact CyberResearch technical support. Problem Cause Solution The SDS does not turn on and no LEDs light up. ¾ The SDS or the 1. Make sure that the power source is properly power source is damaged, or the SDS does not have power. connected to the SDS’ power jack. Caution! Only use the CyberResearch +5 V power source. 2. Make sure the power adapter is connected to a functioning electrical outlet. 3. Contact CyberResearch tech support. The serial device will not respond even though the SDS is functioning. ¾ The serial device is The search utility does not find the SDS. Could be due to a variety of causes: ¾ Check power not powered up; the serial cable is wrong/damaged, or the serial port settings are wrong. ¾ Check status Page 80 1. Make sure the serial device is powered up. 2. Make sure the serial cable is properly connected to the serial device and to the SDS. Verify the cable pinouts. Try a different serial cable. Try a different port on the SDS. Review your serial device literature. Make sure the settings it specifies match those the SDS is using (check the SDS serial port settings using the Web interface). 7. Try plugging the serial device directly into a PC. 3. 4. 5. 6. Verify that the blue Power LED is lit. If the Power LED is not lit, 1. Check the power connection. 2. If power is connected properly, contact CyberResearch tech support. Verify that the green Status LED is lit. If the Status LED is not lit, 1. Check the firmware version. a. If the SDS firmware has been upgraded from the factory default, reset the SDS to the factory default. See page 9. b. If the procedure to return to factory default fails, contact CyberResearch tech support. 2. Cycle power on the box and wait approximately 30 seconds. If the Status LED still does not October 2006 WTS SDS User’s Manual Problem The search utility does not find the SDS, cont. Troubleshooting and Maintaining an SDS Cause Solution light, contact CyberResearch tech support. ¾ Check LAN Verify that the link status light under the LAN connection is lit. If it is not lit, 1. Check to see if the LAN patch cable is fully seated at both ends. 2. Make sure the hub is powered up and functioning. 3. Try another port on the hub. 4. Try another patch cable. 5. Contact CyberResearch tech support. ¾ Check subnet Verify that the SDS and the PC from which the search is being performed are on same subnet. Note: There should be nothing other than a hub or a switch between the PC and SDS. 1. Check with the network administrator to verify that the SDS and the PC are on same subnet. 2. If you are unsure of the subnet, check the IP address of the PC (by running ipconfig in a command box) against the IP address of another PC plugged into the same hub as SDS. 3. If the PC and SDS are on same subnet but a search still fails, connect the SDS directly to the PC using a crossover cable (if supplied; otherwise, use any Ethernet cable) and the instructions provided. 4. Contact CyberResearch tech support. Web Browser does not display the SDS home page. October 2006 ¾ Check Web connection Use Ping to verify the connection. 1. If Ping fails: a. Find the SDS using the search utility. Display the network settings. 1. Is subnet mask OK? 2. Is Gateway address OK? 3. Is IP address OK? b. Can the PC ping another device on the same subnet as the SDS? 1. No: Correct the PC setup and then retry. 2. Yes: Contact CyberResearch tech support. 2. If Ping passes: a. Is Internet Explorer setup to use proxy server? If yes, disable the proxy server and retry. b. Is a supported browser being used? 1. No: Install and use supported browser. 2. Yes: Contact CyberResearch tech Page 81 Troubleshooting and Maintaining an SDS Problem Cause WTS SDS User’s Manual Solution support. Problem Cause Solution Your application cannot open the COM port ¾ Wrong COM port 1. Is the application set up to use the correct COM port number? a. No – Select correct COM port number. b. Yes – Continue with step 2. 2. Does COM port(s) show up in Device Manager? a. No – Go through the installation process, then verify that the COM port(s) shows up in Device Manager. b. Yes – In Device Manager, open the properties page under Multi-port Serial Adapters for the SDS and go to the SDS Configuration tab. 3. Does the auto query that runs when you select the SDS Configuration tab find the device? a. Yes – Continue with step 3: Try to open the COM port in HyperTerminal. b. No - Verify that the MAC address, IP address, Subnet mask, and gateway address are correct for the SDS being used. If not, click on the Advance button and use the search utility to select the correct SDS and set these parameters. Retry to see if the application will open the port. 4. Try to open the COM port in HyperTerminal. a. Port opens: There is a problem with your application that is beyond scope of this troubleshooting guide. b. Port does not open: You require help that is beyond the scope of this troubleshooting guide. Contact CyberResearch tech support. Application can open COM port but data will not transfer. ¾ Check COM port in Page 82 number or other COM port-related problem; problem with application HyperTerminal Using HyperTerminal, open the selected COM port. 1. Place a loopback connector on the selected COM port. 2. Set the communication parameters. 3. Type random characters. Does the screen show these characters echoed back? a. Yes - The port is functioning. b. No - Try another port. If the characters still are not echoed back, contact October 2006 WTS SDS User’s Manual Problem Troubleshooting and Maintaining an SDS Cause Solution CyberResearch tech support. October 2006 Page 83 Troubleshooting and Maintaining an SDS WTS SDS User’s Manual Maintaining an SDS Operating conditions The SDS series is designed to work in environments that are free from dust, dirt, and moisture. You can operate an SDS at temperatures between 0° to 70°C. Do not leave an SDS where moisture can condense on it. Handling the SDS The following information can help you to use the SDS in a reliable, trouble-free manner. ¾ ¾ ¾ ¾ Make sure the SDS is off before you connect or remove the Ethernet cable. Make sure that all serial devices are connected correctly. Protect the SDS from excessively dirty or damp conditions. Do not drop, strike, or handle the SDS roughly. Handle it like any other piece of sensitive electronic equipment. Moving the SDS Follow these steps if you need to move your SDS or prepare it for shipment. ¾ ¾ ¾ Disconnect the power cable. Disconnect all other cables. If you are shipping the SDS, use the original packing material and container. If you no longer have the original packaging, use a sturdy carton and sufficient packing material to protect the SDS during shipment. Cleaning the SDS Clean the outside of the SDS as needed with a slightly moist soft cloth. Do not use solvents or abrasive cleaners. Servicing the SDS There are no user-serviceable parts in the SDS. Contact CyberResearch for repair. Be sure to obtain an RMA number from CyberResearch technical support before returning your SDS for service. Page 84 October 2006 WTS SDS User’s Manual Appendix C Appendix A Specifications LAN interface 10/100 Base T (IEEE 802.3), auto-negotiation and auto MDI/MDIX. RJ-45 Network connector Optional 802.11b wireless networking Serial interface ¾ Fully independent ports on multiport models ¾ ¾ DB-9 male, DTE configuration “M” models are supplied with 10-pin RJ-45 adapters that attach to the DB-9 connectors ¾ ¾ “W” models are equipped with 802.11b wireless networking capability Hardware flow control ¾ Full modem control RS-232 (EIA-232) RS-232/422/RS-485 Parity, Stop bits: Parity configurable as: Data bits configurable as: Stop bits configurable as: Speed: Each serial port supports data transfer speeds of up to 921.6 kbps, depending on flow control protocols used, cable length and condition, and other factors. The aggregate throughput of all ports on any given Device Server is limited to approximately 5 Mbps. None, Even, Odd 5, 6, 7, 8 1, 1.5, 2 Note: The surge suppression (–SS) option reduces effective baud rates to 115.2 Kbps maximum on each port. Please contact Technical Support at [email protected] for additional information. October 2006 Page 85 Appendix C WTS SDS User’s Manual Signals: RJ-45: View looking into the connector RS-232 signal Pin # RS-422/485 signal, 4-wire mode RS-422/485 signal, 2-wire mode RI 1 TxD– RTS 2 AuxOut+ Transmit/Receive Data (Data–) N/C DTR 3 AuxOut– N/C GND 4 GND Signal Ground (GND) TxD 5 TxD+ RxD 6 RxD+ Transmit/Receive Data (Data+) N/C DCD 7 AuxIn– N/C DSR 8 RxD– N/C CTS 9 AuxIn+ N/C N/C 10 N/C N/C DB-9: View looking into the connector Page 86 RS-232 signal Pin # RS-422/485 signal, 4-wire mode RS-422/485 signal, 2-wire mode DCD 1 AuxIn– N/C RxD 2 RxD+ N/C TxD 3 TxD+ Transmit/Receive Data (Data+) DTR 4 AuxOut– N/C GND 5 GND DSR 6 RxD– Signal Ground (GND) N/C RTS 7 AuxOut+ N/C CTS 8 AuxIn+ N/C RI 9 TxD– Transmit/Receive Data (Data–) October 2006 WTS SDS User’s Manual Appendix C Transmitter outputs RS-232: High Level Output: Low Level Output: Transmitter Skew: +5 V (min), +5.4 V (typical) –5 V (min), –5.4 V (typical) 50 ns (typical), 200 ns (max) RS-422/485: Transmitter Outputs: 2 V (min) for 100 Ohm load Transmitter Skew: 5 ns (typical), 10 ns (max) Distance: 4000 feet Receiver inputs: RS-232: Input Voltage Rating: –15 V to +15 V Receiver Skew: 120 ns (typical), 250 ns (max) RS-422/485: Input Voltage Rating: –15 V to +15 V Common Mode Input Voltage Receiver Skew: 13 ns (typical) Surge suppression option Surge suppressor is applied to each line; capable of sustaining up to 40-A peak, 8 x 20-μs transient surges, a clamping voltage of 30 V (RS232) or 15.5 V (RS-422/485), and a peak energy dissipation of 0.1 Joules. Note: Units with the "SS" option are limited to 115.2 kbps due to capacitive loading. Protocols and software CyberResearch provides several ways to manage and configure SDS after installation: a. Windows Device Manager (CyberResearch Device Manager on Windows NT4) b. On-board utility accessible from a standard HTTP web browser. c. Simple Network Management Protocol (SNMP) d. IntelliSock TCP socket services Management UDP, TCP/IP, HTTP, DHCP, ARP, SNMP IP configuration DHCP, Static IP (set through SDS Installation Wizard) or custom UDP datagram utility Communication modes Normal, Tunneling, Raw TCP, Auto TCP, Raw UDP Client OS support Device drivers provided for Windows 2000, Windows XP, Windows NT4, and Linux Other operating systems supported by IntelliSock TCP socket services Check Website for latest OS support information October 2006 Page 87 Appendix C Hardware WTS SDS User’s Manual Processor: Freescale / Motorola Power PC SDRAM: 8 MB FLASH Memory: 2 MB FLASH is field upgradeable over Ethernet connection Switches All models: On back panel: ¾ Reset: Resets the unit and does a hard reboot. User data in volatile memory cleared. System configuration unchanged. If held until Status LED flashes slowly and then released: User data in memory is cleared and configuration is reset to factory default settings If held until Status LED flashes quickly and then released: User data in memory is cleared and system firmware reverts to the factory default Indicators 4- and 8-port models: On front panel ¾ Power: On when unit has power On rear panel ¾ Link (left side of Ethernet connector): Network connection ON = connected to network; OFF = not connected ¾ Speed (right side of Ethernet connector): Speed of network connection, ON = 100 Mbps; OFF = 10 Mbps. Data: Color RED if port is configured for RS-232 operation. Color GREEN if port is configured for RS-422/485 operation. Flashes when data is being sent or received on the serial port. ¾ ¾ Page 88 Status: Off until box is running then turned on. If the Reset button is pushed in and held, the following occurs: 1. Status LED flashes at a rate of 1 flash every 2 seconds for 10 seconds (slow flash). If Reset button is released during this time period, the configuration is reset to factory defaults; then the SDS automatically restarts. 2. If Reset button is held past the first 10 seconds, the LED starts to flash at a rate of 1 flash per second for 10 seconds (fast flash). If Reset button is released during this time period, the SDS is reset back to factory default firmware revision; then the SDS automatically restarts. 3. If Reset button is held past the first 20 seconds, the LED stops flashing. If Reset button is released during this time period, the SDS resets but the configuration is unchanged. October 2006 WTS SDS User’s Manual 1- and 2-port models: Appendix C All LEDs have the same definitions as above and are located as indicated below: ¾ ¾ Power – top cover Link – left side of Ethernet connector ¾ ¾ Speed – right side of Ethernet connector Data – next to DB-9 serial port(s) ¾ Status – next to power jack Power supply DC input, with AC Adapters provided for 100VAC–240VAC, 50Hz– 60Hz, Autosensing. +5V, 2A (10W) max Environment Operating: Storage: Relative Humidity: Certifications FCC, CE, IC October 2006 0° C to 70° C –40° C to 70° C 10% to 90% non-condensing Page 89 ® CyberResearch Data Acquisition WTS 160xE Series Product Service Diagnosis and Debug CyberResearch, Inc. maintains technical support lines staffed by experienced Applications Engineers and Technicians. There is no charge to call and we will return your call promptly if it is received while our lines are busy. Most problems encountered with data acquisition products can be solved over the phone. Signal connections and programming are the two most common sources of difficulty. CyberResearch support personnel can help you solve these problems, especially if you are prepared for the call. To ensure your call’s overall success and expediency: 1) 2) 3) 4) 5) 6) Have the phone close to the PC so you can conveniently and quickly take action that the Applications Engineer might suggest. Be prepared to open your PC, remove boards, report back-switch or jumper settings, and possibly change settings before reinstalling the modules. Have a volt meter handy to take measurements of the signals you are trying to measure as well as the signals on the board, module, or power supply. Isolate problem areas that are not working as you expected. Have the source code to the program you are having trouble with available so that preceding and prerequisite modes can be referenced and discussed. Have the manual at hand. Also have the product’s utility disks and any other relevant disks nearby so programs and version numbers can be checked. Preparation will facilitate the diagnosis procedure, save you time, and avoid repeated calls. Here are a few preliminary actions you can take before you call which may solve some of the more common problems: 1) 2) 3) 4) Check the PC-bus power and any power supply signals. Check the voltage level of the signal between SIGNAL HIGH and SIGNAL LOW, or SIGNAL+ and SIGNAL– . It CANNOT exceed the full scale range of the board. Check the other boards in your PC or modules on the network for address and interrupt conflicts. Refer to the example programs as a baseline for comparing code. CyberResearch, Inc. 25 Business Park Drive Branford, CT USA 91 P: (203) 483-8815; F: (203) 483-9024 www.cyberresearch.com ® CyberResearch Data Acquisition WTS 160xE Series Intentionally Blank 92 ©Copyright 2006 CyberResearch, Inc. ® CyberResearch Data Acquisition WTS 160xE Series Warranty Notice CyberResearch, Inc. warrants that this equipment as furnished will be free from defects in material and workmanship for a period of one year from the confirmed date of purchase by the original buyer and that upon written notice of any such defect, CyberResearch, Inc. will, at its option, repair or replace the defective item under the terms of this warranty, subject to the provisions and specific exclusions listed herein. This warranty shall not apply to equipment that has been previously repaired or altered outside our plant in any way which may, in the judgment of the manufacturer, affect its reliability. Nor will it apply if the equipment has been used in a manner exceeding or inconsistent with its specifications or if the serial number has been removed. CyberResearch, Inc. does not assume any liability for consequential damages as a result from our products uses, and in any event our liability shall not exceed the original selling price of the equipment. The equipment warranty shall constitute the sole and exclusive remedy of any Buyer of Seller equipment and the sole and exclusive liability of the Seller, its successors or assigns, in connection with equipment purchased and in lieu of all other warranties expressed implied or statutory, including, but not limited to, any implied warranty of merchant ability or fitness and all other obligations or liabilities of seller, its successors or assigns. The equipment must be returned postage prepaid. Package it securely and insure it. You will be charged for parts and labor if the warranty period has expired. Returns and RMAs If a CyberResearch product has been diagnosed as being non-functional, is visibly damaged, or must be returned for any other reason, please call for an assigned RMA number. The RMA number is a key piece of information that lets us track and process returned merchandise with the fastest possible turnaround time. PLEASE CALL FOR AN RMA NUMBER! Packages returned without an RMA number will be refused! In most cases, a returned package will be refused at the receiving dock if its contents are not known. The RMA number allows us to reference the history of returned products and determine if they are meeting your application’s requirements. When you call customer service for your RMA number, you will be asked to provide information about the product you are returning, your address, and a contact person at your organization. Please make sure that the RMA number is prominently displayed on the outside of the box. • Thank You • CyberResearch, Inc. 25 Business Park Drive Branford, CT USA 93 P: (203) 483-8815; F: (203) 483-9024 www.cyberresearch.com ® CyberResearch Data Acquisition WTS 160xE Series Intentionally Blank 94 ©Copyright 2006 CyberResearch, Inc. CyberResearch, Inc. 25 Business Park Drive Branford, CT 06405 USA P: (203) 483-8815; F: (203) 483-9024 www.cyberresearch.com