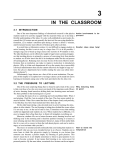
Transcript
Information
When using any electrical apparatus always observe safety regulations and
use basic safety precautions to reduce the risk of fire, electric shock and
personal injury, including the following:
English
Read, Keep and Follow these instructions, heeding all Warnings.
Help line
For assistance during normal working hours (9am-5pm, Mon-Fri, New Zealand local time)
call Oriental Pacific International Ltd.
CAUTION! This is a class 1 laser product. However this player uses a visible laser beam which could cause
hazardous radiation exposure if directed. Be sure to operate the equipment as directed.
Do not place eyes close to any openings when connected to the mains supply.
WARNING! Do not remove any cover.
WARNING! No objects filled with liquid, such as vases, shall be placed on this equipment or in any position
where liquid may fall into this equipment or any other electrical apparatus
.
WARNING! Do not insert any objects into any openings of this equipment or any other electrical apparatus.
NZ call: 0800 89 85 80
Email: [email protected]
WARNING! Do not use this apparatus near water. To avoid the risk of fire or electric shock, do not expose
this apparatus to rain or moisture. The apparatus shall not be exposed to dripping or splashes and
is strictly for indoor use only.
IMPORTANT SAFEGUARDS
WARNING! Not for use in Tropical humid climates.
WARNING! Do not immerse in any liquid whilst in use or cleaning. Clean only with a damp cloth,
dry with a dry towel. Do not use harsh abrasives as these may damage the plastic parts.
The graphic symbols used in this manual or on the back cover of the set mean the following:
WARNING! DO NOT block any ventilation openings. Keep away from curtains, newspapers and
restricted areas. Install in accordance with any specific manufacturer’s instructions. Always allow a
sufficient gap around the apparatus to avoid overheating.
WARNING! Do not install near any heat sources such as radiators, gas heaters, stoves or other
apparatus (including amplifiers) that produce heat. Do not leave in direct sunlight.
Read this manual in full before use.
WARNING! Do not place any naked flame source, such as lighted candles on any electrical apparatus.
Class II Double insulated Appliance
WARNING! Connect to a suitable 230-240V ~ 50 Hz power supply only
The lightning flash symbol is intended to alert the user to the enclosures
that contain hazardous voltages.
WARNING! Keep out of reach of young children. This apparatus is not suitable for use by young children
or infirm persons without supervision. Young children must be supervised to ensure that they do not play
with the apparatus. Ensure young children have enough knowledge to operate the equipment safely if
they do have access to this equipment.
The exclamation symbol is intended to alert the user to the presence
of important operating and maintenance (servicing) instructions in the
literature accompanying the appliance.
Have a Blast-Just Not in your
eardrums!
Make sure you turn down the
volume on the unit before you
put on headphones. Increase the
volume to the desired level only
after headphone are in place.
WARNING! Do not abuse or damage a power cord. If any power cord is damaged, it must be replaced
by the manufacturer, its service agent or a similarly qualified person in order to avoid a hazard.
A replaceable cord must be replaced with an authorised replacement from an authorised service agent only.
WARNING! Only use attachments/accessories specified by the manufacturer.
WARNING! Unplug completely from the power source this apparatus during lightening storms
or when unused for long periods of time.
CAUTION
RISK OF ELECTRIC SHOCK
DO NOT OPEN
THE LIGHTNING
FLASH AND ARROWHEAD WITHIN THE
TRIANGLE IS A
WA R N I N G S I G N
ALERTING YOU OF
"DANGEROUS
VOLTAGE" INSIDE
THE PRODUCT.
Main plug is used as the disconnect device, it shall
remain readily operable and should not be
obstructed during intended used. To be
completely disconnected the apparatus from
supply mains, the main plug of the apparatus
shall be disconnected from the mains socket
outlet completely.
CAUTION: TO REDUCE THE
RISK OF ELECTRIC SHOCK,
DO NOT REMOVE COVER
(OR BACK). NO USERS E RV I C E A B L E PA R T S I N S I D E . R E F E R S E RV I C I N G
TO QUALIFIED SERVICE
PERSONNEL.
THE EXCLAMATION
POINT WITHIN THE
TRIANGLE IS A
WARNING
SIGN
ALERTING YOU OF
I M P O R TA N T
INSTRUCTIONS
A C C O M PA N Y I N G
T H E P R O D U C T.
SEE MARKING ON BOTTOM / BACK OF PRODUCT
WARNING: TO PREVENT FIRE OR ELECTRICAL
SHOCK HAZARD, DO NOT EXPOSE THIS PRODUCT
TO RAIN OR MOISTURE.
WARNING! Attention is drawn to the environmental aspects of disposing of any battery.
WARNING! Refer all servicing to qualified personnel. Servicing is required when the apparatus
has been damaged in any way, such as when the power supply cord or plug is damaged,
liquid has been spilled or objects have fallen into the apparatus, the apparatus has been exposed to rain
or moisture, does not operate normally, or has been dropped.
General Controls
Precautions
General Precautions
• Water and Moisture - Do not use this
product near water for example, near a
bathtub, wash bowl, kitchen sink, or
laundry tub; in a wet basement; or near
a swimming pool; and the like. Do not
spill liquids on your Portable DVD or its
components as they may touch
dangerous voltage points or short-out
parts that could result in a fire or electric
shock. To clean your Portable DVD use a
soft slightly damp cloth. Always allow all
the components to dry completely before
using again.
• Cleaning - Unplug this product from the
wall outlet before cleaning. Do not use
liquid cleaners or aerosol cleaners. Use a
damp cloth for cleaning.
• Heat - The product should be placed
away from heat sources such as radiators,
heat registers, stoves, or other products
(including amplifiers) that produce heat.
Do not expose the Portable DVD or any
of its components to extreme heat or
cold. Do not expose the player to direct
sunlight.
• Attachments - Do not use attachments
not recommended by the product
manufacturer as they may cause hazards.
• Servicing - Do not attempt to service this
product yourself as opening or removing
covers may expose you to dangerous
voltage or other hazards. Refer all
servicing to qualified service personnel.
• AC/DC power adapter cords should be
routed so that they are not likely to be
walked on or pinched by items placed
upon or against them, paying particular
attention to cords at plugs, convenience
receptacles, and the point where they
exit from the product.
WARNING! For household use only, this apparatus is not intended for commercial use.
WARNING! If this apparatus is to be used by a third party, please supply these instructions with it.
•
Power Sources - This product should be
operated only from the type of power source
indicated on the marking label. If you are
not sure of the type of power supply to your
home, consult your product dealer or local
power company.
Model: DRC630N
TV System: NTSC
Supported Disc Formats: DVD, SVCD, VCD, CD,
HDCD, CD-R, CD-RW, DVD+/-R, DVD+/-RW
Supported File Formats: MPEG, MP3, WMA,
JPEG, Kodak Picture CD
DVD Regional Code: 1
AV Input/Output: Composite x 1, Coaxial digital
output (audio) x 1
Power Requirement: DC in 12V (power
adapter bundled)
Power Consumption: <8.5W (main unit), <6.5W
(monitor unit)
Operating Temperature: 5oC to 35oC (41oF to
95oF)
Operating Humidity: 5% to 90% (no
condensation)
Size: 210(W) x 160(D) x 41(H) mm (main unit),
210(W) x160(D) x 28(H) mm (monitor unit)
Weight: 690g (main unit), 380g (monitor unit)
External Connections
Quick Start
Playback
Displaying Playback Information
1.
Slide ON/OFF switch to turn on the
player. The DVD logo appears on the
screen.
2. Open the disc compartment door. Place
the disc in the tray with the printed side
up. Push back the compartment door.
The player will automatically try to read
and play the disc. If a menu appears,
one of its options can be selected to
start playing the disc. Select it using
keys and press OK.
3. Press STOP to stop playback.
Note: The player stores the point where
playback was interrupted. If you press PLAY/
PAUSE again, playback resumes from this
point. To stop playback completely or to start
from the beginning, press STOP twice.
Press DISPLAY repeatedly during playback to
show various playback information on screen.
They include current title and chapter, elapsed
playback time, remaining playback time, audio,
subtitle and angle settings.
2.
Main unit
or
C
D
Coaxial digital
output cable (for
sound output from
the player only)
E
Sound and Picture Output
A - connect the smaller yellow connector of the AV cable to the VIDEO IN/OUT jack.
B - connect the black connector of the AV cable to the AUDIO IN/OUT jack. Alternatively, connect the
smaller connector of the coaxial digital output cable (included) for better sound quality.
C - connect the larger yellow connector of the AV cable to the video input jack of a TV or display unit.
D & E - connect the white connector of the AV cable to the left channel audio input jack of an
external audio device (e.g. active speaker systems) (Red connector to the right channel input jack). If
you are using the coaxial digital output cable, connect the larger end of the coaxial digital output
cable to the coaxial input jack of an external audio device (e.g. amplifier or receiver).
Sound and Picture Input
A - connect the smaller yellow connector of the AV cable to the VIDEO IN/OUT jack.
B - connect the black connector of the AV cable to the AUDIO IN/OUT jack.
C - connect the larger yellow connector of the AV cable to the video output jack of a TV or display
unit.
Slide ON/OFF switch to turn on the
player. The DVD logo appears on the
screen.
Open the disc compartment door. Place
the disc in the tray with the printed side
up. Push back the compartment door.
The player will automatically try to read
and play the disc. If a menu appears,
one of its options can be selected to
start playing the disc. Select it using
keys and press OK.
Player Setup
Press SETUP and the player’s setup menu will
show on screen.
Select a menu icon using
keys. Then
select one of the available options using
keys. Press
key to access the submenus and
use
keys to select an option. Press OK
to confirm your selections. Return to a
previous menu using key.
To exit from the player menu, press SETUP
again.
System Setup
Setup the TV system, TV type, screen format,
screen orientation, rating, password and
restore to default settings.
Rating feature is a parental guardian feature
which disables playback of certain DVDs based
on their ratings from 1 (most restive) to 8
(least restrictive). DVDs that are rated above
the level you set will not play until the correct
password is entered.
If a password has been set, you cannot change
the rating without entering the correct password.
To set up the password, highlight the Password
part to input a 4-digit password. Use
keys
to select a number and
keys to shift to the
next digit. Press OK to set the password.
Language Setup
Setup the language of the OSD, Audio, Subtitle
and Menu.
Video Setup
Setup the brightness, contrast, hue and
saturation.
Digital Setup
Setup the Audio Output mode (SPDIF OFF/RAW/
PCM) and DRC (Dynamic range control).
TVG Setup
TVG is the Foul Language Filtering technology to
remove offensive language from the programs
you watch. You need to purchase a license to
activate this feature (for details:
www.tvguardian.com). The license provides you
with a 5 digit activation code.
Input the activation code in this setup menu by
using
keys to select a number and
keys to shift to the next digit. Press OK to
confirm. When activation is successful, a message
“TVG ACTIVATED…” shows at the bottom of the
menu. Refer to More Information for futher
details.
D & E - connect the white connector of the AV cable to the left channel audio output jack of an
external audio device (e.g. active speaker systems) (Red connector to the right channel output jack).
1.
Accelerated Play
or
While the disc is playing, press and hold
one or more times to vary the speed and
direction of the accelerated play. Press PLAY/
PAUSE to resume normal playback.
Still Image
While the disc is playing, press PLAY/PAUSE
once to freeze frame. Press again to resume
playback.
Changing Chapter / Track
Changing Audio Setting
Press AUDIO repeatedly during playback to select
an audio setting. The current audio setting shows
on the display briefly.
2.
Press RESET anytime during a game to stop playing. Switch off the game pad, disconnect the game
pad cable and press AV IN/OUT key on the DVD main unit to resume to normal playback.
Action keys (4)
A (access the number list, confirm number selection), B (access option menu)
TA/A (fire)
A (start), TA/A (accelerate), TB/B (brake)
TA (continuous fire), A (fire)
TA/A (set angle / fire arrows), TB/B (set the wind strength)
TA/A (start / undo last move), TB/B (restart current level)
TA/A (abandon this attempt)
TA/A (pick up ball / throw ball)
TA/A (launch the ball)
TA/A (hold to set acceleration and start jump slowly), TB/B (continue the game)
TA/A (jump)
TA/A (shooting)
TA/A (catch action)
TA/A (pause the game)
TA/A/TB/B (change sequence of three jewels)
TB/B (brake), A (accelerate)
TA/A/TB/B (start next screen)
TA (continuous fire), A (fire)
A (accelerate), B (brake)
A (accelerate), TB/B (brake)
TA/A (throw the ball), TB/B (pick up the ball)
TA/A (put the chess)
TA/A (exchange the blank tile with the selected one)
TA/A (confirm the selection, bombing), TB/B (change direction)
After the Game (4)
Exit icon: return to game menu
TA/A: continue the game
TB/B: return to main menu
TA/A: continue the game
TA/A: continue the game
Return to main menu automatically
Reset: return to main menu
TA/A: continue the game
TA/A: continue the game
Continue the game automatically
Reset: return to main menu
Return to main menu automatically
TA/A: continue the game
Continue the game automatically
TA/A: continue the game
Continue the game automatically
TA/A: continue the game
TB/B: continue the game
TA/A: continue the game
TA/A: continue the game
TA/A/TB/B: continue the game
Continue the game automatically
Reset: return to main menu
Continue the game automatically
Continue the game automatically
Continue the game automatically
TA/A: continue the game
Continue the game automatically
TA/A: continue the game
Continue the game automatically
•
•
•
Turn off the power, and then turn it on
again.
Make sure power cord is properly
connected.
Make sure the car DC power voltage is
not over 16V.
There is no sound or picture.
•
•
•
•
•
Check the connection to the mains
socket.
Make sure the power switch is on.
Make sure the power outlet is
operational.
Make sure the power cord is not
damaged.
Make sure the volume is not set too
low.
There is no sound or sound quality is
poor.
•
•
•
•
•
Make sure the audio jacks are securely
connected.
Make sure the audio connector is not
damaged.
Make sure the volume is turned up.
Make sure you have set the player’s
audio settings correctly.
Make sure you have entered the correct
AV input for your TV.
Your player also supports playback of MP3,
WMA and JPEG files. When a disc is loaded,
the player will automatically search for
supported files and begin playback
automatically. During playback of MP3 and
WMA files and stop mode of JPEG files, the
following screen will appear:
Name of current file
Folder directory
•
•
Use
keys to move to
different files or directories.
Press OK to play the file highlighted.
While viewing JPEG files, press
keys will rotate or flip picture
respectively.
•
•
Make sure the video connector is not
damaged.
Make sure you have set the player’s video
settings correctly.
It is impossible to read the disc
•
•
•
•
Make sure the disc is inserted with the
printed side up.
Make sure the disc is not warped, damaged,
deformed, stained or scratched.
Check that the disc format is supported by
the player.
Check that the disc’s regional code matches
that of the player. This player’s regional
code is 1.
You have forgotten your rating
password.
•
Enter 9688 in the password menu to clear
the memory. Keep this master password out
of the reach of children. Refer to “Player
Setup - System Setup” for details.
•
•
Make sure that the AV in/out mode is
properly selected.
Make sure the video jacks are securely
connected.
Make sure you have entered the correct
AV input for your TV.
More on TVG
Standing Support
Car Mounting
After you have activated TVG, more settings
can be defined.
Both the main and monitor units have support
stand on the back. Pull out the stand as indicated
on the unit’s back.
You can easily mount the player on the back of a car seat headrest with the help of a headrest
mount. See illustration below:
Game Pad
A game pad is also included with 30 games.
Three AA-size batteries are required to power the
game pad. They are inserted into the battery
compartment at the bottom of the game pad.
You need to unscrew at the compartment door in
order to open it.
Connect the video connector of the game pad
cable to the VIDEO IN/OUT jack and audio
connector to the AUDIO IN/OUT jack on the main
unit. Press AV IN/OUT key to select the video
input mode and switch on the game pad. Refer to
“More Information” for game selection and
operations.
To VIDEO IN/OUT
jack
Game pad
cable
(Video - yellow)
Control stick
On/off key
Action keys
TB
B
TA
A
Control pad
Control wheel
Start and reset keys
Guarantee Card
This Product is guaranteed against faulty materials and workmanship for a period of 12 months
from date of purchase. The obligation to the purchaser under this warranty is limited to servicing
the unit and replacing defective parts when the product is returned freight prepaid to the retailer.
This warranty becomes void if the product has been tampered with, damaged, damaged by
accident, damaged in any other way by improper use or has been purchased second hand.
Warning! Refer specific instructions. All production orders have quality inspections.
IN the unlikely event of a deficiency, please contact the retailer from whom this product
was purchased.
WARRANTY FOR APPLIANCES USED COMMERCIALLY LIMITED TO 90 DAYS
Type of Appliance:______________________________________________
Model Number:_________________ Purchase date:___________________
Product Purchased From:________________________________________
Your Name:___________________________________________________
Address:_____________________________________________________
____________________________________________________________
Phone Number:_______________________________________________
Distributed by Oriental Pacific International Ltd.
PO BOX 302-158
North Harbour Industrial Estate
Albany, Auckland
Made in China
Please read this user manual carefully to ensure proper use of this product. Keep this manual for future reference.
Audio CD
There is no picture or picture quality
is poor.
•
DRC630N
EN
Your player also supports playback of audio CD.
Playback starts automatically after an audio CD is
loaded.
(Audio - red, white)
•
Main unit
More Information
To AUDIO IN/
OUT jack
File directory in
current folder
MP3, WMA and JPEG files stored on a USB
device can be played via the USB connector on
the left side of the main unit. Playback
operations are the same as files on discs as
shown in previous section. When an USB
device is connected or playback is stopped, a
selection menu appears on the screen for
playback from USB or disc.
During playback, press REPEAT repeatedly to
select repeating a chapter or a title (DVD
discs).
Selecting and Playing Games
Quitting Games
Playback of MP3, WMA and
JPEG Files
Monitor unit
Connect the AVP (Audio, Video and
Power) cable to the AUDIO IN/OUT,
VIDEO IN/OUT and DC OUT jacks of the
main unit.
Connect the other end of the AVP cable
to the AUDIO IN, VIDEO IN and DC IN
jacks of the monitor unit.
More Information
Playback via USB Connector
Repeat Playback
Troubleshooting Tips
Note:
(1) L = left, R = right, U = up, D = down, use the Control Stick or Control Pad for direction control.
For games with only left and right movement, you can also use the Control Wheel for control.
(2) Move leftward to rotate the center disc counter-clockwise, rightward to rotate the center disc
clockwise.
(3) Move upward to accelerate.
(4) Action keys: TA = , A =
, TB =
,B=
.
1.
Accessing Disc Menu
While the disc is playing, press and release
to go immediately to the previous or
or
next chapter, or to the previous or next track.
22.
23.
24.
25.
26.
27.
u s e r
m a n u a l
USB Connector
Volume control
DC power output jack
Earphone jack
Video output / input jack
Audio output / input jack or coaxial digital
output jack
Power indicator
Power switch
DC power input jack
Video input jack
Audio input jack
Battery socket cover (optional battery can
be purchased separately)
Connect the power adapter to the DC input jack of the main unit.
Connect the other side of the power adapter with the wall plug or car adapter.
Turn on the power.
Disconnect the adapter if the set is not used for a period of time.
Connecting the Monitor Unit
with the Main Unit
At anytime during playback, press MENU to
access disc’s menu.
The unit is not working.
Directions(1)
L,R,U,D
L,R
L,R
L,R
L,R,U,D
L,R,U,D
L,R,U,D
L,R
L,R
L,R
L,R,U,D
L,R
L,R(2)
L,R,U,D
L,R,U(3),D
L,R
L,R
L,R,U,D
L,R,U,D
L,R,U,D
U,D
L,R,U,D
L,R
L,R,U,D
L,R
L,R,U,D
L,R,U,D
L,R,U,D
1.
2.
3.
•
Press SUBTITLE repeatedly during playback to
select a subtitle setting. The current subtitle
setting shows on the display briefly.
Screen saver will show when the player is idle for
more than 5 minutes. Press any key to de-activate
it.
16.
17.
18.
19.
20.
21.
Connecting the Power
Monitor Unit
Changing Subtitle Setting
Screen Saver
Opens the disc compartment door
Disc compartment door
LCD display
Speaker
Menu navigation keys (up, down, left
and right), the right key also selects
subtitle setting, the left key also selects
audio setting
Confirms selections
Starts and pauses playback
Stops playback
Skips backward a chapter / track;
searches backward
Skips forward a chapter / track; searches
forward
Selects AV input or output mode
Selects information to be displayed
Enters disc’s menu
Enters player’s setup menu
Selects repeat mode during playback
Connections
Tips: For VCD playback, press AUDIO repeatedly
to select audio channel: mono left, mono right or
stereo; press MENU repeatedly to select PBC
mode (if available on the disc) on or off.
More Information
Games
Sudoku
Space Castle
VR Racing
Sea War
Dragon Fire
Golden Arrow
Push the Box
Bean’s Adventure
Ball Clash
Block Out
Road Star
Super Surfing
Bubble Blaster
Fish Catcher
Ball Mania
Grass Cutter
Jewel Master
Motor Rally
Birdie Nest
Insect Chase
Bingo Zap
Last Cabra
Ocean Quest
Pinball Track
Runner Car
Spin Ball
Animal Pool
Go Bang
Garden Maze
Submarine War
11.
12.
13.
14.
15.
Playback of Various Media Formats
• Press AV IN/OUT to enjoy sound and picture from the external device.
Press START when you see a welcome screen, the game menu will then show. Select a game by using
the Control Stick / Control Pad and then press START to start game (some games also need to press A
key to confirm start). Refer to the table below for game operations
10.
WARNING! No liability will be accepted for any personal injury or damage caused by failure
to follow these instructions.
This player can output / input sound and picture to / from external devices. Follow the diagram below
to set up the required connections. Always switch off the player before connecting to any devices.
B
6.
7.
8.
9.
Specifications
DVD Playback
A
1.
2.
3.
4.
5.
Main Unit
Precautions when watching and playing
• When using your Portable DVD player do not
sit or stand too close to the screen. Play as
far back from the screen as possible.
• For the best game image, look directly at the
Portable DVD display on your TV screen and
only operate in good light.
• Do not play if you are tired or need sleep.
Always play in a well-lit room.
• Some people may experience fatigue or
discomfort after playing for a long time. Be
sure to take a 10 to 15 minutes break at
least every hour while playing.
Quick Start & Player Setup
Connections
General Controls
IMPORTANT!
Please retain this warranty card with your purchase receipt.
Please do not post to the retailer or importer.
If service is required, both of these documents are to be returned with the appliance to your retailer,
otherwise a fee may be charged.
TVG Mode:
Select among Off, Tolerant, Moderate and
Strict with increasing filtering standards.
Word Subset Filtering:
In addition to the main TVG mode listed
above, you can turn certain word subsets on
or off:
Damn and hell - filters out variations of
“Damn” and “Hell”.
Religious - filters out references to deity. To
watch religious programs, turn this word
subset off.
Sexual - filters sexually explicit languages.
CC Mode:
CC Off - captions are never displayed.
ON Mute (default) - captions are displayed
when offensive language is being filtered.
CC Continous - captions are displayed
continually.
CC Channel:
To use the TVG captioning features while
watching a DVD movie, your television must
be capable of displaying closed captions.
Make sure that your TV CC is set to CCI or CI
(closed caption on channel), and that the CC
channel on your DVD player is set to CC2
(default setting).
The player - gently slide down by
aligning the backpanel groove with
the headrest mount until you hear
a click sound.
Headrest mount sponge facing
headrest.
Accessories
Check that all the following accessories come with
your unit in the package:
1.
AC/DC adapter x 1
2.
AVP (Audio, Video and Power) Cable x 1
3.
Headrest mount x 2
4.
Car power cable x 1
5.
AV cable x 1
6.
Carrying case x 1
7.
Game pad x 1
8.
Game pad cable x 1
9.
Coaxial digital output cable x 1
Mounting straps - firmly
secure the mount by
tightening the straps.
Game Pad
Monitor Unit
Playing Games
Main Unit
Watching DVD
DVD Regional Code
Your DVD player has been designed to process regional
management information that is stored on DVD discs.
The regional code for your player is 4.
Only DVD discs that have regional codes of 4 or ALL
(for all regions) can be played by your player.
Audio, Video and Power Cable
Game Pad Cable
DVD Copy Protection
This product incorporates copyright protection
technology that is protected by U.S. patents and other
intellectual property rights. Use of this copyright
protection technology must be authorized by
Macrovision Corporation, and is intended for home
and other limited consumer uses only unless otherwise
authorized by Macrovision. Reverse engineering or
disassembly is prohibited.
Game Pad
The two units can either watch DVDs and/or
play games at the same time. To watch DVD
on the main unit and play games on the
monitor unit, hook up the cable connections
as illustrated.
The descriptions and characteristics in this owner’s manual are for the purpose of general reference only and
not as a guarantee. In order to provide you with the highest quality product, we may make changes or
modifications without prior notice. The English version serves as the final reference on all product and
operational details should any discrepancies arise in other languages.