1
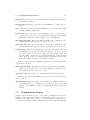
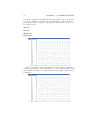
pLinguaPlugin: User’s Manual
Research Group on Natural Computing. University of Seville
2
Preamble
3
5
Thanks for downloading pLinguaPlugin. This document is a user’s
guide for pLinguaPlugin. We hope you find it useful. If you have
any questions, please do not hesitate to send an e-mail with them
to: [email protected].
Yours sincerely,
Research Group on Natural Computing. University of Seville.
6
Contents
I
II
Installation of pLinguaPlugin
Use of pLinguaPlugin
9
25
1 Project creation
29
2 P-Lingua file creation
39
3 File editing
47
4 File import
49
5 File export
53
6 Simulation creation
57
7 P system simulation
61
7.1 Configuration display . . . . . . . . . . . . . . . . . . . . . . . . . 63
7
8
CONTENTS
Part I
Installation of
pLinguaPlugin
9
11
c it is necessary to install it on the computer
Before using pLinguaPlugin,
where it will be used. To do so, it is necessary to follow the following steps:
1. Install a version of Eclipse (3.4 or later). The last available version can
be accessed on the website http://www.eclipse.org.
2. Install a version of ColorEditor, available in http://www.gstaff.org/colorEditor/
c provides syntax
(1.2.6 o later). By using this plug-in, pLinguaPlugin
coloring, in other words, the elements of the P-Lingua files used (such as
rules and objects) are colored so as to make them easier to identify at first
glance. If that plug-in is not installed, there will not be syntax coloring.
Instead, the entire specification of the P system will display the same color.
Important: After installing ColorEditor, the cause of the errors
will not be able to be identified by rolling over them, unless the
default editor included in pLinguaPlugin is used. There are two
possible ways to install this product:
(a) Copy the file cbg.editor 1.2.6.jar on the directory plugins, which is
inside the directory where the installation of Eclipse is located.
(b) Download a version of ColorEditor (1.2.6 or later) from the website
http://www.gstaff.org/colorEditor and follow the following steps:
i. Move the downloaded version of ColorEditor into the directory
plugins, which is inside the directory where the installation of
Eclipse is located.
12
ii. Open the file catalog, inside the directory modes, which is contained in the file ColorEditor
13
iii. Modify the file catalog, inside the directory modes on the file
ColorEditor by including the next XML tag:
<MODE NAME="plingua" FILE="plingua.xml"
FILE_NAME_GLOB="*.pli" />
as a child tag of <MODES>.
iv. Include in the same directory modes the file plingua.xml included
on this website.
3. Copy the file org.gcn.plinguaplugin 1.0.1.jar inside the directory plugins,
which is inside the directory where the installation of Eclipse is located.
14
Once the steps listed above have been followed, it is necessary to associate
the files whose extension is .pli to the ColorEditor. To do so, it is necessary to
follow the following steps:
1. Launch the Eclipse IDE.
2. Left-click on the option Window on the main menu of Eclipse.
3. Left-click on the option Preferences on the deployed menu. Then, a new
window appears.
15
4. Left-click on the menu General, which belongs to the window mentioned
above. This menu can be spread in order to see its options.
5. Spread the menu General and, then, spread the menu Editors, which is
inside General.
16
6. Left-click on the option File Associations, which is insi de the menu Editors. A list of the file extensions recognized by Eclipse is displayed.
17
7. If the file extension *.pli does not exist, follow the following steps:
• Left-click on the button Add. . . on the top right part of the window.
A new window with the field File Type: is displayed.
18
• Introduce the extension *.pli on the field File Type: and left-click on
the button OK.
19
8. Left-click on the extension *.pli on the list which appears on the top right
part of the window.
20
9. Left-click on the button Add. . . on the bottom right part of the window.
A new window is displayed.
10. Left-click on the option Internal Editors on the top of the new window.
21
11. Left-click on the option Syntax Coloring Editor on the menu on the bottom
of the window.
22
12. Left-click on the button OK. After doing so, the current window is closed.
13. Left-click on the option Syntax Coloring Editor on the menu which is on
the bottom part of the window.
23
14. Left-click on the button Default on the right part of the window.
24
15. Left-click on the button OK.
Once the steps listed above have been followed, the computer is ready to
c
execute pLinguaPlugin.
Part II
Use of pLinguaPlugin
25
27
c offers several services to the user, such as compiling o simpLinguaPlugin
ulating P systems. Next, each one of the services is described, as well as the
way to access them.
28
Chapter 1
Project creation
c the first thing to do is to create a project. A project
For using pLinguaPlugin,
is a work directory on which P systems related among each other which will be
used for an specific purpose will be organized. To do so, left-click on the option
File on the main menu of Eclipse.
Then, a menu with several options appears.
29
30
CHAPTER 1. PROJECT CREATION
Inside this menu, roll over the option New.
After doing so, a new menu appears. Inside this menu there is an option
called Project. . . .
Left-click on it. Then, a new window appears.
31
Inside this new window, roll over the menu General. Inside this menu, there is
an option called Project. Left-click on this option and, then, left-click on the
button Next, which is on the bottom bar of the window.
Then, a new window appears. Inside this window, there is a field called Project
name. On this text field, introduce the name of the new project, for instance,
pSystemProject.
32
CHAPTER 1. PROJECT CREATION
Once this name has been introduced, left-click on the button Finish, which
is on the bottom part of the window. Once the steps listed above have been
followed, a new Eclipse project is created.
The next thing to do is to assign a P-Lingua nature to the project. A nature is
merely a kind of behavior which is assigned to a project. Hence, as the project
has to perform the proper actions of the P systems specification projects, it
should be assigned that nature. In order to do so, there are two ways to assign
a P-Lingua nature to a project.
• Right-click on the project which is going to be assigned a P-Lingua nature.
Then, a new menu appears.
33
Roll over the option P-Lingua. Then, a new window appears.
Inside this menu, left-click on the option Add/Remove P-Lingua project
nature. Once this action has been executed, press F5 on the keyboard.
Then, the projects acquires the following icon as its image:
34
CHAPTER 1. PROJECT CREATION
• Left-click on the project which is going to be assigned a P-Lingua nature,
suitable to work with P systems.
Then, left-click on the tab P-Lingua on the main menu of Eclipse.
Finally, left-click on the option Add/Remove P-Lingua project nature on the menu above and press F5, just like the option described
before.
35
Once the actions mentioned above have been performed, there is a suitable
environment to work with P systems, whose icon is the one displayed before,
and whose outlook is the following:
In order to avoid potential pitfalls, it is recommended to create a directory
called src inside the project created. This directory will contain he files and
subdirectories which contain the P system specifications. In order to do so,
right-click on the project and access the menu called New:
36
CHAPTER 1. PROJECT CREATION
Inside this menu, left-click on the option Folder. Then, a menu appears, which
is similar to that which is displayed next.
On this menu, select a project with a P-Lingua nature associated, write src on
the field Folder name and left-click on the button Finish.
After following those steps, the directory src should appear on the project.
37
38
CHAPTER 1. PROJECT CREATION
Chapter 2
P-Lingua file creation
For creating a P-Lingua file, the P-Lingua files creation window needs to be
accessed. For accessing this window, there are three different options:
• Right-click on the directory where the P-Lingua file is going to be created.
This directory has to be inside a project with a P-Lingua nature assigned.
Then, a new menu appears.
Roll over the option P-Lingua. Then, a new menu appears.
39
40
CHAPTER 2. P-LINGUA FILE CREATION
Inside this menu, left-click on the option New P-System. Once the former option has been chosen, the P-Lingua files creation window appears.
• Left-click on the directory where the P-Lingua file is going to be created.
This directory should be located inside a project with a P-Lingua nature
assigned.
Then, left-click on the tab called P-Lingua on the main menu of Eclipse.
Inside this menu, left-click on the option New P-System.
41
Once the option above has been chosen, a P-Lingua file creation window
will appear.
• Left-click on the directory where the P-Lingua file is going to be created.
This directory should be located inside a project with a P-Lingua nature
assigned.
Then, left-click on the tab called File on the main menu of Eclipse.
42
CHAPTER 2. P-LINGUA FILE CREATION
Then, left-click on the menu called New inside the menu mentioned above.
Then, a new menu appears.
Inside this new menu, left-click on the option Other. Immediately, a new
window appears.
43
Inside this new window, left-click on the menu P-Lingua and, inside this
menu, left-click on the option P-System.
In order to end, left-click on the button Next >.
Once the steps of any of the options above have been followed, the P-Lingua
files creation window appears.
44
CHAPTER 2. P-LINGUA FILE CREATION
Inside this window there are several fields:
Project: This field indicates the project where the new P-Lingua file will be
created.
Package: This field indicates the package or directory where the new file will
be created, inside the project mentioned above.
Name: This field indicates the name of the P-Lingua file which will be created.
c
Available Models: This field indicates the models recognized by pLinguaCore
so that the user can select, from them, the model of the P system specified
by the file which will be created.
Create main method: This option is not available yet, since it would only be
useful in the case that P-Lingua admits the inclusion of modules defined
on other files. Nevertheless, it is provided due to tha fact that maybe
future versions of P-Lingua allow to include modules from different files.
Once the options of the file to create have been selected, right-click on the
button Finish. After that, the P-Lingua file will be displayed.
45
46
CHAPTER 2. P-LINGUA FILE CREATION
Chapter 3
File editing
Once a file which specifies a P system on P-Lingua format has been created or
imported, the existing errors on the specification can be checked. This way, if
the specification contains errors, these will appear underlined, indicating their
location.
If you use the editor included in pLinguaPlugin and roll over the error mark,
you will see a message describing the cause of the error.
47
48
CHAPTER 3. FILE EDITING
This mark will only appear until you have already saved the file with errors
in the hard disk.
Chapter 4
File import
For modifying the format of a file which encodes a P system and include it into
a previously existent project, the import P system files window needs to be
accessed. For accessing this window, there are two different options:
• Right-click on the directory where you want to import the file. This
directory should be inside a project with a P-Lingua nature assigned.
Then, a new menu appears. Inside this menu, roll over the option PLingua. Immediately, a new menu appears. Inside this new menu, leftclick
on
the
option
Import P-System.
49
50
CHAPTER 4. FILE IMPORT
• Left-click on the directory where you want to save the file which resulted
from the import.
This directory should be inside a project with a P-Lingua nature assigned.
Then, left-click on the tab called P-Lingua on the main menu of Eclipse.
Finally, left-click on the option Import P-System, inside this menu.
51
Once the steps of any of the options listed above have been taken, the import
P system window appears.
Inside this window there are several fields and options, whose purpose is described below:
Project: This field indicates the project where the file resulting from the import of the original one will be created.
Package: This field indicates the package or directory in which the file resulting
from the import will be created, inside the project above.
52
CHAPTER 4. FILE IMPORT
Name: This field indicates the name of the P-Lingua file which will be created
as a result of the import.
Available Output Formats: This field lists the output formats recognized
c so that the user can select, from them, the file format
by pLinguaCore
in which the P system will be imported, inside the previously selected
directory.
Preserve Format: This option indicates whether the format of the file created
as a result of the import will be the the same as the original format or not.
In such a case, the format selected in Available Formats will not have any
effect.
Select source file: This field indicates the route of the original file from where
the import will be performed. This file should be encoded on an input or
c
output format recognized by pLinguaCore.
Once the parameters of the file to create have been selected, left-click on the
button Finish. After executing this action, the file resulting from the import
of the original one will be created and displayed inside the specified directory.
Chapter 5
File export
For modifying the format of a file which encodes a P system and store the
resulting file in another different file, there are two different options:
• Right-click on the file that you want to export. This file should be inside
a project with a P-Lingua nature assigned, though it does not have to be
necessarily encoded on P-Lingua format. Instead, it is enough for it to be
c
encoded on any input or output format recognized by pLinguaCore.
Then, a new menu appears. Inside this menu, roll over the option PLingua. Immediately, a new menu appears.
53
54
CHAPTER 5. FILE EXPORT
Inside this menu, left-click on the option Export P-System.
• Left-click on the file that you want to export. This file should be located inside a project with a P-Lingua nature assigned, though it does
not have to be necessarily encoded on P-Lingua format. Instead, it is
enough for it to be encoded on any input or output format recognized by
c
pLinguaCore.
Then, left-click on the tab called P-Lingua, inside the main menu of
55
Eclipse. Finally, left-click on the option Export P-System, inside this
menu.
Once the steps of any op the options mentioned above have been followed,
the P system files export window appears.
Inside this window there are several fields and options, which are described
below:
Available Output Formats: This field lists the different output formats recc so that the user selects, from them, the format
ognized by pLinguaCore
56
CHAPTER 5. FILE EXPORT
on which the exported file will be encoded.
Preserve Format: This option indicates whether the format of the file create
as a result of the export will be the same as the original one or not. In
such a case, the format selected on Available Formats will have no effect.
Select destination file: This field indicates the route of the file where the
result of the file export will be encoded.
Once the paramters of the file to export have been selected, left-click on the
button Finish. Then, the file resulting of the export of the original file will be
created on the route specified on the P system file export window.
Chapter 6
Simulation creation
For creating a simulation capable of simulating a P system encoded on a file,
The simulation creation window has to be accessed. There are two options to
access this window:
• Right-click on the file whose P system is going to be simulated. This file
has to be inside a project with a P-Lingua nature assigned, though it
does not have to be encoded on P-Lingua format necessarily. Instead,
it is enough for it to be encoded on any input format recognized by
c
pLinguaCore.
Then, a new menu appears. Inside this menu, roll over the option called
P-Lingua. Then, a new menu appears. Inside this menu, left-click on
the option called New Simulation.
57
58
CHAPTER 6. SIMULATION CREATION
• Left-click on the file whose P system you want to simulate. This file should
be inside a project with a P-Lingua nature assigned, though it does not
have to be necessarily encoded on P-Lingua format. Instead, it is enough
c
for it to be encoded on any input format recognized by pLinguaCore.
Then, left-click on the tab called P-Lingua on the main menu of Eclipse.
Finally, left-click on the option called New Simulation, which is inside
this menu.
59
Once the steps of any of the options above have been followed, the simulation
creation window appears.
Inside this window there are several fields and options:
Available simulators: This field lists the different simulators recognized by
c which are suitable for the model of the P system to simpLinguaCore
ulate so that the user selects, from them, the specific simulator for the
simulation to create.
60
CHAPTER 6. SIMULATION CREATION
Allow steps back: This field indicates whether the simulation to create will
be able to execute steps back or not.
Allow alternative steps: This field indicates whether the simulation to create will be able to execute alternative steps or not. This option is only
available on those simulators which allow to take alternative steps.
Open simulation console: This option indicates whether the simulation console will be displayed after creating the simulation, so as to execute the
simulation created.
Select file: This field indicates the route of the file in which the simulation of
the P system will be created.
Once the creation parameters for the simulation of the P system have been
selected, left-click on the button Finish. Then, the simulation according to the
parameters previously set will be created on the specified route.
In fact, two files are created: a file (whose extension is .sim) on which
the parameters of the simulation are encoded, for instance, whether steps back
and/or alternative steps are allowed or not, and another one (whose extension
is XML) which is the file resulting of the export on XML format of the P system
to simulate. For the right performance of the simulation, it is necessary for both
files to be located on the same directory.
Chapter 7
P system simulation
For executing a simulation if a P system encoded on a file, the simulation console
should be accessed. For accessing this console, it is necessary to follow the
following steps:
1. Left-click on the tab called P-Lingua on the main menu of Eclipse.
2. Inside this menu, left-click on the option called Open Simulation Console.
Once the steps listed above have been taken, the P system simulation console
will be displayed.
61
62
CHAPTER 7. P SYSTEM SIMULATION
This window contains several fields, options and buttons:
File: menu This field contains the typical actions for handling files. Inside
this menu, there are different buttons:
Open file. . . : This button opens a file which contains a simulation and
loads it on the simulation console, so that the simulation can be
executed. The P system simulation files have the file extension .sim.
For properly loading a simulation it is necessary that the file which
encodes the P system to simulate (on XML format) is on the same
directory than the simulation file.
Save: This button saves the current simulation on the file specified by
the last route for the simulation file selected by the user.
Save As: This button saves the current simulation on the file specified
by the new file route selected by the user, along with the simulated
P system on XML format.
Current configuration: This field indicates the number of the current configuration of the simulation.
Show current configuration: This field displays a graphical representation
of the current configuration of the simulation.
Steps limit: In the case that this option is enabled, this field indicates the
maximum number of steps that the simulation can take before stopping
or reaching a halting configuration.
Time out limit (in milliseconds): In the case that this option is enabled,
this field indicates the maximum time (in milliseconds) that the simulation
can take before stopping or reaching a halting configuration.
7.1. CONFIGURATION DISPLAY
63
Reset: This button resets the current simulation to the initial configuration of
the simulated P system.
Step forward: This button causes the current simulation to take a step forward.
Run: This button causes the current simulation to take steps forward until
reaching a halting configuration.
Pause: This button causes the current simulation to stop. It only can be
executed in the case that the previously clicked button is run, not Step
forward, though future versions might not have this limitation.
Set output trace file: This option indicates whether the computation of the
current simulation is being saved on a trace file or not.
Select file: This button selects the trace file where the computation of the
current simulation is being saved, in the case that the option above is set.
Commit trace: This button commits the save of the computation of the current simulation on the trace file, in the case that the option above is set.
Note that, if this button is not left-clicked after the last steps taken, the
trace file might contain part of (or all) the information of the last steps
taken. However, in the case that the button is left-clicked, the trace file
will contain all the information of the last steps taken.
In the case that the specific simulation can take steps back, the following
actions can be executed:
Clear previous steps: This button erases the steps taken by the simulation
which were previously stored, so the current simulation cannot take steps
back unless it takes at least a step forward.
Step Back: This button causes the current simulation to take a step back.
In the case that the specific simulation can take steps back, the next action
can be executed:
Alternate Step: This button takes an alternative step. This action has not
been implemented yet, as it has not been defined precisely the external
interface of the simulators capable of performing alternative steps in PLingua.
7.1
Configuration display
Starting from the simulation console, it is possible to visualize the current configuration of the simulation which is been currently executed. For doing so,
left-click on the button Show current configuration inside the simulation console. Then, a new window will be displayed. This window displays graphically
64
CHAPTER 7. P SYSTEM SIMULATION
the current configuration, including the membranes which compose it, their labels, their polarizations and their associated multisets, as well as the rules of
the P system which is currently being simulated. This window is composed of
four different parts:
Top bar
Left bar
Middle bar
Right panel
The top bar displays general information about the current configuration,
including its number, as well as information about the skin membrane, such
as its identifier (a number to identify membranes univocally), its label and its
polarization.
7.1. CONFIGURATION DISPLAY
65
The left bar displays a membrane tree which represents the current configuration. This way, the children of a node of the tree represent the child
membranes of its associated membrane. With regard to the information displayed on the tree, for each membrane it is displayed its identifier, its label and
its polarization.
On the middle bar there are different tabs. Among them, there are tabs
which display the set of rules of the P system simulated, its alphabet, its starting
multisets and the environment of the current configuration.
Besides, if an element of the right panel is selected, the objects of the multiset
associated to its corresponding membrane are displayed on the multisets tab of
the middle bar.
66
CHAPTER 7. P SYSTEM SIMULATION
The right panel displays information about the membranes which compose
the current configuration. This way, for each membrane it is displayed its identifier, its label, the objects of its associated multiset and its child membranes.
When a node on the left bar tree is selected, its corresponding membrane is
highlighted in blue on the right panel. This way, if a membrane is selected on
the right panel, its corresponding element will be selected on the left tree.
7.1. CONFIGURATION DISPLAY
67
By double-clicking on a membrane on the right panel a detached view of
such a membrane is obtained in a different window. This way, the user can
focus on a specific membrane in order to explore the objects of its associated
multiset as well as its children membrane in an easier way.