1
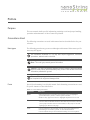
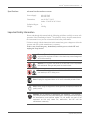
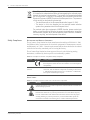
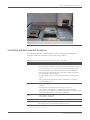
nCounter ™ Prep Station
User Manual
v.20081003
For research use only. Not for use in diagnostic procedures.
Intellectual Property Rights
This nCounter™ Analysis System manual and its contents are the property of NanoString Technologies, Inc. (“NanoString”),
and is intended solely for the use of NanoString customers, for the purpose of operating the nCounter Analysis System. The
nCounter Analysis System (including both its software and hardware components) and this User Guide and any other
documentation provided to you by NanoString in connection therewith, are subject to patents, copyright, trade secret rights
and other intellectual property rights owned by, or licensed to, NanoString. No part of the software or hardware, may be
reproduced, transmitted, transcribed, stored in a retrieval system, or translated into other languages without the prior written
consent of NanoString.
Limited License
Subject to the terms and conditions of the nCounter™ Analysis System contained in the product quotation, NanoString grants
you a limited, non-exclusive, non-transferable, non-sublicensable, research use only license to use the proprietary nCounter
Analysis System only in accordance with the manual and other written instructions provided by NanoString. Except as
expressly set forth in the terms and conditions, no right or license, whether express, implied or statutory, is granted by
NanoString under any intellectual property right owned by, or licensed to, NanoString by virtue of the supply of the
proprietary nCounter Analysis System. Without limiting the foregoing, no right or license, whether express, implied or
statutory, is granted by NanoString, to use the nCounter Analysis System with any third party product not supplied or licensed
to you by NanoString, or recommended for use by NanoString in a manual or other written instruction provided by
NanoString.
NanoString does not assume any liability arising from your use of the nCounter Analysis System, this manual or other
documentation provided by NanoString.
For proper operation and testing results, the instructions in this manual must be followed by experienced personnel. It is
important to read and understand the contents of this manual prior to operating the nCounter Analysis System.
Trademarks
NanoString Technologies®, NanoString™, nCounter™ and Molecules That Count™ are registered trademarks or trademarks of
NanoString Technologies, Inc., in the United States and/or other countries. All other trademarks and/or service marks not
owned by NanoString that appear in this manual are the property of their respective owners.
Copyright
© 2008 NanoString Technologies, Inc. All rights reserved.
Preface
Purpose
This user manual details specific information pertaining to safe and proper handling,
operation and maintenance of the nCounter Prep Station.
Conventions Used
The following conventions are used in this manual and are described below for your
reference.
Note types
The following general note types are used throughout this manual. Other more specific
notes may also appear.
TIP: Information contained in a Tip may offer helpful suggestions, alternative
procedures, methods and/or shortcuts.
N OTE: This note type presents general information.
C AUTION: This note type presents essential content indicating that the potential
exists for assay failure, diminished data quality, and/or a loss of data if the of the
information presented is ignored.
WARNING: This note type indicates that a potential hazard to your personal safety,
or the potential for equipment damage exists.
Fonts
Special font formatting is used in this manual. Such formatting conventions are used
in specific instances as described below:
Table i.1 Text Formatting Conventions
Convention
When Used
Bold
• When appearing in a procedure, the bold text serves to highlight a
specific button, key stroke, or menu option available.
• Bold text may appear elsewhere to highlight important text or terms
Blue
• Blue text is used to help the reader identify active hyperlinks and crossreference links in the PDF document. The links may be internal, allowing
you to jump to another section of the manual, or they may be external
opening up an Internet web page.
Italic
• Used to emphasize an important word or expression within the text.
• Formatting of a book title, journal, or other documentation
• Used to indicate the special or unusual meaning of a word or phrase.
ii
nCounter™ Prep Station User Manual
Procedures
Numbered procedures appear frequently providing step-by-step instruction for
accomplishing a task. Typically, a numbered step provides direction for a specific
action and may be followed by the expected response. For example:
1.
On the Notification Option screen, select the beep when complete option if you
would like an audible alarm to alert you that the run is complete. Press next.
>>> The Start Processing screen appears (Figure 2.22).
Additional information may be presented in the form of a specific note type, bullets,
screen capture or other image important to facilitate clarity and understanding.
Contact Information
NanoString Technologies
530 Fairview Ave N, Suite 2000
Seattle, WA 98109 USA
Phone:
1-888-358-NANO (1-888-358-6266)
Fax:
1-206-378-6288
E-mail: [email protected]
Contact Information
1
Contents
Preface
Purpose . . . . . . . . . . . . . . . . . . . . . . . . . . . . . . . . . . . . . . . . . i
Conventions Used . . . . . . . . . . . . . . . . . . . . . . . . . . . . . . . . . . . . i
Note types . . . . . . . . . . . . . . . . . . . . . . . . . . . . . . . . . . . . . . . . . . . .i
Fonts . . . . . . . . . . . . . . . . . . . . . . . . . . . . . . . . . . . . . . . . . . . . . .i
Procedures . . . . . . . . . . . . . . . . . . . . . . . . . . . . . . . . . . . . . . . . . . ii
Contact Information . . . . . . . . . . . . . . . . . . . . . . . . . . . . . . . . . . . . ii
Chapter 1: nCounter ™ Prep Station General Information
The nCounter™ Analysis System . . . . . . . . . . . . . . . . . . . . . . . . . . . . . 1
nCounter ™ Prep Station Overview . . . . . . . . . . . . . . . . . . . . . . . . . . . . . . . 2
nCounter ™ Digital Analyzer Overview . . . . . . . . . . . . . . . . . . . . . . . . . . . . . 2
Touchscreen Overview
. . . . . . . . . . . . . . . . . . . . . . . . . . . . . . . . . . . . 4
nCounter™ Prep Station Information . . . . . . . . . . . . . . . . . . . . . . . . . . . . 4
Serial Number . . . . . . . . . . . . . . . . . . . . . . . . . . . . . . . . . . . . . . . . . 4
Specifications . . . . . . . . . . . . . . . . . . . . . . . . . . . . . . . . . . . . . . . . . 5
nCounter Prep Station Specifications . . . . . . . . . . . . . . . . . . . . . . . . . . . . . . . . . 5
Important Safety Information . . . . . . . . . . . . . . . . . . . . . . . . . . . . . . . 5
Safety Compliance
. . . . . . . . . . . . . . . . . . . . . . . . . . . . . . . . . . . . . . 6
Declarations and Marks of Conformity . . . . . . . . . . . . . . . . . . . . . . . . . . . . . . . . . 6
Safety Labels . . . . . . . . . . . . . . . . . . . . . . . . . . . . . . . . . . . . . . . . . . . . . 6
Installation and Environmental Conditions . . . . . . . . . . . . . . . . . . . . . . . . 7
General Maintenance, Service & Support . . . . . . . . . . . . . . . . . . . . . . . . . 8
Technical Support . . . . . . . . . . . . . . . . . . . . . . . . . . . . . . . . . . . . . . . 8
General Cleaning . . . . . . . . . . . . . . . . . . . . . . . . . . . . . . . . . . . . . . . 8
Instructions & Guidelines . . . . . . . . . . . . . . . . . . . . . . . . . . . . . . . . . . . . . . . 8
Tips for Using the nCounter™ Prep Station . . . . . . . . . . . . . . . . . . . . . . . . 9
Reagent Plates . . . . . . . . . . . . . . . . . . . . . . . . . . . . . . . . . . . . . . . . 9
Tips and Piercers . . . . . . . . . . . . . . . . . . . . . . . . . . . . . . . . . . . . . . . 9
Purchasing . . . . . . . . . . . . . . . . . . . . . . . . . . . . . . . . . . . . . . . 10
iv
nCounter™ Prep Station User Manual
Chapter 2: Running the nCounter™ Prep Station
Introduction . . . . . . . . . . . . . . . . . . . . . . . . . . . . . . . . . . . . . . . 11
NanoString™ Technology . . . . . . . . . . . . . . . . . . . . . . . . . . . . . . . . 11
Principles and Procedures . . . . . . . . . . . . . . . . . . . . . . . . . . . . . . . . . . .11
The nCounter™ Expression Assay Overview . . . . . . . . . . . . . . . . . . . . . . 12
Before You Begin . . . . . . . . . . . . . . . . . . . . . . . . . . . . . . . . . . . . 13
Waste Removal . . . . . . . . . . . . . . . . . . . . . . . . . . . . . . . . . . . . . . . .13
Consumables Required . . . . . . . . . . . . . . . . . . . . . . . . . . . . . . . . . . . .13
Setting Up a Prep Station Run . . . . . . . . . . . . . . . . . . . . . . . . . . . . . 14
Chapter 3: Maintenance
System Setup . . . . . . . . . . . . . . . . . . . . . . . . . . . . . . . . . . . . . . . . .29
Setting the System Clock . . . . . . . . . . . . . . . . . . . . . . . . . . . . . . . . . . . . . . 29
Hardware . . . . . . . . . . . . . . . . . . . . . . . . . . . . . . . . . . . . . . . . . . .31
Home Robot . . . . . . . . . . . . . . . . . . . . . . . . . . . . . . . . . . . . . . . . . . . . . 31
Align Electrodes . . . . . . . . . . . . . . . . . . . . . . . . . . . . . . . . . . . . . . . . . . . 31
Lubricating the Pipetting Head O-rings . . . . . . . . . . . . . . . . . . . . . . . . . . . . . . . . 35
Disconnect robot
. . . . . . . . . . . . . . . . . . . . . . . . . . . . . . . . . . . . . . . . . . 38
Software . . . . . . . . . . . . . . . . . . . . . . . . . . . . . . . . . . . . . . . . . . . .39
Troubleshoot
. . . . . . . . . . . . . . . . . . . . . . . . . . . . . . . . . . . . . . . . .39
System Shutdown . . . . . . . . . . . . . . . . . . . . . . . . . . . . . . . . . . . . . . .39
1
nCounter™ Prep Station General Information
This chapter provides a general introduction to the instrumentation of the nCounter
System as well as specific information pertaining to the nCounter Prep Station.
Specific information provided in this chapter includes:
• Serial Number Location
• Safety Considerations
• Specifications
• Installation Information & Environmental Conditions
• Maintenance, Service & Support
The nCounter™ Analysis System
The nCounter Analysis System is comprised of two instruments, the nCounter Prep
Station used for post-hybridization processing, and the Digital Analyzer used for data
collection.
N OTE: The Prep Station and the Digital Analyzer are stand alone units. These
instruments do not require connection to an external PC and are not networked
to one another. They may be set up and installed separately. Connecting the
Digital Analyzer to a network is optional, and this enables data delivery to the user
via a network connection.
The nCounter Analysis System uses Setup and Process wizards on an embedded
touchscreen user interface to guide you through the sample processing and data
collection steps of the assay. Following the instructions will walk you through setting
up runs step-by-step on the Prep Station and Digital Analyzer.
2
nCounter™ Prep Station User Manual
nCounter ™ Prep
Station Overview
The nCounter Prep Station is the automated fluidic handling component of the
nCounter System and processes samples post-hybridization to prepare them for data
collection on the nCounter Digital Analyzer.
Figure 1.1 nCounter™ Prep Station
Prior to placing samples in the Prep Station, samples need to be hybridized according
to the protocol outlined in The nCounter Gene Expression Assay Manual - Total RNA
and Cell Lysate Protocols. On the deck of the Prep Station, hybridized samples are
purified and immobilized in a Sample Cartridge for data collection.
1
2
7
3
8
4
9
5
10
6
11
12
Figure 1.2 Sample Cartridge
All consumable components and reagents required for sample processing on the Prep
Station are provided in the nCounter Master Kit and are ready to load onto the deck of
the robot. No reagent preparation or dilutions are required. The Prep Station can
process up to 12 samples per run in approximately two hours.
nCounter ™ Digital
Analyzer Overview
The nCounter Digital Analyzer collects data by taking images of the immobilized
fluorescent reporters in the sample cartridge with a CCD camera through a microscope
objective lens. At the highest standard data resolution, 600 fields of view (FOV) are
collected per flow cell (sample) yielding data of hundreds of thousands of target
molecule counts. The number of images taken corresponds to the number of reporters
counted and this, in part, determines the dynamic range and level of sensitivity in the
system.
Images are processed internally and the results are exported as a comma separated
values format file that can be downloaded via memory stick. The file can be opened
by most commonly used spreadsheet packages, including Microsoft® Excel or
exported to other data visualization packages.
The nCounter™ Analysis System
nCounter™ Prep Station General Information
3
Figure 1.3 nCounter™ Digital Analyzer
The Digital Analyzer is accompanied by the nCounter Imaging Oil Applicator; a
stand-alone unit used to apply oil to the nCounter cartridge prior to inserting it into the
Digital Analyzer for data collection. The application of optical oil is important for
achieving high quality images. For detailed information on operation and maintenance
please see the nCounter Digital Analyzer User Manual.
Figure 1.4 nCounter™ Imaging Oil Applicator
The nCounter ™ Analysis System
4
nCounter™ Prep Station User Manual
Touchscreen Overview
The nCounter System’s touchscreen is a pressure-sensitive method of controlling the
Prep Station and Digital Analyzer which enables the user to interact with the system
by touching a selection on the screen. There are several standard option ‘buttons’ that
appear in the touchscreen user interface (Table 1.1).
Table 1.1 nCounter ™ System’s Touchscreen Interface Buttons
Button
Action
Next
Proceeds to the next screen.
Back
Moves back to the previous screen.
Cancel
Purges all entered data and returns to the main menu.
Save
Saves entered data, and allows you to continue. The Save button is primarily
used during file creation, upload, and download.
Finish
Allows you to skip instructional steps and jumps to the next screen that
requires input. The Finish button is also used to indicate that data entry is
complete and that you are ready to initiate processing.
nCounter™ Prep Station Information
For proper operation and testing results, the instructions in this manual must be
followed by experienced personnel. It is important to read and understand the contents
of this manual prior to operating the nCounter Analysis System.
For service and support information, please refer to General Maintenance, Service &
Support on page 8.
NanoString Technologies® does not assume any liability arising from your use of the
nCounter Analysis System, this manual or other documentation provided by
NanoString.
Serial Number
Each nCounter Prep Station has a model and serial number located on the back panel
of the unit. Please include your individual model and serial number in communications
with NanoString pertaining to the Prep Station.
For your reference, please record the model and serial number of your nCounter Prep
Station in the space provided below.
Serial Number
_____________________________________
Product Number _____________________________________
Date Received
nCounter™ Prep Station Information
_____________________________________
nCounter™ Prep Station General Information
Specifications
NC OUNTER
5
P REP S TATION S PECIFICATIONS
Power Supply
100-120 VAC
200-240 VAC
Dimensions
cm: 89 X 67 X 62.5
inches: 35.04 X 26.38 X 24.61
Pollution Degree
2
Weight
120 Kg
Important Safety Information
Please read through this manual and the following guidelines carefully to ensure safe
operation of the NanoString nCounter™ Prep Station. Always keep this manual near
the instrument for easy access to instructions and safety information.
Failure to comply with the instructions in this manual may pose a dangerous risk to the
operator and will void the manufacturer’s warranty.
In the event of an Emergency, immediately turn the power switch OFF and
unplug the Prep Station.
WARNING: Ensure that water or chemicals do not come in contact with
any part of the equipment. Water or chemicals may cause damage and
will void the warranty.
W ARNING: Do not touch the panel on the left side of the Prep Station
with wet hands. Doing so may result in electric shock.
W ARNING: Do not touch the heat block surface. Surface temperature
can reach up to 45°C during a run.
N OTE: Unplug the equipment when not in use for extended periods of time.
N OTE: When using the equipment, follow generally accepted procedures for
quality control.
WARNING: Do not attempt to disassemble the equipment. The nCounter™
Prep Station contains no user-serviceable parts. Service personnel trained by
the manufacturer must perform repairs. Do not modify any part of the
equipment as this may cause fire, malfunction, and will void the
manufacturer’s warranty.
Important Safety Information
6
nCounter™ Prep Station User Manual
N OTE: Disposal of Electronic Equipment
It is important to understand and follow all laws regarding the safe and proper
disposal of electrical instrumentation. The symbol of a crossed-out wheeled
bin on the product is required in accordance with the Waste Electrical and
Electronic Equipment (WEEE) Directive of the European Union. The presence
of this marking on the product indicates that:
• The device was put on the European Market after August 13, 2005.
• The device is not to be disposed via the municipal waste collection
system of any member state of the European Union.
For products under the requirement of WEEE directive, please contact your
dealer or local NanoString office for the proper decontamination information
and take back program, which will facilitate the proper collection, treatment,
recovery, recycling, and safe disposal of the device.
Safety Compliance
D ECLARATIONS AND M ARKS OF C ONFORMITY
The nCounter™ Prep Station has been manufactured according to EN61010-1: 2001
2nd Edition (Safety requirements for electrical equipment for measurement, control,
and laboratory use - Part 1: General requirements) and has been checked in accordance
with all relevant safety standards prior to leaving the factory.
The nCounter Prep Station has been approved for use by the following testing
institutions, confirmed by their respective test/conformity symbols:
Table 1.2 Description of nCounter ™ Prep Station Safety Compliance
Acronym
Test Symbol
Testing Institution
CE
The instrument meets the protection requirements laid down in
the European Council directive 89/336/EEC on electromagnetic
compatibility.
CB
Scheme
This instrument has been tested for safety of its electrical,
electronic, and mechanical components according to IEC610101, 2nd Edition and IEC61010-2-101, 1st Edition. A CB Scheme
test reportis available upon request.
S AFETY L ABELS
Table 1.3 Description of Caution Labels used on the nCounter ™ Prep Station
Icon
Meaning
Caution Hot Surface. The surface temperature of the heat block can reach 45°C
while running a protocol.
Potential hazard from a biological source exists. If you choose to use
biohazardous materials on your Prep Station the area of the Waste Tip may
become contaminated with biohazardous materials. Please affix the proper
warning labeling to your Prep Station if you use biohazardous inputs. Be
careful not touch this area without gloves or other biohazard protection.
Important Safety Information
nCounter™ Prep Station General Information
7
Figure 1.5 nCounter™ Prep Station Deck Layout
Installation and Environmental Conditions
The following table provides information on the environmental requirements
necessary for the safe operation of the nCounter Prep Station.
Table 1.4 Environmental Conditions Required for the nCounter™ Prep Station
Installation Site
• Indoor use only.
• The Prep Station should be placed on flat, stable surface with access to
an electrical power source (see Power Source requirements, below).
• Avoid locating the Prep Station near large electrical equipment to
prevent possible interference from noise and/or voltage fluctuation.
• Avoid locating in direct sunlight.
• Avoid locating where the potential for vibration from other sources
exists.
• Do not position the equipment so that it is difficult to operate the
disconnecting device.
Power Source
• An independent power outlet used only for the nCounter Prep Station is
required.
• The Prep Station requires an electrical power source at
100-120VAC / 200-240VAC, 1000W maximum and 50/60Hz*.
• Always use a grounded power outlet and use the power cable provided
by NanoString in order to ensure proper grounding.
Fuse
• 100-120VAC: 250V/8AT
• 200-240VAC: 250V4AT
Temperature
The room temperature required for operation is 15 to 35°C.
Humidity
The maximum relative humidity = 80% for temperatures up to 31°C
decreasing linearly to 50% relative humidity at 35°C.
* The
nCounter Prep Station can be modified from US to EU power by inverting a fuse found on the back of the instrument. Please check with your
Technical Support representative for detailed instructions.
Installation and Environmental Conditions
8
nCounter™ Prep Station User Manual
General Maintenance, Service & Support
Technical Support
Technical support is available by phone, fax, mail, or e-mail. Please be sure to include
your model number and serial number in communications. Please refer to Serial
Number on page 4 for information on locating the model and serial number of your
product.
NanoString Technologies
530 Fairview Ave N, Suite 2000
Seattle, WA 98109 USA
Phone:
1-888-358-NANO (1-888-358-6266)
Fax:
1-206-378-6288
E-mail: [email protected]
General Cleaning
When using the nCounter Prep Station it is important to follow all safety and operating
instructions provided in this manual. Always use safe laboratory operating
precautions, including wearing a mask, safety glasses and gloves.
As human and/or biohazardous materials may be used, always follow the appropriate
precautions outlined by your lab.
INSTRUCTIONS & G UIDELINES
• Keep the waste boxes clean.
• Wear gloves, safety glasses and a mask when handle specimens and reagents to
avoid contamination and infection.
• Clean the Prep Station after each run.
- After a completed run, remove all consumables and waste.
- Clean the stage surface of the Prep Station by wiping with a disinfectant
followed by wiping with water or 70% ethanol. A disinfectant such as DNA
Zap® from Ambion is recommended.
- Clean all other areas using a diluted neutral soap, followed by water.
General Maintenance, Service & Support
nCounter™ Prep Station General Information
9
Tips for Using the nCounter™ Prep Station
The following section provides helpful information for the proper use of the Prep
Station.
Reagent Plates
Reagent plates are properly placed (on the deck) using the positioning pins. Incorrectly
placed plates will interfere with the positioning pin and will not sit flat (on the deck).
Use Figure 1.6 to confirm the correct placement of reagent plates.
Figure 1.6 Use the positioning pins to ensure correct placement of reagent plates.
Tips and Piercers
The nCounter™ Prep Pack, a sub-component of the nCounter™ Master Kit, contains the
Racked Tips and Foil Piercers. Each rack contains 96 positions, with the six front-right
positions reserved for the piercers and the remaining 90 positions containing the tips.
The location of the six Foil Piercers is shown in Figure 1.7, below.
Figure 1.7 Location of the six Foil Piercers on the rack.
Tips for Using the nCounter™ Prep Station
10
nCounter™ Prep Station User Manual
Purchasing
All reagents and consumables required to process 48 nCounter Gene Expression
Assays are supplied in the nCounter Master Kit (individual kit components may be
purchased separately if required). For further information, please refer to
Consumables Required on page 13.
Accessories and consumables may be purchased from NanoString Technologies.
Please contact your representative directly, or e-mail [email protected] to have a
representative contact you.
Purchasing
2
Running the nCounter ™ Prep Station
Introduction
The nCounter™ Gene Expression Assay is designed to provide an ultra-sensitive,
reproducible and highly multiplexed method for detecting gene expression across all
levels of biological expression. This assay provides a method for direct detection of
mRNAs with molecular barcodes called nCounter Reporter Probes without the use of
reverse transcription or amplification.
This manual describes the process for post-hybridization processing using your
nCounter Prep Station. Please refer to the nCounter™ Gene Expression Assay Manual,
the nCounter™ Digital Analyzer User Manual, and the nCounter™ Data Analysis
Guidelines for Gene Expression for information on setting up your assay and data
collection and analysis.
NanoString™ Technology
Principles and
Procedures
NanoString technology is based on digital detection and direct molecular barcoding of
target molecules through the use of a color coded probe pair. The probe pair consists
of a Reporter Probe, which carries the signal on its 5’ end, and a Capture Probe which
carries a biotin on the 3’ end. The color codes carry six positions and each position can
be one of four colors, thus allowing for a large diversity of tags that can be mixed
together in a single well for direct hybridization to target and yet still be individually
resolved and identified during data collection.
Figure 2.1 Capture and Reporter Probes (left) and, Probe pair bound to an mRNA (right)
Probe pairs are placed into a reaction in massive excess to target mRNA to ensure that
each target finds a probe pair. After hybridization, excess probes are washed away
using a two step magnetic bead-based purification on the nCounter™ Prep Station.
Magnetic beads derivatized with short nucleic acid sequences that are complementary
to the Capture Probe and the Reporter Probes are used sequentially. First, the
hybridization mixture is allowed to bind to the magnetic beads by the Capture Probe.
Wash steps are performed and excess Reporter Probes and non-target cellular
12
nCounter™ Prep Station User Manual
transcripts are removed during wash steps. After washing, the Capture Probes and
Target/Probe complexes are eluted off of the beads and are hybridized to magnetic
beads complementary to the Reporter Probe. Wash steps are performed and excess
Capture Probes are washed away. Finally, the purified Target/Probe complexes are
eluted off and are immobilized in the cartridge for data collection.
Data Collection is carried out in the nCounter™ Digital Analyzer. At the highest
standard data resolution, 600 fields of view (FOV) are collected per flow cell (sample)
using a microscope objective and a CCD camera yielding data of hundreds of
thousands of target molecule counts. Digital images are processed on the nCounter
Digital Analyzer and the barcode counts are tabulated in a comma separated value
(CSV) format.
The nCounter instrument system was created by NanoString Technologies®. The
nCounter system is an easy-to-use integrated system that includes a Prep Station and
a Digital Analyzer (analyzer). The Prep Station and the analyzer together make lab
work and sample analysis a simpler process by limiting the variables in experiments
for lab technicians. The end result is a very precise and accurate measurement,
enabling you to gather data on your targets of interest rapidly with minimal
intervention.
The nCounter™ Expression Assay Overview
The nCounter Expression Assay is run on the nCounter System. The system is
comprised of two instruments, the nCounter Prep Station used for post-hybridization
processing, and the Digital Analyzer used for data collection. Follow the instructions
on the touchscreen to guide you step-by-step through setting up runs on the Prep
Station and Digital Analyzer. For further details on the nCounter System
instrumentation, please refer to The nCounter™ Analysis System on page 1.
Figure 2.2 Suggested workflow for the nCounter™ Expression Assay
The nCounter™ Expression Assay Overview
Running the nCounter ™ Prep Station
13
Before You Begin
Waste Removal
Prior to starting a new run you must ensure that the waste containers have been
emptied. Empty waste containers are required for every run.
WARNING: If waste containers are not emptied before a run, tips could come into
contact with waste liquids and contaminate samples, or excess tips could pile up
and cause a system malfunction.
1.
Remove the combined waste receptacle by lifting it straight up and out of the Prep
Station.
2.
Remove the liquid waste container from the combined receptacle and dispose of
the liquid appropriately.
• Tips should be discarded into the appropriate waste stream as outlined in your
laboratory’s procedures.
• If you are not handling biohazardous samples on your system, you may dispose
of the liquid waste in the drain.
Verify that the plastic rack holding the used piercers, tip sheaths, prep plates and
strip tubes from the previous run have all been removed from the deck.
3.
Consumables
Required
There are several consumable items that must be kept in stock. These consumables
may be purchased through NanoString Technologies.
The consumables required for each run are available as part of the nCounter™ Master
Kit or can be purchased separately. The kit contains the reagents and consumables
required to process 48 nCounter Gene Expression Assays. No reagent preparation or
dilutions are required.
WARNING: Used plasticware, such as reagents cartridges and pipetting tips, may
contain hazardous chemicals or infectious agents. Such wastes must be collected
and disposed of properly in accordance with the local safety regulations and
laboratory procedures.
The components of the nCounter Master Kit include:
• nCounter Cartridges
• nCounter Prep Plates (foil sealed 96-well plates used by the Prep Station)
• nCounter Prep Pack
-
Racked Tips & Foil Piercers
12-Tube Strips
Strip Tube Caps
Tip Sheaths (for storing tips to prevent cross contamination and unnecessary
tip consumption)
- Cartridge Well Seals
- Hybridization Buffer
N OTE: If you are processing fewer than 12 samples at a time, you will need to
purchase more nCounter Cartridges to process all 48 assays.
Before You Begin
14
nCounter™ Prep Station User Manual
Setting Up a Prep Station Run
Hybridized samples should be processed immediately using the nCounter™ Prep
Station. Hybridizations can stay at 65°C for up to 24 hours. The following steps
outlined are from the Main Menu on the Prep Station touchscreen.
C AUTION: Storing hybridizations at 4°C is not recommended as it increases nonspecific background.
1.
To set up a new run select start processing from the Main Menu (Figure 2.3).
>>> The Warm Reagents & Cartridge screen appears (Figure 2.4).
Figure 2.3 Main Menu touchscreen
Figure 2.4 Warm Reagents & Cartridge touchscreen
Setting Up a Prep Station Run
Running the nCounter ™ Prep Station
2.
15
Cartridges and Prep Plates must be at room temperature prior to processing.
a. Set out the sealed Sample Cartridge and Prep Plates for at least 10 minutes to
warm to room temperature.
N OTE: If the cartridges and Prep Plates are not at room temperature prior to
processing them, you may experience increased assay variability. Do not
open the cartridge pouch until it has reached room temperature to prevent
condensation on cartridge.
Figure 2.5 Sealed Sample Cartridge (left) and Prep Plate (right)
b. Centrifuge the Prep Plates at 670 x g for 2 minutes to collect all liquids in the
bottom of the wells. We suggest a medium deceleration speed to guard against
shaking which may produce splattering within the plate well.
c. Press next.
>>> The Waste Receptacles screen appears (Figure 2.6).
Figure 2.6 Waste Receptacles touchscreen
3.
Remove the liquid waste container from the combined receptacle and dispose of
the liquid appropriately. See Waste Removal on page 13 for further information.
• Tips should be discarded into the appropriate waste stream as outlined in your
laboratory’s procedures.
• If you are not handling biohazardous samples on your system, you may dispose
of the liquid waste in the drain.
Press next.
Setting Up a Prep Station Run
16
nCounter™ Prep Station User Manual
>>> The Hybridized Samples screen appears (Figure 2.6).
Figure 2.7 Hybridized Samples touchscreen options
4.
The Hybridize Samples screen:
a. Place your hybridized sample tubes on the deck of the Prep Station, ensuring
that tube 1 aligns with position 1 (see Figure 2.8).
Hybridized
sample tubes &
numbered orientation
guides
Figure 2.8 Hybridization sample tubes and number orientation guides.
IMPORTANT: The numbering on the deck of the robot corresponds to the
numbers on the hybridized sample tubes. If the sample tubes are
inverted, your sample specific information will be assigned to the
incorrect data file.
C AUTION: Ensure that all tube caps are removed from the hybridized
samples prior to placing tubes on the deck. Leaving the caps on will
result in a system failure.
Setting Up a Prep Station Run
Running the nCounter ™ Prep Station
17
C AUTION: All tubes should be seated fully and evenly in the rack to
ensure proper processing.
C AUTION: Only use NanoString supplied strip tubes. Other tubes may
have different dimensions and cause system failure.
b. In the Hybridize Samples screen press next.
>>> The Sample Selection screen appears (Figure 2.9).
Figure 2.9 Sample Selection touchscreen
5.
On the Sample Selection touchscreen:
a. Select any wells that are to be processed.
• You can run fewer than 12 samples, however, it is important to note that
one Prep Plate is for wells 1 – 6, and the other is for wells 7 – 12. You can
run wells 1 – 6, or all 12.
• If processing less than 6 samples use tubes 1 through 6. For processing
6 samples or less please place a prep plate, tip sheaths, and a strip tube with
at least 6 tubes attached to keep reagents from being dispensed on the deck.
• Reagents for all 12 samples will be used if more than 6 samples are entered.
• Note that blue wells indicate that they will be processed, the gray wells
indicate that they will not be processed.
b. Press next.
>>> The Reagent Plate screen appears (Figure 2.10).
Setting Up a Prep Station Run
18
nCounter™ Prep Station User Manual
Figure 2.10 Reagent Plate touchscreen
6.
Remove the clear plastic lids and place the reagent plate on deck (see
Figure 2.11).
C AUTION: Do not remove the foil or pierce the wells on the reagent well. The
Prep Station pierces the wells during processing.
The deck has alignment pins that will only allow the plates to sit flat if they
are in the correct orientation. The Prep Plate should be oriented with the
label facing the user. If the plate is placed in the wrong direction, the assay
will fail.
Figure 2.11 Reagent cards on deck.
Press next.
>>> The Tips & Foil Piercers screen appears (Figure 2.12).
Setting Up a Prep Station Run
Running the nCounter ™ Prep Station
19
Figure 2.12 Tips & Foil Piercers touchscreen
7.
Remove the metal tip carrier from the Prep Station deck by lifting straight up.
Place the tips and the foil piercers into the carrier. It is helpful to place the carrier
at eye level to align the plastic tips in the carrier as shown in Figure 2.13.
C AUTION: There are two sets of tips nested in each box with each side of the
box being the opening for one set of tips. Hold your hand firmly over the
bottom of the box when opening to avoid accidentally spilling the second set
of tips.
Figure 2.13 Placing the tips and foil piercers into metal tip carrier.
8.
Replace the loaded tip carrier back onto the Prep Station deck with the foil
piercers closest to the user. Press next.
>>> The Tip Sheaths screen appears (Figure 2.14).
Setting Up a Prep Station Run
20
nCounter™ Prep Station User Manual
Figure 2.14 Tip Sheaths touchscreen
9.
Place the tip sheaths on the deck and press firmly into place. Press next.
N OTE: Tip sheaths are used to reduce the amount of consumable waste.
They allow the system to dedicate tips to a set of 6 samples and store them
while other 6 samples are being processed.
>>> The Empty Strip Tubes screen appears (Figure 2.15).
Figure 2.15 Empty Strip Tubes touchscreen
10. Place the empty tubes on the deck. Securely close the lid that flips down over the
tubes (Figure 2.16). Press next.
C AUTION: Failing to securely clip the lid over the tubes can result in a system
malfunction. If the metal lid is not closed completely the sensor will return an
error and the run will not be able to commence.
C AUTION: Only use NanoString supplied strip tubes. Other tubes may have
different dimensions and cause system failure.
Setting Up a Prep Station Run
Running the nCounter ™ Prep Station
21
Figure 2.16 Lid closed over tubes
>>> The Sample Cartridge screen appears (Figure 2.17).
Figure 2.17 Sample Cartridge touchscreen
11. Carefully place a Sample Cartridge under the electrode fixture in the orientation
shown in Figure 2.18. Make sure that it is seated completely in the machined
depression. If it is not seated properly, the electrodes may become bent.
Setting Up a Prep Station Run
22
nCounter™ Prep Station User Manual
Figure 2.18 Sample Cartridge placed on deck
Press next.
>>> The Electrode Fixture screen appears (Figure 2.19).
Figure 2.19 Electrode Fixture touchscreen
Setting Up a Prep Station Run
Running the nCounter ™ Prep Station
23
12. Carefully lower the electrode fixture in place over the cartridge. The 24 electrodes
should insert into the 24 wells. If any resistance is felt while lowering the fixture,
stop and make sure that the electrodes are correctly aligned.
N OTE: Ensure that when you are placing the electrode fixture over the wells,
you do not bend the electrodes. If the electrodes do get bent, bend them back
to their correct position using the align electrodes function under the
Maintenance menu. If there is no cartridge, the sensor will not allow the run
to commence.
Figure 2.20 lowering the electrode fixture in place over the cartridge.
Click next.
>>> The Notification Option screen appears (Figure 2.21).
Figure 2.21 Notification Option touchscreen
Setting Up a Prep Station Run
24
nCounter™ Prep Station User Manual
13. In the Notification Option screen, select the beep when complete option if you
would like an audible alarm to alert you that the run is complete. Press next.
>>> The Start Processing screen appears (Figure 2.22).
Figure 2.22 Start Processing touchscreen
14. On the Start Processing screen, press start when you are ready to begin
processing.
>>> The nCounter Prep Station first checks that all of the consumables and
reagents have been placed properly on the deck. To do this, the Prep Station
confirms that the sensors for the sample cartridge, electrode fixture, and heater lid
are all in the correct state. The pipette head then checks that tips, tip sheaths, strip
tubes and Prep Plates are all in place by touching them with a set of validation tips.
Do not be alarmed that the Prep Station is touching the consumables; this is a part
of normal operation. If the Prep Station determines that a consumable is
misplaced, it will instruct you to fix the configuration.
N OTE: Please stand by the Prep Station during deck layout validation as any
problems that may be encountered will require user intervention to proceed.
>>> The System Processing screen appears (Figure 2.23).
Figure 2.23 System Processing touchscreen
Setting Up a Prep Station Run
Running the nCounter ™ Prep Station
25
The System Processing screen displays the current time of day and the estimated
time of day that the run will complete. In this screen, you can also pause the run.
Pausing or Aborting a Run
The following information is provided should you need to pause a run (optional).
If you do not need to pause a run skip to Step 13, below.
C AUTION: When you pause a run, it is important that you resume it as quickly
as possible. Incubation times are very important. Pausing the instrument can
affect data quality and consistency. Pausing should only be used to avoid
data loss due to operator error.
a. To pause a run, press pause on the System Processing screen.There may be a
delay before pausing. The system much reach a “safe” state before pausing.
>>> The Paused screen appears (Figure 2.24).
Figure 2.24 Paused touchscreen
b. After you pause a run, you have the option of aborting a run. Once the
hybridized samples have been moved to the Prep Plate for processing they
cannot be recovered if the run is terminated.
c. Press resume to continue the run, or press abort to end the run.
WARNING: When you abort a run, you can not restart the run and
samples may be lost if fluidic processing had commenced.
15. When the run is complete, the blue System Processing Complete screen appears
and the timer starts to count up from when the run has completed (Figure 2.25).
Setting Up a Prep Station Run
26
nCounter™ Prep Station User Manual
Figure 2.25 System Processing Complete touchscreen
16. On the System Processing Complete screen press next.
>>> The Run Successfully Completed screen appears (Figure 2.26).
Figure 2.26 Run Successfully Completed touchscreen
The Run Successfully Completed screen lists the steps to follow once the run is
complete, including:
•
•
•
•
•
a.
Setting Up a Prep Station Run
Remove and discard empty reagent plates
Remove and discard the empty tip racks and foil piercers
Remove and discard the sample strips
Remove the Sample Cartridge and seal the wells
Emptying waste containers
To release the fixture after the run is complete, press the lever in the center top
of the device towards yourself with your index finger as shown in Figure 2.27.
Running the nCounter ™ Prep Station
27
Figure 2.27 Releasing the fixture after a completed run.
b. When the processing is complete, it is important to do the following:
• Seal the wells immediately with the sealing film provided to prevent
evaporation.
• Do not leave the samples in direct sunlight or at a temperature greater than
room temperature.
• If you will not be scanning the samples within an hour, store them in the
refrigerator at 4°C. Once sealed, samples can be stored at 4°C for up to a
week with minimal data loss.
17. Press finish to return to the Main Menu.
Setting Up a Prep Station Run
28
nCounter™ Prep Station User Manual
Setting Up a Prep Station Run
3
Maintenance
There are several tasks that can be accomplished through the use of the Maintenance
screens on the Prep Station:
• system setup: set the date and time on the system clock
• hardware: home robot, align electrodes, lubricate o-rings and disconnect robot
• software: update Prep Station’s system software when a new release occurs
• troubleshoot: download log files for remote analysis at NanoString
• shutdown system: system shutdown
To access the Maintenance Menu press maintenance on the Main Menu (Figure 3.1).
z
Figure 3.1 The Main Menu and the Maintenance Menu
System Setup
The System Setup menu in the Maintenance section allows you to set the Prep
Station’s date and time.
S ETTING THE S YSTEM C LOCK
Log files are created by the Prep Station and can be important for troubleshooting
purposes. Setting the system clock allows for accurate time to be displayed on screen
and in the log files. The system clock must be manually set during the initial system
setup and for adjustments such as Daylight Saving Time.
30
nCounter™ Prep Station User Manual
Figure 3.2 System Setup screen
Figure 3.3 Set Date and Time screen
Maintenance
Hardware
31
The Hardware menu in the Maintenance section allows you to:
• Home Robot
• Align Electrodes
• Lubricate O-Rings
• Disconnect Robot
Figure 3.4 System Hardware menu screen
H OME R OBOT
If the robot enters into an undesirable state, using the home robot button can home all
the motors. This button should not be needed under normal operation.
Figure 3.5 Homing Robot message screens
A LIGN E LECTRODES
From time to time, the electrodes used for stretching the reporters may become bent
out of alignment and no longer fit into the cartridge. This usually occurs if the cartridge
was not aligned properly when the electrode fixture was depressed causing the
electrode to make contact with the cartridge and bend. The following describes a
32
nCounter™ Prep Station User Manual
method for re-alignment of the electrodes using the system hardware interface. This
method allows the electrode fixture to tilt at an angle that makes it much easier to view
the electrodes during alignment.
If the electrode is so severely bent that it cannot be inserted into a cartridge, the process
outlined below may need to be repeated twice – once without a cartridge present to get
the electrodes into roughly the right position so that they can be inserted into a
cartridge and a second time with a cartridge present for fine tuning the placement of
electrodes in the cartridge well.
1.
Select hardware on the Maintenance menu.
>>> The System Hardware menu appears (Figure 3.13).
Figure 3.6 Maintenance Menu and System Hardware Menu
2.
Select align electrodes.
>>> The Align Electrodes screen appears.
Figure 3.7
3.
If the electrode is severely bent to the point where a cartridge cannot be inserted.
Close the electrode fixture without a cartridge in it. If it is only slightly bent and
a cartridge can be inserted by carefully maneuvering the bent electrode, then insert
a cartridge before closing the electrode fixture. Press next.
>>> Figure 3.8 appears.
Maintenance
33
Figure 3.8
4.
Close the door and select next.
>>> While the door is closed, the electrode fixture tilts towards the operator for
easier access to the electrodes. Two screens follow in succession (Figure 3.9).
Figure 3.9
5.
Using a pair of tweezers or fine tip pliers, bend the electrodes into alignment by
trying to align the tip of the electrode to the center and bottom of the cartridge
well. Press next.
>>> Figure 3.10 appears on screen.
34
nCounter™ Prep Station User Manual
Figure 3.10
6.
Close the door and the electrode fixture will tilt back to its home position. Press
next.
>>> Two screens appear in succession (Figure 3.11).
Figure 3.11
7.
Press finish to return to the Maintenance menu.
Maintenance
35
L UBRICATING THE P IPETTING H EAD O- RINGS
N OTE: When conducting maintenance activities always use appropriate safety
precautions including wearing safety glasses and gloves.
The O-rings on the pipetting nozzles in the Prep Station are present to ensure a good
seal with the pipette tips thus ensuring accurate liquid volume control. O-rings are the
small black rings found on the lower end of the nozzle. These O-rings must be
lubricated once a month in order to ensure a good seal.
The Prep Station Maintenance menu has an interface to make O-ring lubrication
easier. Following the user interface brings the pipetting head to the front of the deck
for easy access during lubrication.
Materials required:
• Silicone Grease
• Lint-free Paper
• Rubber Gloves
• pipette tip
• Paper clip
To Lubricate the O-rings
1.
Select hardware on the Maintenance menu.
>>> The System Hardware menu appears (Figure 3.13).
Figure 3.12 Maintenance Menu
36
nCounter™ Prep Station User Manual
Figure 3.13 System Hardware Menu
2.
Select lubricate o-rings.
>>> A series of Lubricate O-Rings Maintenance screens appears.
Figure 3.14
3.
Follow the directions on screen.
Figure 3.15
Maintenance
37
Figure 3.16
4.
To lubricate the o-rings take a small amount of silicone grease on the end of a
pipette tip and rub the tip around the o-ring as shown in Figure 3.17.
5.
Using lint-free paper, thoroughly wipe off any excess silicone grease from the
nozzles and Tip Ejectors.
• Be careful not to get grease into the nozzle itself. If grease does happen to get
in the nozzle, un-bend a paperclip and very carefully use the wire to scrape the
grease back out.
C AUTION: Excessive grease may cause equipment malfunction.
Figure 3.17 Lubricating the O-rings
38
nCounter™ Prep Station User Manual
Figure 3.18
Figure 3.19
D ISCONNECT ROBOT
The disconnect robot button closes some internal software applications and should
only be used by service personnel.
Maintenance
Software
39
The system software page is used for updating the system software when there is a new
release from NanoString.
Figure 3.20 System software touchscreen
Troubleshoot
If you experience technical difficulties, NanoString support staff may ask you to
download and email log files to them for diagnosis of the issue. The trouble shoot
screen is used to gain access to the screen where you can select files to download. Log
files are stored by date. Be careful not to select the top level .(LogData) folder unless
instructed to do so. This folder contains all log files on the system and may overwhelm
the available storage capacity on the memory stick used for the transfer. Multiple
dated folders may be selected for download by touching them. Selected folders will
show up highlighted in blue.
1.
Insert a memory stick into the Prep Station's front USB port.
2.
When the correct folders have been selected, press download data and they will
be transferred to the memory stick.
Figure 3.21 Troubleshoot touchscreen
System Shutdown
If the system needs to be shut down it is preferable to use the system shutdown button
to power off the system before using the hard power switch in the back of the Prep
Station.
40
nCounter™ Prep Station User Manual