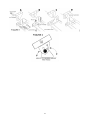
1
Product Manual
OAsys / iPAD
Kitchen Display Systems
Release 2.1 Nov 1, 2006
This manual is also published at WEB PAGE: www.selectelectronics.com
Please refer to this URL to obtain the most recent release available
Select Electronics Corporation
1975 Rockledge Drive
Rockledge, FL 32955
(321) 638-8948 FAX (321) 638-8973
Select Electronics Corporation
2 Patricia Lane
Rockaway, NJ 07866
(973) 627-0351 FAX (973) 625-4763
Select Electronics Corporation reserves the right to update, or modify this document without notice. The information within this
document is believed to be accurate and correct. Select Electronics Corporation shall not be held liable for errors contained
within this document, the incidental or consequential damage or losses resulting from or in connection with the interpretation,
presentation, or product performance relating to the use or availability of material; within, or to the product itself.`The
proprietary information contained within this document is copyright protected. No part of this document may be reproduced,
photocopied, or distributed without the expressed written consent of Select Electronics Corporation.
Copyright (c) 1999-2006 by Select Electronics Corporation, All Rights Reserved
1
Table Of Contents
Chapter 1
1.1
1.2
Chapter 2
2.1
2.2
2.3
General
Terms and Definitions
Product Limited Warranty
OAsys Hardware
General Safety Precautions
Oasys Model Installation
2.2.1 General Requirements
2.2.2 Configuring Components
2.2.3 Making Cable Connections To The OAsys KDS
2.2.4 Installing AV1000 Cards with Existing EV1000 Cards
2.2.5 Troubleshooting
2.2.6 SK9200 Bump Bar Universal Mounting Bracket Kit
OAsys IPad Model Installation
2.3.1 General Requirements
2.3.2 Configuring Components
2.3.3 Making Cable Connections To The IPad KDS
2.3.4 Troubleshooting
2.3.5 Optional Accessories
2.3.5.1
Universal Mounting Bracket Kit
2.3.5.2
Cable Shroud Kit
Chapter 3
3.1
3.2
3.3
3.4
3.5
3.6
3.7
3.8
3.9
3.10
OAsys Software
OAsys Setup Utility
Ethernet Setup Utility
EVBasic Software
SEC Dashboard Utility
Rod Maintenance
Remote Order Display (ROD)
OAsys Diagnostics
Register Emulator
Chinese Support (DBCS)
Troubleshooting
Chapter 4
4.1
4.2
OAsys KDS
OAsys Ipad KDS
Chapter 5
Copyrights and License Agreement
Product Specifications
2
Chapter 1
General
1.1
Terms & Definitions
Host PC – any controller or PC that the ROD/Dashboard software is installed on. This may be a backroom
server, PC based register etc.
IPad – refers to the OASys IPad. To differentiate between the OASys and OASys IPad we will reference it
in this manual as “IPad” only.
IPad NGen – Next generation IPad. To differentiate between the IPad NGen and the other products in this
manual it will be simply refered to as “NGen”.
IPad+ – remote keypad that can be used in conjunction with the IPad and IPan NGen devices.
Keypad – synonymous with bump bar. This refers to the SK9200 bump bar when talking about the OASys
product, the integrated membrane keypad when talking about the IPad product or the IPad+.
OASys – for simplicity purposes the term OASys is used generically in this manual to refer to the
OASys, OASys IPad and IPad NGen products except when making comparisons between the
various products.
PC keyboard – full travel keypad plugged into OASys or IPad for configuration purposes ONLY.
3
1.2
Product Limited Warranty
Select Electronics Corporation (SEC) expressly warrants that for a period of one (1) year SEC OAsys Series
products and components will be free from defects in materials (parts), and workmanship (labor), and function
within the specified operating parameters. This warranty covers purchases made from SEC, or its authorized
dealers. SEC may, at its discretion, elect to replace any defective product with a directly compatible model or
version, in lieu of repair.
To obtain warranty service:
1) Access the TECHNICAL SUPPORT page at the web site: www.selectelectronics.com. Follow the instructions
for submitting an RMA Request.
2) Upon receipt of an RMA number, deliver the defective product to SEC's designated repair center. Shipments
made for repair service must include the assigned RMA number(s) on each package.
3) Repairs will normally require 15-30 days for return. UPS Ground Service provides return shipment, unless
otherwise specified and paid for.
WARRANTY EXCLUSIONS
This warranty does not apply to
1) failure caused by improper installation of this product or exposure to improper operating conditions
2) abuse, misuse, accident, or disaster affecting this product
3) products evident of any form of alteration or modification that was not authorized, in writing, directly by SEC,
or
4) Products with missing or altered serial numbers.
The customer is responsible for insuring against shipment damage and loss, and thus assumes all risk for loss
or damage in transit. Fulfillment of SEC's warranty obligation will be the customer's exclusive remedy and SEC's
(and its dealer's) limit of liability for any breach of warranty or otherwise. This foregoing expressed warranty is
made in lieu of any other product warranty, expressed or implied.
4
Chapter 2
2.1
IMPORTANT SAFETY PRECAUTIONS – READ
CAREFULLY
General When using electronic equipment, safety
precautions should always be observed to reduce the
risk of equipment damage, fire, electric shock and
personal injury. While installation is taking place, alert
workers and personal on-site to avoid accidental injury
to themselves, installation crew, and damage to the
equipment.
Warning Labels Observe all warnings marked on
each product component.
Exposure To Liquids Unplug this product from the
wall outlet before cleaning. Do not use liquid cleaners
or aerosol cleaners. Use a damp cloth for cleaning.
Never allow liquids of any kind to reside inside or
make contact with enclosed internal product
components. Do not use this product near water, for
example, near a tub, wash bowl, kitchen sink, or
laundry tub, in a wet basement, or near a swimming
pool.
Ventilation This product requires proper ventilation
for operation. This product should never be placed
near or over a radiator or heat register. DO NOT
mount this equipment where ambient temperatures
exceed 90 degrees F.
AC Power This product should be operated only from
the type of power source indicated on the marking
label. If you are not sure of the type of power supplied
at your location, consult your dealer or local power
company. As a safety feature, grounded type AC cord
plugs will only fit into a grounding type power outlet.
Alternately, polarized AC cord plugs will fit only into
the power outlet when inserted in the designated
position. If you are unable to insert the plug into the
outlet, contact your electrician to replace your
incompatible outlet. Do not defeat the safety purpose
of the grounding type cord plug or the polarized AC
cord plug supplied. To reduce risk of fire or electric
shock, do not overload wall outlets or use extension
AC cords. Do not allow anything to rest on the power
cord. Do not locate this product where the cord will
interfere in the work area. Do not locate this product
where the cord may wear or stress in any manner.
Never push objects of any kind into this product
through cabinet slots as they may touch dangerous
voltage points or short out parts that could result in a
risk of fire or electric shock.
Disassembly To reduce the risk of electric shock, do
not disassemble product components labeled for AC
power operation (i.e. power supplies) or components
not specifically designated in these instructions for
user access. Opening or removing covers may
expose dangerous voltages. Service or repair work is
performed at the service depot.
OAsys Hardware
General Safety Precautions
Re-assembly When required to dismantle system
components, be sure than all mounting screws,
washers, nuts, etc. are securely in place prior to
operation of the kitchen system. These hardware
components may be required to ensure reliable
operation and compliance to radio emissions standards.
Incorrectly reassembled products can cause electric
shock when the equipment is subsequently powered on.
Mounting To avoid equipment damage or personal
injury: a) DO NOT permanently install any of these
product components on a portable cart, stand, or table,
b) DO NOT route equipment cables where normal
usage of the desired area is impeded, c) insure proper
isolation from heat, chemicals, or liquids, d) mounting
equipment to shelves only where accidental contact will
not cause falling, e) tightly wrap and secure excess
cable wires in an out-of-the-way place - such as under
counters, or behind the monitor. DO NOT leave cable
where it may accidentally drop onto food preparation
areas, hot surfaces, or floors
A) SK9200 bump bars are capable of horizontally or
vertically mounting to walls or table tops. Use
appropriate fastener hardware to mount these devices
to the surface material (wood, concrete, dry wall, metal,
etc).
B) Monitor brackets may require attachment to ceiling
joists or structural beams that are not readily available at
your site. Consult bracket manufacturer for accessory
hardware designed specifically for support of the weight
load of your monitor. When deciding on a mounting
location, consider the surrounding work area conditions
that may cause damage to the monitor. Install monitors
where there is no risk of personal injury, or accidental
contact. Prolonged physical contact with monitor
brackets may cause structural weaknesses to develop,
increasing the risk of falling.
Product Failure Unplug this product from the wall outlet
and refer servicing to qualified service personnel under
the following abnormal conditions:
A. When the power cord is damaged or frayed.
B. If the product is overheating, emitting noise, odors,
smoke, or exhibit any physical changes.
C. If the product has been exposed to liquids.
D. If the product does not operate normally by following
the operating instructions. Adjust only those controls
that are covered by the operating instructions because
improper adjustment of other controls may result in
damage and will require extensive work by a qualified
technician to restore the product to normal operation.
E. If the product has been dropped or the cabinet has
been damaged.
F. If the product exhibits a distinct change in
performance.
5
2.2
2.2.1
OAsys Model Installation
General Requirements
In addition to components supplied with OAsys KDS kits,
on site, you will need the following other equipment in
order to complete installation of the OAsys KDS system.
MONITORS A standard computer VGA/SVGA color or
paper white display monitor for each OAsys video
channel supplied with your kit. Models and size may be
selected at your option. Standard 15 Pin high-density
connector should be provided for compatible
interconnection.
AC POWER An AC power wall outlet needs to be located
in close proximity to the OAsys KDS base enclosure, and
additionally, for each video monitor to be installed. DO
NOT attempt to extend the power supply output cord,
which connects directly to the OAsys enclosure.
COMPUTER Often, existing computer or POS resisters
existing on-site can readily interface with your OAsys
KDS base unit. Alternately, an Ethernet hub link may be
used for OAsys kits which were purchased with an
Ethernet interface option. For new sites, typically all POS
equipment will be installed within the same time period. It
is assumed the dealer has integrated the desired ordertaking equipment and interface for simple connection with
the OAsys KDS system. In other cases, there may be
existing order-taking ECR or PC-based POS equipment
that now is desired to facilitate a new kitchen display
system or upgrade. This equipment will use one of two
B) In other installations an Ethernet hub connection is
required. KDS application software will transfer order
transactions internally from the POS terminal
methods to interface with the OAsys KDS system.
6
A) Similarly both simple and complex POS PCbased & ECR-based systems are ready to
interface with the OAsys KDS providing a
standard RS232C port is available for dedicated
KDS peripheral use. This port may be available on
many POS registers, backroom PC, or site server,
from which the KDS software will be implemented.
B) In other installations an Ethernet hub
connection is required. KDS application software
will transfer order transactions internally from the
POS terminal or ECR register, to the Host
platform, and then to the kitchen display system,
connected at the RS232C port or Ethernet hub.
OAsys KDS software or other application
software provider will make available optional
parameter features which select desired
kitchen routing tasks, screen formats, etc., for
kitchen system operation. Refer to the
software application documentation when
ready to install software. MOUNTING
HARDWARE (OPTIONAL) Monitor Brackets may
be required for overhead monitor mounting, or
other methods of out-of-the-way monitor
mounting. Select brackets that suit your needs
based on cost, size, positioning, etc.
CUSTOM CABLING (OPTIONAL) Some
installations may require custom length cabling for
connecting the Host computer RS232C port or
when networking the OAsys KDS system into the
on-site Ethernet hub or for cabling each SK9200
bump bar to the OAsys base unit. Restrict null
modem RS232C cable and 8 wire RJ45
terminated SK9200 bump bar cabling to maximum
lengths of 50 feet each. Refer to Ethernet hub
manufacturer for maximum Ethernet cabling
distances specified.
Mounting Components
Monitors If monitor brackets are used, install
these prior to cabling monitors or other
components. Be sure, when locating the mounting
location of monitors, that the video signal cable
length used to connect to the OAsys base unit
does not exceed 50 feet.
OAsys Base Unit The base unit is best installed
on top of a shelf or under counter shelf. Consider
power outlet location and best area for ventilation,
servicing, & safety to both personnel and
equipment. Under no circumstances should the
power supply cables, communications cables or
VGA monitor cables be used to suspend the
OAsys Base Unit as a mounting means.
SK9200 Universal Mounting Bracket When
using this bump bar bracket, refer to APPENDIX A
for instructions.
2.2.2
Configuring Components
EV1000 /AV1000 CARD
SK9200 BUMP BAR
The newer AV1000 cards can be used instead of or in
conjunction with EV1000 cards. The jumpers, settings,
and connectors mimic those on the EV1000 card.
OAsys Cover Removal Remove all four cover screws.
Two screws are located on each side panel of the top
cover.
OAsys Base Unit Configuration Each OAsys Unit is preset for plug-n-play operation at the factory. It may be
wise to visually check the required settings are intact,
especially when servicing or replacing base units. Below
are the designated settings for proper OAsys KDS
operation. Factory settings are in BOLD.
Video ID Number Unique selection one for each
EV1000 card installed.
S1 #1
S1 #2
DOWN
DOWN = ID 1 First E/AV1000
UP
DOWN = ID 2 Sec’nd E/AV1000
DOWN
UP
= ID 3 Third E/AV1000
UP
UP
= ID 4 Fourth E/AV1000
SK9200 Cover Removal To remove the top cover
on the SK9200 bump bar carefully insert a flat
screwdriver tip at the slotted end of the unit and
twist the screwdriver tip until the SK9200 top cover
lifts out of its hold position. Then, slowly pry open
the top cover and place on a flat surface –
excercising care not to crease or damage the key
matrix ribbon cable.
SK9200 Configuration Each SK9200 bump bar is
pre-set for plug-n-play operation at the factory. It
may be wise to visually check the required settings
are intact, especially when servicing or replacing
bump bar devices. The following table lists the
designated settings for proper SK9200 bump bar
use for OAsys KDS operation. Factory settings are
in BOLD.
Touch Screen Mode
S1 #8 Disable=DOWN, Enable=UP
UART IRQ
The same selection is made for all E/AV1000 cards
installed. JP1 IRQ15 SHORTED = PC IRQ 15
SK9200 Bump Bar Interface
Power Input
JP1 OPEN = +12V Input
CLOSE = +5V Input
Compatibility
JP2 - +12V SHORT
+5V SHORT
JP3 - Factory Setting = B
JP4 - Factory Setting = B
JP5 - Factory Setting = SHORTED
JP2 RS232C = SHORT
RESET = SHORT = SK4400 Compatibility
DEVICE ID #
S1 #1 #2 #3 #4
Device ID #
OFF OFF OFF OFF
When configuration of the OAsys Base unit is
completed, ensure all components within the OAsys
enclosure are firmly secured, screwed down to the base
unit chassis, and the enclosure cover is secured in
place.
NOTE: When using EV1000 cards and AV1000 cards
together in the same Oasys enclosure, refer to
APPENDIX B for proper installation.
7
ON OFF OFF OFF
OFF ON OFF OFF
ON ON OFF OFF
OFF OFF ON OFF
ON OFF ON OFF
OFF ON ON OFF
ON ON ON OFF
OFF OFF OFF ON
ON OFF OFF ON
OFF ON OFF ON
ON ON OFF ON
OFF OFF ON ON
ON OFF ON ON
OFF ON ON ON
ON ON ON ON
Communications Mode
S1 #5
#6
Mode
OFF OFF RS232C
2
3
4
5
6
7
8
9
10
11
12
13
14
15
16
1
SK9200 BUMP BAR (Cont.)
SPEAKER VOLUME Adjust to suitable SPEAKER
volume.
Key Template Orientation
The SK9200 bump bar is supplied with a double sided,
removable key template. The template provided offers
key labels for most common KDS usage. It will display
key labels for viewing in a horizontal bump bar mounting
position or a vertical mounting position. The bump bar
comes factory oriented for horizontal mounting, but can
easily be switched to display vertical key labels as
follows:
1) Remove the bump bar top cover as instructed
above.
2) Locate the key template tab on the back of the bump
bar top cover. Grab the tab, and slide out the
template.
3) Holding the template tab, reinsert the template with
the vertical key labels visible through the key
windows on the top of the bump bar cover.
Connect bump bar RJ45 cable into designated jack on
SK9200 circuit card, for routing to EV1000 card in
OAsys enclosure.
When configuration and cable connection for the
SK9200 bump bar is completed, ensure that the SK9200
key matrix ribbon cable is in place, the communications
cable is connected to the RJ45 jack, the rubber cable
grommet is also in place, then firmly secure top cover.
If you are unsure of the appropriate speaker volume
needed at this time, upon final installation and power up,
adjust the speaker volume to desired level. Secure top
cover after this adjustment is made.
PC3860 PROCESSOR CARD
There are no user-selectable options necessary for
configuring the PC3860 processor card. This card is
plug-n-play ready for operation as supplied from the
factory for the base OAsys operation. Future optional
features will be provided, as needed, which may affect
these factory defaults.
8
ON OFF HALF DUPLEX RS485 CHAN 1
OFF ON
HALF DUPLEX RS485 CHAN 2
ON ON
FULL DUPLEX RS485 CHAN 1/2
To ensure these settings are not dislodged or
displaced the following settings are required:
JP1, JP4, JP5 – OPEN
JP2 [1-2] RS232
JP3 [1-2] MIO ENABLED
CONT1, CONT16, CONT17 – NO CONNECTION
CONT12 1 OPEN, 3 OPEN, 5 OPEN
ESL-816 Ethernet Adapter Card
BNC/TPI ISA PnP Ethernet Adapter
GREEN [LED ON] To indicate the link integrity
between the adapter and the twisted-pair hub. The
LED remains on while the network cable's link
integrity is good.
Hardware Installation
Each ESL-186 Card is pre-set for plug-n-play
operation at the factory. Remove all four cover
screws to the Oasys unit encloser. Two screws are
located on each side panel of the top cover. Insert
the ESL-816 card into an available slot on the
motherboard, and secure card bracket to enclosure
with mounting screw. When the card is mounted
firmly secured to the OAsys base unit chassis,
screw down the enclosure cover.
Thin Ethernet Cable
1. Connect the T-connect.or to the card's BNC
connector.
2. Connect the Thin coaxial cable to the Tconnector. Note: If you are installing a station at
the end of a cable segment, you need 50-ohm
cable terminators at both ends of the cable
segment (one end must be grounded).
Twisted-Pair Cable
1.Insert the RJ-45 connector into the UTP jack on
the adapter.
2.Connect one end of the UTP cable to a 10BASET HUB
Once the hardware is installed, initialize your software
(refer to software vendor instructions) to complete
installation.
2.2.3
Making Cable Connections To The OAsys KDS
NOTE: DO NOT APPLY POWER TO ANY
COMPONENTS AT THIS TIME.
As shown in Figure 1, make the proper cable
connections.
1) OAsys network connection to the RS232C port on the
PC/POS
2) Position universal power supply in place for normal
operation. (DO NOT APPLY AC POWER)
3) Attach bump bars to the proper port on the
1) Plug in monitor power cords into AC outlet and
apply power to each monitor.
2) Plug in OAsys base unit power supply to AC
outlet. NOTE: If properly installed, The OAsys
power LED’s (+5V, +12V, & -12V) should illuminate,
each bump bar should visibly show an illuminated
green light and sound a single 1-second 'beep'
when then OAsys unit is powered up. Also, each
monitor should display a visible start-up screen
within a few seconds. If the proper response is not
confirmed, refer to the TROUBLESHOOTING
section of this manual for advice.
3) For normal operation, the video monitor used as
DISPLAY #1 will report when the OAsys KDS startup is ready. From the bump bar, press the FUNC
key to switch to the site menu. At this menu, you
can test the bump bar, display set up configuration,
and monitor network activity. Instructions for menu
operation are supplied on the menu screen. To
resume to normal screen mode, press ESC key.
4.) Once all devices are confirmed to be
operationally powered on, the PC (POS) can be
powered on and the KDS software can be installed.
(See KDS Software documentation for proper
software installation, configuration, and operation)
Optional Features
Duplicate Video Output
A duplicate video configuration allows 2 monitors to
display the identical information. This configuration
is directly available at each video monitor port on
the OAsys base unit. One duplicate video port is
supplied for each unique video port on the OAsys
base unit. For extending the duplicate feature to
more than one additional monitor, use the SEC
video splitter/booster device, available from SEC or
your dealer.
Touch Screen Monitors
OAs
ys unit. NOTE: The cable between the OAsys unit to the
bump bar provides DC power to the bump bar (+12V)
and should be no more than 50 feet in length. Excessive
cable distances could cause erratic bump bar behavior.
4) Attach each VGA monitor video signal cable to the
proper OAsys video port.
Final Steps
NOTE: During the final steps installing the OAsys
KDS, and at any time during normal usage, DO NOT
connect or disconnect any cables while power is
supplied to any system devices. Connections or
removal of cables while power is applied may result
in erratic operation, system degradation, or possible
damage to system devices.
9
Requires a TOUCHSCREEN ADAPTER PLUG
available from SEC or your distributor. Select
ELOGRAPHICS or MICROTOUCH models with an
RS232C serial interface at 9600 Baud.
Set S1 #8 Enable = UP on only the EV1000 card(s)
that will be using a touch screen monitor interface
Use RJ45 8-wire cable to connect to the desired
EV1000 card port normally used for bump bar input
with the adapter plug at the touch screen port side.
The configured plug will make necessary RS232C
9-pin serial port connections, as follows.
EV1000 Pin
1
4
7
RS232C Pin
5
3
2
Signal
GND
TX
RX
2.2.4
Installing AV1000 Cards with Existing EV1000 Cards
These instructions apply for the following conditions:
1) Adding AV1000 card(s) to an OAsys enclosure with pre-existing EV1000 card(s),
2) Substituting AV1000 card(s) for defective EV1000 card(s),
3) All other cases when there will be EV1000 cards and AV1000 cards co-existing within the same OAsys
controller enclosure.
Please take note of the following steps to insure proper operation. Failure to perform the following steps will
prevent the OAsys from working properly and may cause the OAsys to appear as if it is not working at
all.
1) Make certain that power is removed from the OAsys controller enclosure prior to removal of
enclosure cover and any devices within the enclosure.
2) If applicable, remove defective EV1000 card(s) from the OAsys controller enclosure.
3) Configure all remaining EV1000 cards for lower ID’s (Example: Video #1 and #2). Insure that software
version 1.1.65 or greater is installed on the OAsys. Booting the OAsys and viewing the main screen can
determine this. If version 1.1.65 or greater is not installed than the unit will have to be flashed with the latest
software before proceeding. In addition, ensure that the BIOS file called ALTBIOS.DAT is also flashed onto the
OAsys root directory. Please contact SEC or visit our web site to obtain the latest software requirements.
4) Install AV1000 card(s) into available empty ISA card slots.
5) Reboot OAsys controller and insure proper operation. The board configuration can be viewed on the status
report screen.
6) Upon successful boot up, remove power again and re-install cover to enclosure.
7) Apply power. Resume software application(s). The OAsys controller unit is now ready for normal operation
10
2.2.5
Troubleshooting
The chart below may resolve common problems installing and operating the OAsys KDS. If, after you have determined all
components have been properly installed and configured, the problem persists, consult with technical support personnel at
dealer or factory. OAsys Kit components are shipped with self-diagnostic features, which the operator can access. To
systematically confirm proper component installation, run the integrated diagnostic application. Additionally, your KDS
software provider will usually offer error code conditions, and log files for monitoring system operation. Refer to the software
documentation to determine what monitoring and error reporting capabilities are offered.
SYMPTOM
MONITOR NOT UPDATING SCREEN
OR ONLY START SCREEN IS
DISPLAYED ON MONITOR
PROBABLE CAUSE
1) Improper communications cable or
disconnected communications cable.
2) Baud rate mismatch.
3) Video ID incorrect.
4) Base unit cards unseated in socket.
5) Register / PC/ Server turned off.
NO VIDEO ON MONITOR
1) Monitor not turned on.
2) Monitor not connected to OAsys base
unit.
3) Monitor brightness turned too low.
4) OAsys unit turned off.
5) Video ID incorrect.
6) Base unit cards unseated in socket.
7) Screen saver active.
8) Video monitor commanded to be blank.
BUMPBAR SENDS NO KEY ENTRY, OR
NO 'BEEP' HEARD
1) Connection cable link lost, or
damaged.
2) Baudrate incorrect.
3) SK9200 power absent.
4) SK9200 cabled to wrong EV1000 card.
5) SK9200 mode setting incorrect.
6) 'Beep' mode set for PC activated.
PC: BOOT UP ERRORS REPORTED,
OR PC LOCKS UP DURING PROGRAM
EXECUTION, ACTING STRANGE, OR
RUNNING SLOWLY
1) PC comm port not configured correctly.
PC: KDS SOFTWARE REPORTS
COMM. ERRORS IN ERROR LOG
1) Comm cable link lost, or wrong
2) OAsys unit turned off.
3) Baud rates incompatible
4)Improper Software installation or
configuration.
5) PC comm port not configured correctly.
2) Comm cable link lost, or damaged.
3) Improper Software installation or
configuration.
11
POSSIBLE SOLUTIONS
1) Trace cable break, check cable pinout.
2) Check POS to OASYS comm baud
rates are identical.
3) Check for proper ID settings or
duplicate ID settings on more than one
EV1000 card.
4) Check base unit cards are secured into
sockets.
5) Check power POS/Host PC equipment
turned on.
1) Check monitor power switches and line
cord connected.
2) Check monitor video cable in place.
3) Adjust monitor brightness control
4) Check power to OAsys base unit.
5) Check for proper ID settings or
duplicate ID settings on more than one
EV1000 card.
6) Check base unit cards are secured into
sockets.
7) Generate system activity to resume
screen display
8) Check software operation and activity
correct
1) Trace cable break or incorrect pinout.
Check SK9200 connected to proper
EV1000 card.
2) Check SK9200 configured to OAsys
plug-n-play configuration.
3) Check power to OAsys base unit.
4) Check for matching use of SK4400
and KDS software Device ID use
5) Check SK9200 configured to OAsys
plug-n-play configuration.
6) Verify SK9200 set for auto beep mode
1) Verify RS232C port is configured
correctly at PC or POS Host.
2) Trace cable break, check cable pinout.
3) Verify no other device shares selected
comm port I/O address
assignment and IRQ.
1) Trace cable break or incorrect pinout
2) Check power to OAsys base unit.
3) Verify RS232C port is configured
correctly at PC or POS Host
4) Verify no other device shares selected
comm port I/O address
assignment and IRQ.
2.2.6
SK9200 Bump Bar Universal Mounting Bracket Kit
The SK9200 Bump Bar Stainless Steel Universal Mounting Bracket is capable of unlimited configuration
positions and useful mounting locations. This bracket can be mounted on walls, tops of counters, counter edges,
shelving edges, under counters, shelves, monitor brackets, vertically and horizontally mounted onto the front or
sides of video monitors or monitor brackets or various unique other locations.
1) Turn off power to the bump bar and all equipment cabled to and from the bump bar.
2) To remove the top cover on the SK9200 bump bar carefully insert a flat screwdriver tip at the slotted end of
the unit and twist the screwdriver tip until the SK9200 top cover lifts out of its hold position. Then, slowly pry
open the top cover and place on a flat surface – taking care not to crease or damage the key matrix ribbon
cable.
3) Using the machine screws provided, mount one of the bracket supports utilizing the two pre-threaded screw
holes on each end of the bottom side of the bump bar (See FIGURE 1). Then mount the second bracket
support to the opposite end of the bump bar. It is not necessary to remove existing bump bar rubber feet to
mount the bump bar to the bracket. Possible mounting bracket methods are provided in FIGURE 1.
4) Using the screw & nuts provided, loosely join the bottom supports to each side of the bracket supports
assembled in STEP 3.
5) Locate a flat surface position to secure the bracket. Take into account the cable routing direction and ample
room to access the bump bar for service and configuration changes in the future. Once you have
determined the proper position and angle, use a pencil to mark the mounting holes that will be made to
secure the bracket firmly in place. Remove both surface bracket flanges from the Bump Bar to secure these
to the mounting surface.
6) Using appropriate fastening method for the surface to which the bump bar brackets will be mounted (i.e.
sheet metal screws, wood tap screws, sheet rock anchor, rivets, etc.), proceed to secure the base bracket to
the mounting surface. If mounting to an electrical device, such as a monitor, make sure no electrical
component damage, electrical contact, or shock will result when screwing or riveting into the electrical
device enclosure
7) Once the bottom bracket support is firmly mounted onto the mounting surface, repeat STEP 4, then rotate
the bracket to the desired angle of access for normal usage, then firmly tighten the bolts holding the top and
bottom bracket supports together.
8) When done mounting the SK9200 bump bar, ensure that the SK9200 key matrix ribbon cable is in place, the
communications cable is connected to the RJ45 jack, the rubber cable grommet is in place, and the top
cover is firmly secured.
9) The bump bar is now ready to be placed into normal operation. Re-connect the RJ45 snap connector in
place. Power may be applied at this time. System may be operated at this time.
12
2.3
2.3.1
In addition to components supplied with IPAD KDS
kits, on site, you will need the following other
equipment in order to complete installation of the
IPAD KDS system.
MONITORS A standard computer VGA/SVGA color
or paper white display monitor for each IPAD video
channel supplied with your kit. Models and size
may be selected at your option. Standard 15 pin
high-density connector should be provided for
compatible interconnection.
AC POWER An AC power wall outlet needs to be
located in close proximity to the IPAD KDS
enclosure. DO NOT attempt to extend the power
supply output cord, which connects directly to the
IPAD enclosure.
COMPUTER Often, existing computer or POS
registers existing on-site can readily interface with
your IPAD KDS base unit. An Ethernet hub link is
provided with the IPAD KDS. For new sites,
typically all POS equipment will be installed within
the same time period. It is assumed the dealer has
integrated the desired order-taking equipment and
interface for simple connection with the IPAD KDS
system. In other cases, there may be existing
order-taking ECR or PC-based POS equipment
that now is desired to facilitate a new kitchen
display system or upgrade. This equipment will use
one of two methods to interface with the IPAD KDS
system.
A) Similarly both simple and complex POS PCbased & ECR-based systems are ready to interface
with the IPAD KDS providing a standard RS232C
port is available for dedicated KDS peripheral use.
This port may be available on many POS registers,
backroom PC, or site server, from which the KDS
software will be implemented.
B) In other installations an Ethernet hub connection
is required. KDS application software will transfer
order transactions internally from the POS terminal
OAsys IPad Model Installation
General Requirements
Or ECR register, to the Host platform, and then to the
kitchen display system, connected at the RS232C port
or Ethernet hub. IPAD KDS software or other
application software provider will make available
optional parameter features which select desired
kitchen routing tasks, screen formats, etc., for
kitchen system operation. Refer to the software
application documentation when ready to install
software. MOUNTING HARDWARE (OPTIONAL)
Monitor Brackets may be required for overhead
monitor mounting, or other methods of out-of-the-way
monitor mounting. Select brackets that suit your
needs based on cost, size, positioning, etc.
CUSTOM CABLING (OPTIONAL) Some installations
may require custom length cabling for connecting the
Host computer RS232C port or when networking the
IPAD KDS system into the on-site Ethernet hub.
Restrict null modem RS232C cable to maximum
lengths of 50 feet each. Refer to Ethernet hub
manufacturer for maximum Ethernet cabling distances
specified.
Mounting Components
Monitors If monitor brackets are used, install these
prior to cabling monitors or other components. Be
sure, when locating the mounting location of monitors,
that the video signal cable length used to connect to
the IPAD unit does not exceed 25 feet.
IPAD Unit The IPAD unit is best installed on top of a
work counter, along the side edge of a shelf or
counter shelf, or fixed to a wall. Consider power outlet
location and best area for ventilation, servicing, &
safety to both personnel and equipment. Under no
circumstances should the power supply cables,
communications cables or VGA monitor cables be
used to suspend the IPad Unit as a mounting means.
IPAD Universal Mounting Bracket When using this
mounting bracket, refer to APPENDIX A for
instructions.
13
2.3.2
Each IPAD KDS Unit is pre-set for plug-n-play
operation at the factory for the most standard
operational usage of the IPAD KDS. There are no
jumpers or DIP switches required for configuring
the IPAD KDS Unit.
Software configuration can be accomplished by
attaching a PC keyboard to the IPad prior to
powering up. Once powered up the IPad
Configuration screen will allow proper setup. This
screen can also be accessed without the use of a
PC keyboard by depressing the <CLEAR> key and
<0> key on the IPad simultaneously while booting.
Key Template Orientation
The IPAD Unit is supplied with a double sided,
removable key template. The template provided
offers key labels for most common KDS usage. It
will display key labels for viewing in a horizontal
bump bar mounting position or a vertical mounting
position. The IPAD Unit comes factory oriented for
horizontal mounting, but can easily be switched to
display vertical key labels as follows:
4) Separate the IPAD Unit top cover from the
base enclosure by removing all four cover
screws. Two screws are located on each side
panel of the top cover
5) Locate the key template tab on the backside of
the top cover. Grab the tab, and slide out the
template.
6) Holding the template tab, reinsert the template
with the vertical key labels visible through the
key windows on the top of the cover.
7) Secure top cover to bottom plate.
Configuring Components
This column intentionally left blank.
14
2.3.3
Making Cable Connections To The IPAD KDS
1) Plug in monitor power cords into AC outlet and
apply power to each monitor.
2) Next, connect the monitor signal cable to the VGA
port on the IPad Unit and secure connector screws
on the VGA connector to the IPad Port.
3) Plug in IPAD Unit power supply to AC outlet.
NOTE: If properly installed, The green power LED
should illuminate on the IPad when power is applied.
Also, the monitor should display a visible start-up
screen within a few seconds. If the proper response
is not confirmed, refer to the TROUBLESHOOTING
section of this manual for advice.
4) For normal operation, the video monitor will report
when the IPAD KDS start-up is ready. From the IPad
keys, press the FUNC key to switch to the menu. At
this menu, you can test the bump bar, display set up
configuration, and monitor network activity.
Instructions for menu operation are supplied on the
menu screen. To resume to normal screen mode,
press ESC key.
4) Depending on which communications method your
system requires (Ethernet or RS232C), cable as
shown in the diagram below.
application. This information will also offer details for
setting the Ethernet IP addresses how to configure
your KDS screen formats, flashing application
versions to the IPad, etc.
The IPad offers a configuration menu, which is
displayed if a standard 101 key PC keyboard is
attached to the keyboard port on the IPad. This menu
will allow you to select a pre-installed KDS application,
configure Ethernet IP address, and for various
diagnostics. Since the PC Keyboard port is for
diagnostic and setup purposes, during normal
operation, the PC keyboard should be detached from
the IPad Unit.
`
Ethernet Cable
The IPad utilizes standard CATV cabling. Ethernet
can be used to attach multiple IPad units to a single
Ethernet network using existing Ethernet hub link
terminations. A single point-to-point Ethernet
connection with one IPad connected directly to a PC
Host Ethernet port can be implemented providing a
crossover Ethernet cable is used.1.Insert the RJ-45
connector into the UTP jack on the IPAD Unit.
2.Connect one end of the UTP cable to a 10BASE-T
HUB
The green LED on the IPad next to the Ethernet port
will remain on whenever the network cables link
integrity is good.
RS232C Cable
Standard RS232C can be used for single point-topoint communications with one IPad to one Host PC
serial port. The RS232 port also uses standard CATV
cabling and can be attached to any host RS232 port
with the DB9-RJ45 adapter included in the IPad kit.
Maximum cable distance for RS232C is limited to 50
feet.
5) Once all devices are confirmed to be powered on
and operational, the PC (POS) can be powered on
and the KDS software can be installed to ensure
proper communications with each IPad. Refer to the
KDS Software documentation for proper software
installation, configuration, and operation of the KDS
Optional Features
Duplicate Video Output
A duplicate video configuration allows 2 or more
monitors to display the identical information. This
feature is available for each video monitor port on the
IPAD base unit. Each video port is capable of driving
multiple monitors using the SEC video splitter/booster
device, available from SEC or your dealer.
15
2.3.4
Troubleshooting
The chart below may resolve common problems installing and operating the IPAD KDS. If, after you have determined all
components have been properly installed and configured, the problem persists, consult with technical support personnel at
dealer or factory. IPAD Kit components are shipped with self-diagnostic features, which the operator can access. To
systematically confirm proper component installation, run the integrated diagnostic application. Additionally, your KDS
software provider will usually offer error code conditions, and log files for monitoring system operation. Refer to the software
documentation to determine what monitoring and error reporting capabilities are offered.
SYMPTOM
MONITOR NOT UPDATING SCREEN
OR ONLY START SCREEN IS
DISPLAYED ON MONITOR
PROBABLE CAUSE
1) Improper communications cable or
disconnected communications cable.
2) Baud rate mismatch (If RS232C Link).
3) IPAD IP Address is incorrect.
4) Register / PC/ Server turned off.
POSSIBLE SOLUTIONS
1) Trace cable break, check cable pinout.
2) Check POS to IPAD baud rates are
identical.
3) Verify Ethernet IP Address or duplicate
IP settings on more than one IPAD.
4) Check power POS/Host PC equipment
turned on.
NO VIDEO ON MONITOR
1) Monitor not turned on.
2) Monitor not connected to IPAD unit.
3) Monitor brightness turned too low.
4) IPAD unit turned off.
5) IPAD IP Address is incorrect.
6) Screen saver active.
7) Video monitor commanded to be blank.
IPAD BUMPBAR SENDS NO KEY
ENTRY, OR NO 'BEEP' HEARD
1) Connection cable link lost, or
damaged.
2) Baud rate mismatch (If RS232C Link).
1) Check monitor power switches and line
cord connected.
2) Check monitor video cable in place.
3) Adjust monitor brightness control
4) Check power to IPAD base unit.
5) Check for proper IP address or
duplicate IP settings on more than one
IPAD.
6) Generate system activity to resume
screen display
7) Check software operation and activity
correct
1) Trace cable break or incorrect pinout.
2) Check POS to IPAD baud rates are
identical.
IPAD: BOOT UP ERRORS REPORTED,
OR IPAD LOCKS UP DURING
PROGRAM EXECUTION, ACTING
STRANGE, OR RUNNING SLOWLY
PC: KDS SOFTWARE REPORTS
COMM. ERRORS IN ERROR LOG
1) Improper Software installation or BIOS
configuration.
1) Verify software installation per vendor’s
requirements. Verify BIOS settings are
correct.
1) Comm cable link lost, or wrong
2) IPAD unit turned off.
3) Baud rate mismatch (If RS232C Link).
1) Trace cable break or incorrect pinout
2) Check power to IPAD base unit.
3) Verify RS232C port is configured
correctly at PC or POS Host
4) Identify software installation problem
5) Verify Ethernet IP Address or duplicate
IP settings on more than one IPAD.
4) Improper software installation or
configuration.
5) PC Comm port not configured
correctly.
6) Incorrect IP Address for Ethernet Link
16
2.3.5
Optional Accessories
2.3.5.1
Universal Mounting Bracket Kit
The IPad Stainless Steel Universal Mounting Bracket is capable of unlimited configuration positions and useful
mounting locations. This bracket can be mounted on walls, tops of counters, counter edges, shelving edges,
under counters, shelves, or video monitor brackets. It is not recommended that this bracket or the IPad be
mounted to any electrical or appliance devices, such as a video monitor, oven side panel, etc.
Your kit contains the following hardware:
2 left oriented mounting supports
2 right oriented mounting supports
2 ¼-20 stainless steel screws
2 ¼ inch stainless steel locking washers
4 ¼ inch stainless steel flat washers
2 ¼-20 stainless steel nuts
4 self tapping #10 screws
4 drywall/concrete plastic anchors
8 #10-24 ½ inch stainless steel machine screws
8 #10 stainless steel lock washers
8 #10-24 stainless steel nuts
1. Turn off power to the IPad and all equipment cabled to and from the IPad.
2. Two hex head screws are located on both side panels of the IPad top cover. Remove all four hex head
cover screws securing the IPad top cover and remove it from the bottom enclosure.
3. Secure bracket supports at the two holes located on each end of the bottom plate of the IPad (See
FIGURE 1 A,B,C,D) by inserting #10-24 ½ inch machine screws (supplied with kit) from the inside of the
base cover through the base cover and the bracket plate, then fastening the #10 lock washer and nut to
the screw. If there are existing rubber feet preventing flush bracket contact with the bottom plate holes,
these must first be removed to mount the IPad to the bracket. Mounting bracket supports can be
fastened in 4 possible positions. (See bracket positioning A,B,C,D provided in FIGURE 1).
4. Using the ¼-20 inch threaded bolt, lock washers, machine washer and nut provided, join the 2
remaining bottom supports (SEE FIGURE 2) to each side of the bracket supports assembled in STEP 3,
leaving this assembly loose enough to pivot the bracket to the ideal work position and angle desired.
The pivot mounting for the bracket can be secured in 2 possible positions, with various degree angles
for final position of the IPad.
5. The Universal Mounting Bracket is designed to be mounted to various flat ridged walls, tabletops, or
workstation surfaces. Locate a flat surface position to secure the bracket. Take into account the cable
routing direction and ample room to access the IPad for service and configuration changes in the future.
Once you have decided on the proper position and angle orientation of the bracket components, use a
pencil to mark the mounting holes (at least 2 mounting holes for each bracket flange) that will be made
to secure the bracket firmly in place.
6. Remove both surface bracket flanges installed in STEP 4 to allow these flanges to be secured to the
mounting surface. For drywall/concrete surface mounting, drill ¼ inch holes at the pencil marks to
secure the plastic anchors which support #10 self-tapping screws provided. With wood surfaces of at
least ¼ inch thickness, mount the bracket support at your pencil marks using The #10 self-tapping
screws. For sheet metal surfaces, either pre-drill ¼ inch holes at your pencil mark locations and secure
the bracket support with #10-24 ½ inch machine screws, lock washer, and nut, or use the self-tapping
#10 screws with non-drilled holes. Proceed to secure the 2 bracket supports to the mounting surface at
the pencil markings indicating the bracket flange hole locations made in STEP 5
7. Once the bottom bracket supports are firmly mounted onto the mounting surface, repeat STEP 4, then
rotate the bracket to the desired angle and height for optimal user access (See FIGURE 2). Firmly
tighten the ¼ inch bolts that hold the top and bottom bracket supports together.
8. When done mounting the IPad bracket, replace the IPad top cover with circuit board and ensure that the
top cover is firmly fastened using the hex screws removed in STEP 2.
9. Re-insert all connections and strap down any loose cables to prevent damage during normal operation.
The IPad is now ready to be placed into normal operation. Power may be applied at this time. System
may be operated at this time.
17
]
18
2.3.5.2
Cable Shroud Kit
19
3.1
OAsys Setup Utility
The very first step in configuring
the OASys hardware for the correct
protocol, communication method etc. is
to execute the OASys Setup Utility. If
this is not done prior to connecting the
OASys to the host PC you may
experience problems in interfacing to this
OASys device. In order to bring up the
Setup Utility simply attach a PC keyboard
to the OASys and apply power. The
Setup Utility screen will be the first
screen to appear.
This screen will not appear if
booting without a PC keyboard on the
OASys. However, this utility can be
accessed on the IPad without a PC
keyboard by holding the <Clear><0>
keys on the IPad while booting.
Once the Setup Utility is entered
a menu of available options will appear.
Select one of the entries on the menu by
depressing the number associated with
that entry and you will be prompted
accordingly.
Keep in mind that you do not
need to reconfigure the OASys each time
it is booted. If it is properly configured
already you can simply depress the
<ESC> key to exit the Setup Utility
without making any changes to the
configuration.
If you do not see your choice on
the first menu you can continue on to the
next menu by depressing the <9> key. At
all times you may depress the <ESC>
key to return to the original setup screen
without having any of your changes take
effect. Actually, none of the changes will
take effect until you complete the entire
configuration process.
20
Once a selection has been
made concerning the type of system,
vendor or register type you will be
prompted to confirm your selection
before moving on. Simply depress
the ‘Y’ key as instructed to continue
or depress the ESC key to exit back
out to the main screen.
On the IPad, if you had
entered the Setup Utility via the IPad
keypad as opposed to the PC
keyboard, you will use the <Clear>
key to continue and ESC key to exit.
After confirmation has been
made on the type of system being
configured you will be prompted
accordingly to answer any questions
related to that system needed to
complete the configuration. For
example, an ethernet system will
request an IP address and subnet
mask setting. Simply enter the number
desired and move from one segment to
the next by depressing the ENTER key
as instructed. If a mistake has been
made simply depress the ESC key and
start over.
Once the IP address is
entered you will be prompted for
the subnet mask. Please make
sure that the IP address and
subnet mask selected is correctly
assigned for use within your
network. You may want to check
with the network administrator
fist.
21
3.2
Ethernet Setup Utility
Each OASys is pre-preloaded with an ethernet setup utility that has been provided to us by the
ethernet chipset manufacturer. This setup utility is required to configure the ethernet port with the proper
settings prior to using the ethernet port. Once configured these settings are permanently saved and should
never have to be modified.
The IPad is pre-configured at the factory with the correct settings. However, it does have this utility
pre-loaded just incase settings need to be modified.
Since the OASys does not always come pre-configured with an ethernet card it is necessary to run this
utility upon installing the ethernet card.
The ethernet setup utility is loaded in one of two ways. Upon successfully completing the OASys
Setup Utility detailed in the previous chapter the ethernet setup utility will automatically load if you have
selected an ethernet system (OASys only, not IPad). Alternatively, you can execute this utility from a
command prompt on the OASys or IPad by running setup.exe.
The main ethernet setup screen
will provide the user with several options.
To reconfigure the ethernet settings
simply cursor down to the Setup option
and depress the enter key. It will also
allow you to view the current
configuration settings and run some basic
diagnostics at both the chip level and
network level.
Once in the setup screen
cursor up or down to the option
requiring change and depress enter. A
menu will appear with all possible
entries.
IMPORTANT: The screen to the right
shows the correct settings. Your
system MUST show the same settings
in order to work properly.
22
When the menu appears with all possible options use the up and down arrow keys to highlight the
correct one. Depress the enter key and your selection will be registered. Once again, in order for your system
to work properly you need to make sure your settings are correct………..
IRQ 10, I/O Address 0x300, Full Duplex = Disabled
After all of the settings have been properly modified you can follow the instructions on the screen to
insure that the new settings have been permanently saved.
NOTE: One common way used to confirm ethernet connections is to execute a PING command from
the host PC. However, this does not insure that your settings are correct. The OASys will respond to the PING
command once the ethernet drivers are properly loaded regardless of these settings. Therefore, a simple
PING test does not confirm proper setup.
Also, as stated, the OASys will not respond to the PING request until the drivers are loaded. These do
not get loaded by the OASys until just prior to loading the EVBASIC software. This means that when you are
sitting at a DOS prompt, Setup Utility screen or other screen not related to EVBASIC, your PING requests will
not be responded to.
23
3.3
EVBasic Software
When the OASys has finished booting it will come to rest at a screen similar to that below. It will indicate
the version number of the software currently running as well as some other important information. At this point
the OASys is completely functional and is waiting for commands to be transmitted to it via the host device. Once
these commands have been received from the host the OASys screen will repaint and order boxes, clocks etc.
will appear. If this does not occur and the OASys remains at the initial screen shown below (typically referred to
as the “OK” screen) this is NOT necessarily an indication that the OASys has a problem. Usually, this is an
indication of a cabling problem or a setup issue. Please go through the “Troubleshooting Guide” for techniques
used to correctly identify problems.
There are several versions of OASys software that SEC distributes. They are all based on the
same source code with various features either included or excluded at compile time based on the target
system. This is done to improve on performance and cut down on overhead.
Since the OASys system is basically a DOS box it utilizes an AUTOEXEC.BAT file and
CONFIG.SYS file. Within the AUTOEXEC.BAT you will see that by default the OASys will execute
EVBASIC.EXE when booting. Although, this can be changed to load any one of the other versions of
software SEC distributes (such as EthBasic.exe, EV2170.exe, EV7448.exe, EthROD.exe, etc.) it is
recommended that you leave the AUTOEXEC.BAT file on the OASys as is.
When flashing a new version of software to the OASys SEC recommends that you first rename the
version that you are trying to flash on your Host PC (such as EthROD.exe) to EVBASIC.EXE and execute
the flash. In this manner the OASys will always be executing the same AUTOEXEC.BAT. Once the OASys
has been reboot you will be able to see the version that is currently running on the “OK” screen to insure
that the OASys was properly flashed
24
3.4
SEC Dashboard Utility
The Dashboard is a utility that will assist in the maintenance and support of SEC devices. The
Dashboard provides features that are not necessarily related to KDS in any way but are more geared towards
installation, troubleshooting and performance of our devices. The Dashboard can be loaded as a standalone
application or it can run along side a KDS application, such as the ROD, and provide detailed, real-time
information about the remote devices.
When loaded as a standalone app the Dashboard requires an INI file that contains the address settings
for the remote devices such as IP address, comm port settings, card ID etc. If this INI file is not available or not
properly programmed the Dashboard will not be able to access the remote devices and therefore will not be
able to update the device information correctly.
If loaded along side another application, such as the ROD, the Dashboard will utilize the settings that
had already been “mapped” by that application. In this case, the Dashboard does not require its own INI file. Of
course, the Dashboard can only use the settings mapped by another application if that application is loaded
and running.
. The particular method that the Dashboard has used, INI settings or pre-mapped settings, will be indicated on
the Dashboards status bar.
Depressing the
INI SETTINGS
button will
display a
window that
allows you to
view the
current INI
settings.
The FLASH
button will allow
you to download
files to the
OASys devices
such as
software
updates,
images, batch
commands etc.
The COMM
DATA button
will allow you to
view the data
being
transmitted and
received for
diagnostics
purposes.
“INI”
indicates
the
Dashboard
is running
based on
INI file
settings.
The
REFRESH
button will get
up to date
information
from the
OASys
devices and
refresh all
views.
PLAY SCRIPT is a
powerful function that
can initiate preprogrammed script files
to perform a host of
functions such as
flashing multiple files,
confirming and recording
proper installation,
displaying information on
remote screens, testing
bump bars, etc.
The HEALTH
STATUS
window
displays the
current status
for all defined
devices, both
OASys and
IPad.
“Mapped”
indicates
that some
application,
perhaps
KDS, is
already
loaded and
has already
mapped all
devices.
Therefore
INI file
settings are
not in effect.
“OK” indicates
that the device
is
communicating
.
“?” indicates
that it is not
communicating
25
Depressing the INI SETTINGS button will bring up a window that displays the content of the current
SECDASH.INI file. These settings cannot be modified within this window. This is merely for viewing
purposes only.
Depressing the “FLASH” button will bring up a window that allows you to select a file for
flashing. Flashing is the process of downloading a file to the OASys devices whereby it is permanently
stored on the Flash Disk of the OASys. This file can be a new executable file, a data file, image files etc.
Batch files can used to flash multiple files but this may be easier and more logical if done via a script file
(See “PLAY SCRIPT”). In order to flash you must first select the device that you are flashing in the
Health Status window or an error message will appear.
26
Depressing the COMM DATA button will bring up a window that displays a variety of information
about the communication layer of the Dashboard. This layer is commonly called the OASysX control. Most
of the information on this screen is for diagnostics purposes only and may only be required for
troubleshooting low level problems. However, it can be very helpful in determining if data is being
transmitted and received by the Host PC in order to confirm basic functionality.
27
Depressing the
PLAY SCRIPT button will
bring up a file selection
window. This will default to
the current working directory
but script files can be created
in and played from any
directory.
Once you
have selected the correct
script file simply depress the
continue button to move on
to the next step.
A script file is a text
file that can be edited with
any standard editor and will
always have the extension
.DSF (Dashboard Script
File).
The content of the script
file selected will appear in a text
window. At this point you may
select to play the script, scroll up
or down to view the script or
simply exit out. Once you choose
to play the script it will be
sequentially read with each line
being highlight as it is being
processed. As the script is
playing you can either allow it to
continue or cancel the script.
Dashboard scripts can
also be initiated from a command
prompt. If initiated from a
command prompt there is no user
interface and the script will play
until complete. This comes in
handy when trying to do remote
updates or remote diagnostics.
EXA: C> SECDash
RemoteUpdate.DSF
Script files are the most powerful and most flexible features of the Dashboard. Script files can be
designed to perform a whole host of functions. From flashing multiple files, rebooting OASys devices,
displaying instructions or test sequences on the OASys devices, testing bump bars etc. Any or all of these can
be incorporated in a single script file.
See “Script File Commands” for more details on creating script files.
28
Dashboard Online Information Tabs
Detailed online information concerning the installed components, current status, version numbers etc.
can be accessed via the informational tabs.
OASys Tab
Video Tab
Bump Bar Tab
Virtual Printer Tab
29
SAMPLE DASHBOARD INI FILE
; SEC Dashboard .INI file
;
; All lines preceded with semi-colons are comment lines and will be ignored
; Valid commands: Default highlighted in brackets
;
; [GENERAL]
;
Sound = [Enabled]/Disabled
;
- Enables/Disables the sound effects on the Dashboard PC
; [VIDEO x]
;
Name = aaaaaaaaaaaa
;
- this is the Name that the Dashboard uses to reference this video, if none is provided name = group
;
Mapping = COMM1,115200 -or- 101.1.1.1
;
- the Mappings field will contain the Comm port/baud or IP address that this video can be found at
;
OASys = [1],2,3,4
;
- OASys box ID or IPad ID that this video card is located at
;
Card = [1],2,3,4
;
- Video card within the OASys this video represents, should be set to 1 for all IPads
; [PRINTER x]
;
Name = aaaaaaaaaaaa
;
- Name assigned to this virtual printer
;
Mapping = COMM2,115200
;
- Comm port/baud for the OASys this port is attached to
;
OASys = [1],2,3,4
;
- OASys box ID this port is found at
;
Port = [1],2,3,4
;
- Comm port at OASys this virtual printer is attached to
;
[GENERAL]
Sound=Enabled
[VIDEO 1]
Name=Grill Display
Mapping=192.168.254.1
OASys=1
Card=1
[VIDEO 2]
Name=Drive thru
Mapping=COMM2,115200
OASys=1
Card=2
30
SAMPLE DASHBOARD SCRIPT FILE
; Dashboard script file
;
; Valid commands:
;
MESSAGE <text>
;
- displays instruction box on PC screen and pauses
;
VIDEO <number>
;
- selects video (1-16) for all subsequent video instructions
;
CLEARSCREEN <color>
;
- clears screen to specified color
;
ATTRIBUTE <foreground>,<background>
;
- sets text attributes
;
CURSOR <row>,<col>
;
- sets cursor position on video
;
DISPLAYTEXT <text>
;
- displays text at current cursor position
;
LOWLEVEL <cmds>
;
- executes low level escape sequences in <cmds> string
;
LOGINFO
;
- logs all of the health info to a file
;
SETTEXTWINDOW <ulr>,<ulc>,<lrr>,<lrc>
;
- sets text window, Upper Left Row, Upper Left Column etc.
;
DRAWBOX <style>
;
- draws box around active test window, style 1/2
;
RESETTEXTWINDOW
;
- resets current text window, if any
;
;
;
CHECKBB,SOUND,FLASH
;
;
Graphic commands:
;
FILLRECT,DRAWFRAME,DRAWLINE,DRAWTEXT,PLAYFLIC,SETFONT,IMAGE
;
SETMODE
;
;
Comm port commands:
;
OPENPORT,SENDPORT
; Give initial instructions
MESSAGE The script will now be started.
; Begin process for Video 1
VIDEO 1
CLEARSCREEN 0
ATTRIBUTE 7,0
CURSOR 1,1
DISPLAYTEXT This message should be appearing on the GRILL DISPLAY
ATTRIBUTE 7,0
CURSOR 3,10
DISPLAYTEXT -If this IS NOT the Grill Display than there is a problem.
CHECKBB 1
DISPLAYTEXT This screen has PASSED. Please move onto the next screen.
LOGINFO
MESSAGE Script completed !
31
3.5
ROD Maintenance
The Remote Order Display (ROD) Maintenance software provides user friendly graphical screens for
defining and maintaining every aspect of your ROD KDS. Through the use of tabs we allow for unlimited future
expansion as we continuously add features to insure that our product is capable of handling all of your needs.
The basic screen consists of three general areas, the TAB AREA,PARAMETER window and STATUS bar. The
TAB AREA consists of a collection of tabs containing the various groupings of parameters available for each
individual video. The PARAMETER window consists of a tree structure that contains a list of all of the
parameters defined for the various devices as well as any global parameters and storewide settings.
As our software evolves and new parameters are added the screen images provided in this document will
change. All attempts will be made to keep these images current with the actual software. Please contact SEC to
report any discrepancies.
Parameter window
Tab Area
Status Area
32
Each entry in the
PARAMETER window can be
expanded or contracted by
depressing the +/- sign to the left of
it. Once expanded, all related
parameters will be displayed
beneath that entry for viewing
purposes only. It is possible to
expand any or all of the entries in
the parameter window at one time.
In order to select a particular
entry in the PARAMETER window and
perform maintenance on it simply point
to the text desired and click the mouse.
Selecting the GLOBAL SETTINGS
entry will bring up a maintenance
window that will allow you to change
any of the GLOBAL SETTINGS. These
are system wide settings. After you
have made your changes make sure
that you depress the APPLY
SETTINGS. If you do not want to save
your changes then simply close this
window without depressing APPLY
SETTINGS.
If you have noticed, up until this
point the TAB AREA has been disabled.
Since the TAB AREA contains all
parameters associated with a particular
video you need to select a video to
perform maintenance on in the
PARAMETER WINDOW. Once you do
this it will unlock the TAB AREA and fill in
all of the fields with the current settings.
At this point you can move from tab to
tab making any necessary changes.
Once you have made all of your changes
you will need to depress the APPLY
CHANGES button in order to register
these changes. Otherwise all settings will
revert to the original settings. You will
also notice that when you apply changes
the PARAMETER WINDOW will
compress all entries.
33
Definition Tab
The initial tab is the screen Definition
Tab. This is where you will define the screen type,
personality and address. This is the only tab that
MUST be filled in for the Remote Order Display
software to function. All other tabs will be filled in
with default settings that can optionally be
modified.
PARAMETERS:
Device Type
Name
Mapping
Screen Type
Screens Tab
The screen tab will contain parameters that
are associated with each KDS screen view. This
includes color, style, number of columns etc. As new
formats become available they will be added to the
drop down list.
PARAMETERS:
Screen Saver
Screen Layout
Screen / Field Color definition
Sounds Tab
The sound tab will contain all parameters
associated with the audible speaker within the IPad or
OASys bump bar (SK9200). Since the IPad can
support a much wider variety of programmable tones
certain fields will only be enabled for IPad devices.
PARAMETERS:
Order Beeper
Tone Style
34
Bumping Tab
The bumping tab contains parameters
associated with the bumping or clearing of orders on
the screen.
PARAMETERS:
Bump Actives
Auto Bump
Send Bumped orders to Video
Send Bumped orders to Printer
Remove orders once the are bumped at
other screens. (by order number)
Routing Tab
The routing tab contains any parameters
that are associated with the routing and/or rerouting
of the orders to this particular screen. The register
list will allow orders from any particular register to
be displayed or blocked at this display.
PARAMETERS:
Reroute downed video to
Send Orders from Closed Station To Video
Register Routing Table
Period Routing
35
Item Display Tab
The Item Display tab contains parameters
that determines how items are displayed or filtered on
the screen.
PARAMETERS:
Disable Item Consolidation
Display ONLY Special Items
Timers Tab
The Timers tab determines how order clocks
are handled on the screen.
PARAMETERS:
Priority Order Clock
Rush Order Clock
36
Text Translation
Text Translation will allow items being
sent from the register to be converted to an
alternate text as well as the ability to enter
alternate languages. These alternate languages can
be instantaneously called up at each individual
video screen so that a user at screen #1 can be
viewing English while the user at video #2 can be
viewing Spanish. In addition, the ROD can be
configured to capture or learn the items being
entered at the cash register so that they do not have
to be manually entered.
PARAMETERS:
Enable Learn Mode
Maximum Table Entries
Conversion
Alt Language 1
Alt Language 2
Routing Periods
Up to 8 different routing periods can
be predefined. Routing periods will determine
how items are routed by video and/or register
during the peak and non peak periods of the
day. The active Routing Period can be
changed at any point of the day via the ROD
user interface. If no text is entered in the
routing period table then no routing periods
are defined.
37
Fault Tolerance
Fault tolerance is a powerful feature
that will allow a copy of the ROD software to
be loaded and running at two different PC’s.
One PC will be designated as the Primary
System and the other as a Backup. The Backup
will run in an Idle Mode until it detects that the
Primary goes down at which time it will
become that active server. If the Primary ever
comes back alive it will take over once again
and the backup will go Idle. This is all done
seamlessly and transparently. There are only
three entries required to configure both the
Primary and Backup.
PARAMETERS:
This System is
Initiate Crossover
IP Address
One important fact about the fault tolerance feature is that the register system in use MUST have the
capability to send orders to both the Primary and Backup PC in order for it to function 100%. If this is not the case
and the register system is only capable of sending to the Primary then the fault tolerance feature can still function in
a limited fashion. Once the Primary goes down the Backup will kick in but it will only allow the processing of
existing orders. Since any new orders rung up at the register are not being sent to the Backup then he has no
knowledge of them.
NHPOS Settings
When the System Type is
configured as “NCR NHPOS” there will be
additional parameter settings available for
programming that interface.
PARAMETERS:
OCB Enabled
OCB Comm Port
Primary OCB Register
Alternate OCB Register
38
3.6
Remote Order Display (ROD)
The Remote Order Display software does not have a very complex user interface. Most of the
interaction is done in the ROD Maintenance software or the Dashboard software. The ROD is designed to
be a streamlined piece of software that takes the parameters setup in the maintenance software and runs
with it. For the most part the ROD software will be loaded, run minimized and can quietly and efficiently go
about its business. The software is designed to work in harmony with the OASys devices and will detect
when any devices are brought online, either due to initial boot or reboot, and will automatically repaint
screens with order data.
The ROD screen provides status information such as which screens are online or offline as well as
the current modes of operation. It will also provide the current status of the Master and Backup if a fault
tolerant system is configured. A clock displayed in the lower right hand corner of the ROD can be used to
indicate that the ROD is currently running (or idle).
There are a few buttons available via the ROD screen to provide limited backroom functionality.
Most of the online options are available at the bump bars and allow easy access at the front of house.
These buttons include a REFRESH ROD button that will repaint all screens, ABOUT ROD that will provide
information about the ROD software and the system it is running on and a ROUTING PERIOD drop down
list that will allow the manager to switch between pre-defined routing periods during peak and non-peak
times.
39
ROD Quick Feature List
1. All screens run in graphics mode with graphical help screens
2. Fault tolerance – master / backup configuration
3. Complete order recovery feature – handles power failures automatically
4. Language translation
5. 200 combined orders per screen. Recall/Open. Programmable for more.
6. Can view any bumped order still in queue. Up to 200 or more.
7. Various color schemes definable by screen.
8. Various screen layouts definable by screen.
9. Average order time displayed by screen
10. Ethernet and/or RS232 capabilities
11. 100% backward compatible with KDSWin and KDSKernel software
12. Comes with Register Emulation program available for generating test orders
13. Comes with SEC Dashboard software for setup and diagnostics features
14. Works with OASys,OASys IPad and IPad NGen hardware
15. Can bump orders to another screen if designated
16. Can bump active orders if selected
17. Auto reroute of orders to alternate screen if screen goes down
18. Automatically refreshes screens when devices turned on or reboot
19. Remotely refresh all screens at managers workstation
20. Programmable item and condiment colors
21. Item summary screen displays summary of ALL items in open orders
22. Item summary separates special items from standard items
23. Auto bump orders by elapsed time
24. Spanning video
NOTE: There is a long list of features that are not mentioned here. There are also new
features being added to the product continuously and we welcome your input.
40
Prior to loading the ROD
software all screens will be
sitting at the “OK” prompt.
Once the ROD has
successfully loaded all
screens will repaint with
the designated layout and
will be ready to accept
orders.
As orders are received by the ROD software they will proceed to fill up the screens. Once the screen
becomes filled with orders new orders are buffered off screen by the ROD software and can be
accessed at any time. Indicators show how many orders are off the screen to the left or right at any
point.
At the top of each screen is an average order timer that shows the average processing time, from first
item entered until the order is bumped, for all orders processed at that particular screen.
41
By default the ROD will
maintain 200 orders per
screen, regardless of size. At
any point all of these orders
can be accessed via the
scroll buttons on the keypad.
However, due to real estate
a limited number of orders
can be displayed. The order
queue is maintained as a
sliding window of orders.
What this means is that as
new orders come in old
orders drop off. At any given
point there can be a total of
200 orders per screen (more
if designated) any of which
can be open orders or closed
orders. Any of the closed
orders in the queueccan be
“RECALLED” for viewing a
any time and the entire
screen can be filled with
“RECALLED” orders, not just
1 order.
The ROD has the capability
of summarizing all of the
open orders in the queue.
These are orders that can be
seen on the screen or that
are buffered off of the
screen. With a single
keystroke all items will be
displayed along with the total
required. Special items,
those with condiments, can
be separated for quicker
processing.
42
IPad / IPad+ functionality
In addition to the pre-defined key definitions provided on the IPad and IPad+ bump bars there is added
functionality provided via pop-up menus as well as multiple key hits and continuous key depressions. Some of
these functions are inherent to the IPad itself and others are provided through the ROD software. Below is a
complete list of bump bar key functions for both the IPad and IPad+.
Key depression
1 thru 8
Used to delete orders within box 1 thru 8 with a single keystroke. While in a menu these
keys are used to select a particular entry from the menu.
9&0
These keys provide dual functionality. When in order mode these keys can be used to
scroll through active orders (left or right).
Clr
While in order mode the clear key will act as a home key and place the 1st active order
1st order box. If the clear key is held for 10 seconds it will also reset the average order
timer for that particular screen.
Park
The park key will only function if the screen is defined as a Drive thru screen type and
the user has chosen to send parked orders to another screen within ROD Maintenance.
Sum
If deperessed while in order mode this will consolidate all items within open orders and
provide a consolidated report. The consolidated report is intentiuonally not updated on
the fly but the Summary key can be depressed again to refresh the report.
Recall
Used to sequentially recall peviously cleared orders.
Esc
Used to exit any report screen, status screen or menu and return to the order mode.
Refresh
Used to repaint the entire screen.
Help
Used to access generic or customer provided help screens. These customer provided
help screens can be anything from simple text instructions to graphical build cards. If
the help key is held for 10 seconds it will perform a reboot of the IPad unit. Since the
ROD software detects this it will automatically repaint the screen once it boots.
Func
The function key will bring up a function menu whereby the number keys can be used to
access diagnostics,status reports, production statistics etc.
Menu
This key is only available on the IPad+ and was added to compensate for the keys that
were available on the IPad that are not available on the IPad+ due to the lesser number
of keys. The menu key will pop up a menu of the missing keys that can then be
accessed via the number keys.
Dual key depression
Clr – 0
Depressing the Clear key and 0 key simultaneously while the IPad is
booting will bring up the IPad setup screen. Normally this setup screen is
accessed by booting the IPad with a PC keyboard plugged into it but this
allows the user to configure the IPad without a PC keyboard.
43
3.7
OAsys Diagnostics
The OASys devices come
equipped with several self diagnostic
features. By using these features it is
possible to troubleshoot potential
problems even prior to connecting it to
a Host PC or communicating to it. In
order to access the diagnostics
function you must first depress the
<FUNC> key on the keypad. This will
bring up a FUNCTION MENU where
several selections can be made. If a
selection is not made within 6 seconds
the FUNCTION MENU will disappear.
To select an option from the menu
simply depress the number associated
with it.
All diagnostics functions are
non-destructive and can be done while
the store is active. No orders will be
lost and you can return to the order
screen by depressing the ESC key
from any diagnostic view.
The STATUS REPORT screen
will display a whole host of information.
This information will include configuration
settings as well as on-going diagnostics
information. It is a good idea to check the
configuration settings to insure that the
device has been properly configured for
baud rate or IP address etc.
The diagnostics information will
indicate if there are problems with the
data being received. These numbers
should always be zero but even small
numbers do not necessarily indicate a
problem. It is when the numbers
continuously increase that there may be
problems and you should investigate
further.
Finally, the keypad diagnostics
on the bottom will echo all keystrokes on
the display and you can quickly diagnose
and troubleshoot your keypad.
Sometimes it may appear that the keypad is not working on your order screen because orders will not
bump or the screen does not react to the keystrokes. Most of the time this is not an indication of a problem with
the keypad but is related to other things such as the ROD software not loaded or a cable not connected. This
is perfectly normal. Therefore, it is always a good idea to go into the diagnostics screen and depressing the
keys. If the keys echo on the screen then the OASys is functional and the keypad is working.
44
By selecting VIEW COMM DATA from the function menu you will be able to view all communication
data going back and forth between the OASys and the Host PC. Although this data can be very cryptic (it is in
hex format) it will tell you if your devices are communicating and can be useful in troubleshooting cabling, baud
rate and connection problems.
For the more serious issues this data can be very useful to SEC but is not typically required.
45
3.8
Register Emulator
Along with the Remote Order Display software SEC provides a Register Emulator program. This
software is to be used for demo purposes, setting up your system initially or troubleshooting existing systems.
The Register Emulator software will allow you to ring up bogus sales and have them sent to the KDS screens
where they can be processed and bumped. In this manner the full functionality of the KDS can be tested and
verified.
Please keep in mind that the Register Emulator is only a process that allows you to enter sales to be
sent to the KDS and in no way performs the KDS functions itself. The ROD software performs the KDS functions
and the Register Emulator feeds it with sales. Therefore, in order to ring up sales and to have them displayed on
the KDS screens you must first have the ROD software running. If the ROD software is not running you will still
be able to ring up sales but they will not be displayed until you start the ROD.
The orders generated buy the Register Emulator are transmitted in a one behind fashion. This means
that when you ring up an item, along with any condiments associated with it, the item will not be sent to the KDS
until the next item is entered.
By default the Register Emulator will load as register #1. If you would like to test with multiple registers or
if you would like to test as any other register number simply load from the command line or from the Run menu
with a parameter. The parameter represents the register number.
EXA: C> Register 2
Multiple instances of the application can be loaded at the same time to simulate multiple registers.
However, you should make sure that only one instance of each register number is running at any one time or you
will get undesired results.
This is only a demo program and is not intended to be a fully functional register application.
46
3.9
Chinese Support (DBCS)
All OASys devices now ship with Simplified Chinese and Traditional Chinese as a user selectable option
via our configuration menus. If the OASys is configured as a Simplified Chinese system or Traditional Chinese
system they will be able to display all 256 ASCII characters (English) as well as the DBCS characters.
If programmed
as a Chinese system
the main screen will
indicate so upon initial
boot.
This sample
KDS screen
illustrates how
Chinese and English
can be
simultaneously
displayed on the
OASys to provide a
common layout for all
users.
47
3.10
Troubleshooting
Overview
This document is intended to provide step-by-step instructions for troubleshooting the OASys system
once it has been installed. By following these instructions it will become easy to determine and rectify common
problems that occur during the installation process that may otherwise go undetected. Please do not skip any
steps in this process as it may invalidate any of the findings.
Before beginning it is important to point out that the OASys is a self-sufficient unit. This means that
troubleshooting can be performed even prior to connecting the OASys to an outside PC. This is important since
that outside source may actually be the cause of any problem. For this purpose we recommend that prior to
beginning these simple diagnostic steps that you remove all cables connected to the OASys box. This document
will step you through the procedure for restoring each cable connection one-by-one.
Step 1
With all cables removed from the OASys box, apply power. Observe the lights on the
front of the OASys box. There should be three (3) green lights lit (+5/+12/-12). If any of
the lights are flashing or off immediately unplug the power supply and check the
following:
• Power supply is connected to live wall outlet.
• Power cord is properly seated.
• All boards are properly seated in the OASys unit. This will require removal of
the lid.
• Disk-on-a-module is properly seated.
If the unit beeps 3 times check the SIMM module (memory) on the processor card for proper
seating. It is best to remove it altogether, check the pins on the SIMM and connector, and
reinstall. If the unit still beeps 3 times the memory may have to be replaced.
Step 2
Unplug power to the OASys box and connect video #1 to the OASys via HD-15 VGA
connector found on EV1000 card #1. Re-apply power to the OASys unit and observe
video #1. If the OASys unit is functional you will see several messages appear on the
screen during the boot process. The entire process should only take about 10 seconds.
Once the OASys is completely up and running messages will appear on the screen
indicating “Select Electronics Corp.” and the software version number as well as some
other information. At this point the OASys unit is ready to receive commands and
functional. If you do not see any messages on the screen at all during this boot process
check the following:
• The DIP switches on this first board are ALL in the ON position.
• Remove any other EV1000 video cards and repeat step #2.
If messages do appear but terminate at with a message indicating “Boot Failure, Insert boot
diskette in A:” check the following:
•
Disk-on-a-module is properly seated
•
CMOS is configured properly….SEE APPENDIX B
If messages do appear on the screen but the boot process does not terminate at the “Select
Electronics Corp.” screen, record the messages and contact SEC support for further
assistance.
48
Step 3
At this point you have determined that the OASys box is up and running and will need to
determine what else is functional. First, unplug power to the OASys unit and connect the
SK9200 bump bars to the unit via the RJ45 connectors on the EV1000 cards. Once all of
the bump bars are connected re-apply power and wait for the unit to boot completely to
the “Select Electronics Corp.” screen. Observe the green power LED on each of the
SK9200 bump bars. These should appear bright green. If the power LED is not lit or if it is
dim check the following:
• Insure that the cable is properly seated on the OASys end as well as inside
the SK9200 bump bar.
• Make sure cable ends are properly crimped. Use of a cable tester is helpful if
handy.
• If a patch cord is available run a separate cable from the bump bar to the
OASys and retest.
• Replace bump bar with known working bump bar. If this works replace the
bump bar. If not, recheck cabling.
Step 4
With the OASys and bump bars up and running, depress the <FUNC> key on the bump
bar followed by the <1> key. You will have 6 seconds from the time you depress the
<FUNC> key to depress the <1> key. If you do not do so just depress the <FUNC> key
again. At this point a diagnostic screen should appear which provides CONFIGURATION
and ERROR information. If you cannot get this screen to appear by depressing the keys
on the bump bar return to Step 3, the bump bar is not yet functional. This step can be
repeated on each of the bump bars attached to the OASys box to insure proper
operation. If you cannot get this screen to appear via any of the bump bars check the
following:
• Make sure that the bump bars are plugged into the proper board to go along
with the screen you are looking at.
It is best to insure that all bump bars are working before moving on. However, Step 4 can be
performed without the use of a bump bar. It is very important that you get to the diagnostics
screen so that we can properly diagnose the problems. By removing power to the OASys box
and installing a PC keyboard you can access the diagnostic screen. This is done by
depressing the “F” key followed by the “1” key on the PC keyboard. We should point out that
you will first hit a “CONFIGURATION” screen if your unit is equipped with a Disk-on-a-module
(DOM). Simply skip this phase of the boot process by depressing the <ESC> key on the PC
keyboard.
***NOTE: You can exit the DIAG screen by depressing the <ESC> key on either the bump bar or PC
keyboard.
49
Step 5
Once you have everything up and running including the screens and bump bars you need
to determine if you have the proper software version and communication parameters set
for the system you are installing.
!!! IMPORTANT: See Appendix A to for correct settings. Do not continue until you have
determined that the OASys controller is programmed/flashed with the proper setting. !!!
You can find all of this information on the DIAG screen that you accessed in step 4. If you
do not have the proper software and/or setting (baud rate/flow control etc.) perform the
following steps…
• Reboot the OASys box with a PC keyboard installed. When you reach the
CONFIGURATION screen select the proper options to have the OASys
configure the system for you.
-OR• If the unit is not equipped with a Disk-on-a-module (DOM) it will be necessary
to re-flash the unit with the correct files. See “OASys User Manual” for proper
flashing techniques.
Step 6
If the unit is loaded with the correct software and settings it is ready to go 100%. The
OASys will not do anything at this point until it receives commands from the Host PC. If
no commands reach the OASys nothing will change on the screen and to the un-trained
eye it may appear that the KDS is not working. You can determine if commands are
being sent to the OASys by depressing the <FUNC> key on the bump bar followed by the
<2> key. Once again, you have 6 seconds to complete this entry. This will bring up
another diagnostics screen on the OASys. Note that this function can only be performed
on screen #1.
This screen will display any and all information being sent to it by the Host PC. If no data
appears on the screen than your OASys is running correctly and your problem can be
found in one of the following areas…
• The host PC is not properly configured properly to send KDS data to the
OASys box. Recheck your PC setting.
• The RS232/Ethernet cable connecting the host PC to the OASys is either
defective or not properly installed.
• The host PC is having troubles communicating. Check PC hardware.
• Contact your PC hardware provider or software provider for additional
assistance.
If you do see data on this screen, yet the OASys still does not display KDS
information than check the following:
• Insure that the communication settings (baud, flow control etc.) match on
both the OASys and PC ends.
• Check cabling connecting the host PC to the OASys box.
Contact SEC for additional assistance.
50
APPENDIX A
Your software vendor may require that the OASys be pre-configured with certain settings and require a minimum version
of OASys software to be flashed onto the OASys box. Without having the correct setting and the correct version number
the OASys box will function properly as a standalone unit but may not receive any kitchen display information or may have
intermittent problems. Please make sure that you have the proper settings and version numbers before continuing.
Progressive
Requires version 1.0.31 or greater be flashed onto each OASys unit.
Requires a baud rate setting of 115200.
May require flow control. See host PC settings.
Jack-in-the-box
Requires version 1.0.31 or greater be flashed onto each OASys unit.
Requires a baud rate setting of 115200.
Requires DSR/DTS flow control.
If you do not see an entry for your system on this list please contact your software vendor or SEC. SEC will
maintain this list with the correct settings as they become available to us from the various software vendors.
51
APPENDIX B
In order to configure the CMOS setting for your OASys unit you will need to boot the unit with a PC keyboard
plugged in. While the OASys unit is booting hold down the <DEL> key on the keyboard and wait until a screen
appears with the AMIBIOS SETUP UTILITY. If you don’t come to this screen try again. The main screen of the
AMIBIOS SETUP UTILITY should look something like this:
AMIBIOS HIFLEX SETUP UTILITY
Standard CMOS Setup
Advanced CMOS Setup
Advanced Chipset Setup
Peripheral Setup
Auto-Detect Hard Disks
Change Supervisor Password
Auto Configuration with Optimal Settings
Auto Configuration with Fail Safe Settings
Save Settings and Exit
Exit Without Saving
Follow these steps:
1.)
Go to Auto-Detect Hard Disks and depress <Enter>. The “Pri Master” field on the center of
the screen should say Type: User, Size: 7. If it does not than the Disk-on-a-module is either not installed
properly or bad.
2.)
Go to Auto Configuration with Fail Safe Settings, depress <Enter> and select “Y”es.
3.)
Go to Auto Configuration with Optimal Settings, depress <Enter> and select “Y”es.
4.)
Go to Advanced CMOS Setup and change “Bootup Sequence” to “C:,A:,CDROM”.
5.)
Go to Save Settings and Exit, depress <Enter> key and select “Y”es.
Your unit should now boot properly.
52
4.1
OAsys Hardware Specifications
This equipment has been tested and found to comply with the limits for Class A digital device pursuant to Part
15 of FCC Rules. These limits are designed to provide reasonable protection against harmful interference when
this equipment is operated in a commercial environment. This equipment generates, uses, and can radiate radio
frequency energy and, if not installed and used in accordance with the instruction manual, may cause harmful
interference to radio communications. Operation of this equipment in a residential area is likely to cause harmful
interference, in which case the user will be required to correct the interference at his/her own expense.
DESCRIPTION:
Oasys Base KDS Unit
MECHANICAL:
Dimensions: (L X W X H)
Weight:
Mounting:
Cable Type:
Inputs/Outputs:
Enclosure:
ENVIRONMENTAL:
Operating Temperature Range:
Storage: Temperature Range:
Humidity Range:
Altitude:
Cooling:
ELECTRICAL:
Power Requirements:
OPERATIONAL:
Screen Format:
Baud Rate:
Communications Distance:
Network Type:
Optional Features:
SAFETY STANDARDS:
FCC:
CE:
SERVICE:
Replaceable Components:
Warranty Coverage:
MTBF:
DESCRIPTION:
8.00 x 5.16 x 6.00 inches, ( 203.2 x 131.1 x 152.4 mm)
87 Ounces, weight varies with optional cards and features installed.
Table Top, or bracket mounted
Flat, 8x26AWG, unshielded, variable length
2 Comm Ports: 9-pin Din
1 PC Keyboard Port
Minimum 1 SVGA Video Port with Duplicate Monitor port (15pin HD Din), and composite video
port (RCA Jack)
Minimum 1 serial Bump Bar port (8pin RJ45)
Rolled Steel, .031 inches, baked enamel finish, charcoal color
0 to 50 Degrees C
-10 to +60 Degree C
10% to 90% RHNC
0 to 14000 feet ASL
Free air convection
1000mA @ +5volts DC, 250mA @+12volts DC, 250mA @-12volts DC
VGA/SVGA color/BW, 80x25 text-16 colors, 40x25 text-16 colors, 640x400 graphics - 2 colors
Selectable to 119k
Maximum 2000 feet from any termination point
RS232C or Ethernet
Touch screen interface, PC AT-101 key board interface, Ethernet port, audio port, parallel
printer port, additional Serial RS232C/RS485 ports
Class A, Part 15
EN 55002 Class A, EN 50082-1, IEC 801-2 4KV, 8KV AD, IEC 801-3 3 V/m CW, IEC 801-4
Socket PCB cards, network cables
Limited, 1-year parts and labor
77,000 HRS TYPICAL, Optional Ethernet Adapter Card - 74,000 HRS TYPICAL
Oasys PC3860 Processor Card
MECHANICAL:
Dimensions: (L X W)
Weight:
Mounting:
Inputs/Outputs:
ENVIRONMENTAL:
Operating Temperature Range:
Storage: Temperature Range:
Humidity Range:
Altitude:
Cooling:
ELECTRICAL:
Power Requirements:
OPERATIONAL:
CPU and Chipset:
BIOS:
DRAM Memory:
Bus Interface:
7.28 x 4.80 inches, ( 185 x 122 mm) PC AT ISA form factor
230 grams, weight varies with optional features installed.
ISA card slot
2 Comm Ports: 9-pin Din, 1 RS232C, 1 RS232C/RS485. Both with 16550 FIFO UART
1 PC Keyboard and mouse port (Mini Din and 5-pin header)
Bi-directional Parrallel Port (SPP, EPP, and ECP modes supported)
Floppy disk drive interface , supports up to 2 floppy drives, 5 ¼ (360KB, 1.2MB) and 3 ½
(720KB and 1.44 MB)
EIDE, supports one port and up to two harddrives
0 to 55 Degrees C
-10 to +60 Degree C
10% to 90% RHNC
0 to 14000 feet ASL
Free air convection
600mA @ +5volts DC, 20mA @+12volts DC With 1 MB DRAM and 1 MB Flash Disk Installed
Ali M6117C, INTEL Compatible 386SX-40 CPU with Ali M1217B chipset
AMI system BIOS
1 MB up to 32MB, 2 sockets for 72-pin single side SIMM modules
ISA and PC/104, 16-bit data bus, at 8 MHz
53
DMA and Interrupts:
Additional Features:
SAFETY STANDARDS:
FCC:
CE:
SERVICE:
Warranty Coverage:
MTBF:
8737 x 2, 7 channels, 8259 x 2 15 hardware interrupts
Watchdog timer, Real-time Clock
DESCRIPTION:
AV1000 Multifunction Video Card
Class A, Part 15
EN 55002 Class A, EN 50082-1, IEC 801-2 4KV, 8KV AD, IEC 801-3 3 V/m CW, IEC 801-4
Limited, 1-year parts and labor
77,000 HRS. TYPICAL
MECHANICAL:
Dimensions: (L X W)
Weight:
Mounting:
Inputs/Outputs:
6.19 x 3.83 inches, ( 157 x 97 mm) PC AT ISA form factor
14 ounces, weight varies with optional features installed.
ISA card slot
1 Comm Port: RJ45 8-pin, RS232C/RS485. with 16550 FIFO UART
1 PC Keyboard and mouse port (Mini Din and 5-pin header)
1 SVGA Video Port with Duplicate Monitor port (15pin HD Din), and composite video
port (RCA Jack)
Bi-directional Parallel Port (SPP, EPP, and ECP modes supported)
ENVIRONMENTAL:
Operating Temperature Range:
Storage: Temperature Range:
Humidity Range:
Altitude:
Cooling:
ELECTRICAL:
Power Requirements:
OPERATIONAL:
Screen Format:
Communications:
Optional Features:
SAFETY STANDARDS:
FCC:
CE:
SERVICE:
Warranty Coverage:
MTBF:
DESCRIPTION:
VGA/SVGA color/BW, 80x25 text-16 colors, 40x25 text-16 colors, 640x400 graphics - 2 colors
RS232C Baud selectable to 119k, Maximum 2000 feet from any termination point
Touch screen interface
Class A, Part 15
EN 55002 Class A, EN 50082-1, IEC 801-2 4KV, 8KV AD, IEC 801-3 3 V/m CW, IEC 801-4
Limited, 1-year parts and labor
86,000 HRS. TYPICAL
6.19 x 4.23 inches, ( 157 x 108 mm) PC AT ISA form factor
14 ounces, weight varies with optional features installed.
ISA card slot
1 Comm Port: RJ45 8-pin, RS232C/RS485. with 16550 FIFO UART
1 PC Keyboard and mouse port (Mini Din and 5-pin header)
1 SVGA Video Port with Duplicate Monitor port (15pin HD Din), and composite video
port (RCA Jack)
Bi-directional Parrallel Port (SPP, EPP, and ECP modes supported)
ENVIRONMENTAL:
Operating Temperature Range:
Storage: Temperature Range:
Humidity Range:
Altitude:
Cooling:
ELECTRICAL:
Power Requirements:
OPERATIONAL:
Screen Format:
Communications:
Network Type:
Optional Features:
SAFETY STANDARDS:
FCC:
CE:
SERVICE:
Warranty Coverage:
MTBF:
MECHANICAL:
Dimensions: (L X W X H)
270mA @ +5volts DC
EV1000 Multifunction Video Card
MECHANICAL:
Dimensions: (L X W)
Weight:
Mounting:
Inputs/Outputs:
DESCRIPTION:
0 to 50 Degrees C
-10 to +60 Degree C
10% to 90% RHNC
0 to 14000 feet ASL
Free air convection
0 to 50 Degrees C
-10 to +60 Degree C
10% to 90% RHNC
0 to 14000 feet ASL
Free air convection
270mA @ +5volts DC
VGA/SVGA color/BW, 80x25 text-16 colors, 40x25 text-16 colors, 640x400 graphics - 2 colors
RS232C Baud selectable to 119k, Maximum 2000 feet from any termination point
Ethernet
Touch screen interface
Class A, Part 15
EN 55002 Class A, EN 50082-1, IEC 801-2 4KV, 8KV AD, IEC 801-3 3 V/m CW, IEC 801-4
Limited, 1-year parts and labor
86,000 HRS. TYPICAL
SK9200 Bump Bar Unit
9.00 x 2.50 x 0.85 inches, (228.6 x 63.5 x 21.6 mm). Height varies with mounting bracket use.
54
Weight:
Mounting:
Cable Type:
Inputs/Outputs:
Enclosure:
ENVIRONMENTAL:
Operating Temperature Range:
Storage: Temperature Range:
Humidity Range:
Altitude:
Cooling:
ELECTRICAL:
Power Requirements:
OPERATIONAL:
Communications Modes:
Baud Rate:
Communications Distance:
Network Type:
Optional Features:
Keystroke Applications:
SAFETY STANDARDS:
FCC:
CE:
SERVICE:
Preventive Maintenance:
Replaceable Components:
Warranty Coverage:
MTBF:
20 Ounces
Wall or tabletop, variable positioning with mounting bracket
Flat, 8x26AWG, unshielded, variable length
Round, CAT V, 8 X 26AWG, unshielded, variable length
1) Power (+5VDC, or +9VDC to +12VDC @70ma)
2) Comm: 8-pin RJ45
Stainless steel sheet, .036 inches, polished finish
0 to 50 Degrees C
-10 to +60 Degree C
10% to 90% RHNC
0 to 14000 feet ASL
Free air convection
70 ma @ +5VDC, or 50 ma-70ma @ +9VDC to +12VDC (regulated to +5VDC)
RS485, RS232C
28800 (RS485 mode), or 1200 (RS232C mode) - Dip switch selectable
RS485 Mode: Maximum 2000 feet from any termination point, with direct power applied
Maximum 20 feet from SV2000/SV1000 with remote power applied
RS232C Mode: Maximum 100 feet from host – with direct or remote power applied
RS485 – proprietary 8 wire, or RS232C – Standard 3 wire / proprietary 8 wire
1) Replaceable key template, 2) Multi-position mounting bracket, 3) Beeper mode select, 4)
Beeper volume/frequency select
1,000,000 Depressions
Class A, Part 15
EN 55002 Class A, EN 50082-1, IEC 801-2 4KV, 8KV AD, IEC 801-3 3 V/m CW, IEC 801-4
Key faceplate damp cloth cleaning.
Socket IC components, Key matrix, key template, network cable
Limited, 1-year parts and labor
65,000 HOURS TYPICAL
NOTE: SK9200 interconnection cable is UL Certified under file number E138922 and is manufactured by:
EVERNEW WIRE & CABLE CO LTD
6TH FL-1
162 CHUNGSHAN N RD, SEC 2
TAIPEI, TAIWAN
DESCRIPTION:
BP5000 Multifunction Backplane Card
MECHANICAL:
Dimensions: (L X W)
Weight:
Mounting:
Inputs/Outputs:
7.25 x 4.83 inches, ( 185 x 123 mm) PC AT ISA form factor
16 ounces
Screw down to chassis
5 ISA PC-AT connector ports, PC-AT form factor
1 Din, 5 pin power port
ENVIRONMENTAL:
Operating Temperature Range:
Storage: Temperature Range:
Humidity Range:
Altitude:
Cooling:
ELECTRICAL:
Power Requirements:
OPERATIONAL:
Power:
ISA Bus:
Optional Features:
SAFETY STANDARDS:
FCC:
CE:
SERVICE:
Warranty Coverage:
MTBF:
DESCRIPTION:
MECHANICAL:
Dimensions: (L X W X H)
Weight:
0 to 50 Degrees C
-10 to +60 Degree C
10% to 90% RHNC
0 to 14000 feet ASL
Free air convection
30mA @ +5volts DC, 15ma @ +12volts DC
Thermo fused on all DC input lines
8 MHz
Reset switch
Class A, Part 15
EN 55002 Class A, EN 50082-1, IEC 801-2 4KV, 8KV AD, IEC 801-3 3 V/m CW, IEC 801-4
Limited, 1-year parts and labor
108,000 HRS. TYPICAL
Universal Triple Output Desk-Top Power Supply
107 x 65 x 42 mm (L x W x H) MAXIMUM
55
Mounting:
Input Connector:
Output Cable:
Input Connector:
Tabletop
3 POSITION MALE IEC 320/C14 INLET
3XI8AWG AND 2)(2OAWG, PVC JACKETED, LENGTH 6 FOOT MINIMUM
5 PIN 180 DEGREE MALE DIN PLUG
PIN 1: DC COMMON , PIN 2; RFI GROUND, PIN 3:+5VDC, PIN 4:- I2VDC, PINS;+I2VDC
SHELL; NO CONNECTION
Black, high impact plastic
ALL MARKING SHALL BE LEGIBLE, PERMANENT, AND CONTRASTING IN COLOR
TO INCLUDE PART NUMBER, MODEL NUMBER, RATINGS, SAFETY MARKS AND FILE
NUMBERS, COUNTRY OF ORIGIN, DATE CODE AND SAFETY RELATED
Enclosure:
MARKING:
WARNINGS
ENVIRONMENTAL:
Operating Temperature Range:
Storage: Temperature Range:
DERATING:
Humidity Range:
Altitude:
Cooling:
ELECTRICAL:
INPUT:
OUTPUT:
SECONDARY PROTECTION:
PEAKLINE REGULATION:
LOAD REGULATION:
DIELECTRIC STRENGTH:
PRIMARY CIRCUIT PROTECTION:
HOLDUP TIME:
THERMAL PROTECTION:
SAFETY STANDARDS:
UL:
CSA:
TUV
CE
FCC
SERVICE:
Warranty Coverage:
MTBF:
DESCRIPTION:
SERVICE:
Warranty Coverage:
MTBF:
90-260 VAC 47-64 Hz, AUTO-RANGING
+5 VDC AT 0.2 TO 2.5 A, RIPPLE 75 mV PEAK TO PEAK
+12 VDC AT 0.1 TO 1.0 A, RIPPLE 150 mV PEAK TO
-12 VDC AT 0.0 TO 0.3 A RIPPLE 150 mV PEAK TO PEAK
OVER VOLTAGE AND OVER CURRENT LIMITED
1.0 % MAXIMUM1 ALL OUTPUTS
+5/-10% MAXIMUM, ALL OUTPUTS
3750 VAC FOR ONE MINUTE BETWEEN PRIMARY AND SECONDARY OF
TRANSFORMER
GLASS TUBE FUSE IN LINE SIDE
lOmS MINIMUM AT FULL LOAD AND 12OV INPUT
NOT APPLICABLE
UL LISTED TO REQUIREMENTS OF UL 1950 STANDARD
cUL CERTIFIED TO REQUIREMENTS OF CSA 22.2 No.950 STANDARD
APPROVED TO REQUIREMENTS OF IEC 950/EN 60950 STANDARDS Class A, Part 15
MARK APPROVED IN ACCORDANCE WITH EMC AND LOW VOLTAGE DIRECTIVES
DESIGNED TO MEET REQUIREMENTS OF FCC LEVEL B RFI LIMITS
Limited, 1-year parts and labor
65000 HOURS TYPICAL at full load and 40 Degrees C
ESP-816 Ethernet Card
MECHANICAL:
Dimensions: (L X W)
Weight:
Mounting:
Inputs/Outputs:
LED Indicators
ENVIRONMENTAL:
Operating Temperature Range:
Storage: Temperature Range:
Humidity Range:
Altitude:
Cooling:
ELECTRICAL:
Power Requirements:
OPERATIONAL:
Network Type:
Communications:
Options:
SAFETY STANDARDS:
FCC:
CE:
0 to 40 Degrees C
-25 TO +70 DEG C
ABOVE +40 DEG C, DERATE OUTPUT LINEARLY TO ZERO AT +105 DEG C AMBIENT
10 % TO 90 % NON-CONDENSING
0 to 14000 feet ASL
Free air convection
6.28 x 2.20 inches, ( 160 x 64 mm) PC AT 16-bit bus, ISA form factor
9 ounces
ISA card slot
1 Ethernet Comm Port: RJ45 and 10Base-T
GREEN [LED ON] To monitor network status
0 to 45 Degrees C
-10 to +50 Degree C
10% to 90% RHNC
0 to 13000 feet ASL
Free air convection
120mA @ +5volts DC
Ethernet 10Mbps
Conforms to IEEE 802.3 10BASE2 and 10BASE-T standards
Supports Full-Duplex Ethernet to double the bandwidth
Fully compatible with Novell NE2000
Supports automatic polarity detection and correction
On-board socket for an optional remote Boot ROM
Class A, Part 15
This equipment complies with the requirements relating to electromagnetic compatibility,
EN 55022 class A for ITE and EN 50082-1, the essential protection requirements of Council
Directive 89/336/EEC on the approximation of the laws of the Member States relating to
electromagnetic compatibility.
Limited, 1-year parts and labor
74,000 HRS. TYPICAL
56
DESCRIPTION:
MECHANICAL:
Dimensions: (L X W X H)
Weight:
Mounting:
Material:
SK9200 Universal Mounting Bracket
Consists of 2 pairs of bracket supports.
Maximum extended size per support 4.40 x 3.25 x 1.50 inches, (118 x 83 x 38 mm).
Minimum extended size per support 2.38 x 1.61 x 0.75 inches, (61 x 41 x 19 mm).
12 ounces, including nuts,bolts, & washers.
Variable orientation and angle to position SK9200 Bump Bar as required per installation: flat
surface concrete, wood, metal, composite material.
All components are stainless steel, bracket material is .031 inches sheet stock.
57
4.2
OAsys IPad Model Specifications
This equipment has been tested and found to comply with the limits for Class A digital device pursuant to Part
15 of FCC Rules. These limits are designed to provide reasonable protection against harmful interference when
this equipment is operated in a commercial environment. This equipment generates, uses, and can radiate radio
frequency energy and, if not installed and used in accordance with the instruction manual, may cause harmful
interference to radio communications. Operation of this equipment in a residential area is likely to cause harmful
interference, in which case the user will be required to correct the interference at his/her own expense.
Product specifications provided are preliminary. Refer to updated specifications in future revision levels of this manual.
DESCRIPTION:
IPAD KDS Unit
MECHANICAL:
Dimensions: (L X W X H)
Weight:
Mounting:
Inputs/Outputs:
Enclosure:
ENVIRONMENTAL:
Operating Temperature Range:
Storage: Temperature Range:
Humidity Range:
Altitude:
Cooling:
ELECTRICAL:
Power Requirements:
OPERATIONAL:
CPU and Chipset:
BIOS:
DRAM Memory:
Bus Interface:
DMA and Interrupts:
Additional Features:
Keystroke Applications:
Screen Format:
Serial Baud Rate:
Network Type:
Optional Features:
Communications:
Communications Distance:
SAFETY STANDARDS:
FCC:
CE:
NA
NA
Wall or tabletop, variable positioning with mounting bracket
2 Comm Ports: 9-pin Din, 1 RS232C, 1 RS232C/RS485. Both with 16550 FIFO UART
1 PC Keyboard and mouse port (Mini Din)
1 SVGA Video Port (15pin HD Din),
Integrated 9x2 Bump Bar port (8pin RJ45)
1 Ethernet Comm Port: RJ45
Rolled Stainless Steel, .062 inches
0 to 50 Degrees C
-10 to +60 Degree C
10% to 90% RHNC
0 to 14000 feet ASL
Free air convection
1000mA @ +5volts DC
Ali M6117C, INTEL Compatible 386SX-40 CPU with Ali M1217B chipset
AMI system BIOS
1 MB up to 32MB, 2 sockets for 72-pin single side SIMM modules
ISA and PC/104, 16-bit data bus, at 8 MHz
8737 x 2, 7 channels, 8259 x 2 15 hardware interrupts
Watchdog timer, Real-time Clock
1,000,000 Depressions
VGA/SVGA color/BW, 80x25 text-16 colors, 40x25 text-16 colors, 640x400 graphics - 2 colors
Selectable to 119k
RS232C or Ethernet 10Mbps
Touch screen interface, Multi-position mounting bracket
Conforms to IEEE 802.3 10BASE2 and 10BASE-T standards
Supports Full-Duplex Ethernet to double the bandwidth
Fully compatible with Novell NE2000
Supports automatic polarity detection and correction
Maximum 2000 feet from any termination point
UL/cUL
Class A, Part 15
This equipment complies with the essential protection requirements of Council Directive
89/336/EEC on the approximation of the laws of the Member States relating to electromagnetic
compatibility: EN 55022:1994 /A1:1995 ITE Class A, EN 61000-3-2:1995, EN 61000-3-3:1994, EN
55024:1998, IEC 61000-4-2:1995, , IEC 61000-4-3:1995, , IEC 61000-4-4:1995, , IEC 61000-45:1995, , IEC 61000-4-6:1996, , IEC 61000-4-8:1993, , IEC 61000-4-11:1994
UL 60950 Listed
SERVICE:
Replaceable Components:
Warranty Coverage:
MTBF:
Key matrix, key template, network cables
Limited, 1-year parts and labor
70,000 HRS TYPICAL
DESCRIPTION:
MECHANICAL:
Dimensions: (L X W X H)
Weight:
Mounting:
Input Connector:
Output Cable:
Input Connector:
Universal DeskTop Power Supply
NA
NA
Tabletop
NA
NA
NA
58
Enclosure:
MARKING:
Black, high impact plastic
ALL MARKING SHALL BE LEGIBLE, PERMANENT, AND CONTRASTING IN COLOR
TO INCLUDE PART NUMBER, MODEL NUMBER, RATINGS, SAFETY MARKS AND FILE
NUMBERS, COUNTRY OF ORIGIN, DATE CODE AND SAFETY RELATED WARNINGS
ENVIRONMENTAL:
Operating Temperature Range:
Storage: Temperature Range:
DERATING:
Humidity Range:
Altitude:
Cooling:
ELECTRICAL:
INPUT:
OUTPUT:
SECONDARY PROTECTION:
PEAKLINE REGULATION:
LOAD REGULATION:
DIELECTRIC STRENGTH:
PRIMARY CIRCUIT PROTECTION:
HOLDUP TIME:
THERMAL PROTECTION:
SAFETY STANDARDS:
UL:
CSA:
TUV
CE
FCC
SERVICE:
Warranty Coverage:
MTBF:
DESCRIPTION:
MECHANICAL:
Dimensions: (L X W X H)
Weight:
Mounting:
Material:
0 to 40 Degrees C
-25 TO +70 DEG C
ABOVE +40 DEG C, DERATE OUTPUT LINEARLY TO ZERO AT +105 DEG C AMBIENT
10 % TO 90 % NON-CONDENSING
0 to 14000 feet ASL
Free air convection
90-260 VAC 47-64 Hz, AUTO-RANGING
+5 VDC AT 0.2 TO 2.5 A, RIPPLE 75 mV PEAK TO PEAK
OVER VOLTAGE AND OVER CURRENT LIMITED
1.0 % MAXIMUM1 ALL OUTPUTS
+5/-10% MAXIMUM, ALL OUTPUTS
3750 VAC FOR ONE MINUTE BETWEEN PRIMARY AND SECONDARY OF
TRANSFORMER
GLASS TUBE FUSE IN LINE SIDE
lOmS MINIMUM AT FULL LOAD AND 12OV INPUT
NOT APPLICABLE
UL LISTED TO REQUIREMENTS OF UL 1950 STANDARD
cUL CERTIFIED TO REQUIREMENTS OF CSA 22.2 No.950 STANDARD
APPROVED TO REQUIREMENTS OF IEC 950/EN 60950 STANDARDS Class A, Part 15
MARK APPROVED IN ACCORDANCE WITH EMC AND LOW VOLTAGE DIRECTIVES
DESIGNED TO MEET REQUIREMENTS OF FCC LEVEL B RFI LIMITS
Limited, 1-year parts and labor
65000 HOURS TYPICAL at full load and 40 Degrees C
Universal Mounting Bracket
Consists of 2 pairs of bracket supports.
Maximum extended size per support 4.40 x 3.25 x 1.50 inches, (118 x 83 x 38 mm).
Minimum extended size per support 2.38 x 1.61 x 0.75 inches, (61 x 41 x 19 mm).
12 ounces, including nuts, bolts, & washers.
Variable orientation and angle to position SK9200 Bump Bar as required per installation: flat
surface concrete, wood, metal, composite material.
All components are stainless steel, bracket material is .031 inches sheet stock.
59