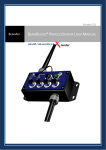
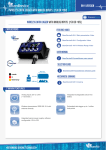
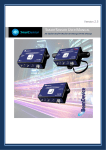
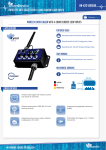
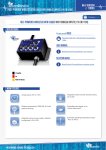
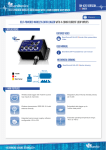
Download BeanDevice® EcoSensor Products line User Manual
Transcript
“Rethinking sensing technology” Document type : User Manual Document version : 1.9 BeanDevice® User Manual EcoSensor product lines – Version 1.9 BEANAIR BEANDEVICE® ECOSENSOR PRODUCTS LINE USER MANUAL Energy Metering Temperature, humidity and dew point IR temperature sensor Please consider the environment before printing this document. ECOSENSOR Ambient Temperature Page : 1 / 97 “Rethinking sensing technology” Document type : User Manual Document version : 1.9 BeanDevice® User Manual EcoSensor product lines – DOCUMENT Document number Version External Reference Last Publication date Author 1.9 10/04/2015 Maxime Obr. Document code Project Code Document Name BeanDevice® EcoSensor User Manual VALIDATION Function Validatio Informatio n n Recipients Writer Maxime Obr., embedded software engineer Reader Yosri Jaouadi, Embedded software engineer Approbation Maneli PARSY X X DIFFUSION Function Recipients Reader 1 Validation Yosri Jaouadi, Embedded software engineer X Updates Version 1.9 Date Author Evolution & Status 10/04/2015 Maxime Obr. Beandevice® ONE-BN wiring code specified Please consider the environment before printing this document. Page : 2 / 97 Action “Rethinking sensing technology” Document type : User Manual Document version : 1.9 BeanDevice® User Manual EcoSensor product lines – Contents 1. TECHNICAL SUPPORT........................................................................................................................... 8 2. VISUAL SYMBOLS DEFINITION ............................................................................................................. 9 3. ACRONYMS AND ABBREVIATIONS .................................................................................................... 10 4. RELATED DOCUMENTS & VIDEOS ..................................................................................................... 11 4.1 Applications Notes ..................................................................................................................... 11 4.2 Technical Notes.......................................................................................................................... 12 4.3 Related videos ........................................................................................................................... 13 5. BEANDEVICE® VERSIONS ................................................................................................................... 14 6. DOCUMENT ORGANISATION ............................................................................................................. 15 7. BEANDEVICE® PRODUCT PRESENTATION ......................................................................................... 16 7.1 BeanDevice ECOSENSOR: common specifications .................................................................... 16 7.2 BeanDevice® ONE-BN ................................................................................................................ 18 7.2.1 Applications ...................................................................................................................... 18 7.2.2 Product reference ............................................................................................................. 18 7.2.3 Binary/Pulse counter specifications ................................................................................. 19 7.3 BeanDevice® ONE-T ................................................................................................................... 20 7.3.1 Applications ...................................................................................................................... 20 7.3.2 Product reference ............................................................................................................. 20 7.3.3 Temperature sensor specification .................................................................................... 21 7.4 BeanDevice® ONE-TIR ................................................................................................................ 22 7.4.1 Applications ...................................................................................................................... 22 7.4.2 Product reference ............................................................................................................. 22 7.4.3 IR temperature sensor specifications ............................................................................... 22 7.4.4 Sensor field of view and accuracy .................................................................................... 23 Please consider the environment before printing this document. Page : 3 / 97 “Rethinking sensing technology” Document type : User Manual Document version : 1.9 BeanDevice® User Manual EcoSensor product lines – 7.5 BeanDevice® ONE-TH ................................................................................................................ 25 7.5.1 Applications ...................................................................................................................... 25 7.5.2 Product reference ............................................................................................................. 25 7.5.3 Temperature/Humidty sensors specifications ................................................................. 25 7.6 Products focus ........................................................................................................................... 27 7.6.1 BeanDevice® ONE-TIR ....................................................................................................... 27 7.6.2 BeanDevice® ONE-BN ....................................................................................................... 28 7.6.3 BeanDevice® ONE-T .......................................................................................................... 30 7.6.1 BeanDevice® ONE-TH ....................................................................................................... 31 7.6.2 Led description ................................................................................................................. 33 7.6.3 Enclosure mechanical drawing ......................................................................................... 34 7.6.3.1 BeanDevice® ONE-T .......................................................................................... 34 7.6.3.2 BeanDevice® ONE-TH, ONE-TIR, ONE-BN ......................................................... 35 7.6.4 Antenna specifications...................................................................................................... 36 7.7 BeanDevice® Power supply ....................................................................................................... 37 8. BEANDEVICE® INSTALLATION GUIDELINE ......................................................................................... 38 8.1 Powering ON your BeanDevice® ONE-XX .................................................................................. 38 8.2 Primary cell replacement ........................................................................................................... 39 8.3 BeanDevice® ONE-BN – wiring code ......................................................................................... 41 8.4 BeanDevice® Network Association ............................................................................................ 44 8.5 DataLogger feature .................................................................................................................... 44 8.6 OTAC (Over-the-air-Configuration) process .............................................................................. 44 8.7 Coexistence With others Frequencies at 2.4 GHz ..................................................................... 44 8.8 Operating temperature ............................................................................................................. 45 8.9 Mechanical mounting ................................................................................................................ 45 8.1 Factory settings.......................................................................................................................... 46 9. BEANDEVICE® SUPERVISION FROM THE BEANSCAPE ....................................................................... 48 9.1 Starting the BeanScape®............................................................................................................ 48 9.2 BeanDevice® status Informations.............................................................................................. 50 9.2.1 Frame: Identity ................................................................................................................. 50 9.2.2 Frame : Wireless Network Diagnostic .............................................................................. 50 9.2.3 Frame : Power Supply diagnostic ..................................................................................... 51 9.2.3.1 BeanDevice® Power Mode status ..................................................................... 51 Please consider the environment before printing this document. Page : 4 / 97 “Rethinking sensing technology” Document type : User Manual 9.3 9.4 9.5 9.6 Document version : 1.9 BeanDevice® User Manual EcoSensor product lines – 9.2.4 Frame : System ................................................................................................................. 52 Frame : BeanDevice® ................................................................................................................. 54 9.3.1 Frame : Product Version ................................................................................................... 54 9.3.2 Frame : Current Data Acquisition mode ........................................................................... 55 Main settings ............................................................................................................................. 56 9.4.1 Tab : Custom Display ........................................................................................................ 57 9.4.2 Tab: Notes ......................................................................................................................... 57 9.4.3 Tab: Data Acquisition configuration ................................................................................. 58 9.4.1 Tab: DataLogger ................................................................................................................ 61 9.4.1 Tab : System config. .......................................................................................................... 61 9.4.1 Tab : Sleep mode management ........................................................................................ 63 9.4.2 Tab : AllGraph ................................................................................................................... 65 Sensor channel profile ............................................................................................................... 67 9.5.1 Sensor channel status ....................................................................................................... 68 9.5.1.1 General informations on Temperature sensor (available on the BeanDevice ONE-T only) 68 9.5.1.2 General informations on IR temperature sensor (available on the BeanDevice® ONETIR only) ........................................................................................................................ 68 9.5.1.3 General informations on binary input (available on the BeanDevice® ONE-BN only) 70 9.5.1.4 Frame: Measurement data ............................................................................... 70 9.5.1.5 Frame : Alarm threshold ................................................................................... 70 9.5.1 Sensor configuration & calibration frame ........................................................................ 71 9.5.1.1 Tab: Custom display .......................................................................................... 72 9.5.1.2 Tab : Notes ........................................................................................................ 75 9.5.1.3 Tab: Configuration ............................................................................................ 76 9.5.1.4 Tab : Sensor & Analog conditioning calibration ............................................... 76 9.5.1.5 Tab : Log configuration ..................................................................................... 77 9.5.2 Graphical display............................................................................................................... 77 9.5.2.1 Frame: Marks ................................................................................................... 81 9.5.2.2 Frame: Symbols ................................................................................................ 81 9.5.2.3 Frame : Scale..................................................................................................... 83 Datalogger configuration ........................................................................................................... 84 10. BEANDEVICE® MAINTENANCE & SUPERVISION (FOR EXPERIENCED USER) ..................................... 85 10.1 Extending the battery life .......................................................................................................... 85 Please consider the environment before printing this document. Page : 5 / 97 “Rethinking sensing technology” Document type : User Manual Document version : 1.9 BeanDevice® User Manual EcoSensor product lines – 10.1 Over-the-air Configuration (OTAC) parameters ........................................................................ 85 10.1.1 Level 1: End-user OTAC parameters ................................................................................. 87 10.2 Network diagnostic from your BeanScape® software ............................................................... 88 10.2.1 Sensor operating status .................................................................................................... 88 10.2.2 Displaying Network information ...................................................................................... 88 10.2.1 System maintenance (for expert only) ............................................................................. 90 10.2.1 Scrolling menu « BeanSensor » ........................................................................................ 92 11. FAQ .................................................................................................................................................... 97 Please consider the environment before printing this document. Page : 6 / 97 “Rethinking sensing technology” Document type : User Manual Document version : 1.9 BeanDevice® User Manual EcoSensor product lines – Disclaimer The information contained in this document is the proprietary information of BeanAir. The contents are confidential and any disclosure to persons other than the officers, employees, agents or subcontractors of the owner or licensee of this document, without the prior written consent of BeanAir GmbH, is strictly prohibited. BeanAir makes every effort to ensure the quality of the information it makes available. Notwithstanding the foregoing, BeanAir does not make any warranty as to the information contained herein, and does not accept any liability for any injury, loss or damage of any kind incurred by use of or reliance upon the information. BeanAir disclaims any and all responsibility for the application of the devices characterized in this document, and notes that the application of the device must comply with the safety standards of the applicable country, and where applicable, with the relevant wiring rules. BeanAir reserves the right to make modifications, additions and deletions to this document due to typographical errors, inaccurate information, or improvements to programs and/or equipment at any time and without notice. Such changes will, nevertheless be incorporated into new editions of this document. Copyright: Transmittal, reproduction, dissemination and/or editing of this document as well as utilization of its contents and communication thereof to others without express authorization are prohibited. Offenders will be held liable for payment of damages. All rights are reserved. Copyright © BeanAir GmbH 2015 Please consider the environment before printing this document. Page : 7 / 97 “Rethinking sensing technology” Document type : User Manual Document version : 1.9 BeanDevice® User Manual EcoSensor product lines – 1. TECHNICAL SUPPORT For general contact, technical support, to report documentation errors and to order manuals, contact BeanAir Technical Support Center (BTSC) at: [email protected] For detailed information about where you can buy the BeanAir equipment/software or for recommendations on accessories and components visit: www.beanair.com To register for product news and announcements or for product questions contact BeanAir’s Technical Support Center (BTSC). Our aim is to make this user manual as helpful as possible. Please keep us informed of your comments and suggestions for improvements. Beanair appreciates feedback from the users. Please consider the environment before printing this document. Page : 8 / 97 “Rethinking sensing technology” Document type : User Manual Document version : 1.9 BeanDevice® User Manual EcoSensor product lines – 2. VISUAL SYMBOLS DEFINITION Symbols Definition Caution or Warning – Alerts the user with important information about BeanAir wireless sensor networks (WSN), if this information is not followed, the equipment /software may fail or malfunction. Danger – This information MUST be followed if not you may damage the equipment permanently or bodily injury may occur. Tip or Information – Provides advice and suggestions that may be useful when installing BeanAir Wireless Sensor Networks. Please consider the environment before printing this document. Page : 9 / 97 “Rethinking sensing technology” Document type : User Manual Document version : 1.9 BeanDevice® User Manual EcoSensor product lines 3. ACRONYMS AND ABBREVIATIONS AES Advanced Encryption Standard CCA Clear Channel Assessment CSMA/CA Carrier Sense Multiple Access/Collision Avoidance GTS Guaranteed Time-Slot kSps Kilo samples per second LLC Logical Link Control LQI Link quality indicator LDCDA Low duty cycle data acquisition MAC Media Access Control PAN Personal Area Network PER Packet error rate RF Radio Frequency SD Secure Digital WSN Wireless sensor Network Please consider the environment before printing this document. Page : 10 / 97 – “Rethinking sensing technology” Document type : User Manual Document version : 1.9 BeanDevice® User Manual EcoSensor product lines – 4. RELATED DOCUMENTS & VIDEOS In addition to this User manual, please consult the related application notes, technical notes and videos: 4.1 APPLICATIONS NOTES Document name (Click on the weblink) Related product AN_RF_007 :“ Beanair_WSN_Deployment“ All BeanAir products Wireless sensor guidelines AN_RF_006 – „How to extend your wireless range“ All BeanAir products A guideline very useful for extending your wireless range AN_RF_005 – BeanGateway® & Data Terminal Equipment Interface BeanGateway® Description DTE interface BeanGateway® networks Architecture deployment on the All BeanAir products Coexistence & interferences of different RF technologies in the 2.4 GHz frequencies band. AN_RF_003 - “IEEE 802.15.4 2.4 GHz Vs 868 MHz” All BeanAir products Comparison between 868 MHz frequency band and a 2.4 GHz frequency band. AN_RF_002 – “Structural Health monitoring on bridges” All BeanAir products The aim of this document is to overview Beanair® products suited for bridge monitoring, their deployment, as well as their capacity and limits by overviewing various data acquisition modes available on each BeanDevice®. AN_RF_004 – “Coexistence And [email protected]” Please consider the environment before printing this document. Page : 11 / 97 “Rethinking sensing technology” Document type : User Manual 4.2 Document version : 1.9 BeanDevice® User Manual EcoSensor product lines – TECHNICAL NOTES Document name (Click on the weblink) Affected product Description TN_RF_010 – « BeanDevice® Power Management » All the BeanDevice® This technical note describes the sleeping & active power mode on the BeanDevice®. TN_RF_009 – « BeanGateway® management on LAN infrastructure » BeanGateway® BeanGateway® integration on a LAN infrastructure TN_RF_008 – “Data acquisition modes available on the BeanDevice®” All the BeanDevice® Data acquisition modes available on the BeanDevice® TN_RF_007 – “BeanDevice® DataLogger User Guide ” All the BeanDevice® This document presents the DataLogger feature on the BeanDevice® TN_RF_006 – “WSN Association process” All the BeanDevice® Description of the BeanDevice® network association TN_RF_005 – “Pulse counter & binary data acquisition on the BeanDevice® ONE-BN” BeanDevice® ONE-BN This document presents Pulse counter (ex: energy metering application) and binary data acquisition features on the BeanDevice® ONE-BN. RF_TN_003 V1.0- “Wireless Network capacity” All the products Network capacity characterization Beanair Wireless Sensor Networks of RF_TN_002 V1.0 - Current consumption BeanDevice® in active & sleeping mode Current consumption estimation of the BeanDevice in active and sleeping mode RF_TN_001 V1.0- Wireless range benchmarking Wireless range benchmarking of the BeanDevice® BeanDevice® Please consider the environment before printing this document. Page : 12 / 97 “Rethinking sensing technology” Document type : User Manual 4.3 Document version : 1.9 BeanDevice® User Manual EcoSensor product lines – RELATED VIDEOS All the videos are available on our Youtube channel Beanair video link (Youtube) Company Presentation Related products All BeanGateway® - Ethernet Outdoor version introduction BeanGateway® - Ethernet Outdoor version introduction BeanGateway® – Ethernet Indoor version presentation BeanGateway® Ethernet Indoor version Beandevice® AN-XX wireless range demonstration BeanDevice® AN-XX & Beandevice® AN-XX Extender BeanDevice® AN-XX presentation BeanDevice® AN-XX & Beandevice® AN-XX Extender BeanDevice® AX-3D presentation BeanDevice® AX-3D BeanDevice® HI-INC presentation BeanDevice® HI-INC BeanDevice® AX-3DS presentation BeanDevice® AX-3DS BeanScape® – WSN supervision software BeanScape® BeanGateway® Ethernet/LAN Configuration, directly connected to the Laptop/PC BeanGateway® Performing an energy scan on your BeanGateway® BeanGateway® Automatic RF Channel selection BeanGateway® Wireless sensors profile deletion from the BeanGateway® Database All Network Diagnostic configuration on the BeanGateway® BeanGateway® RF Power configuration on the BeanGateway® BeanGateway® Please consider the environment before printing this document. Page : 13 / 97 “Rethinking sensing technology” Document type : User Manual Document version : 1.9 BeanDevice® User Manual EcoSensor product lines 5. BEANDEVICE® VERSIONS Hardware BeanDevice® ONE-XX V1.0 – First hardware Version Embedded Software V1.0 – First version Wireless Stack IEEE 802.15.4 V2006 V1.1 – Hardware filter added on pulse inputs (BeanDevice® ONE-BN) These ID versions should be transmitted to our technical support center when you encountered a material or software issue. Please consider the environment before printing this document. Page : 14 / 97 – “Rethinking sensing technology” Document type : User Manual Document version : 1.9 BeanDevice® User Manual EcoSensor product lines 6. DOCUMENT ORGANISATION This manual is organized in 7 chapters, as follows: BeanDevice® product presentation Data acquisition mode description •Introduces BeanDevice® Ecosensor products line : •BeanDevice® ONE-T •BeanDevice® ONE-TH •BeanDevice® ONE-BN •BeanDevice® ONE-TIR •Details the data acquisition mode available on the BeanDevice® BeanDevice® installation guidelines •Details the installation guidelines of the BeanDevice®: •Power Management •BeanDevice® power supply •BeanDevice® network association •Datalogger feature •OTAC (over-the-air configuration) process BeanDevice® supervision from the Beanscape® •Details the BeanDevice® supervision from the BeanScape® BeanDevice® maintenance & supervision (for experienced user) Installation procedures •Details the BeanDevice® maintenance (for experienced user) •Details the installation procedures Please consider the environment before printing this document. Page : 15 / 97 – Document version : 1.9 “Rethinking sensing technology” BeanDevice® User Manual EcoSensor product lines Document type : User Manual – 7. BEANDEVICE® PRODUCT PRESENTATION It is highly recommended to read all the user manual related to BeanAir software & equipment (BeanScape®, BeanGateway® BeanDevice®) before getting start your BeanDevice®. 7.1 BEANDEVICE ECOSENSOR: COMMON SPECIFICATIONS This section describes the common technical features for the following BeanDevice® BeanDevice® ONE-T BeanDevice® ONE-TH BeanDevice® ONE-TIR BeanDevice® ONE-BN RF Specifications Wireless Protocol Stack WSN Topology Data rate RF Characteristics TX Power Receiver Sensitivity Max. Radio Range IEEE 802.15.4 (2006 version) Point-to-Point / Star 250 Kbits/s ISM 2.4GHz – 16 Channels -7 dBm to +18 dBm -95.5 dBm to -104 dBm 300 m (L.O.S) Antenna Omndirectional antenna 2.2dBi Over-the-air configuration (OTAC) parameters Data Acquisition mode Alarm Threshold Power Mode TX Power Low Duty Cycle Data Acquisition (LDCDA) Mode: 1s to 24 hour Alarm & Survey mode: 1s to 24 hour 2 high levels alarms & 2 low levels alarms Sleeping, Sleeping with Network Listening & Active -7 dBm / -1 dBm / 5 dBm / 11 dBm / 15 dBm / 18 dBm Embedded data logger Storage capacity up to 1 000 000 data points Please consider the environment before printing this document. Page : 16 / 97 “Rethinking sensing technology” Document type : User Manual Document version : 1.9 BeanDevice® User Manual EcoSensor product lines – 3 minutes to download the full memory (average time) Wireless data downloading Environmental and Mechanical Polycarbonate, Watertight IP67 – Fire Protection : ULV94 Enclosure dimensions (Lxlxh) : 119 mm x 35 mm x 35 mm Weight (battery included): 120g -40°C to +75°C FCC & CE compliant ROHS - Directive 2002/95/EC Enclosure Operating Temperature Norms Power supply · During data acquisition : 20 to 30 mA · During Radio transmission : 40 mA @ 5dBm , 70 mA @ 18 dBm · During sleeping : < 10 µA Lithium-thionyl chloride battery with 1800 mAh capacity (AA size) Current consumption @3.3 Volts Included primary cell Option(s) Calibration COFRAC connected calibration ( on 1 point) Choose an ultra low power wireless sensor RF transmission Every 2 minutes Every 5 minutes Every 10 minutes Battery life (temperature room 25°C) 22 months 51 months 102 months Please consider the environment before printing this document. Page : 17 / 97 “Rethinking sensing technology” Document type : User Manual 7.2 Document version : 1.9 BeanDevice® User Manual EcoSensor product lines BEANDEVICE® ONE-BN 7.2.1 Applications This product is adapted for the following applications: Energy Metering (Gas, Water, Electric) Process control Technical Building Management Logistics 7.2.2 Product reference Please consider the environment before printing this document. Page : 18 / 97 – “Rethinking sensing technology” Document type : User Manual 7.2.3 Document version : 1.9 BeanDevice® User Manual EcoSensor product lines – Binary/Pulse counter specifications For further informations about the “Pulse counter” and “Binary” data acquisition, please read the technical note TN_RF_005: “Pulse counter & binary data acquisition on the BeanDevice® ONE-BN”. Please consider the environment before printing this document. Page : 19 / 97 “Rethinking sensing technology” Document type : User Manual 7.3 Document version : 1.9 BeanDevice® User Manual EcoSensor product lines – BEANDEVICE® ONE-T 7.3.1 Applications This product is adapted for the following applications: Technical Building Management Cold chain traceability Medical lab & white room Solar Panels Monitoring Transport Air-conditionning System (HVAC) 7.3.2 Product reference Product Reference BND-ONE-T-SA-CL SA—temperature sensor accuracy & design CL—Sensor Cable length Sensor cable length in cm · ST : standard accuracy Maximum cable length: 150 cm · HA: High accuracy · HAEY: High accuracy with eyelet probe for wall If this field is empty: no cable length mounting (minimum cable length 25 cm) Example 1 : BND-ONE-T-ST, wireless temperature sensor with 1 probe, standard accuracy (temperature range -25°C to +75°C), no cable length Example 2: BND-ONE-T-HA-120, wireless temperature sensor with 1 probe, High accuracy (temperature range -10°C to +60°C), cable length 120 cm Example 3: BND-ONE-T-HAEY-25, wireless temperature sensor with eyelet probe for wall mounting , high accuracy (temperature range -10°C to +60°C), cable length 25 cm Please consider the environment before printing this document. Page : 20 / 97 “Rethinking sensing technology” Document type : User Manual 7.3.3 Document version : 1.9 BeanDevice® User Manual EcoSensor product lines – Temperature sensor specification Temperature probe types Temperature probe with eyelet mounting Probe type HAEY (Length 50 mm, Diameter 6 mm, Hole diam. 5.3 mm) Length 40 mm, Diameter 6 mm Probe type ST & HA Temperature sensor specifications Temperature Sensor technology Measurement range Measurement accuracy Sensor resolution Silicon temperature probe —Probe watertightness : IP67 Mechanical assembly type : steel tube High accuracy temperature probe: BND-ONE-T-HA-CL -10 °C to +60 °C BND-ONE-T-HAEY-CL Standard accuracy temperature probe with cable -50 °C to +150 °C length:BND-ONE-T-ST-CL Standard accuracy temperature probe without -25°C to +75°C cable length: BND-ONE-T-ST ±0.2°C between -10°C and -5 °C High accuracy temperature probe: ±0.1°C between -5°C and BND-ONE-T-HA-CL +45°C BND-ONE-T-HAEY-CL ±0.2°C between +45°C and +60°C ±0.3 °C between -10 °C and +60 °C ±(0.3 + 0.012(T-60)) °C Standard accuracy temperature probe : between +60 °C and +150 °C BND-ONE-T-ST-CL +/- (0.3 - 0.012(T+10)) °C between -50 °C and -10 °C High accuracy temperature probe: BND-ONE-T-HA-CL 0.0034 °C BND-ONE-T-HAEY-CL Standard accuracy temperature probe : 0.1 °C BND-ONE-T-ST-CL Please consider the environment before printing this document. Page : 21 / 97 “Rethinking sensing technology” Document type : User Manual 7.4 Document version : 1.9 BeanDevice® User Manual EcoSensor product lines BEANDEVICE® ONE-TIR 7.4.1 Applications This product is adapted for the following applications: Railway temperature control Industrial temperature control of moving parts Gas detection Plastic, glass & metal processing Movement Detection Chemistry & pharmaceutical industry Automotive diagnosis Electrical Systems & equipment monitoring Healthcare 7.4.2 Product reference Product reference BND-ONE-TIR 7.4.3 IR temperature sensor specifications IR temperature Sensor Specification Measurement range Sensor Technology Emissivity coefficient Accuracy Measurement resolution Field of View (FOV) -40°C to +85°C for ambient temperature (Ta) -70°C to +380°C for object temperature (To) Thermopile 0 to 1 ( Configurable from the BeanScape®) CF. IR Temperature Table 0.02 °C Peak zone ±0°, Width Zone ±90°C . See curve Please consider the environment before printing this document. Page : 22 / 97 – “Rethinking sensing technology” Document type : User Manual 7.4.4 Document version : 1.9 BeanDevice® User Manual EcoSensor product lines – Sensor field of view and accuracy All accuracy specifications apply under settled isothermal conditions only. Furthermore, the accuracy is only valid if the object fills the FOV of the sensor completely. Ta (Ambient temperature) and To (Object temperature) Figure 1: ONE-TIR sensor accuracy Please consider the environment before printing this document. Page : 23 / 97 “Rethinking sensing technology” Document type : User Manual Document version : 1.9 BeanDevice® User Manual EcoSensor product lines Figure 2: Field of view measurement Figure 3 : Typical FOV curve Please consider the environment before printing this document. Page : 24 / 97 – “Rethinking sensing technology” Document type : User Manual 7.5 Document version : 1.9 BeanDevice® User Manual EcoSensor product lines BEANDEVICE® ONE-TH 7.5.1 Applications HVAC (heating, ventilation, and air conditioning) Cold chain traceability Medical lab & clean room Agriculture & Greenhouse Environment 7.5.2 Product reference Product Reference BND-ONE-TH 7.5.3 Temperature/Humidty sensors specifications Sensor filter cap mechanical specifications Filter cap Glass grommet and sinter filter Pressure Resistant Up to 16 bar Dew formation resistant Yes Temperature sensor specifications Temperature Sensor technology Measurement range Measurement accuracy Sensor resolution Long term drift Response time Thermistor - 40°C to +85 °C ±0.2 °C (0 ... 60 °C) 0.015 °C < 0.05 K / year < 10s with sensor cap Humidity sensor specifications Humidity Sensor technology Capacitive polymer humidity sensor Please consider the environment before printing this document. Page : 25 / 97 – “Rethinking sensing technology” Document type : User Manual Measurement range Sensor accuracy (at 23°C) Sensor resolution Hysteresis (50% rH) Linearity error Response time Long term drift Document version : 1.9 BeanDevice® User Manual EcoSensor product lines 0 to 100% RH ±1.8% RH (10 ... 80% RH) 0.02% RH < ±1% RH < ±1% RH <10s with sensor cap < 0.5 % RH / year Please consider the environment before printing this document. Page : 26 / 97 – “Rethinking sensing technology” Document type : User Manual 7.6 Document version : 1.9 BeanDevice® User Manual EcoSensor product lines – PRODUCTS FOCUS 7.6.1 BeanDevice® ONE-TIR 5 6 7 4 3 2 1 Figure 4: Beandevice® ONE-TIR -Product description Number Function 1 IR Sensor Description Waterproof (IP67) infrared Sensor ON/OFF Reed Switch. Activated using a magnet. (waiting time : 2 seconds) 2 ON/OFF If the “Network LED” illuminates in GREEN color, the BeanDevice® is powered on. If the “Network LED” illuminates in RED color, the BeanDevice® is powered off. 3 Sensor/Activity LED Bi-color led light, either displays in GREEN or RED color depending up on the status of the device See Led Description table 4 Network LED Bi-color led light for network status, GREEN or RED depending upon the status of the network. Please consider the environment before printing this document. Page : 27 / 97 “Rethinking sensing technology” Document type : User Manual Document version : 1.9 BeanDevice® User Manual EcoSensor product lines – See Led Description table 5 2.2 dBi omnidirectional antenna Antenna See antenna description section “Network” non-contact button restores the factory settings on the BeanDevice®. 6 Point the pole of the Neodymium magnet that was provided with your BeanDevice® towards the “Network” label circle. Hold the magnet for approximately 2s Network Please read the following section for more information “click here” 7 Eyelet 7.6.2 Eyelet for screw mounting BeanDevice® ONE-BN 5 6 7 4 3 2 1 Figure 5 : Beandevice® ONE-BN - Product description Please consider the environment before printing this document. Page : 28 / 97 “Rethinking sensing technology” Document type : User Manual Number Document version : 1.9 BeanDevice® User Manual EcoSensor product lines Function – Description M12-5pins A coding socket dedicated to pulse measurement 1 Binary inputs Please read the following section for more information “click here” ON/OFF Reed Switch. Activated using a magnet. (waiting time : 2 seconds) 2 ON/OFF If the “Network LED” illuminates in GREEN color, the BeanDevice® is powered on. If the “Network LED” illuminates in RED color, the BeanDevice® is powered off. 3 Sensor/Activity LED Bi-color led light, either displays in GREEN or RED color depending up on the status of the device See Led Description table 4 Network LED Bi-color led light for network status, GREEN or RED depending upon the status of the network. See Led Description table 5 Antenna 2.2 dBi omnidirectional antenna See antenna description section “Network” non-contact button restores the factory settings on the BeanDevice®. 6 Network Point the pole of the Neodymium magnet that was provided with your BeanDevice® towards the “Network” label circle. Hold the magnet for approximately 2s Please read the following section for more information “click here” Please consider the environment before printing this document. Page : 29 / 97 “Rethinking sensing technology” Document type : User Manual 7.6.3 Document version : 1.9 BeanDevice® User Manual EcoSensor product lines – BeanDevice® ONE-T 6 5 7 4 3 2 1 Figure 6: Beandevice® ONE-T - Product description Number Function 1 Silicon Temperature Sensor Description Silicon temperature sensor Up to 1.5 meters of cable length ON/OFF Reed Switch. Activated using a magnet. (waiting time : 2 seconds) 2 ON/OFF If the “Network LED” illuminates in GREEN color, the BeanDevice® is powered on. If the “Network LED” illuminates in RED color, the BeanDevice® is powered off. 3 Sensor/Activity LED Bi-color led light, either displays in GREEN or RED color depending up on the status of the device See Led Description table 4 Network LED Bi-color led light for network status, GREEN or RED depending upon the status of the network. Please consider the environment before printing this document. Page : 30 / 97 “Rethinking sensing technology” Document type : User Manual Document version : 1.9 BeanDevice® User Manual EcoSensor product lines – See Led Description table 5 Antenna 2.2 dBi omnidirectional antenna See antenna description section “Network” non-contact button restores the factory settings on the BeanDevice®. 6 Network Point the pole of the Neodymium magnet that was provided with your BeanDevice® towards the “Network” label circle. Hold the magnet for approximately 2s Please read the following section for more information “click here” 7 7.6.1 Eyelet Eyelet for screw mounting BeanDevice® ONE-TH 5 6 7 4 3 2 1 Figure 7: Beandevice® ONE-TH - Product description Please consider the environment before printing this document. Page : 31 / 97 “Rethinking sensing technology” Document type : User Manual Number 1 Document version : 1.9 BeanDevice® User Manual EcoSensor product lines Function – Description Temperature/Humidity/Dew Temperature/Humidity sensor coming with IP67 sensor filter Point sensor ON/OFF Reed Switch. Activated using a magnet. (waiting time : 2 seconds) 2 ON/OFF If the “Network LED” illuminates in GREEN color, the BeanDevice® is powered on. If the “Network LED” illuminates in RED color, the BeanDevice® is powered off. 3 Sensor/Activity LED Bi-color led light, either displays in GREEN or RED color depending up on the status of the device See Led Description table 4 Network LED Bi-color led light for network status, GREEN or RED depending upon the status of the network. See Led Description table 5 Antenna 2.2 dBi omnidirectional antenna See antenna description section “Network” non-contact button restores the factory settings on the BeanDevice®. 6 Network Point the pole of the Neodymium magnet that was provided with your BeanDevice® towards the “Network” label circle. Hold the magnet for approximately 2s Please read the following section for more information “click here” 7 Eyelet Eyelet for screw mounting Please consider the environment before printing this document. Page : 32 / 97 “Rethinking sensing technology” Document type : User Manual 7.6.2 Document version : 1.9 BeanDevice® User Manual EcoSensor product lines – Led description This table shows the led description depending on the BeanDevice® status: BeanDevice® status Leds Description The BeanDevice® is power on Network Led flashes one time in GREEN The BeanDevice® is power off Network Led flashes one time in RED The Beandevice® starts successfully a Network Led flashes slowly in GREEN Network association The BeanDevice® transmits a data to the Network Led flashes fastly in GREEN BeanGateway® The Beandevice® fails to start a Network Network Led flashes one time in RED and then restart association flashing in GREEN for a new Network association The BeanDevice® fails to transmit a data to Network Led flashes fastly in RED the BeanGateway® Data acquisition and/or data logginng are Sensor activity Led flashes one time in GREEN correctly performed on the BeanDevice® Data acquisition and/or data logging fails Sensor activity Led flashes one time in RED Please consider the environment before printing this document. Page : 33 / 97 “Rethinking sensing technology” Document type : User Manual 7.6.3 Document version : 1.9 BeanDevice® User Manual EcoSensor product lines Enclosure mechanical drawing Material type PUR (Polycarbonate) Enclosure size (w/o external sensor & antenna) in mm LxlxH 110 x 30 x 34 Impact EN 50 102 IK 08 Protection IP67 7.6.3.1 BeanDevice® ONE-T Figure 8: Beandevice® ONE-T Mechanical drawing Mechanical drawing is available on the following weblink: Click here Please consider the environment before printing this document. Page : 34 / 97 – “Rethinking sensing technology” Document type : User Manual Document version : 1.9 BeanDevice® User Manual EcoSensor product lines 7.6.3.2 BeanDevice® ONE-TH, ONE-TIR, ONE-BN Figure 9 : Beandevice® ONE-TH/ONE-TIR/ONE-BN Mechanical drawing Mechanical drawing is available on the following weblink: Click here Please consider the environment before printing this document. Page : 35 / 97 – “Rethinking sensing technology” Document type : User Manual 7.6.4 Document version : 1.9 BeanDevice® User Manual EcoSensor product lines – Antenna specifications The BeanDevice® EcoSensor range comes with an external omnidirectional antenna. Figure 10 : Omnidirectional 2.2dBi Antenna RF Properties Value Unit Tol. Frequency range 2400 … 2500 MHz VSWR 1.5 Impedance 50 Ω Peak Gain 2.8 dBi Typ. Average Gain 2.2 dBi Typ. max Table 1 : Antenna Specifications table During BeanDevice® installation, test several orientation of the antenna in order to get best wireless link quality. Check the LQI (Link Quality Indicator) of your BeanDevice® for being sure that your antenna is right oriented. For further information, read the application note: AN_RF_007 :“ Beanair_WSN_Deployment“ Please consider the environment before printing this document. Page : 36 / 97 “Rethinking sensing technology” Document type : User Manual 7.7 Document version : 1.9 BeanDevice® User Manual EcoSensor product lines – BEANDEVICE® POWER SUPPLY The BeanDevice® ONE-XX is power supplied by a Lithium-thionyl chloride primary cell with a very low leakage current (less than 2%/year) A primary cell is not a rechargeable battery, don’t try to recharge it. You will damage your primary cell and your BeanDevice®. Primary cell technology Nominal Voltage Nominal capacity Size LiSOCl2 (Lithium -thionyl chloride) 3,6V 1800 mAh 14.5*33.5mm (AA) Maximum continuous current Maximum pulse current 500mA Type ER14505M 1A Table 2 : Primary cell specifications table List of LiSOCl2 primary cell manufacturer: Manufacturer EEMB Product Reference ER14505M BIPOWER CORP EVE Ultralife Important Precautions to follow: Lithium-thionyl chloride primary cell with a size of AA must be used. Don’t try to use another primary cell technology, you will damage your BeanDevice® ; Use only the ER14505M battery type with the “M” extension for high power management; Primary cell is not a rechargeable battery. Don’t try to recharge a primary cell; you will damage your BeanDevice®. Please consider the environment before printing this document. Page : 37 / 97 “Rethinking sensing technology” Document type : User Manual Document version : 1.9 BeanDevice® User Manual EcoSensor product lines – 8. BEANDEVICE® INSTALLATION GUIDELINE 8.1 POWERING ON YOUR BEANDEVICE® ONE-XX The BeanDevice® ONE-XX includes a reed switch that allows switching ON or OFF the wireless sensor. The device could be powered ON by hovering the magnet on the ON-OFF label. This technology allows you to power on your BeanDevice® instantly and without any physical contact between the magnet and the BeanDevice® enclosure. Powering ON your BeanDevice® ONE-XX is very simple: 1. Please make sure that your BeanDevice® ONE-XX is provided with a magnet (the magnet is provided in another box separated from the BeanDevice®) Magnet Reed switch location 2. As shown in the picture below, hover your magnet slowly above the ON-OFF label for about 2 seconds, your BeanDevice® turns on automatically. The LED light illuminates GREEN. You can hold your magnet position diagonally or in parallel to your device label. Please consider the environment before printing this document. Page : 38 / 97 “Rethinking sensing technology” Document type : User Manual Document version : 1.9 BeanDevice® User Manual EcoSensor product lines – Magnet 3. Repeat the same process to Power OFF your BeanDevice®. The LED illuminates in RED. Your BeanScape will specify that the device is no longer active. 8.2 PRIMARY CELL REPLACEMENT Located inside the BeanDevice® enclosure, the primary cell provides the BeanDevice® power supply. The self-discharge rate is very low on a primary cell (2% / year). The BeanScape® displays the battery charge level, if it is in low state you will need to change the battery as follows. Step n°1: Open the BeanDevice® casing • Power down your BeanDevice® • Use a Philips screwdriver with the right size • Unscrew the cover Please consider the environment before printing this document. Page : 39 / 97 “Rethinking sensing technology” Document type : User Manual Step n°2: Primary cell replacement Document version : 1.9 BeanDevice® User Manual EcoSensor product lines • Remove the primary cell from the battery holder • Replace the primary cell. Follow the electrical polarity on the battery holder(see picture) • Close the cover Please consider the environment before printing this document. Page : 40 / 97 – “Rethinking sensing technology” Document type : User Manual Document version : 1.9 BeanDevice® User Manual EcoSensor product lines – Pole + Pole - 8.3 BEANDEVICE® ONE-BN – WIRING CODE The BeanDevice® ONE-BN comes with a M12-4Pins Socket. This socket is watertight IP67, the user should use a M12-4Pins plug coming with IP67 Rating. Please consider the environment before printing this document. Page : 41 / 97 “Rethinking sensing technology” Document type : User Manual Document version : 1.9 BeanDevice® User Manual EcoSensor product lines M12 Socket The wiring code is described in the following drawing: Please consider the environment before printing this document. Page : 42 / 97 – “Rethinking sensing technology” Document type : User Manual Signal Description Document version : 1.9 BeanDevice® User Manual EcoSensor product lines M12 Pin Number Sens1 Digital input signal 1 PIN2 Sens2 Digital input signal 2 PIN1 PWR+ Sensor power supply (5V). A maximum current could be to an external sensor is 25mA PIN3 Ground PIN4 Gnd Wiring code – M12 Plug side PIN2/SENS1 PIN3/PWR+(5V) PIN1/SENS2 PIN4/GND Please consider the environment before printing this document. Page : 43 / 97 – “Rethinking sensing technology” Document type : User Manual 8.4 Document version : 1.9 BeanDevice® User Manual EcoSensor product lines – BEANDEVICE® NETWORK ASSOCIATION Please read the technical note TN_RF_006 – “WSN Association process” 8.5 DATALOGGER FEATURE Please read the technical note TN_RF_007 – “BeanDevice® DataLogger User Guide ” 8.6 OTAC (OVER-THE-AIR-CONFIGURATION) PROCESS Please read the technical note TN_RF_010 – « BeanDevice® Power Management » 8.7 COEXISTENCE WITH OTHERS FREQUENCIES AT 2.4 GHZ The BeanDevice ® is sensitive to noise 2.4GHz (Wi-Fi as a source for example), but many protections are already in place, particularly in the IEEE 802.15.4®. It should however be careful when installing the product, check all the possibilities of radio channels on the frequency range 2.4-2.5GHz. The operation of the product will be improved. For further information, read the application note: AN_RF_004 – “Coexistence And [email protected]” Please consider the environment before printing this document. Page : 44 / 97 “Rethinking sensing technology” Document type : User Manual 8.8 Document version : 1.9 BeanDevice® User Manual EcoSensor product lines – OPERATING TEMPERATURE The table below shows the BeanDevice® operating temperature: Operating temperature -45 ° C to +75 ° C BeanDevice® can operate in an area with 90% humidity. However, the wireless range can be reduced in the presence of water. Avoid mounting the BeanDevice® in an enclosure surrounded by water, or near bushy plants (plants are composed of 90% water),... 8.9 MECHANICAL MOUNTING The BeanDevice® ONE-XX enclosure can be easily mounted to the wall through 2 mounting holes provided on the back of the box. The diameters of these holes are 4.2mm respectively. Please consider the environment before printing this document. Page : 45 / 97 Document version : 1.9 “Rethinking sensing technology” Document type : User Manual 8.1 BeanDevice® User Manual EcoSensor product lines – FACTORY SETTINGS If desired, the user can perform a Network context deletion. It allows to restore default parameters on the BeanDevice®: Power Mode TX Power ONE-TIR Sleep with Network listening Data Acquisition duty cycle Data Acquisition mode ONE-T ONE-TH Parameter ONE-TIR BeanDevice® version 10s LowDutyCycle +18dBm To restore these defaults parameters, you must perform a Network context deletion. The “Network” non-contact button is outside the product. Hold the magnet on the button network ("Network") for more than 2 seconds. Network non contact button Please consider the environment before printing this document. Page : 46 / 97 “Rethinking sensing technology” Document type : User Manual Document version : 1.9 BeanDevice® User Manual EcoSensor product lines Please consider the environment before printing this document. Page : 47 / 97 – “Rethinking sensing technology” Document type : User Manual Document version : 1.9 BeanDevice® User Manual EcoSensor product lines – 9. BEANDEVICE® SUPERVISION FROM THE BEANSCAPE Don’t hesitate to read the BeanScape® user manual for furthers informations about the BeanScape® 9.1 STARTING THE BEANSCAPE® The BeanScape® is a supervision software monitor fully dedicated to BeanAir WSN (Wireless Sensor Networks): Start the BeanScape® by double-clicking on the BeanScape® icon Click on the button « start » All the BeanDevice® operating on the WSN will appear on the left window Select the BeanDevice® you want to configure. BeanDevice® profile Sensor channel profile The User interface is structured as follow: Green text on black background: displays the current status information o Black text on white background : device settings Please consider the environment before printing this document. Page : 48 / 97 “Rethinking sensing technology” Document type : User Manual Document version : 1.9 BeanDevice® User Manual EcoSensor product lines "BeanDevice® System Profile” frame is composed of two parts: Status information; Main settings; BeanDevice® Status informations This part consists of a set of frames, with visualization field BeanDevice® configuration frame is composed of several tabs Please consider the environment before printing this document. Page : 49 / 97 – “Rethinking sensing technology” Document type : User Manual 9.2 Document version : 1.9 BeanDevice® User Manual EcoSensor product lines BEANDEVICE® STATUS INFORMATIONS You will find below a description of the data information fields for each frame. 9.2.1 Frame: Identity MAC Address (encoded on 64-bits): The Media Access Control address is a unique identifier assigned to the BeanDevice® by the manufacturer for identification. PAN Address (encoded on 16-bits): Personal Area Network address. Network Address on 16-bits: This address is allocated by the BeanGateway® when you start the network. BeanDevice® Label: By default the MAC address is registered as a Label. This label is user-configurable. How PAN ID is assigned ? The BeanGateway® starts the WSN, assigning a PAN ID (Personal Area Network identifier) to the network. The PAN ID is pre-determined and cannot be modified. If several WSN are used, before deploying your BeanDevice® check to which BeanGateway® is assigned your BeanDevice®. 9.2.2 Frame : Wireless Network Diagnostic Please consider the environment before printing this document. Page : 50 / 97 – “Rethinking sensing technology” Document type : User Manual Document version : 1.9 BeanDevice® User Manual EcoSensor product lines – LQI : Link quality indicator of the BeanDevice® (0 to 255). Local Packet error rate (PER): represents the PER between the BeanGateway® and the BeanDevice® PER = Number of lost packet/Total of packet transmitted 9.2.3 Frame : Power Supply diagnostic Internal temperature This colored led indicates the BeanDevice power mode status. See below for more informations. Battery voltage (unit V) Battery level, three values: Good, Medium and Low If the battery level is low, it is highly recommended to change your primary cell. 9.2.3.1 BeanDevice® Power Mode status Please consider the environment before printing this document. Page : 51 / 97 “Rethinking sensing technology” Document type : User Manual Document version : 1.9 BeanDevice® User Manual EcoSensor product lines BLUE LED: The BeanDevice® is power off GREEN LED: The BeanDevice® is in sleeping with network listening power mode Sleeping with network listening power mode is displayed GREEN LED: The BeanDevice® is in active sleeping power mode Sleeping power mode is displayed 9.2.4 Frame : System Diagnostic cycle in seconds (battery charge status,internal temperature, LQI, PER…). Radio TX Power in dBm Please consider the environment before printing this document. Page : 52 / 97 – “Rethinking sensing technology” Document type : User Manual Document version : 1.9 BeanDevice® User Manual EcoSensor product lines Please consider the environment before printing this document. Page : 53 / 97 – “Rethinking sensing technology” Document type : User Manual 9.3 Document version : 1.9 BeanDevice® User Manual EcoSensor product lines – FRAME : BEANDEVICE® According to the BeanDevice® version, the information displayed in the frame will not be the same. For example (BeanDevice® ONE-BN): Number of sensors channels available on the BeanDevice®. BeanDevice® type 9.3.1 Frame : Product Version Hardware version: BeanDevice® hardware selected) version Software version: software version BeanDevice® embedded V (version) related to a major modification of the embedded software. R (Release) related to a minor modification of the embedded software These ID versions should be transmitted to our technical support center when you encountered a material or software dysfunction. Please consider the environment before printing this document. Page : 54 / 97 “Rethinking sensing technology” Document type : User Manual 9.3.2 Document version : 1.9 BeanDevice® User Manual EcoSensor product lines – Frame : Current Data Acquisition mode This frame displays the current data acquisition mode : Data acquisition mode available on the BeanDevice® Data acquisition cycle in Day, hour, minute and second Not available for Ecosensor products streaming streaming Not available formode Ecosensorand products packet mode)Math mode, If Green, Radio transmission is enabled If Green, data logging is enabled Please consider the environment before printing this document. mode) Page : 55 / 97 Document version : 1.9 “Rethinking sensing technology” BeanDevice® User Manual EcoSensor product lines Document type : User Manual 9.4 – MAIN SETTINGS Select the BeanDevice® which should be configured This frame is composed of several Tabs and includes BeanDevice® OTAC (Over the Air Configuration) Parameters: Tab Description Custom Display Notes Customize the BeanDevice® label This area contains the notes related to the BeanDevice®. Data acquisition mode configuration Data logger Configure the data acquisition mode , set the acquisition cycle, enable/disable the data logger function. Data logger function on the BeanDevice® System configuration Diagnostic cycle and the TX Power Please consider the environment before printing this document. Page : 56 / 97 “Rethinking sensing technology” Document type : User Manual Power Mode Management 9.4.1 BeanDevice® User Manual EcoSensor product lines Configure the Power Mode (Sleep, Sleep with network listening) Tab : Custom Display Parameter Type Description Enter here the type of BeanDevice® you want to use Reference Label Document version : 1.9 Assign an internal reference to the BeanDevice® Assign any sort of Label to your BeanDevice®. Therefore, the user can easily associate the BeanDevice® with its equipment (example: Room_N521_Second_Floor) Then click on “Validate” to confirm these new settings. 9.4.2 Tab: Notes This field contains the user notes related to the BeanDevice®. Please consider the environment before printing this document. Page : 57 / 97 – “Rethinking sensing technology” Document type : User Manual Document version : 1.9 BeanDevice® User Manual EcoSensor product lines – To change this field, enter your text and click on « Validate » button. To back up your text, press the icon Example: Machine failure n°XX, requested intervention. 9.4.3 Tab: Data Acquisition configuration Data acquisition mode configuration DataLogger options Parameter Different values Low duty cycle Data Acquisition (LDCDA) Data Acquisition mode Alarm Survey Description Low duty cycle data acquisition is adapted for static measurement (tilt, pressure, temperature) requiring a low power consumption on your BeanDevice®. The duty cycle can be configured between 1 data acquisition & transmission per second to 1 data acquisition & transmission per day. Data acquisitions are transmitted by radio whenever an alarm threshold (fixed by the user) is reached (4 alarms threshold levels High/Low). Survey mode is a mix between the LDCDA mode and Alarm mode. A data acquisition is transmitted Whenever an alarm threshold (fixed by the user) is reached (4 alarm threshold levels High/Low). A transmission cycle is reached, the transmission cycle is configurable through the BeanScape® 1s to 24h ; Please consider the environment before printing this document. Page : 58 / 97 “Rethinking sensing technology” Data acquisition Cycle Document type : User Manual Document version : 1.9 BeanDevice® User Manual EcoSensor product lines – Select the Data acquisition cycle between 1s and 24hours. The format is: Day : Hour : Minute :Second Data acquisition duration Sampling rate Not available on Ecosensor product lines Not available on Ecosensor product lines Tx only: The BeanDevice® transmits the data acquisition without Datalogging Options Log only: The Beandevice® logs the data acquisition without wireless transmission Tx & Log: The BeanDevice® transmits and logs the data acquisition; For further information about the DataLogger feature, read the technical note TN_RF_007 – “BeanDevice® DataLogger User Guide ” Please consider the environment before printing this document. Page : 59 / 97 “Rethinking sensing technology” Document type : User Manual Document version : 1.9 BeanDevice® User Manual EcoSensor product lines All the new modifications are displayed on “Current data acquisition mode” frame: Please consider the environment before printing this document. Page : 60 / 97 – “Rethinking sensing technology” Document type : User Manual 9.4.1 Document version : 1.9 BeanDevice® User Manual EcoSensor product lines – Tab: DataLogger Please read the technical note TN_RF_007 – “BeanDevice® DataLogger User Guide ” 9.4.1 Tab : System config. Parameter Description Diagnostic cycle You can set the BeanDevice® diagnostic cycle (Battery status, LQI, PER ...). The Diagnostic cycle is modulo the data acquisition cycle. Ex: If you try to set the diagnostic cycle at 10s while the data acquisition cycle is set at 20s, the diagnostic cycle will be adjusted to 10s ; TX Power BeanDevice® TX Power unit is in dBm, it represents the power ratio in decibels (dB) of the measured power referenced to one milliwatt (mW). The antenna radio power is not included. If the BeanDevice® PER is high or the LQI is too low, try to increase the transmission power. The following flow chart shows the effect of a higher TX power: Please consider the environment before printing this document. Page : 61 / 97 “Rethinking sensing technology” Document type : User Manual Document version : 1.9 BeanDevice® User Manual EcoSensor product lines • Higher Tx Power TX Power Wireless Range Pwr consumption • Wireless range will increase • Power consumption will increase It is highly recommended to set the minimum RF power required for your applications. Please consider the environment before printing this document. Page : 62 / 97 – “Rethinking sensing technology” Document type : User Manual Document version : 1.9 BeanDevice® User Manual EcoSensor product lines – If you set the TX power at its minimum value (-7dBm), and the wireless range is more than 5m, you will lose the radio link between your BeanGateway® and the BeanDevice®. To restore the network context with a maximum RF Power: By pressing the Network push button for more than 2s, you can reset to factory settings (default RF power is fixed at its maximum: 18 dBm). How to convert dBm to mW Zero dBm equals one milliwatt. A 3dB increase represents roughly doubling the power, which means that 3 dBm equals roughly 2 mW. For a 3 dB decrease, the power is reduced by about one half, making −3 dBm equal to about 0.5 milliwatt. To express an arbitrary power P as x dBm, or go in the other direction, the following equations may be used: or, and or, where P is the power in W and x is the power ratio in dBm. Inside a building, the maximum authorized power is +12 dBm (antenna power included). It is highly recommended to follow the R&TTE guidelines. For more information please visit http://www.etsi.org. It is your responsibility to carefully observe the R&TTE guidelines. 9.4.1 Tab : Sleep mode management This Tab is composed of three frames: Sleep mode configuration: Configure the Power mode on your BeanDevice® Please consider the environment before printing this document. Page : 63 / 97 “Rethinking sensing technology” Document type : User Manual Document version : 1.9 BeanDevice® User Manual EcoSensor product lines Listening Mode Status : Describes the status of an OTAC (Over-the-air-Configuration) Sleep mode with listening config. : Configuration settings for Sleep mode with network listening Please consider the environment before printing this document. Page : 64 / 97 – “Rethinking sensing technology” Document type : User Manual Document version : 1.9 BeanDevice® User Manual EcoSensor product lines – Parameter Description Sleep mode configuration Disabled: Sleeping mode is disabled. The BeanDevice® operates in Active power mode. Enabled: Sleeping mode is enabled Enabled with nwk listening: Sleeping with network listening mode is enabled. Ratio: Fix the Ratio of the listening cycle depending on the data acquisition low duty cycle. Example : If the data acquisition is 30 seconds, the Listening cycle will be 150 seconds. Listening mode status Ratio: displays the latest Ratio value Waiting: This led is green if an OTAC (Over-the-Air configuration) frame is pending for a transmission to the BeanDevice® Sent: This led is green if an OTAC (Over-the-Air configuration) frame is transmitted to the BeanDevice®. Deleted: This led is red if a pending OTAC (Over-the-Air configuration) is deleted Sleep mode with listening By clicking on “validate”, the pending OTAC frame is deleted config 9.4.2 Tab : AllGraph Allgraph mode allows displaying all the sensors curves of a BeanDevice® on the same graph. Please consider the environment before printing this document. Page : 65 / 97 “Rethinking sensing technology” Document type : User Manual Document version : 1.9 BeanDevice® User Manual EcoSensor product lines Please consider the environment before printing this document. Page : 66 / 97 – “Rethinking sensing technology” Document type : User Manual 9.5 Document version : 1.9 BeanDevice® User Manual EcoSensor product lines SENSOR CHANNEL PROFILE The screen « Sensor profile » consists of three parts: 1 General information on the measurement channel; 2 Measurement channel configuration; 3 A graph which displays in real-time sensor signals during data acquisition; 1 2 3 Please consider the environment before printing this document. Page : 67 / 97 – “Rethinking sensing technology” Document type : User Manual 9.5.1 Document version : 1.9 BeanDevice® User Manual EcoSensor product lines – Sensor channel status 9.5.1.1 General informations on Temperature sensor (available on the BeanDevice ONE-T only) Sensor Type Minimum Temperature value Sensor Reference Sensor label displayed on the Sensor BeanScape technology Maximum Temperature value Sensor ON/OFF Button: enable/disable the sensor channel 9.5.1.2 General informations on IR temperature sensor (available on the BeanDevice® ONE-TIR only) Ambient temperature Minimum Temperature value Sensor Type Please consider the environment before printing this document. Page : 68 / 97 “Rethinking sensing technology” Document type : User Manual Document version : 1.9 BeanDevice® User Manual EcoSensor product lines – Sensor Reference Sensor label displayed on the Sensor BeanScape technology Maximum Temperature value Sensor ON/OFF Button: enable/disable the sensor channel IR temperature Sensor Type Minimum Temperature value Sensor Reference Sensor label displayed on the BeanScape Sensor Maximum Temperature value technology Sensor ON/OFF Button: enable/disable the sensor channel IR Emissivity coefficient Please consider the environment before printing this document. Page : 69 / 97 “Rethinking sensing technology” Document type : User Manual Document version : 1.9 BeanDevice® User Manual EcoSensor product lines – 9.5.1.3 General informations on binary input (available on the BeanDevice® ONE-BN only) Please read the Technical note: TN_RF_005 – “Pulse counter & binary data acquisition on the BeanDevice® ONE-BN” 9.5.1.4 Frame: Measurement data Date and time of the latest measurement Measurement data value By default, sensor unit format is BeanDevice® ONE-T : °C for the temperature sensor BeanDevice® ONE-TIR : °C for IR & ambient temperature sensors BeanDevice® ONE-TH: °C for the temperature sensor, %RH for humidity sensor BeanDevice® ONE-BN : Pulsecounter or binary 1/0 measurement for binary inputs 9.5.1.5 Frame : Alarm threshold Please consider the environment before printing this document. Page : 70 / 97 “Rethinking sensing technology” Document type : User Manual Document version : 1.9 BeanDevice® User Manual EcoSensor product lines – Alarm threshold frame Alarm threshold are displayed in this frame: H1 : High value threshold alarm H2 : High value threshold alarm L1: Low value threshold alarm L2: Low value threshold alarm Depending on your sensor resolution, the displayed threshold value can differ from the reference value. 9.5.1 Sensor configuration & calibration frame This frame contains a set of 5 tabs: Please consider the environment before printing this document. Page : 71 / 97 “Rethinking sensing technology” Document type : User Manual Custom Display Notes • Allows Measurement conditionning & calibration Log configuration BeanDevice® User Manual EcoSensor product lines the end user to customzie the sensor • Contains notes relating Configuration Document version : 1.9 to the BeanDevice® sensor • Sensor configuration interface. The user can configure the alarm thresholds related to the sensor • Depending on the BeanDevice® version which is used, other configuration parameters are available • Sensor or measurement channel calibration • Logs configuration on the BeanScape® 9.5.1.1 Tab: Custom display These parameters allow the user to customize his sensor: Please consider the environment before printing this document. Page : 72 / 97 – “Rethinking sensing technology” Document type : User Manual Document version : 1.9 BeanDevice® User Manual EcoSensor product lines – Type: Describe the sensor type (ex: load cell, pressure, Strain gage +/- 2 Mv/v, LVDT,…. ) Unit: customer sensor unit (bar, °C, l/h….) Ratio : Sensor Ratio coefficient (RAT); Offset : Sensor Offset Coefficient (OFF); Label: Give a name to your sensor. (ex : Sensor on StatorMachine 1, sensor in Room 2 Floor 3) Measurement conversion formula: Converted Measurement = Measurement x RAT + OFF Example with a temperature sensor: By default the temperature unit is in degree Celsius. The user wants to convert the unit of his temperature sensor in degree Fahrenheit. Converted Measurement[°F] = Measurement[°C] x RAT + OFF With RAT = 1.8 and OFF = 32 Please consider the environment before printing this document. Page : 73 / 97 “Rethinking sensing technology” Document type : User Manual Document version : 1.9 BeanDevice® User Manual EcoSensor product lines – Conversion assistant To avoid conversion error, a conversion assistant is available to help you to setup quickly your measurement channel of your BeanDevice®. Click on conversion assistant from the tab “Custom display”, a window will open allowing you to do a linear conversion. On the left column, the user can enter the non-converted measurement data. On the right column, the user can enter the converted measurement values with the desired unit. The ratio and offset values are calculated automatically by the conversion assistant. Please consider the environment before printing this document. Page : 74 / 97 “Rethinking sensing technology” Document type : User Manual Document version : 1.9 BeanDevice® User Manual EcoSensor product lines – 9.5.1.2 Tab : Notes This field contains notes relating to the BeanDevice® sensor. To change this field, enter a value or free text and click the “Validate” button. A new window opens; accept your modifications by clicking on “OK”. To backup your text click on the icon “Backup your Database” Please consider the environment before printing this document. Page : 75 / 97 “Rethinking sensing technology” Document type : User Manual Document version : 1.9 BeanDevice® User Manual EcoSensor product lines – 9.5.1.3 Tab: Configuration Alarm threshold You can configure threshold high values (H1, H2) and low values (L1,L2) . In alarm mode, when a higher low threshold value is reached, an alarm notification is transmitted to the BeanGateway® ; If the sensor value is higher than H1/H2, an alarm notification is send to the BeanGateway®/BeanScape®; If the sensor value is lower than L1/L2, an alarm notification is send to the BeanGateway®/BeanScape®;. Threshold values must be organized in this manner: H2>= H1 > L1>=L2 9.5.1.4 Tab : Sensor & Analog conditioning calibration These coefficients are used to calibrate the external sensors (temperature, IR Temperature, Humidity….) sensor. The BeanScape® provides a calibration interface for each measurement channel: Ratio : multiplier coefficient Offset: adder/subtracted coefficient. Its unit is the sensor unit. Calibrated_value = (Ratio x Non_Calibrated_Value) + Offset Please consider the environment before printing this document. Page : 76 / 97 “Rethinking sensing technology” Document type : User Manual Document version : 1.9 BeanDevice® User Manual EcoSensor product lines – Enter the calibration coefficients and then click on Validate. The calibrations coefficients are backed up on the BeanDevice® flash memory and are conserved during the lifetime of your product. WARNING: These calibration coefficients should be accessible to an advanced user. A wrong calibration will result in false measurements. 9.5.1.5 Tab : Log configuration For more info, see BeanScape® user manual 9.5.2 Graphical display Please consider the environment before printing this document. Page : 77 / 97 “Rethinking sensing technology” Document type : User Manual Document version : 1.9 BeanDevice® User Manual EcoSensor product lines The chart is composed of two parts: Part 1: This is a preview window, allowing you to observe sensors acquisitions: Part 2: A strip on the side composed of different frames allows customizing the graph; The graph has two axes: Axe-X: Timeline Axes-Y: received sensor acquisitions Please consider the environment before printing this document. Page : 78 / 97 – “Rethinking sensing technology” Document type : User Manual Document version : 1.9 BeanDevice® User Manual EcoSensor product lines – We can visualize the BeanDevice® data acquisition mode, and the last data acquisition obtained directly from the graph: Last data acquisition received BeanDevice® data acquisition mode A right click on the graph allows a set of actions: Menu obtained when you right click on the graph The meaning of each field of the menu is: Copy: Copies the graph to the clipboard Please consider the environment before printing this document. Page : 79 / 97 “Rethinking sensing technology” Document type : User Manual Document version : 1.9 BeanDevice® User Manual EcoSensor product lines – Save Image As …: Save your graph The application offers a wide choice of type, for recording your graphs Page Setup…: Use page setup to fine-tune pages before printing Print …: Select your printer and start printing Show Point Values: Enabling this option allows you to see the detail of each measurement plot A zoom of the graph is possible using the mouse. This is possible only if one or both boxes "Zoom X and Y Zoom" is checked. Indeed, in this case the passage of the mouse cursor over the figure changes its shape. The form taken by the cursor is . Two options available to you to zoom the graph: 1) You use the mouse wheel 2) Or holding down the left mouse button, you select a chart area. Release the left mouse button causes a zoom selection. Please consider the environment before printing this document. Page : 80 / 97 “Rethinking sensing technology” Document type : User Manual Document version : 1.9 BeanDevice® User Manual EcoSensor product lines – 9.5.2.1 Frame: Marks This frame consists of two check boxes that are "grid and alarm." If this check box is ticked, a grid is displayed on the graph. Grid displayed on the graph If this check box is ticked, all the alarms threshold H1/H2/L1/L2 are displayed on the graph Alarms threshold H1/H2/L1/L2 are displayed on the graph 9.5.2.2 Frame: Symbols From this frame you can select the display mode of action of the chart. Three types of symbols are available: Circle: Brings up a point on each bar graph Square: brings up a square on each measure of the graph None: No logo is displayed on the graph Please consider the environment before printing this document. Page : 81 / 97 “Rethinking sensing technology” Document type : User Manual Document version : 1.9 BeanDevice® User Manual EcoSensor product lines No symbol activated Square symbol activated Please consider the environment before printing this document. Page : 82 / 97 – “Rethinking sensing technology” Document type : User Manual Document version : 1.9 BeanDevice® User Manual EcoSensor product lines Circle symbol activated 9.5.2.3 Frame : Scale From this frame, you can customize the scaling of your graphics to suit your needs. Lift Y Lift X Check box "Auto Y" and "Auto X Select “Auto X” scales the X-axis automatically on the graph Select “Auto Y” scales Y-axis automatically on the graph Lifts Y and X Please consider the environment before printing this document. Page : 83 / 97 – “Rethinking sensing technology” Document type : User Manual Document version : 1.9 BeanDevice® User Manual EcoSensor product lines – Where the "Auto Y" box is unchecked, you can set the limits for the graph from the field “X-lift” Where the "Auto X" box is unchecked, you can set the limits for the graph from the field “Y-lift” Checkbox "Zoom X and Y Zoom" These boxes are useful for performing a graph zoom from the mouse wheel, there are four cases: Case 1: Case "Zoom X checked" and "Zoom Y unchecked." The graph zoom will only affect the X axis. Case 2: Case "Zoom X unchecked" and "Zoom Y ticked." The graph zoom will only affect the Y axis. Case 3: Case "Zoom X checked" and "Zoom Y ticked." Zoom will affect both X and Y axes Case 4: Case "Zoom X unchecked" and "Zoom Y unchecked." The zoom function from the mouse wheel is disabled. 9.6 DATALOGGER CONFIGURATION Please read the technical note TN_RF_007 – “BeanDevice® DataLogger User Guide ” Please consider the environment before printing this document. Page : 84 / 97 “Rethinking sensing technology” Document type : User Manual Document version : 1.9 BeanDevice® User Manual EcoSensor product lines – 10. BEANDEVICE® MAINTENANCE & SUPERVISION (FOR EXPERIENCED USER) This section allows to an experienced user to configure correctly the Wireless Sensor Networks. 10.1 EXTENDING THE BATTERY LIFE The battery life depends on several parameters: Operating temperature Data acquisition cycle & mode For further information about the current consumption on a BeanDevice® during sleeping & active power mode, please read the technical note: RF_TN_002 V1.0 - Current consumption in active & sleeping mode The following table gives you a list of recommendations in order to extend the battery autonomy of your BeanDevice®: Influence factors on battery autonomy Observations Recommendations Data acquisition cycle TX Power Power consumption will grow with the TX Power If your wireless range is low, try to use a lower TX Power. Packet Error Rate (PER) A high packet error rate can cause a higher retransmission data and this increase the current consumption. Try to replace your BeanDevice® in an area where the radio link is much better (see Link Quality Indicator value). 10.1 OVER-THE-AIR CONFIGURATION (OTAC) PARAMETERS The BeanDevice® integrates an internal flash memory used for backing up OTAC (Over-the-air configuration) parameters. This memory is organized into several levels: Please consider the environment before printing this document. Page : 85 / 97 “Rethinking sensing technology” Document type : User Manual Document version : 1.9 BeanDevice® User Manual EcoSensor product lines Level 1 • End-user parameters Level 2 • Sensor calibration coefficients Level 3 • Network maintenance (only fo experts) Level 4 • Battery/Primary cell calibration Please consider the environment before printing this document. Page : 86 / 97 – “Rethinking sensing technology” Document type : User Manual Document version : 1.9 BeanDevice® User Manual EcoSensor product lines – 10.1.1 Level 1: End-user OTAC parameters The following table presents all the defaults configuration parameters: BeanDevice® version ONE-BN Sleeping with Network listening Data Acquisition duty cycle 1 minute Data Acquisition mode LowDutyCycle TX Power +15dBm Alarms Threshold H1 :2 ou10 H1 :20 H1 :20 H1 :20 H2 :2 ou 10 H2 :20 H2 :20 H2 :20 S2 :-2 ou -10 S2 :0 S2 :0 S2 :0 S1 :-2 ou -10 S1 :0 S1 :0 S1 :0 ONE-TH Power Mode ONE-T ONE-TIR Parameter To restore these defaults parameters, you must perform a Network context deletion. The user should press the button network ("Network") network for more than 2 seconds. Level 2, 3 & 4 of Configuration parameters are not affected by network context deletion (by hardware or software) Please consider the environment before printing this document. Page : 87 / 97 “Rethinking sensing technology” Document type : User Manual Document version : 1.9 BeanDevice® User Manual EcoSensor product lines – 10.2 NETWORK DIAGNOSTIC FROM YOUR BEANSCAPE® SOFTWARE This chapter describes the network diagnostic tool available on the BeanScape®. 10.2.1 Sensor operating status Two states of the sensor operating status exist: o On : the sensor is enabled o Off : the sensor is disabled The BeanDevice® checks the sensor connection and it status. It decides to disable the sensor when: The sensor is disconnected; A short-circuit is present on the sensor; The sensor doesn’t respond; 10.2.2 Displaying Network information From your BeanScape® interface, click on a BeanDevice® profile displayed on the left window, a tab “BeanDevice" will appear on the top of the window. Click on this tab, then click "View History Network”. Please consider the environment before printing this document. Page : 88 / 97 “Rethinking sensing technology” Document type : User Manual Document version : 1.9 BeanDevice® User Manual EcoSensor product lines – A new window will appear: PER : Packet error rate LQI : Link quality Indicator BeanDevice® internal temperature Battery voltage & charge PER (Packet Error Rate): Packet error rate (PER) is the number packet errors divided by the total number of transferred packet during a studied time interval. PER is a unit less performance measure, often expressed as a percentage number. PER is only available with IEEE 802.15.4 Network, it represents the ratio of “lost data/data send” between the BeanDevice® and the BeanGateway®. LQI (Link Quality Indicator ) LQI (Link Quality Indicator) represents the radio signal quality in your Environment. It is possible that LQI is low due to EMC interference or metal presence in the environment. If you encounter such problems, several solutions are proposed to increase your LQI: Please consider the environment before printing this document. Page : 89 / 97 “Rethinking sensing technology” Document type : User Manual Document version : 1.9 BeanDevice® User Manual EcoSensor product lines – Use the Maximum TX Power on your BeanDevice. The maximum TX Power authorized in Europe for indoor application is 12 dBm. For Outdoor application, you are authorized to extend the TX Power to 18 dBm. You can easily configure the TX Power on your BeanDevice from your BeanScape WSN software supervision. Try to configure your receiver antenna and your transmitter antenna on the same antenna pattern (cf. the Beam with of your antenna) Use a high gain antenna ( in outdoor use only) for a better RF Link Budget Fix your BeanDevice & BeanGateway on a top of a mast or a building. For further information, read the application note on “How to extend your wireless range?” Internal temperature monitoring An internal temperature sensor is used for onboard & battery temperature monitoring Battery charge monitoring Battery charge is based on current accumulation. The BeanDevice® integrates a current accumulator circuit which facilitates remaining capacity estimation by tracking the net current flow into and out of the battery. Current flow into the battery increments the current accumulator while current flow out of the battery decrements it. Voltage measurement corresponds to battery voltage. 10.2.1 System maintenance (for expert only) This section is dedicated to experimented persons in Wireless sensor networks. Configuring wrongly on such an interface may cause malfunction your BeanDevice®. Please consider the environment before printing this document. Page : 90 / 97 “Rethinking sensing technology” Document type : User Manual Document version : 1.9 BeanDevice® User Manual EcoSensor product lines – TX Fault Threshold: By default this value is fixed to 15. This value allows to set the threshold for TX failure transmission before a reboot system Clear Network context (software) : This option may be substituted for the push button “Network”. However, when the BeanDevice ® is not available (not powered or in sleeping mode) this option is not usable. Delete measurement data: Delete stored measurements. Restore default parameters: This function restores all the default parameters stored on the BeanDevice flash memory Primary Cell/Battery profile modifications : You can change your primary cell / battery profile here; Reset the « Reset counter » : resets the reset counter which is used for BeanDevice reboot ; The following diagram describes how the BeanDevice® is restarted after radio transmission failures: Please consider the environment before printing this document. Page : 91 / 97 “Rethinking sensing technology” Document type : User Manual Document version : 1.9 BeanDevice® User Manual EcoSensor product lines – 10.2.1 Scrolling menu « BeanSensor » The BeanSensor® scrolling menu provides access to additional features: like the multi-graph mode (display of multiple windows on a graph measuring the same screen), deleting graphs displayed and the activation / deactivation of logging measurements. To access to this scrolling menu, click on the sensor attached to your BeanDevice®. You will then see the BeanSensor® scrolling menu appearing. Please consider the environment before printing this document. Page : 92 / 97 “Rethinking sensing technology” Document type : User Manual Document version : 1.9 BeanDevice® User Manual EcoSensor product lines By clicking on the scrolling menu « BeanSensor », you can access to the following features : Disable/Enable log All the data received on the BeanScape® are stored in a log file in CSV format. This feature allows you to enable / disable data logging on your log file. Please consider the environment before printing this document. Page : 93 / 97 – “Rethinking sensing technology” Document type : User Manual Document version : 1.9 BeanDevice® User Manual EcoSensor product lines – For further information about CSV log file, please read the BeanScape® user manual. Buffer reset This function clears the graphical display concerning recorded measurements of your sensor. The data stored in a log are not affected by this function. By clicking on « Buffer reset », a second window appears asking you to confirm your choice: Yes, you accept to delete the whole measure data of this BeanSensor; No, don’t delete the whole measure data of this BeanSensor; Please consider the environment before printing this document. Page : 94 / 97 “Rethinking sensing technology” Document type : User Manual Document version : 1.9 BeanDevice® User Manual EcoSensor product lines Open the graph in a new window By clicking on “Open the graph in a new window”, you can open a graph corresponding to your sensor. You can easily open several graphs in a window. Please consider the environment before printing this document. Page : 95 / 97 – “Rethinking sensing technology” Document type : User Manual Document version : 1.9 BeanDevice® User Manual EcoSensor product lines – The multi-graph mode requires a lot of resources on your computer, it is recommended to install the BeanScape® software on a powerful computer. Please consider the environment before printing this document. Page : 96 / 97 “Rethinking sensing technology” Document type : User Manual Document version : 1.9 BeanDevice® User Manual EcoSensor product lines 11. FAQ Visit our FAQ page: http://www.industrial-wsn.com/category/faq Please consider the environment before printing this document. Page : 97 / 97 –


